

Page 1
Wireless Digital Audio
VGF-WA1
Setup Guide
STEP 2 Plug into a power outlet
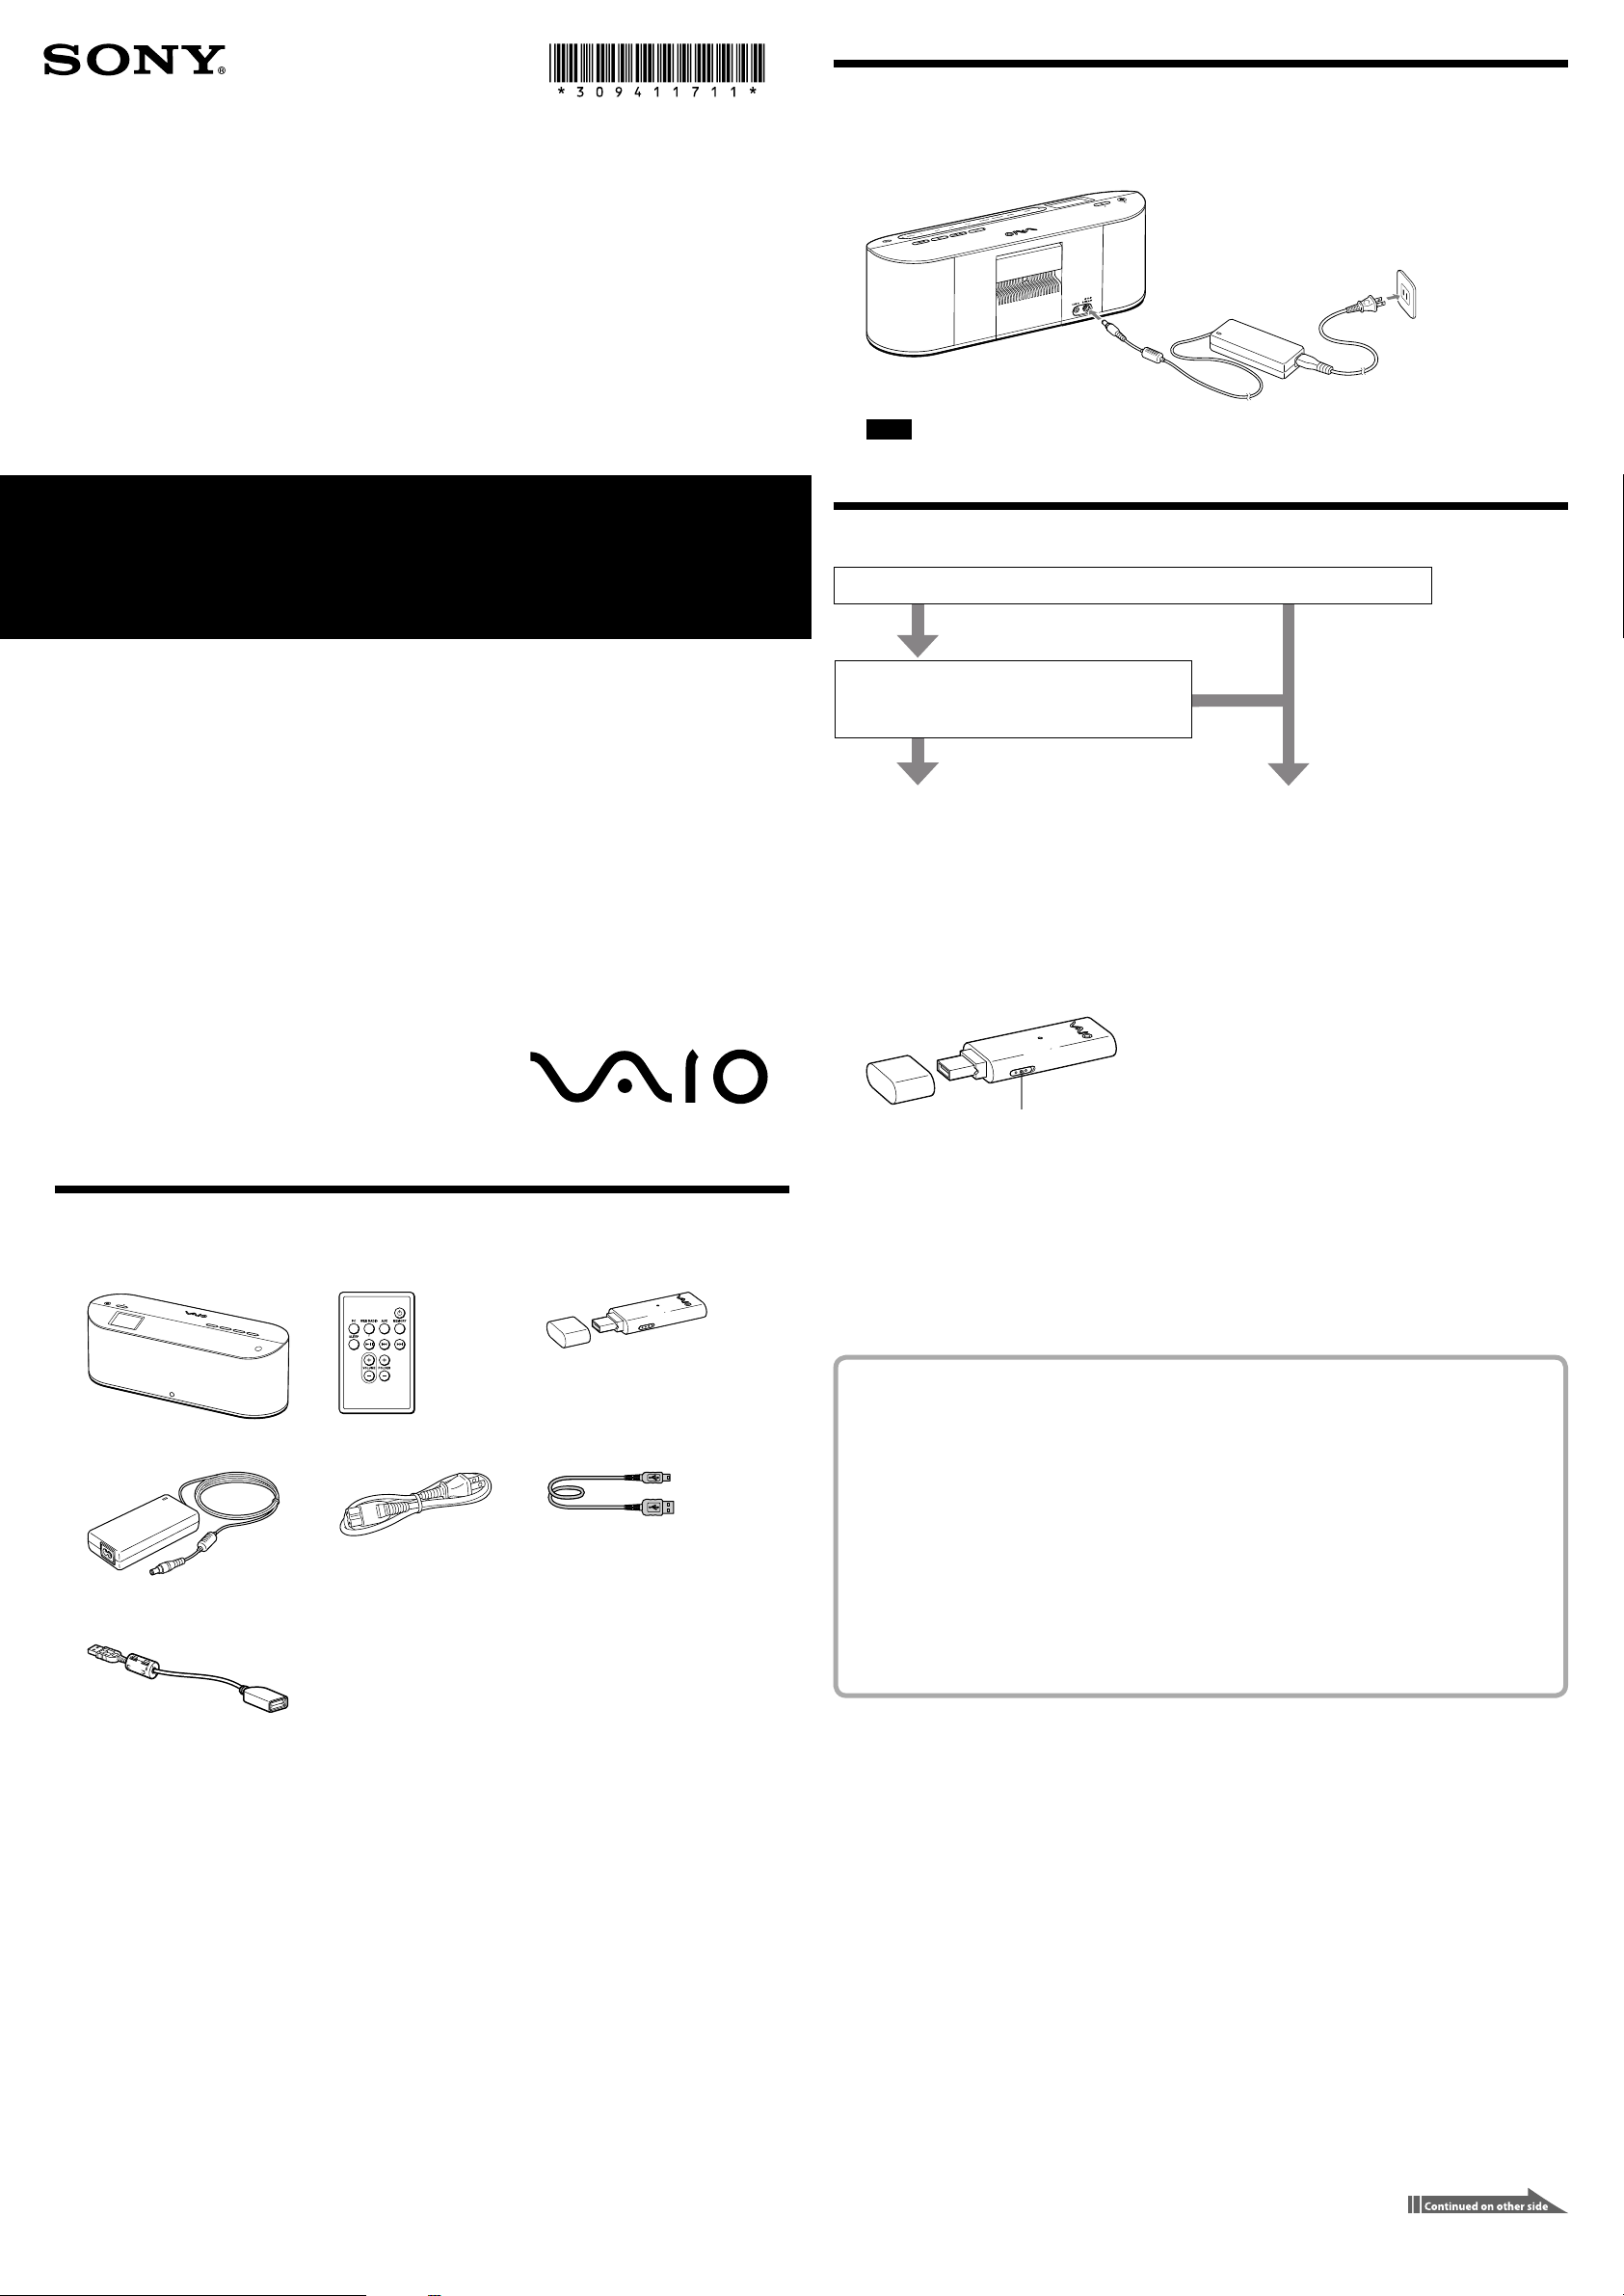
1
Connect the supplied AC adapter to this device, and then plug into a wall outlet.
The POWER lamp lights up in red.
Note
Do not disconnect the AC adapter during the setup of this device. It may cause a malfunction.
STEP 3 Install and set up the software
Q1: Do you already have a wireless LAN environment that contains an access point?
No
Yes
* This Setup Guide explains how to connect and set up the Wireless Digital Audio (hereinafter referred to as “this
device”). For more detailed instructions, refer to the supplied “Operating Instructions”.
3-094-117-11(1) © 2007 Sony Corporation Printed in China
STEP 1 Check the contents of the carton
Wireless Digital Audio Remote control Wireless Adapter
Q2: Do you intend to connect the Wireless Digital
Audio to a Sony VAIO computer installed with
Windows Vista?
Yes
Proceed to .
No
Proceed to .
(Other side)
Using the supplied Wireless Adapter
1
Turn the AUTO INSTALL switch of the Wireless Adapter to ON.
AUTO INSTALL switch
2
Insert the Wireless Adapter into the USB port of the computer.
The Setup automatically starts.
Tip
If you cannot insert the Wireless Adapter directly into the USB port of your computer, connect via the supplied
Wireless Adapter connection support cable.
3
Perform the setup following the instructions on the screen of your computer.
Be sure to read the precautions on the screen thoroughly.
AC adapter Power cord USB cable
Wireless Adapter connection
support cable
Setup CD-ROM
Operating Instructions
Setup Guide (this leaflet)
Warranty card
If you have set up the VAIO Media Integrated Server in the Setup,
the preparation is complete.
To listen to the music files that are stored on your computer (PC Streaming Function), select the desired
server from the server selection screen. This device begins to connect to the server. Select the desired
music files to start playback. Refer to the supplied “Operating Instructions” for more detailed
information on how to use this device.
If your Internet service provider instructs you to use their proxy server, use the access
point connection tool to set up the proxy server settings. For more details, refer to
“Setting up the proxy server settings for the Wireless Adapter connection” in the
“Operating Instructions” (page 54).
To use this device with Windows Media Connect or Windows Media Player, proceed to
“Preparing the computer” on the back side of this guide to set up.
Page 2
Using the supplied CD-ROM
When using Windows Media Player 11
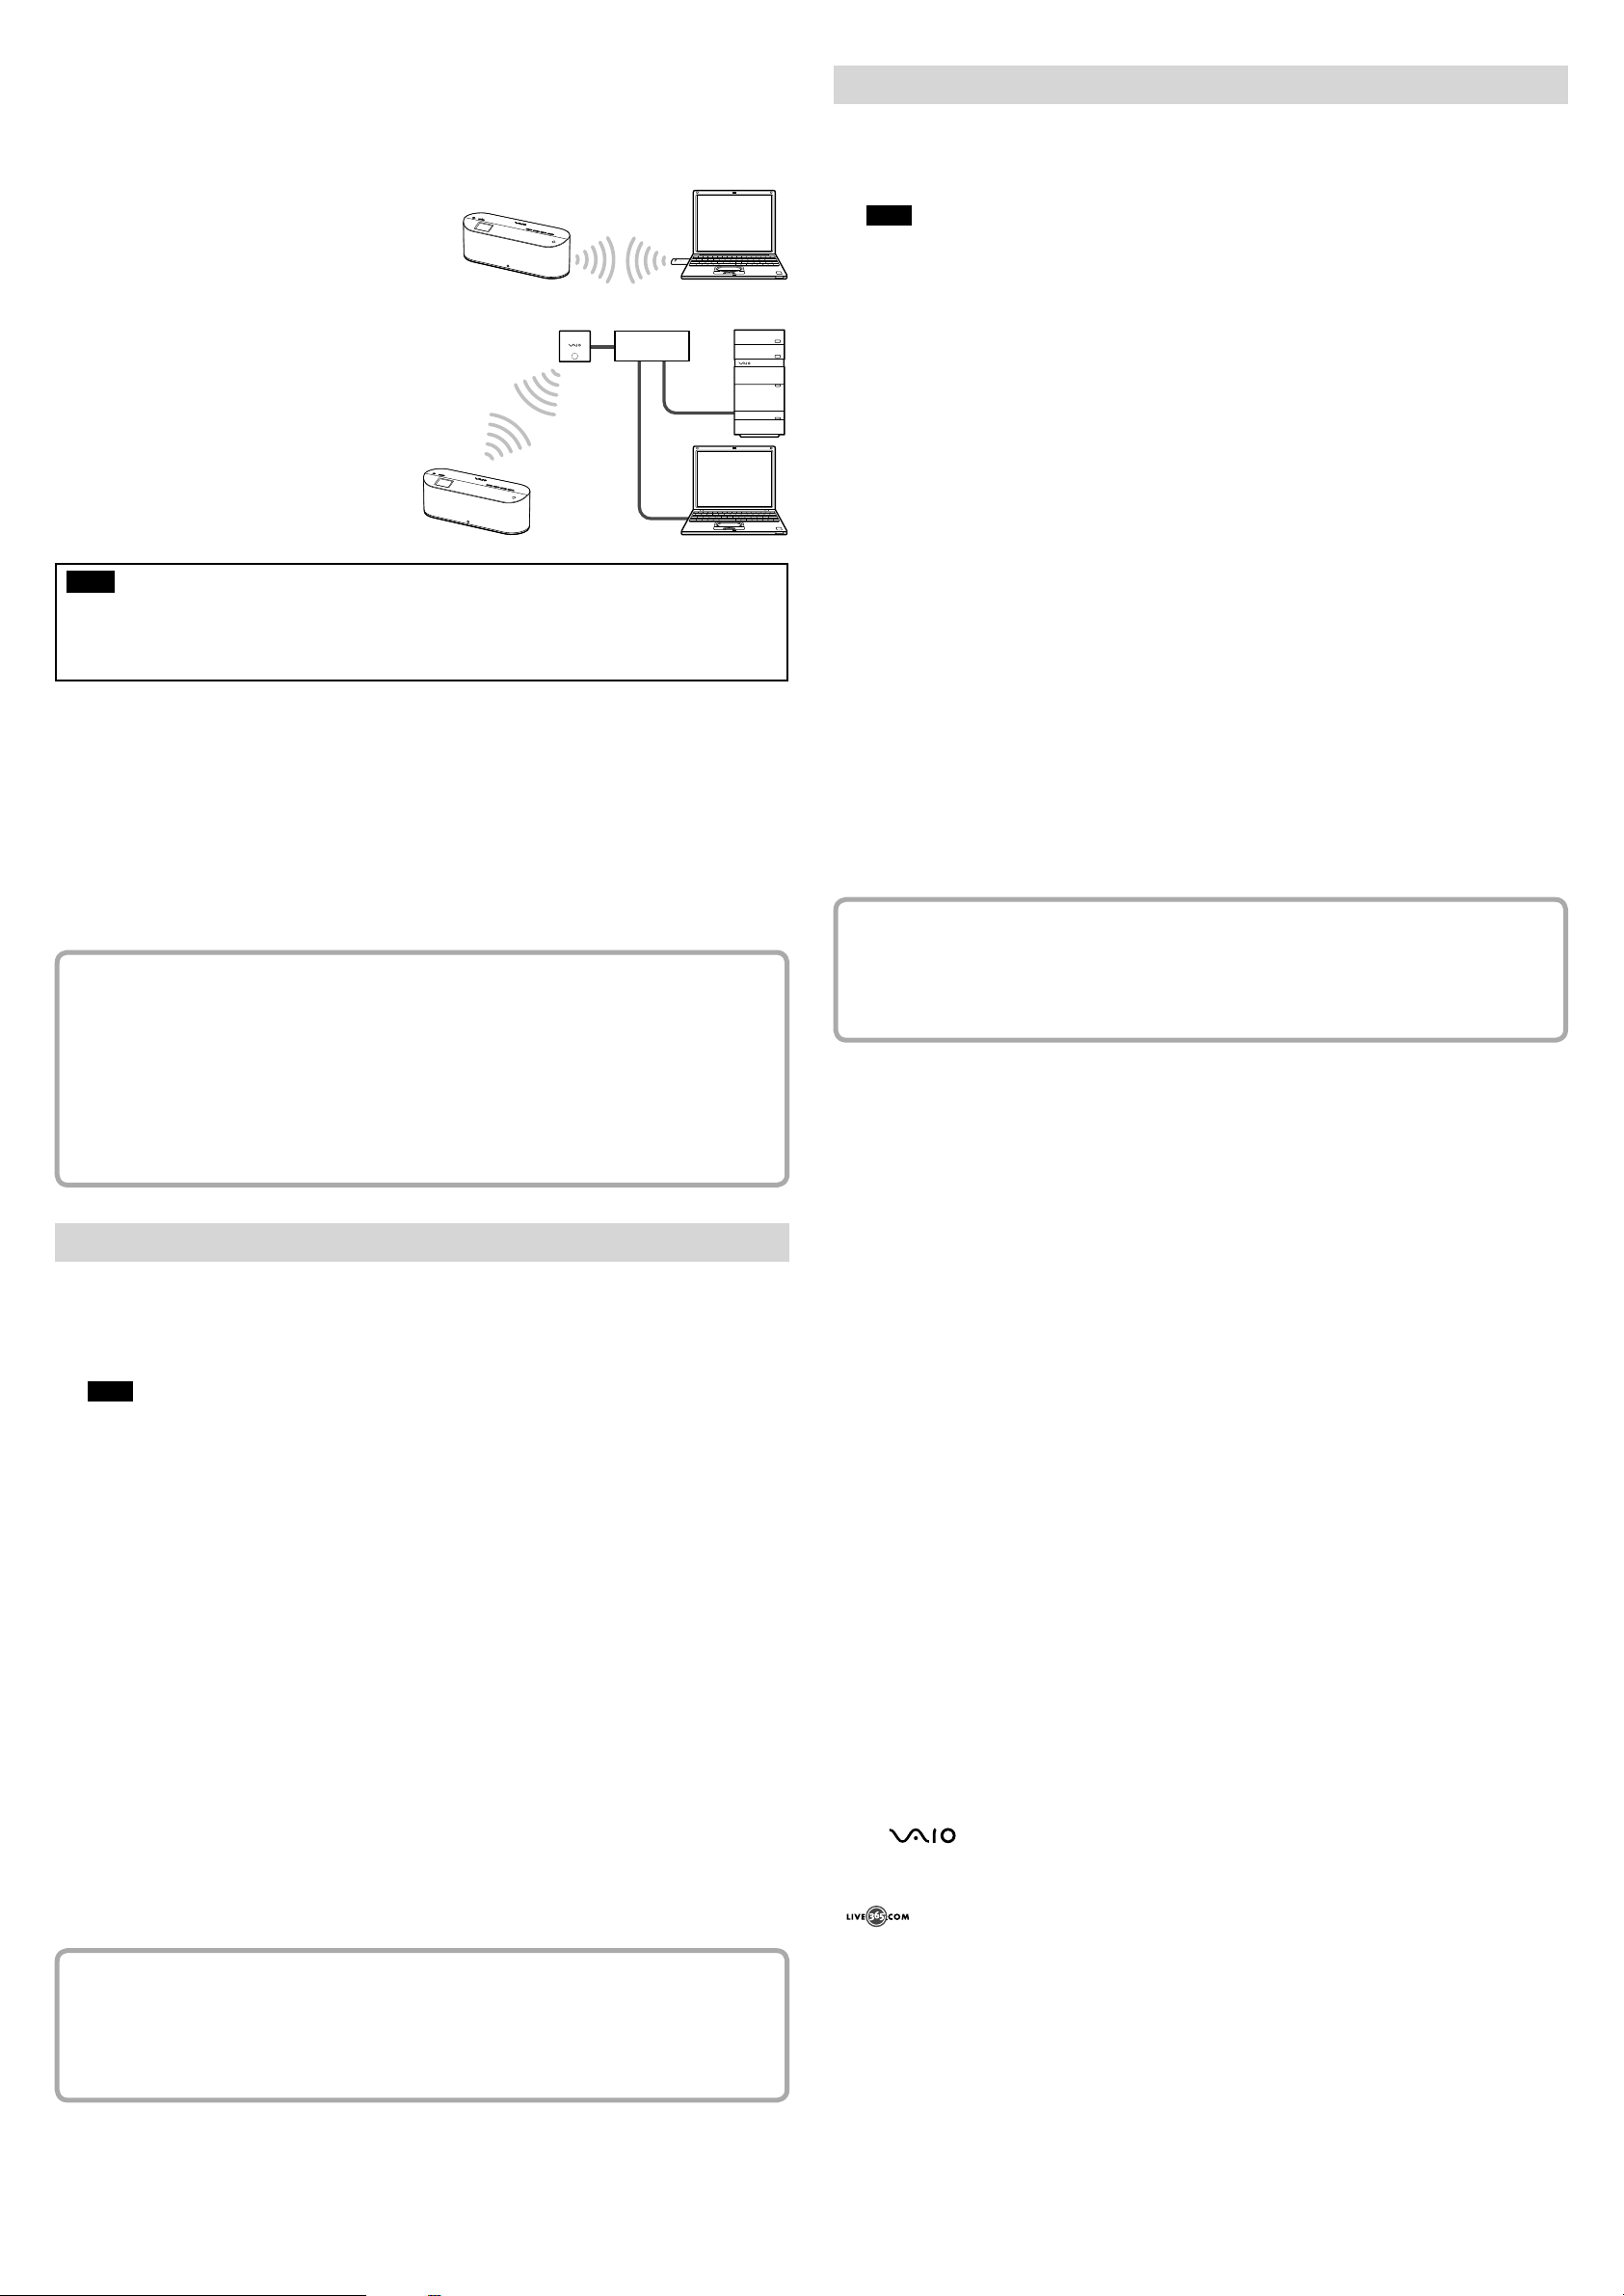
You can connect this device to a computer in one of the following two ways:
Connecting via the supplied Wireless Adapter
If you do not have a wireless LAN environment that contains
an access point, you can plug the supplied Wireless Adapter
into a computer to connect this device to the computer.
Use this method when you intend to connect this device to
only one computer.
Connecting via your access point
If you already have a wireless LAN environment, you
can connect this device to a computer via your access
point.
Use this method when you intend to connect this
device to more than one computer.
Note
Do not perform the following operations until an instruction to do so appears on the Setup screen, or the
software installation may fail.
Inserting the Wireless Adapter into your computer.
Connecting this device to your computer via the USB cable.
1
Close all applications that are running on your computer.
Check to see if the following conditions are met before you proceed to step 2. If these conditions are not
met, the installation may fail.
You are logged in as a user who has administrative privileges (Administrator).
You have also temporarily closed the antivirus software (because it uses large memory).
2
Insert the supplied CD-ROM into the CD drive of your computer.
The Setup automatically starts.
3
Perform setup following the instructions on the screen of your computer.
Be sure to read the precautions on the screen thoroughly.
If you have set up the VAIO Media Integrated Server in the Setup,
the preparation is completed.
To listen to the music files that are stored on your computer (PC Streaming Function), select the desired
server from the server selection screen. This device begins to connect to the server. Select the desired
music files to start playback. Refer to the supplied “Operating Instructions” for more detailed
information on how to use this device.
Start Windows Media Player 11 and register this device as a content delivery destination.
1
Make sure that this device is started in the PC Streaming Function.
On this device, the PC lamp lights and [Select Server] appears in the display window.
Note
When making the access point connection, if the USB cable connected to your computer is disconnected, this
device automatically connects to the wireless LAN and starts in PC Streaming Function. Please wait a while for
the wireless LAN connection to be established.
2
On the computer screen, click [All programs] from the [Start] menu, and then click [Windows
Media Player].
When starting Windows Media Player, the Windows Media Player main window appears.
3
Click [Sync], and then click [More Options].
The [Option] window appears.
4
Click the [Library] tab.
5
Click [Configure Sharing].
The [Media Sharing] window appears.
6
Check [] the [Share my media] check box.
7
Click [OK].
Tip
When the [User Account Control] message window appears after clicking [OK], click [Continue].
8
Check the MAC address of this device.
On this device, press SETTINGS to enter the settings and then select [Device Information] and [MAC
Address].
9
On the computer screen, select this device.
10
Click [Allow].
The status of this device changes from [Deny] to [Allow].
11
Click [OK].
Preparation is complete.
When you listen to music stored on your computer (PC Streaming Function), select a desired server on
the server selecting screen. Connection with the server starts.
When you select a song, playback starts. For details on how to operate this device, refer to the supplied
“Operating Instructions”.
To use this device with Windows Media Connect or Windows Media Player, proceed to
“Preparing the computer” below to set up.
When using Windows Media Connect
To play content on this device, start Windows Media Connect and register this device as a content delivery
destination.
1
Make sure that this device is started in PC Streaming Function.
On this device, the PC lamp lights and [Select Server] appears in the display window.
Note
When making the access point connection, if the USB cable connected to your computer is disconnected, this
device automatically connects to the wireless LAN and starts in PC Streaming Function. Please wait a while for
the wireless LAN connection to be established.
2
On the computer screen, click [All programs] from the [Start] menu, then click [Windows Media
Connect].
When starting Windows Media Connect for the first time after installation, the Windows Media Connect
Wizard appears.
Tip
If Windows Media Connect is already installed, the main window appears.
3
Check the MAC address of this device.
On this device, press SETTINGS to enter the settings, and then select [Device Information] and [MAC
Address].
4
On the computer screen, select this device.
For a device which is compatible with this device, the MAC address checked in step 3 appears.
When a device is compatible with this device, but does not appear, click [Next], then proceed to step 6.
After completing step 7, open the Windows Media Connect main window, then register the device.
5
Click [Allow].
The status of a device which is compatible with this device changes from [Deny] to [Allow].
6
Select the shared folder settings.
7
Click [Finish].
Preparation is complete.
When you listen to music stored on your computer (PC Streaming Function), select a desired server on
the server selecting screen. Connection with the server starts.
When you select a song, playback starts. For details on how to operate this device, refer to the supplied
“Operating Instructions”.
Trademarks
VAIO, , and VAIO Media are registered trademarks of Sony Corporation.
Microsoft, Windows, and Windows Media are registered trademarks and Windows Vista is a trademark of Microsoft
Corporation in the United States and/or other countries.
Adobe and Adobe Reader are registered trademarks of Adobe Systems Incorporated.
is a trademark of Live365.com.
Other system names and product names appearing in this document are generally registered trademarks or
trademarks of their manufacturers. and marks are not shown in this document.
In this manual, Microsoft Windows XP Home Edition, Microsoft Windows XP Professional and Microsoft
Windows XP Media Center Edition are referred to as Windows XP.
In this manual, Microsoft Windows Vista Home Basic, Microsoft Windows Vista Home Premium, Microsoft
Windows Vista Business and Microsoft Windows Vista Ultimate are referred to as Windows Vista.
This product is protected by certain intellectual property rights of Microsoft Corporation. Use or distribution of such
technology outside of this product is prohibited without a license from Microsoft or an authorized Microsoft
subsidiary.
http://www.sony.net/
 Loading...