

Page 1

3-858-249-11 (1)
KV-V1430K/P
KV-V2110K/P
Operating Instructions
GB
Trinitron Colour Video TV
PAL NTSC 4.43
© 1995 by Sony Corporation Printed in Spain
Page 2

WARNING
Precautions
To prevent fire or shock hazard, do not expose the
unit to rain or moisture.
Dangerously high voltages are present inside the
set. Do not open the cabinet. Refer servicing to
qualified personnel only.
Caution
Television programmes, films, video tapes and
other materials may be copyrighted.
Unauthorized recording of such materials may be
contrary to the provisions of the copyright laws.
Colour System of Your
Set
This video TV is designed to receive TV
programmes based on PAL (B/G and D/K) and
SECAM (B/G and D/K) colour systems and to
record and play on PAL and MESECAM colour
systems. Also, the video TV can play tapes on
NTSC colour system.
Safety Information
For general safety:
• Do not expose the unit to rain or moisture.
• Do not open the rear cover.
For safe installation:
• Do not block the ventilation openings.
• Do not install the unit in hot, humid, or
excessively dusty places.
• Do not install the unit where it may be exposed to
mechanical vibrations.
For safe operations:
• Do not operate the unit on anything but 230 V
AC.
• Do not operate the unit if any liquid or solid
object falls in it—have it checked immediately.
• Unplug the unit from the wall outlet if you do not
intend to use it for an extended period of time. To
disconnect the cord, pull it out by the plug, never
by the cord.
For your protection, refer all servicing to qualified
personnel.
About Moisture
Condensation
If the unit is brought directly from a cold place to a
warm place, moisture may condense on the video
head drum. If this happens, the tape may stick to
the head drum and it may be damaged or the unit
may not operate correctly. To avoid possible
damage caused by moisture condensation, be sure
not to leave a cassette inside the compartment
when the unit is not in use. When bringing the unit
from a cold place to a warm place, wait for about
10 minutes before operating it.
If the tape operation buttons do not work due to
moisture condensation, leave the unit for more
than one hour with the power on.
Getting Started
2
Page 3

Contents
Getting Started
Step 1—Preparation ................................................... 4
Checking the supplied accessories ....................... 4
Inserting batteries into the Remote
Commander .......................................................... 4
Step 2—Connecting the aerial ................................... 5
Connecting an indoor aerial
(KV-V1430K/P only) ........................................... 5
Connecting an outdoor aerial ................................ 5
Step 3—Tuning in to TV stations ............................. 6
Selecting the language on the menu..................... 6
Presetting channels automatically ........................ 7
Presetting channels manually ............................... 8
Skipping programme positions ............................ 9
Captioning a TV station name ............................ 10
Manual fine-tuning ............................................... 11
Step 4—Setting the clock ......................................... 12
Basic Operations
Watching the TV ....................................................... 13
Switching the TV on and off ................................ 13
Selecting TV programmes .................................... 13
Adjusting the volume ........................................... 13
Muting the sound .................................................. 14
Displaying the on-screen information ............... 14
Adjusting the picture ............................................ 14
Watching line input .............................................. 16
Listening with headphones ................................. 16
Playing a Tape ........................................................... 17
Inserting a video cassette ..................................... 17
Ejecting a video cassette ....................................... 17
Protecting your cassette against accidental
erasure ................................................................ 17
Playing a tape ........................................................ 18
Playing a tape repeatedly (Auto Repeat)........... 19
Displaying the on-screen indications ................. 19
Resetting the tape counter ................................... 19
Recording TV programmes ..................................... 20
Recording TV programmes ................................. 20
Recording with the TV off ................................... 20
Recording TV programmes using the timer ......... 21
Setting the timer .................................................... 21
Using the video TV before timer recording
starts ..................................................................... 23
Checking the timer settings ................................. 24
Changing or canceling the timer settings .......... 24
Recording using the quick-timer ........................ 25
Additional Operations
Switching off automatically—Sleep timer ............ 26
Switching on at your desired time—On timer ..... 27
Enhancing video picture quality ............................ 28
Adjusting the tracking .......................................... 28
Adjusting with the optimum picture control
(OPC) ................................................................... 29
About the auto head cleaner ............................... 29
Connecting optional equipment ............................. 30
Watching the picture input from optional
equipment ........................................................... 30
Editing with another VCR ................................... 30
Additional Information
Troubleshooting ........................................................ 31
Taking care of your video TV ................................. 33
Video head cleaning ............................................. 33
Worn video heads ................................................. 33
Check the video heads after 1,000 hours
of use .................................................................... 33
Specifications ............................................................. 34
Receivable channels .............................................. 34
Index to parts and controls...................................... 35
Video TV set—front .............................................. 35
Remote Commander ..............................Back cover
About This Manual
The instructions in this manual are for models KVV1430K/P and KV-V2110K/P.
The KV-V2110K/P differs from the KV-V1430K/P
in the location of some jacks on rear panel of the
video TV.
There are no differences between these models in
operation.
GB
Getting Started
3
Page 4

Getting Started
Step 1 — Preparation
Checking the Supplied Accessories
When you have taken everything out of the carton, check that you have
these items:
• Remote Commander
• Two R6 (size AA) batteries
• Monopole aerial (KV-V1430K/P only)
• Aerial connector (KV-V1430K/P only)
(KV-V1430K/P only)
Inserting Batteries into the Remote
Commander
Close the cover.
Turn the Commander over,
and remove the cover.
Check the polarities and
position two R6 batteries
correctly.
Getting Started
4
Page 5

Step 2 — Connecting the Aerial
Connecting an Indoor Aerial (KVV1430K/P only)
If your local VHF/UHF signal is strong, an indoor aerial can be used to
obtain a clear picture. Connect the supplied dipole aerial as follows.
1 Insert the aerial until it clicks.
2 After turning on the video TV, adjust the aerial for best reception.
2
1
GB
Connecting an Outdoor Aerial
For better TV reception and recording with clear video picture, connect an
outdoor aerial to your video TV.
To connect a VHF aerial or a combination
VHF/UHF aerial—75-ohm coaxial cable (round)
Attach an IEC aerial connector to 75-ohm coaxial cable.
Plug the connector into the (aerial) socket of the video TV.
VHF/UHF aerial
Rear
or
To connect both VHF and UHF aerials
Attach the aerial cable ends to the VHF/UHF mixer (not supplied).
Plug the mixer into the (aerial) socket of the video TV.
UHF aerial VHF aerial
On a wall
Rear
300-ohm twin-lead cable
VHF/UHF mixer
75-ohm coaxial cable
After connecting the aerial, connect the mains lead to a wall outlet.
Getting Started
5
Page 6

Step 3 — Tuning in to TV Stations
You should preset the channels (up to 60 channels) by choosing either the
automatic or manual method.
The automatic method is easier if you want to preset all receivable
channels at once. Use the manual method if you want to allocate
123
456
789
-/--
0
programme numbers to the channels one by one.
Before you begin
• If the u lamp on the video TV is lit in red, press ;, PROGR +/– or a
number button on the Remote Commander.
COUNTER
RESET
TIMER REC
ON/OFF
PROGR
FFPLAY
CLEAR
MENU
OK
ON TIMER
SLEEP
QUICK
TIMER
REC
REW
STOP PAUSE
TIMER
ON SCREEN
Note on the DEMONSTRATION
function
If you choose “DEMONSTRATION”
on the main menu and press OK,
you can see a sequential
demonstration on the menu
functions on the screen. Press any
button (e.g. MENU) to stop this
function.
Selecting the Language on the
Menu
You can select one of several languages for the menu and on-screen
information.
The initial setting is English.
1 Press MENU.
The main menu appears.
MENU
VISUAL MODE
ON TIMER SET
CLOCK SET
TRACKING CONTROL
LANGUAGE
PROGRAMME PRESET
DEMONSTRATION
Sape l ec t nd r ess
2 Move the cursor (z) to “LANGUAGE” with + ◊ or – √ and press OK.
The LANGUAGE menu appears.
LANGUAGE
ENGLISH
DEUTSCH
FRANÇAIS
ITALIANO
ESPAÑOL
NEDERLANDS
PORTUGUÊS
Sape l ec t nd r ess
3 Select the language you want with + ◊ or – √ and press OK.
The selected language is coloured green, and the menu appears in the
selected language.
4 Press MENU to go back to the original screen.
OK
OK
Getting Started
6
Page 7
Presetting Channels Automatically
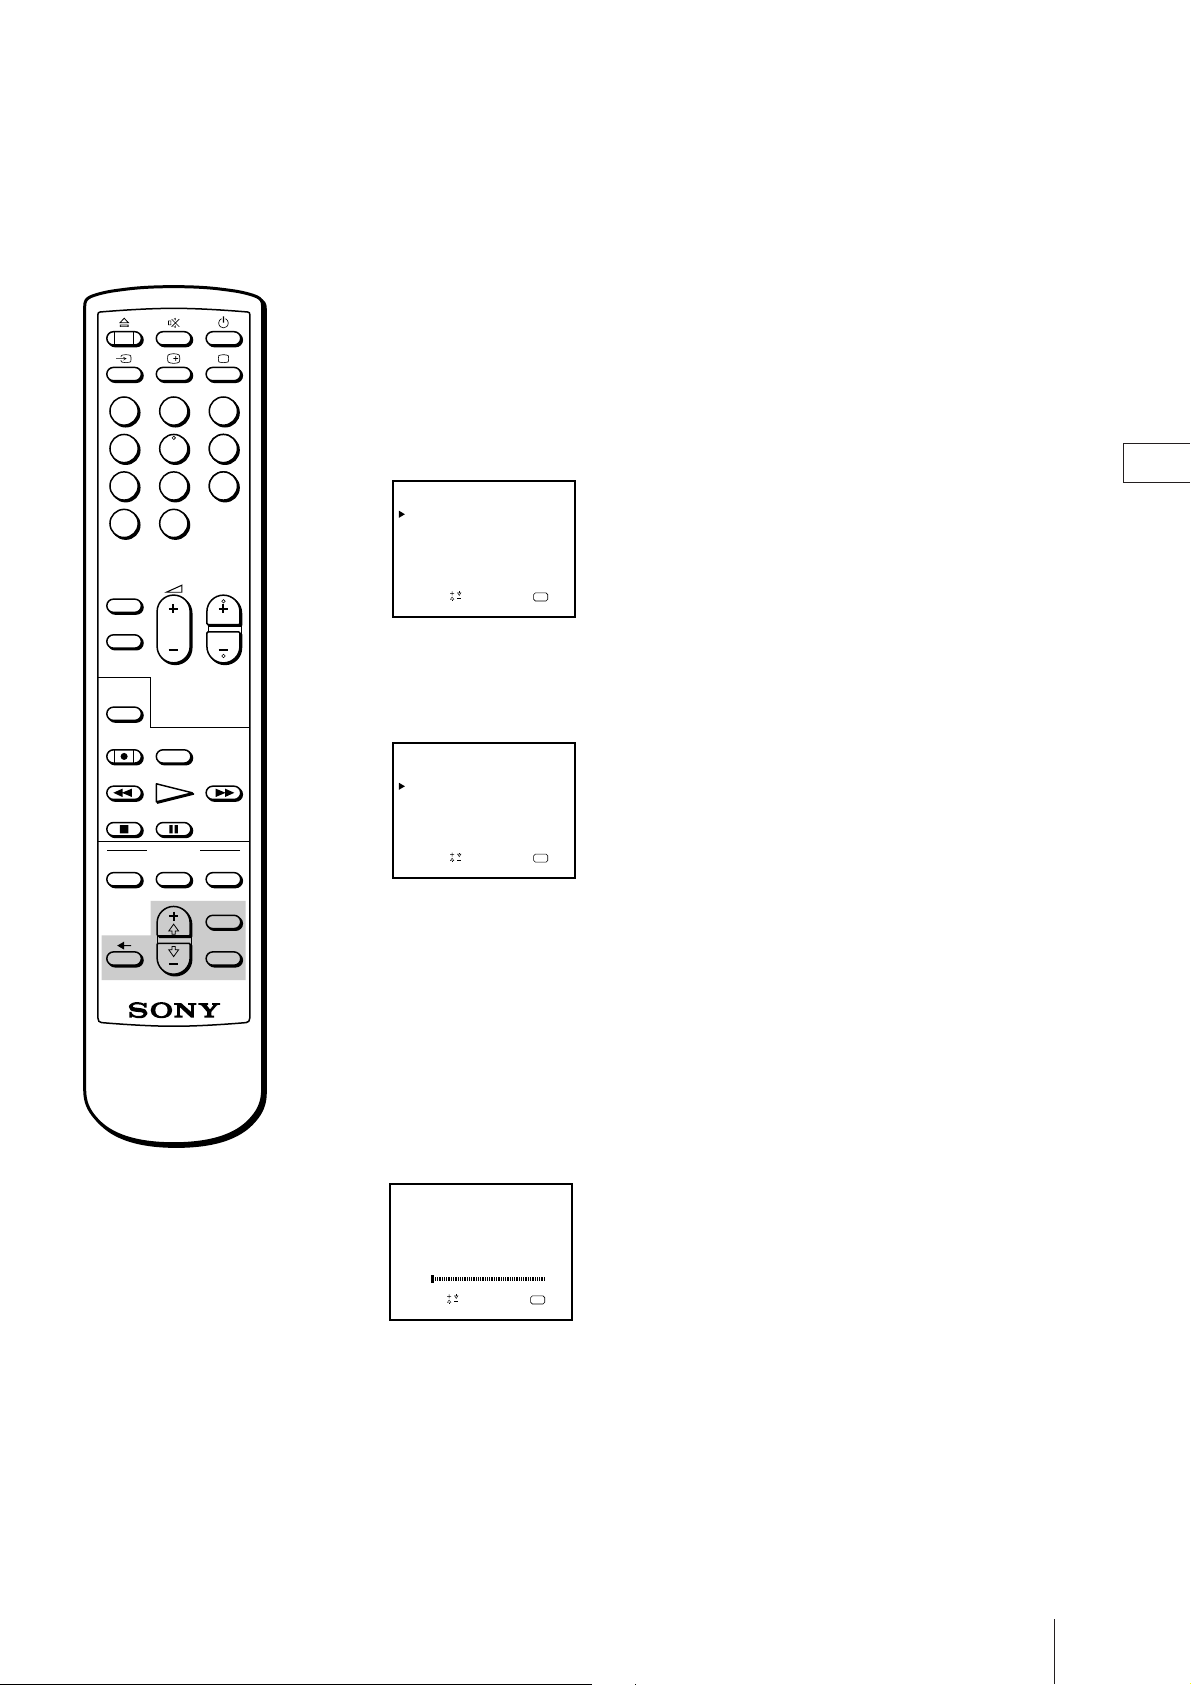
1 Press MENU to display the main menu.
123
456
789
-/--
0
COUNTER
RESET
TIMER REC
ON/OFF
PROGR
FFPLAY
CLEAR
MENU
OK
ON TIMER
SLEEP
QUICK
TIMER
REC
REW
STOP PAUSE
TIMER
ON SCREEN
2 Move the cursor (z) to “PROGRAMME PRESET” with + ◊ or – √ and
press OK.
The PROGRAMME PRESET menu appears.
PROGRAMME PRESET
AUTO PROGRAMME
MANUAL PROGRAMME
Sapelect nd ress
OK
3 Move the cursor (z) to “AUTO PROGRAMME” with + ◊ or – √ and press
OK.
The AUTO PROGRAMME menu appears.
AUTO PROGRAMME
SYSTEM
Sap
PROG BAND
B
/G –– –––
D/K –– –––
elect nd ress
OK
4 Move the cursor (z) to “B/G” or “D/K” with + ◊ or – √ and press OK.
The programme number you previously watched appears in red in the
“PROG” position.
Using + ◊ or – √, select the programme number from which you want to
start presetting.
GB
To stop automatic channel
presetting
Press ? on the Remote
Commander.
5 Press OK.
The tuning bar appears, and the video TV starts scanning and presetting a
receivable channel from programme number selected in step 4.
The band scanning by tuning bar is displayed in the “BAND” position.
AUTO PROGRAMME
SYSTEM
Sape l ec t nd r ess
The preset programme and channel numbers are displayed on the screen
in sequence. When presetting is finished, the original screen appears. All
available channels are now stored on successive number buttons.
PROG BAND
B
/G 01 V–L
OK
Getting Started
7
Page 8

Presetting Channels Manually
1 Press MENU to display the main menu.
123
456
789
-/--
0
COUNTER
RESET
TIMER REC
ON/OFF
PROGR
CLEAR
MENU
OK
ON TIMER
SLEEP
QUICK
TIMER
REC
REW
STOP PAUSE
TIMER
ON SCREEN
2 Move the cursor (z) to “PROGRAMME PRESET” with + ◊ or – √ and
press OK.
The PROGRAMME PRESET menu appears.
PROGRAMME PRESET
AUTO PROGRAMME
MANUAL PROGRAMME
e l ec t nd r es s
Sap
OK
3 Move the cursor (z) to “MANUAL PROGRAMME” with + ◊ or – √ and
press OK.
The MANUAL PROGRAMME menu appears.
MANUAL PROGRAMME
SYS BAND
FFPLAY
PROG
B/GG/
0V––––
B
1
2
B/G
elect nd ress
Sap
V–H
UHF
LABEL AFT
L
––––– ON
––––– ON
–– ON
OK
4 Using + ◊ or – √, move the cursor (z) to the programme position (number
button) to which you want to preset the channel, and press OK.
MANUAL PROGRAMME
PROG
SYS BAND
B/GG/
0V––––
B
1
2
B/G
Sap
e l ec t nd r es s
V–H
UHF
LABEL AFT
L
––––– ON
––––– ON
–– ON
OK
For programme positions
beyond 2
The display scrolls by pressing – √
repeatedly.
If you have made a mistake
Press ? to go back to the previous
position.
Getting Started
8
5 Press OK.
The BAND position turns red.
6 Select the band (V-L, V-H or UHF) you want to preset with + ◊ or – √, and
press OK repeatedly until the tuning bar turns red.
7 Press + ◊ (up) or – √ (down).
The tuning bar turns green and starts scanning receivable channels. When
the receivable channel is found, the tuning bar stops. If you want to preset
this channel, press OK. If not, press + ◊ or – √ again to search for another
band.
8 Repeat steps 4 to 7 to preset other channels.
9 After you finish presetting, press MENU to go back to the original screen.
Page 9
123
Skipping Programme Positions
You can skip unused programme positions when selecting programme
with PROGR +/– buttons. However, the skipped programmes may still
be called up when you select them with the number buttons.
456
789
-/--
0
COUNTER
RESET
TIMER REC
ON/OFF
PROGR
FFPLAY
CLEAR
MENU
OK
ON TIMER
SLEEP
QUICK
TIMER
REC
REW
STOP PAUSE
TIMER
ON SCREEN
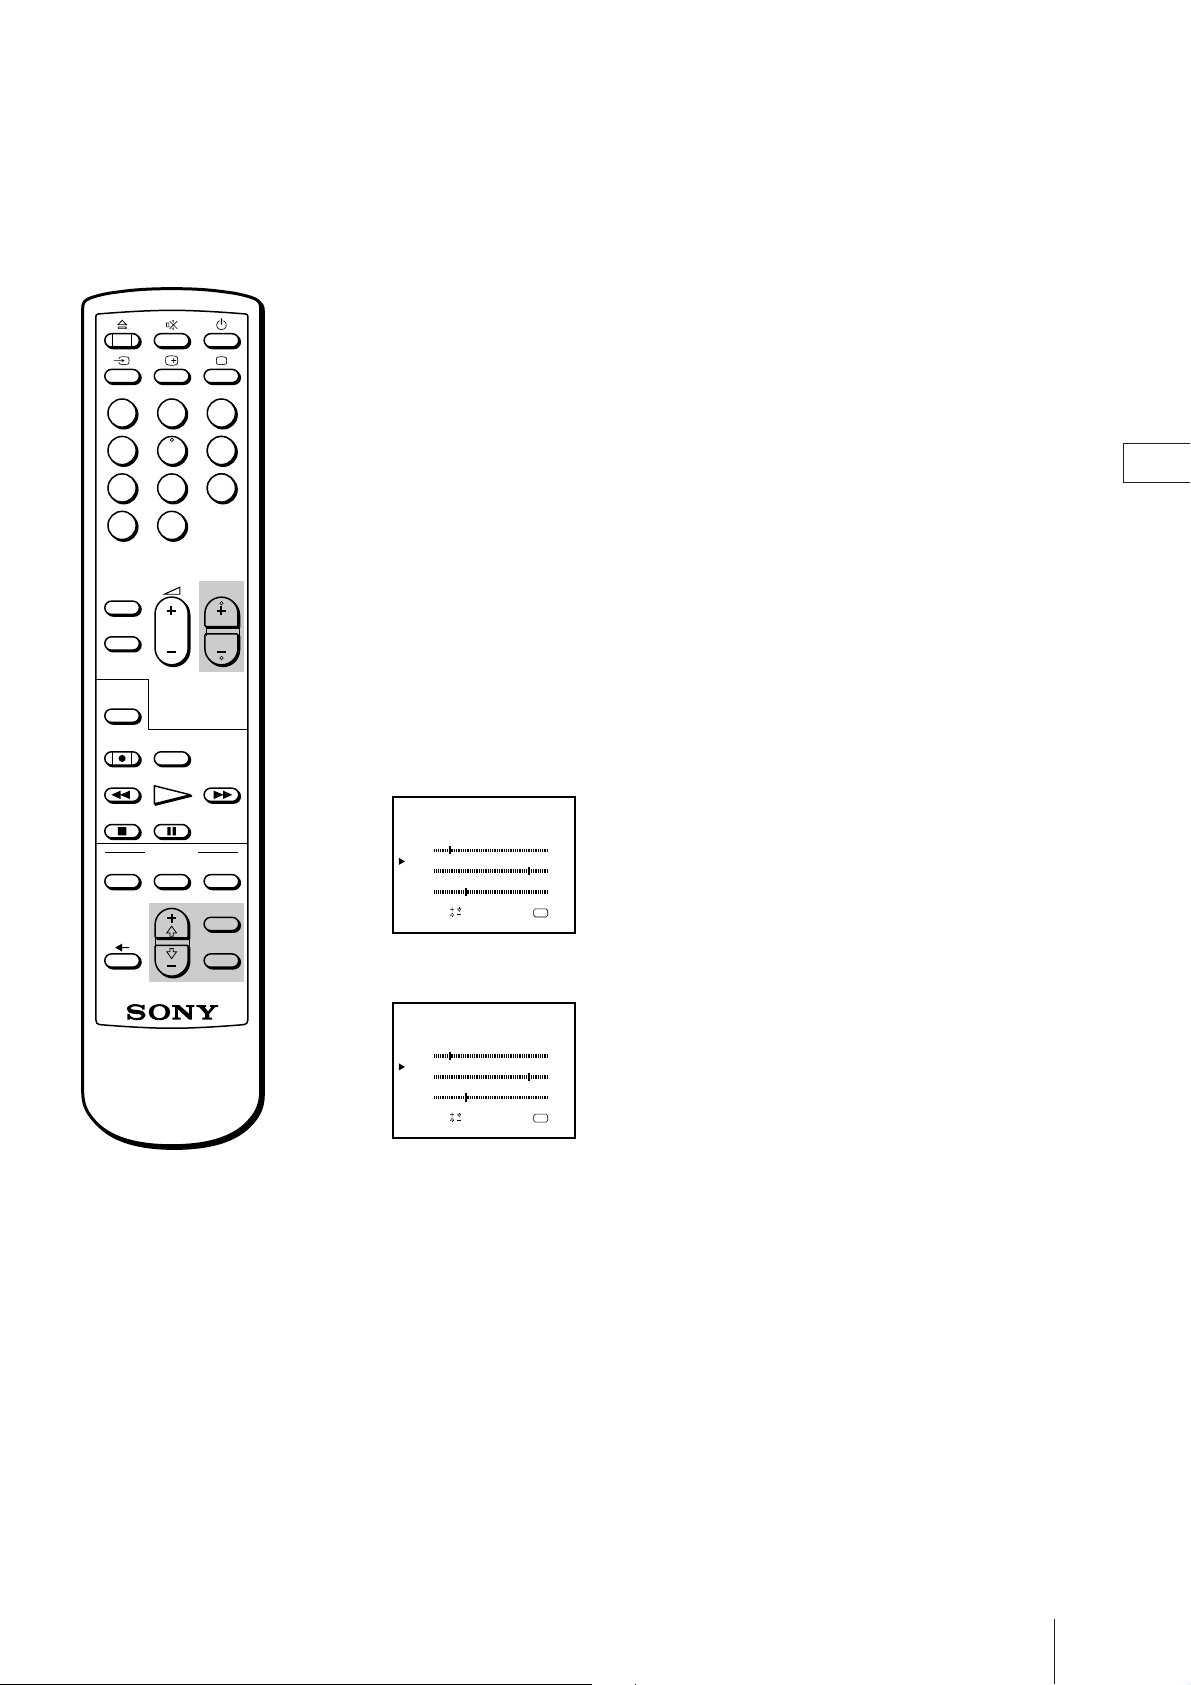
1 Press MENU to display the main menu.
2 Move the cursor (z) to “PROGRAMME PRESET” with + ◊ or – √ and
press OK.
The PROGRAMME PRESET menu appears.
3 Move the cursor (z) to “MANUAL PROGRAMME” with + ◊ or – √ and
press OK.
The MANUAL PROGRAMME menu appears.
4 Using + ◊ or – √, move the cursor (z) to the programme position which
you want to skip and press OK.
The “SYS” position turns red.
MANUAL PROGRAMME
PROG
SYS BAND
B/GG/
0V––––
B
1
2
B/G
Sapelect nd ress
V–H
UHF
LABEL AFT
L
––––– ON
––––– ON
–– ON
OK
5 Press + ◊ or – √ until “---” appears in the “SYS” position and press OK.
MANUAL PROGRAMME
SYS BAND
PROG
0V––––
BG/
–––
1
2
B/G
e l ec t nd r es s
Sap
V–H
UHF
LABEL AFT
L
––––– ON
––––– ON
–– ON
OK
GB
For programme positions
beyond 2
The display scrolls by pressing – √
repeatedly.
When you select programmes using the PROGR +/– buttons, the
programme position is skipped.
6 Repeat steps 4 and 5 to skip other programme positions.
7 Press MENU to go back to the original screen.
Getting Started
9
Page 10

123
Captioning a TV Station Name
You can name a channel using up to five characters (letters or numbers) to
be displayed on the TV screen (e.g. MTV). Using this function, you can
easily identify which channel you are watching.
456
789
-/--
0
COUNTER
RESET
TIMER REC
ON/OFF
PROGR
FFPLAY
CLEAR
MENU
OK
ON TIMER
SLEEP
QUICK
TIMER
REC
REW
STOP PAUSE
TIMER
ON SCREEN
1 Press MENU to display the main menu.
2 Move the cursor (z) to “PROGRAMME PRESET” with + ◊ or – √ and
press OK.
The PROGRAMME PRESET menu appears.
3 Move the cursor (z) to “MANUAL PROGRAMME” with + ◊ or – √ and
press OK.
The MANUAL PROGRAMME menu appears.
MANUAL PROGRAMME
PROG
SYS BAND
B/GG/
0V––––
B
1
2
B/G
Sap
e l ec t nd r es s
V–H
UHF
LABEL AFT
L
––––– ON
––––– ON
–– ON
OK
4 Using + ◊ or – √, move the cursor (z) to the programme position you want
to caption and press OK repeatedly until the first element of the “LABEL”
position turns red.
5 Select a letter or number with + ◊ or – √ and press OK.
The next element turns red. Select other characters in the same way. For
the element you want to leave blank, select “-” and press OK.
If you have made a mistake
Press ? to go back to the previous
position.
Getting Started
10
MANUAL PROGRAMME
PROG
SYS BAND
B/GG/
0V––––
B
1
2
B/G
Sap
elect nd ress
V–H
UHF
LABEL AFT
L
––––– OFF
MTV–– ON
–– ON
OK
6 After selecting all the characters, press OK repeatedly until the cursor
appears. Now the caption you chose is stored.
7 Repeat steps 4 to 6 to caption other channels.
8 Press MENU to go back to the original screen.
Page 11
123
Manual Fine-Tuning
Normally, the automatic fine-tuning (AFT) is already working. However, if
the picture of a programme is distorted, you can use the manual finetuning function to obtain better picture reception.
456
789
-/--
0
COUNTER
RESET
TIMER REC
ON/OFF
PROGR
FFPLAY
CLEAR
MENU
OK
ON TIMER
SLEEP
QUICK
TIMER
REC
REW
STOP PAUSE
TIMER
ON SCREEN
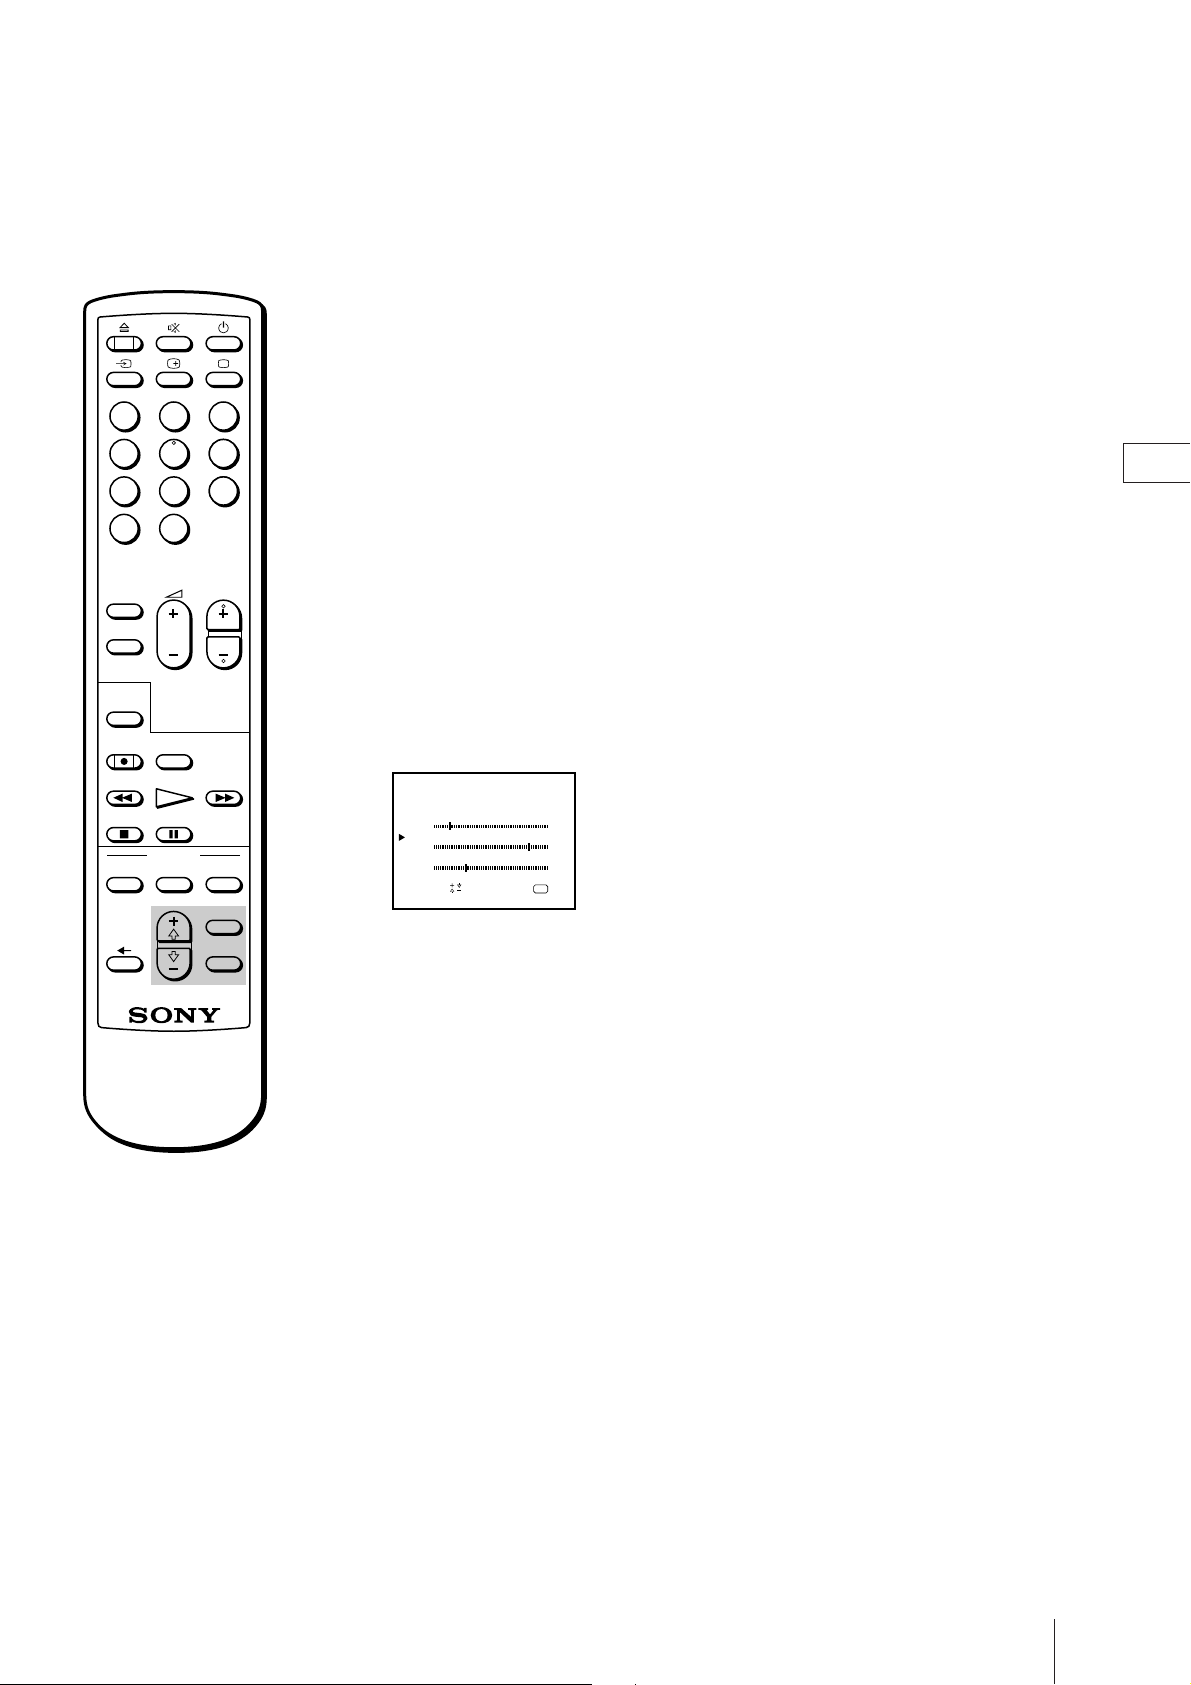
1 Press MENU to display the main menu.
2 Move the cursor (z) to “PROGRAMME PRESET” with + ◊ or – √ and press
OK.
The PROGRAMME PRESET menu appears.
3 Move the cursor (z) to “MANUAL PROGRAMME” with + ◊ or – √ and
press OK.
The MANUAL PROGRAMME menu appears.
4 Using + ◊ or – √, move the cursor (z) to the programme position which
you want to manually fine-tune.
MANUAL PROGRAMME
PROG
SYS BAND
BG/
0V––––
B/G
1
2
B/G
Sapelect nd ress
V–H
UHF
LABEL AFT
L
––––– ON
––––– ON
–– ON
OK
5 Press OK repeatedly until the AFT position turns red, then press + ◊ or – √
to select OFF.
6 Press OK.
The tuning bar turns red.
While holding down + ◊ or – √, the tuning bar flashes red and green by
turns, and the channel is fine-tuned. When the best TV reception is found,
release + ◊ or – √.
GB
To reactivate automatic finetuning (AFT)
Repeat from the beginning and
select “ON” in step 5.
7 Press OK.
The cursor (z) appears. Now the fine-tuned level is stored.
8 Repeat steps 4 to 7 to fine-tune other channels.
9 Press MENU to go back to the original screen.
Getting Started
11
Page 12
Step 4 — Setting the Clock
You need to set the clock for using timer recording and quick-timer
recording functions.
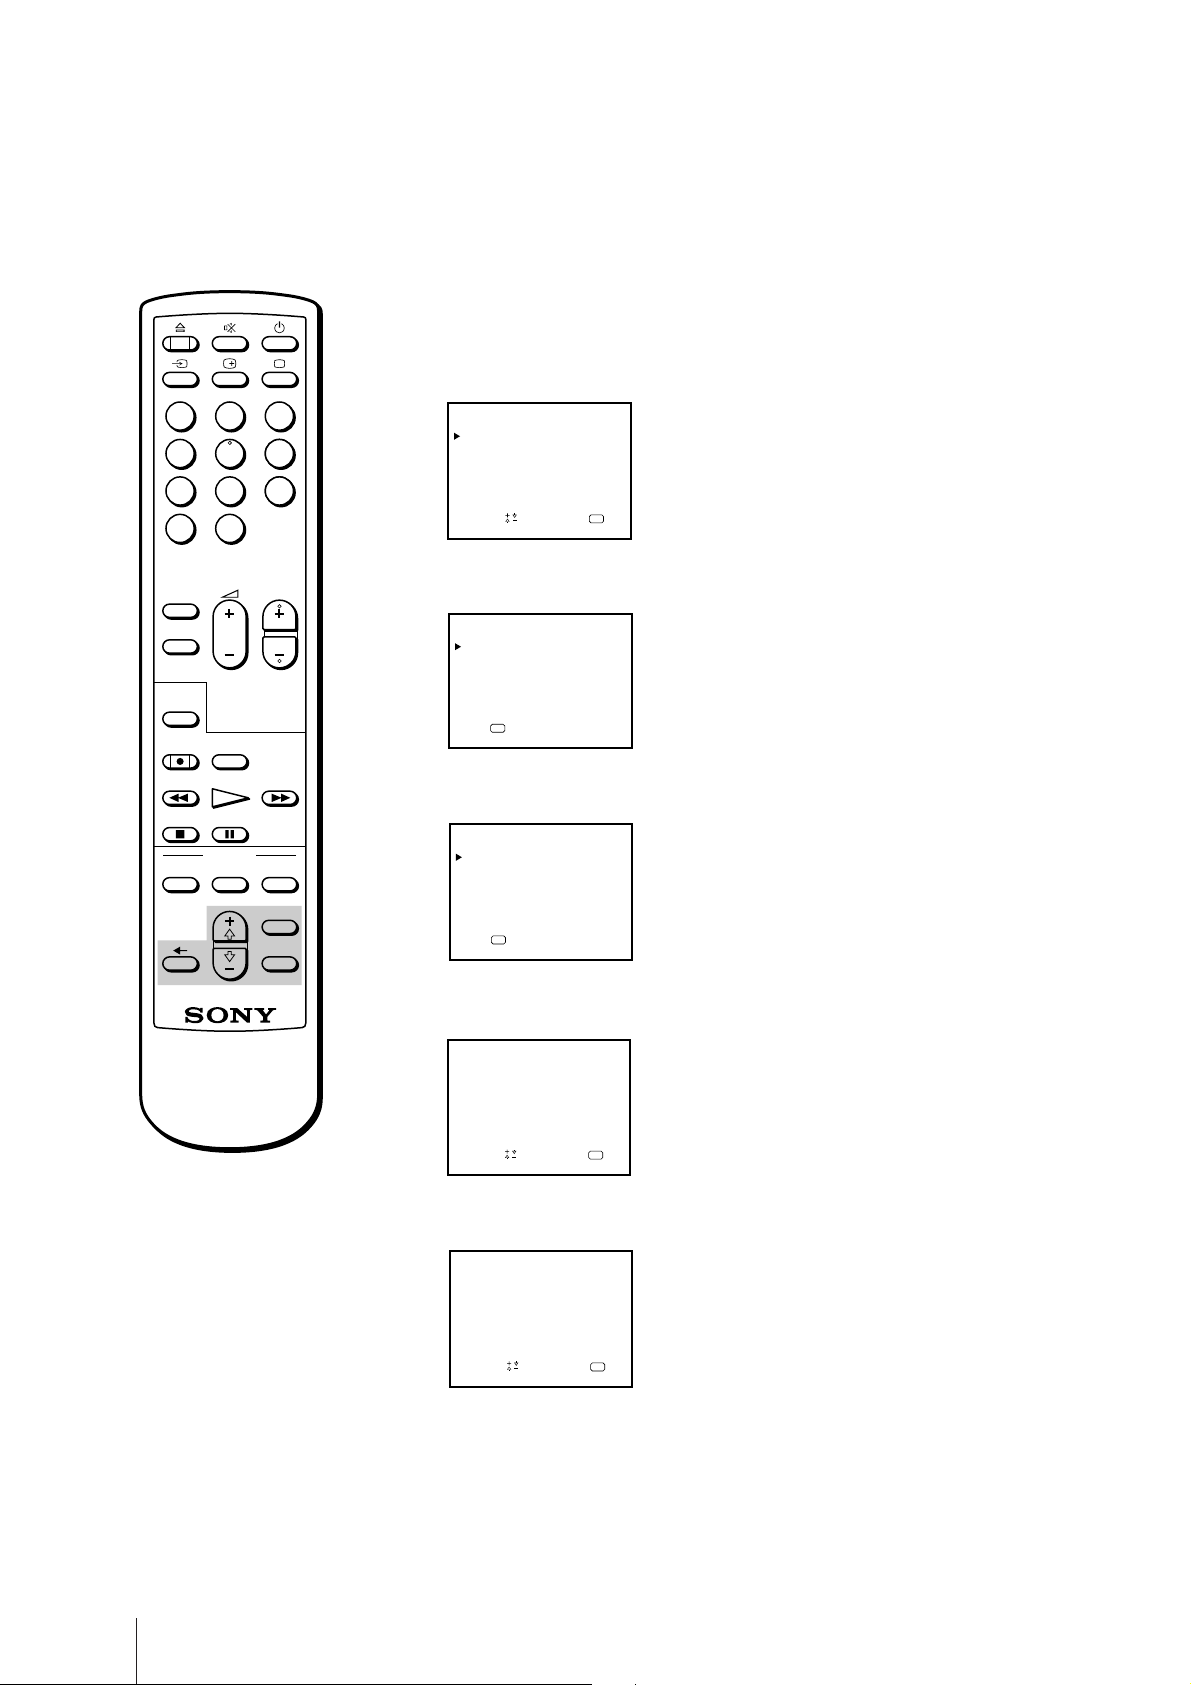
1 Press MENU to display the main menu.
123
456
789
-/--
0
COUNTER
RESET
TIMER REC
ON/OFF
PROGR
FFPLAY
CLEAR
MENU
OK
ON TIMER
SLEEP
QUICK
TIMER
REC
REW
STOP PAUSE
TIMER
ON SCREEN
MENU
VISUAL MODE
ON TIMER SET
CLOCK SET
TRACKING CONTROL
LANGUAGE
PROGRAMME PRESET
DEMONSTRATION
Sape l ec t nd r ess
OK
2 Move the cursor (z) to “CLOCK SET” with + ◊ or – √ and press OK.
The CLOCK SET menu appears.
CLOCK SET
––. ––. –––– ––– –– :––
OK
P ress
3 Press OK to start setting the clock.
The day section turns red.
CLOCK SET
1. 1. 1995 SUN 0: 00
OK
P ress
4 Set the day with + ◊ or – √ and press OK.
The month section turns red.
If you have made a mistake
Press ? to go back to the previous
position.
If power is interrupted or you
disconnect the mains lead for
more than one day
You have to re-set the clock.
Getting Started
12
CLOCK SET
4. 1. 1995 WED 0 :0 0
Sapelect nd ress
OK
5 Using + ◊ or – √ and OK, set the month, year, hour and minute in the
same way as in step 4.
CLOCK SET
4. 2. 1995 MON 5 : 30
11
Sape l ec t nd r ess
OK
6 After setting the minute, press OK.
The clock starts working.
7 Press MENU to go back to the original screen.
Page 13
Basic Operations
Watching the TV
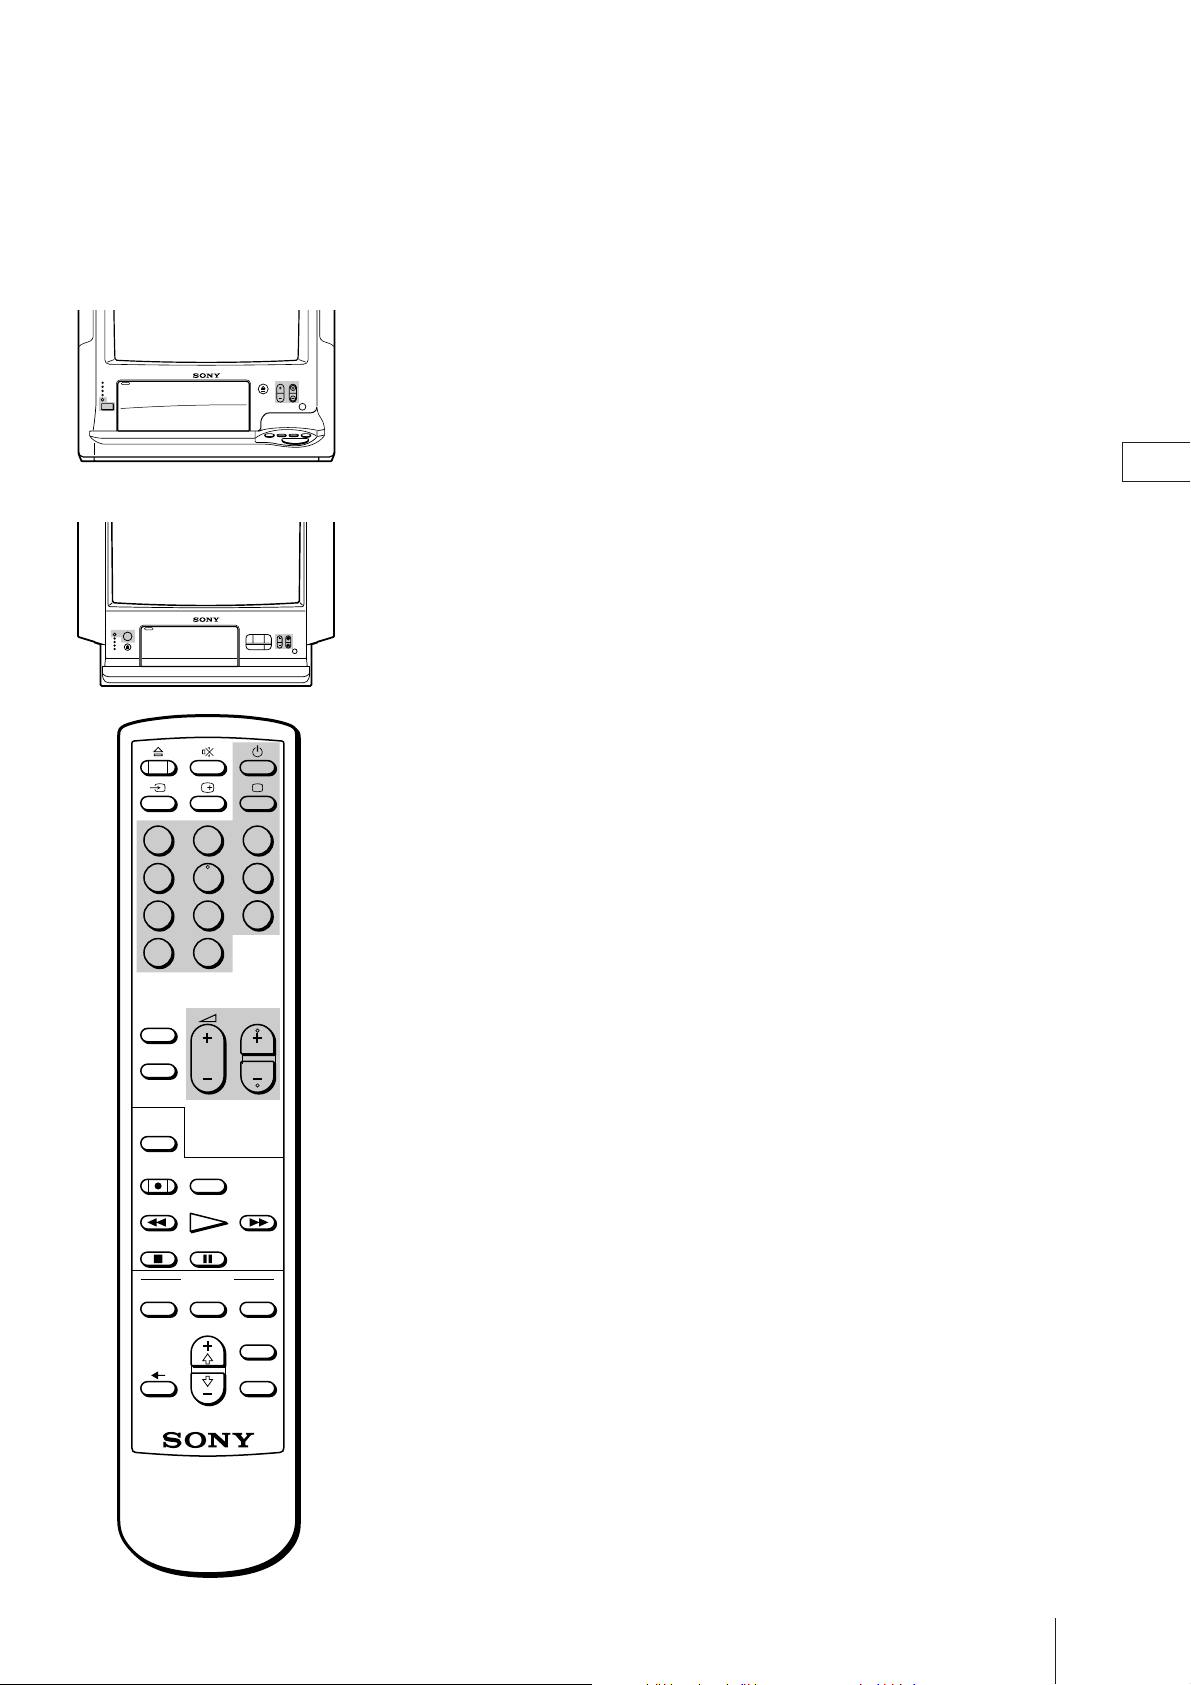
KV-V1430K/P
KV-V2110K/P
123
This section explains the basic functions you use while watching the TV.
Most of the operations can be done using the Remote Commander.
Switching the TV On and Off
GB
Switching on
Press ;, PROGR +/– or number buttons on the Remote Commander, or
PROGR+/– on the video TV.
Switching off
Press u.
The video TV enters standby mode and the u lamp on the front of the
video TV lights up in red.
To switch off the main power
Disconnect the mains lead from a wall outlet.
456
789
-/--
0
COUNTER
RESET
TIMER REC
ON/OFF
PROGR
FFPLAY
CLEAR
MENU
OK
ON TIMER
SLEEP
QUICK
TIMER
REC
REW
STOP PAUSE
TIMER
ON SCREEN
Selecting TV Programmes
Press PROGR +/– or number buttons on the Remote Commander or
PROGR +/– on the video TV.
To select a double-digit number using the
number buttons
Press ÷, then the numbers.
For example, if you want to choose 14, press ÷, 1 and 4.
Adjusting the Volume
Press Á +/–.
Basic Operations
13
Page 14
123
456
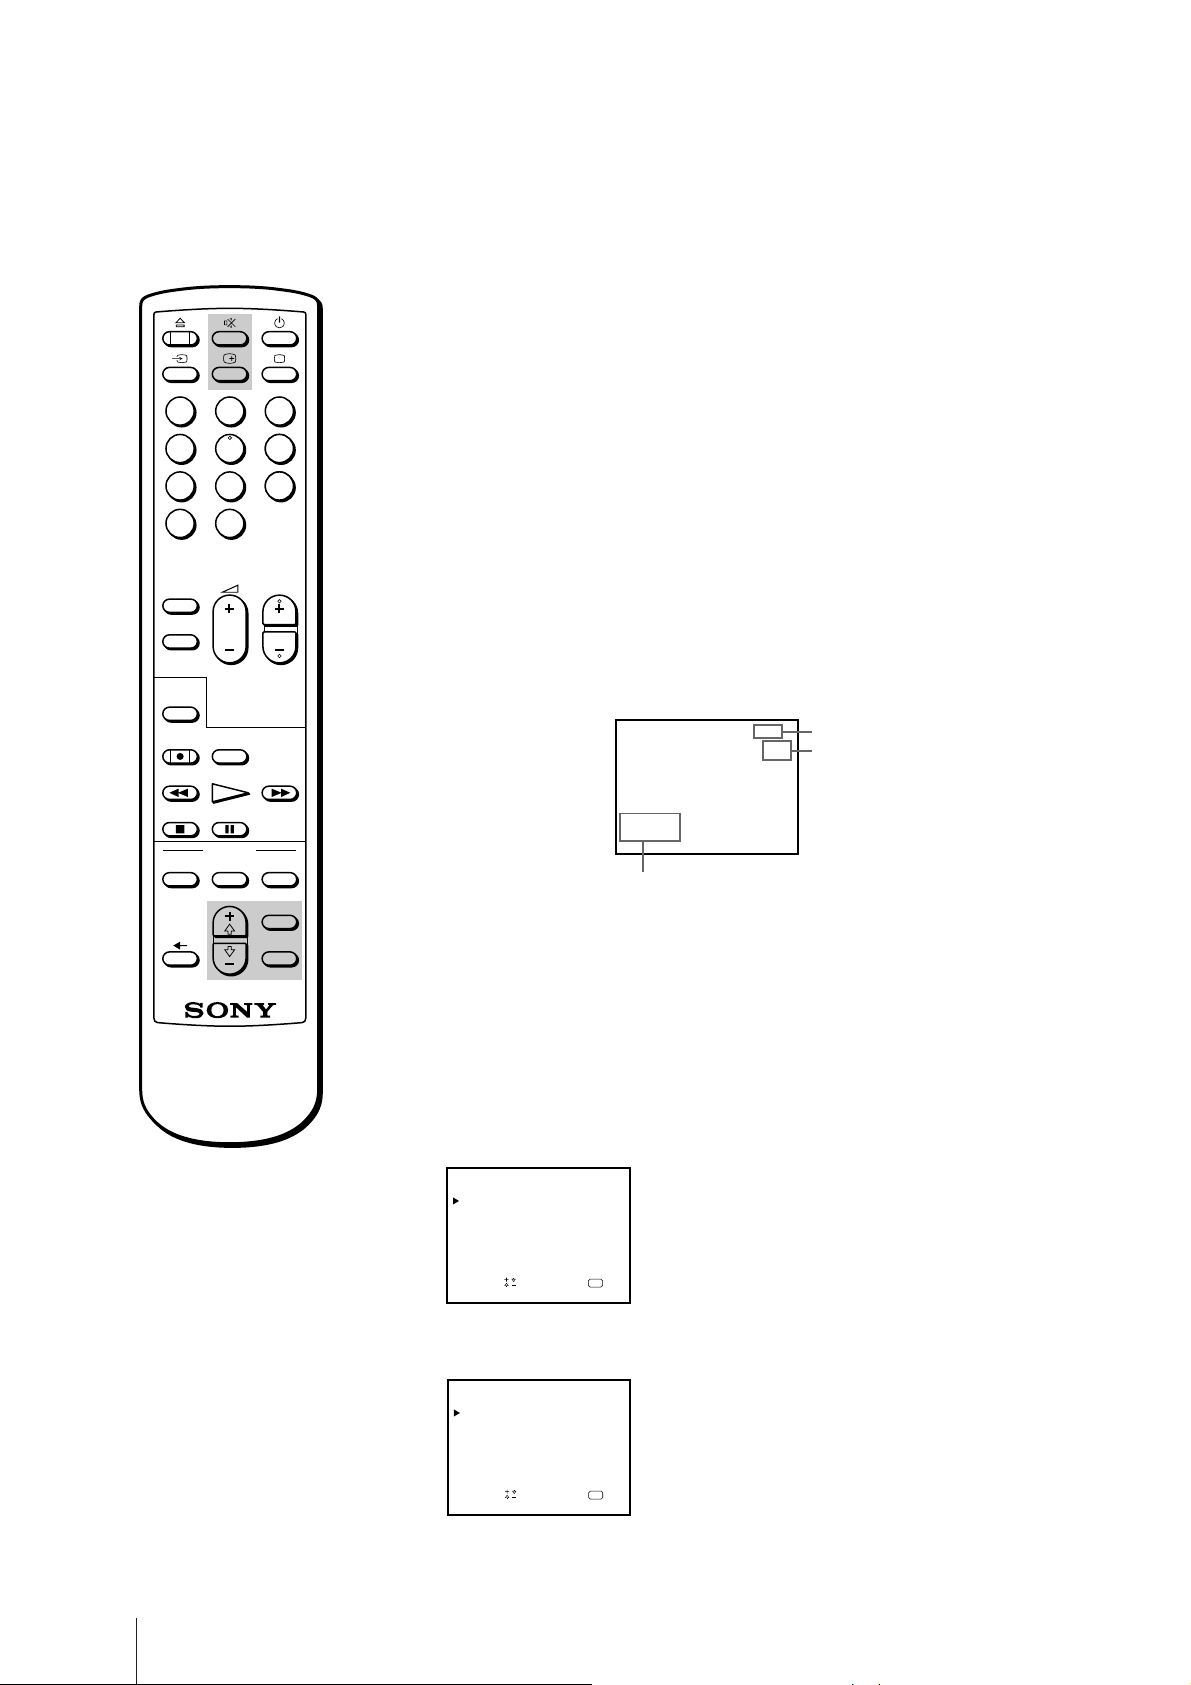
Muting the Sound
Press ¤.
The ¤ indicator appears and stays on the screen.
To resume normal sound, press ¤ again or Á +.
789
-/--
0
COUNTER
RESET
TIMER REC
ON/OFF
PROGR
FFPLAY
CLEAR
MENU
OK
ON TIMER
SLEEP
QUICK
TIMER
REC
REW
STOP PAUSE
TIMER
ON SCREEN
Displaying the On-screen
Information
Press e to display the following on-screen information.
To have the programme number and caption stay on the screen, press e
again.
To make the indications disappear, press e until no indications are
displayed on the screen.
ABC
Caption
Programme position
12
4.12MON
20:00
Current date and time
Adjusting the Picture
You can select one of four settings for picture effect in the menu. You can
also adjust the picture to suit your own taste.
Basic Operations
14
Selecting the picture effect
1 Press MENU to display the main menu.
MENU
VISUAL MODE
ON TIMER SET
CLOCK SET
TRACKING CONTROL
LANGUAGE
PROGRAMME PRESET
DEMONSTRATION
Sap
elect nd ress
2 Move the cursor (z) to VISUAL MODE with + ◊ or – √ and press OK.
The VISUAL MODE menu appears.
VISUAL MODE
PICTURE CONTROL
STANDARD
MILD
MOVIE
OPC: ON
Sap
elect nd ress
OK
OK
Page 15
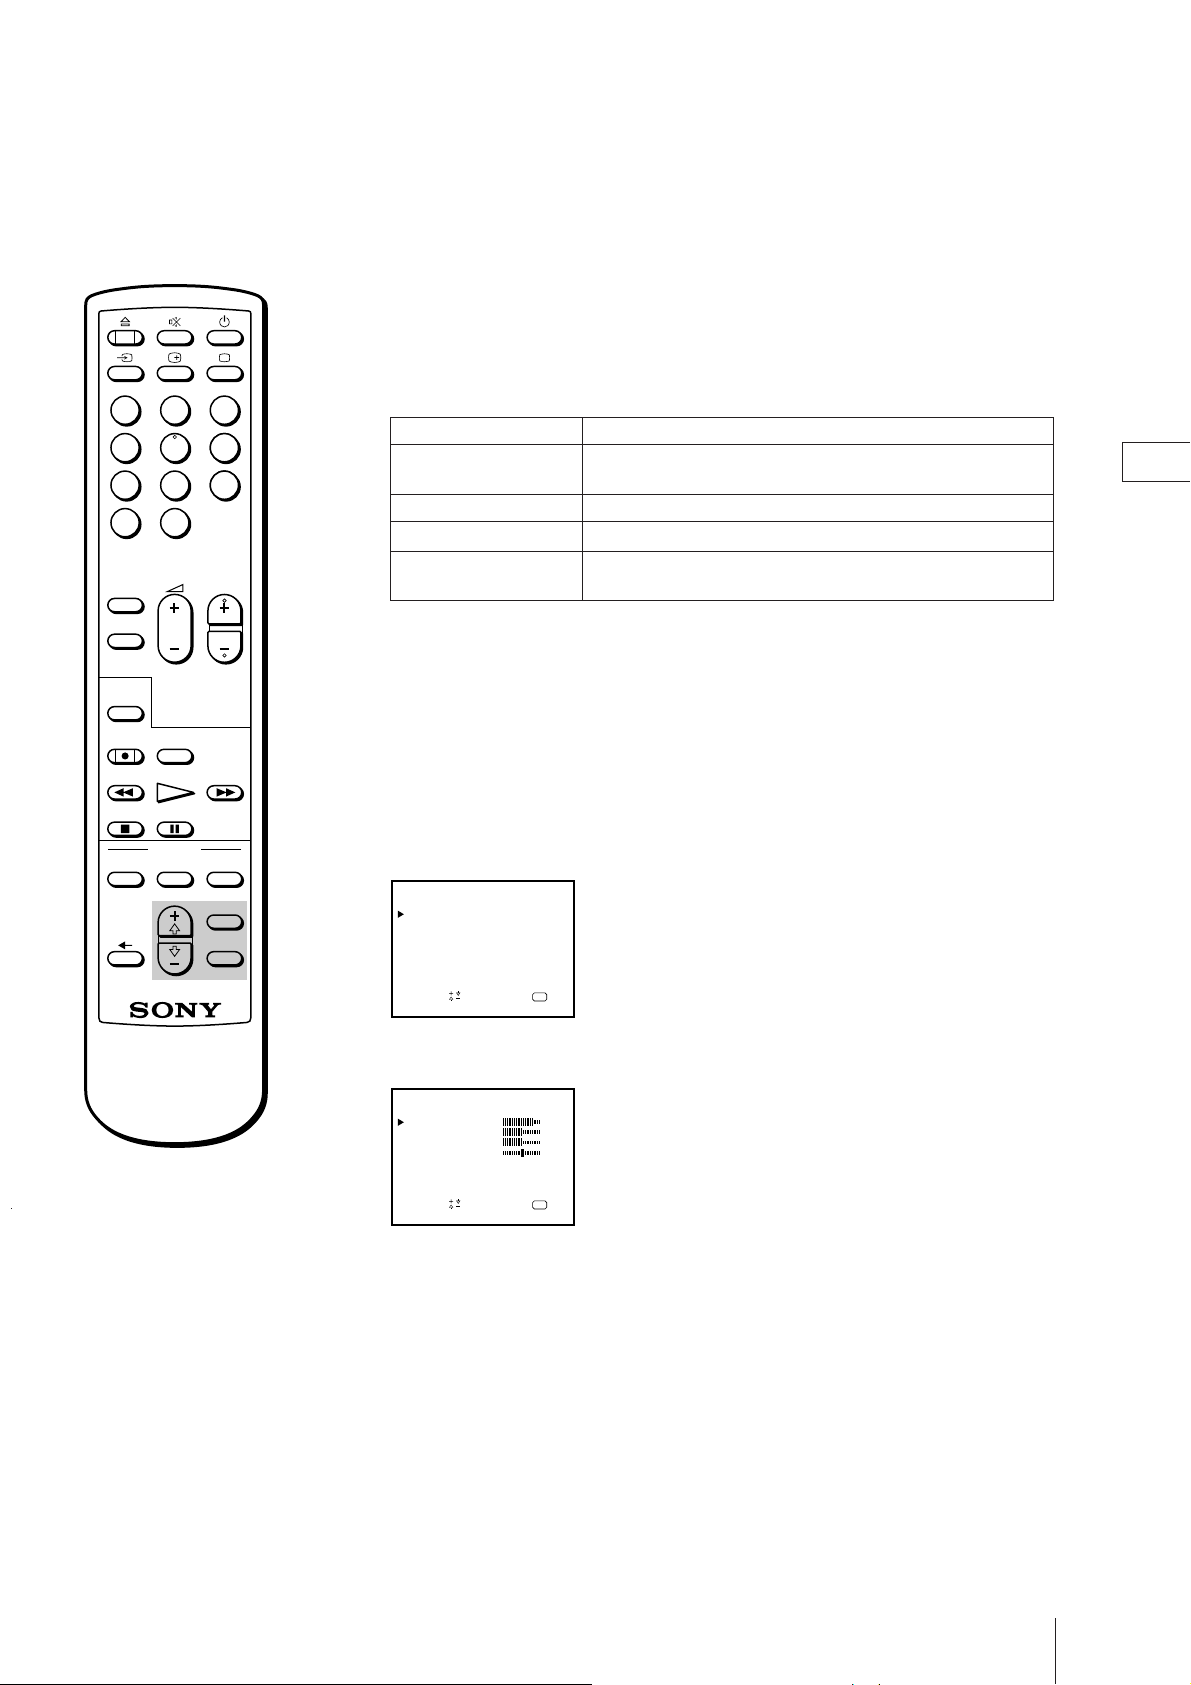
3 Using + ◊ or – √, select the setting you want and press OK. For the effect
of each setting, see the table below.
The selected setting is stored.
123
456
789
-/--
0
COUNTER
RESET
TIMER REC
ON/OFF
PROGR
FFPLAY
CLEAR
MENU
OK
ON TIMER
SLEEP
QUICK
TIMER
REC
REW
STOP PAUSE
TIMER
ON SCREEN
Effect of each setting
Setting
PICTURE CONTROL
STANDARD
MILD
MOVIE
Press MENU to go back to the original screen.
4
Picture effect
The adjusted picture control levels are stored. (See
“Adjusting the picture displayed on the screen.”)
More contrast
Less contrast
Darker
e.g. when watching a movie
Adjusting the picture displayed on the screen
1 Press MENU to display the main menu.
2 Move the cursor (z) to VISUAL MODE with + ◊ or – √ and press OK.
The VISUAL MODE menu appears.
VISUAL MODE
PICTURE CONTROL
STANDARD
MILD
MOVIE
OPC: ON
GB
Note
The HUE adjustment is available
only for the NTSC colour system.
Sape l ec t nd r ess
OK
3 Move the cursor (z) to PICTURE CONTROL with + ◊ or – √ and press OK.
The PICTURE CONTROL menu appears.
PICTURE CONTROL
CONTRAST
COLOUR
BRIGHTNESS
HUE
RESET
Sape l ec t nd r ess
80
50
50
00
OK
4 Using + ◊ or – √, select the item you want to adjust and press OK.
5 Adjust the picture with + ◊ or – √ and press OK.
With each press the vertical bars increase or decrease and the figure at the
right margin changes to show the control level. (See the table on the next
page.)
6 Repeat steps 4 and 5 to adjust other items.
Basic Operations
15
Page 16
KV-V1430K/P
7 Press MENU to go back to the original screen.
The adjusted control levels are stored.
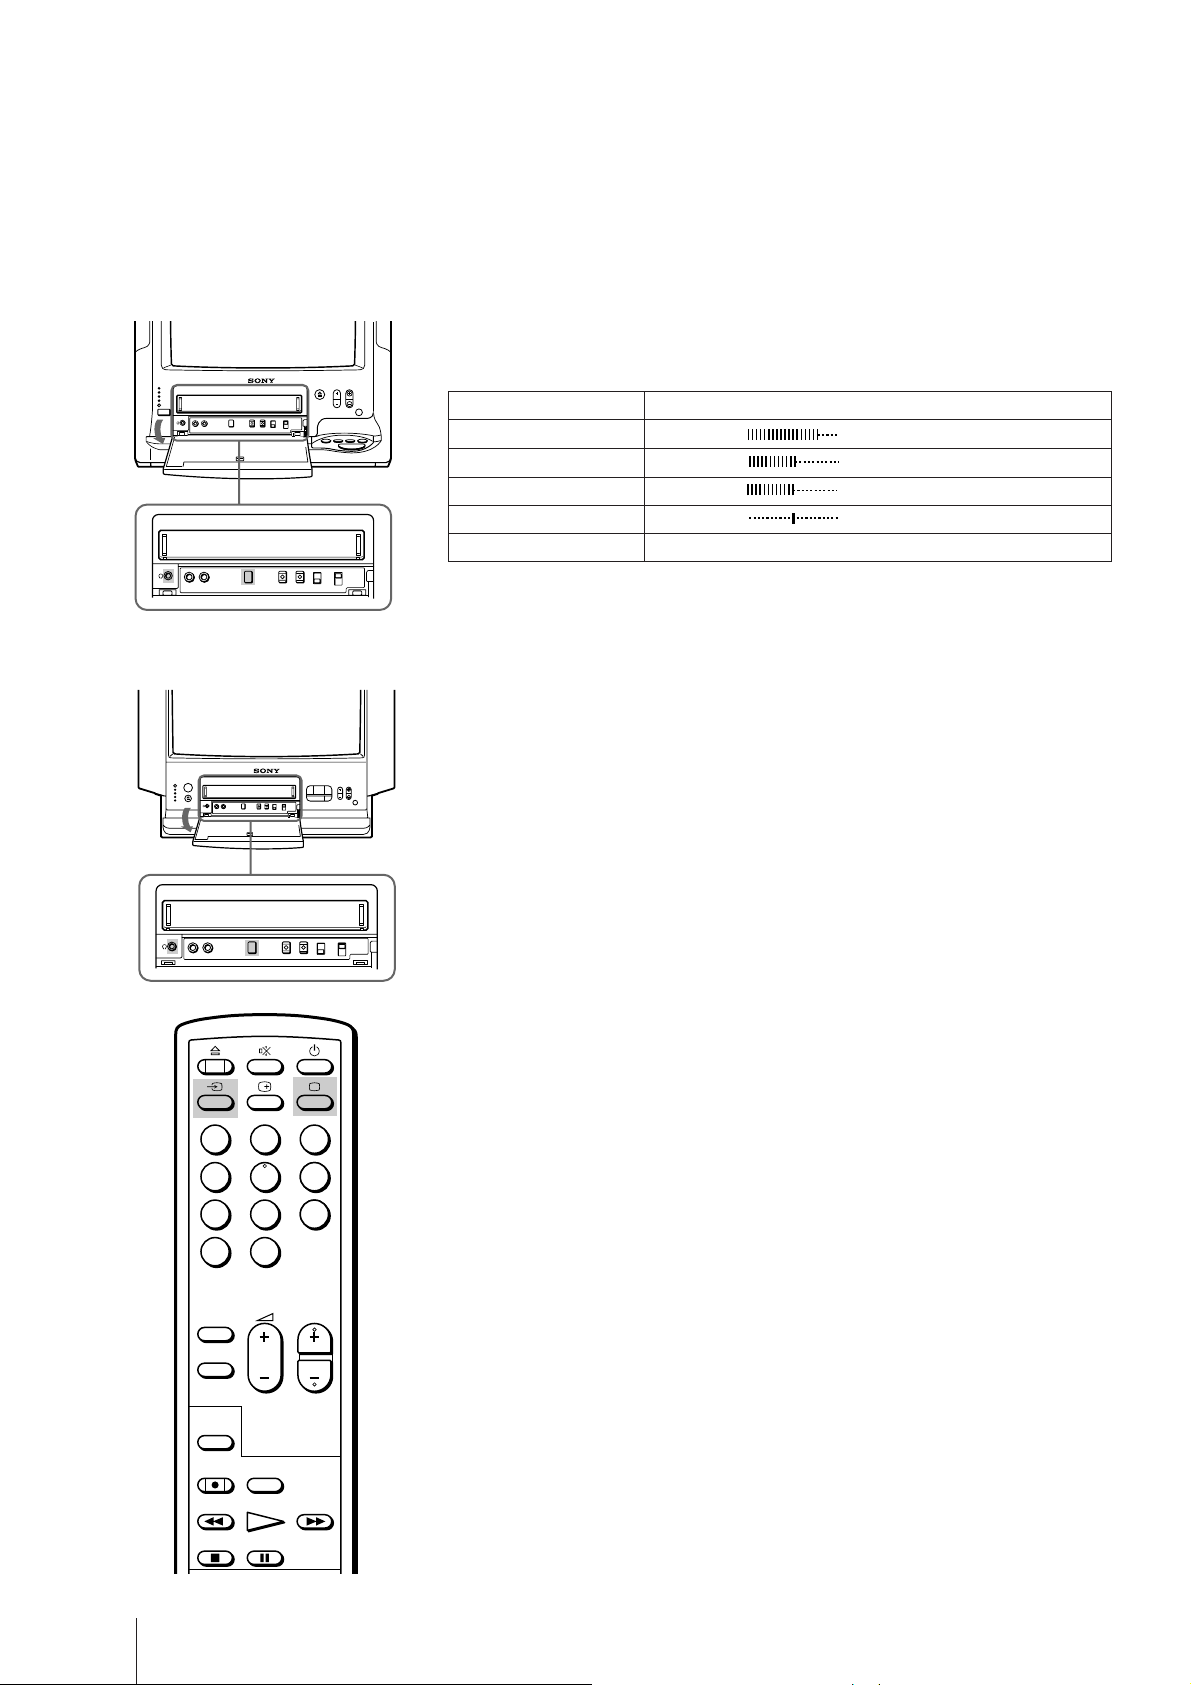
Effect of each control
PICTURE CONTROL
CONTRAST
COLOUR
BRIGHTNESS
HUE
RESET
Effect
Less More
Less More
Darker Brighter
Greenish Reddish
Resets all the items to the factory preset levels.
KV-V2110K/P
123
456
789
Watching Line Input
Press … repeatedly until the desired input indicator appears.
To go back to the normal TV picture, press … until the programme
position appears, or press ; on the Remote Commander once. For details
of the video input picture, see page 30.
Listening with Headphones
Plug the headphones (not supplied) to the 2 (headphones) jack inside the
front panel on the video TV.
The sound from the speaker is shut off.
Basic Operations
16
-/--
ON TIMER
SLEEP
QUICK TIMER
COUNTER
REC
REW
STOP PAUSE
0
PROGR
RESET
FFPLAY
Page 17
Playing a Tape
KV-V1430K/P
KV-V2110K/P
This section shows you how to insert a cassette and to play it. More
convenient functions you can use while playing a tape is shown in
“Additional Operations” from page 26.
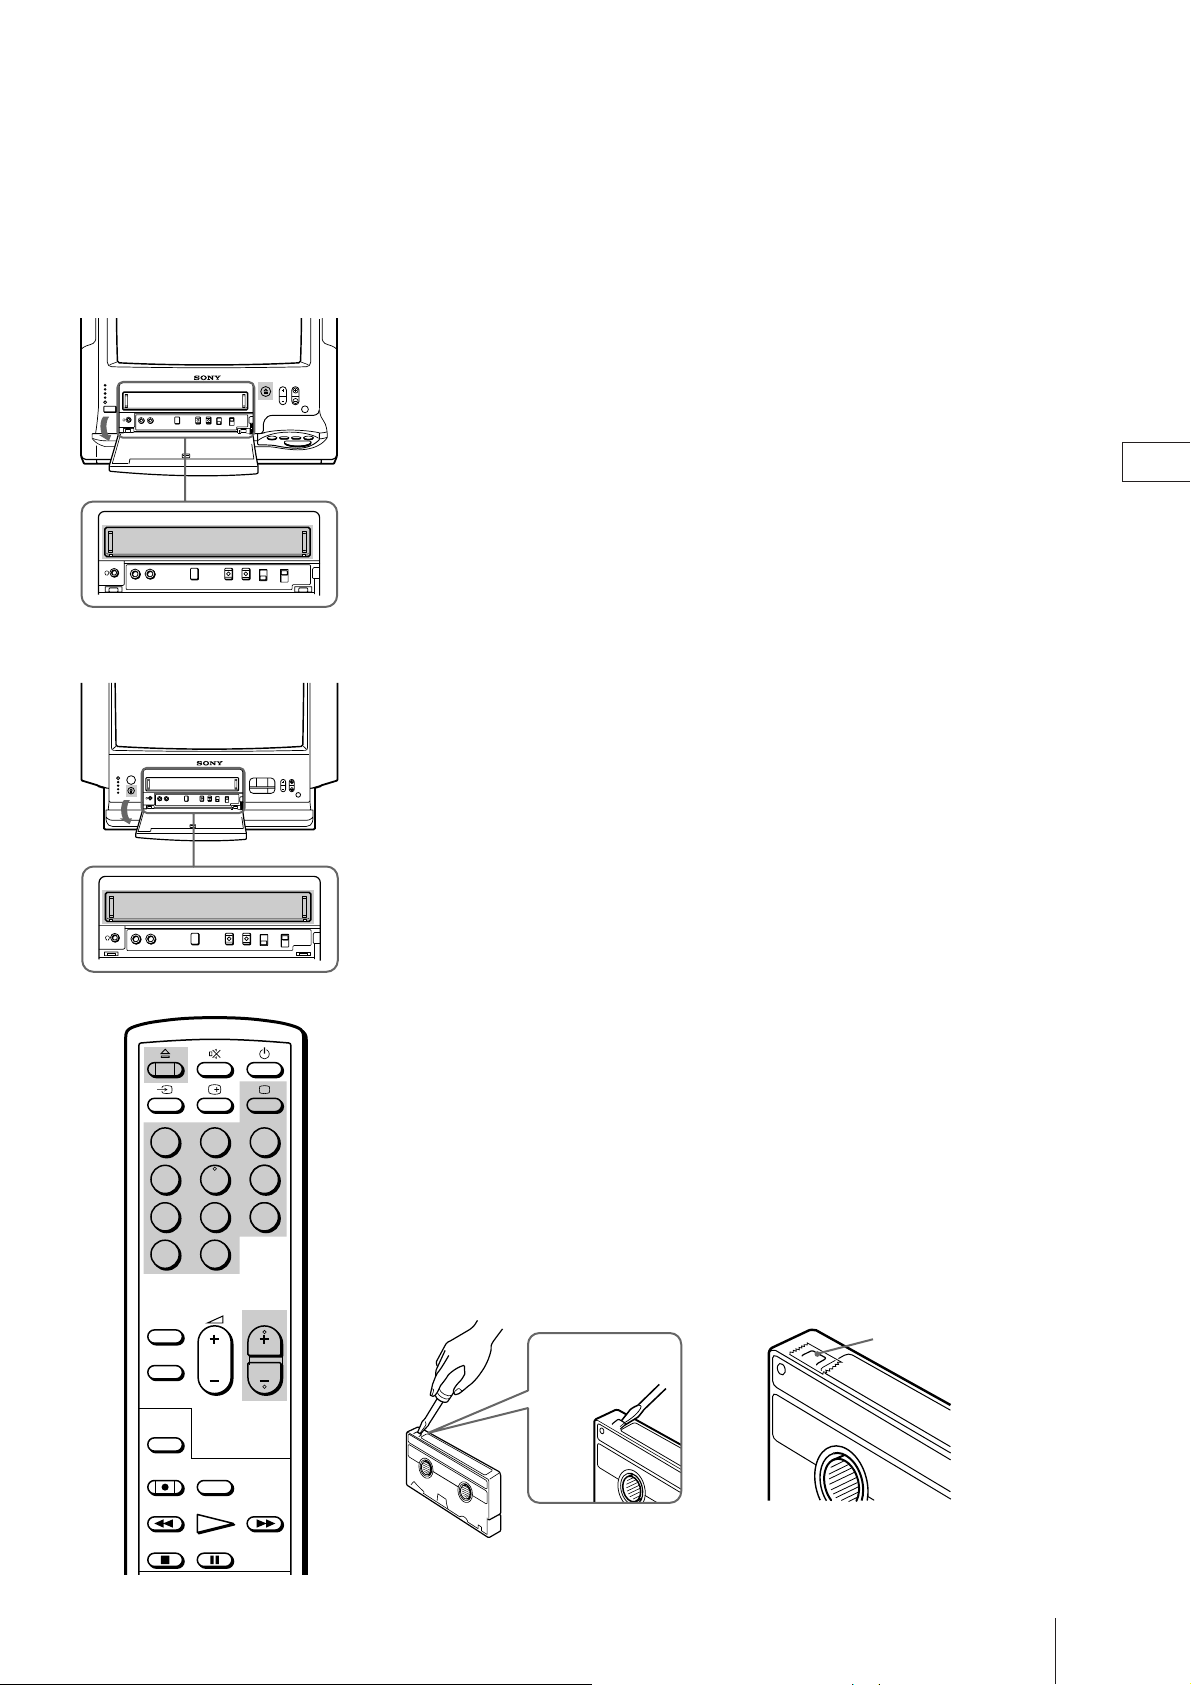
Inserting a Video Cassette
1 Press ;, PROGR +/– or number buttons on the Remote Commander, or
PROGR +/– on the video TV.
2 Open the front panel on the video TV.
3 Gently press the centre of the front side of a cassette with the arrow
indication facing upwards. The cassette is automatically loaded into the
cassette compartment.
The Ò indicator appears on the screen and stays until the cassette has
been loaded.
The video TV turns on automatically when it is in standby mode. If you
insert a cassette with its safety tab removed, playback starts.
Ejecting a Video Cassette
GB
123
456
789
-/--
0
COUNTER
RESET
PROGR
ON TIMER
SLEEP
QUICK TIMER
REC
Press EJECT 6 on the video TV or 6 on the Remote Commander.
The Ò indicator appears and stays until the cassette is ejected.
You can eject the cassette even if the power is off.
Protecting Your Cassette against
Accidental Erasure
The cassette is provided with a safety tab to protect against accidentally
erasing a previous recording. Break off the safety tab with a screw driver
or a similar tool.
If the safety tab is removed, the cassette is ejected when you try to record
on it.
To record on a cassette with the safety tab broken off, simply cover the tab
hole with adhesive tape.
Adhesive tape
Safety tab
REW
STOP PAUSE
FFPLAY
Basic Operations
17
Page 18
KV-V1430K/P
KV-V2110K/P
Playing a Tape
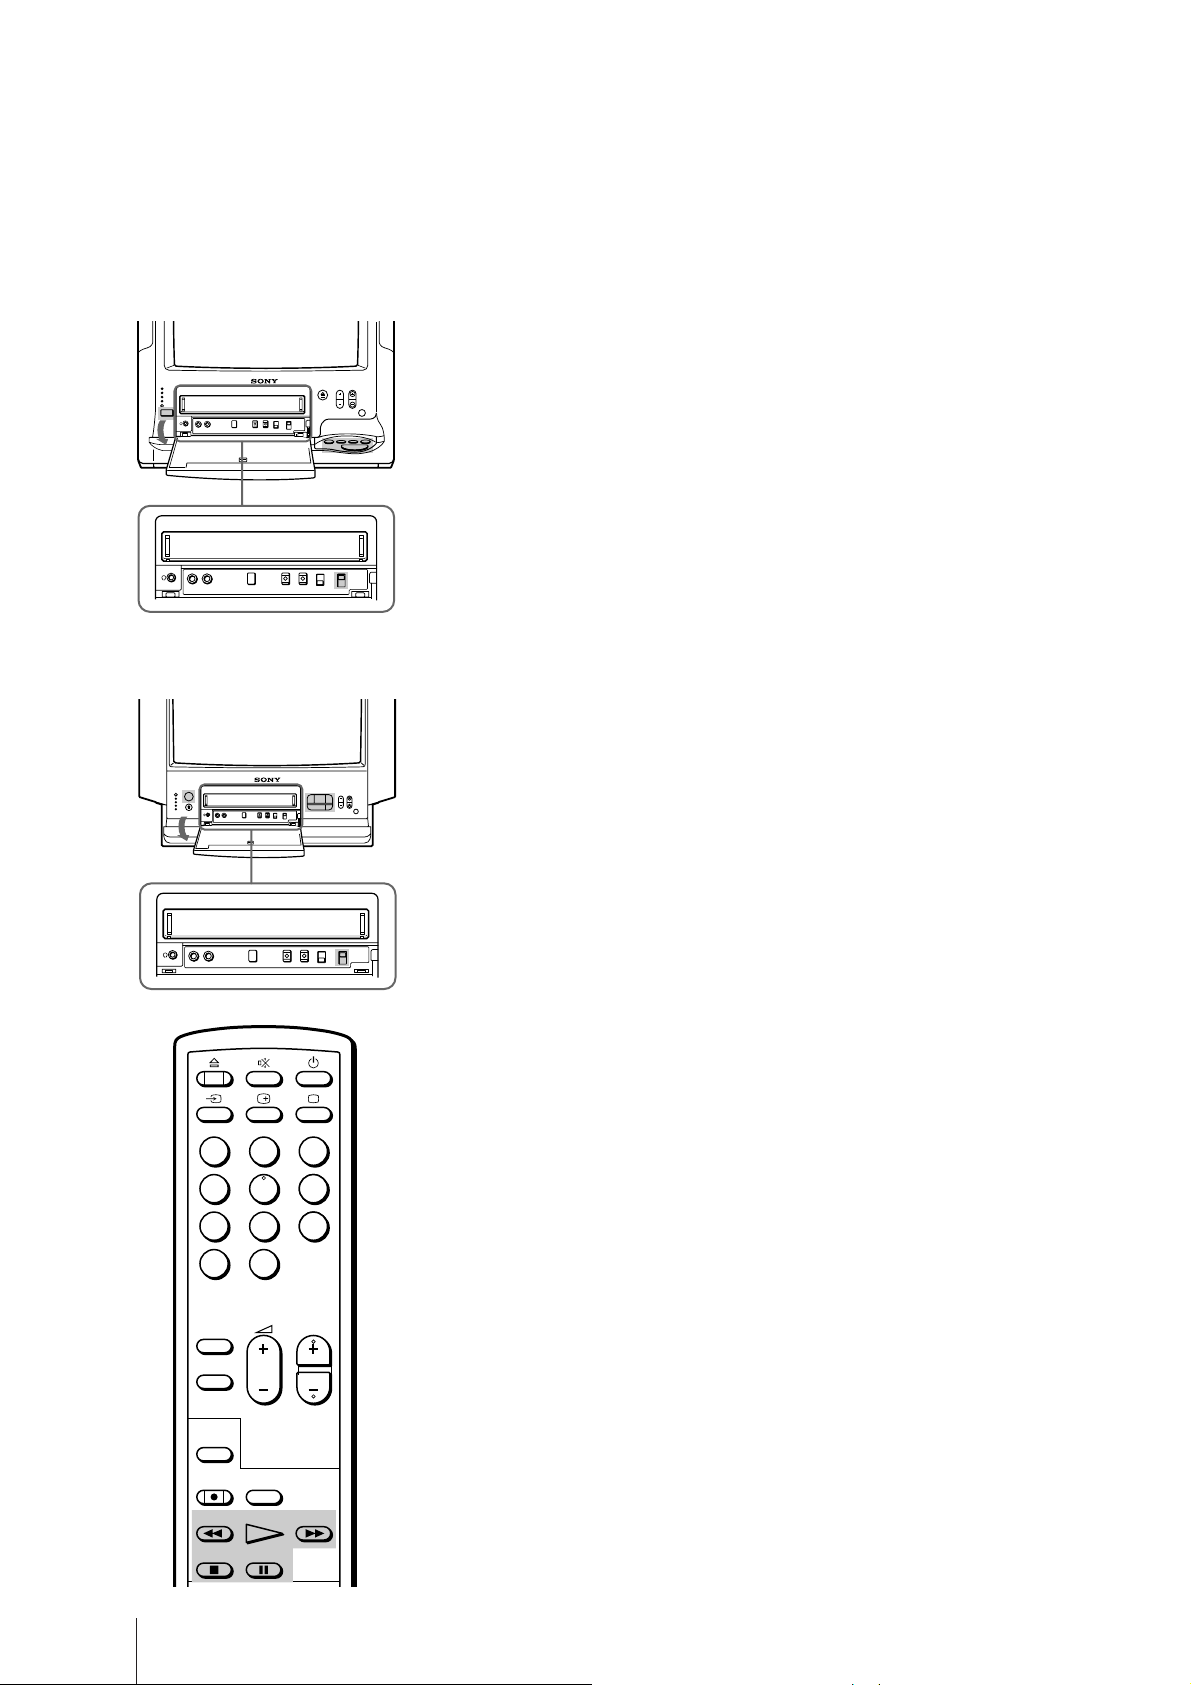
1 Press ;, PROGR +/– or number buttons on the Remote Commander, or
PROGR +/– on the video TV when the u lamp is lit in red.
2 Insert a cassette.
If you insert a cassette with its safety tab removed, playback starts
automatically.
3 Set the COLOUR SYSTEM switch to conform to the colour system of the
tape to be played. Normally, set it to AUTO. If streaks appear when
playing a tape, switch it to select the colour system.
PAL: to play a tape recorded in PAL or MESECAM colour system
NTSC: to play a tape recorded in NTSC colour system
4 Press PLAY ·.
Playback starts. On-screen information is displayed for some seconds.
To stop playback
Press STOP p.
The video TV goes back to the normal TV picture.
To stop playback for a moment
Press PAUSE P. The picture pauses.
Press PAUSE P again or press PLAY · to resume playback.
If you leave your video TV in pause mode, normal playback resumes after
about 5 minutes to protect the quality of video tapes.
123
456
789
-/--
0
COUNTER
RESET
PROGR
FFPLAY
ON TIMER
SLEEP
QUICK TIMER
REC
REW
STOP PAUSE
To fast forward the tape
Press STOP p, then press FF ).
To rewind the tape
Press STOP p, then press REW 0.
To search a tape at high speed
During playback, press and hold REW 0 (rewind) or FF ) (fast
forward).
A high-speed picture appears on the TV screen.
To resume normal playback, release the button.
To view the picture in fast forward or rewind mode
Press and hold FF ) during fast forward or REW 0 during rewind.
While you hold the button, you can view the picture.
When you release the button, fast forward or rewind mode is resumed.
Basic Operations
18
Page 19
KV-V1430K/P
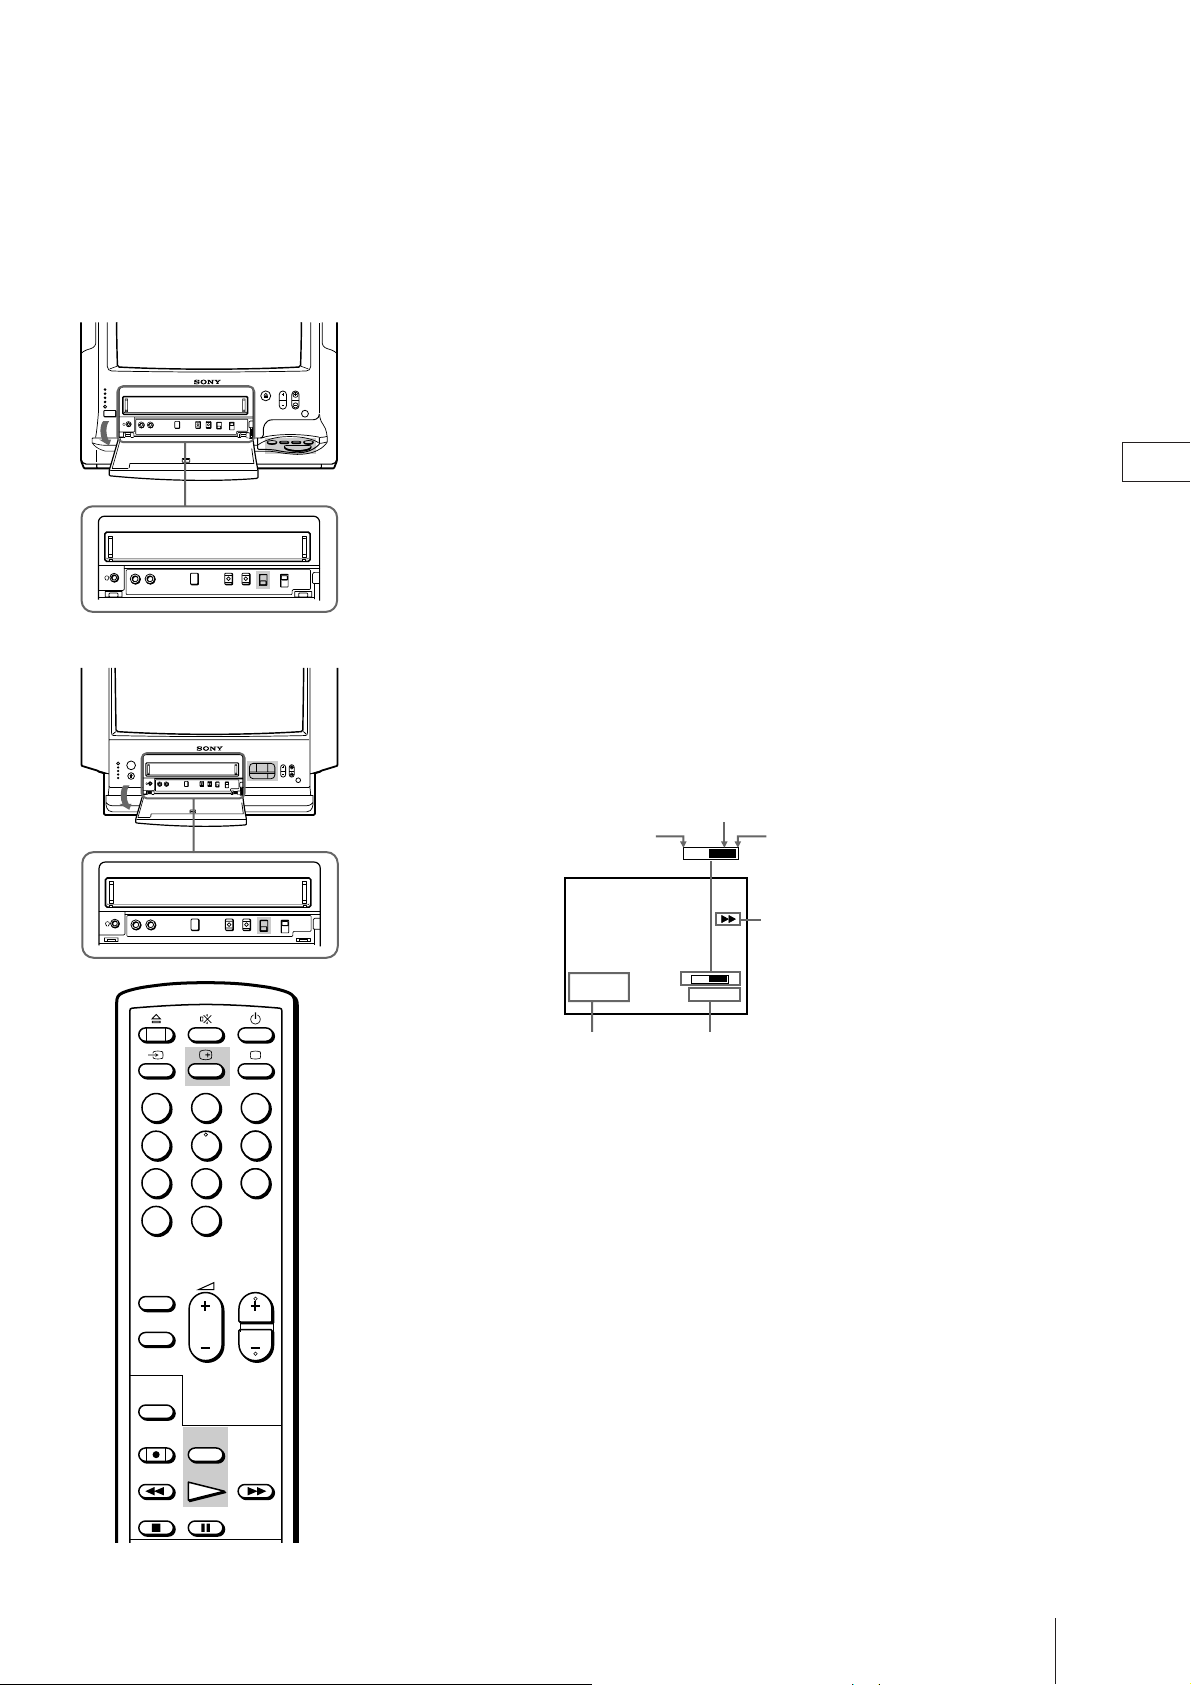
Playing a Tape Repeatedly (Auto
Repeat)
You can play the recorded portion of the tape repeatedly.
Set the AUTO REPEAT switch on the video TV to ON, and press
PLAY ·.
Playback starts. When the tape reaches the end, the video TV rewinds the
tape to the beginning, then plays it.
Displaying the on-Screen
GB
KV-V2110K/P
123
456
789
Indications
Press e to display the following on-screen information. To show only the
amount of tape remaining and linear tape counter on the screen, press e
again.
To make the indications disappear, press e until no indications appear.
Amount of tape remaining
Beginning of the tape
4.12MON
20:00
Current date and
time
S
2:05:10
Linear tape
counter
End of the tape
ES
Tape operation mode
E
Resetting the Tape Counter
-/--
0
COUNTER
RESET
PLAY
PROGR
ON TIMER
SLEEP
QUICK
TIMER
REC
REW FF
STOP PAUSE
Note
The tape operation mode will be
displayed whenever you change
the mode (even when the e is
turned off.)
The tape counter helps you to locate a certain scene after playback. Press
COUNTER RESET on the Remote Commander to set the counter to
“0:00:00” before playing the tape. The tape counter is automatically reset
to “0:00:00” whenever a cassette is inserted. The video TV keeps counting
the length of the tape being played. Note, however, that the tape counter
does not count the portions without video signals recorded.
Basic Operations
19
Page 20
Recording TV Programmes
KV-V1430K/P
KV-V2110K/P
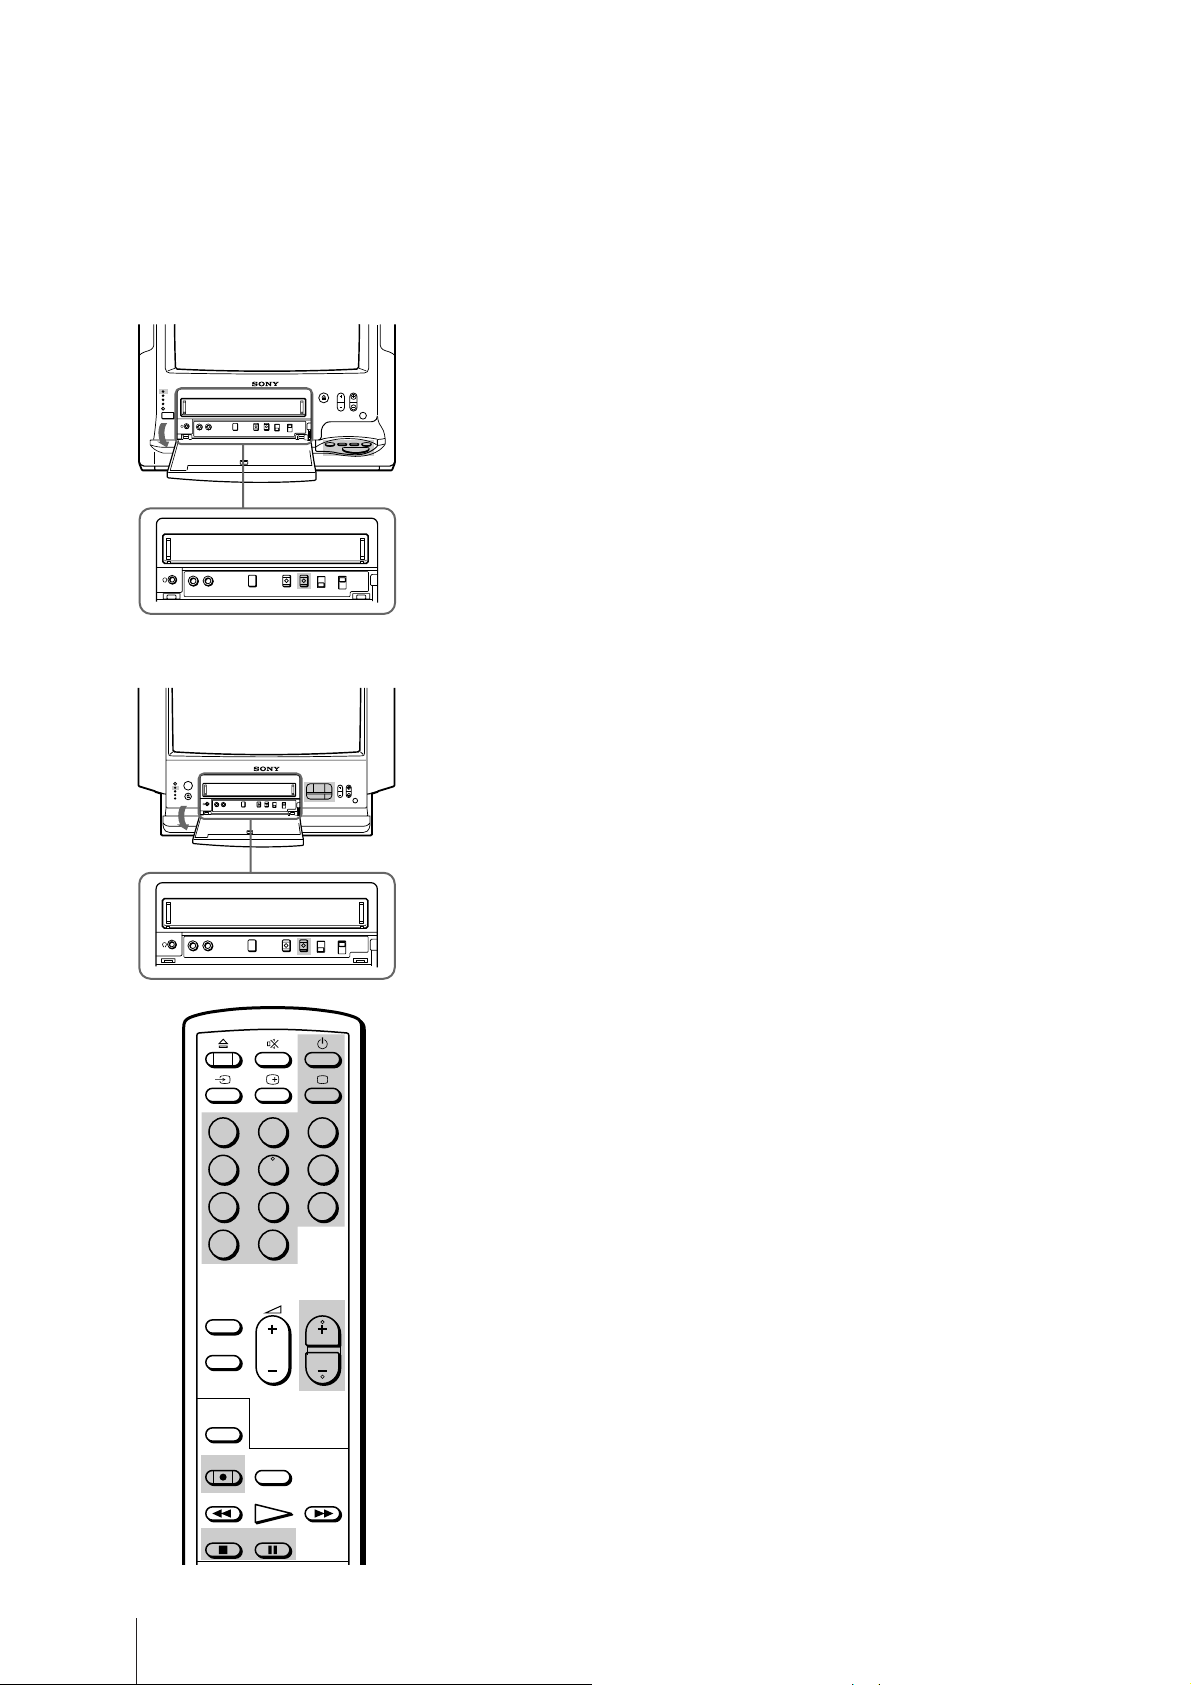
Recording TV Programmes
1 Press ;, PROGR +/– or number buttons on the Remote Commander, or
PROGR +/– on the video TV when the u lamp is lit in red.
2 Insert a cassette with a safety tab.
3 Select the programme position with PROGR+/–. You can also use number
buttons on the Remote Commander. For double-digit numbers (e.g.14),
first press ÷, then press 1 and 4.
4 Press REC r.
The REC lamp on the front of the video TV lights up and recording begins.
To stop recording
Press STOP p.
When the tape reaches the end, the video TV rewinds the tape
automatically to the beginning, then stops. This function does not work
when the power of the video TV is off.
To pause recording
123
456
789
-/--
0
COUNTER
RESET
PROGR
ON TIMER
SLEEP
QUICK
TIMER
REC
Press PAUSE P.
To resume recording, press PAUSE P again.
You can cut out an unwanted scene during recording with this button.
1 Press PAUSE P when an unwanted scene appears on the screen.
Recording pauses.
2 Press PAUSE P again to release the pause mode at the desired scene.
Recording resumes from the point set in step 1.
When the recording pause mode lasts for about 5 minutes, the video TV
stops recording to protect the quality of video tapes.
Recording with the TV Off
Press u.
The TV screen is turned off and the u lamp lights up.
The video TV continues recording.
Basic Operations
20
REW FFPLAY
STOP PAUSE
Page 21
Recording TV Programmes Using
the Timer
The Timer Recording function allows you to preset your video TV to
record up to six programmes within a one-month period.
Before you begin
123
456
789
-/--
0
ON TIMER
SLEEP
PROGR
• Press ;, PROGR +/– or number buttons on the Remote Commander, or
PROGR +/– on the video TV to switch on the video TV.
• Make sure that the time and date clock are set. If not, the message
“Please set the clock” is displayed on the screen. Refer to “Setting the
clock” on page 12.
• Make sure that the loaded cassette has its safety tab. If a cassette
without safety tab is loaded, the message “Tape with safety tab is
required for recording” is displayed.
GB
QUICK
TIMER
COUNTER
REC
REW
STOP PAUSE
TIMER REC
TIMER
ON/OFF
ON SCREEN
RESET
FFPLAY
CLEAR
MENU
OK
Setting the Timer
Example: Here is how to record a programme broadcast on programme
position 26 from 20:15 to 21:55 on Wednesday, 6th December 1995.
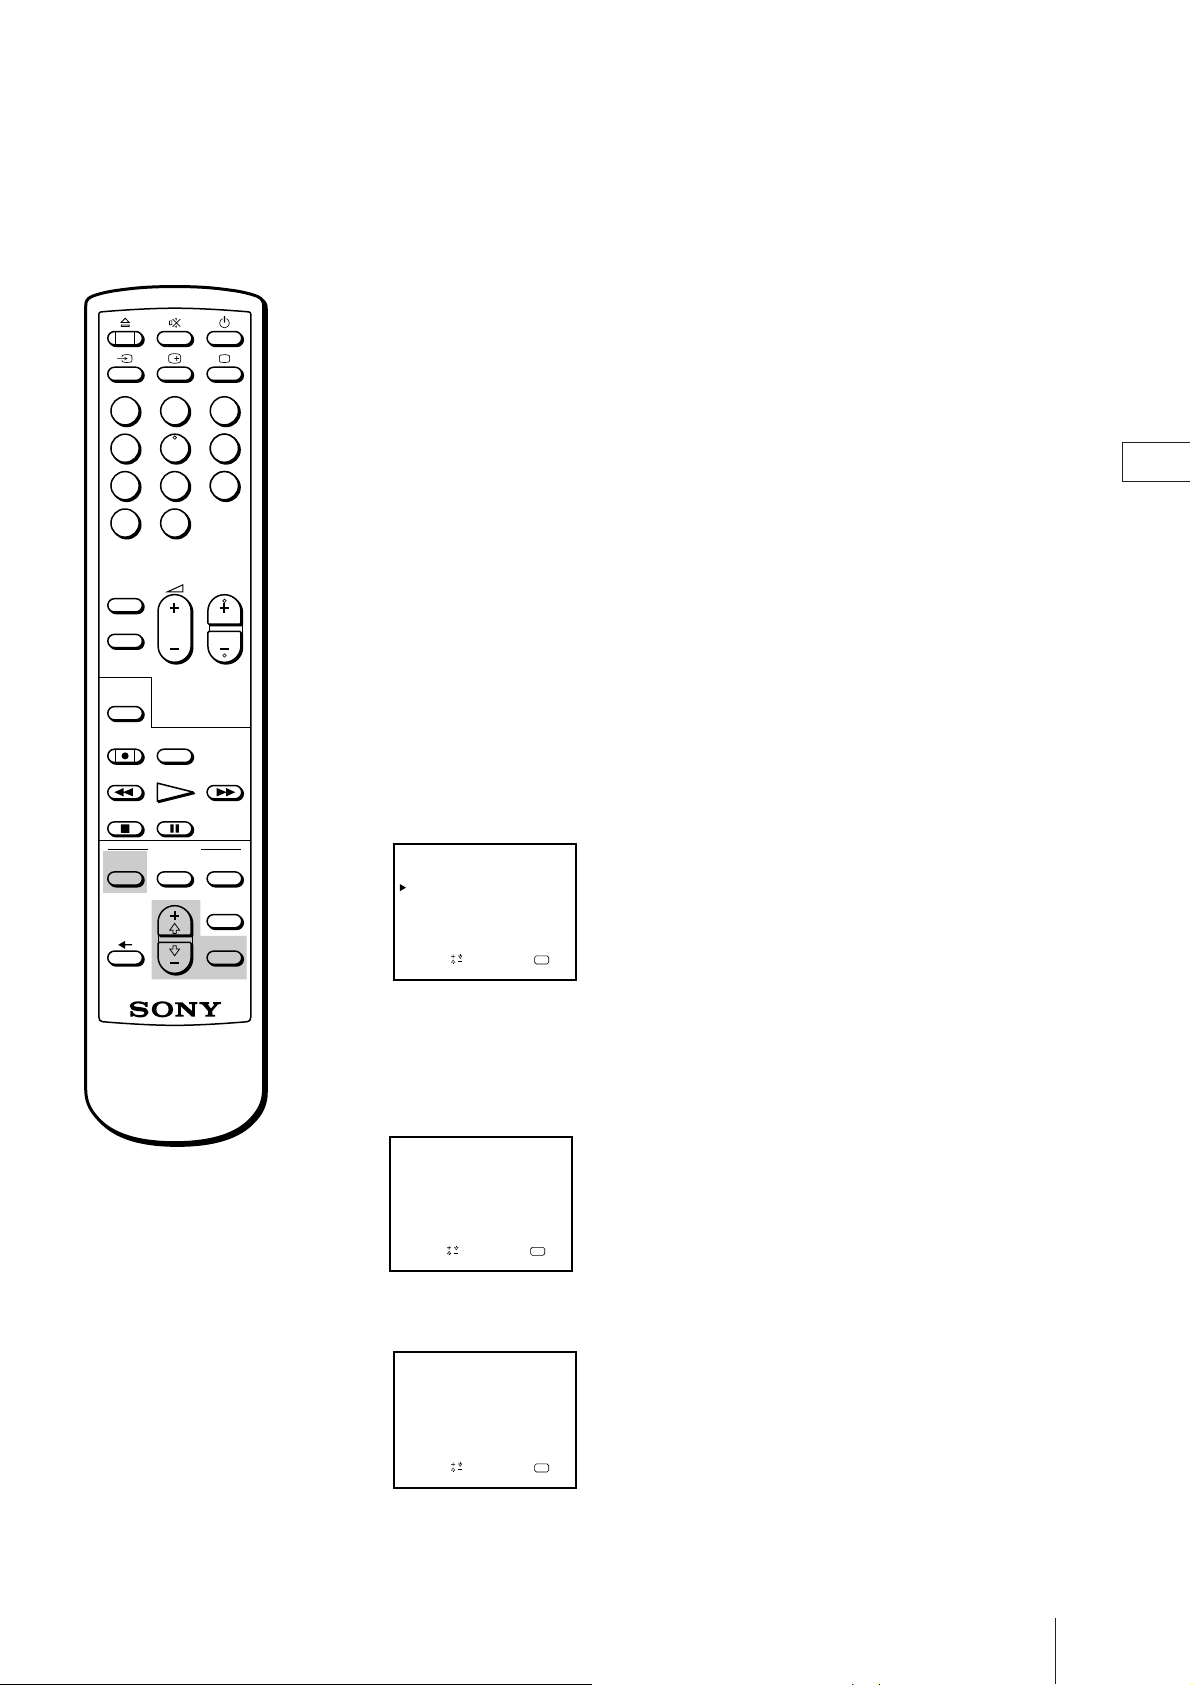
1 Press TIMER ON SCREEN.
The PROGRAMME LIST appears.
PROGRAMME LIST
DATE
START STOP
––
–––
––
––
––
––
Sape l ec t nd r ess
2 Press OK.
Today’s date coloured red appears.
3 Press + ◊ until “6 WED” appears.
For daily and weekly recording see “Daily/weekly recording” on page 23.
PROGRAMME LIST
DATE
START STOP
––
––
––
––
––
Sap
e l ec t nd r ess
––::––––––––::––––WED6
––::––––––––::–––
––:––––:––
––:––––:––
––:––––:––
––:––––:––
––:––––:––
––:––––:––
––:––––:––
––:––––:––
20 :00
MON12.4
PROG
–––
–––
––
––
––
––
OK
20 :00
MON12.4
PROG
–––
–––
––
––
––
––
OK
4 Press OK, then set the hour of the recording start time to “20” with + ◊ or
–√.
PROGRAMME LIST
DATE
START STOP
––
––
––
––
––
Sape l ec t nd r ess
––::––––––––::0–2–WED6
20 :00
––:––––:––
––:––––:––
––:––––:––
––:––––:––
OK
MON12.4
PROG
–––
–––
––
––
––
––
Basic Operations
21
Page 22
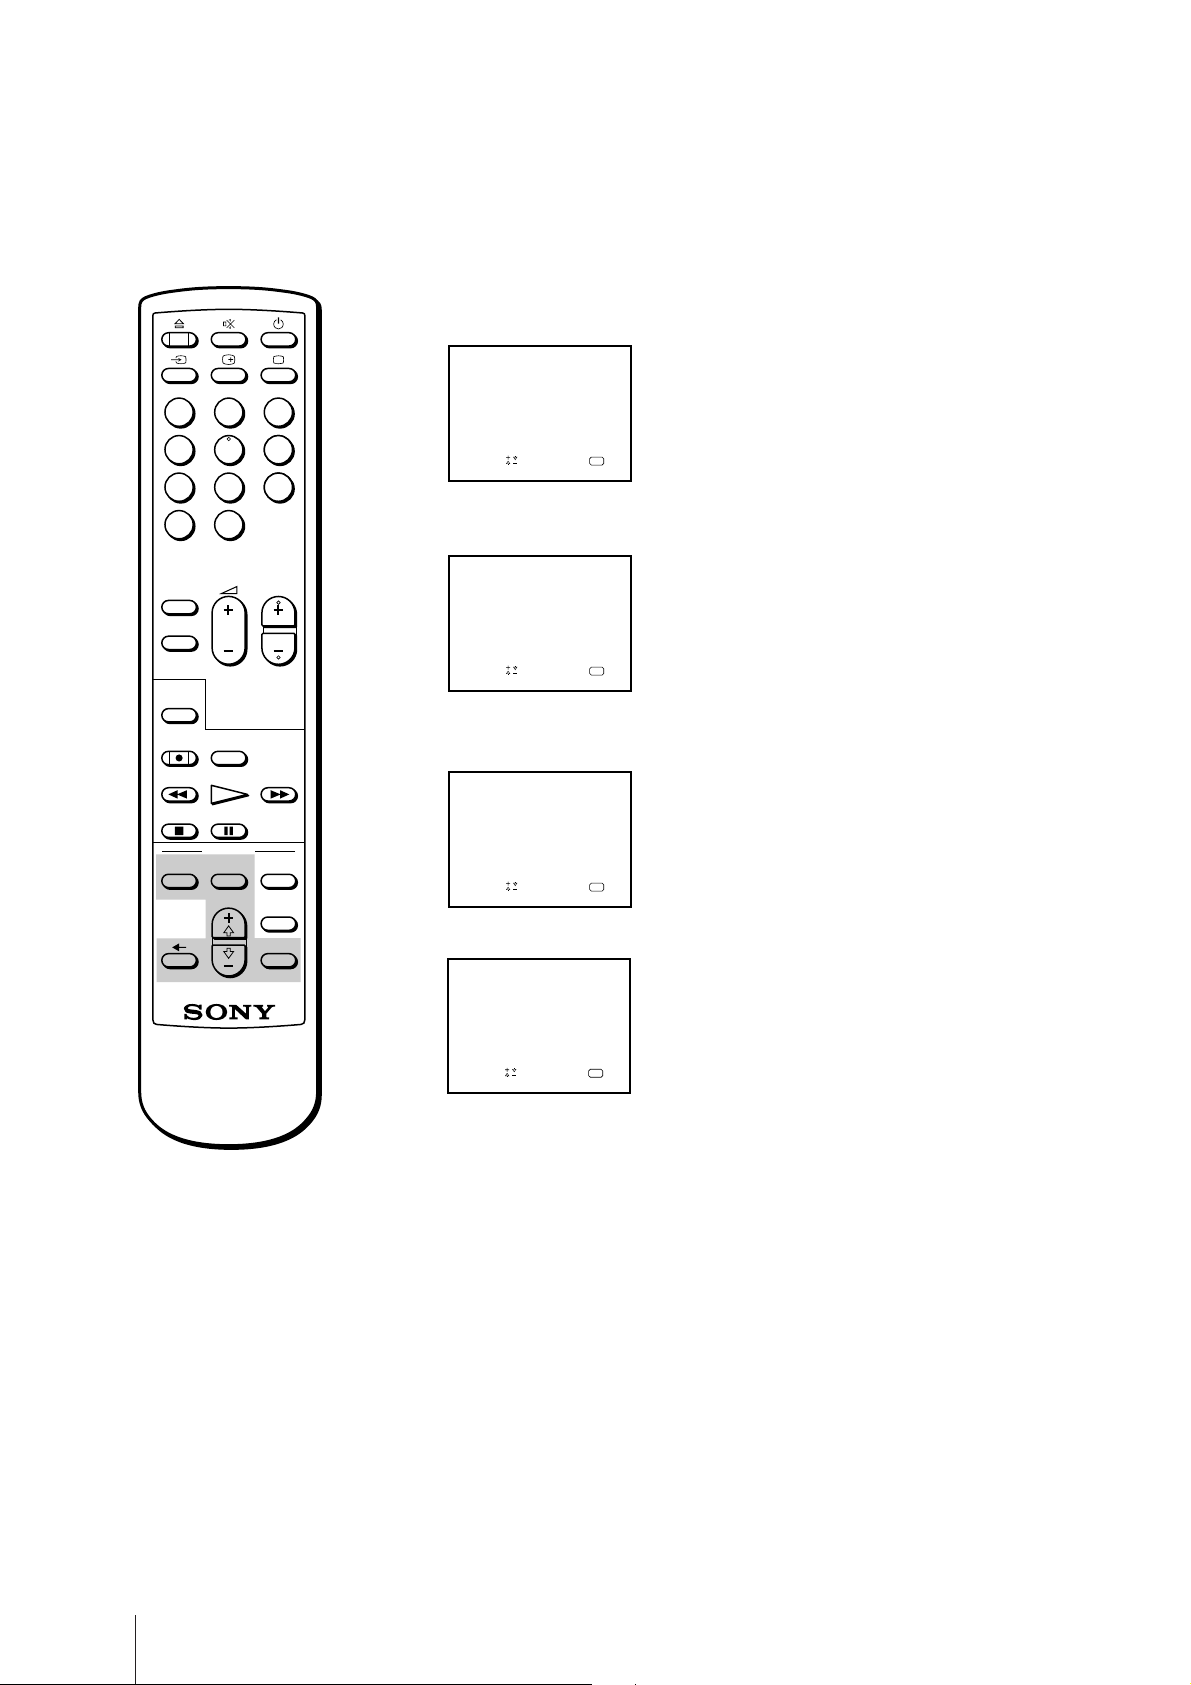
5 Press OK, then set the minute of the recording start time to “15” with + ◊
or – √.
123
456
789
-/--
0
COUNTER
RESET
TIMER REC
ON/OFF
PROGR
FFPLAY
CLEAR
MENU
OK
ON TIMER
SLEEP
QUICK
TIMER
REC
REW
STOP PAUSE
TIMER
ON SCREEN
––::––––5–1–::0–2–WED6
20 :00
PROG
––:––––:––
––:––––:––
––:––––:––
––:––––:––
OK
MON12.4
–––
–––
––
––
––
––
PROGRAMME LIST
START STOP
DATE
––
––
––
––
––
e l ec t nd r es s
Sap
6 Press OK, then set the hour of the recording stop time to “21” with + ◊ or
– √.
PROGRAMME LIST
DATE
START STOP
––
––
––
––
––
Sap
elect nd ress
––::1–2–5–1–::0–2–WED6
20 :00
PROG
––:––––:––
––:––––:––
––:––––:––
––:––––:––
OK
MON12.4
–––
–––
––
––
––
––
7 Press OK, then set the minute of the recording stop time to “55” with + ◊
or – √.
PROGRAMME LIST
DATE
START STOP
––
––
––
––
––
Sap
elect nd ress
5–::1–2–5–1–::0–2–WED6
20 :00
PROG
––:––––:––
––:––––:––
––:––––:––
––:––––:––
OK
MON12.4
––5
–––
––
––
––
––
8 Press OK, then set the programme position to “26” with + ◊ or – √.
PROGRAMME LIST
DATE
START STOP
––
––
––
––
––
Sap
e l ec t nd r ess
5–::1–2–5–1–::0–2–WED6
––:––––:––
––:––––:––
––:––––:––
––:––––:––
20 :00
MON12.4
PROG
265
–––
––
––
––
––
OK
If you have made a mistake
during timer setting
Press ? to go back to the previous
position and correct the setting.
If you try to enter the
recording start time prior to
the current time
All the items of the setting will be
erased.
If you try to do incorrect
operation
The video TV displays a message on
the screen to interrupt your setting.
Basic Operations
22
9 Press OK.
The cursor (z) appears at the left margin.
10 When you want to set other programmes, press – √ to move down the
cursor to the next line, then repeat steps 2 to 9.
11 Press TIMER REC ON/OFF.
The TIMER REC lamp on the front of the video TV lights up and the video
TV enters timer recording standby mode.
Press TIMER ON SCREEN to erase the PROGRAMME LIST.
Turn off the video TV if you do not want to watch the TV.
The video TV turns on automatically and starts recording at the preset
start time, and goes off at the preset stop time.
Page 23
123
456
789
-/--
0
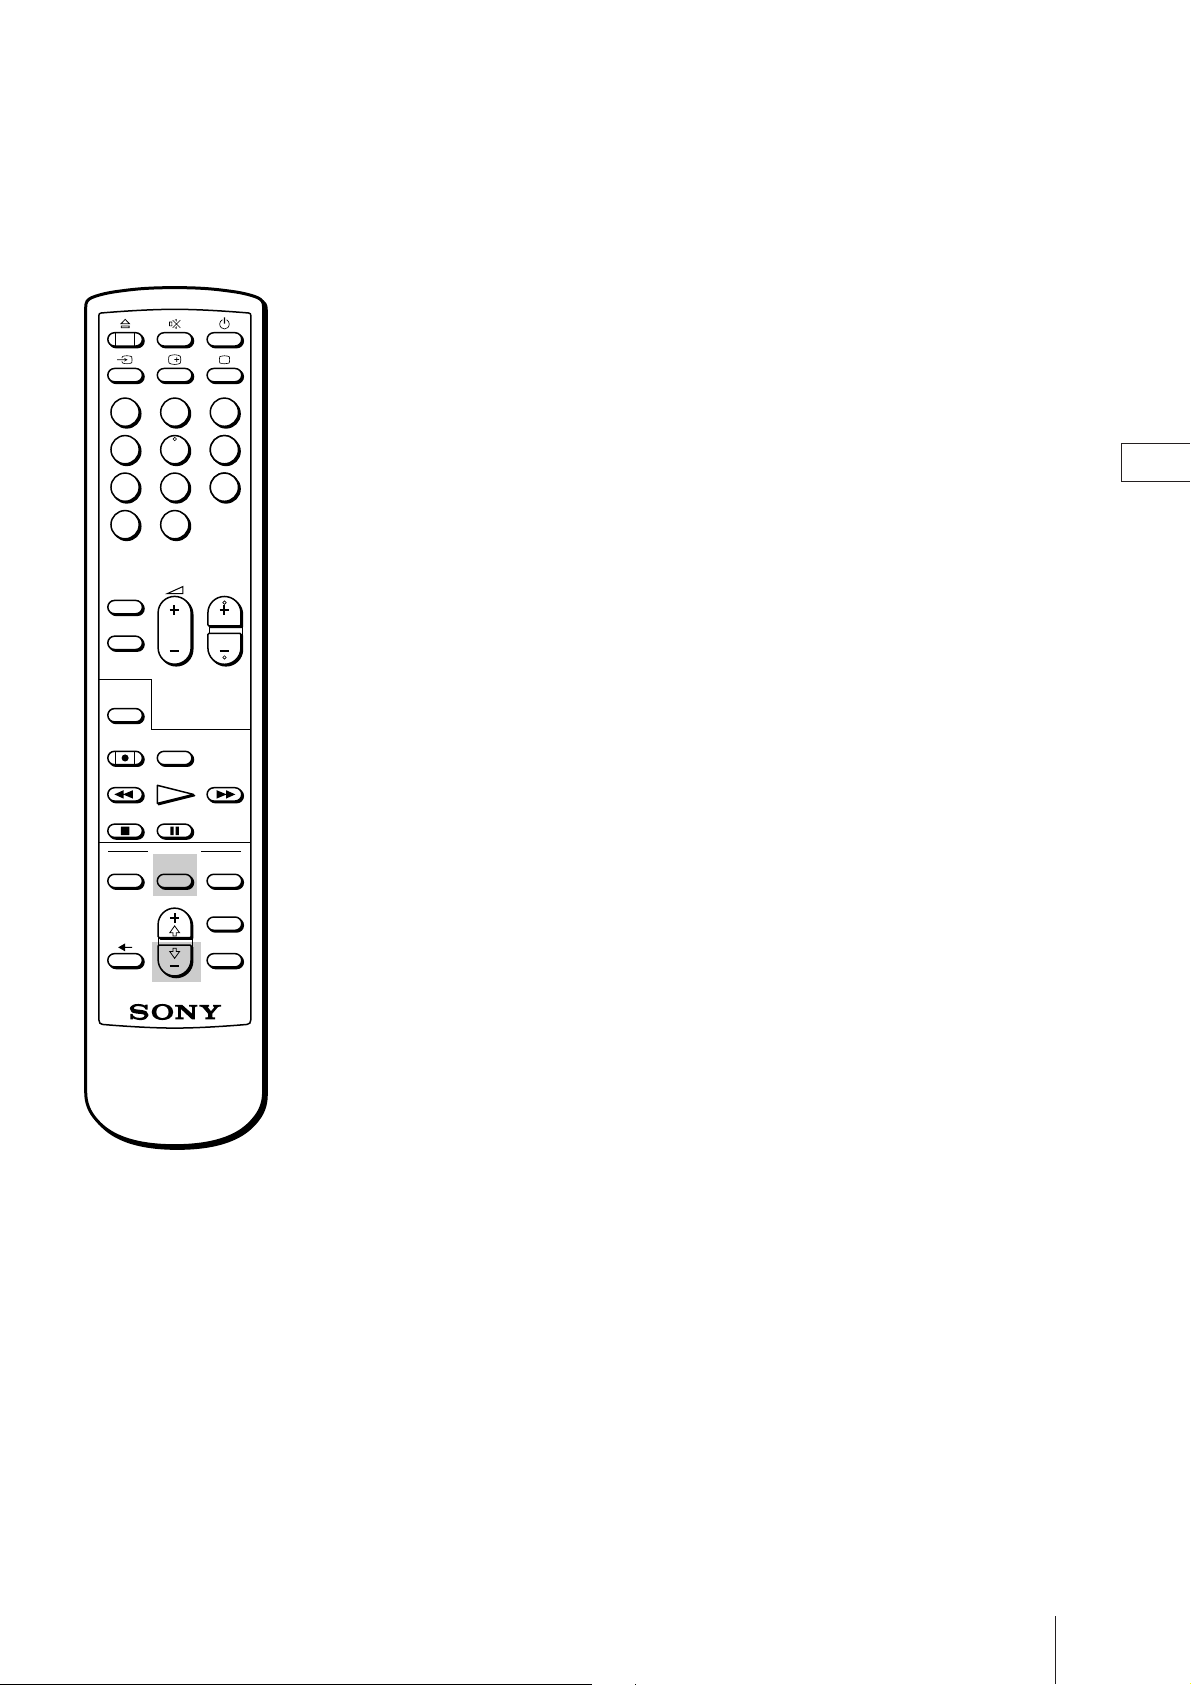
Daily/weekly recording
You can preset your video TV to record the same programme every day of
the week (daily recording) or the same programme on the same day every
week (weekly recording). Press –√ in step 3 until the desired setting
appears in the “DATE” position. With each press, the setting changes as
follows:
GB
4 (today) n MON–SUN n MON–SAT n MON–FRI n EVERY SAT n
EVERY FRI n EVERY THU n EVERY WED n EVERY TUE n EVERY
MON n EVERY SUN n 3 (next month) n 2......
ON TIMER
SLEEP
QUICK
TIMER
COUNTER
REC
REW
STOP PAUSE
TIMER REC
TIMER
ON/OFF
ON SCREEN
RESET
PROGR
FFPLAY
CLEAR
MENU
OK
To stop timer recording
Press TIMER REC ON/OFF.
The TIMER REC lamp turns off.
Using the Video TV before Timer
Recording Starts
You can watch a TV programme, check the timer settings and reset the
counter in timer recording standby mode. However, press TIMER REC
ON/OFF to turn off the TIMER REC lamp on the front of the video TV to
do the following operations:
• ejecting the cassette
• using the tape operation buttons
• changing or cancelling the timer settings
Remember to press TIMER REC ON/OFF again to make the TIMER REC
lamp light after the above operations.
Basic Operations
23
Page 24
Checking the Timer Settings
You can display the list of the timer settings which you preset.
123
456
789
-/--
0
COUNTER
RESET
TIMER REC
ON/OFF
PROGR
CLEAR
MENU
OK
ON TIMER
SLEEP
QUICK
TIMER
REC
REW
STOP PAUSE
TIMER
ON SCREEN
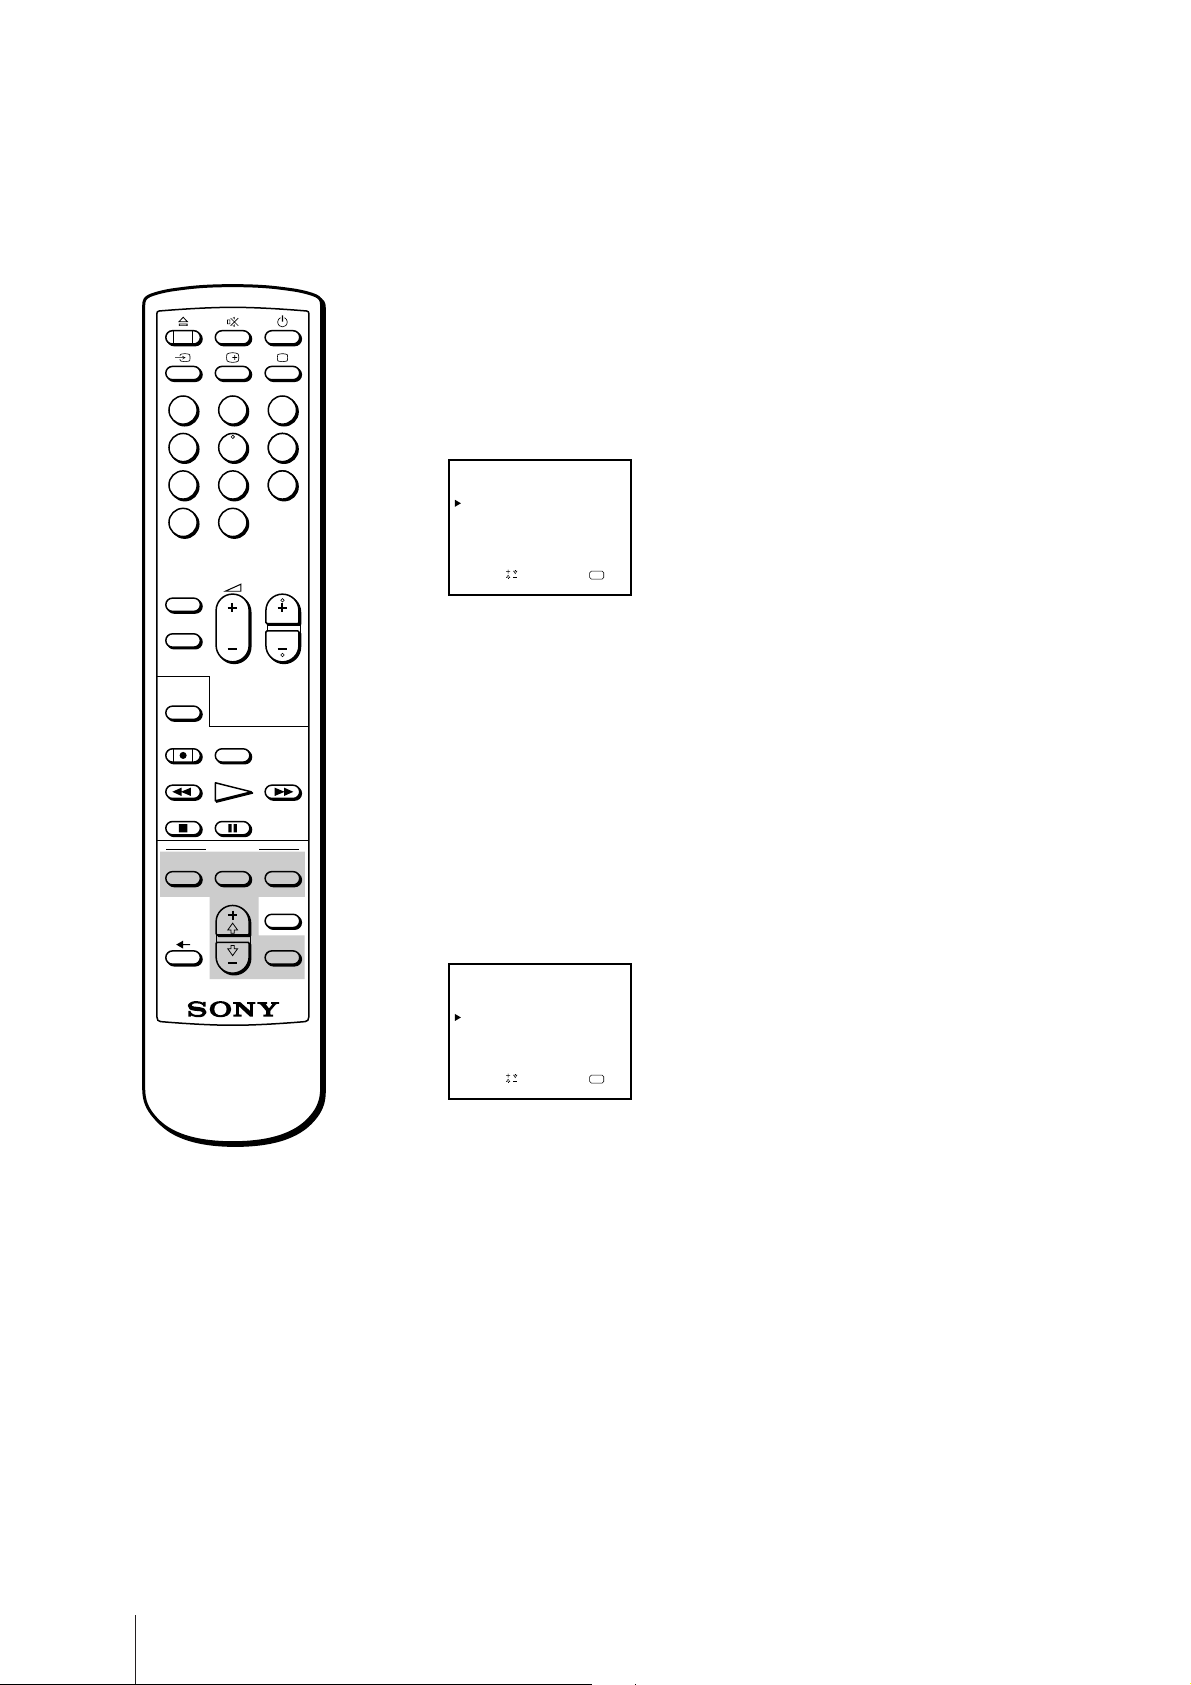
Press TIMER ON SCREEN.
The PROGRAMME LIST appears.
PROGRAMME LIST
DATE
START STOP
THU
7
MON-SAT
EVERY SUN
––
––
Sap
elect nd ress
51::10215013::082WED6
20 :00
12
PROG
00:000:32
03:2155:9
––:––––:––
––:––––:––
OK
MON.4
265
505
1
12
––
––
Press TIMER ON SCREEN again to erase the PROGRAMME LIST.
Changing or Canceling the Timer
FFPLAY
Settings
1 Press TIMER REC ON/OFF to turn off the TIMER REC lamp on the front
of the video TV.
2 Press TIMER ON SCREEN to display the PROGRAMME LIST.
3 Select the setting you want to change or cancel with + ◊ or – √.
PROGRAMME LIST
DATE
START STOP
THU
7
MON-SAT
EVERY SUN
––
––
Sap
elect nd ress
51::10215013::082WED6
20 :00
12
PROG
00:000:32
03:2155:9
––:––––:––
––:––––:––
OK
MON.4
265
505
1
12
––
––
Basic Operations
24
4 To change the setting
Using + ◊ or – √ and OK, re-enter all the items.
Refer to “Setting the timer” steps 2 to 9 on pages 21 and 22.
To cancel the setting
Press TIMER REC CLEAR.
5 Press TIMER ON SCREEN to go back to the original screen.
6 If there are other timer settings on the list, press TIMER REC ON/OFF to
set the video TV to timer recording standby mode.
Page 25
123
Recording Using the Quick-Timer
You can preset your video TV to start timer recording immediately and to
automatically stop recording after a specific time period.
If you have not set the clock, quick-timer recording cannot be done.
456
789
-/--
0
COUNTER
RESET
TIMER REC
ON/OFF
PROGR
FFPLAY
CLEAR
MENU
OK
ON TIMER
SLEEP
QUICK
TIMER
REC
REW
STOP PAUSE
TIMER
ON SCREEN
If you are recording
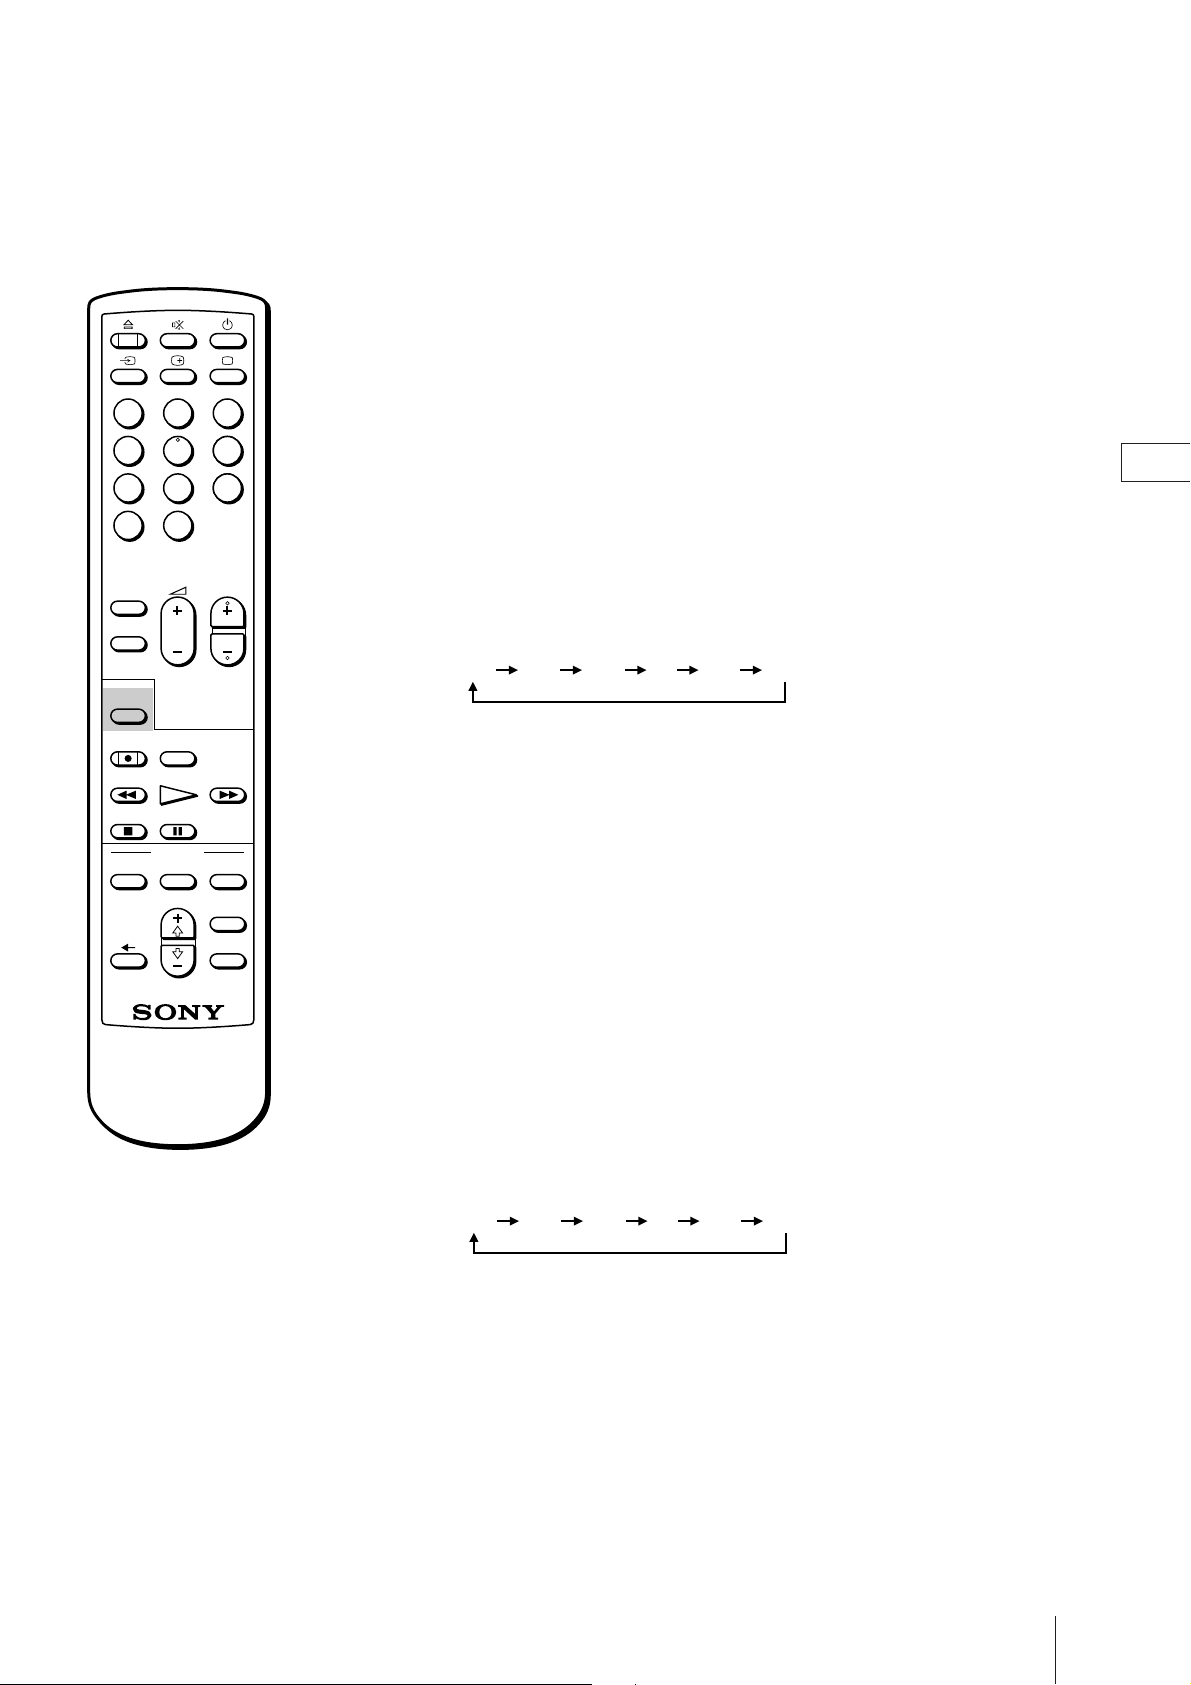
1 Press QUICK TIMER on the Remote Commander.
The “QUICK TIMER 0:00” appears on the screen.
2 Press QUICK TIMER repeatedly to select the recording time period. With
each press, the time period changes as follows:
0:00 0:30 1:00 .... 3:30 4:00
Even if you switch off the video TV, it continues recording. After the
selected time period has elapsed, recording stops automatically.
If you are not recording
1 Press ;, PROGR +/– or number buttons on the Remote Commander, or
PROGR +/– on the video TV to switch it on.
2 Insert a cassette with its safety tab.
3 Select the programme position which you want to record.
GB
To change the recording time
period after quick-timer
recording begins
Press QUICK TIMER until the
desired time period appears.
To display the remaining time
period during quick-timer
recording
Press e. The recording time period
decreases minute by minute.
To stop quick-timer recording
Press TIMER REC ON/OFF.
4 Press QUICK TIMER on the Remote Commander.
The “QUICK TIMER 0:00” appears on the screen.
5 Press QUICK TIMER repeatedly to select the recording time period. With
each press the time period changes as follows:
0:00 0:30 1:00 .... 3:30 4:00
The time period turns yellow and recording starts.
Even if you switch off the video TV, it continues recording.
When the preset time period has elapsed, the video TV stops recording.
Basic Operations
25
Page 26
Additional Operations
Switching off Automatically — Sleep
Timer
You can automatically switches the video TV into standby mode after a
selected time period.
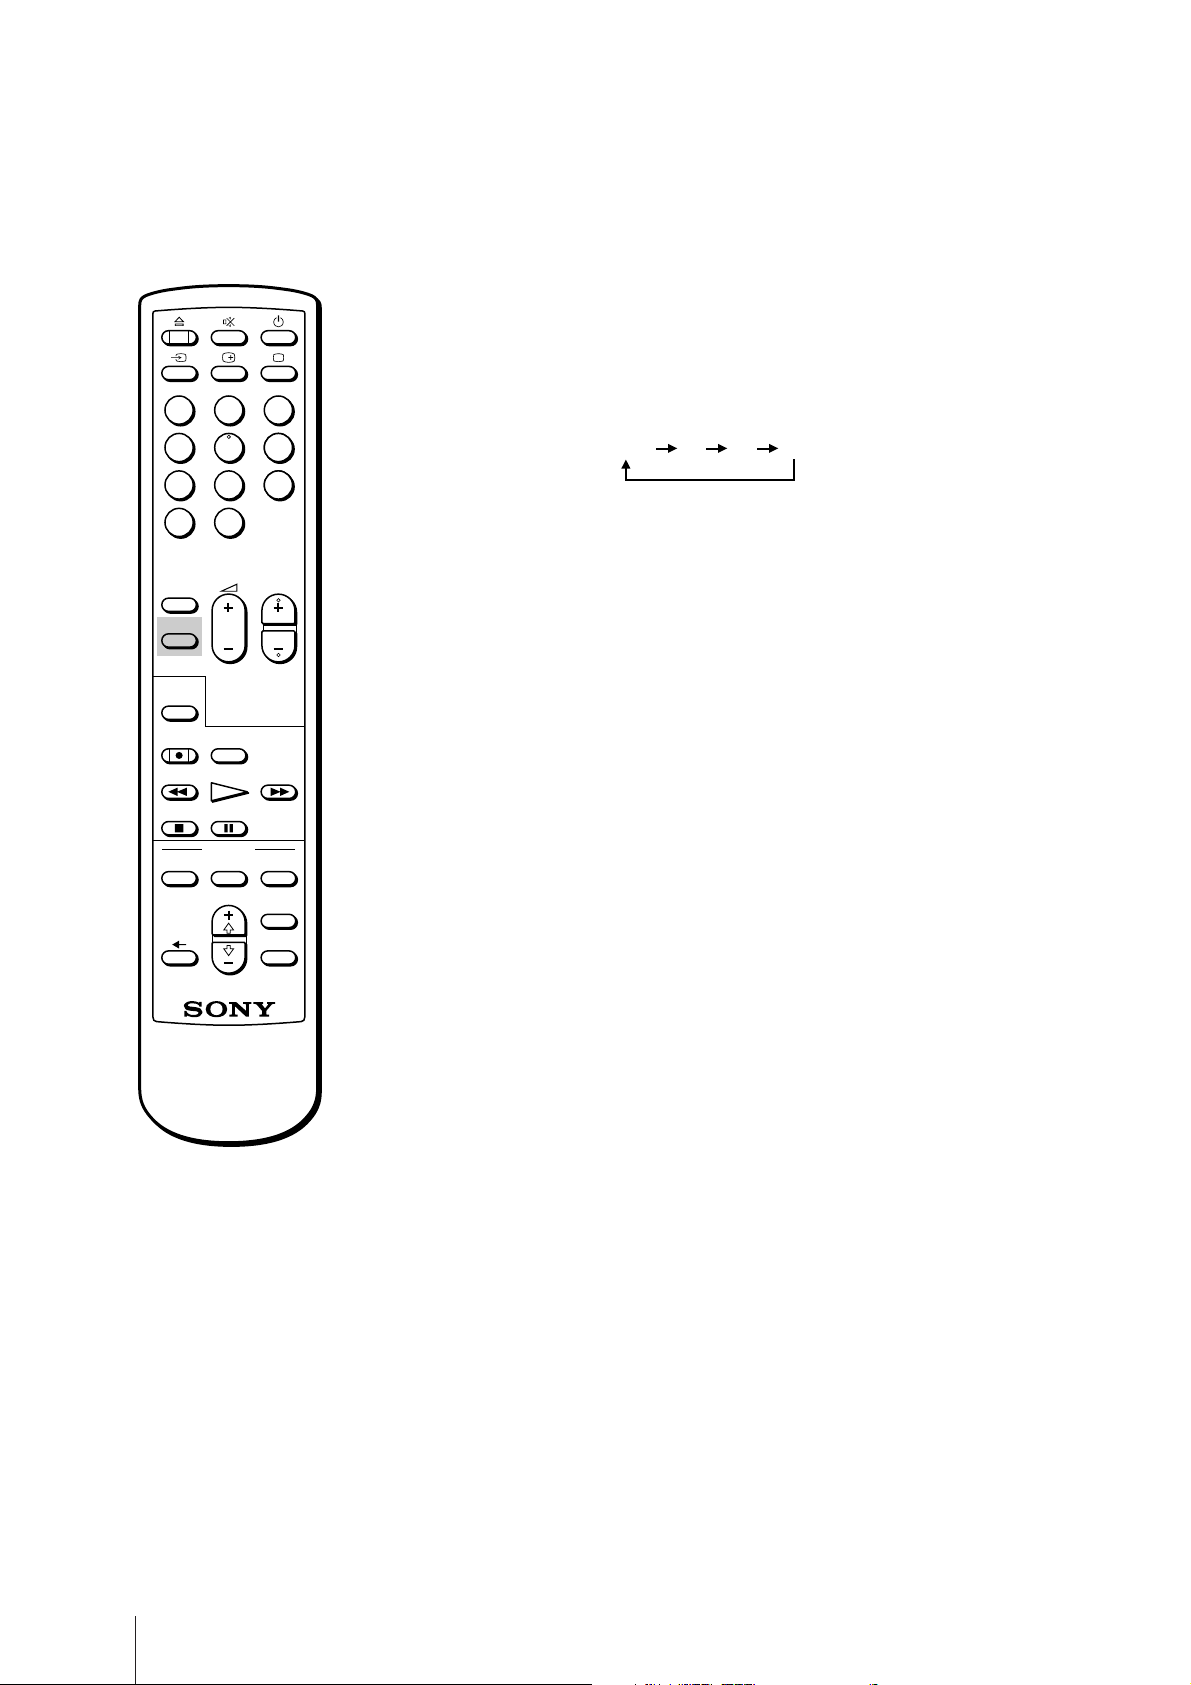
Press SLEEP.
123
With each press, the time period (in minutes) changes as follows:
456
789
-/--
0
COUNTER
RESET
TIMER REC
ON/OFF
PROGR
FFPLAY
CLEAR
MENU
OK
ON TIMER
SLEEP
QUICK
TIMER
REC
REW
STOP PAUSE
TIMER
ON SCREEN
OFF 30 60 90
One minute before the TV switches into standby mode, a message ‘‘Good
night’’ is displayed on the screen.
To cancel the timer
Press SLEEP to select “OFF”.
Additional Operations
26
Page 27
Switching on at Your Desired Time
— On Timer
You can preset your video TV to automatically switch on at a desired time.
You can select the TV programme or video playback to be switched on.
1 Press MENU to display the main menu.
123
456
789
-/--
0
COUNTER
RESET
TIMER REC
ON/OFF
PROGR
FFPLAY
CLEAR
MENU
OK
ON TIMER
SLEEP
QUICK
TIMER
REC
REW
STOP PAUSE
TIMER
ON SCREEN
2 Move the cursor (z) to “ON TIMER SET” with + ◊ or – √ and press OK.
The ON TIMER SET menu appears.
ON TIMER SET
TIME:
SOURCE:
ON TIMER: OFF
Sap
e l ec t nd r ess
6:00
TV PROG 1
20 :00
MON12.4
OK
3 Press OK.
The timer setting hour section turns red.
4 Set the hour with + ◊ or – √ and press OK.
The minute section turns red.
5 Set the minutes (by one minute) with + ◊ or – √ and press OK.
The cursor appears beside “TIME.”
6 Move the cursor (z) to “SOURCE” with + ◊ or – √ and press OK.
7 Select TV or VCR (video playback) to be switched on with + ◊ or – √ and
press OK.
When you select TV, select the programme position with + ◊ or – √ and
press OK.
ON TIMER SET
TIME:
SOURCE:
ON TIMER: OFF
7:30
TV PROG 1
20 :00
MON12.4
2
GB
To erase the message
Press any button on the video TV or
Remote Commander.
Sapelect nd ress
OK
8 Move the cursor (z) to “ON TIMER” with + ◊ or – √ and press OK, then
select ON with + ◊ or – √ and press OK.
9 Press MENU to go back to the original screen.
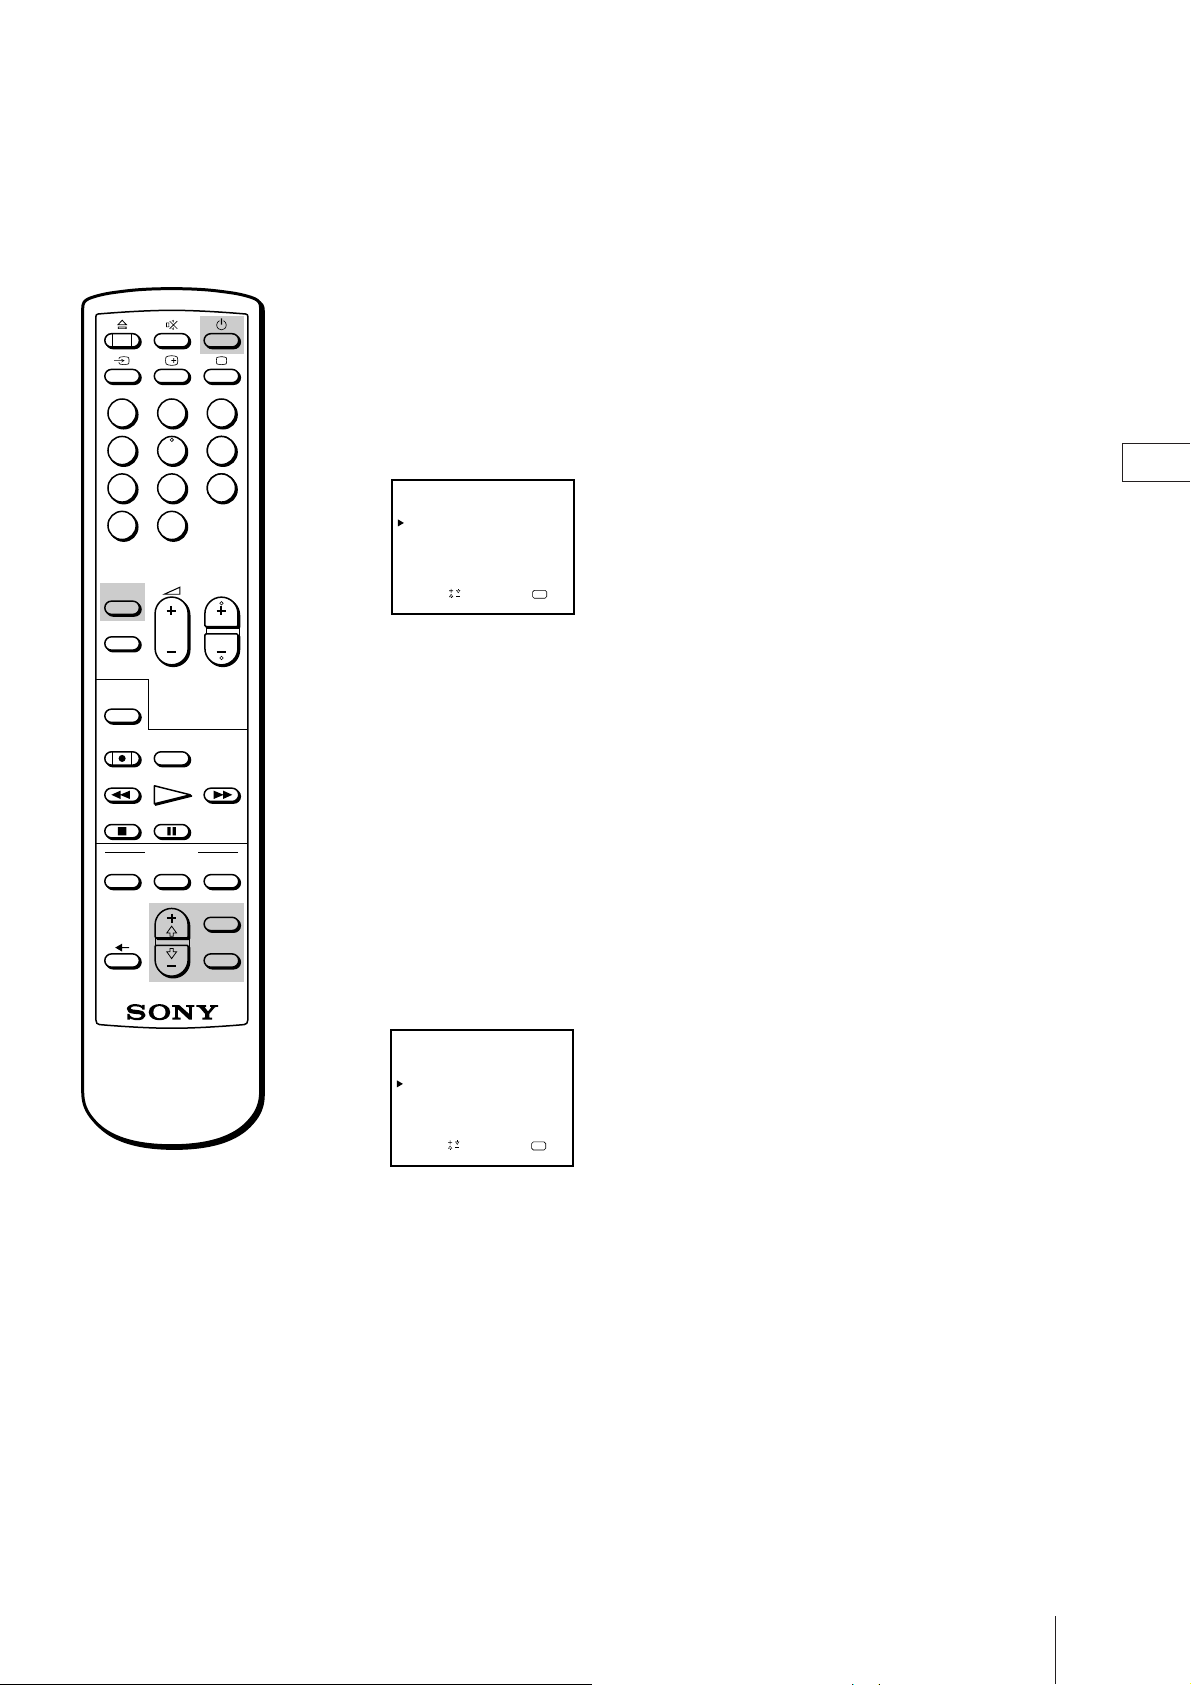
10 Press ON TIMER.
The ON TIMER lamp on the front of the video TV lights up.
If you are not using the video TV, press u to set the video TV in standby
mode.
At the preset time, the video TV automatically switches on and a message
“Good morning” is displayed for five minutes.
If you do not press any button for 2 hours, the video TV automatically
shuts off.
Additional Operations
27
Page 28
Enhancing Video Picture Quality
Adjusting the Tracking
Adjusting the Tracking Automatically
123
456
789
-/--
0
ON TIMER
SLEEP
PROGR
The tracking condition is automatically adjusted on this video TV. The
AUTO TRACKING indicator will appear while the video TV is searching
for best tracking condition.
Adjusting the Tracking Manually
If streaks or snow noise appear on the video playback picture, adjust the
tracking condition manually.
QUICK
TIMER
COUNTER
REC
RESET
REW
STOP PAUSE
TIMER REC
TIMER
ON SCREEN
To go back to automatic
tracking
Select AUTO in the TRACKING
CONTROL menu with + ◊ or – √
and press OK.
ON/OFF
FFPLAY
CLEAR
MENU
OK
1 Press MENU to display the main menu.
2 Move the cursor (z) to “TRACKING CONTROL” with + ◊ or – √ and
press OK.
The TRACKING CONTROL menu appears.
TRACKING CONTROL
AUTO
MANUAL
e l ec t nd r es s
Sap
OK
3 Select MANUAL with + ◊ or – √ and press OK.
The tracking meter appears.
TRACKING CONTROL
AUTO
MANUAL
NORMAL TRACKING
Sap
e l ec t nd r es s
OK
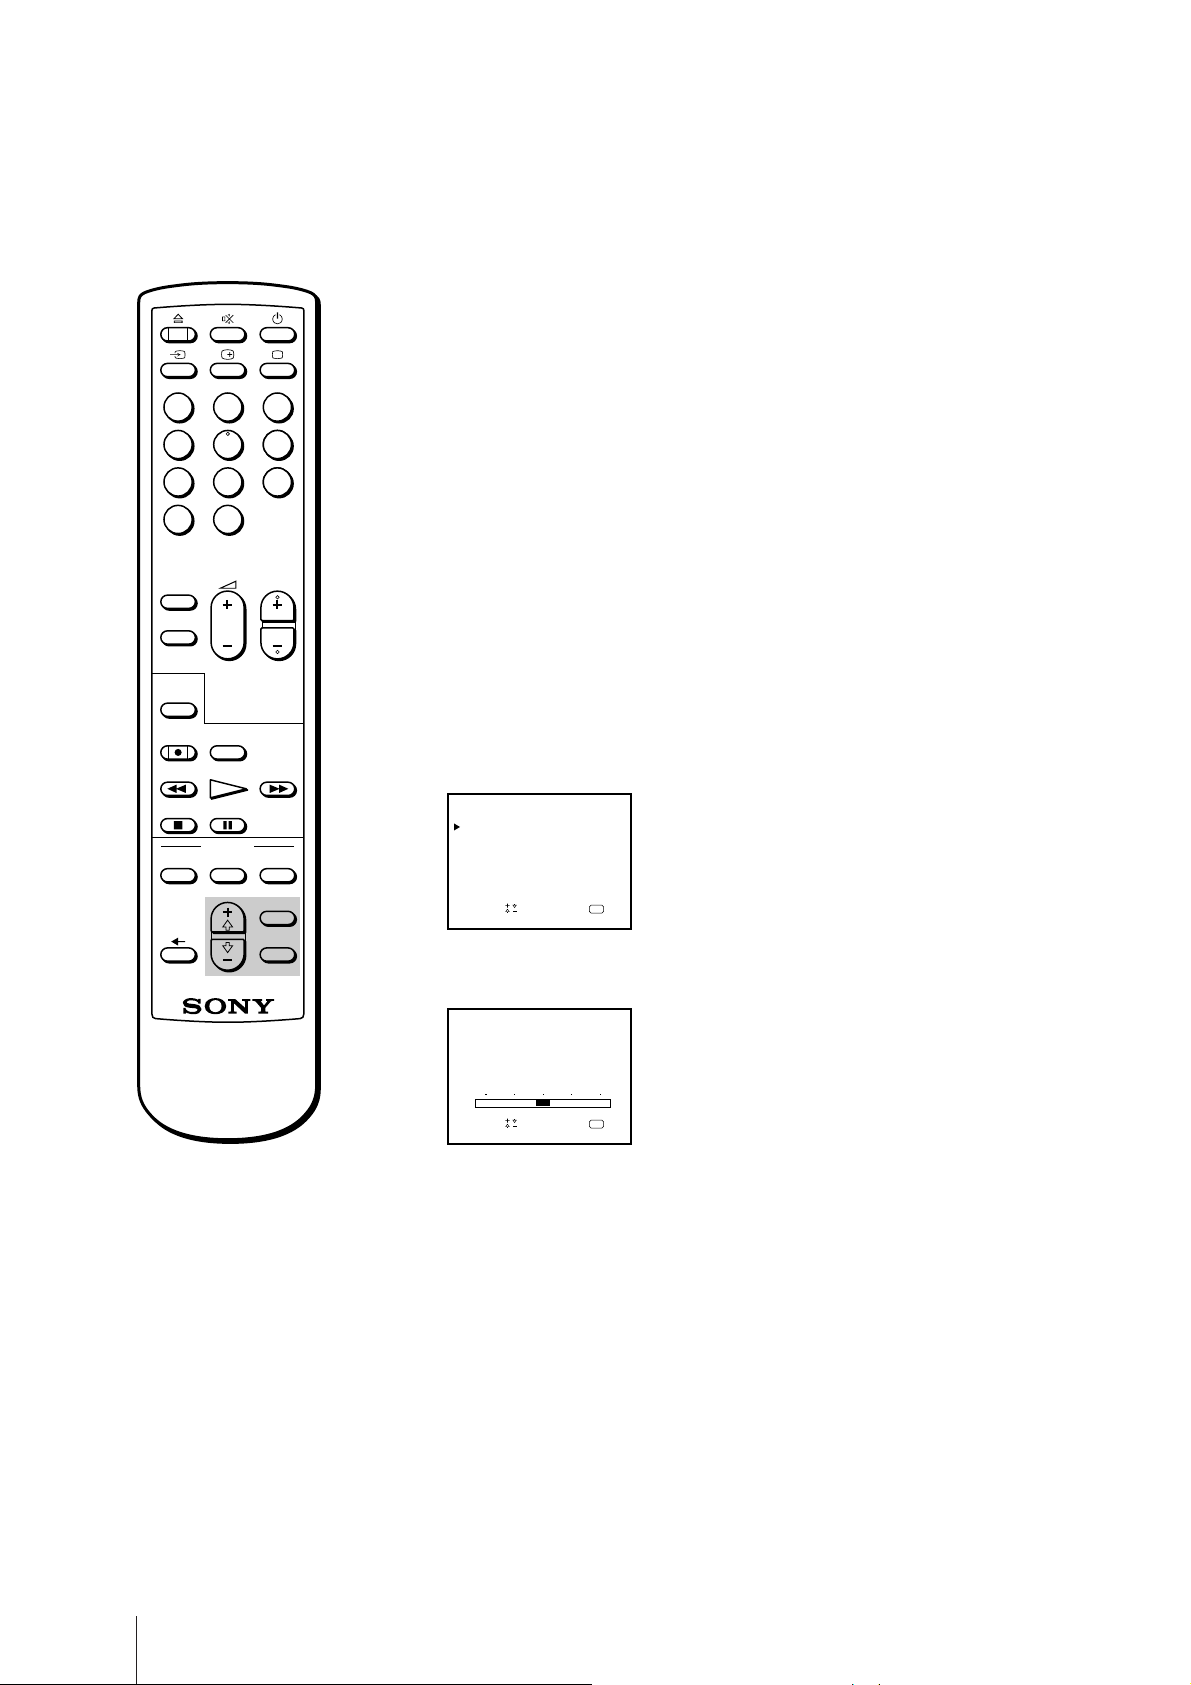
4 Using + ◊ or – √, adjust the tracking to get the best picture.
5 Press OK.
The main menu reappears.
6 Press MENU to go back to the original screen.
Additional Operations
28
Page 29
123
456
789
-/--
0
ON TIMER
SLEEP
PROGR
Adjusting with the Optimum
Picture Control (OPC)
This function allows you to improve playback and recording quality by
adjusting the system parameter automatically according to the condition
of the video tape.
This function is set to ON at the factory. To maintain better picture
quality, it is advisable to leave the function on so that the OPC lamp
remains lit. The OPC function works on all types of tapes, even on rental
tapes.
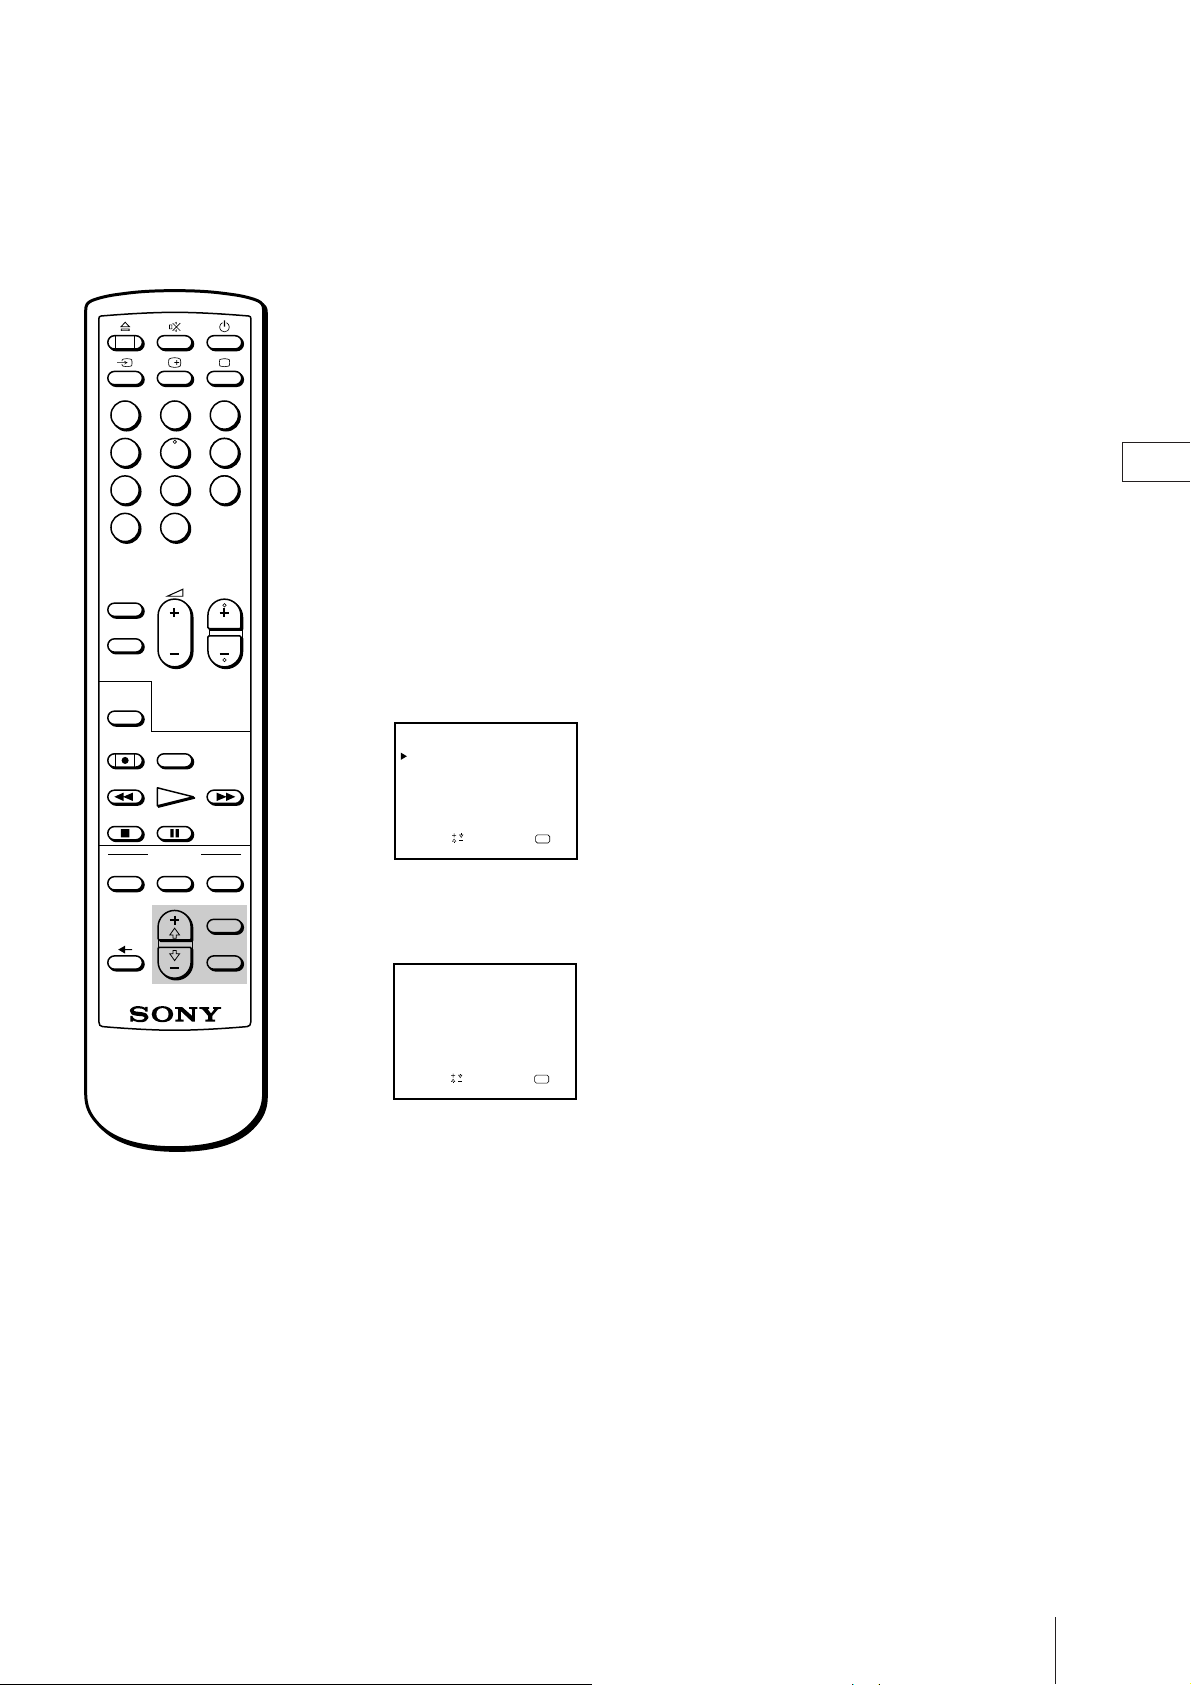
To change the setting, use the menu display.
1 Press MENU to display the main menu.
GB
QUICK
TIMER
COUNTER
REC
REW
STOP PAUSE
TIMER REC
TIMER
ON/OFF
ON SCREEN
RESET
FFPLAY
CLEAR
MENU
OK
2 Move the cursor (z) to VISUAL MODE with + ◊ or – √ and press OK.
The VISUAL MODE menu appears.
VISUAL MODE
PICTURE CONTROL
STANDARD
MILD
MOVIE
OPC: ON
Sapelect nd ress
OK
3 Move the cursor (z) to OPC with + ◊ or – √ and press OK.
4 Select ON or OFF with + ◊ or – √ and press OK.
VISUAL MODE
PICTURE CONTROL
STANDARD
MILD
MOVIE
OPC: OFF
Sap
e l ec t nd r es s
OK
5 Press MENU to erase the main menu.
About the Auto Head Cleaner
The auto head cleaner built into this set automatically cleans the video
heads when a cassette is loaded or unloaded. If the effect of head cleaning
is not sufficient even after a cassette has been loaded/unloaded several
times, clean the heads using the Sony V-25CL video head cleaning cassette.
For details on head cleaning see page 33.
Additional Operations
29
Page 30
Connecting Optional Equipment
Watching the Picture Input from
Optional Equipment
Rear
WW
W
WW
……
≤≤
… 2/
≤ 2
……
≤≤
……
≤≤
…/
≤
……
≤≤
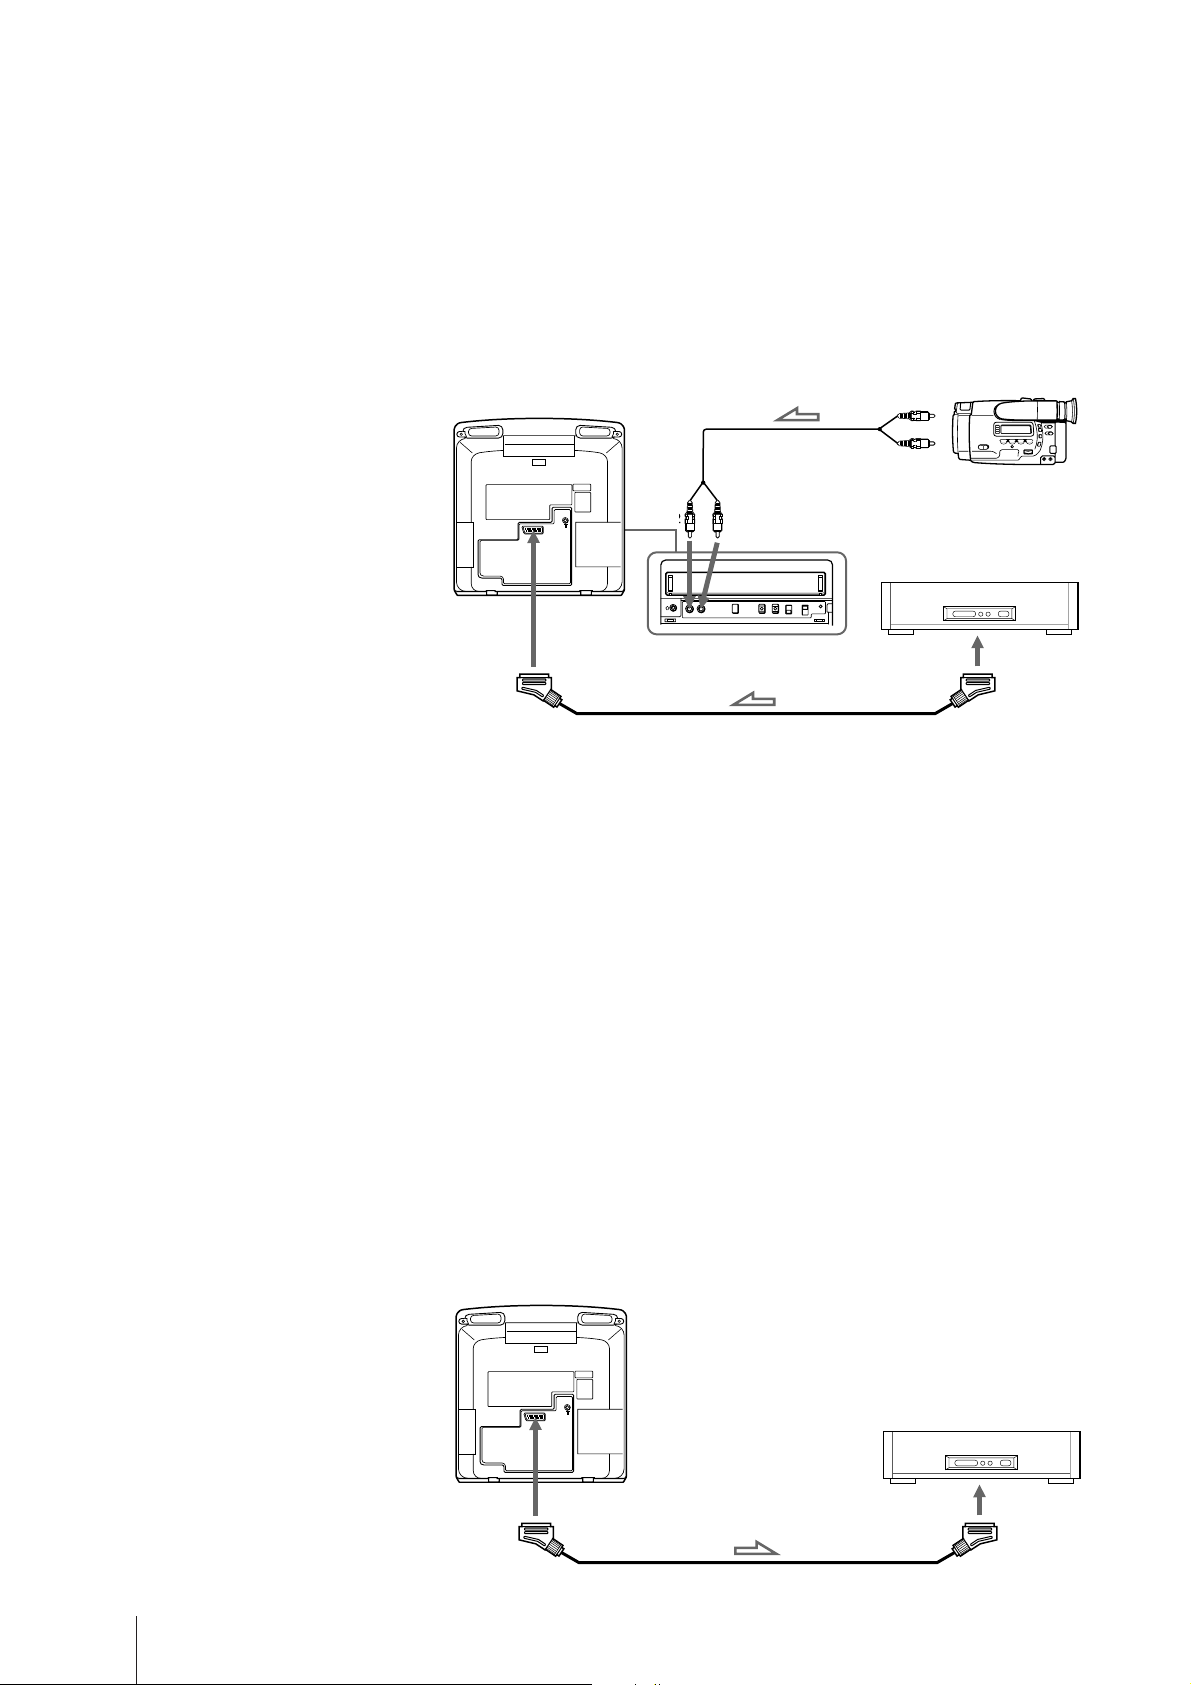
VMC-212CE EURO cable (not supplied)
Inside the front panel
to video/audio outputs
to 21-pin
EURO-AV
connector
To watch the video input signal
Press … repeatedly until the desired input indicator appears on the
screen.
• … 1 for audio/video input or RGB input through the W connector
• … 2 for audio/video input through the … 2/≤ 2 jacks on the front
Editing with Another VCR
Using an additional VCR, you can edit a tape.
Editing from another VCR
Connections are the same as in “Watching the picture input from optional
equipment.”
Editing onto another VCR
Rear
to 21-pin
WW
W
WW
VMC-212CE EURO cable (not supplied)
EURO-AV
connector
Additional Operations
30
Page 31

Additional Information
Troubleshooting
Function
TV reception
Clock and
timer
Playback
Problems
No picture (screen is
dark), no sound
Good picture but no
sound
No colour or poor
colour (screen is
dark) for colour
programmes, but
good sound.
No picture, no
sound
from video input
source
The clock has
stopped and “--/--”
is displayed.
The clock loses or
gains.
Power is on, but the
tape does not run.
Poor playback
picture
The sound drops
out.
Possible causes and remedies
• The mains lead is disconnected.
/ Connect the mains lead.
• The video TV is switched off.
/ Press ;, PROGR +/– or programme number on the Remote
Commander, or PROGR +/– on the video TV.
• The headphones are connected to 2 jack.
/ Disconnect the headphones.
• The ¤ is displayed on the screen.
/ Press ¤.
• Press Á +/–.
• Adjust “CONTRAST,” “COLOUR,” and “BRIGHTNESS” in the
PICTURE CONTROL menu. (page 15)
• The connecting cord between the video TV and the input source is
disconnected.
/ Connect it firmly.
• Input is not selected correctly.
/ Press … until the desired input indicator appears. (page 30)
• The power has been interrupted or the mains lead is disconnected for
more than one day.
/ Re-set the clock and timer settings if necessary. (pages 12, 21)
• The power has been interrupted or the mains lead is disconnected for
less than one day.
/ Re-set the clock and timer settings if necessary. (pages 12, 21)
• The safety device has been activated.
/ Switch off, disconnect the mains lead, and leave the set for about
one minute.
• The COLOUR SYSTEM switch is set to incorrect position.
/ Set COLOUR SYSTEM to the position corresponding to the colour
system with which the tape is recorded. (page 18)
• Adjust the tracking. (page 28)
• The video heads are dirty.
/ Clean the heads using the Sony V-25CL video head cleaning tape
(page 33). If the cleaning tape is not available in your area, have
the heads cleaned at your nearest Sony service facility. (Do not use
a commercially available wet-type cleaning tape, as it may
damage the video heads.)
• The tape is worn out.
/ Use a new tape.
• The tape is defective.
/ Use a new tape.
GB
Additional Information
31
Page 32

Function
Recording
Timer
recording
Others
Problems
The cassette is ejected
when you press
REC r.
Recording cannot be
done.
Timer settings cannot
be made.
The cassette is ejected
when you press
TIMER REC ON/
OFF.
The TIMER REC lamp
does not light up
even though you
press TIMER REC
ON/OFF.
Timer recording was
not made.
A cassette cannot be
inserted.
The Remote
Commander does not
work.
Possible causes and remedies
• The safety tab of the cassette has been removed.
/ Cover the tab hole with adhesive tape, or use another cassette
with a safety tab. (page 17)
• No cassette has been inserted.
/ Insert a cassette with the safety tab.
• The tape is at its end.
/ Rewind the tape.
• The clock has not been set.
/ Set the current time and date. (page 12)
• You have made a mistake when setting the timer.
/ Check the setting steps. (pages 21 to 23)
• The safety tab of the cassette has been removed.
/ Cover the tab hole with adhesive tape, or use another cassette
with a safety tab.
• No cassette has been inserted.
/ Insert a cassette with its safety tab.
• The tape is at its end.
/ Rewind the tape.
• No setting is made for timer recording.
/ Set the programme for timer recording. (pages 21 to 23)
• You did not press TIMER REC ON/OFF.
• There has been a power interruption lasting more than one day.
• Another cassette is already inserted.
/ Press 6 to eject the cassette.
• The batteries are low.
/ Replace the batteries. (page 4)
• The batteries are installed incorrectly.
/ Install the batteries with correct polarities. (page 4)
Additional Information
32
Page 33
Taking Care of Your Video TV
Video Head Cleaning
When playback pictures are noisy and hardly visible, or when no picture
appears, the video heads may be contaminated. In such a case, clean the
video heads using the V-25CL video head cleaning tape (not supplied), or
ask Sony service personnel to clean the video heads, with this service there
would be a standard charge.
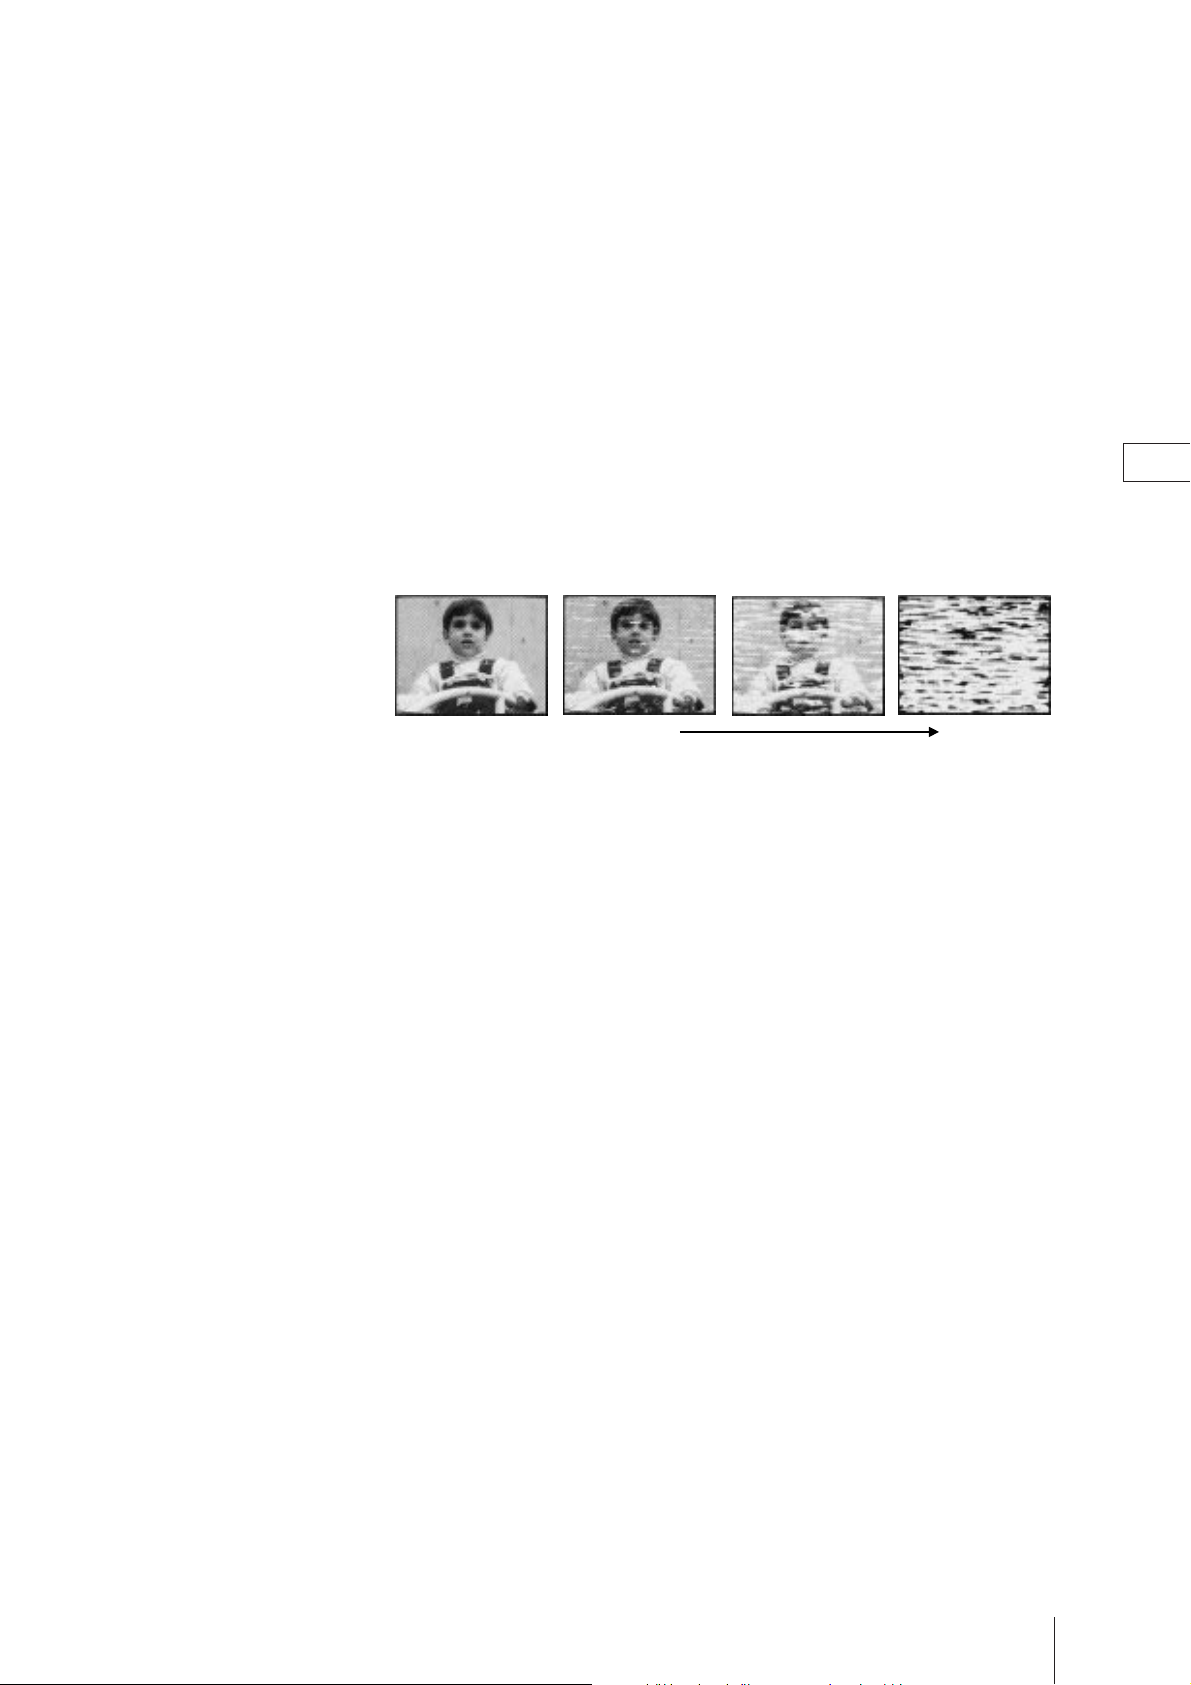
Symptoms caused by contaminated video heads
• Normal picture • Rough picture • Unclear picture • No picture (or
GB
black & white
screen appears)
Note
Do not use a commercially available
wet-type cleaning tape, as it may
damage the video heads.
initial terminal
Worn Video Heads
If your video TV displays a poor picture after you clean the video heads,
you may need to replace them. Consult your dealer or the Sony Service
Center nearest you.
Check the Video Heads after 1,000
Hours of Use
A video TV is a high precision machine. It must record on or play from
magnetic tapes on which the image signals from the colour TV or the
video camcorder are recorded.
The video heads or mechanical parts for transporting the tape are
contaminated or worn after extended use. You should have your video TV
checked after each 1,000 hours of use.
Additional Information
33
Page 34

Specifications
TV Section
Television system B/G, D/K
Colour system PAL/SECAM
Channel coverage See “Receivable channels” at the
bottom.
Picture tube Trinitron
KV-V1430K/P: Approx. 37 cm
(145/8 inches)
(Approx. 34 cm picture
measured diagonally)
KV-V2110K/P: Approx. 54.5 cm
(21 inches)
(Approx. 51 cm picture
measured diagonally)
Aerial in 75-ohm aerial socket for VHF/
UHF
Video Section
Format VHS standard
Video recording system
Rotary 2-head helical scanning
system
Audio recording system
Monaural
Video signal PAL/MESECAM
Tape speed PAL/MESECAM: 23.39 mm/
sec.
NTSC (playback only): 33.35
mm/sec.
Maximum recording time
240 minutes with E-240
Inputs and Outputs
Inputs LINE IN VIDEO: phono jack (1)
1 Vp-p, 75 ohms, unbalanced,
sync negative
LINE IN AUDIO: phono jack (1)
Input level: 500 mVrms (100%
modulation)
EURO-AV: 21-pin
Output EURO-AV: 21-pin
Headphones jack Monaural minijack
General
Clock Quartz locked
Power back up Approx. 1 day or less
Power requirements
230 V AC, 50 Hz
Power consumption
KV-V1430K/P: 60 W
KV-V2110K/P: 81 W
Operating temperature
5°C to 40°C (41°F to 104°F)
Storage temperature
–20°C to 60°C (-4°F to 140°F)
Dimensions KV-V1430K/P:
Approx. 391 × 409 × 443 mm
(w/h/d)
1
(15
/2 × 161/8 × 17
KV-V2110K/P:
Approx. 540 × 518 × 470 mm
(w/h/d)
3
(21
/8 × 201/2 × 18
Mass KV-V1430K/P:
Approx. 15 kg (33 lb 1 oz)
KV-V2110K/P:
Approx. 25 kg (55 lb 2 oz)
Accessories supplied
Remote Commander (1)
R6 (size AA) batteries (2)
KV-V1430K/P only:
Monopole aerial (1)
Design and specifications are subject to change
without notice.
1
/2 inches)
5
/8 inches)
Receivable Channels
System Area Channel coverage
B/G Western European E-2 to E-12
countries E-21 to E-69
CATV S-01 to S-05
D/K Eastern European R-21 to R-60
countries R-1 to R-12
CATV S-01 to S-05
Additional Information
34
S-1 to S-41
S-1 to S-41
Page 35
Index to Parts and Controls
REC
TIMER REC
ON TIMER
OPC
OPEN
EJECT
PROOR
TIMER REC
ON/OFF
REC AUTO
REPEAT
ON
OFF
AUTO
NTSC
COLOUR
SYSTEM
PAL
u
Video TV Set—Front
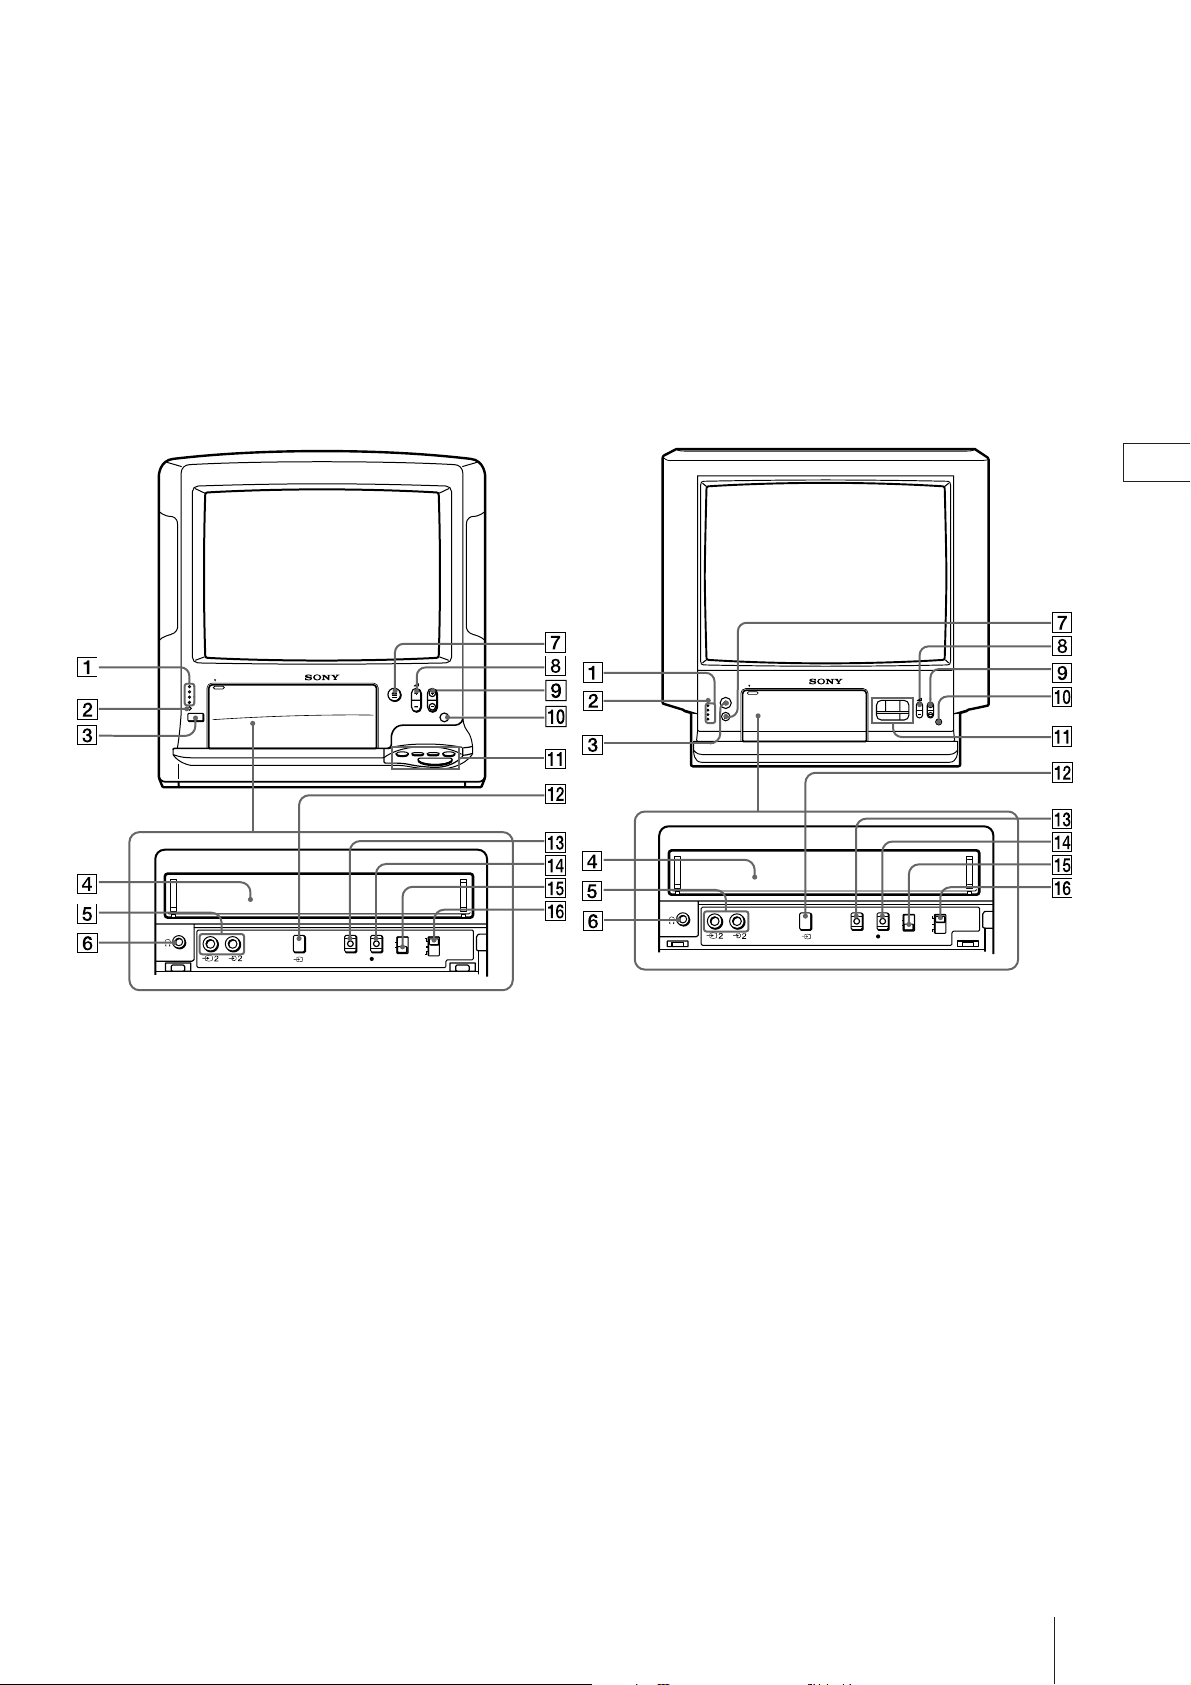
This section briefly describes the buttons and controls on the video TV set and on the Remote Commander.
For more information, refer to the pages next to each description.
GB
OPEN
REC
TIMER REC
ON TIMER
OPC
u
1 Lamps
REC(recording) (page 20)
TIMER REC(recording) (page 22)
ON TIMER (page 27)
OPC (page 29)
2 u (standby) lamp (page 13)
TIMER REC
ON/OFF
EJECT PROOR
ON
OFF
REC AUTO
REPEAT
AUTO
PAL
NTSC
COLOUR
SYSTEM
9 PROGR(programme) +/– buttons (page 13)
!º Remote sensor
!¡ Tape transport buttons (page 18)
!™ … (input select) button (pages 16, 30)
3 u (standby) button (page 13)
4 Cassette compartment (page 17)
5 …2/≤2 (video/audio input) jacks (page 30)
6 2 (headphones) jack (page 16)
7 EJECT 6 button (page 17)
8 Á (volume) +/– buttons (page 13)
!£ TIMER REC ON/OFF button (pages 22, 24)
!¢ REC(recording) r button (page 20)
!∞ AUTO REPEAT ON/OFF switch (page 19)
!§ COLOUR SYSTEM switch (page 18)
Additional Information
35
Page 36
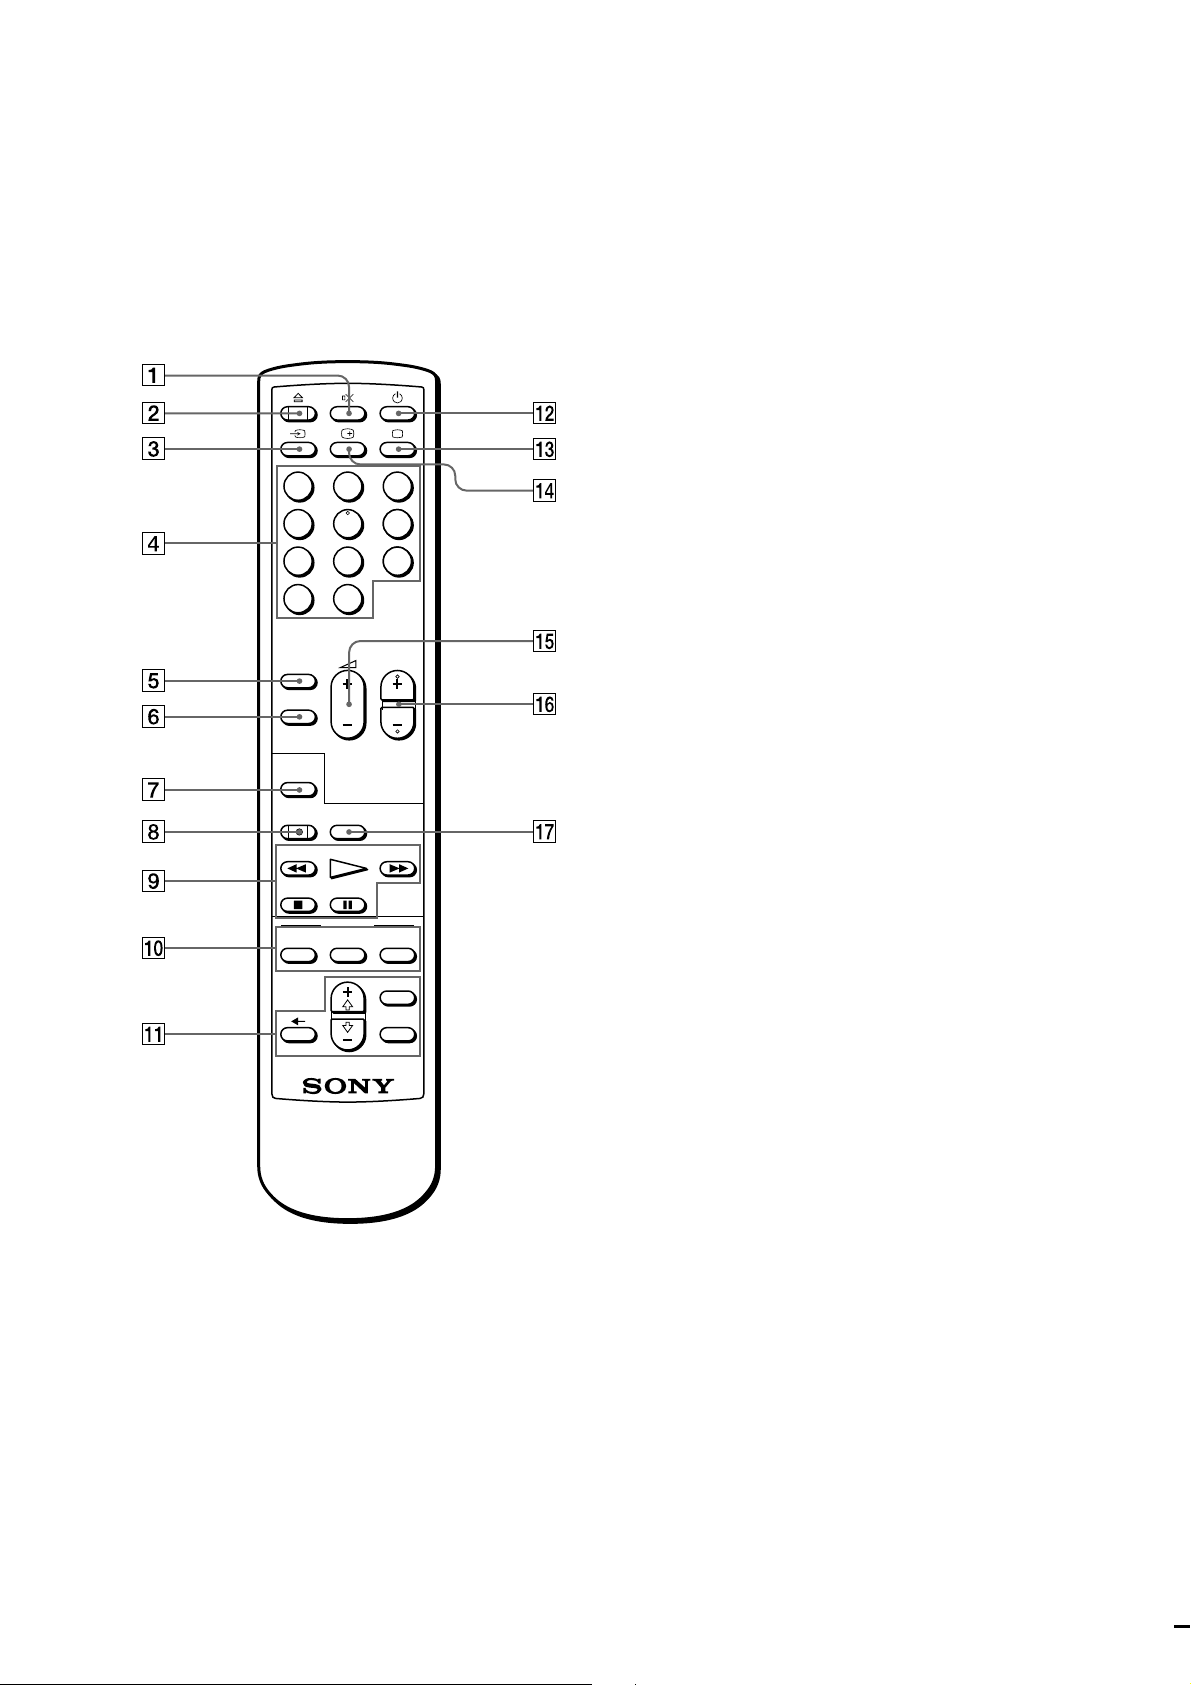
Remote Commander
123
456
1 ¤ (muting) button (page 14)
2 6 (eject)button (page 17)
3 … (input select) button (pages 16, 30)
4 Number button (page 6, 13)
789
-/--
0
COUNTER
RESET
TIMER REC
ON/OFF
PROGR
FFPLAY
CLEAR
MENU
OK
ON TIMER
SLEEP
QUICK
TIMER
REC
REW
STOP PAUSE
TIMER
ON SCREEN
5 ON TIMER button (page 27)
6 SLEEP button (page 26)
7 QUICK TIMER button (page 25)
8 REC (recording) r button (page 20)
9 Tape transport buttons (page 18)
· PLAY, p STOP, P PAUSE, 0 REW
(rewind), ) FF (fast forward)
!º TIMER REC buttons
TIMER ON SCREEN (pages 21, 24)
ON/OFF (pages 22, 24)
CLEAR (page 24)
!¡ Menu operation buttons (pages 6, 7)
MENU
+ ◊/– √
?
OK
Additional Information
36
!™ u (standby) button (page 13)
!£ ; (TV) button (pages 6, 13)
!¢ e (on-screen display) button (pages 14, 19)
!∞ Á (volume) +/– buttons (page 13)
!§ PROGR (programme) +/– buttons (page 13)
!¶ COUNTER RESET button (page 19)
 Loading...