

Sony TC-WA9ES User Manual

Stereo
Cassette Deck
3-798-768-23(1)
Operating Instructions
TC-WA9ES
1995 by Sony Corporation
WARNING
To prevent fire or shock
hazard, do not expose the
unit to rain or moisture.
For the customers in the
United States
This symbol is intended to alert the user
to the presence of uninsulated
“dangerous voltage” within the product’s
enclosure that may be of sufficient
magnitude to constitute a risk of electric
shock to persons.
INFORMATION
This equipment has been tested and
found to comply with the limits for a
Class B digital device, pursuant to Part 15
of the FCC Rules.
These limits are designed to provide
reasonable protection against harmful
interference in a residential installation.
This equipment generates, uses, and can
radiate radio frequency energy and, if not
installed and used in accordance with the
instructions, may cause harmful
interference to radio communications.
However, there is no guarantee that
interference will not occur in a particular
installation. If this equipment does cause
harmful interference to radio or television
reception, which can be determined by
turning the equipment off and on, the
user is encouraged to try to correct the
interference by one or more of the
following measures:
— Reorient or relocate the receiving
antenna.
— Increase the separation between the
equipment and receiver.
— Connect the equipment into an outlet
on a circuit different from that to
which the receiver is connected.
— Consult the dealer or an experienced
radio/TV technician for help.
Welcome!
Thank you for purchasing the Sony
Stereo Cassette Deck. Before operating
the unit, please read this manual
thoroughly and retain it for future
reference.
About This Manual
This manual covers models for the U.S.A.,
Canada, and other countries. Please note
the following differences in design and
function according to the country of
purchase.
Models for the U.S.A. and Canada
• Remote is not supplied.
• Voltage selector is not equipped.
• CONTROL S connector is equipped.
Models for other countries
• Remote is supplied.
• Voltage selector is equipped (except for
Australian model).
• CONTROL S connector is not
equipped.
This symbol is intended to alert the user
to the presence of important operating
and maintenance (servicing) instructions
in the literature accompanying the
appliance.
Owner’s Record
The model and serial numbers are located
on the rear of the unit.
Record the serial number in the space
provided below. Refer to them whenever
you call upon your Sony dealer regarding
this product.
Model No. TC-WA9ES
Serial No.
CAUTION
You are cautioned that any changes or
modifications not expressly approved in
this manual could void your authority to
operate this equipment.
For the customers in Canada
CAUTION
TO PREVENT ELECTRIC SHOCK, DO
NOT USE THIS POLARIZED AC PLUG
WITH AN EXTENSION CORD,
RECEPTACLE OR OTHER OUTLET
UNLESS THE BLADES CAN BE FULLY
INSERTED TO PREVENT BLADE
EXPOSURE.
Any difference in operation is clearly
indicated in the text, for example, “not
supplied with the U.S.A. and Canadian
models).”
Conventions
• Instructions in this manual describe the
controls on the cassette deck. You can
also use the controls on the remote (not
supplied with the U.S.A. and Canadian
models) if they have the same or
similar names as those on the deck.
• The following icons are used in this
manual:
Indicates a task that requires use
of the remote.
Indicates useful information or
tips that make a task easier.
2

TABLE OF CONTENTS
Recording on a Tape 4
Playing a Tape 6
Getting Started
Unpacking 7
Hooking Up the System 7
Advanced Playback Operations
Locating a Track (Multi-AMS/Auto Play/Memory Play/Blank Skip) 9
Creating Your Own Program (RMS Play) 10
Playing a Tape Using a Timer 11
Advanced Recording Operations
Adjusting Bias and Recording Level Calibration Automatically 12
Dubbing a Tape 13
Recording on Both Decks in Succession (Relay Recording) 14
Recording the Same Source on Both Decks (Simultaneous Recording) 15
Recording Your Own Program (RMS Dubbing) 15
Inserting a Blank Space During Recording (Record Muting) 16
Synchro-Recording With a CD Player 16
Recording Using a Timer 17
Additional Information
Precautions 18
Notes on Cassette Tapes 18
Cleaning 19
Troubleshooting 20
Specifications 21
Glossary 22
Index 22
3
Basic Operations
Basic Operations
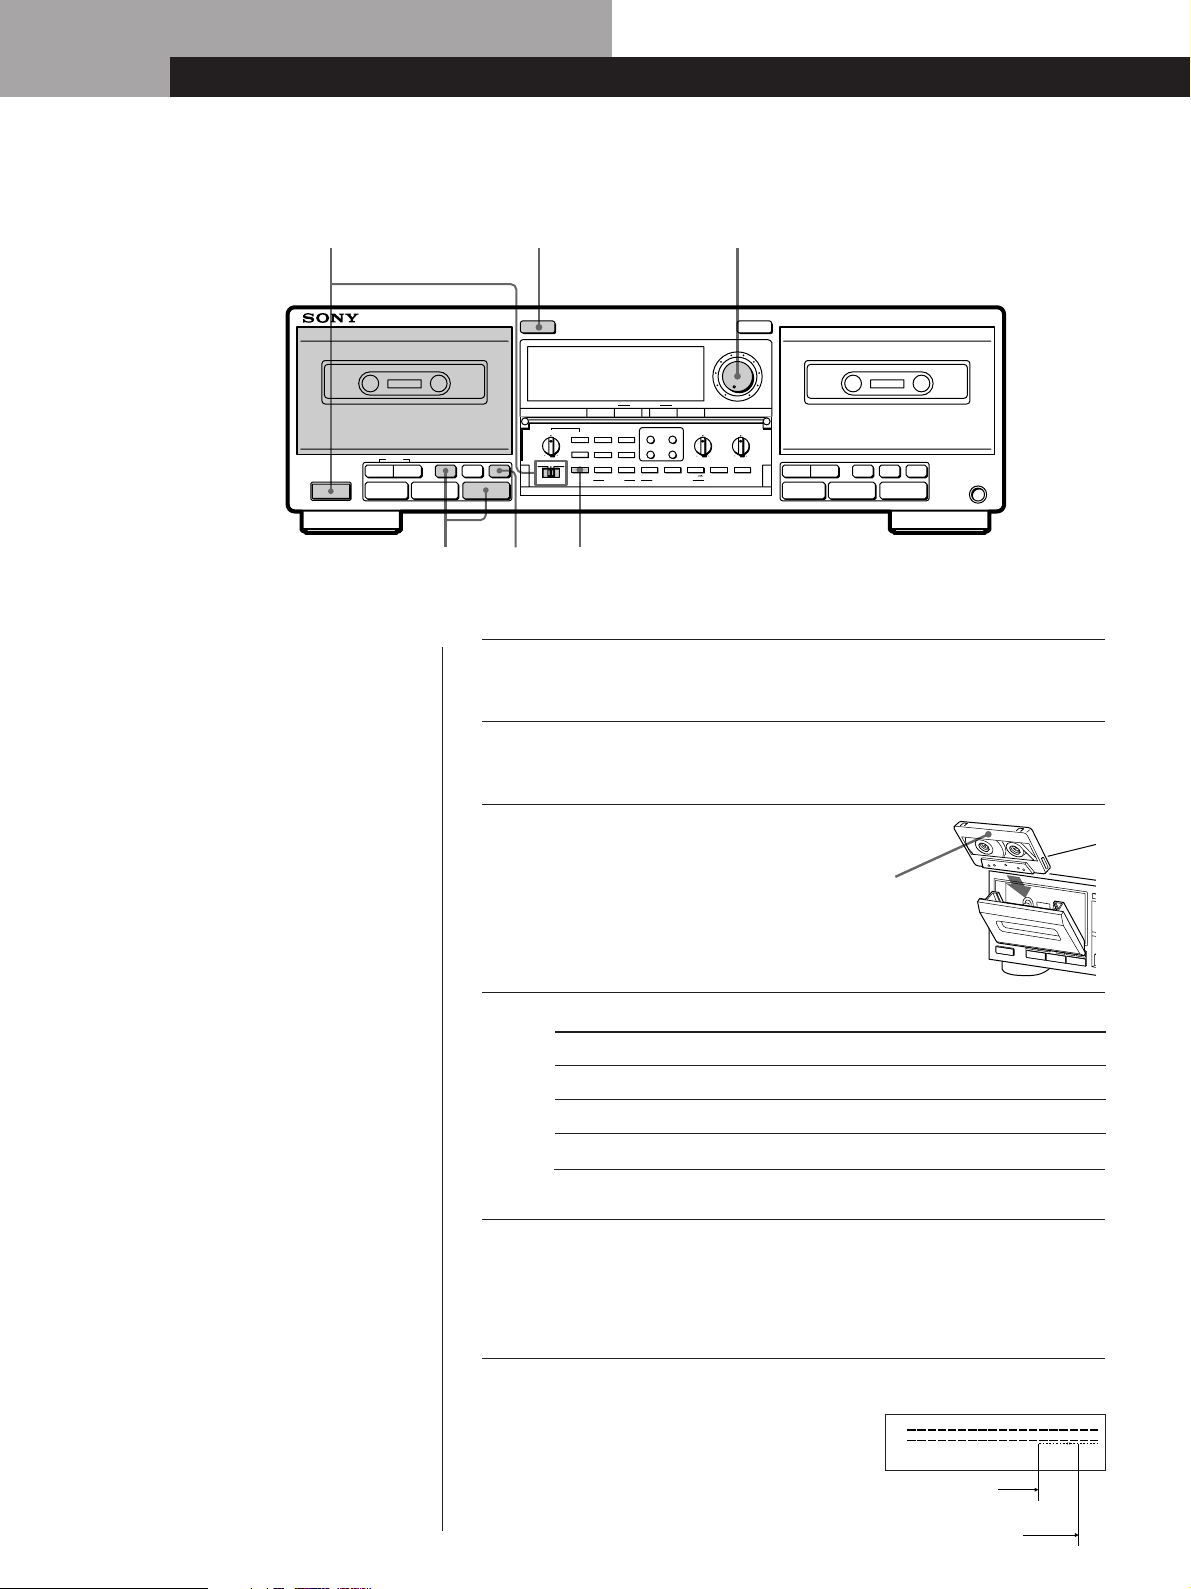
Recording on a Tape
2 3
0
POWER
• See page 7 for hookup
information.
• You can record on either
deck.
• Refer to "Dubbing a Tape"
(page 13) to make a copy of
the tape.
- RMS +
(AMS)
(AMS)
p
CLEAR BACK FRONT
)
9
REC MUTE REC
PAUSE
PRr
6
OPEN/
§
CLOSE
COUNTER BA
RESET
MEMORY
RESET MEMORY
RMS
PITCH CONTROL
ON/OFF
BLANK SKIP
AUTO PAUSE
1
2
3
MPX FILTER
A -DOLBY NR-B
+–
4
5
6
A -AUTO CAL-B
DIR MODE
OFF
REC PLAY
7
8
9
START P
5
TIMER
47
(
RMS / START DISPLAY
CHECK SET
A+B REC10HIGH
SYNCHRO DUBBING A B
START (DECK B P)
>10
DUBBING LEVEL
NORMAL
Turn on the amplifier and play the program source you want to
1
record.
Set TIMER to OFF and press POWER.
2
OPEN/
§
CLOSE
REC LEVEL
5
46
37
28
19
100
BALANCE
L
MAXMIN R
– +
PHONE LEVEL
PAUSE REC MUTE REC
(AMS))(AMS)
0
p
PRr
9
(
PHONES
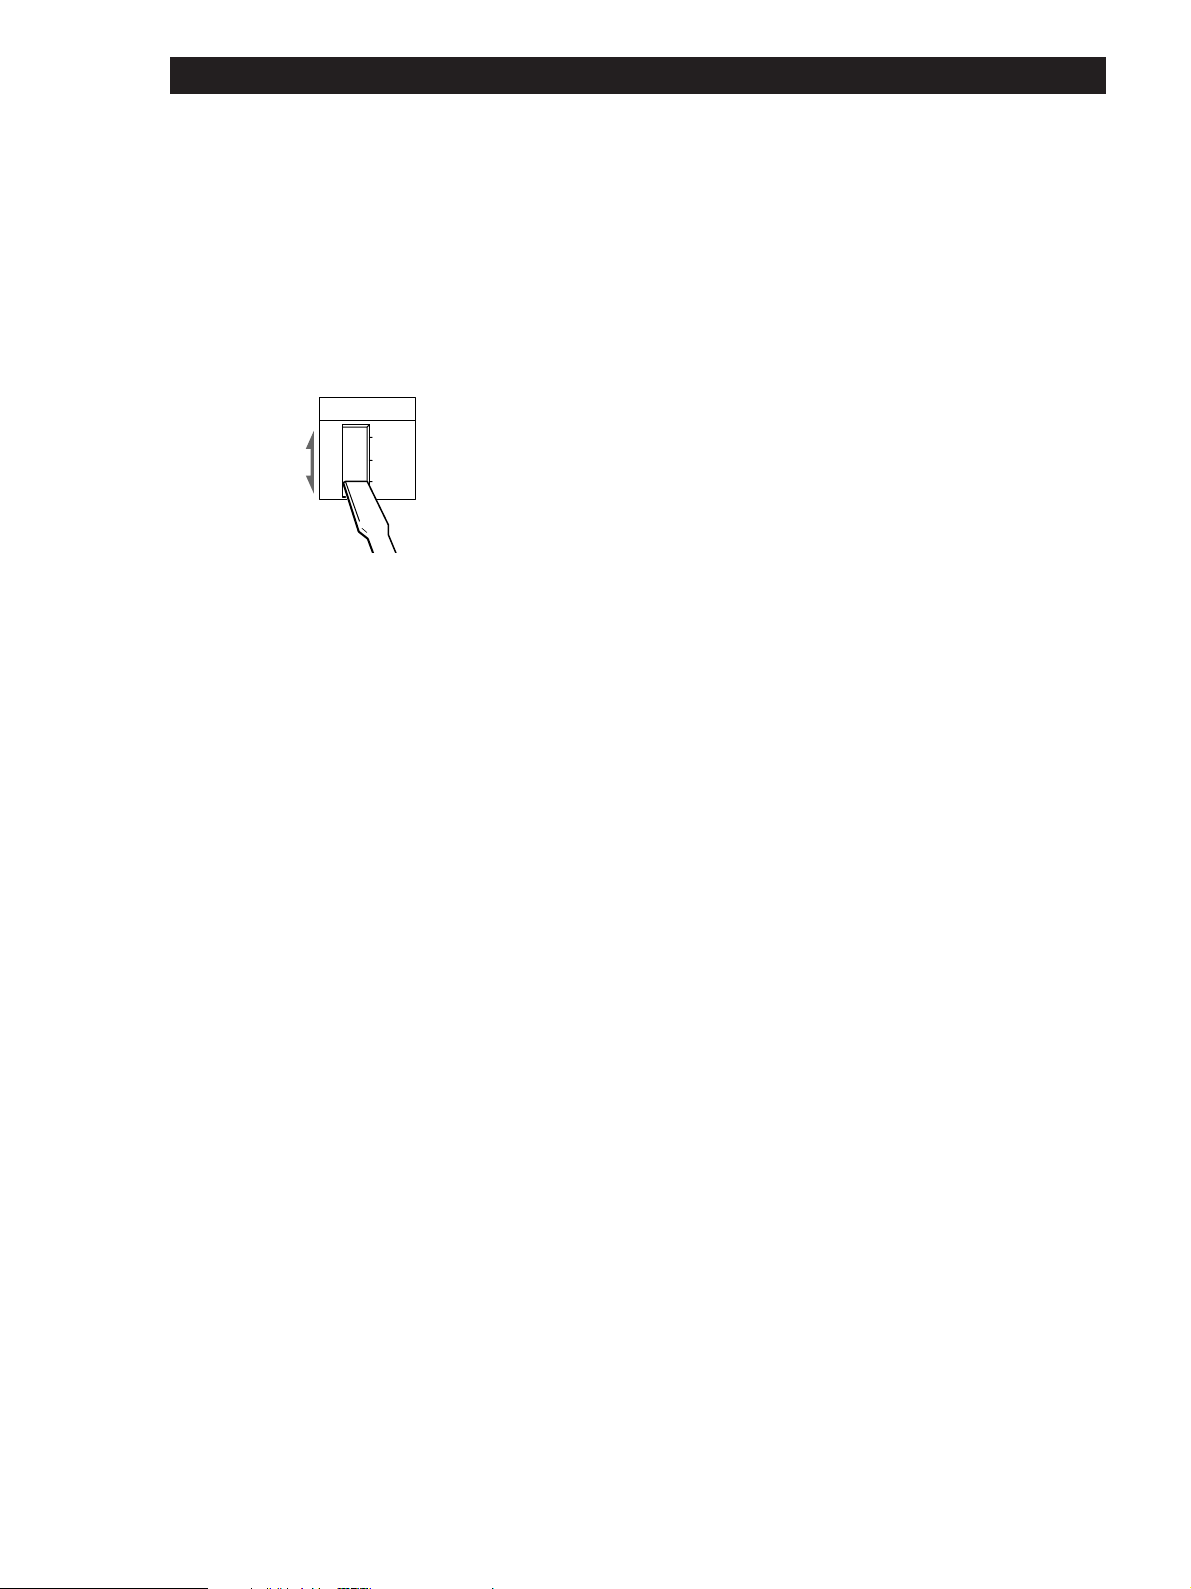
Press § OPEN/CLOSE and insert a cassette,
3
then press the button again to close the
cassette holder.
With the side you want to record
facing you.
Select the direction mode.
4
To record on
Only one side
Both sides*
Both decks in succession
Press DIR MODE repeatedly to select
A
a
RELAY (see page 14)
* Recording stops when the tape reaches the end of reverse side.
Press REC r.
5
”·”, “P”, and “REC” for the deck you’re using light up. “·”
indicates the side facing you. If “ª” lights up instead, press (
once.
Turn REC LEVEL to adjust the recording level.
6
0
+
a
–
–10–20–
30
–
∞
Turn REC LEVEL so that the peak level
meters reach the recommended level for
the corresponding tape type.
After you’ve done the adjustments, stop
4
playing the program source.
dB
L
R
For type I or
type II tape
For type IV tape
4
+8+6+4
2
Basic Operations
S
To protect recordings
against accidental erasure
Break out the record-protect
tab(s) (see page 18).
Press PAUSE P or (.
7
Recording starts.
Start playing the program source.
8
To
Stop recording
Start recording from the reverse side 9
Pause PAUSE P. Press the button again to
Take out the cassette § OPEN/CLOSE after stopping recording
Use these buttons (controls) for additional operations
OPEN/
§
CLOSE
PITCH CONTROL
REC MUTE REC
PAUSE
PRr
9
BACK FRONT
(
OFF
REC PLAY
TIMER
+–
Press
p
resume recording.
RESET
MEMORY
ON/OFF
BLANK SKIP
AUTO PAUSE
1
2
3
MPX FILTER
A -DOLBY NR-B
4
5
6
A -AUTO CAL-B
DIR MODE
7
8
9
START P
COUNTER BA
RMS / START DISPLAY
CHECK SET
A+B REC10HIGH
SYNCHRO DUBBING A B
START (DECK B P)
RESET MEMORY
RMS
>10
REC LEVEL
46
37
28
19
DUBBING LEVEL
MAXMIN R
NORMAL
– +
PHONE LEVEL
BALANCE
L
OPEN/
§
CLOSE
5
100
(AMS) (AM
0
p
Basic Operations
To check the approximate
remaining time on a tape
1 Locate the end of the
recorded portion on the
tape and press RESET for
the deck you’re using to
reset the tape counter to
“0.00”.
2 Press ) to fast-forward
the tape to its end. The tape
counter shows the
approximate remaining
time.
* Dolby noise reduction and HX
Pro headroom extension
manufactured under license from
Dolby Laboratories Licensing
Corporation. HX Pro originated
by Bang & Olufsen.
“DOLBY“, the double-D symbol
a and “HX PRO” are
trademarks of Dolby Laboratories
Licensing Corporation.
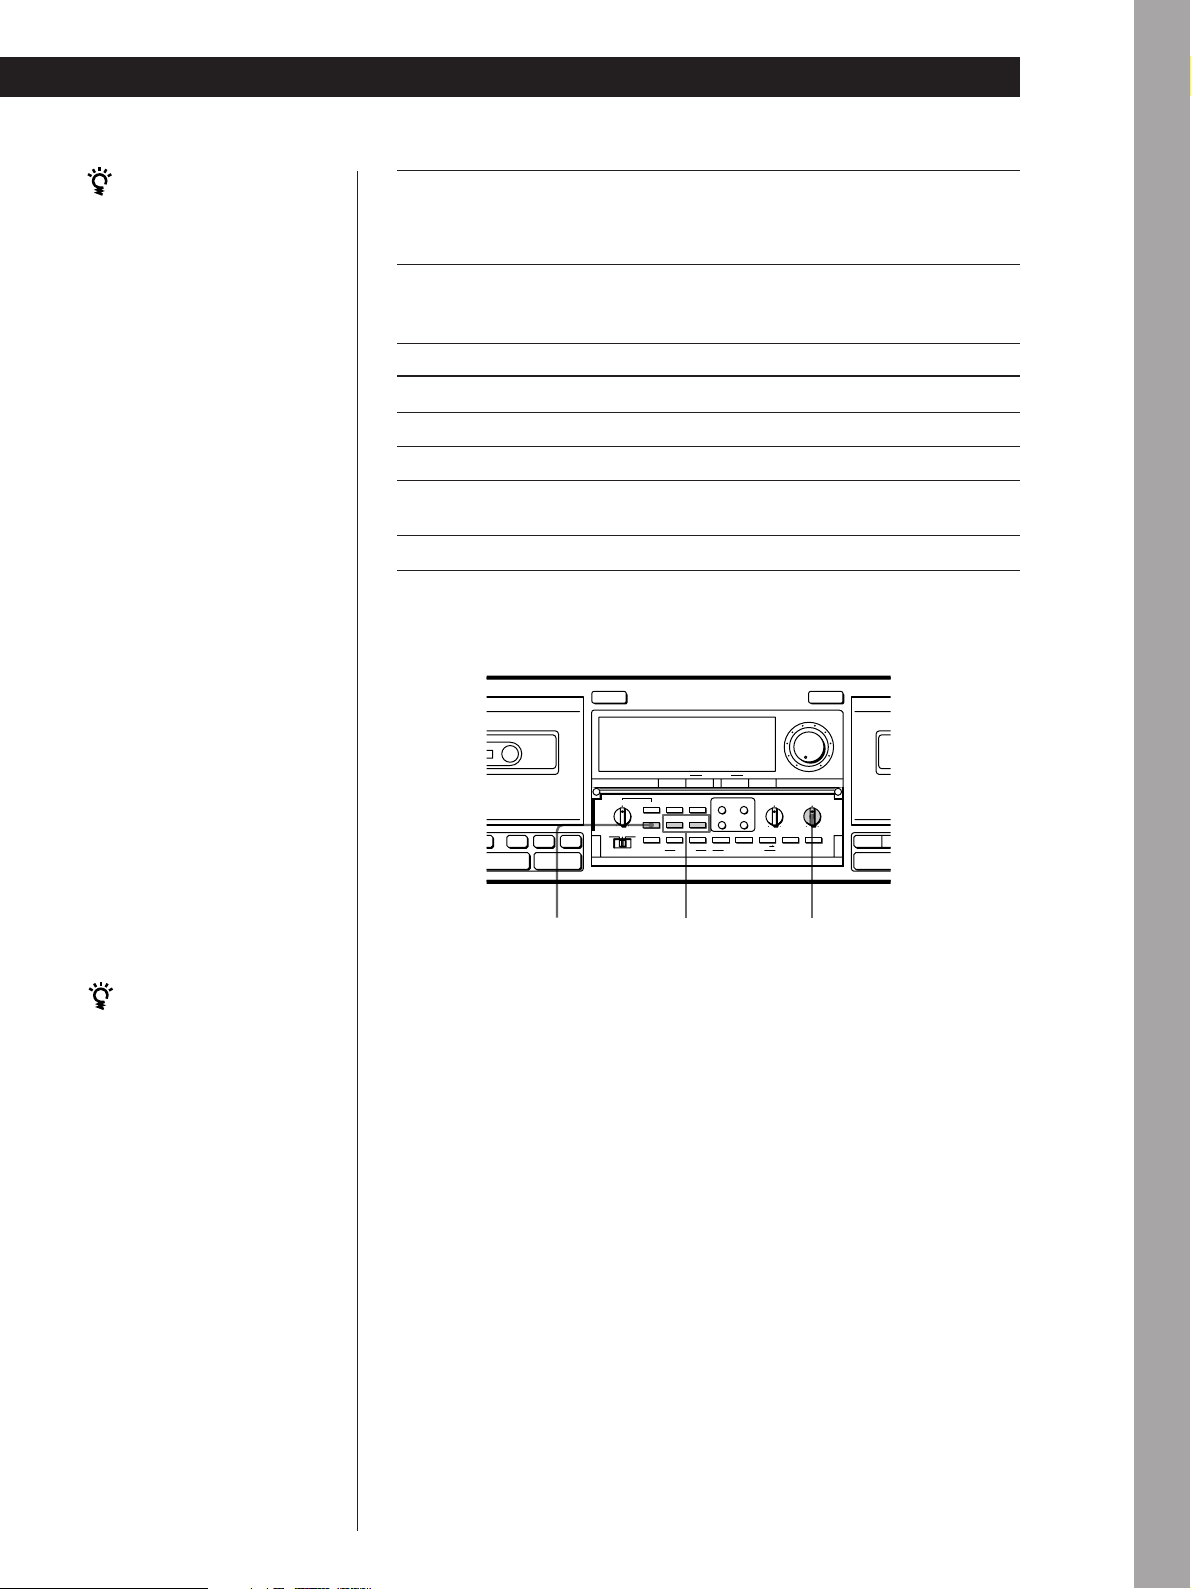
MPX FILTER DOLBY NR BALANCE
To adjust balance
Turn BALANCE so that L (left) and R (right) of the peak level meters in the
display are at the levels you want.
To record with the Dolby NR* system
Press DOLBY NR repeatedly for the deck you’re using to select B, C, or S
before you start recording.
“B,” “C,” or “S” appears in the display.
If you can’t get satisfying results when recording FM broadcasts
with the Dolby NR system
Press MPX FILTER (multiplex filter) (see page 22) with the Dolby NR system
on. The filter turns on to make the Dolby NR system work more effectively.
“FILTER” appears in the display.
5

Basic Operations
Playing a Tape
2 3
POWER
- RMS +
PAUSE
(AMS)
(AMS)
p
)
9
PRr
0
CLEAR BACK FRONT
REC MUTE REC
(
OPEN/
§
CLOSE
PITCH CONTROL
REC PLAY
COUNTER BA
RESET
MEMORY
RESET MEMORY
RMS
ON/OFF
BLANK SKIP
AUTO PAUSE
1
2
3
MPX FILTER
A -DOLBY NR-B
+–
4
5
6
A -AUTO CAL-B
DIR MODE
OFF
7
8
9
START P
TIMER
RMS / START DISPLAY
CHECK SET
A+B REC10HIGH
SYNCHRO DUBBING A B
START (DECK B P)
>10
DUBBING LEVEL
NORMAL
OPEN/
§
CLOSE
REC LEVEL
5
46
37
28
19
100
BALANCE
L
MAXMIN R
– +
PHONE LEVEL
PAUSE REC MUTE REC
(AMS))(AMS)
0
p
PRr
9
(
PHONES
45
• See page 7 for hookup
information.
• You can play a tape on either
deck.
To adjust the pitch (Pitch
Control function)
ON/OFF
PITCH CONTROL
–
1
+
Press PITCH CONTROL ON/
OFF so that “TAPE SPEED”
appears in the display.
Turn PITCH CONTROL
clockwise to raise the pitch, or
counterclockwise to lower it.
You can adjust it during
playback on deck A or
normal-speed dubbing.
Press PITCH CONTROL ON/
OFF to turn off “TAPE
SPEED” when not in use.
To play a tape recorded
with the Dolby NR system
Press DOLBY NR repeatedly
to select the same position that
the tape was recorded in—B,
C, or S.
You can connect the
headphones to PHONES
You can adjust the headphone
volume with PHONE LEVEL
+/–. Press – to lower the
volume, or + to raise it.
The adjustment range is – ∞ to
0 dB.
6
Turn on the amplifier and select the tape deck position.
1
Set TIMER to OFF and press POWER.
2
Press § OPEN/CLOSE and insert a cassette,
3
then press the button again to close the
cassette holder.
With the side you want to play
facing you.
Select the direction mode.
4
To play back
Press DIR MODE repeatedly to select
One side only A
Both sides continuously* a
Both decks in succession* RELAY
* The deck automatically stops after playing back five times.
Press (.
5
The deck starts playing. Adjust the volume on the amplifier.
To
Stop playing p
Start playback from the reverse side 9
Pause PAUSE P. Press the button again to
Fast-forward or rewind ) or 0 when the deck is stopped
Take out the cassette § OPEN/CLOSE
Press
resume play.
Getting Started
Unpacking
Check that you received the following items:
• Audio connecting cords (2)
• Remote commander (remote) RM-J903 (1)*
• Sony size AA (R6) batteries (2)*
* not supplied with the U.S.A. and Canadian models
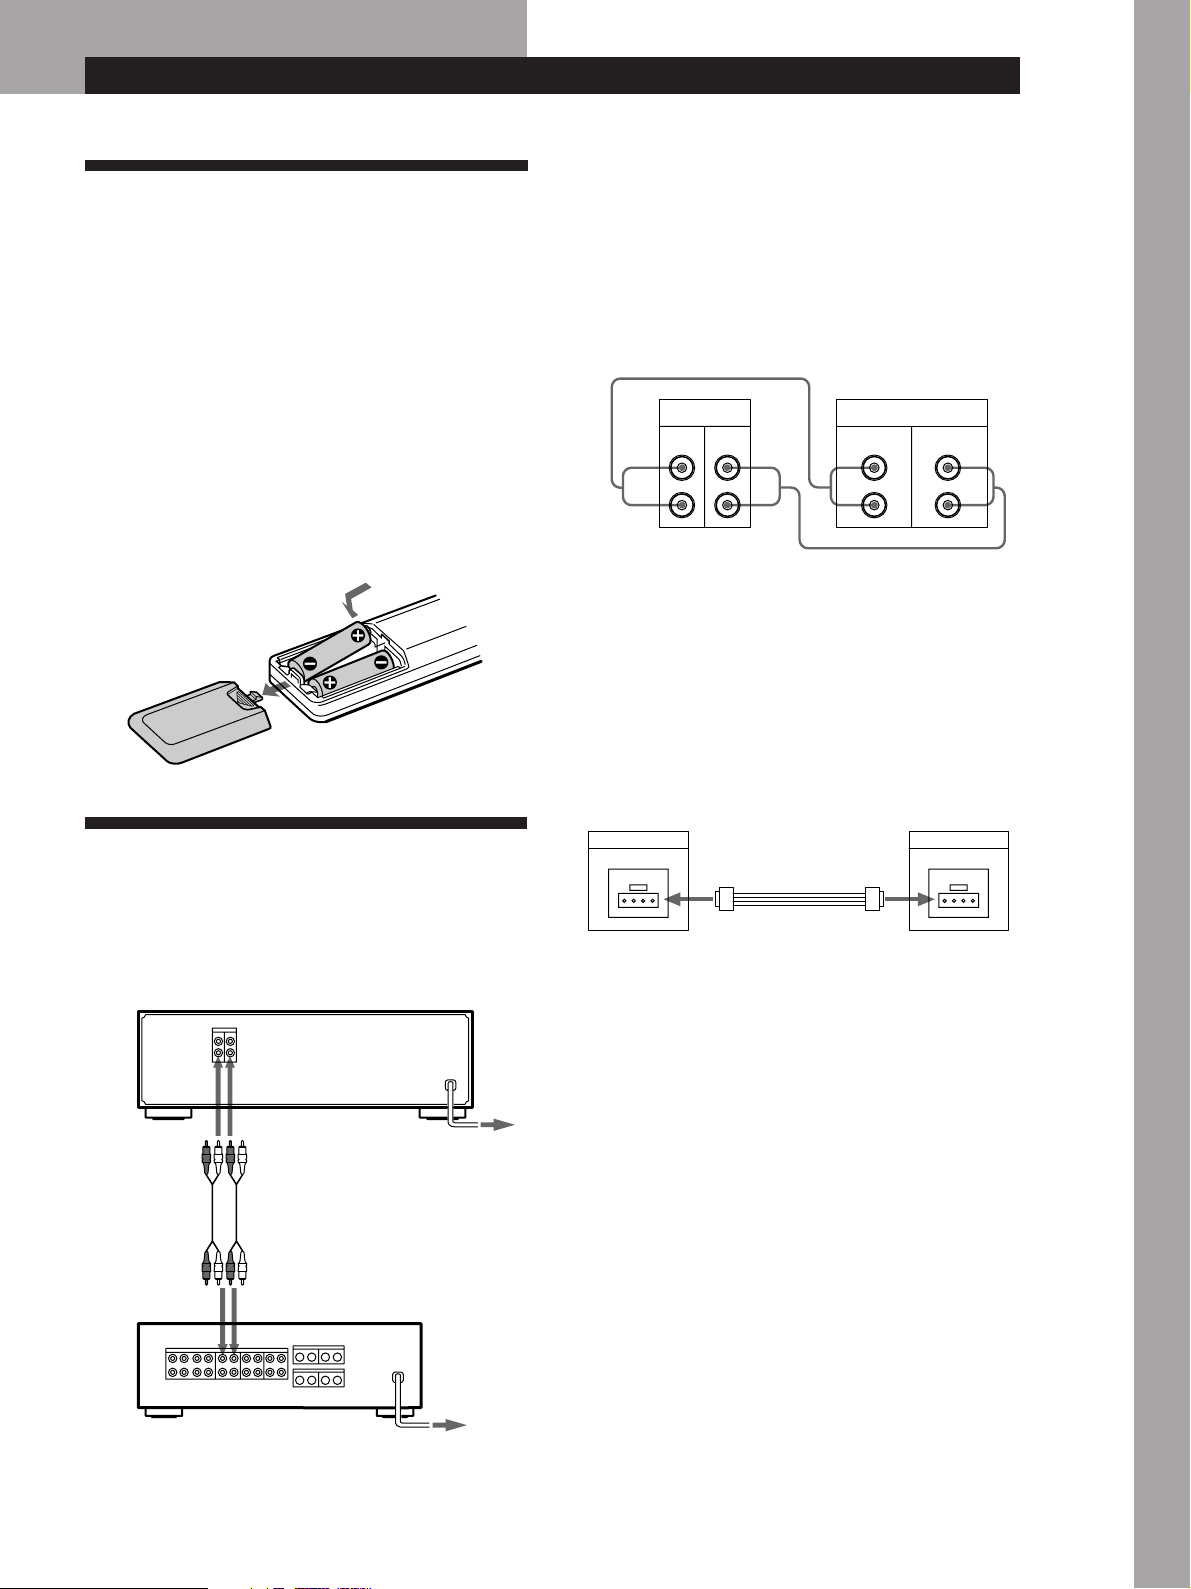
Hookups
Be sure to match the color-coded cord to the
appropriate jacks on the components: Red (right) to
Red and White (left) to White. Be sure to make
connections firmly to avoid hum and noise.
Connect the tape deck to the amplifier as shown below.
Tape deck Amplifier
Ç
Inserting batteries into the remote
Insert two size-AA (R6) batteries, matching the + and –
on the batteries with the markings inside the battery
compartment. When using the remote, point it at the
remote control sensor g on the tape deck.
Hooking Up the System
This section describes how to hook up the tape deck to
an amplifier. Be sure to turn off the power of each
component before making the connections.
TC-WA9ES
LINE
L
R
ç: Signal flow
OUTIN
L
R
TAPE
REC OUT IN
L
R
ç
L
R
Connecting the tape deck to a Sony amplifier or a receiver
through CONTROL S connectors (U.S.A. and Canadian
models only)
Connect the components through the CONTROL S connectors
using a CONTROL S cable (not supplied). When using this
connection, the deck accepts only remote commands from the
amplifier or receiver. The remote control sensor on the tape
deck will not function.
Tape deck Amplifier/receiver
CONTROL S
IN
Ç
CONTROL S cable
(not supplied)
ç: Signal flow
CONTROL S
OUT
Basic Operations
to LINE IN
to REC OUT
to LINE OUT
to TAPE IN
Note
For more information on the availability of Sony amplifier or
receiver with a CONTROL S connector, contact your nearest
Sony dealer.
to an AC outlet
(or a switched
outlet on the
amplifier for
using a timer)
Amplifier
to a
wall outlet
7
Getting Started
Setting the voltage selector (not supplied
with the U.S.A., Canadian, and Australian
models)
Check that the voltage selector on the rear panel of the
tape deck is set to the local power line voltage. If not,
set the selector to the correct position using a
screwdriver before connecting the AC power cord to
an AC outlet.
VOLTAGE
220V
240V
120V
Connecting the AC power cord
Connect the AC power cord to an AC outlet.
Where do I go next?
Now you’re ready to use your tape deck.
For basic operations, go to pages 4 to 6; for advanced
operations, go to the sections immediately after this one.
8
 Loading...