

Page 1

Page 2

Page 3

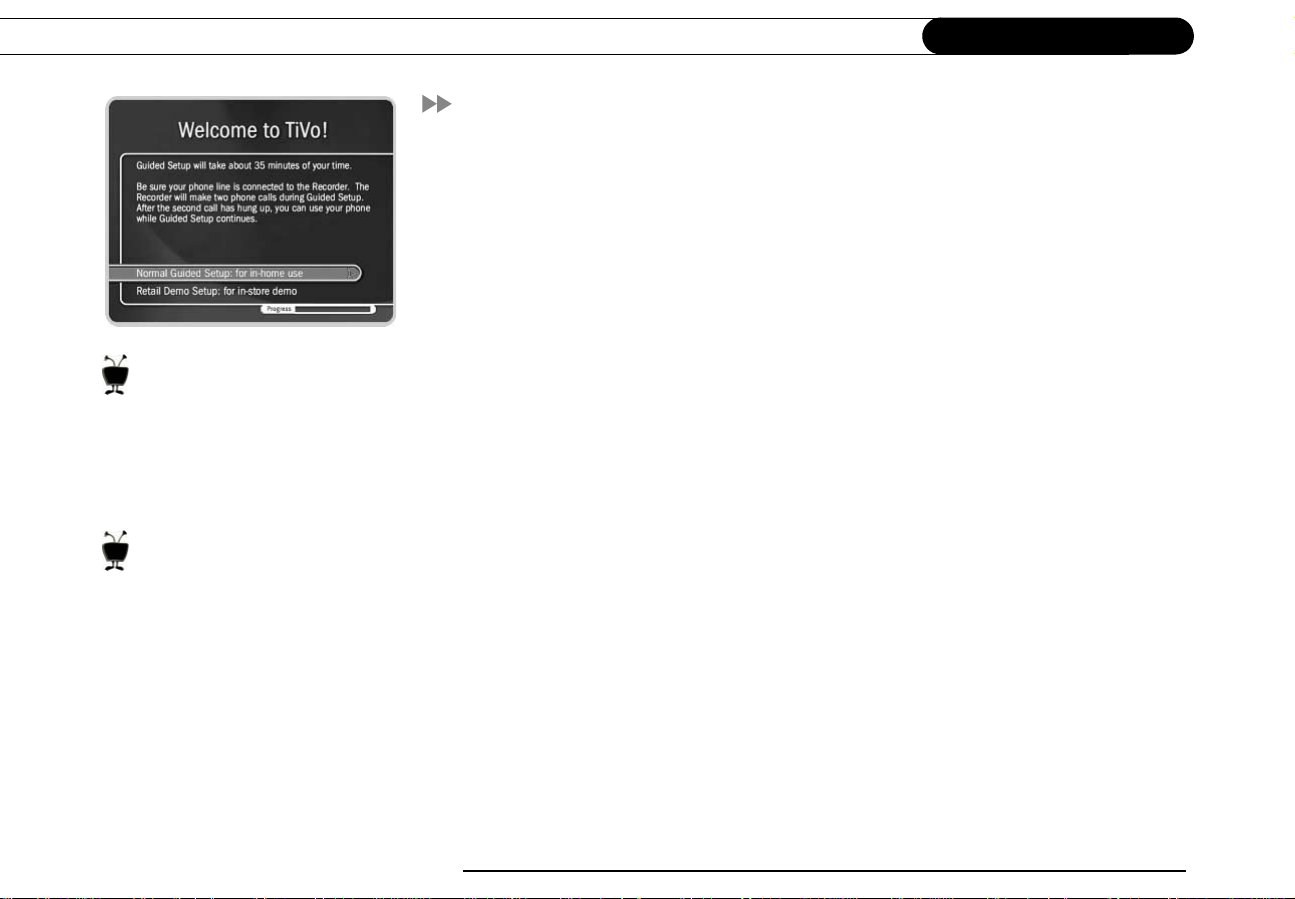
Welcome to TiVo!
Page 4

© 2002 by TiVo Inc. Reproduction in whole or in part without written permission is
prohibited. All rights reserved. Printed in the USA.
TiVo, TiVo Central, and TiVolution are registered trademarks of TiVo Inc.
The TiVo logo; TiVo, TV Your Way; Ipreview;
the Instant Replay logo; the Jump logo; Season Pass;
Overtime Scheduler; the Thumbs Down logo and text;
the Thumbs Up logo and text are trademarks
of TiVo Inc., 2160 Gold Street, P.O. Box 2160, Alviso, CA 95002-2160.
All other trademarks are the properties of their respective owners.
ii
Page 5

Welcome to the TiVolution®!
It’s a revolution in television. We’ve pioneered an exciting new category that will forever
change the way you watch TV. With a new TiVo Digital Video Recorder (DVR) in your
living room, you’ll quickly see how easy it is to watch what you want, when you want.
Never miss your favorite show again.
TiVo automatically records every episode of your favorite series, all season long, even if
the network schedule changes. It can even skip reruns.
No more interruptions.
Pause live TV for as long as 30 minutes—any channel, any time. You can also rewind,
instant replay, and s low-motion live or recorded TV. Wow!
No videotapes required.
Because it’s all-digital, TiVo saves all your programs in one place so they’re ready-towatch anytime. You can even start watching a show from the beginning while it’s still
recording.
Watch more of what you like, less of what you don’t.
Because the TiVo service is “smart,” it automatically finds and records shows that feature
your favorite actor, team, hobby, etc., so you’ll always catch the good stuff—even if you
never knew it was on.
At last, TV fits into your busy life, not the other way around.
TM
TiVo, TV your way.
™
iii
Page 6

Table of Contents
UsingThisGuide ............................................................................vi
Chapter 1: Guided Setup . . . . . . . . . . . . . . . . . . . . . . . . . . . . . . . . . . . . . . . . . . . . . . . . . . . . . . . . . . . . . . . . .1
BasicSteps..................................................................................2
ActivatingtheTiVoService.....................................................................8
Chapter 2: The Basics in 5 Short Tou rs . . . . . . . . . . . . . . . . . . . . . . . . . . . . . . . . . . . . . . . . . . . . . . . . . . . . . .9
TourOne:PlaywithLiveTV ..................................................................10
TourTwo:TheTiVoLiveGuide................................................................12
TourThree:FindandRecordYourFavoritePrograms...............................................14
TourFour:FindNewPrograms.................................................................16
TourFive:NowPlaying.......................................................................18
CoolThingsYouCanDo......................................................................20
Chapter 3: Live TV . . . . . . . . . . . . . . . . . . . . . . . . . . . . . . . . . . . . . . . . . . . . . . . . . . . . . . . . . . . . . . . . . . . . . .21
WatchingLiveTV ...........................................................................22
StatusBar..................................................................................23
ControllingLiveTV..........................................................................24
RecordingaLiveProgram.....................................................................25
TheTiVoLiveGuide.........................................................................26
ChannelBanner .............................................................................28
Chapter 4: Now Playing & Pic k Pro g ra ms to Rec ord . . . . . . . . . . . . . . . . . . . . . . . . . . . . . . . . . . . . . . . . . .29
NowPlaying................................................................................30
SeasonPass ................................................................................33
iv
Page 7

RecordingOptions...........................................................................34
SearchByTitle .............................................................................36
WishLists ..................................................................................37
TiVo’sSuggestions ..........................................................................44
RecordbyTimeorChannel....................................................................45
SeasonPassManager.........................................................................48
ToDoList .................................................................................49
Chapter 5: Messages and Setup . . . . . . . . . . . . . . . . . . . . . . . . . . . . . . . . . . . . . . . . . . . . . . . . . . . . . . . . . .51
TiVoMessages..............................................................................52
MyPreferences .............................................................................53
Recorder & Phone Setup . . . ...................................................................62
SystemInformation ..........................................................................66
Troubleshooting . ............................................................................67
SystemReset ...............................................................................68
Standby ...................................................................................69
Chapter 6: Troubleshooting . . . . . . . . . . . . . . . . . . . . . . . . . . . . . . . . . . . . . . . . . . . . . . . . . . . . . . . . . . . . . .71
Customer Support . . . ........................................................................72
Troubleshooting . ............................................................................73
Chapter 7: Privacy and Service . . . . . . . . . . . . . . . . . . . . . . . . . . . . . . . . . . . . . . . . . . . . . . . . . . . . . . . . . . .95
TiVoPrivacyPolicy..........................................................................97
TiVoServiceAgreement .....................................................................104
Index. . . . . . . . . . . . . . . . . . . . . . . . . . . . . . . . . . . . . . . . . . . . . . . . . . . . . . . . . . . . . . . . . . . . . . . . . . . . . . . . 109
v
Page 8

You will see important and helpful
notes and tips in this side column.
This is a Program Information screen. It
has a description of the program and a list
of actions you can select.
Using This Guide
Getting Started
1. Connect your Recorder using the Start Here booklet and Installation Guide.
2. Complete Guided Setup—following the steps provided in Chapter 1 of this guide—
and activate the TiVo service (see page 8 for more on activating).
3. Start using the TiVo service. It’s easy! Take the quick, easy tours in Chapter 2 of this
guide and check out the TiVo service’s exciting features. Chapters 3, 4, and 5 describe
the TiVo service. Read through them to become more familiar wi th the service’s
capabilities or ref er to them with specific questions.
Basic terms. These are terms used in this guide when we talk about the rest of the service:
Live TV: If you’re watching a program as it’s being broadcast, you’re watching live
TV. With TiVo, you can also watch recorded programs or watch “behind” live TV (for
example: if you pause live TV, t hen come back later and watch from the paused spot).
Icons:These are graphic symbols used in the TiVo service to provide information and
options you can select. You’ll find a glossary of icons on the inside back cover.
Program Information screen:When you select a program (either a future showing or
a recording in Now Playing) from a list, you will see this type of screen. With it you
can select actions and view a description of the program.
On a Program Information scree n, press
DISPLAY (or ENTER if you don’t have
DISPLAY on your remote) to see the
vi
Program Details screen.
Service Updates
A few features described in this manual (such as “Skip to Tick,” the Program Details
screen, and using an asterisk (*) in a WishList) may not be available when you first start
your TiVo DVR. If not, they’ll arrive as part of your first TiVo service update. TiVo
subscribers automatically receive service updates with the latest TiVo software. Details
about recent service updates are available at www.tivo.com/support. Updates happen
automatically. You don’t need to do a thing!
Page 9

HAPTER
C
1
Guided Setup
Basic Steps 2
Activating the TiVo Service 8
Page 10
Chapter 1
If you can’t find th e help yo u need in
this chapter, please visit online
TiVo Customer Support at
www.tivo.com/support
1-877-367-8486.
If you need to use the phone during
either of the setup phone call s, pick
up your telephone, then ha ng it up and
wait a few seconds. The recorder will hang
up, and the next time you pick the phone
up there will be a dial tone. You will need
to re-initiate the phone calls later.
or call us at
Guided Setup
Basic Steps
After you connect your recorder, the next steps are to complete Guided Setup—which
takes about 35 minutes—and activate the TiVo service. (For more information about
connecting your recorder, see the Start Here booklet and the Installation Guide.)
• Guided Setup is easy. The Guided Setup screens s tep you through the process. If you
get stuck, look for tips and troubleshooting in this chapter. (You may not see all the
screens described here, or you may see them in a different order, depending on your
equipment.)
If you make a mistake during Guided Setup, simply press LEFT arrow to go back and
fix it. You can also change your setup information later in Messages & Setup. (See
Chapter 5 for details.)
• Guided Setup is intelligent. In Guided Setup, you tell your recorder your program
source ( a ntenna, cable, or satellite) and equipment setup. Then the steps change
depending on how you have set up your recorder.
• Guided Setup requires two phone calls.Try to complete Guided Setup when you
don’t need the phone.
After completing Guided Setup, you can watch live TV and use TiVo service features to
control live TV. You will have to wait a few hours while the recorder organizes
information before you can set up your Season Passes and search for programs (see page 7
for details).
2
Page 11
Basic Steps
Tips and Troubleshooting
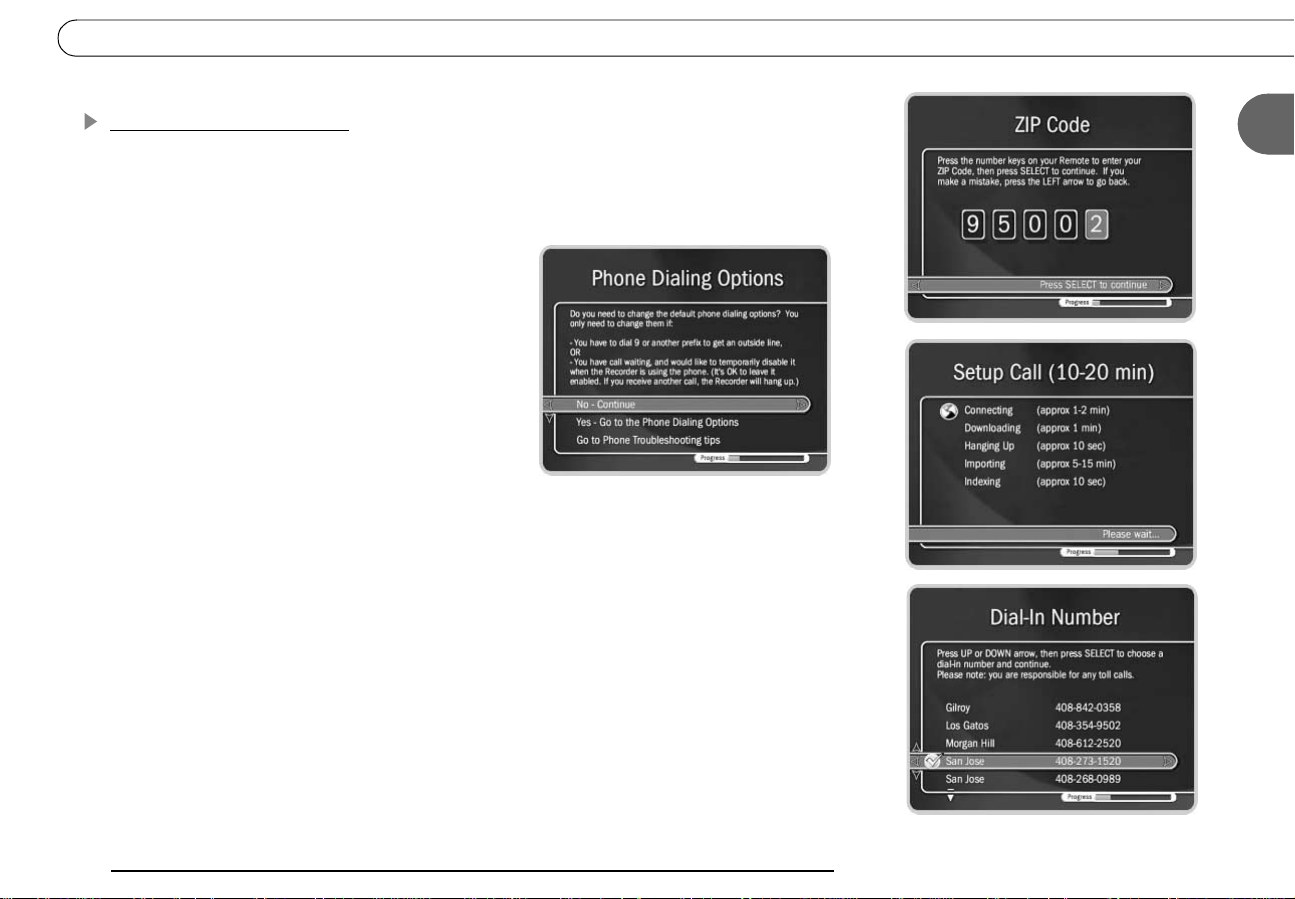
Zip Code. Antenna users: The TiVo service uses the channel lineup of a nearby cable
service to determine which channels you receive. If there is no cable company that serves
your zip code, enter the zip code of a nearby community that has cable service.
Phone Dialing Options. If your phone system
requires special dialing options, choose “Yes.”
(For example: do you dial “9” to get an outside
line?) Most people won’t need to change the
settings. If you’re not sure, or if you need help
with specific dailing options, see page 62 for
information about each option.
Setup Call. This toll-free call takes a few minutes
to get the dial-in numbers for your area code and
the list of cable or satellite providers for your zip code. After hanging up, the recorder will
take 5 to 15 minutes to organize the information. If the call doesn’t succeed, see pages 73
to 74 for troubleshooting steps.
Dial-In Number.The recorder will use the dial-in number you choose for its daily calls to
the TiVo service. The list may be too long to fit on one screen. To see more phone
numbers, press the DOWN arrow or CHAN DOWN.
Note: TiVo uses a standard telephone line to provide the TiVo service and is available as a
local call in most areas. In some areas, however, local and long distance toll charges may
apply. You are responsible for any such telephone charges.
1
3
Page 12

Chapter 1
Guided Setup
Dialing Format. Choose how you want the recorder to dial the dial-in number. (For
example: should the dial-in number be preceded by your area code and should a “1”
precede the area code?) In some areas, local numbers must be dialed using the area code.
Satellite Providers. If you subscribe to additional
local channels for your cit y or a nearby city from
DIRECTV, choose the DIRECTV option
followed by the city name from which you get
your local channels (e.g., DIRECTV-Boston).
Cable Providers. Cable companies may have
entries with very similar names, and it may be
difficult to know which is yours. Check your
channel lineup card (received during cabl e
installation) or your cable bill. If you still aren’t sure, make your best guess. Check your
guess on the Channels You Receive screen (see page 5). If you s till don’t see your
provider, go back and verify that you entered the correct zip code.
Cable Lineups. A lineup is the type of subscription you purchased from your cable
company. Lineups usually have names like “Basic” or “Extended Basic.” Your cable bill
may have this information. If you still aren’t sure, make your best guess. You should then
check your guess on t he Channels You Receive screen (see page 5).
“Rebuild” is a term TiVo uses to refer to a revised channel lineup. Usually you would be
informed by your cable company that your lineup has been revised.
If you have a cable A/B system, you can pick only A or B to watch with your recorder.
Check your Installation Guide for information about splitting your signal in order to
watch the other channels.
4
Page 13

Channels You Receive. First, if you had to make a guess about your provider or lineup,
verify that the channel numbers match the networks on this list. (For example: if you had
the lineup to the right, is channel 16 actually KKPX?) If you aren’t sure, refer to the
channel guide or quick-reference card from your cable or satellite company.
Next, add or remove check marks—so that the list reflects the channels you actually
subscribe to—by highlighting a channel and pressing SELECT. (Some types of satellite
receivers will try to tune to a channel you don’t receive if it is selected here, so be sure to
de-select the channels you don’t receive.)
You can also customize this channel list to reflect your viewing preferences. If you never
watch a particular channel, and don’t plan to set up recordings or let TiVo search for
programs on it, remove the check mark next to that channel.
The TiVo service will search for programs on the checkmarked channels only. Also, the
CHAN UP/DOWN button skips channels that don’t have a check mark in this list.
Finally, press the RIGHT arrow to continue. If you change your mind later, you can easily
check and uncheck channels in this list. (See page 59 for details.)
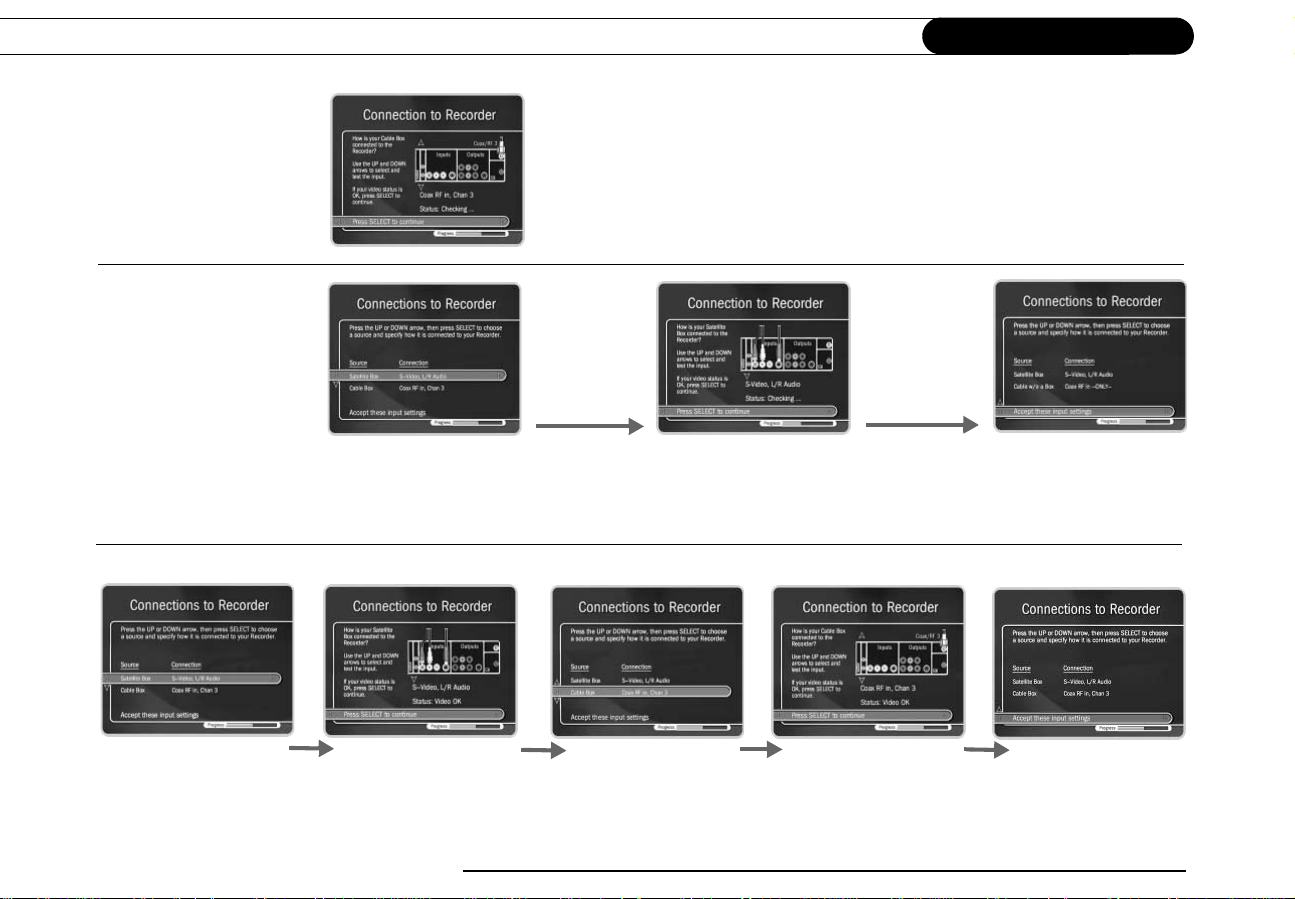
Connection to Recorder Screens.These screens ask what type of video cable you used to
connect your cable box o r satellite receiver to your recorder. Choose your configuration
from the three choices described on page 6 (Hint: the first one is the most common).
Basic Steps
1
Use the CHAN UP/DOWN button as a
shortcut to go up or down a whole
screen at a time.
Connection to Cable/Satellit e Bo x.Your recorder needs to send a signal to the cable box
or satellite receiver to change channels. It can do this through an IR (infrared) or serial
connection. We recommend you use the serial connection if possible, because it is easier,
more reliable, and faster than an IR connection. For help choosing a connection method,
see your Start Here booklet and Installation Guide. After Guided Setup, if your channels
don’t change, see the Troubleshooting suggestions on page 79.
5
Page 14
Chapter 1
Guided Setup
Satellite only
or cable with a box
only:
Satellite & antenna
or satellite & cable
without a box:
Satellite & cable with a box:
1. Use the UP/DOWN ar rows to
highlight “Satellite Box” and
press SELECT.
* Use the UP/DOWN arrows until the picture of the recorder matches the
cable connection you used to connect your satellite re ceiver or cable box.
When the video status below the picture says “Video OK,” press SELECT to
continue. If the video status says “No Video,” double-check that the video
cable is firmly connected to the recorder and that you have selected the
correct type of video cable.
2. Follow the *directions at
the top of this page.
3. Use the DOWN arrow to
highlight “Accept these
input settings” and press
SELECT.
1. Highlight “Satellite
Box” and press SELECT.
6
2. Follow the *directions
at the top of this page.
3. Highlight “Cable
Box” and press
SELECT.
4. Follow the *directions
at the top of this page.
5. Highlight “Accept
these input settings”
and press SELECT.
Page 15

IR Code Li st.Each code has a slow, medium, and fast version. First test the slow codes by
highlighting them and pressing the CHAN UP/DOWN button slowly 10-15 times. When
you find a slow code that changes channels every time, try a faster speed for that code.
(Slow may take longer, but fast may be too fast for your cable box or satellite receiver.)
You want to find the code wit h the fastest speed that changes the channel every time.
When you find it, press SELECT to choose that code. If channels don’t change at all, see
page 77 for troubleshooting steps.
Program Call.During this call, the TiVo service downloads all your program
information—which includes program titles, times, channels, and descriptions—for up to
the next two weeks. If the call doesn’t succeed, see pages 73 to 74 for troubleshooting
steps. If you need to use the phone during the program call, pick up your telephone, then
hang it up and wait a few seconds. The next time you pick the phone up there will be a dial
tone. You will need to re-initiate the program call later.
Congratulations! When the recorder has finished
downloading your program information, press
SELECT to continue, and you’ll see the
Congratulations! screen. You can now watch live
TV and use your recorder’s features to control live
TV (pause, instant replay, slow motion).
Basic Steps
1
After Guided Setup, the recorder works behind the
scenes for about four to eight hours to organize
program information for the first time. During this
process, you will have to wait to search for programs and set up recordings. A message
at the bottom of the Pick Programs to Record screen will let you know if you can
search for programs yet. I f the message appears, try again after a few hours.
onscreen
message
7
Page 16

Chapter 1
Guided Setup
Activating the TiVo Service
The TiVo service includes the program information shown in the TiVo Live Guide™and
used by the Season Passes, WishLists, and Search by Title features, as well as by
TiVolution Magazine, Showcases, and Service Updates.
If you haven’t activated the TiVo service already, you’ll be instructed to visit the TiVo
website at http://www.tivo.com/activate/ or to call 1-877-367-8486. To activate, you must
register the TiVo Service Number of your recorder and choose a billing option.
You can find the 15-digit TiVo
Service Number by going to TiVo
Central (press the TiVo button on the
remote), then Messages & Setup (press
the DOWN arrow to move the blue
highligh t bar, then press SELECT), then
selecting System Information.
For instructions on programming
your remote to control your TV’s
power, volume, and mute settings, see
8
You will receive enough program information to give you a chance to try the TiVo
service. If you do not activate within about a week of completing Guided Setup, your
recorder will have limited functionality. The recorder was designed to be used exclusively
with the TiVo service. The TiVo service is required for proper operation of the recorder.
No functionality is represented, warranted, or should be expected without a subscription to
the TiVo service.
Activate today! Don’t miss a si ngle day of using the TiVo service.
From the Congratulations! screen, press the TiVo button on your remote control to go to
TiVo Central
®
and begin enjoying the TiVo service. For help getting started, check out
the tours in Chapter 2 of this guide.
Page 17

HAPTER
C
2
The Basics in 5 Short Tours
Tour One: Play with Live TV 10
Tour Two: The TiVo Live Guide 12
Tour Three: Find and Record Your Favorite Programs 14
Tour Four: Find New Programs 16
Tour Five: Now Playing 18
Cool Things You Can Do 20
Page 18
Chapter 2
The Basics in Five Short Tours
Tour One: Play with Live TV
In this tour, you’ll take a look at how you can control live TV. So turn on your TV and
grab your TiVo remote!
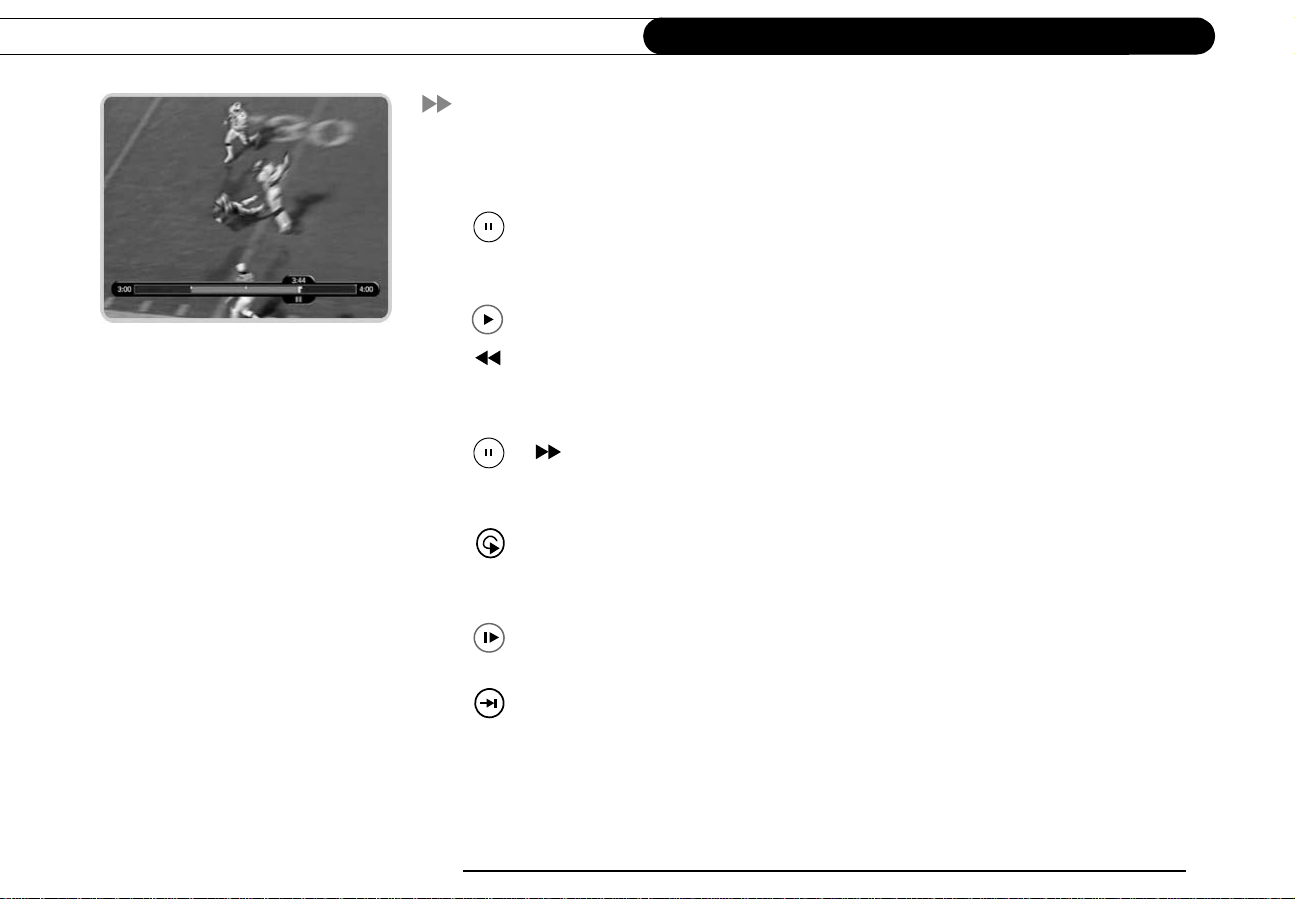
First, press the PAUSE button—the program you’re watching pauses. Now you can
stand up and stretch, or go to the kitchen and get a snack. You can pause live TV for
up to 30 minutes!
But for now, press PLAY and the program resumes.
Next, press BACK—the program rewinds. Press BACK a second time—it goes
faster! A third time—faster still! Both the FWD and BACK buttons have three
speeds. Press BACK a fourth time t o return to normal speed.
+ Press PAUSE once more, then immediately press FWD—frame-by-frame
forward! Press BACK—frame-by-frame back. When your show is paused, FWD and
BACK let you go frame by frame. Press PLAY to resume watching at normal speed.
Try out the INSTANT REPLAY button. INSTANT REPLAY jumps you back 8
seconds—useful for when you miss a great sports play or a bit of dialog, or for when
you fast forward too far.
10
Press INSTANT REPLAY again, then immediately press SLOW. You get your own
slow-motion replay!
Finally, try the ADVANCE button. Presto! You’re caught up to live TV.
Page 19

Tour One: Play with Live TV
Status Bar
Press PAUSE to make the status bar visible. It shows a one-hour period. The green
segment is the portion of the current hour that has been saved by your recorder.
Look for the white line. It marks the part of the program you are currently watching. If the
white line is anywhere back in the green segment you are “behind” real time (which is
way better than being behind the times!).
Now press CHAN UP. When you change channels, the saved programming from the old
channel is cleared, and the recorder starts to save what is showing on the new channel.
Channel Banner
Press DISPLAY to see the channel banner. It’s only there for a few seconds, but you can
bring it back by pressing DISPLAY again. (If your remote doesn’t have a DISPLAY
button, press RIGHT arrow.) While the banner is visible, press the RIGHT arrow to switch
from a small, to medium, to large banner. Note that each version has a different amount of
information.
Keep pressing the RIGHT arrow until you see the largest version of the channel banner.
Notice the small icons on the right side. Each symbol represents a useful feature, like
recording or Parental Controls. Press the UP and DOWN arrows to highlight different
icons. Pressing SELECT while an icon is highlighted will take you to that feature. (For
more on using these icons, see page 28.)
status bar
channel banner
2
This white line
tells you where
you are.
Finally, press the CLEAR button—the channel banner disappears. (CLEAR gets rid of
things that aren’t part of the program you’re watching.)
Now go have fun playing with live TV, then come back for the next tour!
selectable
icons
11
Page 20

Chapter 2
The Basics in Five Short Tours
Tour Two: The TiVo Live Guide
Your recorder’s program guide, the TiVo Live Guide, lets you see what’s on, change
channels, schedule recordings, and more—all while you’re watching live TV. Press the
GUIDE button to see the TiVo Live Guide.
On the left side of the TiVo Live Guide, there is a list of channels and their current
programs. The channel you’re watching is highlighted with a blue bar, and a description of
the current program appears at the top of the grid. On the right side is a list of upcoming
programs on the highlighted channel.
Choose a Program to Watch
When you record from live TV, you
can record both the saved portion
(up to the last half hour) and the rest of
the program. See page 25 for details.
12
See something you’d like to watch? Press the UP and DOWN arrows to move the
highlight bar to it. (Notice that the description at the top and list of upcoming programs on
the right side change.) Then press SELECT on the highlighted channel—the channel
changes and the program guide disappears. Press the GUIDE button again to bring the
guide back. (Remember, whenever you change channels, programming saved from the old
channel is cleared, and the recorder starts to save what is showing on the new channel.)
Record a Program
You can always record the program you’re watching by pressing the RECORD ( )
button on your remote control. You can also use the TiVo Live Guide to record current or
future programs. (See page 25 for more on recording from live TV.)
Highlightany program you see in the TiVo Live Guide and press RECORD. A transparent
screen with recording choices appears. Choose an option or press the LEFT arrow to go
back to the TiVo Live Guide.
Page 21

Tour Two: The TiVo Live Guide
Looking Ahead
While you’re in the left side of TiVo Live Guide, press the FWD ( ) button to move
the displayed time 30 minutes ahead. Try it. To go back in time, press BACK ( ).
You can also quickly change the day and time the guide shows by changing the Guide
Options. To see Guide Options, press DISPLAY when the TiVo Live Guide is visible. To
change the day, use DOWN arrow to highlight the day, then press the RIGHT arrow once
to choose tomorrow. Press SELECT. “Done changing options” becomes highlighted.
Press SELECT again and voila!, the TiVo Live Guide appears with tomorrow’s program
schedule. You know what this means—no more setting the VCR!
Filter the TiVo Liv e Guide
The TiVo Live Guide can also find specific kinds of shows for you. Display Guide
Options by bringing up the guide and pressing DISPLAY. (If your remote doesn’t have a
DISPLAY button, press ENTER.) Then highlight “Choose Filter.” Press SELECT and a
list of categories appears. Select “Arts and Living” and then select the subcategory
“Cooking.” The Guide Options screen appears again and “Filtering” should now be “On.”
Select “Done changing options.”
This time when the TiVo Live Guide appears, it only shows you channels airing cooking
shows in the next six hours. It has grayed out programs that are not about cooking. To see
all the channels again, go to Guide Options (press GUIDE, then press DISPLAY).
Highlight “Filtering,” and press LEFT arrow to turn it “Off.” Then press SELECT.
Take some time to play around in the TiVo Live Guide (and set up some recordings, while
you’re at it). See you in a little bit for the next tour!
2
13
Page 22

Chapter 2
The Basics in Five Short Tours
Tour Three: Find and Record Your Favorite Programs
You can always record the program you’re watching by pressing the RECORD button on
your remote control. The TiVo service also provides many ways to quickly search large
numbers of TV programs, find your favorites, and schedule recordings in advance. What’s
more, if a program is part of a series, you can get a Season Pass
Pass records every episode of the series that airs on the selected channel.
Search by Title
In this tour, you’ll find a program (The Simpsons) by searching for its title. Press the TiVo
button to see TiVo Central. Press the DOWN arrow to highlight Pick Programs to Record
and press SELECT. The Pick Programs to Record screen appears.
As you can see, TiVo gives you many ways to find programs. Since you know the
program’s title, highlight “Search by Tit le” and press SELECT. The next screen is a
categories screen. It lets you limit your search to any of several categories—but for now,
choose “All Programs,” then press SELECT.
™
to the series. A Season
If you just finished Guided Setup
and you go to Pick Programs to
Record, you will see a message at the
bottom of the screen stating that the
recorder is still indexing data. The
recorder should be done indexing within 4
to 8 hours of finishing Guided Setup.
14
The next screen has a grid of letters. Notice the white box around the letter A.Usethe
RIGHT, LEFT, UP, and DOWN arrows to move the box among the letters. Now move it
to S, then press SELECT.
A list of programs that begin with “S” appears on the right side of the screen. Move the
white box to the letter I and press SELECT again. The list changes. The TiVo service has
searched through all available programs (usually, those airing in the next two weeks) to
find those that begin with SI, then listed those programs.
Page 23

Tour Three: Find and Record Your Favorite Programs
Keep on entering letters until you see “Simpsons, The” in the list on the right. (Notice, the
list alphabetizes without “A” or “The.”) If you make a mistake entering text, select DEL
(on the screen) or press BACK on the remote control. To clear all text, use CLR on the
screen or press the CLEAR button. (SP enters a space.)
To get to the list of programs, press the RIGHT arrow until you move off the grid of
letters. Press the UP or DOWN arrow to highlight “Simpsons, The” and press SELECT.
A Program Information screen appears. This kind of screen appears when you select a
program title from a list and lets you choose to record the episode, view upcoming
episodes, or get a Season Pass.
Get a Season Pa ss
On the Program Information screen for The Simpsons, highlight “Get a Season Pass,” and
press SELECT. A confirmation screen appears to make sure the recorder is doing what
you want. Press SELECT again—and after a short pause you have a Season Pass to The
Simpsons!
You should now be on the Search By Title screen again. Press the LEFT arrow to return to
Pick Programs to Record, then select the T o Do List. You can see all your scheduled
recordings here.
In the To Do List, notice the upcoming episodes of The Simpsons are marked with two
check marks ( ), indicating they are part of a Season Pass. If y ou don’t want to keep
this Season Pass, highlight it and press CLEAR.
Get some more Season Passes now, or go on to the next tour to learn how TiVo helps you
find new shows you might like—sort of like your own “smart” TV assistant.
2
If you schedule a lot of Season
Passes, it’s a good idea to set
priorites for them. You do this with the
Season Pass Manager; see page 48 for
more information.
15
Page 24
Chapter 2
The Basics in Five Short Tours
Tour Four: Find New Programs
TiVo helps you find what you want to watch—both exciting new shows and old favorites
you might have forgotten.
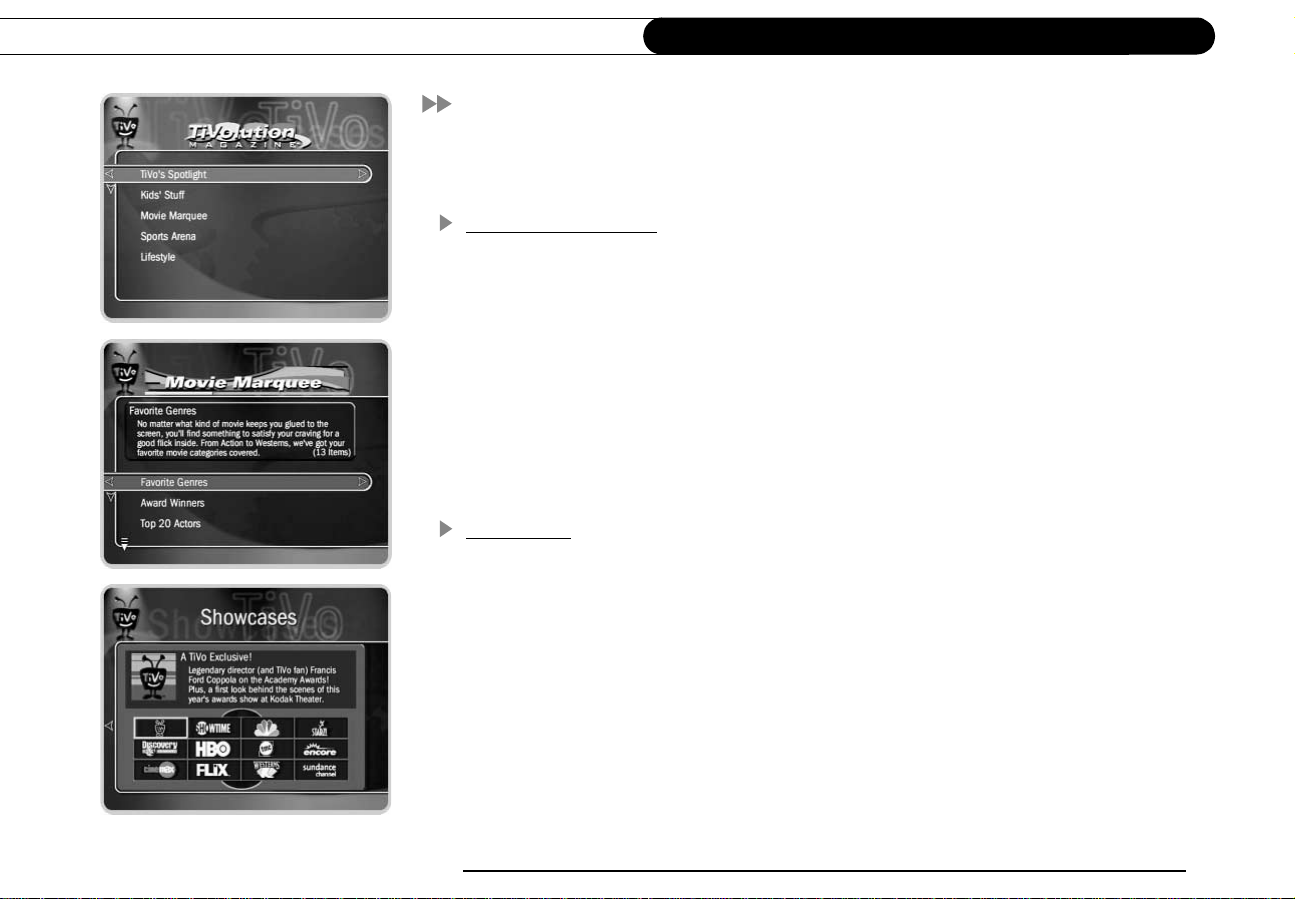
TiVoluti on Magazine
You’ll always find something fun and unusual in TiVolution Magazine, an interactive
guide to the best upcoming shows on television. You’ll find premieres, specials, and
offbeat gems, making it easy for you to schedule recordings. New content is d elivered
fresh to your TiVo during the daily phone call.
To find TiVolution Magazine, press your TiVo button and go to TiVo Central. Use the
Down arrow to highlight TiVolution Magazine, then press SELECT. Once you’re inside,
use the arrow buttons and SELECT to explore the selections. Once you get to a list of
programs, select a title to see the Program Information screen. If you get the channel the
program airs on, you can set up a recording here—it’s that easy!
Showcases
Showcases lists the best programs offered by television’s biggest networks. The programs
in Showcases are grouped in theme packages, giving you one-stop shopping convenience
when browsing for programs to record. Packages include hit movies, exciting miniseries,
hot specials, popular series, and shows from the greatest s tars on TV. Showcases is
updated during your recorder’s daily phone call. You can set up recordings in Showcases,
much the same as in TiVolution Magazine.
16
Page 25

Tour Four: Find New Programs
TiVo’s Suggestions
TiVo’s Suggestions is a personalized list of shows selected to match your preferences.
How is this magic possible? Any time you watch programs, live or pre-recorded, or
browse programs with the TiVo Live Guide, you can rate them by pressing the THUMBS
UP and THUMBS DOWN buttons ( ). You can give a program up to three
Thumbs.
Over time, the more shows you rate with your THUMBS buttons, the better TiVo’s
Suggestions will be at finding programs you like. The suggestions are listed under TiVo’s
Suggestions in order of how closely they match your preferences.
Try it out: Press GUIDE to bring up the TiVo Live Guide. Highlight a few programs and
rate them by pressing the THUMBS buttons. Then go to TiVo Central, then Pick
Programs to Record, then TiVo’s Suggestions. Suggested programs based on your
THUMBS Ratings appear in TiVo’s Suggestions. (If you don’t see programs yet, come
back later—it may take a few hours the first time.) You can press SELECT on a
suggestion, then set up a recording.
As an added bonus, when the recorder has empty space, it may automatically record some
of TiVo’s Suggestions. You will find them at the bottom of Now Playing, below programs
you requested. TiVo’s S uggestions never replace shows you request or prevent them from
being recorded. TiVo’s Suggestions are also always the first programs deleted to make
room for recordings you request.
Your personal TV preferences are
just that: personal. See TiVo’s
Privacy Policy in Chapter 7, and the
Federal T rade Commission (FTC) White
Paper available at
for more information.
www.tivo.com/privacy
2
This icon indicates that the program was
recorded as a Suggestion.
17
Page 26

Chapter 2
The Basics in Five Short Tours
Tour Five: Now Playing
Your recorder can record many hours of programming (enough to fill a slew of video
tapes!). Fortunately, it also labels and organizes all those saved programs. Unlike using a
VCR, Now Playing gives you instant access to all recorded programs—no need to spend
time searching for an episode on that tape you thought you used.
To go to Now Playing, just press the TiVo button twice. Your new recorder may already
have some entertaining short programs created by TiVo’s partners. A network logo to the
right of the show tells you which partner brings you the program.
An icon like this one to the left of the program’s title tells you the recording’s
current status (see the inside back cover for a glossary of these icons).
Programs you request will appear in Now Playing the moment r ecording begins. The most
recently recorded shows appear at the top of the list. You can watch any title in Now
Playing—even one that is still being recorded—by highlighting it, then pressing the
PLAY button.
Try it. Highlight a program in Now Playing and press PLAY. OK, now for the cool part:
Watch the program for at least 5 minutes, then press the LEFT arrow to go back to Now
Playing. Select the program again—the Program Information screen will now s ay
“Resume Playing,” instead of “Play.” Select “Resume Playing,” and return to the program
from the point you left it!
18
Page 27

Tour Five: Now Playing
Save Until...
By default, programs you record are saved until space is needed (this usually means for
about two d ays). The oldest ones may be deleted to make room for new recordings you’ve
scheduled. However, you always have the option to save a program for as long as you
want to.
To change how long a program in Now Playing will be saved, highlight it and press
SELECT or RIGHT arrow. The Program Information screen appears. Select “Save
Until....” On the next screen you can choose “Until I delete” or use the arrow buttons to
highlight and change the date displayed. When you are done, press SELECT.
Feel free to watch some programs from Now Playing—but come back for the end of this
chapter! There are still more cool things you may want to learn about.
2
When you set up recordings, you
can also specify how long you want
to keep them by setting the Keep Until
Recording Option. For more on this
option, see page 35.
19
Page 28
Chapter 2
The Basics in Five Short Tours
Cool Things You Can Do
Never be late for your f avorit e pr ograms: Working late? Stuck in traffic? Don’t worry! If
you’ve set up a recording or a Season Pass, the program will be waiting for you in Now
Playing. You can even start watching from the beginning while the recording continues.
Make your television wishes come true with a WishList™:Have a favorite actor? A
favorite hobby or interest? How about a favorite sports team? If they’re on TV, chances
are a WishList will find them. For details see pages 37 through 42.
Looking for good movies? Kids’ shows? Scienc e fiction? With Search By Title, you can
browse all the upcoming programs in a particular category and find shows you didn’t
know were on. For details see page 36.
See a good preview, record the show: If you’re watching live TV and a promotion
comes on for an upcoming program, you may see an IPreview™ icon like this
one: PressingTHUMBS UP while the icon is visible automatically sets up a
recording for the upcoming program. You don’t have to remember when it’s on—it will
be recorded! (If you did not s chedule a recording when you saw the icon, rewind until it’s
visible again.)
20
Use the Overtime Scheduler™ (and don’t miss overtime!): Programs sometimes start
before they’re supposed to, and often end later than scheduled. With TiVo’s recording
options, you can “pad” your recordings to account for variations by using the Overtime
Scheduler. For details see page 34.
Use the CLEAR button: The CLEAR button hides the status bar, TiVo Live Guide,
channel banner, and anything else that is not part of the program. It clears the text entered
using the letter grid. And if you highlight a program’s title in a list, pressing CLEAR
deletes the program.
Page 29

HAPTER
C
3
Live TV
Watching Live TV 22
Status Bar 23
Controlling Live TV 24
Recording a Live Program 25
The TiVo Live Guide 26
Channel Banner 28
Page 30

Chapter 3
Live TV
Watching Live TV
When you’re watching programming as i t’s broadcast, you’re watching live TV. To go to
live TV from the TiVo screens, press the LIVE TV button on your remote control. If
you’ve used Trick Play and are “behind” live TV, press ADVANCE to catch up.
Changing Channels
There are several ways to change channels:
• TiVo Live Guide. Tired of channel surfing? Choose something to watch with the TiVo
Live Guide. To see the guide, press the GUIDE button. Then use the UP and DOWN
arrows to highlight a program in the list. To change the channel, press SELECT. (See
page 26 for more on the TiVo Live Guide.)
• Number pad. To go to a specific channel, use the numbers on your remote control,
then press ENTER/LAST. (If you don’t press ENTER/LAST, the channel changes
automatically after a few seconds.) To clear the number before the channel changes,
press CLEAR.
• ENTER/LAST.To j ump back to the previous channel, press ENTER/LAST.
You can use your recorder’s remote
to control the power, volume, mute,
and TV input settings on your TV. For
information on setting this up, see the
Installation Guide that came with your
recorder.
22
• CHAN UP/DOWN. Of course, you can also still use the CHAN UP/DOWN button on
your remote control. (CHAN UP/DOWN skips channels that are not on the channel list
selected in Guide Options. For more information on channel lists, see page 27.)
Page 31

Status Bar
Status Bar
When you press PLAY, PAUSE, FWD, or BACK, the status bar appears on the lower part
of your screen. In live TV, the status bar represents one hour and the white tick marks are
15 minutes apart. In recorded programs, the bar shows the program’s length. The white
tick marks are 15 or 30 minutes apart, depending on the length of the program.
The green segment represents the part of the program saved by the recorder. The recorder
automatically saves up to 30 minutes of live TV. You can use Trick Play to move
backward and forward through the saved portion of a program.
In live TV, the right edge of the green segment represents the current time. A white
vertical line shows where you are in the recording. If the white line is anywhere back in
the green segment, you are behind live TV. If you are behind live TV, you can press the
ADVANCE button to catch up.
Status Bar for live TV.
Tick marks (15 min. apart)
Status Bar for a twohour recorded program.
This shows that the BACK
button has been pressed twice.
This symbol shows you are
controlling live TV (here, live
TV is paused).
White line indicates
where yo u are now.
This end is where you
catch up with live TV and
the current time.
This recorded program
is two hours long.
The CLEAR button hides the status
bar, the TiVo Live Guide, the
channel banner, and anything else that i s
not part of the program.
3
You can only rewind live TV to the
point where you last changed the
channel. When you change the channel,
you skip ahead to the current time on the
new channel and start saving on that
channel. If you are behind live TV and
watching something you still want to see,
you should not change the channel.
23
Page 32

Chapter 3
Live TV
Co ntrolling Live TV
Part of the fun of watching live TV with TiVo is using its pause, instant replay, and slow
motion features. You can also use these features during recorded programs.
RECORD: Records a program when you’re watching TV or browsing the TiVo
Live Guide.
PLAY: Plays a program at normal speed. Shows the Status Bar for three seconds.
PAUSE: Pauses a live program for up to 30 minutes and a recorded program for as
long as you want. To resume playing, press PAUSE again (or press PLAY).
BACK: Rewinds a program. Press BACK once, twice, or three times to go
backward fast, faster, or fastest. Press it a fourth time to return to normal speed.
FWD: Fast forwards a program. Press FWD once, twice, or three times to go
forward fast, faster, or fastest. Press it a fourth time to return to normal speed.
When you fast for ward to o far, pr ess
INSTANT REPLAY to rewind eight
seconds. Press it again if you really
missed the mark.
24
Frame Forward or Back.Press PAUSE, then press the FWD or BACK button.
The image moves forward or backward one frame at a time.
INSTANT REPLAY: Instantly shows the last eight seconds of the program again.
ADVANCE: (a) In live TV, catches up to the live broadcast. (b) When you are fast
forwarding in a recorded program, press ADVANCE to instantly jump ahead to
the next tick mark. When you are rewinding, press ADVANCE to jump back to
the previous tick mark. (c) In a recorded program, press ADVANCE once to
jump to the end of the recording, press twice to jump to the beginning.
SLOW: Plays the program in slow motion.
Page 33

Recording a Live Program
Recording a Live Program
Starting a Recording
To start recording a program while you are watching it, press the RECORD button. On the
transparent screen that appears, sel ect “Record this showing (Best Quality).” As soon as
the recording starts, the program will appear in Now Playing.
If you select “Season Pass & other options,” a Program Information screen appears with
more actions you can take, including getting a Season Pass and changing Recording
Options (see page 33 for more on Season Passes and page 34 for more on Recording
Options).
Recording the Saved Portion
Up to 30 minutes of programming from the current channel is always being saved, even
when you are not recording a program. When you change channels, the recorder clears
what it has saved and starts saving programming again on the new channel. (So, if the
saved portion is important to you, don’t change the channel.)
To record the saved portion—in addition to the rest of the program—you must choose
“Record this showing (Best Quality).” If you choose to change the Video Recording
Quality, the saved portion of the program won’t be recorded.
Stopping a Recording
Two ways to stop a recording are
• Select the title in Now Playing, then select “Stop Recording,” or
3
You can also record any program—
even one in progress—by
highlighting it in the TiVo Li ve Gui de, t hen
pressing RECORD.
• Press the RECORD button in live TV, then choose “Stop t he current recording.”
25
Page 34

Chapter 3
day and time
Live TV
The TiVo Live Guide
selected channel
The TiVo Live Guide is the TiVo s ervice program guide. It shows you current and
upcoming programs airing up to two weeks into the future. You can also quickly set up
recordings, give any program Thumbs Ratings, and customize the channels and types of
programs shown in the guide. Plus, the TiVo Live Guide is a transparent screen, so you
won’t miss anything in the program you’re watching while you browse.
What’s on Live TV?
To display the guide, go to live TV, then press the GUIDE button. To hide the guide, press
GUIDE again or press CLEAR.
The left side shows a
list of all programs
during this time
period.
BACK buttons to change the time in halfhour increments.
While the highlight is on the right side,
you can press the FWD and BACK buttons
to change the channel selected.
26
The right side shows a
list of what’s coming up
on the channel you have
highlighted.
While the highlight is on the left
side, you can press the FWD and
Left side. On its left side, the guide has a list of channels and the programs that are
currently airing on them. If you want to watch a program in the list, highlight it, then press
SELECT. This changes the channel.
Right side. The right side has a list of what’s coming up on the highlighted channel.
Moving Around the Guide
• Press the UP and DOWN arrows to highlight channels or programs.
• Press CHAN UP/DOWN to quickly move up or down one page at a time.
• Press the LEFT and RIGHT arrows to move between the left and right sides.
Record ing a Progra m
To record a program, highlight it, then press RECORD. On the transparent screen that
appears, select “Record this showing (Best Quality)” or “Season Pass & other options” for
more choices. (See page 25 for more on recording from live TV.)
Page 35

Customizing the TiVo Live Guide
The TiVo Live Guide has options that let you quickly change what programs and channels
the guide shows. To see Guide Options, press DISPLAY (or, if you don’t have a
DISPLAY button on y our remote, press ENTER) while the TiVo Live Guide is visible.
The available options are Channels, Day, Time, Filtering (on/off ), and Choose filter.
Channels. Choosing a list here selects the channels displayed by the TiVo Live Guide.
Also, the CHAN UP/DOWN button skips to channels that are on the chosen list. (For
details on how to customize these channel lists, see page 59.) The three channel lists
available are
• [Channels] You Receive. This is the default list. It displays only the channels you
have chosen in the Channels You Receive channel list.
• Favorites. Use this list to save time when browsing the TiVo Live Guide.
• All. This list displays all of your cable or satellite provider’s channels.
Day and Time. Sets the guide to show what’s on at a particular day and time.
Filtering. Turns filtering on or off. (Choosing a filter is explained below.) When you want
to see all channels and programs in the guide, turn filtering off.
Choose filter. Press SELECT on this option. In the list that appears, use the UP and
DOWN arrows to highlight a category, then press SELECT. Choose a subcategory. In the
TiVo Live Guide, only channels with programs in that subcategory wi ll appear.
To c hange a guide option: Highlight the option, and then press the LEFT or RIGHT
arrows to change the choice displayed. Save your changes by pressing SELECT or
GUIDE. To cancel your changes, press CLEAR.
The TiVo Live Guide
3
When filtering is on, the guide will
only show channels that have a
program in that category within six hours
of the day and time selected. Programs
that don’t fit your categor y are grayed out.
27
Page 36

Chapter 3
Live TV
Pressing the RIGHT arrow swit ches
among channel banner styles, from
small...
...to medium
...to large
Channel Banner
The channel banner appears at the top of the screen when you change channels or press
DISPLAY while watching live TV. (If you don’t have a DISPLAY button on your remote,
press RIGHT arrow to view the channel banner.) This also works when you’re watching a
program in Now Playing. The channel banner will disappear after a few seconds. You can
hide the channel banner before it disappears by pressing CLEAR or the LEFT arrow.
There are three versions of the channel banner: small (with the current time and channel),
medium (adds the title, running time and ratings), and large (adds a program description
and icons). Press RIGHT arrow to switch among them.
Channel banner icons. The large channel banner has three selectable icons. Each icon
controls a different feature. To use an icon, use the UP/DOWN arrows to highlight it , then
press SELECT.
Select to record a program (or stop a current recording). If a recording is in
progress, the icon appears bright.
Select to go to Parental Controls.
If Parental Controls are off, the lock appears unlocked and dim.
If they are on, it appears locked and bright (pictured here).
28
If they are on but temporarily disabled, it appears unlocked and bright.
Select to read TiVo Messages. If the symbol is bright, you have new messages
from the TiVo service.
Page 37

HAPTER
C
4
Now Playing & Pick Programs to Record
Now Playing 30
Season Pass 33
Recording Options 34
Search By Title 36
WishLists 37
TiVo’s Suggestions 44
Record by Time or Channel 45
Season Pass Manager 48
To Do List 49
Page 38

Chapter 4
Pick Programs to Record
Now Playing
To go to Now Playing, press the TiVo button on your remote control twice. All the
programs saved on your recorder are in Now Playing (no more searching through
unlabeled videotapes!). As soon as a recording begins, it appears at the top of the list. You
can watch any title in Now Playing, even one that is still being recorded.
To watch a program in Now Playing, highlight it and press PLAY. If you h ave watched
part of the program already, it resumes from the point you stopped watching.
To see more actions you can take, highlight a title, then press SELECT or RIGHT arrow.
A Program Information screen appears and lets you select from the actions below:
• Play or Resume playing.
• Save until... To change the date when the program may be deleted, highlight the date,
then press the RIGHT or LEFT arrows until the date you want appears. Press SELECT
to return to the Program Information screen.
•Stop Recording
As recordings appear in Now
Playing, a colored icon to the left of
each title reflects how long each program
will be saved and whether or not it was
recorded automatically. See the back
cover for a key to these icons.
30
• Delete now
• Save to VCR. If you have a VCR, you can save a program from Now Playing to a
videotape. (See page 31 for more on using this feature.)
TiVo Central Now Playing
Page 39

Now Playing
Save to VCR
If you have a VCR, you can save a program from Now Playing to a videotape. Transfers
happen to a VCR in real time. For example, if a program is two hours long, it will take two
hours to save it. You will not be able to watch live TV or recordings while saving.
Most of the buttons on your remote that control live TV work as usual during Save to
VCR. Keep in mind that the VCR will record the video exactly as it is played. (This means
you can fast forward through the boring parts!)
If you press a button on your remote that would actually interrupt the transfer
to VCR—for example, if you press GUIDE, the TiVo button, or PAUSE—a
videotape icon appears as a warning.
Preparing to Save to VCR:
1. Set up your VCR. Be sure you have connected your TiVo recorder’s video and audio
to your VCR’s video and audio. (See the guides that came with your TiVo recorder for
details on how to connect your TiVo recorder to a VCR.)
2. Be sure your VCR is set to record input from your TiVo recorder, not some other video
source. (See your VCR’s instructions for how to set the input.)
3. Make sure you have a videotape in the VCR.
Using Save to VCR:
The VCR will also record the channel
banner, status bar, and any icons
that may appear on the sc reen if yo u press
buttons on the remote.
4
1. Go to Now Playing, highlight the show you want to save, then press SELECT.
2. Using the arrow buttons, highlight “Save to VCR,” then press SELECT.
3. Select “Start saving from the beginning.”
TiVo Central Now Playing Save to VCR
31
Page 40

Chapter 4
Pick Programs to Record
4. A title screen appears for ten seconds. When you see it, press your VCR’s record
button.
5. When the program is over, press stop on your VCR.
Stopping or Canceling Save to VCR:
You can stop or interrupt the transfer by going to live TV or to the TiVo menus. You can
also resume saving later. To stop or interrupt Save to VCR:
1. Press a button (for example, the TiVo button) that would interrupt Save to VCR. The
videotape icon appears.
2. While the icon is visible, press the same button again.
3. A confirmation screen appears. On the confirmation s creen, choose either “Stop saving
for now. Resume later” or “Cancel saving to VCR.”
4. Press stop on your VCR, as well.
To resume saving the p rogram (unless you chose to cancel):
1. Go to Now Playing, select the program, and
choose “Save to VCR” on the Program
Information screen.
32
2. Choose “Save from the paused location.” A
countdown screen appears.
3. To ensure that your VCR has time to begin
recording, press record on your VCR before
the countdown gets to “1.”
TiVo Central Now Playing
Page 41

Season Pass
A Season Pass records every episode of a series that airs on a certain channel—even if the
day or time slot changes! It is totally aut omatic and really easy to set up. Just select a
program (from the TiVo Live Guide, Search By Title, View upcoming, etc.) and choose
“Get a Season Pass.” There are two other types of recordings that repeat automatically:
• Manual Repeating Recording: Records on a specific channel at a specific time, just as
you would with a VCR. See page 47 for more information.
• Auto-recording WishLis t s:Records all the programs a WishList finds. See page 42.
These three types of repeating recordings also have the following in common:
• No duplicates within 28 day s. Ifyou watch or delete a particular episode or showing,
it will not be recorded automatically again for 28 days. This prevents Now Playing
from filling up with shows you probably don’t want. If you want to record duplicates,
go to Recording Options, Show Type, and select “All (with duplicates).” You can also
schedule a single duplicate recording for a particular program.
• Parental Controls. If Parental Controls are on when you schedule a repeating
recording, the recorder checks its current program information to see if any upcoming
program violates a Parental Control. If a program does, the recorder requires the
current password to continue. See page 53 for more information.
Season Pass
An exception to the 28-day rule may
occur if the program wasn’t watched
but was deleted from Now Playing to
make room for anothe r recording you
requested—or if the prog ram information
describes it incorrectly.
4
• Keep at Most=5. By default, five episodes of a repeating recording program are kept
in Now Playing. (You can change this setting; for more information, see page 34.)
• Resolving conflicts. The TiVo service resolves scheduling conflicts between
repeating recordings by comparing recording priorities. You can change recording
priorities with the Season Pass Manager. (See page 48 for more details).
33
Page 42

Chapter 4
Recording Options: one-ti me recording
Pick Programs to Record
Recording Options
When you set up a recording, you can set Recording Options. You can also change them
later by selecting the program in the To Do List or the Season Pass Manager, then
choosing “Options.”
Setting Recording O ptions
The Program Information screen that appears
when you select a program includes choices to
“Record this episode” and “Get a Season Pass.”
When one of these recording actions is
highlighted, “Options” appears to its right. To
see the current Recording O ptions, use the arrow
buttons to highlight “Options,” then press
SELECT.
To set your Recording Options:
1. On the Recording Optio ns screen, use the UP/DOWN arrows to highlight an option.
Recording Options
34
Recording Options: repeating recording
2. Press the RIGHT and LEFT arrows to change the setting.
3. When you are done, press SELECT or highlight “Record with these options.”
4. Press SELECT again to schedule the recording with the new options.
To cancel your changes, press the LEFT arrow.
Page 43

Recording Options include:
Record Qu ality. The choices for Video Recording Quality are Basic, Medium, High,
and Best. The default setting is Best, (Best looks great, but keep in mind that it takes
up more space). These settings are described on page 60. (This option is not available
once a recording starts.)
Keep At Most. This option sets the maximum number of episodes to be saved—useful
for keeping only the most recent nightly news or only a few of your kids’ d aily
programs. The default setting is 5. (This option is available only for a repeating
recording.)
Recording Options
Show Type. The choices are “Repeats & first run,” “First run only,” which records
only new episodes, and “All (with duplicates).”
Keep Until. You can change this setting from “Space needed” (the default setting) to
“Until I delete.” (This option is available only for a repeating recording.)
Keep At Least. You can set the minimum amount of time the recorder keeps a
recording. The default setting is “Until Space Needed.”
The Overtime Scheduler™ consists of these two options:
Start Recording. You can choose to start recording up to ten minutes before a
program begins. The default settin g is “On-time.” (This option is not available once
recording starts.)
Stop Recording. You can set a recording to continue—for a few minutes or up to
three hours—after it’s scheduled to end. For example, you can extend a recording o f a
sports event and be sure to catch the whole game—even if it goes into overtime. The
default setting is “On-time.”
Are two of your favorit e progr ams on
at the same time? If you use
Recording Options, you can create two
Season Passes for the same time. Set the
first one to record only First Run episodes;
set the second to record every episode.
Use the Season Pass Manager (described
on page 48) to give the first one higher
priority than the second. Voila! As long as
the program information is corre ct, when
reruns of the first program air, your
recorder will ignore them and record
episodes of the second program.
4
35
Page 44

Chapter 4
If you only know one word in th e
title, use a Title Wishlist to find the
program. See page 40 for more
information.
Pick Programs to Record
Search By Title
Search By Title finds programs, even if you just know the first part of the title.
To find a specific program:
1. If you wish, you can first narrow the search with a category and subcategory.
2. The next screen has a grid with numbers and
letters. On the keypad screen, spell out the title
by using the arrow buttons to move around,
then pressing select on each letter you want.
(Skip “a,” “an,” or “the.”) As you select letters,
an alphabetical list of programs appears to the
right of the keypad. Keep selecting letters until
you see your program.
Replace hyphens ( - ), slashes ( / )
and periods ( . ) with spaces. For
example, use 20 20 to search for the title
“20/20”. Any other marks, such as
apostrophes ( ’ ), asterisks ( * )
ampersands ( & ) and dollar signs ( $ ) are
ignored. For example, you would use
6 OCLOCK NEWS to search for the title
“6 O’Clock News.”
36
(The CLEAR button on the remote erases
everything; the BACK button erases one letter at a time; FWD inserts a space.)
3. When you see your program, press RIGHT arrow until the highlight is in the list. To
move the highlight within the list, press the UP and DOWN arrows. You can also press
CHAN UP/DOWN to quickly move up or down the list.
4. Press SELECT when the title you want is highlighted. The Program Information
screen will appear. Then you can view upcoming episodes, set up a Season Pass, or
record an individual showing.
To browse a category of upcoming programs: Choose a category and subcategory.
Numbers come before letters, so to start from the top, enter a zero.
TiVo Central Pick Programs to Record Search By Title
Page 45

WishLists
A WishList is a powerful search feature that finds upcoming programs. It keeps on
searching automatically for as long as you keep the WishList.
For example, you could create a Category Only WishList for the category “Movies” and
subcategory “Action/Adventure.” You could then use it occasionally to look at a list of all
action/adventure movies airing in the next two weeks. The list would be constantly
updated by your recorder’s daily calls for more program information.
You could search for something more specific by creating an Actor WishList for Sean
Connery, and then include the category “Movies,” and subcategory “Action.” This
WishList would only find action movies with Sean Connery.
With Keyword WishLists, you can look for something very specific. For example, the
Keyword WishList “GIANTS” with category “Football” would find Giants football (but
not baseball) games for you.
Here’s another example: You could make a Keyword WishList to find the 1986 remake of
the science fiction classic The Fly, starring Geena Davis. The keyword entry would look
like this: “GEENA DAVIS” FLY. Not only does this WishList find a specific program—it
finds the specific version! (You could also find this movie by making a Keyword
WishList for the movie’s title and year. In that case, the keyword entry might look like
this: “THE FLY” 1986.)
WishLists
4
After you make a WishList, you can periodically view what it finds by selecting “View all
upcoming WishList programs,” or selecting an individual WishList, then selecting “View
upcoming programs.” Then you can schedule recordings for the programs or episodes you
want. (See page 42 for more details.)
TiVo Central Pick Programs To Record S earch Using WishLists
37
Page 46

Chapter 4
If you set up an auto-recording
WishList for sports, consider using
the Overtime Scheduler (described on
page 34) to make sure you don’t miss the
most exciting part of the game!
Pick Programs to Record
Can a WishList Do More Than Search?
You can set a WishList to auto-record, and it will record every program the WishList
finds. For example, with the Sean Connery Actor WishList, you would automatically
collect Sean Connery action movies in Now Playing.
Some WishLists are better suited to browsing than to auto-recording. For example, you
could create a Category Only WishList for the category “Documentary.” This WishList
would find every upcoming documentary. You could then occasionally browse the
WishList and choose the upcoming documentaries you want to record.
The more specific a WishList is, the better suited it is to auto-recording. For example, an
auto-recording Keyword WishList with the keywords KNICKS and BULLS, and category
“Sports/Basketball”would only record basketball games with both of these teams—a
great way to ensure that you enjoy this season’s rivalry. (For more on auto-recording
WishLists, see page 42.)
38
TiVo Central Pick Programs to Record Search Using WishLists
Page 47

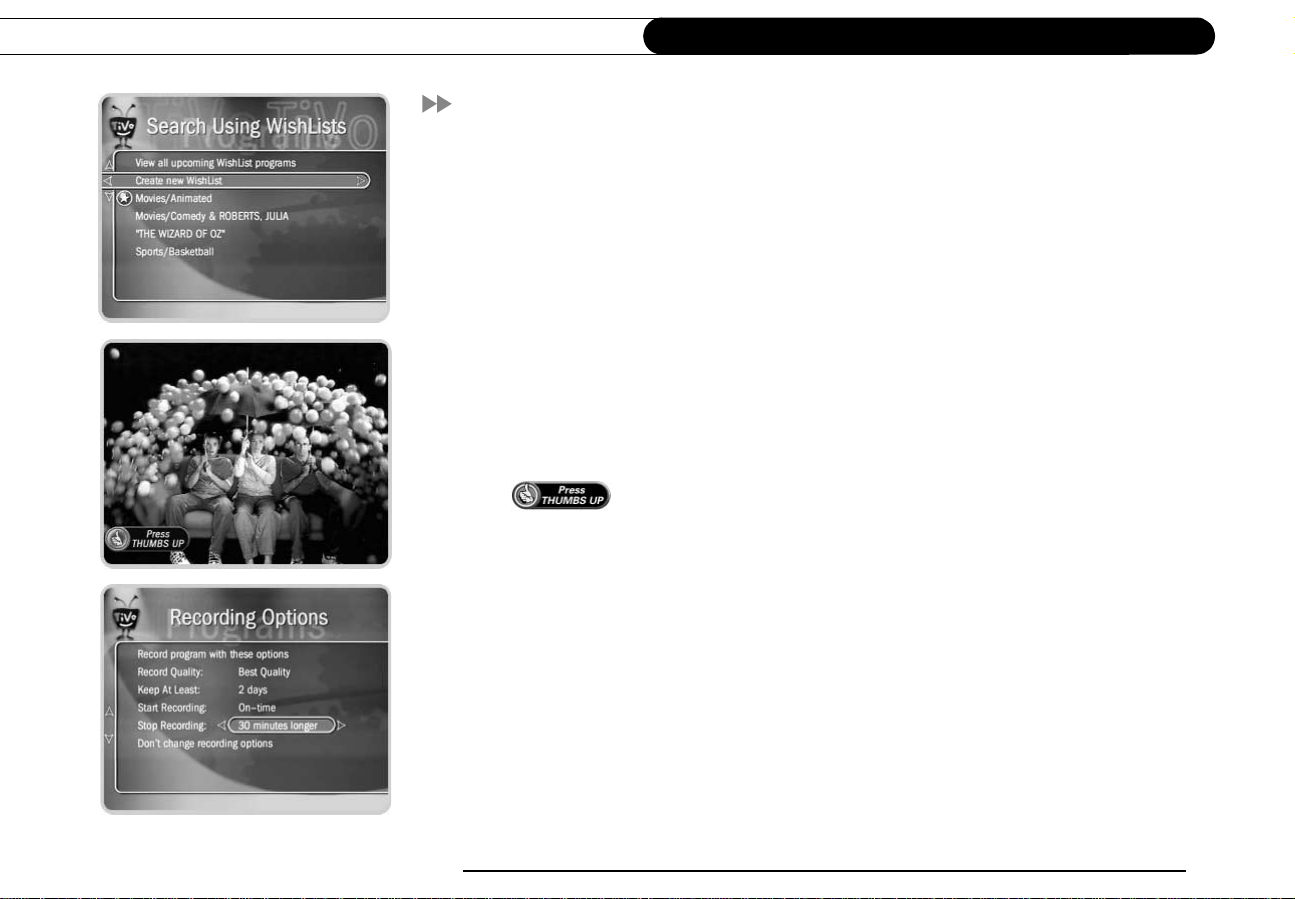
Creating a WishList
From Search Using WishLists, select “Create new WishList.” Next, select the type of
WishList: Actor, Director, Category Only, Keyword, or Title. For most WishLists, you
use the grid of letters on the next screen to spell out what you’re looking for.
As the last step, you’ll then be able to select a category and subcategory to narrow your
search. For example, if you want movies with Harrison Ford, but not documentaries or
talk shows, select “Movies.” To search every category, select “Don’t specify a category.”
Category Only WishList: Use the UP and DOWN buttons to highlight a category, then
press SELECT or RIGHT arrow. A subcategories list appears. Highlight a subcategory,
then press SELECT or RIGHT arrow. To search all subcategories, you can also select
“Don’t specify a subcategory.”
Actor or Director WishLists: Spell the person’s last name first by using the arrow keys to
move the selection box around the grid and pressing SELECT to enter a highlighted letter.
As you select letters, a list of names appears to the right of the keypad.
If you see the person’s name, press the RIGHT
arrow until you move the highlight to a name in
the list. Use the UP or DOWN arrow to highlight
the name you want and press SELECT.
WishLists
4
To search for a name that is not on the list, enter
the name in the format: LAST NAME, FIRST
NAME. You must match the spelling of the name
exactly, and you must use a comma (available in
the grid under the letter W).
TiVo Central Pick Programs To Record S earch Using WishLists
39
Page 48

Chapter 4
Pick Programs to Record
Keyword or Title WishLists
You can create a Keyword or Title WishList with one keyword or with several. With
Keyword WishLists,the TiVo servicechecks for your keywords in the program or episode
title, description, actor, director, year, and category information. Title WishLists work
very similarly, but the TiVo service only searches program and episode titl es.
Spell your keyword(s) by using the arrow buttons to move around, then pressing select to
enter highlighted letters on the grid. You can enter as many characters as will fit on the
screen. When you have finished, use the RIGHT arrow to highlight “Done creating
keywords,” then press SELECT or the RIGHT arrow.
Using * in WishList Searches
To search for similar words in Keyword and Title WishLists, use the asterisk (*) as a
special symbol that replaces the endings of words. For example, the keyword AIRP*
would find shows containing “airport,” “airplane,” “airplanes,” as well as the movie
“Airplane!” To enter an asterisk, press the SLOW ( ) button as you are spelling out
your keyword or title.
The asterisk can be helpful when you’re looking for a range of similar words, as in the
example above, or if you’re just not sure how something is spelled. Pop quiz: is it
“irresistable” or “irresistible?” Use the keyword IRRESIST* and don’t worry about it!
Two things to note about using the asterisk:
40
• It can only be used at the end of a keyword; it cannot be u sed to omit letters at the
beginning or in the middle of a word. (For example, AIR*NE or *PLANE would not
work.)
TiVo Central Pick Programs to Record Search Using WishLists
Page 49

• When using this symbol, be as specific as possible. For example, do not use keywords
like TH*. There will not be enough room to show all the results of a keyword that is
too general.
Tips for entering keywords
• To specify an exact phrase in a Keyword or Title WishList, surround a set of words
with quotation marks (to enter quotation marks, press PAUSE ( ). For example,
the key word PAUL SIMON might also turn up a documentary about Simon Bolivar
with a director whose name is Paul. Use “PAUL SIMON” to be certain you find
programs that only feature Paul Simon.
• If you enter more than one keyword in Keyword or Title WishLists, they only find
programs that match all of your keywords (for example, “GEENA DAVIS” FLY).
• If you want to include an exact phrase and additional keywords, there s hould be a
space between the final quotation mark and the beginning of t he next word. You can
place a space character by selecting SP on the grid of letters.
• Replace hyphens ( - ), slashes ( / ) and periods ( . ) with spaces. For example, you
would use the keyword phrase 20 20 to search for the title “20/20.” For an Actor
WishList for Catherine Zeta-Jones, use ZETA JONES, CATHERINE. You can place a
space character by selecting SP on the grid of letters or by pressing FW D ( ).
WishLists
4
• Any other marks, such as apostrophes ( ’ ) and ampersands ( & ), are ignored. For
example, you would use the keyword phrase 6OCLOCKNEWSto search for the title
“6 O’Clock News.” (Note that commas ( , ) are also ignored, except in actor and
director WishLists, where they are essential.)
TiVo Central Pick Programs To Record S earch Using WishLists
41
Page 50

Chapter 4
As you browse the upcoming
program titles found by WishLists,
remember that the CHAN UP/DOWN
button pages quickly through lists.
Pick Programs to Record
• For dollar signs ( $ ) substitute the letter S. For example, to find “$100,000 Pyramid,”
use S100000. (In Search by Title, skip the dollar signs to find these titles.)
Browsing, Recording, and Editing WishLists
To browse all WishLists: Select “View all upcoming WishList programs.” This selection
displays a list of up to 10 upcoming programs from each of your WishLists—and up to
200 programs total. The list is divided to display programs f ound by each WishList. To
record a program, select its title; you will see the Program Information screen, where you
can select “Record this episode” and other actions.
To browse an individual WishList: Highlight the WishList and press SELECT. Select
“View upcoming programs,” which searches through current program information and
creates a list of up to 200 unique upcoming programs that match this WishList. This list
displays the first airing of an episode or program.
To see all the showings of upcoming episodes (up to two weeks into the future), select the
title of the program in the “Upcoming programs” list generated by your WishList. Then
select “View upcoming episodes” on the Program Information screen that appears. A
comprehensive list appears, including several episodes with showings on different
channels and d ifferent time slots. The Program Information screen also includes an option
for recording a particular program.
42
Auto-recording WishLists. When you create a WishList or select it, you can choose the
action, “Auto-record WishList programs.” This means every program the WishList finds
will be automatically recorded. (See page 33 for more on repeating recordings.)
TiVo Central Pick Programs to Record Search Using WishLists
Page 51

Auto-recording WishLists themselves and their upcoming recordings are marked with a
star ( ). If you want to be sure that all the matches your auto-recording WishList finds
are recorded, give the auto-recording WishList a high priority in the Season Pass
Manager. (See page 48 for details.)
To edit a WishList. Select the WishList, then select Edit WishList. Y ou can change your
WishList—for example, to correct a misspelling or to add a category if you did not add
one when you created the WishList.
WishLists
4
TiVo Central Pick Programs To Record TiVo’s Suggestions
43
Page 52

Chapter 4
If other members of your household
are pressing THUMBS UP on shows
you don’t care for, and vice versa, you may
find that TiVo’s Suggestions is m a king
some suggestions that you like, and some
that are more appropriate for other
members of your household.
Pick Programs to Record
TiVo’s Suggestions
The TiVo service tries to make sure there is always something interesting on for you to
watch. When you aren’t using it, your recorder is sifting through upcoming programs to
find things you might like. How does it know what you will like? It tries to predict your
preferences based on Thumbs Ratings you have given other programs, and on t he single
THUMBS UP given automatically to programs you choose to record.
The more you record and use the THUMBS buttons, the better the Suggestions become.
You can use the THUMBS buttons while you are browsing TiVo’s Suggestions or while:
• Watching live TV or browsing through the TiVo Live Guide
• Viewing a Program Information screen (for example, to schedule a recording)
• Looking through Showcases and TiVolution Magazine
You can check TiVo’s Suggestions occasionally to see what TiVo has found for you. The
list of programs is ranked, so shows you are more likely to enjoy are near the top. If you
want to record a program, select it and the Program Information screen appears.
When there is empty space in Now Playing, the TiVo service may record one of TiVo’s
suggestions for you. Suggestions are marked with a TiVo icon ( ). The recorder
never deletes your programs in Now Playing in order to make room for a Suggestion.
Instead, Suggestions are deleted to make room for recordings you schedule.
44
Your personal TV preferences are just that: personal. All that information is stored in the
recorder, in your living room. See TiVo’s Privacy Policy at www.tivo.com/privacy,orin
Chapter 7 for more information. If you would like to turn off automatic recording of
Suggestions, you have that option. (See page 61 for details.)
TiVo Central Pick Programs to Record Record By Time or Channel Browse By Time
Page 53

Record by Time or Channel
Record by Time or Channel
Three options: Browse by Time, Browse by Channel, and Manually Record Time/
Channel, are available under Record by Time/Channel.
Browse by Time
Browse by Time lets you browse all programs on a particular day and time. With Browse
by Time, you can filter the list to see only programs in a particular category. For example,
you can browse all the movies airing on Saturday night.
To browse by time:
1. Use the arrow buttons to highlight a category (for example, “Movies”) to narrow the
list of programs, then press SELECT.
2. Press the UP and DOWN arrows to select the date you want to see, then press RIGHT
arrow to move the highlight to the time column.
3. Press the UP and DOWN arrows to select a time.
4. Press SELECT to bring up the list of
programs without leaving the time selector, or
press RIGHT arrow to bring up the list of
programs and move to the list at the same time.
5. When you find a program you want to
record, highlight it and press SELECT to bring
up the Program Information screen. Then you
can view upcoming episodes, s et up a Season
Pass, or record an individual showing.
TiVo Central Pick Programs to Record Record By Time or Channel Browse By Channel
4
45
Page 54

Chapter 4
Pick Programs to Record
Browse by Channel
Browse by Channel lets you browse through programs on a particular channel. You can
start with all channels or just your favorites.
To browse by channel:
1. Highlight and select either “All Channels,” which includes all the channels you
receive, or “Favorite Channels,” which includes just the channels you have selected as
your favorites. (For information on customizing the list of Favorite Channels, see page
59.)
2. Press the UP and DOWN arrows to select the date you want to browse, then press
RIGHT arrow to move the highlight to the channel column.
3. Press the UP and DOWN arrows to select a channel. (You can also use the numbers on
the remote to type in a channel, then press ENTER/JUMP.)
4. Press SELECT to bring up the list of programs without leaving the channel selector, o r
press RIGHT arrow to bring up the list of programs and move t o the list at the same
time.
5. When you find a program you want to record, highlight it and press SELECT to bring
up the Program Information screen. Then you can view upcoming episodes, set up a
Season Pass, or record an individual s howing.
46
TiVo Central Pick Programs to Record Record By Time or Channel Manually Record Time/Channel
Page 55

Record by Time or Channel
Manually Record Tim e / Channel
Manually Record Time/Channel lets you schedule a recording on a specific channel at a
specific time, (just as you would with a VCR). You can also create a manual repeating
recording here by setting the recording to repeat every week, every day, or every weekday.
To create a manual recording:
1. Choose the recording type, using the UP and DOWN arrows to select “One Time,” or
“Repeating.” Then press the RIGHT arrow.
2. Choose the day(s) for the recording, using the UP and DOWN arrows to change the
current selection. If you chose “Repeating,” you can choose to repeat the recording on
a specified day of the week (for example., “Every Tuesday”) or several times a week
(for example, “Every M-F”or “Every Day”). Then press the RIGHT arrow.
3. Choose a channel using the UP and DOWN arrows (or by entering a number with the
remote, then pressing ENTER). Press RIGHT arrow.
4. Set the hour, minute, and am/pm for the start and stop time, using the UP/DOWN
arrows to change the current selection. Press RIGHT arrow to move to the next step,
LEFT arrow to move back.
5. Schedule the recording by pressing SELECT. A confirmation screen appears. (The
recording will be named with a “best guess” based on program guide listings for that
time and channel. This will help you find your program later in the To Do List or in
Now Playing.) If you’re ready to schedule the recording, press SELECT on “Record
this Showing.”
4
Here’s a tip: Use a Manual
Repeating Recording to record
things like the opening monologue of a
late night talk show.
TiVo Central Pick Programs to Record Season Pass Manager
47
Page 56

Chapter 4
Pick Programs to Record
Season Pass Manager
Say you have a S eason Pass to ER and an auto-recording WishList for movies with Julia
Roberts. What if a Julia Roberts movie happens to air at the same time as ER? The
recorder will check the priorities in the Season Pass Manager to decide which program to
record. If the Julia Roberts WishList has a higher priority than the ER Season Pass, the
Julia Roberts movie will be recorded, and ER will not.
If you don’t change priorities in the Season Pass Manager, repeating recordings are
prioritized by the order they were set up: the first has highest priority, and so on.
To change the priority order:
1. Use the UP/DOWN arrows to highlight one of your repeating recordings.
2. Press RIGHT arrow to highlight the arrows to the right of the title.
3. Use the UP/DOWN arrows to move the selected title up or down in the list.
Priorities and Resolving Conflicts
If a conflict occurs when you’re setting up a new repeating recording, you’ll be shown
which programs are involved. You’ll also be given options to resolve the conflict:
48
• Record only those programs that do not conflict with others previously scheduled to
record. This gives the repeating recording the lowest priority.
• Record all programs requested. This gives the repeating recording the highest priority.
TiVo Central Pick Programs to Record To Do List
Page 57

To Do List
The To Do List shows all your scheduled recordings and lets you cancel or edit them.
Individual recordings are marked with a single check mark ( ). Season Passes and
manual repeating recordings have a double check mark ( ), and WishLists have a
white star ( ).
To cancel a program or a repeating recording: Highlight the title and press CLEAR.
View Recording History
This is an advanced feature in the To Do List for those who really want all the details.
Selecting this option takes you to a list of three types of programs:
Deleted: To find programs that were deleted, press the UP arrow or CHAN UP. (You find
them above where the highlight bar starts off.) Selecting a title will take you to a screen
that tells you how and when the program was deleted.
Were not recorded: To find programs that were not recorded, press the UP arrow or
CHAN UP. (You find them above where the highlight bar starts off.) Selecting a title will
take you to a screen that tells why it was not recorded.
Will not be recorded:To find programs that will not be recorded, press DOWN arrow or
CHAN DOWN. (You find them below where the highlight bar starts off.) Selecting a title
will take you to a screen that tells you why the program will not be recorded. You can then
select “More recording options” on this screen, which will display the Program
Information screen. You could choose “View upcoming episodes” to find an episode that
doesn’t conflict with anything else, or change Recording Options, which m ay allow the
program to be recorded.
To Do List
4
49
Page 58

Chapter 4
Pick Programs to Record
50
Page 59

HAPTER
C
5
Messages and Setup
TiVo Messages 52
My Preferences 53
Recorder & Phone Setup 62
System Information 66
Troubleshooting 67
System Reset 68
Standby 69
Page 60

Chapter 5
Messages and Setup
TiVo Messages
Select TiVo messages to read any messages from the TiVo service or internal alerts from
your recorder. When you receive a new message, TiVo C entral will show the option,
“NEW TiVo Messages & Setup.”
To read the messages:
1. Go to TiVo Central, then select NEW TiVo Messages & Setup.
2. Select Read NEW TiVo Messages. A list of all of your messages appears. Messages
you have already read are checkmarked.
3. Use the UP/DOWN arrows to highlight a message, then press SELECT to read it.
CHAN UP/DOWN lets you page through a message if it doesn’t fit on the screen.
52
TiVo Central Messages & Se tup TiVo Messages
Page 61

My Preferences
With the selections in My Preferences, you can make the recorder work more to your
liking: you can set Parental Controls and your default Record Quality, customize channel
lists, turn on Save Disk Space, and set a number of other options.
Parental Controls
Parental Controls allow you to set limits on movie and television ratings and to lock
specific channels so that a p assword is required to view them. If you try to watch a
program in Now Playing that violates a Parental Control, you will also be asked for the
password. In addition, when Parental Controls are on, you must enter a password to delete
a program that violates a Parental Control.
The padlock icon shows the current state of Parental Controls:
Off. No password or controls set. Padlock appears unlocked and dark.
My Preferences
On. Password and controls set. Padlock appears locked and bright.
Temporarily disabled. Controls set but password was entered to temporarily
disable. Padlock appears unlocked and bright.
While Parental Controls are on, you can watch a locked program or channel by pressing
SELECT, then entering the Parental C ontrols password. This temporarily disables
Parental Controls.
(The large version of the channel banner has a shortcut to Parental Controls; see page 28
for details.)
TiVo Central Messages & Setup My Preferences Parental Controls
5
53
Page 62

Chapter 5
Messages and Setup
To turn on Parental Controls and define a password ( )
1. Select “Turn on Parental Controls.”
2. Use the number buttons on the remote control to enter a four-digit password.
3. Enter the same password again for confirmation.
To temporarily disable Parental Controls ( )
• Enter the password to watch a program or channel—Parental Controls become
temporarily disabled, or
• Select “Temporarily Disable Parental Controls” on the Parental Controls screen, then
enter your password.
When Parental Controls are temporarily disabled, any program or channel can be viewed,
but the correct password is still required to change Parental Controls settings.
To re-enable Parental Controls ( )
• On the Parental Controls screen, select “Re-enable Parental Controls,” or
• Put the recorder in Standby, then take it out of Standby. To do this, press the POWER
or STANDBY button on the front of your recorder; or select Messages & Setup, then
Standby, and then press the TiVo or LIVE TV buttons.
54
Auto Re-lock Option
When Parental Controls are on but temporarily disabled, they re-lock automatically after
four hours if you don’t use your remote. Parental Controls won’t re-lock in the middle of
a show. By default, the Auto Re-lock option is on.
TiVo Central Messages & Setup My Preferences Parental Controls
Page 63

To turn off Auto Re-lock:
• To turn off Auto Re-lock, go to Messages & Setup, then My Preferences, then Parental
Controls. Press the DOWN arrow to highlight “Auto Re-lock,” then press SELECT.
Enter your password, then highlight and select “Auto Re-lock off.”
My Preferences
Rating Settings for TV and Movies
Movies that are originally meant for release to theaters have a different rating system from
programs that are made for TV. You can use Parental Controls to set limits for both rating
systems (see page 57). There is al so a rating system for TV content that allows you to set
limits for specific types of content that may be objectionable—such as sexual content or
violence.
To set Rating Limits for TV and Movies:
1. From Parental Controls, select “Rating Settings,” then enter the password and press
SELECT.
2. Select the kind of limit you want to change: TV or Movies.
3. The next screen contains a box list ing all potential ratings. Rat ings shaded in green are
not locked; those in red are locked. Use the UP and DOWN arrows to move the red
shading and adjust which ratings are locked. Your changes are saved automatically.
When you are done, press the RIGHT or LEFT arrow to return to Parental Controls.
()
5
TiVo Central Messages & Setup My Preferences Parental Controls
55
Page 64

Chapter 5
Messages and Setup
To set Rating L i mi ts for Spec i f i c TV Co ntent:
1. From Parental Controls, select “Rating Settings,” then enter the password and press
SELECT.
2. SelectBlockbyTVContent.
3. A list of categories appears o n the next screen. Select a category (for example,
V-Violence).
4. A box containing all the possible ratings appears. Ratings in green are not locked;
ratings in red are locked. (Ratings in gray do not apply to the category. For example,
a TV-Y program would not have V-Violence content so there is nothing to block.)
Use the UP and DOWN arrows to adjust which ratings are locked or unlocked. The
display to the right of the box will change to tell you exactly what ratings level you are
allowing. Your changes are saved automatically. To return to the Parental Controls
screen, press SELECT or RIGHT arrow.
56
gray = does not apply
to the category
green = not locked
red = locked
Page 65

Motion Picture Association of America ratings for movies
G: General Audiences. Most parents would findthismaterialsuitable
for all ages.
PG: Parental GuidanceSuggested. Parents may find portions of this
material unsuitable for younger children.
PG-13: Parents Strongly Cautioned. This material contains portions
many parents would find unsuitable for children under 13 years of age.
R: Restricted.Thismaterialis
adults and therefore may be unsuitable for children under 17.
NC-17: Adult Content. This material contains intense, disturbing, or
graphically portrayed themes or content that are not suitable for
viewing by children under 17.
AO:ExplicitSexualContent. This material contains explicit sexual
content and is intended to be viewed by adults ONLY.
Ratings for television movi e s and programs (including c ontent ratings) :
TV-Y. All children. This program is designedtobeappropriate for all
children. Whether animated or live action, the themes and elements in
this program are specifically designed for a very young audience,
including children from ages 2-6. This program is not expected to
frighten younger children.
TV-Y7. Directed to older children. This program is designed for
children age 7 and above. Themes and elements in this program may
include mild fantasy or comedic violence, or may frighten children
under the age of 7. Programs where fantasy violence that may be more
intense or more combative than other programs in the TV-Y7 category
are designated TV-Y7-FV.
TV-G. Generalaudience.Most parents would find this program
appropriate for all ages. Although this rating does not signify a
program designed specifically for children, most parents may let
younger children watch this program unattended. It contains little or
no violence, sexual dialogue, or situations; and no strong language.
TV-PG. Parental guidance suggested. This program contains
material that parents may find unsuitable for younger children. Many
parents may want to watch it with their younger children. The theme
itself may call for parental guidance and/or the program contains one
or more of the following: moderate violence (V), some sexual
situations (S), infrequent coarse language(L), or some suggestive
dialogue (D).
TV-14. Parents strongly cautioned.This program contains some
material thatparentswould find unsuitable for childrenunder14years
of age. Parents are strongly urged to exercise greater care in
monitoring this program and are cautioned against letting children
under the age of 14 watch unattended. This program contains one or
more of the following: intense violence (V), intense sexual situations
(S), strong coarse language (L), or intensely suggestive dialogue (D).
TV-MA. Mature audiences only. This program is specifically
designed to be viewed by adults and therefore may be unsuitable for
children under 17. This program contains one or more of the
following: graphic violence (V), explicit sexual activity (S), or crude,
indecent language (L).
My Preferences
specifically designed to be viewed by
5
TiVo Central Messages & Setup My Preferences Parental Controls
57
Page 66

Chapter 5
When you turn Parental Controls off,
you don’t need to know a password
to turn them back on. You may prefer to
temporarily disable Parental Controls, so
that another person in your household
does not choose a new password.
Messages and Setup
Channel Lock for Live TV( )
You can lock individual channels so that a password is required to view any program on
those channels. To lock or unlock channels:
1. From the Parental Controls screen, SELECT “Channel Lock,” and then enter the
password.
2. A channel list appears with a padlock icon to the left of any locked channels. Highlight
a channel and press SELECT to add or remove a padlock icon. Use CHAN UP/DOWN
to move through the list quickly. You can highlight a specific channel by entering its
channel number with the number buttons on the remote.
3. When you are done, press the RIGHT or LEFT arrow to return to Parental Controls.
Your changes are saved automatically.
To c hange the Password ( )
To change the password for Parental Controls, Parental Controls must be on.
1. Select “Change Password” on the Parental Controls screen.
2. Enter a new password.
3. Re-enter the new password.
To turn off Parental Controls ( )
1. Select “Turn off Parental Controls.”
2. Enter the password and press SELECT.
When Parental Controls are turned off, the password is deleted and anyone can view any
programs or watch any channels.
58
TiVo Central Messages & Setup My Preferences Customize Channels
Page 67

Customize Channels
What are c h an nel l i st s f or? Featuressuch as Search by Title and Search Using WishLists
only look at programs available o n channels selected in the Channels You Receive list.
Your recorder also uses lists of channels to decide which channels the TiVo Live Guide
displays and which channels to search in Browse By Channel.
There are three selections available in Customize Channels:
Cable Lineup.Select this if you have changed your subscription package or your
channel lineup looks wrong in “Channels you Receive.” On the next screen you’ll be
able to choose among available service packages based on your zip code.
Channels You Receive. The Channels You Receive list starts with all the channels
included in your service package. It can be customized to include only channels you
actually subscribe to and to reflect your viewing preferences (for example: if you
never watch a channel and don’t plan to set up any recordings on it, or let the TiVo
service search for programs on it, you can de-select it here).
Favorites. The Favorites list is for channels you watch frequently. Include only a few
channels in this list, so that you can quickly look at what’s coming up on them.
To set up a custom channel list:
1. Select the Channels You Receive or Favorite Channels list. A check mark appears to
the left of channels that are part of the selected list.
2. To remove or add a channel, highlight it and press SELECT. (You can speed through
the list with the CHAN UP/DOWN. To go directly to a specific channel, press the
number buttons, then press ENTER/JUMP.)
My Preferences
5
In the event that there is a change
to the subs cription package you
purchased, a TiVo message will let you
know what the change is. You must then
go to Customize Channels and make the
Channels You Receive list reflect the
change.
TiVo Central Messages & Setup My Preferences
59
Page 68

Chapter 5
Messages and Setup
3. Your changes are saved automatical ly. Press LEFT or RIGHT arrow to return to the
Customize Channels screen.
Channel Banner
Normally, when you change channels, a Channel Banner is displayed for a few seconds. If
you want the channel banner to disappear quickly, select “Cl ear banner quickly.”
Audio Options
Sound Effects Volume. Allows you to change the volume or turn off your recorder’s
sound effects (the tones played when you press buttons on the remote control). The default
setting is Medium.
Television Audio. This option lets you select the recorder’s default audio output option.
You can choose to have the default audio in stereo or mono, or have a secondary audio
program (SAP) recorded when one is available.
Secondary audio programs are generally audio broadcasts in a language other than
English. If you choose to record SAP and there is a secondary audio program, it will be
recorded. The SAP may be in Spanish, French, Japanese or some other language.
Video Recording Quality
You can increase the time available for video recording on your recorder much the same
as you can choose “standard play” (SP) or “extended play” (EP) when using a VCR to
tape a program. The recorder, however, offers you four levels of Video Recording Quality
instead of just two. The choice you make here will be used unless you change the Video
Recording Quality (on the Recording Options screen) when you schedule the recording
(for details, see page 34). Two different Video Recording Qualities cannot be used on one
recording.
60
TiVo Central Messages & Setup My Preferences
Page 69

The recording quality choices available are Best, High, Medium, and Basic. The default is
Best. Basic quality takes up about one-third the space of Best quality, so it gives you about
three times the amount of space for programs. You may wish to experiment with different
levels and then reset your default.
One hour of Best Quality equals about: Suggested use:
3 hours of Basic Quality News
2 hours of Medium Quality Daytime Talk Shows, Animation
1.5 hours of High Quality Dramas, Films
1 hour of Best Quality Sports, Action Movies
The recorder automatically uses Best Quality when displaying live TV. However, when it
records a program, the recorder uses the Video Recording Quality you specified for that
program. If that quality is not Best, you may notice the difference when recording starts.
My Preferences
TiVo’s Suggestions
You can turn off automatic recording of TiVo’s Suggestions. When automatic recording is
on (the default), TiVo’s Suggestions may be recorded onto free space. Programs you have
recorded or scheduled to record will never be d eleted to make room for Suggestions. Also,
if space is needed to save programs you have scheduled to record, Suggestions are the first
things to be deleted. (For more information on TiVo’s Suggestions, see page 44.)
RF Video
If you used an RF coaxial cable as the input to your recorder, you may see static on some
channels. You can use options on the RF Video screen to smooth the video, which will
decrease the static and cause the picture to lose some sharpness. This option affects all the
channels that are carried to your recorder on an RF cable.
TiVo Central Messages & Setup Recorder & Phone Setup
5
61
Page 70

Chapter 5
If you change video sources, for
example, by changing from cable to
satellite service, you should repeat
Guided Setup (Go to Messages & Setup,
then System Reset, then Repeat Guided
Setup).
Your recorder should NOT be used
with a digital PBX phone system.
Doing so may permanently damage your
recorder’s modem and will void your
warranty. See your
more information.
Installation Guide
for
Messages and Setup
Recorder & Phone Setup
Cable/Satellite Box
Select Cable/Satellite Box if you want to change the connection of your cable or satellite
box to the recorder—for example, if you decide to replace a Composite cable connection
with an S-Video connection. You should also select this if you want to change the way
your cable box is set up to interact with the recorder. For example, if you buy a new cable
box, you can find the correct IR codes for changing channels on your new cable box with
your TiVo remote here.
Connection to Recorder. Select this if you change the cables you use to connect your
cable box or satellite r eceiver to the recorder. The next screen you see depends on whether
you have one or two video sources. For details on getting through these Connection to
Recorder screens, see page 6.
Cable Box Setup, Satellite Box Setup, or Control Cable/Sat. Setup. (The name of t his
selection changes depending on the video source to your recorder.) Use this selection if
you change the control cable (IR or Serial) you use to change channels on your cable box
or satellite receive, or if your cable box or satellite receiver is replaced by another make or
model.
Phone Connect i on
The recorder makes a brief daily phone call to get updates to the TiVo service; program
information for the TiVo Live Guide, Search By Title, and WishLists; and updates to
TiVolution Magazine and Showcases. The recorder usually uses the phone for less than
ten minutes for a daily call. When the TiVo service is being updated, i t may take longer,
but this happens rarely (only a few times a year).
62
TiVo Central Messages & Setup Recorder & P hone Setup
Page 71

Recorder & Phone Setup
On the Phone Connection screen you can see details, including the time of the last
successful call and last call attempt, and the status of the las t call. You also have the
following options:
Make Test Call. When you select this, a tes t call to the TiVo service will start
automatically. You may wish to use this option for troubleshooting or other unusual
circumstances. Test calls usually only take a couple of minutes. When the call has
finished, press SELECT to continue.
Make Daily Call Now. Under normal use, you do not need to make the daily call manually.
However, for troubleshooting or other unusual circumstances, you may wish to use this
option. After you start the call, the status indicator reads “Starting Up” and will change as
it goes through several stages. You can watch live TV, set up recordings, and search for
programs while the call is in progress.
Change Dialing Options. You can change the following settings (if you make a mistake
while entering a change, use the BACK button to backspace):
Set Dial-In Number. Usethisto change the number the recorder uses to make test calls
and daily calls. To change it:
1. Select “Set Dial-In Number.” The Area Code screen appears.
5
2. Use the number keypad on the remote to set the area code, then press SELECT. If
you change the area code, or if the recorder has not made a daily call in the last
twenty-four hours, the Update Numbers screen appears and the recorder calls the
TiVo service to retrieve a list of local dial-in numbers. After the phone call, press
SELECT. The Dial-In Number screen appears.
3. Use the UP/DOWN arrow to choose one of the listed phone numbers. The recorder
will use this number for daily calls to the TiVo service. Then press SELECT.
TiVo Central Messages & Setup Recorder & Ph one Setup Phone Connection
63
Page 72

Chapter 5
Messages and Setup
If your area code has no access numbers, you can press the LEFT arrow to return to
the Area Code screen and try a nearby area code. Toll charges may apply and are
your responsibility.
4. The Dialing Format screen appears after you have chosen a dial-in number. You
should use this screen to tell the recorder which dialing format to use. For example:
should the dial-in number be preceded by your area code and should a “1” precede
the area code? In some areas, even local numbers must be dialed using the area
code. Press SELECT to return to the Phone Dialing Options screen.
To test your new dial-in number, select “Test Phone Connection Now.” The Test
Phone Connection screen appears and a test phone call begins. When the call
completes, you should see the message “Test Succeeded!” Press SELECT to return
to Phone Dialing Options.
Set Dial Prefix. Use this option if the recorder must use a prefix to reach an outside
line (for example, the recorder may need to dial “9” b efore it dials out). Use the
number keys on the remote control to enter the prefix. Press the PAUSE button after
you have entered the prefix. This will insert a comma, which will create a two second
pause after the prefix is dialed.
Set Call Waiting Prefix.If you have call waiting, you may choose to disable it while
the recorder is making a call, so that the recorder’s phone call is not interrupted. If you
do not disable it, the recorder may drop the call and allow the second call to ring
through, depending on your phone system. The recorder will then try its call again
later. The most common code that phone companies use to disable call waiting is *70
(check with your phone company to find out how to disable call waiting in your area).
Press the PAUSE button after you have entered the prefix. This will insert a comma,
which will create a two second pause after the prefix is dialed.
64
TiVo Central Messages & Setup Recorder & Phone Setup Phone Connection
Page 73

Recorder & Phone Setup
Set Tone/Pulse. If your phone system uses pulse dialing, rather than tone dialing, you
can change the setting to pulse here. (Today, most phone systems are tone.)
Set “Phone Avail.” Detection. When Set ‘Phone Avail.’ Detection is on, the recorder
can determine whether the phone line is in use by detecting voltage on the line. This
allows it to avoid disrupting a call in progress (such as another m odem call).
This setting is off by default. With ‘Phone Avail.’ Detection turned off, if you are on
the phone when the recorder tries to call, you may hear a click on the line. If you have
another modem call in progress (on your computer or other device), that call may be
disrupted if the recorder attempts to call the TiVo service. If you have a standard dialtone, and ‘Phone Avail.’ Detection is off, turn on Dial Tone Detection (below).
If you are experiencing “Failed, Line unavailable” errors, or if the recorder is not
making daily calls, you may have a low-voltage phone system that the recorder cannot
detect. In this case, it’s best to have ‘Phone Avail.’ Detection off.
Set Dial Tone Detection. This setting is on by default. If you leave it on, the recorder
will check for a dial tone before it starts dialing. H owever, if you have a non-standard
dial tone, or a stuttering dial tone (as some voice messaging systems have), the
recorder will be unable to detect the dial tone and will not make its daily call.
Restore previous options.The recorder must make a successful test phone call before
it will accept changes to Phone Dialing Options. If you want to restore your previous
dialing options and continue p ast this screen without making a test phone call, s elect
“Restore previous options.”
Phone Troubleshooting
With Dial Tone Detection and
‘Phone Avail.’ Detection bo th turned
off, if you happen to be talking on the
phone when the recorder tries to call you
will hear the modem dial and try to
communicate with the the TiVo service
5
This screen provides tips that may help you troubleshoot problems with your phone calls.
TiVo Central Messages & Setup Recorder & Ph one Setup Phone Connection
65
Page 74

Chapter 5
Messages and Setup
System Information
The System Information screen provides general information about your recorder,
including its Service Number, manufacturer, model number, software version used,
storage capacity, and information about recent service calls. You’ll need some of this
information if you call Customer Support. You can use the CHAN UP/DOWN button to
see the rest of the information on the screen.
66
TiVo Central Messages & Setup System Information
Page 75

Troubleshooting
Parenta l Controls Trouble shooting
This screen provides a brief description of how to use Parental Controls. Us e CHAN UP/
DOWN to see all of the text on the screen. (For details on Parental Controls, see page 53.)
Phone Troubleshooting
This screen provides tips to help you troubleshoot problems with your phone connection.
Use CHAN UP/DOWN to see all of the text on the screen.
Channel Troubleshooting
This screen provides tips to help you troubleshoot channel changing problems if you are
using a satellite or cable box.
• The tips at the top of the screen are for set-top boxes that attach to the recorder through
a serial connection.
• You may have to use CHAN UP/DOWN to see th e second set of tips, which deal with
cable box or satellite receiver using an IR (infrared) connector to the recorder. You can
also find tips in Chapter 6 and additional troubleshooting at www.tivo.com/support.
Troubleshooting
5
TiVo Central Messages & Setup Troubleshooting
67
Page 76

Chapter 5
Messages and Setup
System Reset
You may need to restart the recorder as a routine troubleshooting step. These other options
erase information and restore original factory settings. Selecting a reset option brings you
to a warning screen. To continue press THUMBS DOWN three times, then press ENTER.
Restart the Recorder.Shuts down the recorder and starts it up again. It will not affect
recorded programs, Season Passes, W ishLists, or TiVo’s Suggestions.
Repeat Guided Setup. You will have to repeat Guided Setup if you move or change your
cable or satellite provider. Repeating Guided Setup will reset the Channels You Receive
and Favorites channel lists to the factory settings. It will not affect recorded programs,
Season Passes, WishLists, or TiVo’s Suggestions.
Reset Thumb Ratings and Suggestions. Removes all THUMBS Ratings and deletes the
list of TiVo’s Suggestions under Pick Programs to Record. It does not delete TiVo’s
Suggestions that have been recorded and are in the Now Playing List.
Clear Program Data and To Do List. Clears all program information, cancels all Season
Passes and everything in the To Do List, and removes all THUMBS Ratings. It does not
delete programs in the Now Playing List. The recorder acquires new program information
during the next daily call. Completing this process may take over an hour.
68
Clear and delete everything.Clears all Season Passes, WishLists, THUMBS ratings,
TiVo’s Suggestions and Now Playing List recordings, program information, and the To
Do List and setup information, including the Channels You Receive and Favorite
Channels lists. It also clears the current password and resets Parental Controls to the
factory specified default. Completing this process may take over an hour.
TiVo Central Messages & Setup System Reset
Page 77

Standby
You can put your recorder in Standby mode by selecting Standby in Messages & Setup.
To return to normal mode from Standby, press either the TiVo button the or LIVE TV
button. (On some remotes, there is a POWER or a STANDBY butto n that puts the
recorder in Standby mode and takes it back out.)
In Standby mode:
• Your TV shows a black screen and the lights on the front of the recorder go out.
• Programs that are being recorded or are scheduled to record will still be recorded. (If a
program is being recorded, the red light will turn on.)
• The recorder will still make a daily phone call. (If the recorder is making a phone call,
the yellow light will turn on.)
• If you temporarily disabled Parental Controls, Standby mode re-enables them. (See
page 53 for more on Parental Controls.)
• The recorder will continue to save a portion of live TV—up to 30 minutes of
programming.
Standby
5
• If live T V was paused when Standby was selected, the recorder will remain paused for
up to 30 minutes.
• If the TiVo Live Guide was set to display a category filter, filtering will be turned off.
69
Page 78

Chapter 5
Messages and Setup
70
Page 79

HAPTER
C
6
Troubleshooting
Customer Support 72
Troubleshooting 73
Page 80

Chapter 6
Troubleshooting
Customer Support
When you have a question:
1. Use this chapter. It contains troubleshooting on the following topics:
Questions About the Recorder’s Phone Calls . . . . . . . . . . . . . 73
Questions about Channels. . . . . . . . . . . . . . . . . . . . . . . . . . . . 77
Questions About Live TV. . . . . . . . . . . . . . . . . . . . . . . . . . . . . . 82
Questions About Recording Programs. . . . . . . . . . . . . . . . . . . 83
Questions About Conflicts . . . . . . . . . . . . . . . . . . . . . . . . . . . . 88
Questions About Parental Controls . . . . . . . . . . . . . . . . . . . . . 91
Questions About Audio/Video. . . . . . . . . . . . . . . . . . . . . . . . . 92
Questions About the TiVo Service . . . . . . . . . . . . . . . . . . . . . . 94
2. Use online support. Go to the Customer Support section of www.tivo.com. You’ll
find online customer support on a number of topics, including setting up IR control
and troubleshooting your phone connection.
72
3. Use the troubleshooting screens on your recorder. On your recorder, go to TiVo
Central, then Messages & Setup, then Troubleshooting. You will find troubleshooting
screens for Parental Controls, your phone connection, and your channels.
4. Call Customer Support. Refer to the Installation Guide for Customer Support contact
infomation, and give us a call.
Page 81

Questions About the Recorder’s Phone Calls
Questions About the Recorder’s Phone Calls
Why does the recorder have to be connected to a phone line?
• The recorder needs to be connected to the phone line for a daily call it makes
automatically to the TiVo service. This call downloads program information, which
tells when programs are scheduled to air and on what channel. The call also downloads
additional information from the Tivo service, such as Showcases, TiVolution
Magazine, and (rarely) software upgrades. In addition, the phone call sends
anonymous viewing information b ack to TiVo—that is, anonymous information about
viewing choices made while using your recorder, that does not identify you as an
individual or household. Program information and other data is als o occasionally
delivered by a special TiVo program that is broadcast and recorded during late-night
hours. The daily phone call is used to organize this information.
Note: TiVo has no way to access any of your Personally Identifiable Viewing
Information from your DVR without your prior consent. Absent your consent, the
TiVo service has no way of knowing what shows you—as an individual or
household— have watched, recorded, or rated with “Thumbs Up” or “Thumbs Down.”
Do I need to keep the phone connected all the time?
6
• Unless it is an inconvenience, we recommend that you leave the phone line connected.
The TiVo service will not interfere with your other needs for the phone line, and daily
calls will keep the recorder’s program information fully up to date.
However, the recorder does not need to be connected all the time. After Guided Setup,
you only need to connect the phone line about once or twice a week. If you do this, y ou
should also manually start a daily call after you connect the recorder. To start a daily
73
Page 82

Chapter 6
Troubleshooting
call, from TiVo Central, select Messages & Setup, then Phone Connection, then select
“Make Daily Call Now.”
My recorder is not making the setup or daily call to the TiVo service.
• First, verify that your phone line is working by connecting a phone to it, then listening
for a dial tone. Make sure the phone cord is connected to both the recorder and the
phone jack. If the phone line is working, continue with the troubleshooting here. If it is
not working, contact your telephone service.
• The following tips require changing your Phone Dialing Options. To change Phone
Dialing Options, go to TiVo Central, then select Messages & Setup, then Recorder &
Phone Setup, then Phone Connection, then Change Dialing Options.
Important: After you change a Phone Dialing Option, make a test call to verify
whether your problem was solved. You do this by choosing “Make Test Call” from the
Phone Connection screen.
• Try another local dial-in number. Select “Set Dial-In Number.” Confirm your area
code, then select a new number from the list of available numbers for your area.
• If you have voice mail or use another non-standard dial tone, turn off “Dial Tone
Detection.” (Select “Set Dial Tone Detection,” then select “Off.”)
74
• If you dial a prefix for outside lines, be sure it is entered on the Phone Dialing
Options screen. To enter or change a prefix, select “Set Dial Prefix,” then follow
instructions on the screen. For example, if you must dial 9 to reach an outside line,
select “Set Dial Prefix,” then press “9” then PAUSE. (This enters a 9, followed by
a comma. The comma inserts a pause.)
Page 83

Questions About the Recorder’s Phone Calls
• If you have call waiting, be sure that it is disabled during the daily phone call.
(Select “Set Call Waiting Prefix,” then enter the correct prefix, usually “*70,”. You
would enter by “*70,” pressing CLEAR then “7” then “0” then PAUSE.)
• Your phone line may have low voltage. Set “Phone avail. detection” is set to “Off.”
(Select “Set Phone Avail. Detection,” then select “Off.”) If you have a cordless
telephone, fax machine, or computer modem connected to the same line, try
tuming “Phone avail. detection” off, as well. When “Phone avail. detection” is off,
you may hear a “click” on the line when the recorder tries to call. This is the sound
of the recorder picking up the line to see if it is free.
• If you use a wireless phone connection, connect the recorder to a standard wall jack
and test whether the wireless modem jack is the source of the problem.
• If you have a caller ID box, try removing it from the line, since some models
interfere with the recorder’s ability to make a call.
• It could be that you have too much line noise due to the length of the phone cord.
Try a shorter cord, or you can buy a line noise filter at your local electronics store.
What if I need to use the phone while the recorder is using the is making daily call?
• You can interrupt the phone call. To do this, pick up the phone, then hang it up. Wait
several seconds. Then when you pick it up again, there should be a dial tone. Repeat
this process if necessary.
6
What if my phone line is busy when the recorder tries to make a daily call?
• The recorder will continue to attempt to call several times a day until it is successful.
You can check the status of the phone calls on the Phone Connection screen (from
TiVo Central, select Messages & Setup, then Recorder & Phone S etup, then Phone
Connection). The status of the most recent call is displayed near the top of the screen.
75
Page 84

Chapter 6
Troubleshooting
Am I charged for the daily call to the TiVo service?
• TiVo uses a standard telephone line to provide the TiVo service (including the daily
call and software updates) and is available as a local call in most areas. In some areas,
however, local and long distance toll charges may apply. Telephone costs are not
included in the TiVo service subscription, and you are responsible for any such
telephone charges.
76
Page 85

Questions about Channels
Questions about Channels
Can I watch one channel while re co r ding from another?
• Yes. If you have antenna o r cable (i.e., use RF cables ) you can split the signal with an
RF splitter. See your Installation Guide for instructions. (You will not have TiVo
functionality on the channels you watch using an RF cable that goes directly to your
TV.) Also, you can always watch any program stored in Now Playing while the
recorder is recording a program.
I can’t get the channel to change.
If you use cable with no set-top box:
• Be sure that you are using the recorder’s remote and that you hold it so that the TiVo
button points toward the recorder.
• Press any button on the remote. Does the red light above the TiVo button flash?
If not , make sure that the batteries are positioned correctly in the remote. If they are,
try a new set of batteries.
If the red light does flash, does the green light on the front of the recorder change to
yellow when you press any button on the remote? If it does not, restart your recorder.
(From TiVo Central, select Messages & Setup, then System Reset, then Restart the
Recorder. On the Restart the Recorder screen, press the THUM BS DOWN button
three times, then press ENTER. You will see the Welcome screen and the system will
restart within about 45 s econds. You can also res tart the recorder by unplugging it,
waiting 15 seconds, then plugging it back in.)
6
77
Page 86

Chapter 6
Troubleshooting
I can’t get the channel to change. (continued)
If you use cable with a set-top box:
• Make sure the set-top box is turned on.
• Make sure you are using the recorder’s remote control, and that you hold it so that the
TiVo button points toward the recorder, not a cable or satellite box.
• Refer to the Start Here booklet to verify that the IR Control cable is positioned
correctly.
• Press the TiVo button to go to TiVo Central, then select Messages & Setup, then
Cable/Satellite Box, then Control Cable Setup. Verify the IR code you chose during
Guided Setup. See page 7 for help choosing an IR code.
• If the installation instructions required you to connect a serial control cable, check that
the Serial Control cable is plugged into the upper serial jack on the back of the
recorder.
• Unplug the cable set-top box from the wall, then plug it back in.
If you use a satellite receiver with an IR Control cable:
• Make sure the satellite receiver is turned on.
78
• Refer to the Start Here booklet to verify that the IR Control cable is positioned
correctly.
• Press the TiVo button to go to TiVo Central, then select Messages & Setup, then
Cable/Satellite Box, then Control Cable Setup. Verify the IR code you chose during
Guided Setup. See page 7 for help choosing an IR code.
• Unplug the satellite set-top box from the wall, then plug it back in.
Page 87

Questions about Channels
I can’t get the channel to change. (continued)
If you use a satellite receiver with a serial control cable:
• You may have incorrectly specified the type of program guide on your receiver. There
are two types of program guides: MPG (Master Program Guide) and APG (Advanced
Program Guide). First, unplug the power cord for the satellite receiver and plug it back
in. Next, go to TiVo Central, then Messages and Setup, then Recorder and Phone
Setup, then Cable/Satellite Box, then Control Cable/Sat. Setup and select “Satellite
Box.” On the Connection to Satellite screen, if you originally selected Serial-MPG,
change your selection to Serial-APG. (If you originally selected Serial-APG, change it
to Seri al-MPG.) You can also check the manual for your satellite receiver (as well as
the satellite receiver’s system setup screen) for information on the type of pro gram
guide it uses.
When I turn on my TV, I see a blue screen with a TiVo logo.
• Your recorder is having trouble tuning to the channel y ou are on. Follow these steps to
restore the video:
• If you have a cable or satellite set-top box, make sure it is turned on.
• Try changing channels. If you see the blue screen with the TiVo logo on every
channel, your video cable may have come loose. Make sure all the cable
connections on the back of your recorder are secure.
6
• Verify that you are receiving a video signal by t emporarily connecting the video
source directly to the TV.
• Restart your recorder. (From TiVo Central, select Messages & Setup, then System
Reset, then Restart the Recorder. On the Restart the Recorder screen, press
79
Page 88

Chapter 6
Troubleshooting
THUMBS DOWN three times, then press ENTER. You will see the Welcome
screen, and the system will restart within about 45 seconds. You can also restart the
recorder by unplugging it, waiting 15 seconds, then plugging it back in.)
• If you have a satellite or cable box, go to Messages & Setup, Cable/Satellite Box,
Connection to Recorder. Verify t hat you chose the same cable on this screen that
you used to connect your set-top box to the recorder.
• The cables you are using to connect your recorder to your TV or other equipment
may be damaged or defective. Try exchanging the cables connected to the recorder
with other cables that you know are working properly.
I can’t go to one of my channels.
• You may be using a channel list that does not include the channel you want. Use the
numbers on the remote control to enter the channel number, then press ENTER/JUMP.
For more information on using a channel list, see page 59.
• The channel you want may be showing a program that exceeds a limit set with Parental
Controls. In this case, you will see only a black screen with a notice that a limit has
been exceeded. You will be able to tune to the channel if you use the Parental Controls
password. (For more information on Parental Controls, see page 53.) If your cable or
satellite set-top box has a feature like Parental Controls, you have to use the set-top
box’s remote to disable it, as well.
80
I can’t find all the channels I receive in the Cha n nels You Receive list.
• Have you changed your satellite or cable provider, or changed your subscription
package? If you have, you should repeat Guided Setup to specify your current cable or
satellite provider and lineup. From TiVo Central, select Messages & Setup, then
Page 89

Questions about Channels
System Reset, then Repeat Guided Setup. Press THUMBS DOWN three times, and
then press ENTER. You may need to check all of the available selections to find the
right one since cable providers are often changing their lineups. For a complete
instructions on G uided Setup, see Chapter 1 of this guide.
• If you have not changed your cable or satellite provider, go to Messages & Setup, then
My Preferences, then Customize Channels, then Channel Lineups. Look at your cable
or satellite bill, or make your best guess at what your lineup is called. Select it here,
then check the Channels You Receive list. If the channels are incorrect, try another
Cable Lineup. If that does not work, call TiVo Customer Care.
6
81
Page 90

Chapter 6
Troubleshooting
Questions About Live TV
Can I watch a program while it is being recorded?
• Yes, you can watch a program as it is being recorded. You can also watch any program
stored in Now Playing while another program is being recorded.
The Channel Banner always says “To be announced.”
• Your recorder probably does not have full program information. For details, see the
question “I can’t find my program in Search By Title or Search Using WishLists, even
though I know it’s on,” on page 83.
There aren’t any shows listed in the TiVo Live Guide.
• If category filtering of the TiVo Live Guide is turned on, but no upcoming programs in
the next six hours match both your filter and your Favorite Channels list, no programs
will appear in the TiVo Live Guide. To view programs in the TiVo Live Guide again,
use the TiVo Live Guide’s Guide Options to turn off filtering. For more information,
seepage27.
• Your recorder may not have program information. For details, see the question “I can’t
find my program in Search By Title o r Search Using WishLists, even though I know
it’s on,” on page 83.
82
I can’t find my program in the TiVo Live Guide, even though I know it’s on.
• You can choose which channel list the TiVo Live Guide will use to display the
program schedule.The channel carrying the program you are looking for may not be in
the channel list you’re using. Press ENTER while the Live Guide is visible to choose
another channel list. You can also add and remove channels on the “Channels You
Receive” and “Favorites” channel lists. (For directions, see page 59.)
Page 91

Questions About Recording Programs
Questions About Recording Progra ms
I can’t find my program in Search By Title or Search Using WishLists, etc., even
though I know it’s on.
• The recorder uses the Channels You Receive list to search for programs in all the
features under Pick Programs to Record. To check if you’ve selected the program’s
channel, go to Messages & Setup, then My Preferences, then Customize Channels,
then Channels You Receive. Does the channel have a check mark next to it? To give it
one, highlight the channel and press SELECT. (For instructions on personalizing this
list, see page 59.)
• Look on the Phone Connection screen (from TiVo Central, select Messages & Setup,
then Recorder & Phone Setup, then Phone Connection) for the time of the last
successful daily call for program information. If it was more than 36 hours ago, your
recorder may be having trouble calling the TiVo service. Select “Make Test Call” to
test the current phone settings. If the test call does not succeed, see the troubleshooting
chapter in the Installation Guide for phone troubleshooting. Next, start a daily call by
selecting “Make Daily Call Now.” If your daily call is successful, new program
information will be downloaded and organized, and become available to search in
about 1 to 5 hours.
6
• Is your TiVo service account up to date? Check your account status on the System
Information screen (from TiVo C entral, select Messages & Setup, then System
Information). If your account is suspended or closed and you wish to re-activate it, use
the number on the back cover of this guide to call TiVo Customer Care.
83
Page 92

Chapter 6
Troubleshooting
• Occasionally the program information provided by the networks includes errors. We
would like to hear of any inaccuracies you discover so that we can work with our
providers to correct them.
I cannot use features in Pick Programs to Record. The recorder says it is organizing
program information.
• Your recorder may not have all its program information yet. The first time you go
through Guided Setup, the recorder downloads program information from the TiVo
service. The recorder then indexes this information in the background over the next 48 hours. As the program information gets indexed, more of it becomes available. After
8 hours, full information (for up to 2 weeks from the time of the last successful daily
call) is available for you to use. Wait a few hours, then try to find your program again.
• If the recorder loses power while it is indexing program information, the indexing
process will stop until the recorder makes a successful daily call to the TiVo service,
and then will start again. If your recorder lost power while it was indexing program
information, you can get it started indexing again by plugging it in and then starting a
call to the TiVo service. To start a call to the TiVo service—from TiVo Central, select
Messages & Setup, then Recorder & Phone Setup, then Phone Connection, then Make
Daily Call Now.
84
What happens if a sports event I have scheduled to record goes into overtime?
• The TiVo service cannot predict whether a sporting event might go into overtime, but
we provide a feature that lets you add anywhere from one extra minute to three hours
at the end of a recording just in case. We call the feature the Overtime Scheduler. The
Overtime Scheduler has two options: “Start Recording” and “Stop Recording.” Both
are available on the Recording Options screen. You can even use the Overtime
Page 93

Questions About Recording Programs
Scheduler to change the scheduled end of a recording while the program is being
recorded. You can use the Overtime Scheduler with any kind of program, not just
sports. For more information on Recording Options, see page 34.
If you are watching a program while it’s being recorded, you can record an overtime
segment in a couple of ways. One way is to go into Now Playing, select the recording,
then select “Change recording options.” On the Recording Options screen that
appears, select “Stop recording.” Use the RIGHT arrow to increase the length of the
recording by anywhere from one minute to 3 hours. Alternatively, you could choose to
press the RECORD button after the regularly scheduled part of the program has
finished.
Is there a way to record a program that will not be aired for weeks or months?
• You can create an auto-recording WishList for programs that are not yet listed in the
TiVo Live Guide. See page 42 for details on WishLists.
• If you know the date, time, and channel on which the program will air, you can create
a manual recording to record it. You can create manual recordings by going to TiVo
Central, then selecting Pick Programs to Record, then Record by Time or Channel,
then Manually Record Time/Channel. (See page 47 for details.)
How do I set the clock so that my shows are recorded on time?
6
• If you are missing the beginning or end of a show, it usually means that the broadcaster
is not starting or stopping the show on time. You can use the Overtime Scheduler,
described on page 35, to compensate for this.
• The TiVo service will re-sync your recorder’s clock during every daily service call. If
you set your time zone and Daylight Savings Time correctly in Guided Setup, you
85
Page 94

Chapter 6
Troubleshooting
never have to worry! If you move to a new time zone, you can change your recorder’s
time settings by repeating Guided Setup. To start a daily call at any time, go to TiVo
Central and choose Messages & Setup, then Recorder & Phone Setup, then Phone
Connection, then “Make Daily Call Now.”
How do I record a Pay Per View event?
• From live TV, catch up to the present broadcast by pressing the ADVANCE button.
Then, order the program from your cable or satellite provider as you normally
would—by using your set-top box remote, or by calling your cable/satellite provider.
(If the program violates a Parental Control limit—or a feature like Parental Controls
on your cable or satellite set-top box—make sure to disable both TiVo’s and your settop box’s Parental Controls.) To record the program, s earch for it in Browse b y Time.
If there are no listings for Pay Per View events, record the showing with the Manually
Record Time/Channel option under TiVo Central, then Pick Programs to Record, then
Record Time/Channel.
Why wasn’t my program recorded?
• Check Recording History for an explanation of why the program did not record.
Recording History is the first selection in the To Do List (from TiVo Central, select
Pick Programs to Record, then To Do List, then View Recording History). Here are
some reasons why a program may not be available in Now Playing:
86
• The program may have been canceled by the network.
• If you had two Season Passes that were on at the same time, only the Season Pass
with the higher priority would be recorded. Priorities and the Season Pass Manager
are described on page 48.
Page 95

Questions About Recording Programs
• The program may have been deleted from Now Playing by someone else.
• There may have been conflict when requesting another program, and the proposed
resolution was to delete the missing program earlier than planned. If you accepted
that resolution, the program would have been deleted.
6
87
Page 96

Chapter 6
Troubleshooting
Questions About Conflicts
Can I record multiple programs simultaneously?
• No. You can watch any program in Now Playing while another is recording. However,
you can only record one program at a time on your recorder, because it does not
contain the necessary hardware to record two programs at o nce. The DIRECTV
Receiver with TiVo has two tuners and can record two programs at the same time.
How can I record a program (or programs) when there is a conflict?
• The recorder gives each repeating recording a priority. You can resolve some conflicts
in favor of preferred programs by using the Season Pass Manager to change priorities.
(See page 48.)
• If you encounter a conflict for a single episode, use “View upcoming episodes” to see
if the program or episode you want will air at a different time.
• You can sometimes resolve recording conflicts by changing the “Stop Time” or “Start
Time” Recording Options. (See page 34 for more about Recording Options.) For
example, if you set a program to start recording one minute early, it may conflict with
a recording that airs right before it. To resolve such a conflict, change the “Start Time”
back to “On Time” on the Recording Options screen.
88
• If a single episode of a repeating r ecording conflicts with another program, you can
select that episode in the To Do List and change it independently of the rest of the
repeating recording.
Page 97

Questions About Now Playing
Questions About Now Playing
Can I recover a recorded program that was deleted?
• There is no way to bring back a program that has been deleted from Now Playing. You
can choose to save programs longer, though. See page 30 for details.
Can I copy or archive programs to a Zip drive or any other computer storage media?
• The recorder does not copy or archive recordings to any device other than a VCR.
I haven’t scheduled enough programs to fill my recorder, but when I try to schedule
more programs, the recorder says there isn’t room.
• The TiVo service’s smart scheduling features track not only how much space you
currently have on your recorder, but also how much space will be needed in the future
to record all of the programs you have scheduled. I f your recorder will be full at some
point in the future, the TiVo service informs you and suggests options—such as
allowing some programs to be deleted early—that will allow you to schedule
additional recordings. With the TiVo service, you always have the final say over what
gets recorded and how long it is kept.
• In addition, the amount of recording space the recorder needs varies from channel to
channel and from show to show. In general, the more action you see on your screen,
such as in fast-moving sports or action movies, the more recording space is required.
Weaker video signals may also require more space. The amount of space required for
each show you record affects the total hours of recording capacity in your recorder.
6
89
Page 98

Chapter 6
Troubleshooting
How can I fit more programs in Now Playing?
• To make space, delete some programs in Now Playing. You delete a program by
highlighting its title, then pressing CLEAR.
• Lowering the default recording quality will allow you to fit more programs in Now
Playing. See page 60 for details.
• Set up Season Passes with the Recording Option “First-run only.” You’ll only collect
new episodes. You’ll also be less likely to run out of space in Now Playing and less
likely to encounter conflicts.
What does it mean when my recorder says programs will be deleted earlier than
planned?
• By default, all programs are kept until space is needed. After that, programs you have
not set to save longer may be deleted to make room for other recordings you request.
The TiVo service’s smart scheduling features keep track of when programs become
available to b e deleted, and of how much free space will be available at any given time
in the future. If space will not be available to record a program you request, the TiVo
service gives you the option of deleting some programs early to make more room.
However, you always have the final say on how long the recorder keeps programs.
You can delete a program at any time and can always change how long it is saved by
changing the “Save until…” option. To see “Save Until...,” select the program in Now
Playing.
90
Page 99

Questions About Parental Controls
Questions About Parental Controls
My Parental Controls are not working.
• For Parental Controls to work, they must be on and must not be temporarily disabled.
When you enter your password to watch a program that violates Parental Controls,
they become temporarily disabled. You can re-enable them on the Parental Controls
screen (from TiVo Central, s elect Messages & Setup, then My Preferences, then
Parental Controls), or by putting your recorder in Standby mode and then taking it out
of Standby (press the Standby Button on your remote, or from TiVo Central, select
Messages & Setup, then Standby).
I disabled Parental Controls, but I still can’t tune to the channel I want.
• If your cable or satellite set-top box has a feature like Parental Controls, make sure you
have disabled them with the set-top box’s remote.
• You may be using a channel list that does not include the channel you want. Use the
number buttons on the remote control to enter the channel number, then press the
ENTER/JUMP button. For more information o n using a channel list see page 59.
6
91
Page 100

Chapter 6
Troubleshooting
Questions About Audio/Video
The audio and video are out o f sync.
• The audio and video may re-sync if you change channels.
• You may be able to re-sync audio and video by pressing the INSTANT REPLAY
button on the remote control.
• Audio and video should re-sync if you press the TiVo button to go to TiVo Central,
then press the LIVE TV button to return to live television.
• You can also try to restart your recorder. From TiVo Central, select Messages &
Setup, then System Reset, then Restart the Recorder. On the Restart the Recorder
screen, press the THUMBS DOWN button three times, then press ENTER. You will
see the Welcome screen and the system will restart within about 45 seconds.
My recorder was working, but now the picture does not move, or
I don’t get a picture now, even though I have been able to get one in the past.
• First, try to restart your recorder. From TiVo Central, select Messages & Setup, then
System Reset, then Restart the Recorder. On the R estart the Recorder screen, press the
THUMBS DOWN button three times, then press ENTER. You will see the Welcome
screen and the system will restart within about 45 seconds. You can also restart the
recorder by unplugging it, waiting 15 seconds, then plugging it back in.
92
• Check to make sure all of the appropriate cables are firmly connected to your recorder,
television and other audio/video equipment. For help with your cable connections, see
the Start Here booklet and the Installation Guide.
 Loading...