

Sony SU-HR3432CH, SU-HR36CH, SU-HR29CH Instructions Manual
4-098-785-E2 (1)
G
H
I
LM
J
K
TV Stand
SU-HR36CH/
SU-HR3432CH/
SU-HR29CH
Instructions English
Thank you for purchasing this product.
This TV stand is designed to hold the following Sony color TV and a hard disc recorder, DVD recorder, etc., on its
glass shelves. Please read these instructions and follow them carefully when assembling the TV stand. Retain these
instructions for future reference.
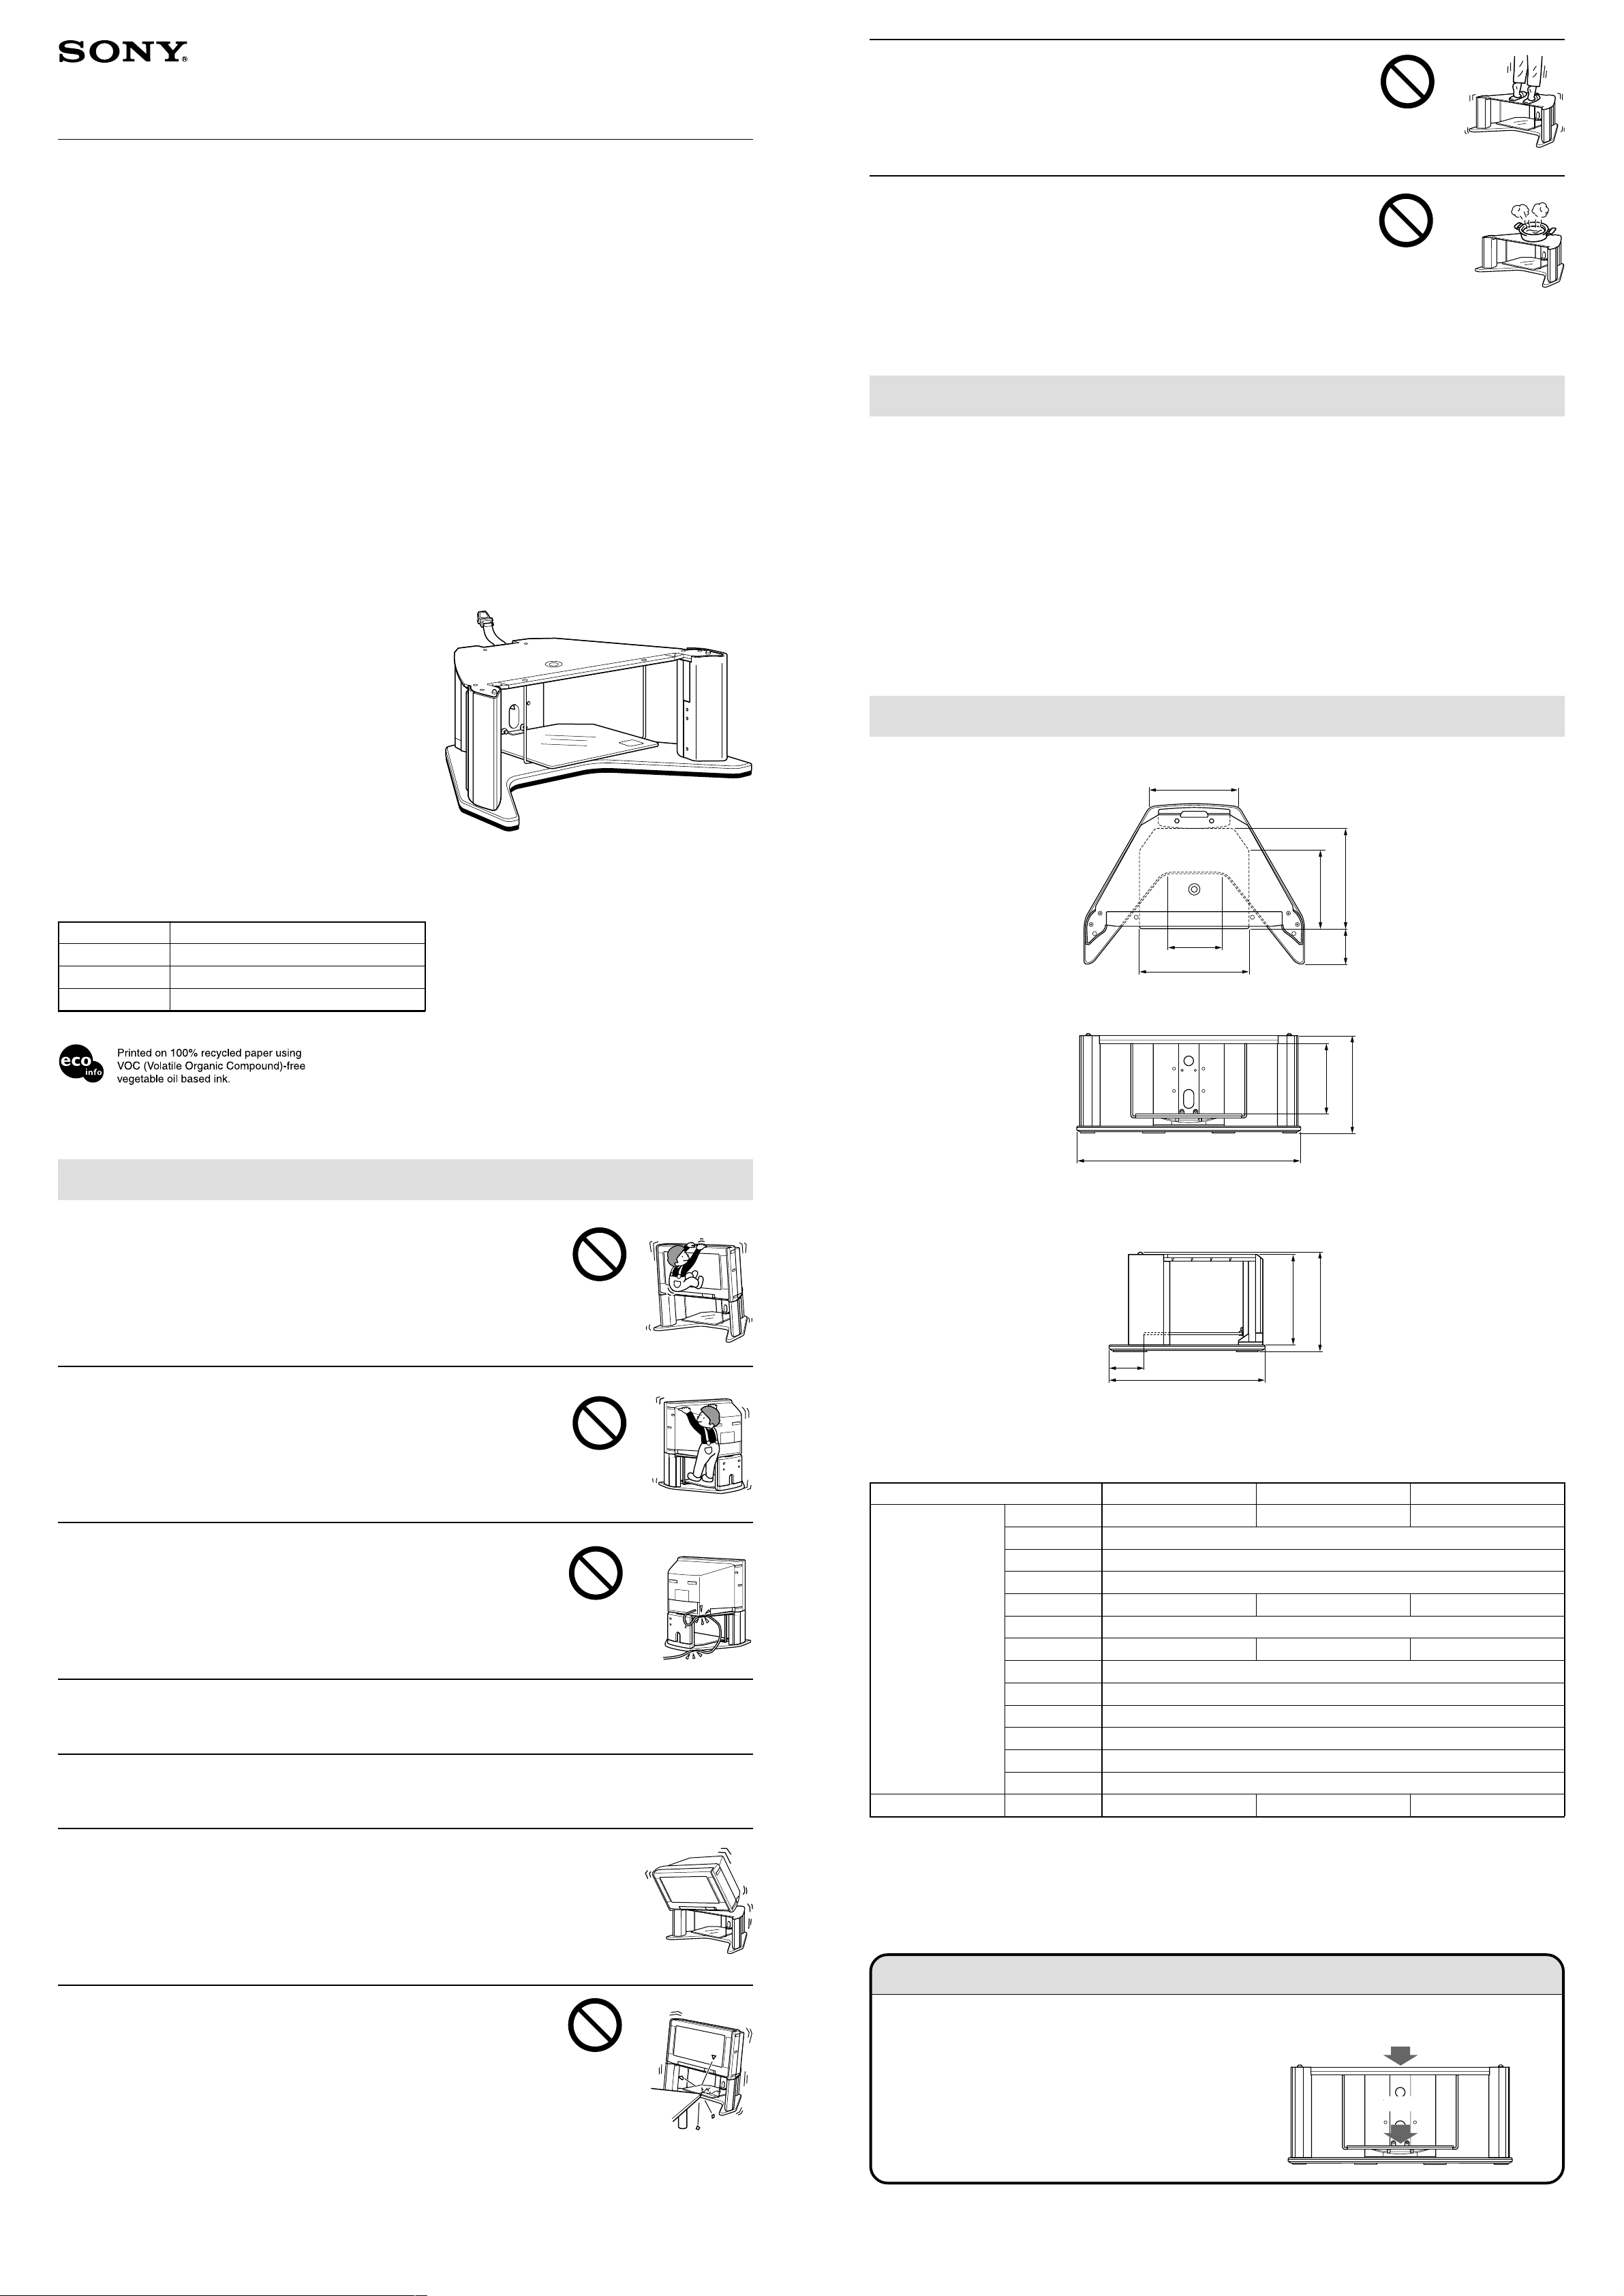
Do not step on the stand.
Do not place hot objects, such as a heated pan or a kettle, on the TV stand.
Notes on use
• Place the TV stand on an even, hard surface.
When placing it on a carpeted floor, put a hard plate, such as a wooden board, on the floor.
• Do not place the TV stand where it is exposed to:
– direct sunlight
– high temperature
– high humidity
• Do not use the TV stand near heating equipment or outdoors.
• When installing the glass shelf, be careful not to catch your fingers between the glass shelf and the shelf hanger.
• Clean the TV stand periodically with a soft, dry cloth. If the TV stand gets dirty, wipe the stand with a soft cloth
moistened with a mild detergent solution. Do not use chemicals such as thinner or benzene, as they may damage
the surface.
TV Stand Model
SU-HR36CH KV-HR36 Series only
SU-HR3432CH KV-HR34 Series/KV-HR32 Series only
SU-HR29CH KV-HR29 Series only
Sony Corporation 2003 Printed in Japan
Specifications
A
E
F
B
C
D
WARNING
Do not lean or rest your weight on the TV while the TV is installed on the TV
stand.
Do not get on or under the glass shelf.
Be careful not to place things on power cords or other cables.
Do not place any equipment other than designated TV devices on the TV stand.
Do not place equipment exceeding the designated maximum weight on the TV stand.
SU-HR36CH SU-HR3432CH SU-HR29CH
Dimension A 40.6 cm 41.6 cm 42.6 cm
B 34.7 cm
C 44.3 cm
D 15.9 cm
E 27.6 cm 25.3 cm 17.6 cm
F 50.0 cm
G 101.4 cm 91.6 cm 79.4 cm
H 31.4 cm
I 44.8 cm
J 16.0 cm
K 70.4 cm
L 41.7 cm
M 45.7 cm
Weight 17 kg 16.5 kg 19.5 kg
Be sure to secure the TV with the fabric band of the TV stand.
Be careful not to allow strong impact on the glass shelf.
• Do not apply a sharp-edged object to the TV stand.
• Do not step upon or sit on the glass shelf.
• Do not place equipment exceeding the designated maximum weight on the TV
stand.
Design and specifications are subject to change without notice.
Note on carrying capacity
To prevent damage, do not place equipment exceeding
the specified weight capacity.
SU-HR36CH SU-HR3432CH SU-HR29CH
90 kg 85 kg 58.5 kg
20 kg
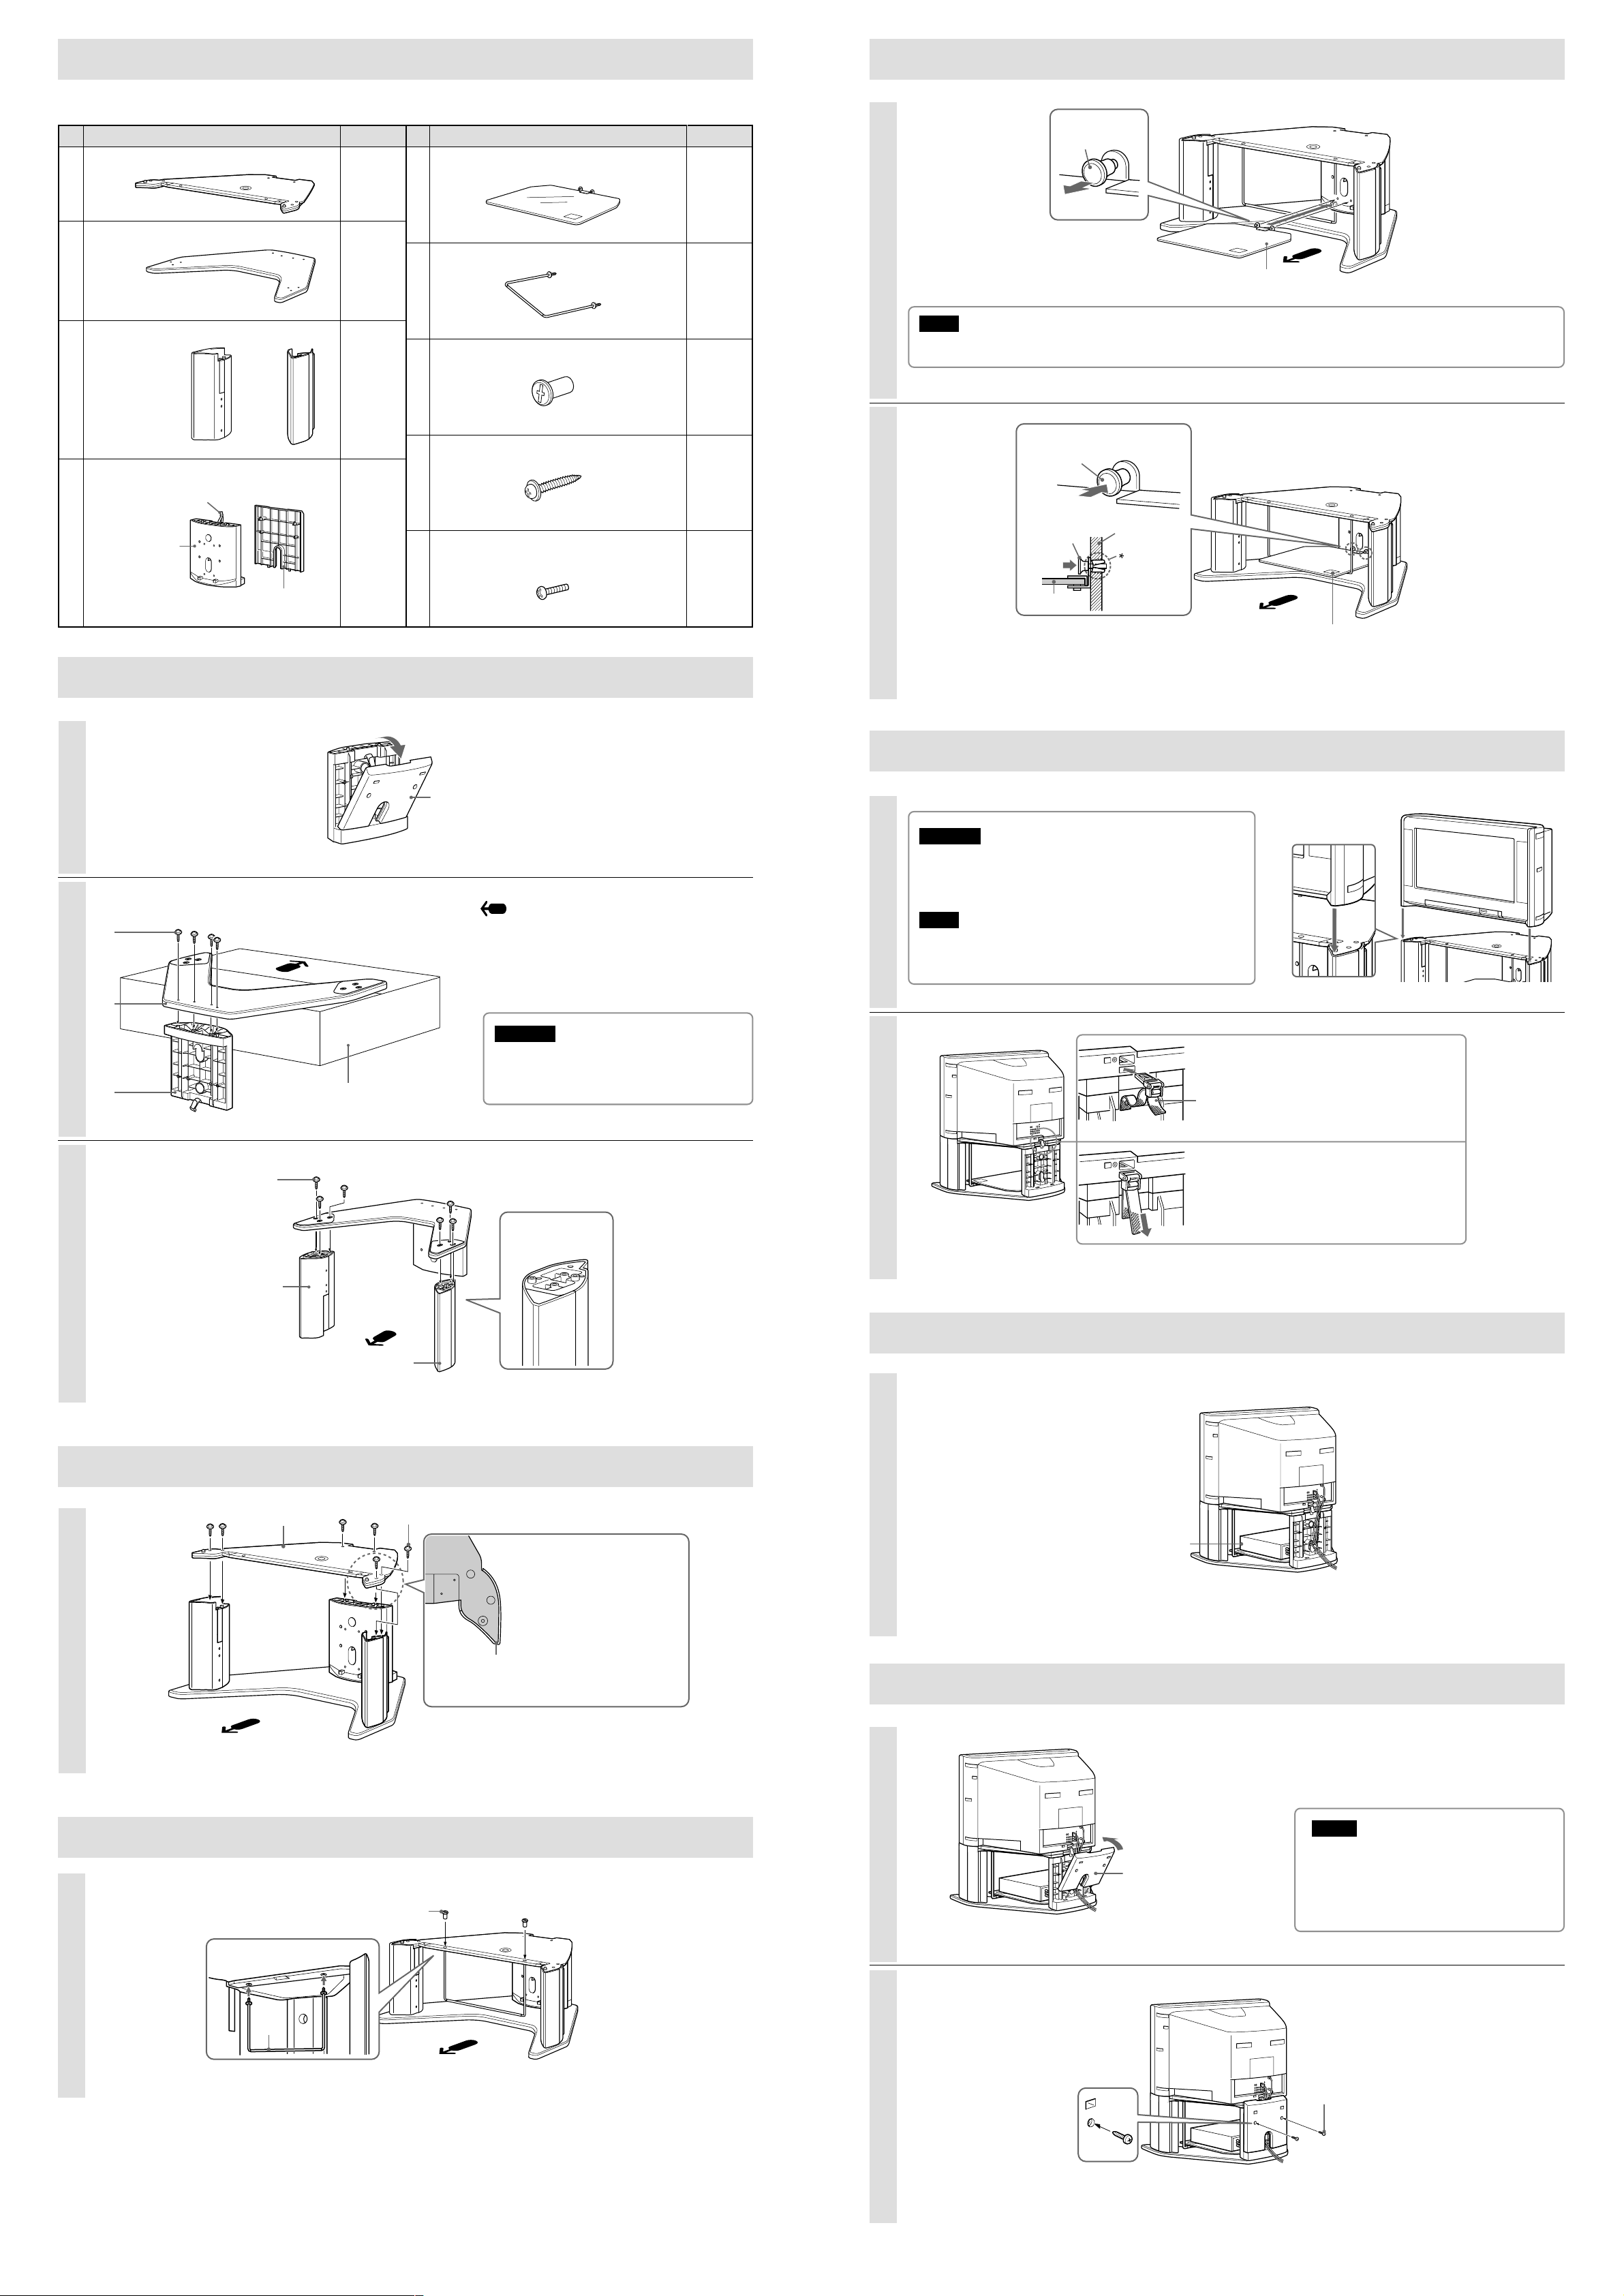
Step 1: Check the parts
E
E
D
I
Prepare a Phillips screwdriver prior to assembling.
Step 5: Attach the glass shelf
Parts name Quantity Parts name Quantity
A Top plate
B Bottom plate
C Front pillar
D Back pillar and cover
Safty band
Back pillar (1)
1
1
2
1
E Glass shelf
F Shelf hanger
G Cap nut
H Big screw
I Small screw (for back pillar cover)
16
1
1
1
Note
Be careful not to allow strong impact on the glass shelf to prevent breakage and cause injury.
2
Locking button
Pull
2
Locking button
Push
Locking
button
Back pillar
cover (1)
Step 2: Attach the back pillar to the bottom plate
1
Back pillar cover
2
H
Arrow direction shows front.
2
Caution label (top side of the glass shelf)
* The tip of the locking button is splayed to fix the glass shelf to the back pillar.
Step 6: Install the TV
1
Warning
Be careful not to allow your hands or fingers to be
pinched between the TV and the TV stand.
Note
Place the TV on the top surface, aligning its front
corners with the front pillars of the stand.
3
B
D
H
C
Packing box
C
Warning
Be careful not to pinch your fingers
during assembly.
Screw holes
2
Safety band
Insert the buckle of the safety band into the
anchor point until it clicks.
Pull the safety band to take up the slack.
Step 7: Install other equipment
Step 3: Attach the top plate
A
H
Step 4: Attach the shelf hanger
Align the tip of the top plate with the front
pillar and place the top plate on the pillars.
G
DVD player, etc.
Step 8: Attach the back pillar cover
1
Back pillar cover
Notes
• To prevent damage to cables, do not
forcibly attach the cover.
• Do not bind the power cords together
to prevent overheating.
2
F
 Loading...