

Page 1
FM Ster eo
FM-AM Tuner
3-859-405-11(1)
Operating Instructions
Mode d'emploi
Manual de Instrucciones
Manual de Instruções
Bedienungsanleitung
Instruzioni per l’uso
Gebruiksaanwijzing
Bruksanvisning
GB
F
E
P
D
I
NL
S
ST-S3000ES
© 1997 by Sony Corporation
GB
1
Page 2
WARNING
Precautions
To prevent fire or shock hazard, do not
expose the unit to rain or moisture.
To avoid electrical shock, do not open
the cabinet. Refer servicing to qualified
personnel only.
On safety
• Should any liquid or solid object fall
into the unit, unplug the unit and
have the unit checked by qualified
personnel before operating it any
further.
On power sources
• Before operating the unit, be sure that
the operating voltage of your unit is
identical with that of your local
power supply.
• Unplug the unit from the wall outlet
if it is not to be used for an extended
period of time. To disconnect the
cord, pull it out by grasping the plug.
Never pull the cord itself.
• AC power cord must be changed only
at the qualified service shop.
On placement
• Place the unit in a location with
adequate ventilation to prevent heat
buildup and prolong the life of its
components.
• Do not place the unit near heat
sources, or in a place subject to direct
sunlight, excessive dust or
mechanical shock.
• Do not place anything on top of the
cabinet which might block the
ventilation holes and cause
malfunctions.
• Do not install the appliance in a
confined space, such as a bookcase or
built-in cabinet.
On cleaning the cabinet
• Clean the cabinet, panels and controls
with a soft cloth lightly moistened
with a mild detergent solution. Do
not use any type of abrasive pad,
scouring powder or solvent such as
alcohol or benzine.
On repacking
• Do not throw away the carton and the
packing material. This makes an
ideal container when transporting the
unit. When shipping the unit, repack
it as it was packed at the factory.
If you have any question or problem
concerning your unit that is not covered
in this manual, please consult your
nearest Sony dealer.
GB
2
Page 3
Welcome!
Thank you for purchasing the Sony FM
Stereo/FM-AM Tuner. Before
operating the unit, please read this
manual thoroughly and retain it for
future reference.
TABLE OF CONTENTS
Getting Started
Unpacking 4
Hooking up the System 4
Selecting the German Display 6
Storing FM Stations Automatically (Auto-betical select) 6
About This Manual
The following icon is used in this
manual:
Indicates hints and tips for
making the task easier.
Basic Operations
Receiving Preset Stations 7
Advanced Tuner Operations
About the Menu Entry System 8
Customizing the Display 8
Receiving broadcasts by scanning stations (Automatic tuning) 9
Tips for Better FM Reception 10
Presetting Radio Stations 11
Naming the Preset Stations 12
Organizing the Preset Stations 12
Using the Radio Data System (RDS) 14
Additional Information
Troubleshooting 15
Specifications 15
Index 16
GB
GB
3
Page 4
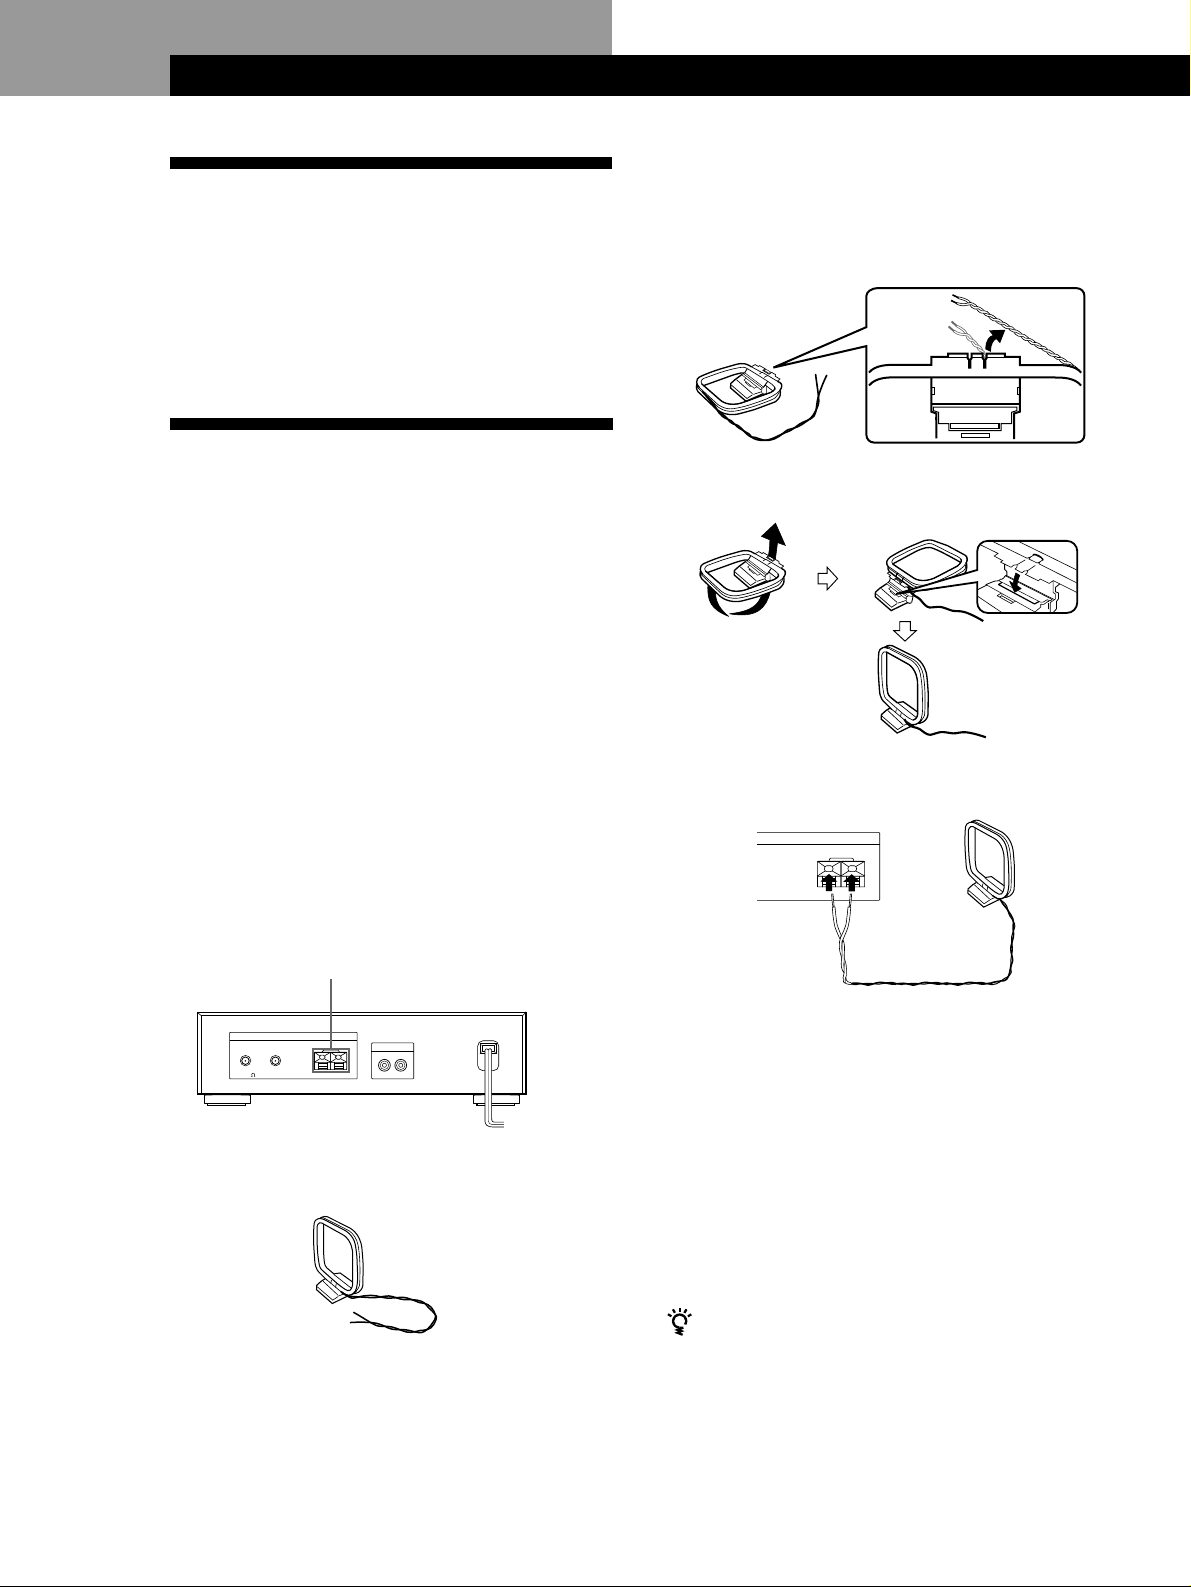
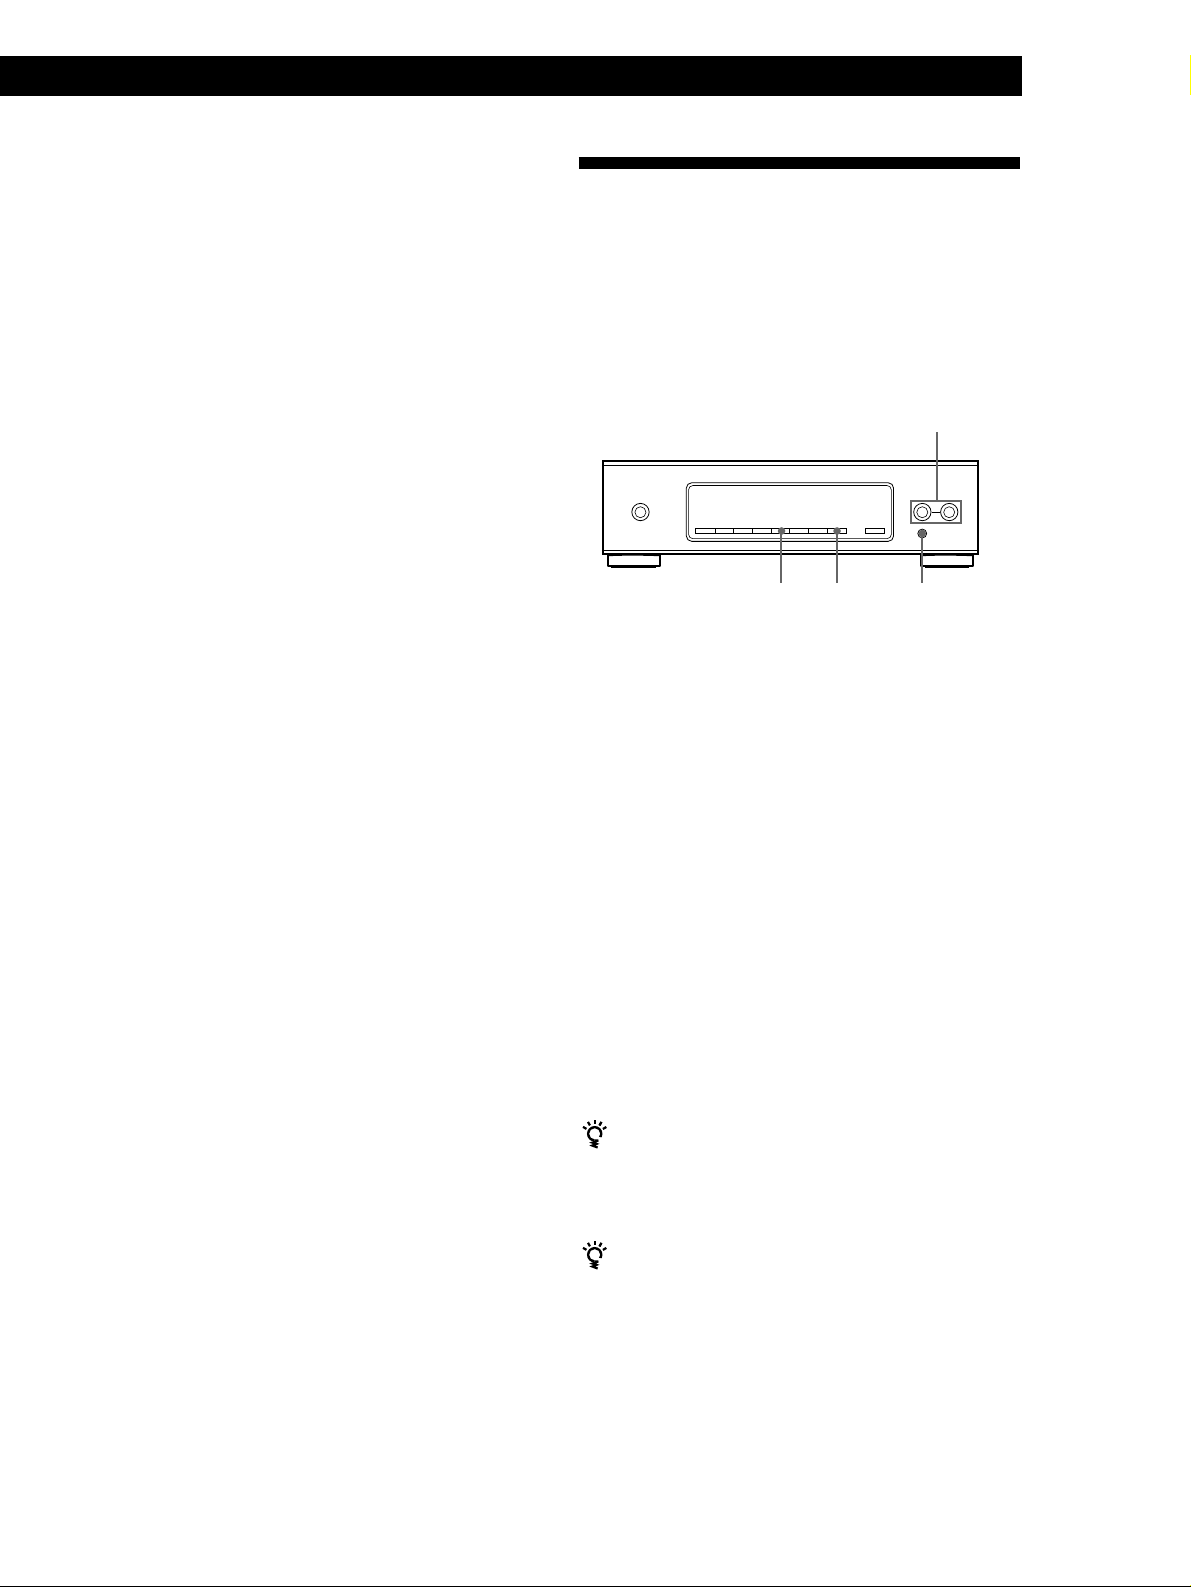
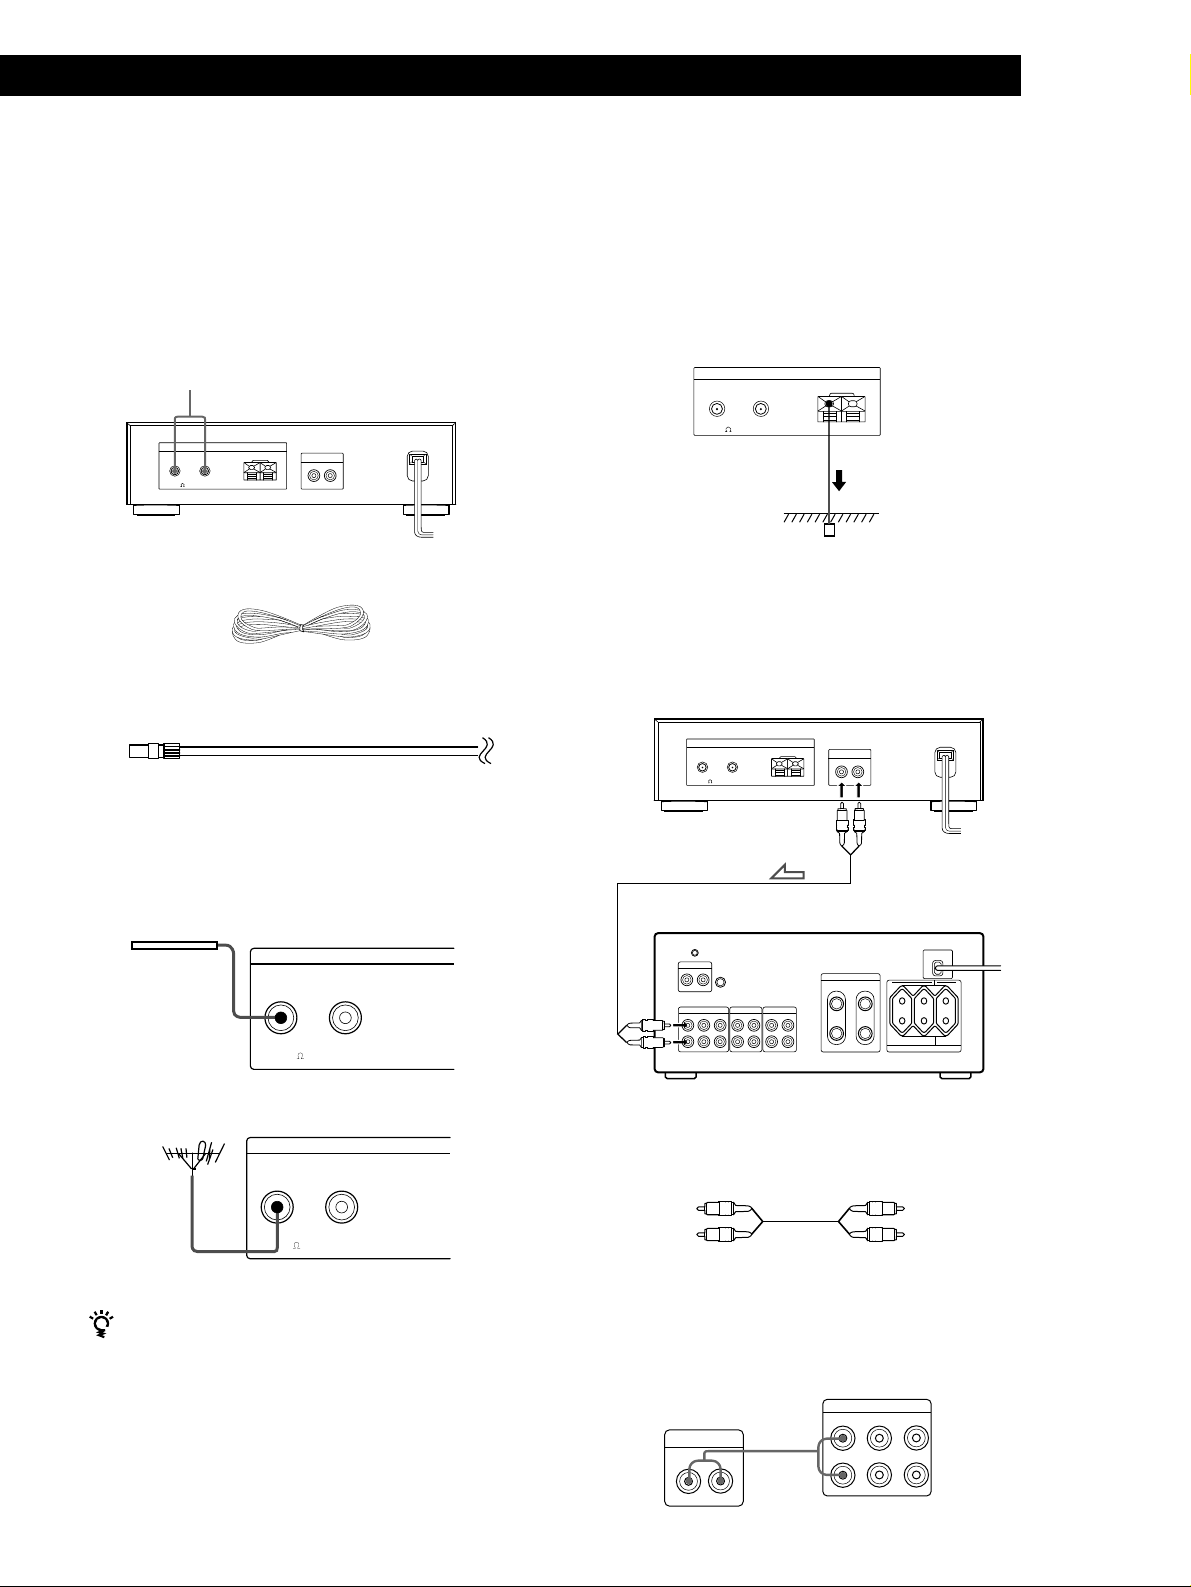
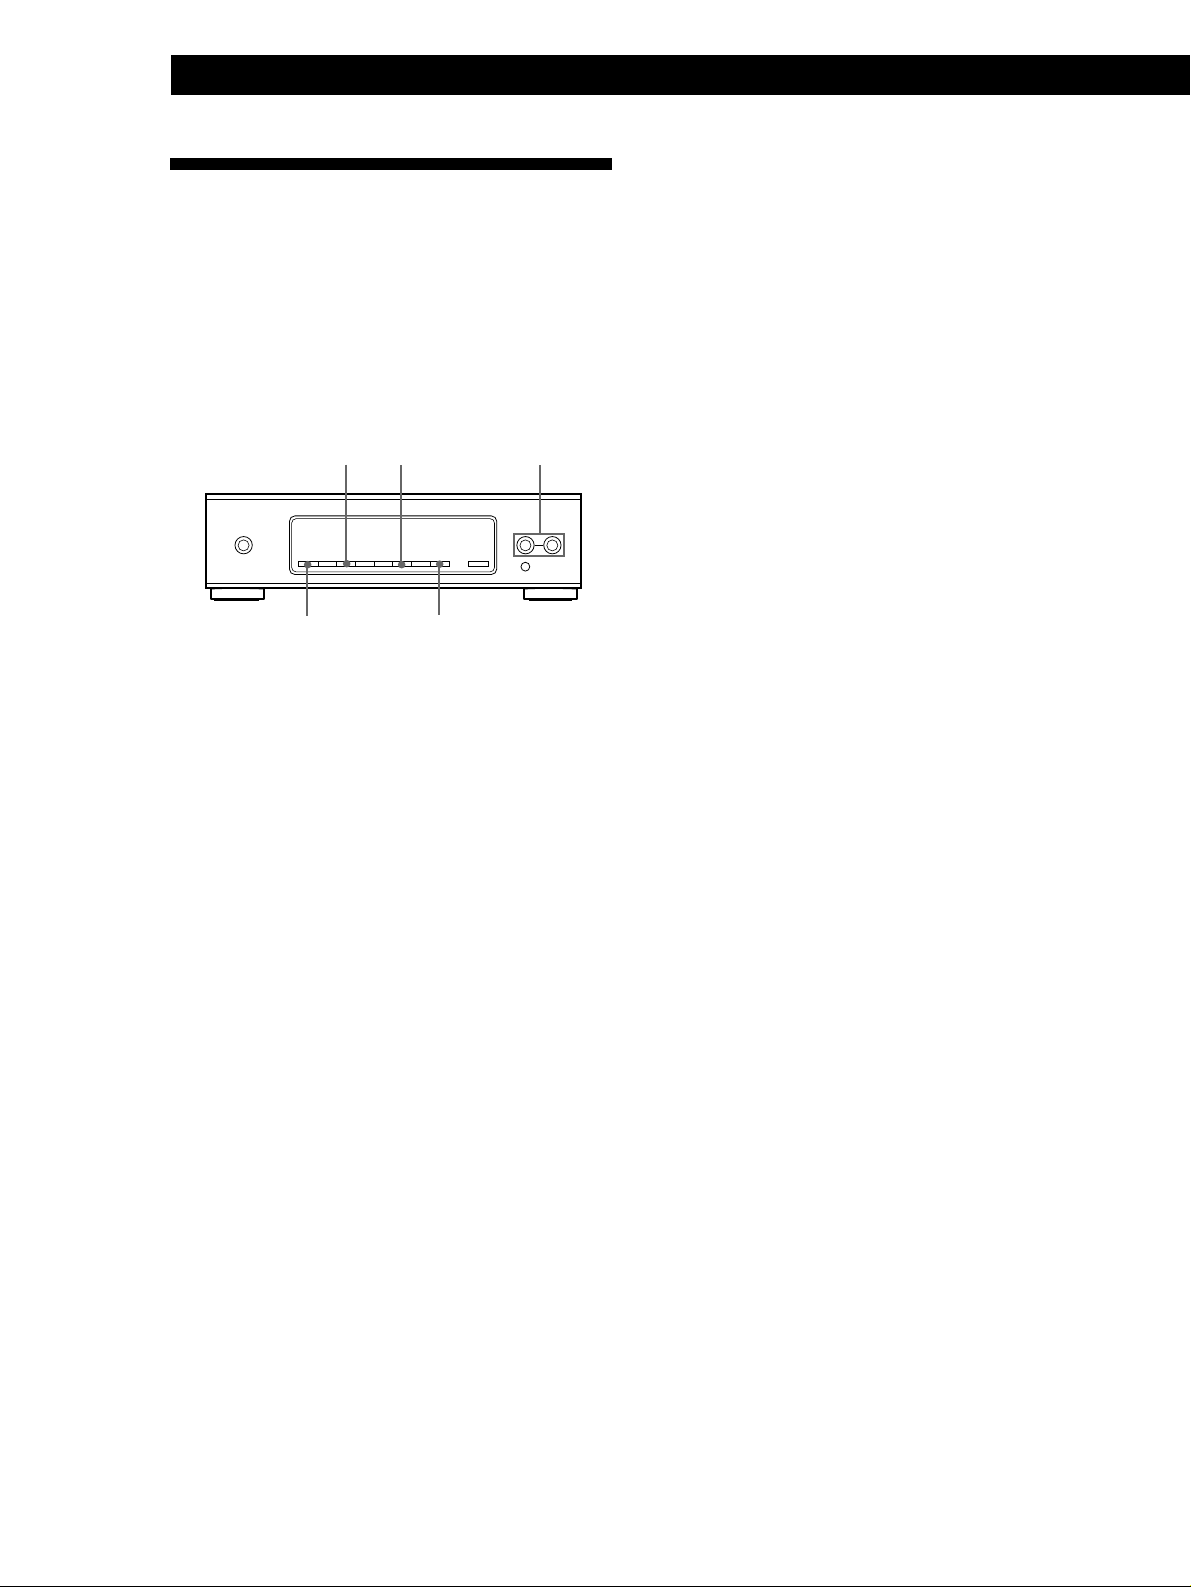
Getting Started
Unpacking
Check that you received the following items with the
tuner:
• Audio cord (1)
• AM loop aerial (1)
• FM wire aerial (1)
Hooking up the System
Before you get started
• Turn off the power to all components before making
any connections.
• Do not connect the mains lead until all of the
connections are completed.
• Be sure to make connections firmly to avoid hum and
noise.
• When connecting an audio cord, be sure to match the
colour-coded pins to the appropriate jacks: White
(left) to White; and Red (right) to Red.
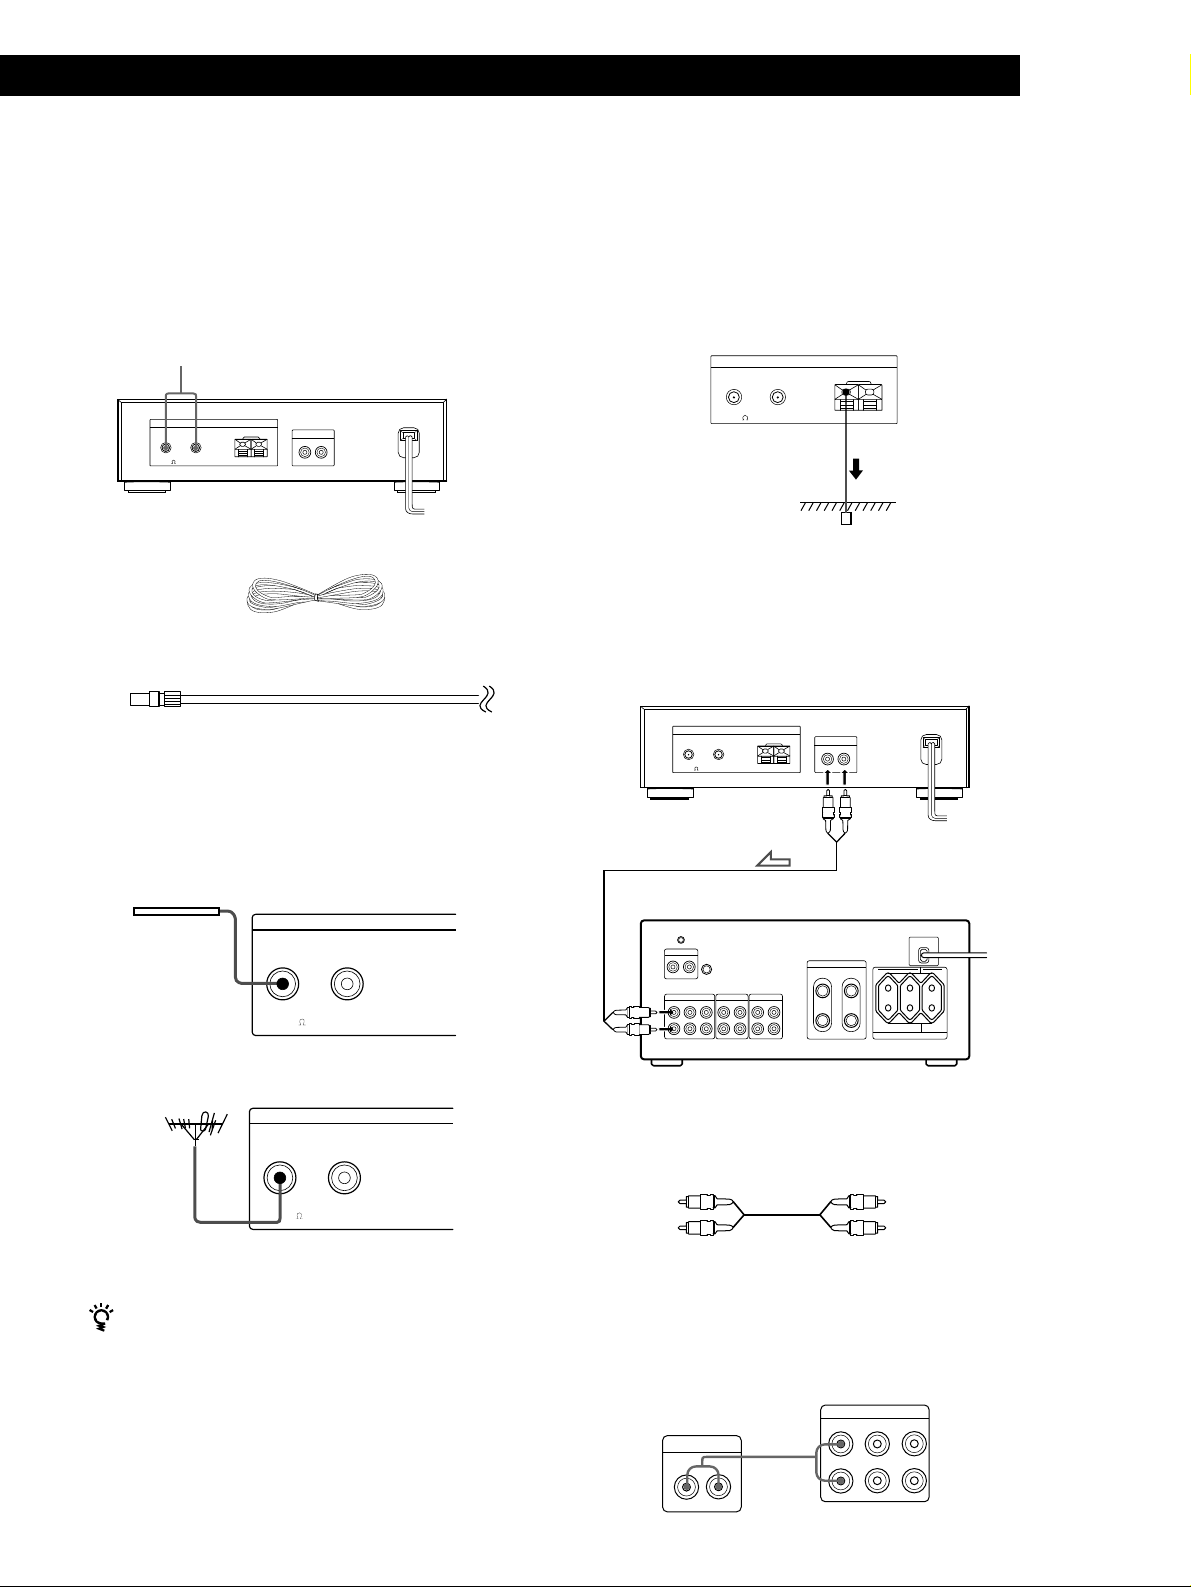
AM aerial hookups
This section describes how to connect the supplied AM
loop aerial. For the specific location of the AM
ANTENNA terminals, see the illustration below.
2 Unwrap 3 lengths of the braided lead wire from
around the frame of the aerial. Be careful to
unwrap only the braided section of the lead wire.
Do not unwrap more than 3 lengths of the lead
wire. Also, be careful not to unbraid the lead wire.
3 Assemble the supplied aerial as shown below.
4 Connect the AM loop aerial to the AM terminals
on the back of this unit.
ANTENNA
AM
y
AM loop aerial
AM ANTENNA
5 Adjust the aerial direction for the best reception.
ANTENNA
AB
FM
75 COAXIAL
AM
LINE OUT
RL
y
What will I need?
• AM loop aerial (supplied) (1)
1 Before assembling the supplied aerial, pull the
lead wire out from the slot in the aerial frame.
GB
4
The AM loop aerial has a directivity which detects
the signal from some angles more strongly than
others. Set the aerial to the orientation which
provides the best receiving condition.
If a high pitched noise (beat noise) occurs when
recording AM broadcasts, adjust the position of
the AM loop aerial so that the noise disappears.
If you live in a building constructed of reinforced
concrete, or with a steel frame, you may not be
able to achieve good reception since the radio
waves become weaker indoors.
For stations that are difficult to receive
Try repositioning the loop aerial while tuning. Placing
the supplied AM loop aerial near a window will help
improve reception quality.
Page 5
Getting Started
AM
y
ANTENNA
75 COAXIAL
FM
AB
LINE OUT
L
R
ç
R
L
INPUT
TUNER CD AUX
FM aerial hookups
With an FM outdoor aerial, you can obtain a higher FM
broadcast sound quality. We recommend that you use
the supplied FM wire aerial only temporarily until you
install an FM outdoor aerial. For the specific location of
the FM ANTENNA terminal, see the illustration below.
FM ANTENNA
ANTENNA
AB
FM
75 COAXIAL
What will I need?
• FM wire aerial (supplied) (1)
• FM outdoor aerial (not supplied) (1) and 75-ohm coaxial
cable with IEC female type connector (not supplied) (1)
IEC female type connector
Connect the supplied FM wire aerial or an FM outdoor
aerial (not supplied) to one of the FM terminals on the
back of this unit.
AM
LINE OUT
RL
y
Connecting a ground wire
If you connect an outdoor aerial, be sure to connect a
earth lead (not supplied) to the AM ANTENNA y
terminal (in addition to the AM loop aerial) for
lightning protection.
To prevent a gas explosion, do not connect the ground
wire to a gas pipe.
to the ground
Amplifier hookups
Connect the tuner to an amplifier. Be sure to turn off
the power to both components before connection. For
the specific location of the terminals, see the illustration
below.
Tuner
ANTENNA
AB
FM
75 COAXIAL
AM
y
LINE OUT
(L/R)
LINE OUT
RL
FM wire aerial
ANTENNA
AFM B
75 COAXIAL
FM outdoor aerial
ANTENNA
AFM B
75 COAXIAL
IEC female type
connector
You can use two FM aerials
This tuner has two FM ANTENNA terminals, A and B,
for use with different types of FM aerials. For example,
you can connect an outdoor aerial to the A jack and
connect a cable aerial to the B jack. You can also switch
the aerial while using the signal meter to determine
which aerial gives the best reception for a particular
station.
Amplifier
INPUT TUNER (L/R)
What cables will I need?
• Audio cord (supplied) (1)
White (L)White (L)
Red (R)
Red (R)
Connect the white plugs to the white (L) jacks and the red
plugs to the red (R) jacks. Insert the plugs completely into
the jacks; incomplete connections may cause noise.
Amplifier
Tuner
(continued)
GB
5
Page 6
Getting Started
Mains lead hookup
Connect the mains lead to a wall outlet after completing all
of the previous connections.
Storing FM Stations
Automatically (Auto-betical
ANTENNA
AB
FM
75 COAXIAL
AM
LINE OUT
RL
y
/
to a wall
outlet
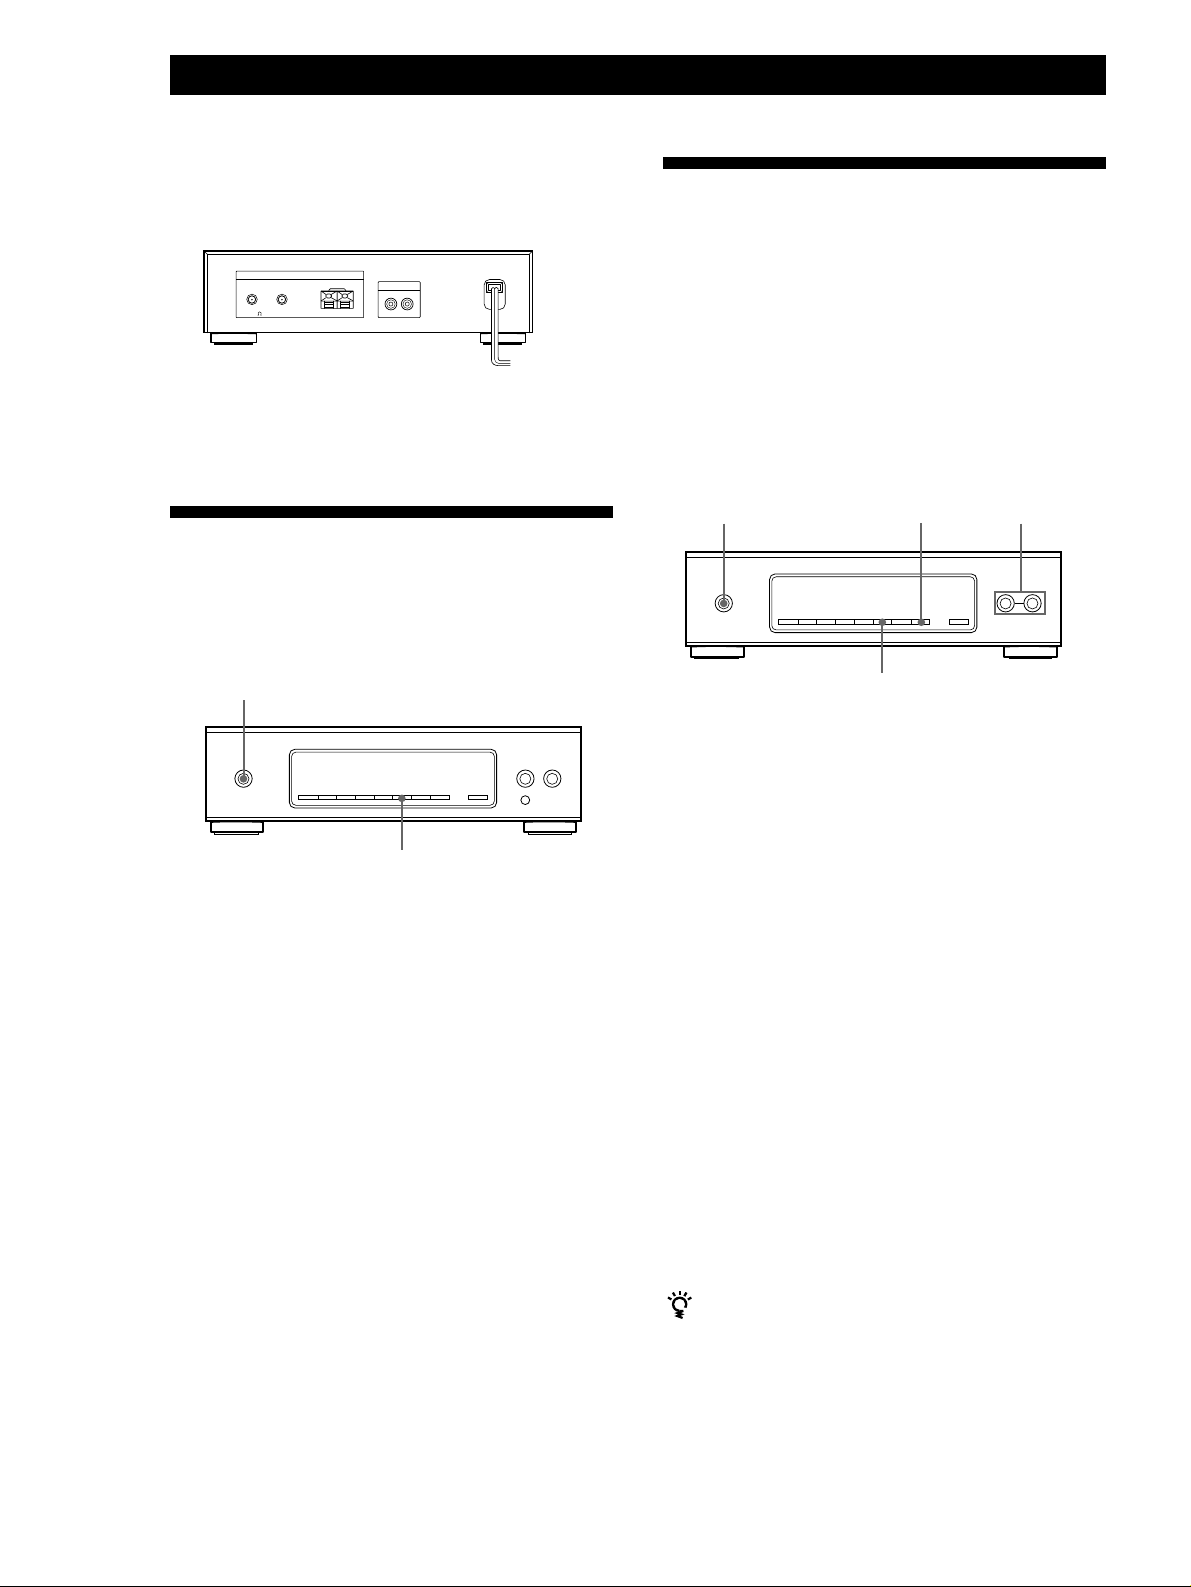
Selecting the German Display
You can choose either an English or a German
language display. The factory preset language is
English. To change the display to German, follow the
steps below.
POWER
MENU
1 Press POWER to turn off the tuner.
select)
With “Auto-betical select” you can automatically store
up to 30 FM and FM RDS stations in alphabetical order
without redundancy. Additionally, “Auto-betical
select” only stores the stations with the clearest signals.
If you want to store FM or AM (MW and LW) stations
one by one, see “Receiving broadcasts by scanning
stations (Automatic tuning)” on page 9 and “Presetting
Radio Stations” on page 11.
POWER ENTER
MENU
1 Connect FM aerial.
See “FM aerial hookups” on page 5.
2 Press POWER to turn on the tuner.
3 Press MENU repeatedly until “Auto-betical”
appears in the display.
4 Press ENTER.
“Yes” and “No” appear in the display.
TUNING/SELECT
2 While holding down the MENU button, press
POWER to turn on the tuner .
5 Press TUNING/SELECT + or – to flash “Yes” in
the display.
“Deutsch” appears in the display.
6 Press ENTER.
To return to the English display
Repeat this procedure.
“English” appears in the display.
GB
6
The tuner scans and stores all the FM and FM
RDS stations in the broadcast area.
For RDS stations, the tuner first checks for
stations broadcasting the same programme, then
stores only the one with the clearest signal. The
selected RDS stations are sorted alphabetically by
their Programme Service name, then assigned a
two-character preset code. For more details on
RDS, see page14.
Regular FM stations are assigned two-character
preset codes and stored after the RDS stations.
To change the location of, or erase, a preset station
See “Organizing the Preset Stations” on page 12.
Notes
• If you move to another area, repeat this procedure to store
stations in your new area.
• For details on tuning stored stations, see page 11.
• The ANTENNA, ANT ATT, IF BAND , and FM MODE
settings are also stored along with the station.
• If you move the aerial after storing stations using "Autobetical select," the stored settings may no longer be valid.
If this happens, store the stations again.
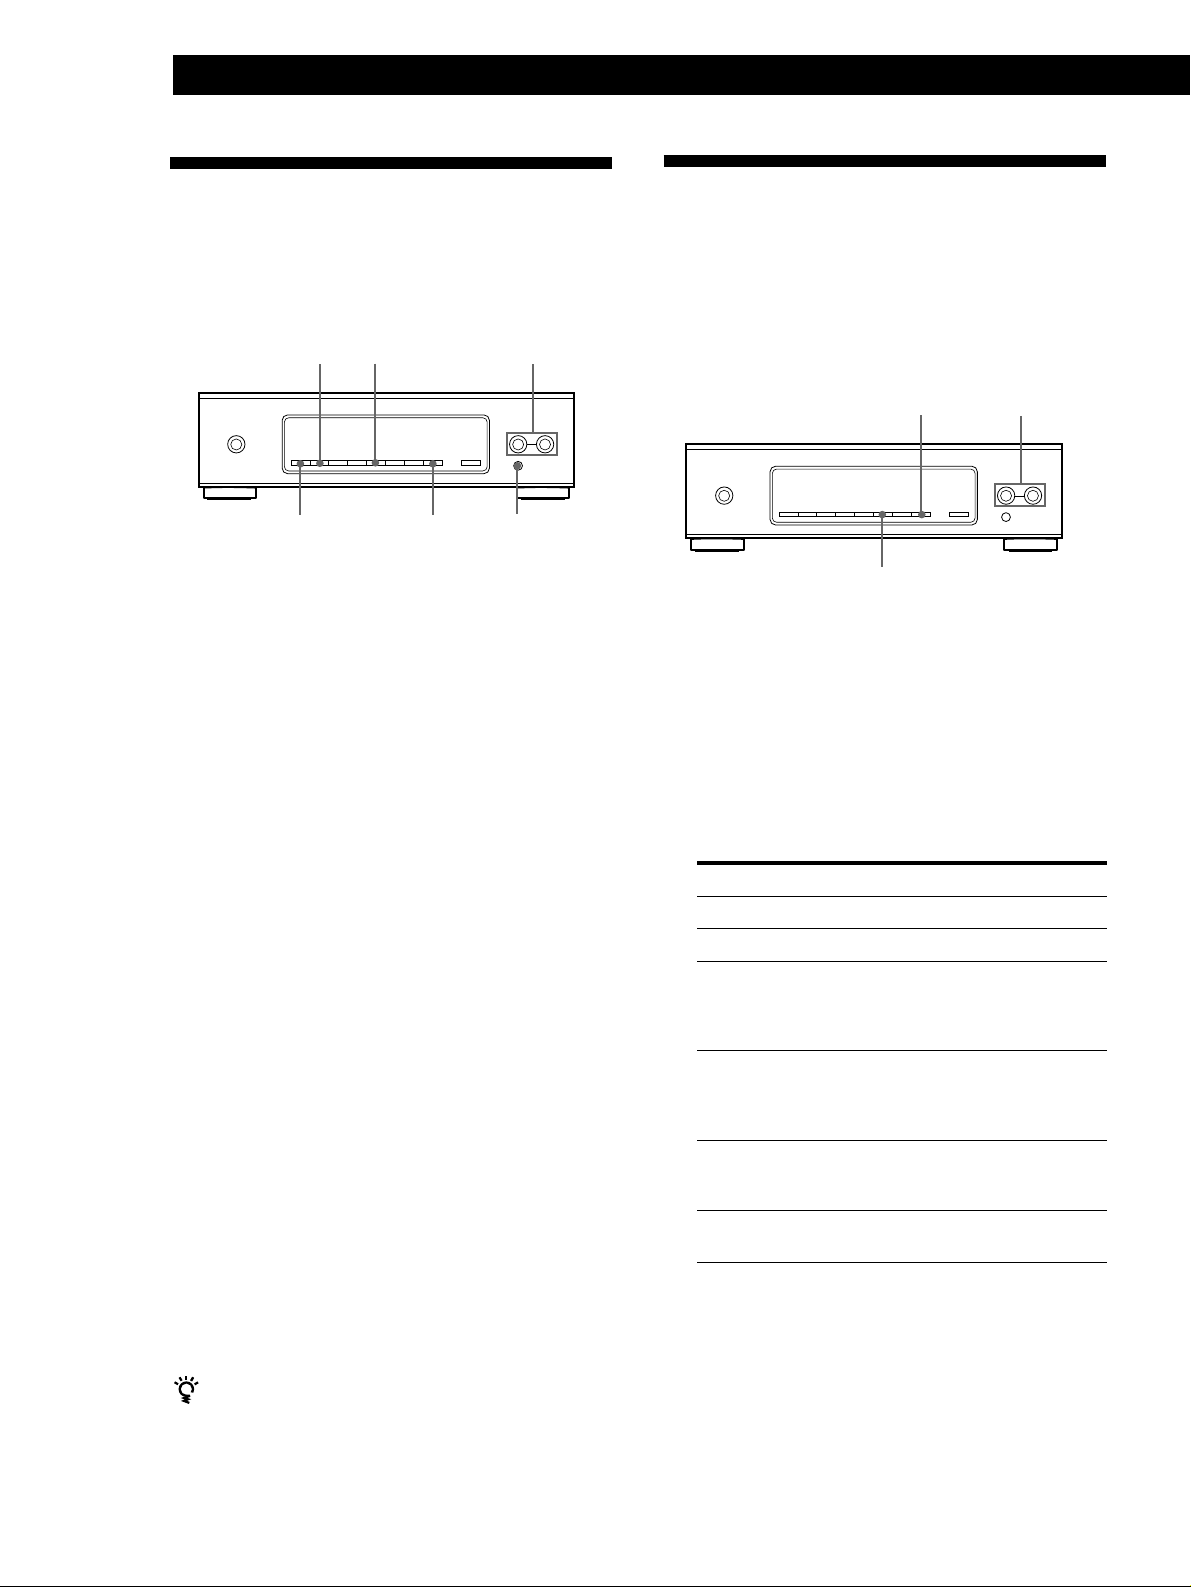
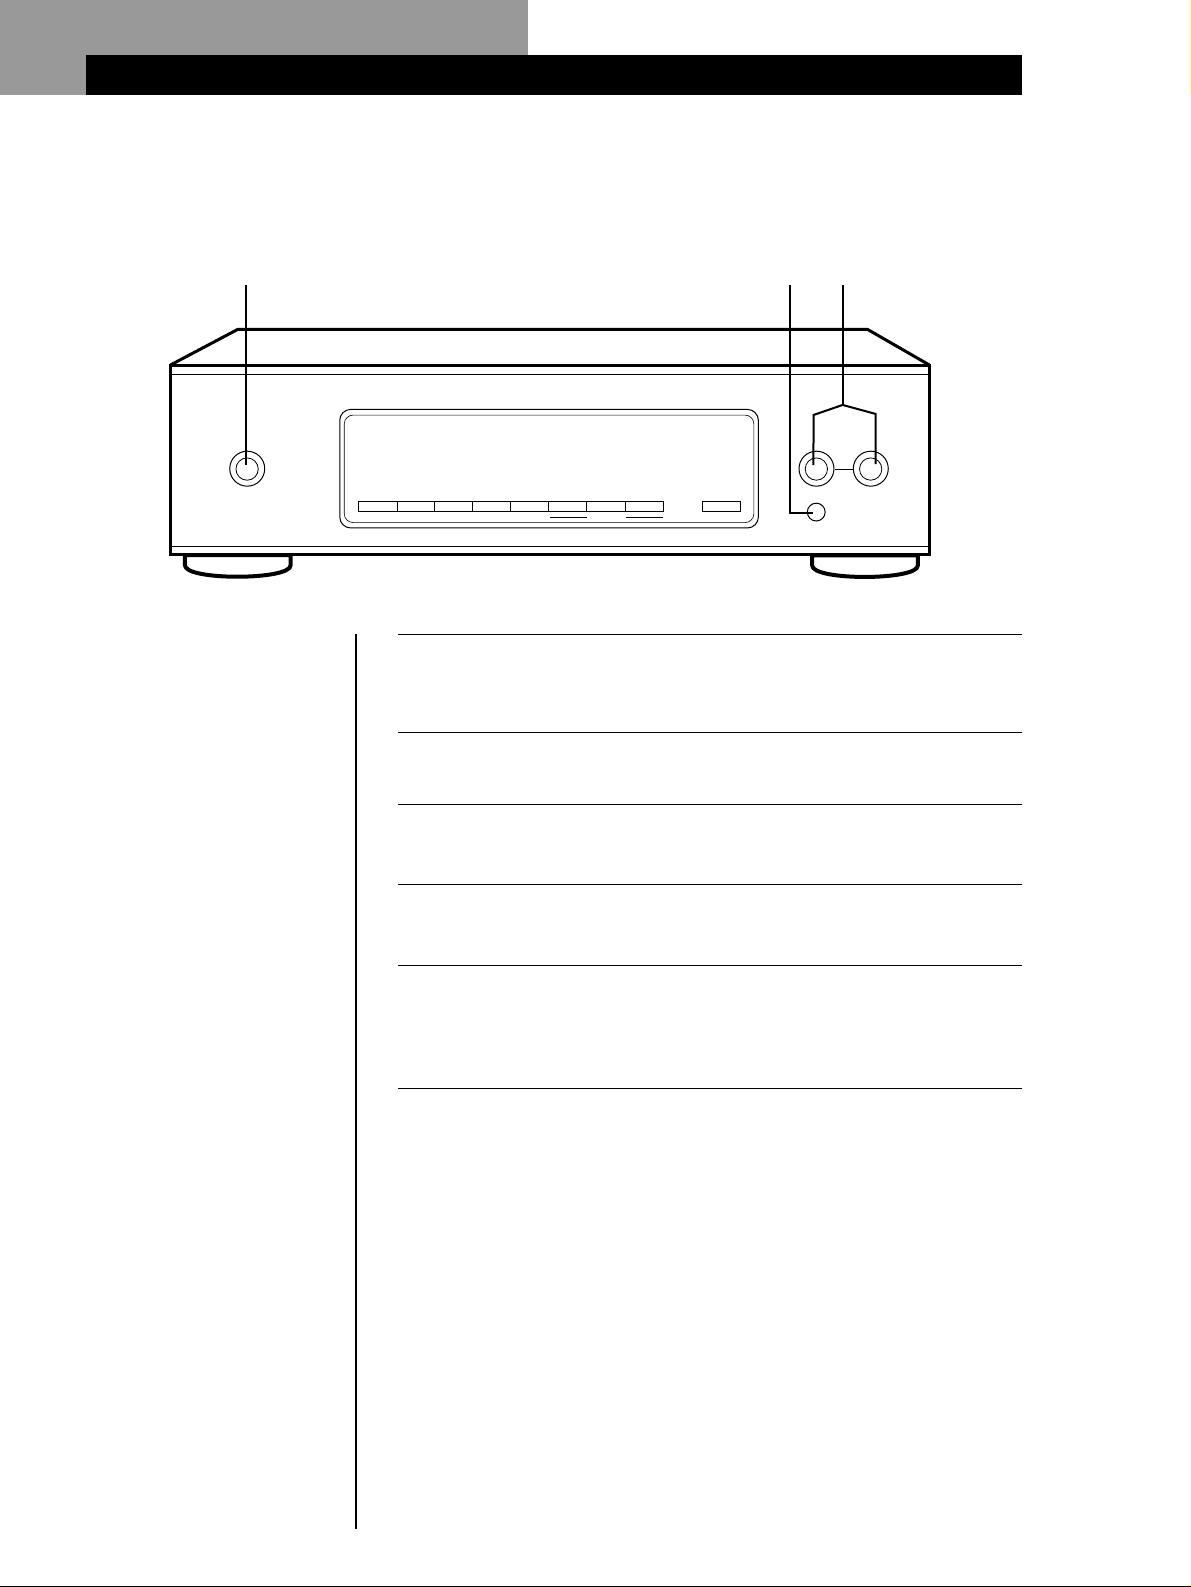
Page 7
Basic Operations
Receiving Preset Stations
This section shows you how to receive preset stations.
• To tune in a non-preset
station, see"Receiving
broadcasts by scanning
stations (Automatic tuning)"
on page 9.
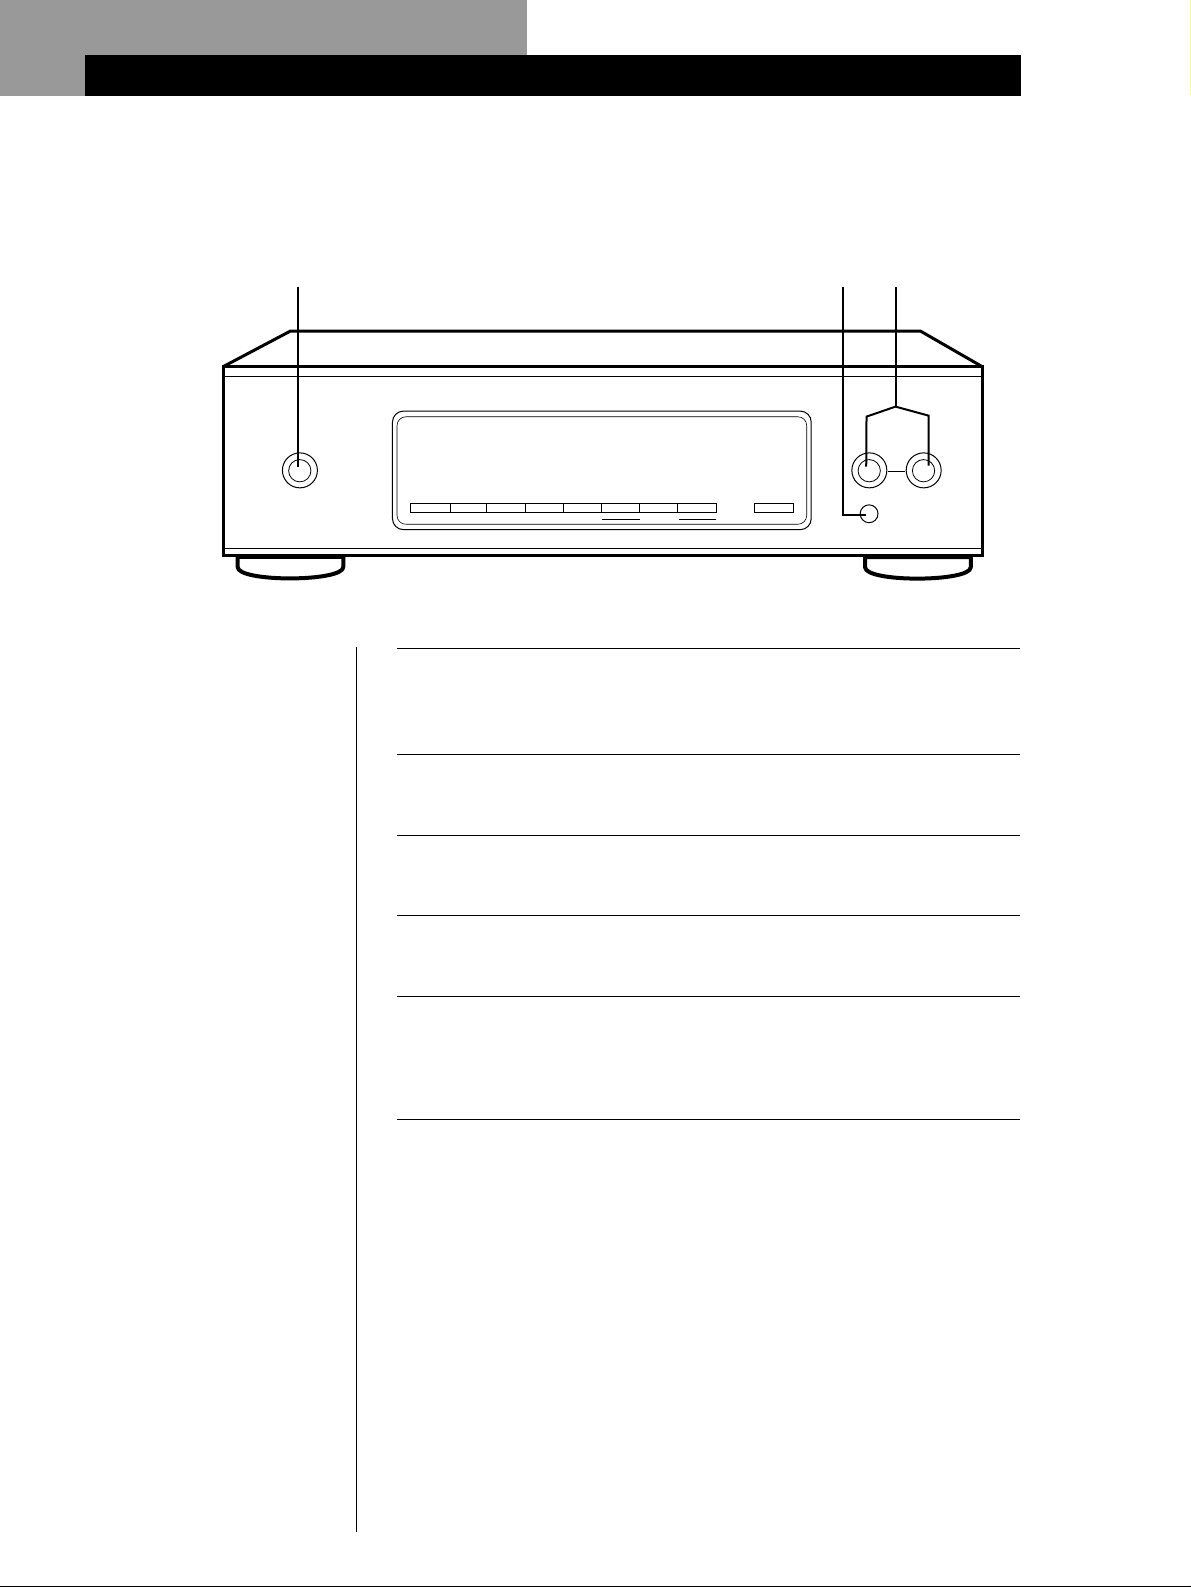
3
POWER
4
FM STEREO / FM-AM TUNER ST-S3000ES
TUNING/SELECT
–+
DISPLAY
CHARACTER
ANTENNA BAND MEMORY MENU RETURN ENTER
MENU ENTRY
Make sure you’ve hooked up the tuner and preset stations.
(See pages 4 – 6 for hookups and page 6 or 11 for presetting.)
1
Turn on the amplifier and select the TUNER mode.
TUNE MODE
SHIFT
2
5
Press POWER to turn on the tuner.
3
Press SHIFT to select A, B, or C.
4
Press TUNING/SELECT + or – to select the preset number you
want. The tuner automatically skips numbers that do not
5
contain preset stations.
GB
7
Page 8

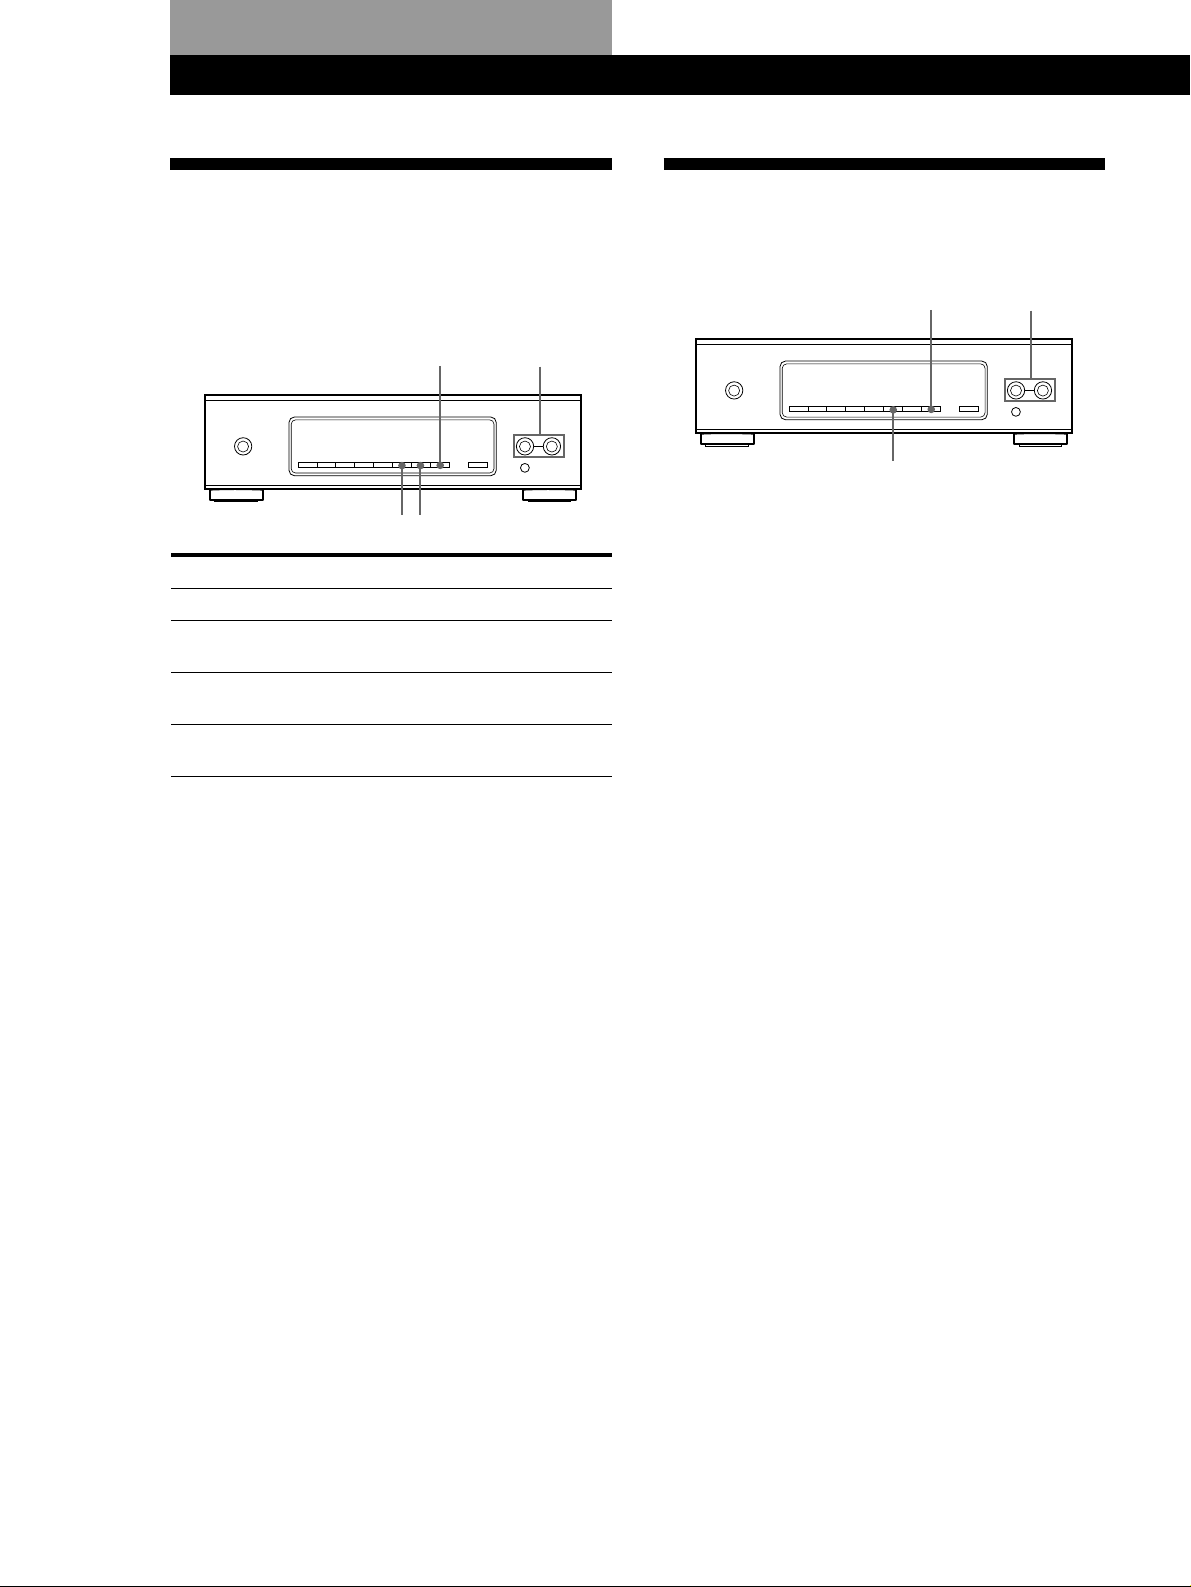
Advanced Tuner Operations
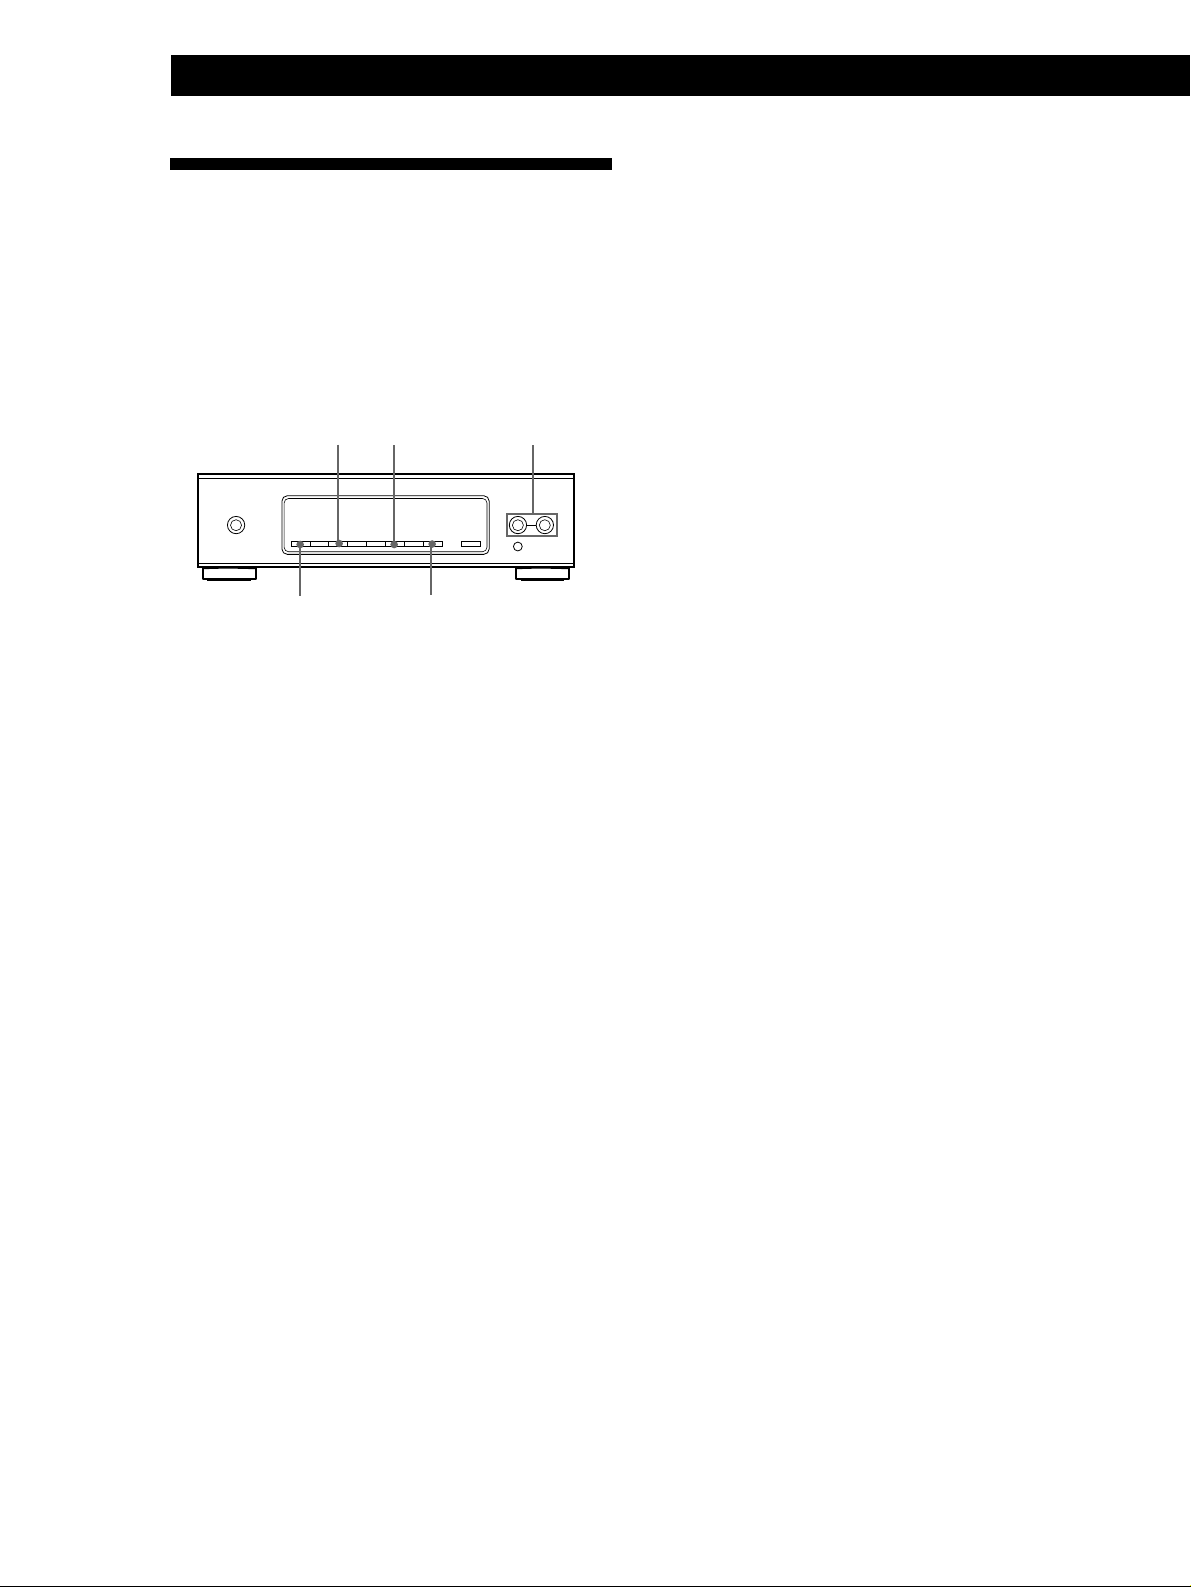
About the Menu Entry System
This tuner uses a menu entry system which allows you
to operate various functions by following messages on
the display. Use the following controls for menu
operation.
TUNING/SELECT
Use the
MENU button
TUNING/SELECT
buttons
ENTER button
RETURN button
ENTER
RETURN
MENU
To:
enter the menu mode.
display different items or settings.
select the currently displayed item
or setting.
return to a previous stage in the
menu mode.
Customizing the Display
You can choose the appearance of the display from one
of the following four display modes.
ENTER TUNING/SELECT
MENU
1 Press MENU, then press TUNING/SELECT + or –
until “Disp-Mode” appears in the display.
2 Press ENTER.
“Select” appears in the display.
3 Press TUNING/SELECT + or – to select a display
mode.
Full Display/Full Brightness
.
Full Display/Dimmed
.
Minimal Display/Full Brightness
.
Minimal Display/Dimmed
4 Press ENTER.
The setting remains in effect until you change it
again.
If you press one of the buttons on the main unit,
the minimal display changes to the full display
with the selected brightness. After about 4
seconds, the display returns to the display mode
you selected.
GB
8
Page 9

Receiving broadcasts by
scanning stations (Automatic
tuning)
With automatic tuning you can quickly tune in a
station without having to know its frequency.
Before you begin, make sure you have:
• Connected an FM, AM aerial to the tuner as
indicated on page 4, 5.
MENU
ENTER
TUNING/SELECT
Advanced Tuner Operations
If you cannot tune in the station you want
(Manual Tuning)
With manual tuning you can search through all stations
broadcasting on each band, and tune in stations with
extremely weak signals that you might not be able to
receive with automatic tuning.
1 Press BAND repeatedly to choose FM, MW, or LW.
2 Press TUNE MODE so that only “TUNING” appears
in the display. “AUTO” should not appear in the
display.
3 Press TUNING/SELECT + or – repeatedly until you
tune in the desired station.
The signal meter indicates the strength of the
broadcast signal.
Note
When you reach the highest or lowest frequency of any
band, tuning stops.
BAND
TUNE MODE
1 Press BAND to choose either FM, MW, or LW.
2 Press TUNE MODE so that “AUTO” appears in
the display.
3 Press TUNING/SELECT + or –.
When the tuner locates a station, it stops
automatically, “TUNED” appears in the display.
The signal meter indicates the strength of the
broadcast signal.
4 Repeat step 3 until you tune in the appropriate
station.
To store the station, see “Presetting Radio
Stations” on page 11.
When you tune in AM (MW and LW) stations
Adjust the direction of the AM loop aerial for optimum
reception.
If the STEREO indicator remains off
Use the menu entry system to set “FM Mode” to
“AUTO”. See “Setting the FM mode manually” on page
10 for details.
If an FM stereo programme is distorted
The STEREO indicator flashes. Use the menu entry
system to set “FM Mode” to “MONO”. You will not
have the stereo effect but the distortion will be reduced.
See “Setting the FM mode manually” on page 10 for
details.
GB
9
Page 10
Advanced Tuner Operations
Tips for Better FM Reception
To Set the ANT ATT and IF BAND manually
1 Press MENU.
This tuner has various functions designed for better
reception. First, try to receive stations with the
standard settings. If the reception is not good, try
altering the reception quality to obtain a clear signal.
The tuner stores the following adjustments, together
with the frequency when you make a station preset.
MENUANTENNA
DISPLAY
TUNING/SELECT
ENTER
Selecting FM aerials
When you use two FM aerials, press ANTENNA to
select FM ANTENNA terminal A or B. By selecting the
aerial, you may be able to receive a station that cannot
be received otherwise.
2 Press TUNING/SELECT + or – repeatedly until
“Reception” appears in the display, then press ENTER.
“FM Only” appears in the display if you choose
“Reception” while tuned to an MW or LW station.
3 Press TUNING/SELECT + or – to choose “ATT/IF Band”,
then press ENTER.
4 Press TUNING/SELECT + or – to choose the ANT ATT
setting you prefer, then press ENTER.
• “ANT ATT : ON” lowers the level of the input signal to
receive broadcasts with extremely high signal levels.
• “ANT ATT : OFF” is for normal tuning.
5 Press TUNING/SELECT + or – to choose the IF setting
you prefer, then press ENTER.
• “IF : Wide” tunes only the stations with high sound
quality and low distortion.
• “IF : Narrow” improves selectivity and reduces
interference to make broadcasts with weak signals
easier to listen to.
Setting the FM mode manually
Use the menu entry system to select either “AUTO”
stereo (no indication) or “MONO”.
Changing the Active Selection Mode (ASM)
This tuner's Active Selection Mode (ASM) is factory
preset to find the best aerial attenuator (ANT ATT),
intermediate frequency bandwidth (IF BAND), and FM
MODE settings for each frequency automatically. You
can, however, choose each setting manually according
to your preference. If you don't want to use the ASM
function, turn it off.
Choose ASM from the menu entry system to turn the
active selection mode off or on.
When ASM is turned on, the ASM indicator appears in the
display when you select the FM band.
1 Press MENU.
2 Press TUNING/SELECT + or – repeatedly until
“Reception” appears in the display, then press ENTER.
3 Press TUNING/SELECT + or – repeatedly until “A.S.M”
appears in the display, then press ENTER.
4 Press TUNING/SELECT + or – to choose “ON” or “OFF”,
then press ENTER.
1 Press MENU.
2 Press TUNING/SELECT + or – repeatedly until
“Reception” appears in the display then press ENTER.
“FM Only” appears in the display if you choose
“Reception” while tuned to an MW or LW station.
3 Press TUNING/SELECT + or – repeatedly until “FM
Mode” appears in the display, then press ENTER.
4 Press TUNING/SELECT + or – to select the settting you
prefer, then press ENTER.
• “AUTO” stereo mode receives stereo broadcasts with
strong signals. The “MONO” indicator disappears
from the display.
• “MONO” receives stations with weak signals.
Stations will be received in monaural but with even
less noise.
10
GB
Page 11
Checking the signal strength
You can use the digital signal meter to check the signal
strength of FM frequencies. The display range is from
16 to 70 dB (1µV of radio frequency voltage = 0dB). To
obtain a signal to noise ratio sufficient for receiving a
stereo broadcast, we recommend a reading greater
than 50 dB.
This unit also lets you use the digital signal meter with
the AM band. With AM, display range is from 0 to 10
(larger values indicate stronger signals).
1 Tune in an FM or AM station.
2 Press DISPLAY repeatedly to display the digital
signal meter.
3 Rotate the FM or AM aerial to obtain the
strongest signal.
Advanced Tuner Operations
Presetting Radio Stations
This section shows you how to store up to 30 of your
favorite FM or AM (MW and LW) stations manually
onto preset codes made up of characters (A, B, or C)
and numbers, such as A7. You can store up to 10
stations on each of the 3 different letters. You can use
these letters to classify stations according to music
category or station band.
TUNING/SELECT
ENTERMEMORY
1 Tune in the FM, MW, or LW station you wish to
store.
SHIFT
2 Press MEMORY.
“MEMORY” appears along with the lowest
vacant code to indicate that the tuner is ready to
store the station.
3 Press SHIFT to chose either A, B, or C.
The letter you choose appears in the display.
4 Press TUNING/SELECT + or – repeatedly to
choose the number you want.
5 Press ENTER to store the station.
The tuner stores the station at the preset code you
specified.
6 Repeat steps 1 through 5 to store other stations.
RDS Station names are stored automatically
When you preset an RDS station broadcasting station
name information, the station name is automatically
stored at the station preset.
If you want to label the stations
Follow the procedure described in “Naming the Preset
Stations” on page 12.
11
GB
Page 12
Advanced Tuner Operations
Naming the Preset Stations
You can assign a name up to 5 characters long to each
preset station (except FM RDS stations). When the
station is tuned in, the station name will appear instead
of the frequency.
CHARACTER
DISPLAY
1 Use SHIFT and the TUNING/SELECT +or –
buttons to specify the preset where you want to
store the station name.
2 Press CHARACTER.
The cursor blinks in the display.
3 Press TUNING/SELECT + or – repeatedly to
select a character.
4 When the character you want appears, press
CHARACTER to move the cursor into position for
the next character.
If you make a mistake
Press CHARACTER repeatedly until the character you
want to change flashes (every time you press
CHARACTER, the next character flashes). Then press
TUNING/SELECT + or – to select a new character.
5 Repeat steps 2 and 3 until the station name you
desire appears in the display.
6 Press MEMORY.
“MEMORY” appears.
Note
The display returns to normal display mode if you do
not press ENTER within 8 seconds after pressing
MEMORY. If this happens, start again from the
beginning.
MEMORY
TUNING/SELECT
ENTER SHIFT
Organizing the Preset Stations
This tuner makes it easy to arrange preset stations in
the order you prefer. You can arrange all the preset
stations automatically, according to alphabetical order,
signal strength, country code, or tuner band, or you
can use the “Move” and “Erase” functions to move and
erase specific preset stations.
ENTER
MENU
1 Press MENU.
2 Press TUNING/SELECT + or – repeatedly until
“Edit” appears in the display, then press ENTER.
If no stations have been stored as presets, “No
Preset” appears in the display.
3 Press TUNING/SELECT +/– repeatedly to
choose one of the following sorting methods:
Choose
Move
Erase
Alphabet
Strength
Country
Band
To
change the location of a specific preset.
erase a specific preset.
sort preset stations in alphabetical order
according to their preset names.
Stations without preset names are arranged
by frequency, from low to high.
sort preset stations in order of their signal
strength (FM stations only).
MW and LW frequencies are arranged by
frequency.
sort FM RDS stations with PI information
alphabetically by country.
Other stations are arranged by frequency.
sort preset stations in order of their
frequency band (FM - MW - LW).
TUNING/SELECT
12
GB
7 Press ENTER to store the station name.
To see the frequency of the displayed station name
Press DISPLAY repeatedly.
4 Press ENTER.
The tuner sorts the stations, then returns to
normal tuning mode and receives preset station
A1 unless you choose “Move” or “Erase”.
Note
Some countries use the same country code, and the stations
from these counties may be arranged together.
Page 13
Moving preset station
You can also move a specific preset station.
1 Follow steps 1 through 3 in “Organizing the
Preset Stations” and choose “Move” from the Edit
menu, then press ENTER.
2 Press TUNING/SELECT + or – so that the preset
code you want to move appears in the display,
then press ENTER.
3 Press TUNING/SELECT + or – to select the new
location for the preset code, then press ENTER.
The preset station you selected is moved to the
new location and the other preset stations in that
group (“A” for example) shift backwards to make
room for the new preset.
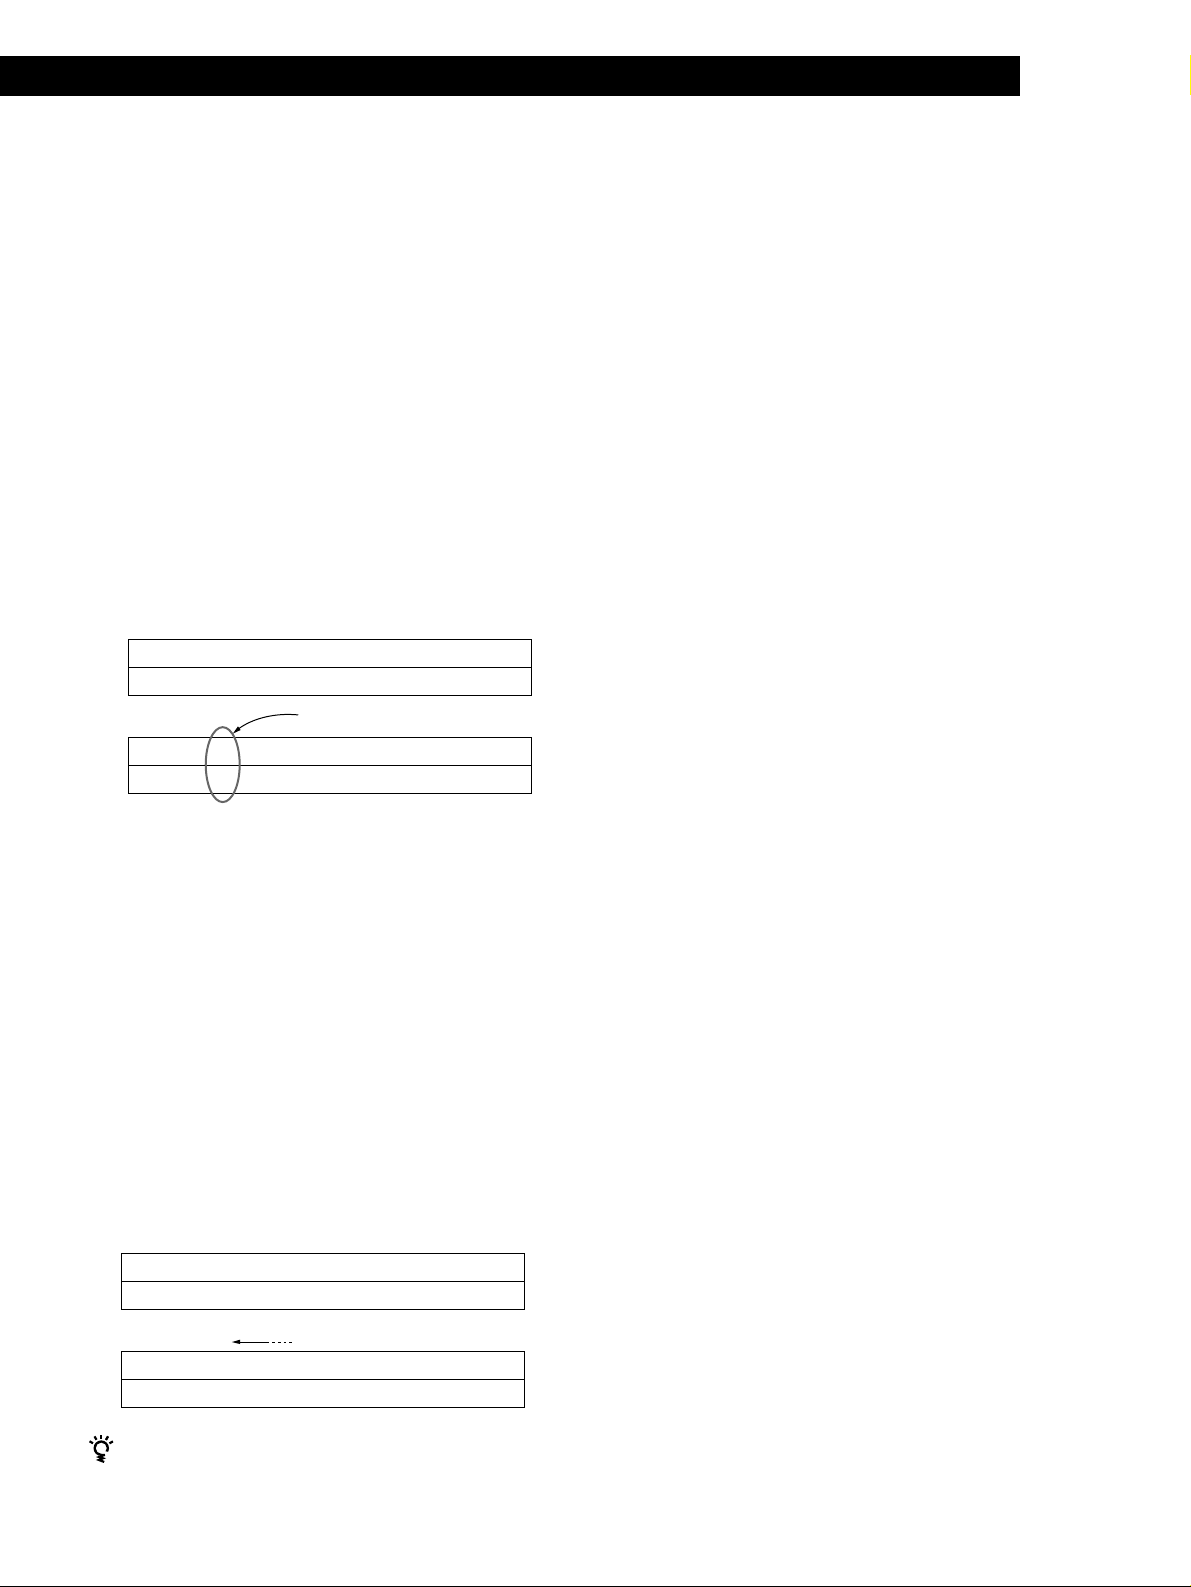
EXAMPLE:
If you move A4 to A1.
A1 A2 A3 A4 A5 A6 A7 A8Preset
89.5 94.5 96.5 98.0 100.5 103.0 104.5 106.0Frequency
Advanced Tuner Operations
.
A1 A2 A3 A4 A5 A6 A7 A8Preset
98.0 89.5 94.5 96.5 100.5 103.0 104.5 106.0Frequency
Erasing preset stations
You can erase preset stations one by one.
1 Follow steps 1 through 3 in “Organizing the
Preset Stations” and choose “Erase” from the Edit
menu, then press ENTER.
2 Press TUNING/SELECT + or – so that the preset
code you want to erase appears in the display,
then press ENTER.
The preset station you selected is erased from the
preset memory and the other preset stations in
that group (“A” for example) shift forward to fill
in the blank space.
EXAMPLE:
If you erase A1.
A1 A2 A3 A4 A5 A6 A7 A8Preset
89.5 94.5 96.5 98.0 100.5 103.0 104.5 106.0Frequency
.
A1 A2 A3 A4 A5 A6 A7 A8Preset
94.5 96.5 98.0 100.5 103.0 104.5 106.0Frequency
If you want to erase all the preset stations
1 Turn off the power.
2 While holding down ANTENNA and ENTER, press
POWER to turn on the power.
13
GB
Page 14

Advanced Tuner Operations
Using the Radio Data System
(RDS)
What you can do with RDS
Notes
• If there is an emergency announcement by governmental
authorities, “ALARM” flashes in the display.
• If a station is not providing a particular RDS service,
“NO...” (such as “NO PTY”) appears in the display.
• Depending on the method used by the radio station to
send the text, some text messages may be incomplete.
The Radio Data System (RDS) is a broadcasting service
that allows radio stations to send additional
information along with the regular radio programme
signal. This unit allows you to display a variety of RDS
information and provides an indicator of stations
designated to broadcast traffic information. RDS is
available only on FM stations.*
Note
RDS may not work properly if the station you are tuned to is
not transmitting the RDS signal properly or if the signal
strength is weak.
* Not all FM stations provide RDS service, nor do they
provide the same types of services. If you are not familiar
with the RDS system, check with your local radio stations
for details on RDS services in your area.
Receiving RDS broadcasts
Simply select a station from the FM band.
When you tune in a station that provides RDS services,
the RDS indicator and the station name appears in the
display.
Finding stations which broadcast traffic
information
When you tune to an RDS station that broadcasts
traffic information, the TP indicator lights up.
14
GB
Displaying the RDS information
Press DISPLAY repeatedly until the information you
desire is displayed.
Information displayed
Station Name*
Frequency*
Clock Time
(24 hour system)
Programme Type
Radio Text
Programme Identification
Digital signal meter*
* This information also appears for non-RDS FM stations.
You can:
Locate each station by name
(e.g., WDR) instead of
frequency.
Locate each station by
frequency.
Display the current time.
Determine a specific type of
programme being broadcast.
Display the text messages sent
by the RDS station.
Determine each broadcast's
country of origin.
(See page 11 for details.)
Page 15

Additional Information
Troubleshooting
If you experience any of the
following difficulties while using
the tuner, use this troubleshooting
guide to help you remedy the
problem. Should any problem
persist, consult your nearest Sony
dealer.
There’s no sound.
/ Connect the aerials.
/ Set the source setting on
the amplifier to TUNER.
You cannot tune in a frequency.
/ Adjust the position of the
aerial.
/ Connect an external aerial
for FM broadcasts.
/ Set IF BAND to NARROW.
/ Preset the stations again if
you've moved.
There is severe hum and/or
background noise.
/ Adjust the position or
direction of the aerial.
/ Tune to a correct
frequency.
/ Connect an external aerial
for FM broadcasts.
/ Move the tuner away from
the source of the noise.
RDS isn‘t working.
/ Make sure that you are
tuned to an FM RDS
station.
/ Select a stronger FM RDS
station.
“No preset” appears in the display.
/ If the mains lead is
disconnected from the wall
outlet for more than one
month, the memory is
erased. Preset stations
again.
The appropriate display or
information does not appear.
/ Turn the power off. Press
and hold ANTENNA and
ENTER and press POWER
to turn the power back on.
This empties any
frequencies stored in the
preset memory and returns
the display to the default
language (English).
/ Contact the radio station
and find out whether or
not they actually provide
the service in question. If
so, the service may be
temporarily out of order.
Specifications
FM tuner section
Frequency range
Aerial terminals
Intermediate frequency
Sensitivity
Usable sensitivity (IHF)
S/N
Harmonic distortion
Frequency response
Separation
87.5 - 108.0 MHz
75 ohms,
unbalanced
IEC-male
10.7 MHz
at 26 dB quieting
(mono) 10.3 dBf,
0.9 µV/75Ω
at 46 dB quieting
(stereo) 38.5 dBf,
23 µV/75Ω
10.3 dBf, 0.9 µV/
75Ω
at 40 kHz deviation :
80 dB (mono),
76 dB (stereo)
at 40 kHz deviation :
WIDE
0.04 % (mono),
0.05 % (stereo)
NARROW
0.06 % (mono),
0.08 % (stereo)
30 Hz - 15 kHz
(+0.2/–0.3 dB)
50 dB at 1 kHz
Selectivity
Output
at 400 kHz
WIDE 80 dB
NARROW 90 dB
at 300 kHz
WIDE 45 dB
NARROW 70 dB
at 40 kHz deviation
600 mV
AM tuner section
Frequency range
Intermediate frequency
Usable Sensitivity
Signal-to-noise ratio
Harmonic distortion
Selectivity
MW: 522 - 1,611 kHz
(9 kHz step)
LW: 144 - 288 kHz
(1 kHz step)
450 kHz
(with AM loop
aerial)
MW: 200 µV/m
LW: 700 µV/m
MW: 54 dB
(50 mV/m,
999 kHz)
LW: 50 dB
(50 mV/m,
216 kHz)
0.3% (50 mV/m,
400 Hz)
50 dB
General
Power requirements
Power consumption
IDimensions
Weight
Supplied accessories
Design and specifications are subject to
change without notice.
220-230 V, AC
50/60 Hz
12 W
280 x 80 x 400 mm
(w/h/d)
4.3 kg
Audio cord (1)
AM loop aerial (1)
FM wire aerial (1)
15
GB
Page 16

Additional Information
Index
A, B
Adjusting
IF band 10
Aerial hookups
AM 4
FM 5
Amplifier hookups 5
Automatic tuning 9
Auto-betical select 6
P, Q
Presetting
AM stations 11
FM stations 6, 11
Preset tuning
AM stations 7
FM stations 7
R
RDS 13
Receiving preset stations 7
C
Connecting. See Hookups
D,E
Display
language 6
mode 8
F, G
FM mode 10
H
Hookups
AM aerial 4
amplifier 5
FM aerial 5
mains lead 6
I, J, K, L
S
Signal meter 10
Storing radio stations. See
Presetting
T
Troubleshooting 15
Tuning. See Receiving
broadcasts
U, V
Unpacking 4
W, X, Y, Z
WIDE 10
16
IF band 10
M
Manual tuning 9
Memory 6, 10, 11
N
Naming stations 11
NARROW 10
O
Organizing preset stations 12
GB
Page 17

17
GB
Page 18

AVERTISSEMENT
Afin d’éviter tout risque d’incendie ou
d’électrocution, ne pas exposer cet
appareil à la pluie ou à l’humidité.
Afin d’écarter tout risque
d’électrocution, garder le coffret fermé.
Ne confier l’entretien de l’appareil qu’à
un personnel qualifié.
Précautions
Sécurité
• Si un solide ou un liquide tombait
dans le coffret, débranchez le tuner et
faites le vérifier par un technicien
qualifié avant de le remettre en
service.
Sources d’alimentation
• Avant de mettre en service le tuner,
vérifiez que la tension de
fonctionnement correspond à celle du
courant secteur local.
• Si vous ne comptez pas utiliser
l’appareil pendant un certain temps,
débranchez-le de la prise murale.
Pour débrancher le cordon, tirez sur
la fiche et jamais sur le cordon
proprement dit.
• Si le cordon d’alimentation secteur
doit être remplacé, adressez-vous à
un technicien qualifié uniquement.
Remballage
• Ne jetez pas le carton et les matériaux
d’emballage car ils peuvent servir
pour le transport du tuner. Si vous
devez expédier le tuner, remballez-le
comme à la sortie d’usine.
Pour toute question ou problème
concernant le tuner et non couverts par
ce mode d’emploi, consultez votre
revendeur Sony.
Installation
• Installez le tuner dans un endroit bien
ventilé pour éviter tout risque de
surchauffe interne et prolonger la
durée de vie des composants.
• N’installez pas le tuner près d’une
source de chaleur, dans un endroit en
plein soleil, poussiéreux ou exposé à
des chocs mécaniques.
• Ne posez rien sur le coffret qui puisse
bloquer les orifices de ventilation et
provoquer un mauvais
fonctionnement.
• Ne pas installer le tuner dans un
espace confiné, comme dans une
bibliothèque ou un placard.
Nettoyage
• Nettoyez le coffret, le panneau et les
commandes avec un chiffon doux
légèrement imprégné d’une solution
détergente douce. N’utilisez pas de
tampon abrasif, de poudre à récurer
ou de solvant, comme de l’alcool ou
de la benzine.
F
2
Page 19
Bienvenue!
Merci d’avoir acheté ce tuner FM
stéréo/FM-AM Sony. Avant la mise en
service du tuner, veuillez lire
attentivement ce mode d’emploi et le
conserver pour toute référence future.
TABLE DES MATIÈRES
Préparatifs
Déballage 4
Raccordements 4
Sélection de l’affichage en allemand 6
Mémorisation automatique des stations FM (Sélection autobétique) 6
Au sujet de ce mode
d’emploi
L’icône suivante est utilisée dans le
mode d’emploi:
Donne des informations et des
conseils supplémentaires pour
faciliter l’utilisation.
Fonctions de base
Réception des stations préréglées 7
Fonctions élaborées
Au sujet du menu 8
Personnalisation de l’affichage 8
Réception par balayage des stations (accord automatique) 9
Conseils pour améliorer la réception FM 10
Préréglage de stations radio 11
Attribution d’un nom aux stations préréglées 12
Mise en ordre des stations préréglées 12
Utilisation du radioguidage (RDS) 14
F
Informations supplémentaires
Guide de dépannage 15
Spécifications 15
Index 16
F
3
Page 20

Préparatifs
Déballage
Vérifiez que les accessoires suivants se trouvent dans
l’emballage:
• Cordon audio (1)
• Antenne cadre AM (1)
• Antenne fil FM (1)
Raccordements
2 Déroulez 3 longueurs de fil tressé du cadre de
l’antenne. Déroulez uniquement la partie tressée
du fil.
Ne déroulez pas plus de 3 longueurs de fil et
veillez à ne pas défaire le fil tressé.
Préparatifs
• Mettez tous les composants hors tension avant
d’effectuer les connexions.
• Effectuez toutes les connexions avant de brancher le
cordon d’alimentation secteur.
• Enfoncez les fiches correctement pour éviter un
bourdonnement et du bruit.
• Lors du raccordement d’un cordon audio, faites
correspondre les broches codées par couleur aux
prises sur les composants: blanc (gauche) à blanc et
rouge (droit) à rouge.
Raccordement de l’antenne AM
Ce paragraphe explique comment raccorder l’antenne
cadre AM fournie. L’illustration ci-dessous indique
l’emplacement des bornes AM ANTENNA.
AM ANTENNA
ANTENNA
AB
FM
75 COAXIAL
AM
LINE OUT
RL
y
3 Assemblez l’antenne fournie comme indiqué ci-
dessous.
4 Raccordez l’antenne cadre AM aux bornes AM à
l’arrière du tuner.
Antenne cadre AM
ANTENNA
AM
y
5 Réglez la direction de l’antenne pour améliorer la
réception. L’antenne cadre AM a un effet directif
et capte mieux le signal selon certains angles.
De quoi avez-vous besoin?
• Vous avez besoin d’une antenne cadre AM (fournie) (1)
Orientez l’antenne selon l’angle qui offre les
meilleures conditions de réception.
Si un bruit aigu (battement) se produit lors de
l’enregistrement d’émissions AM, ajustez la
position de l’antenne cadre AM pour que le bruit
disparaisse. Si vous habitez dans un immeuble
construit en béton armé ou avec ossature
métallique, vous risquez de ne pas obtenir une
bonne réception car les ondes radio seront trop
faibles à l’intérieur du bâtiment.
1 Avant d’installer l’antenne fournie, sortez le fil de
la rainure du cadre de l’antenne.
F
4
Pour les stations qui sont difficiles à recevoir
Essayez de repositionner l’antenne cadre pendant
l’accord. Le fait de placer l’antenne cadre AM près
d’une fenêtre peut améliorer la qualité de la réception.
Page 21
Préparatifs
AM
y
ANTENNA
75 COAXIAL
FM
AB
Raccordement de l’antenne FM
En raccordant une antenne FM extérieure, vous pouvez
obtenir un son FM de meilleure qualité. Nous vous
conseillons d’utiliser l’antenne fil FM fournie
uniquement en attendant d’installer une antenne FM
extérieure. L’illustration ci-dessous indique
l’emplacement de la borne FM ANTENNA.
FM ANTENNA
ANTENNA
AB
FM
75 COAXIAL
De quoi avez-vous besoin?
• Vous avez besoin d’une antenne fil FM (fournie) (1).
• Antenne extérieure FM (non fournie) (1) et câble coaxial
de 75 ohms avec connecteur femelle IEC (non fourni) (1)
Connecteur femelle IEC
AM
LINE OUT
RL
y
Raccordement à la terre
Si vous raccordez une antenne extérieure, veillez à
raccorder un fil de terre (non fourni) à la borne AM
ANTENNA y (en plus de l’antenne cadre AM) par
mesure de précaution contre la foudre.
Afin d’éviter tout risque d’explosion, ne raccordez pas
le fil de terre à un tuyau de gaz.
à la terre
Raccordement d’un amplificateur
Raccordez le tuner à un amplificateur. Veillez à mettre
les deux appareils hors tension avant de les raccorder.
Pour plus de détails sur l’emplacement des bornes, voir
l’illustration ci-dessous.
Tuner
ANTENNA
AB
FM
75 COAXIAL
AM
LINE OUT
RL
y
Raccordez l’antenne fil FM fournie ou une antenne FM
extérieure (non fournie) à une des bornes FM à l’arrière
du tuner.
Antenne fil FM
AFM B
75 COAXIAL
ANTENNA
Antenne FM extérieure
ANTENNA
AFM B
75 COAXIAL
Connecteur femelle IEC
Vous pouvez utiliser deux antennes FM
Le tuner est équipé de deux bornes FM ANTENNA, A
et B, qui permettent de raccorder différentes antennes
FM. Par exemple, vous pouvez raccorder une antenne
extérieure à la prise A et une antenne fil à la prise B.
Vous pouvez également alterner les antennes en
utilisant l‘indicateur de signal pour déterminer
l’antenne qui offre les meilleures conditions de
réception pour une station particulière.
LINE OUT
(L/R)
Amplificateur
INPUT TUNER (L/R)
De quels cordons avez-vous besoin?
• Vous avez besoin d’un cordon audio (fourni) (1)
Blanc (gauche)
Rouge (droit)
Blanc (gauche)
Rouge (droit)
Raccordez les fiches blanches aux prises blanches (canal
gauche) et les fiches rouges aux prises rouges (canal droit).
Insérez complètement les fiches dans les prises car des
connexions relâchées peuvent provoquer du bruit.
Amplificateur
INPUT
Tuner
LINE OUT
R
ç
L
TUNER CD AUX
L
R
(voir page suivante)
F
5
Page 22
Préparatifs
Raccordement au courant secteur
Branchez le cordon d’alimentation secteur sur une prise
murale après avoir terminé toutes les autres connexions.
ANTENNA
FM
AB
75 COAXIAL
AM
LINE OUT
RL
y
/
à une prise murale
Sélection de l’affichage en
allemand
Vous pouvez choisir l’anglais ou l’allemand comme
langue d’affichage. L’anglais est la langue préréglée en
usine. Pour obtenir l’affichage en allemand, effectuez
les opérations suivantes.
POWER
balayage des stations (accord automatique)” à la page 9
et “Préréglage de stations radio” à la page 11.
POWER
MENU
ENTER
TUNING/SELECT
1 Raccordez l’antenne FM.
Voir “Raccordement de l’antenne FM” à la page 5.
2 Appuyez sur POWER pour mettre le tuner sous
tension.
3 Appuyez de façon répétée sur MENU jusqu’à ce
que “Auto-betical” apparaisse sur l’afficheur.
4 Appuyez sur ENTER.
“Yes” et “No” apparaissent sur l’afficheur.
5 Appuyez sur TUNING/SELECT + ou – de sorte
que “Yes” clignote sur l’afficheur.
6 Appuyez sur ENTER.
Le tuner balaye toutes les stations FM et FM RDS
MENU
1 Appuyez sur POWER pour mettre le tuner hors
tension.
2 Tout en tenant la touche MENU enfoncée,
appuyez sur POWER pour mettre le tuner sous
tension.
“Deutsch” apparaît sur l’afficheur.
Pour revenir à l’affichage anglais
Refaites la même opération.
“English” apparaît sur l’afficheur.
Mémorisation automatique
des stations FM (Sélection
autobétique)
Avec la sélection “autobétique”, vous pouvez
mémoriser automatiquement jusqu’à 30 stations FM et
FM RDS dans l’ordre alphabétique, sans redondance.
En outre, la sélection “autobétique” mémorise
uniquement les stations qui ont un signal clair.
Si vous voulez mémoriser les stations FM ou AM (PO
F
6
et GO) une par une, reportez-vous à “Réception par
de la région et les mémorise.
Dans le cas des stations RDS, le tuner recherche
d’abord les stations qui diffusent le même
programme, puis mémorise uniquement celle qui
a le signal le plus clair. Les stations RDS
sélectionnées sont classées alphabétiquement par
leur nom de service de programme, puis un code
de préréglage à deux caractères leur est attribué.
Pour plus de détails sur le service RDS, voir à la
page 14.
Un code de préréglage à deux caractères est
également attribué aux stations FM ordinaires lors
de leur mémorisation après les stations FM RDS.
Pour changer d’emplacement ou effacer une station
préréglée
Voir “Mise en ordre des stations préréglées” à la page 12.
Remarques
• Si vous déménagez, répétez ces démarches pour
mémoriser de nouvelles stations.
• Pour plus de détails sur l’accord des stations préréglées,
voir la page 11.
• Les paramètres ANTENNA, ANT ATT, IF BAND et FM
MODE sont également mémorisés en même temps que la
station.
• Si vous bougez l’antenne après avoir mémorisé des
stations avec la “sélection autobétique”, les paramètres
risquent d’être effacés. Dans ce cas, mémorisez de
nouveau les stations.
Page 23
Fonctions de base
Réception des stations préréglées
Ce paragraphe explique comment recevoir les stations préréglées.
345
FM STEREO / FM-AM TUNER ST-S3000ES
POWER
• Pour accorder une station qui
n’a pas été préréglée, voir
“Réception par balayage des
stations (accord
automatique)” à la page 9.
DISPLAY
TUNING/SELECT
–+
CHARACTER
ANTENNA BAND MEMORY MENU RETURN ENTER
MENU ENTRY
Vérifiez que vous avez raccordé le tuner et préréglé des
stations. (Voir les pages 4 - 6 pour les raccordements et la page
1
6 ou 11 pour le préréglage.)
Mettez l’amplificateur sous tension et sélectionnez le mode
TUNER.
2
Appuyez sur POWER pour mettre le tuner sous tension.
TUNE MODE
SHIFT
3
Appuyez sur SHIFT pour sélectionner A, B ou C.
4
Appuyez sur TUNING/SELECT + ou - pour sélectionner le
numéro de préréglage souhaité. Le tuner saute
5
automatiquement les numéros qui ne correspondent pas à une
station préréglée.
F
7
Page 24
Fonctions élaborées
Au sujet du menu
Le menu du tuner permet d’utiliser différentes
fonctions en suivant les messages qui apparaissent sur
l’affichage. Utilisez les commandes suivantes pour
l’exploitation du menu.
TUNING/SELECTENTER
MENU RETURN
Utilisez
la touche MENU
Pes touches TUNING/
SELECT
la touche ENTER
la touche RETURN
Pour:
entrer dans le menu.
afficher différents paramètres ou
réglages.
sélectionner le paramètre ou
réglage affiché.
revenir à l’étape précédente du
menu.
Personnalisation de l’affichage
Vous pouvez choisir un des quatre modes d’affichage
suivants.
TUNING/SELECTENTER
MENU
1 Appuyez sur MENU, puis sur TUNING SELECT
+ ou – jusqu’à ce que “Disp-Mode” apparaisse sur
l’afficheur.
2 Appuyez sur ENTER.
“Select” apparaît sur l’afficheur.
3 Appuyez sur TUNING/SELECT + ou – pour
sélectionner un mode d’affichage.
Affichage complet/Luminosité intense
.
Affichage complet/Luminosité réduite
.
Affichage minimal/Luminosité intense
.
Affichage minimal/Luminosité réduite
4 Appuyez sur ENTER.
Ce réglage reste en vigueur jusqu’à ce que vous le
changiez à nouveau.
Si vous appuyez sur une des touches du tuner,
l’affichage complet remplace l’affichage minimal
avec la luminosité sélectionnée. Au bout de 4
secondes environ, l’afficheur revient au mode
d’affichage sélectionné.
F
8
Page 25

Réception par balayage des
stations (accord automatique)
L’accord automatique permet d’accorder rapidement
une station même si vous ne connaissez pas sa
fréquence.
Avant de commencer, assurez-vous que:
• L’antenne FM/AM est raccordée au tuner comme
indiqué à la page 4, 5.
MENU
TUNING/SELECTENTER
Fonctions élaborées
Si vous ne parvenez pas à accorder une station
(accord Manuel)
L’accord manuel permet de rechercher toutes les
stations d’une gamme et d’accorder les stations avec un
signal faible qui ne peuvent pas être accordées avec
l’accord automatique.
1 Appuyez plusieurs fois sur BAND pour sélectionner
FM, MW (PO) ou LW (GO).
2 Appuyez sur TUNE MODE de sorte que seul
“TUNING” apparaisse sur l’afficheur. “AUTO” ne
devrait pas apparaître.
3 Appuyez de façon répétée sur TUNING/SELECT +
ou – jusqu’à ce que la station souhaitée soit accordée.
L‘indicateur de signal donne l’intensité du signal
d’émission.
Remarque
Quand la plus petite ou la plus grande fréquence d’une
gamme est atteinte, le balayage s’arrête.
BAND
TUNE MODE
1 Appuyez sur BAND pour sélectionner FM, MW
(PO) ou LW (GO).
2 Appuyez sur TUNE MODE de sorte que “AUTO”
apparaisse sur l’afficheur.
3 Appuyez sur TUNING/SELECT + ou –.
Quand le tuner trouve une station, le balayage
s’arrête automatiquement, “TUNED” apparaît sur
l’afficheur et l’indicateur de signal donne
l’intensité du signal d’émission.
4 Répétez l’étape 3 jusqu’à ce que la station
souhaitée soit accordée.
Pour mémoriser la station, voir “Préréglage de
stations radio” à la page 11.
Quand vous accordez des stations AM (PO et GO)
Ajustez la direction de l’antenne cadre AM pour une
réception optimale.
Si l’indicateur STEREO reste éteint
Utilisez le menu pour régler “FM Mode” sur “AUTO”.
Voir “Réglage manuel du mode FM” à la page 10 pour
les détails.
Si l’émission FM stéréo est parasitée
L’indicateur STEREO clignote. Utilisez le menu pour
régler “FM Mode” sur “MONO”. L’effet stéréo sera
supprimé mais les parasites seront réduits. Voir
“Réglage manuel du mode FM” à la page 10 pour les
détails
F
9
Page 26
Fonctions élaborées
Conseils pour améliorer la
réception FM
Ce tuner est équipé de diverses fonctions destinées à
améliorer la réception. Essayez d’abord d’accorder les
stations avec les réglages de base. Si la réception n’est
pas de bonne qualité, essayez de changer les différents
réglages. Le tuner mémorise ces réglages en même
temps que la fréquence de la station lors du préréglage
d’une station.
ANTENNA
MENU TUNING/SELECT
Pour régler les paramètres ANT ATT et IF BAND
manuellement
1 Appuyez sur MENU.
2 Appuyez de façon répétée sur TUNING/SELECT + ou –
jusqu’à ce que “Reception” apparaisse sur l’afficheur, puis
appuyez sur ENTER.
“FM Only” apparaît sur l’afficheur si vous avez
sélectionné “Reception” pendant la réception d’une
station PO ou GO.
3 Appuyez sur TUNING/SELECT + ou – pour sélectionner
“ATT/IF Band”, puis appuyez sur ENTER.
4 Appuyez sur TUNING/SELECT + ou – pour sélectionner
le réglage ANT ATT souhaité, puis appuyez sur ENTER.
• “ANT ATT : ON” pour recevoir des émissions avec un
signal extrêmement élevé. Le niveau du signal d’entrée
est diminué.
• “ANT ATT : OFF” pour l’accord normal.
DISPLAY
ENTER
Sélection de l’antenne FM
Si vous avez raccordé deux antennes FM, appuyez sur
ANTENNA pour sélectionner la borne FM ANTENNA
A ou B. En sélectionnant l’antenne, vous pouvez
recevoir d’autres stations qui ne seraient pas accordées
autrement.
Changement du mode ASM (mode de
sélection active)
Le mode ASM (mode de sélection active) du tuner est
préréglé en usine pour régler automatiquement
l’atténuateur d’antenne (ANT ATT), la fréquence
intermédiaire (IF BAND) et le mode FM MODE pour
chaque fréquence. Cependant, vous pouvez régler ces
paramètres manuellement. Vous pouvez aussi mettre
le mode ASM hors service si vous ne voules pas
l’utiliser.
Choisissez ASM dans le menu pour mettre le mode de
sélection active en ou hors service.
Quand cette fonction est en service, l’indicateur ASM
apparaît sur l’afficheur lorsque vous sélectionnez la gamme
FM.
1 Appuyez sur MENU.
2 Appuyez de façon répétée sur TUNING/SELECT + ou –
jusqu’à ce que “Reception” apparaisse sur l’afficheur, puis
appuyez sur ENTER.
5 Appuyez sur TUNING/SELECT + ou – pour sélectionner
le réglage IF souhaité, puis appuyez sur ENTER.
• “IF : Wide” pour accorder uniquement les stations de
haute qualité sonore et sans distorsion.
• “IF : Narrow” pour mieux recevoir les émissions avec
un signal faible. La sélectivité est améliorée et les
interférences sont réduites.
Réglage manuel du mode FM
Utilisez le menu pour sélectionner le mode de
réception stéréo automatique (pas d’indication) ou
“MONO”.
1 Appuyez sur MENU.
2 Appuyez de façon répétée sur TUNING/SELECT + ou –
jusqu’à ce que “Reception” apparaisse sur l’afficheur, puis
appuyez sur ENTER.
“FM Only” apparaît sur l’afficheur si vous choisissez
“Reception” quand une station PO ou GO est accordée.
3 Appuyez de façon répétée sur TUNING/SELECT + ou –
jusqu’à ce que “FM Mode” apparaisse sur l’afficheur, puis
appuyez sur ENTER.
4 Appuyez sur TUNING/SELECT + ou – pour sélectionner
le réglage souhaité, puis appuyez sur ENTER.
• Avec le mode de réception stéréo automatique, seules
les stations ayant un signal puissant seront reçues.
L’indicateur “MONO” disparaît de l’afficheur.
• Le mode “MONO” permet de recevoir les stations
avec un signal faible. Le son sera monophonique mais
le bruit sera quasiment éliminé.
10
3 Appuyez de façon répétée sur TUNING/SELECT + ou –
jusqu’à ce que “A.S.M” apparaisse sur l’afficheur, puis
appuyez sur ENTER.
4 Appuyez sur TUNING/SELECT + ou – pour sélectionner
F
“ON” ou “OFF”, puis appuyez sur ENTER.
Page 27

Vérification de l’intensité du signal
Utilisez l‘indicateur de signal numérique pour vérifier
l’intensité du signal des stations FM. La plage
d’affichage est comprise entre 16 et 70 dB (1µV de
tension de fréquence radio = 0dB). Pour obtenir un
rapport signal sur bruit suffisant pour la réception
d’une émission stéréo, nous vous conseillons une
valeur supérieure à 50 dB. Vous pouvez aussi utiliser
l’indicateur de signal numérique pour la gamme AM.
Avec la gamme AM, la plage d’affichage va de 0 à 10
(les valeurs supérieures indiquent des signaux plus
puissants).
1 Accordez une station FM ou AM .
2 Appuyez plusieurs fois sur DISPLAY pour
afficher l‘indicateur de signal numérique.
3 Tournez l’antenne FM ou AM jusqu’à obtention
du signal le plus clair.
Fonctions élaborées
Préréglage de stations radio
Ce paragraphe explique comment mémoriser jusqu’à
30 stations FM ou AM (PO et GO) manuellement sur
des codes de préréglage composés d’une lettre (A, B ou
C) et d’un numéro, comme par exemple A7. Vous
pouvez mémoriser jusqu’à 10 stations sur chacune des
trois lettres. Vous pouvez utiliser ces lettres pour
classer les stations en fonction du type de musique ou
de la gamme.
TUNING/SELECT
MEMORY SHIFT
1 Accordez la station FM, PO ou GO que vous
voulez mémoriser.
ENTER
2 Appuyez sur MEMORY.
“MEMORY” apparaît en même temps que le plus
petit numéro de code disponible pour indiquer
que le tuner est prêt à mémoriser la station.
3 Appuyez sur SHIFT pour choisir A, B ou C.
La lettre choisie apparaît sur l’afficheur.
4 Appuyez de façon répétée sur TUNING/SELECT
+ ou – pour sélectionner le numéro souhaité.
5 Appuyez sur ENTER pour mémoriser la station.
Le tuner mémorise la station sur le code choisi.
6 Répétez les étapes 1 à 5 pour mémoriser d’autres
stations.
Les noms des stations RDS sont automatiquement
mémorisés
Lorsque vous préréglez une station RDS qui diffuse le
nom de la station, le nom est automatiquement
mémorisé.
Si vous voulez attribuer un nom aux stations
Suivez la procédure de “Attribution d’un nom aux
stations préréglées” à la page 12.
11
F
Page 28
Fonctions élaborées
Attribution d’un nom aux
stations préréglées
Vous pouvez attribuer un nom comprenant jusqu’à 5
caractères à chaque station préréglée (excepté les
stations FM RDS). Par la suite, quand vous accorderez
la station, le nom apparaîtra au lieu de la fréquence.
CHARACTER TUNING/SELECT
1 Utilisez les touches SHIFT et TUNING/SELECT +
ou – pour désigner la station préréglée à laquelle
vous souhaitez attribuer un nom.
2 Appuyez sur CHARACTER.
Le curseur clignote sur l’afficheur.
3 Appuyez de façon répétée sur TUNING/SELECT
+ ou – pour sélectionner un caractère.
4 Quand le caractère souhaité apparaît, appuyez sur
la touche CHARACTER pour mettre le curseur
sur la position du caractère suivant.
En cas d’erreur
Appuyez plusieurs fois sur CHARACTER jusqu’à ce
que le caractère à remplacer clignote (chaque fois que
vous appuyez sur CHARACTER, le caractère suivant
clignote). Puis, appuyez sur TUNING/SELECT + ou –
pour sélectionner un nouveau caractère.
5 Répétez les étapes 2 et 3 jusqu’à ce que le nom
apparaisse entièrement sur l’affichage.
6 Appuyez sur MEMORY.
“MEMORY” apparaît.
Remarque
L'afficheur revient au mode normal si vous attendez
plus de 8 secondes pour appuyer sur ENTER après
avoir appuyé sur MEMORY. Dans ce cas, recommencez
depuis le début.
MEMORY
ENTER
SHIFTDISPLAY
Mise en ordre des stations
préréglées
Le tuner vous permet de mettre les stations préréglées
dans l’ordre que vous voulez. Les stations peuvent être
classées automatiquement dans l’ordre alphabétique
ou en fonction de la puissance du signal, du code du
pays ou de la gamme d’accord. Vous pouvez en outre
“Move” (déplacer) ou “Erase” (supprimer) des stations
préréglées.
1 Appuyez sur MENU.
2 Appuyez de façon répétée sur TUNING/SELECT
+ ou – jusqu’à ce que “Edit” apparaisse sur
l’afficheur, puis appuyez sur ENTER.
Si aucune station n’a été préréglée, “No Preset”
apparaît sur l’afficheur.
3 Appuyez de façon répétée sur TUNING/SELECT
+ ou – pour choisir une des méthodes de
classement suivantes:
Choisissez
Move
Erase
Alphabet
Strength
Country
Band
Pour
changer l’emplacement d’une station
préréglée.
supprimer une station préréglée.
classer les stations préréglées par ordre
alphabétique en fonction du nom
préréglé. Les stations qui n’ont pas de
nom sont classées selon la fréquence,
dans l’ordre ascendant.
classer les stations préréglées selon
l’intensité du signal (stations FM
uniquement).
Les stations PO et GO sont classées selon
la fréquence.
classer les stations FM RDS qui ont des
données PI par pays, dans l’ordre
alphabétique.
Les autres stations sont classées selon la
fréquence.
classer les stations selon la gamme de
fréquence (FM - PO - GO).
MENU
ENTER
TUNING/SELECT
12
4
7 Appuyez sur ENTER pour mémoriser le nom de
la station.
Pour faire apparaître la fréquence de la station dont
le nom est affiché
Appuyez plusieurs fois sur DISPLAY.
F
Appuyez sur ENTER.
Le tuner classe les stations, puis revient en mode
d’accord et reçoit la station préréglée sur le code
A1 à moins que vous ne choisissiez “Move” ou
“Erase”.
Remarque
Certains pays utilisent le même code. Dans ce cas, les
stations de ces pays risquent d’être classées ensemble.
Page 29

Fonctions élaborées
Déplacement d’une station préréglée
Vous pouvez aussi changer de place une station
particulière.
1 Effectuez les étapes 1 à 3 de “Mise en ordre des
stations préréglées” et choisissez “Move” dans le
menu Edit, puis appuyez sur ENTER.
2 Appuyez sur TUNING/SELECT + ou – de sorte
que le code préréglé de la station que vous voulez
déplacer apparaisse sur l’afficheur, puis appuyez
sur ENTER.
3 Appuyez sur TUNING/SELECT + ou – pour
sélectionner un nouvel emplacement pour la
station, puis appuyez sur ENTER.
La station préréglée que vous avez sélectionnée
est déplacée et les autres stations préréglées dans
le groupe (“A”, par exemple) reculent pour faire
place au nouveau préréglage.
Exemple:
Si vous déplacez A4 vers A1.
A1 A2 A3 A4 A5 A6 A7 A8Préréglage
89.5 94.5 96.5 98.0 100.5 103.0 104.5 106.0Fréquence
Pour effacer toutes les stations préréglées
1 Mettez le tuner hors tension.
2 Tout en tenant la touche ANTENNA et la touche
ENTER enfoncées, appuyez sur POWER pour mettre
le tuner sous tension.
.
A1 A2 A3 A4 A5 A6 A7 A8Préréglage
98.0 89.5 94.5 96.5 100.5 103.0 104.5 106.0Fréquence
Effacement de stations préréglées
Vous pouvez effacer les stations préréglées une par une.
1 Effectuez les étapes 1 à 3 de “Mise en ordre des
stations préréglées” et choisissez “Erase” sur le
menu Edit, puis appuyez sur ENTER.
2 Appuyez sur TUNING/SELECT + ou – de sorte
que le code préréglé de la station que vous voulez
supprimer apparaisse sur l’afficheur, puis
appuyez sur ENTER.
La station préréglée que vous avez sélectionnée
est effacée de la mémoire et les autres stations
préréglées dans le groupe (“A”, par exemple)
avancent pour remplir l’espace libre.
Exemple:
Si vous supprimez A1.
A1 A2 A3 A4 A5 A6 A7 A8Préréglage
89.5 94.5 96.5 98.0 100.5 103.0 104.5 106.0Fréquence
.
A1 A2 A3 A4 A5 A6 A7 A8Préréglage
94.5 96.5 98.0 100.5 103.0 104.5 106.0Fréquence
F
13
Page 30

Fonctions élaborées
Utilisation du radioguidage
(RDS)
Description du système RDS
Remarques
• En cas d’annonces urgentes provenant d’autorités
gouvernementales, “ALARM” clignote sur l’afficheur.
• Si la station ne diffuse pas de service RDS particulier,
“NO...” (ex. “NO PTY”) apparaît sur l’afficheur.
• Certains messages peuvent être incomplets, selon la
méthode adoptée par la station pour diffuser les messages.
Le radioguidage (RDS) est un service de radiodiffusion
qui permet aux stations de diffuser des informations
supplémentaires parallèlement au signal radio normal.
Ce tuner vous permet d’afficher des informations RDS
variées et est équipé d’un indicateur de stations
diffusant des bulletins routiers. Le service RDS est
disponible uniquement sur les stations FM.*
Remarque
Le RDS peut ne pas fonctionner correctement si la
transmission de la station RDS accordée est de mauvaise
qualité ou si le signal est trop faible.
* Toutes les stations FM n’offrent pas de service RDS et
toutes les stations RDS ne diffusent pas les mêmes
services. En cas de doute, vérifiez quels services RDS sont
diffusés dans votre région.
Réception des émissions RDS
Sélectionnez simplement une station de la gamme FM.
Quand vous accordez une station qui fournit des
services RDS, l’indicateur RDS et le nom de la station
apparaissent sur l’afficheur.
Affichage des informations RDS
Recherche d’une station diffusant un
bulletin routier
Quand vous accordez une station RDS qui diffuse un
bulletin routier, l’indicateur TP s’allume.
Appuyez plusieurs fois sur DISPLAY jusqu’à ce que
l’information souhaitée apparaisse sur l’affichage.
Information affichée
Nom de la station*
Fréquence*
Horloge (cycle de 24
heures)
Type de programme
Données
alphanumériques
Identification de
programme
Indicateur de signal
numérique*
* Cette information apparaît également pour les stations FM
qui ne fournissent pas de service RDS.
Vous pouvez:
Localiser chaque station par son nom
(ex. WDR) au lieu de la fréquence.
Localiser chaque station par la
fréquence.
Afficher l’heure courante.
Localiser un type de programme en
cours de diffusion.
Afficher les messages diffusés par les
stations RDS.
Déterminer le pays d’origine de
chaque émission.
(Voir la page 11 pour plus de détails.)
14
F
Page 31

Informations supplémentaires
Guide de dépannage
Si vous rencontrez des difficultés
lors de l’utilisation du tuner, essayez
les solutions proposées dans ce
guide de dépannage. Si le problème
persiste, contactez votre revendeur
Sony.
Pas de son.
/ Raccordez les antennes.
/ Réglez l’amplificateur sur
la source TUNER.
Impossible d’accorder une fréquence.
/ Réglez la position de
l’antenne.
/ Raccordez une antenne
extérieure pour les
émissions FM.
/ Réglez IF BAND sur
NARROW.
/ Si vous avez déménagé,
préréglez de nouveau les
stations.
Bourdonnements et/ou bruit de fond
importants.
/ Réglez la position ou la
direction de l’antenne.
/ Accordez la fréquence
correctement.
/ Raccordez une antenne
extérieure pour les
émissions FM.
/ Eloignez le tuner de la
source de bruit.
Le RDS ne fonctionne pas.
/ Assurez-vous que vous
avez accordé une station
FM RDS.
/ Sélectionnez une station
FM RDS avec un signal
plus fort.
“No preset” apparaît sur l’afficheur.
/ Si le cordon d’alimentation
a été débranché de la prise
murale pendant plus d’un
mois, les préréglages sont
effacés. Mémorisez de
nouveau les stations.
Pas d’affichage ou bien les données
affichées sont incorrectes.
/ Mettez le tuner hors
tension. Tenez enfoncées la
touche ANTENNA et la
touche ENTER et appuyez
sur POWER pour remettre
le tuner sous tension.
Toutes les fréquences
mémorisées sont effacées et
l’affichage est de nouveau
en anglais (réglage usine).
/ Vérifiez auprès de la
société de radio si la station
diffuse le service en
question ou si le service
n’est pas temporairement
interrompu.
Spécifications
Section tuner FM
Plage de fréquence
Bornes d’antenne
Fréquence
intermédiaire
Sensibilité
Sensibilité utilisable
(IHF)
S/B
Distorsion harmonique
Réponse en fréquence
Séparation
87,5 - 108,0 MHz
75 ohms,
asymétrique
IEC (mâle)
10,7 MHz
au seuil de 26 dB
(mono) 10,3 dBf,
0,9 µV/75 Ω
au seuil de 46 dB
(stéréo) 38,5 dBf,
23 µV/75 Ω
10,3 dBf, 0,9 µV/
75 Ω
à 40 kHz de
déviation:
80 dB (mono),
76 dB (stéréo)
à 40 kHz de
déviation:
WIDE
0,04 % (mono),
0,05 % (stéréo)
NARROW
0,06 % (mono),
0,08 % (stéréo)
30 Hz - 15 kHz
(+0,2/–0,3 dB)
50 dB à 1 kHz
Sélectivité
Sortie
à 400 kHz
WIDE 80 dB
NARROW 90 dB
à 300 kHz
WIDE 45 dB
NARROW 70 dB
à 40 kHz de
déviation 600 mV
Section tuner AM
Plage de fréquence
Fréquence
intermédiaire
Sensibilité utilisable
Rapport signal sur bruit
Distorsion
harmonique
Sélectivité
PO: 522 - 1.611 kHz
(intervalle de
9 kHz)
GO: 144 - 288 kHz
(intervalle de
1 kHz)
450 kHz
(Avec antenne
cadre AM)
PO: 200 µV/m
GO: 700 µV/m
PO: 54 dB
(50 mV/m,
999 kHz)
GO: 50 dB
(50 mV/m,
216 kHz)
0,3% (50 mV/m,
400 Hz)
50 dB
Généralités
Alimentation
Consommation
électrique
Dimensions
Poids
Accessoires fournis
La conception et les spécifications sont
modifiables sans préavis.
CA 220-230 V,
50/60 Hz
12 W
280 x 80 x 400 mm
(l/h/p)
4,3 kg
Cordon audio (1)
Antenne cadre AM
(1)
Antenne fil FM (1)
15
F
Page 32

Informations supplémentaires
P, Q
Index
A
Préréglage
stations AM 11
stations FM 6,11
Accord automatique 9
Accord manuel 9
Accord préréglé
stations AM 7
stations FM 7
Accord. Voir Réception d‘une
station
Affichageur
langue 6
mode 8
Attribution d’un nom aux
stations 11
B
BAND IF 10
C
Connexion. Voir raccordements
D, E
Déballage 4
R
Raccordements
antenne AM 4
antenne FM 5
cordon d’alimentation
secteur 6
amplificateur 5
RDS 13
Réception des stations
préréglées 7
Réglage
de la gamme IF 10
S, T, U, V
Sélection autobétique 6
W, X, Y, Z
WIDE 10
F
Fréquence intermédiaire 10
G, H
Guide de dépannage 15
I, J, K, L
Indicateur de signal 10
M
Mémorisation 6,10,11
Mémorisation de stations. Voir
Préréglage
Mise en ordre des stations
prérégléés 12
Mode FM 10
N, O
NARROW 10
16
F
Page 33

17
F
Page 34

ADVERTENCIA
Para evitar incendios o el riesgo de
elctrocución, no exponga la unidad a la
lluvia ni a la humedad.
Para evitar descargas eléctricas, no abra
la unidad. En caso de avería, solicite los
servicios de personal cualificado.
Precauciones
Seguridad
• Si dentro del sintonizador cae algún
objeto sólido o líquido, desenchúfelo
y haga que sea revisado por personal
cualificado.
Fuentes de alimentación
• Antes de utilizar el sintonizador,
compruebe si su tensión de
alimentación es idéntica a la de la red
local. La tensión de alimentación está
indicada en la placa de características
de la parte posterior del sintonizador.
• Cuando no vaya a utilizar el
sintonizador durante mucho tiempo,
desenchúfelo de la red. Para
desconectar el cable de alimentación,
tire del enchufe. No tire nunca del
propio cable.
• El cable de alimentación de CA
solamente deberá ser cambiado en un
taller de reparaciones cualificado.
Reempaque
• No tire la caja ni el material de
relleno. Estos elementos serán
ideales para transportar el receptor.
Cuando tenga que enviar el
sintonizador, reempáquelo como fue
empacado en fábrica.
Si tiene alguna pregunta o problema
con respecto a este sintonizador que no
pueda resolver el manual, póngase en
contacto con su proveedor Sony más
cercano.
Ubicación
• Coloque el sintonizador en un lugar
adecuadamente ventilado para evitar
el recalentamiento interior y
prolongar su duración útil.
• No coloque el sintonizador cerca de
fuentes térmicas, ni sometido a la luz
solar directa, polvo excesivo, ni a los
golpes.
• No coloque nada sobre el
sintonizador, ya que podría bloquear
los orificios de ventilación y provocar
su mal funcionamiento.
• No instale el sintonizador en un
espacio cerrado, como una librería o
un armario empotrado.
Limpieza
• Limpie la caja, los paneles, y los
controles con un paño suave
ligeramente humedecido en una
solución poco concentrada de
detergente. No utilice ningún tipo de
estropajos, polvos abrasivos, ni
disolventes tales como aocohol o
bencina.
E
2
Page 35

¡Bienvenido!
Muchas gracias por la adquisición de
este sintonizador de FM estéreo/FMAM. Antes de utilizar el sintonizador,
lea detenidamente este manual de
instrucciones y guárdelo para futuras
referencias.
Descripción de este
ÍNDICE
Preparativos
Desembalaje 4
Conexión del sistema 4
Selección de la visualización en alemán 6
Almacenamiento automático de emisoras de FM (Auto-betical select) 6
Operaciones básicas
Recepción de emisoras memorizadas 7
manual
Convencionalismo
En este manual se utiliza el icono
siguiente:
Indica consejos y sugerencias
para facilitar las tareas.
Operaciones avanzadas del sintonizador
Información sobre el sistema de introducción con menú 8
Personalización del visualizador 8
Recepción de la radio explorando emisoras (Sintonía automática) 9
Consejos para mejorar la recepción de FM 10
Memorización de emisoras 11
Asignación de nombres a emisoras 12
Organización de las emisoras memorizadas 12
Utilización del sistema de datos radiofónicos (RDS) 14
Información adicional
Solución de problemas 15
Especificaciones 15
Índice alfabético 16
E
E
3
Page 36

Preparativos
Desembalaje
Compruebe si ha recibido los accesorios siguientes con
el sintonizador:
• Cable de audio (1)
• Antena de cuadro de AM (1)
• Antena monofilar de FM (1)
Conexión del sistema
Antes de comenzar
• Antes de realizar cualquier conexión, desconecte la
alimentación de todos los componentes.
• No conecte el cable de alimentación de CA antes de
haber realizado todas las conexiones.
• Cerciórese de realizar conexiones firmes para evitar
zumbidos y ruidos.
• Cuando conecte un cable de audio/vídeo, cerciórese
de hacer coincidir las clavijas codificadas en color
con las tomas apropiadas: blanca (canal izquierdo) a
blanca y roja (canal derecho) a roja.
Conexión de la antena de AM
Además, tenga cuidado de no desapantallar el
cable.
3 Ensamble la antena como se muestra a
continuación.
4 Conecte la antena de cuadro de AM a los
terminales de AM del panel posterior de este
sintonizador.
ANTENNA
AM
Antena de cuadro
de AM
En esta sección se describe cómo conectar la antena de
y
cuadro de AM suministrada. Con respecto a la
ubicación específica de los terminales AM ANTENNA,
consulte la ilustración siguiente.
AM ANTENNA
5 Ajuste la dirección de la antena hasta obtener la
ANTENNA
AB
FM
75 COAXIAL
AM
LINE OUT
RL
y
¿Qué se necesita?
• Antena de cuadro de AM (suministrada) (1)
mejor recepción. La antena de cuadro de AM
posee directividad, y detecta la señal que llega
con ciertos ángulos con más intensidad que con
otros. Oriente la antena hasta que ofrezca las
mejores condiciones de recepción.
Si se produce un ruido de tono alto (ruido de
batido) cuando grabe programas de AM, ajuste la
posición de la antena de cuadro de AM hasta que
desaparezca tal ruido.
Si vive en un edificio construido o reforzado con
hormigón, o con estructura de acero, es posible
que no pueda obtener una buena recepción
porque las ondas radioeléctricas se debilitan en
interiores.
1 Antes de instalar la antena suministrada, extraiga
el cable de la ranura del armazón de la misma.
2 Desenrolle 3 vueltas del cable apantallado del
armazón de la antena. Tenga cuidado de
desenrollar solamente la sección apantallada del
E
4
cable. No desenrolle más de 3 vueltas del cable.
Para emisoras que sean difíciles de recibir
Pruebe a cambiar la ubicación de la antena cuando
sintonice. La colocación de la antena de cuadro de AM
suministrada cerca de una ventana le ayudará a mejorar
la calidad de la recepción.
Page 37

Preparativos
AM
y
ANTENNA
75 COAXIAL
FM
AB
LINE OUT
L
R
ç
R
L
INPUT
TUNER CD AUX
Conexión de una antena de FM
Con una antena exterior de FM, podrá obtener un
sonido de FM de mayor calidad. Le recomendamos
que utilice la antena monofilar de FM suministrada
sólo temporalmente hasta que haya instalado una
antena exterior de FM. Con respecto a la ubicación
específica de los terminales FM ANTENNA, consulte la
ilustración siguiente.
FM ANTENNA
ANTENNA
AB
FM
75 COAXIAL
¿Qué se necesita?
• Antena monofilar de FM (suministrada) (1)
• Antena exterior de FM (no suministrada) (1) y cable
coaxial de 75 ohmios con conector tipo hembra de normas
IEC (no suministrado) (1)
AM
LINE OUT
RL
y
Conexión de un conductor de puesta a
tierra
Cuando haya conectado una antena exterior, cerciórese
de conectar un conductor de puesta a tierra (no
suministrado) al terminal AM ANTENNA y (además
de la antena de cuadro de AM) como medida de
protección contra rayos.
Para evitar una explosión de gas, no conecte el
conductor de puesta a tierra a un tubo de gas.
tierra
Conexión a un amplificador
Conecte el sintonizador a un amplificador. Antes de
realizar la conexión, desconecte la alimentación de
ambos componentes. Con respecto a la ubicación
específica de los terminales, consulte la ilustración
siguiente.
Sintonizador
Conecte la antena monofilar de FM suministrada o una
antena exterior de FM (no suministrada) a uno de los
terminales de antena de FM del panel posterior de esta
unidad.
Conector tipo hembra de normas IEC
Antena monofilar de FM
ANTENNA
AFM B
75 COAXIAL
Antena exterior de FM
ANTENNA
AFM B
75 COAXIAL
Conector tipo hembra
de normas IEC
Usted podrá utilizar dos antenas de FM
Este sintonizador posee dos terminales FM ANTENNA,
A y B, para utilizarse con tipos diferentes de antenas de
FM. Por ejemplo, usted podrá conectar una antena
exterior a la toma A y una antena monofilar a la toma B.
También podrá cambiar de antena utilizando el
medidor de señal para determinar qué antena ofrece la
mejor recepción para una emisora particular.
ANTENNA
AB
FM
75 COAXIAL
AM
LINE OUT
RL
y
LINE OUT
(L/R)
Amplificador
INPUT TUNER (L/R)
¿Qué cables se necesitan?
• Cable de audio (suministrado) (1)
Blanca
(izquierdo)
Roja (derecho)
Blanca
(izquierdo)
Roja (derecho)
Conecte las clavijas blancas a las tomas blancas (canal
izquierdo) y las rojas a las rojas (canal derecho). Inserte
completamente las clavijas en las tomas, ya que una
conexión incompleta podría causar ruido.
Amplificador
Sintonizador
(Continúa)
E
5
Page 38

Preparativos
Conexión del cable de alimentación de CA
Conecte el cable de alimentación de CA en una toma de la
red después de haber finalizado todas las conexiones
anteriores.
ANTENNA
FM
AB
75 COAXIAL
AM
LINE OUT
RL
y
a una toma de la red
/
Selección de la visualización en
alemán
Usted podrá elegir entre inglés o alemán como idioma
de la visualización. El idioma preajustado en fábrica es
el inglés. Para cambiar la visualización a alemán,
realice los pasos siguientes.
POWER
radio explorando emisoras sintonia automatica)” de la
página 9 y “Memorización de emisoras” de la página
11.
POWER ENTER
MENU
TUNING/SELECT
1 Conecte la antena de FM.
Consulte “Conexión de una antena de FM” de la
página 5.
2 Presione POWER para desconectar la
alimentación del sintonizador.
3 Presione repetidamente MENU hasta que en el
visualizador aparezca “Auto-betical”.
4 Presione ENTER.
En el visualizador aparecerán “Yes” y “No”.
5 Presione TUNING/SELECT+ o – para hacer que
en el visualizador parpadee “Yes”.
6 Presione ENTER.
El sintonizador explorará y almacenará todas las
emisoras de FM y FM RDS del área de
MENU
1 Presione POWER para desconectar la
alimentación del sintonizador.
2 Manteniendo pulsada la tecla MENU, presione
POWER para conectar la alimentación del
sintonizador. En el visualizador aparecerá
“Deutsch”.
Para volver a la visualización en inglés
Repita este procedimiento.
En el visualizador aparecerá “English”.
Almacenamiento automático
de emisoras de FM
(Auto-betical select)
Con “Auto-betical select” (selección automática
alfabética) podrá almacenar automáticamente hasta 30
emisoras de FM y de FM RDS en orden alfabético sin
redundancia. Además, “Auto-betical select”
almacenará solamente las emisoras con señal más clara.
Si desea almacenar emisoras de FM o AM
E
6
(MW y LW) una tras otra, consulte “Recepción de la
radiodifusión.
Para las emisoras de RDS, el sintonizador
comprobará en primer lugar las emisoras que
estén transmitiendo el mismo programa, y
después almacenará la que tenga la señal más
clara. Las emisoras de RDS seleccionadas se
clasificarán alfabéticamente por su nombre de
servicio de programa, y después se les asignará
un código de memorización de dos caracteres.
Para más detalles sobre RDS, consulte la página 14.
A las emisoras de FM normales se les asignarán
códigos de memorización de dos caracteres y se
almacenarán después de las emisoras de RDS.
Para cambiar el lugar de una emisora memorizada o
para borrarla
Consulte “Organización de las emisoras memorizadas”
de la página 12.
Notas
• Si se traslada a otra zona, repita este procedimiento para
almacenar las emisoras de la nueva zona.
• Con respecto a los detalles sobre la sintonía de emisoras
memorizadas, consulte la página 11.
• Los ajustes de ANTENNA, ANT ATT, IF BAND, y FM
MODE también se almacenarán con la emisora.
• Si mueve la antena después de haber almacenado
emisoras utilizando “Auto-betical select”, es posible que
los ajustes memorizados pierdan su validez. Cuando
suceda esto, vuelva a almacenar las emisoras.
Page 39

Operaciones básicas
Recepción de emisoras memorizadas
En esta sección se indica cómo recibir emisoras memorizadas.
3
POWER
• Para sintonizar una emisora no
memorizada, consulte
“Recepción de la radio
explorando emisoras (Sintonía
automática)” de la página 9.
DISPLAY
45
FM STEREO / FM-AM TUNER ST-S3000ES
TUNING/SELECT
–+
CHARACTER
ANTENNA BAND MEMORY MENU RETURN ENTER
MENU ENTRY
Cerciórese de haber conectado el sintonizador y de haber
memorizado las emisoras. (Con respecto a las conexiones,
1
consulte las páginas 4-6, y para la memorización de emisoras,
vaya a la página 6 u 11.)
Conecte la alimentación del amplificador y seleccione el modo
de sintonizador (TUNER).
2
Presione POWER para conectar la alimentación del
sintonizador.
3
TUNE MODE
SHIFT
Presione SHIFT para seleccionar A, B, o C.
4
Presione TUNING/SELECT + o – para seleccionar el número
de memorización deseado. El sintonizador saltará
5
automáticamente los números que no contengan emisoras
memorizadas.
E
7
Page 40

Operaciones avanzadas del sintonizador
Información sobre el sistema
de introducción con menú
Este sintonizador utiliza un sistema de introducción
con menú que le permitirá utilizar varias funciones
siguiendo los mensajes del visualizador. Para la
operación del menú, utilice los controles siguientes.
TUNING/SELECT
Utilice
la tecla MENU
las teclas TUNING/
SELECT
la tecla ENTER
la tecla RETURN
ENTER
RETURN
MENU
para:
entrar en el modo de menú.
hacer que se visualicen diferentes
ítemes o ajustes.
seleccionar el ítem o ajuste
actualmente visualizado.
volver a la etapa anterior en el modo
de menú.
Personalización del
visualizador
Usted podrá elegir el aspecto del visualizador entre
uno de los cuatro modos de visualización siguientes.
ENTER TUNING/SELECT
MENU
1 Presione MENU, y después presione TUNING/
SELECT + o – hasta que en el visualizador
aparezca “Disp-Mode”.
2 Presione ENTER.
En el visualizador aparecerá “Select”.
3 Presione TUNING/SELECT + o – para seleccionar
un modo de visualización.
Visualización completa/brillo completo
.
Visualización completa/brillo atenuado
.
Visualización mínima/brillo completo
.
Visualización mínima/brillo atenuado
4 Presione ENTER.
El ajuste permanecerá en efecto hasta que lo
cambie.
Si presiona una de las teclas de la unidad
principal, la visualización mínima cambiará a la
visualización completa con el brillo seleccionado.
Después de unos 4 segundos, el visualizador
volverá al modo de visualización seleccionado.
E
8
Page 41

Recepción de la radio
explorando emisoras (Sintonía
automática)
Con la sintonía automática, usted podrá sintonizar
rápidamente una emisora sin necesidad de conocer su
frecuencia.
Antes de comenzar, cerciórese de haber:
• Conectado una antena de FM, AM al sintonizador
como se indica en la página 4, 5.
MENU
ENTER
TUNING/SELECT
Operaciones avanzadas del sintonizador
Si no puede sintonizar la emisora deseada (Sintonía
Manual)
Con la sintonía manual, podrá buscar todas las emisoras
de radiodifusión de cada banda, y sintonizar emisoras
con señal extremadamente débil, que no podrían
recibirse con la sintonía automática.
1 Presione repetidamente BAND para seleccionar FM,
MW, o LW.
2 Presione TUNE MODE hasta que en el visualizador
aparezca solamente “TUNING”. En el visualizador
no deberá aparecer “AUTO”.
3 Presione repetidamente TUNING/SELECT + o –
hasta sintonizar la emisora deseada.
El medidor de señal indicará la intensidad de la señal
de radiodifusión.
Nota
Cuando llegue a la frecuencia más alta o más baja de
cualquier banda, la sintonía se parará.
BAND
TUNE MODE
1 Presione BAND para seleccionar FM, MW, o LW.
2 Presione TUNE MODE de forma que en el
visualizador aparezca “AUTO”.
3 Presione TUNING/SELECT + o –.
Cuando el sintonizador localice una emisora se
parará automáticamente, y en el visualizador
aparecerá “TUNED”. El medidor de señal
indicará la intensidad de la señal de
radiodifusión.
4 Repita el paso 3 hasta que logre sintonizar la
emisora apropiada.
Para almacenar la emisora, consulte
“Memorización de emisoras” de la página 11.
Cuando sintonice emisoras de AM (MW y LW)
Ajuste la dirección de la antena de cuadro de AM hasta
obtener la óptima recepción.
Si el indicador STEREO permanece apagado
Utilice el sistema de introducción con menús para
ajustar “FM Mode” a “AUTO”. Con respecto a los
detalles, consulte “Ajuste manual del modo de FM” de
la página 10.
Si un programa de FM estéreo se oye distorsionado
Si el indicador STEREO parpadea, utilice el sistema de
introducción con menús para ajustar “FM Mode” a
“MONO”. Usted no tendrá efecto estéreo, pero la
distorsión se reducirá. Con respecto a los detalles,
consulte “Ajuste manual del modo de FM” de la página
10.
E
9
Page 42

Operaciones avanzadas del sintonizador
Consejos para mejor ar la
Para ajustar manualmente ANT ATT e IF BAND
1 Presione MENU.
recepción de FM
Este sintonizador posee varias funciones diseñadas
para mejorar la recepción. En primer lugar, pruebe a
recibir las emisoras con los ajustes estándar. Si la
recepción no es buena, trate de alterar la calidad de la
recepción hasta obtener una señal clara. Cuando
memorice una emisora, el sintonizador almacenará los
ajustes siguientes, junto con la frecuencia.
MENUANTENNA
DISPLAY
Selección de antenas de FM
Cuando utilice dos antenas de FM, presione
ANTENNA para seleccionar el terminal FM
ANTENNA A o B. Seleccionando la antena, podrá
recibir emisoras que de otra forma sería imposible.
TUNING/SELECT
ENTER
2 Presione repetidamente TUNING/SELECT + o – hasta que
en el visualizador aparezca “Reception”, y después
presione ENTER.
Cuando haya elegido “Reception” mientras esté
sintonizando una emisora de MW o de LW, en el
visualizador aparecerá “FM Only”.
3 Presione repetidamente TUNING/SELECT + o – para
elegir “ATT/IF Band”, y después presione ENTER.
4 Presione repetidamente TUNING/SELECT + o – para
elegir el ajuste de ANT ATT deseado, y después presione
ENTER.
• “ANT ATT: ON” reducirá el nivel de la señal de entrada
para recibir programas de radiodifusión con señales
extremadamente altas.
• “ANT ATT: OFF” es para sintonía normal.
5 Presione repetidamente TUNING/SELECT + o – para
elegir el ajuste de IF deseado, y después presione ENTER.
• “IF: Wide” sintonizará solamente las emisoras con
sonido de gran calidad y baja distorsión.
• “IF: Narrow” mejorará la selectividad y reducirá las
interferencias para que los programas de radiodifusión
con señales débiles resulten más fáciles de recibir.
Cambio del modo de selección activa (ASM)
El modo de selección activa (ASM) de este sintonizador
ha sido preajustado en fábrica para buscar
automáticamente los mejores ajustes de atenuador de
antena (ANT ATT), la banda de frecuencia intermedia
(IF BAND), y el modo de FM (FM MODE) para cada
frecuencia. Sin embargo, usted podrá elegir
manualmente cada ajuste a su gusto. Si no desea
utilizar la función de selección activa, desactívelo.
Elija ASM del sistema de menús para activar o desactivar
el modo de selección activa.
Cuando haya activado el modo ASM, el indicador ASM
aparecerá en el visualizador cuando seleccione la banda de
FM.
1 Presione MENU.
2 Presione repetidamente TUNING/SELECT + o – hasta
que en el visualizador aparezca “Reception”, y después
presione ENTER.
3 Presione repetidamente TUNING/SELECT + o – hasta
que en el visualizador aparezca”A.S.M”, y después
presione ENTER.
Ajuste manual del modo de FM
Utilice el sistema de menús para seleccionar estéreo
“AUTO” (sin indicación), o “MONO”.
1 Presione MENU.
2 Presione repetidamente TUNING/SELECT + o – hasta que
en el visualizador aparezca “Reception”, y después
presione ENTER.
Cuando haya elegido “Reception” mientras esté
sintonizando una emisora de MW o de LW, en el
visualizador aparecerá “FM Only”.
3 Presione repetidamente TUNING/SELECT + o – hasta que
en el visualizador aparezca “FM Mode”, y después
presione ENTER.
4 Presione TUNING/SELECT + o – para seleccionar el
ajuste deseado, y después presione ENTER.
• En el modo estéreo “AUTO” se recibirán emisiones
estéreo de señal intensa. El indicador “MONO”
desaparecerá del visualizador.
• En el modo “MONO” se recibirán emisoras de señal
débil. Las emisoras se recibirán en forma monoaural,
pero con menos ruido.
10
4 Presione TUNING/SELECT + o – para elegir “ON” u
“OFF”, y después presione ENTER.
E
Page 43

Comprobación de la intensidad de la señal
Usted podrá utilizar el medidor de señal digital para
comprobar la intensidad de la señal de las frecuencias
de FM. El margen de visualización es de 16 a 70 dB
(1 µV de tensión de radiofrecuencia = 0 dB). Para
obtener una relación señal-ruido suficiente para recibir
una emisión en estéreo, recomendamos una indicación
superior a 50 dB. Esta unidad también le permitirá
utilizar el medidor de señal digital con la banda de
AM. Con AM, el margen de visualización es de 0 a 10
(cuanto mayor sea el valor, más intensa será la señal).
1 Sintonice una emisora de FM o AM.
2 Presione repetidamente DISPLAY para hacer que
se visualice el medidor de señal digital.
3 Gire la antena de FM o AM hasta obtener la señal
más intensa.
Operaciones avanzadas del sintonizador
Memorización de emisoras
En esta sección se indica cómo almacenar
manualmente hasta 30 de sus emisoras favoritas de FM
o AM (MW y LW) en códigos de memorización
compuestos de letras (A, B, o C) y números, como A7.
Usted podrá almacenar hasta 10 emisoras con cada una
de las 3 diferentes letras. Usted podrá utilizar estas
letras para clasificar las emisoras de acuerdo con la
categoría de música o con la banda de emisoras.
TUNING/SELECT
ENTERMEMORY
SHIFT
1 Sintonice la emisora de FM, MW, o LW que desee
almacenar.
2 Presione MEMORY.
Aparecerá “MEMORY” junto con el código
vacante más bajo para indicar que el sintonizador
está listo para almacenar la emisora.
3 Presione SHIFT para elegir A, B, o C.
La letra que haya elegido aparecerá en el
visualizador.
4 Presione repetidamente TUNING/SELECT + o –
hasta elegir el número deseado.
5 Presione ENTER para almacenar la emisora.
El sintonizador almacenará la emisora en el código de
memorización especificado.
6 Repita los pasos 1 a 5 para almacenar otras
emisoras.
Los nombres de las emisoras de RDS se almacenarán
automáticamente
Cuando memorice una emisora de RDS que transmita la
información sobre su nombre, el nombre de tal emisora
se almacenará automáticamente.
Si desea asignar nombres a emisoras
Siga el procedimiento descrito en “Asignación de
nombres a emisoras” de la página 12.
11
E
Page 44

Operaciones avanzadas del sintonizador
Asignación de nombres a
emisoras
Usted podrá asignar un nombre de hasta 5 caracteres a
cada emisora, (excepto las emisoras de FM RDS).
Cuando sintonice una emisora, el nombre de la misma
aparecerá en vez de la frecuencia.
CHARACTER MEMORY
DISPLAY
ENTER SHIFT
1 Utilice las teclas SHIFT y TUNING/SELECT + o –
para especificar el código de memorización en el
que desee almacenar el nombre de la emisora.
2 Presione CHARACTER.
El cursor parpadeará en el visualizador.
3 Presione repetidamente TUNING/SELECT + o –
para seleccionar un carácter.
4 Cuando aparezca el carácter deseado, presione
CHARACTER para mover el cursor hasta la
posición correspondiente al carácter siguiente.
Si comete un error
Presione repetidamente CHARACTER hasta que
parpadee el carácter que desee cambiar (cada vez que
presione CHARACTER, parpadeará el carácter
siguiente). Después presione TUNING/SELECT + o –
para seleccionar un nuevo carácter.
5 Repita los pasos 2 y 3 hasta que en el visualizador
aparezca el nombre de emisora deseado.
6 Presione MEMORY.
Aparecerá “MEMORY”.
Nota
Si no presiona la tecla ENTER durante más de 8
segundos después de haber presionado MEMORY, el
visualizador volverá al modo de visualización normal.
Cuando suceda esto, comience de nuevo desde el
principio.
TUNING/SELECT
Organización de las emisoras
memorizadas
Este sintonizador le permitirá disponer fácilmente las
emisoras memorizadas en el orden que desee. Usted
podrá disponer automáticamente todas las emisoras
memorizadas por orden alfabético, según la intensidad
de la señal, según el código del país, o la banda del
sintonizador, o también podrá utilizar las funciones
“Move” y “Erase” para mover y borrar emisoras
memorizadas específicas.
1 Presione MENU.
2 Presione repetidamente TUNING/SELECT + o –
hasta que en el visualizador aparezca “Edit”, y
después presione ENTER.
Si no hay emisoras almacenadas, en el
visualizador aparecerá “No Preset”.
3 Presione repetidamente TUNING/SELECT + o –
para seleccionar uno de los métodos de
clasificación siguientes:
Elija
Move
Erase
Alphabet
Strength
Country
Band
para
cambiar la ubicación de una emisora
memorizada específica.
borrar una emisora memorizada específica.
clasificar las emisoras memorizadas por
orden alfabético de acuerdo con sus nombres
de memorización. Las emisoras sin nombre
de memorización se dispondrán por su
frecuencia, de baja a alta.
clasificar las emisoras memorizadas por el
orden de la intensidad de sus señales
(frecuencias de FM solamente). Las emisoras
de MW y LW se dispondrán por su
frecuencia.
clasificar las emisoras de FM RDS con
información de PI alfabéticamente por el
país. Las demás emisoras se dispondrán por
su frecuencia.
clasificar las emisoras por el orden de su
banda de frecuencias (FM - MW - LW).
MENU
ENTER
TUNING/SELECT
12
7 Presione ENTER para almacenar el nombre de la
emisora.
Para ver la frecuencia del nombre de emisora
visualizado
Presione repetidamente DISPLAY.
E
4 Presione ENTER.
El sintonizador clasificará las emisoras, después
volverá al modo de sintonía normal, y recibirá la
emisora memorizada en A1 a menos que elija
“Move” o “Erase”.
Nota
Algunos países utilizan el mismo código de país, por lo que
las emisoras de tales países pueden disponerse juntas.
Page 45

Operaciones avanzadas del sintonizador
Movimiento de una emisora memorizada
Usted también podrá mover una emisora memorizada
específica.
1 Realice los pasos 1 a 3 de “Organización de las
emisoras memorizadas”, elija “Move” del menú
de edición, y después presione ENTER.
2 Presione TUNING/SELECT + o – hasta que en el
visualizador aparezca el código que desee mover,
y después presione ENTER.
3 Presione TUNING/SELECT + o – para seleccionar
la nueva ubicación para el código de
memorización, y después presione ENTER.
La emisora memorizada seleccionada se moverá
hasta la nueva ubicación y las demás emisoras
memorizadas del grupo (“A”, por ejemplo) se
desplazarán hacia atrás para dejar espacio para la
nueva emisora memorizada.
EJEMPLO:
Si mueve A4 a A1.
A1 A2 A3 A4 A5 A6 A7 A8Preset
89.5 94.5 96.5 98.0 100.5 103.0 104.5 106.0Frequency
.
A1 A2 A3 A4 A5 A6 A7 A8Preset
98.0 89.5 94.5 96.5 100.5 103.0 104.5 106.0Frequency
Borrado de emisoras memorizadas
Usted podrá borrar, una tras otra, las emisoras memorizadas.
1
Realice los pasos 1 a 3 de “
emisoras memorizadas
edición, y después presione ENTER.
Organización de las
”, elija “Erase” del menú de
2 Presione TUNING/SELECT + o – hasta que en el
visualizador aparezca el código que desee borrar,
y después presione ENTER.
La emisora memorizada seleccionada se borrará
de la memoria y las demás emisoras memorizadas
del grupo (“A”, por ejemplo) se desplazarán hacia
adelante para llenar el espacio en blanco.
EJEMPLO:
Si borra A1.
A1 A2 A3 A4 A5 A6 A7 A8Preset
89.5 94.5 96.5 98.0 100.5 103.0 104.5 106.0Frequency
.
A1 A2 A3 A4 A5 A6 A7 A8Preset
94.5 96.5 98.0 100.5 103.0 104.5 106.0Frequency
Si desea borrar todas las emisoras memorizadas
1 Desconecte la alimentación.
2 Manteniendo pulsadas ANTENNA y ENTER,
presione POWER para conectar la alimentación.
13
E
Page 46

Operaciones avanzadas del sintonizador
Utilización del sistema de
datos radiofónicos (RDS)
¿Qué puede hacerse con el sistema de
datos radiofónicos?
El sistema de datos radiofónicos (RDS) es un servicio
de radiodifusión que permite a las emisoras transmitir
información adicional junto con la señal del programa
radiofónico normal. Esta unidad le permitirá
visualizar gran variedad de información de RDS y
proporciona un indicador de las emisoras diseñadas
para emitir información sobre el tráfico. RDS
solamente estará disponible en emisoras de FM*.
Nota
RDS puede no trabajar adecuadamente si la emisora
sintonizada no está transmitiendo adecuadamente señales de
RDS, o si la intensidad de las mismas es débil.
Notas
• Si hay un anuncio de emergencia de autoridades
gubernamentales, en el visualizador aparecerá ALARM.
• Si una emisora no está proporcionando un servicio de RDS
particular, en el visualizador aparecerá “NO...” (p. ej.,
“NO PTY”).
• Dependiendo del método utilizado por la emisora para
transmitir texto, es posible que algunos mensajes de texto
sean incompletos.
Búsqueda de emisoras que transmitan
información sobre el tráfico
Cuando sintonice una emisora de RDS que emita
información sobre el tráfico, se encenderá el indicador
TP.
* No todas las emisoras de FM proporcionan servicios de
RDS, ni tampoco los mismos tipos de servicios. Si no está
familiarizado con el sistema RDS, solicite a las emisoras
locales los detalles sobre los servicios de RDS de su zona.
Recepción de emisiones de RDS
Simplemente seleccione una emisora de la banda de
FM. Cuando sintonice una emisora que proporcione
servicios de RDS, el indicador RDS y el nombre de tal
emisora aparecerán en el visualizador.
Visualización de la información de RDS
Presione algunas veces DISPLAY hasta que se visualice
la información deseada.
Información visualizada
Nombre de la emisora*
Frecuencia*
Hora del reloj (sistema de
24 horas)
Tipo de programa
Radiotexto
Identificación de
programa
Medidor de señal digital*
Usted podrá:
Localizar cada emisora por su
nombre (p. ej., WDR) en vez de su
frecuencia.
Localizar cada emisora por su
frecuencia.
Hacer que se visualice la hora
actual.
Localizar un tipo específico de
programa que esté
transmitiéndose.
Hacer que se visualicen los
mensajes de texto transmitidos
por la emisora de RDS.
Determinar el país de origen de
cada programa de radiodifusión.
(Con respecto a los detalles,
consulte la página 11.)
14
* Esta información también aparecerá con emisoras de FM
E
que no sean de RDS.
Page 47

Información adicional
Solución de
problemas
Si experimenta cualquiera de las
dificultades siguientes cuando
utilice el receptor, use esta guía de
solución de problemas para tratar de
resolver el problema. Si el problema
persiste, consulte a su proveedor
Sony más cercano.
No hay sonido.
/ Conecte las antenas.
/ Ajuste la fuente del
amplificador a sintonizador
(TUNER).
No es posible sintonizar una
frecuencia.
/ Ajuste la posición de la
antena.
/ Conecte una antena para
programas de FM.
/ Ponga IF BAND en
NARROW .
/ Cuando se haya trasladado
a otro lugar, vuelva a
memorizar emisoras.
Se oye zumbido o ruido considerable.
/ Ajuste la posición o la
orientación de la antena.
/ Sintonice la frecuencia
correcta.
/ Conecte una antena para
programas de FM.
/ Aleje el sintonizador de la
fuente de sonido.
No aparece la visualización o la
información apropiada.
/ Desconecte la alimentación.
Mantenga presionadas
ANTENNA y ENTER, y
presione POWER para
volver a conectar la
alimentación. Esto borrará
las frecuencias
almacenadas en la
memoria y devolverá la
visualización al idioma
ajustado en fábrica (inglés).
/ Póngase en contacto con la
emisora para ver si está
ofreciendo o no el servicio
en cuestión. Si lo está
ofreciendo, es posible que
tenga algún problema
temporal.
Especificaciones
Sección del sintonizador de FM
Gama de frecuencias
Terminales de antena
Frecuencia intermedia
Sensibilidad
87,5 - 108,0 MHz
75 ohmios,
desequilibrados
Macho de normas
IEC
10,7 MHz
a 26 dB de
silenciamiento
(monoaural) 10,3
dBf, 0,9 µV/75Ω
a 46 dB de
silenciamiento
(estéreo) 38,5
dBf, 23 µV/75Ω
Selectividad
Salida
a 400 kHz
WIDE 80 dB
NARROW 90 dB
a 300 kHz
WIDE 45 dB
NARROW 70 dB
a 40 kHz de
desviación,
600 mV
Sección del sintonizador de AM
Gama de frecuencias
Frecuencia intermedia
Sensibilidad útil
Relación señal-ruido
Distorsión armónica
Selectividad
MW: 522 - 1.611
kHz (intervalo
de 9 kHz)
LW: 144 - 288 kHz
(intervalo de
1 kHz)
450 kHz
(con antena de
cuadro de AM)
MW: 200 µV/m
LW: 700 µV/m
MW: 54 dB
(50 mV/m,
999 kHz)
LW: 50 dB
(50 mV/m,
216 kHz
0,3 % (50 mV/m,
400 Hz)
50 dB
Generales
Alimentación
Consumo
Dimensiones
Peso
220-230 V CA,
50/60 Hz
12 W
280 x 80 x 400 mm
(an/al/prf)
4,3 kg
RDS no trabaja.
/ Cerciórese de que ha
sintonizado una emisora de
FM RDS.
/ Seleccione una emisora de
FM RDS más intensa.
En el visualizador aparece “No
preset”.
/ Si deja el cable de
alimentación de CA
desconectado de la toma de
la red durante más de un
mes, la memoria se borrará.
Vuelva a memorizar los
datos deseados.
Sensibilidad útil (IHF)
Relación señal-ruido
Distorsión armónica
Frequency response
Separación entre
canales
10,3 dBf, 0,9 µV/
75Ω
a 40 kHz de
80 dB (mono),
76 dB (estéreo)
a 40 kHz de
desviación
WIDE
0,04 % (mono),
0,05 % (estéreo)
NARROW
0,06 % (mono),
0,08 % (estéreo)
30 Hz - 15 kHz
(+0,2/–0,3 dB)
50 dB a 1 kHz
Accesorios
suministrados
Diseño y especificaciones sujetos a cambio
si previo aviso.
Cable conector de
audio (1)
Antena de cuadro
de AM (1)
Antena monofilar
de FM (1)
15
E
Page 48

Información adicional
Índice alfabético
A
Ajuste
banda de frecuencia
intermedia 10
Almacenamiento de emisoras.
Consulte Memorización
Asignación de nombres a
emisoras 11
Auto-betical select 6
B
S, T, U
Sintonía. Consulte Recepción
de emisoras memorizadas
Sintonía automática
Sintonía manual 9
Sintonía memorizada
emisoras de AM 7
emisoras de FM 7
Solución de problemas 15
V
Visualización
idioma 6
modo 8
Banda de Frecuencia
intermedia 10
C
Conexiones
amplificador 5
antena de AM 4
antena de FM 5
cable de alimentación
de CA 6
D, E, F, G, H, I, J, K, L
Desembalaje 4
M
Medidor de señal 10
Memoria 6, 10, 11
Memorización
emisoras de AM 11
emisoras de FM 6, 11
Modo de FM 10
W, X, Y, Z
WIDE 10
16
N
NARROW 10
O, P, Q
Organización de emisoras
memorizadas 12
R
Recepción de emisoras
memorizadas 7
RDS 14
E
Page 49

17
E
Page 50

ADVERTÊNCIA
Para evitar o risco de incêndio ou de
choque eléctrico, não exponha o
aparelho à chuva nem à humidade.
Para evitar descargas eléctricas, não
abra o aparelho. Solicite assistência
somente a técnicos especializados.
Precauções
Acerca da segurança
• Se algum objecto sólido ou líquido
cair dentro do aparelho, este deve ser
desligado da rede eléctrica e
submetido a uma averiguação técnica
por pessoal qualificado antes de
voltar a ser utilizado.
Acerca das fontes de alimentação
• Antes de utilizar o aparelho,
certifique-se de que a voltagem de
funcionamento do mesmo é idêntica à
tensão da rede eléctrica local.
• Quando este aparelho não for ser
utilizado por um período prolongado,
desligue-o da tomada da rede. Para
desligar o cabo, puxe-o pela ficha;
nunca pelo próprio fio.
• O cabo de alimentação CA deve ser
alterado somente em serviços técnicos
qualificados.
Caso surjam quaisquer dúvidas ou
problemas concernentes a este aparelho,
não abordados neste manual, consulte o
seu agente Sony mais próximo.
Acerca da instalação
• Instale o aparelho num local com
ventilação adequada, a fim de evitar o
seu sobreaquecimento interno e
prolongar a vida útil dos seus
componentes.
• Não instale este aparelho nas
cercanias de fontes de calor, nem em
locais sujeitos à luz solar directa,
muito pó ou choques mecânicos.
• Não coloque sobre a superfície
superior do aparelho nada que possa
bloquear os orifícios de ventilação e
causar algum mau funcionamento.
• Não instale o aparelho em um espaço
confinado, tal como uma estante de
livros ou um armário embutido.
Acerca da limpeza da parte externa
do aparelho
• Limpe a parte externa, os paineis e os
controlos com um pano macio
levemente humedecido com uma
solução de detergente suave. Não
utilize nenhum tipo de escova
abrasiva, pó saponáceo ou solvente,
tal como álcool ou benzina.
Acerca do reempacotamento
• Não jogue fora a caixa e o material de
empacotamento. Estes constituem a
embalagem ideal para o transporte do
aparelho. Quando necessitar
transportar o aparelho, reempacote-o
P
2
da maneira como veio da fábrica.
Page 51

Bem-vindo!
Agradecemos-lhe pela aquisição do
Sintonizador FM-AM/Estéreo FM da
Sony. Antes de utilizar este aparelho,
leia atentamente este manual e guarde-o
para futuras consultas.
ÍNDICE
Preparativos
Desempacotamento 4
Ligação do sistema 4
Selecção do mostrador em alemão 6
Armazenamento automático de estações FM (selecção alfabética
automática) 6
Acerca deste manual
O seguinte símbolo é utilizado neste
manual:
Indica conselhos e lembretes para
tornar as operações mais fáceis.
Operações básicas
Recepção de estações programadas 7
Operações avançadas do sintonizador
Acerca do sistema de entrada no menu 8
Personalização do mostrador 8
Recepção de transmissões por varredura de estações
(Sintonização automática) 9
Conselhos para a melhor recepção de FM 10
Programação de estações de rádio 11
Intitulação de estações programadas 12
Organização das estações programadas 12
Utilização do sistema de dados radiofónicos (RDS) 14
Outras informações
Verificação de problemas 15
Especificações 15
Índice remissivo 16
P
P
3
Page 52

Preparativos
Desempacotamento
Certifique-se de ter recebido os itens a seguir junto com
o seu sintonizador:
• Cabo de ligação de áudio (1)
• Antena de quadro AM (1)
• Antena filiforme FM (1)
Ligação do sistema
2 Desenrole 3 comprimentos do fio de chumbo
trançado do quadro da antena. Seja cuidadoso
para desenrolar somente a secção trançada do fio
de chumbo. Não desenrole mais do que 3
extensões do mesmo. Ademais, seja cuidadoso
para não destrançá-lo.
Medidas preliminares
3 Instale a antena fornecida tal como ilustrado
• Desligue a alimentação de todos os componentes
antes de efectuar quaisquer ligações.
• Não ligue o cabo de alimentação CA antes de ter
completado todas as ligações.
•
Certifique-se de efectuar firmemente as ligações, a fim
de evitar a captação de zumbidos ou interferências.
• Quando da ligação de um cabo de ligação de áudio,
certifique-se de combinar os terminais codificados
por cores com as tomadas correspondentes: branco
(esquerda) com branco; vermelho (direita) com
vermelho.
abaixo.
4 Ligue a antena de quadro AM aos terminais AM
Ligações da antena AM
Esta secção descreve como ligar a antena de quadro
AM fornecida. Quanto à localização específica dos
terminais AM ANTENNA, consulte a ilustração
abaixo.
AM ANTENNA
ANTENNA
AB
FM
75 COAXIAL
AM
LINE OUT
RL
y
O que é necessário?
• Antena de quadro AM (fornecida) (1)
1 Antes de instalar a antena fornecida, puxe o fio de
chumbo para fora da abertura do quadro da
antena.
P
4
na parte posterior deste aparelho.
Antena de
quadro AM
ANTENNA
AM
y
5 Ajuste a orientação da antena para a melhor
recepção.
A antena de quadro AM possui uma directividade
que detecta o sinal mais intensamente a partir de
alguns ângulos do que de outros. Ajuste a antena
para a orientação que proporcione a melhor
condição de recepção.
Caso um ruído de alta tonalidade (ruído de
batida) seja produzido durante gravações de
transmissões AM, ajuste a posição da antena de
quadro AM de modo que o ruído desapareça.
Caso more num edifício construído de concreto
reforçado ou com uma estrutura de aço, pode não
ser possível atingir uma boa recepção, visto que
as ondas de rádio tornam-se fracas em interiores.
Para estações de difícil recepção
Experimente reposicionar a antena de quadro durante a
sintonização. A instalação da antena de quadro AM
fornecida nas proximidades de uma janela auxiliará o
aprimoramento da qualidade de recepção.
Page 53

Preparativos
AM
y
ANTENNA
75 COAXIAL
FM
AB
Ligações da antena FM
Com uma antena externa FM, pode-se obter uma
melhor qualidade sonora nas transmissões de FM.
Recomenda-se a utilização da antena filiforme FM
fornecida somente temporariamente, até que seja
instalada uma antena externa FM. Quanto à localização
específica do terminal FM ANTENNA, consulte a
ilustração abaixo.
FM ANTENNA
ANTENNA
AB
FM
75 COAXIAL
O que é necessário?
• Antena filiforme FM (fornecida) (1)
• Antena externa FM (não fornecida) (1) e cabo coaxial de 75
ohms com conector IEC do tipo fêmea (não fornecido) (1)
Conector IEC do tipo fêmea
Ligue a antena filiforme FM fornecida ou uma antena
externa FM (venda avulsa) a um dos terminais FM na
parte posterior deste aparelho.
AM
LINE OUT
RL
y
Ligação de um fio terra
Caso ligue uma antena externa, certifique-se de ligar
um fio terra (venda avulsa) ao terminal AM
ANTENNA y (em adição à antena de quadro AM)
para a protecção contra relâmpagos.
Para evitar explosões de gás, não ligue o fio terra a
uma tubulação de gás.
à terra
Ligações do amplificador
Ligue o sintonizador a um amplificador. Certifique-se
de desligar a alimentação de ambos os equipamentos
antes de efectuar a ligação. Quanto à localização
específica dos terminais, consulte a ilustração abaixo.
Sintonizador
ANTENNA
AB
FM
75 COAXIAL
AM
y
LINE OUT
(L/R)
LINE OUT
RL
Antena filiforme FM
ANTENNA
AFM B
75 COAXIAL
Antena externa FM
ANTENNA
AFM B
75 COAXIAL
Conector IEC do tipo fêmea
Podem-se utilizar duas antenas FM
Este sintonizador possui dois terminais FM ANTENNA,
A e B, para a utilização com diferentes tipos de antenas
FM. Por exemplo, pode-se ligar uma antena externa à
tomada A e ligar uma antena de cabo à tomada B. Podese, ainda, comutar a antena durante a utilização do
medidor de sinal para determinar qual antena oferece a
melhor recepção para uma estação em particular.
Amplificador
INPUT TUNER (L/R)
Quais os cabos necessários?
• Cabo de ligação de áudio (fornecido) (1)
Branco (L) Branco (L)
Vermelho (R)
Vermelho (R)
Ligue as fichas brancas às tomadas brancas (L), e as fichas
vermelhas, às tomadas vermelhas (R). Insira as fichas
completamente nas tomadas; ligações frouxas podem causar
interferências.
Amplificador
Sintonizador
LINE OUT
L
R
ç
INPUT
TUNER CD AUX
L
R
(continua…)
P
5
Page 54

Preparativos
Ligação do cabo de alimentação CA
Ligue o cabo de alimentação CA a uma tomada da rede após
completar todas as ligações prévias.
ANTENNA
FM
AB
75 COAXIAL
AM
LINE OUT
RL
y
/
a uma tomada
da rede CA
Selecção do mostrador em
alemão
Pode-se optar entre o idioma inglês e o alemão para as
indicações do mostrador. O idioma pré-ajustado na
fábrica é o inglês. Para alterar a indicação do mostrador
para o alemão, execute os passos abaixo.
POWER
com os sinais mais nítidos. Caso deseje armazenar
estações FM ou AM (MW e LW) uma a uma, consulte
«Recepção de transmissões por varredura de estações
(Sintonização automática)» na página 9 e
«Programação de estações de rádio» na página 11.
POWER
ENTER TUNING/SELECT
MENU
1 Ligue a antena FM.
Consulte «Ligações da antena FM» na página 5.
2 Carregue em POWER para ligar o sintonizador.
3 Carregue em MENU repetidamente, até que
«Auto-betical» apareça no mostrador.
4 Pressione ENTER.
«Yes» ou «No» aparece no mostrador.
5 Carregue em TUNING/SELECT + ou - para fazer
piscar «Yes» no mostrador.
6 Pressione ENTER.
O sintonizador pesquisa e armazena todas as
estações FM e FM RDS da região de transmissão.
Para estações RDS, o sintonizador primeiro
verifica quais as estações a transmitir o mesmo
MENU
1 Carregue em POWER para desligar o
sintonizador.
2 Enquanto mantém pressionada a tecla MENU,
carregue em POWER para ligar o sintonizador.
«Deutsch» aparece no mostrador.
Para retornar às indicações em inglês
Repita este procedimento.
«English» aparece no mostrador.
Armazenamento automático
de estações FM (selecção
alfabética automática)
Com «Auto-betical select», pode-se armazenar
automaticamente um total de 30 estações FM e FM RDS
em ordem alfabética, sem redundâncias. Além do mais,
P
6
«Auto-betical select» armazena somente as estações
programa, e então armazena somente aquela com
o sinal mais nítido. As estações RDS seleccionadas
são ordenadas em ordem alfabética pelos
respectivos nomes de programa de serviço, e
então recebem um código de memória de dois
caracteres. Consulte a página 14 quanto a maiores
detalhes sobre o RDS.
Estações FM regulares recebem códigos de
memória de dois caracteres e são armazenadas
após as estações RDS.
Para alterar a localização da, ou apagar a estação
programada
Consulte «Organização das estações programadas» na
página 12.
Notas
• Caso se desloque para uma outra região, repita este
procedimento para armazenar as estações da nova área.
• Quanto a detalhes sobre a sintonização das estações
armazenadas, consulte a página 11.
• Os ajustes ANTENNA, ANT ATT, IF BAND e FM MODE
também são armazenados com a estação.
• Caso desloque a antena após o armazenamento de
estações mediante a utilização de «Auto-betical select», os
ajustes armazenados podem perder a sua validade. Neste
caso, armazene novamente as estações.
Page 55

Operações básicas
Recepção de estações programadas
Esta secção mostra como receber estações programadas.
3
POWER
• Para sintonizar uma estação
não-programada, consulte
«Recepção de transmissões
por varredura de estações
(Sintonização automática)» na
página 9.
DISPLAY
4
5
FM STEREO / FM-AM TUNER ST-S3000ES
TUNING/SELECT
–+
CHARACTER
ANTENNA BAND MEMORY MENU RETURN ENTER
MENU ENTRY
Certifique-se de ter efectuado as ligações do sintonizador e
programado estações. (Consulte as páginas 4 - 6 quanto às
1
ligações, e a página 6 ou 11, quanto à programação.)
Ligue o amplificador e seleccione o modo TUNER.
TUNE MODE
SHIFT
2
Pressione POWER para ligar o sintonizador.
3
Pressione SHIFT para seleccionar A, B ou C.
4
Carregue em TUNING/SELECT + ou – para seleccionar o
número de memória desejado. O sintonizador salta
5
automaticamente números que não contenham estações
programadas.
P
7
Page 56

Operações avançadas do sintonizador
Acerca do sistema de entrada
no menu
Este sintonizador utiliza um sistema de entrada no
menu que possibilita-lhe operar várias funções,
seguindo as mensagens no mostrador. Utilize os
controlos a seguir para a operação do menu.
TUNING/SELECT
RETURN
Utilize
a tecla MENU
Teclas TUNING/
SELECT
a tecla ENTER
a tecla RETURN
ENTER
MENU
Para:
entrar no modo do menu.
obter a indicação de diferentes
itens ou ajustes.
seleccionar o item ou ajuste
correntemente indicado.
retornar a um estágio anterior no
modo do menu.
Personalização do mostr ador
Pode-se seleccionar o aspecto visual do mostrador
dentre os quatro modos de indicação a seguir.
ENTER
MENU
1 Carregue em MENU e então pressione TUNING/
SELECT + ou – até que «Disp-Mode» apareça no
mostrador.
2 Carregue em ENTER.
Aparece a indicação «Select» no mostrador.
3 Pressione TUNING/SELECT + ou – para
seleccionar um modo de indicação.
Indicação máxima/brilho máximo
.
Indicação máxima/brilho atenuado
.
TUNING/SELECT
Indicação mínima/brilho máximo
.
Indicação mínima/brilho atenuado
4 Pressione ENTER.
O ajuste permanece válido até que seja novamente
alterado.
Caso pressione uma das teclas no aparelho
principal, a indicação mínima altera-se para a
indicação máxima com o brilho seleccionado.
Após cerca de 4 segundos, o mostrador retorna ao
modo de indicação seleccionado.
P
8
Page 57

Recepção de transmissões por
varredura de estações
(Sintonização automática)
Com a sintonização automática, pode-se rapidamente
sintonizar um estação mesmo sem saber a sua
frequência.
Antes de começar, certifique-se de ter:
• ligado uma antena AM, FM ao sintonizador, tal
como indicado nas páginas 4 e 5.
MENU
ENTER
TUNING/SELECT
Operações avançadas do sintonizador
Caso não seja possível sintonizar a estação desejada
(Sintonização Manual)
Com a sintonização manual, pode-se executar a varredura
de todas as estações transmissoras em cada banda, e
sintonizar estações com sinais extremamente fracos, não
captáveis por meio da sintonização automática.
1 Pressione BAND repetidamente para seleccionar FM,
MW ou LW.
2 Carregue em TUNE MODE de modo que somente
«TUNING» apareça no mostrador. A indicação
«AUTO» não deve aparecer no mostrador.
3 Pressione TUNING/SELECT + ou – repetidamente,
até sintonizar a estação desejada.
O medidor de sinal indica a intensidade do sinal de
transmissão.
Nota
Quando a estação mais alta ou a mais baixa é atingida, a
sintonização é cessada.
BAND
TUNE MODE
1 Carregue em BAND para seleccionar FM, MW ou
LW.
2 Pressione TUNE MODE de forma que «AUTO»
apareça no mostrador.
3 Carregue em TUNING/SELECT + ou –.
Quando o sintonizador localizar uma estação, a
varredura será cessada automaticamente e
«TUNED» aparecerá no mostrador.
O medidor de sinal indica a intensidade do sinal
de transmissão.
4 Repita o passo 3 até sintonizar a estação
apropriada.
Para armazenar a estação, consulte «Programação
de estações de rádio» na página 11.
Na sintonização de estações AM (MW e LW)
Ajuste o direccionamento da antena de quadro AM para
obter uma recepção óptima.
Caso o indicador STEREO permaneça desligado
Utilize o sistema de entrada de menu para ajustar «FM
Mode» a «AUTO». Consulte «Para ajustar o modo FM
manualmente» na página 10 quanto aos detalhes.
Caso um programa FM estéreo apresente distorções
O indicador STEREO pisca. Utilize o sistema de entrada
de menu para ajustar «FM Mode» a «MONO». Não se
obterá o efeito estéreo, porém a distorção será reduzida.
Consulte «Para ajustar o modo FM manualmente» na
página 10 quanto aos detalhes.
P
9
Page 58

Operações avançadas do sintonizador
Conselhos para a melhor
Para ajustar manualmente ANT ATT e IF BAND
1 Pressione MENU.
recepção de FM
Este sintonizador possui várias funções designadas
para a obtenção da melhor recepção. Primeiro,
experimente receber estações com os ajustes
padronizados. Caso a recepção não seja satisfatória,
experimente alterar a qualidade de recepção para obter
um sinal mais nítido. O sintonizador armazena os
ajustes a seguir junto com a frequência, quando uma
estação é programada.
ANTENNA
DISPLAY
Selecção das antenas FM
Caso esteja a utilizar duas antenas FM, pressione
ANTENNA para seleccionar o terminal FM
ANTENNA A ou B. Mediante a selecção da antena,
pode-se receber uma estação não recebível de outra
forma.
MENU
ENTER
TUNING/SELECT
2 Pressione TUNING/SELECT + ou – repetidamente, até
que «Reception» apareça no mostrador, e então carregue
em ENTER.
A indicação «FM Only» aparece no mostrador, caso
seleccione «Reception» durante a sintonização de uma
estação MW ou LW.
3 Pressione TUNING/SELECT + ou – para escolher «ATT/
IF Band» e então carregue em ENTER.
4 Carregue em TUNING/SELECT + ou – para escolher o
ajuste ANT ATT preferido e então pressione ENTER.
• «ANT ATT : ON» reduz o nível do sinal de entrada para
receber transmissões com níveis de sinal extremamente
altos.
• «ANT ATT : OFF» corresponde à sintonização normal.
5 Carregue em TUNING/SELECT + ou – para escolher o
ajuste IF preferido e então pressione ENTER.
• «IF : Wide» sintoniza somente as estações com alta
qualidade sonora e baixa distorção.
• «IF : Narrow» aprimora a selectividade e reduz
interferências para tornar as transmissões com sinais
fracos mais fáceis de se escutar.
Para ajustar o modo FM manualmente
Utilize o sistema de entrada de menu para seleccionar
«AUTO» estéreo (nenhuma indicação) ou «MONO».
Alteração do modo de selecção activa (ASM)
O modo de selecção activa (ASM/Active Selection
Mode) deste sintonizador é pré-ajustado na fábrica
para localizar automaticamente os melhores ajustes do
atenuador de antena (ANT ATT), da banda de
frequência intermediária (IF BAND) e de FM MODE
para cada frequência. Pode-se, todavia, seleccionar
cada ajuste manualmente, de acordo com a preferência
pessoal. Caso não queira utilizar a função ASM,
desligue-a.
Seleccione ASM do sistema de entrada de menu para
desligar ou ligar o modo de selecção activa.
Quando ASM for accionado, o indicador ASM aparecerá no
mostrador ao se seleccionar a banda FM.
1 Pressione MENU.
2 Carregue em TUNING/SELECT + ou – repetidamente, até
«Reception» aparecer no mostrador, e então pressione
ENTER.
3 Carregue em TUNING/SELECT + ou – repetidamente, até
«A.S.M» aparecer no mostrador, e então pressione ENTER.
4 Carregue em TUNING/SELECT + ou – para escolher
«ON» ou «OFF», e então pressione ENTER.
1 Carregue em MENU.
2 Pressione TUNING/SELECT + ou – repetidamente, até
que «Reception» apareça no mostrador e então carregue
em ENTER.
«FM Only» é exibida no mostrador, caso escolha
«Reception» enquanto uma estação MW ou LW está
sintonizada.
3 Carregue em TUNING/SELECT + ou – repetidamente, até
que «FM Mode» apareça no mostrador, e então pressione
ENTER.
4 Carregue em TUNING/SELECT + ou – para seleccionar o
ajuste preferido e então pressione ENTER.
• O modo estéreo «AUTO» recebe transmissões em
estéreo com sinais intensos. O indicador «MONO»
desaparece do mostrador.
• «MONO» recebe estações com sinais fracos.
As estações serão recebidas em mono como ainda
menos ruído.
10
P
Page 59

Verificação da intensidade do sinal
Pode-se utilizar o medidor de sinal digital para
verificar a intensidade do sinal das frequências FM. A
gama de indicação é de 16 a 70 dB (1 µV da voltagem
de radiofrequência = 0 dB). Para se obter uma relação
sinal/ruído suficiente para a recepção de transmissões
em estéreo, recomenda-se uma leitura maior que 50 dB.
Este aparelho permite-lhe, também, utilizar o medidor
de sinal digital com a banda AM. Com AM, a gama de
indicação é de 0 a 10 (valores maiores indicam sinais
mais intensos).
1 Sintonize uma estação FM ou AM.
2 Pressione DISPLAY repetidamente para obter a
indicação do medidor de sinal digital.
3 Gire a antena FM ou AM para obter o sinal mais
intenso.
Operações avançadas do sintonizador
Programação de estações de
rádio
Esta secção mostra como armazenar manualmente um
total de 30 das suas estações FM ou AM (MW e LW)
favoritas em códigos de memória compostos de
caracteres (A, B ou C) e números, tal como A7. Pode-se
armazenar um total de 10 estações com cada uma das
três letras diferentes. Tais letras podem ser utilizadas
para classificar estações de acordo com a categoria
musical ou banda da estação.
TUNING/SELECT
MEMORY
ENTER
SHIFT
1 Sintonize a estação em FM, MW ou LW que deseja
armazenar.
2 Pressione MEMORY.
Aparece a indicação «MEMORY» junto com o
mais baixo código vago para indicar que o
sintonizador está pronto para armazenar a
estação.
3 Carregue em SHIFT para seleccionar A, B ou C.
A letra seleccionada aparecerá no mostrador.
4 Carregue em TUNING/SELECT + ou –
repetidamente para escolher o número desejado.
5 Carregue em ENTER para armazenar a estação.
O sintonizador armazena a estação no código de
memória especificado.
6 Repita os passos de 1 a 5 para armazenar outras
estações.
Os nomes das estações RDS são armazenados
automaticamente
Quando uma estação RDS a transmitir a informação do
nome da estação é programada, o nome da estação é
automaticamente armazenado na memória da estação.
Caso deseje intitular as estações
Execute o procedimento descrito em «Intitulação de
estações programadas» na página 12.
11
P
Page 60

Operações avançadas do sintonizador
12
Intitulação de estações
programadas
Podem-se designar nomes compostos de até 5
caracteres para cada estação programada, (excepto as
estações FM RDS). Quando a estação for sintonizada, o
nome designado aparecerá no lugar da frequência.
CHARACTER
DISPLAY
MEMORY
ENTER
TUNING/SELECT
SHIFT
Organização das estações
programadas
Este sintonizador torna fácil arranjar as estações
programadas na ordem da sua preferência. Podem-se
arranjar todas as estações programadas
automaticamente, de acordo com a ordem alfabética, a
intensidade do sinal, o código do país ou a banda do
sintonizador, ou ainda utilizar as funções de «Move»
(Realocação) e «Erase» (Apagamento) para deslocar e
apagar estações programadas específicas.
ENTER
TUNING/SELECT
1 Utilize as teclas SHIFT e TUNING/SELECT + ou
– para especificar a memória onde deseja
armazenar o nome da estação.
2 Pressione CHARACTER.
O cursor passa a piscar no mostrador.
3 Carregue em TUNING/SELECT + ou –
repetidamente para seleccionar um caracter.
4 Quando o caracter desejado aparecer, pressione
CHARACTER para deslocar o cursor até a posição
do próximo caracter.
Caso efectue algum erro
Pressione CHARACTER repetidamente, até que o
caracter que deseja alterar passe a piscar (cada vez que
se pressiona CHARACTER, o próximo caracter passa a
piscar). A seguir, pressione TUNING/SELECT + ou –
para seleccionar um novo caracter.
5 Repita os passos 2 e 3, até que o nome desejado
para a estação apareça no mostrador.
6 Pressione MEMORY.
«MEMORY» aparece.
Nota
O mostrador retorna ao modo de indicação normal, caso
não pressione ENTER dentro de 8 segundos após o
pressionamento de MEMORY. Neste caso, comece
novamente a partir do início.
7 Pressione ENTER para armazenar o nome da
estação.
Para obter a frequência do nome de estação em
indicação
Pressione DISPLAY repetidamente.
P
1 Pressione MENU.
2 Carregue em TUNING/SELECT + ou –
repetidamente, até que «Edit» apareça no
mostrador, e então pressione ENTER.
Caso nenhuma estação tenha sido armazenada
nas memórias, «No Preset» é indicada no
mostrador.
3 Carregue em TUNING/SELECT +/–
repetidamente para escolher um dos métodos de
classificação a seguir:
Seleccione
Move
(Realocação)
Erase
(Apagamento)
Alphabet
(alfabeto)
Strength
(intensidade)
Country
(país)
Band
(banda)
Para
alterar a localização de uma estação
programada específica.
apagar uma estação programada específica.
ordenar as estações programadas em ordem
alfabética, de acordo com os seus títulos inscritos.
Estações sem títulos inscritos são arranjadas por
frequência, da mais baixa para a mais alta.
ordenar as estações programadas na ordem de
intensidade dos seus sinais (somente estações FM).
Estações de MW e LW são arranjadas por frequência.
ordenar as estações FM RDS com
informações PI alfabeticamente por país.
As demais estações são arranjadas por frequência.
ordenar as estações na ordem de suas
bandas de frequência (FM - MW - LW).
4 Carregue em ENTER.
O sintonizador classifica as estações e então
retorna ao modo de sintonização normal para
receber a estação programada A1, a menos que se
seleccione “Move” ou “Erase”.
Nota
Alguns países utilizam o mesmo código de país; portanto, as
estações de tais países podem ser arranjadas em conjunto.
MENU
Page 61

Realocação de estações programadas
Pode-se também deslocar uma estação programada
específica.
1
Siga os passos de 1 a 3 em «
estações programadas
Organização das
» e seleccione «Move» no
menu de edição. A seguir, carregue em ENTER.
2 Carregue em TUNING/SELECT + ou – de forma
que o código de memória que deseja deslocar
apareça no mostrador, e então pressione ENTER.
3 Carregue em TUNING/SELECT + ou – para
seleccionar a nova posição para o código de
memória, e então pressione ENTER.
A estação programada seleccionada é deslocada
para a nova posição e as outras estações
programadas de tal grupo («A», por exemplo)
deslocam-se para trás, abrindo espaço para a nova
programação.
EXEMPLO:
Caso realoque A4 para A1.
Código de
memória
A1 A2 A3 A4 A5 A6 A7 A8
89.5 94.5 96.5 98.0 100.5 103.0 104.5 106.0Frecuência
Operações avançadas do sintonizador
.
Código de
memória
A1 A2 A3 A4 A5 A6 A7 A8
98.0 89.5 94.5 96.5 100.5 103.0 104.5 106.0Frecuência
Apagamento de estações programadas
Podem-se apagar estações programadas uma a uma.
1 Siga os passos de 1 a 3 em «Organização das
estações programadas» e seleccione «Erase» no
menu de edição. A seguir, carregue em ENTER.
2 Carregue em TUNING/SELECT + ou – de forma
que o código de memória que deseja apagar
apareça no mostrador, e então pressione ENTER.
A estação programada seleccionada é apagada da
memória programada e as outras estações
programadas de tal grupo («A», por exemplo)
deslocam-se para frente, preenchendo o espaço
em branco.
EXEMPLO:
Caso apague A1.
Código de
memória
A1 A2 A3 A4 A5 A6 A7 A8
89.5 94.5 96.5 98.0 100.5 103.0 104.5 106.0Frecuência
.
Código de
memória
Caso deseje apagar todas as estações programadas
1 Desligue a alimentação.
2 Enquanto mantém pressionada a tecla ANTENNA e
ENTER, carregue em POWER para ligar a alimentação.
A1 A2 A3 A4 A5 A6 A7 A8
94.5 96.5 98.0 100.5 103.0 104.5 106.0Frecuência
13
P
Page 62

Operações avançadas do sintonizador
Utilização do sistema de dados
radiofónicos (RDS)
O que se pode fazer com o RDS
O Sistema de Dados Radiofónicos (RDS) é um serviço
de transmissão que possibilita às estações de rádio, o
envio de informações adicionais junto com o sinal de
programas de rádio regulares. Este aparelho permitelhe exibir uma variedade de informações RDS e oferece
um indicador de estações designadas para transmitir
informações de tráfego. RDS está disponível somente
nas estações FM*.
Nota
O RDS pode não funcionar adequadamente, caso a estação
sintonizada não esteja a transmitir o sinal RDS
apropriadamente, ou caso a intensidade do sinal seja fraca.
Notas
•
Caso haja um noticiário de emergência emitido por autoridades
governamentais, «ALARM» passa a piscar no mostrador.
• Caso uma estação não esteja a fornecer um serviço RDS
em particular, «NO...» (tal como «NO PTY») aparece no
mostrador.
• Conforme o método utilizado pela estação de rádio para
enviar o texto, algumas mensagens de texto podem estar
incompletas.
Localização de estações transmissoras de
informações de tráfego
Quando se sintoniza uma estação RDS que transmite
informações de tráfego, o indicador TP acende-se.
* Nem todas as estações FM oferecem os serviços RDS, e os
serviços oferecidos podem não ser do mesmo tipo. Caso
não esteja familiarizado com o sistema RDS, informe-se
nas estações de rádio locais quanto aos detalhes sobre os
serviços RDS na sua região.
Recepção de transmissões RDS
Simplesmente seleccione uma estação da banda FM.
Quando uma estação fornecedora de serviços RDS é
sintonizada, o indicador RDS e o nome da estação
aparecem no mostrador.
Indicação de informações RDS
Pressione DISPLAY algumas vezes, até que a
informação desejada seja indicada.
Informação em indicação
Nome da estação*
Frequência*
Relógio (ciclo de 24 horas)
Tipo de programa
Radiotexto
Identificação do
programa
Medidor de sinal digital*
Possibilita:
localizar cada estação por nome (ex.:
WDR) ao invés de por frequência.
localizar cada estação por
frequência.
obter a indicação da hora corrente.
localizar um tipo específico de
programa em transmissão.
a indicação de mensagens em texto
enviadas pela estação RDS.
determinar o país de origem de
cada transmissão.
(Consulte a página 11 quanto aos
detalhes.)
14
*
Esta informação também aparece para estações FM não-RDS.
P
Page 63

Outras informações
Verificação de
problemas
Caso alguma das dificuldades a
seguir surja durante a operação do
sintonizador, utilize este guia de
verificação de problemas para
solucionar o problema. Caso algum
problema persista, consulte o seu
agente Sony mais próximo.
Ausência de som.
/ Ligue as antenas.
/ Ajuste a fonte, ligando o
amplificador a TUNER.
Não é possível sintonizar uma
frequência.
/ Ajuste a posição da antena.
/ Ligue uma antena externa
para transmissões de FM.
/ Ajuste IF BAND para
NARROW.
/ Programe as estações
novamente, caso tenha
mudado de lugar.
Ocorrência de zumbidos e/ou ruídos
de fundo intensos.
/ Ajuste o posicionamento
ou a orientação da antena.
/ Sintonize uma frequência
correcta.
/ Ligue uma antena externa
para transmissões de FM.
/ Aumente a distância entre
o sintonizador e a fonte de
interferência.
RDS não-funcionante.
/ Certifique-se de ter
sintonizado uma estação
FM RDS.
/ Seleccione uma estação FM
RDS com sinal mais
intenso.
«No preset» aparece no mostrador.
/ Caso o cabo de alimentação
CA tenha sido desligado da
tomada da rede por mais
de um mês, a memória é
apagada. Realize as
programações novamente.
A indicação ou informação
apropriada não aparece.
/ Desligue a alimentação.
Mantenha pressionadas
ANTENNA e a ENTER, e
então carregue em POWER
para voltar a ligar a
alimentação. Isto apaga
todas as frequências
armazenadas na memória e
retorna o mostrador ao
idioma original (inglês).
/ Entre em contacto com a
estação de rádio e confirme
se esta realmente oferece o
serviço em questão. Em
caso positivo, o serviço
pode estar
temporariamente
interrompido.
Especificações
Secção do sintonizador de FM
Gama de frequências
Terminais de antena
Frequência
intermediária
Sensibilidade
Sensibilidade utilizável
(IHF)
Relação sinal/ruído
Distorção harmónica
Resposta de frequência
87,5 - 108,0 MHz
75 ohms,
desbalanceado
IEC macho
10,7 MHz
a 26 dB inerte
(mono) 10,3 dBf,
0,9 µV/75Ω
a 46 dB inerte
(estéreo) 38,5 dBf,
23 µV/75Ω
10,3 dBf; 0,9 µV/
75 Ω
a 40 kHz de desvio
80 dB (mono),
76 dB (estéreo)
a 40 kHz de desvio
WIDE
0,04% (mono),
0,05% (estéreo)
NARROW
0,06% (mono),
0,08% (estéreo)
30 Hz - 15 kHz
(+0,2/–0,3 dB)
Separação de canais
Selectividade
Saída
50 dB a 1 kHz
a 400 kHz
WIDE 80 dB
NARROW 90 dB
a 300 kHz
WIDE 45 dB
NARROW 70 dB
a 40 kHz de desvio
600 mV
Secção do sintonizador de AM
Gama de frequências
Frequência
intermediária
Sensibilidade utilizável
Relação sinal/ruído
Distorção harmónica
Selectividade
MW: 522 - 1.611 kHz
(9 kHz de
intervalo)
LW: 144 - 288 kHz (1
kHz de intervalo)
450 kHz
(com antena de
quadro AM)
MW: 200 µV/m
LW: 700 µV/m
MW: 54 dB
(50 mV/m,
999 kHz)
LW: 50 dB
(50 mV/m,
216 kHz)
0,3% (50 mV/m,
400 Hz)
50 dB
Generalidades
Alimentação
Consumo
Dimensões
Peso
Acessórios fornecidos
Design e especificações sujeitos a alterações
sem aviso prévio.
220 - 230 V CA,
50/60 Hz
12W
280 x 80 x 400 mm
(l/a/p)
4,3 kg
Cabo de ligação de
áudio (1)
Antena de quadro
AM (1)
Antena filiforme
FM (1)
15
P
Page 64

Outras informações
Índice remissivo
A
P, Q
Programação
estações AM, de 11
estações FM, de 6, 11
Ajuste
banda IF, da 10
Amplificador
ligações do 6
Antena
AM, ligações 4
FM, ligações 5
Armazenamento de estações de
rádio. Veja programação
B, C
Banda IF 10
D, E, F, G, H
Desempacotamento 4
I, J, K
Intitulação de estações 11
L
R
Recepção de estações
programadas 7
RDS 13
S, T, U
Selecção auto-betical 6
Sintonização. Consulte
Recepção de transmissões
Sintonizada automática 9
Sintonização manual 9
Sintonização programada
estações AM, de 7
estações FM, de 7
V
Verificação de problemas 15
W, X, Y, Z
WIDE 10
Ligação. Consulte Ligações
Ligações
amplificador, do 5
antena AM, da 4
antena FM, da 5
cabo de alimentação CA,
do 6
M
Medidor de sinal 10
Memória 6, 10, 11
Modo FM 10
Mostrador
modo do 8
idioma do 6
N
NARROW 10
O
Organização das estações
programadas 12
16
P
Page 65

17
P
Page 66

VORSICHT
Um Feuergefahr und die Gefahr eines
elektrischen Schlages zu vermeiden,
darf das Gerät weder Regen noch
Feuchtigkeit ausgesetzt werden.
Um einen elektrischen Schlag zu
vermeiden, darf das Gehäuse nicht
geöffnet werden. Überlassen Sie
Wartungsarbeiten stets nur einem
Fachmann.
Zur besonderen
Beachtung
Zur Sicherheit
• Sollte ein fester Gegenstand oder
Flüssigkeit in das Gehäuse gelangen,
trennen Sie das Gerät ab und lassen
Sie es von einem Fachmann
überprüfen, bevor Sie es
weiterverwenden.
Zur Stromversorgung
• Bevor Sie das Gerät in Betrieb
nehmen, überprüfen Sie, ob die
Betriebsspannung mit der örtlichen
Netzspannung übereinstimmt.
• Trennen Sie bei längerer
Nichtverwendung das Gerät von der
Wandsteckdose ab. Zum Abtrennen
des Kabels fassen Sie stets am Stecker
und niemals am Kabel an.
• Das Netzkabel darf nur von einer
Fachwerkstatt ausgewechselt werden.
Zur Wiederverpackung
• Heben Sie den Karton und das
Verpackungsmaterial auf, um das
Gerät bei einem späteren Transport
wieder sicher verpacken zu können.
Bei weiterführenden Fragen wenden Sie
sich bitte an den nächsten Sony
Händler.
Zur Aufstellung
• Stellen Sie das Gerät an einem Ort
auf, an dem ausreichende
Luftzirkulation gewährleistet ist, um
einen internen Hitzestau zu
vermeiden und eine lange
Lebensdauer des Geräts
sicherzustellen.
• Stellen Sie das Gerät nicht in die
Nähe von Wärmequellen und achten
Sie darauf, daß es keinem direkten
Sonnenlicht, keinem Staub und
keinen Stößen ausgesetzt ist.
• Stellen Sie nichts auf das Gerät. Wenn
die Ventilationsöffnungen blockiert
werden, kann es zu Fehlfunktionen
kommen.
• Stellen Sie das Gerät nicht in einen
geschlossenen Schrank und nicht auf
ein Bücherregal.
Zur Reinigung
• Reinigen Sie das Gehäuse, das
Bedienungspult und die
Bedienungselemente mit einem
weichen, leicht mit mildem
Haushaltsreiniger angefeuchteten
Tuch. Scheuermittel, Scheuerpulver
und Lösungsmittel wie Alkohol oder
Benzin dürfen nicht verwendet
werden.
D
2
Page 67

Herzlichen
Glückwunsch!
Wir beglückwünschen Sie zum Kauf
dieses Sony UKW-Stereo/MW/LWTuners. Vor der Inbetriebnahme lesen
Sie diese Anleitung sorgfältig durch
und bewahren Sie sie zum späteren
Nachschlagen gut auf.
Zu dieser Anleitung
INHALTSVERZEICHNIS
Vor dem Betrieb
Nach dem Auspacken 4
Anschluß des Systems 4
Umschalten auf deutsche Anzeigeninformationen 6
Automatisches Abspeichern von UKW-Sendern
(Auto-betical select-Funktion) 6
Grundlegender Betrieb
Abrufen gespeicherter Sender 7
Auf einigen Seiten wird das folgende
Symbol verwendet:
Kennzeichnet Zusatzhinweise
und Tips zur
Bedienungserleichterung.
Fortgeschrittener Betrieb
Das Menüsystem 8
Wahl des Display-Anzeigemodus 8
Automatischer Sendersuchlauf 9
Tips für optimalen UKW-Empfang 10
Abspeichern eines Senders 11
Zuteilen von Sendernamen 12
Ordnen, Verschieben und Löschen von gespeicherten Sendern 12
Das Radio Data System (RDS) 14
Zusatzinformationen
Störungsüberprüfungen 15
Technische Daten 15
Stichwortverzeichnis 16
D
D
3
Page 68

Vor dem Betrieb
Nach dem Auspacken
Vergewissern Sie sich, daß die folgenden Teile bei
Ihrem Tuner mitgeliefert sind:
• Audiokabel (1)
• MW/LW-Rahmenantenne (1)
• UKW-Antennendraht (1)
Anschluß des Systems
Vorbereitung
• Schalten Sie alle Geräte aus, bevor Sie Anschlüsse
vornehmen.
• Schließen Sie das Netzkabel als letztes an.
• Achten Sie auf sicheren Anschluß, um Brummen und
andere Störgeräusche zu vermeiden.
• Achten Sie beim Anschluß der Audiokabel auf die
Farben der Stecker und Buchsen. Schließen Sie Weiß
(linker Kanal) an Weiß und Rot (rechter Kanal) an
Rot an.
2 Wickeln Sie drei Lagen vom Rahmen ab. Wickeln
Sie nicht mehr als drei Lagen ab, und achten Sie
darauf, daß die Adern verdrillt bleiben.
3 Montieren Sie die MW/LW-Rahmenantenne wie
gezeigt.
4 Schließen Sie die MW/LW-Rahmenantenne an
die AM ANTENNA-Klemmen an der Rückseite
des Geräts an.
MW/LW-Rahmenantenne
Anschluß der MW/LW-Antenne
Im folgenden wird der Anschluß der mitgelieferten
MW/LW-Antenne behandelt. Die Abbildung zeigt die
AM ANTENNA-Klemmen, an denen der Anschluß
vorzunehmen ist.
AM ANTENNA
ANTENNA
AB
FM
75 COAXIAL
AM
LINE OUT
RL
y
Was wird benötigt?
• MW/LW-Rahmenantenne (mitgeliefert) (1)
1 Vor dem Zusammenbau der MW/LW-
Rahmenantenne ziehen Sie das Kabel aus der Nut
des Rahmens heraus.
ANTENNA
AM
y
5 Richten Sie die Antenne auf besten Empfang aus.
Die MW/LW-Rahmenantenne ist
richtempfindlich. Drehen Sie sie so, daß der beste
Empfang gewährleistet ist.
Wenn beim Aufnehmen eines MW-Senders ein
Pfeifgeräusch hoher Frequenz zu hören ist, stellen
Sie die MW/LW-Rahmenantenne an eine andere
Stelle. Beachten Sie auch, daß in
Stahlbetongebäuden aufgrund der Abschirmung
der elektromagnetischen Wellen der Empfang
schwächer ist.
Bei schwachem Empfang
Wenn auch nach Drehen der MW/LW-Rahmenantenne
der Empfang noch zu schwach ist, stellen Sie die
Antenne in die Nähe eines Fensters.
D
4
Page 69

Vor dem Betrieb
AM
y
ANTENNA
75 COAXIAL
FM
AB
LINE OUT
L
R
ç
R
L
INPUT
TUNER CD AUX
Anschluß der UKW-Antenne
Der mitgelieferte UKW-Antennendraht sollte nur
vorübergehend (bis zur Installation einer UKWAußenantenne) verwendet werden. Optimaler
Empfang ist nur mit einer UKW-Außenantenne
möglich. Die folgende Abbildung zeigt die FM
ANTENNA-Buchsen, an denen der Anschluß
vorzunehmen ist.
FM ANTENNA
ANTENNA
AB
FM
75 COAXIAL
Was wird benötigt
• UKW-Antennendraht (mitgeliefert) (1)
• UKW-Außenantenne (nicht mitgeliefert) (1) und 75-OhmKoaxialkabel mit IEC-Stecker (nicht mitgeliefert) (1).
IEC-Stecker
Schließen Sie den mitgelieferten UKW-Antennendraht
oder eine UKW-Außenantenne (nicht mitgeliefert) an
eine der FM-Buchsen an der Geräterückseite an.
AM
LINE OUT
RL
y
Anschluß eines Erdungskabel
Bei Verwendung einer Außenantenne muß als
Blitzschutzvorkehrung ein Erdungskabel (nicht
mitgeliefert) an die AM ANTENNA y-Klemme
(zusätzlich zur MW/LW-Rahmenantenne)
angeschlossen werden.
Auf keinen Fall darf das Erdungskabel an eine
Gasleitung angeschlossen werden, da sonst
Explosionsgefahr besteht.
an Erde
Anschluß des Verstärkers
Bevor Sie den Ausgang des Tuners an den Verstärker
anschließen, schalten Sie die Geräte aus. Die folgende
Abbildung zeigt die Buchsen, an denen der Anschluß
vorzunehmen ist.
ANTENNA
AB
FM
75 COAXIAL
AM
y
LINE OUT
(L/R)
LINE OUT
RL
Tuner
UKW-Antennendraht
AFM B
75 COAXIAL
ANTENNA
UKW-Außenantenne
ANTENNA
AFM B
75 COAXIAL
IEC-Stecker
Anschlußmöglichkeit für zwei UKW-Antennen
Dieser Tuner besitzt zwei UKW-Antennenbuchsen (FM
ANTENNA A und B) zum gleichzeitigen Anschluß von
zwei UKW-Antennen. So können Sie beispielsweise an
die Buchse A eine Außenantenne und an die Buchse B
eine Kabelantenne anschließen. Anhand des
Signalstärkemeters können Sie ermitteln, welche der
beiden Antennen den besten Empfang ermöglicht.
Schalten Sie dann auf diese Antenne um.
Verstärker
INPUT TUNER (L/R)
Benötigte Kabel
• Audiokabel (mitgeliefert) (1)
Weiß (L)
Rot (R)
Weiß (L)
Rot (R)
Stecken Sie die weißen Stecker in die weißen Buchsen (linker
Kanal) und die roten Stecker in die roten Buchsen (rechter
Kanal). Achten Sie darauf, die Stecker fest einzustecken;
lockerer Anschluß kann Störgeräusche verursachen.
Verstärker
Tuner
(Siehe Fortsetzung)
D
5
Page 70

Vor dem Betrieb
Netzanschluß
Wenn alle anderen Anschlüsse hergestellt sind, schließen Sie
das Netzkabel an eine Wandsteckdose an.
ANTENNA
AB
FM
75 COAXIAL
AM
LINE OUT
RL
y
/
an eine Wandsteckdose
Umschalten auf deutsche
Anzeigeninformationen
Für die Anzeigen im Display kann zwischen Englisch
und Deutsch gewählt werden. Werksseitig ist auf
Englisch voreingestellt. Zum Umschalten auf Deutsch
verfahren Sie wie folgt:
POWER
abgespeichert. (Zum manuellen Abspeichern einzelner
UKW- und MW/LW-Sender siehe unter
„Automatischer Sendersuchlauf“ auf Seite 9 und
„Abspeichern eines Senders“auf Seite 11.)
POWER ENTER
MENU
TUNING/SELECT
1 Schließen Sie die UKW-Antenne an.
Siehe „Anschluß der UKW-Antenne” auf Seite 5.
2 Schalten Sie den Tuner durch Drücken von
POWER ein.
3 Drücken Sie MENU wiederholt, bis „Auto-
betical” im Display angezeigt wird.
4 Drücken Sie ENTER.
„Yes“ und „No“ erscheint im Display.
5 Drücken Sie TUNING/SELECT + oder –, so daß
„Yes” im Display angezeigt wird.
6 Drücken Sie ENTER.
Der Tuner sucht nun den UKW-Bereich nach
MENU
1 Schalten Sie den Tuner durch Drücken von
POWER aus.
2 Während Sie die Taste MENU gedrückt halten,
schalten Sie den Tuner durch Drücken von
POWER ein.
„Deutsch” erscheint im Display.
Zum Zurückschalten auf Englisch
Wiederholen Sie den obigen Vorgang.
„English“ erscheint dann im Display.
Automatisches Abspeichern
von UKW-Sendern (Autobetical select-Funktion)
Mit der „Auto-betical select“-Funktion können bis zu
30 UKW- und UKW-RDS-Sender in alphabetischer
Reihenfolge automatisch abgespeichert werden.
Wenn identische, aber auf unterschiedlichen
Frequenzen arbeitende RDS-Sender vorhanden sind,
D
6
wird nur der Sender mit dem stärksten Signal
Sendern ab und überprüft bei jedem gefundenen
RDS-Sender, ob dasselbe Programm auch noch
auf einer anderen Frequenz ausgestrahlt wird.
Falls ja, wird nur die Frequenz mit dem stärkeren
Signal abgespeichert. Alle gefundenen RDSSender werden dann alphabetisch nach ihren
Namen geordnet und unter zweistelligen Codes
abgespeichert. Einzelheiten zur RDS-Funktion
finden Sie auf Seite 14.
Anschließend werden die UKW-Sender ohne
RDS-Service unter zweistelligen Codes
abgespeichert.
Zum Umarrangieren der gespeicherten Sender
Siehe „Ordnen, Verschieben und Löschen von
gespeicherten Sendern” auf Seite 12.
Hinweise
• Wenn der Tuner in einem anderen Gebiet betrieben wird,
wiederholen Sie den obigen Vorgang, um die
empfangbaren Sender abzuspeichern.
• Zum Abrufen von gespeicherten Sendern siehe Seite 11.
• Außer der Senderfrequenz werden noch die folgenden
Einstellungen mit abgespeichert: ANTENNA, ANT ATT,
IF BAND und FM MODE.
• Wenn nach dem automatischen Abspeichern mit der
„Auto-betical select“-Funktion die Antenne anders
ausgerichtet oder eine andere Antenne verwendet wird,
sind möglicherweise einige der gespeicherten Sender nicht
mehr empfangbar. Wiederholen Sie dann den „Autobetical select“-Vorgang.
Page 71

Grundlegender Betrieb
Abrufen gespeicherter Sender
Zum Abrufen von gespeicherten Sendern führen Sie die folgenden Schritte aus.
3
POWER
• Zum Abstimmen auf einen
nicht gespeicherten Sender
siehe unter „Automatischer
Sendersuchlauf“ auf Seite 9.
DISPLAY
4
5
FM STEREO / FM-AM TUNER ST-S3000ES
TUNING/SELECT
–+
CHARACTER
ANTENNA BAND MEMORY MENU RETURN ENTER
MENU ENTRY
Achten Sie darauf, daß der Tuner richtig angeschlossen und die
Sender abgespeichert sind (zum Anschluß siehe Seite 4 bis 6;
1
zum Abspeichern von Sendern siehe Seite 6 oder 11).
Schalten Sie den Verstärker ein, und schalten Sie ihn auf
TUNER.
2
Schalten Sie den Tuner an POWER ein.
TUNE MODE
SHIFT
3
Wählen Sie durch Drücken von SHIFT zwischen A, B oder C.
4
Drücken Sie TUNING/SELECT + oder –, um die
Stationsnummer zu wählen. Nicht belegte Stationsnummern
5
werden übersprungen.
D
7
Page 72

Fortgeschrittener Betrieb
Das Menüsystem
Verschiedene Parameter können menügesteuert
eingestellt werden. Die folgenden Bedienungselemente
werden hierbei verwendet:
TUNING/SELECT
Bedienungselement
MENU-Taste
TUNING/SELECTTasten
ENTER-Taste
RETURN-Taste
ENTER
RETURN
MENU
Zweck
Umschalten in den Menübetrieb
Anzeigen der Parametereinstellung
Speichern der momentan angezeigten
Parametereinstellung
Rückkehr zum vorausgegangenen
Schritt
Wahl des DisplayAnzeigemodus
Vier verschiedene Anzeigemodi können gewählt
werden.
ENTER TUNING/SELECT
MENU
1 Drücken Sie MENU und dann TUNING/SELECT
+ oder –, bis „Disp-Mode” im Display angezeigt
wird.
2 Drücken Sie ENTER.
„Select“ erscheint im Display.
3 Drücken Sie TUNING/SELECT + oder –, um den
Modus zu wählen.
Alle Informationen/Volle Helligkeit
.
Alle Informationen/Gedämpfte Helligkeit
.
Eingeschränkte Informationen/Volle Helligkeit
.
Eingeschränkte Informationen/Gedämpfte
Helligkeit
4 Drücken Sie ENTER.
Die Einstellung bleibt erhalten, bis eine
Umstellung vorgenommen wird.
Beim Drücken einer Taste am Gerät wird von
„Eingeschränkte Informationen“ auf „Alle
Informationen“ (mit gleichbleibender Helligkeit)
umgeschaltet. Nach vier Sekunden schaltet der
Tuner automatisch in den ursprünglichen
Anzeigemodus zurück.
D
8
Page 73

Automatischer Sendersuchlauf
Mit dem automatischen Sendersuchlauf können Sie
einen Sender schnell und bequem finden, auch wenn
die Frequenz nicht bekannt ist.
Vergewissern Sie sich zunächst, daß:
• eine UKW/MW/LW-Antenne entsprechend der
Angabe von Seite 4 und 5 angeschlossen ist.
MENU
ENTER
TUNING/SELECT
Fortgeschrittener Betrieb
Manuelles Abstimmen
Wenn der automatische Suchlauf einen Sender
aufgrund zu geringer Signalstärke nicht findet, stimmen
Sie wie folgt manuell ab:
1 Schalten Sie durch wiederholtes Drücken von BAND
auf FM (UKW), MW oder LW.
2 Drücken Sie TUNE MODE, so daß TUNING im
Display angezeigt wird. (AUTO muß erloschen sein.)
3 Drücken Sie TUNING/SELECT + oder – wiederholt,
um den gewünschten Sender aufzusuchen.
Das Feldstärkemeter liefert eine Aussage über die
Empfangsqualität.
Hinweis
Am oberen bzw. unteren Ende des Wellenbereichs
stoppt der Abstimmvorgang.
BAND
TUNE MODE
1 Drücken Sie BAND zur Wahl von FM (UKW),
MW oder LW.
2 Drücken Sie TUNE MODE, so daß „AUTO” im
Display angezeigt wird.
3 Drücken Sie TUNING/SELECT + oder –.
Der Sendersuchlauf beginnt. Sobald ein Sender
gefunden ist, stoppt der Suchlauf. Im Display
erscheint dann „TUNED”, und das
Feldstärkemeter zeigt die Stärke des
empfangenen Signals an.
4 Wiederholen Sie Schritt 3, bis der gewünschte
Sender gefunden ist.
Zum Abspeichern eines Senders siehe
„Abspeichern eines Senders” auf Seite 11.
Bei Empfang eines MW- oder LW-Senders
Richten Sie die MW/LW-Rahmenantenne optimal aus.
Wenn bei einem UKW-Stereosender die STEREOAnzeige nicht leuchtet
Schalten Sie den Menüparameter „FM Mode“ auf
„AUTO“. Siehe „Zum manuellen Einstellen von FM
MODE” auf Seite 10.
Bei gestörtem UKW-Stereoempfang
Bei schwachem oder gestörtem UKW-Stereoempfang
blinkt die STEREO-Anzeige. Schalten Sie in einem
solchen Fall den Menüparameter „FM Mode“ auf
„MONO“. Der Empfang verbessert sich dann,
allerdings geht der Stereoeffekt verloren. Einzelheiten
finden Sie im Abschnitt „Zum manuellen Einstellen von
FM MODE“ auf Seite 10.
D
9
Page 74

Fortgeschrittener Betrieb
Tips für optimalen UKW-
Zum manuellen Einstellen von ANT ATT und IF BAND
1 Drücken Sie MENU.
Empfang
Der Tuner ist mit verschiedenen Zusatzfunktionen
ausgestattet, die bei schlechtem oder gestörtem
Empfang eine Verbesserung ermöglichen.
Empfangen Sie den Sender zunächst in der
Standardeinstellung. Ist der Empfang unbefriedigend,
versuchen Sie durch Ändern der im folgenden
behandelten Parameter eine Verbesserung zu erzielen.
Beim Abspeichern einer Senderfrequenz werden auch
die Parametereinstellungen mit abgespeichert.
MENUANTENNA
DISPLAY
Umschalten der UKW-Antenne
Der Tuner ist mit zwei UKW-Antennenbuchsen (FM
ANTENNA A und B) ausgestattet. Wenn zwei UKWAntennen angeschlossen sind, können Sie durch
Drücken von ANTENNA auf die Antenne umschalten,
die den besten Empfang liefert.
TUNING/SELECT
ENTER
2 Drücken Sie TUNING/SELECT + oder – wiederholt, bis
„Reception” im Display erscheint, und drücken Sie dann
ENTER.
Wenn bei MW- oder LW-Empfang versucht wird, auf
„Reception“ zu schalten, erscheint die Anzeige „FM
Only“ im Display.
3 Drücken Sie TUNING/SELECT + oder –, um „ATT/IF
Band” zu wählen, und drücken Sie dann ENTER.
4 Drücken Sie TUNING/SELECT + oder –, um den
Parameter ANT ATT einzustellen, und drücken Sie dann
ENTER.
• Bei Einstellung auf „ANT ATT : ON“ wird das
Antennensignal bedämpft (günstig bei extrem stark
einfallenden Sendern).
• Bei Einstellung auf „ANT ATT : OFF“ erfolgt keine
Signalbedämpfung (Normaleinstellung).
5 Drücken Sie TUNING/SELECT + oder –, um den
Parameter IF einzustellen, und drücken Sie dann ENTER.
• Bei Einstellung auf „IF : Wide“ arbeitet der Tuner mit
großer Bandbreite (bestmögliche Tonqualität, geringe
Verzerrungen).
• Bei Einstellung auf „IF : Narrow“ arbeitet der Tuner mit
geringerer Bandbreite (Interferenzen von benachbarten
Sendern werden unterdrückt und schwache Sender sind
besser zu hören).
Ein- und Ausschalten der ASM-Funktion
Bei eingeschalteter ASM-Funktion (Active Selection
Mode) stellt der Tuner die Parameter ANT ATT
(Bedämpfung des Antennensignals), IF BAND (ZFBandbreite) und FM MODE (UKWEmpfangsbetriebsart) automatisch optimal ein. Nach
Ausschalten der ASM-Funktion können diese
Parameter manuell eingestellt werden. Werksseitig ist
die ASM-Funktion eingeschaltet.
Mit dem Menüparameter ASM kann die ASM-Funktion
ein- und ausgeschaltet werden.
Wenn bei UKW-Empfang die ASM-Funktion eingeschaltet
ist, erscheint die Anzeige ASM im Display.
1 Drücken Sie MENU.
2 Drücken Sie TUNING/SELECT + oder –, bis „Reception”
im Display erscheint, und drücken Sie dann ENTER.
3 Drücken Sie TUNING/SELECT + oder –, bis „A.S.M” im
Display erscheint, und drücken Sie dann ENTER.
4 Drücken Sie TUNING/SELECT + oder –, um „ON” oder
„OFF” zu wählen, und drücken Sie dann ENTER.
Zum manuellen Einstellen von FM MODE
Wählen Sie im Menü den Parameter „AUTO”
(Stereoprogramme werden in Stereo wiedergegeben, es
erscheint im Display keine Anzeige) oder „MONO”.
1 Drücken Sie MENU.
2 Drücken Sie TUNING/SELECT + oder – wiederholt, bis
„Reception” im Display erscheint, und drücken Sie dann
ENTER.
Wenn versucht wird, bei MW- oder LW-Empfang den
Parameter „Reception” zu wählen, weist die Anzeige
„FM Only” darauf hin, daß dies nicht möglich ist.
3 Drücken Sie TUNING/SELECT + oder – wiederholt, bis
„FM Mode” im Display erscheint, und drücken Sie dann
ENTER.
4 Drücken Sie TUNING/SELECT + oder – wiederholt, um
den Modus einzustellen, und drücken Sie dann ENTER.
• Bei Wahl von „AUTO” werden Stereoprogramme in
Stereo wiedergegeben, vorausgesetzt, das
Sendersignal ist stark genug. Die Anzeige MONO
erlischt im Display.
• Bei Wahl von „MONO” erfolgt die Wiedergabe stets
monaural. Dies ist bei schwachem Empfangssignal
vorteilhaft, da das Rauschen geringer ist.
10
D
Page 75

Überprüfen der Signalstärke
Das digitale Feldstärkemeter besitzt bei UKWEmpfang einen Anzeigebereich von 16 bis 70 dB (1 µV
entspricht 0 dB). Für rauschfreien Stereoempfang muß
die Signalstärke über 50 dB liegen.
Das digitale Signalstärkemeter auch bei MW/LWEmpfang. Der Anzeigebereich liegt dann zwischen 0
und 10 (je höher der Wert, um so stärker das Signal).
1 Stimmen Sie auf einen UKW-Sender oder einen
MW/LW-Sender ab.
2 Drücken Sie DISPLAY wiederholt, bis das digitale
Feldstärkemeter angezeigt wird.
3 Richten Sie die UKW-Antenne bzw. die MW/LW-
Antenne so aus, daß das Empfangssignal am
stärksten ist.
Fortgeschrittener Betrieb
Abspeichern eines Senders
Bis zu 30 UKW- oder MW/LW-Sender können unter
zweistelligen Speichercodes (beispielsweise A7)
abgespeichert werden. Die Speichercodes bestehen aus
einem Buchstaben (A, B oder C) und einer Ziffer. Die
Buchstaben können Sie beispielsweise dazu benutzen,
die Sender nach bestimmten Kategorieren unterteilt
abzuspeichern. Unter jedem Buchstaben sind 10 Sender
speicherbar.
TUNING/SELECT
ENTERMEMORY
SHIFT
1 Stimmen Sie auf den gewünschten UKW-, MW-
oder LW-Sender ab.
2 Drücken Sie MEMORY.
„MEMORY” und der niedrigste freie
Speichercode erscheinen im Display. Der Tuner
ist nun speicherbereit.
3 Wählen Sie durch Drücken von SHIFT zwischen
A, B oder C.
Der Buchstabe erscheint im Display.
4 Drücken Sie TUNING/SELECT + oder –
wiederholt, um eine Ziffer zu wählen.
5 Drücken Sie ENTER.
Der Sender wird unter dem eingegebenen Code
gespeichert.
6 Wiederholen Sie die Schritte 1 bis 5 zum
Speichern weiterer Sender.
Automatische Speicherung der Namen von RDSSendern
Im Falle von RDS-Sendern wird außer der Frequenz
auch der Sendername automatisch mit abgespeichert.
Zum Zuteilen eigener Sendernamen
Führen Sie die Schritte des Abschnitts „Zuteilen von
Sendernamen“ (Seite 12) aus.
11
D
Page 76

Fortgeschrittener Betrieb
Zuteilen von Sendernamen
Jedem gespeicherten Sender (Ausnahme: UKW-RDSSender) können Namen aus bis 5 acht Zeichen zugeteilt
werden. Diese Namen werden dann statt der Frequenz
im Display angezeigt.
CHARACTER
DISPLAY
1 Wählen Sie mit den Tasten SHIFT und TUNING/
SELECT + oder – den Speichercode, für den ein
Sendername festgelegt werden soll.
2 Drücken Sie CHARACTER.
Der Cursor blinkt im Display.
3 Drücken Sie TUNING/SELECT + oder –
wiederholt, um das Zeichen zu wählen.
4 Wenn das gewünschte Zeichen eingestellt ist,
drücken Sie CHARACTER, so daß sich der Cursor
zur nächsten Stelle bewegt.
Bei einem Eingabefehler
Drücken Sie CHARACTER wiederholt, bis das zu
löschende Zeichen blinkt (bei jedem Drücken von
CHARACTER wird um eine Stelle weitergeschaltet).
Wählen Sie dann durch Drücken von TUNING/
SELECT + oder – das richtige Zeichen.
5 Wiederholen Sie die Schritte 2 und 3, bis alle
Zeichen des Namens eingegeben sind.
6 Drücken Sie MEMORY.
Die Anzeige „MEMORY” erscheint.
Hinweis
Wenn nach Drücken von MEMORY nicht innerhalb von
8 Sekunden ENTER gedrückt wird, schaltet das Display
auf Normalanzeige zurück. Beginnen Sie in einem
solchen Fall erneut von Anfang an.
7 Drücken Sie ENTER, um den Sendername
abzuspeichern.
MEMORY
ENTER
TUNING/SELECT
SHIFT
Ordnen, V erschieben und
Löschen von gespeicherten
Sendern
Die gespeicherten Sender können bequem
umarrangiert werden. So können Sie beispielsweise die
Sender in alphabetischer Reihenfolge, in der
Reihenfolge der Signalstärke, des Ländercodes oder
des Wellenbereichs anordnen oder mit den Funktionen
„Move“ und „Erase“ wunschgemäß verschieben bzw.
löschen.
1 Drücken Sie MENU.
2 Drücken Sie TUNING/SELECT + oder –
wiederholt, bis „Edit” im Display erscheint, und
drücken Sie dann ENTER.
Wenn kein Sender abgespeichert ist, erscheint
„No Preset“ im Display.
3 Drücken Sie TUNING/SELECT +/– wiederholt,
um unter den folgenden Funktionen/
Sortierkriterien zu wählen:
Funktion/
Sortierkriterium
Move
Erase
Alphabet
Strength
Country
Band
Erläuterung
Verschieben eines Senders.
Löschen eines Senders.
Die gespeicherten Sender werden
nach ihren Namen alphabetisch
sortiert. Sender ohne Namen werden
nach ihrer Frequenz (von niedriger zu
hoher Frequenz) sortiert.
Die gespeicherten Sender (nur UKWSender) werden nach ihrer Signalstärke
sortiert.
MW- und LW-Sender werden nach
ihrer Frequenz sortiert.
UKW-RDS-Sender werden nach ihrem
Land (PI-Code) sortiert.
Andere Sender werden nach ihrer
Frequenz sortiert.
Die Sender werden nach ihrem
Wellenbereich (UKW, MW und LW)
sortiert.
MENU
ENTER
TUNING/SELECT
12
Um statt des Namens die Frequenz anzuzeigen
Drücken Sie DISPLAY wiederholt.
D
4 Drücken Sie ENTER.
Wenn nicht die Funktion „Move” oder „Erase”,
sondern ein Sortierkriterium („Alphabet” usw.)
gewählt wurde, führt der Tuner den
Sortiervorgang nun aus. Anschließend schaltet er
in den Normalbetrieb zurück, und der Sender A1
ist zu hören.
Hinweis
Dieselben Ländercodes werden manchmal von mehreren
Ländern benutzt. Beim Sortieren kann der Tuner dann nicht
zwischen diesen Ländern differenzieren.
Page 77

Fortgeschrittener Betrieb
Verschieben eines gespeicherten Senders
Ein gespeicherter Sender kann wie folgt zu einem
anderen Speichercode verschoben werden:
1 Führen Sie die Schritte 1 bis 3 des Abschnitts
„Ordnen, Verschieben und Löschen von
gespeicherten Sendern“ aus, wählen Sie im EditMenü den Parameter „Move“, und drücken Sie
ENTER.
2 Wählen Sie durch Drücken von TUNING/
SELECT + oder – den Speichercode, unter dem
der zu verschiebende Sender gespeichert ist, und
drücken Sie dann ENTER.
3 Wählen Sie durch Drücken von TUNING/
SELECT + oder – den gewünschten neuen
Speichercode, und drücken Sie dann ENTER.
Der Sender wird entsprechend verschoben, und
alle nachfolgenden Sender der Gruppe (A im
Beispiel) werden entsprechend verschoben, um
Platz zu schaffen.
Beispiel:
Sender von A4 wird zu A1 verschoben.
Beispiel:
Sender A1 wird gelöscht.
A1 A2 A3 A4 A5 A6 A7 A8Preset
89.5 94.5 96.5 98.0 100.5 103.0 104.5 106.0Frequency
.
A1 A2 A3 A4 A5 A6 A7 A8Preset
94.5 96.5 98.0 100.5 103.0 104.5 106.0Frequency
Zum Löschen aller gespeicherter Sender
1 Schalten Sie das Gerät an POWER aus.
2 Während Sie ANTENNA und ENTER gedrückt
halten, schalten Sie das Gerät durch Drücken von
POWER ein.
A1 A2 A3 A4 A5 A6 A7 A8Preset
89.5 94.5 96.5 98.0 100.5 103.0 104.5 106.0Frequency
.
A1 A2 A3 A4 A5 A6 A7 A8Preset
98.0 89.5 94.5 96.5 100.5 103.0 104.5 106.0Frequency
Löschen eines gespeicherten Senders
Gespeicherte Sender können wie folgt einzeln gelöscht
werden:
1 Führen Sie die Schritte 1 bis 3 des Abschnitts
„Ordnen, Verschieben und Löschen von
gespeicherten Sendern“ aus, wählen Sie im EditMenü den Parameter „Erase“, und drücken Sie
ENTER.
2 Wählen Sie durch Drücken von TUNING/
SELECT + oder – den zu löschenden
Speichercode, und drücken Sie dann ENTER.
Der Sender dieses Speichercodes wird gelöscht
und die anderen Sender dieser Gruppe (A im
Beispiel) rücken nach, so daß keine Lücke
entsteht.
13
D
Page 78

Fortgeschrittener Betrieb
Das Radio Data System (RDS)
Was ist RDS?
RDS-Sender strahlen neben dem Programm RDSCodes aus, die verschiedene
Bedienungserleichterungen und Zusatzfunktionen
ermöglichen. Verschiedene RDS-Informationen werden
im Display dieses Tuners angezeigt. Wenn ein
Verkehrfunksender empfangen wird, leuchtet eine
Anzeige auf. Beachten Sie, daß RDS nur im UKWBereich zur Verfügung steht.*
Hinweis
Die RDS-Funktionen stehen nur dann zur Verfügung, wenn
die betreffenden Codes vom Sender einwandfrei übertragen
werden, und das Empfangssignal stark genug ist.
* Nicht alle UKW-Sender strahlen RDS-Codes aus und die
RDS-Funktionen können sich von Sender zu Sender
unterscheiden. Bei Unklarheiten fragen Sie bitte bei Ihrer
Sendeanstalt nach.
Hinweise
• Bei offiziellen Notmeldungen blinkt die Anzeige
„ALARM“ im Display.
• Wenn ein Sender einen bestimmten RDS-Service nicht
bietet, erscheint „NO…“(beispielsweise „NO PTY“) im
Display.
• Abhängig vom RadiotextÜbertragungsverfahren, das der
Sender benutzt, ist die Meldung möglicherweise
unvollständig.
Aufsuchen von Verkehrsfunksendern
Bei Empfang eines RDS-Verkehrsfunksenders, leuchtet
die Anzeige TP auf.
Empfang eines RDS-Senders
Stimmen Sie auf den gewünschte UKW-Sender ab.
Falls es sich um einen RDS-Sender handelt, erscheint
die RDS-Anzeige und der Sendername im Display.
Anzeigen der RDS-Informationen
Durch wiederholtes Drücken von DISPLAY können
nacheinander die folgenden Informationen in das
Display abgerufen werden.
Anzeige
Sendername*
Frequenz*
Uhrzeit (24-StundenSystem)
Programmart (PTY)
Radiotext
Programmkette (PI)
Digitales
Feldstärkemeter*
Möglichkeiten
Aufsuchen eines Senders anhand
des Namens (z.B. WDR).
Aufsuchen eines Senders anhand
der Frequenz.
Anzeige der momentanen Uhrzeit.
Aufsuchen eines Senders einer
bestimmten Programmart.
Anzeige des vom RDS-Sender
ausgestrahlten Radiotextes.
Ermittlung des Landes, in dem der
Sender steht.
Einzelheiten siehe Seite 11.
14
* Diese Information erscheint auch bei UKW-Sendern, die
keinen RDS-Service bieten.
D
Page 79

Zusatzinformationen
Störungsüberprüfungen
Bei Problemen mit dem Tuner
gehen Sie die folgende Aufstellung
durch. Sollte das Problem nicht
selbst behoben werden können,
wenden Sie sich an den nächsten
Sony Händler.
Kein Ton.
/ Die Antennen anschließen.
/ Am Verstärker auf TUNER
schalten.
Kein Empfang möglich.
/ Die Antenne ausrichten.
/ Eine UKW-Außenantenne
anschließen.
/ IF BAND auf NARROW
schalten.
/ Falls der Tuner in einem
anderen Gebiet betrieben
wird, die Sender erneut
abspeichern.
Starkes Rauschen oder andere
Störgeräusche.
/ Die Antenne ausrichten.
/ Auf die richtige Frequenz
abstimmen.
/ Eine UKW-Außenantenne
anschließen.
/ Den Tuner weiter von der
Störquelle entfernen.
Die RDS-Funktionen arbeiten nicht.
/ Auf einen UKW-RDS-
Sender abstimmen.
/ Auf einen stärkeren UKW-
RDS-Sender abstimmen.
Im Display erscheint „No preset“.
/ Die Senderspeicherungen
sind verlorengegangen, da
das Netzkabel länger als
einen Monat abgetrennt
war. Die Sender erneut
abspeichern.
Die gewünschte Anzeige oder
Information erscheint nicht im
Display.
/ Den Tuner an POWER
ausschalten. Dann die
Tasten ANTENNA und
ENTER gedrückt halten
und gleichzeitig POWER
drücken. Dabei werden alle
gespeicherten Sender
gelöscht und die Anzeigen
auf die Ausgangssprache
(Englisch)
zurückgeschaltet.
/ Bei der Sendeanstalt
nachfragen, ob RDS-Service
geboten wird.
Möglicherweise ist der
RDS-Service momentan
gestört.
Technische Daten
UKW-Tunerteil
Empfangsbereich
Antennenanschluß
Zwischenfrequenz
Empfindlichkeit
Nutzbare Empfindlichkeit
(IHF)
Signal-Rauschabstand
Klirrgrad
87,5-108,0 MHz
75 Ohm,
unsymmetrisch
IEC-Stiftbuchse
10,7 MHz
bei 26 dB
Rauschabstand
(Mono): 10,3 dBf,
0,9 µV/75 Ohm
bei 46 dB
Rauschabstand
(Stereo): 38,5 dBf,
23 µV/75 Ohm
10,3 dBf, 0,9 µV/
75 Ohm
bei 40 kHz Hub
80 dB (Mono),
76 dB (Stereo)
bei 40 kHz Hub
WIDE
0,04% (Mono),
0,05% (Stereo)
NARROW
0,06% (Mono),
0,08% (Stereo)
Trennschärfe
Ausgangspegel
bei 400 kHz
WIDE 80 dB
NARROW 90 dB
bei 300 kHz
WIDE 45 dB
NARROW 70 dB
bei 40 kHz Hub:
600 mV
MW/LW-Tunerteil
Empfangsbereich
Zwischenfrequenz
Nutzbare Empfindlichkeit
Signal-Rauschabstand
Klirrgrad
Trennschärfe
MW: 522-1.611 kHz
(9-kHz-Raster)
LW: 144-288 kHz
(1-kHz-Raster)
450 kHz
(Mit MW/LW-
Rahmenantenne)
MW: 200 µV/m
LW: 700 µV/m
MW: 54 dB
(50 mV/m,
999 kHz)
LW: 50 dB
(50 mV/m,
216 kHz)
0,3% (50 mV/m,
400 Hz)
50 dB
Allgemeines
Stromversorgung
Leistungsaufnahme
Abmessungen
Gewicht
Mitgeliefertes Zubehör
Änderungen, die dem technischen
Fortschritt dienen, bleiben vorbehalten.
220-230 V
Wechselspannung,
50/60 Hz
12 W
280 x 80 x 400 mm
(B/H/T)
4,3 kg
Audiokabel (1)
MW/LW-
Rahmenantenne
(1)
UKW-
Antennendraht
(1)
Frequenzgang
Kanaltrennung
30 Hz - 15 kHz
(+0,2/–0,3 dB)
50 dB bei 1 kHz
15
D
Page 80

Zusatzinformationen
Stichwortverzeichnis
U, V
UKW-Empfangsbetriebsart 10
A, B, C
Abrufen eines gespeicherten
Senders
MW/LW-Sender 7
UKW-Sender 7
Abspeichern eines Senders
MW/LW-Sender 11
UKW-Sender 6, 11
Abstimmen, siehe Empfang
eines Senders
Anschluß
MW/LW-Antenne 4
Netzkabel 6
UKW-Antenne 5
Verstärker 5
Antennenanschluß
MW/LW 4
UKW 5
Auspacken 4
Auto-betical select 6
Automatischer Sendersuchlauf
9
D
Display
Anzeigemodus 8
Sprache 6
W, X, Y, Z
WIDE (große Bandbreite) 10
E
Einstellungen
IF BAND (Bandbreite) 10
F, G, H
Feldstärkemeter 10
I, J, K, L
IF BAND (Bandbreite) 10
M
Manuelle Abstimmung 9
N
Namenseingabe 11
NARROW (geringe Bandbreite)
10
O, P, Q
Ordnen, Verschieben und und
Löschen von gespeicherten
Sendern 12
R
RDS 13
16
S, T
Speicher 6, 10, 11
Störungsüberprüfungen 15
D
Page 81

17
D
Page 82

ATTENZIONE
Per evitare incendi o scosse elettriche,
non esporre l’apparecchio alla pioggia o
all’umidità.
Per evitare scosse elettriche, non aprire
l’apparecchio. Per le riparazioni
rivolgersi solo a personale qualificato.
PER I CLIENTI IN ITALIA
Si dichiara che l’apparecchio è stato
fabbricato in conformità all’Art. 2
Comma 1 del D.M. 28.08.1995 n. 548.
Sony Deutschland GmbH
Product Compliance Europe
Precauzioni
Sicurezza
• In caso di penetrazione di oggetti o
liquidi all’interno dell’apparecchio,
scollegare il cavo di alimentazione e
far controllare l’apparecchio da
personale qualificato prima di usarlo
nuovamente.
Fonti di alimentazione
• Prima di usare l’apparecchio,
verificare che la sua tensione
operativa sia identica a quella della
rete elettrica locale.
• Scollegare l’apparecchio dalla presa a
muro se non lo si usa per un lungo
periodo di tempo. Per scollegare il
cavo, tirarlo afferrandone la spina.
Non tirare mai il cavo stesso.
• Il cavo di alimentazione CA deve
essere sostituito solo presso un centro
manutenzione qualificato.
Reimballaggio
• Non gettare via lo scatolone e il
materiale di imballaggio. Sono il
contenitore ideale per trasportare
l’apparecchio. Quando si spedisce
l’apparecchio, reimballarlo come era
stato fatto in fabbrica.
Nel caso di interrogativi o problemi
riguardanti l’apparecchio non
contemplati in questo manuale,
consultare il proprio rivenditore Sony.
Collocazione
• Collocare l’apparecchio in un luogo
con una ventilazione sufficiente per
evitare surriscaldamenti interni e
prolungare la durata dei suoi
componenti.
• Non collocare l’apparecchio nei pressi
di fonti di calore, o in luoghi esposti
alla luce solare diretta, polvere
eccessiva o scosse meccaniche.
• Non collocare oggetti sopra
l’apparecchio, dove potrebbero
bloccare i fori di ventilazione e
causare malfunzionamenti.
• Non installare l’apparecchio in spazi
chiusi, come una libreria o un
mobiletto.
Pulizia del rivestimento
• Pulire il rivestimento, i pannelli e i
comandi con un panno morbido
leggermente inumidito con una
blanda soluzione detergente. Non
usare alcun tipo di straccio graffiante,
polvere abrasiva o solventi come
alcool o benzina.
I
2
Page 83

Benvenuti!
Grazie per avere acquistato questo
sintonizzatore FM/AM-FM stereo Sony.
Prima di usare l’apparecchio leggere
con attenzione questo manuale e
conservarlo per riferimenti futuri.
INDICE
Preparativi
Disimballaggio 4
Collegamento al sistema 4
Selezione della visualizzazione in tedesco 6
Memorizzazione automatica delle stazioni FM (selezione autobetica) 6
Uso del manuale
Il seguente simbolo è usato in questo
manuale:
Indica consigli e suggerimenti
per facilitare l’impiego.
Funzionamento di base
Ricezione delle stazioni preselezionate 7
Funzionamento avanzato del sintonizzatore
Sistema a menu 8
Personalizzazione della visualizzazione 8
Ricezione di trasmissioni tramite scorrimento delle stazioni (sintonia
automatica) 9
Consigli per una ricezione FM migliore 10
Preselezione delle stazioni 11
Assegnazione di nomi alle stazioni preselezionate 12
Organizzazione delle stazioni preselezionate 12
Uso del sistema dati radio (RDS) 14
Altre informazioni
Soluzione di problemi 15
Caratteristiche tecniche 15
Indice analitico 16
I
I
3
Page 84

Preparativi
Disimballaggio
Controllare di aver ricevuto i seguenti elementi
insieme al sintonizzatore:
• Cavo audio (1)
• Antenna AM ad anello (1)
• Antenna FM a filo (1)
Collegamento al sistema
Prima di cominciare
• Spegnere tutti i componenti prima di eseguire
qualsiasi collegamento.
• Non collegare il cavo di alimentazione prima di aver
completato tutti i collegamenti.
• Assicurarsi di eseguire collegamenti saldi per evitare
ronzii e rumori.
• Quando si collega un cavo audio, assicurarsi di far
corrispondere le spine colorate in codice alle relative
prese. Bianco (sinistra) a bianco e rosso (destra) a
rosso.
Collegamento dell’antenna AM
Questa sezione descrive come collegare l’antenna AM
ad anello in dotazione. Per la posizione dei terminali
AM ANTENNA, vedere l’illustrazione sotto.
2 Svolgere 3 lunghezze del filo di guida intrecciato
dal telaio dell’antenna. Fare attenzione a svolgere
solo la parte intrecciata del filo di guida. Non
svolgere più di 3 lunghezze del filo di guida. Fare
inoltre attenzione a non disintrecciare il filo di
guida.
3 Montare l’antenna in dotazione come mostrato
sotto.
4 Collegare l’antenna AM ad anello ai terminali AM
sul retro di questo apparecchio.
Antenna AM ad anello
ANTENNA
AM
y
AM ANTENNA
ANTENNA
AB
FM
75 COAXIAL
AM
LINE OUT
RL
y
5 Regolare l’orientamento dell’antenna per ottenere
la ricezione migliore.
L’antenna AM ad anello ha una direttività che
individua il segnale con maggior forza da alcune
angolazioni che in altre. Disporre l’antenna
Elementi necessari
• Antenna AM ad anello (in dotazione) (1)
sull’orientamento che offre le migliori condizioni
di ricezione.
Se si verificano disturbi di tono acuto (battimento)
durante la registrazione di trasmissioni AM,
regolare la posizione dell’antenna AM ad anello
in modo da far sparire i disturbi. Se si abita in un
edificio in cemento armato o con infrastrutture in
acciaio, può non essere possibile ottenere una
buona ricezione perché le onde radio si
indeboliscono in interni.
1
Prima di montare l’antenna in dotazione, estrarre
il filo di guida dalla fessura sul telaio dell’antenna.
I
4
Per le stazioni dalla ricezione difficile
Provare a riposizionare l’antenna ad anello durante la
sintonia. Se si colloca l’antenna AM ad anello in dotazione
vicino ad una finestra la qualità di ricezione migliora.
Page 85

Preparativi
AM
y
ANTENNA
75 COAXIAL
FM
AB
LINE OUT
L
R
ç
R
L
INPUT
TUNER CD AUX
Collegamento dell’antenna FM
Con un’antenna FM esterna è possibile ottenere una
qualità sonora migliore delle trasmissioni FM.
Consigliamo di usare l’antenna FM a filo in dotazione
solo temporaneamente fino a quando si installa
un’antenna FM esterna. Per la posizione dei terminali
FM ANTENNA, vedere l’illustrazione sotto.
FM ANTENNA
ANTENNA
AB
FM
75 COAXIAL
Elementi necessari
• Antenna FM a filo (in dotazione) (1)
• Antenna FM esterna (non in dotazione) (1) e cavo coassiale
da 75 ohm con connettore tipo CEI femmina (non in
dotazione) (1)
Connettore tipo CEI femmina
Collegare l’antenna FM a filo in dotazione o
un’antenna FM esterna (non in dotazione) a uno dei
terminali FM sul retro di questo apparecchio.
AM
LINE OUT
RL
y
Collegamento di un filo di massa
Se si collega un’antenna esterna, assicurarsi di
collegare un filo di massa (non in dotazione) al
terminale AM ANTENNA y (oltre all’antenna AM ad
anello) per protezione contro i fulmini.
Per evitare esplosioni del gas, non collegare il filo di
massa ad un tubo del gas.
a massa
Collegamento all’amplificatore
Collegare il sintonizzatore ad un amplificatore.
Assicurarsi di spegnere entrambi i componenti prima
di eseguire il collegamento. Per la posizione dei
terminali, vedere l’illustrazione sotto.
Sintonizzatore
ANTENNA
AB
FM
75 COAXIAL
AM
y
LINE OUT
(L/R)
LINE OUT
RL
Antenna FM a filo
ANTENNA
AFM B
75 COAXIAL
Antenna FM esterna
ANTENNA
AFM B
75 COAXIAL
Connettore tipo
CEI femmina
È possibile usare due antenne FM
Questo sintonizzare è dotato di due terminali FM
ANTENNA, A e B, per l’uso con tipi diversi di antenna
FM. Per esempio è possibile collegare un’antenna
esterna al terminale A e un’antenna a cavo al terminale
B. È anche possibile alternare le antenne osservando il
misuratore di segnale per stabilire quale antenna offre
la migliore ricezione per una particolare stazione.
Amplificatore
INPUT TUNER (L/R)
Cavi necessari
• Cavo audio (in dotazione) (1)
Bianca (sinistra)
Rossa (destra)
Bianca (sinistra)
Rossa (destra)
Collegare le spine bianche alle prese bianche (L) e le spine
rosse alle prese rosse (R). Inserire le spine a fondo nelle
prese: collegamenti incompleti possono causare disturbi.
Amplificatore
Sintonizzatore
(continua)
I
5
Page 86

Preparativi
Collegamento del cavo di alimentazione
Collegare il cavo di alimentazione ad una presa a muro dopo
aver completato tutti i collegamenti precedentemente
descritti.
ANTENNA
AB
FM
75 COAXIAL
AM
LINE OUT
RL
y
ad una presa a muro
/
Selezione della visualizzazione
in tedesco
È possibile scegliere tra la visualizzazione in inglese o
in tedesco. La lingua preselezionata in fabbrica è
l’inglese. Per selezionare la visualizzazione in tedesco,
procedere come segue.
POWER
POWER
ENTER TUNING/SELECT
MENU
1 Collegare l’antenna FM.
Vedere “Collegamento dell’antenna FM” a pagina
5.
2 Premere POWER per accendere il sintonizzatore.
3 Premere ripetutamente MENU fino a che “Auto-
betical” appare sul display.
4 Premere ENTER.
“Yes” e “No” appaiono sul display.
5 Premere TUNING/SELECT + o – per far
lampeggiare “Yes” sul display.
6 Premere ENTER.
Il sintonizzatore cerca e memorizza tutte le
stazioni FM e FM RDS nell’area di ricezione.
Per le stazioni RDS, il sintonizzatore prima
controlla le stazioni che trasmettono gli stessi
MENU
1 Premere POWER per spegnere il sintonizzatore.
programmi e quindi memorizza solo quella con il
segnale più chiaro. Le stazioni RDS selezionate
sono ordinate alfabeticamente in base al loro
nome di servizio programma e ricevono un codice
2 Tenendo premuto il tasto MENU, premere
POWER per accendere il sintonizzatore.
“Deutsch” appare sul display.
di preselezione di due caratteri. Per maggiori
dettagli sull’RDS, vedere pagina 14.
Le normali stazioni FM ricevono codici di
preselezione di due caratteri e sono memorizzate
Per tornare alle indicazioni in inglese
Ripetere questo procedimento.
“English” appare sul display.
dopo le stazioni RDS.
Per cambiare la posizione di una stazione
preselezionata o cancellarla
Vedere “Organizzazione delle stazioni preselezionate” a
pagina 12.
Memorizzazione automatica
delle stazioni FM (selezione
autobetica)
Con la “selezione autobetica” è possibile memorizzare
automaticamente fino a 30 stazioni FM e FM RDS in
ordine alfabetico senza duplicazioni. Inoltre la
“selezione autobetica” memorizza solo le stazioni con i
segnali più chiari. Se si desidera memorizzare stazioni
FM o AM (MW e LW) una per una, vedere “Ricezione
di trasmissioni tramite scorrimento delle stazioni
(sintonia automatica)” a pagina 9 e “Preselezione delle
stazioni” a pagina 11.
I
6
Note
• Se ci si sposta in un’altra zona, ripetere questo
procedimento per memorizzare le stazioni della nuova
zona.
• Per dettagli sulla sintonizzazione delle stazioni
memorizzate, vedere pagina 11.
• Anche le regolazioni ANTENNA, ANT ATT, IF BAND e
FM MODE sono memorizzate insieme alla stazione.
• Se si sposta l’antenna dopo aver memorizzato le stazioni
con la “selezione autobetica”, le regolazioni memorizzate
possono non essere più valide. In questo caso
memorizzare di nuovo le stazioni.
Page 87

Funzionamento di base
Receiving Pr eset Stations
Ricezione delle stazioni preselezionate
Questa sezione spiega come ricevere le stazioni preselezionate.
345
FM STEREO / FM-AM TUNER ST-S3000ES
POWER
• Per sintonizzare una stazione
non preselezionata, vedere
“Ricezione di trasmissioni
tramite scorrimento delle
stazioni (sintonia automatica) ”
a pagina 9.
DISPLAY
TUNING/SELECT
–+
CHARACTER
ANTENNA BAND MEMORY MENU RETURN ENTER
MENU ENTRY
Verificare di aver collegato il sintonizzatore e aver
preselezionato le stazioni. (Vedere le pagine 4-6 per il
1
collegamento e pagina 6 o 11 per la preselezione.)
Accendere l’amplificatore e selezionare il modo TUNER.
TUNE MODE
SHIFT
2
Premere POWER per accendere il sintonizzatore.
3
Premere SHIFT per selezionare A, B o C.
4
Premere TUNING/SELECT + o – per selezionare il numero di
preselezione desiderato. Il sintonizzatore salta automaticamente
5
i numeri per cui non esistono stazioni preselezionate.
I
7
Page 88

Funzionamento avanzato del sintonizzatore
Sistema a menu
Questo sintonizzatore utilizza un sistema a menu che
consente di usare le varie funzioni seguendo i
messaggi sul display. Usare i seguenti comandi per
l'uso dei menu.
TUNING/SELECTENTER
MENU RETURN
Usare
iltasto MENU
iltasti TUNING/
SELECT
iltasto ENTER
iltasto RETURN
Per:
attivare il modo di menu.
visualizzare voci o regolazioni
differenti.
selezionare la voce o la regolazione
attualmente visualizzata.
ritornare ad una fase precedente del
modo di menu.
Personalizzazione della
visualizzazione
È possibile scegliere l’aspetto del display tra uno dei
quattro modi di visualizzazione seguenti.
ENTER
MENU
1 Premere MENU e quindi premere TUNING/
SELECT + o – fino a che “Disp-Mode” appare sul
display.
2 Premere ENTER.
“Select” appare sul display.
3 Premere TUNING/SELECT + o – per selezionare
un modo di visualizzazione.
Visualizzazione completa/luminosità massima
TUNING/SELECT
.
Visualizzazione completa/luminosità tenue
.
Visualizzazione minima/luminosità massima
.
Visualizzazione minima/luminosità tenue
4 Premere ENTER.
La regolazione rimane valida fino a che la si
cambia di nuovo.
Se si preme uno dei tasti dell’apparecchio la
visualizzazione minima diventa completa con la
luminosità selezionata. Dopo 4 secondi circa la
visualizzazione torna al modo selezionato.
I
8
Page 89

Funzionamento avanzato del sintonizzatore
Ricezione di trasmissioni
tramite scorrimento delle
stazioni (sintonia automatica)
Con la sintonia automatica è possibile sintonizzare
rapidamente una stazione senza bisogno di conoscerne
la frequenza.
Prima di cominciare, assicurarsi di aver:
• collegato un’antenna FM, AM al sintonizzatore come
spiegato a pagina 4, 5.
MENU ENTER TUNING/SELECT
Se non è possibile sintonizzare la stazione
desiderata (sintonia manuale)
Con la sintonia manuale è possibile esaminare tutte le
stazioni che trasmettono su ciascuna banda e
sintonizzare le stazioni con segnali molto deboli che
possono non essere ricevibili con la sintonia automatica.
1 Premere ripetutamente BAND per selezionare FM,
MW o LW.
2 Premere TUNE MODE in modo che solo “TUNING”
appaia sul display. “AUTO” non deve essere
visualizzato sul display.
3 Premere ripetutamente TUNING/SELECT + o – fino
a sintonizzare la stazione desiderata.
Il misuratore di segnale indica la forza del segnale
di trasmissione.
Nota
Quando viene raggiunta la frequenza più alta o più
bassa di una banda, la sintonia si ferma.
TUNE MODEBAND
1 Premere BAND per selezionare FM, MW o LW.
2 Premere TUNE MODE in modo che “AUTO”
appaia sul display.
3 Premere TUNING/SELECT + o –.
Quando il sintonizzatore localizza una stazione si
ferma automaticamente. “TUNED” appare sul
display. Il misuratore di segnale indica la forza
del segnale di trasmissione.
4 Ripetere il punto 3 fino a sintonizzare la stazione
desiderata.
Per memorizzare la stazione, vedere
“Preselezione delle stazioni” a pagina 11.
Quando si sintonizzano stazioni AM (MW e LW)
Regolare l’orientamento dell’antenna AM ad anello per
una ricezione ottimale.
Se l’indicatore STEREO rimane spento
Usare il sistema a menu per regolare “FM Mode” su
“AUTO”. Per dettagli vedere “Regolazione manuale del
modo FM” a pagina 10.
Se un programma FM stereo è distorto
L’indicatore STEREO lampeggia. Usare il sistema a
menu per regolare “FM Mode” su “MONO”. Non c’è
più effetto stereo ma la distorsione viene ridotta. Per
dettagli vedere “Regolazione manuale del modo FM” a
pagina 10.
I
9
Page 90

Funzionamento avanzato del sintonizzatore
Regolazione manuale di ANT ATT e IF BAND
Consigli per una ricezione FM
1 Premere MENU.
migliore
Questo sintonizzatore dispone di varie funzioni
progettate per migliorare la ricezione. All’inizio
provare a ricevere le stazioni con la regolazione
normale. Se la ricezione non è buona, provare ad
alterare la qualità di ricezione per ottenere un segnale
chiaro. Il sintonizzatore memorizza le seguenti
regolazioni insieme alla frequenza quando si
preseleziona una stazione.
MENU TUNING/SELECTANTENNA
DISPLAY
Selezione dell’antenna FM
Quando si usano due antenne FM, premere
ANTENNA per selezionare il terminale FM
ANTENNA A o B. Cambiando l’antenna può essere
possibile ricevere una stazione che non è altrimenti
ricevibile.
ENTER
2 Premere ripetutamente TUNING/SELECT + o – fino a che
“Reception” appare sul display e quindi premere ENTER.
“FM Only” appare sul display se si seleziona
“Reception” mentre è sintonizzata una stazione MW o
LW.
3 Premere TUNING/SELECT + o – per selezionare “ATT/IF
Band” e quindi premere ENTER.
4 Premere TUNING/SELECT + o – per selezionare la
regolazione ANT ATT preferita e quindi premere ENTER.
• “ANT ATT : ON” abbassa il livello del segnale in
ingresso per ricevere stazioni con livelli di segnale
molto alti.
• “ANT ATT : OFF” è per la sintonia normale.
5 Premere TUNING/SELECT + o – per selezionare la
regolazione IF preferita e quindi premere ENTER.
• “IF : Wide” sintonizza solo le stazioni con alta qualità
sonora e bassa distorsione.
• “IF : Narrow” migliora la selettività e riduce le
interferenze per facilitare l’ascolto di stazioni dal
segnale debole.
Regolazione manuale del modo FM
Usare il sistema a menu per selezionare “AUTO”
stereo (nessuna indicazione) o “MONO”.
Cambiamento del modo di selezione attiva
(ASM)
Il modo di selezione attiva (ASM) di questo
sintonizzatore è stato predisposto in fabbrica per
trovare automaticamente le migliori regolazioni di
attenuatore antenna (ANT ATT), banda di
interfrequenza (IF BAND) e modo FM per ciascuna
frequenza. È possibile tuttavia scegliere manualmente
ciascuna regolazione secondo le proprie preferenze.
Se non si desidera usare la funzione ASM, disattivarla.
Selezionare ASM dal sistema a menu per disattivare o
attivare il modo di selezione attiva.
Quando l’ASM è attivato, l’indicatore ASM viene
visualizzato sul display quando si seleziona la banda FM.
1 Premere MENU.
2 Premere ripetutamente TUNING/SELECT + o – fino a che
“Reception” appare sul display e quindi premere ENTER.
3 Premere ripetutamente TUNING/SELECT + o – fino a che
“A.S.M” appare sul display e quindi premere ENTER.
4 Premere TUNING/SELECT + o – per selezionare “ON” o
“OFF” e quindi premere ENTER.
1 Premere MENU.
2 Premere ripetutamente TUNING/SELECT + o – fino a che
“Reception” appare sul display e quindi premere ENTER.
“FM Only” appare sul display se si seleziona
“Reception” mentre è sintonizzata una stazione MW o
LW.
3 Premere ripetutamente TUNING/SELECT + o – fino a che
“FM Mode” appare sul display e quindi premere ENTER.
4 Premere TUNING/SELECT + o – per selezionare la
regolazione desiderata e quindi premere ENTER.
• Il modo “AUTO” stereo riceve le trasmissioni stereo
dai segnali forti. L’indicatore “MONO” scompare dal
display.
• “MONO” riceve le stazioni dai segnali deboli. Le
stazioni sono ricevute in monoaurale ma con meno
disturbi.
10
I
Page 91

Funzionamento avanzato del sintonizzatore
Controllo della forza del segnale
È possibile usare il misuratore di segnale digitale per
controllare la forza del segnale delle frequenze FM. La
gamma di visualizzazione va da 16 a 70 dB (1 µV di
tensione di frequenza radio = 0 dB). Per ottenere un
rapporto segnale/rumore sufficiente alla ricezione di
trasmissioni stereo, consigliamo letture superiori a 50
dB.
Questo apparecchio permette di usare il misuratore di
segnale digitale anche per la banda AM. Nel caso della
banda AM, la gamma di visualizzazione va da 0 a 10
(valori maggiori indicano segnali più forti).
1 Sintonizzare una stazione FM o AM.
2 Premere ripetutamente DISPLAY per visualizzare
il misuratore di segnale digitale.
3 Ruotare l’antenna FM o AM per ottenere il
segnale più forte.
Preselezione delle stazioni
Questa sezione spiega come memorizzare
manualmente fino a 30 stazioni FM o AM (MW e LW)
preferite su codici di preselezione composti di lettere
(A, B o C) e numeri, come ad esempio A7. È possibile
memorizzare fino a 10 stazioni per ciascuna delle tre
lettere. È possibile usare queste lettere per classificare
le stazioni in base al tipo di musica o alla banda radio.
TUNING/SELECT
MEMORY SHIFT
1 Sintonizzare la stazione FM, MW o LW che si
desidera memorizzare.
ENTER
2 Premere MEMORY.
“MEMORY” appare insieme al primo codice
libero indicando che il sintonizzatore è pronto a
memorizzare la stazione.
3 Premere SHIFT per selezionare A, B o C.
La lettera selezionata appare sul display.
4 Premere ripetutamente TUNING/SELECT + o –
per selezionare il numero desiderato.
5 Premere ENTER per memorizzare la stazione.
Il sintonizzatore memorizza la stazione sul codice di
preselezione specificato.
6 Ripetere i punti da 1 a 5 per memorizzare altre
stazioni.
I nomi delle stazioni RDS sono memorizzati
automaticamente
Quando si preseleziona una stazione RDS che trasmette
informazioni di nome stazione, il nome della stazione
viene memorizzato automaticamente con la stazione
preselezionata.
Per assegnare nomi alle stazioni
Seguire il procedimento descritto in “Assegnazione di
nomi alle stazioni preselezionate” a pagina 12.
11
I
Page 92

Funzionamento avanzato del sintonizzatore
Assegnazione di nomi alle
stazioni preselezionate
È possibile assegnare un nome di 5 caratteri al
massimo a ciascuna stazione preselezionata (tranne le
stazioni FM RDS). Quando la stazione viene
sintonizzata, il nome della stazione appare invece della
frequenza.
CHARACTER TUNING/SELECT
1 Usare SHIFT e i tasti TUNING/SELECT + o – per
specificare il codice di preselezione dove si
desidera memorizzare il nome stazione.
2 Premere CHARACTER.
Il cursore lampeggia sul display.
MEMORY
ENTER
SHIFTDISPLAY
Organizzazione delle stazioni
preselezionate
Questo sintonizzatore facilita il riordinamento delle
stazioni preselezionate. È possibile organizzare
automaticamente tutte le stazioni preselezionate in
ordine di alfabeto, forza di segnale, codice paese o
banda sintonizzatore oppure si possono usare le
funzioni “Move” e “Erase” per spostare e cancellare
stazioni preselezionate specifiche.
TUNING/SELECTENTER
1 Premere MENU.
2 Premere ripetutamente TUNING/SELECT + o –
fino a che “Edit” appare sul display e quindi
premere ENTER.
Se non sono state preselezionate stazioni, “No
Preset” appare sul display.
MENU
12
3 Premere ripetutamente TUNING/SELECT + o –
per selezionare un carattere.
4 Quando appare il carattere desiderato, premere
CHARACTER per spostare il cursore alla
posizione del carattere successivo.
Se si fa un errore
Premere ripetutamente CHARACTER fino a che il
carattere da cambiare lampeggia (ogni volta che si
preme CHARACTER il carattere successivo lampeggia).
Quindi premere TUNING/SELECT + o – per
selezionare un altro carattere.
5 Ripetere i punti 2 e 3 fino a che il nome della
stazione desiderata appare sul display.
6 Premere MEMORY.
Appare “MEMORY”.
Nota
Il display torna alla visualizzazione normale se non si
preme ENTER entro 8 secondi dalla pressione di
MEMORY. In questo caso, ricominciare dall’inizio.
7 Premere ENTER per memorizzare il nome
stazione.
Per vedere la frequenza del nome stazione
visualizzato
Premere ripetutamente DISPLAY.
I
3 Premere ripetutamente TUNING/SELECT + o – per
scegliere uno dei seguenti metodi di organizzazione.
Selezionare
Move
Erase
Alphabet
Strength
Country
Band
Per
cambiare la posizione di una stazione
preselezionata specifica.
cancellare una stazione preselezionata
specifica.
disporre le stazioni preselezionate in
ordine alfabetico in base ai loro nomi
preselezionati. Le stazioni senza nome
preselezionato sono disposte in ordine di
frequenza, dalla più bassa alla più alta.
disporre le stazioni preselezionate in ordine
di forza di segnale (solo stazioni FM).
Le frequenze MW e LW sono disposte in
ordine di frequenza.
disporre le stazioni FM RDS con
informazioni PI in ordine alfabetico per
ciascun paese.
Le altre stazioni sono disposte in ordine di
frequenza.
disporre le stazioni nell’ordine della loro
banda di frequenza (FM - MW - LW).
4 Premere ENTER.
Il sintonizzatore riordina le stazioni e quindi
torna al modo di sintonia normale e riceve la
stazione preselezionata A1 a meno che si sia scelto
“Move” o “Erase”.
Nota
Alcuni paesi usano lo stesso codice di paese e le stazioni di
questi paesi possono essere ordinate insieme.
Page 93

Funzionamento avanzato del sintonizzatore
Spostamento di una stazione
preselezionata
È anche possibile spostare una stazione preselezionata
specifica.
1 Eseguire i punti da 1 a 3 di “Organizzazione delle
stazioni preselezionate” e selezionare “Move” dal
menu Edit, quindi premere ENTER.
2 Premere TUNING/SELECT + o – in modo che il
codice di preselezione da spostare appaia sul
display e quindi premere ENTER.
3 Premere TUNING/SELECT + o – per selezionare
la nuova posizione del codice di preselezione e
quindi premere ENTER.
La stazione preselezionata scelta viene spostata
alla nuova posizione e le altre stazioni
preselezionate del gruppo (per esempio “A”) sono
spostate per fare posto alla nuova preselezione.
ESEMPIO:
Se si sposta A4 ad A1.
A1 A2 A3 A4 A5 A6 A7 A8Preselezione
89.5 94.5 96.5 98.0 100.5 103.0 104.5 106.0Frequenza
Per cancellare tutte le stazioni preselezionate
1 Spegnere l’apparecchio.
2 Tenendo premuti ANTENNA e ENTER, premere
POWER per accendere l'apparecchio.
.
A1 A2 A3 A4 A5 A6 A7 A8Preselezione
98.0 89.5 94.5 96.5 100.5 103.0 104.5 106.0Frequenza
Cancellazione delle stazioni preselezionate
È possibile cancellare le stazioni preselezionate una per
una.
1 Eseguire i punti da 1 a 3 di “Organizzazione delle
stazioni preselezionate” e selezionare “Erase” dal
menu Edit, quindi premere ENTER.
2 Premere TUNING/SELECT + o – in modo che il
codice di preselezione da cancellare appaia sul
display e quindi premere ENTER.
La stazione preselezionata scelta viene cancellata
dalla memoria di preselezione e le altre stazioni
preselezionate del gruppo (per esempio “A”) sono
spostate in avanti a riempire lo spazio vuoto.
ESEMPIO:
Se si cancella A1.
A1 A2 A3 A4 A5 A6 A7 A8Preselezione
89.5 94.5 96.5 98.0 100.5 103.0 104.5 106.0Frequenza
.
A1 A2 A3 A4 A5 A6 A7 A8Preselezione
94.5 96.5 98.0 100.5 103.0 104.5 106.0Frequenza
I
13
Page 94

Funzionamento avanzato del sintonizzatore
Note
Uso del sistema dati radio
(RDS)
Il sistema dati radio
Il sistema dati radio (RDS) è un servizio di trasmissione
che consente alle stazioni radio di inviare informazioni
addizionali insieme al normale segnale di programma
radio. Questo apparecchio permette di visualizzare
varie informazioni RDS e fornisce un’indicazione per le
stazioni designate per la trasmissione di informazioni
sul traffico. Il sistema RDS è disponibile solo su
stazioni FM.*
Nota
L’RDS può non funzionare correttamente se la stazione
sintonizzata non trasmette correttamente il segnale RDS o se
la forza del segnale è debole.
* Non tutte le stazioni FM offrono il servizio RDS e non tutte
offrono gli stessi tipi di servizi. Se non si è familiari con il
sistema RDS, controllare con le stazioni radio locali che
offrono servizi RDS nella zona.
• Se c’è un annuncio di emergenza da parte delle autorità
governative, “ALARM” lampeggia sul display.
• Se una stazione non offre un particolare servizio RDS,
“NO ...” (come ad esempio “NO PTY”) appare sul display.
• A seconda del metodo usato dalla stazione radio per
l’invio del testo, alcuni messaggi di testo possono essere
incompleti.
Localizzazione di stazioni che trasmettono
informazioni sul trafffico
Quando si sintonizza una stazione RDS che trasmette
informazioni sul traffico, l’indicatore TP si illumina.
Ricezione di trasmissioni RDS
Basta selezionare una stazione della banda FM.
Quando si sintonizza una stazione che offre servizi
RDS, l’indicatore RDS e il nome della stazione
appaiono sul display.
Visualizzazione delle informazioni RDS
Premere alcune volte DISPLAY fino a che sono
visualizzate le informazioni RDS.
Informazione visualizzata
Nome stazione*
Frequenza*
Orario (sistema 24 ore)
Tipo programma
Testo radio
Identificazione programma
Misuratore di segnale
digitale*
È possibile:
localizzare ciascuna stazione
con il nome (p.es.WDR) invece
che con la frequenza.
localizzare ciascuna stazione
con la frequenza.
visualizzare l’orario attuale.
localizzare un tipo specifico di
programma in fase di
trasmissione.
visualizzare i messaggi di testo
inviati dalla stazione RDS.
stabilire il paese di origine di
ciascuna trasmissione.
(vedere pagina 11 per dettagli)
14
* Queste informazioni appaiono anche per stazioni FM non
RDS.
I
Page 95

Altre informazioni
Soluzione di
problemi
Se durante l’uso del sintonizzatore
si presenta uno dei seguenti
problemi, usare questa guida per
risolvere il problema. Se il problema
dovesse rimanere irrisolto,
consultare il proprio rivenditore
Sony.
Suono assente.
/ Collegare le antenne.
/ Regolare la fonte
sull’amplificatore su
TUNER.
Non è possibile sintonizzare una
frequenza.
/ Regolare la posizione
dell’antenna.
/ Collegare un’antenna
esterna per trasmissioni
FM.
/ Regolare IF BAND su
NARROW .
/ Preselezionare di nuovo le
stazioni se si è traslocato.
Forte ronzio o disturbi di sottofondo.
/ Regolare la posizione e
l’orientamento
dell’antenna.
/ Sintonizzare correttamente
la frequenza.
/ Collegare un’antenna
esterna per trasmissioni
FM.
/ Allontanare il
sintonizzatore dalla fonte
di disturbo.
L’RDS non funziona.
/ Verificare che sia
sintonizzata una stazione
FM RDS.
/ Selezionare una stazione
FM RDS più forte.
“No preset” appare sul display.
/ Se il cavo di alimentazione
viene scollegato dalla presa
a muro per più di un mese,
la memoria viene
cancellata. Eseguire di
nuovo le preselezioni.
La visualizzazione o le informazioni
corrette non appaiono.
/ Spegnere l’apparecchio.
Tenendo premuto
ANTENNA e ENTER
premere POWER per
riaccendere. Questo
cancella le frequenze
attualmente memorizzate
nella memoria di
preselezione e riporta la
visualizzazione alla lingua
originale (inglese).
/ Contattare la stazione radio
per sapere se
effettivamente offre il
servizio in questione. Il
servizio potrebbe essere
temporaneamente sospeso.
Caratteristiche
tecniche
Sezione sintonizzatore FM*
Campo di frequenza
Terminali antenna
Frequenza intermedia
Sensibilità
Sensibilità utilizzabile
(IHF)
Rapporto segnale/
rumore
87,5-108,0 MHz
75 ohm, non bilanc.
CEI maschio
10,7 MHz
a soglia 26 dB
(mono) 10,3 dBf,
0,9 µV/75 Ω
a soglia 46 dB
(stereo) 38,5 dBf,
23 µV/75 Ω
10,3 dBf, 0,9 µV/
75 Ω
a deviazione 40 kHz
80 dB (mono),
76 dB (stereo)
Distorsione armonica
Risposta in frequenza
Separazione
Selettività
Uscita
a deviazione 40 kHz
WIDE
0,04% (mono),
0,05% (stereo)
NARROW
0,06% (mono),
0,08% (stereo)
30 Hz - 15 kHz
(+0,2/–0,3 dB)
50 dB a 1 kHz
a 400 kHz
WIDE 80 dB
NARROW 90 dB
a 300 kHz
WIDE 45 dB
NARROW 70 dB
a deviazione 40 kHz
600 mV
Sezione sintonizzatore AM
Campo di frequenza
Frequenza intermedia
Sensibilità
utilizzabile
Rapporto segnale/
rumore
Distorsione armonica
Selettività
MW: 522 - 1.611 kHz
(passo 9 kHz)
LW: 144 - 288 kHz
(passo 1 kHz)
450 kHz
(con antenna AM
ad anello)
MW: 200 µV/m
LW: 700 µV/m
MW: 54 dB
(50 mV/m,
999 kHz)
LW: 50 dB
(50 mV/m,
216 kHz)
0,3% (50 mV/m,
400 Hz)
50 dB
Generali
Alimentazione
Consumo
Dimensioni
Peso
Accessori in
dotazione
* “di cui al par. 3 dell’Allegato A al D.M.
25/06/85 e al par. 3 dell’Allegato 1 al
D.M. 27/08/87”
220-230 V CA,
50/60 Hz
12 W
280 x 80 x 400 mm
(l/a/p)
4,3 kg
Cavo audio (1)
Antenna AM ad
anello (1)
Antenna FM a filo (1)
Disegno e caratteristiche tecniche soggetti a
modifiche senza preavviso.
15
I
Page 96

Altre informazioni
Indice analitico
A, B
P, Q
Preselezione
stazioni AM 11
stazioni FM 6, 11
Amplificatore,
collegamento 5
Antenne, collegamento
AM 4
FM 5
Assegnazione di nomi alle
stazioni 11
Automatica, sintonia 9
C
Collegamenti
amplificatore 5
antenna AM 4
antenna FM 5
cavo di alimentazione 6
Connessioni. Vedere
Collegamenti
D, E, F, G, H
Disimballaggio 4
I, J, K, L
Interfrequenza, banda di 10
R
RDS 14
Regolazione
banda IF 10
Ricezione delle stazioni
preselezionate 7
S, T, U
Selezione autobetica 6
Sintonia. Vedere Ricezione di
trasmissioni
Sintonia preselezionata
stazioni AM 7
stazioni FM 7
Soluzione di problemi 15
V
Visualizzazione
lingua 6
modo 8
W, X, Y, Z
WIDE 10
M
Manuale, sintonia 9
Memoria 6, 10, 11
Memorizzazione delle
stazioni radio Vedere
Preselezione
Misuratore di segnale 10
Modo FM 10
N
NARROW 10
O
Organizzazione delle stazioni
preselezionate 12
16
I
Page 97

17
I
Page 98

WAARSCHUWING
Stel het apparaat niet bloot aan regen of
vocht, om gevaar voor brand of een
elektrische schok te voorkomen.
Open nooit de behuizing, om gevaar
voor elektrische schokken te vermijden.
Laat reparaties aan de erkende
vakhandel over.
V oorzorgsmaatregelen
Veiligheid
• Mocht er vloeistof of een voorwerp in
het apparaat terechtkomen, trek dan
de stekker uit het stopkontakt en laat
het apparaat eerst nakijken door een
deskundige, alvorens het weer in
gebruik te nemen.
Stroomvoorziening
• Kontroleer voor het aansluiten van
het apparaat eerst of de
bedrijfspanning ervan wel
overeenkomt met de plaatselijke
netspanning.
• Trek de stekker van het netsnoer uit
het stopkontakt wanneer u denkt het
apparaat geruime tijd niet te zullen
gebruiken. Om de aansluiting op het
stopkontakt te verbreken, mag u
uitsluitend aan de stekker trekken;
trek nooit aan het snoer.
• Indien het netsnoer vervangen moet
worden, mag dit alleen worden
uitgevoerd door een erkende
onderhoudsdienst.
Reinigen van de behuizing
• Gebruik voor het reinigen van de
ombouw, het voorpaneel en de
bedieningsorganen een zachte doek,
licht bevochtigd met wat milde
vloeibare zeep. Gebruik geen
schuurspons, schuurmiddelen of
vluchtige stoffen zoals spiritus of
benzine.
Opnieuw verpakken
• Gooi de doos en het andere
verpakkingsmateriaal niet weg. Deze
vormen een ideale verpakking voor
als u het apparaat nogmaals wilt
vervoeren.
Voor vervoer van het apparaat dient
u het apparaat zo mogelijk weer
precies te verpakken als u het bij
aflevering hebt aangetroffen.
Mocht u na het doorlezen van de
gebruiksaanwijzing nog vragen over of
problemen met het apparaat hebben,
aarzel dan niet kontakt op te nemen met
de dichtstbijzijnde Sony handelaar.
Opstelling
• Zet het apparaat op een goed
geventileerde plaats, met rondom
vrije luchtdoorstroming, om
oververhitting van de inwendige
onderdelen te voorkomen, in het
belang van een langdurige
betrouwbare werking.
• Plaats het apparaat niet in de buurt
van een warmtebron of in direkt
zonlicht. Vermijd tevens plaatsen met
veel stof, vocht en mechanische
trillingen of schokken.
• Zet niets bovenop het apparaat. De
ventilatie-openingen aan de
bovenzijde mogen niet geblokkeerd
worden, in het belang van een juist
funktioneren van het apparaat en een
langere levensduur van de
componenten.
• Installeer het apparaat niet in een
krappe, omsloten ruimte zoals een
boekenrek of een inbouwkast.
NL
2
Page 99

Welkom!
Hartelijk dank voor uw aankoop van
deze Sony FM stereo/FM-AM tuner.
Lees, alvorens het apparaat in gebruik
te nemen, deze gebruiksaanwijzing
aandachtig door en bewaar deze voor
eventuele naslag.
INHOUDSOPGAVE
Voorbereidingen
Uitpakken 4
Aansluiten van de installatie 4
Instellen op Duitse aanduidingen in het uitleesvenster 6
Automatisch alfabetisch vastleggen van FM radiozenders
(“Auto-betical” zenderopslag) 6
Omtrent deze
handleiding
Op een aantal plaatsen in deze
gebruiksaanwijzing zult u het
onderstaande tekentje aantreffen:
Dit symbool vestigt uw
aandacht op handige tips, die de
bediening vergemakkelijken.
Basisbediening
Ontvangst van vooringestelde radiozenders 7
Uitgebreide afstemfunkties
Betreffende het funktiemenu 8
Instellen van de helderheid/informatie in het uitleesvenster 8
Radio-ontvangst met doorzoeken van zenders (Automatische
zoekafstemming) 9
Funkties voor betere FM ontvangst 10
Voorinstellen van radiozenders 11
Naamgeving van vooringestelde radiozenders 12
Rangschikken van vooringestelde zenders 12
Gebruik van het Radio Data Systeem (RDS) 14
Aanvullende informatie
Verhelpen van storingen 15
Technische gegevens 15
Index 16
NL
NL
3
Page 100

Voorbereidingen
Uitpakken
Kontroleer of het onderstaande bijgeleverd toebehoren
inderdaad in de verpakking van de tuner aanwezig is:
• Audio-aansluitsnoer (1)
• AM kaderantenne (1)
• FM draadantenne (1)
Aansluiten van de installatie
Vóór het aansluiten
• Schakel eerst alle betrokken apparatuur uit, alvorens
u begint met het aansluiten ervan.
• Sluit de netsnoeren van de apparatuur pas op het
stopkontakt aan nadat alle andere aansluitingen in
orde zijn.
• Steek alle stekkers stevig over de volle lengte in de
aansluitbussen, om brom en andere bijgeluiden te
voorkomen.
• Zorg bij het aansluiten van de audio-signaalsnoeren
dat u links en rechts niet verwisselt: sluit de witte
stekkers aan op de witte stekkerbussen (voor het
linker kanaal) en de rode stekkers op de rode
stekkerbussen (voor het rechter kanaal).
2 Trek ongeveer drie slagen van de gevlochten
aansluitdraad uit de rand van de antenne te
voorschijn. Trek alleen het gevlochten gedeelte
eruit, en let op dat de gevlochten draad niet
uitrafelt. Zorg tevens dat er niet meer van de
aansluitdraad van de antenne loskomt dan 3
wikkelingen.
3 Monteer de bijgeleverde kaderantenne zoals
hieronder aangegeven.
4 Sluit de AM kaderantenne aan op de AM
antenne-aansluitingen op het achterpaneel van dit
apparaat.
ANTENNA
AM
AM kaderantenne
y
Aansluiten van de AM antenne(s)
Hieronder wordt beschreven hoe u de bijgeleverde AM
kaderantenne aansluit. Zie voor de plaats van de AM
antenne-aansluitingen de onderstaande afbeelding.
AM ANTENNA
ANTENNA
AB
FM
75 COAXIAL
AM
LINE OUT
RL
y
Benodigdheden
• AM kaderantenne (bijgeleverd) (1)
1 Alvorens u de bijgeleverde antenne gaat
monteren, trekt u eerst de aansluitdraad uit de
buitenrand van het antennekader.
NL
4
5 Verstel de richting van de kaderantenne voor de
beste radio-ontvangst.
De AM kaderantenne is richtingsgevoelig en
vangt signalen vanuit bepaalde richtingen veel
beter op dan uit andere richtingen. Draai de
antenne dus en blijf uitproberen tot u de beste
stand voor heldere ontvangst hebt gevonden.
Als er tijdens het opnemen van een AM radiouitzending een storende hoge fluittoon klinkt
(door zweving), verstel dan de kaderantenne zo
dat de fluittoon verdwijnt. In een gebouw met een
stalen skelet of van gewapend beton kan de radioontvangst wel eens erg zwak zijn, omdat de
radiogolven daarin niet goed kunnen
doordringen.
Voor radiozenders waarvan de ontvangst
problematisch is
Probeer of het verstellen van de kaderantenne tijdens de
afstemming verbetering in de ontvangst brengt.
Opstellen van de bijgeleverde AM kaderantenne in de
buurt van een venster zal vaak voor een betere
ontvangst zorgen.
 Loading...