

Sony SLV-ED828SG User Manual
3-073-156-P1 (1) GB
Video Cassette
Recorder
Operating Instructions
PAL NTSC
SLV-ED828SG
SLV-ED323SG
© 2002 Sony Corporation
Index to parts and controls
Refer to the pages indicated in parentheses ( ) for details.
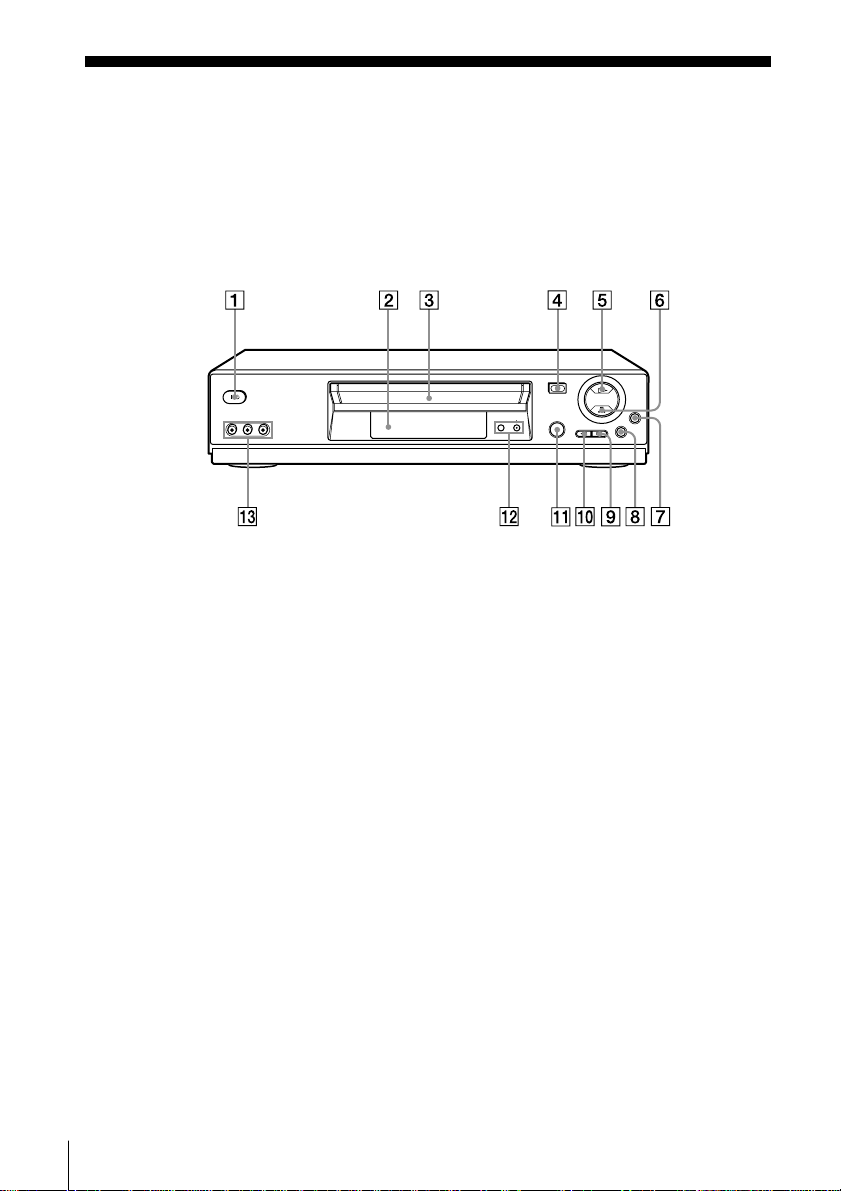
Front panel
For SLV-ED828SG
1 ?/1 ON/STANDBY switch
2 Remote sensor
3 Tape compartment
4 A EJECT button (28)
5 H PLAY button* (28)
6 x STOP button* (9) (28) (Back
cover)
7 z REC (record) button (17) (29)
(Back cover)
8 X PAUSE button (24) (28) (Back
cover)
2
9 M FF (fast-forward) button (28)
q; m REW (rewind) button (28)
qa EASY TIMER (19)
qs PROGRAM/TRACKING +/–
buttons* (20)
qd LINE-2 IN VIDEO/AUDIO L/R
(left/right) jacks (30)
* The H PLAY, x STOP and PROGRAM/
TRACKING + buttons have a tactile dot.
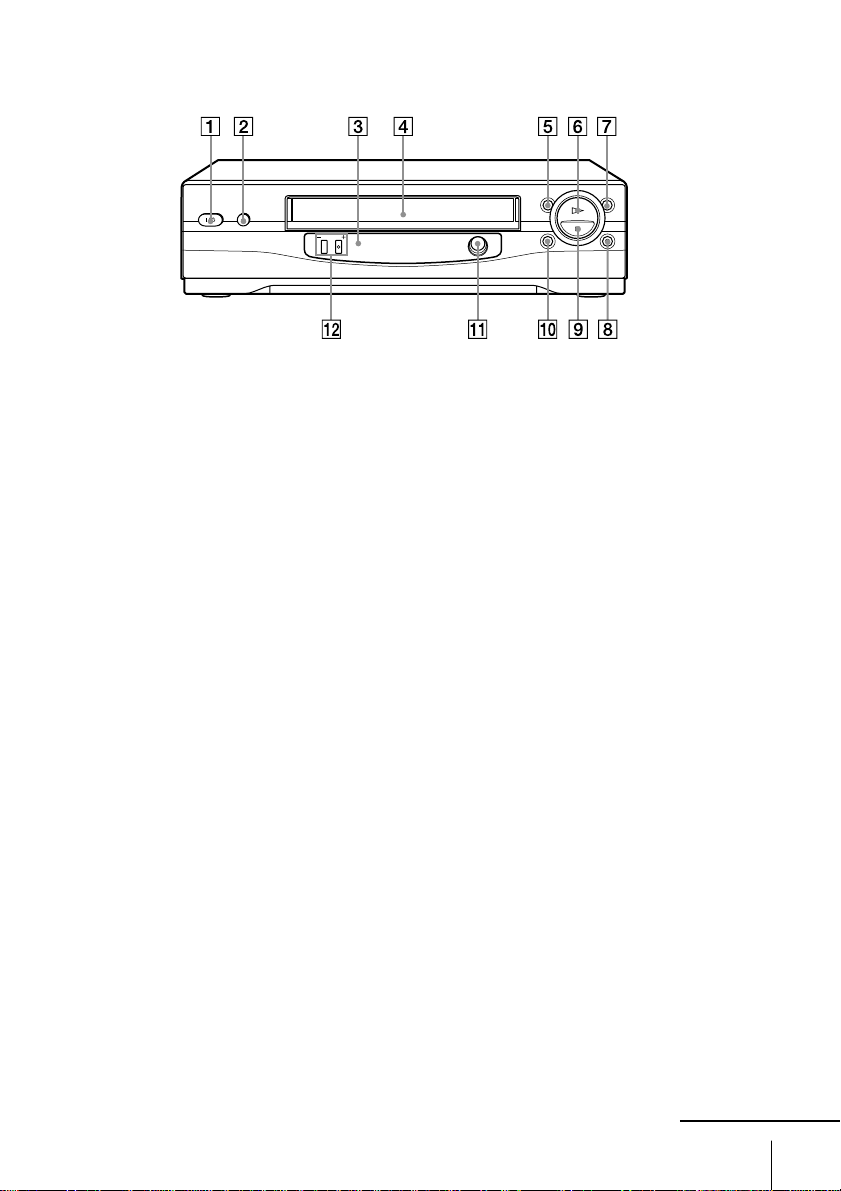
For SLV-ED323SG
1 ?/1 ON/STANDBY switch
2 A EJECT button (28)
3 Remote sensor
4 Tape compartment
5 m REW (rewind) button (28)
6 H PLAY button (28)
7 M FF (fast-forward) button (28)
8 z REC (record) button (17) (29)
(Back cover)
9 x STOP button (9) (28) (Back
cover)
q; X PAUSE button (24) (28) (Back
cover)
qa EASY TIMER (19)
qs PROGRAM/TRACKING +/–
buttons* (20)
* The PROGRAM/TRACKING + button
has a tactile dot.
continued
3
Index to parts and controls (continued)
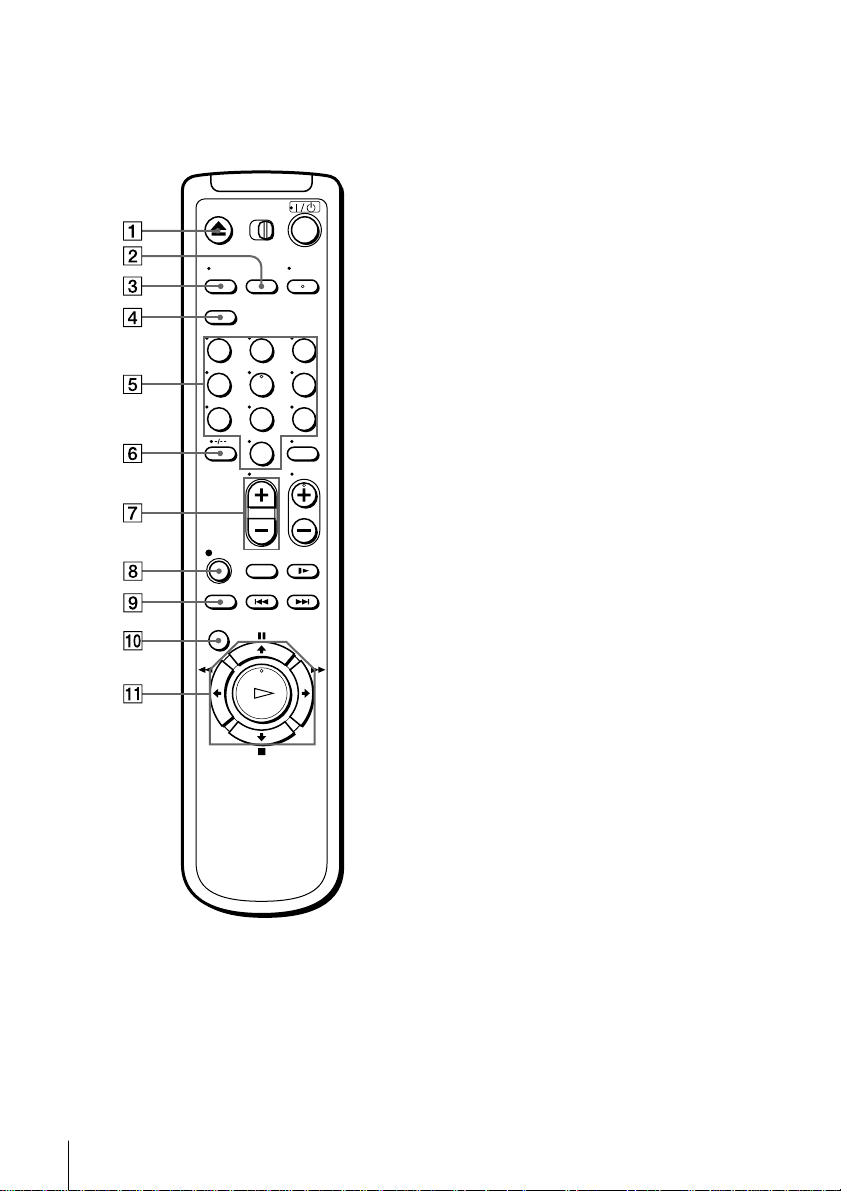
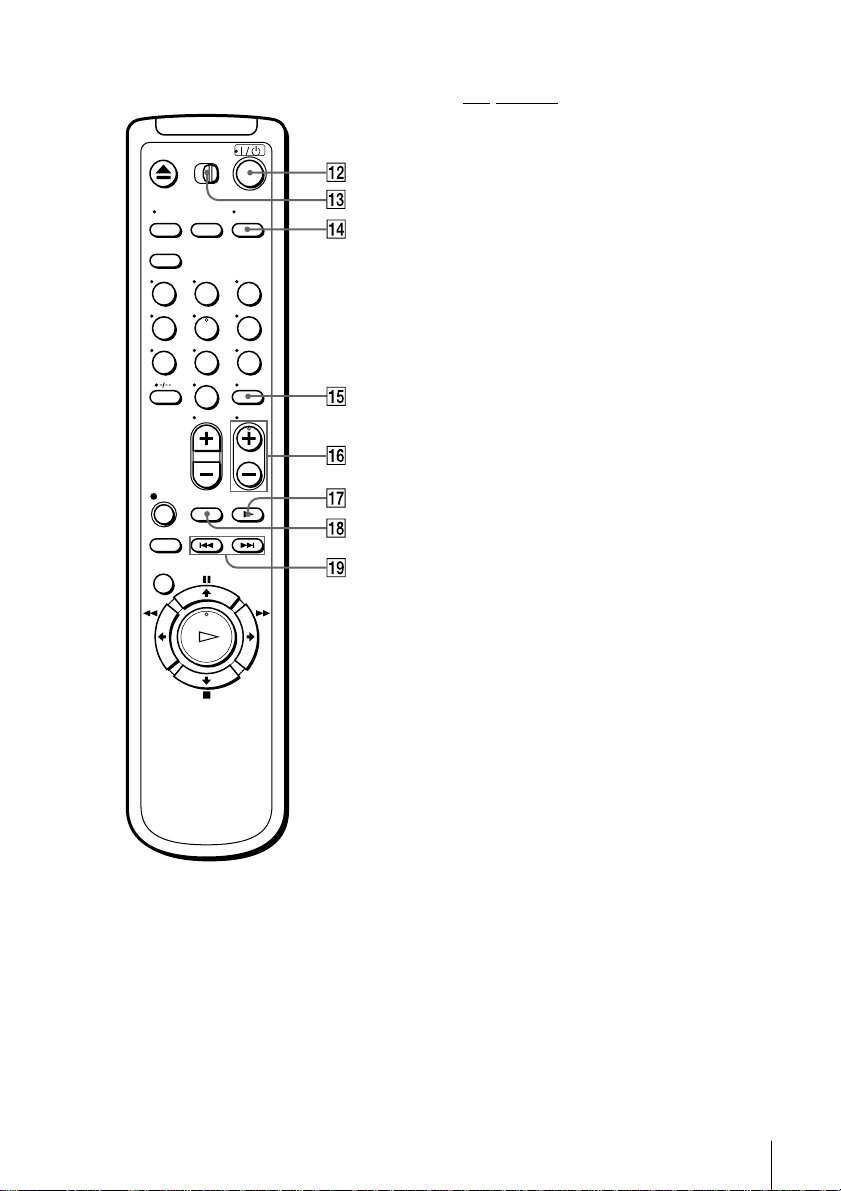
Remote commander
123
456
789
0
1 Z EJECT button (28)
2 INPUT SELECT button (17) (25)
(Back cover)
3 TV/VIDEO button (for TV)
4 CLEAR button (14)
5 Programme number buttons*
6 -/-- (ten’s digit) button
7 VOL (volume) +/– buttons
8 z REC (record) button (17) (29)
9 REC SPEED (recording speed)
button
q; MENU button (12)
qa X PAUSE/M button (12) (28)
x STOP/m button (12) (28)
m REW (rewind)/< button (12)
(28)
M FF (fast-forward)/, button
(12) (28)
H PLAY/OK button* (12) (28)
* The H PLAY, AUDIO MONITOR,
number 5 and PROG + buttons have a
tactile dot.
4
123
456
789
0
qs ?/1 (on/standby) switch (26)
qd •TV/VIDEO remote control switch
qf AUDIO MONITOR button*1*
2
qg DISPLAY button (18)
qh PROG (programme) +/– buttons*
qj y SLOW button (28)
qk ×2 button (28)
ql ./> INDEX SEARCH
buttons
*1The H PLAY, AUDIO MONITOR,
number 5 and PROG + buttons have a
tactile dot.
*2SLV-ED828SG only
1
5
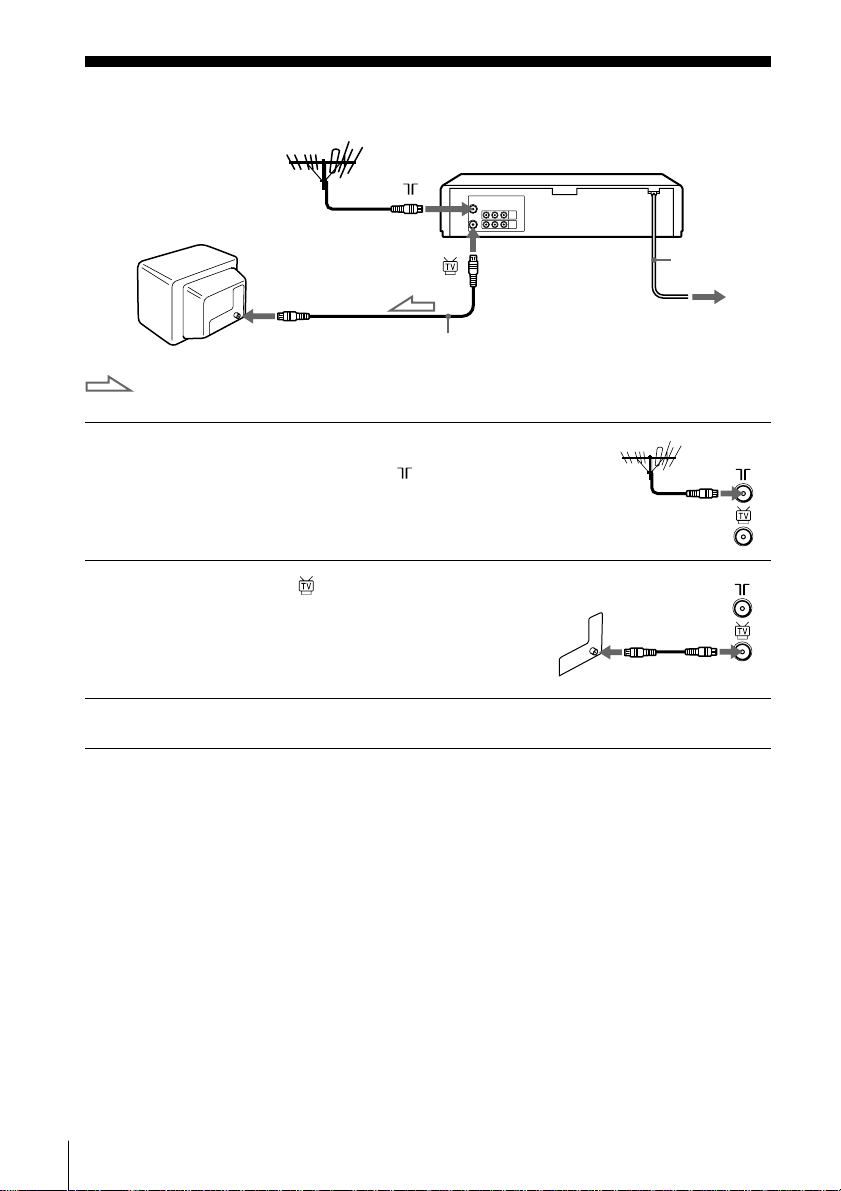
Connecting the VCR
Mains lead
AERIAL IN
Aerial cable (supplied)
: Signal flow
1 Disconnect the aerial cable from your
TV and connect it to on the rear
panel of the VCR.
2 Connect of the VCR and the aerial
input of your TV using the supplied
aerial cable.
3 Connect the mains lead to the mains.
Note
• When you connect the VCR and your TV only with an aerial cable, you have to
tune your TV to the VCR (see page 8).
to mains
6
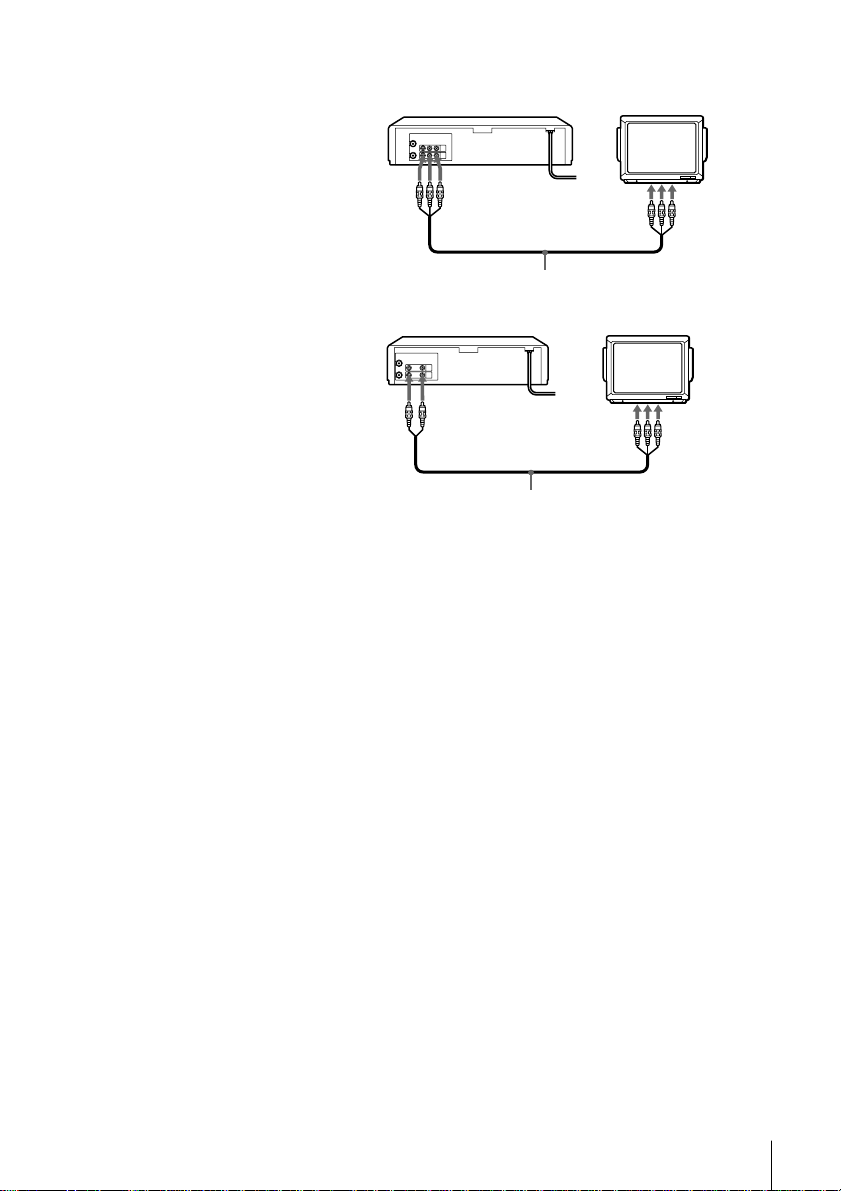
Additional connections
To a TV that has audio/
video input jacks
This additional connection
improves picture and sound
quality. Connect the TV as
shown on the left.
For SLV-ED828SG
LINE OUT
LINE IN
Audio/video cable (not supplied)
For SLV-ED323SG
LINE OUT
Audio/video cable (not supplied)
LINE IN
7
EXIT MENU:OK:SET
SELECT
SYSTEM
SYSTEM
SYSTEM
:
SYSTEM SELECT
–B/G
D/K–
I
–
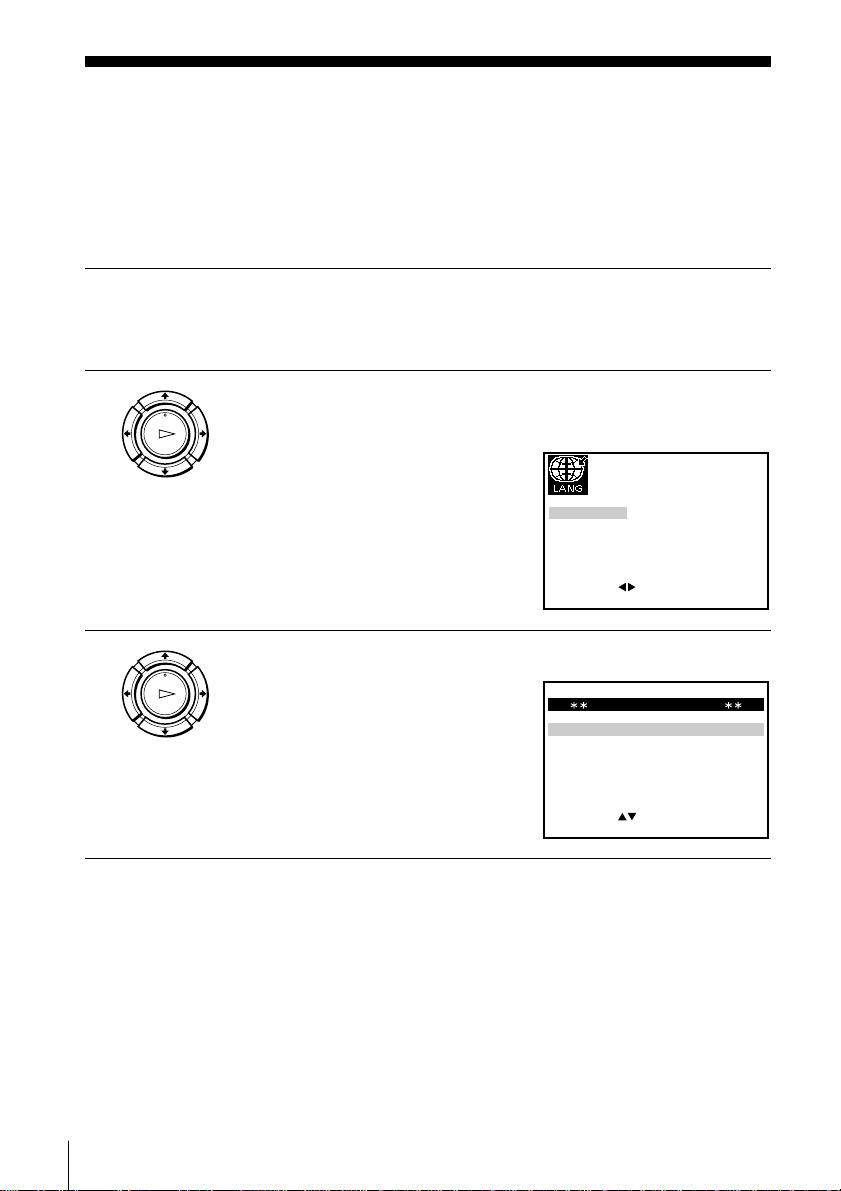
Setting up the VCR with the Auto
EXIT MENU:OK:SET
SELECT
ENGLISH ARABIC
:
Set Up function
Before using the VCR for the first time, set up the VCR using the Auto Set Up
function. With this function, you can set the language for the on-screen display and
TV channels automatically.
1 Turn on your TV and set it to the video channel.
Tune the TV to channel 32 (the initial RF channel for this VCR).
Refer to your TV manual for TV tuning instructions.
2 Connect the mains lead to the mains.
PLAY
OK
The VCR automatically turns on.
The LANGUAGE SET menu
appears on the TV screen.
Press </, to select the desired
language, ENGLISH or ARABIC,
then press OK.
The message for the Auto Set Up
function appears.
3 Press OK.
PLAY
OK
The SYSTEM SELECT menu
appears.
8
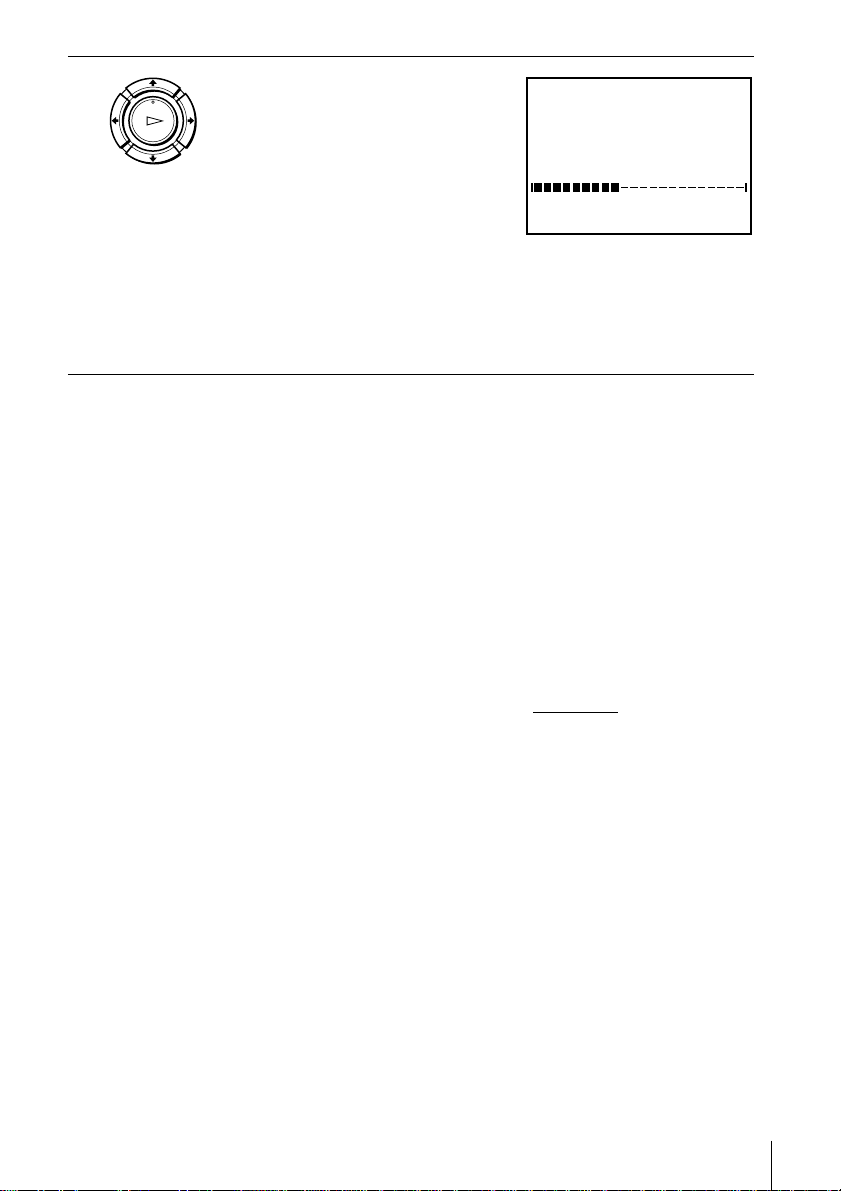
4 Press M/m to select the appropriate
MENU:
PLEASE WAIT
AUTO SET UP
40%
EXIT
PLAY
OK
To cancel the Auto Set Up function
Press MENU.
Notes
• Whenever you operate the Auto Set Up function, some of the settings (timer, etc.)
• Auto preset starts automatically only when you plug in the mains lead for the first
• After using the Auto Set Up function, the LANGUAGE SET menu does not
• Auto preset can be performed by pressing x STOP
TV system, then press OK.
The VCR starts searching for all of
the receivable channels and presets
them (in the appropriate order for
your local area).
If you want to disable unwanted
programme positions, see
“Disabling unwanted programme
positions” on page 14.
After the search is complete, the clock setting menu appears. See
“Setting the clock” on page 10.
will be reset. If this happens, you have to set them again.
time after you purchase the VCR.
appear automatically when you connect the mains lead again. If you want to use
the Auto Set Up function again, press MENU, then press M/m/</, to highlight
INSTALLATION and press OK. Press M/m to highlight AUTO SET UP, then
repeat all procedures from step 3.
5 seconds or more with no tape inserted.
on the VCR continuously for
9
SET
MENU:
:
OK:END
SELECT
12 0 1 JAN/0:20
TUE
02/
:
EXIT
SET
MENU:
:
OK:END
SELECT
18 0 1 JAN/0:20
TUE
02/
:
EXIT
SET
MENU:
:
OK:END
SELECT
18 3 1 JAN/0:20
TUE
02/
:
EXIT
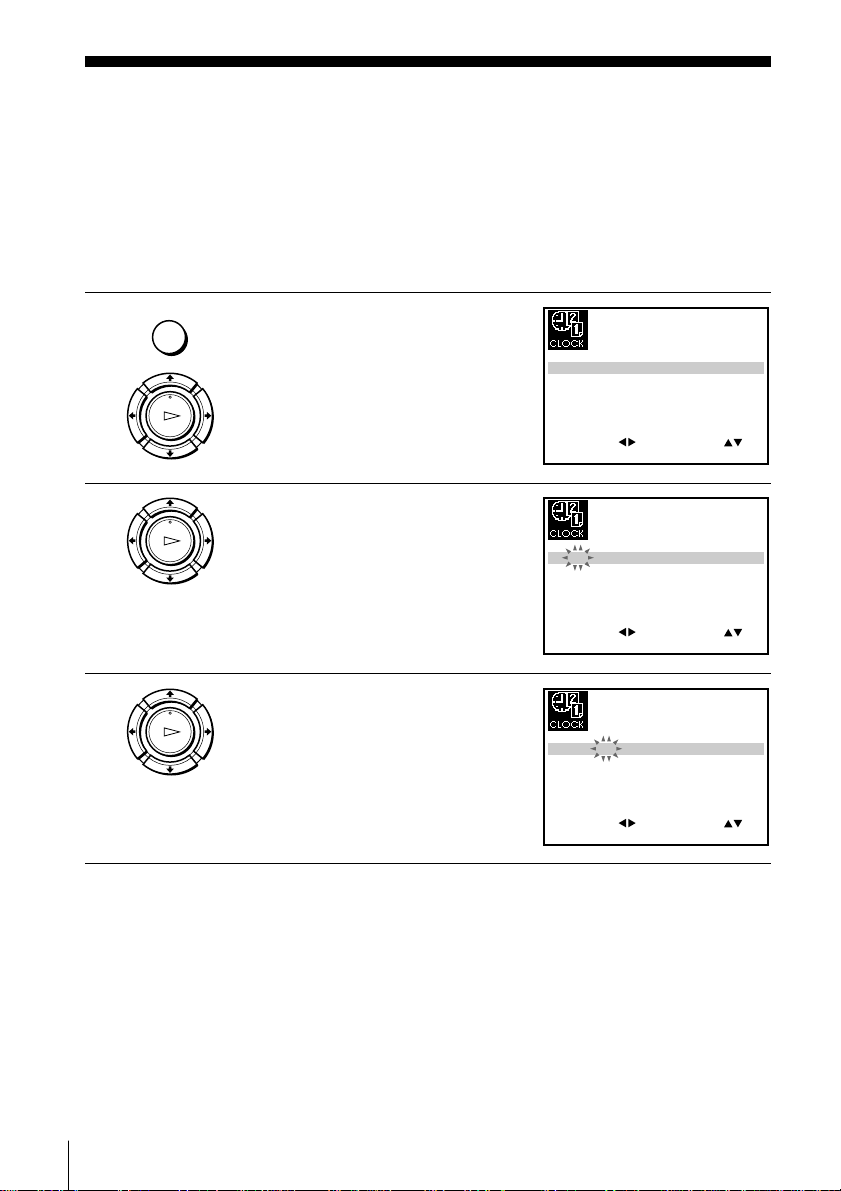
Setting the clock
You must set the time and date on the VCR to use the timer features properly.
Before you start…
• Turn on the VCR and the TV.
• Set the TV to the video channel.
• Refer to “Index to parts and controls” for button locations.
1 Press MENU, then press M/m/</
MENU
, to highlight CLOCK SET and
press OK.
PLAY
OK
2 Press M/m to set the hour.
PLAY
OK
3 Press , to select the minutes and
PLAY
OK
set the minutes by pressing M/m.
10
 Loading...