

Sony PM0862 User Manual
Important Information
Before you use your device, please read the
Important
Information
provided in your device regarding warranty,
safety and handling information.
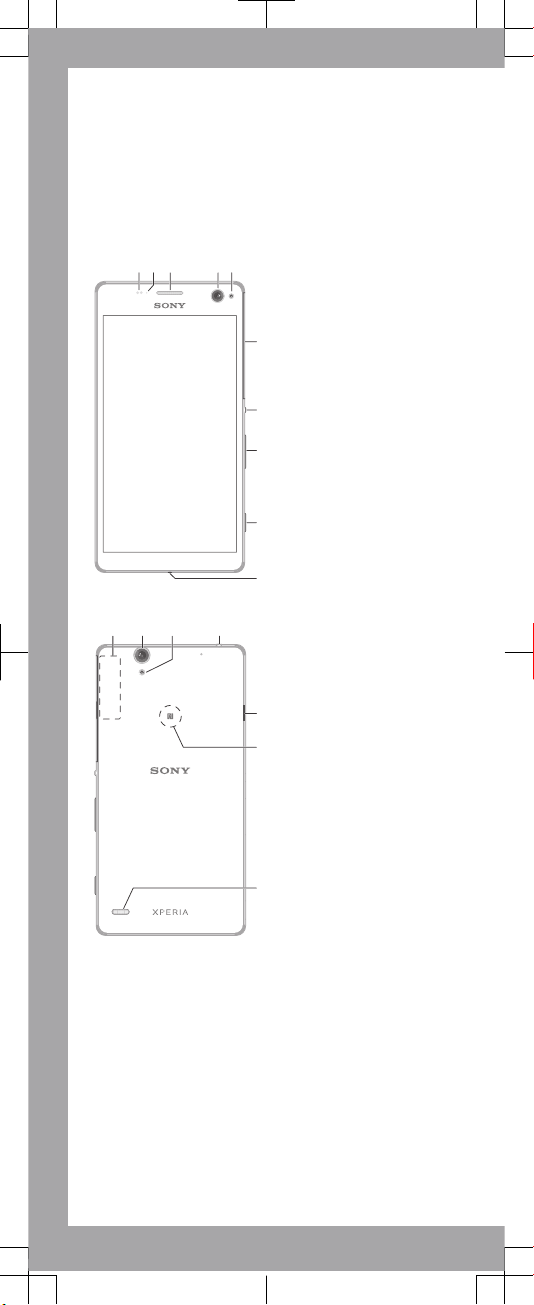
Overview
1 3 4 5
6
7
8
9
10
2
1211 1413
15
16
17
1. Proximity/Light sensor
2. Charging/Notification
light
3. Ear speaker
4. Front camera lens
5. Front camera flash
6. Nano SIM/Memory
card slot cover
7. Power key
8. Volume/Zoom key
9. Camera key
10. Microphone
11. Wi-Fi/Bluetooth/GPS
antenna area
12. Main camera lens
13. Main camera light
14. Headset jack
15. Charger/USB cable port
16. NFC™ detection area
17. Loudspeaker
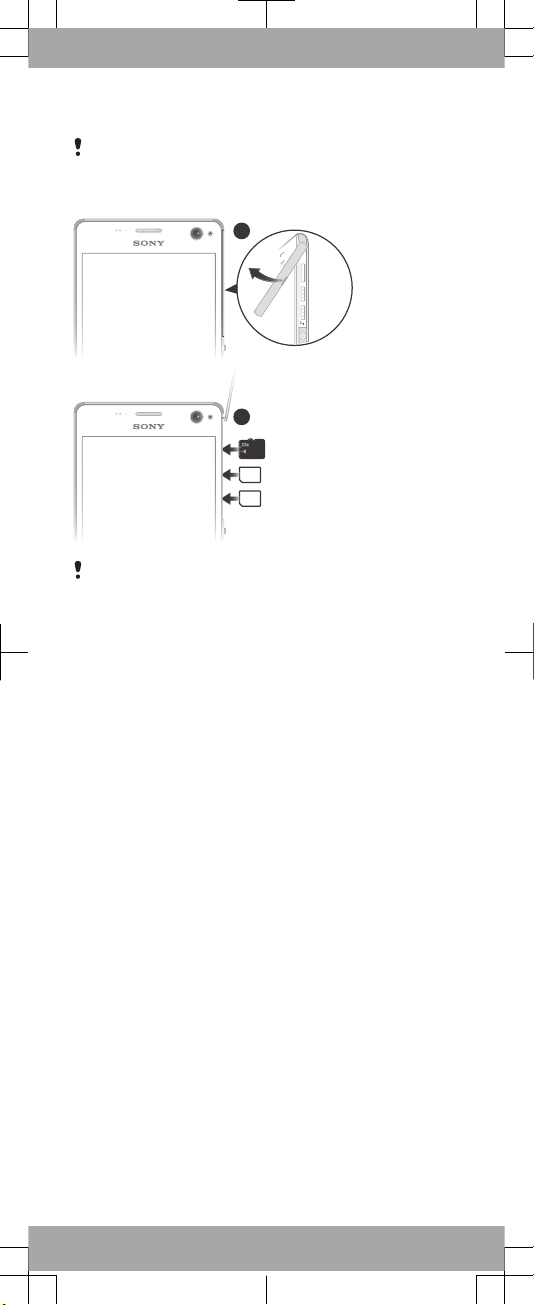
Assembly
Be careful not to lift up the back cover of the device by
accident when detaching the cover for the nano SIM and
memory card slots. The back cover should not be removed
in any circumstances.
1
2
Don’t confuse the nano SIM card slot with the memory
card slot. Inserting a card in the wrong slot could damage
both the card and your device.
To insert the nano SIM cards
1
Detach the cover for the nano SIM card and memory card
slots.
2
With the gold coloured contacts facing down, insert the
nano SIM card (or cards) into the relevant nano SIM card
slot (or slots).
3
Re-attach the cover.
To insert the memory card
1
Detach the cover for the nano SIM card and memory card
slots.
2
With the gold coloured contacts facing down, insert the
memory card into the memory card slot, then re-attach the
cover.
Basics
Turning on the device
Make sure that the battery is charged for at least 30 minutes
before you turn on the device for the first time.
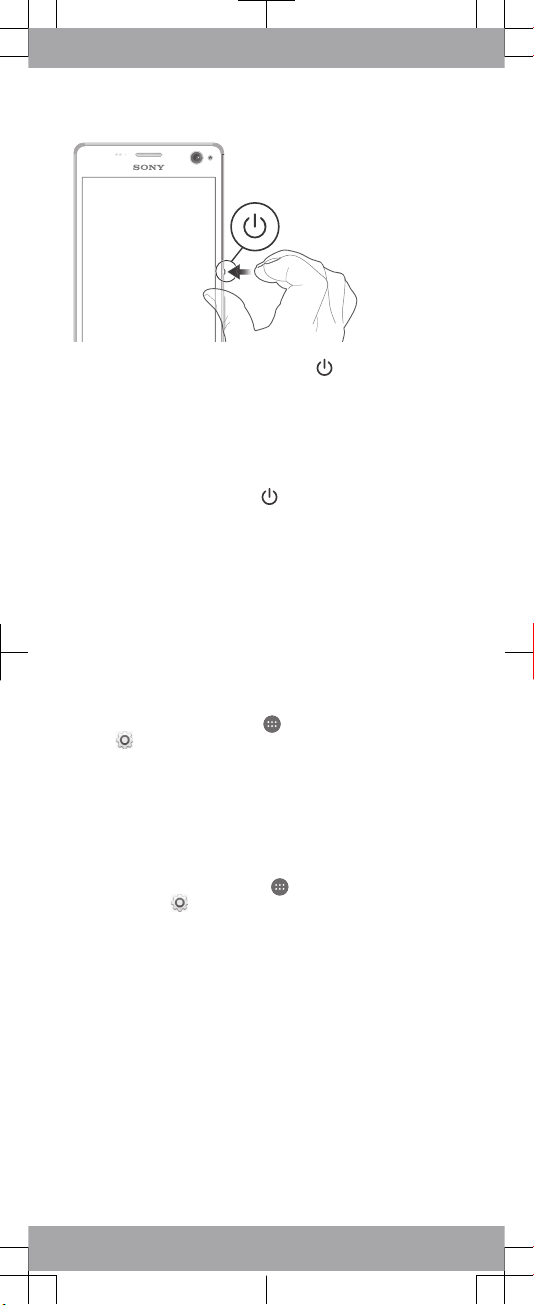
To turn on the device
1
Press and hold down the power key
until the device
vibrates.
2
Wait a while for the device to start.
Waking up the screen
To activate the screen
•
Briefly press the power key
.
Setting up your device
Setup guide
The first time you start your device, a setup guide opens to
help you configure basic settings, sign in to some accounts
(for example, your Google™ account), and personalise your
device. You can also manually access the setup guide at a
later stage.
To access the setup guide manually
1
From the Home screen, tap .
2
Tap > Setup guide.
Accessing settings
View and change settings for your device from the Settings
menu. The Settings menu is accessible from both the
Application screen and the Quick settings panel.
To access your device settings
1
From your Home screen, tap .
2
Find and tap .
Transferring your contacts
Xperia™ Transfer is an application that helps you to collect
contacts from your old device and transfer them to your new
device. Xperia™ Transfer, which you can access from within
the PC Companion and the Sony Bridge for Mac computer
programs, supports mobile devices that run on several
operating systems, including iOS, Android™, Windows® and
BlackBerry™.
To use Xperia™ Transfer, you need:
•
An Internet-connected computer.
•
A USB cable for your old device.
•
A USB cable for your new Android™ device.
•
Your old device.
•
Your new Android™ device.
 Loading...