

Sony PM-0764 User Guide
Startup guide
Xperia® T2 Ultra
D5316
1279-8618.1
Welcome
Important Information
Before you use your device, please read the
Important
Information
provided in your device regarding warranty,
safety and handling information.
Assembly
Please use the SIM card included in the box. This new
card will allow you to use the Wi-Fi Calling feature, ISIS
Mobile Wallet™ feature and other enhanced device
features.
For help transferring contacts from your previous SIM
card, please ask a retail store representative to help you.
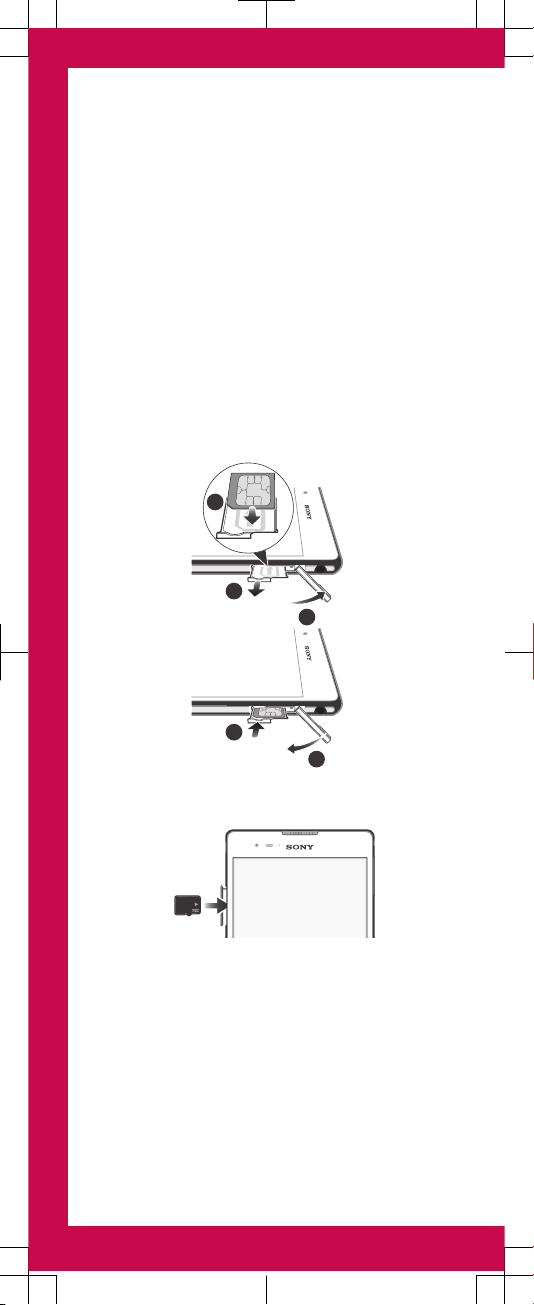
To insert the micro SIM card
1
2
3
5
4
To insert a memory card

Basics
Overview
14
5
8
9
10
2
7
6
3
11 1312
17
16
15
14
1. Front camera lens
2. Proximity sensor/
Light sensor
3. Charging light/
Notification light
4. Speaker
5. Headset jack
6. Micro SIM card slot
cover
7. Power key
8. Volume/Zoom key
9. Camera key
10. Microphone
11. Main camera lens
12. Camera light
13. Second microphone
14. Charger/USB port cover
15. NFC™ detection area
16. Memory card slot cover
17. Loudspeaker
Use the accessories provided with your device, or
other compatible accessories for optimal
performance.
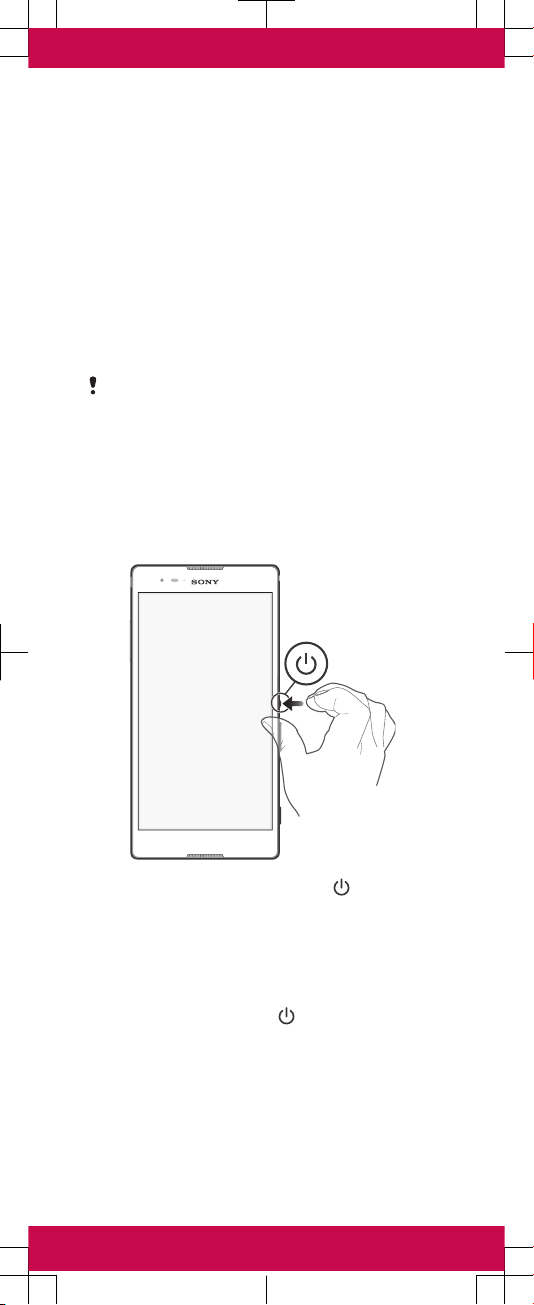
Turning on the device
Make sure that the battery is charged for at least 30
minutes before you turn on the device for the first time.
To turn on the device
1
Press and hold down the power key until the
device vibrates.
2
Wait a while for the device to start.
Waking up the screen
To activate the screen
•
Briefly press the power key .
To unlock the screen
•
Place a finger on the lower part of the screen and
swipe up or down.
Setting up your
device
What is Android™?
Android is your device's operating system. Since
Android is developed by Google™, your device is
preloaded with several Google™ services, such as
Google Maps™ and Google™ web search. To use
some of the services provided by Google™, you need
a Google account.
Android provides backup options through Gmail™
account sync to restore contacts, Wi-Fi settings, and
app data to/from Android devices.
Google™ account
With a Google™ account, you can use Gmail™ to send
emails, Hangouts™ to chat with friends, and Google
Play™ to download applications and games, music,
movies and books.
To set up a Google™ account on your device
1
From your Home screen, tap .
2
Find and tap Settings > Add account > Google.
3
Follow the registration wizard to create a Google™
account, or sign in if you already have an account.
You can also sign in to or create a Google™
account from the setup guide the first time you
start your device. Or you can go online and create
an account at
www.google.com/accounts
.
Basic settings
The first time you start your device, a setup guide
explains basic device functions and helps you enter
essential settings. You can also access the setup guide
later.
To access the setup guide manually
1
From the Home screen, tap .
2
Tap Settings > Setup guide.
Transferring content
to your new device
Transferring content (such as contacts, messages,
photos and video clips) to your new device can
sometimes be complicated, but help is available. You
can transfer content from several device brands,
including iPhone, Samsung, HTC and Nokia. You
need:
•
An Internet-connected PC or Apple® Mac
®
computer.
•
A USB cable for your old device.
•
A USB cable for your new Android™ device.
•
Your old device and new Android™ device.
Get started transferring your
contacts
Sony's migration wizard, called Xperia Transfer™,
helps reduce the barriers that consumers face when
moving the content (contacts, photos, video clips,
messages, music and more) from their old phone to
their new Xperia® smartphone and is part of the latest
versions of the PC Companion and Bridge for Mac
software.
If you are a PC user, use the PC Companion program
to transfer your contacts. It's free, and the installation
files are already saved on your new device. PC
Companion also offers a range of other features,
including help to update your device software. For
Apple® Mac® computer users, the Sony™ Bridge for
Mac application is available to help you transfer your
contacts. It's also free and downloadable from
www.sonymobile.com/support
.
To install PC Companion
1
New device: Turn on your new Android™ device and
connect it to a PC using a USB cable.
2
New device: Tap Install to install PC Companion on
the PC.
3
Computer: If a popup window appears to notify you
about available PC software, select
Run Startme.exe
.
4
Computer: Click
Install
to start the installation and
then follow the instructions to complete the
installation.
To install Sony™ Bridge for Mac
1
Using your Apple Mac computer, go to
www.sonymobile.com/support
, then search for and
download the Sony™ Bridge for Mac application to a
folder on the computer.
2
After the download is complete, open the folder and
double-click the
Sony Bridge for Mac.dmg
file to
start the installation.
3
Follow the instructions on your Apple® Mac
®
computer to complete the installation.
To transfer content to your new Xperia
®
smartphone
1
Make sure that PC Companion is installed on your
PC or that Sony™ Bridge for Mac application is
installed on your Apple® Mac® computer.
 Loading...