

Page 1
Startup guide
Xperia™ SP
M35c
Sony Mobile Communications AB
SE-221 88 Lund, Sweden
www.sonymobile.com
Page 2
Welcome
Important Information
Before you use your device, please read the Important
Information provided in your device or in the box.
Assembly
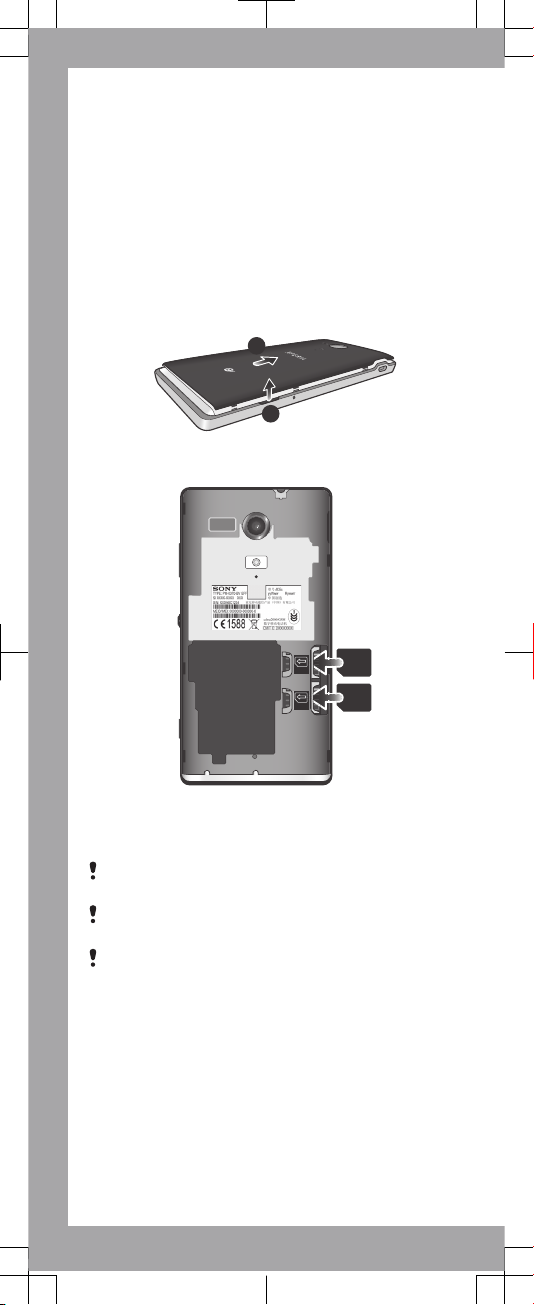
To remove the back cover
1
2
To insert the micro UIM and micro SIM cards
OFF
CTC
GSM
•
Insert the micro UIM card into the CTC card slot, and
insert the micro SIM cards into the GSM card slot with
the gold-coloured contacts facing down.
The micro UIM card cannot work if it is inserted in the
GSM card slot, and vice versa.
Please do not plug or unplug the cards when the
device is turned on!
Your phone requires a micro UIM card and a micro SIM
card. Inserting an incompatible UIM/SIM card in the
card slot could damage the card or your phone, and
Sony does not warrant and will not be responsible for
any damage caused by use of incompatible or modified
UIM/SIM cards.
Page 3
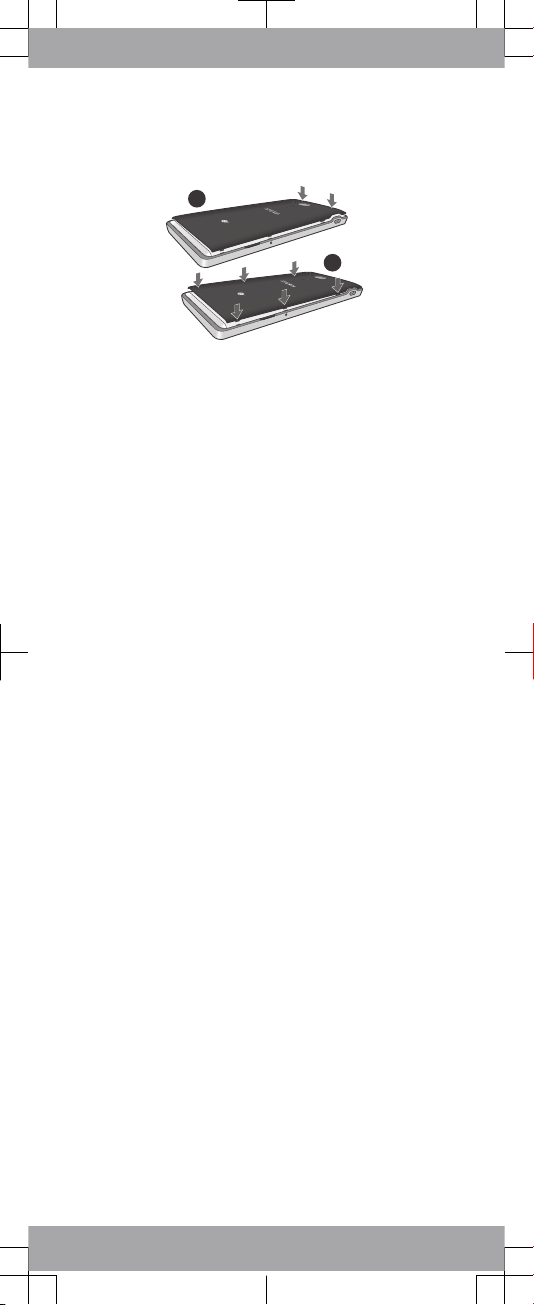
To attach the back cover
1
2
Page 4
Basics
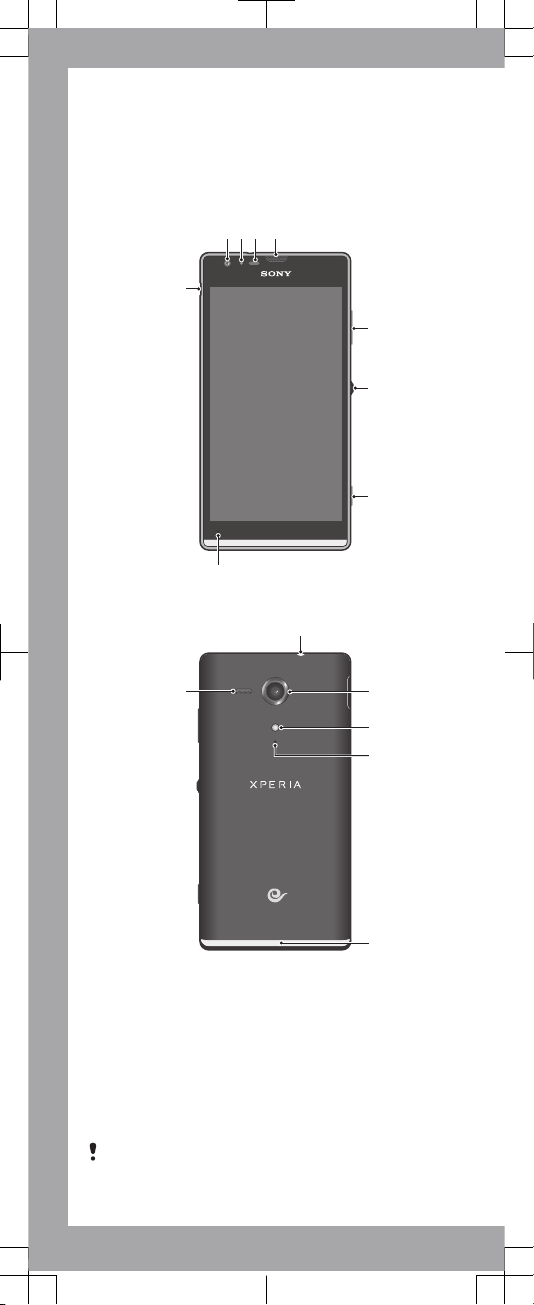
Device overview
1 2 3 4
8
5
7
6
9
10
11
12
14
13
15
1. Front camera lens
2. Light sensor
3. Proximity sensor
4. Ear speaker
5. Volume/Zoom key
6. Power key
7. Camera key
8. Main microphone
9. Port for charger/USB cable
10. Headset jack
11. Camera lens
12. Camera light
13. Second microphone
14. Illuminating transparent band
15. Speaker
Use the accessories provided with your device, or other
compatible accessories, for optimal performance.
Page 5
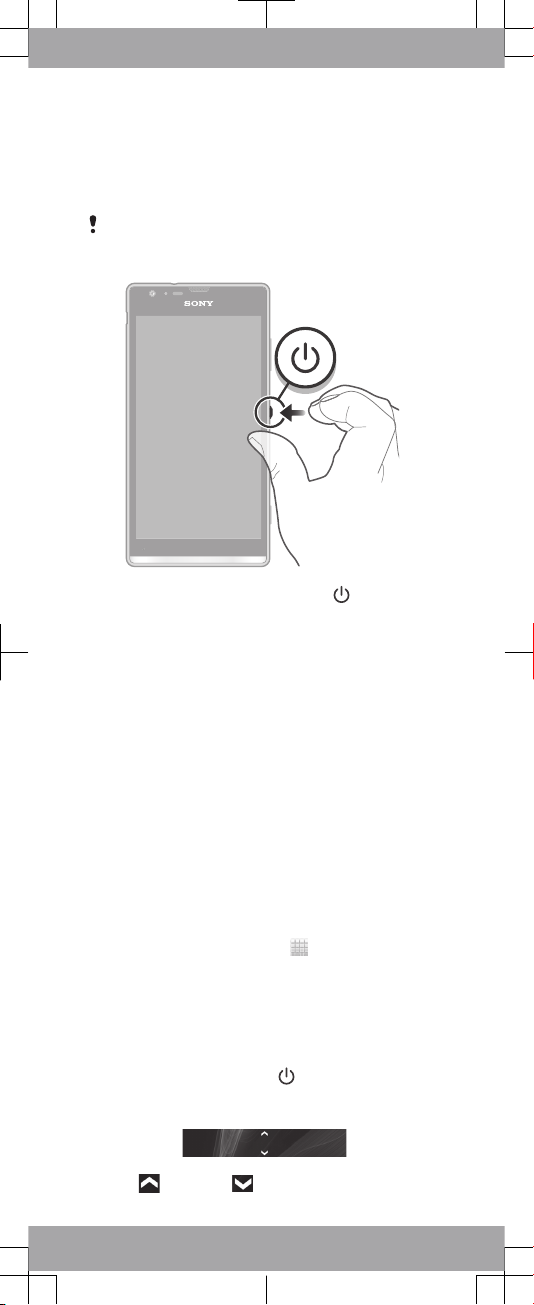
Turning on the device
To turn on the device
Make sure that the battery is charged for at least 30
minutes before you turn on the device for the first
time.
1
Press and hold down the power key until the
device vibrates.
2
Wait a while for the device to start.
Illuminating transparent
band
The transparent band on your phone illuminates when
you use certain applications, when an incoming call
arrives, and when an alarm sounds. It then fades out
after a few seconds to save power.
The colour of the illuminated band varies depending on
the theme you are using. When you view photos in
Gallery, the colour changes according to the photo you
are viewing. When you play music with the music
player, the colour changes every time a new album
cover is displayed. You can adjust these various light
effects.
To set light effects for your device
1
From your Home screen, tap
.
2
Tap Settings > Display > Light effects.
3
Select the effects that you want to use.
Waking up the screen
To activate the screen
•
Briefly press the power key .
To unlock the screen
•
Drag up or drag down.
Page 6
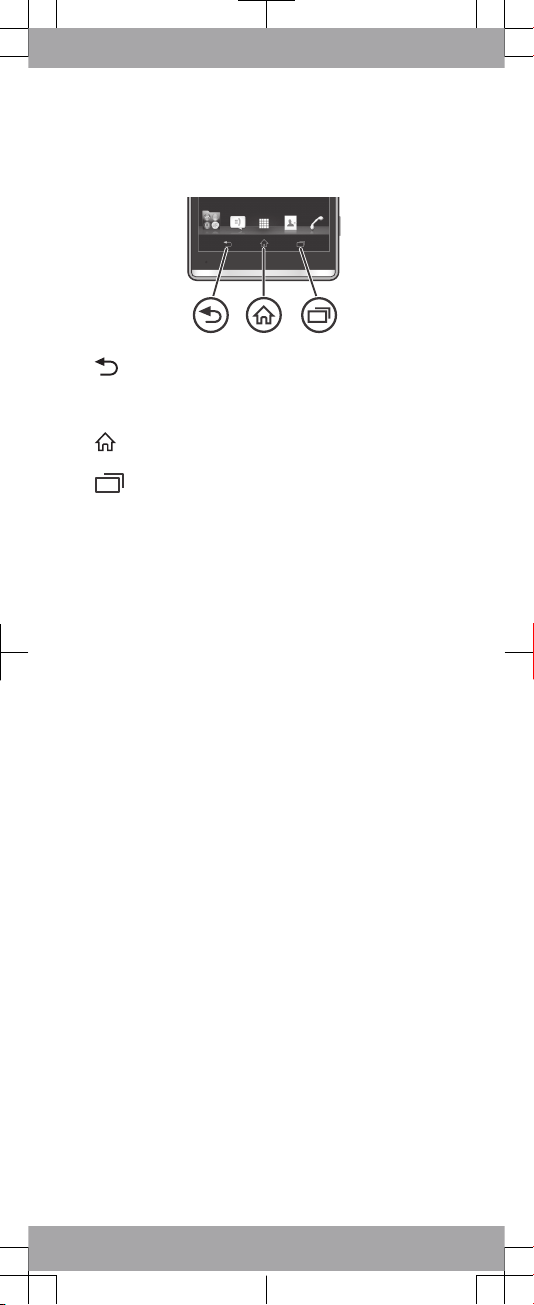
Using the keys
Back
•
Go back to the previous screen
•
Close the on-screen keypad, a dialog box,
an options menu, or the Notification panel
Home
•
Go to the Home screen
Task
•
Tap to open a window showing your most
recently used applications and a small apps
bar
Page 7
Set up your device
Android™ – what and why?
An Android™ phone can perform many of the same
functions as a computer and you can customise it to your
own needs. For example, you can add and delete
applications, or enhance existing applications to improve
functionality. You can also integrate applications on your
Android™ phone with other applications and with online
services that you use.
What is different about Android?
Android™ is an open system, which means that you're not
limited to using applications and services from only one
provider.
Basic settings
The first time you start your device, a setup guide explains
basic device functions and helps you enter essential
settings. You can also access the setup guide later.
To access the setup guide manually
1
From the Home screen, tap
.
2
Tap Settings > Setup guide.
Page 8
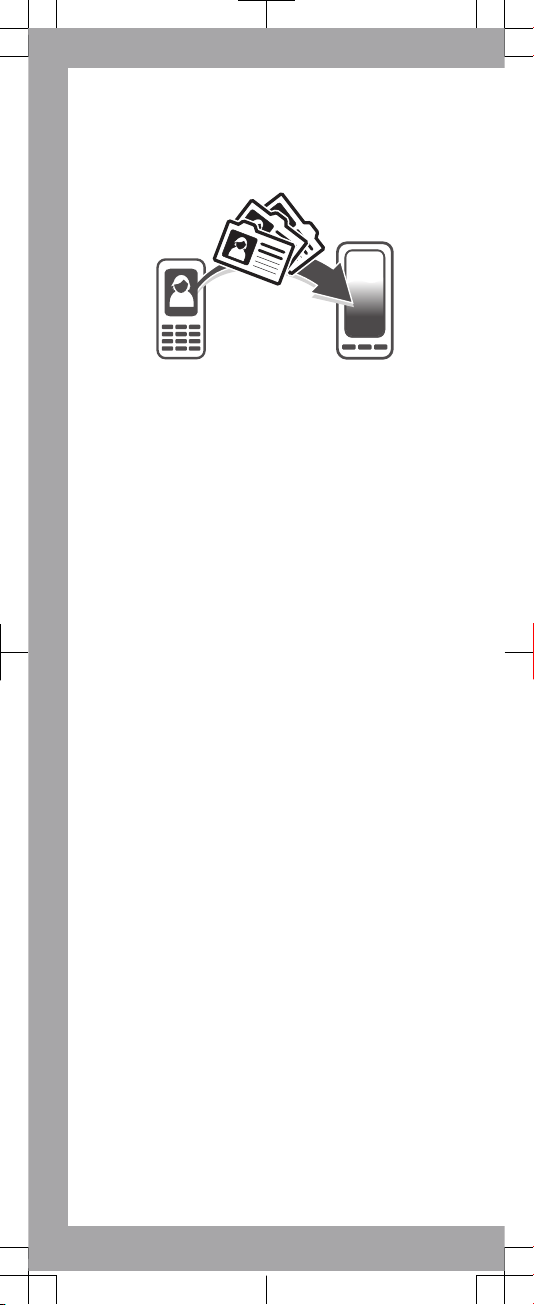
Transferring contacts
to your new device
Transferring contacts to your new device can sometimes
be complicated, but help is available.
You can transfer contacts from several device brands,
including iPhone, Samsung, HTC and Nokia.
You need:
•
An Internet-connected PC running Windows®
•
A USB cable for your old device
•
A USB cable for your new Android™ device
•
Your old device
•
Your new Android™ device
Get started transferring your
contacts
Use the PC Companion program to transfer your contacts.
It's free, and the installation files are already saved on your
new device. PC Companion also offers a range of other
features, including help to update your device software.
To install PC Companion
1
New device: Turn on your new Android™ device and
connect it to a PC using a USB cable.
2
New device: Tap Install to install PC Companion on the
PC.
3
Computer: If a popup window appears to notify you
about available PC software, select Run Startme.exe.
4
Computer: Click Install to start the installation and then
follow the instructions to complete the installation.
To transfer contacts to your new device using
PC Companion
1
Make sure that PC Companion is installed on your PC.
2
Open the PC Companion program on the PC, then click
Contacts Setup and follow the instructions to transfer
your contacts.
Page 9
Finding your way
Home screen
The Home screen is your gateway to the main features on
your device. You can customise your Home screen with
widgets, shortcuts, folders, themes, wallpaper and other
items.
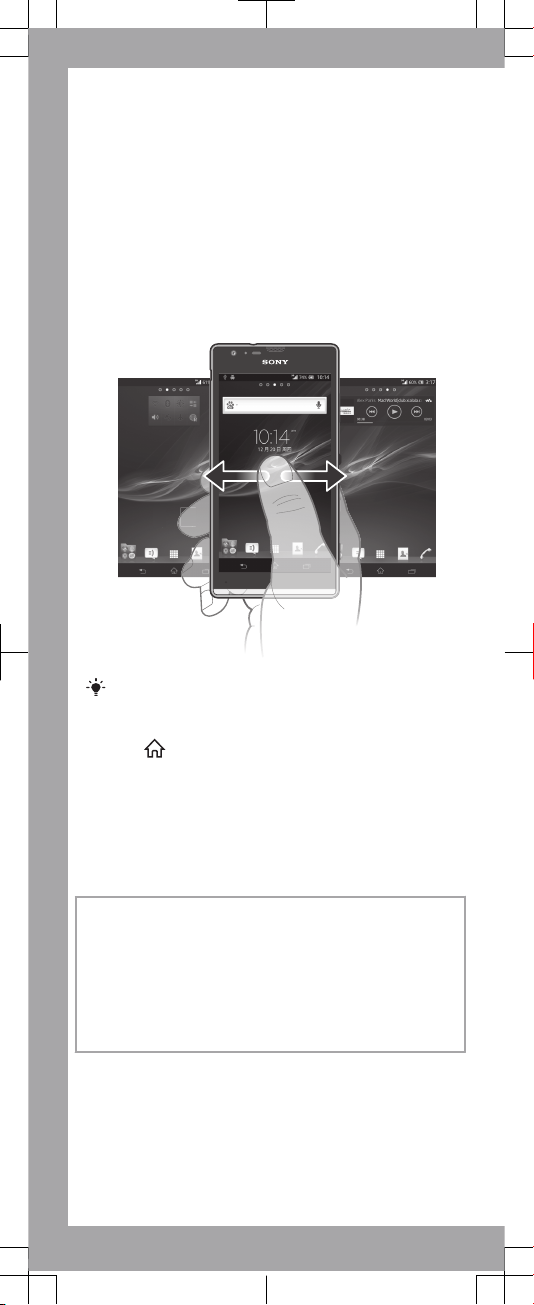
The Home screen extends beyond the regular screen
display width, so you need to flick left or right to view
content in all of the Home screen's panes.
The items in the bar at the bottom of the screen are
always available for quick access.
To go to the Home screen
•
Press .
To browse the Home screen
•
Flick right or left.
To change your Home screen wallpaper
1
Touch and hold an empty area on your Home screen
until the device vibrates.
2
Tap Wallpapers and select an option.
Widgets
Widgets are small applications that you can use directly on
your Home screen. For example, the Music player widget
allows you to start playing music directly.
Some widgets are resizable, so you can expand them to
view more content or shrink them to save space on your
Home screen.
Application screen
The Application screen, which you open from your Home
screen, contains the applications that come pre-installed
on your device as well as the applications you download.
The Application screen extends beyond the regular screen
width, so you need to flick left and right to view all content.
Page 10
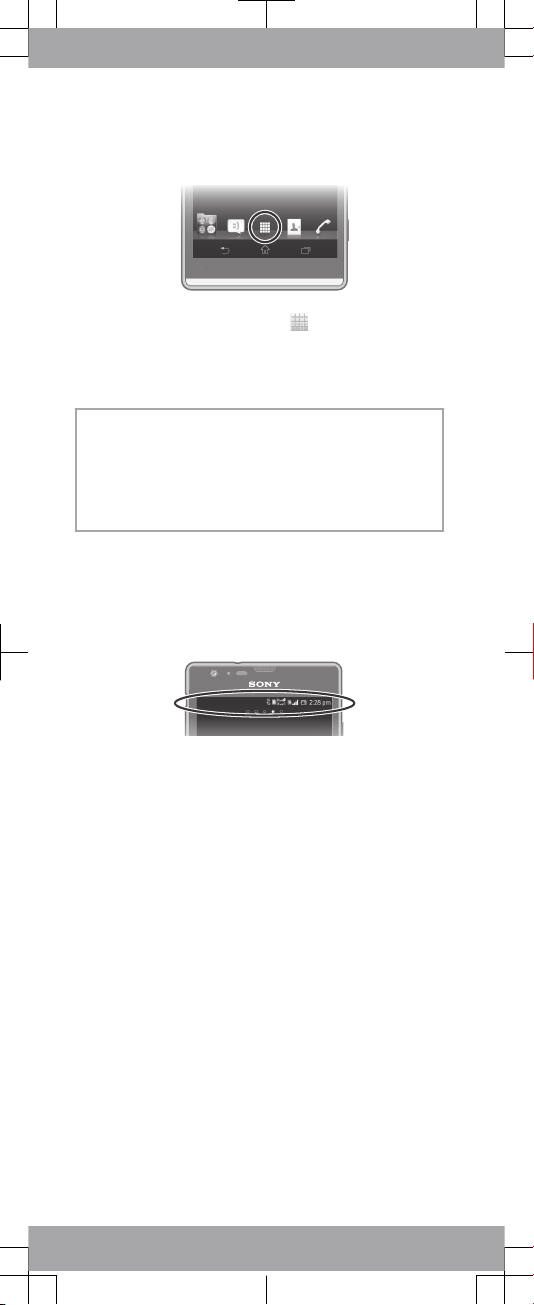
To open the Application screen
•
From your Home screen, tap .
To open an application
•
From your Home screen or the Application screen,
tap the application.
Applications
An application is a phone program that helps you
perform a task. For example, there are applications to
make calls, take photos and download more
applications.
Status and notifications
The status bar at the top of your screen shows what's
going on in your device. For example, new message
and calendar notifications appear here.
Checking notifications and ongoing
activities
You can drag down the status bar to open the
Notification panel and get more information. For
example, you can use the panel to open a new
message or view a calendar event. You can also open
some applications that run in the background, such as
the music player.
Page 11
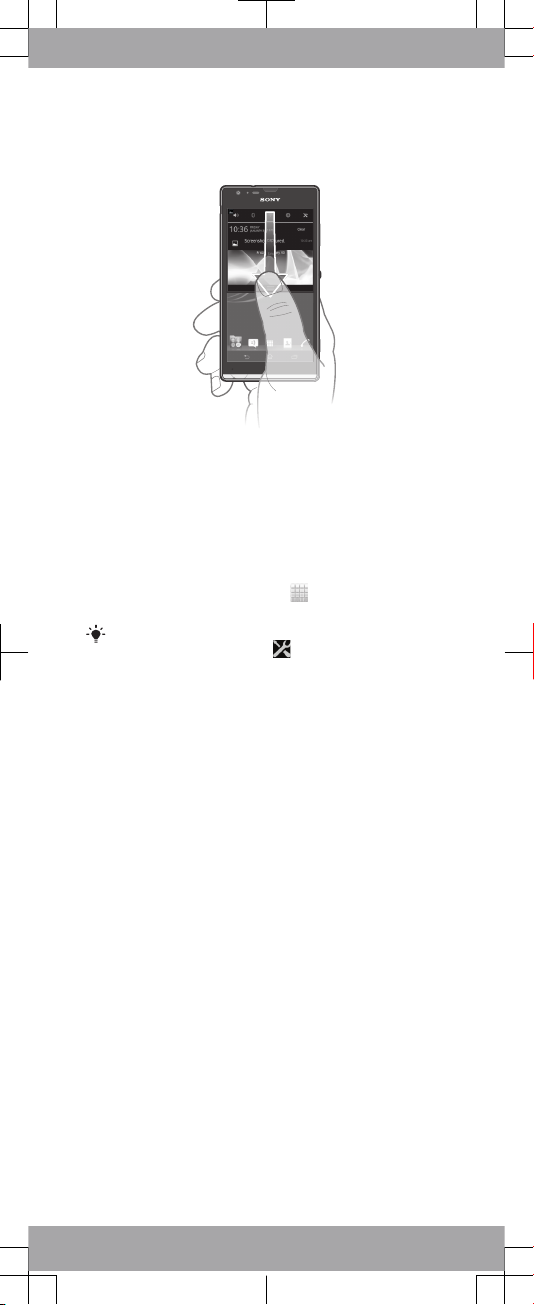
To open the Notification panel
•
Drag the status bar downwards.
Settings menu
View and change settings for your device from the
Settings menu.
To access your device settings
1
From your Home screen, tap .
2
Tap Settings.
You can also drag the status bar downwards on
the Home screen and tap to access your device
settings.
Page 12
More basics
Calling
To make a call by dialling
1
From your Home screen, tap
.
2
Find and tap Phone.
3
Enter the number of the recipient and tap with an
icon or . To delete a number, tap .
To end a call
•
Tap .
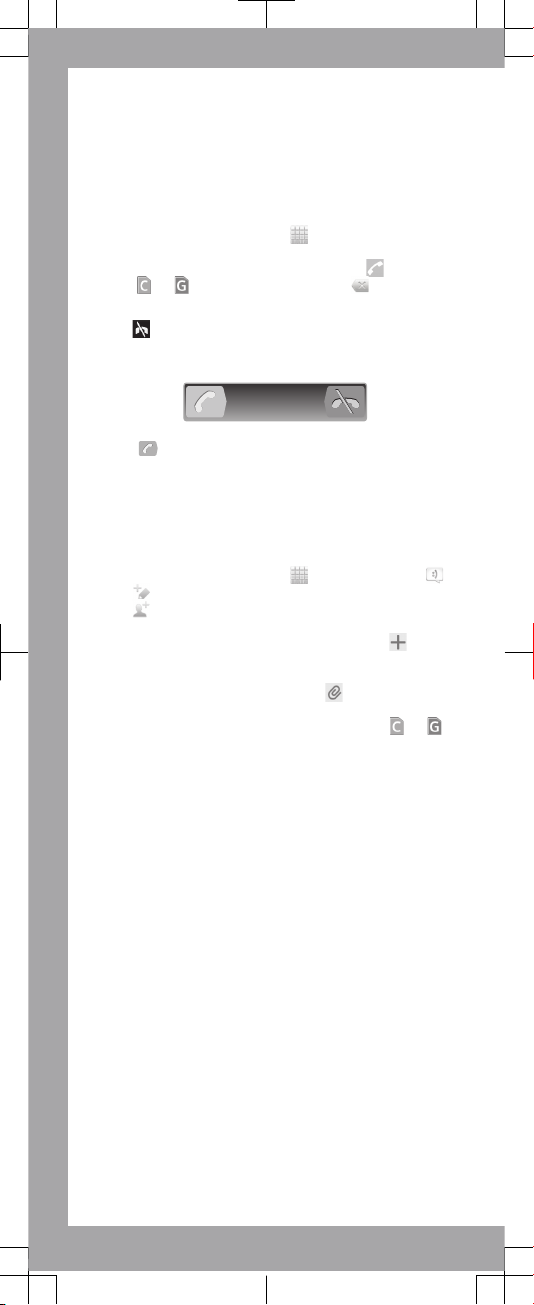
To answer a call
•
Drag to the right across the screen.
Multimedia and text
messaging
To create and send a message
1
From your Home screen, tap , then find and tap .
2
Tap .
3
Tap , then select the desired recipients from the
Contacts list. If the recipient is not listed as a contact,
enter the contact's number manually and tap .
4
When you are finished adding recipients, tap Done.
5
Tap Write message and enter your message text.
6
If you want to add a media file, tap and select an
option.
7
To send the message, tap Send with an icon or .
Page 13
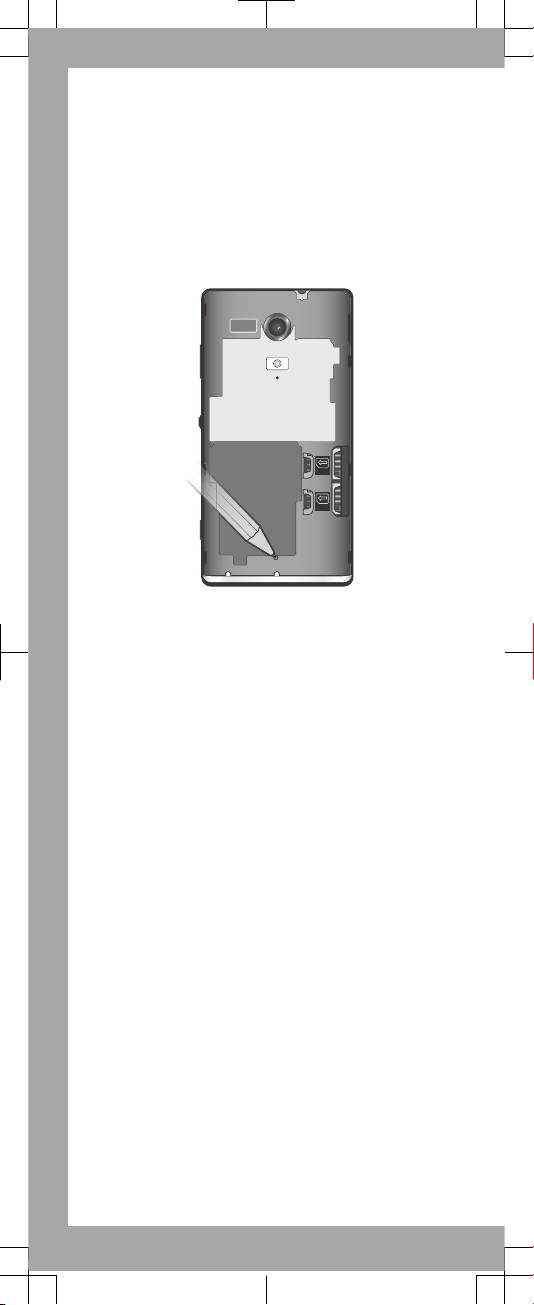
Troubleshooting
My device is not responding
If your device hangs, or if you cannot restart it normally,
you can force the device to shut down.
To force the device to shut down
OFF
CTC
GSM
1
Remove the back cover.
2
Press and hold down the OFF button using the tip of a
pen or a similar object. The device turns off
automatically.
The device does not
recognise my wired headset
•
Make sure the wired headset that you are using
complies to the CTIA standard. Your device supports the
CTIA standard, and may not be fully compatible with
other standards such as OMTP.
•
If you have a wireless headset that is compatible with
your device, try using that instead.
Page 14
Legal information
Sony M35c
Google Play™ is not available in all countries. Some of the services and features
described in this Startup guide are not supported in all countries/regions or by all
networks and/or service providers in all areas. Without limitation, this applies to
the GSM International Emergency Number 112. Please contact your network
operator or service provider to determine availability of any specific service or
feature and whether additional access or usage fees apply.
This Startup guide is published by Sony Mobile Communications AB or its local
affiliated company, without any warranty. Improvements and changes to this
Startup guide necessitated by typographical errors, inaccuracies of current
information, or improvements to programs and/or equipment, may be made by
Sony Mobile Communications AB at any time and without notice. Such changes
will, however, be incorporated into new editions of this Startup guide.
© 2012 Sony Mobile Communications AB. All rights reserved.
Your device has the capability to download, store and forward additional content,
e.g. ringtones. The use of such content may be restricted or prohibited by rights of
third parties, including but not limited to restriction under applicable copyright
laws. You, and not Sony, are entirely responsible for additional content that you
download to or forward from your device. Prior to your use of any additional
content, please verify that your intended use is properly licensed or is otherwise
authorized. Sony does not guarantee the accuracy, integrity or quality of any
additional content or any other third party content. Under no circumstances will
Sony be liable in any way for your improper use of additional content or other third
party content.
This Startup guide may reference services or applications provided by third
parties. Use of such programming or services may require separate registration
with the third party provider and may be subject to additional terms of use. For
applications accessed on or through a third-party website, please review such
websites’ terms of use and applicable privacy policy in advance. Sony does not
warrant or guarantee the availability or performance of any third-party websites or
offered services.
Remove the back cover to see regulatory information such as the CE mark.
All product and company names mentioned herein are the trademarks or
registered trademarks of their respective owners. Any rights not expressly granted
herein are reserved. All other trademarks are property of their respective owners.
Visit www.sonymobile.com for more information.
All illustrations are for illustration only and may not accurately depict the actual
device.
This product is protected by certain intellectual property rights of Microsoft. Use
or distribution of such technology outside of this product is prohibited without a
license from Microsoft.
Product compliance: This product has been manufactured by or on behalf of Sony
Mobile Communications, Mobilvägen, SE-221 88 Lund, Sweden. Inquiries related
to product compliance based on national legislation shall be addressed to Sony
Mobile Quality Officer, Sony Mobile Communications AB, Mobilvägen, SE-221 88
Lund, Sweden. For any service or guarantee matters, please refer to the contact
details provided in the separate service or guarantee documents.
Note:
Sony advises users to backup their personal data information.
Electronic Warranty Card:
an SMS will be sent automatically by the phone (The SMS expense is upon the
mobile fee bill from the operator) to the server of Sony Mobile Communications
(China) Co., Ltd. once the phone is in use. Sony and any other 3rd party will not
charge any additional cost of it. The relevant information of the SMS will be stored
and used for after-sales service management by Sony, such as consumer does
not needed to provide service center the invoice and the relevant warranty card to
enjoy the Refund, Replace and Repair depend on the real status.
To use some pre-loaded applications (e.g. TrackID, MSN) you need first activate
data service. Using data services (GPRS or 3G services) may incur data traffic fee.
Please contact your network operator for expense details.
Please visit www.sonymobile.com to get the latest version of this User's Guide.
In order to provide more convenient after-sale services,
Page 15
Our support to you –
Xperia™ Care
User guide
A User guide for your device is available at
www.sonymobile.com.
Support in your device
Get user support directly in your device using the Support
application.
To access the support application
1
From your Application screen, find and tap .
2
Find and tap the required support item.
Support on the web
Visit www.sonymobile.com to access a range of support
and get the most from your device.
Customer support
Customer support – if all else fails. Access the relevant
support number at www.sonymobile.com by clicking the
Contact us link at the bottom of the page.
Learn more
Learn more about how we can support you with Xperia™
Care at www.sonymobile.com/support.
www.sonymobile.com
 Loading...