

Page 1
Help Guide
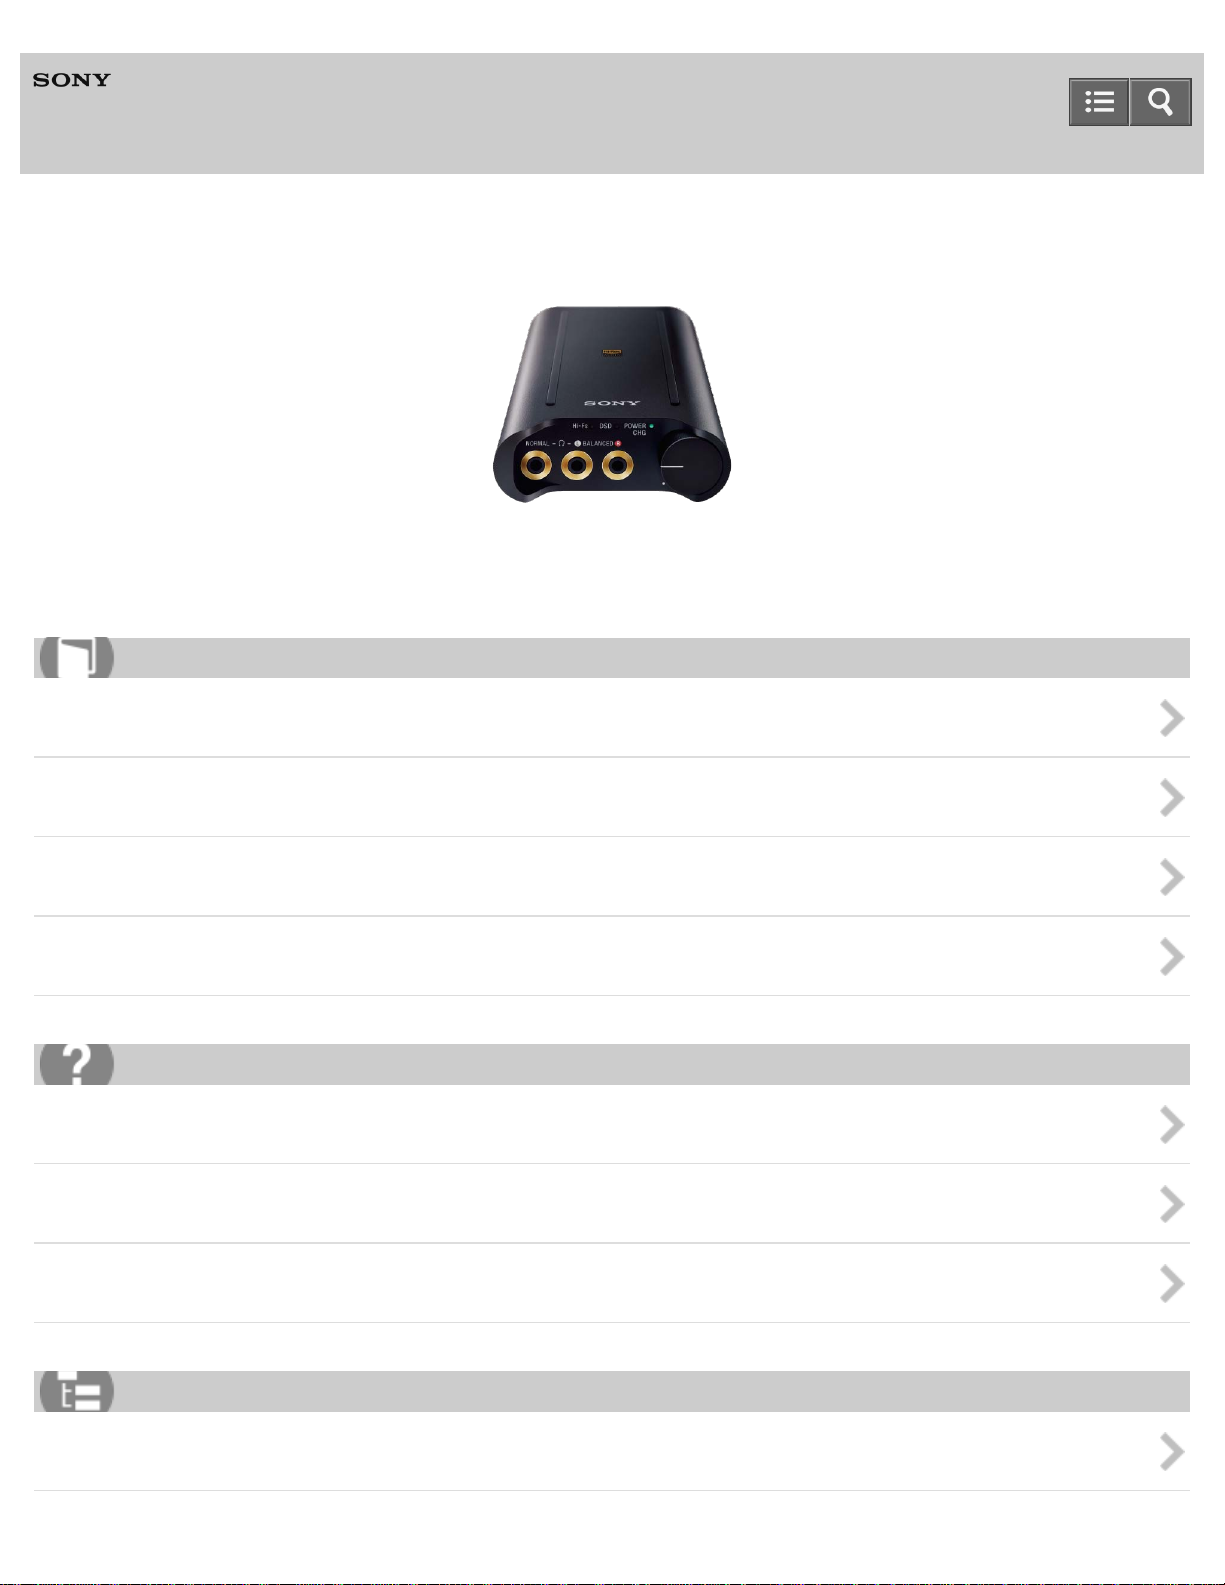
Portable Headphone Amplifier
PHA-3
The following explains how to use the headphone amplifier. Select a topic from the navigation pane on the left.
How to Use
Getting Started
Making connections
Listening to music
Information
Troubleshooting
Troubleshooting
Headphone amplifier
Connected device
List of Topics
How to Use
Page 2

Troubleshooting
4-547-524-11(4)
Copyright 2014 Sony Corporation
Page 3

Table Of Contents
TOC-1
Help Guide PHA-3 i...........................................................................................................................
Getting Started 1...............................................................................................................................
Included items 11........................................................................................................................
Checking the included items 35.............................................................................................
About the supplied manuals 36.............................................................................................
How to use the silicone belts 37............................................................................................
Overview 12.................................................................................................................................
What you can do with the headphone amplifier 39................................................................
About High-Resolution Audio format files 40.........................................................................
About the balanced connection 41........................................................................................
Parts and controls 13...................................................................................................................
Parts and controls 42.............................................................................................................
About the indicators 44..........................................................................................................
Before connecting to a computer 14............................................................................................
Installing the driver software on a Windows computer 46.....................................................
Installing “Hi-Res Audio Player” on a computer 48...............................................................
Power source 15..........................................................................................................................
Charging the battery via a computer 49.................................................................................
Charging the battery via an AC outlet 51...............................................................................
Turning the power on 53........................................................................................................
Turning the power off 54........................................................................................................
Checking the battery level 55................................................................................................
Making connections 2........................................................................................................................
Connecting to a Windows computer 56.......................................................................................
Connecting to a Mac 58...............................................................................................................
Connecting to a WALKMAN 18...................................................................................................
Connecting to a digital output supported WALKMAN 60.......................................................
Connecting to WALKMAN models unsupported by digital-out 62.........................................
Connecting to an Xperia 19.........................................................................................................
Connecting to a digital output supported Xperia 63...............................................................
Connecting to Xperia models unsupported by digital-out 65.................................................
Connecting to an iPhone/iPad/iPod 66........................................................................................
Connecting to an optical audio output supported device 21........................................................
Connecting to a PCM recorder, etc. 68.................................................................................
Connecting to an analog output device 69..................................................................................
Listening to music 3...........................................................................................................................
Headphones 23...........................................................................................................................
Listening to music with headphones 71.................................................................................
Page 4

Listening to music with headphones via balanced connection 74.........................................
TOC-2
Setting the sound quality (DSEE HX) 77...............................................................................
Amplifier or active speaker 24.....................................................................................................
Listening to music with an amplifier or active speaker 78......................................................
Information 4......................................................................................................................................
About the indications and settings 25..........................................................................................
About the indicators 44..........................................................................................................
Summary of settings and connections 80..............................................................................
Compatible device 26..................................................................................................................
Compatible WALKMAN models 82........................................................................................
Compatible Xperia models 83................................................................................................
Compatible iPhone/iPad/iPod models 84..............................................................................
Compatible operating systems (Windows) 85.......................................................................
Compatible operating systems (Mac) 86...............................................................................
Compatible balanced connection headphones 87.................................................................
Notes on use 27..........................................................................................................................
Precautions 88.......................................................................................................................
Trademarks 89............................................................................................................................
Support website 29......................................................................................................................
Customer support websites 90..............................................................................................
Troubleshooting 30............................................................................................................................
What can I do to solve a problem? 91.........................................................................................
Headphone amplifier 6......................................................................................................................
Power 31.....................................................................................................................................
Unable to turn on the headphone amplifier/The battery life becomes short. 92....................
Unable to charge the battery. 93...........................................................................................
Charging time is too long. 94.................................................................................................
Sound 32.....................................................................................................................................
There is no sound. 95............................................................................................................
The sound is low. 96..............................................................................................................
The sound is distorted. 97.....................................................................................................
Noise is generated. 98...........................................................................................................
Connected device 7...........................................................................................................................
Computer 33................................................................................................................................
Unable to install the driver software on a Windows computer. 99.........................................
When connecting to a computer, there is no sound or the sound is not
played back properly. 100......................................................................................................
Sound is interrupted when connecting to the computer. 101.................................................
Other device 34...........................................................................................................................
The remote control of the headset does not work. 102.........................................................
Page 5

The microphone of the headset does not work. 103..............................................................
TOC-3
The connected radio or TV cannot receive a signal/Noise is generated. 104.......................
How to Use 8.....................................................................................................................................
Troubleshooting 10............................................................................................................................
Page 6
Help Guide
1
How to Use
Portable Headphone Amplifier
PHA-3
Getting Started
Included items
Overview
Parts and controls
Before connecting to a computer
Power source
4-547-524-11(4)
Copyright 2014 Sony Corporation
Page 7
Help Guide
2
How to Use
Portable Headphone Amplifier
PHA-3
Making connections
Connecting to a Windows computer
Connecting to a Mac
Connecting to a WALKMAN
Connecting to an Xperia
Connecting to an iPhone/iPad/iPod
Connecting to an optical audio output supported device
Connecting to an analog output device
4-547-524-11(4)
Copyright 2014 Sony Corporation
Page 8

Help Guide
3
How to Use
Portable Headphone Amplifier
PHA-3
Listening to music
Headphones
Amplifier or active speaker
4-547-524-11(4)
Copyright 2014 Sony Corporation
Page 9

Help Guide
4
How to Use
Portable Headphone Amplifier
PHA-3
Information
About the indications and settings
Compatible device
Notes on use
Trademarks
Support website
4-547-524-11(4)
Copyright 2014 Sony Corporation
Page 10

Help Guide
5
Troubleshooting
Portable Headphone Amplifier
PHA-3
Troubleshooting
Troubleshooting
4-547-524-11(4)
Copyright 2014 Sony Corporation
Page 11

Help Guide
6
Troubleshooting
Portable Headphone Amplifier
PHA-3
Headphone amplifier
Power
Sound
4-547-524-11(4)
Copyright 2014 Sony Corporation
Page 12

Help Guide
7
Troubleshooting
Portable Headphone Amplifier
PHA-3
Connected device
Computer
Other device
4-547-524-11(4)
Copyright 2014 Sony Corporation
Page 13

Help Guide
8
List of Topics
Portable Headphone Amplifier
PHA-3
How to Use
Getting Started
Included items
Checking the included items
About the supplied manuals
How to use the silicone belts
Overview
What you can do with the headphone amplifier
About High- Resolution Audio format files
About the balanced connection
Parts and controls
Parts and controls
About the indicators
Before connecting to a computer
Installing the driver software on a Windows computer
Installing “Hi -Res Audio Player” on a computer
Power source
Charging the battery via a computer
Charging the battery via an AC outlet
Turning the power on
Turning the power off
Checking the battery level
Making connections
Connecting to a Windows computer
Connecting to a Windows computer
Connecting to a Mac
Connecting to a Mac
Connecting to a WALKMAN
Connecting to a digital output supported WALKMAN
Connecting to WALKMAN models unsupported by digital- out
Connecting to an Xperia
Page 14

Connecting to a digital output supported Xperia
Connecting to Xperia models unsupported by digital-out
9
Connecting to an iPhone/iPad/iPod
Connecting to an iPhone/iPad/iPod
Connecting to an optical audio output supported device
Connecting to a PCM recorder, etc.
Connecting to an analog output device
Connecting to an analog output device
Listening to music
Headphones
Listening to music with headphones
Listening to music with headphones via balanced connection
Setting the sound quality (DSEE HX)
Amplifier or active speaker
Listening to music with an amplifier or active speaker
Information
About the indications and settings
About the indicators
Summary of settings and connections
Compatible device
Compatible WALKMAN models
Compatible Xperia models
Compatible iPhone/iPad/iPod models
Compatible operating systems (Windows)
Compatible operating systems (Mac)
Compatible balanced connection headphones
Notes on use
Precautions
Trademarks
Trademarks
Support website
Customer support websites
4-547-524-11(4)
Copyright 2014 Sony Corporation
Page 15

Help Guide
10
List of Topics
Portable Headphone Amplifier
PHA-3
Troubleshooting
Troubleshooting
Troubleshooting
What can I do to solve a problem?
Headphone amplifier
Power
Unable to turn on the headphone amplifier/The battery life becomes short.
Unable to charge the battery.
Charging time is too long.
Sound
There is no sound.
The sound is low.
The sound is distorted.
Noise is generated.
Connected device
Computer
Unable to install the driver software on a Windows computer.
When connecting to a computer, there is no sound or the sound is not played back properly.
Sound is interrupted when connecting to the computer.
Other device
The remote control of the headset does not work.
The microphone of the headset does not work.
The connected radio or TV cannot receive a signal/Noise is generated.
4-547-524-11(4)
Copyright 2014 Sony Corporation
Page 16

Help Guide
11
How to Use
Portable Headphone Amplifier
PHA-3
Included items
Checking the included items
Check that all items are packed with the headphone amplifier before use.
About the supplied manuals
Refer to the supplied manuals depending on your situation.
How to use the silicone belts
You can fasten a connected device to the headphone amplifier using the silicone belts (supplied).
4-547-524-11(4)
Copyright 2014 Sony Corporation
Page 17

Help Guide
12
How to Use
Portable Headphone Amplifier
PHA-3
Overview
What you can do with the headphone amplifier
Introduction to the main features
About High-Resolution Audio format files
What are High -Resolution Audio format files ?
About the balanced connection
What is the balanced connection?
4-547-524-11(4)
Copyright 2014 Sony Corporation
Page 18

Help Guide
13
How to Use
Portable Headphone Amplifier
PHA-3
Parts and controls
Parts and controls
Introducing the names of switches, jacks and indicators, etc. on the headphone amplifier.
About the indicators
The indicators show the status of the headphone amplifier.
4-547-524-11(4)
Copyright 2014 Sony Corporation
Page 19

Help Guide
14
How to Use
Portable Headphone Amplifier
PHA-3
Before connecting to a computer
Installing the driver software on a Windows computer
When playing the music files on your Windows computer with the headphone amplifier, you need to download and install the
driver software on the computer.
Installing “Hi-Res Audio Player” on a computer
When playing the High-Resolution Audio format files on your computer (Windows/Mac) with the headphone amplifier, you need
to download and install “Hi- Res Audio Player” on the computer.
4-547-524-11(4)
Copyright 2014 Sony Corporation
Page 20

Help Guide
15
How to Use
Portable Headphone Amplifier
PHA-3
Power source
Charging the battery via a computer
Connect the headphone amplifier to a computer using the micro- USB cable (supplied) to charge the battery.
Charging the battery via an AC outlet
The battery can be charged via an AC outlet by using the recommended USB AC adaptor (AC -UD20) (sold separately).
Turning the power on
How to turn the headphone amplifier on.
Turning the power off
How to turn the headphone amplifier off.
Checking the battery level
You can check the battery level with the POWER/CHG indicator.
4-547-524-11(4)
Copyright 2014 Sony Corporation
Page 21

Help Guide
16
How to Use
Portable Headphone Amplifier
PHA-3
Connecting to a Windows computer
Connecting to a Windows computer
You can connect the headphone amplifier to a Windows computer using the micro- USB cable (supplied).
4-547-524-11(4)
Copyright 2014 Sony Corporation
Page 22

Help Guide
17
How to Use
Portable Headphone Amplifier
PHA-3
Connecting to a Mac
Connecting to a Mac
You can connect the headphone amplifier to a Mac using the micro - USB cable (supplied).
4-547-524-11(4)
Copyright 2014 Sony Corporation
Page 23

Help Guide
18
How to Use
Portable Headphone Amplifier
PHA-3
Connecting to a WALKMAN
Connecting to a digital output supported WALKMAN
You can connect the headphone amplifier to a WALKMAN that supports digital output using the digital cable for WALKMAN
(supplied).
Connecting to WALKMAN models unsupported by digital-out
You can connect the headphone amplifier to a WALKMAN, which only supports an analog output, using the stereo mini cable
(supplied).
4-547-524-11(4)
Copyright 2014 Sony Corporation
Page 24

Help Guide
19
How to Use
Portable Headphone Amplifier
PHA-3
Connecting to an Xperia
Connecting to a digital output supported Xperia
You can connect the headphone amplifier to a digital output supported Xperia using the digital cable for Xperia (supplied).
Connecting to Xperia models unsupported by digital-out
You can connect the headphone amplifier to Xperia models, which only supports an analog output, using the stereo mini cable
(supplied).
4-547-524-11(4)
Copyright 2014 Sony Corporation
Page 25

Help Guide
20
How to Use
Portable Headphone Amplifier
PHA-3
Connecting to an iPhone/iPad/iPod
Connecting to an iPhone/iPad/iPod
You can connect the headphone amplifier to an iPhone/iPad/iPod using the USB cable supplied with your iPhone/iPad/iPod.
4-547-524-11(4)
Copyright 2014 Sony Corporation
Page 26

Help Guide
21
How to Use
Portable Headphone Amplifier
PHA-3
Connecting to an optical audio output supported device
Connecting to a PCM recorder, etc.
You can connect the headphone amplifier to a device with the optical out jack, such as a PCM recorder, using a digital optical
cable (sold separately).
4-547-524-11(4)
Copyright 2014 Sony Corporation
Page 27

Help Guide
22
How to Use
Portable Headphone Amplifier
PHA-3
Connecting to an analog output device
Connecting to an analog output device
You can connect the headphone amplifier to an analog output device using the stereo mini cable (supplied).
4-547-524-11(4)
Copyright 2014 Sony Corporation
Page 28

Help Guide
23
How to Use
Portable Headphone Amplifier
PHA-3
Headphones
Listening to music with headphones
You can listen to music from an audio device using the headphones with a standard 3-pole stereo mini plug via the headphone
amplifier.
Listening to music with headphones via balanced connection
You can connect the headphone amplifier to the headphones that are compatible with the balanced connection using a
balanced- connection headphone cable. By doing so, you can enjoy music with better sound quality.
Setting the sound quality (DSEE HX)
By setting the DSEE HX select switch to ON, you can enjoy better sound quality from your audio device connected to the
headphone amplifier.
4-547-524-11(4)
Copyright 2014 Sony Corporation
Page 29

Help Guide
24
How to Use
Portable Headphone Amplifier
PHA-3
Amplifier or active speaker
Listening to music with an amplifier or active speaker
You can listen to music from an audio device by your amplifier or active speaker via the headphone amplifier.
4-547-524-11(4)
Copyright 2014 Sony Corporation
Page 30

Help Guide
25
How to Use
Portable Headphone Amplifier
PHA-3
About the indications and settings
About the indicators
The indicators show the status of the headphone amplifier.
Summary of settings and connections
The settings and connections vary depending on the connected device.
4-547-524-11(4)
Copyright 2014 Sony Corporation
Page 31

Help Guide
26
How to Use
Portable Headphone Amplifier
PHA-3
Compatible device
Compatible WALKMAN models
Compatible Xperia models
Compatible iPhone/iPad/iPod models
Compatible operating systems (Windows)
Compatible operating systems (Mac)
Compatible balanced connection headphones
4-547-524-11(4)
Copyright 2014 Sony Corporation
Page 32

Help Guide
27
How to Use
Portable Headphone Amplifier
PHA-3
Notes on use
Precautions
Precautions on safety and placement, etc.
4-547-524-11(4)
Copyright 2014 Sony Corporation
Page 33

Help Guide
28
How to Use
Portable Headphone Amplifier
PHA-3
Trademarks
Trademarks
List of trademarks/registered trademarks
4-547-524-11(4)
Copyright 2014 Sony Corporation
Page 34

Help Guide
29
How to Use
Portable Headphone Amplifier
PHA-3
Support website
Customer support websites
URLs of the customer support websites
4-547-524-11(4)
Copyright 2014 Sony Corporation
Page 35

Help Guide
30
Troubleshooting
Portable Headphone Amplifier
PHA-3
Troubleshooting
What can I do to solve a problem?
4-547-524-11(4)
Copyright 2014 Sony Corporation
Page 36

Help Guide
31
Troubleshooting
Portable Headphone Amplifier
PHA-3
Power
Unable to turn on the headphone amplifier/The battery life becomes short.
Unable to charge the battery.
Charging time is too long.
4-547-524-11(4)
Copyright 2014 Sony Corporation
Page 37

Help Guide
32
Troubleshooting
Portable Headphone Amplifier
PHA-3
Sound
There is no sound.
The sound is low.
The sound is distorted.
Noise is generated.
4-547-524-11(4)
Copyright 2014 Sony Corporation
Page 38

Help Guide
33
Troubleshooting
Portable Headphone Amplifier
PHA-3
Computer
Unable to install the driver software on a Windows computer.
When connecting to a computer, there is no sound or the sound is not played back properly.
Sound is interrupted when connecting to the computer.
4-547-524-11(4)
Copyright 2014 Sony Corporation
Page 39

Help Guide
34
Troubleshooting
Portable Headphone Amplifier
PHA-3
Other device
The remote control of the headset does not work.
The microphone of the headset does not work.
The connected radio or TV cannot receive a signal/Noise is generated.
4-547-524-11(4)
Copyright 2014 Sony Corporation
Page 40

Help Guide
35
How to Use
Portable Headphone Amplifier
PHA-3
Checking the included items
After unpacking, check that all items in the list below are included in the package.
If any items are missing, contact your dealer.
The number in ( ) indicates the item amount.
Portable headphone amplifier (1)
Digital cable for WALKMAN (1)
Digital cable for Xperia (1)
Micro-USB cable (1)
Stereo mini cable (1)
Silicone belt (4)
Protection sheet (1)
Start Guide (1)
Reference Guide (1)
Warranty card (depending on your region/country)
Page 41

Help Guide
36
How to Use
Portable Headphone Amplifier
PHA-3
About the supplied manuals
The following three manuals come with the headphone amplifier.
Help Guide (this data)
Operation manual on the Web, which can be accessed by a PC or smartphone, provides the detailed information on how
to use the headphone amplifier and troubleshooting, etc.
Start Guide (enclosed paper)
Provides basic information on how to connect or use the headphone amplifier.
Reference Guide (enclosed paper)
Provides precautions and specifications.
4-547-524-11(4)
Copyright 2014 Sony Corporation
Page 42

Help Guide
37
How to Use
Portable Headphone Amplifier
PHA-3
How to use the silicone belts
You can fasten a connected device to the headphone amplifier using the silicone belts (supplied).
1. Mount the connected device on the headphone amplifier.
2. Bind the headphone amplifier and the connected device using the silicone belt with its wider part placed under the
bottom of the headphone amplifier.
4 silicone belts are supplied.
If the connected device does not fit on the rubber rails
If the audio device does not mount on the rubber rails of the headphone amplifier, place the protection sheet (supplied)
between the headphone amplifier and the audio device to avoid scratching.
Note
Page 43

Be careful not to pinch your finger when binding the headphone amplifier and the connected device with the silicone
38
belt. It may cause injury.
Sony is not liable for damage to an audio device caused by using the silicone belts.
The silicone belts are not guaranteed to fasten all audio devices.
Do not over-stretch the silicone belt. It may cause a malfunction.
Stop using the silicone belt if it is cracked.
4-547-524-11(4)
Copyright 2014 Sony Corporation
Page 44

Help Guide
39
How to Use
Portable Headphone Amplifier
PHA-3
What you can do with the headphone amplifier
Balanced output support for clean signal ground *
for balanced output, a balanced-connection headphone cable and balanced headphones are needed.
Selected parts for high quality sound (ES9018/TPA6120)
USB Audio PCM 384 kHz/32 bit, DSD compatible
WALKMAN, Xperia, iPhone/iPad/iPod Digital connection
All content you hear is enhanced.
The DSEE HX upscales the existing sound file to near High -Resolution sound quality, making you feel as though you
are really there at the recording studio or concert.
High-quality analog circuit with dedicated master clock
High-quality line-out operation amplifier (LME49860)
Low-resistance high-quality rotary volume for clear and pure sound
*
Works as a normal headphone amplifier.
4-547-524-11(4)
Copyright 2014 Sony Corporation
Page 45

Help Guide
40
How to Use
Portable Headphone Amplifier
PHA-3
About High-Resolution Audio format files
High-Resolution Audio, which is typically 96 kHz/24 bit or higher, is made by digitally sampling an original analog audio
source. The number of times at which sampling is performed (in one-second increments) is called the sampling
frequency, which is expressed in hertz or “Hz.” Digitizing refers to the audio process where the sampled signal is
converted (or quantized) into binary digits, consisting of 1’s and 0’s, and expressed as “bits”. The higher the number of
bits, the closer the sample is to the original source. CDs are standardized at 44.1 kHz/16 bit, but there is no single
standard for High-Resolution Audio.
An alternative way of digitizing an analog source is a method called DSD (Direct Stream Digital) which captures sound
information as a sequence of single bit values with an extremely high sampling rate of either 2.8 MHz or 5.6 MHz. This is
approximately 64 or 128 times the sampling rate of CD audio and is simply known as DSD 2.8 MHz or DSD 5.6 MHz.
For some engineers, this is the closest a digital file sample can get to an original analog source.
4-547-524-11(4)
Copyright 2014 Sony Corporation
Page 46

Help Guide
41
How to Use
Portable Headphone Amplifier
PHA-3
About the balanced connection
Unbalanced connections have commonly been used for portable audio devices. This connection method works as L+/R+
signals go through an amplifier and L-/R- signals go through the ground. Devices with unbalanced output are normally
less expensive and easy to handle compared with the balanced output devices, but unbalanced connections cannot
prevent noise occurrence since noise can be picked up if there is a difference in voltage potential on the ground of the
chassis of your device.
One of the biggest advantages of balanced connection is that it can stabilize the voltage potential by transmitting the
signals as the opposite phase, L+/L- and R+/R-, to an amplifier. Not only does this prevent the signal distortion caused
on the ground, but also eliminates noise and hum with opposite polarities relative to each other. As a result of this,
balanced connections brings you clear sound with noiseless signals and improved crosstalk.
4-547-524-11(4)
Copyright 2014 Sony Corporation
Page 47

Help Guide
42
How to Use
Portable Headphone Amplifier
PHA-3
Parts and controls
Front and left side
Rear side
1. GAIN select switch
2. DSEE HX select switch
3. Hi-Fs (High Sampling Frequency) indicator
4. DSD indicator
5. POWER/CHG (power/charge) indicator
6. (headphones) NORMAL jack
7. (headphones) BALANCED L/R jack
Page 48

8. Power/volume knob
9. INPUT select switch
43
10. OUTPUT select switch
11. Xperia/WALKMAN/PC (USB AUDIO) connecting port
12. iPhone/iPad/iPod connecting port
13. OPT IN port
14. AUDIO IN/LINE OUT jack
15. DC IN 5V port
Related Topic
About the indicators
Copyright 2014 Sony Corporation
4-547-524-11(4)
Page 49

Help Guide
44
How to Use
Portable Headphone Amplifier
PHA-3
About the indicators
POWER/CHG (power/charge) indicator
When the headphone amplifier is being charged, the indicator flashes/lights up in red.
When the headphone amplifier is turned on, the indicator flashes/lights up in green.
While the headphone amplifier is being charged
Turns off
The headphone amplifier is fully charged.
Lights up (red)
The headphone amplifier is being charged.
Flashes (red)
The headphone amplifier is not being charged properly.
When the headphone amplifier is not in the battery charge status
You can check the battery level by the number of times that the indicator flashes when the headphone amplifier is turned
on.
Turns off
The headphone amplifier is not turned on.
Lights up (green)
The headphone amplifier is turned on.
Flashes three times (green)
The battery is substantially charged.
Flashes twice (green)
The battery is half charged.
Flashes once (green)
The battery level is low. It is necessary to charge the battery.
Always flashing (green)
If you continue to use the headphone amplifier without charging, it will turn off in a few minutes.
Hi-Fs (High Sampling Frequency) indicator
Page 50

Turns off
The headphone amplifier is being input with;
45
the linear PCM digital signal of sampling frequencies under 48 kHz
the analog signal
Lights up
The headphone amplifier is being input with;
the linear PCM digital signal of sampling frequencies not under 48 kHz
the DSD digital signal of the High-Resolution Audio format
DSD indicator
Turns off
The headphone amplifier is being input with;
the linear PCM digital signal
the analog signal
Lights up
The headphone amplifier is being input with the DSD signal of the High-Resolution Audio format.
4-547-524-11(4)
Copyright 2014 Sony Corporation
Page 51

Help Guide
46
How to Use
Portable Headphone Amplifier
PHA-3
Installing the driver software on a Windows computer
To play back the music files on your Windows computer with the headphone amplifier, you need to download and install
the driver software for Windows “Sony USB Device Driver” on the computer.
1. Visit the following support website, then download and install the driver software for Windows “Sony USB Device
Driver” on your Windows computer.
http://www.sony.com/support/
For details on installing, refer to the download pages.
The headphone amplifier needs to be connected to your Windows computer at a certain point while installing the driver
software.
In this case, connect the Windows computer to the Xperia/WALKMAN/PC (USB AUDIO) connecting port of the
headphone amplifier using the micro-USB cable (supplied).
Hint
Note
There is no need to install the driver software on a Mac computer.
If the driver software is not installed on your Windows computer, music files cannot be played back via the headphone
amplifier.
Related Topic
Page 52

Connecting to a Windows computer
47
4-547-524-11(4)
Copyright 2014 Sony Corporation
Page 53

Help Guide
48
How to Use
Portable Headphone Amplifier
PHA-3
Installing “Hi-Res Audio Player” on a computer
To play back the High- Resolution Audio format files on your computer (Windows/Mac) with the headphone amplifier, you
need to download and install “Hi-Res Audio Player” on the computer.
1. Visit the following support website, then download and install “Hi-Res Audio Player” on your computer.
http://www.sony.com/support/
For details on installing, refer to the download pages.
Related Topic
About High- Resolution Audio format files
4-547-524-11(4)
Copyright 2014 Sony Corporation
Page 54

Help Guide
49
How to Use
Portable Headphone Amplifier
PHA-3
Charging the battery via a computer
The headphone amplifier contains a rechargeable lithium -ion battery, which should be charged before using it for the first
time.
1. Rotate the power/volume knob counterclockwise, until it clicks, to turn off the headphone amplifier.
The battery charges only when the headphone amplifier is off. Rotate the power/volume knob clockwise to turn on
the headphone amplifier. Rotate it more to adjust the volume.
2. Connect your booted computer to the DC IN 5V port of the headphone amplifier using the micro-USB cable
(supplied).
The POWER/CHG indicator lights up in red while the battery is being charged, and the indicator turns off when
charging is completed.
Charging is completed in about 15 hours.
*1
If the battery is not charged properly, the POWER/CHG indicator will flash in red.
*1
Time required for empty battery to recharge.
Page 55

When the battery cannot be charged
50
Check that the headphone amplifier and your computer are firmly connected via the micro-USB cable (supplied).
Use only the supplied micro-USB cable. Do not charge the battery using any other USB cable.
Check that the computer is turned on and not in standby, sleep or hibernation mode.
If the computer enters standby, sleep, or hibernation mode while the headphone amplifier is connected to the
computer, the POWER/CHG indicator turns off and the battery charge will not be completed properly. In this case,
change the computer settings and then charge the battery again.
Check that the headphone amplifier is directly connected to a computer using the micro-USB cable (supplied).
Charging may not be completed properly by an indirect connection, such as via a USB hub.
Battery life
Analog connection: Approx. 28 hours
Digital (balanced) connection: Approx. 5 hours
*2
when using the headphone amplifier at 1 mW + 1 mW output (24 Ω). Time may vary, depending on the immediate
environment or conditions of use.
Hint
*2
*2
*2
The battery can be charged via an AC outlet by using the recommended USB AC adaptor (AC-UD20) (sold
separately). Charging is completed in about 6 hours.
Note
The charge will continue for about 10 hours, then the timer function of the charge protection circuit will stop the
charging. If you want to continue charging, disconnect and reconnect the micro-USB cable.
When the headphone amplifier had not been used for a long time, it may take a while for the POWER/CHG indicator
to light up in red. In this case, do not disconnect the micro-USB cable from the headphone amplifier. Wait until the
POWER/CHG indicator lights up in red.
Charge the battery in an ambient temperature between 5 °C to 35 °C. If you try to charge the battery outside this
range, the POWER/CHG indicator may flash in red, but the battery may not be charged.
When the battery is full, the POWER/CHG indicator may not light up in red.
When storing the headphone amplifier for a long time, avoid a place subject to high temperatures. When storing the
headphone amplifier for more than a year, charge the battery every six months to prevent over discharge.
Related Topic
Charging the battery via an AC outlet
4-547-524-11(4)
Copyright 2014 Sony Corporation
Page 56

Help Guide
51
How to Use
Portable Headphone Amplifier
PHA-3
Charging the battery via an AC outlet
The battery can be charged via an AC outlet by using the recommended USB AC adaptor (AC-UD20) (sold separately).
For details on the adaptor, refer to its operation manual.
1. Rotate the power/volume knob counterclockwise until it clicks to turn off the headphone amplifier.
The battery charges only when the headphone amplifier is off. Rotate the power/volume knob clockwise to turn on
the headphone amplifier. Rotate it more to adjust the volume.
2. Connect the DC IN 5V port of the headphone amplifier and the USB AC adaptor (AC-UD20) (sold separately) using
the micro-USB cable (supplied), then connect the USB AC adaptor to an AC outlet.
The POWER/CHG indicator lights up in red while the battery is being charged, and the indicator turns off when
charging is completed.
Charging is completed in about 6 hours.*
If the battery is not charged properly, the POWER/CHG indicator will flash in red.
*
Time required for empty battery to recharge.
Page 57

Battery life
*2
52
Analog connection: Approx. 28 hours
Digital (balanced) connection: Approx. 5 hours
*2
when using the headphone amplifier at 1 mW + 1 mW output (24 Ω). Time may vary, depending on the immediate
*2
*2
environment or conditions of use.
Note
The charge will continue for about 10 hours, then the timer function of the charge protection circuit will stop the
charging. If you want to continue charging, disconnect and reconnect the micro-USB cable.
When the headphone amplifier had not been used for a long time, it may take a while for the POWER/CHG indicator
to light up in red. In this case, do not disconnect the micro-USB cable from the headphone amplifier. Wait until the
POWER/CHG indicator lights up in red.
Charge the battery in an ambient temperature between 5 °C to 35 °C. If you try to charge the battery outside this
range, the POWER/CHG indicator may flash in red, but the battery may not be charged.
When the battery is full, the POWER/CHG indicator may not light up in red.
When storing the headphone amplifier for a long time, avoid a place subject to high temperatures. When storing the
headphone amplifier for more than a year, charge the battery every six months to prevent over discharge.
4-547-524-11(4)
Copyright 2014 Sony Corporation
Page 58

Help Guide
53
How to Use
Portable Headphone Amplifier
PHA-3
Turning the power on
When using the headphone amplifier for the first time, charge its battery beforehand.
Connect the headphone amplifier to your booted computer using the micro-USB cable (supplied).
1. Rotate the power/volume knob clockwise.
The POWER/CHG indicator flashes in green then lights up.
Rotate the power/volume knob further clockwise to increase the volume.
Hint
When the headphone amplifier is turned on, you can check the battery level by the number of times the POWER/CHG
indicator flashes in green.
Flashes three times: Substantially charged
Flashes twice: Half charged
Flashes once: Battery level is low. It is necessary to charge the battery.
Always flashing: It is necessary to charge the battery. If you continue to use the headphone amplifier without charging, it
will turn off automatically.
Related Topic
Charging the battery via a computer
Charging the battery via an AC outlet
4-547-524-11(4)
Copyright 2014 Sony Corporation
Page 59

Help Guide
54
How to Use
Portable Headphone Amplifier
PHA-3
Turning the power off
1. Rotate the power/volume knob counterclockwise until it clicks.
The POWER/CHG indicator turns off.
Note
The POWER/CHG indicator lights up in red when the DC IN 5V port is connected to your computer or the USB AC
adaptor (sold separately). The indicator turns off when battery charge is completed.
4-547-524-11(4)
Copyright 2014 Sony Corporation
Page 60

Help Guide
55
How to Use
Portable Headphone Amplifier
PHA-3
Checking the battery level
Check the battery level before carrying out the headphone amplifier.
1. If the micro-USB cable (supplied) is connected to the DC IN 5V port, disconnect it.
2. Rotate the power/volume knob clockwise to turn the headphone amplifier on, and check how many times the
POWER/CHG indicator flashes in green.
Flashes three times: Substantially charged
Flashes twice: Half charged
Flashes once: Battery level is low. It is necessary to charge the battery.
Always flashing: It is necessary to charge the battery. If you continue to use the headphone amplifier without
charging, it will turn off automatically.
Note
The battery level that the indicator shows is a rough guide. The actual battery level may differ depending on the
condition of use.
4-547-524-11(4)
Copyright 2014 Sony Corporation
Page 61

Help Guide
56
How to Use
Portable Headphone Amplifier
PHA-3
Connecting to a Windows computer
You can connect the headphone amplifier to a Windows computer using the micro-USB cable (supplied). The
headphone amplifier is compatible with High -Resolution Audio format files, up to 384 kHz/32 bit PCM, DSD 2.8 MHz or
DSD 5.6 MHz.
1. Start your computer.
You need to download and install the driver software for Windows “Sony USB Device Driver” on your computer to
play back music files on the computer with the headphone amplifier.
You need to download and install “Hi-Res Audio Player” on your computer to play back High -Resolution Audio
format files on the computer with the headphone amplifier.
2. Set the INPUT select switch to the position of the Xperia/WALKMAN/PC (USB AUDIO) connecting port (left edge
position).
3. Connect the computer to the Xperia/WALKMAN/PC (USB AUDIO) connecting port using the micro-USB cable
(supplied).
Hint
The headphone amplifier supports USB 2.0 (USB 2.0 High Speed) as an audio device.
Note
If you are listening to music loudly with the headphone amplifier connected to a computer, the POWER/CHG indicator
Page 62

may flash in green or the sound may be interrupted. This is not a malfunction. In this case, turn the volume down.
The headphone amplifier is not guaranteed to operate via a USB hub or USB cable extension. Use the supplied
57
micro-USB cable only.
Do not disconnect the computer while operating. Before disconnecting the computer from the headphone amplifier,
stop playback and turn the headphone amplifier off to prevent damage to data.
Digitally broadcast sound may not be output from a computer’s USB port. In this case, connect the AUDIO IN/LINE
OUT jack of the headphone amplifier to the analog audio output of the computer. For details on connections, see
“Connecting to an analog output device.”
If you are listening to music too loudly, the battery may drain even if the DC IN 5V port of headphone amplifier is
connected to a computer or an AC outlet.
Be careful not to trip over the connecting cable.
Related Topic
Installing the driver software on a Windows computer
Installing “Hi -Res Audio Player” on a computer
Connecting to an analog output device
Compatible operating systems (Windows)
4-547-524-11(4)
Copyright 2014 Sony Corporation
Page 63

Help Guide
58
How to Use
Portable Headphone Amplifier
PHA-3
Connecting to a Mac
You can connect the headphone amplifier to a Mac using the micro-USB cable (supplied). The headphone amplifier is
compatible with High- Resolution Audio format files, up to 384 kHz/32 bit PCM, DSD 2.8 MHz or DSD 5.6 MHz.
1. Start your Mac.
You need to download and install “Hi-Res Audio Player” on your Mac to play back High-Resolution Audio format
files on the Mac with the headphone amplifier.
2. Set the INPUT select switch to the position of the Xperia/WALKMAN/PC (USB AUDIO) connecting port (left edge
position).
3. Connect the Mac to the Xperia/WALKMAN/PC (USB AUDIO) connecting port using the micro-USB cable (supplied).
Hint
The headphone amplifier supports USB 2.0 (USB 2.0 High Speed) as an audio device.
Note
If you are listening to music loudly with the headphone amplifier connected to a Mac, the POWER/CHG indicator may
flash in green or the sound may be interrupted. This is not a malfunction. In this case, turn the volume down.
The headphone amplifier is not guaranteed to operate via a USB hub or USB cable extension. Use the supplied
micro-USB cable only.
Do not disconnect the Mac while operating. Before disconnecting the Mac from the headphone amplifier, stop
playback and turn the headphone amplifier off to prevent damage to data.
Page 64

Digitally broadcast sound may not be output from a Mac’s USB port. In this case, connect the AUDIO IN/LINE OUT
jack of the headphone amplifier to the analog audio output of the Mac. For details on connections, see “Connecting to
59
an analog output device.”
If you are listening to music too loudly, the battery may drain even if the DC IN 5V port of headphone amplifier is
connected to a Mac or an AC outlet.
Be careful not to trip over the connecting cable.
Related Topic
Installing “Hi -Res Audio Player” on a computer
Connecting to an analog output device
Compatible operating systems (Mac)
4-547-524-11(4)
Copyright 2014 Sony Corporation
Page 65

Help Guide
60
How to Use
Portable Headphone Amplifier
PHA-3
Connecting to a digital output supported WALKMAN
By using the digital cable for WALKMAN (supplied), the headphone amplifier can amplify the signal directly without the
built-in amplifier of the WALKMAN.
Compatible WALKMAN models
NWZ-A10 series, NWZ-ZX1 and NWZ-F880 series (as of July 2014)
For the latest compatible models, access the following URL:
http://www.sony.com/support/
When connecting a WALKMAN other than the compatible models mentioned above, follow the connecting method
described in “Connecting to WALKMAN models unsupported by digital-out.”
1. Turn on the WALKMAN.
2. Set the INPUT select switch to the position of the Xperia/WALKMAN/PC (USB AUDIO) connecting port (left edge
position).
3. Connect the WALKMAN to the Xperia/WALKMAN/PC (USB AUDIO) connecting port using the digital cable for
WALKMAN (supplied).
Note
The headphone amplifier only supports the audio playback function of a WALKMAN.
Turn on your WALKMAN before operating the headphone amplifier.
Some operations may not be possible with the headphone amplifier, even if you use a supported WALKMAN.
Page 66

The following settings of your WALKMAN may be causing the sound distortion. Set these settings off to solve the
problem.
61
Dynamic Normalizer
Equalizer
VPT (Virtualphones Technology)
DSEE (Digital Sound Enhancement Engine)
Speaker output optimizer
Sound is not output from the headphone jack of the WALKMAN when it is connected to the headphone amplifier.
You cannot adjust the volume by the WALKMAN when it is connected to the headphone amplifier.
The WALKMAN cannot be charged while it is connected to the headphone amplifier.
If you are listening to music too loudly, the battery may drain even if the DC IN 5V port of headphone amplifier is
connected to a computer or an AC outlet.
Related Topic
Connecting to WALKMAN models unsupported by digital- out
Compatible WALKMAN models
4-547-524-11(4)
Copyright 2014 Sony Corporation
Page 67

Help Guide
62
How to Use
Portable Headphone Amplifier
PHA-3
Connecting to WALKMAN models unsupported by digital-out
Before connecting, turn the volume of your WALKMAN down, and turn the headphone amplifier off.
1. Turn on the WALKMAN.
2. Set the INPUT select switch to the position of the AUDIO IN/LINE OUT jack (right edge position).
3. Set the OUTPUT select switch to (right edge position).
4. Connect the WALKMAN to the AUDIO IN/LINE OUT jack using the stereo mini cable (supplied).
5. Connect your headphones to the (headphones) NORMAL jack on the front side of the headphone amplifier.
When the WALKMAN is connected to the AUDIO IN/LINE OUT jack, your headphones cannot be connected to the
(headphones) BALANCED L/R jack.
Note
If you connect the headphone amplifier to a WALKMAN with a built-in radio or tuner, broadcasts may not be received,
or sensitivity may be reduced significantly.
If there is noise in broadcasts, place the headphone amplifier farther away from the connected WALKMAN and check
whether reception improves.
If you are listening to music too loudly, the battery may drain even if the DC IN 5V port of the headphone amplifier is
connected to a computer or an AC outlet.
Page 68

Help Guide
63
How to Use
Portable Headphone Amplifier
PHA-3
Connecting to a digital output supported Xperia
You can connect the headphone amplifier to a digital output supported Xperia using the digital cable for Xperia
(supplied).
The compatibility of digital output supported Xperia models depend on the country/region. For the latest compatible
models, access the following URL:
http://www.sony.com/support/
When connecting an Xperia model that is unsupported by the digital-output, follow the connecting method described in
“Connecting to Xperia models unsupported by digital-out.”
1. Turn on the Xperia.
2. Set the INPUT select switch to the position of the Xperia/WALKMAN/PC (USB AUDIO) connecting port (left edge
position).
3. Connect the Xperia to the Xperia/WALKMAN/PC (USB AUDIO) connecting port using the digital cable for Xperia
(supplied).
Note
The headphone amplifier only supports the audio playback function of the Xperia.
Turn on your Xperia before operating the headphone amplifier.
Some operations may not be possible with the headphone amplifier, even if you use a supported Xperia model.
Depending on your Xperia model, you may not be able to adjust the volume of the Xperia when it is connected to the
headphone amplifier.
Page 69

If you are listening to music too loudly, the battery may drain even if the DC IN 5V port of headphone amplifier is
connected to a computer or an AC outlet.
64
Related Topic
Connecting to Xperia models unsupported by digital-out
Compatible Xperia models
4-547-524-11(4)
Copyright 2014 Sony Corporation
Page 70

Help Guide
65
How to Use
Portable Headphone Amplifier
PHA-3
Connecting to Xperia models unsupported by digital-out
Before connecting, turn the volume of your Xperia down, and turn the headphone amplifier off.
1. Turn on the Xperia.
2. Set the INPUT select switch to the position of the AUDIO IN/LINE OUT jack (right edge position).
3. Set the OUTPUT select switch to (right edge position).
4. Connect the Xperia to the AUDIO IN/LINE OUT jack using the stereo mini cable (supplied).
5. Connect your headphones to the (headphones) NORMAL jack on the front side of the headphone amplifier.
When the Xperia is connected to the AUDIO IN/LINE OUT jack, your headphones cannot be connected to the
(headphones) BALANCED L/R jack.
Note
If you connect the headphone amplifier to an Xperia with a built-in radio or tuner, broadcasts may not be received, or
sensitivity may be reduced significantly.
If there is noise in broadcasts, place the headphone amplifier farther away from the connected Xperia and check
whether reception improves.
If you are listening to music too loudly, the battery may drain even if the DC IN 5V port of the headphone amplifier is
connected to a computer or an AC outlet.
Page 71

Help Guide
66
How to Use
Portable Headphone Amplifier
PHA-3
Connecting to an iPhone/iPad/iPod
You can connect the headphone amplifier to an iPhone/iPad/iPod using the USB cable supplied with your
iPhone/iPad/iPod. For details on compatible models, see “Compatible iPhone/iPad/iPod models.”
The headphone amplifier is compatible with audio format files, up to 48 kHz/24 bit PCM.
1. Turn on the iPhone/iPad/iPod.
2. Set the INPUT select switch to the position of the iPhone/iPad/iPod connecting port (second position from the left).
3. Connect the iPhone/iPad/iPod to the iPhone/iPad/iPod connecting port using the USB cable supplied with your
device.
Compatible iPhone/iPad/iPod models
You can use the headphone amplifier with only the following models. Update your iPhone, iPad or iPod to the latest
software before use. (as of July 2014)
iPhone 5s
iPhone 5c
iPhone 5
iPhone 4s
iPhone 4
iPhone 3GS
iPad Air
iPad mini with Retina display
Page 72

iPad (4th generation)
iPad mini
67
iPad (3rd generation)
iPad 2
iPad
iPod touch (5th generation)
iPod touch (4th generation)
iPod touch (3rd generation)
iPod touch (2nd generation)
iPod classic 120GB / 160GB (2009)
iPod nano (7th generation)
iPod nano (6th generation)
iPod nano (5th generation)
iPod nano (4th generation)
iPod nano (3rd generation)
Note
If noise is generated, turn off the connected iPhone/iPad/iPod, then turn it on again.
The headphone amplifier only supports the audio playback function of an iPhone/iPad/iPod.
You cannot transfer music to your iPhone/iPad/iPod from the headphone amplifier.
Do not connect an iPhone/iPad/iPod that is not supported. The headphone amplifier is not guaranteed to work with an
unsupported iPhone/iPad/iPod.
Sony is not liable for damage/erasure of recorded data caused by using an iPhone/iPad/iPod with the headphone
amplifier.
Do not disconnect the iPhone/iPad/iPod while operating. Before disconnecting the iPhone/iPad/iPod from the
headphone amplifier, stop playback and turn the headphone amplifier off to prevent damage to data.
If the sound is distorted, set the equalizer to “Off” or “Flat” on your iPhone/iPad/iPod.
Turn on your iPhone/iPad/iPod before connecting it to the headphone amplifier.
Depending on an iPhone/iPad/iPod, the sound may become loud suddenly when you adjust the volume.
If the battery level of an iPhone/iPad/iPod is too low, charge it before use.
Music volume may vary depending on the ring tone of the iPhone and its application. Refer to the operation manual of
your iPhone.
If the iPhone is set to silent mode, the ring tone may not be heard from the headphones.
For details on operating an iPhone/iPad/iPod, refer to its operation manual.
An iPhone/iPad/iPod will not be charged when it is connected to the headphone amplifier.
If you are listening to music too loudly, the battery may drain even if the DC IN 5V port of headphone amplifier is
connected to a computer or an AC outlet.
Related Topic
Compatible iPhone/iPad/iPod models
4-547-524-11(4)
Copyright 2014 Sony Corporation
Page 73

Help Guide
68
How to Use
Portable Headphone Amplifier
PHA-3
Connecting to a PCM recorder, etc.
You can connect the headphone amplifier to a device with the optical out jack, such as a PCM recorder, using a digital
optical cable (sold separately).
The headphone amplifier is compatible with High- Resolution Audio format files, up to 192 kHz/24 bit PCM.
1. Turn on the device.
2. Set the INPUT select switch to the position of the OPT IN port (second position from the right).
3. Connect the device to the OPT IN port using a digital optical cable (sold separately).
About a digital optical cable (sold separately)
The OPT IN port of the headphone amplifier is compatible with a square plug of digital optical cable. Choose the
appropriate plug type for your device.
Note
The audio files on your device may not be played back via the headphone amplifier even though they are playable
with the device itself. This is because there is a restriction on optical media. In this case, refer to the operation manual
of your device.
4-547-524-11(4)
Copyright 2014 Sony Corporation
Page 74

Help Guide
69
How to Use
Portable Headphone Amplifier
PHA-3
Connecting to an analog output device
You can connect the headphone amplifier to an analog output device, such as a smartphone or portable music player,
using the stereo mini cable (supplied).
Before connecting, turn the volume of your device down, and turn the headphone amplifier off.
1. Turn on the device.
2. Set the INPUT select switch to the position of the AUDIO IN/LINE OUT jack (right edge position).
3. Set the OUTPUT select switch to (right edge position).
4. Connect the device to the AUDIO IN/LINE OUT jack using the stereo mini cable (supplied).
5. Connect your headphones to the (headphones) NORMAL jack on the front side of the headphone amplifier.
When the device is connected to the AUDIO IN/LINE OUT jack, your headphones cannot be connected to the
(headphones) BALANCED L/R jack.
Note
If you connect the headphone amplifier to a device with a built- in radio or tuner, broadcasts may not be received, or
sensitivity may be reduced significantly.
If there is noise in broadcasts, place the headphone amplifier farther away from the connected device and check
whether reception improves.
If you are listening to music too loudly, the battery may drain even if the DC IN 5V port of the headphone amplifier is
Page 75

connected to a computer or an AC outlet.
70
4-547-524-11(4)
Copyright 2014 Sony Corporation
Page 76

Help Guide
71
How to Use
Portable Headphone Amplifier
PHA-3
Listening to music with headphones
You can listen to music from an audio device with your headphones via the headphone amplifier. Follow the steps below
when you connect the headphones with the stereo mini plug to the headphone amplifier.
1. Connect the stereo mini plug of your headphones to the (headphones) NORMAL jack of the headphone
amplifier.
If you connect the headphones which has the L-shaped stereo mini plug to the (headphones) NORMAL jack,
position it so that its cable is on the right side of the jack, avoiding the ridge on the left of the jack, and ensure the
plug is fully inserted.
2. Connect an audio device to the headphone amplifier.
3. Set the INPUT select switch to the position where the port that your device is connecting to.
4. Set the OUTPUT select switch to “ .”
5. Rotate the power/volume knob clockwise to turn on the headphone amplifier.
The POWER/CHG indicator flashed in green and then lights up.
Rotate the power/volume knob further clockwise to turn up the volume.
Page 77

6. Start playback on the connected audio device.
72
When playing High-Resolution Audio format files on your computer with the headphone amplifier, download and
install “Hi-Res Audio Player.”
7. Rotate the power/volume knob to adjust the volume.
When the volume remains low
Depending on the headphones, the volume may remain low, even if you turn the volume up to the max volume.
In this case, turn off the headphone amplifier and set the GAIN select switch to HIGH, then turn on the headphone
amplifier again. In normal use, the GAIN select switch should be set at NORMAL.
Hint
When the headphone amplifier is turned on, you can check the battery level by the number of times that the
POWER/CHG indicator flashes in green.
Flashes three times: Substantially charged
Flashes twice: Half charged
Flashes once: Battery level is low. It is necessary to charge the battery.
Always flashing: It is necessary to charge the battery. If you continue to use the headphone amplifier without charging, it
will turn off automatically.
When connecting a device such as a smartphone or portable audio player, adjust the volume on the connected device
beforehand. Depending on the device, audio output settings may be required.
Note
The headphone amplifier does not support monaural headphones, headphones with a remote control, or headsets
with a microphone. Do not attempt to connect these devices to the headphone amplifier. It may cause malfunctions.
If you turn the volume up too high, it may damage your hearing. Be careful not to turn the volume up too high.
In the following cases, the relay in the internal circuit will make a sound.
When the unit is turned on
When the OUTPUT select switch is moved
When the INPUT select switch is moved to/from the position of the AUDIO IN/LINE OUT jack (right edge position)
Related Topic
Page 78

Installing “Hi -Res Audio Player” on a computer
73
Summary of settings and connections
4-547-524-11(4)
Copyright 2014 Sony Corporation
Page 79

Help Guide
74
How to Use
Portable Headphone Amplifier
PHA-3
Listening to music with headphones via balanced connection
Connecting the balanced connection compatible headphones to the headphone amplifier upgrades sound quality from an
audio device connected to the headphone amplifier.
Balanced connection compatible headphones
MDR-Z7, XBA-Z5, MDR- 1A*, XBA-H3* (as of July 2014)
*
The balanced-connection headphone cable (MUC- S20BL1/MUC -M20BL1) (sold separately) is required to connect MDR -1A and
XBA-H3.
For the latest compatible models, access the following URL:
http://www.sony.com/support/
You cannot connect your headphones to the (headphones) BALANCED L/R jack when the device is connected to the
AUDIO IN/LINE OUT jack. Connect your headphones to the (headphones) NORMAL jack.
1. Connect the L plug of the balanced-connection headphone cable to the (headphones) BALANCED L jack and R
plug to the (headphones) BALANCED R jack.
2. Connect an audio device to the headphone amplifier.
3. Set the INPUT select switch to the position where the port that your device is connecting to.
4. Set the OUTPUT select switch to “ .”
Page 80

5. Rotate the power/volume knob clockwise to turn on the headphone amplifier.
75
The POWER/CHG indicator flashes in green and then lights up.
Rotate the power/volume knob further clockwise to turn up the volume.
6. Start playback on the connected audio device.
When playing High-Resolution Audio format files on your computer with the headphone amplifier, download and
install “Hi-Res Audio Player.”
7. Rotate the power/volume knob to adjust the volume.
When the volume remains low
Depending on the headphones, the volume may remain low, even if you turn the volume up to the max volume.
In this case, turn off the headphone amplifier and set the GAIN select switch to HIGH, then turn on the headphone
amplifier again. In normal use, the GAIN select switch should be set at NORMAL.
Hint
When the headphone amplifier is turned on, you can check the battery level by the number of times that the
POWER/CHG indicator flashes in green.
Flashes three times: Substantially charged
Flashes twice: Half charged
Flashes once: Battery level is low. It is necessary to charge the battery.
Always flashing: It is necessary to charge the battery. If you continue to use the headphone amplifier without charging, it
will turn off automatically.
Note
When using balanced connection with headphones that have low impedance (less than 16 ohms), the limiter prevents
excessive output, which may cause the sound to be cut off. In this case, turn down the volume of the headphone
amplifier.
Page 81

If you turn the volume up too high, it may damage your hearing. Be careful not to turn the volume up too high.
Do not connect your headphones to the (headphones) NORMAL jack and (headphones) BALANCED L/R jack
76
simultaneously.
In the following cases, the relay in the internal circuit will make a sound.
When the unit is turned on
When the OUTPUT select switch is moved
When the INPUT select switch is moved to/from the position of the AUDIO IN/LINE OUT jack (right edge position)
Connect balanced connection compatible headphones to the (headphones) BALANCED L/R jack of the
headphone amplifier properly. Otherwise sound quality will not be upgraded.
Related Topic
Installing “Hi -Res Audio Player” on a computer
About the balanced connection
Summary of settings and connections
4-547-524-11(4)
Copyright 2014 Sony Corporation
Page 82

Help Guide
77
How to Use
Portable Headphone Amplifier
PHA-3
Setting the sound quality (DSEE HX)
By setting the DSEE HX select switch to ON, you can enjoy better sound quality from your audio device connected to
the headphone amplifier.
1. Set the DSEE HX select switch to ON.
The compressed audio files are upgraded to a sound quality higher than that of a CD, and provides a dynamic
sound.
Note
The DSEE HX function will stop working when the signals below are transmitting to the headphone amplifier.
the optical signal
the analog signal
the linear PCM digital signal of sampling frequencies is more than 88.2 kHz
the DSD digital signal
4-547-524-11(4)
Copyright 2014 Sony Corporation
Page 83

Help Guide
78
How to Use
Portable Headphone Amplifier
PHA-3
Listening to music with an amplifier or active speaker
You can listen to music from an audio device that is connected to the Xperia/WALKMAN/PC (USB AUDIO) port,
iPhone/iPad/iPod port or OPT IN port via an speaker by connecting an amplifier or an active speaker to the AUDIO
IN/LINE OUT jack.
1. Connect an amplifier or active speaker to the AUDIO IN/LINE OUT jack of the headphone amplifier.
2. Connect an audio device to the headphone amplifier.
3. Set the INPUT select switch to the position where the port that your device is connecting to.
4. Set the OUTPUT select switch to the position of the AUDIO IN/LINE OUT jack (left edge position).
5. Rotate the power/volume knob clockwise to turn on the headphone amplifier.
The POWER/CHG indicator flashes in green and then lights up.
Page 84

6. Start playback on the connected audio device.
79
When playing High-Resolution Audio format files on your computer with the headphone amplifier, download and
install “Hi-Res Audio Player.”
7. Adjust the volume on the amplifier or active speaker that is connected to the AUDIO IN/LINE OUT jack.
For details on adjusting the volume on the connected device, refer to its operation manual.
Note
The sound from the AUDIO IN/LINE OUT jack of the headphone amplifier cannot be adjusted by the power/volume
knob or the GAIN select switch of the headphone amplifier.
Related Topic
Installing “Hi -Res Audio Player” on a computer
Summary of settings and connections
4-547-524-11(4)
Copyright 2014 Sony Corporation
Page 85

Help Guide
80
How to Use
Portable Headphone Amplifier
PHA-3
Summary of settings and connections
When connecting a Windows computer, Mac, digital output supported
WALKMAN or digital output supported Xperia to the headphone amplifier
The connecting port
Xperia/WALKMAN/PC (USB AUDIO) connecting port
The position of the INPUT select switch
Left edge position where the Xperia/WALKMAN/PC (USB AUDIO) connecting port is
The jack that the audio signal is output from/the position of the OUTPUT select switch
(headphones) NORMAL jack /right edge position ( )
(headphones) BALANCED L/R jack /right edge position ( )
AUDIO IN/LINE OUT jack /left edge position where the AUDIO IN/LINE OUT jack is
When connecting an iPhone/iPad/iPod to the headphone amplifier
The connecting port
iPhone/iPad/iPod connecting port
The position of the INPUT select switch
Second position from the left where the iPhone/iPad/iPod connecting port is
The jack that the audio signal is output from/the position of the OUTPUT select switch
(headphones) NORMAL jack /right edge position ( )
(headphones) BALANCED L/R jack /right edge position ( )
AUDIO IN/LINE OUT jack /left edge position where the AUDIO IN/LINE OUT jack is
When connecting an optical out jack supported device to the headphone
Page 86

amplifier
The connecting port
81
OPT IN port
The position of the INPUT select switch
Second position from the right where the OPT IN port is
The jack that the audio signal is output from/the position of the OUTPUT select switch
(headphones) NORMAL jack /right edge position ( )
(headphones) BALANCED L/R jack /right edge position ( )
AUDIO IN/LINE OUT jack /left edge position where the AUDIO IN/LINE OUT jack is
When connecting an analog output device to the headphone amplifier
The connecting port
AUDIO IN/LINE OUT jack
The position of the INPUT select switch
Right edge position where the AUDIO IN/LINE OUT jack is
The jack that the audio signal is output from/the position of the OUTPUT select switch
(headphones) NORMAL jack /right edge position ( )
4-547-524-11(4)
Copyright 2014 Sony Corporation
Page 87

Help Guide
82
How to Use
Portable Headphone Amplifier
PHA-3
Compatible WALKMAN models
Supporting models (as of July 2014)
For the latest compatible models, access the following URL:
http://www.sony.com/support/
Digital output supported WALKMAN
NWZ-A10 series
NWZ-ZX1
NWZ-F880 series
Note
When connecting a WALKMAN other than the compatible models mentioned above, follow the connecting method
described in “Connecting to WALKMAN models unsupported by digital-out”
Related Topic
Connecting to WALKMAN models unsupported by digital- out
4-547-524-11(4)
Copyright 2014 Sony Corporation
Page 88

Help Guide
83
How to Use
Portable Headphone Amplifier
PHA-3
Compatible Xperia models
For the latest compatible models, access the following URL:
http://www.sony.com/support/
4-547-524-11(4)
Copyright 2014 Sony Corporation
Page 89

Help Guide
84
How to Use
Portable Headphone Amplifier
PHA-3
Compatible iPhone/iPad/iPod models
iPhone/iPad/iPod models that can be used with the headphone amplifier are shown below. (as of July 2014)
Update the software of your iPhone/iPad/iPod to the latest version before using it with the headphone amplifier.
For the latest iPhone/iPad/iPod compatible models, access the following URL:
http://www.sony.com/support/
iPhone 5s
iPhone 5c
iPhone 5
iPhone 4s
iPhone 4
iPhone 3GS
iPad Air
iPad mini with Retina display
iPad (4th generation)
iPad mini
iPad (3rd generation)
iPad 2
iPad
iPod touch (5th generation)
iPod touch (4th generation)
iPod touch (3rd generation)
iPod touch (2nd generation)
iPod classic 120GB / 160GB (2009)
iPod nano (7th generation)
iPod nano (6th generation)
iPod nano (5th generation)
iPod nano (4th generation)
iPod nano (3rd generation)
Note
Sony cannot accept responsibility in the event that data recorded to an iPhone/iPad/iPod is lost or damaged when
using an iPhone/iPad/iPod connected to the headphone amplifier.
4-547-524-11(4)
Page 90

Help Guide
85
How to Use
Portable Headphone Amplifier
PHA-3
Compatible operating systems (Windows)
Supporting Operating Systems
Windows 8.1
Windows 8.1 Pro
Windows 8
Windows 8 Pro
Windows 7 Starter (SP1 or later)
Windows 7 Home Basic (SP1 or later)
Windows 7 Home Premium (SP1 or later)
Windows 7 Professional (SP1 or later)
Windows 7 Ultimate (SP1 or later)
Windows Vista Home Basic (SP2 or later)
Windows Vista Home Premium (SP2 or later)
Windows Vista Business (SP2 or later)
Windows Vista Ultimate (SP2 or later)
CPU
Intel Core 2 Processor 1.6 GHz or higher
Memory
1 GB or higher
USB
USB port (USB 2.0 High Speed)
One of the above OS needs to be installed to the computer at the factory.
The headphone amplifier is not guaranteed to operate with all computers.
The headphone amplifier is not guaranteed to operate with home built computers, operating systems that are
personally upgraded, or multiple operating systems.
The headphone amplifier is not guaranteed to operate with functions such as system suspend, sleep, or hibernation
on any computer.
4-547-524-11(4)
Copyright 2014 Sony Corporation
Page 91

Help Guide
86
How to Use
Portable Headphone Amplifier
PHA-3
Compatible operating systems (Mac)
Supporting Operating Systems
Mac OS X (v10.6.8 or later)
CPU
Intel Core 2 Processor 1.6 GHz or higher
Memory
1 GB or higher
USB
USB port (USB 2.0 High Speed)
One of the above OS needs to be installed to the computer at the factory.
The headphone amplifier is not guaranteed to operate with all computers.
The headphone amplifier is not guaranteed to operate with home built computers, operating systems that are
personally upgraded, or multiple operating systems.
The headphone amplifier is not guaranteed to operate with functions such as standby, sleep, or hibernation on any
computer.
4-547-524-11(4)
Copyright 2014 Sony Corporation
Page 92

Help Guide
87
How to Use
Portable Headphone Amplifier
PHA-3
Compatible balanced connection headphones
Supporting models (as of July 2014)
For the latest compatible models, access the following URL:
http://www.sony.com/support/
MDR-Z7
XBA-Z5
MDR-1A
XBA-H3
*
The balanced-connection headphone cable (MUC- S20BL1/MUC -M20BL1) (sold separately) is required to connect MDR -1A and
XBA-H3.
*
*
4-547-524-11(4)
Copyright 2014 Sony Corporation
Page 93

Help Guide
88
How to Use
Portable Headphone Amplifier
PHA-3
Precautions
On Safety
Do not put weight or pressure on the headphone amplifier as it may cause the headphone amplifier to deform during
long storage.
Do not drop the headphone amplifier or subject it to external shock, as it may cause a malfunction.
Clean the headphone amplifier with a soft dry cloth.
If there is noise while listening to the radio, etc., move the headphone amplifier farther away from the connected
device.
On placement
Do not place the headphone amplifier in a location where it is:
Subject to extremely high temperature (such as in a car with its windows closed).
Subject to direct sunlight or near a heat source.
Subject to mechanical vibration or shock.
Subject to a magnetic field. (such as near a magnet, speaker or TV).
Subject to excessive dust.
On charging
When the headphone amplifier is stored for a long period, to prevent excessive discharge, charge the headphone
amplifier every half year or so.
4-547-524-11(4)
Copyright 2014 Sony Corporation
Page 94

Help Guide
89
How to Use
Portable Headphone Amplifier
PHA-3
Trademarks
“WALKMAN” and “WALKMAN” logo are registered trademarks of Sony Corporation.
“Xperia” and “Xperia Tablet” are registered trademarks of Sony Mobile Communications AB.
iPad, iPhone, iPod, iPod classic, iPod nano, iPod touch, and Retina are trademarks of Apple Inc., registered in the
U.S. and other countries. iPad Air, and iPad mini are trademarks of Apple Inc.
“Made for iPod,” “Made for iPhone,” and “Made for iPad” mean that an electronic accessory has been designed to
connect specifically to iPod, iPhone or iPad, respectively, and has been certified by the developer to meet Apple
performance standards. Apple is not responsible for the operation of this device or its compliance with safety and
regulatory standards. Please note that the use of this accessory with iPod, iPhone or iPad may affect wireless
performance.
Macintosh and Mac OS are trademarks of Apple Inc., registered in the U.S. and other countries.
Microsoft, Windows and Windows Vista are registered trademarks or trademarks of Microsoft Corporation in the
United States and/or other countries.
All other trademarks and registered trademarks are trademarks or registered trademarks of their respective holders. In
this manual, ™ and ® marks are not specified.
4-547-524-11(4)
Copyright 2014 Sony Corporation
Page 95

Help Guide
90
How to Use
Portable Headphone Amplifier
PHA-3
Customer support websites
http://www.sony.com/support/
Access the support website to get the information about the supported models, software update or troubleshooting, etc.
4-547-524-11(4)
Copyright 2014 Sony Corporation
Page 96

Help Guide
91
Troubleshooting
Portable Headphone Amplifier
PHA-3
What can I do to solve a problem?
The headphone amplifier may become warm during use. This is not a malfunction.
If the headphone amplifier does not function as expected, try the following steps to resolve the
issue.
Find the symptoms of the issue in this Help Guide, and try any corrective actions listed.
Look up information on the issue on the customer support website.
If the operations above do not work, consult your nearest Sony dealer.
Related Topic
Customer support websites
4-547-524-11(4)
Copyright 2014 Sony Corporation
Page 97

Help Guide
92
Troubleshooting
Portable Headphone Amplifier
PHA-3
Unable to turn on the headphone amplifier/The battery life becomes short.
Charge the battery of the headphone amplifier.
When the battery life is reduced to half, the battery is approaching the end of its service life. Consult your nearest
Sony dealer for replacement.
4-547-524-11(4)
Copyright 2014 Sony Corporation
Page 98

Help Guide
93
Troubleshooting
Portable Headphone Amplifier
PHA-3
Unable to charge the battery.
Turn off the headphone amplifier and charge the battery again.
Check that the headphone amplifier and your computer are firmly connected using the micro-USB cable (supplied).
Check that the computer is turned on and not in standby, sleep or hibernation mode.
Check that the headphone amplifier and the computer are directly connected, and not via a USB hub.
Try the USB connection procedure again in cases other than those stated above.
The USB port of the connected computer may have a problem. Connect the headphone amplifier to another USB port
of the computer if available.
A USB AC adaptor that is not recommended is being used.
Connect your computer or a USB AC adaptor to the DC IN 5V port of the headphone amplifier.
The battery is fully charged.
If the battery is fully charged, the POWER/CHG indicator may blink in red and go off, and charging may not start. This
is not a malfunction.
If the headphone amplifier had not been used for a long time, it may take a while to light up the POWER/CHG
indicator in red when the headphone amplifier is connected to your computer or an AC outlet to charge the battery. In
this case, do not disconnect the micro-USB cable from the headphone amplifier, and wait until the POWER/CHG
indicator lights up in red.
When Windows 8.1 is used for your computer, update your system to the latest version by Windows update.
4-547-524-11(4)
Copyright 2014 Sony Corporation
Page 99

Help Guide
94
Troubleshooting
Portable Headphone Amplifier
PHA-3
Charging time is too long.
Check that the headphone amplifier and the computer are directly connected, not via a USB hub.
A cable that is not supplied is used.
A USB AC adaptor that is not recommended is used.
4-547-524-11(4)
Copyright 2014 Sony Corporation
Page 100

Help Guide
95
Troubleshooting
Portable Headphone Amplifier
PHA-3
There is no sound.
Check that the headphone amplifier and the audio device are connected correctly.
Check that the connected device is turned on.
Check that the headphone amplifier is turned on.
If the POWER/CHG indicator does not light up in green, charge the battery. When you charge the battery, turn the
headphone amplifier off beforehand.
Check that the INPUT select switch is in the correct position for the connected audio device.
Check that the OUTPUT select switch is in the correct position for the output jack.
Turn up the volume of the connected device.
Turn up the volume of the headphone amplifier.
Connect the headphone plug firmly to the headphone amplifier.
Check that the headphone amplifier, amplifier and active speaker are connected correctly.
Check that the connected headphones are stereo, not monaural.
The headphone amplifier does not support monaural headphones. Do not connect monaural headphones. It may
cause a malfunction.
When the headphone amplifier is connected to your computer, see “When connecting to a computer, there is no
sound or the sound is not played back properly.”
Sound will be output from the (headphones) BALANCED L/R jack when the (headphones) NORMAL jack and
the (headphones) BALANCED L/R jack are used simultaneously and the digital signal is transmitting to the
headphone amplifier.
Sound will be output from the (headphones) NORMAL jack when the signal is transmitting to the headphone
amplifier via the AUDIO IN/LINE OUT jack.
The headphone amplifier is only compatible with the PCM digital signal as optical signals. Other optical signals such
as 7.1 ch. etc, will not be output from the headphone amplifier.
Related Topic
When connecting to a computer, there is no sound or the sound is not played back properly.
Summary of settings and connections
4-547-524-11(4)
Copyright 2014 Sony Corporation
 Loading...