

Sony PCV-RX640 Computer User Guide (primary manual), VAIO Digital Studio PCV-RX640 User Manual
Page 1

VAIO Dig it a l St u d io ™
Computer User Guide
Page 2

Page 3

Contents
Welcome.......................................................7
Locating Controls And Connect ors..... ......9
Front Panel Overview..................................................9
Back Panel Overview................................................12
VAIO Action Setup ....................................15
Shortcut Keys............................................................15
To Change the Sony Software Window Design........16
VAIO AV Applic a tions........ .......................17
Overv iew of Preinstal led So f tware ...........................18
DigitalPrint Software .................................................21
DVgate Software.......................................................29
MovieS haker Software.... ..........................................31
PictureGear Software ................................................39
Smart Capture............................................................42
SonicStage Software .................................................51
Visual F low So ftware...................................... ...........58
Additional Software Information ..............................60
3
Page 4

VAIO Digital Studio Computer User Guide
Configu ri n g Your V A IO C ompute r......... ..61
Hard Disk Drive Par tition.. ... .... ... .... . ...... . ...... . .... ... ...61
i.LINK (IEEE1394) Compatibility ...........................62
System, Application,
And Driver Recovery CD(s)......................65
To Use the System Reco very CD(s)...... .......... .........66
To Use the Applicat i o n Recovery CD(s)..................68
To Use the Driver Recovery CD..... .......... ................69
Troubleshooting........................................71
Topics........................................................................71
Notes on U se....................... ......................................85
Resources..................................................................90
Index...........................................................93
4
Page 5

Welcome
Thank you for purchasing your Sony VAIO® computer! Your new
computer is a superb blend of high technology and easy-to-use
functionality. The information provided here is designed to help you to
become familiar with the hardware and software applications included
with your system.
7
Page 6

VAIO Digital Studio Computer User Guide
8
Page 7

Locating Controls And
Connectors
Your computer may not be equipped with all of the hardware features
listed in thi s secti on. To view the specific har dware configuration for your
system, see the Specifications sheet.
Front Panel Overview
The front panel of your VAIO Comput er enables access to the optica l and floppy
disk drives. It also includes Universal Serial Bus (USB) and i.LINK® ports to
connect compatible peripheral devices.
✍ i.LINK is a trademark of Sony used only to designate that a product contains an
IEEE1394 connection. The i.LINK connection ma y vary, depending on the software
applications, operating sy stem and compat ible i.LINK devices. All pr oducts with an
i.LINK connection m ay not communic ate with each other.
Please refer to the documentation that cam e w ith your com patible i. LINK device for
information on oper ating conditions and proper connecti on. Before connecting
compatible i.LINK PC peripherals to your system, such as an optical or hard disk drive,
confirm their operating system compatibility and required operating conditions.
9
Page 8

VAIO Digital Studio Computer User Guide
Front panel
1 Optical drive 1
See Specifications sheet for optical drive information.
2 Optical drive 2
See Specifications sheet for optical drive information.
3 Floppy disk drive
Reads and write s data from and to a 3.5-inch flop py disk.
DRIVE
10
Page 9

Locati ng Co ntr ols And Connectors
4 Floppy disk drive access indicator light
Lights in gree n while reading and writing data from and to a floppy
disk.
5 Optical drive access indicator light
Lights in amber while reading and writing dat a from and to the optical
drives.
6 Hard disk drive access indicator light
Lights in amber whi le reading and writing data from and to the hard
disk.
7 Power switch and indica tor light
Tur ns the c ompute r on/of f. The indi cato r ligh t is blue whil e the power is
on and amber when the computer is in Stand by mode.
8 Optical drive 1 eject button
Ejects a disc fro m O p tical dri v e 1 .
9 Optical drive 2 eject button
Ejects a disc fro m O p tical dri v e 2 .
10 Floppy disk eject button
Ejects a floppy disk.
11 Universal Serial Bus (USB) ports (2)
Connecti ons for compatible USB devices.
12 i.LINK 4-pin port (IEEE1394)
Connecti on for a compatible digi tal device.
✍ For your convenience, your computer includes USB and i.LI NK ports on both the front
and back panels. The 4-pin i.LINK port is located on the front panel and the 6-pin
i.LINK port is located on the back.
11
Page 10
VAIO Digital Studio Computer User Guide
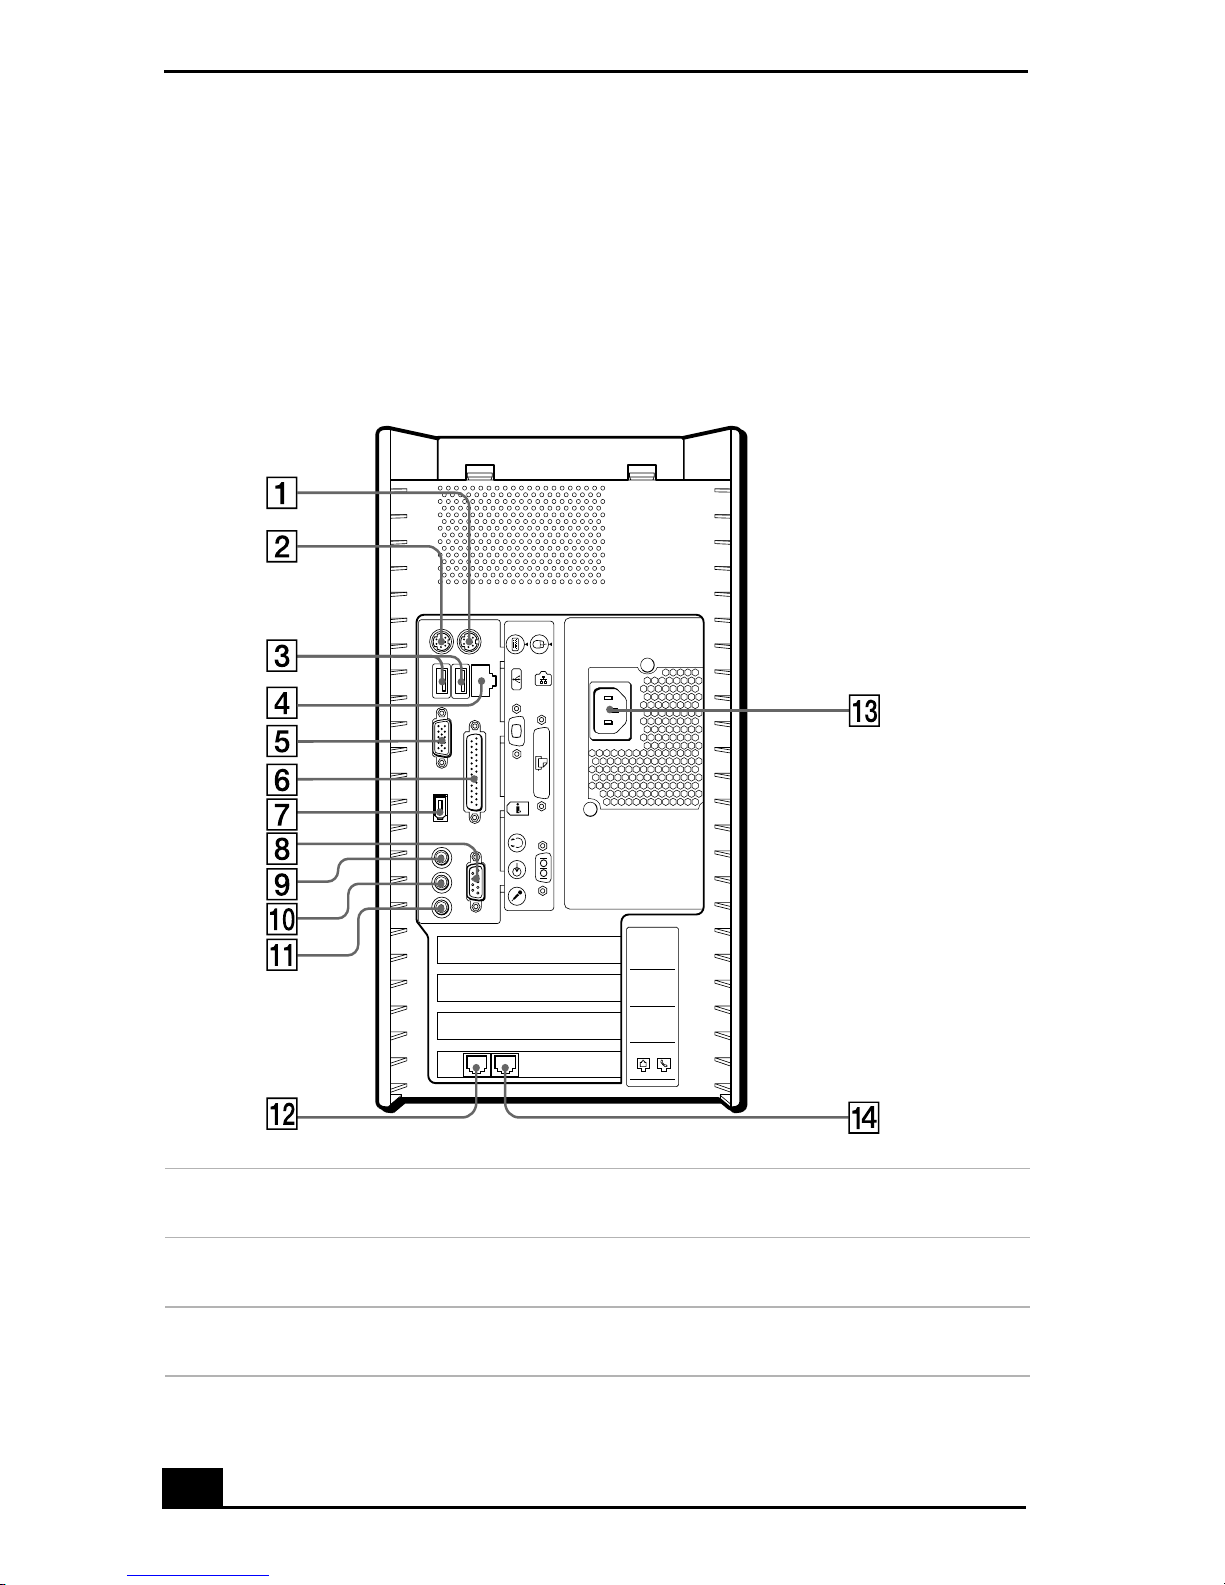
Back Panel Overview
The back panel of your computer contains the ports for supplied and opti onal
accessories. The icons on the back panel locate and identify the ports on your
computer.
Back panel
KEYBOARD
MOUSE
USB
1Mouse port
Connecti on for a PS /2® mouse.
2 Keyboard port
Connecti on for a PS /2 keyboard.
MONITOR
i.LINK
S400
HEADPHONES
LINE IN
MIC
PRINTER
SERIAL
4
3
2
1
LINE
TELEPHONE
3 Universal Serial Bus (USB) ports (2)
Connecti ons for compatible USB devices.
12
Page 11

4 Ethernet port
10BASE-T/100BASE-TX Fast Et h ernet interface .
(The port marked with (Network) is for LAN connections only.)
5 Monitor p ort
Connect ion for a display.
6 Printer port
Connection for a parallel device, such as a printer or scanner.
7 i.LINK 6-pin port (I EEE1394)
Connect ion for a compatible digital device.
8Serial port
Connect ion for a c ompa tible serial device.
9 Headphones jack
Connect ion for the supplied speake rs or optional headphone s.
10 Line In jack
Connect ion for an audio device.
Locati ng Co ntr ols And Connectors
11 Microphone jack
Connect ion for a microphone (optional).
12 Modem line jack
Connect ion for the supplied modem cable to the wall jack.
13 AC Input port
Connection for the supplied power cord .
14 Telephone jack
Connect ion for a phone cable (optional) to the computer.
✍ i.LINK is a trademark of Sony used only to designate that a product contains an
IEEE1394 connection. The i.LINK connection ma y vary, depending on the software
applications, operating sy stem and compat ible i.LINK devices. All pr oducts with an
i.LINK connection m ay not communic ate with each other.
Please refer to the documentation that cam e w ith your com patible i. LINK device for
information on oper ating conditions and proper connecti on. Before connecting
compatible i.LINK PC peripherals to your system, such as an optical or hard disk drive,
confirm their operating system compatibility and required operating conditions.
13
Page 12

VAIO Digital Studio Computer User Guide
14
Page 13

VA IO A c ti o n S e tu p
VAIO Action Setup manages the settings for your computer’s Shortcut
keys (S Keys).
Shortcut Keys
The programmabl e S Keys are linked with the following applications as their
default settings:
❑ S1 — Outlook® Express
❑ S2 — Internet Explorer
❑ S3 — SonicStage
❑ S4 — PictureGear™
❑ S5 — MovieShaker™
❑ S6 — Help/Demo
You can reprogram the S keys to launch other applications.
✍ i.LINK is a trademark of Sony used only to designate that a product contains an
IEEE1394 connection. The i.LINK connection ma y vary, depending on the software
applications, operating system, and compatible i.LINK devices. All products with an
i.LINK connection m ay not communic ate with each other.
Please refer to the documentation that cam e w ith your com patible i. LINK device for
information on oper ating conditions and proper connecti on. Before connecting
compat ible i.LINK PC peripherals to your sys tem, such as an optical or ha rd disk
drive, confirm t h eir operating system compatibility and required operating condi tions.
Changi n g the setting s o f th e S keys
1 Click Start in the Wi ndows taskbar and select All Programs.
2 Select VAIO Action Setup, then click VAIO Action Setup.
15
Page 14

VAIO Digital Studio Computer User Guide
✍ Yo u can also double-click the VAIO Action Setup icon, located in the Windows
taskbar, to launch VAIO Action Setup.
3 Click the S Key you want to change.
4 From the Select Application dialog box, click the option for the desired type
of function. The corresponding applications appear in the list box on the
right.
✍ Yo u can drag an applicati on to place it into the list box.
5 The Confirmation Application Na me window appe ars. Click Next.
6 You can type a new name and description, if desired. Click Finish.
To Change the Sony Software Window Design
You can select from different window desig ns for your S ony software and create
your own personal computing environment.
Changing the window design
1 Click Start in the Windows taskbar and select the Control Panel.
2 Click Other Control Panel Options.
3 Click UI Design Selector.
4 Click << or >> and select the desired desi gn.
5 Click Apply.
6 The “UI Design Selector” window design changes. The window desi gn for
your Sony software matches the “UI Design Selector” window.
7 To try another selection, cli ck << or >>, then click Apply.
8 When you have made your selection, click OK. The UI Design Selector
closes and the Sony software window design displays.
✍ Yo u may only use this feature with compatible UI Design Selector software.
16
Page 15

VAIO AV Applications
Your V AIO® computer has a preinstalled collection of audio and vi de o
(AV) applications that make it easy to use advanced multimedia
technology. This section describes the VAIO AV applications.
✍ Yo ur computer may not be supplied with all of the sof tware applications listed,
depending on the syst em configuration you pur chased.
Y our computer’s visual prese ntation of the VAIO AV applications may not appear
exactly as shown in this section, depending on the specific computer model yo u
purchased.
17
Page 16

VAIO Digital Studio Computer User Guide
Overview of Preinstalled Software
DigitalPrint
Sony Electronics Inc.
This image management software makes it fun and easy to edit, import, and
organize your digital pictures in a photo album for rich digital printing to any
standard col or laser or inkjet printer. DigitalPrint ca n also be used to make
custom CD labels for your audio CDs.
DVgate™
Sony Electronics Inc.
Connect a digital video camera recorder to the i.LINK® port and capture your
own video clip s a nd still images. You can edit clips from your video, add new
clips, and combine clips into ne w movi e segm ents. You can also save your
images in a variety of popular file formats.
Media Bar® DVD Player
Sony Electronics Inc.
Media Bar DVD Player is created especially for high -quality DVD playback.
You can enjoy the s uperior digita l video quality and the effects features. You can
rewind or fast-forwa rd scenes from the DVD Player monitor as you would with
any ordinary DVD player, to easily find the scene you want to view. Typical
DVD playback features are available , such as multiple angles, audio langua ge
tracks, an d subtitles. Media Bar DVD Player sea mlessly integrat es a premium
audio/visual experience with an easy-to-use software interface.
MovieShaker™
Sony Electronics Inc.
Sony’s origi nal MovieShaker software cre ates personal movies that have
transi tions , backgr ound music , and tex t. Just import your vide o clips and “shake ”
with a click of the mous e. Your personal movies are easy to create and fun to
share with family and friends.
PictureGear™
Sony Electronics Inc.
This image management software displays images from your hard drive, a Sony
digital still camera, or a Sony Mavica®
camera. The im ag e s ap pe ar in a
convenient light-table format, so that you can easily view the contents of an
entire folder.
18
Page 17

Overview of Preinstalled Software
Smart Capture
Sony Electronics Inc.
Smart Capture is a fun new way to send multimedia messages via e-mail. Smar t
Capture mana ges the i.LINK® connection between your notebook and a Sony
Digital Handycam® Camcorder tha t supports the i.LINK interface. It allows you
to captu re compress ed vide o or sti ll im ages and save the m to your ha rd dis k drive
or share via e-m ail. A smart solution for computer, digital audio/video and
network convergence.
SonicStage™ (On selected models)
Sony Electronics Inc.
This new jukebox application adds a host of new features to its predecessor,
OpenMG™ Jukebox. Continuing to take advantage of Sony’s copyrightprotected ATRAC3™ format for high-quality digital audio storage, SonicStage
sports a new musi c visualizer , a sleek new player skin design, audio CD burning
capability, and a parametric equalizer for fine-tuning audi o playback.
SonicStage™ Premium (On selected models)
Sony Electronics Inc.
SonicStage Premium is a spec ial jukebox appl ication that supports high quality
digital audio playback and recording from the NetMD, FM Tuner, and DVD-RW
devices in your VAIO MX Desktop PC. Re cording from external analog and
digital audio devices, such as CD players and MiniDisc players, is also
supported. SonicStage Premium includes several standard jukebox features,
including a music visualize r, audio CD burning capability, and a parametric
equalizer for fine-tuning audio playback.
VisualFlow™
Sony Electronics Inc.
VisualFlow software is a state-of-the-art Sony multimedia browser designed
specifically for Memory Stick® media. It displays any still picture, mo vie or
sound file stored in a Memory St ick media in a visually ple asing , artisti c manne r .
VisualFlow software not only plays a selected movie or sound file, but als o
enables pl ayback of files by other appli ca tions like PictureGear™ soft ware or
Mem or y Stick S lide s h ow.
19
Page 18

VAIO Digital Studio Computer User Guide
20
Page 19
DigitalPrint Software
DigitalPrint So ftware
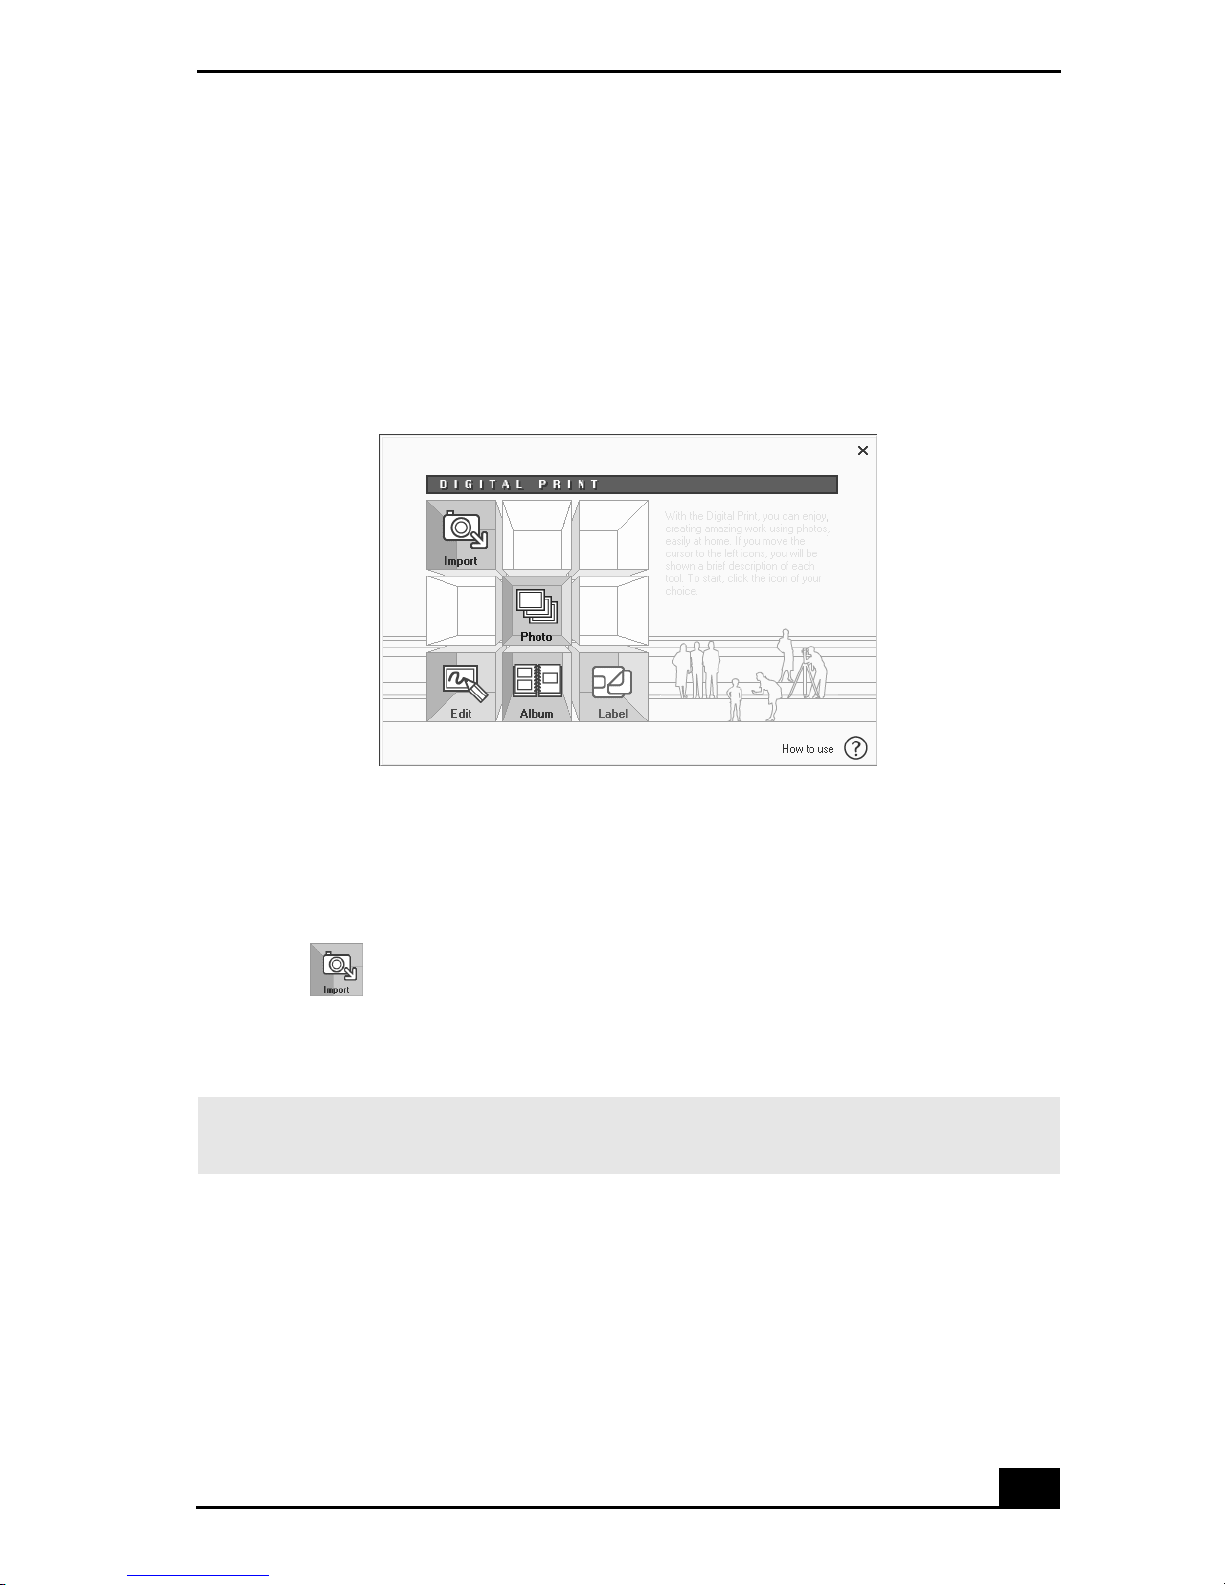
DigitalPrint is designed to creatively manage your digital pictures . With its
easy-to-use features, you can quickly load images from your digita l ca mera or
camcorder, print high-quality photos, and make personalized photo albums and
labels to share with fri ends and family.
DigitalPrint mai n window
Using PhotoCapture
Capture and import your digital pictures from your digital camera or camcorder
into your computer. You can select your favorite pictures and place them in
handy folder s for fut ure use.
1 Click (Import) to open the PhotoCapture window. Your connected
digital camera, camcorder, or Memory Stick® media is indicated in the
window.
✍ Properly connect your digital cam era, camcorder, or ins ert your Memory Stick media
in your computer.
21
Page 20

VAIO Digital Studio Computer User Guide
PhotoCapture window
2 Click the camera icon to open the Enter Photo Folder Name dial og box. You
can enter a name for a new folder or cli ck Sele ct Photo Fol der t o import your
pictures to an existing folder. Click OK.
Enter Photo Folder Name dial og box
22
Page 21
DigitalPrint Software
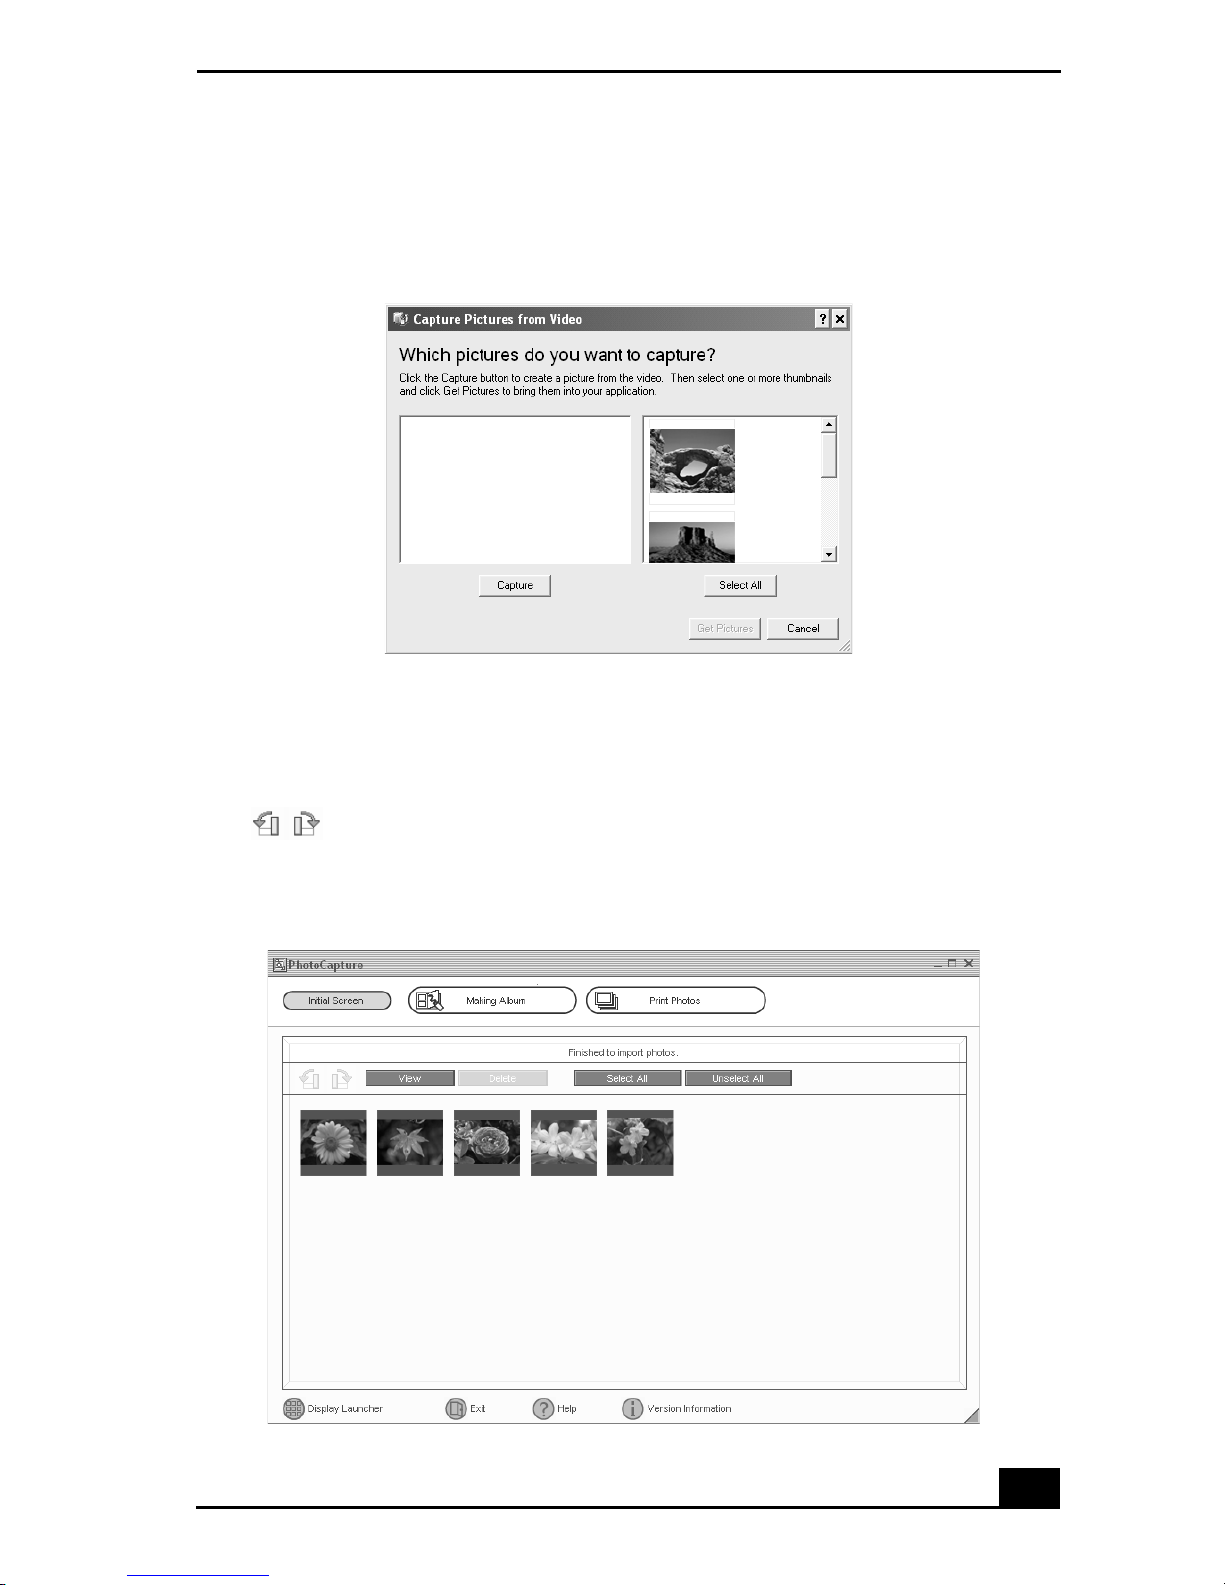
3 Click Capt ure to capture stil l images. You can preview a thumbnail version
of your pictures in the selection view window.
Capture Pictures from Video window
4 Select th e desired pic tur es, and cli ck Get Pictur es. The Phot oCapture picture
editor window appears.
5 Click View to see an enlarged version of a selected picture. You can use
(Rotate) to ch ange the position of a sele cted picture. Click Delete to
eli minate any unwant ed pictures.
PhotoCapture editing window
23
Page 22
VAIO Digital Studio Computer User Guide
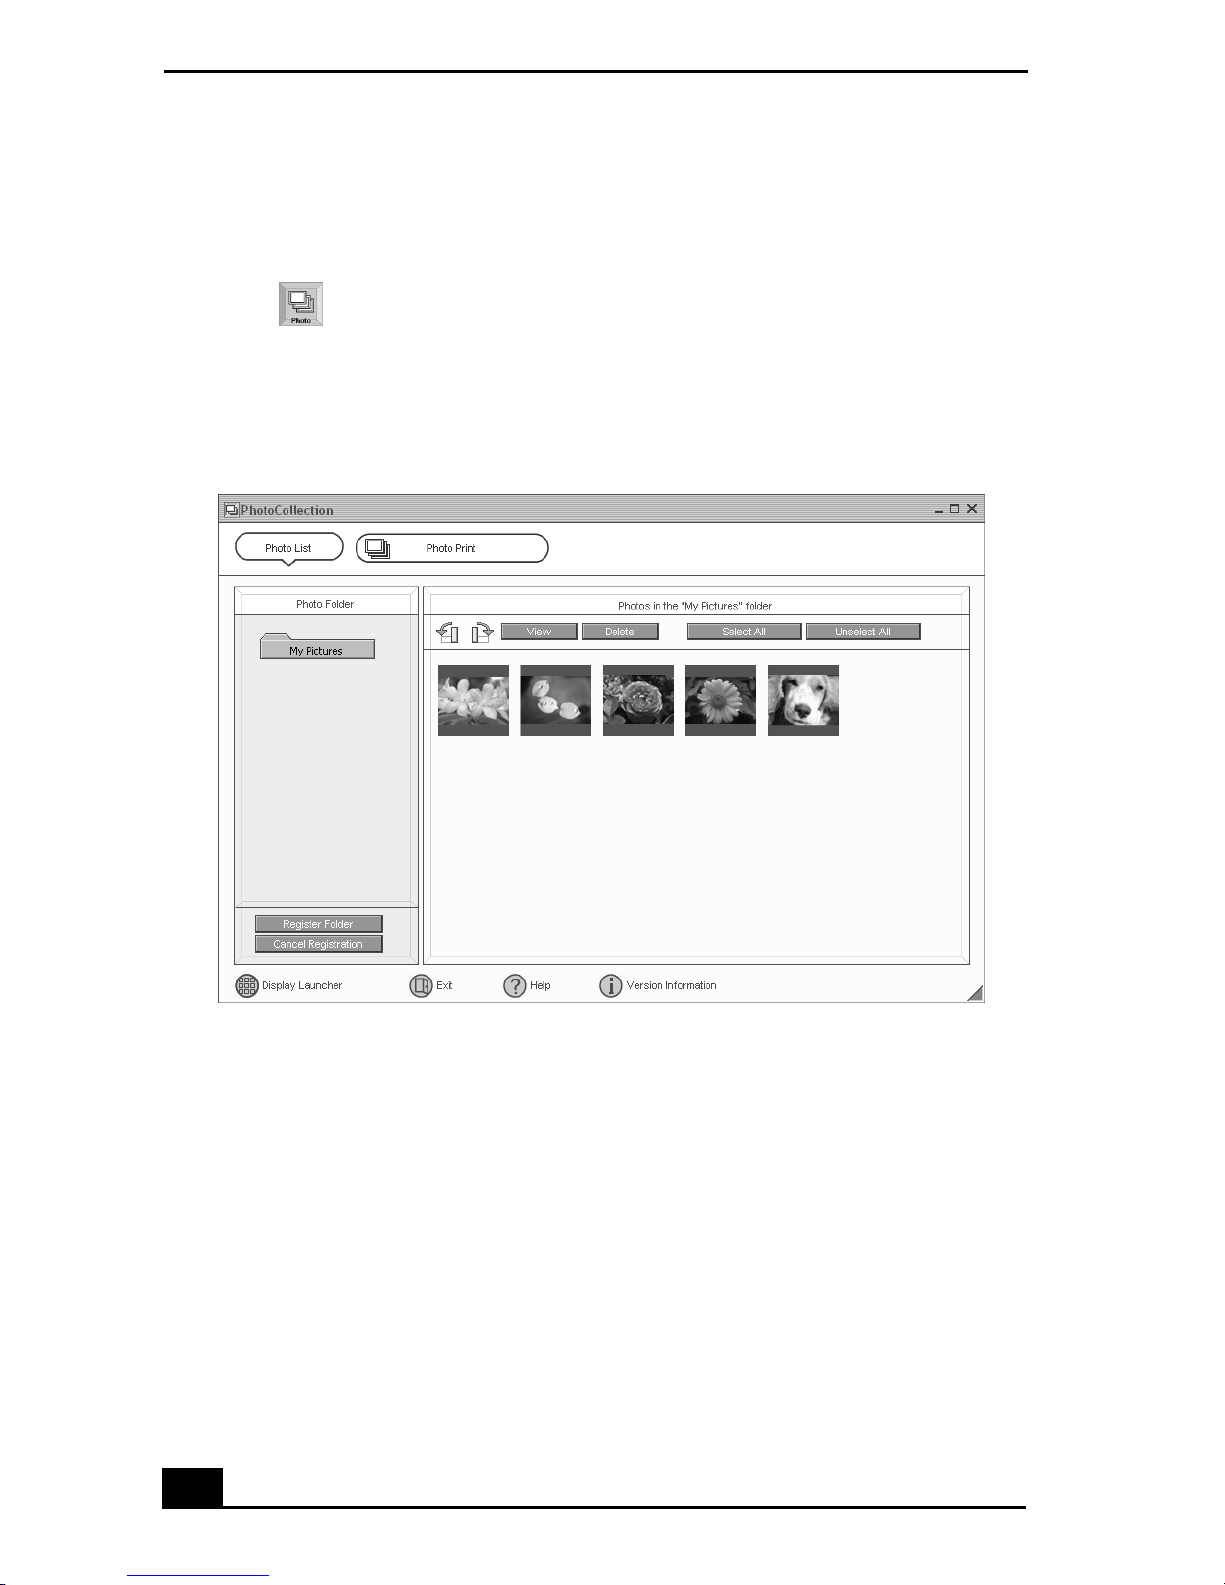
Using PhotoCollection
You can select and print your favorite digital pictures, using your computer and
home printer.
1 Click (Photo) to open the PhotoCollection window. A list of folders is
displa yed on the left side of the wind ow, with the folder contents displayed
as thumbnail picture s on the right.
PhotoCollecti on window
2 Select the desired fold er. From t he thumbnail view, click t o select the
pictures you wan t to print.
3 Click Photo P r int at the top of the windo w. Select the number of prints you
want to make, us ing the scro ll arrows. Click OK.
4 Select th e paper, based on the picture positioning desired. A layout pr eview
is displayed on the left side of the window.
5 Use the config uration butto ns and drop -down lis ts to sel ect the printer a nd to
set margins.
24
Page 23
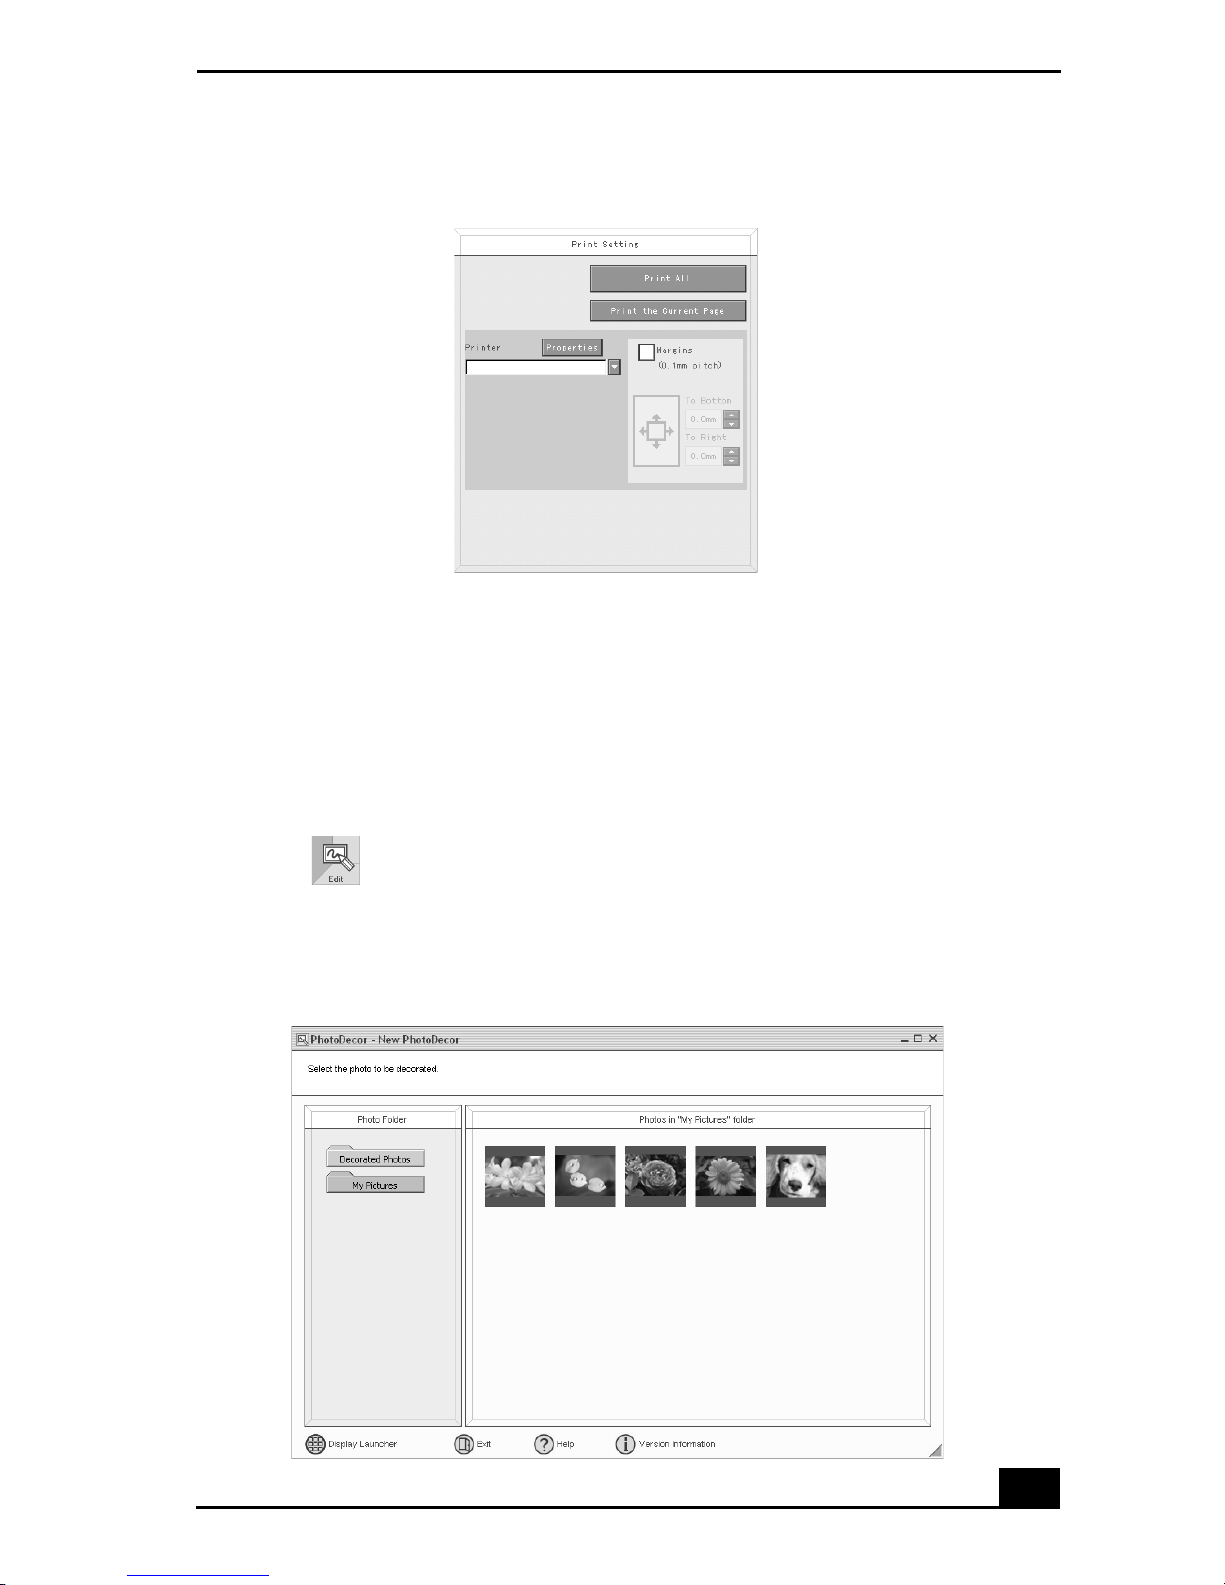
DigitalPrint Software
Printer and Paper selection window
6 Click Print All to print all pages, or click “Print the selected pag e only” to
print a specific page of photos.
Using PhotoDecor
You can decorate your favori te photos with cl ip art, sta mps, or your own dra wing
talent. Add, remove, and change your designs to create your own unique photo
art.
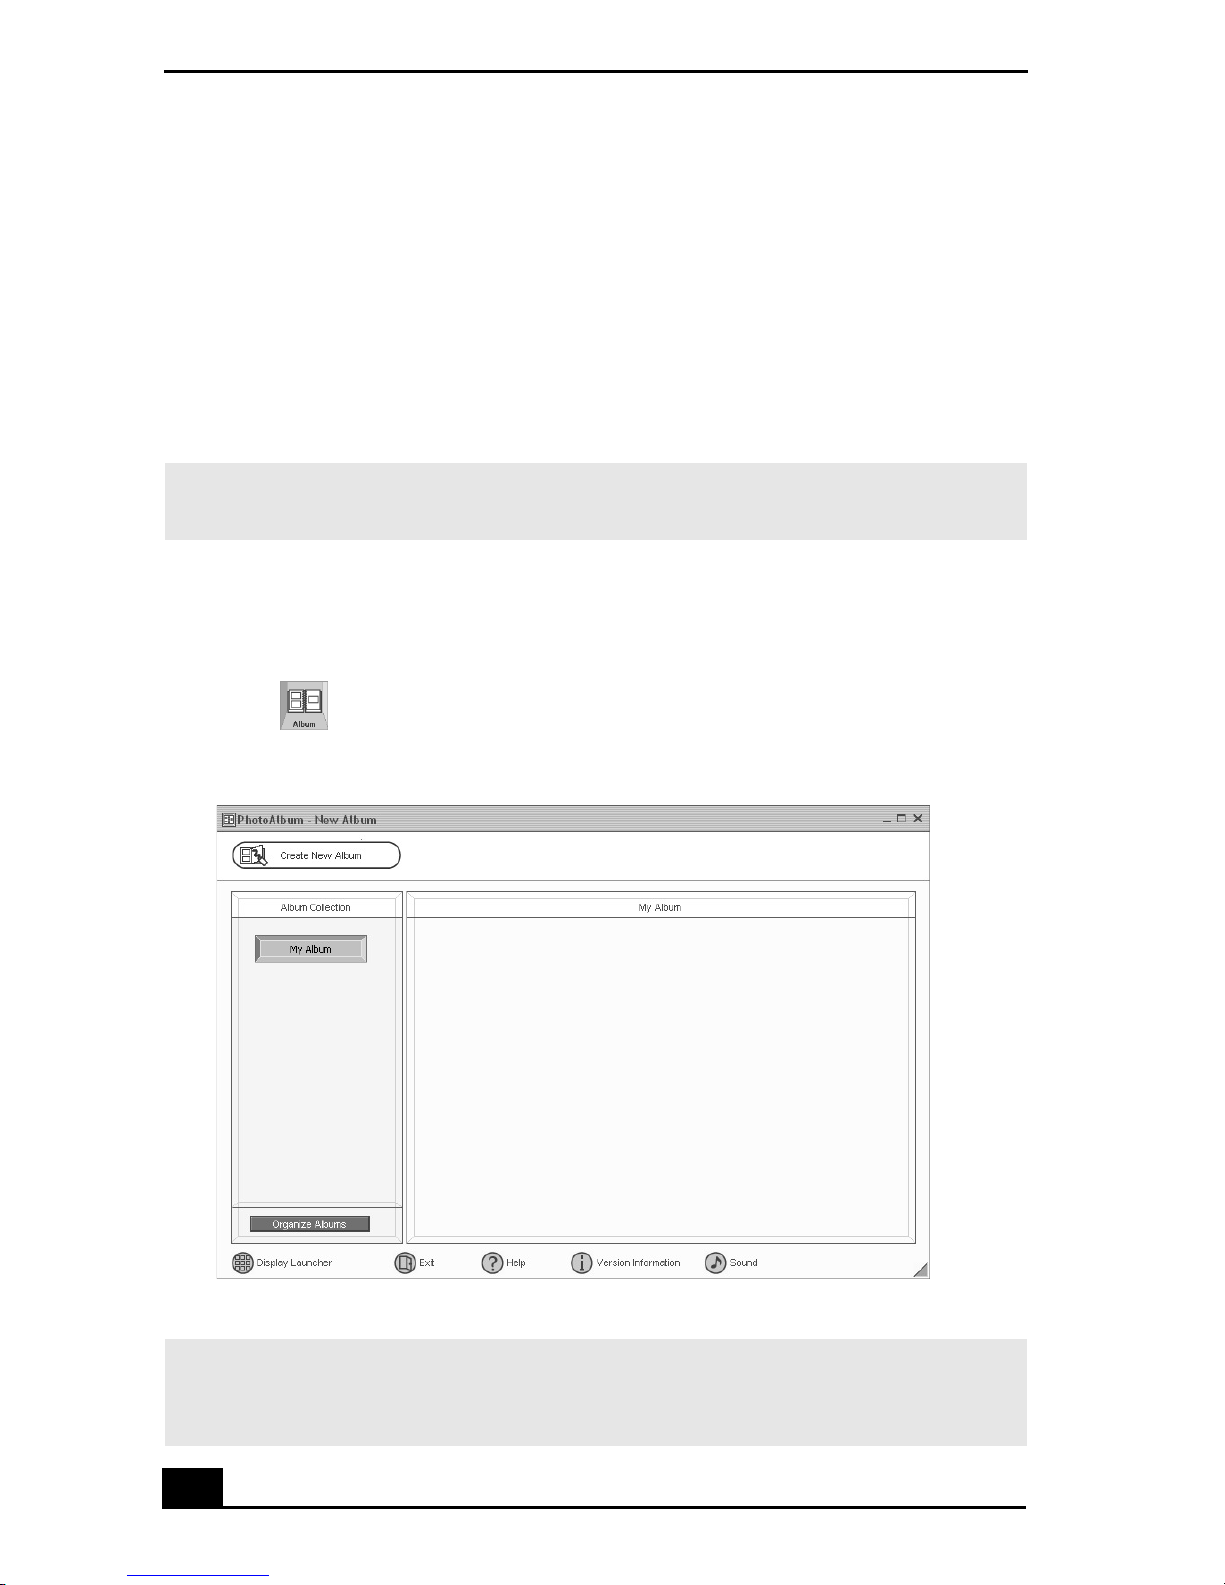
1 Click (Edit) to ope n the PhotoDecor - New P hotoDecor window. A list
of folders is displ ayed o n th e left side of the win dow, with the fol der con te nts
displayed as thumbnail pictures on the right.
PhotoDecor-New PhotoDecor window
25
Page 24
VAIO Digital Studio Computer User Guide
2 Select the desired fold er. From t he thumbnail view, click t o select the
pictures you wan t to decorate. The PhotoDecor editing window appears.
3 Use the decoration features on the right side of the window by clicking on
the desired decoration icon, and then dra gging the decoration onto your
photo.
4 Click Print when your photo is ready to be printed. You can save your
decorated pic tures before printi ng. Name the new picture, and click Save.
✍ The defau lt locatio n for your saved decorated pictur es is in the Decorated Photos
folder, which can be v iewed from the PhotoDecor - New PhotoDecor window.
Using PhotoAlbum
Capture your special photos in an organized photo album. You can share your
custom-made photo albums with friends and family.
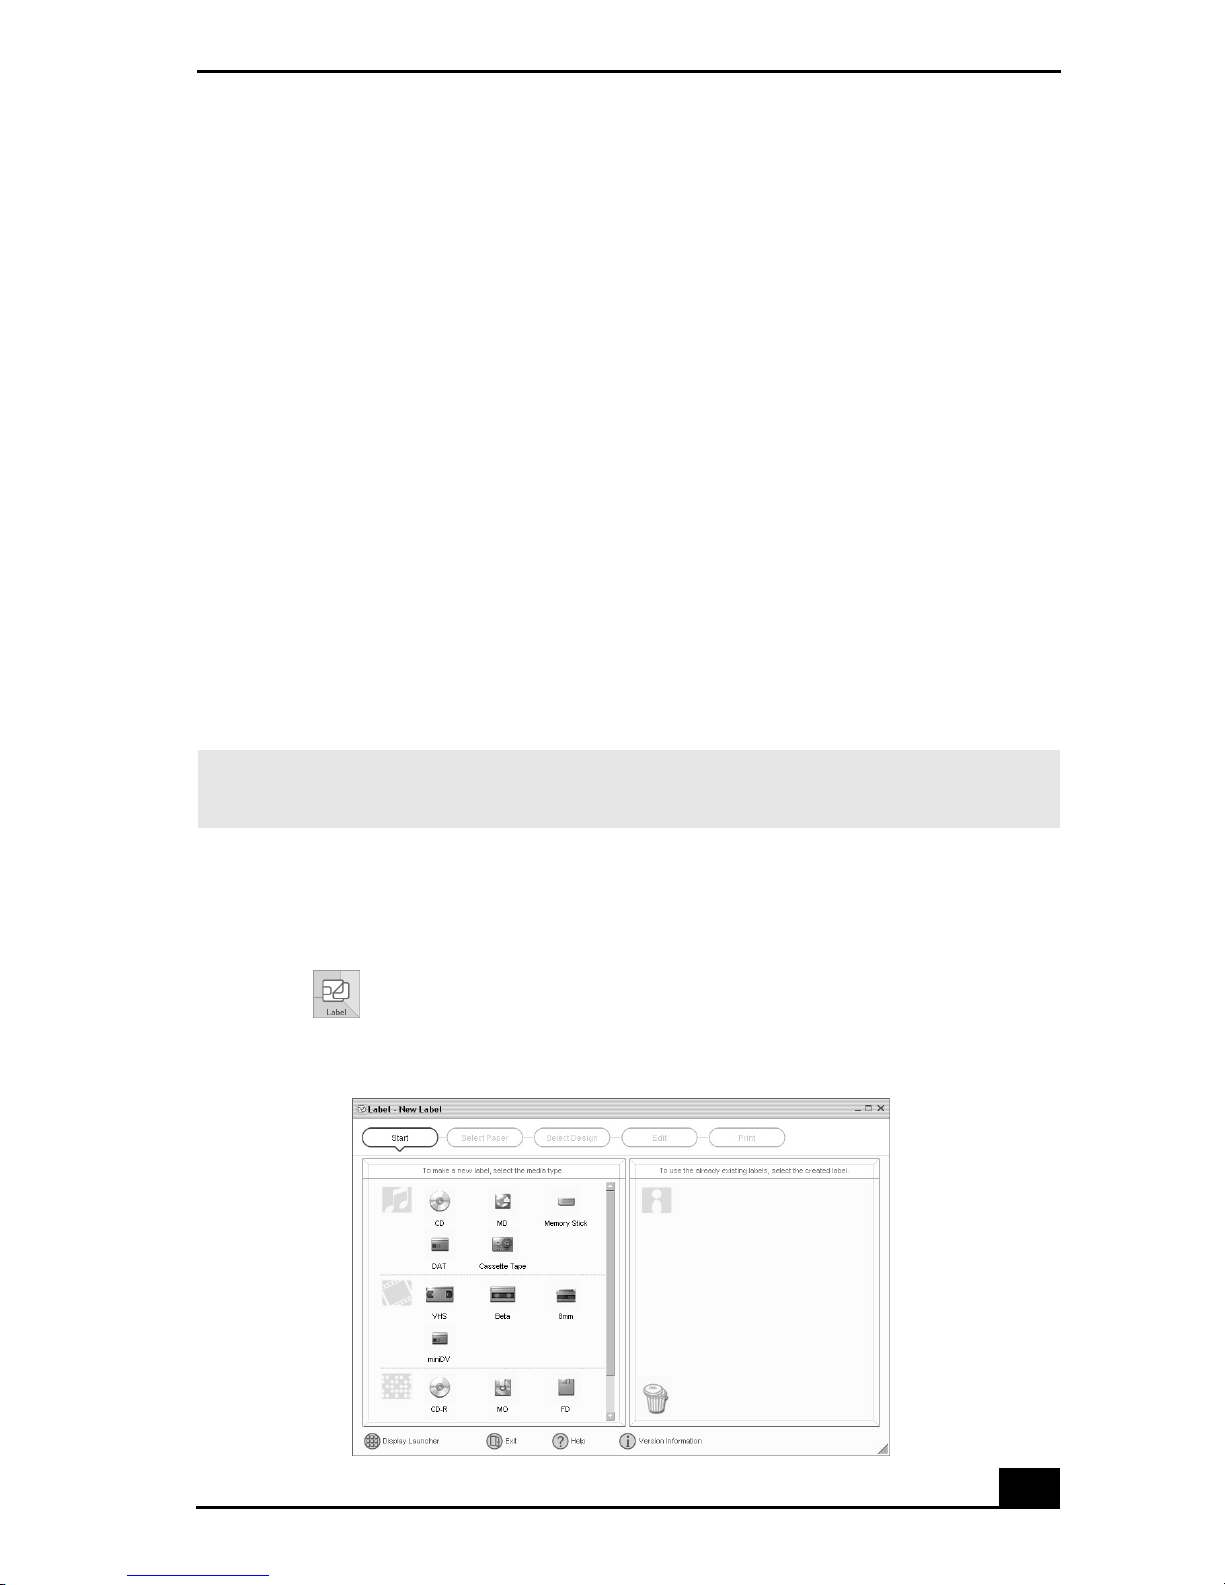
1 Click (Album) to open the PhotoAlbum - New Album window.
PhotoAlbum - New Alb um window
✍ If you wish to work on a previously created album , do not click Crea te New Album.
Instead, select the desired album from the Album Collect ion view on the right side of
the window.
26
Page 25
DigitalPrint Software
2 Click Create New Album. The Select Photo wind ow appears.
3 Select the photos you want to include in your album from the available
folders displayed. Click List to s elect individual pictures from each folder.
The Select Design window appears.
4 Select a design template for your alb um. Use the scroll bar to see all
availa ble designs. When you have s elected the design, the Select Layout
window appears.
5 Select a page layout for your album. A preview of your selected design and
page layout is displayed. Scroll through the album using the book icons at
the bottom of the window.
6 Click Page List to edit your album. Cus tom ize your album by adding more
picture s, decorations, comment s, or deleting pages.
7 You can save your album before printing by clicking Save.
8 Click Pr int. Select an album type, and click Print again.
✍ For information on stitching your album, click Stitch Album. See the online Help file
for mo re det ai ls .
Using LabelMaker
Use LabelMaker to design original labe ls to personalize your media, such as
Memory Sti ck® media, CDs, or video cassettes.
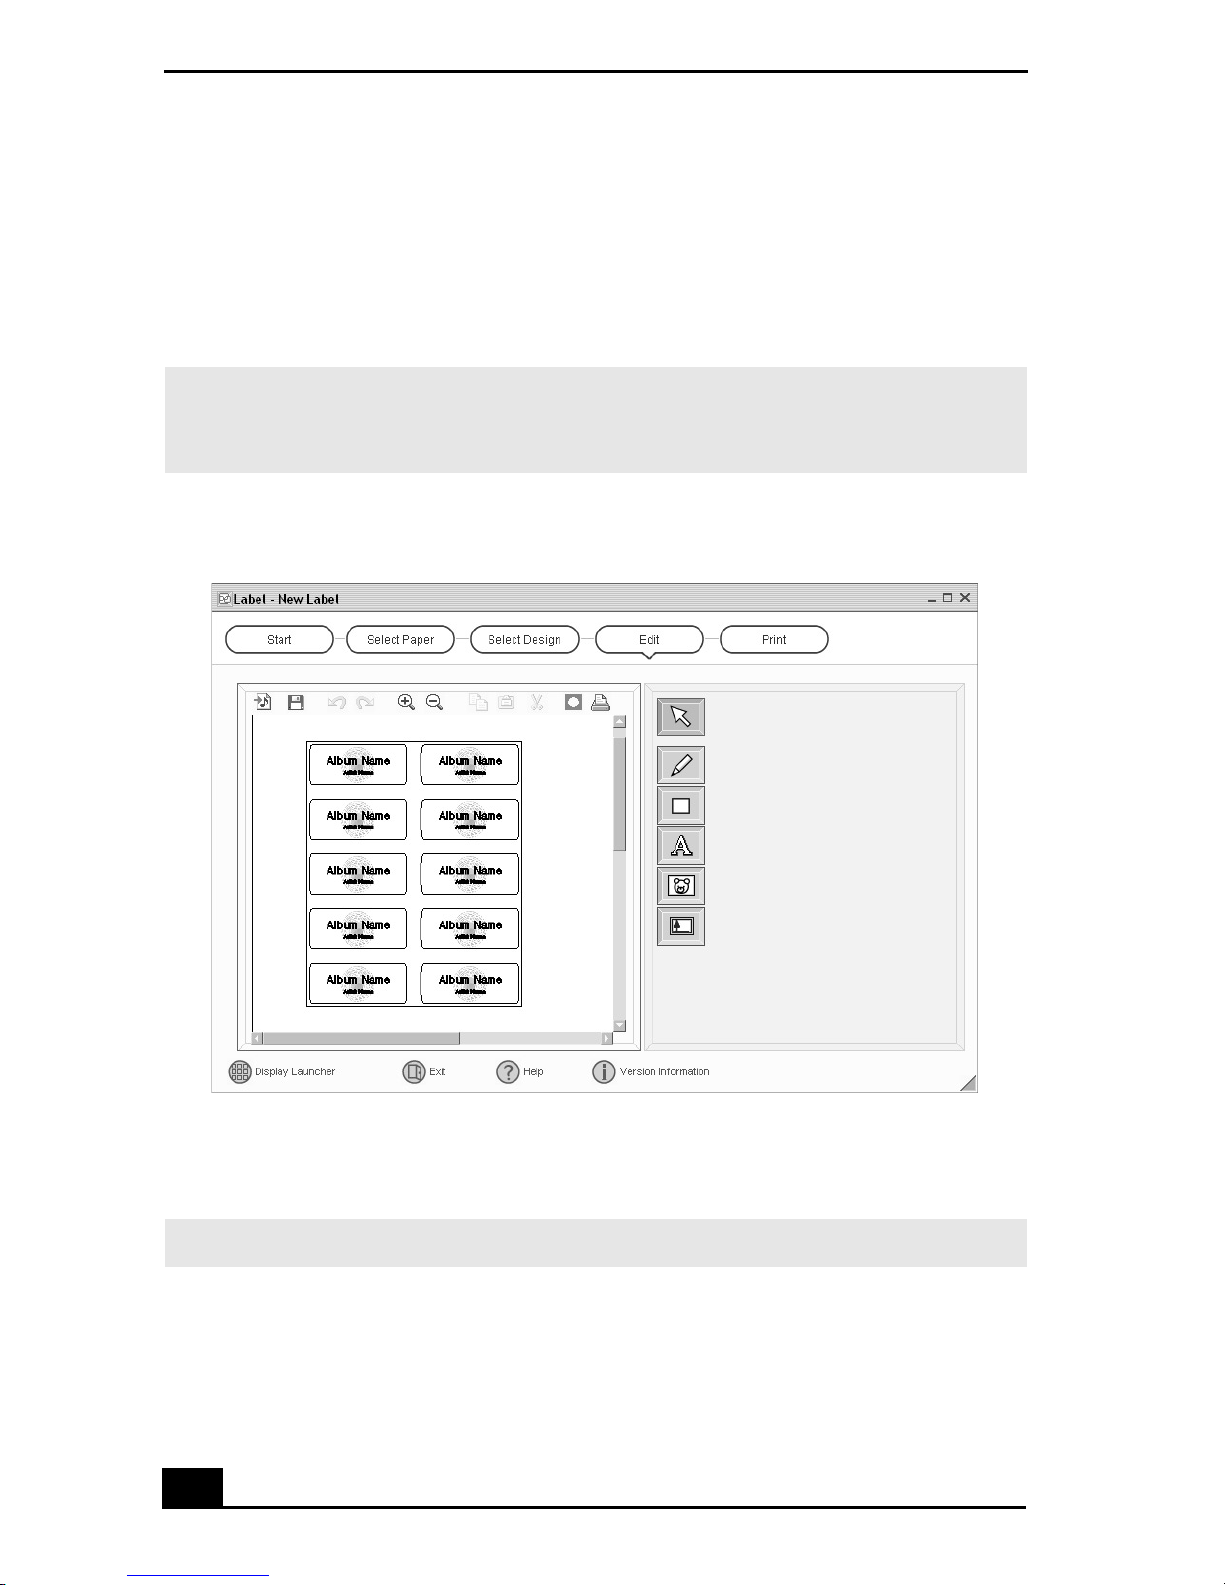
1 Click (Label) to open the Label - New Label window.
Label - New Label window
27
Page 26
VAIO Digital Studio Computer User Guide
2 Click an ic on to s elect a media type. A new window opens.
3 Click the paper layout icon. The Select Design window appears.
4 Select a design template. Use the decoration and customization features on
the right by clicking an icon and dragging it onto your template.
✍ A new window appea rs , enabl ing yo u to list the con ten ts of y our audio or video medi a.
Y ou can create a song or video list, depending on the type of me dia label being
created.
Design Edit window
5 Click Print to complete the label making process. Use the configuration
buttons and drop-down lists to selec t the printer and to set margins.
✍ See the online Help for detailed information on usi ng DigitalP rint software.
28
Page 27

DVgate Software
DV gate Software
Connecting a digital video camcorder
Turn off the power to your dig ital video camcorder before connecting it to your
computer. After connecting th e device, turn its power bac k on. You do not need
to turn off the computer when connect ing the camcorder.
To use DVgate™ software with a digital video camcorder
❑ Do not use DVgate™ s oftware when the connected digital video device is in
Timer Recording mode, as this may produce a malfunction in the device.
❑ Video captures larger than 2 GB (9 minutes and 30 seconds) are
automatically conti nued in a second file.
❑ You can record stereo a udio (stereo 1) while capturing video, or you can add
audio on the stereo 2 track after capturing the video data.
❑ You cannot use different audio m odes on the same tape. Perform a separate
capture for each audio mode you wish to use.
❑ DVgate software does not support hard disk compression. Do not use disk
compression if you are planning to work with DVgate software.
❑ Title data is saved in the flash memory of a digital video camera and is not
transferred to tape by DVgate software.
❑ Disa ble your screen s aver program to avoid interruption during your capture
sessions.
❑ The dro p fr ame compe ns ation feature does not provi de a cc urate
compensation adjustments for tapes recorded in LP mode.
❑ The information displayed by the capture progres s indicator may not be
accur at e f o r ta p es th at are rec o r de d usi n g a mi xt u r e of b oth SP an d L P
modes.
❑ Keep the video head of your digita l video device properly cleaned.
Anomalies that you see i n captur ed data may be du e to dus t or ot her part icle s
on the video he ad.
❑ The last frame captured is one frame before your selected [OUT] point. The
frame you see immediately after clicking the [OUT] button is not captured.
29
Page 28

VAIO Digital Studio Computer User Guide
To use DVgate software to record AVI files to tape
✍ You can record only AVI files. MPEG files cannot be recorded.
❑ Do not use DVgate™ software when the conne cted digi tal vide o device is in
Timer Recording mode, as this could produce a malfunction in the device.
❑ Avoid recording probl ems, such as a single frame appear ing in multiple
frames, by closing other applications on your system while recording.
❑ You cannot use mult ip le audi o mode s on the same tape. If you hav e AVI files
that use different audio m odes , the fil es cannot be recorded at the same time,
but must be recorded separately.
❑ The DVgate software does not support AVI files that are smaller than 4 MB.
❑ The DVgate software does not support hard disk compression.
❑ To maximize recording ca pabilities, video and audio data are not a vailable
while you are recording.
❑ If the DVga te soft ware indic ates t hat frames are dropped, tr y clos ing a ll open
applications or defragmenting your hard drive.
30
Page 29
MovieShaker Software
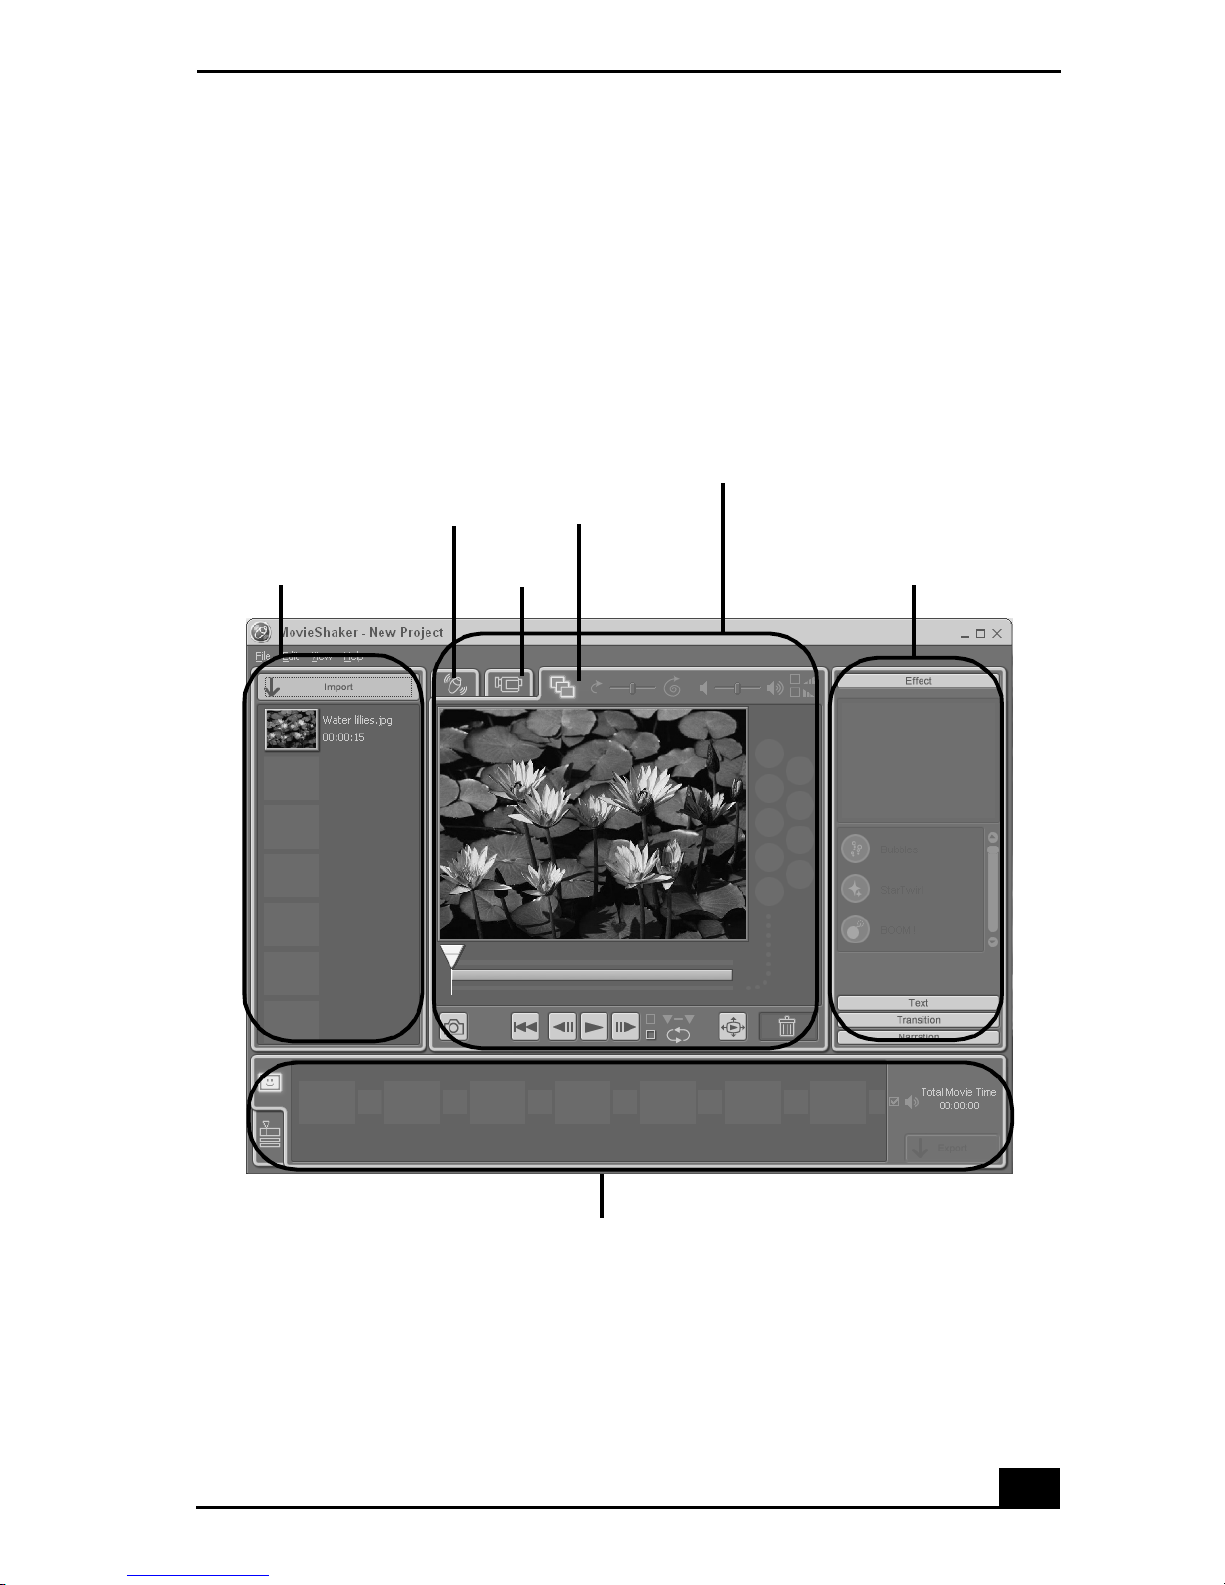
MovieShaker Software
MovieShake r™ so ftware can be used to create fun and innovative movies
without any pre vious knowledge of film editing. In a few simple steps, video
files ca n be made fr om st ill im ages wit h ad ded speci al ef fe cts and mus ic. You can
save your personal video creation in a format that is compatible with most
computers.
MovieShaker main window
Worki n g pa nel
Shake
tab/tray
Edit
tab/tray
Import clip tray
Capture
tab/tray
Effect tray
Story B oard tray
31
Page 30

VAIO Digital Studio Computer User Guide
Creating movies with MovieShaker software
Using your i mported clips, you can create a sh ort movie using the S hake feature.
The Shake feature selects clips from the Story Board tray, adds effects, and
combines them randomly in to a 30-second m ovie. After you “Shake” your video,
you can edit it by adding effects a nd text, by adjusting the color and contrast, and
by modifying its length.
Importing images and sound clips
1 Click Import. The Import file browser window appears.
2 Find the clips you want to add.
3 Click th e cl ip s . T h e fil e s ar e ad d ed to th e I m p o rt clip tray.
4 Repeat this process to gather each of the images and video and sound clips
you want to use in your movie.
✍ Yo u can delete a clip from t he Import clip tray by dragging the cl ip’s icon to the tras h
icon located on the Edit tray of the working panel.
Importing image or sound file s that are over 30 seconds in len gth may caus e
the MovieShaker software to stop responding.
32
Page 31

MovieShaker Software
Using the Shak e feature
1 Click the Shake tab. The Shake tray appears
2 Select a mood by clicking a face in the Shake pattern tray.
Shake tray
Shake tab
Shake
pattern tray
Shake!
button
Playback
buttons
3 Click the Shake! button. A 30-second movie is automatically generated.
4 Optional: Add text to your new movie by clicking on the Input button.
5 To preview, rewind, or fast forward your movie, use the Playback buttons.
✍ Scenes created with the Shake fe ature begin with a black screen in the Shake tray
window. Your scenes appear during movie playback.
Y ou can improve the image quality produced by the Shake featur e (at the cost of
longer Shake times) by turni ng off the “Shorten the Shake time” feature in the General
panel of the Setting di alog box. See th e “Menu reference” sectio n of th e online He l p
file for de t ails.
33
Page 32

VAIO Digital Studio Computer User Guide
Adding eff ects to a scene or a clip
1 Double-click or drag the desired clip or scene to move it to the Story Board
tray.
2 Click the Effect button on the Ef fect tray.
Effect tray window (Effect button selected)
Effect
button
Effect
icons
Additional
effects
3 Drag the Effec t icon you want to add from the Effect tray to the Effect
palette on the Edit tra y.
4 Click the Play button on the Edit tray to preview the effect. The added effe ct
previews on the clip displayed in the Effect tray window.
✍ A preview of the added effect is displayed in the Effect tray window. You can eliminate
an effect by dragging it from the Effect palette to the trash icon on the Edit tray. See
the online Help file for more information on adjusting effect duration and replaying
clip s an d scene s.
34
Page 33

MovieShaker Software
Adding text effects to a scene or clip
1 Double-click or drag the clip or scene to move it to the Story Board tr ay.
2 Click the Text button on the Editing tray.
Effect s Tray (T ext butt on selected)
3 Click the Text Setting button to create customized text. The Text Setting
dialog box ap pears. Enter your text, and select the font, size, color , and
positioning for your text.
4 Drag the Text effect icon you want to add fr om the Effect tray to the Effe ct
palette on the Edit tray.
5 Click the Play button on the Edit tray to preview the text effect. The clip
displays the text effect in the Effect tray win dow.
✍ A preview of th e added text and t ext effect is displayed in the Effects tray window .
From the Edit t ray, you can elimin ate a text effect by dragging it from the Effect pa lette
to the trash icon. See the online Help file for more in formati on on adjusting Text
effects.
35
Page 34

VAIO Digital Studio Computer User Guide
Saving a movie
1 Verify that the movie or clips you want to save are loca ted on the Story
Board tray.
2 Click the Export button on the Story Board tray.
3 Select the format in which you want the movie to be saved.
✍ Yo u can click on each export format to view its description and u se.
Export window
4 Click Next.
5 Confirm tha t you want to continue.
6 Locate the folder to which you want to save the file, name your file, and
click Save.
✍ The time required to export your movie file may vary, depending on t he format
selec te d. See th e on li n e Help file fo r m or e in fo rmation on ex po r tin g a mov ie .
36
Page 35

MovieShaker Software
Using ImageStation online service with MovieShaker software
ImageStationSM is an online ser vice that allows you to store your pictures and
movi es on th e Int erne t to s har e with fa mily and fri end s. Imag eS tati o n requ ire s an
Internet connection and registra tion for the Web-based service. You must be
connected to the Internet before uploading your pictures or movies using
MovieShaker and ImageStation applications.
To upload MovieShaker files
1 Locate the clips or video files th at you want to upload to the ImageStation
service, and import th em to the Import Clip tray.
2 Drag the desired clips or video files to the Story Board tray.
3 Click the Export button. The Export window appears.
4 Select “MPEG1 (ImageStat ion)” and click Next.
✍ The MovieShaker application creates a temp orary file to store your images prior to
uploading to ImageStation. This file is deleted after the upload process.
5 If you are a registered member, provide your login name and password.
For first-time users, click “Register to ImageStation.” The ImageStation
registration wizard appears and guides you through the initial registration
process. Fo llow the on-screen instructions.
ImageStation Login window
37
Page 36

VAIO Digital Studio Computer User Guide
6 When the ImageSt ation application on your computer connects with
ImageStation online, your files are uploaded to the Web site. The Image
Uploader window appears and displays the Internet connection and upload
status.
Image Upload er window
7 Go to http://www.imagestation.com to view your uploaded pictures or
movies. Follow the on-screen instructions to access your Im ageStation
account.
✍ The ImageSt ation Web site may ask you to complete a full login again if your current
sess ion is not active.
38
Page 37

PictureGear Software
PictureGear Software
PictureGear™ software is a digital image management application that allows
you to view all the images stored in any directory on your computer. Thumbnail
views provide qui ck re mi nders of your pictures. Use PictureGear software to
brighten, add contrast, enhance, resize, crop, and color-correct your pictures.
Create anim ations, screen save rs, wallpaper , still picture s from MPEG, and
HTML photo albums.
PictureGear main window
Managing your pictures
Use the Colle ction feature to manage you r pictures.
1 From the Collection menu, click Create New Collection.
2 Enter a name for your collection, then click OK.
3 Click the Folder t ab in the main window, and browse to locate your pictures.
4 Select the pictures you want to include in your collect ion.
5 From the Collection menu, click Add File to Collection.
6 In the Add File to My Collection message box, select the name of your
collection, and click OK.
39
Page 38

VAIO Digital Studio Computer User Guide
Creating a photo album
1 Click the Folder tab in the main window and brows e to locate your pictures.
2 Select the pictures you want to include in your album.
PIctureGear Album Maker window
3 From the Utilities menu, select Album Maker.
4 Choose a Design template for your album.
5 Click the “Make soon” button to create your album immediatel y, using the
PictureGear default settings.
40
Page 39

PictureGear Software
6 Click the “C u stomize the design ” button to add pictures, frames, text, and
effects.
Custom Album window
✍ If you select the Custom Album process, the final album is created w h en you click the
Finish button in the last dialog box.
Custom album “Completed” window
7 Click Save to designate the location where you want to save your album.
8 Enter a n ame for the target folder and cl ick OK.
9 The PictureG ear™ Custom Album fea ture creat es the new folder in the
design ate d location.
41
Page 40

VAIO Digital Studio Computer User Guide
Smart Capture
Smart Capt ure is a Sony applicatio n that manages the i.LINK ® connec tion
between you r computer and a compatible i.LINK digital camera or camcorder.
You can capture and enhanc e vide o or still images to share with your family and
friends over the Internet or through e-mail.
✍ i.LINK is a t rademark of S ony used only to designate that a product contains an
IEEE1394 connecti on. The i.LINK co nnection may vary, dependi ng on the software
applications, operating sy stem and compat ible i.LINK devices. All products with an
i.LINK connection may not communicate with each other.
Please refer to the documentation that came with yo ur compatib le i.LINK dev ice for
information on operating con ditions and pr oper connection. Before connecting
compat ible i.LINK PC peripherals to your system, such as an optical disc drive or hard
disk drive, conf irm their operating sys tem compati b ility and required operating
conditions.
Smart Capture main window
1
2
3
4
5
6
42
Page 41

Smart Capture
1 Mode indicator
Displays the current mode (Still or
Net Movie).
2 Mode dial
Switches Smart Capture from Still
mode to Net Movie mode with a
single click of your mouse.
3 Options button
Displays the configuration options
avail a b l e for either St il l o r Ne t
Movie mode.
Effects button
Displa ys the special ef fect s that you
can apply to your pictures or video
clips.
4 Help button
Connects you directly to the online
Smart Capture Help.
5 Capture button
Captures your individual still
images in the same manner as a
came r a. You can select di ffer en t
characteristics fo r the Captu r e
button when capturing a Net Movie.
6 Image window
Displays the still or video image
from your digital camera or
camcorder.
The Smart Capture main window opens with a blue screen image, indicating that
there is no data input from a digital camera or camcorder. When you connect
your digita l cam era or camcorde r to your syste m with an i.LINK cable and turn it
on, an image appea rs in t he main wind ow. Some cameras and camco rder s need to
have a recording media inserted before an image can be displayed in the Smart
Capture window. Consult the manual supplied with your digital camera or
camcorder for more information.
Using Still Mode
1 Click Start in the Windows® taskba r and cl ick All Programs.
2 Select Sm art Ca ptur e and th en c lick Sm art Capture . The Smart C apt ure main
window appears.
3 Connect your compatible i.LINK digital camera or camcorder to your
computer with an i.LINK cable (optional). An image appears in the Smart
Capture mai n window.
4 Check th at the Mode dial is set to Still. Click the Mode dial to switch
between Still mode and Net Movie mode.
43
Page 42

VAIO Digital Studio Computer User Guide
5 Click the Options button to view the available options for your still image
capture. The Still Image Options window appears.
Still Image Options window
The Still Image Options window has four ta bs:
❑ Capturing Mode — You can choose between Normal, Self-timer, or
Panorama Capture modes.
❑ Ima ge Size — Select the image size, horizontal by vertical, in pixels.
❑ Imag e Qual ity — Set the quality of your pictures as they are being
saved by selecting Fine, Standard, or Economy image quality.
❑ Destination — Select a file destinati on for your pictures.
6 Click th e Effec ts button to select a s p ecial image effect. The Ef f ect Settings
window appea rs. Use th e drop-down li st to vi ew and cust omize the ava ilabl e
effects.
✍ Yo u can use a different special effect for each picture, or you can remove all special
effects by clicking the No Effects button.
Effect Setti ngs window
44
Page 43

Smart Capture
To capture a picture in Still mode
1 Use your digital camera or camcorder to locate the image you want to
capture. Whe n you se e the d esired i mage i n the Sm art Ca pture wind ow, click
the Capture button. The Still Viewer window appears. You can capture one
picture or severa l pictures at a time.
Still Viewer window
2 Click the arrows or drag the scroll bar to view the pictures. As each image is
capture d, it appears in the Still Viewer window with a text balloon to add
your comments and an identifyin g number in the viewer queue.
To manage pictures in Still mode
From the Still Viewer window, you can perform various functions using the task
buttons:
❑ Delete — Discard any or all of your still images by clicking the Delete
button. Select a single image or all and the image( s) is “torn” and remove d
from the Still Viewer window.
❑ Upload — Send your still images online to the ImageStation Web site to
share with your family and friends. The ImageStation service stores your
still images online when you become a registered user. See “Using
ImageStation with Smart Capture software.”
❑ Mail — E-mai l your still images to your family and friends. Click the Mail
button and your e-mail application launches with a new messa ge window
containing th e still image as an attachment.
❑ Save — Click the Save button to save your still image in a variety of
formats, to a location of your choice.
45
Page 44

VAIO Digital Studio Computer User Guide
✍ You must be connected to the Internet before attempting to upload or e-mail your still
images or videos.
Using Net Movie Mode
1 From the Start button in the Windows taskbar, select All Programs, s elect
Smart Capture, and then click Smart Capture. The Sma rt Capture main
window appear s.
2 Connect your compatible i.LINK digital camcorder to your computer with
an i.LINK cable (optional). An image appears in the Smart Capture main
window.
3 Verify tha t the Mode dial is set to Net Movie. Click the Mode dial to swit ch
between Still mode and Net Movie mod e.
4 Click the Options button to view the available options for your movie
capture. The Recording Options window app ea r s.
Recording Options window
Format tab view
Capture Button tab view
The Recording Options window has three ta bs:
❑ Format — You can adjust the compression rate for your movies in
MPEG1 format or choose the AVI option for no compression. You can
also set th e maxim um recording time for your movie capture.
46
Page 45

Smart Capture
❑ Destination — Select a file desti na tion for y our movie s when recordi ng
video clips.
❑ Capture Button — Set the characteris tics of the software’s on-screen
Capture button. You can st art a nd stop recordi ng by clic king the Ca ptur e
button (t his is the default characteristic). You can select Anti-Ground
Shootin g, which allows recording to occur only while you click and
hold the Capt ure button. Recording will stop when you release the
button.
5 Click the Effects button to select a specia l image eff ect. The Effect Settings
window appear s. Use the dro p-down l ist to view and cust omize the avail able
effects.
✍ Yo u can remove all special effects by clicking the No Effec ts button.
To capture a movie in N et Movie mode
1 Use your digital camcorder to locate the view(s) you want to capture. When
you see the desired view in either the Smart Capture window or your
camcorder’s viewfinder , click the Capture button to begin recording your
movie. The Movie Player window appears.
2 Click the Capture button when you have finished recording your movie and
the first fr ame of your m ovie appears in the Movie Player window . You can
record a movie for approxi ma tely 30 seconds. The Movie Player feature
automatically stops recording when this time limit is reached.
Movie Player window
47
Page 46

VAIO Digital Studio Computer User Guide
3 You can review your movie from the Movie Player window by using the
play, pause, and stop buttons . Click the arrows or drag the scroll bar to view
your movie. Each fra me is di splayed with an identifying number in the
queue.
✍ If you have set the Captur e button to use th e Anti-Ground setting, you must click and
hold the Capture button to record your movie.
To manage your movie in Net Movie mode
From the Movie Player window, you can perform various functions using the
task buttons:
❑ Delete — Discard any frame or the entire movie by cli cking the Delete
button. Th e frame or movie is rem oved from the Movie Player window.
❑ Upload — Send your movies online to the ImageStation Web site to share
with your family and friends. The ImageStation service store s your movies
online when you become a registered user. See “Using ImageStation with
Smart Capture software.”
❑ Mail — E-mai l your m ovies to family a nd fr iends . Cli ck the Mail bu tto n and
your e-mail app licat ion launc hes wit h a ne w messa ge window cont ainin g the
movie as an attachment.
❑ Save — Click the Save button to compress and save your movie in a variety
of formats, to a location of your choice.
Using ImageStation with Smart Capture software
ImageStationSM is an online service that allows you to store your pictures and
movies on the Internet to share with family and friends. The ImageStation service
requires an Interne t connection and registration for the Web-based servi ce. You
must be connected to the Internet before uploading your pictures or movies with
Smart Capture and Im ageStation applications .
48
Page 47

Smart Capture
To upload with Movie Player
1 Click the Upload Button in Movie Player to begin transfer of your movie to
the ImageStation Web site . The Image Uploader window appears and
displays the Internet connect ion and upload status.
Image Uploader window
2 Click to see thumbnail previews of your pictures or movies .
✍ The ImageStation preview feature is available when you upload two or more pictures
or a movie. No preview is shown if a single picture is being uploaded.
To upload with Still Viewer
1 Click the Upload button in St ill V iewer. The ImageStation Login window
appears.
ImageStation Login window
2 For first-t ime u sers, t he ImageS tati on re gist ration wi zard gui des yo u through
the initial registration process. Follow the on-screen instructions. If you are
already a registered member, provide your login name and passw ord. The
Image Uploader window appears.
49
Page 48

VAIO Digital Studio Computer User Guide
3 From the Still Viewer window, click the Upload button to transfer your
pictures or movies to t h e I mageStation Web site. The Image Uploader
window displays your Internet connection and upload status. Click to
see thumbnail previews of your pictures or movies.
✍ The ImageStation preview feature is available when you upload two or more pictures
or a mov i e . No prev ie w i s sh o w n i f a single pi cture is being up loade d .
4 Go to http://www.imagestation.com to view your uploaded pictures or
movies. Follow the on-screen instructions to access your Im ageStation
account. The ImageStation Web site may ask you to complete a full login
again, if your current session is not active.
✍ Sony recom mends tha t your movi e fil e s ize no t ex ceed 25 4 M B if comp re sse d, or 2 GB
if not com pressed. Large movi e files take longer to upload to the Im ageStation Web
site.
50
Page 49

SonicStage Software
SonicStage Software
SonicS tage softwa re is a ne w jukebox ap plica tion th at adds a hos t of ne w featur es
to its predecessor, OpenMG™ Jukebox. Sonic Stage software lets you play and
record fr om aud io CDs and i mpo rt digi ta l audi o f iles whi le mai ntaini ng c opyr ight
information. Continuing to take advantage of Sony’s copyright-protected
ATRAC3™ format for high-quality digital audio storage, SonicStage sports a
new music visualizer, a sleek new player skin design, audio CD burning
capability, and a parametric equalizer for fine-tuning audi o playback.
Electroni c M u si c Distribut ion (EMD) S er vices
EMD enables you to download music files v i a the Inter net. To u se Internet
services that are compatible with SonicSt age, you need:
❑ Access to th e Int erne t from your computer. Sign up with an Internet Service
Provider (IS P ) and configure your computer for Internet access before using
EMD servi ce s.
❑ An EMD service provider. Consult the provider for service inf ormation.
✍ T o protect your personal data, Sony uses Secure Sockets Layer (SSL), an encryption
protocol for communi cation between your browse r and Sony’s Wo r ld Wi de Web
(WWW) server. If you are accessing the Inter net from an en terprise Local Area
Network (LAN), you may not be able to use S SL due to the proxy server of the LAN .
Contact your network administrator fo r m ore information.
Starting SonicStage
1 Click Start in the Wi ndows taskbar and then cli ck All Programs.
2 Select SonicStage and then click SonicStage.
✍ The CDDB® (Compact Disc Database) Music Recognition Service registration wizard
enab les you to register with CDDB. You need Internet access from your computer to
register and use this se rvice. For more information regarding CDDB regist ration, click
the Help button.
3 When you have registered with CDDB, the “Conf ir m the setup of
SonicStage...” dialog box appears.
4 Click Yes to con tinue.
51
Page 50

VAIO Digital Studio Computer User Guide
SonicSt age feature tabs (Main window)
❑ CD tab — The contents of your inserted audio CD are displayed,
enabling functions such as recor ding to the computer’s hard dis k drive.
❑ Import tab — Import MP 3, WAV or audio files on your computer t o
a Play li st.
❑ Playl ist tab — View the available P l aylists as “tree + list” or “list”
only.
❑ Transfer tab — View the a vaila ble Pla yli sts on your comput er. You
can transfer the audio files to an external device or media.
❑ Device/Media tab — View the status of your audio files,
connected external device, or inserted media.
❑ Internet tab — The browser view displays your connection to the
Internet, enabling you to locate audio files and use EMD services .
SonicStage main window
1
3
Playlist view
2
4
52
5 6
7
Page 51

SonicStage Software
1Feature tabs
Changes the screen view according
to the select ed fe ature.
2 Player contro l b u tt o n s
Controls playback functions, such
as play, pause, stop, fast forward,
and reverse. You can increase or
decrease volume and switch view
modes.
3 Play list drop-down list
(Playlist view)
Displa ys a vailable playlis ts and
audio files.
4 File tree view (Playli st view)
Disp lays the folders avai lable on
your computer, enabling you to
locate your audio files. Expand the
views for the file list or Playlist
drop-down usin g the Playlis t switch
button.
5Tutorial
Click to open or close the Tutorial
feature.
6 Internet address drop-down list
Displays current and recently
visite d Internet a ddresses. Click the
“Go to URL link” button to
immediately connect to your
favorite Web sites.
7 File list view (Playlist view)
Displays the contents of the folder
selected in the file tree view.
Recording from a CD
You can record songs from audio CDs and import them to playlists in
SonicStage.
✍ When you record from an audio CD from your optical di sc drive for the first time, the
“CD Drive Optimizat ion” dialog box appears. Click Start to verify your optical disc
drive. After the verification is performed, record ing begins.
1 Insert an audio CD into your system’s optical disc drive .
2 Click the CD tab.
3 Use the dro p-down l ist s to s ele ct the ATRAC3 bi t rate , CD dri ve, a nd Reco rd
To dest ina tion.
53
Page 52

VAIO Digital Studio Computer User Guide
CD tab window
4 You can identify specific tracks on your CD by clearing the check marks
from the tracks you don’t want to recor d. You can clear all se le ct ed tr ac ks by
selecti ng t he empt y c heckbox next t o Se le ct All , and the n se lect ing the t racks
you want to recor d.
If your Internet connection is active, you can use the CD Info button to
view the name of your CD and its song titles.
✍ The CD Info button feature is not support ed for all audio CDs.
5 Click (Rec to Jukebox) to be gin recording. When the rec ording is
finishe d, the new playlist appear s in the File tree view of the Pl aylist
window.
Tr an sferring songs (Ch eck-In/Check-Out)
You can transfer songs between the playlists in the SonicStage software and
external devices or media. For more information on using your external devices
or media, see the instructions supplied with the device or media.
These instructions are for using the Check-In/Check-Out “1-step” method. For
information on us ing another method, see “Changing the check-in/check-out
settings” in the SonicStage online Help file.
54
Page 53

SonicStage Software
Check-Out
1 Connect the external device or in se rt the media into your computer.
2 Click the Transfer tab to display the Transfer window. Your computer
automatically recognizes the connected external device or media and lists
the content information in a new panel on the right side of the Transfer
window.
Transfer window
3 Select the Playlist that contains the song that you want to check out. The
songs in the playlist are shown in the Playlist view pane l located in the
center of th e Transfer window .
4 From the Pla yli st vie w panel, sele ct the song to be check ed ou t. To check out
more than one song at a time, hold down the Ctrl key and select the
additional songs.
5 Click (Out), or drag the song to t he desire d posit ion in th e song lis t of the
externa l device or media. Check Out begins.
✍ T o can cel Ch eck Out , clic k (Sto p), or cl i ck Canc el in t he Pr ocess in g dial og box that
is displayed during the Check Out process.
55
Page 54

VAIO Digital Studio Computer User Guide
Check In
✍ The song s that you transf er to external devices or media can only be checked in to the
hard drive of the same computer from which the songs were checked out.
1 Connect the external device or insert the media into your com puter.
2 Click the Transfer tab to display the Transfer window. Your computer
automatically recognizes the connected external device or media and lists
the content information in a new panel on the right side of the T ransfer
window.
3 Select the song to be checked in from th e s ong list of the external device or
media. To check in more than one son g at a time, hold do wn the Ct rl key and
click the additional songs.
4 Click (In), or drag the song(s) to the Pl aylist view panel. If you want to
check in all of the songs in the external device or media, click (In Al l).
Check In begins.
✍ To cancel Check In, click (Stop), or click Cance l in the Processing dialog box that
is displ ayed during the Check Out process.
For more informati on about using SonicStage software, go to the onl ine
SonicStage Help. You can access the online help file as follows:
1 Click the Start button in the Windows taskbar, s elect All Programs .
2 Select SonicStage, then select SonicStage Help.
56
Page 55

SonicStage Software
Additional features
❑ SonicStage Tutorial — Son i cS ta ge fe atures ar e d es c r ib e d in th e Tutorial .
The user-friendly interface instructs you on how to use all SonicStage
features.
❑ SonicStage Backup Tool — Y ou can back up and restore music, graphics,
and information data managed by SonicSta ge. You must be connected to the
Internet to use the SonicStage Backup Tool.
❑ Impor t au di o files in various format s — You can import audio files in
various forma ts , such as MP3 or WAV standards. You can also import audio
files th at comp l y wi th th e M icros o f t® Windows Media™ Technologies
(WMT) standard, identified by .asf or .wma extensions. Manage your audio
files through the Playlist feature of SonicStage.
❑ Manage impor t ed s on gs on the Playlist — Additional featu r es are
available when you register your imported songs through t he Playlist fe ature
of SonicStage. You can manage your music by creating your own list of
songs categorized by genre or artis t, displaying your song list in the Playlis t
feature, and arranging your songs in a customized order using the Playlist
folders. Edit your music by combining multiple songs into a single song, or
divide one song into two, by using the Combine and Divide features.
❑ Simple mode — The main Sonic S tage windo w viewed in Sim ple mode, is a
smalle r, compact ve rsion of Full mode. This may be convenient when you
want to lis ten to music with SonicStage software, whil e using other
applications, or whenever you fe el the Full mode view is intrusive. The
design of the main SonicStage window in simple mode can be changed by
selecting a new “Skin,” which enhances the window’s appearance. The
Simple mode feature enables you to perform play bac k operations only.
57
Page 56

VAIO Digital Studio Computer User Guide
VisualFlow Software
VisualFlow™ software is a Sony state-of-the-art multimedia browser designed
specifically for Memory Stick® media. It displays any still picture, movie or
sound files stored in a Memory Stick media in a visually pleasing, artistic
manner. VisualFlow software plays a selected movie or sound file and enables
playback of files by other applications like PictureGear™, PictureToy™, and
Mem o ry St ick Slid eshow.
Using VisualFlow software
You can navigate in the VisualFlow application by using your mouse, the
directional arrows on your keyboard, or the Sony J og Dial™ control (on those
models that offer the Sony Jog Dial™ control).
1 Click Start in the Windows taskbar, then select All Programs.
2 Select VisualFlow, then click VisualFlow .
VisualFlow ma in window
3 Click an icon in the View section on the main toolbar to select a display
layout.
58
Page 57

Vis u alFlow Softw are
4 Click an ic on in the Sort section on the main toolbar to select a sorting
method.
5 Placing your cursor on the left end of the main tool bar activates the current
Mem or y Stic k p r op erti es .
6 Placing your cursor on the right end of the main toolbar activates a
secondary toolbar with more functions .
7 Click an image to sho w a normal view center ed on the scr een.
Doubl e- clicki n g an image sh ows an enl arge d view.
8 The movie file start s pla yba ck when the vi ew i s en larg ed. Cl ic k on the m ovie
files again to restore the view to normal.
✍ While an image is enlarge d, the Launch to olbar appear s at the bottom of t he window.
Any associated appl ication ca n be activate d from this point.
59
Page 58

VAIO Digital Studio Computer User Guide
Additional Soft wa re Information
VAIO Edit Components
VAIO® Edit Components is a software plug-in for Adobe® Premiere® that
provides maxim um co mpatibility and vid eo quality for capturing video from
your Sony digital camcorder. If your VAIO computer does not have Adobe
Premiere software preinstalled and you subsequently purchase this software,
install the VAIO Edit Component plu g-in to ensure compatibility with Sony
digital camcorders.
Installing VAIO Edit Components
1 Insert the Driver Recovery CD into your optical drive.
2 Click Start from the Windows® taskbar , sel ect My Comput er, and clic k your
optical drive.
3 Select Support, and click VEC.
4 Double-click Setup. The VAIO Edit Components installation wizard starts.
5 Foll o w the on - s c r ee n in struct io n s in th e in st allatio n wi zard.
6 Restart your computer when prompted.
60
Page 59

Configuring Your VAIO Computer
This section provides information about maintainin g your computer’s
hard disk drive performance and connecti ng a compatible i.LINK®
device.
Hard Disk Drive Partition
To maintain optimum system performance, you should defragment your
computer’s D partition regularly.
To improve the pe rformance of Sony audio and video so ftware application s, the
hard disk drive on your computer has been formatt ed with two partitio ns, C and
D. Some Sony software applications save files to the D partition. This prevents
large video captures from cons uming the available space on your C partition.
Defragmenting your hard disk drive
If you encounter frame dropping while recording digital video onto your hard
disk drive , defragmentation may be necessary.
1 Deactivat e your screen save r and close othe r open appli cati ons, if applic able .
2 Click Start in the Wi ndows taskbar and select All Programs.
3 Poin t to Access o r ie s , po int to S ystem Tools , and the n se le ct Disk
Defragmenter.
The Disk Defragment dialog box appears.
4 Select Action from the menu bar and click Analyze.
✍ It may take more than a couple of hours to complete defragmentation, depending on
the data capacity and current uti lization of your computer’s hard disk dri ve(s).
61
Page 60

VAIO Digital Studio Computer User Guide
i.LINK (IEEE1394) Compatibility
Your VAIO computer may include eithe r 4-pin or 6-pin, or both types, of i .L I NK
ports.
✍ i.LINK is a t rademark of S ony used only to designate that a product contains an
IEEE1394 connecti on. The i.LINK co nnection may vary, dependi ng on the software
applications, operating sy stem and compat ible i.LINK devices. All products with an
i.LINK connection may not communicate with each other.
Please refer to the documentation that came with yo ur compatib le i.LINK dev ice for
information on operating con ditions and pr oper connection. Before connecting
compat ibl e i .LINK PC pe riphe ra ls to you r s yst em, su ch a s a n opt ica l o r hard di sk drive ,
confirm their operating system compatibility and required operating conditions.
A 6-pin i.LINK port can:
❑ supply power from the computer to the connected device if the device is
equipped wit h a 6-pin connector.
❑ supply 10V to 12V.
A 4-pin i.LINK port cannot supply power to a connecte d device.
The total power supplie d by the 6-pin i.LINK port cannot exceed 6 watts.
The follo wing Sony i.LINK 400 Mbps cable s are a vaila ble an d recommende d for
use with your computer: VMC-IL4415, VMC-IL4435, VMC-IL4 615,
VMC-IL4635, VMC-IL6615, and VMC-IL6635.
Sony compu ter s upplie s, accessor ie s, and peri pheral s c an be purcha sed f rom you r
local retailer, from the Sony VAIO Direct Web site at http://vaio.sony st yle.com,
or by calling 1-888-315-7669 (toll free).
62
Page 61

i.LINK (IEEE1394) Compatibility
Connecting an i.LINK (IEEE1394) device
1 Use the symbol to locate the i.LINK port on your compatible i.LI NK
device and on yo ur comput er. Plug the i.LINK cable con nector i nto this port.
2 Plug the other end of the cable into the corres ponding 4- or 6-pin i.LINK
port on your computer.
✍ See the instructions that came w ith your i.LINK device for more information on
installation and use.
63
Page 62

VAIO Digital Studio Computer User Guide
64
Page 63

System, Application,
And Driver Reco very CD(s)
System Recovery CD(s)
Sony Electronics Inc.
The System Recovery CD utility enables you to restore the operating system and
soft ware tha t s hi pped with y o ur co mpu ter if th ey be co me corr u pte d or a re e r ase d.
It can be used only to restore the hard disk of the Sony computer you purchased.
Application Recovery CD(s)
Sony Electronics Inc.
The Application Recovery CD program enables you to reinstal l individual
applicatio n s. Use it to restore corrupted or erased files.
Driver Recovery CD
Sony Electronics Inc.
The Driver Recovery CD program enables you to reins tall individ u al device
driver s. Use it to res t o r e co rr up t ed or er ased file s.
65
Page 64

VAIO Digital Studio Computer User Guide
To Use the System Recovery CD(s)
The System Recov ery utility formats your hard disk drive and restores all the
original software applications. Your computer is returned to the original factory
settings.
The System Re covery process removes all software that you may have
install ed since you star ted using your computer. Reinstall any applications
that were not included with the computer when you purchased it .
If you experie nce a problem with your computer, reinstalling an individua l
application or device driver may corre ct the problem. You may not need to
recover the entire contents of your hard drive.
✍ Use the Application Rec overy CD(s) to reinstall individua l applications.
When you successfully complete your system recovery, you are prompted to
complete the Windows registration proce ss.
System Recovery Options
System Drive Recovery
All data on Drive C is dele ted. The factory default se ttings and software
applications are restored on thi s dri ve only.
Change Partition Size
All partitions, custom installations, and changes are removed from the hard disk
drive. You can set the partition sizes for both the Drive C and Drive D. The
original, preinstalled ope rating system and softwa re applications are re st ored.
Recovery to Origi nal Factory Defaults
All data and partitions are removed from the hard disk drive. All ori ginal factory
settings , operating system, an d pr einstalled softwa re is res tored.
The System Recovery utility does not back up your system's data. If you wish
to retain your syst em data, perform a back up to an ext ernal media.
66
Page 65

To Use the System Recovery CD(s)
Using th e System R ecovery CD (s)
Your system may take a few minutes to load necessary files. A blue screen
appears during the downloading process.
1 Insert th e Sys tem Recovery CD in your computer’s optical drive.
The System Recovery utility starts from the optical drive. The first CD must
be in the drive when you turn on your computer.
✍ If your sys te m is e quippe d wi th two op tica l d rives , inser t the Sy st em Rec ove ry CD into
the upper optical drive.
2 Turn off your computer.
3 Wait 30 seconds and turn on your computer. Your screen displays the
downloading progress, “Starting VAIO Recovery Utility.”
4 The VAIO System Recove ry Utility dialog box appe ars. Click Next.
5 At the pop-up prompt, select Yes to begin the system recovery process.
Follow the on-scre en instructions.
✍ Yo ur system may i n clude one or more System Rec o very CDs. If you have more than
one System Recovery CD, insert the first CD to run the System Recovery program.
Y ou are prom pted to insert the next CD(s) once the info rm ation from the first CD has
been inst a lle d .
The re covery process takes approximately 30 to 60 mi nutes to co mplete.
After re cov ering yo ur syste m usi ng th e Sy stem Recov ery CD(s ), yo u may be pr ompt ed
to insert your Application Recovery CD(s) after rest arting Windows. Use the
Application Recovery CD(s) to com plete full restoration of your system .
67
Page 66

VAIO Digital Studio Computer User Guide
To Use the Application Recovery CD(s)
The Appl ica tion Recovery CD utility enables y ou to reinstall individual software
appl ic at io n s if they becom e co r rup t ed or ar e erased. Rei n stalling an in d iv i dual
software appl ication may correct a problem that you are experiencing with your
computer o r spe cific application. You may not need to reinstall the entire
content s of your ha rd drive.
✍ If you need to reinstall all of the softwar e that shipped with your com p uter, use the
System Recovery CD(s).
You must be in Windows to r un the Applic ation Recovery CD utility. If you have
any questions about using the Application Recovery CD(s), visit
http://www.sony.com/pc support, or contact Sony Customer Support at
1-888-4-SONY-PC.
Using the Application Recovery CD(s)
1 Turn on your computer. If your computer is already on, save and close all
open applic ations.
2 When the Windows desktop appear s, ins ert the Application Recovery CD
into your computer’s optical drive. The Application Recovery utility loads
automatically.
✍ If your system is e quipped wit h two optical drives, insert th e Application Recovery CD
into the upper opti cal drive.
3 When the Application Recovery menu appears , follow the on-screen
inst r u ct io n s to co m p l ete the recove r y pr oc ess.
✍ Yo ur system may i n clude one or more Applicat ion Recovery CDs. If you have more
than one Application Recovery CD, insert the first CD to run the Application Recovery
utility. You may be prompted to insert the next CD(s), depending on the software
application you wish to restore.
68
Page 67

To Use the Driver Recovery CD
To Use the Driver Recovery CD
The Driver Recovery CD utility enables you to reinstall indiv idual drivers and
repair software applications if they become corrupted or are erased. You can
reinstall an individual driver to correct a proble m that you are experiencing with
your computer, peripheral hardware, or software application.
✍ If you need to reinstall all of the software applicati ons that sh ipped with your
comput er, use the System Reco very CD(s).
You must be in Windows to run the Driver Recovery CD utility.
Reinst alling device drivers w i th th e D r iv er R ecovery CD
1 Turn on your computer. If your computer is already on, close all
applications.
2 When the Windows desktop a ppears, insert the Driver Recovery CD into the
optical disc drive.
✍ If your system is equipped with two optical drives, inser t the Driver Recovery CD into
the upper optical drive.
3 Click Start in the Windows taskbar and click Control Panel. The Control
Panel window appears.
4 Click Performance and Maintenance and click System. T he System
Propert ies dialog box appears.
5 From the Hardware tab, click Device Manager.
6 Click to select the unknown device or the device that requires the driver
installation. The unknown device(s) is identified by a yellow question mark.
7 From the Ac tion menu, click Uninstall. This removes the device driver from
your system. Click OK. Repeat for each device driver as necessary.
8 Restart your computer. Click Start in the Windows taskbar, select Turn Off
Computer, and then click Restart.
9 When the desktop appears, Wi ndows automatically reinstalls the device
driver(s ) f rom the Driver Recovery CD.
69
Page 68

VAIO Digital Studio Computer User Guide
70
Page 69

Troubleshooting
This section desc ribes how to solve common problems you may encounter
when using your computer. Many problems have simple solutions, so try
these suggestions before you call Sony Customer Support.
Topics
My computer does not start.
❑ Ch eck that the computer is plugged into a power source and that it is turned
on. Check th at the power light is lit on the front panel of the computer.
❑ Co nfirm that a disk is not in the floppy disk drive (unless you ar e us ing a
bootable floppy disk).
❑ Co nfirm that the power cord and all cables are connected firmly.
❑ If you plugged the computer into a power strip or Uninterruptible Power
Supply (UPS), make sure the power strip or UPS is turned on and working.
❑ Ch eck that the monitor is plugged into a power source and turned on. Check
that the brigh tness and contrast controls ar e ad justed correctly. See the
manual that came with your display for details.
❑ Ch eck that the computer is not in stand by mode.
My files are corrupte d or deleted. I want to recover appl ications that came with
my computer.
See “To Use the App lic ation Re cover y C D(s)” in the online User Guide, for more
information. You can acce ss th e online U ser Guide as follows:
1 Click Start in the Windows taskbar, then click VAIO Help and Support.
2 From the VAIO Help and Support menu, click VAIO User Guide.
71
Page 70

VAIO Digital Studio Computer User Guide
My drivers are c orrupted or deleted. I want to recover drivers that came with my
computer.
See “To Use the Driver Recovery CD” in the online User Guide, for more
information. You can access the online User Guide as follows:
1 Click Start in the Windows taskbar, then click VAIO Help and Support.
2 From the VAIO Help and Support menu, click VAIO User Guide.
My computer or sof tware application stopp ed respondi ng.
You can try to locate and close the software applica tion that has stopped
responding.
1 Press the Ctrl+Alt+Delete keys. The Windows Task Manager window
appears.
2 From the Appl icati ons ta b, locat e the ap plica tion tha t ha s the status message ,
“Not respondin g.”
3 Select the application that has a Not Responding status and click End Task.
Windows attempts to close the application.
If your computer does not respond or the application does not close, try the
following steps:
1 Save any o pen fi le s , if poss ib l e .
2 Press the Alt+ F 4 keys . The Turn Off Computer window appears.
3 Click the Restart button.
If your computer still does not respond and you cannot restart, shut down your
computer by pr essing and holding the power switch for more than six seconds .
If the software application continues to stop responding or causes your computer
to stop respondi ng, conta ct th e sof twar e publi sher or d esig nated techni cal support
provider.
Pressing and holding the power switch for more than six seconds, may result
in the loss of data from file s that are curren tly open.
72
Page 71

Troubleshooting
Why does the Windows® operating system stop responding during shutdown?
The Wi ndows operating system may not shut down properly for many reasons,
including incompatible or conflicting driv ers , damaged files, or non-responsive
hardware. For troubleshooting inform ation, you can search Windows Help.
1 Click Start in the Windows taskbar and select VAIO Help and Support. The
VAIO Help and Support dialog box appears.
2 Select Fixing a Problem and then select Startup and Shut Down problems. A
list of specific problem topics appears on the right side of the dialog box.
3 Select Startup and Shutdown Troubles hooter. Follow the on-screen
instructions according to your specific situation.
How do I change the parallel port type to ECP, EPP, or bi-directional?
You can change the parallel port type using the System Setup utility (CMOS
Setup Utility). To access System Set up:
1 Click Start in the Wi ndows taskbar and select Turn Off Computer. Select
Restart.
2 When the Sony screen displays, press the F2 key on your ke yboard.
3 Select the Advanced tab from the Setup Utility screen .
4 Select “I/O Device Configurat ion” and press Ent er.
5 Use the arrow keys to highlight Parallel Port Mode and press Enter.
✍ Yo u can toggle bet w een the Normal (bi-dire ctional), EPP, ECP, and ECP+EPP opt ions
using the directional arro w keys.
6 Select th e desired setting displays, and press Enter.
7 Press the F10 key to Save and Exit.
73
Page 72

VAIO Digital Studio Computer User Guide
My optical drive tray does not open.
There are two methods for opening your optical drive tray:
❑ Us e the Eject butto n
1 Make su re the compu ter is turned on.
2 Press the Eje ct button on the drive.
❑ Us e the My Comp u t er icon
1 Click Start in the Windows taskbar, then select My Computer.
2 Right-click the appropriate optical drive icon.
3 Select Eject from the shortcut menu.
✍ Avoid using adhesive labels to identify your CD media. Adhe sive labels may come off
while the CD media is in use in your optical drive(s) and may cause damage to the
unit.
I cannot play a DVD or CD.
❑ After inserting your optical disc, wait a few seconds for it to be detected
before trying to access it.
❑ Verify that the dis c is in the tray with the label side facing up .
❑ Install your CD or DVD software according to the manufac turer’s
instructions.
❑ If you r drive reads some DVDs or CDs, but not others, chec k the shiny side
of the disc for dirt or scratches. You may also need to clean the dis c drive
lens wi t h an ap p r opr i at e cl eaner.
✍ T o recover the CD or DVD software applications that are preinst alled on your
comput er, see “To Use the Application Recovery CD(s)” for more information.
74
Page 73

Troubleshooting
I cannot play a DVD.
If a region code warning appears when you are using the DVD player
application, it may be that the reg ion code of the DVD you are trying to play is
incompatible with the region cod e s etting of your optical drive. A region code is
listed on the disc packaging. Region code indicat ors such as “1” or “ALL” are
labeled on some DVDs to indicate the type of pla yer that can play the disc.
Unless a “1” or “ALL” appears on the DVD or on its packaging, you cannot play
the disc on th i s sys t em.
If you hear audio but cannot see video, your computer’s video resolution may be
set too high. To improve video resolution, verify that your screen area is set to
1024 x 768, using 32-bit color (preset factory default). To check your video
resolution, see the Troubleshooting topic, “How do I change the video resol ution
of my display?”
✍ If your video card utilizes syste m memory, you may improve video resolution by
changing your screen area to 800 x 600, using 16-bit color. See your Specifications
sheet for details about your computer’s video RAM.
If you see video but cannot hear audio, chec k all of the following:
❑ Verify that your DVD player’s mute feature is tu rned off.
❑ Ch eck the master volume se tting in the Audio Mixer.
❑ Check the volume settings on your computer speakers.
❑ Ch eck the connections betw een your speakers and the computer.
❑ Verify that drivers are installed properly, by following these steps:
1 Click Start in the Windows taskbar, then select Control Panel.
2 Click Performance and Maintenance and then click Systems. The
System Properties dialog box appears.
3 Select th e Hardwa re tab and then select the Device Manager button to
view inst alled drivers.
A dirty or damaged disc may also cause the computer to stop responding while it
tries to read the disc. If necessary, remove the disc and check that it is not di rty or
damaged.
✍ T o recover the CD or DVD software applica tions that are preinstalled on your
comput er, see “To Use the Applica tion Re co v ery CD ( s) ” fo r more infor m at io n .
75
Page 74

VAIO Digital Studio Computer User Guide
When I click an appli cation icon, a message such as “You must insert the
application CD into your drive” appe ars and the software does not start .
❑ Some software applicati ons require specific files that are located on the
application’s CD-ROM. I ns ert the disc and try starting the program again.
❑ Ch eck to make sure you inserted the CD-ROM with the label side facing up.
Why doesn't my optical drive (DVD-RW or CD-R W) record at the highest speed?
If you are having difficulty formatting DVD-RW or CD-RW media for recordin g
purposes, try changing the write speed to a lower setting.
See the onl ine Help or documenta tion tha t cam e with your CD or DVD re cording
software application for details on adjusting write speed settings.
Why is my computer operating improperly aft er do wnloading the CD-bur ning
component of Real Jukebox® software?
If you choose to download and use the optional Re alJukebox software’s CD-
burning component to create CDs, the software feature may interfere with your
computer’s normal system operations.
For VAIO® computers that are equipped with all of the necessary components
for creati ng a CD-R or CD-RW, Sony recommends using the SonicStage
software application to create CDs. SonicStage software is preinstalled on your
computer.
How do I change the video resolution of my display?
1 Click Start in the Windows taskbar and then select Control Panel.
2 Select Appearances and Themes, then select “Change th e screen resolution.”
3 Click the Settings tab.
4 Change the Screen resolution and Col or quality to the desire d levels.
5 Click Apply and then click OK.
76
Page 75

Troubleshooting
Why is there no sound in any application?
❑ Check that the speakers are plugged into the Headphones jack.
❑ If your speakers have a mute button, verify that it is turned off .
❑ If your speakers are powered by batteries, verify that the batteries are
inserted properly and that they are charged.
❑ If your speakers use an external power source, verify that the power cord is
plugged into a grounded wall outlet or power stri p.
❑ If your speakers have volume control, check the volume level.
❑ You cannot he ar s ound from your speakers if headphones are connected to
your computer.
❑ If the software application you are using has its own volume control, check
that the vol um e is turned up.
❑ Check the volume controls in the Windows® operating system using these
steps:
1 Click Start in the Windows taskbar, then select Control Panel.
2 Select Sounds, Speech, and Audio Devices, then click “Adjust the
system volume.”
3 From the Volume tab, adjust the Device volume by moving the slider
bar to the desired sound level. Verify tha t the Mute option is not
selected.
❑ Check that the Mute check box is not selected in the Windows volume
control.
✍ Yo u m ay need to reins tall the sound drivers. Se e “To Use the Driver Recovery CD” for
more information.
77
Page 76

VAIO Digital Studio Computer User Guide
My modem connection is slow.
Many factors influence modem connection speed:
❑ Telephone line noi se
❑ Incompatibility with other telephone equipment such as fax machines or
other modems.
❑ Internet Service Provi ders (IS P ) connection capability may vary.
If you think your modem is not connecting properl y to other PC-based modems,
fax machines, or your ISP, check the following:
❑ Contact your phone company and ask them to verify that your phone line is
free from line noise.
❑ If you r problem is fax-related, ch eck that there are no problems with the fax
machine you are calling and that it is com patible with fax modems .
❑ For opt imum performance, verify that your ISP point of presence (POP)
phone number is compliant with V.90 standards.
❑ If you are ha ving a problem connecting wit h your IS P, check tha t they are
not experien cing technical pr oblems.
❑ Try connecting your modem through another phone line, if avai lable.
My modem does not work.
Your modem may be experiencing equipment or software conflicts. If your
modem is not functioning properly, check the following:
❑ Ch eck that the phone line is plugged into the Line jack.
❑ Check that the phone line is working properly. You can verify the line by
plugging in an external device such as a stan dard telephone or fax machine
and listening for a dial tone.
❑ Check that the access phone number (POP) is correct.
❑ All software applicat ions that are preinstalled by Sony are compatible with
your computer’s modem. If you have installed other software, conta ct the
software p ublisher for information on how to configure the softwa re in order
to recognize the modem.
78
Page 77

Troubleshooting
❑ If it appe ars that your modem is not funct ioning properly, check the device
status.
1 Click Start in the Windows taskbar, then click Control Panel.
2 Click Printers and Oth er Hard ware and then sele ct Phone and Modem
Options.
3 From the Modems tab, click to select your modem.
4 Click Pr operties. The Modem Properties window appears .
5 Review the information in the Device status section. If your modem is
not working pr operly, click the Troubleshoot button. The VAIO Help
and Support Cent er window appears.
6 Follow the on-screen instructions to resolve the problem.
✍ You may need to reinstall the modem drivers. See “To Use the Driver Recove ry CD” for
more information.
How do I change my modem to rotary or Touch-Tone dialing?
1 Click Start in the Windows taskbar, then click Control Panel.
2 Click Printers and Other Hardware, then click Phone and Modem options.
3 From the Dial ing Rules tab, clic k Edit. The Edit Location dialog box
appears.
4 Select the Tone or Pulse option. Click OK.
My microphone does not work.
Check tha t the microphone is plug ged into the Microphone jack.
My microphone is too sensitive to background noise.
If you find there is too much background noise when you record sound, you
should adjust the microphone gain by following these steps:
1 Click Start in the Windows taskbar, then click Control Panel.
2 Click Sounds, Speech, and Audio Device s, then click Sounds and Audio
Devices.
79
Page 78

VAIO Digital Studio Computer User Guide
3 From the Audio tab, locat e the Sound recording sect ion and click the Volume
button. Th e Rec ording Control dial og box appears.
4 Select the Options menu and click Properties. The Properties dialog box
appears.
5 In the s ection, “Adjust vol ume for,” select the Recording option. Click OK.
6 From the Reco rding Control dialog box, decrease the microphone volume
level by moving the slider bar down .
7 Close the Rec o rding Control dial og box and then close the Sounds and
Audio Devices Properties window.
My mouse does not work.
❑ Ch eck that the mouse is plugged securely into the Mouse port.
❑ Sav e and close all open applications. Turn off your computer , wait
approximately 10 seconds, and then restart your computer.
❑ There may be dust or dirt inside the mouse mechanism. To clean the mouse,
follo w these steps:
1 Save and close all applications, a nd turn off your computer.
2 Turn the mouse upside down.
3 Remove the mouse ball cover on the back of the mouse by turning
clockwise the ring that covers the mouse ball.
4 Turn the mouse upright, and drop the mouse ball into your hand.
5 Using a piece of tape, remove any dust or dirt on the mouse ball and
ins i d e the mouse ball so cket.
6 Return the mouse ball to the socket, and replace the mouse ball cover.
Secure the cover by turning the ring counter-clockwise.
✍ You may need to reinstall the mouse drivers. See “T o Use the Driver Recovery CD” for
more information.
80
Page 79

Troubleshooting
My mouse needs to be set up for left-hand use.
1 Click Start in the Windows taskbar, then click Control Panel.
2 Click Print ers an d Other Hardwar e, the n click Mouse . The Mouse Pro pertie s
dialog box ap pears.
3 From the Buttons tab, select “Switch primary and secondary buttons” under
the Button Configuration options.
4 Click Apply, then click OK.
My keyboard does not work.
❑ Ch eck that the keyboard is secu rely plugged into the Keyboa rd port.
❑ Sa ve an d clos e all open applications. Turn off your computer , wait
approximately 10 seconds, and then restart your computer.
I cannot find the Windows® taskbar.
The Wi ndows taskbar may be hidden or minimized.
❑ Use the mouse to locate a hidden taskbar by pointing to the left, right, top,
and bottom edge s of the screen. The taskbar appear s whe n the cursor is
placed over its location.
1 Right-click on the taskbar and select Properties fr om th e sh ortcut menu.
2 Clear the check box for Autohide the taskba r, then click OK.
❑ Use th e mo us e to locate a minimized taskb ar by pointing to the left, right,
top and bottom edges of the display screen. The taskbar has been loca ted
when the cursor change s to a double arrow cursor. Left-click a nd drag a w ay
from the edge of the dis play screen. The minimized taskbar resizes and
becomes visible.
Why is my system running slowly?
❑ The sys tem responsiveness varies depending with the number of
applica tions that are open and r unning. Close any appl ications that you are
not currently using.
❑ In creasing the system memory may also help. Fo r inform ation on installi ng
memo r y, please se e th e on li n e VA I O Us er G u id e .
81
Page 80

VAIO Digital Studio Computer User Guide
How do I install a printer?
❑ If you r printer has a USB, IEEE1394, or infrare d connection, contact the
printer manufact urer for information or updates that may be required for
proper installa tion.
❑ Ch ec k the printer manufacturer’s Web site for the latest dr ivers for your
operating system before proceeding with installation. Some printers do not
function properly without the up dated drivers for sp ec ific operating syst ems.
❑ To install your printer, follow these steps:
1 Click Start in the Windows taskbar, then click Control Panel.
2 Click Printers and Other Har d ware, then click Add a Printer.
3 From the Add Printer Wizard, click Next.
4 Select Local Printer, then click Next.
✍ Place a check mark in the bo x for “Automatically detect and install my Plug and Play
printer”, if you are installing a recently manufactured printer with Plug and Play
capability.
5 Select th e appropriate port, us ually LPT1, and then click Next .
6 Select th e app r opriate printer manufac turer and model
7 Follow the on-screen instructions to print a test page and complete
printer installation.
✍ If the printer is not included in th e list and the printer manufacturer i ncluded a disk
with a Win dows XP Print er driv er, choose Hav e Disk, en ter t he a ppr opria te pat h f or the
disk or CD and click OK.
If the printer is not included on the list and no drivers are included wi th the printer,
choose an alternat e printer driver that your printer ma y emulate. Refer to the manual
that came with your printer for specific emulation information.
My connected printer doesn't function after the computer resumes from a power
saving mode.
Clear t he print er memo ry by turni ng t he pri nte r off fo r ap proximate ly 10 seconds ,
and then turning it back on.
82
Page 81

Troubleshooting
To contact Sony for technical support
For further technical assistance, call 1-888-4-SONY-PC (1-888-476-6972) or
access the Sony Computing Support Web site at:
http://www.sony.com/pcsupport.
83
Page 82

VAIO Digital Studio Computer User Guide
84
Page 83

Notes on Use
Notes on Use
The information in this section provides basic procedures to follow when
handling your computer, components, and accessories.
The power source
❑ Your computer operates on 100–120 V AC 50/60 Hz only.
❑ Pl ug all the power cords for your c omputer and its peri pheral equipment into
the same AC supply line. AC derived from different supply lines may result
in voltage d ifferences that can cause unstable operation or unwanted weak
currents at the time of connection.
❑ Do not share the AC outlet with any other power-consuming equipment,
such as copying machines or shredders.
❑ You can purchase a power strip with a surge protector. This devi ce prevents
damage to your computer caused by sudden power surges such as those that
may occur during an electrical storm.
❑ If you live in an area that experience s frequent power fluctua tions, you may
want to purcha se an Uninterruptibl e Power Supply (UPS). This device
contain s bot h a surge protector a nd a bat tery backup. The surge pr otector
prevents dam age to your computer caused by power surges. The battery
backup safe guards your data during a brief period of power loss.
❑ The power control button on the front panel does not t urn off the syst em AC
power. To remove power from the system, you must turn off the computer
and then unpl ug the AC power cord from the wall outlet or powe r st rip.
❑ Do not plac e heavy objects on the power cord.
❑ Do not operate the system with the cover removed. Always reinstall the
cover before turning on the system.
❑ To disconnect the cord , pull it out by the plug. Never pull the cord itself.
❑ Unp lug your computer from the wal l outlet if you will not be using the
computer for a long time.
❑ Before touching anything inside the computer, turn the system off and let it
cool for ten minutes. This will ensure that the processor hea t sink will not be
hot.
❑ Do no t atte mpt to op en the po wer suppl y. There are no user -servi ceable pa rts
in the power supply. To avoid personal injury or damage to your equipm ent,
refer the repair or replacement of the power supply to qualified personnel
only.
85
Page 84

VAIO Digital Studio Computer User Guide
Disposal of the lithium battery
Dispose of the lithium battery properly. In some areas, the disposal of lithium
batteries in household or business trash may be prohibited. You can return your
unwanted li thium batteries to your nearest Sony Service Center or Factory
Service Center. For the Sony Service Center neare st you, call 1-888-4-SONY-PC
(1-888-476-6972).
Do not handle damaged or leaking lithium batteries. The lithiu m b attery may
explode if mistrea ted. Do not disassemble it or dispose of it in fire.
Replace the battery with a Sony CR2032 lithium battery. Using a type of
battery other than a CR2032 may present a r isk of fire or explosion.
Handling the compute r s ystem
❑ Do not place your Sony computer in a location subject to:
❑ Heat sources, such as radiators or air ducts
❑ Direct sunlight
❑ Excessive dus t
❑ Mecha nical vibration or sh ock
❑ Strong magnets or speakers that are not magnetically shielded
❑ Ambie nt temperature of more tha n 95ºF (35ºC) or less than 50ºF (10ºC)
❑ High humidity, moisture, or rain
❑ Do not place electronic equipment near your computer. The computer’s
electr omagnetic field may caus e a malfunction.
❑ Provide adequate air circulation to prevent internal heat build-up. Do not
place your computer on loose surfaces (such as rugs or blankets) or near
material s (such as curtains or draperies) that may block its ventilation slots.
Leave a space of at le ast 8 inches from the back panel of your computer.
❑ Cl ea n the cabinet with a soft, dry cloth or a soft c loth lightly moistened with
a mild detergent solution. Do not use any type of abrasive pad, scouring
powder, or s olvent such as alcohol or b enz ine, as it may da mage the fi nish of
your Sony computer.
86
Page 85

Notes on Use
❑ Should any solid object or liquid fall into the cabinet, keybo ard, or mouse,
shut down your computer and then unplug it. You may want to have the
computer che cke d by qualified personnel before operating it any further.
❑ The com puter uses high-frequen cy ra dio signals and may cause inte rference
to radio or TV recep tion. Should this occ ur, relocate the comput er a suitable
distance away from the set.
❑ Use onl y specified peripheral equipment and interface cables; otherwis e,
problems may result.
❑ Do not use cut or damaged connection cables.
❑ Always switch the power off before connecti ng your computer to peripheral
equipment; otherwise, damage may occ ur to the integrated circuits in your
computer.
❑ Your computer, keyboard, and mouse consist of high-precision electronic
parts. Do not drop them or bump them against other objects.
❑ Your Sony compu ter will not work wi th party lines , canno t be conne cted to a
coin-operated telephone, and may not work with multiple phone lines or a
privat e b r an ch ex ch a ng e (PB X ) .
❑ If the telephone company makes a service call to your home or office and
determines that your computer is responsible for the problem, the telephone
company may bill you for the service call. If you do not disconnect your
computer when it is adversely affecting the telephone line, the telephone
company has the right to disconnect your service until you correct the
problem.
Moisture condensation
If your compu ter is brough t di rectl y from a cold l ocati on to a warm one, mois tu re
may condense inside your computer. In this case, allow at least an hour before
turning on your computer. If any problem occurs, unplug your computer, and
contact your S ony S ervice Center.
87
Page 86

VAIO Digital Studio Computer User Guide
Upgrading the computer system
❑ The upgrading procedures described in the online m anua l, assume
familiarity with the general termi nology associated with persona l computers
and with the safety practices and regulatory compliance required for using
and modifying electronic equipment.
❑ Disconnect the system from its power source and from telecommunications
links, networks, or modems be fore you open the system or follow any of the
upgrading proc edures described in the online manual. Failure to do so may
result in personal injury or equipment damage.
❑ Electrostatic discharge (ESD) can damage disk drives, add-on cards, and
other components. Follow the upgrad ing procedures described in the online
manual while working at an ESD workstation. If such a station is not
availa ble, use these precautions:
❑ Avoid working in a carpeted area.
❑ Do not handle mate rials that m ay produce or hold static electricity, such
as cellophane wrappers.
❑ Grou nd yourself by maintaining continuous conta ct with an unpainted
metal portion of the chassis while performing the procedure.
❑ When removing a slot cover, be careful not to damage components on the
system board or add -on cards. You may need to temporarily remove ad d-on
cards that ar e next to the slot cover you want to remove.
Handling a display
❑ Do not change the display refresh rate to 85 Hz, as DVD playback and the
DVgate software may not function correctly. Sony recommends that you
keep your display at the preset, optimal refresh rate (75 Hz).
❑ Do no t place the display near a strong magnetic force.
❑ Do not block the ventilation slots on the displa y.
❑ Using the computer in low temperature conditions may produce a residual
image on t he sc reen. This is n ot a mal func tion. When t he comput er returns to
normal te mperature, th e screen returns to normal.
❑ A residual image may appear on the screen if the same image is displayed
for a lengthy pe riod of time. The image disappears after a period of time.
You can use a screen saver to preve nt residual images.
❑ The scre en becomes warm during operation. This is normal and does not
indicate a malfunction.
88
Page 87

Notes on Use
Using the hard disk drive
❑ Do not plac e the computer in a location that is subject to vibration or shock.
❑ Do not move the computer during operation.
❑ Do not subj ect the computer to sudde n changes in temperature.
❑ Do not turn off the power while the computer is accessing the hard disk
drive.
Handling floppy disks
❑ Do not open the shutter manually and touch the surface of the floppy disk.
❑ Keep floppy disks away from magnets.
❑ Keep floppy disks away from direct sunlight and other heat sourc es .
Handling CD or DVD media
❑ Do not touch the surface of the disc.
❑ Do not dr op or bend the disc.
❑ Do n ot use adh esiv e labe ls to ide nti fy t he di sc. The l abe l may come o ff whil e
the disc is in use in the optical driv e and da mage the drive.
Cleaning CD or DVD media
❑ Fingerprints and dust on the surface of a disc may cause read errors. Proper
care of th e disc is essential to maintain its reliab ility. Do not us e solvents
such a s be nzine , thinne r, commercia lly a vai la ble c leane rs or anti -s tati c spr ay,
as they may cause damage to the disc.
❑ For n ormal cleaning, hol d the di sc by its edge an d use a s oft clo th to wipe th e
surface fro m the center out.
❑ If the disc is badly soiled , mo isten a soft cloth with wate r, wring it out well,
and use it to wipe th e surface of the disc from the cente r out. Wipe off any
remaining moisture with a dry soft cloth.
89
Page 88

VAIO Digital Studio Computer User Guide
Resources
Sony provides several support options for your Sony computer. When you have
questions about you r comput er and t he prein stalle d softwa re, chec k thes e sources
for answers, in the following sequence:
VAIO QuickS tart The QuickStart contains information on how to set up
your computer quickly and easily.
VAIO Computer
User Guide
Online (Electronic)
Documentation
Software application
manuals and online
help files
The User Guide contains information on how to get the
most from you r c ompute r, fi nd help, an d solv e com mon
problems. (Note: The User Guide is not available in
hard copy for all models.)
The Use r G ui d e is available el ectron ic ally on y our hard
drive. Two additional gui des, Upgrading and
Maintaining Your VAIO Digital Studio Computer and
the Tro ubleshooting Help are also available online.
To access online docum entation:
1 Click Start and point to VAIO Help and Support
Center.
2 Click on the VAIO User Guide.
Most manuals for preinstalled software are located on
your hard disk d rive as onl ine he lp fil es. You can a ccess
onlin e help files from the Help menu within the specific
applic ation. A printed manual may be available for
some appli cations.
Knowledge Database This database provides instant access to information on
90
commonly encountered problems. E nter a description
of your problem and the Kno wledge Database searches
for the correspo nding solutions onli ne. You can access
the Sony Knowledge Database from the Sony
Computing Support Web site at
http://www.sony.com/pcsupport.
Page 89

Resources
Sony Fax-on-Demand This service provides you with answers to commonly
asked ques tions. You can use this automa ted service to
request a list of available topics. Sele ct the topic s tha t
you want to view. To contact the Sony fax-on-demand
service, ca ll 1-888-4-SONY-PC (1-888-476-6972).
(Requires a fax machine or fax software. )
Software Updates You can download the latest software updates and
software pat ches for your Sony computer by selecting
Softwar e Updates on the Sony Computing Support W eb
site at http://www.sony.com/pcsupport.
VAIO Computer
System Reference
Manual
This advanced reference manual suppl ies detailed
techni ca l information about your co mpu ter's hardware.
This docum ent is available on the Sony Com puting
Support Web site at http://www.sony.com/pcsupport.
91
Page 90

VAIO Digital Studio Computer User Guide
92
Page 91

Index
A
AC
Input port 13
air circulatio n 86
Application Recovery CD(s)
ARCDs 68
audio file formats 57
audio problems 77
B
Back Panel 12
Browser security 51
C
caution
lithium ba ttery 86
speakers 86
CD
playback pr oblems 74, 76
tray eject 74
CD-RW
recording problems 76
changing window design 16
Check-In/ Check-out 54
computer
adjusting voltage settings 85
changing parallel port type 73
condensation 87
disposing of lithium battery 86
hard disk drive 89
proper handling 86
removing sid e cover 85
shutti ng down 85
startup prob lems 71
system response problem 72
upgrading 88
connecting
cables 87
peripheral equipment 87
power cord 85
printer s 82
D
defragmenting
hard disk drive 61
DigitalPrint softwa re 21
LabelMaker 2 7
PhotoAlbum 26
PhotoCapture 21
PhotoColl ec tion 24
Pho toD ecor 25
disconnecting power cords 85
display
port 13
refresh rate 88
Driver Rec overy CD
DRCD 69
DVD
playback prob lems 74, 75
region code warning 75
tray eject 74
DVD-RW
recording problems 76
DVgate software 29
AVI files 30
using a digital video device 29
93
Page 92

VAIO Digital Studio Computer User Guide
E
electr onic equipment 86
Electronic Music Distribu tion service
51
elect r ostatic disch arge 88
EMD servi ce 51
encryption 51
Ethernet
port 13
F
Floppy disk
drive 10
Front Panel 9
Full mode 57
H
handling your computer 86
hard disk drive
defragmenti ng 61
partitioning 61
using 89
hardware
cooling the heat sink 85
Headphones ja ck 13
I
i.LINK
(4-pin) por t 11
(6-pin) por t 13
compatibility 62
connecting 63
ImageStation 37
interfer ence 87
J
Jog Dial 58
K
keyboard
port 12
troubleshooting 81
L
Line In jack 13
lithium ba ttery
disposing 86
lo sing po w er 85
M
magnetic shielding 86
Memory Stick 58
Microphone
jack 13
microphone
background noise 79
troublesh ooting 79
Modem
jack 13
modem
slow connection 78
troublesh ooting 78
moisture condensation 87
Monitor
port 13
monitor
refresh rate 88
Mouse
port 12
mouse
troublesh ooting 80
MovieShaker softwa re 31
adding effects 34
creating movie s 32
saving a movie 36
uploading to Internet 37
using ImageSt ation 37
using the Shaker fea ture 33
multiple telephone lines 87
O
Operating syst em locks up 73
optical drive
94
Page 93

Index
recording speed 76
tray eject 74
P
parallel port
changing type 73
partitioning your hard disk drive 61
party lines 87
PBX (Private Br anch Exchange ) 87
PictureGear software 39
creati ng a photo album 40
managing pictures 39
power
button 11
cord 85
disconnec ting power cord 85
fluctua tions or loss 85
source 85
source, precautions 85
switch 1 1
precaut ions about power source 85
Printer
port 13
printer
insta lling 82
R
radio interference 87
recovering drivers 72
Recovery CDs 65
region codes 75
removing sid e cover 85
S
safeguarding data 85
Secure Sockets Layer 51
Serial port 13
setti ng up
electronic equipment 86
printers 82
Shortc ut Keys 15
changing settings 15
shutting down the co mputer 85
Simple mode 57
Skins 57
slot cover 88
Software
audio problems 77
CD playback problems 76
driver recovery 72
recovering applications 71
stopped respo nding 72
SonicStage software 51
Backup Tool 57
Electronic Music Distribution
service 51
importing audio files 57
Main Features 52
managing imported songs 57
recording from a CD 53
Secure Sockets Layer (SSL) 51
Simple mode 57
transfer ring s ongs 54
Tutorial 57
Sony
online service 37
Sony software
changing windo w des ign 16
speakers
caution 86
surge prot ec tors 85
System Recovery CD(s)
SRCDs 66
system response problem 81
T
Telephone jack 13
telephone service 87
Troubleshooting 72
CD playback problems 76
CD/DVD playback problems 74
95
Page 94

VAIO Digital Studio Computer User Guide
CD-RW recording 76
changing parallel port type 73
computer stopped responding 72
DVD playback problems 75
DVD-RW recording 76
keyboard 81
micropho ne 79
modem 78
modem speed 78
mouse 80
operating system locks up 73
opti ca l drive tra y ej ec t 74
printer installation 82
recover applications 71
software audio problems 77
startup problems 71
system response 81
Topics 71
turning off your computer 85
TV interference 87
U
Uninterruptible Power Supply 85
Univer sal Seri al Bus por ts 12
upgrading
your computer 88
UPS 85
USB 12
V
VAIO Action Setup 15
VAI O Edit Components 60
VAIO Edit Components software 60
ventila tion 86
VisualFlow software 58
navigating 58
voltage settings 85
96
 Loading...