

Page 1
WALK M AN Use r Guide
1
Print
Top page
Getting Started
How to Use the Software
Music
Videos/Photos
FM Radio
Timer
Settings
Troubleshooting
Important Information
Specifications
Contents list
NWZ-E363/E364
User Guide
Use this manual if you encounter any problems, or have any questions about the player.
Copyright 2011 Sony Corporation
Back to top
Page 2
WALK M AN Use r Guide
2
Print
Top page > Getting Started
Getting Started
How to Use the Software
Music
Videos/Photos
FM Radio
Timer
Settings
Troubleshooting
Important Information
Specifications
Contents list
Ge t t ing Started
Be fore Use
Before first use
How to use this User Guide
Opera tion flow of “WA LK M AN ”
What you can do with “WALKMAN”
Operation flow to enjoy music
Operation flow to enjoy videos and photos
Pow e r/Cha rging
Turning the player on and off
Charging the battery
About battery life
Initial Set t ings
Selecting the display language [Language Settings]
Setting the current time [Set Date-Time]
Pa rts and Controls
Parts and controls
About t he Softw are
About the software
Hom e Menu/Opt ion M enu
About the Home menu
How to use the Home menu
How to use the option menu
Copyright 2011 Sony Corporation
Back to top
Page 3
WALK M AN Use r Guide
3
Print
Top page > How to Use the Software
Getting Started
How to Use the Software
Music
Videos/Photos
FM Radio
Timer
Settings
Troubleshooting
Important Information
Specifications
Contents list
How t o U se t he Softw are
Window s Me dia Player
Importing music from CDs using Windows Media Player
Transferring music using Windows Media Player
Cont e nt T ra nsfer
Transferring music using Content Transfer
Transferring videos/photos using Content Transfer
Window s Explorer (Drag -and -Drop)
Transferring music using Windows Explorer
Transferring videos/photos using Windows Explorer
Back to top
Copyright 2011 Sony Corporation
Page 4
WALK M AN Use r Guide
4
Print
Top page > Music
Getting Started
How to Use the Software
Music
Videos/Photos
FM Radio
Timer
Settings
Troubleshooting
Important Information
Specifications
Contents list
Music
Playing Music
Playing music
Browsing and using the music screen
Searching for songs
Playing the songs in a playlist
Playing all songs in random order
Deleting songs
Music Opt ion Menu
Using the music option menu
Music Setti ngs
Setting the play mode [Play Mode]
Setting the sound quality (CLEAR BASS) [Equalizer]
Listening with Clear Stereo [Clear Stereo]
Adjusting the volume level [Dynamic Normalizer]
Back to top
Copyright 2011 Sony Corporation
Page 5
WALK M AN Use r Guide
5
Print
Top page > Videos/Photos
Getting Started
How to Use the Software
Music
Videos/Photos
FM Radio
Timer
Settings
Troubleshooting
Important Information
Specifications
Contents list
Videos/Phot os
Wa t c hing V ide os
Watching videos [Videos]
Browsing and using the video screen
Deleting videos
Video Option M e nu
Using the video option menu
Video Se ttings
Setting the zoom function [Zoom]
Setting the display of the video screen [Display]
Setting the video orientation [Video Orientation]
Vie w ing Photos
Viewing photos [Photos]
Browsing and using the photo screen
Playing a slide show
Deleting photos
Phot o O pt ion Menu
Using the photo option menu
Phot o S etti ngs
Photo orientation [Photo Orientation]
Setting the display of the photo screen [Display]
Setting the slide show play mode [Slide Show Repeat]
Setting the interval of a slide show [Slide Show Interval]
Copyright 2011 Sony Corporation
Back to top
Page 6
WALK M AN Use r Guide
6
Print
Top page > FM Radio
Getting Started
How to Use the Software
Music
Videos/Photos
FM Radio
Timer
Settings
Troubleshooting
Important Information
Specifications
Contents list
FM Radio
List e ning t o FM Radio
Listening to FM radio [FM Radio]
Browsing and using the FM radio screen
Presetting broadcast stations automatically [Auto Preset]
Presetting broadcast stations manually
Deleting preset broadcast stations [Delete from Preset]
FM Ra dio Op tion Me nu
Using the FM radio option menu
FM Ra dio Se t t in gs
Setting the reception [Scan Sensitivity]
Setting monaural/stereo [Mono/Auto]
Back to top
Copyright 2011 Sony Corporation
Page 7

WALK M AN Use r Guide
7
Print
Top page > Timer
Getting Started
How to Use the Software
Music
Videos/Photos
FM Radio
Timer
Settings
Troubleshooting
Important Information
Specifications
Contents list
Tim e r
Se t t ing t he T ime r
About the timer
Setting the alarm [Alarm]
Setting the sleep timer [Sleep Timer]
Back to top
Copyright 2011 Sony Corporation
Page 8
WALK M AN Use r Guide
8
Print
Top page > Settings
Getting Started
How to Use the Software
Music
Videos/Photos
FM Radio
Timer
Settings
Troubleshooting
Important Information
Specifications
Contents list
Se t t ings
Common Settings
Displaying the player information [Unit Information]
Limiting the volume [AVLS (Volume Limit)]
Turning off the beep sound [Beep Settings]
Setting the screensaver type [Screensaver]
Adjusting the brightness of the screen [Brightness]
Setting the current time [Set Date-Time]
Setting the date format [Date Display Format]
Setting the time format [Time Display Format]
Returning to the factory settings [Reset all Settings]
Formatting memory [Format]
Selecting the display language [Language Settings]
Music Setti ngs
Setting the play mode [Play Mode]
Setting the sound quality (CLEAR BASS) [Equalizer]
Listening with Clear Stereo [Clear Stereo]
Adjusting the volume level [Dynamic Normalizer]
Video Se ttings
Setting the zoom function [Zoom]
Setting the display of the video screen [Display]
Setting the video orientation [Video Orientation]
Phot o S etti ngs
Photo orientation [Photo Orientation]
Setting the display of the photo screen [Display]
Setting the slide show play mode [Slide Show Repeat]
Setting the interval of a slide show [Slide Show Interval]
FM Ra dio Se t t in gs
Setting the reception [Scan Sensitivity]
Setting monaural/stereo [Mono/Auto]
Copyright 2011 Sony Corporation
Back to top
Page 9
WALK M AN Use r Guide
9
Print
Top page > Troubleshooting
Getting Started
How to Use the Software
Music
Videos/Photos
FM Radio
Timer
Settings
Troubleshooting
Important Information
Specifications
Contents list
Trouble shooting
To Deal w it h a Trouble
What can I do to solve a problem?
Customer support Web site
Possible Cause s of Sym pt oms
Table of contents for symptoms and possible causes
Operation
Display
Power
Connection to a computer
FM Radio
Other
Messages
Back to top
Copyright 2011 Sony Corporation
Page 10
WALK M AN Use r Guide
10
Print
Top page > Important Information
Getting Started
How to Use the Software
Music
Videos/Photos
FM Radio
Timer
Settings
Troubleshooting
Important Information
Specifications
Contents list
Import a nt I nformation
Precautions
Important product information
Warning
Caution
Notice for users
Notes on the headphones
Notes on the software
Cleaning
Notes on cleaning
St oring Data
Storing data
Upgra ding t he Pla ye r’s Firm w are
Upgrading the player’s firmware
License and Trade m ark N ot ice
License and trademark notice
Back to top
Copyright 2011 Sony Corporation
Page 11

WALK M AN Use r Guide
11
Print
Top page > Specifications
Getting Started
How to Use the Software
Music
Videos/Photos
FM Radio
Timer
Settings
Troubleshooting
Important Information
Specifications
Contents list
Specific a tions
Specifications
Specifications
Supplied items
System requirements
What are For mat a nd Bit Rate
What is audio format?
What is video format?
What is photo format?
Back to top
Copyright 2011 Sony Corporation
Page 12
WALK M AN Use r Guide
12
Print
Top page > Contents list
Getting Started
How to Use the Software
Music
Videos/Photos
FM Radio
Timer
Settings
Troubleshooting
Important Information
Specifications
Contents list
Cont e nts list
Ge t t ing Started
Be fore Use
Before first use
How to use this User Guide
Opera tion flow of “WA LK M AN ”
What you can do with “WALKMAN”
Operation flow to enjoy music
Operation flow to enjoy videos and photos
Pow e r/Cha rging
Turning the player on and off
Charging the battery
About battery life
Initial Set t ings
Selecting the display language [Language Settings]
Setting the current time [Set Date-Time]
Pa rts and Controls
Parts and controls
About t he Softw are
About the software
Hom e Menu/Opt ion M enu
About the Home menu
How to use the Home menu
How to use the option menu
How t o U se t he Softw are
Window s Me dia Player
Importing music from CDs using Windows Media Player
Transferring music using Windows Media Player
Cont e nt T ra nsfer
Transferring music using Content Transfer
Transferring videos/photos using Content Transfer
Window s Explorer (Drag -and -Drop)
Transferring music using Windows Explorer
Transferring videos/photos using Windows Explorer
Back to top
Back to top
Page 13

Music
13
Playing Music
Playing music
Browsing and using the music screen
Searching for songs
Playing the songs in a playlist
Playing all songs in random order
Deleting songs
Music Opt ion Menu
Using the music option menu
Music Setti ngs
Setting the play mode [Play Mode]
Setting the sound quality (CLEAR BASS) [Equalizer]
Listening with Clear Stereo [Clear Stereo]
Adjusting the volume level [Dynamic Normalizer]
Videos/Phot os
Back to top
Wa t c hing V ide os
Watching videos [Videos]
Browsing and using the video screen
Deleting videos
Video Option M e nu
Using the video option menu
Video Se ttings
Setting the zoom function [Zoom]
Setting the display of the video screen [Display]
Setting the video orientation [Video Orientation]
Vie w ing Photos
Viewing photos [Photos]
Browsing and using the photo screen
Playing a slide show
Deleting photos
Phot o O pt ion Menu
Using the photo option menu
Phot o S etti ngs
Photo orientation [Photo Orientation]
Setting the display of the photo screen [Display]
Setting the slide show play mode [Slide Show Repeat]
Setting the interval of a slide show [Slide Show Interval]
Back to top
FM Radio
List e ning t o FM Radio
Page 14

Listening to FM radio [FM Radio]
14
Browsing and using the FM radio screen
Presetting broadcast stations automatically [Auto Preset]
Presetting broadcast stations manually
Deleting preset broadcast stations [Delete from Preset]
FM Ra dio Op tion Me nu
Using the FM radio option menu
FM Ra dio Se t t in gs
Setting the reception [Scan Sensitivity]
Setting monaural/stereo [Mono/Auto]
Tim e r
Se t t ing t he T ime r
About the timer
Setting the alarm [Alarm]
Setting the sleep timer [Sleep Timer]
Back to top
Back to top
Se t t ings
Common Settings
Displaying the player information [Unit Information]
Limiting the volume [AVLS (Volume Limit)]
Turning off the beep sound [Beep Settings]
Setting the screensaver type [Screensaver]
Adjusting the brightness of the screen [Brightness]
Setting the current time [Set Date-Time]
Setting the date format [Date Display Format]
Setting the time format [Time Display Format]
Returning to the factory settings [Reset all Settings]
Formatting memory [Format]
Selecting the display language [Language Settings]
Music Setti ngs
Setting the play mode [Play Mode]
Setting the sound quality (CLEAR BASS) [Equalizer]
Listening with Clear Stereo [Clear Stereo]
Adjusting the volume level [Dynamic Normalizer]
Video Se ttings
Setting the zoom function [Zoom]
Setting the display of the video screen [Display]
Setting the video orientation [Video Orientation]
Phot o S etti ngs
Photo orientation [Photo Orientation]
Setting the display of the photo screen [Display]
Setting the slide show play mode [Slide Show Repeat]
Page 15

Setting the interval of a slide show [Slide Show Interval]
FM Ra dio Se t t in gs
15
Setting the reception [Scan Sensitivity]
Setting monaural/stereo [Mono/Auto]
Trouble shooting
To Deal w it h a Trouble
What can I do to solve a problem?
Customer support Web site
Possible Cause s of Sym pt oms
Table of contents for symptoms and possible causes
Operation
Display
Power
Connection to a computer
FM Radio
Other
Messages
Back to top
Back to top
Import a nt I nformation
Precautions
Important product information
Warning
Caution
Notice for users
Notes on the headphones
Notes on the software
Cleaning
Notes on cleaning
St oring Data
Storing data
Upgra ding t he Pla ye r’s Firm w are
Upgrading the player’s firmware
License and Trade m ark N ot ice
License and trademark notice
Back to top
Specific a tions
Specifications
Specifications
Supplied items
System requirements
Page 16

What are For mat a nd Bit Rate
What is audio format?
16
What is video format?
What is photo format?
Copyright 2011 Sony Corporation
Back to top
Page 17
WALK M AN Use r Guide
17
Getting Started
Print
Top page > Getting Started > Before Use > Before first use
How to Use the Software
Music
Videos/Photos
FM Radio
Timer
Settings
Troubleshooting
Important Information
Specifications
Contents list
Be fore first use
Thank you for purchasing this “WALKMAN.”
This User Guide explains how to transfer music, videos and photos to the player and how to use
various functions of it. Browse this User Guide for necessary information.
Before you start using the player, be sure to read “Important Information” that contains important
information on the use of the player. To read it, click “Important Information” in the side bar on
the left of the browser window.
Also, “Quick Start Guide” supplied with the player contains important information for you.
For information about the customer support Web site, see
About model na mes m ent ioned in this Use r Guide
Depending on the country/region in which you have purchased the player, some models may not
be available.
About Window s operating system a nd Window s M e dia Pla yer
Make sure that the operating system is Windows XP (Service Pack 3 or later), Windows Vista
(Service Pack 1 or later) or Windows 7 (*1), and the installed Windows Media Player version on
your computer is 11 (Windows XP/Windows Vista) or 12 (Windows 7).
For details about usage or support on Windows Media Player, refer to Windows Media Player
information from the following web site:
http://support.microsoft.com/
(*1) [Compatibility mode] for Windows XP is not supported.
[Details].
About ba t t ery cha rging
The battery might not be charged at time of purchase. See [Details] for how to charge the
battery.
Back to top
Copyright 2011 Sony Corporation
Page 18
WALK M AN Use r Guide
18
Getting Started
Print
Top page > Getting Started > Before Use > How to use this User Guide
How to Use the Software
Music
Videos/Photos
FM Radio
Timer
Settings
Troubleshooting
Important Information
Specifications
Contents list
How t o use t his U ser Guide
Selecting a topic to display
Returning to a previous page
Printing out a page
This User Guide explains how to use each function of the player, how to change settings, and
how to troubleshoot a problem.
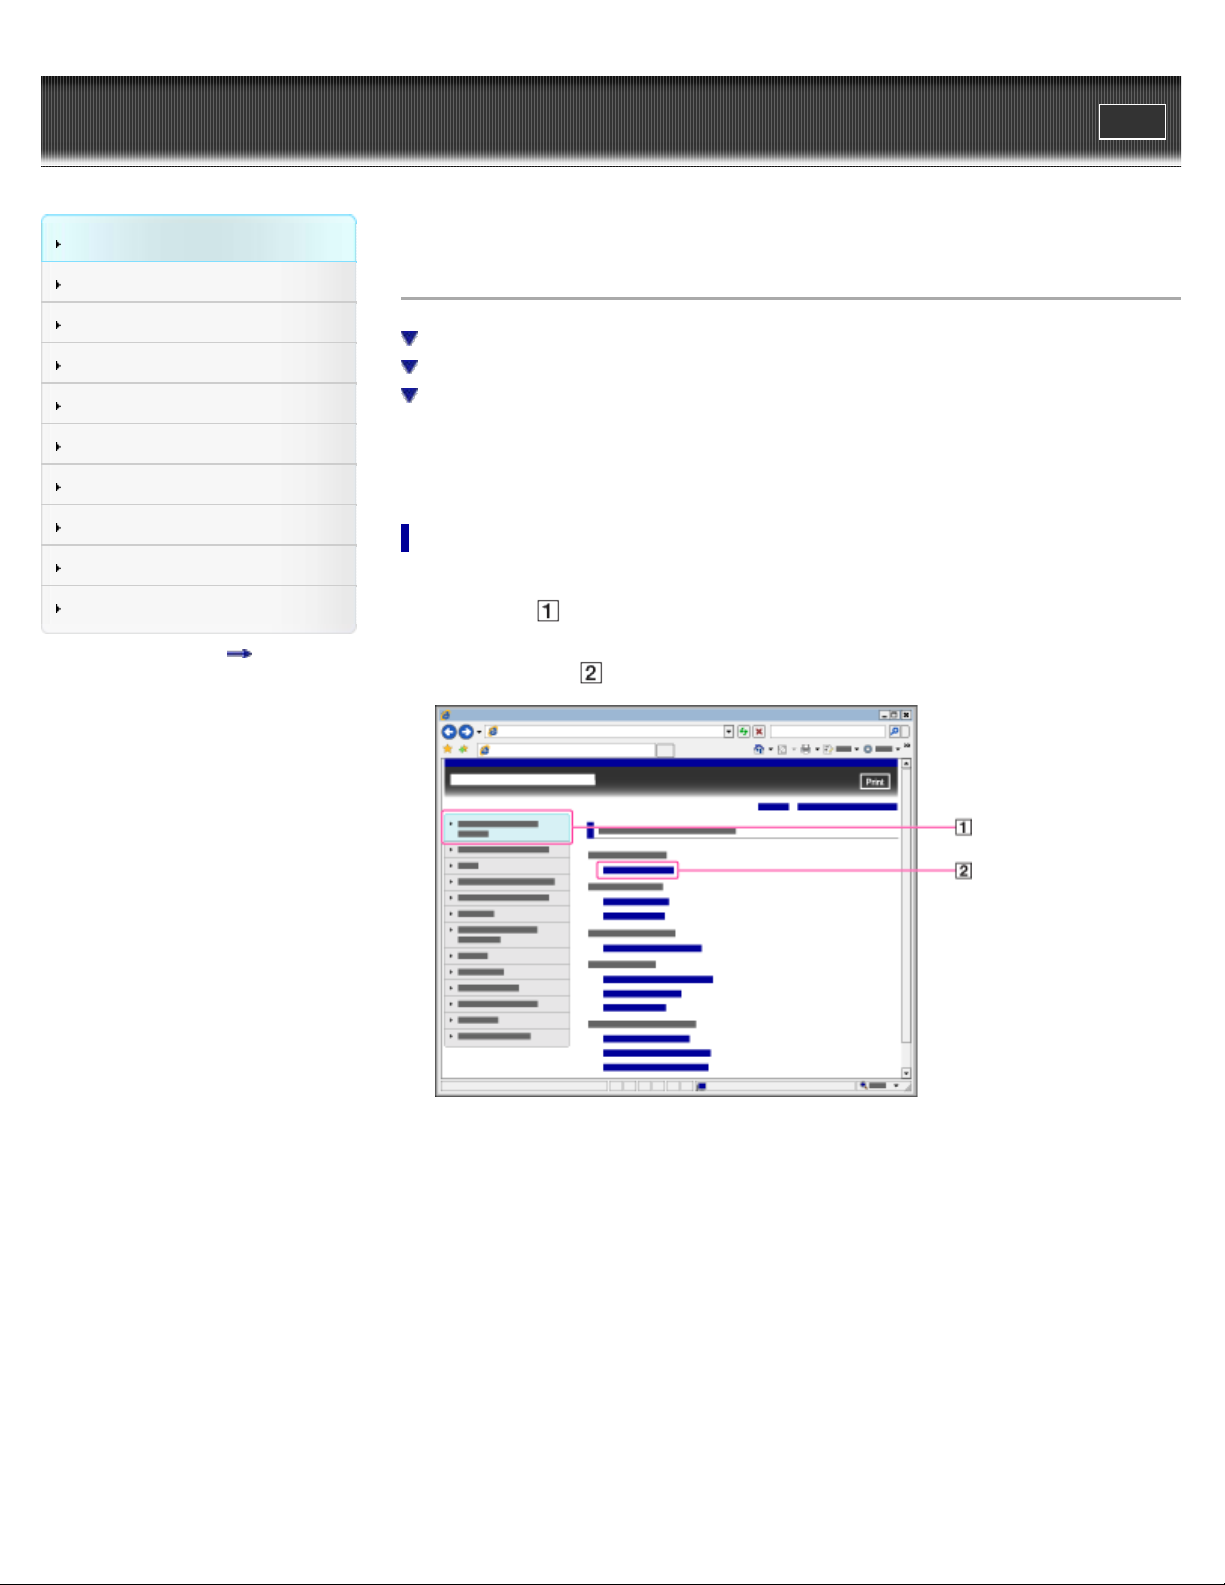
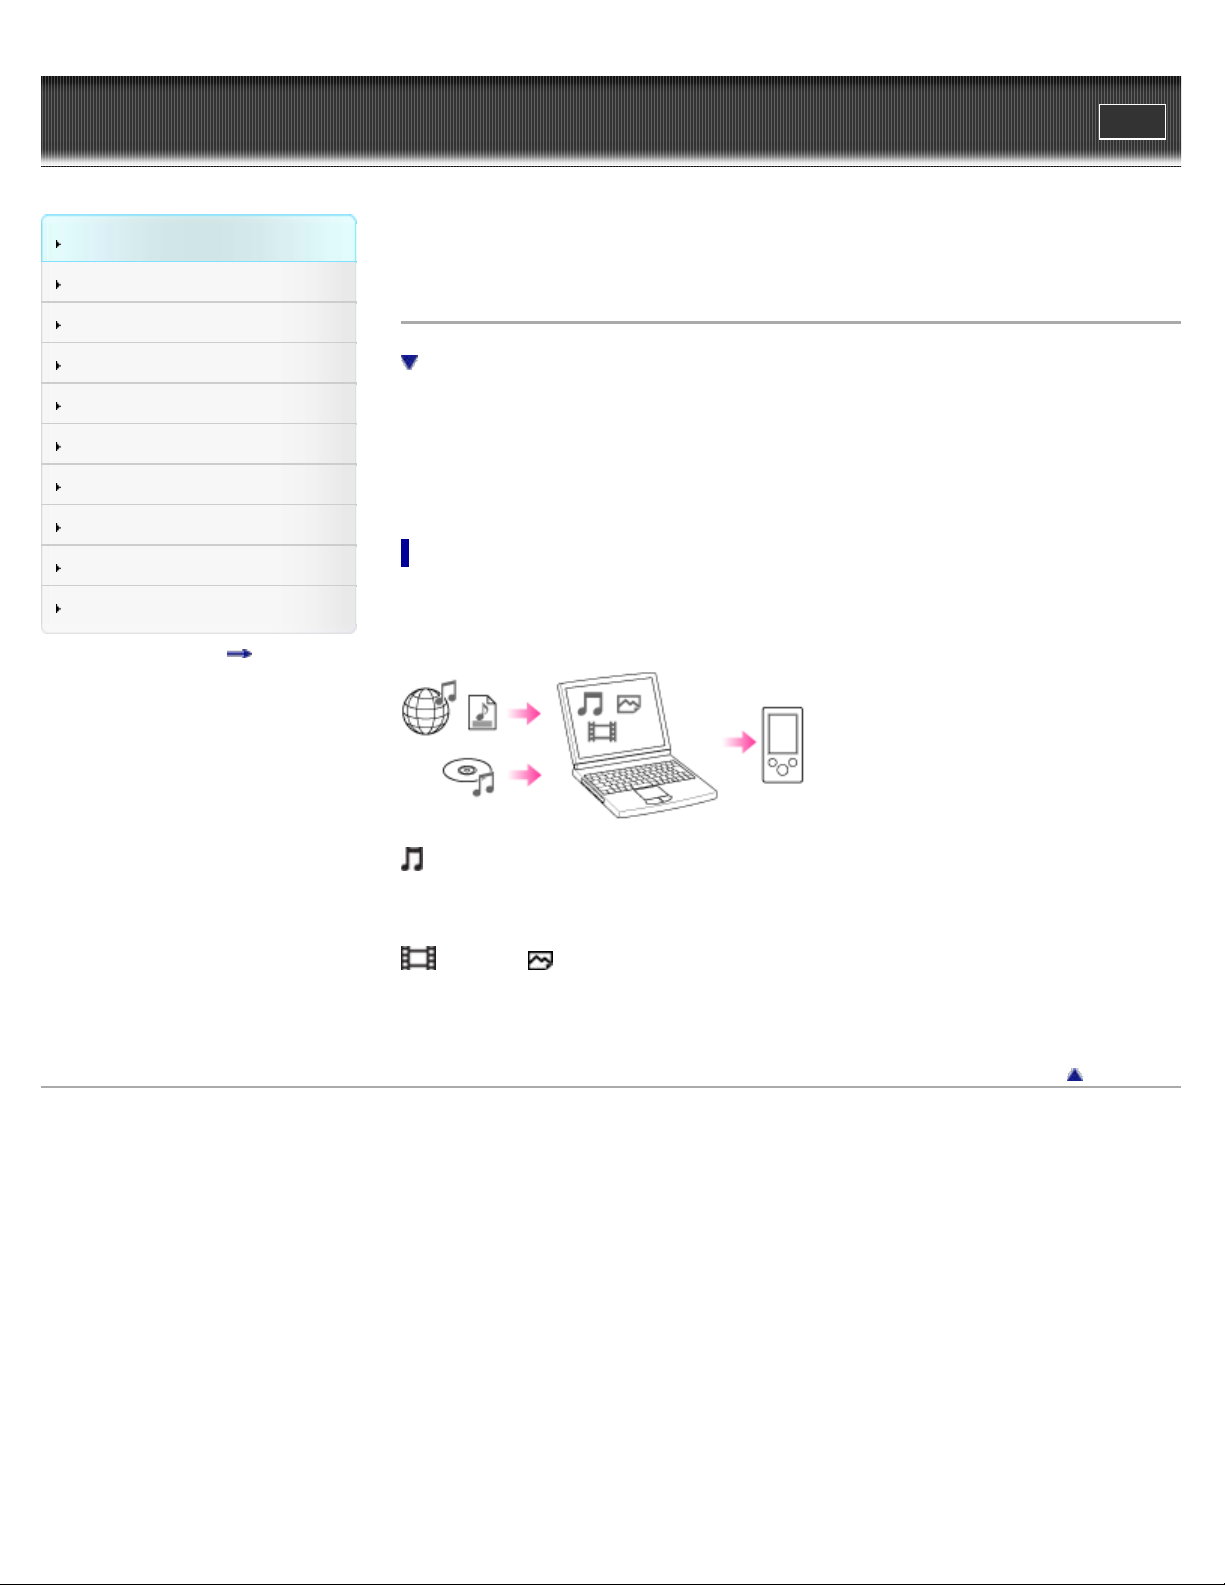
Se lecting a topic t o display
Internet Explorer 7 is used for illustration purposes.
1 . Click a title (
The title’s topic list appears in the right pane.
2 . Click a topic title (
) in the side bar on the left of the browser window.
) in the list.
Descriptions appear in the right pane.
Page 19
Changing the font size
19
You can change the font size by changing the setting of your web browser. For how to change
the font size setting, refer to the Help of your web browser.
Re t urning to a previous pa ge
Use the back button of your web browser ( ) or breadcrumb trail navigation ( ) to return to a
page you previously viewed.
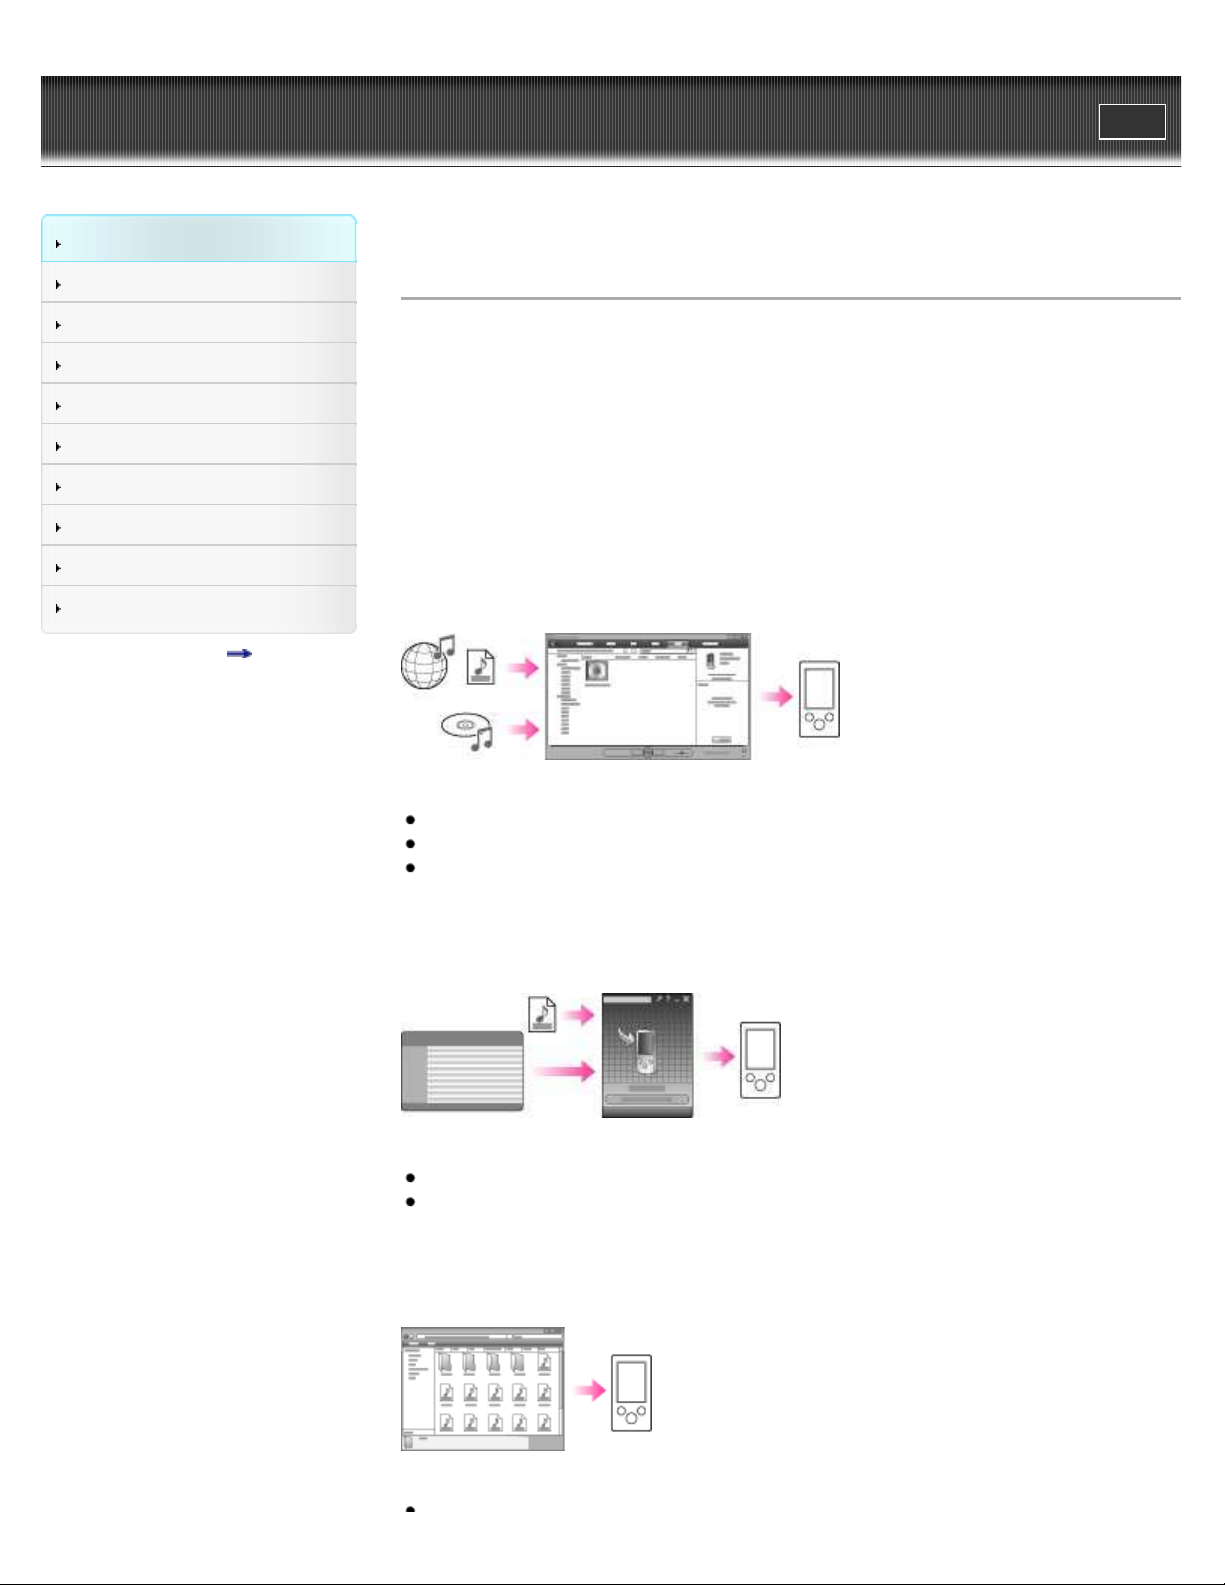
Printing out a pa ge
Click the print button ( ) to print out a page you are viewing.
Back to top
Copyright 2011 Sony Corporation
Page 20
WALK M AN Use r Guide
20
Getting Started
Print
Top page > Getting Started > Operation flow of “WALKMAN” > What you can do with
“WALKMAN”
How to Use the Software
Music
Videos/Photos
FM Radio
Timer
Settings
Troubleshooting
Important Information
Specifications
Contents list
What you c a n do w ith “WALK M AN”
Enjoying music, videos and photos transferred from a computer
Your “WALKMAN” incorporates various functions. This page introduces some of its major
features to you.
You need to transfer music, videos or photos from a computer to your “WALKMAN” to enjoy
them.
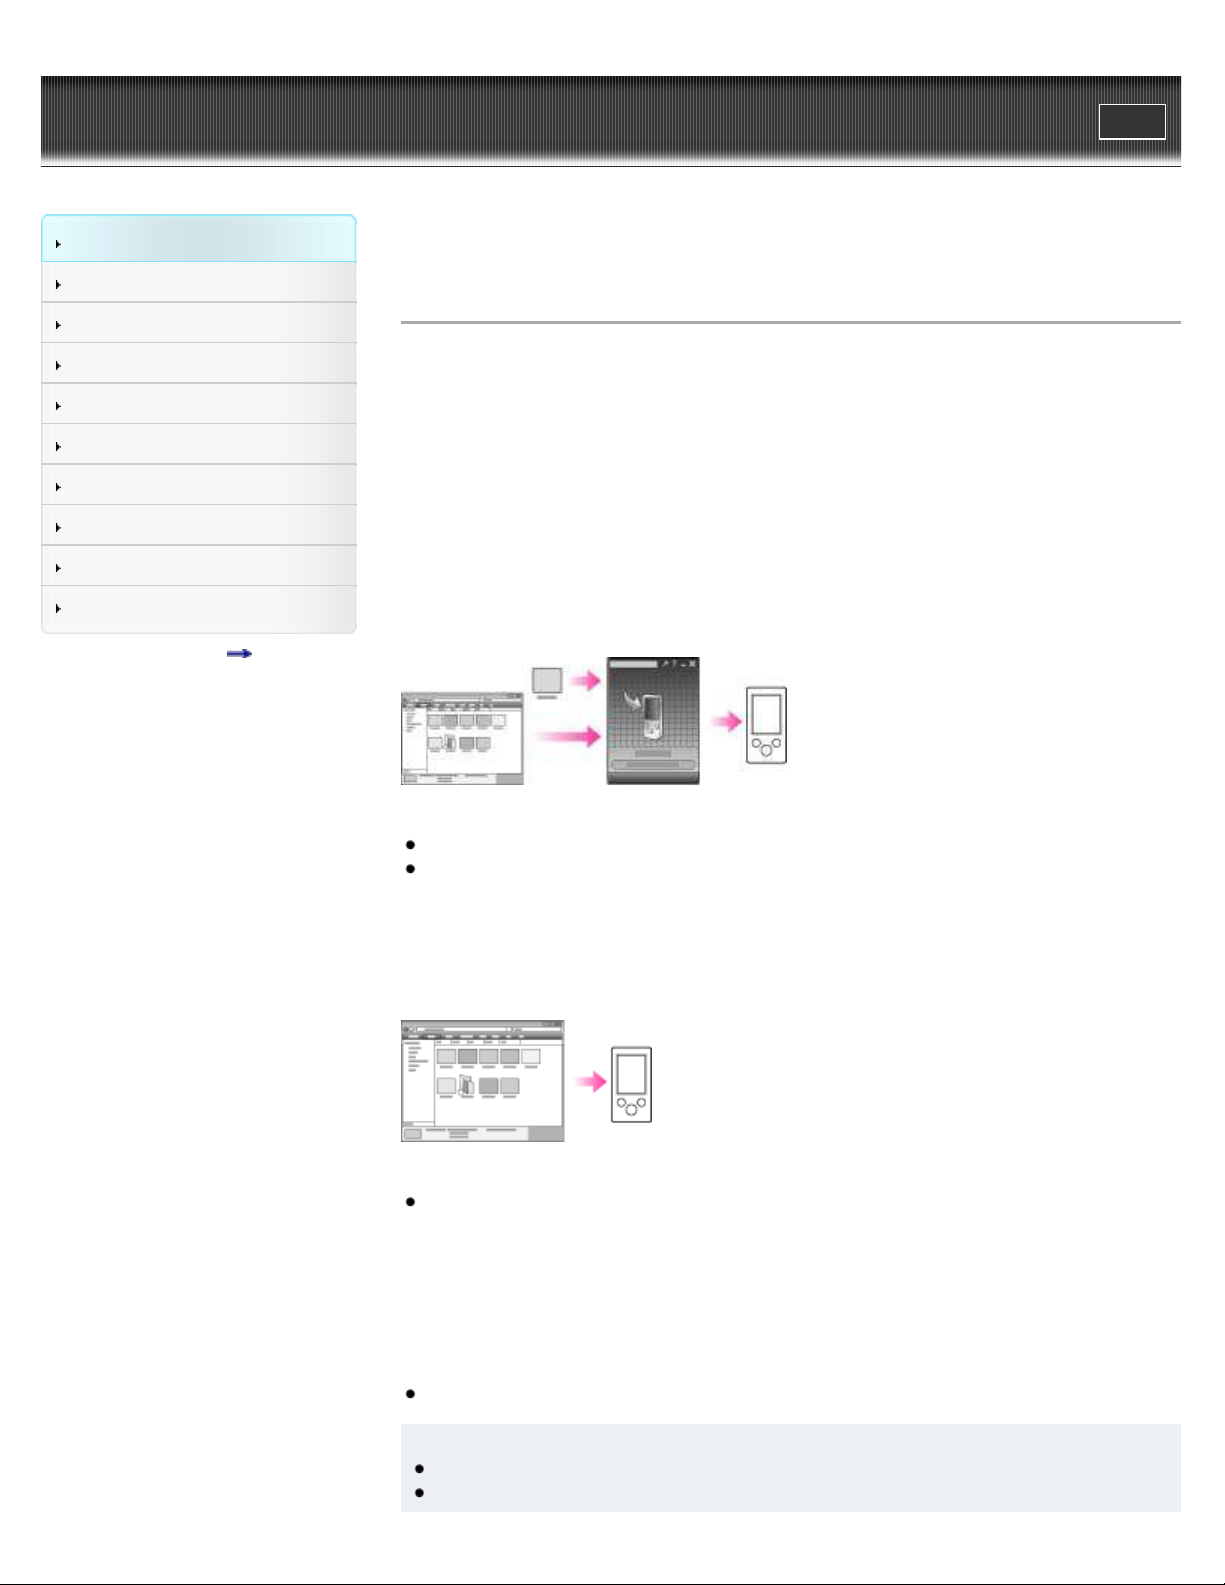
Enjoying music, vide os and phot os tra nsferre d from a c omput e r
To enjoy music, videos or photos, use bundled software (Content Transfer) or supported software
(Windows Media Player) to transfer them from a computer to the player. For how to install the
bundled software, refer to “Quick Start Guide.”
M usic
There are several ways to transfer music to the player. See [Details] for how to transfer your
favorite songs to the player. After transferring, see
[Details] for how to play them back.
V ide os/ Photos
There are several ways to transfer videos or photos to the player. See [Details] for how to
transfer them to the player. After transferring, see
for how to view photos.
Copyright 2011 Sony Corporation
[Details] for how to watch videos, or [Details]
Back to top
Page 21
WALK M AN Use r Guide
21
Getting Started
Print
Top page > Getting Started > Operation flow of “WALKMAN” > Operation flow to enjoy music
How to Use the Software
Music
Videos/Photos
FM Radio
Timer
Settings
Troubleshooting
Important Information
Specifications
Contents list
Opera t ion flow to e njoy m usic
You need to have music files on your computer before transferring them to the player and
playing back. There are various ways to obtain music files, such as importing from CDs,
purchasing at online music stores, downloading from the Internet, and so on.
Be careful that the player can play back music files in supported formats only. Also, copyright
protected music files may not be playable depending on their copyright protection. For details
about supported file formats, see
Once you have music files on your computer, you are ready to transfer them to the player. You
can transfer music to the player in the following three ways.
Tra nsferring music from CDs using Window s Media Pla yer
You can import music from your CDs, etc., to your computer, and transfer them to the player
using Windows Media Player.
For how to use Windows Media Player, see the following topics.
Windows Media Player
Importing music from CDs using Windows Media Player [Details]
Transferring music using Windows Media Player [Details]
[Details].
[Details]
Tra nsferring music from iTunes, etc., using Cont e nt T ransfer
If you have already managed music with iTunes, etc., you can transfer them to the player using
Content Transfer.
For how to use Content Transfer, see the following topics.
Content Transfer
Transferring music using Content Transfer [Details]
[Details]
Tra nsferring music by drag-a nd -drop using Window s Ex plore r
You can directly transfer music stored on your computer by drag-and -drop using Windows
Explorer.
For how to use Windows Explorer, see the following topic.
Page 22

Transferring music using Windows Explorer [Details]
22
Hint
For detailed information on how to import music, refer to the Help of each software.
For details about supported file formats, see
[Details].
The player does not use SonicStage software (SonicStage software, developed by Sony,
manages music on a computer or transfers music to other types of players). For this player,
you can transfer music in the above three ways, not using SonicStage.
ATRAC files managed by SonicStage can be transferred to the player after conversion to
MP3 file format.
The maximum number of files per folder in the [MUSIC] folder is 4,000.
Not e
During data transfer between the player and a computer, [Do not disconnect.] appears on
the player’s screen. While [Do not disconnect.] is displayed, do not disconnect the USB
cable. Otherwise, the data being transferred or the data stored in the player may be
damaged.
Do not leave the player connected for extended periods to a laptop computer that is not
connected to AC power, since the player may discharge the computer’s battery.
If you turn on or restart the computer while the player is connected to the computer, the
player may malfunction. In this case, press the RESET button of the player to reset it
[Details]. Disconnect the player from the computer before turning on or restarting the
computer.
Copyright 2011 Sony Corporation
Back to top
Page 23
WALK M AN Use r Guide
23
Getting Started
Print
Top page > Getting Started > Operation flow of “WALKMAN” > Operation flow to enjoy videos
and photos
How to Use the Software
Music
Videos/Photos
FM Radio
Timer
Settings
Troubleshooting
Important Information
Specifications
Contents list
Opera t ion flow to e njoy videos a nd photos
You need to have video/photo episode files on your computer before transferring them to the
player and playing back.
You can import videos from recorded videos or download from the Internet, etc. You can import
photos from a digital camera or download from the Internet, etc.
Be careful that the player can play back files in supported formats only. Also, copyright protected
files may not be playable depending on their copyright protection. For details about supported file
formats, see
Once you have video/photo files on your computer, you are ready to transfer them to the player.
You can transfer video/photo files to the player in the following three ways.
Tra nsferring vide os/photos using Content T ransfe r
You can transfer videos/photos stored on your computer to the player using Content Transfer.
For how to use Content Transfer, see the following topics.
Content Transfer
Transferring videos/photos using Content Transfer [Details]
[Details].
[Details]
Tra nsferring vide os/photos by dra g -a nd-drop using Window s
Ex plore r
You can directly transfer videos/photos stored on your computer by drag-and-drop using
Windows Explorer.
For how to use Windows Explorer, see the following topic.
Transferring videos/photos using Windows Explorer
[Details]
Tra nsferring vide os/photos using Windows M e dia Pla yer
You can transfer videos/photos managed with Windows Media Player to the player.
For details about usage or support on Windows Media Player, refer to Windows Media Player
information from the following web site:
http://support.microsoft.com/
Also, see the following topic.
Windows Media Player
Hint
For detailed information on how to import videos/photos, refer to the Help of each software.
For details about supported file formats, see [Details].
[Details]
Page 24

The maximum number of files per folder in the [PICTURE], [PICTURES] or [DCIM] folder is
24
4,000.
Not e
Commercial DVDs and Blu-ray Discs are copyright protected and cannot be transferred to
the player.
Back to top
Copyright 2011 Sony Corporation
Page 25
WALK M AN Use r Guide
25
Getting Started
Print
Top page > Getting Started > Power/Charging > Turning the player on and off
How to Use the Software
Music
Videos/Photos
FM Radio
Timer
Settings
Troubleshooting
Important Information
Specifications
Contents list
Turning the playe r on and off
To turn on the player
To turn off the player
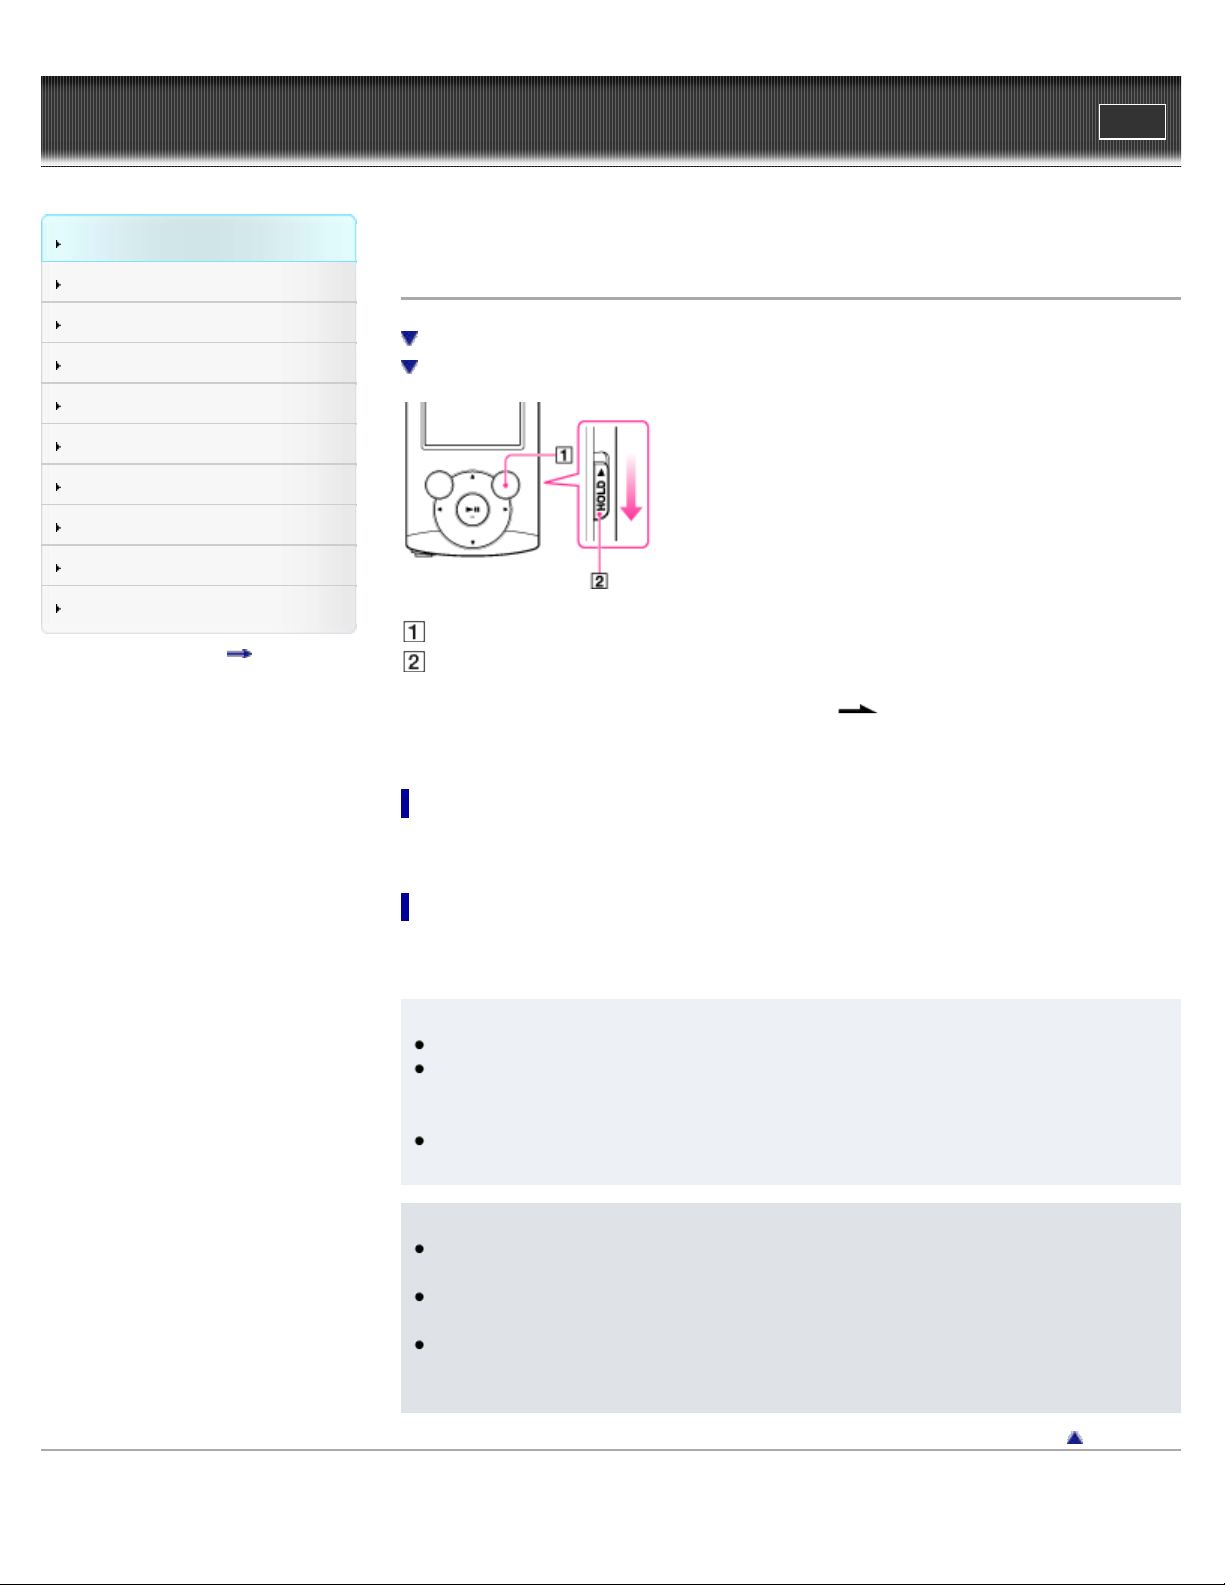
OPTION/PWR OFF button
HOLD switch
If [On hold... Cancel HOLD function to activate controls.] appears on the screen, slide the
HOLD switch in the opposite direction of the arrow
cancel the HOLD function.
To t urn on the playe r
Press any button to turn the player on.
on the right side of the player to
To t urn off the player
Press and hold the OPTION/PWR OFF button [Details]. [POWER OFF] appears, the player
enters standby mode, and the screen turns off.
Hint
Set the date and time on the player before using it
During pause, if there is no operation for about 3 minutes, the player automatically enters
standby mode, and the screen turns off. In standby mode, press any button to turn on the
screen again.
While the player is in standby mode, if there is no operation for about 4 hours, the player
completely turns off automatically.
Not e
You cannot operate the player when it is connected to a computer. Disconnect the USB
cable before operating the player.
After connecting to a computer with the USB cable, the resume information of the last
played song, video, photo, etc., is cleared. Reselect the desired content from the list screen.
The player consumes battery power very slightly even when it is in standby mode.
Therefore, the player might unexpectedly turn off completely, depending on the power
remaining in the battery.
Copyright 2011 Sony Corporation
[Details].
Back to top
Page 26
WALK M AN Use r Guide
26
Getting Started
Print
Top page > Getting Started > Power/Charging > Charging the battery
How to Use the Software
Music
Videos/Photos
FM Radio
Timer
Settings
Troubleshooting
Important Information
Specifications
Contents list
Charging t he battery
About the battery indicator
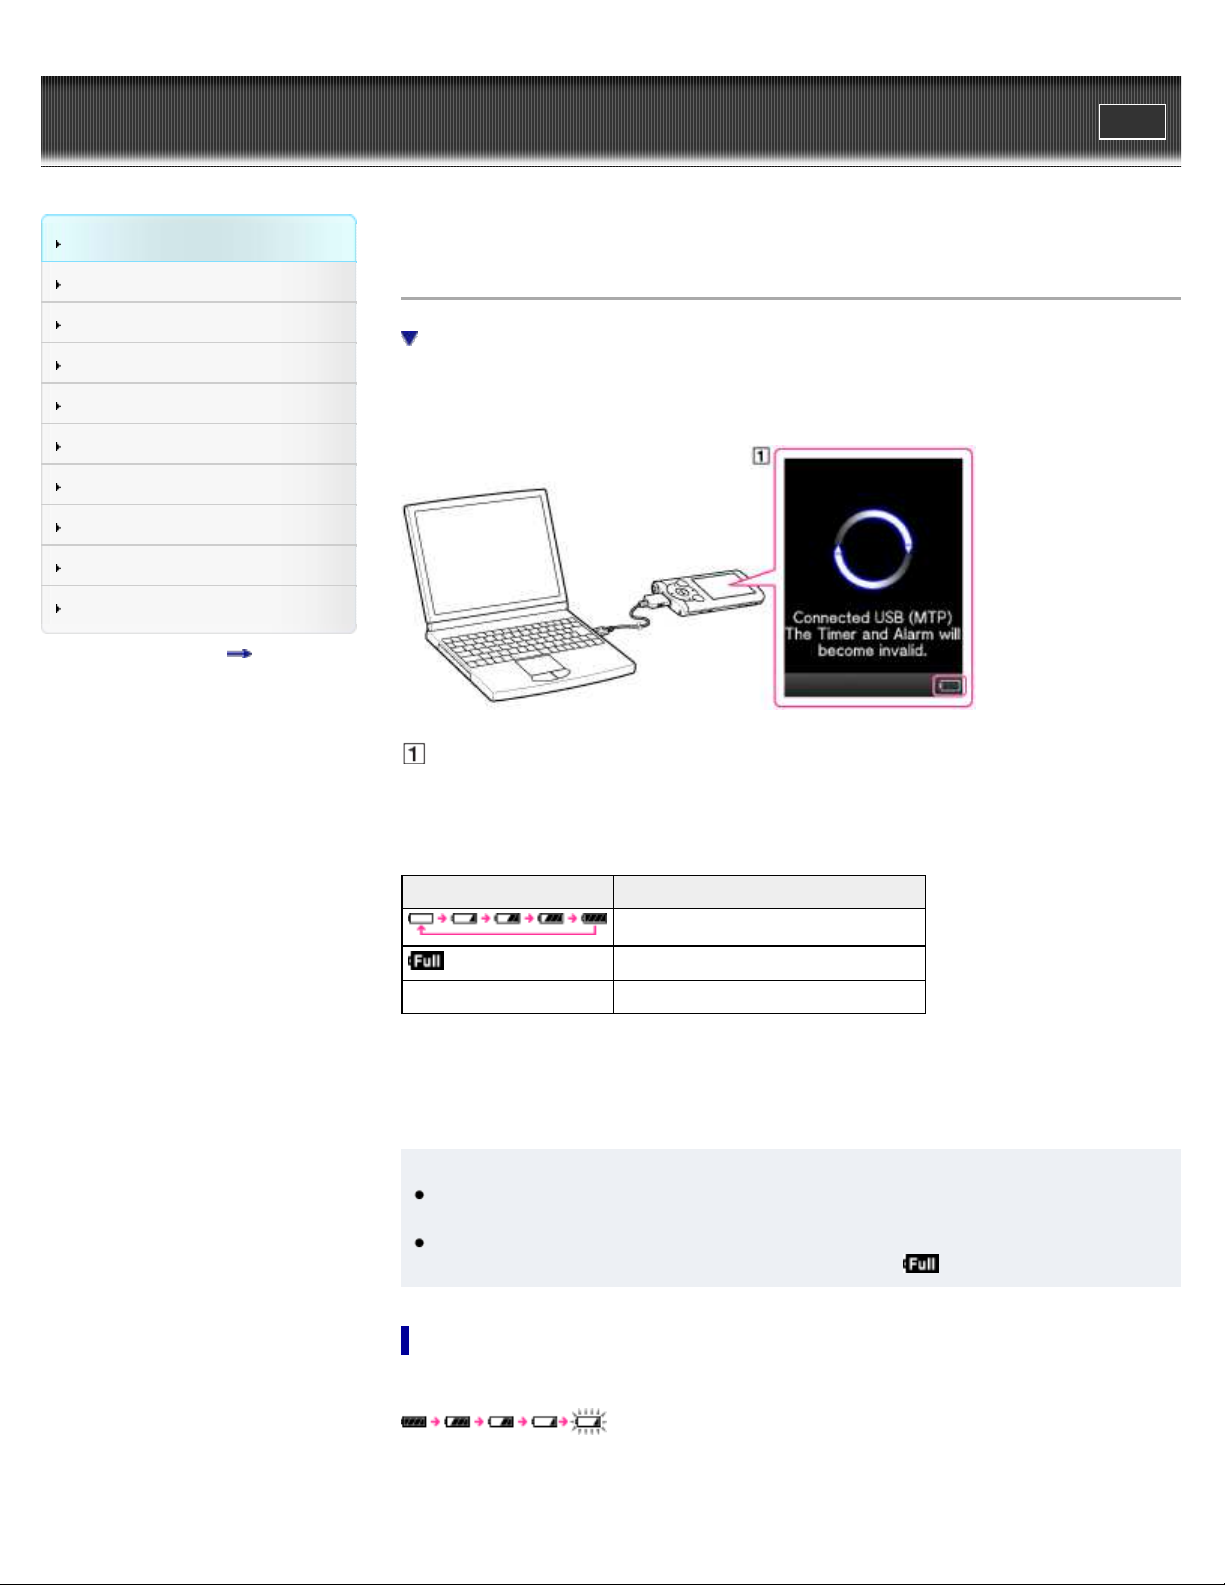
The player’s battery is recharged while the player is connected to a running computer.
When you connect the player to your computer, use the USB cable (supplied).
Display
When charging the battery, you can check the battery charging status.
Ba t t e ry charging st a t us on t he display
St a tus De scription
Charging (*1)
Charging is completed (*1).
Blank screen The battery is not being charged (*2).
(*1) Charging time is approx. 2 hours. When charging is completed, disconnect the player from the USB
connector of your computer.
(*2) If the computer enters a power saving mode, such as the Sleep or Hibernation mode, the player’s
screen may turn off. In this case, the player consumes battery power.
Hint
Depending on the computer, changing the settings of the Sleep or Hibernation mode varies.
Refer to the manufacturer.
When you use the player for the first time, or if you have not used the player for a long time,
recharge it fully (until the battery charge indicator displays
).
About the ba ttery indic a t or
The battery indicator in the information area shows the remaining battery charge.
As the battery power gets lower, the bars of the icon disappear. If [LOW BATTERY. Please
Charge.] appears, you cannot use the player. In this case, charge the battery by connecting to
Page 27

your computer. See [Details] on battery duration.
27
Not e
If you charge the player when it has not been used for a long period, your computer may not
recognize the player, or nothing may appear on the display. Charge the player for about 5
minutes, after which it should start operating normally again.
Charge the battery in an ambient temperature of between 5 ºC to 35 ºC (41 ºF to 95 ºF). If
you try to charge the battery in an ambient temperature outside this range, the
may appear, and charging cannot be performed.
The number of times the battery can be recharged before it is used up is approximately 500
times. This number may vary, depending on the conditions under which you use the player.
The battery indicator on the display is only an estimate. For example, one section of black in
the indicator will not always indicate exactly one-fourth of the battery’s charge.
[Do not disconnect.] appears in the display while the computer accesses the player. During
this time, do not disconnect the USB cable (supplied); otherwise, data being transferred (or
data already in the player) may be damaged.
The control buttons on the player become inoperative while it is connected to a computer.
To prevent battery deterioration, charge the battery at least once every half a year or every
year.
Some USB devices connected to the computer may interfere with proper operation of the
player.
We do not guarantee battery recharging using a personally assembled/modified computer.
If the computer enters a power saving mode, such as the Sleep or Hibernation mode, while
the player is connected via the USB cable, the player’s battery will not be charged. Instead,
the player continues to draw power from the battery, discharging it.
Do not leave the player connected for extended periods to a laptop computer that is not
connected to AC power, since the player may discharge the computer’s battery.
While the player is connected to a computer, do not turn on, restart, wake up from sleep
mode, or shut down the computer. These operations may cause the player to malfunction.
Disconnect the player from the computer before performing these operations.
Heat may build up in the player while charging. This is not a malfunction.
After connecting to a computer with the USB cable, the resume information of the last
played song, video, photo, etc., is cleared. Reselect the desired content from the list screen.
icon
Copyright 2011 Sony Corporation
Back to top
Page 28
WALK M AN Use r Guide
28
Getting Started
Print
Top page > Getting Started > Power/Charging > About battery life
How to Use the Software
Music
Videos/Photos
FM Radio
Timer
Settings
Troubleshooting
Important Information
Specifications
Contents list
About ba t t e ry life
Turn off the player manually
Longer battery life settings
Adjust data format and bit rate
By adjusting the settings or managing the power supply properly, it is possible to save battery
power for longer usage time between charges.
The following hints will yield a longer battery life.
Turn off t he playe r m a nua lly
If you press and hold the OPTION/PWR OFF button, the player enters standby mode and the
screen turns off to save battery power. Furthermore, if standby mode continues for more than
about 4 hours, the player turns completely off automatically.
Longer ba t t ery life sett ings
The following settings are effective for extending the battery life of the player.
Reduce the [Brightness] setting value.
Set [Type] of [Screensaver] to [Blank].
Set [Equalizer], [Clear Stereo] and [Dynamic Normalizer] to [None] or [Off].
See
[Details] for details on the effect of setting changes, default settings, and battery life
measurement conditions.
Adjust da t a form a t and bit rate
Playing time will vary, as battery charge can be affected by the format and bit rate of songs,
videos or photos that are played.
For details on charging time and usage time, see
Re lat e d Topics
Charging time
Copyright 2011 Sony Corporation
[Details].
Back to top
Page 29
WALK M AN Use r Guide
29
Getting Started
Print
Top page > Getting Started > Initial Settings > Selecting the display language [Language
Settings]
How to Use the Software
Music
Videos/Photos
FM Radio
Timer
Settings
Troubleshooting
Important Information
Specifications
Contents list
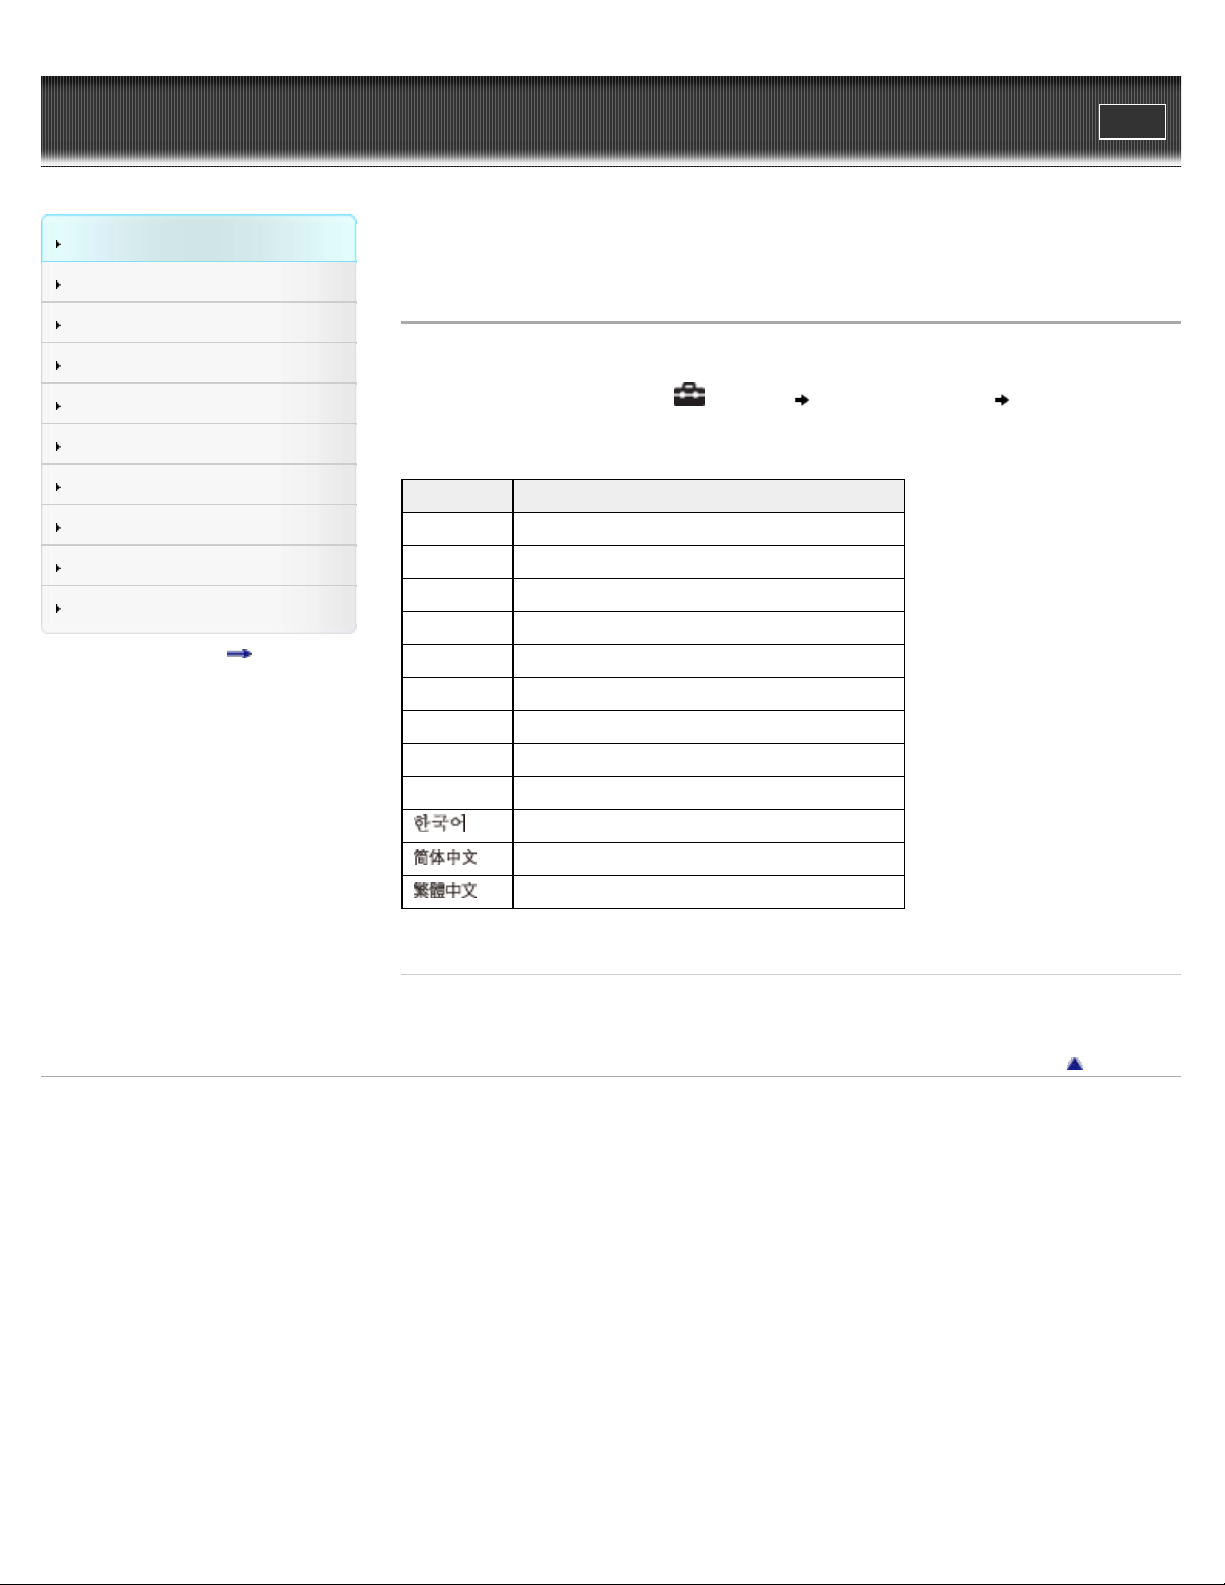
Se lecting t he display langua ge [Langua ge Settings]
You can select from a variety of languages for menus and messages.
1 . From the Home menu, select [Settings] [Language Settings] desired language
setting.
La ngua ge Messa ges and m enus are displa yed in
[Deutsch] German
[English] English
[Español] Spanish
[Français] French
[Italiano] Italian
[Polski] Polish
[Português] Portuguese
[Русский] Russian
[Türkçe] Turkish
[
] Korean
[
[
] Simplified Chinese
] Traditional Chinese
Re lat e d Topics
How to use the Home menu
Copyright 2011 Sony Corporation
Back to top
Page 30
WALK M AN Use r Guide
30
Getting Started
Print
Top page > Getting Started > Initial Settings > Setting the current time [Set Date-Time]
How to Use the Software
Music
Videos/Photos
FM Radio
Timer
Settings
Troubleshooting
Important Information
Specifications
Contents list
Se t t ing the c urrent tim e [Set Da t e -Tim e ]
To display the current time
You can set the date and time.
1 . From the Home menu, select [Settings] [Common Settings] [Set Date-Time].
2 . Press the
the value.
3 . As in step 2 , adjust the settings for month, date, hour, and minutes, and then press the
button to confirm.
To displa y the c urrent time
Select [Clock Display] on the Home menu.
Press the OPTION/PWR OFF button on the Home menu or the playback screen, and select
[Clock Display] from the option menu.
Hint
You can select the date format from [YYYY/MM/DD], [MM/DD/YYYY], or [DD/MM/YYYY]
[Details]. Furthermore, you can select the time format from either [12-hour] or [24-hour]
[Details].
/ button to select the year, and then press the / button to change
Not e
If battery power is used up because, for example, the player has not been used for a long
time, your settings for date and time may be lost, and “-” will be displayed instead of the
current date and time.
The clock may gain or lose up to 60 seconds per month. In this case, set the clock again.
Re lat e d Topics
How to use the Home menu
Copyright 2011 Sony Corporation
Back to top
Page 31

WALK M AN Use r Guide
Back to top
31
Getting Started
Print
Top page > Getting Started > Parts and Controls > Parts and controls
How to Use the Software
Music
Videos/Photos
FM Radio
Timer
Settings
Troubleshooting
Important Information
Specifications
Contents list
Pa rts a nd c ont rols
BACK /HOM E button [Det a il s]
Press to go up one list screen level, or to return to the previous menu.
Press and hold the BACK/HOME button to display the Home menu.
5 -w ay but ton (*1) [Det a il s]
Press to start playback or navigate through the player’s on-screen menus.
(*1) There is a tactile dot. Use it to help with button operations.
Headphone jac k
Insert the headphone plug until it clicks into place. If the headphones are connected
improperly, the sound from the headphones will be impaired.
USB connector
Connect the USB cable (supplied).
Display
VOL + (* 1)/– b ut t on
Press to adjust the volume.
(*1) There is a tactile dot. Use it to help with button operations.
OPTION/PWR OFF but t on [ De t ails]
Press to display the option menu.
If you press and hold the OPTION/PWR OFF button, the screen turns off and the player
enters standby mode
HOLD sw itch
You can protect the player against accidental operation during transportation by setting the
HOLD switch. By sliding the HOLD switch in the direction of the arrow
buttons are disabled. If you slide the HOLD switch in the opposite position, the HOLD
function is released.
St rap hole
This is used to attach a strap (not supplied).
RESET butt on
Press the RESET button with a small pin, etc., to reset the player.
[Details].
, all operation
[Deta ils]
Page 32

Copyright 2011 Sony Corporation
32
Page 33

WALK M AN Use r Guide
33
Getting Started
Print
Top page > Getting Started > About the Software > About the software
How to Use the Software
Music
Videos/Photos
FM Radio
Timer
Settings
Troubleshooting
Important Information
Specifications
Contents list
About the softw a re
Bundled software
Compatible software
You can use several software shown below to manage music, videos and photos on your
computer or transfer them to the player.
Bundle d softw a re
Cont e nt T ransfer
Content Transfer can transfer music, videos or photos from a computer to the player by a simple
drag-and-drop operation. You can use Windows Explorer or iTunes, etc., to drag-and-drop data
to Content Transfer. Content Transfer can also convert a video file of a format not supported by
the player into a playable format. For details on operation, refer to the Help of the software.
Transferable files: Music (MP3, WMA, AAC, WAV), Photo (JPEG), Video (WMV (*1))
(*1) Some WMV files cannot be played back after being transferred by Content Transfer. If you retransfer
them using Windows Media Player, they may become playable.
WALK M AN Guide
The User Guide (this manual) and a useful list of links are available to you.
Compa t ible softw a re
Window s M edia Pla yer
Windows Media Player can import audio data from CDs and transfer data to the player.
Transferable files: Music (MP3, WMA), Video (WMV), Photo (JPEG)
For details on operation, refer to the Help of the software, or visit the following website.
http://support.microsoft.com/
Re lat e d Topics
Importing music from CDs using Windows Media Player
Transferring music using Windows Media Player
Transferring music using Content Transfer
Transferring videos/photos using Content Transfer
Back to top
Copyright 2011 Sony Corporation
Page 34

WALK M AN Use r Guide
34
Getting Started
Print
Top page > Getting Started > Home Menu/Option Menu > About the Home menu
How to Use the Software
Music
Videos/Photos
FM Radio
Timer
Settings
Troubleshooting
Important Information
Specifications
Contents list
About the H ome m e nu
The following list shows the items of the Home menu.
[Shuffle All] [De t ails ]
Listen to all the songs stored on the player in random order.
[FM Radio] [Deta ils]
Listen to FM radio broadcasting.
[Photos] [De t ails ]
View photos transferred to the player.
[Music] [De tails]
Listen to songs transferred to the player.
[Se ttings] [Deta il s]
Set up the player and its applications.
[Playlists] [De tai ls]
Listen to songs in the playlists.
[Clock Displa y] [De t a ils]
Display the current time.
[Vide os] [De tai ls]
Watch videos transferred to the player.
[Now Pla ying]
Display the playback or display screen of the currently playing content.
Inform a tion are a
[Deta ils]
About the information area
The icons shown in the table below appear in the information area. The icons vary according to
the playback status, setting or screen.
For details about the icons, see each reference page.
Icons De scription
Page 35

, , ,
35
,
, , ,
, etc.
Music playback status
[Details], video playback status [Details], and
playback status of a slide show [Details]
, , ,
Song name, artist name, video title, or photo title
FM radio
, , etc.
Play mode
, etc. Equalizer [Details]
,
Zoom setting ([Auto] or [Full]) [Details]
Remaining battery power [Details]
Alarm timer indication [Details]
Sleep timer indication [Details]
Busy status indication
Re lat e d Topics
How to use the Home menu
Copyright 2011 Sony Corporation
[Details]
Back to top
Page 36

WALK M AN Use r Guide
36
Getting Started
Print
Top page > Getting Started > Home Menu/Option Menu > How to use the Home menu
How to Use the Software
Music
Videos/Photos
FM Radio
Timer
Settings
Troubleshooting
Important Information
Specifications
Contents list
How t o use t he Hom e menu
The Home menu is the starting point of each application, such as searching for songs, changing
settings, etc.
You can display the Home menu by pressing and holding the BACK/HOME button of the player.
BACK/HOME button
5-way button
From the Home menu, you can select the desired item on the screen by using the 5-way button.
/ / / button: Selects an item.
button: Confirms an item.
In this manual, operating instructions from the Home menu are described as below.
Ex a mple:
From the Home m e nu, se lec t
de sire d song.
1 . Press and hold the BACK/HOME button.
The Home menu appears.
[ Music ] [ Album] de sire d album
2 . Press the / / / button to select [Music], and then press the button to
confirm.
The [Music] screen appears.
Page 37

3 . Press the / / / button to select [Album], and then press the button to
37
confirm.
The album list appears.
4 . Press the / / / button to select an album, and then press the button to
confirm.
The song list for the selected album appears.
5 . Press the / / / button to select a song, and then press the button to
confirm.
The music playback screen appears and playback begins.
To return to the H ome me nu during opera t ion
Press and hold the BACK/HOME button.
To return to the pre vious scre e n during ope ration
Press the BACK/HOME button.
Re lat e d Topics
How to use the option menu
About the Home menu
Back to top
Copyright 2011 Sony Corporation
Page 38

WALK M AN Use r Guide
38
Getting Started
Print
Top page > Getting Started > Home Menu/Option Menu > How to use the option menu
How to Use the Software
Music
Videos/Photos
FM Radio
Timer
Settings
Troubleshooting
Important Information
Specifications
Contents list
How t o use t he option menu
The option menu items vary depending on the function, allowing you to change the settings of
each application.
You can display the option menu by pressing the OPTION/PWR OFF button. Press the
OPTION/PWR OFF button once more to dismiss the option menu.
OPTION/PWR OFF button
5-way button
From the option menu, you can select the desired item on the screen by using the 5-way button.
/ / / button: Selects a menu item.
button: Confirms an item.
For example, the operations for setting [Play Mode] option to [Shuffle] are shown below.
1 . From the music playback screen, press the OPTION/PWR OFF button.
The option menu appears.
2 . Press the / / / button to select [Play Mode], and then press the button to
confirm.
3 . Press the / / / button to select [Shuffle], and then press the button to
confirm.
The play mode changes to [Shuffle].
Page 39

The items in the option menu differ, depending on the screen on which you press the
39
OPTION/PWR OFF button.
Re lat e d Topics
How to use the Home menu
Using the music option menu
Using the video option menu
Using the photo option menu
Using the FM radio option menu
Copyright 2011 Sony Corporation
Back to top
Page 40

WALK M AN Use r Guide
40
Getting Started
Print
Top page > How to Use the Software > Windows Media Player > Importing music from CDs
using Windows Media Player
How to Use the Software
Music
Videos/Photos
FM Radio
Timer
Settings
Troubleshooting
Important Information
Specifications
Contents list
Import ing music from CDs using Window s Media Playe r
You can use Windows Media Player to copy (rip) music from your CDs. Follow these instructions
to rip songs from a CD to your computer.
Hint
For details about usage or support on Windows Media Player, refer to Windows Media
Player information from the following web site:
http://support.microsoft.com/
1 . Insert an audio CD.
2 . Start up Windows Media Player, and then click the [Rip] tab at the top of the window.
When connected to the Internet, Windows Media Player obtains CD information (CD title,
song name or artist name, etc.), and displays it in the window.
3 . Click [Start Rip].
Windows Media Player begins to import the CD.
The imported songs are indicated as [Ripped to library]. Wait until all songs have been
imported.
Hint
Imported songs are stored in the [My Music] folder (Windows XP/Windows 7) or [Music]
folder (Windows Vista) of the computer. Click the [Library] tab of the Windows Media Player
window to find them.
Windows Media Player obtains the CD information from a database on the Internet.
However, depending on the CD, information may not be available in the database. If your
CDs’ information is missing, you can add it after importing. For information about adding and
editing CD information, refer to the Help of Windows Media Player.
If you want a song not to be imported, uncheck the checkbox to the left of the song title.
Not e
Imported songs are limited to private use only. Use of a song beyond this limitation requires
permission of the copyright holders.
Some files may not be played back on the player due to copyright protection.
The player cannot play the audio files that use the digital rights management technology for
Windows Media (“WM-DRM”). If the audio files cannot be transferred, check on Windows
Media Player information about DRM from the following web site:
http://support.microsoft.com/
Page 41

Re lat e d Topics
41
About the software
Transferring music using Windows Media Player
Copyright 2011 Sony Corporation
Back to top
Page 42

WALK M AN Use r Guide
42
Getting Started
Print
Top page > How to Use the Software > Windows Media Player > Transferring music using
Windows Media Player
How to Use the Software
Music
Videos/Photos
FM Radio
Timer
Settings
Troubleshooting
Important Information
Specifications
Contents list
Tra nsferring music using Window s Media Playe r
You can use Windows Media Player to transfer music from your computer to the player.
Not e
Do not disconnect the USB cable while [Do not disconnect.] appears on the player, as the
data being transferred may be damaged.
If Content Transfer starts automatically after connecting the player to your computer using
the USB cable (supplied), close or ignore Content Transfer as Content Transfer need not be
used. For details on setting automatic start of Content Transfer, refer to the Help of Content
Transfer.
Hint
For details about usage or support on Windows Media Player, refer to Windows Media
Player information from the following web site:
http://support.microsoft.com/
1 . Start up Windows Media Player, and then connect the player to your computer using the
USB cable (supplied).
Insert the connector of the USB cable into the player.
The [Device Setup] window appears.
2 . Click [Cancel].
Close the auto play window, if it appears, by clicking [Cancel] or the Close icon.
If you click [Finish] instead of [Cancel], the entire library data of Windows Media Player is
automatically copied to the player. If the library data size is larger than the available
storage space on the player, the copy process will not start.
You can open the [Device Setup] window at any time. To open it, right-click [WALKMAN]
on the left side of the Windows Media Player window, and then click [Set Up Sync].
3 . Click the [Sync] tab on the Windows Media Player window.
4 . Drag-and-drop the desired songs to the Sync List on the right side of the window.
The songs are added to the Sync List.
5 . Click [Start Sync] to start synchronization.
When synchronization is complete, a message confirming you can disconnect the player
appears on the Sync List. After completion, close Windows Media Player, and disconnect the
player from the computer.
Page 43

Not e
Some files may not be played back on the player due to copyright protection.
43
The player cannot play the audio files that use the digital rights management technology for
Windows Media (“WM-DRM”). If the audio files cannot be transferred, check on Windows
Media Player information about DRM from the following web site:
http://support.microsoft.com/
Re lat e d Topics
About the software
Importing music from CDs using Windows Media Player
Transferring music using Content Transfer
Transferring music using Windows Explorer
Playing music
Copyright 2011 Sony Corporation
Back to top
Page 44

WALK M AN Use r Guide
44
Getting Started
Print
Top page > How to Use the Software > Content Transfer > Transferring music using Content
Transfer
How to Use the Software
Music
Videos/Photos
FM Radio
Timer
Settings
Troubleshooting
Important Information
Specifications
Contents list
Tra nsferring music using Content Tra nsfer
If you have already managed music with iTunes, etc., you can transfer them to the player using
Content Transfer. You can use iTunes, etc., to drag -and-drop music to Content Transfer.
Not e
Do not disconnect the USB cable while [Do not disconnect.] appears on the player, as the
data being transferred may be damaged.
Content Transfer cannot be used for Windows Media Player contents.
Contents with copyright protection cannot be transferred.
Content Transfer supports data transfer from iTunes 10.0 to the player. For details on
restrictions on transferring songs from iTunes, visit the customer support Web sites
[Details].
1 . Connect the player to your computer using the USB cable (supplied).
Insert the connector of the USB cable into the player.
Content Transfer starts automatically.
For details on setting automatic start and general operation of Content Transfer, refer to
the Help of Content Transfer.
You can also click [All programs] in the [start] menu, and then [Content Transfer] [Content Transfer] to start the software.
2 . Start up iTunes, etc.
3 . Select the desired songs from iTunes, etc. (
Transfer (
Content Transfer recognizes the type of data by filename extension, and sends it to the
appropriate folder of the player.
Re lat e d Topics
About the software
Transferring videos/photos using Content Transfer
).
), and drag-and-drop them to Content
Page 45

Transferring music using Windows Media Player
45
Transferring music using Windows Explorer
Playing music
Copyright 2011 Sony Corporation
Back to top
Page 46

WALK M AN Use r Guide
46
Getting Started
Print
Top page > How to Use the Software > Content Transfer > Transferring videos/photos using
Content Transfer
How to Use the Software
Music
Videos/Photos
FM Radio
Timer
Settings
Troubleshooting
Important Information
Specifications
Contents list
Tra nsferring vide os/photos using Content T ransfe r
You can transfer videos/photos stored on your computer to the player using Content Transfer.
You can transfer videos/photos by drag-and -drop of the desired videos/photos from Windows
Explorer to Content Transfer.
Not e
Do not disconnect the USB cable while [Do not disconnect.] appears on the player, as the
data being transferred or the data stored in the player may be damaged.
Contents with copyright protection cannot be transferred.
1 . Connect the player to your computer using the USB cable (supplied).
Insert the connector of the USB cable into the player.
Content Transfer starts automatically.
For details on setting automatic start and general operation of Content Transfer, refer to
the Help of Content Transfer.
You can also click [All programs] in the [start] menu, and then [Content Transfer] [Content Transfer] to start the software.
2 . Select the desired videos/photos from Windows Explorer (
Content Transfer (
Content Transfer recognizes the type of data by filename extension, and sends it to the
appropriate folder of the player.
Re lat e d Topics
About the software
Transferring music using Content Transfer
Transferring videos/photos using Windows Explorer
Watching videos [Videos]
).
), and drag-and-drop them to
Page 47

Viewing photos [Photos]
47
Copyright 2011 Sony Corporation
Back to top
Page 48

WALK M AN Use r Guide
48
Getting Started
Print
Top page > How to Use the Software > Windows Explorer (Drag-and -Drop) > Transferring
music using Windows Explorer
How to Use the Software
Music
Videos/Photos
FM Radio
Timer
Settings
Troubleshooting
Important Information
Specifications
Contents list
Tra nsferring music using Window s Ex plore r
You can directly transfer data by drag-and-drop using Windows Explorer on your computer.
1 . Connect the player to your computer using the USB cable (supplied).
Insert the connector of the USB cable into the player.
2 . Click [start] – [My Computer] or [Computer] – [WALKMAN] – [Storage Media], and then
select the [MUSIC] folder.
Data hierarchy may differ, depending on your computer environment.
3 . Drag-and-drop files or folders (
) into the [MUSIC] folder ( ), or one of its subfolders.
Not e
Do not disconnect the USB cable while [Do not disconnect.] appears on the player.
Otherwise, data being transferred or stored on the player may be damaged. If the player is
disconnected while files are being transferred, unnecessary files may be left in the player. In
this case, transfer usable files back to the computer and format the player
Do not change folder names or delete the [MUSIC], [MP_ROOT], [MPE_ROOT], [VIDEO],
[PICTURE] and [PICTURES] folders.
Do not change folder or file names directly under the [MP_ROOT] and [MPE_ROOT]
folders. Otherwise, they will not be displayed on the player.
Some files may not be played back on the player due to copyright protection.
If Content Transfer starts automatically after connecting the player to your computer using
the USB cable (supplied), close or ignore Content Transfer as Content Transfer need not be
used. For details on setting automatic start of Content Transfer, refer to the Help of Content
Transfer.
Re lat e d Topics
[Details].
Page 49

Transferring music using Windows Media Player
49
Transferring music using Content Transfer
Transferring videos/photos using Windows Explorer
Playing music
Copyright 2011 Sony Corporation
Back to top
Page 50

WALK M AN Use r Guide
50
Getting Started
Print
Top page > How to Use the Software > Windows Explorer (Drag-and -Drop) > Transferring
videos/photos using Windows Explorer
How to Use the Software
Music
Videos/Photos
FM Radio
Timer
Settings
Troubleshooting
Important Information
Specifications
Contents list
Tra nsferring vide os/photos using Window s Ex plore r
You can directly transfer data by drag-and-drop using Windows Explorer on your computer.
Hint
Some WMV files can be played back only by transferring using Windows Media Player.
1 . Connect the player to your computer using the USB cable (supplied).
Insert the connector of the USB cable into the player.
2 . Click [start] – [My Computer] or [Computer] – [WALKMAN] – [Storage Media], and then
select the [VIDEO], [PICTURE] or [PICTURES] folder.
Data hierarchy may differ, depending on your computer environment.
3 . Drag-and-drop files or folders into the [VIDEO], [PICTURE] or [PICTURES] folder or one of
their subfolders.
Video files or folders: drag and drop into the [VIDEO] folder, or one of its subfolders.
Photo files or folders: drag and drop into the [PICTURE] or [PICTURES] folder, or one of
their subfolders.
Video/photo files or folders in your computer
Video: [VIDEO] folder in your player
Photo: [PICTURE] or [PICTURES] folder in your player
Not e
Do not disconnect the USB cable while [Do not disconnect.] appears on the player.
Otherwise, data being transferred or stored on the player may be damaged. If the player is
disconnected while files are being transferred, unnecessary files may be left in the player. In
this case, transfer usable files back to the computer and format the player
Do not change folder names or delete the [MUSIC], [MP_ROOT], [MPE_ROOT], [VIDEO],
[PICTURE] and [PICTURES] folders.
[Details].
Page 51

Do not change folder or file names directly under the [MP_ROOT] and [MPE_ROOT]
51
folders. Otherwise, they will not be displayed on the player.
Some files may not be played back on the player due to copyright protection.
If Content Transfer starts automatically after connecting the player to your computer using
the USB cable (supplied), close or ignore Content Transfer as Content Transfer need not be
used. For details on setting automatic start of Content Transfer, refer to the Help of Content
Transfer.
Re lat e d Topics
Transferring videos/photos using Content Transfer
Transferring music using Windows Explorer
Watching videos [Videos]
Viewing photos [Photos]
Back to top
Copyright 2011 Sony Corporation
Page 52

WALK M AN Use r Guide
52
Getting Started
Print
Top page > Music > Playing Music > Playing music
How to Use the Software
Music
Videos/Photos
FM Radio
Timer
Settings
Troubleshooting
Important Information
Specifications
Contents list
Playing m usic
To play music, select [Music] on the Home menu to display the [Music] screen.
1 . From the Home menu, select [Music].
The search menu appears.
You can select the desired search method to display the music list screen and search for
[Details].
songs
2 . Select desired search method
desired song.
The music playback screen appears and song playback begins.
Select items until a song list appears.
For details on how to operate the music playback screen, see
Not e
It may take time to start up the player or display the file/folder list when many files or
folders are stored on the player.
Re lat e d Topics
Importing music from CDs using Windows Media Player
Transferring music using Windows Media Player
Transferring music using Content Transfer
Transferring music using Windows Explorer
Browsing and using the music screen
Searching for songs
Playing all songs in random order
[Details].
Page 53

Deleting songs
53
Using the music option menu
Copyright 2011 Sony Corporation
Back to top
Page 54

WALK M AN Use r Guide
54
Getting Started
Print
Top page > Music > Playing Music > Browsing and using the music screen
How to Use the Software
Music
Videos/Photos
FM Radio
Timer
Settings
Troubleshooting
Important Information
Specifications
Contents list
Brow sing a nd using the music scre e n
Music playback screen
Music list screen
Music pla yba ck sc reen
Song name
Current song number/Total song number to be played (*1)
Artist name
Album title
Genre
Release year
Information area
(*1) These items disappear after a while.
Indic a t ion icons of the music pla yba ck sc reen
Icon Description
[Play Mode] is set to [Repeat] [Details].
[Play Mode] is set to [Shuffle] [Details].
[Play Mode] is set to [Shuffle&Repeat] [Details].
[Play Mode] is set to [Repeat 1 Song] [Details].
[Equalizer] is set to [Heavy] [Details].
[Equalizer] is set to [Pop] [Details].
[Equalizer] is set to [Jazz] [Details].
[Equalizer] is set to [Unique] [Details].
[Equalizer] is set to [Custom 1] [Details].
[Equalizer] is set to [Custom 2] [Details].
Page 55

Opera t ions on the music playba c k screen
55
To (screen indic ati on) Do this
Play ( )/pause ( ) (*1) Press the button.
Fast forward ( )/
fast rewind (
Find the beginning of the previous (or current) song (
)/
find the beginning of the next song (
Display the cursor and scroll all through the displayed
items
Return to the list screen Press the BACK/HOME button.
(*1) During pause, if there is no operation for a while, the player automatically enters standby mode.
)
)
Press and hold the /
button.
Press the / button.
Press the
/ button.
Music list sc re e n
The following are examples of music list screens.
Song list scre en
Index
The initials of song and album, etc., names in the list section appear.
Album list screen
Opera t ions on the music list sc reen
To Do this
Confirm an item in the list Press the button.
Page 56

Press the / button.
56
Move the cursor up or down
Press and hold the
/ button to
scroll up or down faster.
Move the cursor left/right when an index is
displayed
Display the previous/next screen of the list when
an index is not displayed
Press the
Press the
/ button.
/ button.
Return to the list screen of the next upper level Press the BACK/HOME button.
Copyright 2011 Sony Corporation
Back to top
Page 57

WALK M AN Use r Guide
57
Getting Started
Print
Top page > Music > Playing Music > Searching for songs
How to Use the Software
Music
Videos/Photos
FM Radio
Timer
Settings
Troubleshooting
Important Information
Specifications
Contents list
Se a rching for songs
When you select [Music] on the Home menu, the search menu appears. You can select the
desired search method on the search menu to search the music list for a desired song.
1 . From the Home menu, select
Select items as follows until a song list appears.
Se a rch method
Method De scription
[All Songs] Select a song from the all songs list.
[Album] Select an album
[Artist] (*1) Select an artist an album song.
[Genre] Select a genre an artist an album song.
[Release Year] Select a release year an artist song.
[Folder] Select a folder song.
(*1) “The” at the beginning of artist names is ignored when arranging a list.
[Music] desired search method desired song.
song.
Hint
[All Songs], [Album], [Artist] and [Genre] lists are arranged in alphanumeric order. The
[Release Year] list is arranged in reverse chronological order. In the [Folder] list, folders are
displayed in name order first, then files are displayed in name order. In this case, upper or
lower case letters are not distinguished.
You can see all the songs of the selected artist, genre or release year. On the [Artist],
[Genre] or [Release Year] list screen, select [All [XXX]].
Back to top
Copyright 2011 Sony Corporation
Page 58

WALK M AN Use r Guide
58
Getting Started
Print
Top page > Music > Playing Music > Playing the songs in a playlist
How to Use the Software
Music
Videos/Photos
FM Radio
Timer
Settings
Troubleshooting
Important Information
Specifications
Contents list
Playing t he songs in a playlist
You can play lists of songs (playlists).
Playlists are created using Windows Media Player. For information on how to create a playlist,
refer to the Help of Windows Media Player. Cover art images registered to a playlist are not
displayed on the player.
1 . From the Home menu, select
Copyright 2011 Sony Corporation
[Playlists] desired playlist desired song.
Back to top
Page 59

WALK M AN Use r Guide
59
Getting Started
Print
Top page > Music > Playing Music > Playing all songs in random order
How to Use the Software
Music
Videos/Photos
FM Radio
Timer
Settings
Troubleshooting
Important Information
Specifications
Contents list
Playing a ll songs in ra ndom order
All the songs stored on the player are played in random order.
1 . From the Home menu, select
All songs are shuffled. Then the music playback screen appears and playback of the songs
begins.
Hint
When you start [Shuffle All] play, the play mode changes to [Shuffle] or [Shuffle&Repeat]
[Details]. Even if you cancel [Shuffle All], the [Shuffle] or [Shuffle&Repeat] setting for the
play mode is retained.
[Shuffle All] play is automatically canceled by any of the following operations:
Starting playback of a song by selecting it from the [Music], etc.
Changing the play mode.
[Shuffle All].
Copyright 2011 Sony Corporation
Back to top
Page 60

WALK M AN Use r Guide
60
Getting Started
Print
Top page > Music > Playing Music > Deleting songs
How to Use the Software
Music
Videos/Photos
FM Radio
Timer
Settings
Troubleshooting
Important Information
Specifications
Contents list
De leting songs
When you delete songs from the player, use the software you used to transfer the songs, or
Windows Explorer.
For details about using the software, see the Help of the software.
Not e
You cannot delete songs without connecting the player to a computer.
Back to top
Copyright 2011 Sony Corporation
Page 61

WALK M AN Use r Guide
61
Getting Started
Print
Top page > Music > Music Option Menu > Using the music option menu
How to Use the Software
Music
Videos/Photos
FM Radio
Timer
Settings
Troubleshooting
Important Information
Specifications
Contents list
Using the music opt ion menu
Option items appearing on the music playback screen
Option items appearing on the music list screen
Displaying the detailed information screen [Detailed Information]
Displaying the cover art screen [Cover Art]
You can bring up the music option menu by pressing the OPTION/PWR OFF button on the music
list or on the music playback screen. For details on how to use the option menu, see
The option items shown on the option menu vary depending on the screen from which you bring it
up. See the reference page for settings and usage.
Option it e m s a ppe aring on t he m usic playback scre e n
Option
it e ms
[Play Mode] Sets the play mode
[Equalizer] Customizes the sound quality
[Cover Art] Displays cover art
[Detailed
Information]
[Alarm] Sets the alarm
[Sleep Timer] Sets the sleep timer
[Clock Display] Displays the current time
De scription/refe re nc e pa ge
[Details].
[Details].
[Details].
Displays detailed information of a song, such as playing time, audio format, bit
rate, and file name
[Details].
[Details].
[Details].
[Details].
[Details].
Option it e m s a ppe aring on t he m usic list scre e n
Option items Descripti on/re fe re nce page
[Now Playing] Displays the playback or display screen of the currently playing content.
[Go to FM Radio
screen]
[Detailed Information]
[Go to the song
playback screen]
The FM Radio screen of the last received broadcast station appears
[Details].
Displays detailed information of a song, such as playing time, audio
format, bit rate, and file name
Displays the music playback screen of the song last played.
[Details].
Displa ying the de t a iled informa t ion scre en [De t a iled I nform ation]
1 . From the music playback screen, press the OPTION/PWR OFF button to bring up the option
Page 62

menu.
62
2 . Select [Detailed Information].
De t a ile d inform a t ion screen
Song name
Playback time
File format
Bit rate
Copyrighted files
While playing back copyright protected songs, [Secured] appears.
Variable bit rate song
While playing back variable bit rate songs, [VBR] is shown.
File name
Hint
When you display this screen from the music playback screen, you can move to the
previous or next song by pressing the
/ button.
Displa ying the cover art scre e n [Cove r Art ]
1 . From the music playback screen, press the OPTION/PWR OFF button.
2 . Select [Cover Art].
Cove r art scre e n
Hint
While the cover art screen is displayed, you can move songs to the previous or the next one
by pressing the / button.
If the songs do not have cover art information, the default picture of the player will be
displayed.
Cover art only appears if cover art information is available. You can set cover art using
Page 63

Windows Media Player or another transfer capable software for setting cover art. For details
63
on operation, refer to the Help or maker of the software. Cover art may not be displayed,
depending on the cover art file format.
Back to top
Copyright 2011 Sony Corporation
Page 64

WALK M AN Use r Guide
64
Getting Started
Print
Top page > Music > Music Settings > Setting the play mode [Play Mode]
How to Use the Software
Music
Videos/Photos
FM Radio
Timer
Settings
Troubleshooting
Important Information
Specifications
Contents list
Se t t ing the pla y mode [Pla y M ode ]
The player offers a variety of play modes, including random play and selected repeat play.
1 . From the Home menu, select [Settings] [Music Settings] [Play Mode]
desired play mode type.
Type - ic on De sc ri pt io n
[Normal] - No
icon
[Repeat] -
[Shuffle] -
[Shuffle&Repeat]
-
[Repeat 1 Song]- The current song or the song selected from a song list is played back
Not e
The player plays back songs only in the lists from which the playback starts (album list, artist
list, etc.).
When you start [Shuffle All] play, the play mode changes to [Shuffle] or [Shuffle&Repeat].
The songs within the playback range are played back in the song list order.
(Default setting)
The songs within the playback range are played back in the song list order
and then repeated.
The songs within the playback range are played back in random order.
The songs within the playback range are played back in random order and
then repeated.
repeatedly.
Copyright 2011 Sony Corporation
Back to top
Page 65

WALK M AN Use r Guide
65
Getting Started
Print
Top page > Music > Music Settings > Setting the sound quality (CLEAR BASS) [Equalizer]
How to Use the Software
Music
Videos/Photos
FM Radio
Timer
Settings
Troubleshooting
Important Information
Specifications
Contents list
Se t t ing the sound quality (CLEAR BASS) [Equa lizer]
Setting the sound quality
Customizing sound quality
You can set the sound quality according to the music genre, etc.
Equalizer settings contain the CLEAR BASS setting. Increasing the CLEAR BASS setting value
allows the player to reproduce dynamic deep bass without distortion, even at a high volume.
Se t t ing the sound qua lity
1 . From the Home menu, select
equalizer type.
Type ic on
[None] No icon
[Heavy] -
[Pop] - Stresses the middle range audio, ideal for vocals.
[Jazz] -
De scription
Sound quality setting is not activated. (Default setting) (*1)
Emphasizes high and low ranges for a powerful sound.
Emphasizes high and low ranges for a lively sound.
[Settings] [Music Settings] [Equalizer] desired
[Unique] -
[Custom 1]
-
[Custom 2]
-
(*1) The default setting of players sold in the Latin America region is [Custom 1], and CLEAR BASS is set
to level +3.
Not e
If your personal settings saved as [Custom 1] and [Custom 2] seem to produce a different
volume level than other settings, you may have to adjust the volume manually to
compensate.
The [Equalizer] setting is not applied while playing a video or FM radio.
Emphasizes high and low ranges, so that even soft sounds can be heard easily.
User-customizable sound settings for which you can adjust each frequency range
individually. See [Details] for details.
Cust omizing sound quality
You can preset the value of CLEAR BASS (bass) and 5 band Equalizer as [Custom 1] or
[Custom 2].
1 . From the Home menu, select
displayed under [Custom 1] or [Custom 2].
[Settings] [Music Settings] [Equalizer] [Edit]
Page 66

2 . Press the / button to select CLEAR BASS or the frequency range setting, and press
66
/ button to adjust the setting level, and then press the button to confirm.
the
The [Equalizer] screen reappears.
CLEAR BASS can be set to any of 4 sound levels, and the 5 frequency ranges can be
set to any of 7 sound levels.
After you have adjusted the setting level, be sure to press the
button to confirm. If
you press the BACK/HOME button before you confirm, the setting will be canceled.
Back to top
Copyright 2011 Sony Corporation
Page 67

WALK M AN Use r Guide
67
Getting Started
Print
Top page > Music > Music Settings > Listening with Clear Stereo [Clear Stereo]
How to Use the Software
Music
Videos/Photos
FM Radio
Timer
Settings
Troubleshooting
Important Information
Specifications
Contents list
List e ning w ith Cle a r Stere o [Cle a r St e reo]
[Clear Stereo] enables individual left and right digital processing of the sound.
1 . From the Home menu, select [Settings] [Music Settings] [Clear Stereo]
desired Clear Stereo type.
Type De scription
[On] Activates the [Clear Stereo] function when you use the supplied headphones.
[Off] Disables the [Clear Stereo] function and plays back normal sound. (Default setting)
Not e
The [Clear Stereo] setting is not applied while playing a video or FM radio.
The [Clear Stereo] function is designed to obtain maximum effect with the supplied
headphones. The [Clear Stereo] effect may not be obtained with other headphones. When
using other headphones, set [Clear Stereo] to [Off].
Back to top
Copyright 2011 Sony Corporation
Page 68

WALK M AN Use r Guide
68
Getting Started
Print
Top page > Music > Music Settings > Adjusting the volume level [Dynamic Normalizer]
How to Use the Software
Music
Videos/Photos
FM Radio
Timer
Settings
Troubleshooting
Important Information
Specifications
Contents list
Adjust ing the volume le vel [Dyna m ic N orm a lizer]
You can reduce the volume level between songs. With this setting, when listening to album songs
in the shuffle play mode, the volume level between songs is moderated to minimize differences in
their recording levels.
1 . From the Home menu, select
desired Dynamic Normalizer type.
Type De scription
[On] Minimizes the difference in volume level between songs.
[Off]
Not e
Plays back songs at their original transferred volume level.
(Default setting)
The [Dynamic Normalizer] setting is not applied while playing a video or FM radio.
Copyright 2011 Sony Corporation
[Settings] [Music Settings] [Dynamic Normalizer]
Back to top
Page 69

WALK M AN Use r Guide
69
Getting Started
Print
Top page > Videos/Photos > Watching Videos > Watching videos [Videos]
How to Use the Software
Music
Videos/Photos
FM Radio
Timer
Settings
Troubleshooting
Important Information
Specifications
Contents list
Wa t c hing videos [Videos]
To play a video, select [Videos] on the Home menu to display the [Videos] screen.
1 . From the Home menu, select [Videos].
The [Videos] screen appears.
2 . Select desired video.
The video playback screen appears and playback of the video begins.
For details on how to operate the video playback screen, see
Hint
When [Display] is set to [On], detailed information, such as the video title, its playback icon,
elapsed playing time, etc., appears while the video is playing. The information disappears if
this setting is [Off] [Details].
You can play back the most recently played video. Press the OPTION/PWR OFF button on
the video list, and then select [Most Recent Video] from the option menu.
Video files are displayed in the order they are transferred. (The latest data appears at the
top.)
You can set JPEG files as thumbnails of video files. When you display the video list, you
can see the thumbnails (small pictures to display on the list) for the video files on the player.
Use a computer to create a thumbnail, observing the following rules:
The thumbnail image file must be in JPEG format.
The image dimension must be horizontal 160 × vertical 120 dots.
The file name must be the same as the video file, with extension “.jpg”.
The thumbnail and video file must be placed in the same folder of the player.
The maximum video size playable on the player is 240 × 320. For detailed specifications,
see
[Details].
Videos are not played back continuously. They are played back one by one.
[Details].
Page 70

Not e
70
Up to 1,000 video files can be displayed in the video lists.
Re lat e d Topics
Transferring videos/photos using Content Transfer
Transferring videos/photos using Windows Explorer
Browsing and using the video screen
Deleting videos
Using the video option menu
Copyright 2011 Sony Corporation
Back to top
Page 71

WALK M AN Use r Guide
71
Getting Started
Print
Top page > Videos/Photos > Watching Videos > Browsing and using the video screen
How to Use the Software
Music
Videos/Photos
FM Radio
Timer
Settings
Troubleshooting
Important Information
Specifications
Contents list
Brow sing a nd using the vide o sc reen
Video playback screen
Video list screen
Video playback scre e n
Video title
Elapsed time/total time
Progress bar
Information area
These indications disappear after a while.
Indic a t ion icons of the video pla yback sc ree n
Icon De scription
Zoom setting ([Auto] or [Full]) [Details]
,
Opera t ions on the vide o pla yba c k screen
While the player is playing back a video in horizontal orientation, the / buttons and /
buttons swap functions.
To (Screen indi cat ion) Do this
Play ( )/pause ( ) (*1) Press the button.
Fast forward ( )/fast rewind ( ) Press and hold the / button.
Fast forward ( )/fast rewind ( ) during
pause (*2)
Forward slightly ( )/rewind slightly ( ) (*3) Press the / button during pause.
Press and hold the / button during
pause.
Page 72

Find the beginning of the current video Press the button.
72
Return to the list screen Press the BACK/HOME button.
(*1) During pause, if there is no operation for a while, the player automatically enters standby mode.
(*2) The speed of fast forward/fast rewind during pause varies depending on the length of the video.
(*3) The interval of forward/rewind during pause varies depending on the video.
Video list scre e n
The following is an example of video list screens.
Playback icon
Icon De scription
(Playback icon)
Shows that the video is currently playing.
Opera t ions on the vide o list sc reen
To Do this
Select an item Press the
Press the / button.
Move the cursor up or down
Display the previous/next screen of the
list
Return to the list screen of the next
upper level
Copyright 2011 Sony Corporation
Press and hold the
down faster.
Press the
Press the BACK/HOME button.
button.
/ button to scroll up or
/ button.
Back to top
Page 73

WALK M AN Use r Guide
73
Getting Started
Print
Top page > Videos/Photos > Watching Videos > Deleting videos
How to Use the Software
Music
Videos/Photos
FM Radio
Timer
Settings
Troubleshooting
Important Information
Specifications
Contents list
De leting videos
When you delete videos from the player, use the software you used to transfer the videos, or
Windows Explorer.
For details about using the software, see the Help of the software.
Not e
The player itself cannot delete videos without connecting to a computer.
Back to top
Copyright 2011 Sony Corporation
Page 74

WALK M AN Use r Guide
74
Getting Started
Print
Top page > Videos/Photos > Video Option Menu > Using the video option menu
How to Use the Software
Music
Videos/Photos
FM Radio
Timer
Settings
Troubleshooting
Important Information
Specifications
Contents list
Using the vide o option menu
Option items appearing on the video list screen
Option items appearing on the video playback screen
You can bring up the video option menu by pressing the OPTION/PWR OFF button on the video
list or on the video playback screen. For details on how to use the option menu, see
The option items shown on the option menu vary depending on the screen from which you bring it
up. See the reference page for settings and usage.
Option it e m s a ppe aring on t he vide o list scre en
Option items De scription/refe re nc e pa ge
[Now Playing]
[Go to FM Radio
screen]
[Play from beginning] Finds the beginning of a video.
[Detailed Information]
[Most Recent Video] Starts playback of the most recently played video.
[Go to the song
playback screen]
Displays the playback or display screen of the currently playing
content.
The FM Radio screen of the last received broadcast station appears
[Details].
Displays file information, such as file size, resolution, video/audio
compression format, and file name, etc.
Displays the music playback screen of the song last played.
[Details].
Option it e m s a ppe aring on t he vide o playback scre e n
Option items De scription/refe re nc e pa ge
[Play from beginning] Finds the beginning of a video.
[Zoom Settings] Sets the zoom function
[Video Orientation] Sets the video orientation
[Display] Sets to display/not display video information
[Detailed Information]
[Brightness] Adjusts the brightness of the screen
[Clock Display] Displays the current time
[Go to the song
playback screen]
Displays file information, such as file size, resolution, video/audio
compression format, and file name, etc.
Displays the music playback screen of the song last played.
[Details].
[Details].
[Details].
[Details].
[Details].
Back to top
Page 75

Copyright 2011 Sony Corporation
75
Page 76

WALK M AN Use r Guide
76
Getting Started
Print
Top page > Videos/Photos > Video Settings > Setting the zoom function [Zoom]
How to Use the Software
Music
Videos/Photos
FM Radio
Timer
Settings
Troubleshooting
Important Information
Specifications
Contents list
Se t t ing the zoom func t ion [Zoom]
You can zoom in the currently playing video.
1 . From the Home menu, select [Settings] [Video Settings] [Zoom Settings]
desired zoom setting type.
Type De scription
The video image is resized to fit the display area, maintaining the original aspect ratio.
(Default setting)
When a 16:9 (wide size) video image is displayed, black bands appear on the top and
bottom of the screen.
[Auto]
[Full]
16:9 source
4:3 source
The video image is resized to fill the available display area, maintaining the aspect
ratio.
When a 16:9 (wide size) video image is displayed, the right/left sides of the image are
trimmed to fit.
16:9 source
4:3 source
The dotted line frame represents the original video image size.
The video image is not resized, and appears in the original resolution. If video
resolution is too high, the left, right, top and bottom of the screen will be cut. If video
resolution is too low, black bars will appear on the right, left, top and bottom of the
screen.
Page 77

[Off]
77
16:9 source
4:3 source
The dotted line frame represents the original video image size.
Back to top
Copyright 2011 Sony Corporation
Page 78

WALK M AN Use r Guide
78
Getting Started
Print
Top page > Videos/Photos > Video Settings > Setting the display of the video screen [Display]
How to Use the Software
Music
Videos/Photos
FM Radio
Timer
Settings
Troubleshooting
Important Information
Specifications
Contents list
Se t t ing the display of the vide o sc reen [Display]
You can display or hide detailed information of a video, such as its title, playback icon, and
elapsed playing time, etc., during playback.
1 . From the Home menu, select
display type.
Type De scription
[On] Displays the video title, playback status, or the elapsed time, etc.
[Off]
Not e
Hides detailed information of the currently playing video and displays it only when you
operate the player. (Default setting)
If [Video Orientation] is set to [Horizontal (right)], the title of the video is not displayed.
Copyright 2011 Sony Corporation
[Settings] [Video Settings] [Display] desired
Back to top
Page 79

WALK M AN Use r Guide
79
Getting Started
Print
Top page > Videos/Photos > Video Settings > Setting the video orientation [Video Orientation]
How to Use the Software
Music
Videos/Photos
FM Radio
Timer
Settings
Troubleshooting
Important Information
Specifications
Contents list
Se t t ing the video orient a t ion [Video Orie ntation]
You can set the video orientation to [Vertical] or [Horizontal (right)].
The operation of the 5-way button is switched according to the setting of [Video Orientation].
1 . From the Home menu, select
desired video orientation type.
Type Description
Displays at 240 × 180 pixels. (Default setting)
[Vertical]
16:9 source
4:3 source
Displays at 320 × 240 pixels.
[Settings] [Video Settings] [Video Orientation]
[Horizontal (right)]
16:9 source
4:3 source
Hint
When [Display] is set to [On], detailed information, such as the video title, its playback icon,
and elapsed playing time, etc., appears. The information disappears if this setting is set to
[Details].
[Off]
Not e
If [Video Orientation] is set to [Horizontal (right)], the video title is not displayed.
Back to top
Copyright 2011 Sony Corporation
Page 80

80
Page 81

WALK M AN Use r Guide
81
Getting Started
Print
Top page > Videos/Photos > Viewing Photos > Viewing photos [Photos]
How to Use the Software
Music
Videos/Photos
FM Radio
Timer
Settings
Troubleshooting
Important Information
Specifications
Contents list
Vie w ing photos [Photos]
To view photos, select [Photos] on the Home menu to display the [Photos] screen.
1 . From the Home menu, select [Photos].
The [Photos] screen appears.
2 . Select desired folder
desired photo.
The photo display screen appears.
Press the
For details on how to operate the photo display screen, see
Hint
In the photo folder list, only folders containing photos are displayed in alphabetical order.
Playback of songs continues even while you are searching for photos in the photo folder
lists or photo lists, or when the photo display screen is displayed.
You can display the photos in a selected folder continuously (slide show play)
You can arrange photos transferred to the player by folder. Select the player (as
[WALKMAN]) using Windows Explorer, and drag and drop a new folder just under the
[PICTURE] or [PICTURES] folder. For details on data hierarchy, see
Photo files are displayed in alphabetical order. The files under the [PICTURE], [PICTURES]
and [DCIM] folders are displayed in the [PICTURE], [PICTURES] and [DCIM] folders
respectively.
Not e
All files with the extension .jpg, including thumbnail files of videos, are recognized as
photos. All folders containing .jpg files are displayed in the photo folder list.
Up to 8,000 photo folders can be displayed in the photo folder list. And, up to 8,000 photos
/ button to display the previous or next photo.
[Details].
[Details].
[Details].
Page 82

can be displayed in the photo lists, regardless of the number of folders in which they are
82
contained.
If the size of a photo is too large, or the photo file is damaged,
appears, and the photo
cannot be displayed.
If photos are not compliant with DCF 2.0 (or folder/file name is long., etc.), operation time (to
display photos or slideshow) may take more time.
Re lat e d topics
Transferring videos/photos using Content Transfer
Transferring videos/photos using Windows Explorer
Browsing and using the photo screen
Deleting photos
Using the photo option menu
Back to top
Copyright 2011 Sony Corporation
Page 83

WALK M AN Use r Guide
83
Getting Started
Print
Top page > Videos/Photos > Viewing Photos > Browsing and using the photo screen
How to Use the Software
Music
Videos/Photos
FM Radio
Timer
Settings
Troubleshooting
Important Information
Specifications
Contents list
Brow sing a nd using the phot o scre e n
Photo display screen
Photo list screen
Phot o display screen
When a photo appears on the screen, information such as the photo’s file name is displayed for a
few seconds.
Information area
Opera t ions on the phot o display sc reen
While the player is playing back a photo in horizontal orientation, the / and /
buttons interchange their functions with each other.
To (Screen indi cat ion) Do this
Play ( )/pause ( ) a slide show (*1) Press the button.
Display the next/previous photo Press the (previous)/ (next) button.
Display the following/previous photos
consecutively
Return to the list screen Press the BACK/HOME button.
(*1) When playing songs while a slide show is paused, the screen goes dark if there is no operation for
more than 30 seconds. When the song playback and a slide show accompanying it are paused, and
there is no operation for more than 3 minutes, the screen turns off and the player enters standby
mode.
Press and hold the (previous)/ (next)
button.
Phot o list sc reen
The following are examples of photo list screens.
Page 84

Opera t ions on the phot o list sc ree n
84
To (Screen indi cat ion) Do this
Select an item Press the button.
Press the / button.
Move the cursor up or down
Display the previous/next screen of the
list
Return to the list screen of the next
upper level
Copyright 2011 Sony Corporation
Press and hold the
down faster.
Press the
Press the BACK/HOME button.
/ button.
/ button to scroll up or
Back to top
Page 85

WALK M AN Use r Guide
85
Getting Started
Print
Top page > Videos/Photos > Viewing Photos > Playing a slide show
How to Use the Software
Music
Videos/Photos
FM Radio
Timer
Settings
Troubleshooting
Important Information
Specifications
Contents list
Playing a slide show
You can display photos in a selected folder in slide show form.
1 . From the Home menu, select [Photos].
The photo folder list appears.
2 . Press the
button.
A slide show of the photos in the selected folder starts.
Hint
You can start playback of a slide show by any of the following operations:
Press and hold the
Press the
Press the OPTION/PWR OFF button on the photo folder list, or a photo list, and then
select [Begin slide show] from the option menu.
Not e
The screen does not turn off automatically or change to a screensaver [Details] while a slide
show is playing.
Copyright 2011 Sony Corporation
/ / / button to select a photo folder, and then press and hold the
button in the photo list.
button on the photo display screen.
Back to top
Page 86

WALK M AN Use r Guide
86
Getting Started
Print
Top page > Videos/Photos > Viewing Photos > Deleting photos
How to Use the Software
Music
Videos/Photos
FM Radio
Timer
Settings
Troubleshooting
Important Information
Specifications
Contents list
De leting photos
When you delete photos from the player, use the software you used to transfer the photos, or
Windows Explorer.
For details about using the software, see the Help of the software.
Not e
The player itself cannot delete photos without connecting to a computer.
Back to top
Copyright 2011 Sony Corporation
Page 87

WALK M AN Use r Guide
87
Getting Started
Print
Top page > Videos/Photos > Photo Option Menu > Using the photo option menu
How to Use the Software
Music
Videos/Photos
FM Radio
Timer
Settings
Troubleshooting
Important Information
Specifications
Contents list
Using the phot o opt ion menu
Option item appearing on the photo folder/photo list screen
Option items appearing on the photo display screen
You can bring up the photo option menu by pressing the OPTION/PWR OFF button on the photo
folder list or photo list, or on the photo display screen. For details on how to use the option menu,
[Details].
see
The option items shown on the option menu vary depending on the screen from which you bring it
up. See the reference page for settings and usage.
Option it e m a ppe aring on t he photo folde r/phot o list scre e n
Option items De scription/refe re nce page
[Now Playing]
[Go to FM Radio screen]
[Begin slide show] Starts a slide show
[Detailed Information]
[Most Recent Photo] Starts playback of the most recently played photo.
[Go to the song playback
screen]
Displays the playback or display screen of the currently playing
content.
The FM Radio screen of the last received broadcast station
appears
Displays file information, such as file size, resolution, and file
name, etc.
Displays the music playback screen of the last song played.
[Details].
[Details].
Option it e m s a ppe aring on t he photo display screen
Option items Descrip tion /re fe ren ce page
[Photo Orientation] Sets the photo orientation
[Display] Sets to display/not display photo information
[Detailed Information]
[Slide Show Repeat] Selects the slide show play mode
[Slide Show Interval] Selects the slide show interval
[Brightness] Adjusts the brightness of the screen
[Clock Display] Displays the current time [Details].
[Go to the song playback
screen]
Displays file information, such as file size, resolution, and file
name, etc.
Displays the music playback screen of the last song played.
[Details].
[Details].
[Details].
[Details].
[Details].
Page 88

Copyright 2011 Sony Corporation
88
Back to top
Page 89

WALK M AN Use r Guide
89
Getting Started
Print
Top page > Videos/Photos > Photo Settings > Photo orientation [Photo Orientation]
How to Use the Software
Music
Videos/Photos
FM Radio
Timer
Settings
Troubleshooting
Important Information
Specifications
Contents list
Phot o orie ntation [Photo Orientation]
You can set the photo orientation to [Vertical], [Horizontal (right)], or [Horizontal (left)].
The operation of the 5-way button is switched according to the setting of [Photo Orientation].
1 . From the Home menu, select
desired photo orientation type.
Type De scription
[Vertical]
[Settings] [Photo Settings] [Photo Orientation]
Displays at 240 × 180 pixels. (Default setting)
Displays at 320 × 240 pixels.
[Horizontal (right)] [Horizontal (left)]
Copyright 2011 Sony Corporation
Back to top
Page 90

WALK M AN Use r Guide
90
Getting Started
Print
Top page > Videos/Photos > Photo Settings > Setting the display of the photo screen [Display]
How to Use the Software
Music
Videos/Photos
FM Radio
Timer
Settings
Troubleshooting
Important Information
Specifications
Contents list
Se t t ing the display of the phot o scre e n [Displa y]
You can display or hide detailed information of a photo, such as an icon that shows playback
status, etc., while displaying a photo.
1 . From the Home menu, select
display type.
Type De scription
[On] Displays the photo title, the shooting date, playback status, photo number, etc.
[Off] Hides the information of the current photo. (Default setting)
Not e
If [Photo Orientation] is set to [Horizontal (right)], or [Horizontal (left)] [Details], the photo title
is not displayed, even if [Display] is set to [On].
Copyright 2011 Sony Corporation
[Settings] [Photo Settings] [Display] desired
Back to top
Page 91

WALK M AN Use r Guide
91
Getting Started
Print
Top page > Videos/Photos > Photo Settings > Setting the slide show play mode [Slide Show
Repeat]
How to Use the Software
Music
Videos/Photos
FM Radio
Timer
Settings
Troubleshooting
Important Information
Specifications
Contents list
Se t t ing the slide show pla y mode [Slide Show Repeat]
You can display photos as a slide show repeatedly.
1 . From the Home menu, select [Settings] [Photo Settings] [Slide Show Repeat]
desired setting type.
Type De scription
[On] Displays photos in a photo folder continuously and repeatedly.
[Off]
Not e
Displays photos in a photo folder continuously, to the last photo, then returns to the
first photo, and playback pauses. (Default setting)
The screen does not turn off automatically or change to a screensaver [Details] while a slide
show is playing.
Back to top
Copyright 2011 Sony Corporation
Page 92

WALK M AN Use r Guide
92
Getting Started
Print
Top page > Videos/Photos > Photo Settings > Setting the interval of a slide show [Slide Show
Interval]
How to Use the Software
Music
Videos/Photos
FM Radio
Timer
Settings
Troubleshooting
Important Information
Specifications
Contents list
Se t t ing the int e rva l of a slide show [Slide Show Int e rva l]
You can set the time each photo is displayed.
1 . From the Home menu, select [Settings] [Photo Settings] [Slide Show Interval]
desired interval type.
Type Description
[Short] Photos switch to the next photos at a short interval.
[Normal] Photos switch to the next photos at the standard interval. (Default setting)
[Long] Photos switch to the next photos at a long interval.
Not e
It may take time to display a large-size photo.
Back to top
Copyright 2011 Sony Corporation
Page 93

WALK M AN Use r Guide
93
Getting Started
Print
Top page > FM Radio > Listening to FM Radio > Listening to FM radio [FM Radio]
How to Use the Software
Music
Videos/Photos
FM Radio
Timer
Settings
Troubleshooting
Important Information
Specifications
Contents list
List e ning to FM ra dio [FM Ra dio]
1 . From the Home menu, select [FM Radio].
The [FM Radio] screen appears.
2 . Press the
select the desired preset number.
The FM radio broadcasting of the selected frequency or preset number is received.
For details on how to operate the FM Radio screen, see
Not e
You cannot select a preset number if no preset station is stored. Preset receivable stations
using [Auto Preset]
The headphone cord serves as an antenna, so extend it as far as possible.
/ button to select the desired frequency, or press the / button to
[Details].
[Details], or preset the receivable stations manually [Details].
Re lat e d Topics
Browsing and using the FM radio screen
Presetting broadcast stations automatically [Auto Preset]
Presetting broadcast stations manually
Deleting preset broadcast stations [Delete from Preset]
Using the FM radio option menu
Copyright 2011 Sony Corporation
Back to top
Page 94

WALK M AN Use r Guide
94
Getting Started
Print
Top page > FM Radio > Listening to FM Radio > Browsing and using the FM radio screen
How to Use the Software
Music
Videos/Photos
FM Radio
Timer
Settings
Troubleshooting
Important Information
Specifications
Contents list
Brow sing a nd using the FM radio scre e n
Operations on the [FM Radio] screen
Frequency
Preset number
Not e
Depending on the country/region in which you have purchased the player, the screen
appearance may differ.
Opera t ions on the [FM Radio] scre e n
To Do this
Select the previous/next frequency Press the
Select the previous/next receivable station (*1) Press and hold the / button.
Select the previous/next preset number (*2) Press the / button.
Pause/resume the FM reception Press the button.
(*1) If sensitivity is too high, change the [Scan Sensitivity] setting [Details] to [Low].
(*2) You cannot select a Preset number if no preset station is stored. Preset receivable stations using
[Auto Preset]
[Details].
Copyright 2011 Sony Corporation
/ button.
Back to top
Page 95

WALK M AN Use r Guide
95
Getting Started
Print
Top page > FM Radio > Listening to FM Radio > Presetting broadcast stations automatically
[Auto Preset]
How to Use the Software
Music
Videos/Photos
FM Radio
Timer
Settings
Troubleshooting
Important Information
Specifications
Contents list
Prese t t ing broadc a st st a t ions aut omatic a lly [Auto Pre set]
You can preset (up to 30) receivable broadcast stations in your area automatically by selecting
[Auto Preset]. When you use the FM radio for the first time, or when you move to a new area, we
recommend you preset receivable broadcast stations by selecting [Auto Preset].
1 . On the [FM Radio] screen, press the OPTION/PWR OFF button.
The option menu appears.
2 . Select [Auto Preset]
Receivable broadcast stations will be preset in order of frequency (low to high).
[Auto Preset completed.] appears when presetting is completed, and the first preset station is
received.
Select [No] to cancel automatic presetting.
Hint
If high sensitivity causes the player to receive many unwanted broadcast stations, change
the [Scan Sensitivity] setting
Not e
The [Auto Preset] operation will delete already preset broadcast stations.
Copyright 2011 Sony Corporation
[Yes].
[Details] to [Low].
Back to top
Page 96

WALK M AN Use r Guide
96
Getting Started
Print
Top page > FM Radio > Listening to FM Radio > Presetting broadcast stations manually
How to Use the Software
Music
Videos/Photos
FM Radio
Timer
Settings
Troubleshooting
Important Information
Specifications
Contents list
Prese t t ing broadc a st st a t ions manually
You can manually preset broadcast stations that [Auto Preset] cannot detect [Details].
1 . On the [FM Radio] screen, select the desired frequency.
2 . Press and hold the
The frequency you select in step 1 is preset and the assigned preset number appears below
the frequency.
Hint
You can preset up to 30 stations.
Not e
The preset numbers are stored in order, from low to high frequency.
Copyright 2011 Sony Corporation
button.
Back to top
Page 97

WALK M AN Use r Guide
97
Getting Started
Print
Top page > FM Radio > Listening to FM Radio > Deleting preset broadcast stations [Delete from
Preset]
How to Use the Software
Music
Videos/Photos
FM Radio
Timer
Settings
Troubleshooting
Important Information
Specifications
Contents list
De leting pre set broadcast st a t ions [Dele t e from Prese t ]
1 . On the [FM Radio] screen, select the preset number you intend to delete.
2 . Press the OPTION/PWR OFF button to bring up the option menu.
3 . Select [Delete from Preset].
The preset broadcast station is deleted, and a message appears.
Back to top
Copyright 2011 Sony Corporation
Page 98

WALK M AN Use r Guide
98
Getting Started
Print
Top page > FM Radio > FM Radio Option Menu > Using the FM radio option menu
How to Use the Software
Music
Videos/Photos
FM Radio
Timer
Settings
Troubleshooting
Important Information
Specifications
Contents list
Using the FM radio opt ion m e nu
You can bring up the FM radio option menu by pressing the OPTION/PWR OFF button on the
[FM Radio] screen. For details on how to use the option menu, see
The option items shown on the option menu vary depending on the screen from which you bring it
up. See the reference page for settings and usage.
Option items De script ion/r efe re nc e pa ge
[Save to Preset ] Presets the currently tuned-in broadcast station
[Delete from Preset] Deletes a broadcast station from a preset station
[Auto Preset] Presets broadcast stations automatically
[Scan Sensitivity] Adjusts the sensitivity of radio reception
[Mono/Auto] Changes to either monaural or stereo
[Clock Display] Displays the current time
[Go to the song playback screen] Displays the music playback screen of the last song played.
Copyright 2011 Sony Corporation
[Details].
[Details].
[Details].
[Details].
[Details].
[Details].
[Details].
Back to top
Page 99

WALK M AN Use r Guide
99
Getting Started
Print
Top page > FM Radio > FM Radio Settings > Setting the reception [Scan Sensitivity]
How to Use the Software
Music
Videos/Photos
FM Radio
Timer
Settings
Troubleshooting
Important Information
Specifications
Contents list
Se t t ing the recept ion [Scan Se nsitivit y]
When you select stations using the [Auto Preset] function [Details] or the / button, the FM
receiver may receive unwanted broadcast stations as a result of sensitivity being too high. In this
case, set the reception to [Low]. [High] is set by default.
1 . From the Home menu, select
[Low].
To set the reception sensitivity back to the default, select [High].
Copyright 2011 Sony Corporation
[Settings] [FM Radio Settings] [Scan Sensitivity]
Back to top
Page 100

WALK M AN Use r Guide
100
Getting Started
Print
Top page > FM Radio > FM Radio Settings > Setting monaural/stereo [Mono/Auto]
How to Use the Software
Music
Videos/Photos
FM Radio
Timer
Settings
Troubleshooting
Important Information
Specifications
Contents list
Se t t ing monaural/stere o [M ono/Auto]
If noise occurs during FM reception, set the receiver to [Mono] for monaural. If you set it to
[Auto], monaural/stereo reception is selected automatically, depending on reception conditions.
[Auto] is set by default.
1 . From the Home menu, select
[Mono].
To return to automatic setting, select [Auto].
Copyright 2011 Sony Corporation
[Settings] [FM Radio Settings] [Mono/Auto]
Back to top
 Loading...