

Page 1

SONY:
Portable
MiniDisc Recorder
Operating instructions
3-858-529-22 (1)
lUPiLKmAnr
MZ-R30
©1996 by Sony Corporation
Page 2

WARNING
To prevent fire or shock
hazard, do not expose
the unit to rain or
moisture.
To avoid electrical
shock, do not open the
cabinet. Refer servicing
to qualified personnel
only.
Caution
The use ot optical instruments with this
product will increase eye hazard.
Information
For Customers in the USA
This equipment has been tested and found to
comply with the limits for a Class B digital
device, pursuant to Part 15 of the FCC rules.
These limits are designed to provide
reasonable protection against harmful
interference in a residential installation. This
equipment generates, used, and can radiate
radio frequency energy and, if not installed
and used in accordance with the instructions,
may cause harmful interference to radio
communications.
However, there is no guarantee that
interference will not occur in a particular
installation. If this equipment does cause
harmful interference to radio or television
reception, which can be determined by
turning the equipment off and on, the user is
encouraged to try to correct the interference
by one more of the following measures:
• Reorient or relocate the receiving antenna.
• Increase the separation between the
equipment and the receiver.
• Connect the equipment into an outlet on a
circuit different from that to which the
receiver is connected.
• Consult the dealer or an experienced
radio/TV technician for help.
\ ou aiv c.uiUotwd that am changes or
in<x.1iiKatK'ns nr'l expresslv apprm od in tins
manual could void vv'vir authority to v'perate
this ov]viipinent.
The built-in batter\- should bo replaced bv
qualifit'd personnel onlv.
For Customers in Australia
If the supply cord of AC power adaptor is
damaged the AC pt>wer adaptor must be
returned to the manufacturer of his agent for
the cord to be replaced.
IN NO EVENT SHALL SELLER BE
LIABLE FOR ANY DIRECT,
INCIDENTAL OR CONSEQUENTIAL
DAMAGES OF ANY NATURE, OR
LOSSES OR EXPENSES RESULTING
FROM ANY DEFECTIVE PRODUCT
OR THE USE OF ANY PRODUCT.
Owner's Record
The serial number is located at the rear of
the disc compartment lid and the model
number is located at the bottom. Record
the serial number in the space provided
below. Refer to them whenever you call
upon your Sony dealer regarding this
product.
Model No. MZ-R30
Serial No.
_______
______
"MD WALKMAN" is a trademark of Sony
Corporation.
Page 3

Welcome!
Welcome to the world ot the MiniDisc!
Here are some ot the capabilities and
features you'll discover with the new
MiniDisc Recorder.
• High-fidelitv recording — Hij»hfidelity sound with little noise and
distortion is recorded through the
optical digital input jack on the
recorder.
• Vertical jog dial — You can select your
desired tracks directly by simply
rotating a dial.
• Synchro-recording — You can easily
dub a digital source such as a CD on an
MD.
• Sampling rate converter — This unit
enables you to record programs from
digital equipment using other
sampling rates, such as a BS tuner or
DAT deck.
• Long-time recording with monaural
sound — You can record up to 148
minutes on a disc using monaural
recording.
• Position pointer — The display shows
you the current location on the disc.
• Date and time stamp function — The
built-in clock allows you to record the
date and time whenever you make a
recording.
• Title function — You can see disc and
track titles in the display while you are
playing/recording an MD.
Page 4

Table of contents
Recording an MD right away!..................................6
Playing an MD right away!.......................................8
Various ways of recording
Two ways of connection to a sound source...............................................................10
Recording with digital input......................................................................................11
To start/stop recording with the player (Synchro-recording) .,11
Recording from a microphone...................................................................................12
Recording in monaural for double the normal recording
time of an MD....................................................................................................... 12
Adjusting the recording level (Manual recording)
Checking the remaining time or the recording position
Setting the clock to stamp the recorded time............................................................ 15
.....................................
....................................................
............................................
10
Various ways of playback.......................................16
Selecting the track number or track name directly
Playing tracks repeatedly...........................................................................................16
Emphasizing bass (DIGITAL MEGA BASS)...........................................................17
Protecting your hearing (AVLS)................................................................................17
Checking the remaining time or the playing position................................................18
Locking the controls..................................................................................................18
Connecting to a stereo system
...................................................................................
Editing recorded tracks
Erasing tracks.............................................................................................................20
To erase a track....................................................................................................20
To erase the whole disc....................................................................................... 20
Adding a track mark..................................................................................................21
Erasing a track mark..................................................................................................21
Moving recorded tracks.............................................................................................22
Labeling recordings................................................................................................... 22
....................................................
..........................................
20
13
14
16
19
Page 5

Power sources..........................................................24
Using on a lithium ion rechargeable battery..............................................................24
Using on drv batteries................................................................................................25
Additional information...........................................26
Precautions.................................................................................................................26
Troubleshooting.........................................................................................................28
System limitations......................................................................................................30
Error messages.......................................................................................................... 31
Specifications.............................................................................................................33
What is MD?..............................................................................................................34
Looking at the controls..............................................................................................36
Page 6
si»».-. .
Recording an MD right away!
The source sound of CDs or tapes will be sent as an analog signal and
recorded digitally. The recorded sound will be stereo. When you
record from a digital source, see "Recording with digital input" (page
11).
o
CD player,
cassettecorder, etc.
(source)
O
Make connections.
I Line cable
(RK-G129, not supplied)*
to a wall outlet
to LINE OUT L (White)
to LINE IN (OPTICAL)
to DC IN 6V portable CD player having a stereo
9
AC power adaptor
(supplied)
* Use the RK-G136 connecting cord
(not supplied) to connect to a
mini-jack.
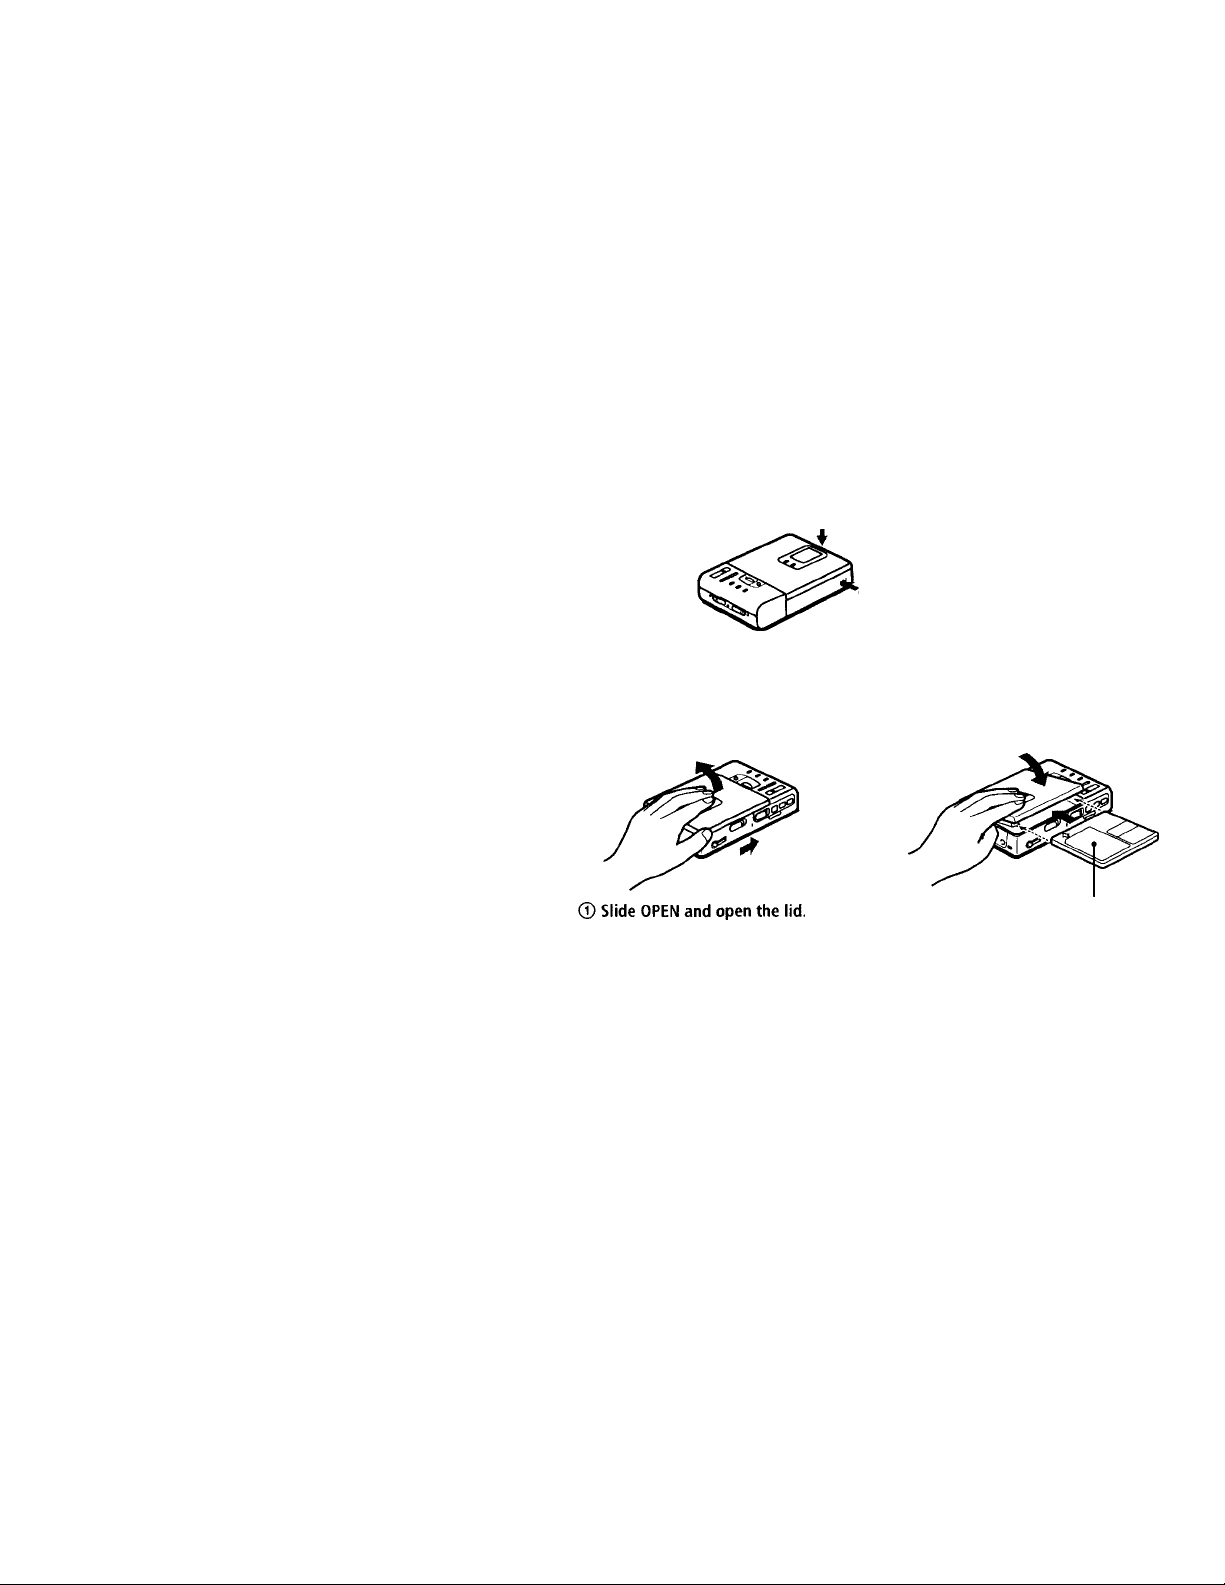
Insert a recordable MD.
(D Insert a recordable MD with the
label side facing up, and press the
lid down to close.
Page 7
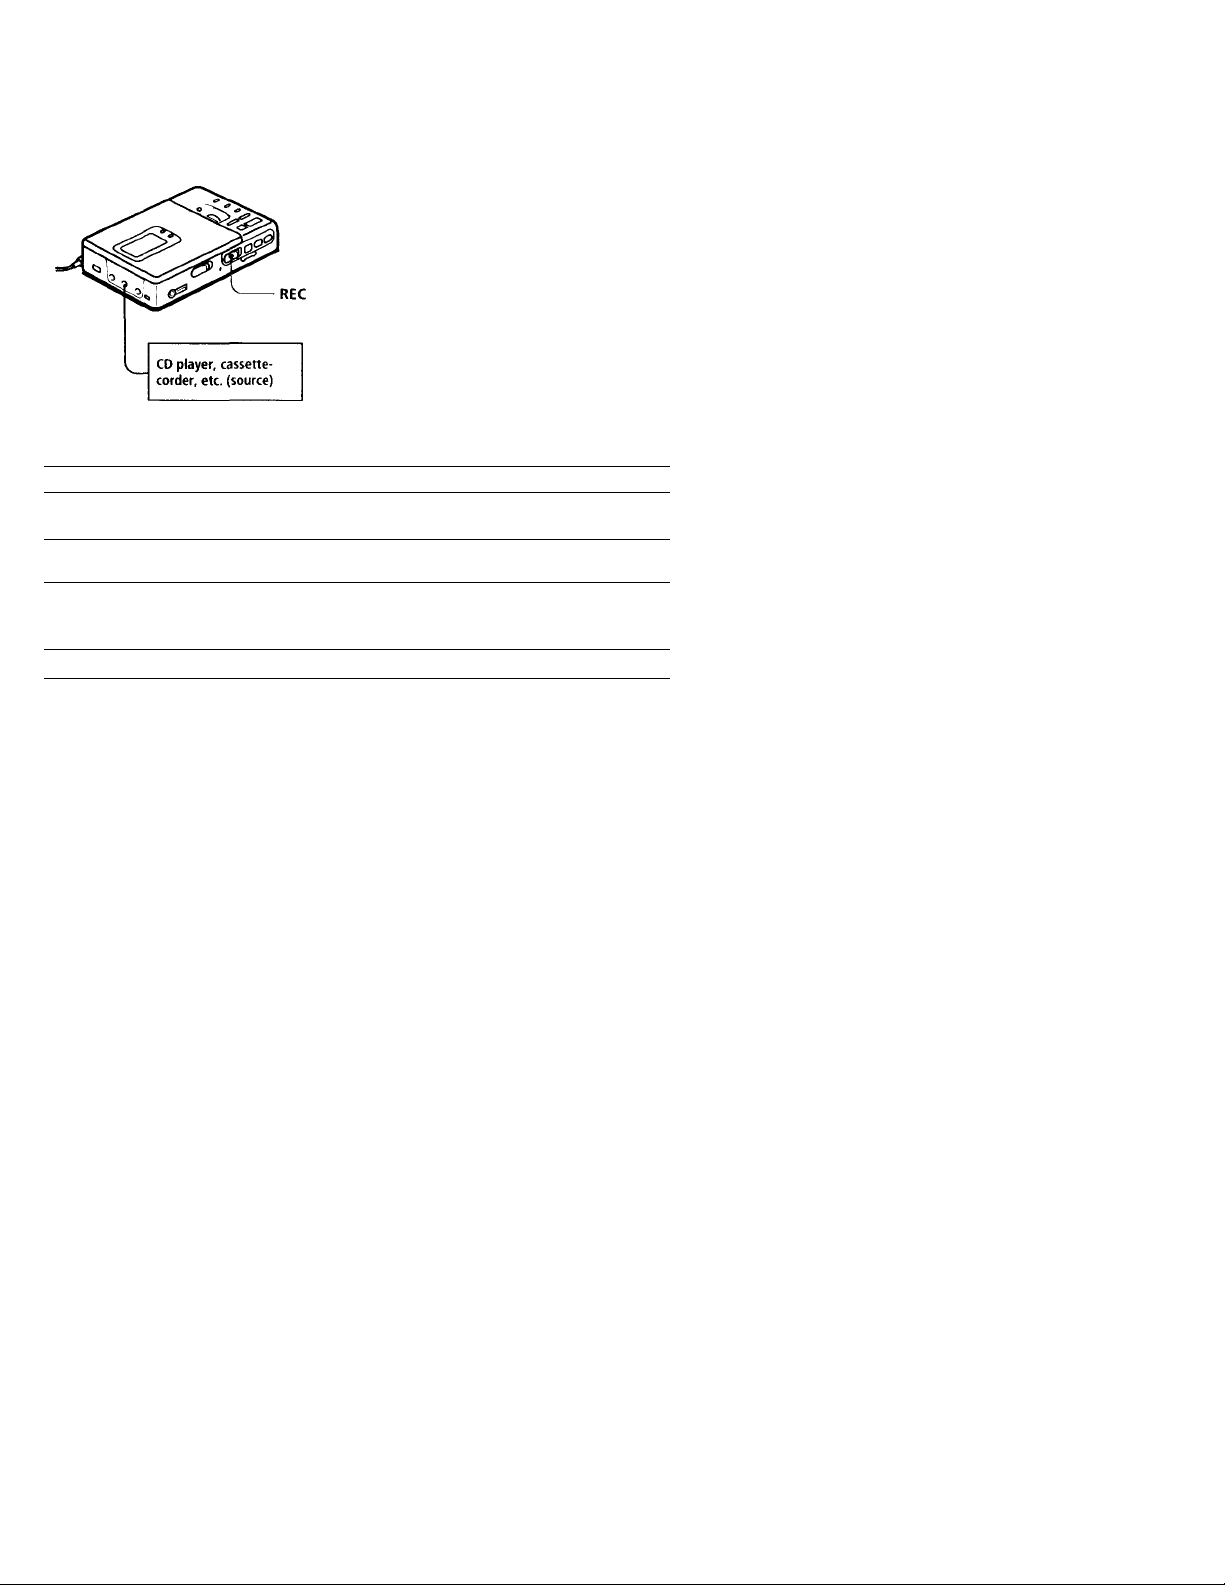
Record an MD.
® Slide REC to the right while
pressing its button.
"REC" lights up and recording starts.
(D Play the CD or tape you want to
record.
To stop recording, press ■.
"Toe Edit" flashes to record data of the
recording (the track's start and end points,
etc.). Do not move or jog the recorder or
disconnect the power source while the
indication is flashing in the display.
33
(D
ri
o
3
(O
0)
3
IQ
ÙÌ
S
D)
To
Pause ll>
Add recording to the end of the
previous recording.
Record over partway through the
previous recording.
Renaove the MD.
" A new track is added at the point where you pressed II, and the recording will be marked with
the new track number when you resume recording.
-■ Once you open the lid, the point to start recording will change to the beginning of the first track.
When recording on a recorded MD, check the point to start recording on the display.
Press
Press II again to resume recording.
END SEARCH and slide REC.
►, or to find the start point
of recording and press ■ to stop. Then
slide REC.
■ and open the lid.^'
If the recording does not start
• Make sure the recorder is not locked (page
18).
•Make sure the MD is not record-protected
(page 27).
• Premastered MDs cannot be recorded over.
•The level of the recorded sound is adjusted
automatically.
>You can monitor the sound being recorded.
Connect the supplied headphones with
remote controller to 0/REMOTE and
adjust the volume by pressing VOLUME
+/- (VOL +/- on the remote controller).
Sound levels are copied onto the MD
automatically and independently of the
volume for monitoring.
Page 8

Playing an MD right away!
You can also use the rechargeable battery or dry batteries (see pages
24, 25).
Make connections.
to a wall outlet
Insert an MD.
facing up, and press the lid down to
close.
8
Page 9

Q Play an MD.
►
©
VOLUME
+/-
VOL +/►
To Press (Beeps in the headphones)
Pause
Find the beginning of the current track
Find the beginning of the next track
Go backwards while playing”
Go forward while playing” keep pressing
Remove the MD ■ and open the lid.^’
“ To go backward or forward quickly without listening, press II and keep pressing or ►
Once you open the lid, the point to start play will change to the beginning of the first track.
A short beep sounds in the headphones.
Press VOLUME +/- to adjust the
volume.
You can check the volume in the display.
To stop play, press ■.
A long beep sounds in the headphones.
II (Continuous short beeps)
Press II again to resume play.
once (Three short beeps)
►W once (Two short beeps)
keep pressing
2
fi}
5*
m
3
a
fij
s
0)
if the play does not start
Make sure the recorder is not locked (page
18).
V:
The recorder automatically switches to play
the stereo or monaural sound according to
the recorded sound.
Page 10

P^Various ways ot recording
Two ways of connection to a sound source
The input i«ick of this recorder works as K>th digital and analog input jack. Connect the
recorder to a CD plaver or a cassette recorder using either digital input or anaU'g input. To
record, see "Rtvording with digital input” (page 11) to record using digital input, and
"Recording an MD right awav!" (page b) to record using analog input.
Difference between digital and analog inputs
Digital input Analog (line) input
(connection)
Connectable source
Usable cord
Signal from the source
Recorded track numbers
Recorded sound level
Equipment with an optical
digital output jack (line) output jack
Digital cable (with an optical Line cable (with 2 phono
or an optical-mini plug) plugs or a stereo-mini plug)
Digital
Marked (copied)
automatically
•at the same positions as the
source.
• when the recorder is
paused while recording.
Same as the source
Equipment with an analog
Analog
Even when a digital source
(such as a CD) is connected,
the signal sent to the recorder
is analog.
Marked
•after more than 2 seconds of
silence.
• when the recorder is
paused while recording.
You can erase unnecessary
marks after recording
("Erasing a track mark",
page 21).
Adjusted automatically. Can
also be adjusted manually
("Adjusting the recording
level", page 13).
Note
Track marks may be copied incorrectly ;
•when you record from some CD players or multi disc players using digital input.
•when the source is in shuffle or program play mode while recording using digital input. In this
case, play the source in normal play mode.
10
Page 11
Recording with digital
input
1 b«> iinil hns Л I'uill in '•nmplnv^ \\\{c
conviTU'r Si' ihjl \4'ii i.m liW'id
pi4'\;i*in)s |1Ч'П\ i4jinpmont usini;
i'llu‘1 sampUn«; rati'-', a> a US tunm
i'l a РЛТ iUvk
CO MO playee
digital amplifier, etc.
Optical f
plug 0
POC-15B etc.
(not supplied)
-РОС-1 SAB etc.
(not supplied)
Insert a recordable MD and start
recording.
To record, see "Recording an MD right
awav !" (page 6). To record from a
portable CD player, set the CD player to
pause and then start recording.
Portable CD
player, etc.
♦ Optical
mini
plug
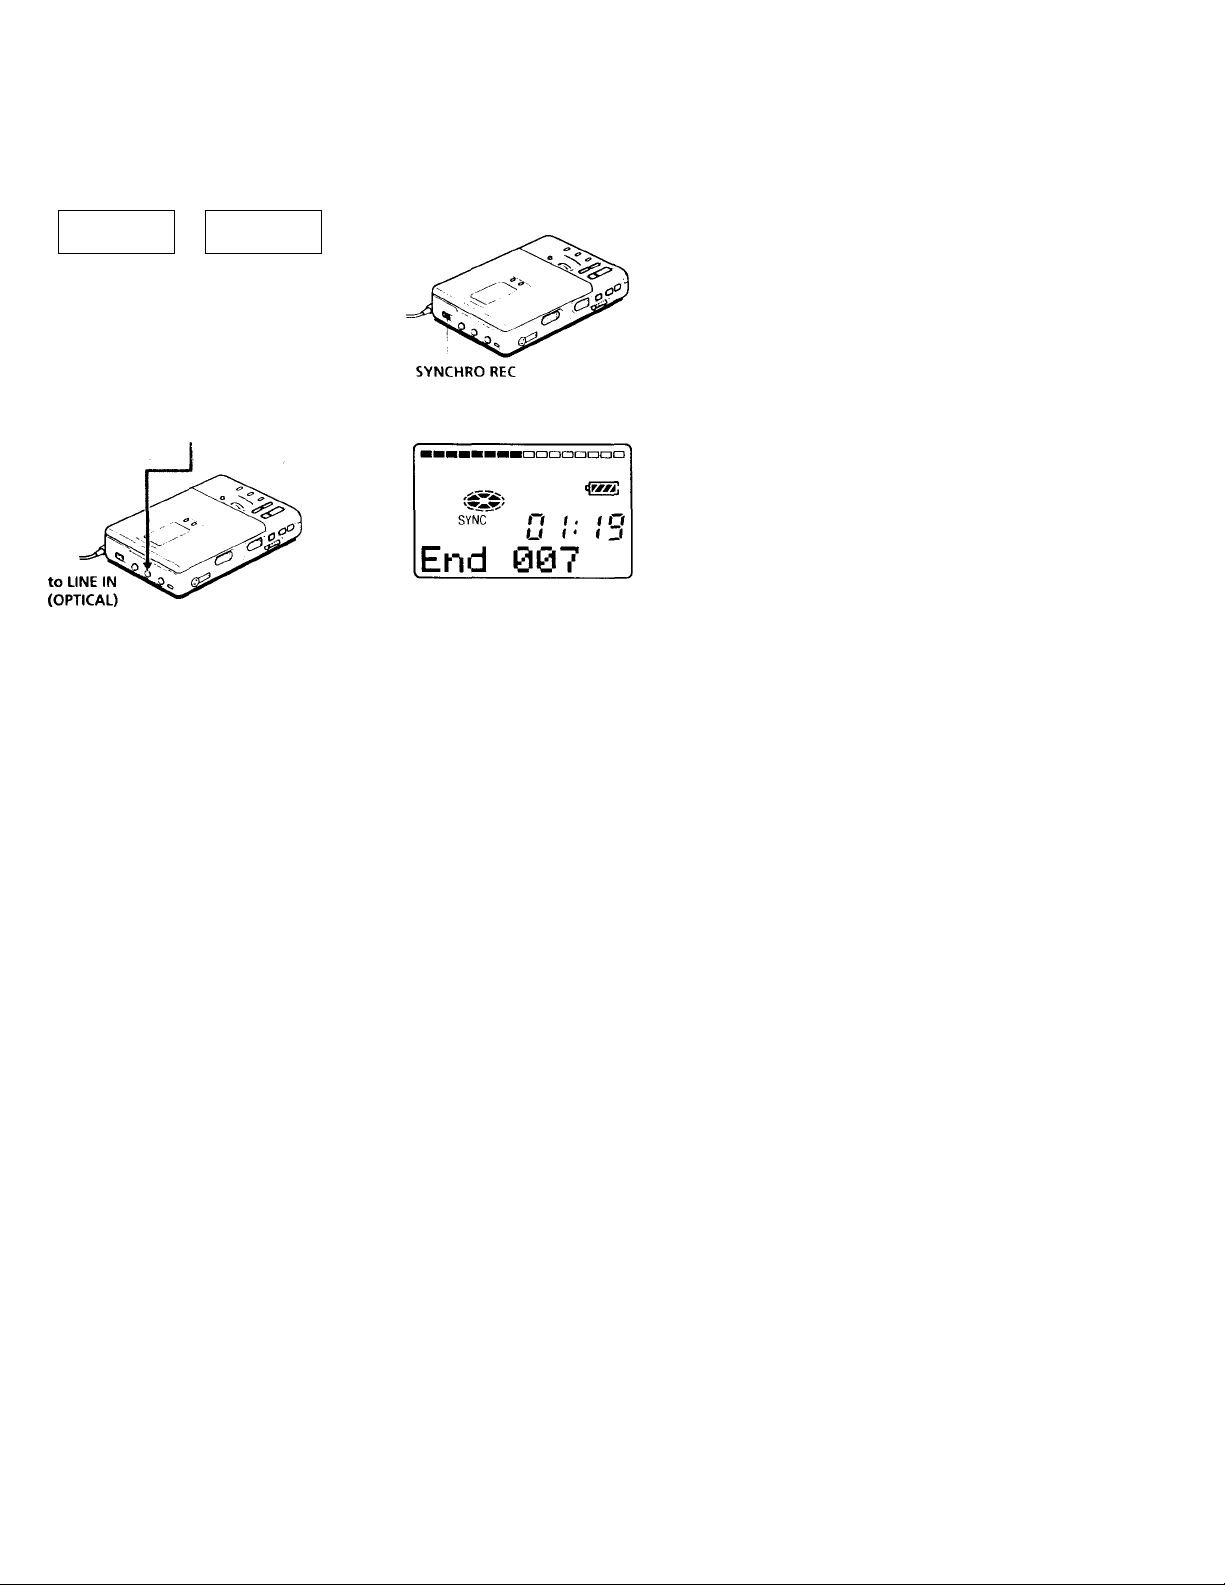
To start/stop recording with
the player
(Synchro-recording)
N on can easilv niako digital recording'' ot
a digital st'urce o[\ an MD.
Uelore s\ nchro-it'ct'iding, make
*.t'uni'ctu'ns to the' digital st'iiiw' w ill\ a
digital cabU’ an<l the ['ouer M'lirce .md
insert a rect'jdable MD.
Slide S^■^¡C^ IRC) Ki:C It' ON,
"5^'NC" appears in thedisplas .
^ Slide REC to the right while pressing
its button.
The recorder stands by for recording.
Play the source plaver. The recorder
starts recording when it recei\'es the
playing sound.
To stop recording, press ■.
<
Ш
5’
c
s
0)
Ф
n
о
Q_
5*
LiNE IN (OPTICAL) jack is for both
digital and analog input
The recorder automatically recognizes the
line cable and switches to digital or analog
input.
Notes
•You can make a digital recording only from
an optical type output
•Some portable CD players with the ESP*
system cannot send out digital signals
when it is activated. In this case, release the
ESP system.
* Electronic Shock Protection
When there is no sound from the plaver
more than 3 seconds during synchrorecording, the recorder stands by for
recording automatically. When the sound
comes from the player again, the recorder
starts synchro-recording again.
Notes
• Do not switch SYNCHRO REC after step 2.
Recording may not be made properly.
•If you record in monaural, do steps 1 and 2
in "Recording in monaural for double the
normal recording time of an MD" (page 12)
before doing the synchro-recording steps.
11
Page 12
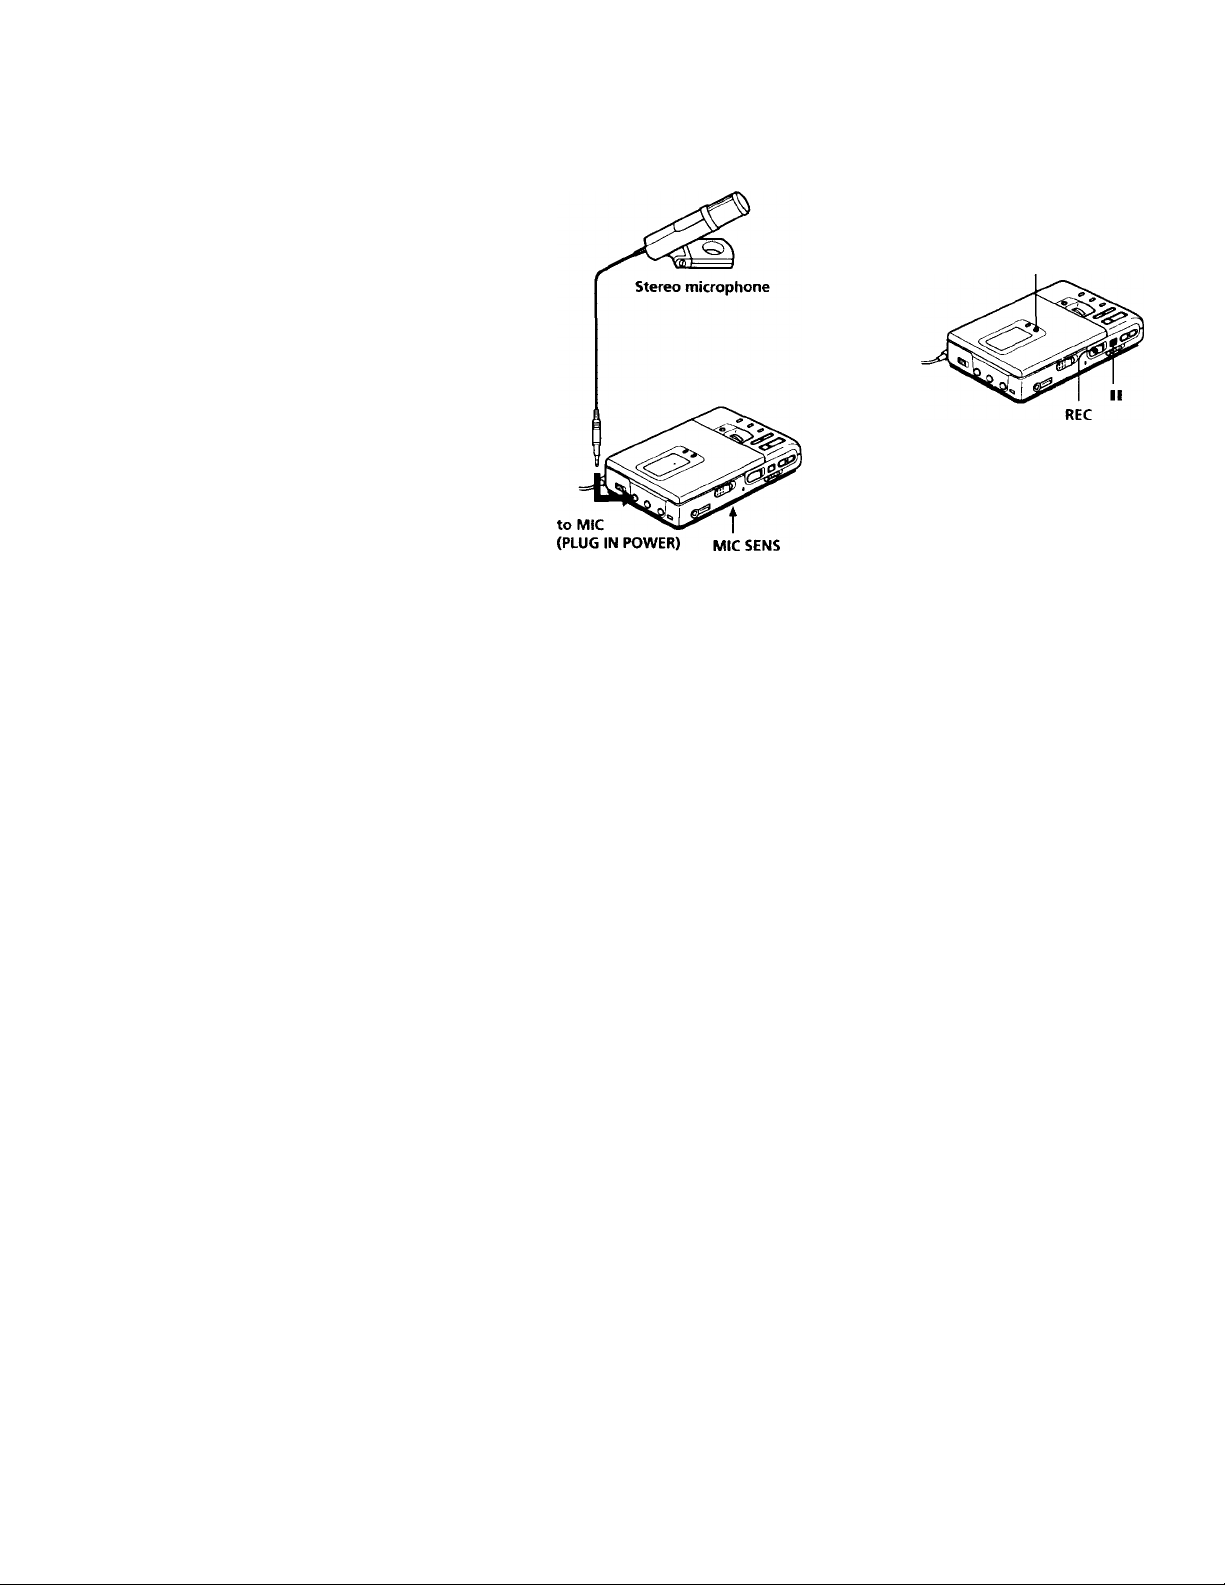
Recording from a
microphone
Connect a stereo microphone ECM-W9A,
ECM-MS907, ECM-717, etc., (not
supplied) to the MIC (PLUG IN POWER)
jack.
1 Select the input level with MIC SENS
(on the bottom of the recorder).
Usually, set it to HIGH. When you
record loud sound such as a live
concert, set it to LOW.
2 Insert a recordable MD and start
recording.
Slide REC to the right while pressing
its button.
"REC" lights up and recording starts.
For details, see "Recording an MD
right away! " (page 6).
Note
To record from a microphone, you must first
disconnect any digital source. If connected,
the recorder will not switch to microphone
input.
12
Recording in monaural
for double the normal
recording time of an
MD
For longer recordings, ch^>ose to record in
monaural sound. The recording time
becomes double the normal.
MODE
1 While pressing II, slide REC to the
right.
The recorder stands by for recording.
2 Press MODE.
"Mono REC" appears in the display,
and the recorder switches to
monaural recording.
Press MODE again to record in stereo
sound.
3 Press II again to start recording.
4 Play the sound source.
To stop recording, press M.
The recorder switches back to stereo
recording when you record the next time.
Notes
•If you record in monaural sound from a
stereo source, the sounds from left and
right will be mixed.
•You cannot record in monaural, if SYNCRO
REC is slid to ON.
•The MDs recorded in monaural sound can
be played back only with an MD player/
recorder that has the monaural playing
function.
Page 13

Adjusting the recording
level
(Manual recording)
\\ hon vou RVorJ with m\ .iiuUoj; input,
tho s^ninJ lo\ ol is nJiustod .uitom.UicalK
It niW'SS.UN’. \\'U <.Mn sot tho lovol
mamiallv
\\ hilo I'bsoiA inj; tho lovol motor in
llio display, adjust tho rcwirdin^ lo\ol
by pri^ssinj; ( + ) or (-).
Sc't tlw lovol s<> that it liits tho sooond
indioatv'r trom tho top whon tho
rcw'rdor rovoix os tho mavimum
sound
Level meter
Note
The recording level should bo adjusted wiiilo
the recorder is in standby iruxle. You canm>t
adjust it while recording.
<
Qi
5*
c
lA
S
Qi
(A
(Q
(D
r\
o
3
While holding down II, hold RbC to
tho rigid tor mc>ro than 2 sooonds.
"ManualREC” appears and tho
recorder stands by for recording.
To return to the automatic control,
while the recorder is in record pause
mode, hold REC to the right for more
than 2 seconds.
■□aanaaoaaa
S \ Ci/V ^ -v n n .
Z-uu'uu
MaWualREC
2 Play
the source.
\ \ \ \ I / /
n n
4 Press II again to start recording.
To stop recording, press ■.
The recording level control is switched back
to automatic control.
V
When you record with microphone input,
select the input level with MIC SENS (page
12).
13
Page 14

Checking the remaining
time or the recording
position
1 Pri'ss OISI’LA\ »vhito rocordii»}; or in
Stop nioilo timo you pross the
button, the Jisplav changos as
follows.
DISPLAY
Position pointer (shows the
current location on the MD)
While recording
o
Elapsed time
Remaining time for Track number
recording
Current time" Current date"
"Appears only when the clock is set.
o
Track number
In stop mode
o o
El.if’soi.l jinio TMck nunilx’r
Rom.iining timo for Track name"
recording
Remaining time pise name"
after the current
li'cation
Current time'’ Current date’’
"The number of the track appears when the
track has no name.
Remaining number of tracks appears when
the MD has iro disc name.
Appears only when the clock is set.
To know the recording condition
The record indicator lights up or flashes
accordingJtMh^^econi^^
Snditlon indicator
While recording
Recording
standby
Less than 3
minutes'
recording time
available
If you want to check the playing position or
track name while playing, see page 18.
lights up
flashes according to
the loudness of the
source while
recording with a
microphone (voice
mirror)
flashes
slowly flashes
14
Page 15

Setting the clock to stamp the recorded time
I o st.imp tlu' d.iU' .iiui tiiiio Olì tlio MP
U Ik'IÌ W'U rivorJ. \\>U tirsi niwl It' sot tlio
oliKk. \\ liOll \ oil uso tho rooordor lor tiiO
lirst timo or .ittor a long poi i<HÌ ol disuso.
vl\.\ri;o ilio built-in battovv tor tbo clock
attor sotlini; tho clock.
1 Connect tho power source.
Use the supplied AC power adaptor.
2 Press CLOCK SET at the bottom oi
the recorder.
Use a pointed object.
The digits of the year flash.
4 iw
Vho digit o\ the lììtMìlh tlaslu's
5 Kojvat stops à and 4 to ontor tlio
curront month, date. hour, and
minutoWhon ymi press ► to sot tho minuto,
tho cltK'k starts operating.
If you make a mistake while
setting the dock
Press ■, and set the clock again from step
2. You can skip a step by pressing ►.
To display the current time
When the recorder is not operating or
while recording, press DISPLAY
repeatedly until the current time appi'ars
in the display.
To display the time in the 24-
hour system
While setting the clock, press DISPLAY.
To display the time in the 12-hour system,
press DISPLAY again
Charging the built-in battery for the
dock
After setting the clock, leave the recorder
connected to the AC power for about 2 hours
to charge the built-in battery for the clock.
Once charged, the built-in batteiy' should last
about a month without connecting to any of
the power sources. The recorder will
automatically charge the built-in battery while
connected to AC power, dry batteries or a
rechargeable battery.
<
0)
5’
c
s
Û)
o
n
O
3
3 Enter the current year by pressing
orKW.
To change the digits rapidly, keep
pressing or
15
Page 16

r- Veil luu^ may^ ui
playback
Selecting the track number or track name directly
> ou can select the desired track directly
by using the vertical jog dial.
Playing tracks repeatedly
^'ou can pla\’ tracks rej.xMtedly in throe
ways — all repeat, single repeat, and
shuffle repeat.
MODE
Rotate the jog dial to select a track,
and press it to play the selected track.
Press
to play.
When you rotate the jog dial, the
track name* appears in the display.
To play the selected track, press the
jog dial.
* If the track has no name, only the track
number appears in the display.
If you select a track in shuffle play mode,
shuffle play starts from the selected track.
1 Press MODE while the recorder is
playing an MD.
Each time you press MODE, the play
mode indication changes as follows.
Play mode indication
indication
none
(normal play) played once.
"C—"
(all repeat)
(single repeat)
"CT- SHUF"
(shuffle repeat)
Play mode
All the tracks are
All the tracks are
played repeatedly.
A single track is
played repeatedly.
All the tracks are
played repeatedly
in random order.
16
Page 17

Emphasizing bass
(DIGITAL MEGA BASS)
Protecting your hearing
(AVLS)
Moj;.i H.iss mtoi^sitios \ow
IrOvjlUMWV MUinJ lor rii'hor qil.llilv Mw\u
roprtKliK'tii'U. ll .iMtvls onK w Jth iho
lUMiiplU'noS
Prt'ss i:)Ic;ítal miíga iv\ss.
Each limo v(.>u press DIGIT AL MhCiA
BASS, IIk' Mega Bass iiulicalion
changes as úillows.
Mega Bass indication
Indication
none
"BASS CDCI] '
Play mode
Normal play
Mega Bass (slight
effect)
Mega Bass {strong
effect)
The A\ I S (Aulomatic \ ohimc 1 imiUT
S\ stom) limction keeps ».iown llu'
ma\mum\ \ olumc It' pit'toct \ our ears.
St.'l AVLS at tik' boltt'm ot Ihe
recorder to LIMIT.
When YOU try to turn the volume,
"AVLS” appears in the display. The
volume is kept at a moderate level.
<
CÜ
o*
c
s
fi)
<
iA
o
■D_
fij
O"
0>
Notes
•If the sound is distorted when emphasizing ‘
bass, turn down the volun^e.
•Mega Bass function docs not affect the
sound being recorded.
•Mega Bass does not function when LINE
OUT jack on the recorder is connected with
a line cable
17
Page 18

Checking the remaining
time or the playing
position
1 I’ross DISPLAY while pUiving.
Each time you press DISPLAY, the
display changes as follows.
DISPLAY
Position pointer (shows the
current location on the MD)
Locking the controls
To pro\ enl the buttons from being
acddentally operated when vou carry lire
recorder, use this function.
aaBoaonoBi
n n. n n
u U ‘ u u
o o
Elapsed time
Remaining time of
the current track
Remaining time
after the current
location
Recorded time^’
"Track number appears when the MD has
no track name.
^’Remaining number of the disc appears
when the disc has no name.
’’ If you record without setting the dock or
play an MD that has no recorded date,
"--y—m—d" and appear.
If you want to check the remaining time or
the recording position while recording or in
stop mode, see page 14.
Track number
Track name"
Disc name^’
Recorded date’’
18
HOLD
o
©
Slide HOLD in the direction of the
On the recorder, slide HOLD to lock
the controls of the recorder. On the
remote controller, slide HOLD to lock
the controls of the remote controller.
Slide HOLD in the opposite direction
of the arrow to unlock the controls.
Page 19

Connecting to a stereo
system
Coniuvt tho I INl Oi V j,u*lv ol tlio
nvordoi lo tho \ l\l IN lacWs v'l an
amplilit'r or a tapo pla\ or u itli a lino oablo
output is aiialoi; I lio rooot\ior plavs tl\o
M!^ ciii;itallv aiul soiuis ai\aU\c, si\;nals to
iho c<.>niuvtod oquiptitonl.
Stereo to LINE IN 2 phono plugs
or lU't siipplioJV riio
Portable DAT IlStcreo
recorder
______
||system, etc.
<
a>
2
o’
c
VA
5
iti
VC
"0_
0)
VC
O"
Ù)
n
Note
Tlte Mega Bass dose not function or will be
cancelled when the LINE OUT jack is
connected with a line cable.
19
Page 20

t^catung recoraea iracKS
^ ou can y<>ur rivi'rdinj;s bv .ukiinj;/
orasinj; track marks or Ubolinj; tracks aiui
MDs. Premasterod MDs cannot K' t\iitod
Notes on editing
• ex'» not move or k'j; tbc recorder while "T^k
Edit" is tlashing in the display.
•^\нl cannot edit tracks on an MD that is
record-protected. Before etliting tracks,
close the tab on the side of the MD.
Erasing tracks
To erase a track
Note that once a recording has been
erased, you cannot retrieve it. Check the
track number before erasing.
To erase the whole disc
^ ou c.in quickly er.iso .ill the tracks and
data of the MD at the same time.
Note that once a recording has been
er.ised, you cannot retrieve it. Be sure to
check the contents of the disc vou want to
ERASE
ERASE
Press ERASE while playing the track
you want to erase.
"Erase OK?" and "Push Erase"
appear in the display alternately, and
the recorder plays the selected track
repeatedly. To cancel erasing, press
^ Check the track number in the
display and press ERASE again.
The track is erased from the MD and
the remaining tracks are renumbered.
To erase a part of a track
Add track marks at the beginning and the
end of the part you want to erase, then
erase the part.
t In stop mode, keep pressing ERASE
and slide REC to the right.
"All Erase?" and "Push Erase" appear
in the display alternately. To cancel
erasing, press ■.
2 Press ERASE again.
"Toe Edit" flashes in the display.
When erasing finishes, "BLANK
DISC" appears.
20
Page 21

Adding a track mark
Erasing a track mark
>ou v*an Ir.Kk lìurks tlut llU'
sc'p.uatc\Ì p.H t .ìttor tlìo tr.K'k m,uk is .is j
now tr.uk.
Tho tr.u k nimìlvrs wiU in*. iv.iso .»s
U'Ilows
1
1 1 2 3 4 5
I While playing or pausing an MD,
2 3
^ Track marking
Track numbers increase
TRACK MARK TRACK MARK
press TRACK MARK on the recorder
at the point you want to mark.
"MARK ON" appears in the display,
and a track mark is added. The track
number will increase by one.
4
To add track marks while recording
Press TRACK MARK on the recorder or tlic
remote commander.
Note
TRACK MARK on the remote controller
does not function during playback.
\\ lu'n wui r^vord Willi Uiiu*) input.
uniu\\'ss.ir\ tr.u k m.irks m.u Iv
ivvorJovl. ^ <Hi o.m or.iso .1 tr.ick in.irk to
vi>mbiiu' llu' Ir.u'ks Ivltiro .md .ittor tho
lr.u k m.irk Tlu' tr.uk numlvrs will
ch.mi;o .is follows
1
2 1 3
▲
^ Erase a track mark
1
Track numbers decrease
2
4
3
1 While playing the track with the track
mark you want to erase, press II to
pause.
2 Find the track mark by pressing V«
slightly.
For example, to erase the third track
mark, find the beginning of the third
track. "00:00" appears in the display.
3 Press TRACK MARK to erase the
mark.
"MARK OFF" appears in the display.
The track mark is erased and the two
tracks are combined.
m
Q.
3
to
(T>
n
o
Q.
0)
Q.
0)
n
7T
The combined track whose mark has been
erased is recorded with the date and time of
the beginning of the first of the two
combined tracks.
21
Page 22

Moving recorded tracks
Labeling recordings
Von c.in change the order of the reci'rdeif
tracks.
Before moving
Track A Tracks TrackC Track D
1
2
2 3
4
3
Move track C
After
moving
Track A Track C Track B Track D
P
1
2
from the third to
the second track.
3
TITLE/ENTER
4
I While playing, keep pressing ► and
press TITLE/ENTER.
The recorder plays the selected track
repeatedly.
For example above, "MV003—>003"
appears in the display.
2 Rotate the vertical jog dial to select
the new track position.
For example above, rotate the jog dial
until "MV003—♦002" appears in the
display.
To cancel moving, press ■.
^ou can label the MDs and tracks vou
recorded with letters, numbers, and
marks. Each label can be made up ot up to
2lX) characters, and each MD can hold up
to 17(XU'haracters.
END SEARCH
I To label a track , play the track you
want to label.
To label an MD, insert the recordable
MD you want to label.
If an MD is already inserted, press ■
to stop.
2 Press TITLE/ENTER.
If you have selected a track in step 1
above, the recorder will play that
track repeatedly.
A cursor flashes in the display.
3 Use the vertical jog dial to select and
enter a character.
3 Press TITLE/ENTER again.
Moving is completed and the
recorder plays the moved track.
You can also move the track by pressing the
jog dial in step 3.
22
Rotate
to select.
Rotate the jog dial to select a
character, and press the jog dial to
enter the selected character. The
cursor shifts rightward and stands by
for the input of the next character.
Page 23

Press
i:np
SliAKCl I
URASL
■ . Cancel labeling.
4 Repeal slop ^ until \ ou have ontoroil
all tho oharaotors for the label.
To
Solivi Ilio I irsi ol oapiUil
lolliTS, sm.ill lollois
.iiul mimbors ijiiiokK
Min o tho oursor lo Ilio
loll or ri;;hl
liisort .1 sp.ioo
Doloto <1 ohar.iolor
5 I’n-ssTIThh/liNThK.
L*ilvlinj; is complotod.
To cancel labeling, press ■. .
Available characters
• Capital aiui small letters ot the lini;lish
alphabet
• Numbers U to 9
• ! ■■ # $ &()* + -. ;< = >^
@ _ ' ' , / : _ (space)
To relabel recordings
Do steps 1 and 2 to display the label of the
track or MD. Enter a new character over
the one you want to change, then press
TITLE/ENTER.
Notes
• You cannot relabel premastered MDs or
label MDs that have not been recorded.
•The recorder is able to display Japanese
"Katakana" characters. But you cannot
label with them on this recorder.
lO
3
o
n
O
Q.
0)
O.
7T
%/s
23
Page 24

►Power sources
^ ou ООП USO Iho uvordor on luniso ourront
or .IS U'ilows.
In ll\0 R44>rdor ...
- .1 lithium ion r^vhargonWo Kittorv
(supplit^l)
With sv\ppUod battorv c.xso ...
- dry h.Utorios (not supplioti)
CDn
•ф
It is protorablo to USO the roc^^rdor i>n
houso current when recording tor л U>ng
time.
Using on a lithium ion rechargeable battery
Before using the supplied LIP-12(H)
lithium ii>n rechargeable battery tor the
first time, charge it in the recorder.
1 Connect the supplied AC power
adaptor.
to wall outlet
2 Insert the LIP-12(H) into the recorder
and close the lid.
B.ittor\’ indication appears in the
display at\d charging starts.
When charging is completed, battery
indication disappears.
Charging time
To charge a completely discharged
battery, it takes the following time.
bO'/,
100':,
V
You can use the recorder while charging.
Approx. 2.5 hours
Approx. 5 hours
Notes
•Be sure to use the supplied AC power
adaptor.
•Charging lime may vary depending on the
battery condition.
24
Page 25

Using on dry batteries
1 ЛОЛкЬИм' supplù'il ЬлИогх o.xsx'
2 Insert two LRti (size AA) dry batteries
(not suppUedV
Battery life'*
Batteries Record- playback
Lir-l2UU Appro\. Approx,
lithium ion 5 hours 8 hours
rtvhargtMblo
KltttTN'
Twt> LKti
(size AA) 6.8 hours
St>nv «ilkaUno
dry batteries
LIP-12(H)
+ Two LR6 15 hours
(size AA)
"The battorv life mav be shorter due to
operating; conditions and the temperature
ot the kKation.
-'When you rect'rd. use a luHy charged
rechargeable battery.
'•Recording lime may differ according to the
alkaline batteries.
mg
-----
” Approx.
-----
Approx.
When to replace the batteries
When the dry batteries or rechargeable
battery are weak, flashing or "LOW
ВАТТ" appear in the display. Replace the
dry batteries or charge the rechargeable
battery.
. ^
“O
О
s
(D
\A
О
c
r>
Ф
25
Page 26

Precautions
On safety
Oo not put anv toroign objects in the IX'
IN 6 Vj.uk.
On power sources
• Use house current, lithium ion
rechargeable battery, two LRb (size
AA) batteries, or car battery.
• For use in your house: Use the AC
power adaptor supplied with this
recorder. Do not use any other AC
power adaptor since it may cause the
recorder to malfunction.
Polarity of
the plug ^
• The recorder is not disconnected from
the AC power source (mains) as long
as it is connected to the wall outlet,
even if the recorder itself has been
turned off.
• If you are not going to use this recorder
for a long time, be sure to disconnect
the power supply (AC power adaptor,
dry batteries, rechargeable battery, or
car battery cord). To remove the AC
power adaptor from the wall outlet,
grasp the adaptor plug itself; never
pull the cord.
• For use in the car: Use the CPA-9 car
connecting pack and the DCC-E260 car
battery cord (not supplied).
On heat build-up
Heat may build up in the recorder if it is
used for an extended period of time. In
this case, leave the recorder turned off
until it cools down.
On the headphones
Road safety
l\> not list' hoadphonos while dri\ ing.
cvcling. or ojx'r.Uing anv molori/tx! vohicU'.
It may create a traffic hazard and is illegal in
manv areas. It can also be potentially
dangerous tt' plav vour recorder at high
vt'lume while walking, esfxvialK’ at
ptxlestrian crossings. Yi>u shi>uld evercise
evlreme cautii>n or discontinue use in
piMentiallv hazardous situations.
Preventing hearing damage
A\ oid using headphones at high \ olume
Hearing experts adv’ise against continuous,
loud and extended plav. If vou experience a
ringing in your ears, reduce the volume or
discontinue use.
Caring for others
Keep llie v olume at a mexierate level. This
will alUnv you to liear outside sounds and to
be considerate of the people around you.
On the MiniDisc cartridge
• Do not break open the shutter.
• Do not place the cartridge where it will
be subject to light, extreme
temperatures, moisture or dust.
On cleaning
• Clean the recorder casing with a soft
cloth slightly moistened with water or
a mild detergent solution. Do not use
any type of abrasive pad, scouring
powder or solvent such as alcohol or
benzene as it may mar the finish of the
casing.
• Wipe the disc cartridge with a dry cloth
to remove dirt.
• Dust on the lens may prevent the unit
from operating properly. Be sure to
close the disc compartment lid after
inserting and ejecting an MD.
On installation
• Never use the recorder where it will be
subjected to extremes of light,
temperature, moisture or vibration.
• Never wrap the recorder in anything
when it is being used with the AC
power adaptor. Heat build-up in the
recorder may cause malfunction or
26
damage.
Page 27

Notes on batteries
Inci'iTivl b»iUor\ usai;o m.u lo.iJ to
ol ballorv tluiJ or burstii^j;
KiUoric's. To pro\ oiU such iUcidonts,
ol'*SiTvo tho tollowini; pnvaulions:
• Install tho + and - p».'los ot tlio batteries
corroctK'
• l\> not install new and used batteries
or ditiorent kinds ot batteries together.
• LX> not trv ti> recharge drv batteries.
• When the recorder is not [o be used tor
a long time, be sure to remove the
batteries.
• If a battery leak should develop,
carefully ai^d thoroughly wipe awav
battery fluid from the battery
compartment before inserting new
ones.
For customers in the USA
DISPOSAL OF LITHIUM lON.BATTERY.
UTHIUM ION BATTERY.
DISPOSE OF PROPERLY.
You can return your unwanted lithium
ion batteries to vour nearest Sonv
Service Center.
Note: In some areas the disposal of
lithium ion batteries in
household or business trash may
be prohibited.
For the Sony Service Center nearest
you call 1-800-222-SONY (United States
only)
Caution: Do not handle damaged or
leaking lithium ion battery.
Note on mechanical noise
The recorder produces out mechanical
noise while operating, which is caused by
the power-saving system of the recorder
and it is not a problem.
To protect a recorded MD
I o record-protect an MI"), slide i>^x'n the
tab at the side of tlu' KlD. In this jx>sition.
tiro MD cannv>t Ix' rc\\>rdi\i. To reci>rd
again, slide the tab back s^.> the tab is
visible.
Back of the MD
Note on digital recording
This recorder uses the Serial Copy
Management System, which allows only
first-generation digital copies to be made
of premastered software. You can only
make copies from a home-recorded MD
by using the analog (line out) connections.
CO player, MO
player, etc.
Digital recording
I
Je
Home- No Recordable
recorded digital MD
MD recording
If you have any questions or problems
concerning your recorder, please consult
your nearest Sony dealer.
>
Q.
Q.
O
3
SL
5’
o
•X
3
fi;
r+
o'
3
27
Page 28

T roubleshooting
Should .my problem persists after you have made these cheeks, consult your nearest Sony
dealer.
Symptom
The recorder devs not tvork
or works prxirly.
No sound comes through
the headphones.
An MD is not played from
the first track.
Cause/Solution
• Audio sources may not be securely connected.
♦ Disconnect the audio sources once and connect
them again (pages 6,11)-
• Moisture has condensed inside the recorder.
Take the MD out and leave the recorder in a
warm place for several hours until the moisture
evaporates.
• The rechargeable battery or dry batteries are weak
(C3 or "LOW ВАТТ" flashes).
♦ Charge the rechargeable battery or replace the
dry batteries (pages 24, 25).
• The rechargeable battery or dry batteries have been
installed incorrectly.
♦ Install the batteries correctly (page 25).
• You pressed a button while the disc indication was
rotating quickly.
Wait until the indication rotates slowly.
• The recording volume is too low.
• The AC adaptor was unplugged during recording or
a power outage occurred.
• While operating, the recorder received a mechanical
shock, too much static, abnormal power voltage
caused by lightning, etc.
Restart the operation as follows.
1 Disconnect all the power sources.
2 Leave the recorder for about 30 seconds.
3 Connect the power source.
> The headphones plug is not firmly connected.
^ Connect the headphones with a repiote controller
plug firmly to D/REMOTE.
> Volume is too low.
Adjust the volume by pressing VOLUME +/(VOL +/- on the remote controller).
• AVLS is on.
♦ Slide AVLS to NOMAL (page 17).
• Disc playing stopped before it came to the last track.
♦ Press repeatedly or open and close the lid
once to go back to the beginning of the disc, and
restart playing after checking the track number in
the display.
•
28
Page 29

Symptom
n.ivKick souvul skips.
Stiund has a lot of static.
Cannot find the track
marks.
Charging the rechargeable
battery does not start.
The clock loses time or the
display flashes.
The recording date was not
stamped onto the disc.
Cause/Solution
• The rcvorder is placcKf where it receives continuous
vibration.
♦ Put the recorder on a stable place.
• A very short track may cause sound to skip.
« Strong magnetism from a television or such device is
interfering with operation.
♦ Move away from the source of strong magnetism.
• You pressed II after pressing or
♦ Press II before pressing or
• The rechargeable battery has been inserted
incorrectly or the AC power adaptor has been
connected incorrectly.
>► Insert the battery correctly or connect the AC
power adaptor correctly.
• The built-in battery for a clock is weak.
♦ Connect the AC power adaptor to DC IN 6 V on
the recorder and the wall outlet to charge the
built-in battery. After charging, set the clock
again. Note that the clock normally loses about 2
minutes per month (page 15).
>
Q.
O.
r+
o’
3
SL
5*
o
■t
3
ùi
«-♦
5’
3
29
Page 30

System limitations
Tho Rvordinj; svstom in vour MiniDisc Rvordor is radicallv dittoront trom those used in
cassette and DAT decks and is characterized b\' the linhtations dL'scrilx\1 lx'!i>\v. Note,
liowe\ er, that these limitations are due to the inheretU nature ot the MD recording s\ stem
itsi'lt and iH>t ti> mechanical causes.
Symptom
"TR FULL” appears even
before the disc has reached the
maximum recording time (60 or
74 minutes).
"TR FULL" appears e\’en
before fhe disc has reachexi the
maximum track number or
recording time.
Track marks cannot be erased.
The remaining recording time
does not increase even after
erasing numerous short tracks.
The total recorded time and the
remaining time on the disc may
not total the maximum
recording time (60 or 74
minutes).
The edited tracks may exhibit
sound dropout during search
operations.
Cause
When 254 tracks ha\ e been recorded on the disc,
"TR FULL" appears regardless of the total
recorded time. More than 254 tracks cannot he
recorded on the disc. To continue recording, erase
unnecessary tracks.
Repeating recording and erasing may cause
fragmentation and scattering of data. Although
those scattered data can be read, each fragment is
counted as a track. In this case, the number of
tracks may reach 254 and further recording is not
possible. To continue recording, erase
unnecessary tracks.
When the data of a track is fragmented, the track
mark of a fragment under 12 seconds long cannot
be erased.
Tracks of under 12 seconds in length are not
counted and so erasing them may not lead to an
increase in the recording time.
Recording is done in minimum units of 2 seconds
each, no matter how short the material. Even if
the last unit of recording is less than 2 seconds, it
is counted as a unit of 2 seconds. Then 2 seconds'
space is put before recording starts again to
prevent the last unit of the previous track from
being erased. The contents recorded may thus be
shorter than the maximum recording capacity.
The fragmentation of data may cause sound
dropout while searching because the tracks are
played in higher speed than normal playback.
30
Page 31

Error messages
U the toUowinj; error
Error message
BLANKDISC
DISC ERR
DISC FULL
BUSY
NAME FULL
Hi DC in
HOLD
LOW ВАТТ
MEM OVER
NO COPY
NO DISC
messages tlash m the display window, check the chart below.
Meaning/Remedy
• An MD with no recording on it is inserted.
♦ Insert a recorded MD.
• The recorder cannot read the disc (it's scratched or dirty).
♦ Reinsert or replace the disc.
• There is no more space to record on the disc (less than 12
seconds available).
♦ Replace the disc.
• You tried to operate the recorder while it was accessing the
recorded data.
♦ Wait until the message goes out (in rare cases, it may take
2-3 minutes).
• You tried to enter more than 200 characters for a track or disc
name or the total characters entered in an MD is more than
1700.
♦ Enter the characters within the limit.
• Power supply is too high (The supplied AC power adaptor or
the recommended car battery cord is not used).
Use the supplied AC power adaptor or the recommended
car battery cord.
• The recorder is locked.
♦ Slide HOLD against the allow to unlock the recorder
(page 18),
• Batteries are weak.
>*■ Charge the rechargeable battery or replace the dry
batteries (pages 24,25).
• You tried to record when there is no indication in the display,
and the recorder is placed where it receives continuous
vibration,
♦ Put the recorder on the stable place, and start recording
again.
• You tried to make a cop.y from a disc that is protected by the
Serial Copy Management System. You cannot make copies
from a digitally connected source which was itself recorded
using the digital connection.
Use the analog connection instead (page 6).
• You tried to play or record with no disc in the recorder.
♦ Insert an MD.
>
о.
Q.
r+
o‘
3
SL
5'
О
3
Ш
5'
3
31
Page 32

Error message
NO SIGNAL
PB ONLY
PROTECTED
SORRY
TEMP OVER
TRFULL
TrPROTECT
Meaning/Remedy
• The recorder could not detect digital input signals.
♦ Make sure that the source is connected firmly (page 11).
•If the error message appears while recording, press ■ to stop
recording.
• You tried to record or edit on a premastered MD (PB means
playback.)
<¥■ Insert a recordable MD.
• You tried to record or edit on a MD with the tab in the recordprotect position.
•¥■ Slide the tab back (page 27).
• You tried to erase a track mark while playing the MD or at the
beginning of the first track.
• You tried to erase a track mark to combine tracks the recorder
cannot combine, (caused by system limitation)
• Heat has built up in the recorder.
♦ Let the recorder cool down.
• There is no more space for new dafa when you are editing the
MD.
♦ Erase unnecessary tracks (page 20).
• You tried to record or edit on a track that is protected from
erasing.
♦ Record or edit on other tracks.
32
Page 33

Specifications
System
Audio playing system
MiniDisc digital audio svstctr»
Laser diode properties
Material; GaAlAs
Wavelength: Л = 780 nm
Emission duration: continuous
Laser output: less than 44.6 gW
(This output is the value measured at a
distance of 2(X) mm from the lens surface on
the optical pick-up block.)
Recording and playback time
Maximum 74 minutes (MDW-74, stereo
recording)
Maximum 148 minutes (MDW-74, monaural
recording)
Revolutions
400 rpm to 9(Ю rpm (CLV)
Error correction
Advanced Cross Interleave Reed'Solomon
Code (ACIRC)
Sampling frequency
44.1 kHz
Sampling rate converter
Input: 33 kHz/44.1 kHz/48 kHz
CcHling
Adaptive TRansform Acoustic Coding
(ATRAC)
Modulation system
EFM (Eight to Fourteen Modulation)
Number of channels
2 stereo channels
1 monaural channel
Frequency response
20 to 20,000 Hz ± 3 dB
Wow and Flutter
Below measurable limit
Inputs
Microphone: stereo mini-jack, 0.22 - 0.78 mV
Line in: stereo mini-jack, 69-194 mV
Optical (Digital) in: optical (digital) mini-jack
Outputs
Headphones: stereo mini-jack, maximum
output level 5 mW+ 5 mW, load impedance
16 ohm
Line out: stereo mini-jack, 194 mV, load
impedance 10 kilohm
General
Power requirements
Si>nv AC l\>wor Adaptor (supplioti)
connected at the DC IN 6 V' j.u'k;
120 V AC, 60 Hz (US miKlel)
230-240 V AC, 50/60 Hz (UK model)
240 \' AC, 50/60 Hz (Australia and New
Zealand nuKlel)
UKl-240 V AC, 50/60 Hz (Other models)
Lithium ion rechargeable battery L1P-12(H)
(supplied)
Two LR6 (size AA) alkaline batteries (not
supplied)
Battery operation time
See "Battery life" (page 25)
Dimensions
Approx. 116.5x 26 X 78 mm (w/h/d)
(4 ^/s X 1 Vih X 3 Vii in.)
Mass
Approx. 220 g (7.1 oz) the recorder only
Approx. 364 g (11.7 oz) for US model, 317 g
(10.2 oz) for other models ; inch a recordable
MD, headphones with a remote controller,
and LIP-12 lithium ion rechargeable battery
Supplied accessories
AC power adaptor (1)
Headphones with a remote controller (1)
LIP-12(H) lithium ion rechargeable battery
(1)
Ear pads (2)(Except for US model)
Carrying case (1)
Dry battery case (1)
>
Ol
Q.
r+
5*
3
SL
5‘
о
"I
3
&)
r+
5'
3
33
Page 34

Optional accessories
1 M'-12 \ ithuim \o\\ rtvliarj;tMbIo KUtorv
1\-Ml’! 1 K'l Mkri> pint; .KlapU'r
(SUtoo mim plug —» Micro plug)
Optical Cable
K X '- 1 51H C ; , 1 \ X ' -I p 2 H G , r c X ' - MZ I ,
1 X X-M Z 2 , 1 X X - I 3B . I\ X ' - I 3 A H . I X X -
D A 1 2 S
CI’A*^^ Car Connocting Pack
DCC-E260 Car Battorv C\>rd
ECM-MSW, ECM-WA. ECM-717 SteriH>
Microplu>nes
MDR-D77, MDR-D55 StertHt Headphones
SRS-A41, SRS-A^l Active Speakers
MDVV-74/74A, MDW-74L/74R/74Y, MDWhO/WlA Recordable MDs
CK-MD4 MiniDisc Carrying Case
CK-MDUl MiniDisc Filing Bt>\
'l our dealer mav ru>t handle some t't the
above listed accessories. Please ask the
dealer tor detailed intt'rmation about the
accessories in vour country.
US and foreign patents licensed from Dcilbv
Laboratories Licensing Corporation.
Design and specifications are subject to
change without notice.
What is MO?
How MiniDisc works
MiniDisc (MD) comes in two types:
prenustered (prerecorded) and
rtvordable (blank). Premastered MDs,
recorded at music studios, can be playcM
back almost endlessly. Howewr, they
can't be rcvi>rded on or m er like cassette
tapes. To record, you must use a
"recordable MD".
Premastered MDs
Premastered MDs are recorded and
played like regular CDs. A laser beam
focuses on the pits in the surface of the
MD and reflects the information back to
the lens in the recorder. The recorder then
decodes the signals and plavs them back
as music.
Recordable MDs
Recordable MDs, which use magneto
optical (MO) technology, can be recorded
again and again. The laser inside the
recorder applies heat to the MD,
demagnetizing the magnetic layer of the
MD. The recorder then applies a magnetic
field to the layer. This magnetic held
corresponds exactly to the audio signals
generated by the connected source. (The
north and south polarities equate to
digital "1" and "0".) The demagnetized
MD adopts the polarity of the magnetic
field, resulting in a recorded MD.
34
0
Page 35

How the MiniDisc got so smalt
Tho 2.5-MK'h MiniPisc. oncas<.\i in a
plastic cartridge that KH>ks like a 3.5-incl\
diskette (see' illustration below), list's a
new digital audio compression
technology called ATRAC (Adaptive
TRansfiirm Acoustic Ctxiing). To store
more sound in less space, ATRAC extracts
and enctxies only those frequency
comptMients actually audible to the
human ear.
Quick Random Access
Like CDs, MDs offer instantaneous
random access to the beginning of any
music track. Premastered MDs are
recorded with location addresses
corresponciing to each music selection.
Recordable MDs are manufactured with a
"User T(XT Area" to contain the order of
the music. The TOC system is similar to
the "directory management system" of
floppy disks. In other words, starting and
ending addresses for all music tracks
recorded on the disc are stored in this
area. This lets you randomly access the
beginning of any track as soon as you
enter the track number (AMS), as well as
label the location with a track name as
you would a file on a diskette.
Shock-Resistant Memory
One major drau back of optical read
systems is that they can skip t>r mute
when subjected to vibration. The MD
system resolves this problem by using a
buffer memorv that stores audio data.
>
Q.
Û.
r+
5‘
3
ÊL
5'
o
3
Û)
r+
5‘
3
User TOC Area Music Data
Contains the order and start/end
points of the music.
35
Page 36

Looking at the controls
Sot' pages in () for more details.
The recorder
Q] TITLE/ENTER button(22)
[2] Battery compartment (on the bottom)
(24)
[3] MODE button (16)
g] DISPLAY button (14,18)
[5] MIC SENS switch (on the bottom) (12) 51 (search / AMS) button (7,9)
fSl AVLS switch (on the bottom) (17)
E] DC IN 6V jack (at the rear) (6)
[8] Display window (14,18)
[9] SYNCHRO REC (synchro-recording)
switch (11)
53 MIC (PLUG IN POWER) jack (12)
53 LINE IN (OPTICAL) jack (6,11)
51 LINE OUT jack (19) 5TI clock set button (on the bottom)
51 DIGITAL MEGA BASS button (17) (15)
53 0 (headphones)/REMOTE jack (8)
51 Vertical jog dial (16,22)
51 TRACK MARK button (21)
51 END SEARCH button (7)
51 ERASE button (20)
53 ► (play) button (7,9)
53 H (pause) button (7,9)
53 VOLUME +/-button (9)
51 HOLD switch (18)
53 REC (record) switch (7)
51 ■ (stop) button (7,9)
51 OPEN button (6)
36
Page 37

The display window
□□□□□□□□□□□□□□□a'
iMONOl IS/4SSr-1[Zll
SYNCI AMjJTn . n n
m Position indicator (14,18)
Shows the current location on the MD.
The point under recording or playing
flashes. The recorded portion lights
up.
Current location
0%
Recorded portion
Disc length
[2 MONO (monaural) indication
[3l Play mode indication
Shows the play mode of the MD.
[4] Disc indication
Shows that the disc is rotating for
recording, playing or editing an MD.
is] SYNC (synchro-recording) indication
[6] REC indication (7)
Lights up while recording. When
flashing, the recorder is in record
standby mode.
50%
mrmm
umrm
pmJ U U • U U,
fn Level meter
Shows the volume of the MD being
played or recorded.
[8] AM/PM indication (15)
Lights up along with the time
indication in the 12-hour system.
f9l Mega bass indication (17)
53 Battery indication (24)
100%
Shows battery condition.
531 REMAIN (remaining time/tracks)
indication (14,18)
Lights up along with the remaining
time of the track, the remaining time
of the MD, or the remaining number
of tracks.
51 REC DATE (recorded/current date)
indication
Lights up along with the date and
time the MD was recorded. When only
"DATE" lights up, the current date
and time are displayed.
51 Time display (14,15,18)
Shows the recorded time, current time,
. elapsed time of the track or MD being
recorded or played.
53 Character information display (14,18)
Displays the disc and track names,
date, error messages, track numbers,
etc.
-m
>
Q.
a
o'
3
S2-
5‘
o
T
3
cu
5'
3
37
Page 38

The headphones with a remote controller
m
m Headphones
Can be replaced with optional
headphones.
[2] VOL (volume) +/- buttons (9)
[3] ► (play)/M^ /►W (search, AMS)
buttons
Press ► to play. While playing, press
the side to find beginning of the
current or preceding tracks or to
search backward, or press the
side to find the beginning of the
succeeding tracks or to search
forward.
38
H] TRACK MARK button (21)
[5] II (pause) button (7,9)
[S HOLD switch (18)
Slide to lock the controls of the remote
controller.
[T] ■ (stop) button (7,9)
 Loading...