

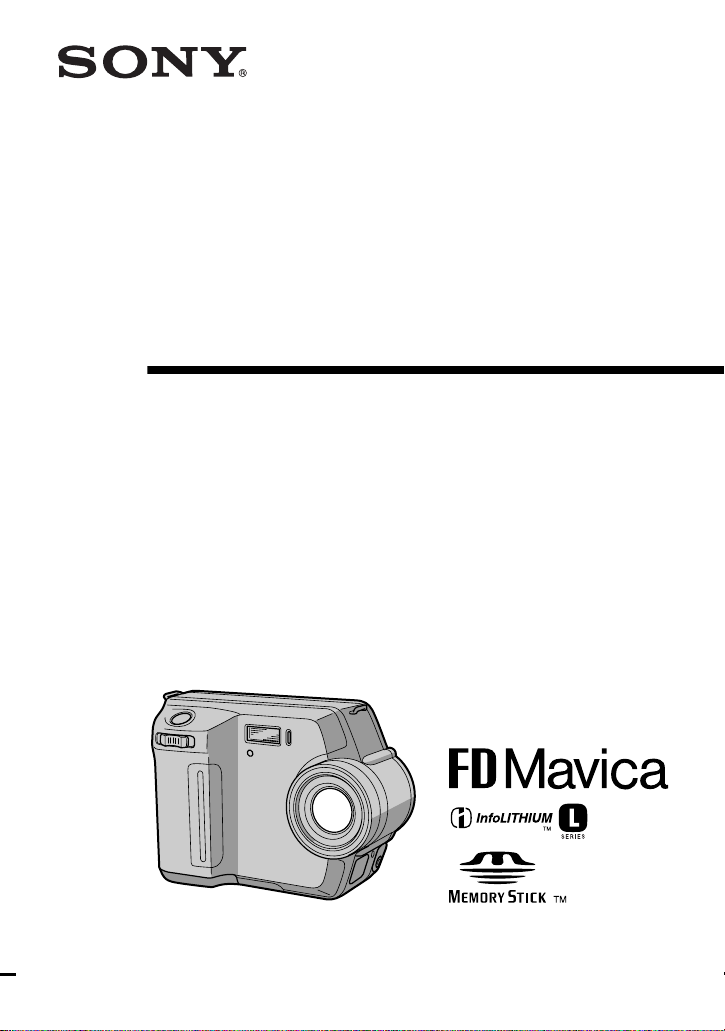
Sony MVC-D200 Operating Instructions
3-073-074-13(1)
Digital Still Camera
Operating Instructions
Before operating the unit, please read this manual thoroughly, and retain it
for future reference.
Owner’s Record
The model and serial numbers are located on the bottom. Record the serial
number in the space provided below. Refer to these numbers whenever you
call upon your Sony deal er regarding this produ ct .
Model No. ________________________
Serial No. _______ ______________ ___
MVC-FD100/FD200
©2002 Sony Corporation
.
WARNING
To prevent fire or shock hazar d, do
not expose the unit to rain or
moisture.
For the Customers in the
U.S.A.
This symbol is intended to
alert the user to the presence
of uninsulated “dangerous
voltage” within the
product’s enclosure that
may be of sufficient
magnitude to constitute a
risk of elec tr ic shock to
persons.
This symbol is intended to
alert the user to the presence
of important operating and
maintenance (servicing)
instructions in the lite rature
accompanying th e
appliance.
If you have any questions about this product,
you may call:
Sony Customer Information Center
1-800-222-SONY (7669)
The number below is for the FCC related
matters only.
Regulatory Information
Declaration of Conformity
Trade Name: SONY
Model No.: MVC-FD100
Responsible Party:Sony Electronics Inc.
Address: 16450 W. Bernardo Dr ,
Te lep hone Number:
This devic e compli es with Pa rt 15 of the FCC
Rules. Operation is subject to the following
two conditions: (1) This device may not
cause harmful interference, and (2) this
device must accept a ny interferen ce recei ved,
including interference t hat may cause
undesired operation.
San Diego, CA 92127
U.S.A.
858-942-2230
Declaration of Conformity
Trade Name: SONY
Model No.: MVC-FD200
Responsible Party:Sony Electronics Inc.
Address: 16450 W. Bernardo Dr ,
Te lep hone Number: 858-942-2230
This devic e compli es with Pa rt 15 of the FCC
Rules. Operation is subject to the following
two conditions: (1) This device may not
cause harmful interference, and (2) this
device must accept a ny interferen ce recei ved,
including interference t hat may cause
undesired operation.
San Diego, CA 92127
U.S.A.
CAUTION
You are cautioned that any changes or
modifications not expressly approved
in this manual could void y our
authority to operat e t hi s equipment.
Notes:
• This equipment has been tested an d fou nd
to comply with the limits for a Class B
digital device, pursuant to Part 15 of the
FCC Rules. These limits are designed to
provide reasonable protection against
harmful interference in a residential
installation. This equipment generates,
uses, and can radiate radio frequency
energy and, if not installed and used in
accordance with the instructions, may
cause harmful interference to radio
2

communications. However, there is no
guarantee that interference will not occur
in a particular installat ion. If this
equipment does cause harmful interference
to radio or television reception, which can
be determined by turning the equipment
off and on, the user is encouraged to try t o
correct the interference b y one o r more of
the following measur es:
— Reorient or relocate the receiving antenna.
—Increase the separation between the
equipment and receiver.
—Connect the equipment into an outlet on
a circuit different from that to which the
receiver is connected.
—Consult the dealer or an experienced
radio/TV technician for help.
The supplied interface cable must be used
with the equipment in order to comply
with the limits for a digital device pursuant
to Subpart B of Part 15 of FCC Rules.
• This product contains mercury. Disposal of
this product may be regulated if sold in the
United States. For disposal or recycling
information, please contact your local
authorities or the Electronics Industries
Alliance (http://w w w.eiae.org).
For the Customers in the
U.S.A. and Canada
RECYCLING LITHIUM-ION
BATTERIES
Lithium-Ion batteries are
recyclable.
You can help preserve our
environment by returning your
used rechargeable batteries to
the collection and recycling location nearest
you.
For more information regarding recycling of
rechargeable batteries, call toll free
1-800-822-8837, or
visit http://www.rbrc.org/.
Caution:Do not handle damage d or leaking
Lithium-Ion batteries.
CAUTION
TO PREVENT ELECTRIC SHO CK, DO NO T
USE THIS POLARIZED AC PLUG WI TH
AN EXTENSION CORD, RECEPTA C LE OR
OTHER OUTLET UNLESS THE BLADES
CAN BE FULLY INSERTED TO PREVENT
BLADE EXPOSURE.
NOTICE FOR THE
CUSTOMERS IN THE UNITED
KINGDOM
A moulded plug complying with BS 1363 is
fitted to this equipment for your safety a nd
convenience.
Should the fuse in the plug supplied need to
be replaced, a 5 AMP fuse approved by
ASTA or BSI to BS 1362, (i.e. marked with
or mark) must be used.
If the plug supplied with this equipment has
a detachable fuse co v er, be sure to a ttach t he
fuse cover after you change the fuse. Never
use the plug without the fuse cover. If you
should lose the fuse cover, please contact
your nearest Sony service station.
For the Customers in
Germany
Directive:EMC Directive 89/336/EEC.92/
31/EEC
This equipment complies with the EMC
regulations when used under the following
circumstances:
• Residential area
• Business district
• Light- industry district
(This equipment complies with the EMC
standard regulations EN55022 Clas s B.)
Attention for the Customer s in
Europe
This product has been tested and found
compliant with the limits sets out on the
EMC Directive for using connection cables
shorter than 3 meters (9.8 feet).
The electromagnetic fields at the specific
frequencies may influence the picture of this
camera.
3

Be sure to read the following
before using your camera
Operating instructions
Before operating the unit, please read this
manual thoroughly, and retain it for future
reference.
As you read through this manual, buttons
and settings on the camera are shown in
capital letters.
e.g. Press DISPLAY.
Trialrecording
Beforeyou recordone-timeevents,you may
want to make a trial recording to make sure
that the camera is working correctly.
No comp ensat ion for contents of
the recording
The recorded imagescannot be
compensated if recording or playback
cannot be performed due to atrouble ofyour
camera or recording medium.
Notes on image data compatibility
of the “Memory Stick”
• Thiscamera conformswith theDesign rule
for Camera File system universal standard
established by the JEITA (Japan
Electronics and Information Technology
Industries Association). You cannot play
back on yourcamera still imagesrecorded
on other equipment (DCR-TRV890E/
TRV900/TRV900E, DSC-D700, DSCD770) that does not conform with this
universal standard. (These models are not
sold in some areas.)
• Playback of images recorded with your
camera on other equipment and playback
of images recorded or edited with other
equipment on your camera are not
guaranteed.
Precaution o n copyright
Televisionprograms, films, video tapes, and
other materials may be copyrighted.
Unauthorized recordingof s uch materials
may be contrary to the provision of the
copyright laws.
Do not shake or strik e the camera
In addition to malfunctions and inability to
record images, this may render the floppy
disks or the “Memory Stick”s unusable or
image data breakdown, damage or loss may
occur.
LCD screen, finder (only models
with a finder) and lens
• The LCD screen and the finder are
manufactured using extremely highprecision technology so over 99.99% of
the pixels are operational for effective use.
However, there may be some tiny black
points and/or bright points (white, red,
blue or green in color) that constantly
appear on the LCD screen and the finder.
These points are normal in the
manufacturingprocess and do not affect
the recording in any way.
• Be careful when placing the cameran ear a
window or outdoors. Exposing the LCD
screen, the finder or the lens to direct
sunlight for long periods may cause
malfunctions.
Do not get the camera wet
When taking pictures outdoors in the rain or
under similar conditions, be careful not to
get the camerawet. If moisture
condensation occurs, refer to page 83 and
follow the instructions on how to remove it
before using the camera.
Back up recommendation
To avoid the potential risk of data loss,
always copy (back up) data to a disk.
When the camera is used for long
periods
Note that the camera body may become hot.
4
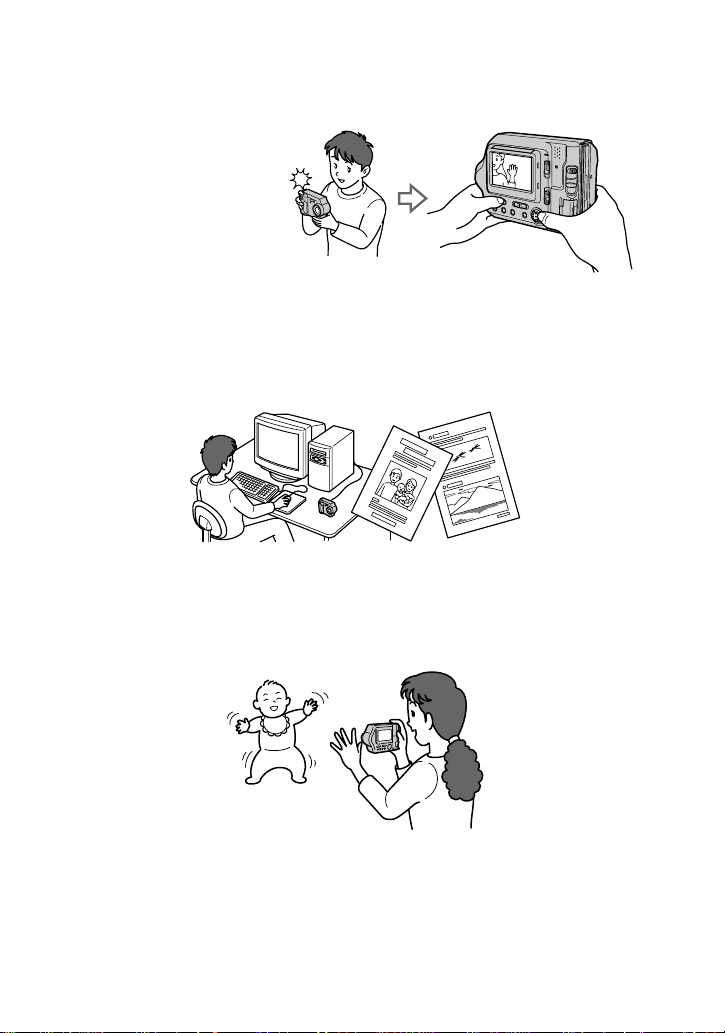
Introduction
Check images after recording
Recording still images:
page 18
Playing back still images:
page 24
Deletingimages(DELETE):
page 75
Capture images with your computer
You can copy images onto your computer and view and modify images or attach
images to e-mail on your computer using the supplied USB cable and application
software.
Viewing images using a computer: page 27
Recording still images for e-mail (E-MAIL): page 61
Records a moving picture
The digital still camera can record a moving picture for maximum 60 seconds. Your
camera does not record sound.
Recording moving images: page 23
Select from various recording modes
Creating Clip Motion Files: page 59
Recording text documents (TEXT): page 62
Recording still images as uncompressed files (TIFF): page 63
5

Table of contents
Introduction ..................................... 5
Getting started
Identifying the parts ........................ 7
Preparing the power supply ............ 9
Setting the date and time ............... 14
Inserting a floppy disk .................. 16
Inserting a “Memory Stick” .......... 17
Basic operations
B Recording
Recording still images .................. 18
Recording moving images ............ 23
B Playback
Playing back still images .............. 24
Playing back moving images ........25
Viewing images using a computer 27
Image file storage destinations and
image file names ..................... 38
Viewing images using
“ImageMixer” ......................... 42
Advanced operations
Before performing
advanced operations
How to use the PLAY/STILL/
MOVIE selector ..................... 48
How to use the control button ....... 48
How to change the menu settings
B Various recording
Setting the image size
(IMAGE SIZE) ....................... 57
Creating Clip Motion Files ........... 59
Recording still images for e-mail
(E-MAIL) ............................... 61
Recording text documents
Recording still images as
uncompressed files (TIFF) ..... 63
Recording images in macro .......... 64
Setting the distance to the subject .64
Using the PROGRAM AE function
.... 50
(TEXT) .62
... 65
Adjusting the exposure
(EXPOSURE) ......................... 67
Adjusting the white balance
(WHITE BALANCE) ............. 68
Recordingthedateandtimeonthe
still image (DATE/TIME) ......69
Enjoying picture effects
(PICTURE EFFECT) ............. 69
B Various playback
Playing back six images at once
(INDEX) ................................ 70
Enlarging a part of the still image
(Zoom and trimming) ............ 71
Playing back the still images in order
(SLIDE SHOW) .....................72
ViewingimagesonaTVscreen...73
B Editing
Preventingaccidentalerasure
(PROTECT) ............................ 74
Deleting images (DELETE) ..........75
Changing the recorded still image
size (RESIZE) ......................... 76
Copying images (COPY) ..............77
Copying all the information on your
floppy disk (DISK COPY) .....79
Selecting still images to print
(PRINT MARK) ..................... 80
Format ........................................... 81
B As an external drive
Using the camera as an external drive
of a computer .......................... 82
Additional information
Precautions ....................................83
On “Memory Stick”s .................... 85
Using your camera abroad ............ 85
About “InfoLITHIUM” battery
pack ........................................ 86
Troubleshooting ............................ 88
Warning and notice messages ....... 93
Self-diagnosis display ...................95
Specifications ................................ 96
LCD screen indicators .................. 97
Index ............................................. 99
6
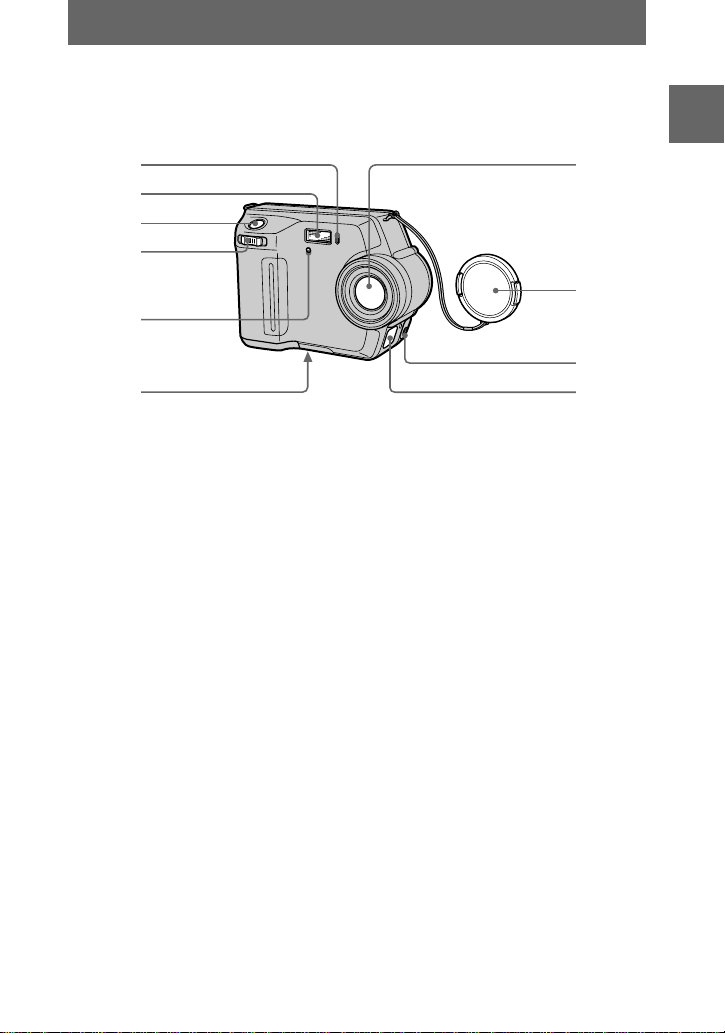
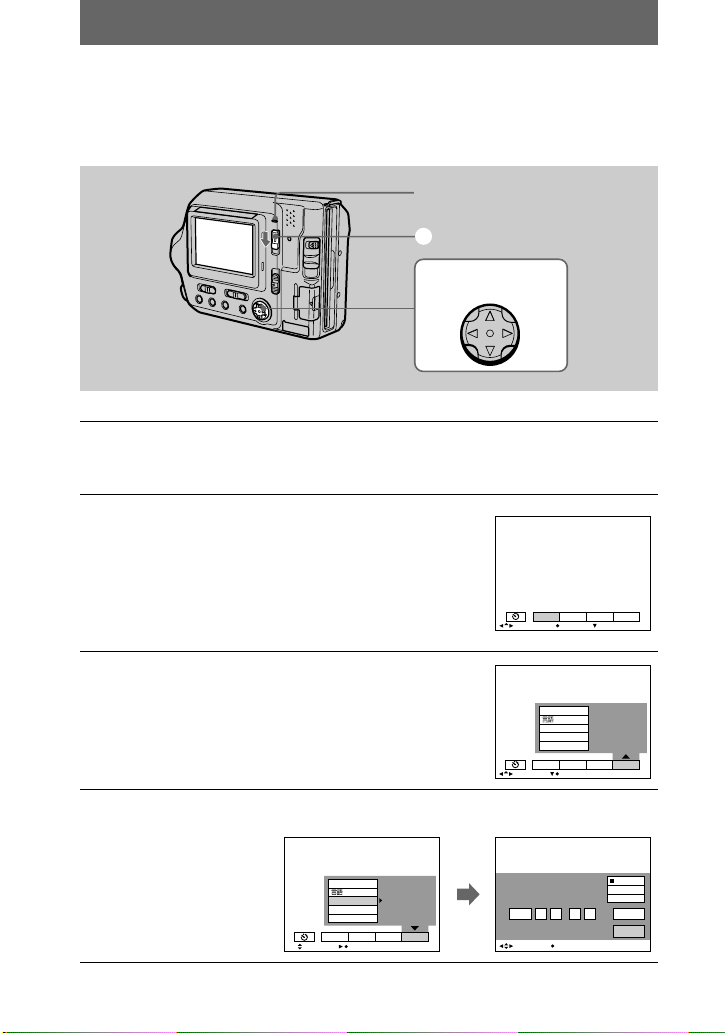
Getting started
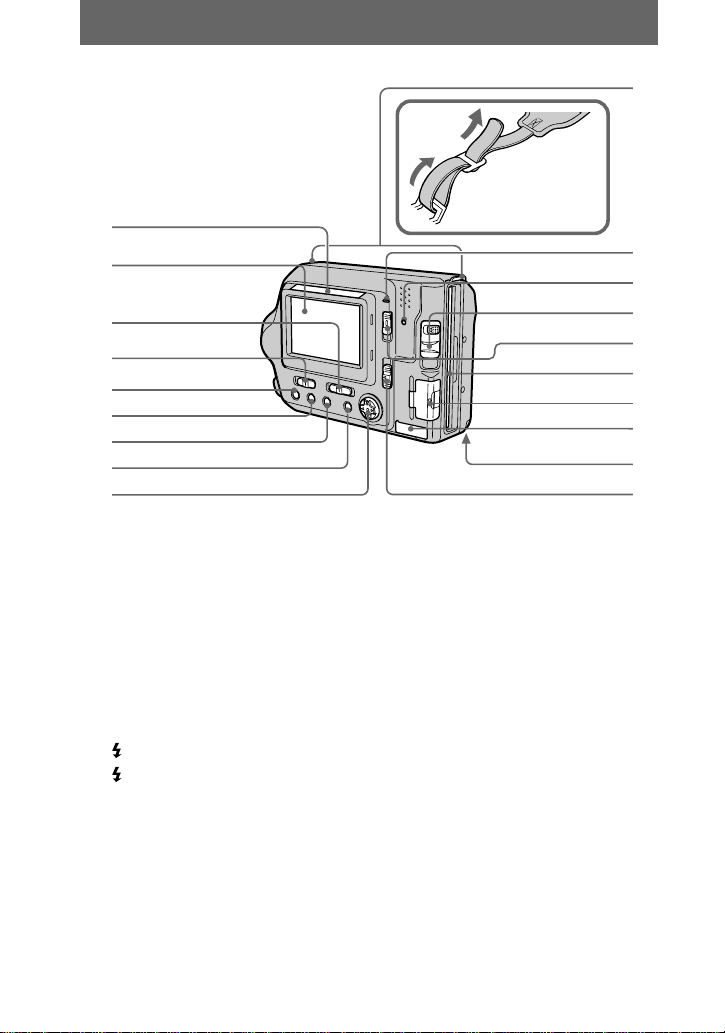
Identifying the parts
See the pages in parentheses for details of operation.
1
2
3
4
5
6
7
Getting started
8
9
0
Self-timer lamp (21)
A
Flash (22)
B
Shutter button (18, 23)
C
Zoom lever (20)
D
Photocell window for flash
E
Do not block while recording.
Tripod receptacle (bottom
F
surface)
Useatripodwithascrewlengthof
less than 5.5 mm (7/32 inch). You
cannot firmlysecurethecamerato
tripods having longer screws, and
may damage the camera.
Lens
G
Lens cap (supplied)
H
VIDEO OUT jack (73)
I
DC IN cover/DC IN jack (10, 13)
J
7
qa
qs
qd
qf
qg
qh
qj
qk
ql
w;
Attaching the
shoulder strap
wa
ws
wd
wf
wg
wh
wj
wk
wl
Photocell window for LCD
K
screen
The LCD screen becomes brighter
when exposed to sunlight.
LCD screen
L
PLAY/STILL/MOVIE selector
M
(48)
LCD BACKLIGHT switch ( 20)
N
(Flash) button/
O
(Flash) lamp (22)
FOCUS button (64)
P
PROGRAM AE button (65)
Q
DISPLAY button (21)
R
Control button (48)
S
8
Hooks for strap
T
POWER ON/OFF (CHG)
U
(Charge) lamp (10)
Access lamp (18, 19)
V
DISK EJECT lever (16)
W
POWER switch (14)
X
Floppy disk slot (16)
Y
“Memory Stick” cover/
Z
“Memory Stick” slot (17)
USB cover/USB jack (29)
wj
Battery cover (9)
wk
MS /FD (“MemoryStick”/floppy
wl
disk) selector
Preparing the power supply
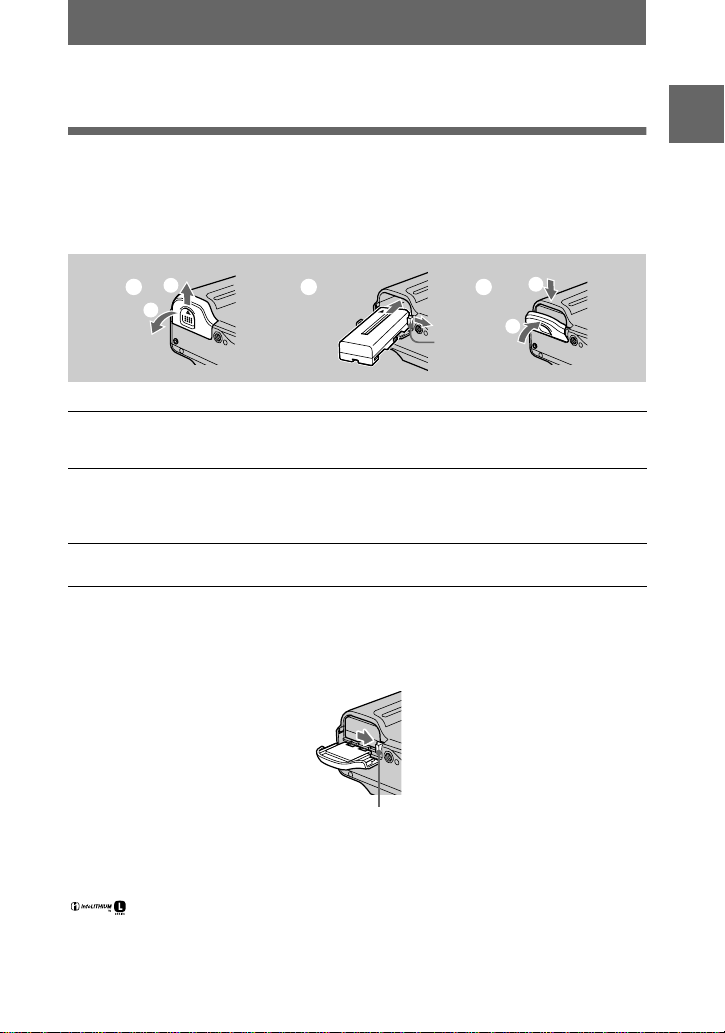
Installing the battery pack
Your camera operates only with the NP-F330 (supplied)/F550 (optional)
“InfoLITHIUM” battery pack* (L series). See page 86 for more information about
“InfoLITHIUM” battery pack.
1
1 2 3
2
Battery
eject lever
Open the battery cover.
1
Slide the battery cover in the direction of the arrow.
Install the battery pack.
2
Pressandholdthe battery eject leverand then insert the batterypack with the
mark facing toward the battery compartment.
Close the battery cover.
3
T o rem ove the battery pack
Open the battery cover. Slide the battery eject lever rightward, and remove the
battery pack.
Be careful not to drop the battery pack when removing it.
2
1
Getting started
v
Battery eject lever
What is “InfoLITHIUM”?
*
“InfoLITHIUM” is a lithium ion battery pack which can exchange information such as battery
consumption with compatible video equipment. “InfoLITHIUM” L series battery packs havethe
mark. “InfoLITHIUM” is a trademark of Sony Corporation.
9

Charging the battery pack
When the camera is turned on, you cannot charge the battery pack. Be sure to turn off
the power of the camera.
To DC IN jack
2
AC-L10A/L10B
AC power adaptor
1
Battery pack
Insert the battery pack into your camera.
1
Open the DC IN cover and connect th e AC power adaptor to the DC
2
IN jack of your c amera with the
Connect the power cord (mains lead) to the AC power adaptor and
3
then to a wall outlet (wall socket).
The POWER ON/OFF (CHG) lamp (orange) on the right of the LCD screen
lightsup whencharging begins.When the POWER ON/OFF (CHG) lamp goes
off, full charge is completed.
To a wall outlet (wall socket)
mark facing up.
v
Power cord
(mains lead)
3
After charging the battery pack
Disconnect the AC power adaptor from the DC IN jack on your camera.
Battery remaining indicator
The LCD screen on the camera shows the remaining time for which you can still
record or play back images.
This indicationmay not be entirely accurate dependingon the conditions of use and
the operating environment.
We recommend charging the battery pack in an ambient temperature of between
10°Cto30°C(50°Fto86°F).
10

NP-F330 (supplied)/F550 (optional) battery pack
When you record images in an extremely cold location or using the LCD screen, the
operating time becomes short. When using the camera in an extremely cold location,
place the battery pack in your pocket or other place to keep it warm, then insert the
battery pack in to the cam er a jus t before recording. When using a pocket h e a te r, take
care not to let the heater directly contact the battery.
Auto power-off function
If you do not operate the camera for about three minutes when using a battery pack,
the camera turns off autom atically to pre vent wearing dow n the battery pack. To use
the camera again, slide th e POWER switch down to turn on the camera again.
Note on the POWER ON/OFF (CHG) lamp during charging
The POWER ON/OFF (CHG) lamp may flash:
• When a malf u nction occurs in the ba ttery pa c k.
The POWER ON/OFF (CHG) lamp does not light up:
• When th e ba tte ry pac k is n o t ins talle d pr op er ly.
Charging time
Battery pa c k Full charge (min.)
NP-F330 (supplied) Approx. 150
NP-F550 Approx. 210
This represents the time required to charge a completely discharged battery pack
using the supplied AC-L10/L10B AC power adaptor in an environment where the
ambient temperature is 25°C (77°F).
The number of images that can be recorded/played back and battery
life
The tables show approximate guidelines for the length of time the camera can be used
when you record in Normal mode with the LCD BACKLIGHT switch ON in an
environment where the ambient temperature is 25°C (77°F), and the battery pack is
fully charged. The guidelines for the number of images that can be recorded or
played back shown below allow for changing a floppy disk or “Memory Stick” as
necessary. Please note that the numbers and time shown in the following table,
“Recordin g still imag es u nder average conditions,” are only for reco rdin g wi th a
“Memory Stick.” Actual resu lts may differ slightly from these, dependin g on the
conditions of use.
Getting started
11
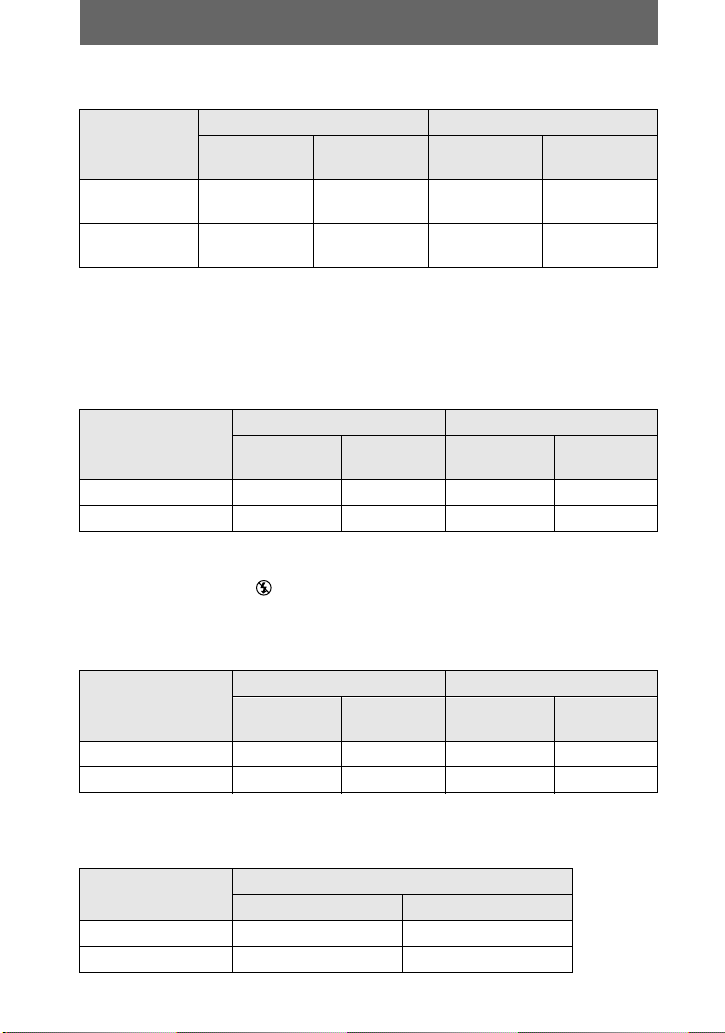
Recording still images
Under average conditions
*1)
NP-F330 (supplied) NP-F550 (optional)
Image size
1600×1200
(MVC-FD2 0 0 )
1280×960
(MVC-FD1 0 0 )
*1)
Recording under the following conditions:
Number of
images
Battery l ife
(min.)
Number of
images
Battery lif e
(min.)
Approx. 150 Approx. 75 Approx. 340 Approx. 170
Approx. 150 Approx. 75 Approx. 340 Approx. 170
— Recording one image every 30 seconds.
— Alternatively sliding the zoom lever to the W a nd T sides fully for each reco rdi ng.
— Using th e fla sh onc e in e very two record ing s .
— Turning the camera on a nd o ff once in e v e ry 1 0 recordings.
Recording continuously
*2)
NP-F330 (supplied) NP-F550 (optional)
Storage media
Number of
images
Battery lif e
(min.)
Number of
images
Battery li fe
(min.)
Floppy disk Approx. 750 Approx. 70 Approx. 1600 Approx. 150
“Memory Stick” Approx. 1600 Approx. 80 Approx. 3400 Approx. 170
*2)
Recording under the following conditions:
— The image size is set to 640×480.
— Flash mo d e is se t to (No flas h) .
— Recording every five seconds when using floppy disks and every three seconds
when using a “Memory Stick.”
Playing back
*3)
still image s
NP-F330 (supplied) NP-F550 (optional)
Storage media
Number of
images
Battery lif e
(min.)
Number of
images
Battery li fe
(min.)
Floppy disk Approx. 2200 Approx. 80 Approx. 4800 Approx. 170
“Memory Stick” Approx. 3000 Approx. 100 Approx. 6900 Approx. 230
*3)
Playing back sing le images in order, one approximately eve ry two seconds
Recording moving images
Recording continuously (when the image size is set to 160×112)
Storage media
NP-F330 (supplied) NP-F550 (optional)
Battery lif e (min.)
Floppy disk Approx. 85 Approx. 180
“Memory Stick” Approx. 90 Approx. 190
12
Note
The battery life and number of images will be decreased when using at low temperature, using
the flash, turning the power on/off frequently, or using the zoom.
Using the AC power adaptor
Getting started
1
To DC IN jack
AC-L10A/L10B
AC power adaptor
Power cord
(mains lead)
2
To a wall outlet (wall socket)
Open the DC IN cover and connect the AC power adaptor to the DC
1
IN jack of your camera with th e v mark facing up.
Connect the power cord (mains lead) to the AC power adaptor and
2
then to a wall outlet (wall socket).
Using your camera abroad
For details, se e page 85.
When using the AC power adaptor
Be sure to use it near a wall outlet (wall socket). If a malfunction occurs, disconnect
the plug from the wall outlet (wall socket).
Note
Do not short the DC plug of the AC power adaptor with a metallic object, as this may cause a
malfunction.
13
Setting the date and time
When you first use your camera, set the date and time. If these are not set, the
CLOCK SET screen appears whenever you turn on your camera.
POWER ON/OFF
(CHG) lamp
1
2 – 8
Control button
Press and hold the gre en button and slide the POWER switch in the
1
directionofthearrowtoturnonpower.
The POWER ON/OFF (CHG) (green) lamp lights up.
Pressvon the control button.
2
The menu bar appears on the LCD screen.
EFFECT FILE SETUP
SELECT OK
CAMERA
MENU BAR OFF
Select [SETUP] withBon the con trol button,
3
then press the center
Select [CLOCK SET] withv/Von the control button, then press the
4
center
.
z
.
z
VIDEO OUT
/LANGUAGE
CLOCK SET
BEEP
LCD BRIGHT
EFFECT FILE SETUP
SELECT OK
200211
12:00:00A
CAMERA
VIDEO OUT
/LANGUAGE
CLOCK SET
BEEP
LCD BRIGHT
EFFECT FILE SETUP
SELECT CLOSE
CLOCK SET
M
2002 :/ / 1 1 12 00AM
OK
SELECT
14
CAMERA
Y/M/D
M/D/Y
D/M/Y
ENTER
CANCEL

Select the desired date display format with
5
v/V on the control button, then press the
center z.
Select fro m [Y /M/D] (year/mon th/ da y ), [M /D /Y]
(mon th/day/year), o r [D/M/Y] (day/month/year).
Select the year, month, day, hour or minute
6
item you w ant to set w ith b/B on the control
button.
The item to be set is i n dicated with v/V.
Set the num eric v alue w ith v/V on the
7
control button, then press the center z to
enter it.
After entering the number, v/V moves to the n ext
item. If you selected [D/M/Y] in step 5, set the
time on a 24-hour cycle.
Select [ENTER] with B on the control button,
8
then press the center z at the desired
moment to begin clock movement.
The date and time are entered.
CLOCK SET
2002 : 1 1 12 00 AM//
SELECT/ADJUST
CLOCK SET
2002 :/ / 1 1 12 00AM
SELECT/ADJUST
CLOCK SET
2002/ :/ 1 7 12 00AM
SELECT/ADJUST
CLOCK SET
2002/ :/ 4 7 10 30PM
SELECT
Y/M/D
M/D/Y
D/M/Y
ENTER
CANCEL
OK
Y/M/D
M/D/Y
D/M/Y
ENTER
CANCEL
OK
Y/M/D
M/D/Y
D/M/Y
ENTER
CANCEL
OK
Y/M/D
M/D/Y
D/M/Y
ENTER
CANCEL
OK
Getting started
T o cancel the date and time setting
Select [CANCEL] with v/V/b/B on the control button, then press the center z.
15
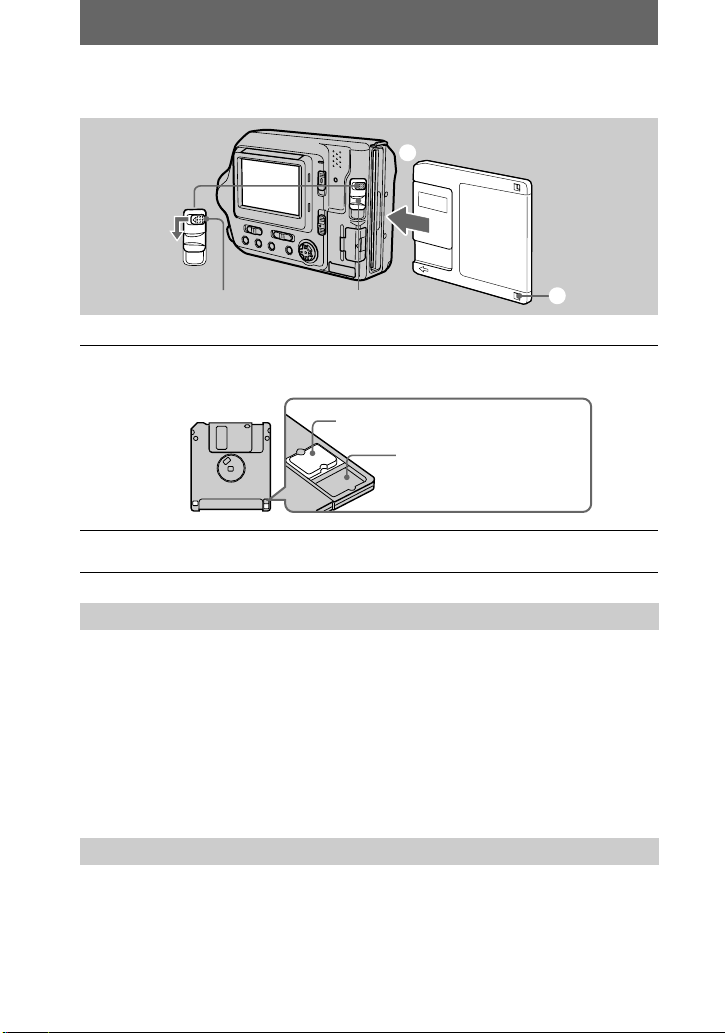
Inserting a floppy disk
2
EJECT lock
Check that the write protect tab is set to the recordable position for
1
recording.
Insert the floppy disk until it clicks.
2
Usable floppy disks
• Size: 3.5-inch
• Type: 2HD (1.44 MB)
• Format: MS-DOS format (512 bytes × 18 sectors)
Notes
• Do not insert the media other than the floppy disks described above.
• You cannot use the optional MSAC-FD2M/FD2MA Floppy Disk Adaptor for Memory Stick.
• If the access lamp is lit, data is being read or written. Never remove the floppy disk, turn off
the power, or change the settingof the MS/FD selector while the access lamp is lit. Otherwise,
the image data could be damaged or lost.
Removing the floppy disk
While sliding the EJECT lock to the left, slide down the DISK EJECT lever.
DISK EJECT lever
Recordable/erasable
Unrecordable/unerasable
1
16

Inserting a “Memory Stick”
See page 85 for details about “Memory Stick”.
1 2 3
“Memory Stick” cover
Open the “Memory Stick” cover.
1
Insert the “Memory Stick.”
2
Insert the “Memory Stick” with the
slot as illustrated u ntil it clicks.
Close t he “Memory Stick” cover.
3
Removing the “Memory Stick”
Open the “Memory Stick” cover, then push the “Memory Stick” once lightly.
Notes
• Insert the “Memory Stick” firmly untilit clicks, otherwise a message such as “MEMORY
STICK ERROR” will be displayed.
• If the access lamp is lit, data is being read or written. Never remove the “Memory Stick,” turn
off the power, or change the setting of the MS/FD selector while the access lamp is lit.
Otherwise, the image data could be damaged or lost.
• You cannot record or edit images on a “Memory Stick” if the write-protect switch is set to the
LOCK position.
Connector
mark facing toward the “Memory Stick”
B
Getting started
Write-protect
switch
The position and shape of the write-protect switch may differ depending on the types of
“Memory Stick” used.
LOCK
Label space
17
Basic operations
B Recording
Recording still images
Still images are recorded in JPEG format.
SlidethePOWERswitchdowntoturnonthepowerandinsertafloppydiskora
“Memory Stick” in your camera.
3, 4
Access lamp
1 2
Set the PLAY/STILL/MOVIE selector to STILL.
1
Select the recording media using the MS/FD selector.
2
MS: When recording on the “Memory Stick.”
FD: When recording on the floppy disk.
Press and hold the shutter button halfway down.
3
The image has not been recorded yet at this time. The camera automatically
adjusts the exposure and focus in accordance with the subject and recording
conditions. When the camera finishes the automatic adjustments, the AE/AF
lock indicator
and the camera is ready for recording.
If you release the shutter button, the recording will be canceled.
stops flashing, then lights up and is followed by beeps,
z
AE/AF lock indicator (green)
flashes t li gh ts up
18

Press the shutter button fully down.
4
The shutter clicks. “RECO RDIN G ” appears on the
will be recorded on the floppy disk or the “Me mory Stick.” When
“RECORDING” disappears from the LCD screen, you can start the next
recording.
LCD screen, and the image
RECORDING
RECORDING
For the number of images you can record on a floppy disk or a
“Memory Stick”
See page 58.
Notes
• When recording bright subjects, the color of the LCD screen may change after the
AE/AF is locked. However, this will not affect the recorded image.
• While the image is being recorded on a floppy disk or a “Memory Stick,” the access
lamp lights. When this lamp is lit, do not shake or strike the camera. Also, do not
turn the power off, not change the position of the MS/FD selector, or not remove
the battery pack/floppydisk/“MemoryStick.”Otherwise, an image data breakdown
mayoccurandthefloppydiskorthe“Memory Stick” may become unusable.
• When you press the shutter button fully down at once, the camera starts recording
after the automatic adjustment is complete. However, the recording cannot be
carried out if the flash is required for the recording and the lamp (page 8) is
flashing.
BB
B Recording
B
Checking the last recorded image (Quick Review)
You can check the last recorded image by clearing the menu bar from the screen
(page 49) and pressing
To return to the normal recording mode
Press the shutter button lightly, or select [RETURN] withb/Bon the control button
andthenpressthecenter
To delete the image
1 Select [DELETE] in the Quick Review screen using
and press the center
2 Select [OK] u sing
on the control button.
b
.
z
b/B
.
z
on the control button and press the centerz.
v/V
on the control button
19
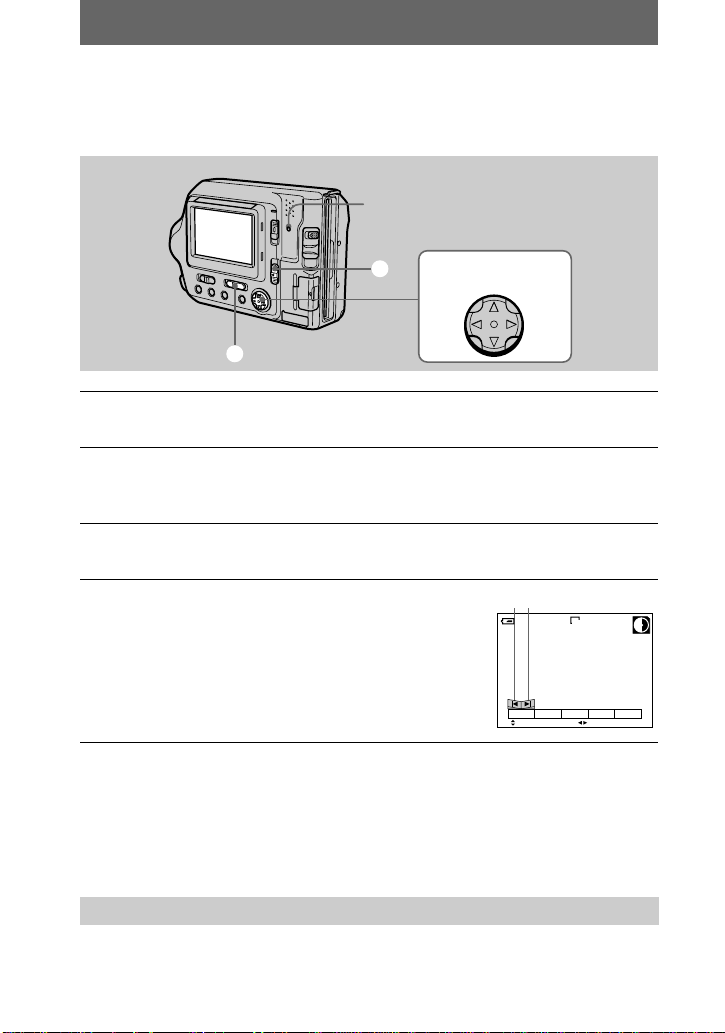
Adjusting the brightness of the LCD screen
Adjust the brightness with the [LCD BRIGHT] item in the menu settings (page 56).
This adjustment does not affect the brightness of the images recorded on the floppy disk
or the “Memory Stick.”
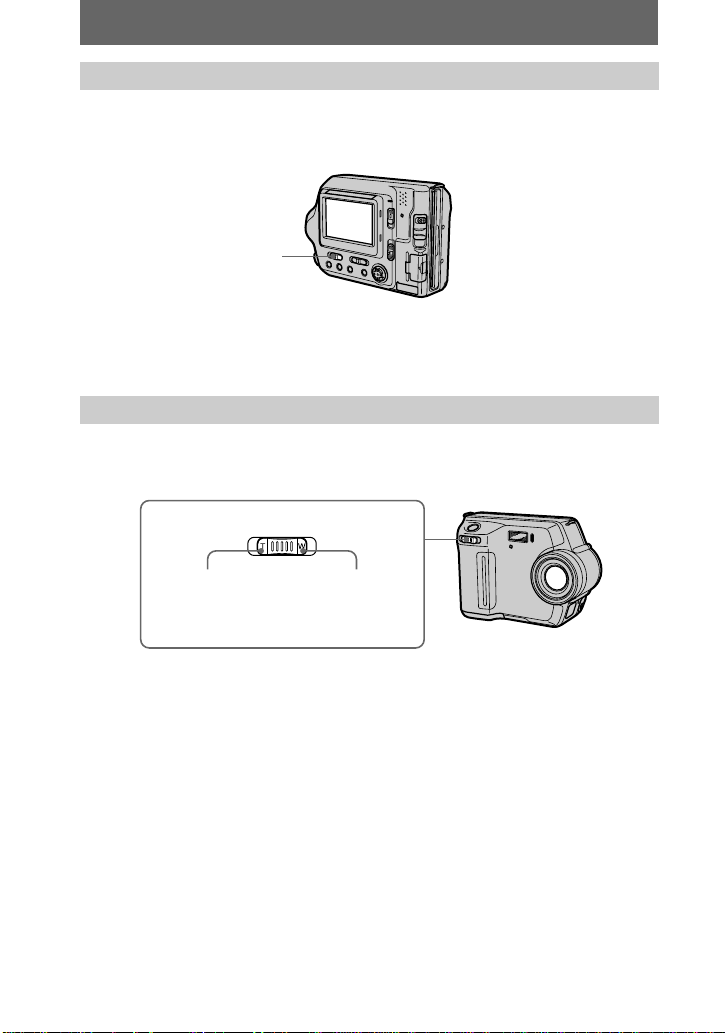
LCD BACKLIGHT switch
To turn off the LCD backlight
Set the LCD BACKLIGHT switch to OFF to save the battery.
Using the zoom feature
Zoom lever
T side: for
telephoto
(subject
appears closer)
W side: for wideangle (subject
appears farther
away)
If you cannot get a sharp focus on a close subject
Slide the zoom lever to the W side and move closer to the subject until the focus is
sharp (page 64).
Minimum focal distance to the subject
Wside:About25cm(97/8inches)
T side: About 80 cm (31 1/2 inches)
To record even closer subjects, see page 64.
20
Digital zoom function
This camera has a digital zoom function.
Digital zoom enlarges the image by digital processing, and it starts to function when
the zoom exceeds 3×.
T
W
The T-side of the bar shows the
digital zooming zone.
Using digital zoom
• The ma ximum zoom magnification is 6×.
• Digital zooming deteriorates the picture q uality. When digital zoom is not
necessary, set [DIGITAL ZOOM] to [OFF] in the menu settings (page 54).
Note
Digital zoom does not work for moving images.
The indicators on the LCD screen during recording
Press DISPLAY to turn on/off the indicators on the LCD screen. See page 97 for a
detailed description of the indicators.
DISPLAY
BB
B Recording
B
Notes
• You cannot turn off the (self-timer) indicator and some of the indicators used in advanced
operations.
• The indicators on the LCD screen are not recorded.
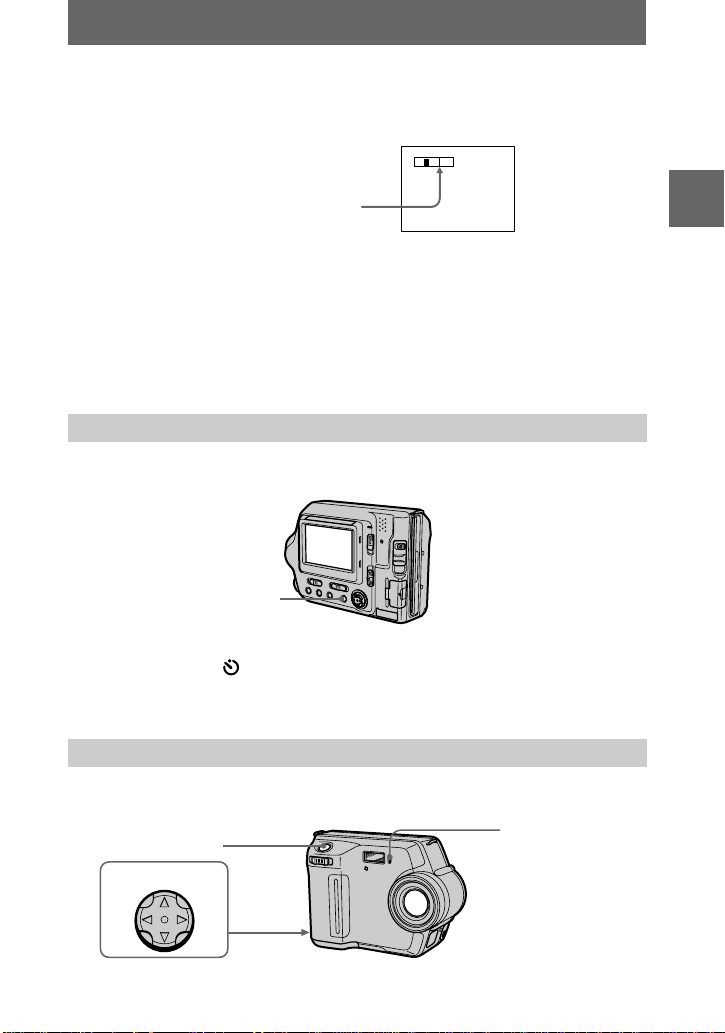
Using the self-timer
When you use the self-timer function, the subject is recorded approximately 10
seconds after you press the shutter button.
Shutter button
Control button
Self-timer lamp
21

Select on the LCD screen usingb/B/v/Von the control button and press the
.
z
center
The (self-timer) indicator appears on the LCD screen, and the subject is recorded
approximately 10 seconds after you press the shutter button. The self-timer lamp
flashes until the subject is recorded.
To cancel the self-timer
To cancel the self-timer, pressvon the control button to display the menu bar and
on the control button to clear on the LCD
select and press the center
z
screen.
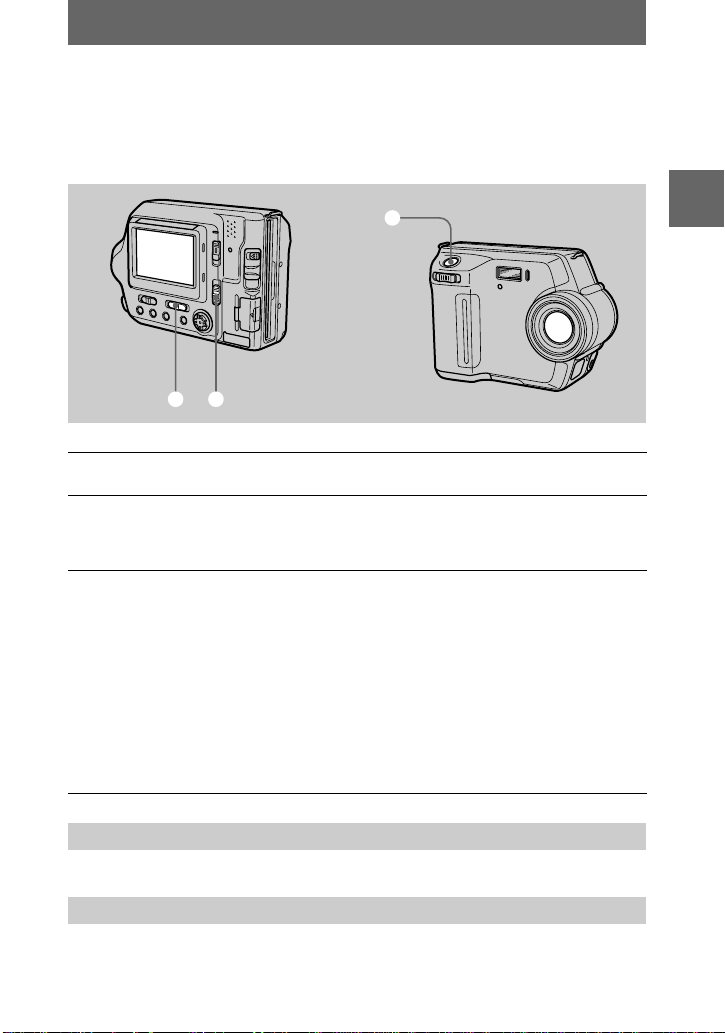
Recording images with the flash
The initial setting is AUTO (no indication). In this mode, the flash is automatically
activated when the surroundings are dark. To change the flash mode to other than
AUTO,press (Flash) several times until the desired flash mode indicator appears
on the LCD screen.
(Flash)
Each time you press the button, the indicator changes as follows.
(No indication)
tttt
(No indication)
Auto red-eye reduction: The flash strobes before recording to reduce the red-
eye phenomenon.
Forced flash : The flash strobes regardless of the surrounding brightness.
No flash : The flash does not strobe.
You can change the amount of the flash light with [FLASH LEVEL] in the menu
settings (page 54).
Notes
• The recommended shooting distance of the built-in flash is 0.5 to 2.0 m (1 2/3 to 6 2/3 feet)
when [ISO] in the menu is [AUTO].
• Attachinga conversionlens (optional)may block the lightfrom the flash andthe shadow ofthe
lens may be recorded.
• Auto red-eye reduction may not produce the desired red-eye reduction effects depending on
individual differences, the distance to the subject, if the subject does not see the pre-strobe, or
other conditions.
• The flash effect is not obtained easily when you use forced flash in a bright location.
22
Recording moving images
Moving images are recorded in MPEG format. Your camera does not record sound.
Slide the POWER switch down to turn on the power and insert a floppy disk or a
“Memory Stick” in your camera.
3
1 2
Set the PLAY/STILL/MOVIE selector to MOVIE.
1
Select the recording media usi ng the MS/FD se lector.
2
MS: When recording on the “Memory Stick.”
FD: When recording on the floppy disk.
Press the shutter button fully down.
3
“REC” appears on the LCD screen, and the moving image is recorded on the
floppy disk or the “Memory Stick.”
If you press the shutter button m o m en tarily
The image is recorded for 5 seconds. The recording time can be set to 10 or 15
seconds with [REC TIME SET] in the menu settings (page 53).
If you hold the shutter button down
The image is recorded while the shutter button is held d own for up to 60
seconds. However, when [IMAGE SIZE] in the menu settings is set to
[320×240], the maximum recording time is 15 seconds (page 57).
BB
B Recording
B
Adjusting the brightness of the LCD screen, zooming or using the self-timer
See pages 20 to 22.
LCD screen indicators during recording
Press DISPLAY to turn on/off the indicators on the LCD screen.
These indicators are not recorded. See page 97 for a detailed description of the indicators.
23
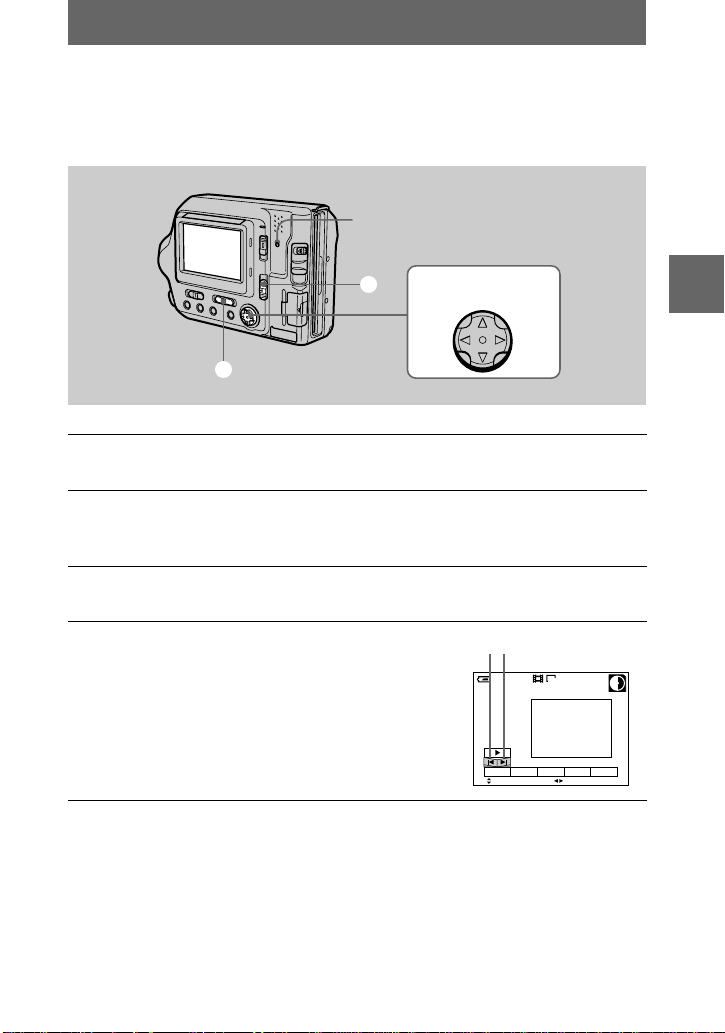
B Playback
"b/B"
Playing back still images
SlidethePOWERswitchdowntoturnonthepowerandinsertafloppydiskora
“Memory Stick” in your camera.
Access lamp
3, 4
2
Control button
1
Set the PLAY/S TILL/M OVIE selector to PLAY.
1
The last recorded image (still or moving) appears on the LCD screen.
Select the playback media using the MS/FD selector.
2
MS: When playing back images in the “Memory Stick.”
FD: When playing back images in the floppy disk.
Pressvon the control button to display the menu bar on the LCD
3
screen.
Select the desired still image with the
4
control button.
Press
v/V/b/B
on the LCD screen, then pressb/B.
"b/B"
: To display the preceding image.
"b
:Todisplaythenextimage.
B"
on the control button to select
60min
640
DELETE
INDEX FILE SETUPTOOL
SELECT FILE BACK/NEXT
6/8
When the menu bar is not displayed
You can directly select and play back the image withb/Bon the control button.
Notes
•
You might not be able tocorrectly play backimagesrecorded with thiscamera on other equipment.
• You may not be able to play back images whose image sizes are larger than the maximum
image size that can be used with this camera for recording.
LCD screen indicators during still image playback
Press DISPLAY to turn on/off th e indicators on the LCD screen.
See page 98 for a detailed description of the indicators.
24
Playing back moving images
Slide the POWER switch down to turn on the power and insert a floppy disk or a
“Memory Stick” in your camera.
Access lamp
3 – 5
2
Control button
1
Set the PLAY/STILL/MOVIE selector to PLAY.
1
The last recorded image (still or moving) appears on the LCD screen.
Select the playback media using the MS/FD selector.
2
MS: When playing back images in the “Memory Stick.”
FD: When playing back images in the floppy disk.
Pressvon the control button to display the m enu bar on the LCD
3
screen.
Select the desired moving image with the
4
control button.
Moving images are displayed one size smaller
than still images.
v/V/b/B
Press
on the LCD screen, then pressb/B.
"b/B"
: To display the preceding image.
"b
: To display the next image.
B"
on the control button to select
"b/B"
60min
DELETE
INDEX FILE SETUPTOOL
SELECT
160
FILE BACK/NEXT
6/8
BB
B Playback
B
25

Select theB(playback) button on the
(playback)/
5
LCD screen with
v/V/b/B
button, then press the center
The moving image is played back.
During playback,
(playback)changesto
B
on the control
.
z
X
B
X (pause) button
60min
160
0:05
6/8
(pause).
DELETE
INDEX FILE SETUPTOOL
SELECT OK
Playback bar
To pause playback
SelectX(pause) on the LCD screen withv/V/b/Bon the control button, then press
.
the center
z
When the menu bar is not displayed
You can directly select the image withb/Bon the control button, and play back the
image by pressing the center
. When you press the centerzduring playback,
z
playback is paused.
LCD screen indicators during moving image playback
Press DISPLAY to turn on/off th e indicators on the LCD screen.
See page 98 for a detailed description of the indicators.
26

Viewing images using a
computer
You can view or edit image data recorded with your camera using software installed
in your computer.You c an also attach the image data to e-mail.
Viewingimagesusingafloppydiskdrive
Example: For Windows Me users
Turn on your computer and insert a floppy disk in the floppy disk
1
drive of your compute r.
Open “ My Computer” and double-click “ 3 1/2 Floppy (A:).”
2
Double-click a file to be viewed.
3
See “Image file storage destinations and image file names” (page 38) for
details.
It is recommended that you copy a moving image file to the hard disk of your
computer before viewing it. If you view the file directly from a floppy disk, the
image may break off.
Viewing images on a computer using the USB cable
This section describes the method for viewing images on a c omputer using the
supplied USB cable.
The USB cableis used to connect the camera to a computer so that operations can
be performed on image files recorded in a floppy disk or a “Memory Stick” from the
computer.
In order to use the USB cabl e, a USB driver must be installed in the computer
beforehand.
Be sure to also refer to the operation manuals for your computer and the application
software.
BB
B Playback
B
Viewingimages on Windows: page 28
Viewing images on Macintosh: page 34
Notes on using your computer: page 37
Notes
• Data recorded with your camera is stored in the following formats. Make sure that applications
that support these file formats are installed on your computer.
—Still images (other than TEXT mode, uncompressed mode, and Clip Motion): JPEG format
—Moving images: MPEG format
—Uncompressedmode still images: TIFF format
—TEXT mode/Clip Motion: GIF format
• Depending on your application software, the file size may increase when you open a still image
file.
27

•When you copy an image to the camera from your computer, which was modified with
retouching softwa re a n d was converted to another file format, the “F IL E ERROR” message
may appear and you may be unable to open the image.
•Depending on your application software, only the first frame of the Clip Motion file may be
played back.
Communications with your computer (for Windows only)
Communications between your camera and your computer may not recover after
recovering from Suspend or Sleep.
•Microsoft, Windows and Windows Media are either registered trademarks or trademarks of
Microsoft Corporation in the United States and/or other countries.
•Macintosh, Mac OS and QuickTime are either registered tradem ark s or tradem arks of A pple
Computer , Inc.
•All other product names mentioned herein may be the trademarks or registered trademarks of
their respective companies. Furthermo re, “™” and “®” are not mentioned in ea ch ca se in this
manual.
•In this manual, the Windows 2000 Professional is referred to as “Windows 2000”, and
W indow s M illennium E dition is referred to as “Windows Me”, an d Windows XP H om e E dition
and Windows X P Professional are referred to as “Windows XP.”
Viewing images on Windows
Recommended computer environment
OS: Microsoft Windows 98, Windows 98SE, Windows 2000 Professional,
Windows Millennium Edition, Windows XP Home Edition, Windows XP
Professional
The above OS must be installed at the factory.
Operation is not assured in an environment upgraded to the operating systems
described above.
CPU: MMX Pentium 200 MHz or faster
Display: Resolution o f 8 0 0× 6 00 dots or higher, High Color (16- bit color, 65 000
colors) or more
The USB connector must be provided as standard.
Windows Media Player (recommended) must be installed to play back moving
pictures.
Notes
•If you connect two or more devices that use USB to a single computer or use a hub, operation is
not guaranteed.
•Some USB de v ices may not operate if they are connected to the computer at th e same time as
your camera.
•Operations are no t g u ara ntee d for all the recommended computer enviro nments mentioned
above.
28

General procedure for viewing images
Step 1
Step 2
Step 3
For Windows XP users
You do not have to install a USB driver. Windows XP recognizes the camera as a
drive as soon as it is connected it to the computer using the USB cable. Begin the
procedurefrom Step 2.
The operation below is explained using Windows Me. The window screen and
operationmethod may be different depending on the type of OS.
Installing the USB driver to the computer (p age 29)
Perform this step only when you view images on your computer for the
first time.
Connecting your camera to your computer using the USB cable
(page 30)
Viewing images on Windows (page 32)
Step 1 Installing the USB driver to the computer
Before connecting your camera to your computer, install the U SB driver to the
computer.The USB driver is included with the application software in the CD-ROM
which is supplied with your camera.
For Windows 98, Windows 98SE, Windows 2000, and Windows Me
users
Do not connect your camera to your computer yet. Be sure to
complete installation of the USB driver before connecting your
camera to the comp ute r. If you connect the USB cable first, you will
be unable to install the USB driver properly.
BB
B Playback
B
See “If the Removable Disk does not appear” (page 33) for corrective measures if the
USB cable was connected before installing the driver and the driver software could
not be installed correctly.
29
Before operation
If you are using Windows 2000 , log in as an admi nistrator an d then install the US B
driver .
T urn on y our computer and allow Windows to load.
1
Close all applications you are running on your computer.
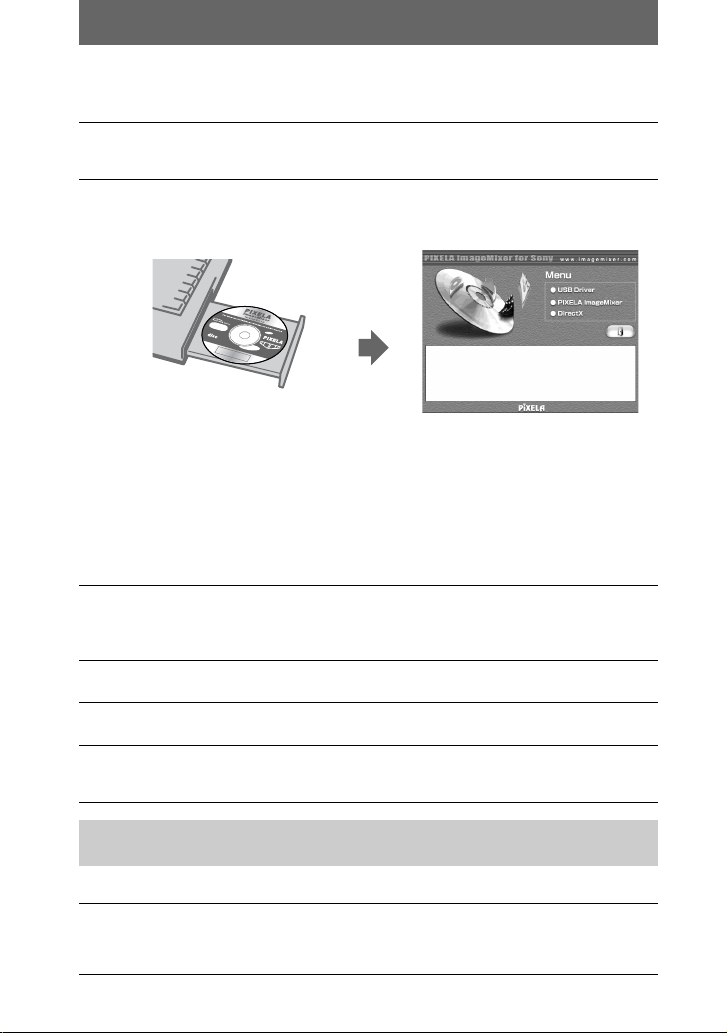
Insert the supplied CD-ROM in the CD-ROM drive of your
2
computer.
The title screen appears after a moment.
If the title screen does not appear
1 Double-click “My Computer” on the Desktop.
2 Double - click the CD-ROM (“ImageMix er (E:)*” ).
∗
The drive symbol ((E:), etc.) may differ depending on your computer.
Note
Set the display to 800×600 dots or higher and High Color (16-bit color, 65 000 colors) or
more. If it is set to less than 800×600 dots and 256 colors, the installation window does not
appear.
Click “USB Driver” on the screen.
3
The “Welcome to the InstallShield Wizard for Sony USB Driver” window
appears.
Follow the on-screen messages to install the USB driver.
4
Eject the CD-ROM from the computer.
5
Select “Yes, I want to restart my computer now” and click “Finish.”
6
Your computer restarts and you can connect your camera to your computer.
Step 2 Connecting your camera to your computer using the USB
You can connect your c amera to your computer after Windows is loaded.
1
cable
Insert a floppy disk or a “Memory Stick” in your computer and set
the MS/FD selector in accordance with the media you have
inserted.
30
 Loading...