

Sony MVC-CD350 Operating Instruction
3-081-835-11(1)
_
_
_
_
_
_
_
_
_
_
_
_
_
Getting started_______________________
Digital Still Camera
Operating Instructions
Before operating the unit, please read this manual thoroughly, and
retain it for future reference.
Owner’s Record
The model and seria l nu mbers are located on the bot t o m. Record the
serial number in the spa ce provided below. Refer to these numbers
whenever you call upon your Son y dea l er regarding this product.
Model No. MVC-CD350
Serial No.
MVC-CD350
© 2003 Sony Corporation
Shooting still images _________________
Viewing still images __________________
Deleting still images__________________
Before advanced oper at ions ____________
Advanced still image shooting___________
Advanced still image viewing____________
Still image editing _____________________
Enjoying movies_______________________
Enjoying images on you r co m put er ______
Troubleshooting _______________________
Additional information__________________
Index_____________________________
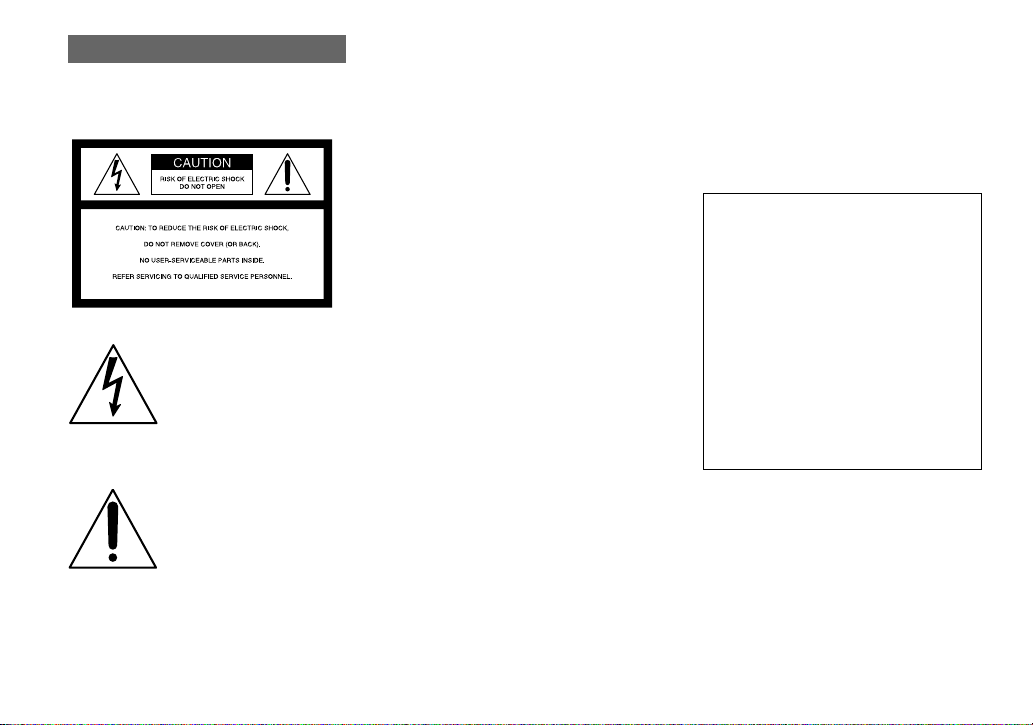
WARNING
To prevent fire or shock hazard, do
not expose the unit to rain or
moisture.
This symbol is intended to alert
the user to the presence of
uninsulated “dangerous
voltage” within the product’s
enclosure that may be of
sufficient magnitude to
constitute a risk of electric
shock to persons.
This symbol is intended to alert
the user to the presence of
important operating and
maintenance (servicing)
instructions in the literature
accompanying the appliance.
CAUTION
The use of op tical instruments with th is
product will in crease eye hazard.
Use of controls or adjustments or
performance of procedures other than those
specified herein may result in haz ard ous
radiation exposure.
If you have any questions about this product,
you may call:
Sony Customer Information Center
1-800-222-SONY (7669)
The number below is for the FCC related matters
only.
Regulatory Information
Declaration of Conformity
Trade Name: SONY
Model No.: MVC-CD350
Responsible Party: Sony Electronics Inc.
Address: 680 Kinderkamack Road,
Oradell, NJ 07649 USA
Telephone No.: 201-930-6972
This device complies with Part 15 of the
FCC Rules. Operation is subject to the
following two conditions: (1) This device
may not cause harmful interf ere nc e , a nd
(2) this device must accept a ny inter ferenc e
received, including interference that may
cause undesired operatio n.
2

CAUTION
Y ou are cautioned that any changes or
modifications not expressly approved in this
manual could void your authority to operate this
equipment.
Note:
This equipment has been tested and found to
comply with the limits for a Class B digital
device, pursuant to Part 15 of the FCC Rules.
These limits are designed to provide reasonable
protection against harmful interference in a
residential installation. This equipment generates,
uses, and can radiate radio frequency energy and,
if not installed and used in accordance with the
instructions, may cause harmful interference to
radio communications. However, there is no
guarantee that interference will not occ ur in a
particular installation. If this equipment does
cause harmful interference to radio or television
reception, which can be determined by turning
the equipment off and on, the user is encouraged
to try to correct the interference by one or more of
the following measures:
— Reorient or relocate the receiving antenna.
— Increase the separation between the
equipment and receiver.
— Connect the equipment into an outlet on a
circuit different from that to which the
receiver is connected.
— Consult the dealer or an experienced radio/
TV technician for help.
The shielded interface cable recommended in this
manual must be used with the equipment in order
to comply with the limits for a disital device
pursuant to Subpart B of Part 15 of FCC Rules.
RECYCLING LITHIUM-ION
BATTERIES
Lithium-Ion batteries are
recyclable.
You can help preserve our
environment by returning your
used rechargeable batteries to
the collection and recycling location nearest
you.
For more information regarding recycling of
rechargeable batteries, call toll free
1-800-822-8837, or visit
http://www.rbrc.org/
Caution:Do not handle damaged or leaking
Lithium-Ion batteries.
CAUTION
TO PREVENT ELECTRIC SHOCK, DO NOT
USE THIS POLARIZED AC PLUG WITH AN
EXTENSION CORD, RECEPTACLE OR
OTHER OUTLET UNLESS THE BLADES
CAN BE FULLY INSERTED TO PREVENT
BLADE EXPOSURE.
3

Before using your camera
This digital still camera uses 8 cm CD-Rs/ CD RWs as recording media. “CD-R” or “CD-R W”
mentioned above is indicated as “disc” in this
manual. When a distinction between CD-Rs and
CD-RWs is necessary, “disc” is indicated as
“CD-R” or “CD-RW.”
Refer to page 18 for discs that can be used with
this camera, and page 108 for precautions on
handling discs.
• We recommend that you use
this camera with Mavica
discs*.
• While the image is being
read from or written to the
disc, the ACCESS lamp
flashes (red). When this
lamp is lit, do not shake or
strike the camera.
∗ The Mavica dis c is an 8 cm CD-R/CD-RW
with the Mavica logo.
Trial recording
Before you record one-time events, you may want
to make a trial recording to make sure that the
camera is working correctly.
No compensation for contents of the
recording
Contents of the recording cannot be compensated
for if recording or playback is not possible due to
a malfunction of your camera or recording media,
etc.
Back up recommendation
To avoid the potential risk of data loss, always
copy (back up) data to a disk.
Notes on image data compatibility
• This camera conforms with the Design rule for
Camera File system universal standard
established by the JEITA (Japan Electronics
and Information Technology Industries
Association).
• Playback of images recorded with your camera
on other equipment and playback of images
recorded or edited with other equipment on
your camera are not guaranteed.
Precaution on copyright
Television programs, films, video tapes, and other
materials may be copyrighted. Unauthorized
recording of such materials may be contrary to
the provision of the copyright laws.
Do not shake or strike the camera
In addition to malfunctions and inability to record
images, this may render the discs unusable or
image data breakdown, damage or loss may
occur.
LCD screen, LCD finder (only models
with an LCD finder) and lens
• The LCD screen and the LCD finder are
manufactured using extremely high-precision
technology so over 99.99% of the pixels are
operational for effective use. However, there
may be some tiny black points and/or bright
points (white, red, blue or green in color) that
constantly appear on the LCD screen and the
LCD finder. These points are normal in the
manufacturing process and do not affect the
recording in any way.
• Be careful when placing the camera near a
window or outdoors. Exposing the LCD screen,
the finder or the lens to direct sunlight for long
periods may cause malfunctions.
• Do not press the LCD screen hardly. T he screen
may be uneven and that may cause a
malfunction.
• Images may be trailed on the LCD screen in a
cold location. This is not a malfunction.
4

Clean the flash surface before use
The heat of flash emission may cause dirt on the
flash surface to become discolored or to stick to
the flash surface, resulting in insufficient light
emission.
Do not get the camera wet
When taking pictures outdoors in the rain or
under similar conditions, be careful not to get the
camera wet. If moisture condensation occurs, see
page 108 and follow the instructions on how to
remove it before using the camera.
Do not expose the camera to sand or
dust
Using the camera in sandy or dusty locations may
cause malfunction.
Do not aim the camera at the sun or
other bright light
This may cause irrecoverable damage to your
eyes. Or it may cause the malfunction of your
camera.
Notes on the camera locations
• Do not use the camera near a location that
generates strong radio wave or emits radiation.
The camera may not be able to record or play
back properly.
• Do not use the camera near a TV, radio, tuner.
Noise may be caused on the camera.
The pictures used in this manual
The photographs used as examples of pictures in
this manual are reproduced images, and are not
actual images shot using this camera.
Trademarks
• “InfoLITHIUM” is a trademark of Sony
Corporation.
• Microsoft and Windows are registered
trademarks of the U.S. Microsoft Corporation
in the United States and other countries.
• Macintosh and Mac OS are trademarks or
registered trademarks of Apple Computer, Inc.
• Pentium is a trademark or a registered
trademark of Intel Corporation.
• In addition, system and product names used in
this manual are, in general, trademarks or
registered trademarks of their respective
developers or manufacturers. However, the
or ® marks are not used in all cases in this
manual.
™
5

Table of contents
Before using your camera.........................4
Introduction...............................................8
Identifying the parts ................................. 9
Getting started
Charging the battery pack.......................11
Using an external power source..............14
Using your camera abroad......................14
Turning on/off your camera ....................15
How to use the control button.................15
Setting the date and time.........................16
Shooting still images
Inserting and removing a disc.................18
Initializing a disc................................ .....19
What is initialization?.........................19
Setting the still image size......................20
Image size and quality ............................21
Basic still image shooting
— Auto adjustment mode....... ........22
Checking the last image you sh ot
— Quick Review............................24
Using the zoom feature....................... 24
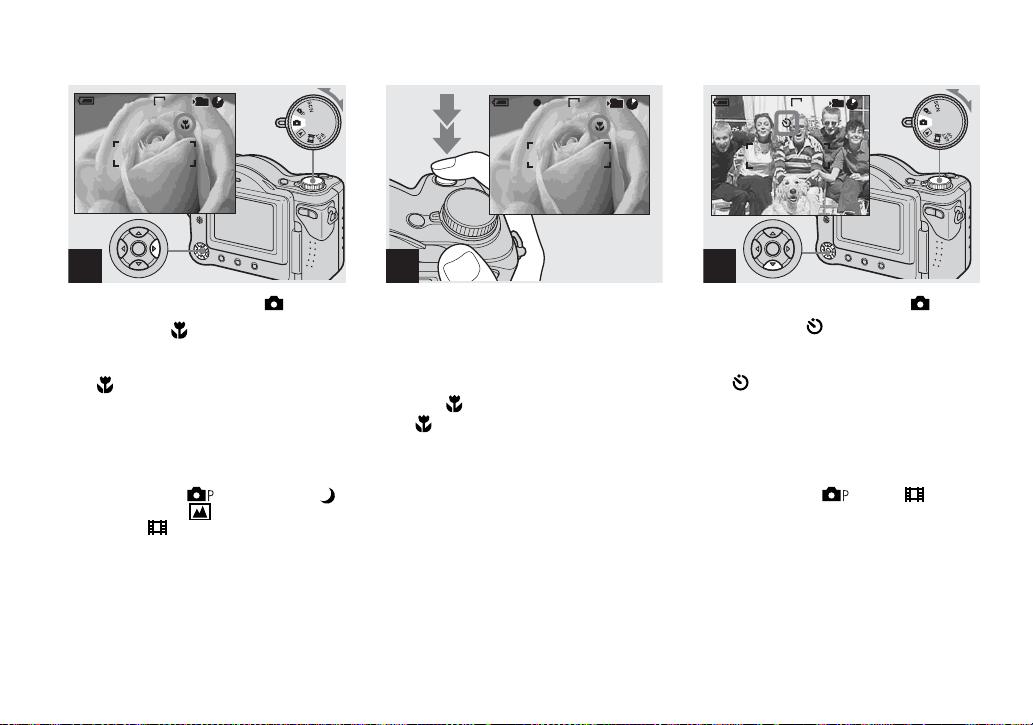
Shooting close-ups — Macro.............25
Using the self-timer............................ 26
Selecting a flash mode........................27
Indicators on the screen during
shooting..........................................29
Inserting the date and time on a still
image..............................................30
6
Viewing still images
Viewing images on the LCD screen of your
camera............................................ 31
Viewing images on a TV screen.............33
Deleting still images
Deleting images........................... ........... 35
Formatting a CD-RW............................. 38
Before advanced operations
How to setup and operat e your camera .. 40
Changing the menu settings............... 40
Changing the items in the SET UP
screen ............................................. 40
Deciding the still image quality.............. 41
Creating or selecting a folder................. 41
Creating a new folder.........................42
Changing the recording folder ........... 42
Advanced still image
shooting
Choosing an auto focus method.............43
Choosing a focus range finder frame
— AF range finder ......................... 43
Choosing a focus operation
— AF Mode................................... 44
Setting the distance to the subject
— Focus preset .............................. 46
Adjusting the exposure
— EV adjustment...........................46
Selecting the metering mode...................47
Adjusting color tones
— White Balance ...........................48
Adjusting th e flash level
— Flash Level................................49
Shooting multiple fra mes
— Clip Motion ...............................50
Shooting in Multi Burst mode
— Multi Burst.................................51
Shooting two images continuously
— Burst 2 .......................................52
Shooting still images in TIFF mode
— TIFF...........................................53
Shooting still images for e-mail
— E-Mail........................................53
Shooting still images with au di o files
— Voice..........................................54
Shooting according to scene conditions
— Scene Selection..........................55
Adding specia l effects
— Picture Effect.............................57
Confirming whether to record images
— Confirm before write.................57

Advanced still image viewing
Selecting the folder an d playing back
images
— Folder............................. ... .........59
Enlarging a portion of a still image.........60
Enlarging an image
— Playback zoom.................... .......60
Recording an enlarged image
— Trimming.................... ...............61
Playing back successive images
— Slide Show.................................61
Rotating still images
— Rotate.........................................62
Playing back images shot in Multi Burst
mode ...............................................63
Playing back continuously..................63
Playing back frame by fr am e
— Jog playback..............................63
Still image editing
Protecting images
— Protect........................................65
Changing image size
— Resize.................................. .......67
Choosing im ages to print
— Print (DPOF) mark....................67
Enjoying movies
Shooting movies.....................................70
Viewing movies on the LCD screen....... 71
Deleting movies — Delete......................72
Enjoying images on your
computer
Viewing images on your computer
— Introduction................ ...............74
Viewing images using CD-RO M drive .. 75
Finalizing a disc..................................75
What is finalization?...........................75
Canceling finalizati on (U nfinalize)
(CD-RW only)................................76
Using the supplied 8cm CD a dapter... 77
Viewing images throug h a CD -ROM
drive................................................ 78
Image file storage destinati ons and
image file names ................ ............79
Copying images into your computer
through a USB connection.............81
Installing the PTP Manager................81
Installing “ImageMixer”..................... 83
Connecting the camera to your
computer.........................................83
Copying images..................................85
When the PTP Manager does not
start up............................................86
Copying images using the Window s XP
AutoPlay Wizard.......... ................. ..86
Viewing images on your computer.....87
Creating a Video CD...........................87
For Mac OS X (v10.0/v10.1/v10.2)
users................................................87
Troubleshooting
Troubleshooting......................................88
Warnings and messages..........................96
Self-diagnosis display .............................98
Additional information
Number of images that can be sav ed or
shooting time...................................99
Menu items............................................101
SET UP items....................... .................10 5
Precautions............................................107
On discs....................... ..........................108
On “InfoLITHIUM” battery pack .........109
Specifications........................................111
The LCD screen ....................................113
Index
Index......................................................116
7

Introduction
This digital still camera is capable of
recording still image s and movies onto 8 cm
CD-R/CD-RW discs.
Capture images with your
computer
You can easily copy imag e s ont o your
computer through a CD -ROM drive or the
USB cable, and view and modify images on
your computer using applicat ion software.
When using a CD-ROM drive to view
images on your computer, fin al ization is
required (page 75).
Flow chart for disc operations
Start
A new disc
Initialize
(page 19)
Preparation for recording
on a disc
Record
Disc preparation for
recording is complete.
The disc status is
pre-finalization.
Blank di sc
Unfinalize
(page 76)
About 13 MB disc space
is restored.
Format
(page 38)
The disc space is fully
available.
Finalize
(page 75)
Preparation for viewing
recorded images on a
computer
Recording is complete.
View on a computer
(page74)
Disc preparation for
viewing recorded images
through a CD-ROM drive
is complete.
: CD-R
: CD-RW
View on the camera
(page 31)
View through
the USB cable
(pages 81, 87)
View through a
CD-ROM drive
(page75)
8
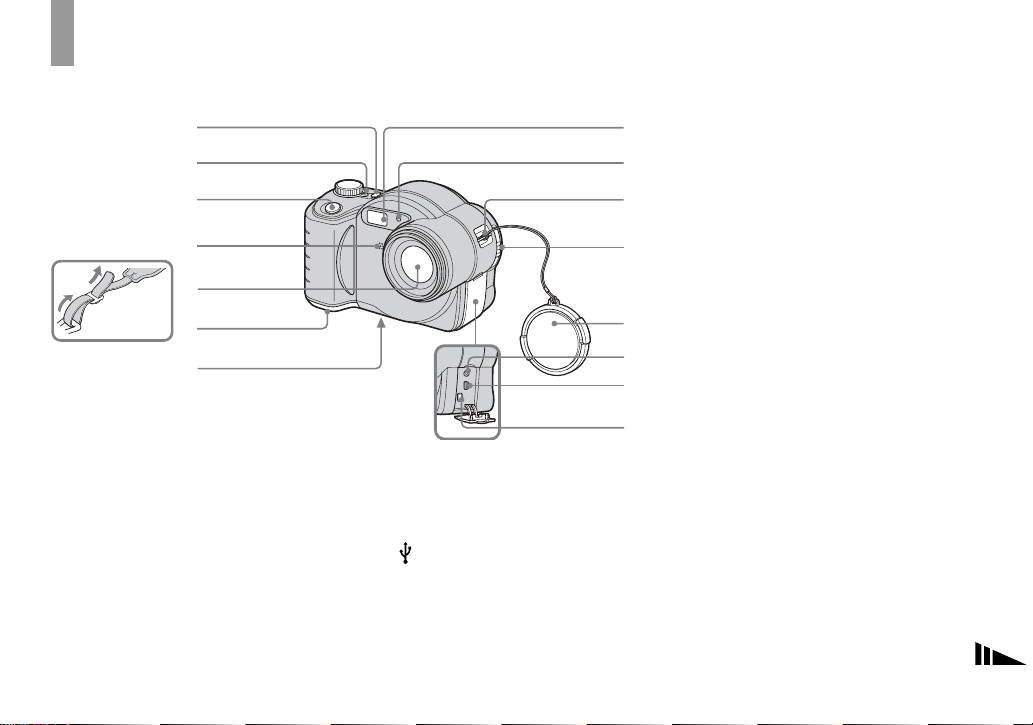
Identifying the parts
1
See the pages in parentheses for details of operati on .
2
3
4
5
8
9
0
qa
• Use a tripod with a screw length of less than 5.5
mm (7/32 inch). You will be unable to firmly
secure the camera to tripods having longer
screws, and may damage the camera.
• Do not touch the microphone while recording.
• The “3.2 MEGA PIXELS” indicated on the
camera shows the number of effective pixels.
The number of actually recorded pixels is
maximum 3.1 MEGA PIXELS. The effective
pixels number is determined according to the
recommendation of the JCIA (Japan Camera
Industry Association).
Attaching the
shoulder strap
A POWER button (15)
B POWER lamp (15)
C Shutter button (22)
D Microphone
E Lens
F Battery cover (11)
G Tripod receptacle (bottom
surface)
H Flash emitter (27)
I Self-timer lamp (26)/
AF illuminator (28, 105)
6
7
qs
qd
qf
qg
J Hook for lens cap/shoulder strap
K Disc cover OPEN lever (18)
L Lens cap
M A/V OUT (MONO) jack (33)
N (USB) jack (84)
O DC IN jack (11, 14)
9
1
2
3
4
5
6
7
8
9
q;
qa
qs
J Hook for shoulder strap
K Zoom button (for shooting) (24)/
Index button ( for viewing) (32)
L (Image Size/Delete)
button (20, 35)
A ACCESS lamp (18)
B /CHG (charge) lamp (12)
C LCD screen
D Speaker
E Control button
(Menu on) (v/V/b/B/z)
(Menu off) ( / /7/) (27, 26,
24, 25)
F MENU button (40, 101)
G DISPLAY ON/OFF button (29)
H RESE T button (bottom surface)
(88)
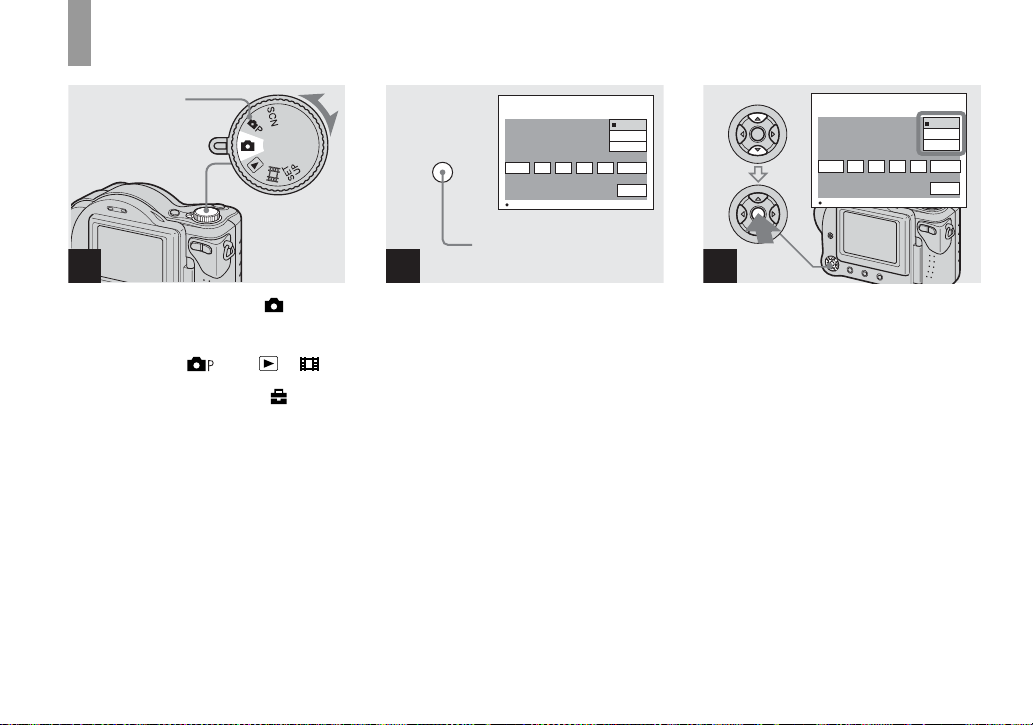
10
I Mode dial (16)
: To shoot still images in auto
adjustment mode
:To shoot still images in
programmed mode
SCN: To shoot in the Scene
Selection mode
SET UP: To set the SET UP items
: To shoot movies, Clip
Motion images or Multi
Burst mode images
: To view or edit images
Getting started
Charging the battery pack
Getting started
DC IN jack cover
DC plug
1
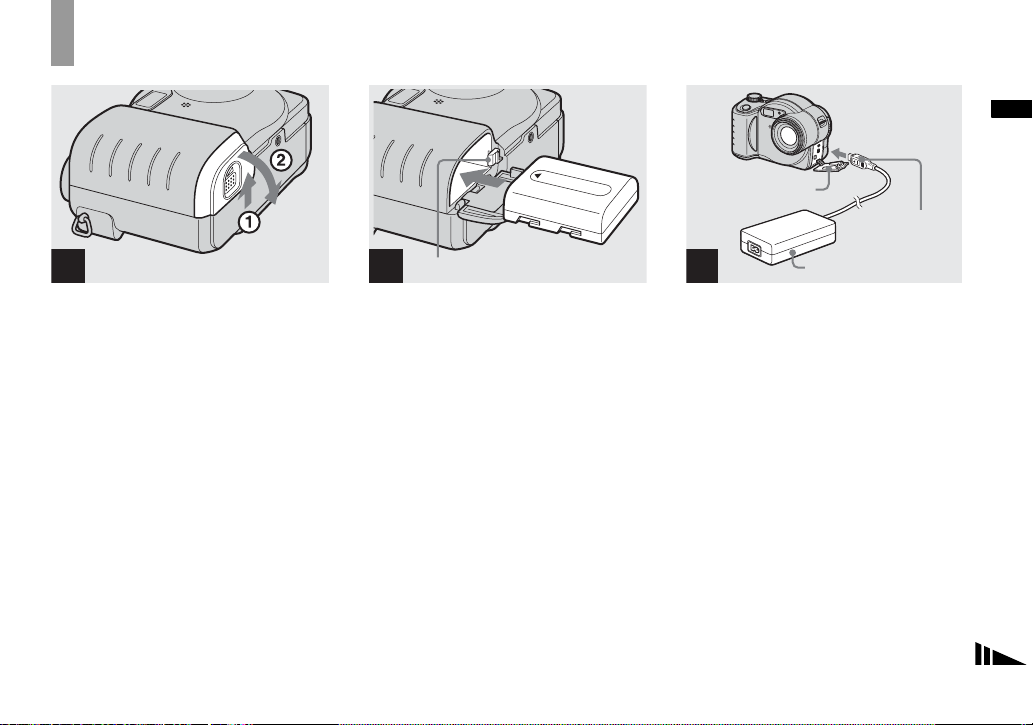
, Open the battery cover .
Slide the cover in the direction of the arrow.
• Be sure to turn off your camera when
charging the battery pack (page 15).
• Your camera operates only with the
“InfoLITHIUM” NP-FM50 battery pack (M
series) (supplied) (page 109).
Battery eject lever
2
, Install the battery pack, then
close the battery cover .
Insert the battery pack with the b mark
facing toward the battery compartment as
illustrated.
Make sure the battery pack is firmly
inserted all the way, then close the cover.
• The battery pack is easily inserted by pushing
the battery eject lever at the front of the battery
compartment up.
3
AC Adaptor
, Open the DC IN jack cover and
connect the AC Adaptor
(supplied) to the DC IN jack of
your camera.
Connect the DC plug with the v mark
facing forward.
• Do not short the DC plug of the AC Adaptor
with a metallic object, as this may cause
malfunction.
• Clean the DC plug of the AC Adaptor with a
dry cotton bud. Do not use the dirty plug. Use
of the dirty plug may not properly charge the
battery pack.
11
2 To wall outlet
Power cord
1
AC Adaptor
4
, Connect the power cord to the
AC Adaptor and then to a wall
outlet.
The /CHG lamp (orange) lights up when
charging begins, and goes off when
charging is completed.
/CHG lamp
• After charging the battery pack, disconnect the
AC Adaptor from the DC IN jack of your
camera.
To remove the battery pack
Battery eject lever
Open the battery cover. Slide the ba ttery
eject lever in the direction of the arrow, and
remove the battery pack.
• Be careful not to drop the battery pack when
removing it.
Battery remaining indicator
The battery remaining indicator on the LCD
screen shows the remaining shooting or viewing
time.
60min
• The black portion of the battery remaining
indicator in the illustration shows the actual
remaining time.
• The displayed remaining time may not be
correct under certain circumstances or
conditions.
3.1M
M AF
101
4
Charging time
Approximate time to charge a completely
discharged battery pack using the AC Adaptor at
a temperature of 25°C (77°F).
Battery pack
NP-FM50 (supplied) Approx. 150
Charging time
(min.)
12
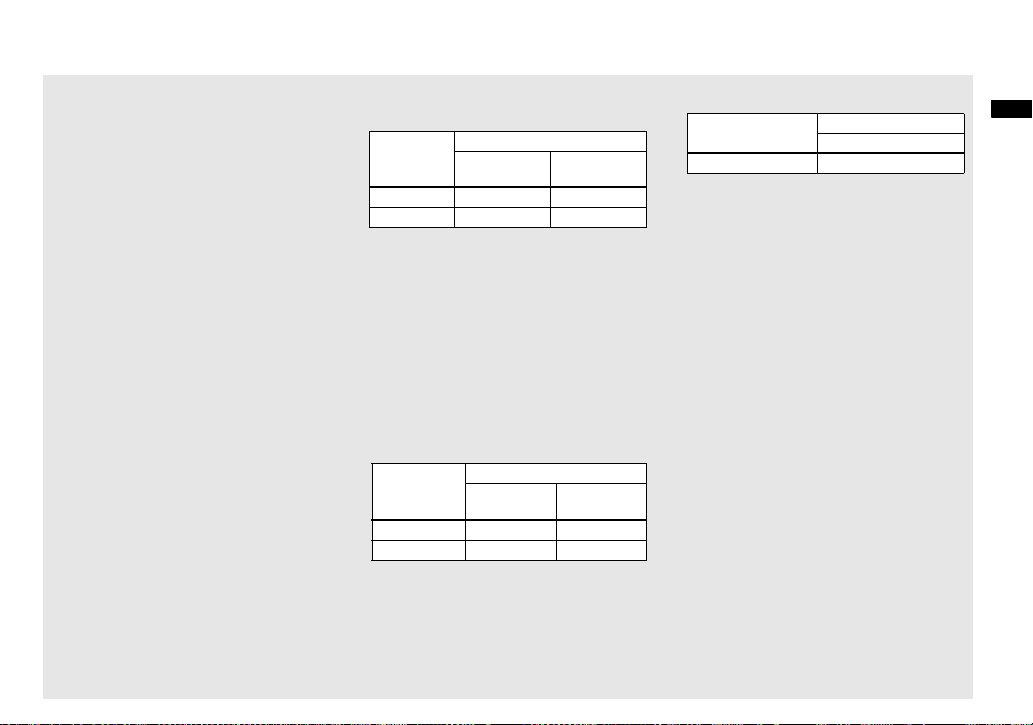
Number of images and battery
life that can be recorded/
viewed
The tables show the approximate number of
images and the battery life that can be recorded/
viewed when you shoot images in normal mode
with a fully charged battery pack at a temperature
of 25°C (77°F). The numbers of images that can
be recorded or viewed take into account changing
the supplied disc as necessary . Note that the actual
numbers may be less than indicated depending on
the conditions of use.
Shooting still images
Under the average conditions
NP-FM50 (supplied)
Image size
No. of
images
3.1M Approx. 270 Approx. 135
VGA Approx. 290 Approx. 145
1) Shooting in the following situations:
– [P. Quality] is set to [Fine]
– Shooting one time every 30 seconds
– The zoom is switched alternately between
the W and T ends
– The flash strobes once every two times
– The power turns on and off once every ten
times
– [AF Mode] is set to [Monitor] in the SET
UP settings
Viewing still images
Image size
3.1M Approx. 1900 Approx. 160
VGA Approx. 2000 Approx. 170
2) Viewing single images in order at about five
second intervals
NP-FM50 (supplied)
No. of
images
1)
Battery life
(min.)
2)
Battery life
(min.)
Shooting movies
3)
NP-FM50 (supplied)
Battery life (min.)
Continuous shooting Approx. 150
3) Shooting contin uous ly at 160 (Mail) image
size
• The number of images and the battery life that
can be recorded/viewed are decreased under the
following conditions:
– The surrounding temperature is low
– The flash is used
– The camera has been turned on and off many
times
– The zoom is used frequently
– [LCD Backlight] is set to [Bright] in the SET
UP settings
– The battery power is low.
The battery capacity decreases as you use it
more and more and as time pass es (p age110).
– [AF Mode] is set to [Cont] in the SET UP
settings
Getting started
13
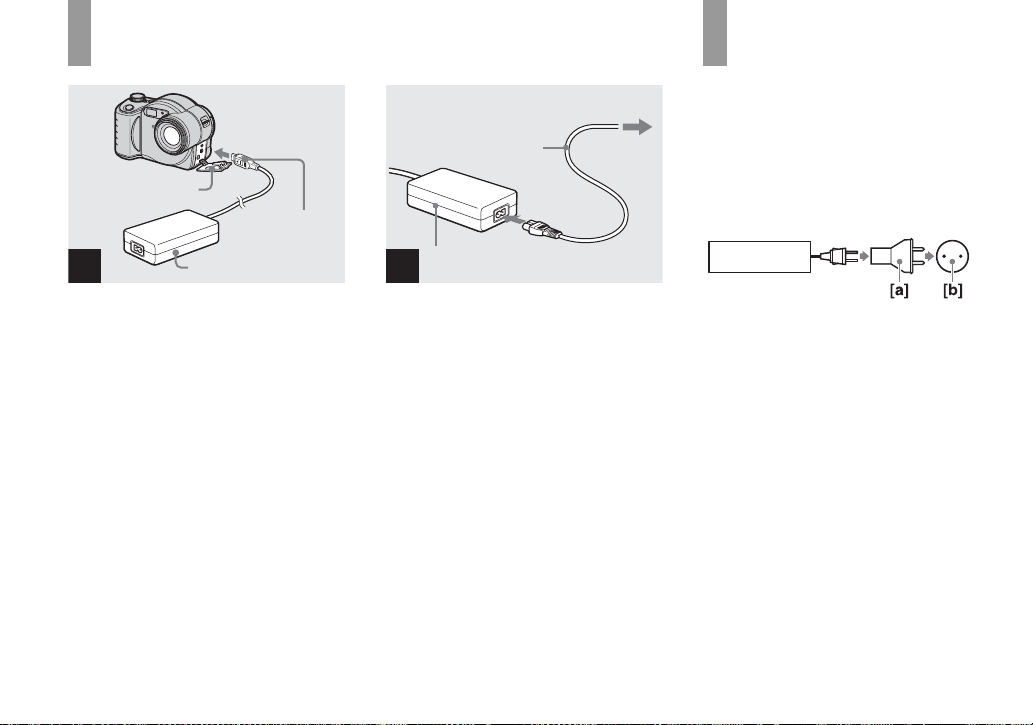
Using an external power source
DC IN jack cover
DC plug
Power cord
2 To wall outlet
1
Using your camera abroad
Power sources
You can use your cam er a in any coun t ry or
region with the supplied AC Adaptor within
100 V to 240 V AC, 50/60 Hz. Us e a
commercially available AC plug adaptor
[a], if necessary, depending on the design of
the wall outlet [b].
1
AC Adaptor
, Open the DC IN jack cover and
connect the AC Adaptor
(supplied) to the DC IN jack of
your camera.
Connect th e DC plug wit h th e v mark
facing forward .
• Connect the AC Adaptor to an easily access ible
wall outlet close by. If any trouble occurs while
using the adaptor, immediately shut off the
power by disconnecting the plug from the wall
outlet.
14
AC Adaptor
2
, Connect the power cord to the
AC Adaptor and then to a wall
outlet.
• When you have finished using the AC Adaptor,
disconnect it from the DC IN jack of the
camera.
• The set is not disconnected from the AC power
source as long as it is connected to the wall
outlet, even if the unit itself has been turned off.
AC-L15A/L15B
• Do not use an electronic transformer (travel
converter), as this may cause a malfunction.
Turning on/off your camera
POWER
POWER button
POWER lamp
, Press POWER.
The POWER lamp (g reen) li ghts u p and th e
power is on. When you turn on your camera
for the first time, the Clock Set screen
appears (pag e16).
Turning off the power
Press POWER again. Th e POWER lamp
goes out, and the camera turns off.
Auto power-off function
If you do not operate the camera for about
three minutes during shooting or viewing or
when performing SET UP, the camera turns
off automatically to prevent wearing down
the battery. The auto power-off function
only operates when the camer a is opera ting
using a batter y pack. The auto power-off
function a ls o will not operate in the
following circumstance s.
• When view ing mo vie s
• When a connector is plugged int o the
(USB) jack or the A/V OUT (MONO)
jack.
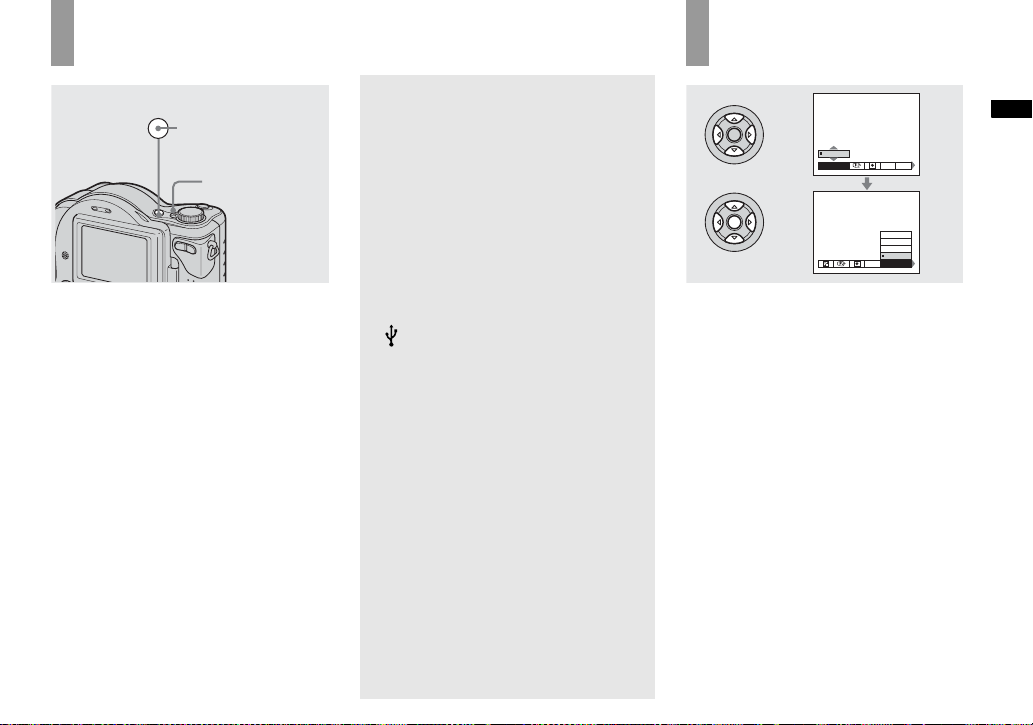
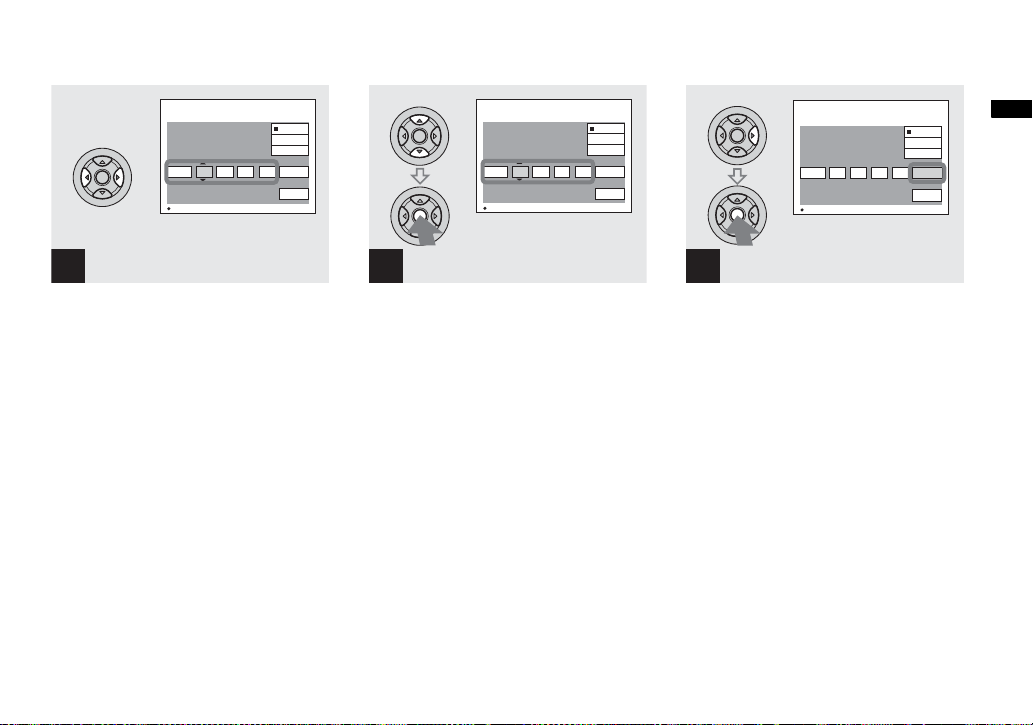
How to use the control button
0EV
0EV
WB
EV ISO
400
200
100
Auto
WB
ISO
To change the current settings of the
camera, bring up the menu or the SET UP
screen (page 40), and use the control button
to make the changes.
For each item, press v/V/b/B to select the
desired value, then press the center z or
v/V/b/B to make th e setting.
Getting started
15
Setting the date and time
Mode dial
1
2
POWER
Clock Set
2003
1
/:
/
1
OK
POWER button
12 00
AM
Y/M/D
M/D/Y
D/M/Y
OK
Cancel
Clock Set
2003
1
/:
/
1
OK
12 00
Y/M/D
M/D/Y
D/M/Y
AM
Cancel
OK
3
, Set the mode dial to .
• You can also carry out this operation when the
mode dial is set to , SCN, or .
• To change the date and time, set the mode dial
to
SET UP, select [Clock Set] in (Setup 1)
(page 106), and perform the procedure from
step 3.
16
, Press POWER to turn on the
power.
The POWER lamp (g reen) l ights up and the
Clock Set screen appears on t he L CD
1
screen.
, Select the desired date display
format with v/V on the control
button, then press z.
Select from [Y/M/D] (year/ mo nth/day),
[M/D/Y] (month/day/yea r) or [D/ M / Y ]
(day/month/year).
• If the rechargeable button battery, which
provides the power for saving the time data, is
ever fully discharged (page 108), the Clock Set
screen will appear again. When this happens,
reset the date and time, by starting from step 3
above.
Clock Set
1
2003
/
12 00
/:
1
OK
Y/M/D
M/D/Y
D/M/Y
AM
Cancel
Clock Set
2003
/:/
OK
7
OK
Y/M/D
M/D/Y
D/M/Y
1
12 00
OK
AM
Cancel
Clock Set
2003
/:/
OK
Y/M/D
M/D/Y
D/M/Y
4
10 30
7
AM
Cancel
OK
Getting started
4
, Select the year, month, day,
hour or minute item you want
to set with b/B on the control
button.
The item to b e s et is indicated with v/V.
5
, Set the numeric value with v/V
on the control button, then
press z to enter it.
After entering the number, v/V move s to
the next item. Repeat this step until all of
the items are set.
• If you selected [D/M/Y] in step 3, set the time
on a 24-hour cycle.
6
, Select [OK] with B on the
control button, then press z.
The date and time ar e entere d and th e clock
starts to keep time.
• To cancel the date and time setting, select
[Cancel] with v/V/b/B on the control button,
then press z.
17
Shooting still image
s
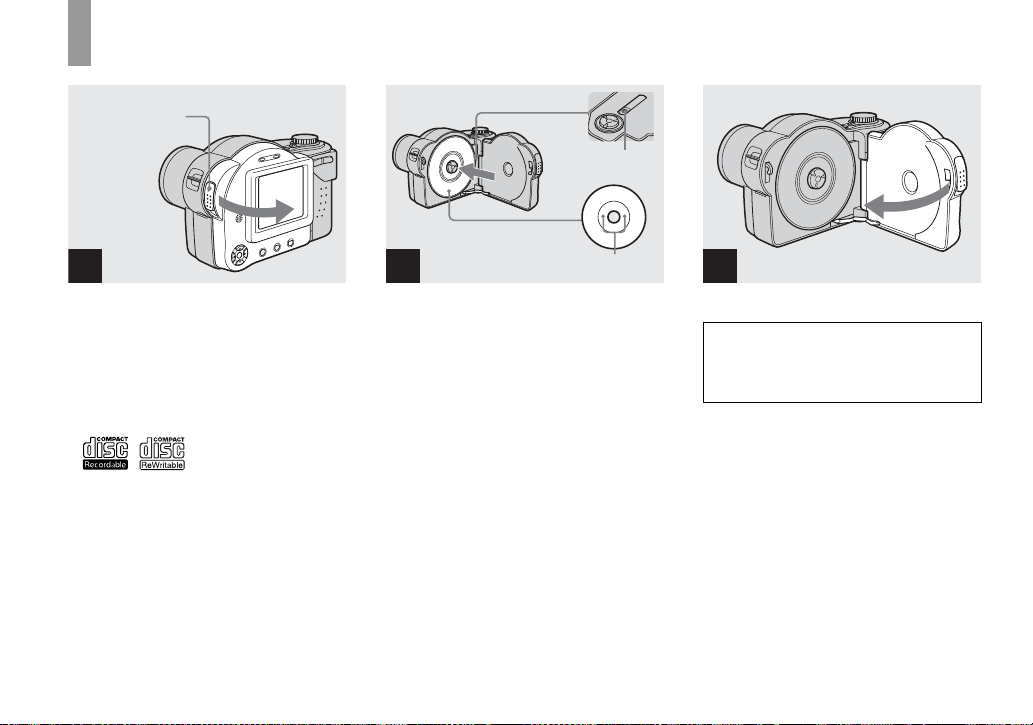
Inserting and removing a disc
Disc cover
OPEN lever
Pickup lens
Disc
1
, Open the disc cover.
Slide down the disc cover OPEN lever, and
open the disc cover.
• You can use only 8 cm CD-R/CD-RW
discs that have these marks.
• For details on disc, see pa ge 108.
18
2
Push here
, Place a disc in the disc tray.
Place the disc wit h the printed side up, and
push down on the center of the disc until it
clicks.
• Do not forcibly push on the disc.
• Do not touch the pickup lens.
3
, Close the disc cover.
Removing the disc
Open the disc cover. Check to make sure that the
disc has completely stopped rotating, then remove
the disc.
• When the ACCESS lamp is flashing, it
means that image data is being read or
written. Never open the disc cover or
turn off the power at this time, as the
image data may be da mage d or th e d is c
may become unusable.
• While the camera is writing data on a disc, the
disc cover OPEN lever is locked.
• After you change the disc, “Repairing Data”
may appear on the LCD screen and it may take
about 10 minutes to prepare the disc for
recording depending on the disc condition.

Initializing a disc
What is initialization?
Initialization is required to record images
on a disc.
When you perform fina li za ti on (page 75)
using your camera to view images through
a CD-ROM drive, initialization is also
automatically pe rformed, and you can
continue to reco rd images. Im ages record ed
before finalization remain on the disc.
Mode dial
1
, Insert a new disc and set the
mode dial to , then turn on
the power.
“Initialize Place on level surface ” appears
on the LCD screen.
To cancel initialization
Select [Cancel] with
button, th en press
initialization , open and close the disc cover,
then perform the proce dure from step 1.
• You can also carry out this operation when the
mode dial is set to , SCN or .
•
Y ou can also perform initialization using
(Disc Tool 1) in the SET UP settings
(page 105).
V on the control
z. After canceling the
Initialize
Avoid any vibration
Ready to initialize
Initialize
Avoid any vibration
Initialize in progress
2
, Select [OK] with v on the
control button, then press z.
Initialization starts. Do not shake or strike
the camera during initialization.
1
Initialize
Initialize complete
Shooting still images
19

Setting the still image size
Mode dial
1
, Set the mode dial to and
turn on the power.
• You can also carry out this operation when the
mode dial is set to or SCN.
3.1M
3.1M
2.8M(3:2)
2.0M
1.2M
VGA
Image Size
2
, Press (Image Size).
The Image Size setup appears.
• For details on the image size, see page 21.
VGA
3.1M
2.8M(3:2)
2.0M
1.2M
VGA
Image Size
3
, Select the desired image size
with v/V on the control button.
The image size is set.
When the setting is compl ete, pre ss
(Image Size) so that the Image Size setup
disappears from the LCD screen.
• The image size selected here is maintained even
when the power is turned off.
20
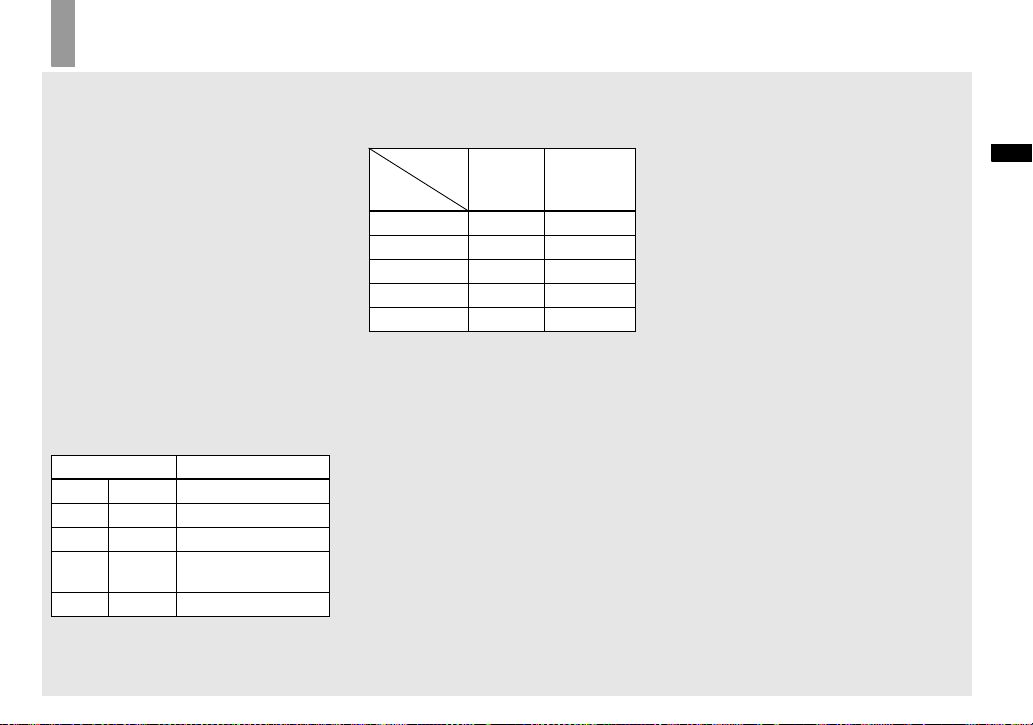
Image size and quality
You can choose image si ze (number of
pixels) and im age quality (compression
ratio) based on the kind of images you want
to shoot. The larger yo u ma ke the image
size and the higher you make the image
quality, the better your image, but also the
larger the amount of data needed to preserve
your image. This means you can save fewer
images in your disc.
Choose an image size and qu al it y le ve l
appropriately for the kind of i mages you
want to sho o t.
You can resize the images later (Resize
function, see page 67).
You can choose image si ze from among th e
five options in the following tables. The
below image size is a minimum setting for
examples. When you want to improve
image qual ity, select th e larger image size.
Image size Examples
3.1M
2.8M(3:2)
2.0M
1.2M
2048×1536
2048 (3:2)
1632×1224
1280×960
Printing A4 size images
1)
3:2 prints
Printing A5 size images
Printing postcard size
images
VGA
640×480
1)
This option records images in a horizontal to
vertical proportion of 3:2 to match the size of
the print paper used.
Creating home pages
The number of images that can
be saved in a supplied CD-R
2)
(Units: images)
3)
Quality
Fine Standard
Image size
3.1M 81 145
2.8M(3:2) 81 145
2.0M 131 234
1.2M 194 345
VGA 655 1285
2)
When [REC Mode] is set to [Normal]
For the number of images that can be saved in
other modes, see page 99.
3)
For more information about the image quality
mode, see page 41.
• The “3.2 MEGA PIXELS” indicated on the
camera shows the number of effective pixels.
The number of actually recorded pixels is
maximum 3.1 MEGA pixels.
• When images recorded using earlier Sony
models are played back on this camera, the
display may differ from the actual image size.
• When the images are viewed on the LCD
screen of the camera, they all look the same
size.
• Number of shooting images can differ from
these values according to shooting conditions.
• When the number of remaining shooting
images is greater than 9999, the >9999
indicator appears on the LCD screen.
Shooting still images
21
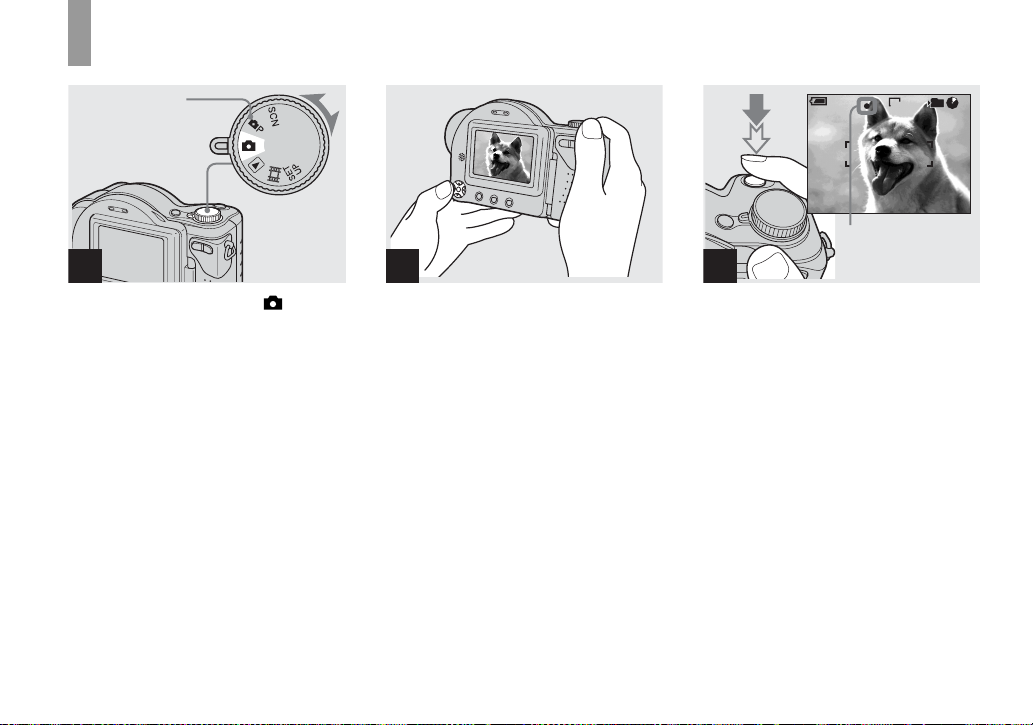
Basic still image shooting — Auto adjustment mode
Mode dial
1
, Set the mode dial to , and
turn on the power.
The name of the folder where th e image will
be recorded ap pears on the LCD screen for
approximately five seconds.
• This camera can create new folders and select
folders to be stored in the disc (page 41).
2
, Hold the camera steadily with
both hands and positi on the
subject in the center of the
focus frame.
Do not cover the lens or flash with your
fingers.
• The minimum focal distance to the subject is
50 cm (19 3/4 inches) at the W end and 80 cm
(31 1/2 inches) at the T end. To shoot even
closer subjects, use macro recording mode
(page 25).
min
60
AE/AF lock indicator
Flashes green
3
t Lights up
101
FINE
3.1M
96
M AF
F3.8
30
, Press and hold the shutter
button halfway down.
The beep sounds. When the AE/AF lock
indicator changes from flash ing to steadily
lit, the camera is ready for shooting.
(The LCD screen may be frozen for a split
second depending on the subjec t.)
• If you release the shutter button, the recording
will be canceled.
• When the camera does not beep, the AF
adjustment is not complete. Y ou can continue to
shoot, but the AF is not set properly (except in
Continuous AF).
• The frame appearing on the LCD screen shows
the focus adjustment range. (For more details
on the AF range finder frame, see page 43.)
22
60
min
101
3.1M
95
M AF
4
, Press the shutter butto n fu lly
down.
The shutter sounds. The image will be
recorded in the d isc. When
(page 10) goes out, yo u ca n shoot the
next image
• When operating the camera using a battery
pack, if you do not operate the camera for about
three minutes during recording, the camera
turns off automatically to prevent wearing
down the battery (page 15).
• While the image is being recorded on the disc,
the ACCESS lamp flashes. Do not shake or
strike the camera while this lamp is flashing.
Also do not turn off the power, remove the
battery pack, or open the disc cover at this time,
as the data may be damaged or the disc may
become unusable.
.
ACCESS lamp
Mode dial for still image
shooting
When shooting still images with your
camera, you can choose from the following
shooting methods.
(Auto adjustment mode)
The focus, exposure and white balance are
automatically adjusted to allow easy
shooting. The image quality is set to [Fine]
(page 41).
(Program auto shooting)
You can set the desired shooting functions
using menus (pages 40 and 101).
SCN (Scene Selection)
You can select from the following modes to
shoot according to the scene conditions
(page 55).
– (Twilight mode)
– (Twilight portrait mode)
–
(Landscape mode)
– (Soft snap mode)
–
(Snow mode)
– (Beach mode)
–
(High-speed shutter mode)
Auto Focus
When you try to shoot a subject that is
difficult to f o cus on, the AE/AF lock
indicator changes to flas hi ng slowly.
The Auto Focus function may have
difficulty working unde r th e following
conditions. In such cases, release the shutter
button, then recompose the shot and focus
again.
• The subject is dista nt from the camera
and dark.
• The contrast bet w een the subject and its
background is poor.
• The subject is seen through glass, such as
a window.
• A fast-moving subj ec t.
• The subject reflec ts or has a lustrou s
finish, such as a mirror or a luminous
body.
• A flashing subjec t.
• A backlit subject .
There are two Auto Focus functions: “AF
range finder frame” which set s the focus
position according to the su bject position
and size, and “AF mode” which sets the
focus operation according to the AF
response and the battery consumption.
See page 43 for details.
Shooting still images
23

Checking the last image you shot — Quick Review
60
min
3.1M
8/8
Review
RETURN
101
10:30
2003 7 4101-0029
PM
Using the zoom feature
min
60
x1.1
T (telephoto)W (wide-angle)
101 101
VGA
min
60
96
M AF
x3.0
VGA
96
M AF
, Press b (7) on the control
button.
To return to the normal shooting mode,
press lightly on the shutter button or press b
(7) again.
To delete the image displayed on the
screen
1 Press (Delete).
2 Select [Delete] with v on th e control
button, then press z.
The image is d eleted.
24
, Press the zoom button to
choose the desired zoom
position for shooting.
Minimum focal distance to the
subject
When the zoom is set to the W side:
Approx. 50 cm (19 3/4 inches) from the lens
surface
When the zoom is set to the T side:
Approx. 80 cm (31 1/2 inches) from the lens
surface
Shooting close-ups — Macro
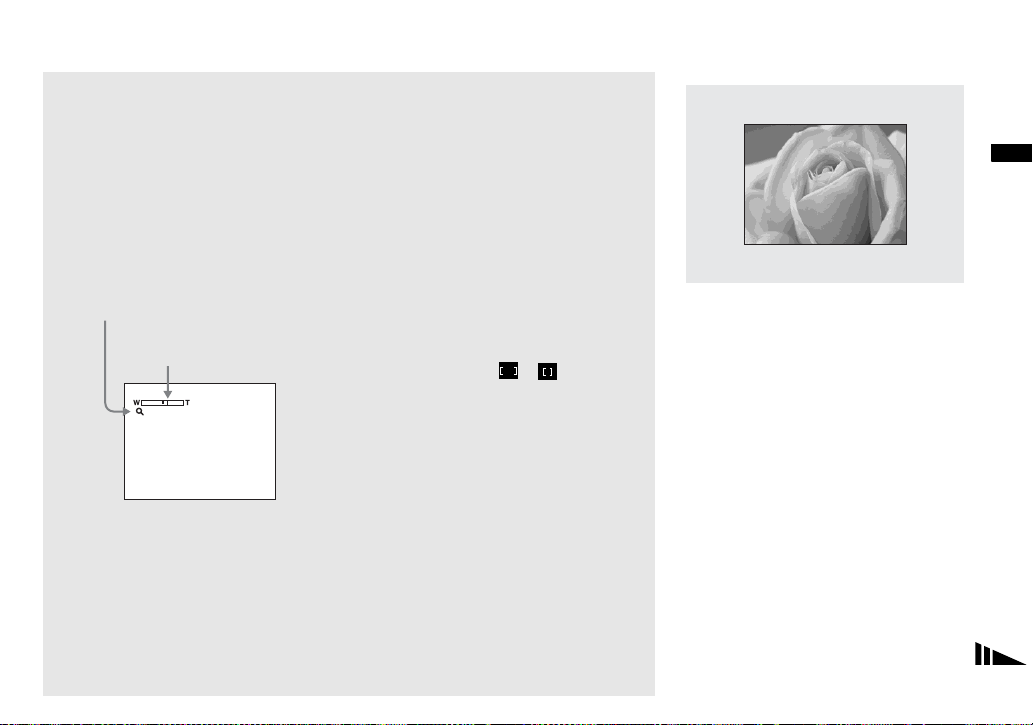
Smart zoom
Digital processing lets you zoom in the
image without deterioration.
When the zoom ex ceeds 3 ×, enla rgem ent is
carried out usi ng th e smart zoom. When t he
smart zoom is not needed, set [Smart Zoom]
to [Off] in the SET UP settings (page 105).
When you press the zoom button, the zoom
scaling indicator appears on the LCD
screen.
Zoom scaling indicator
The T side of this line shows
the extent of smart zoom
x2.5
The maximum zoom scal e de pe nds on the
image size.
[2.0M]: 3. 8×
[1.2M]: 4. 8×
[VGA]: 9.6×
When the image size is [3.1M] or
[2.8M(3:2)], the smart zoom does not
work.
• When using the smart zoom, the image on the
LCD screen may look rough. However, this
phenomenon has no effect on the recorded
image.
• AF range finder is not shown when using the
smart zoom. When 9 (Focus) is set to [Multi
AF] or [Center AF], or flashes and the
centrally-located subject has priority to focus
on.
Shooting still images
The macro recording mode is used when
zooming up a small subject, such as flowers
or insects. You can shoot close-ups of
subjects up to the distances specified below.
When the zoom is set all the way to
the W side:
Approx. 3 cm (1 3/16 inches) from the lens
surface
When the zoom is set all the way to
the T side:
Approx. 80 cm (31 1/2 inches) from the lens
surface
25
Using the self-timer
60
min
101
3.1M
96
M AF
60
min
FINE
101
3.1M
95
M AF
F3.8
30
60
min
101
3.1M
96
M AF
1
, Set the mode dial to , and
press B ( ) on the control
button.
The (macro) indicator appears on the
screen.
• If the menu is currently displayed, press MENU
first so that the menu disappears.
• You can also carry out this operation when the
mode dial is set to , SCN (other than
(Twilight mode) or (Landscape mode),
page 55) or .
26
2
, Center the subject in the frame,
and press the shutter button
fully down.
To return to normal recording mode
Press B ( ) on the control but ton again.
The indicator disappears.
1
, Turn the mode dial to , and
press V ( ) on the control
button.
The (self-timer) indicator appears on the
LCD screen.
• If the menu is currently displayed, press MENU
first so that the menu disappears.
• You can also carry out this operation when the
mode dial is set to , SCN or .
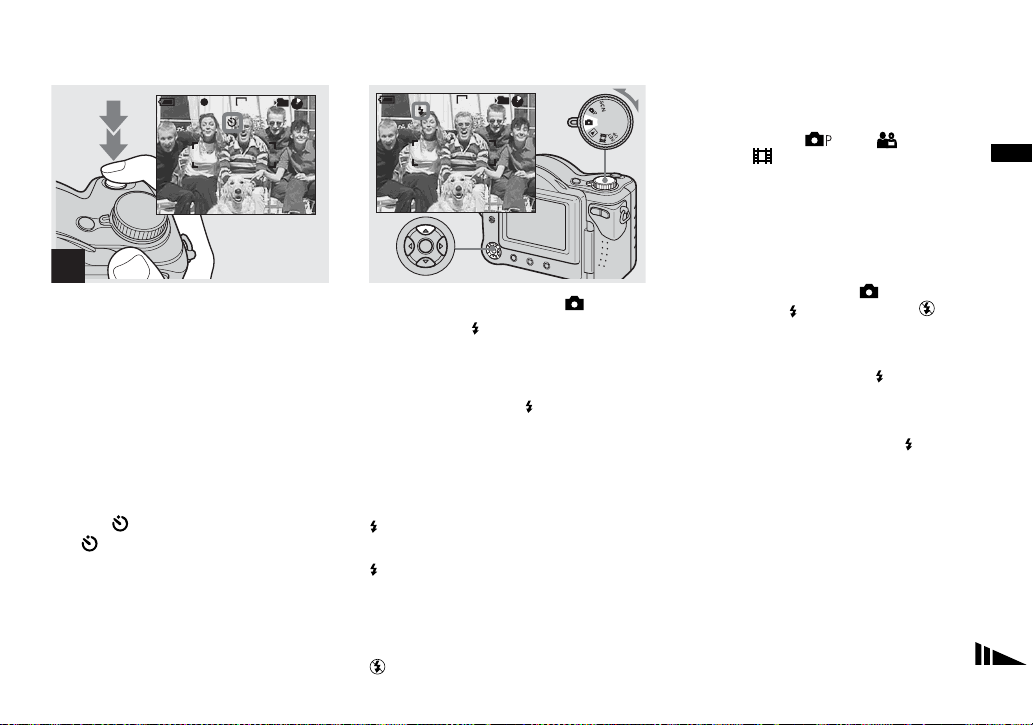
Selecting a flash mode
60
min
FINE
101
3.1M
96
M AF
F3.8
30
2
, Center the subject in the frame,
and press the shutter button
fully down.
The self-timer lamp (page 9) fl ashes and a
beep sounds after you press the shutter
button until the shutter oper ates
(approximately 10 seconds).
To cancel the self-timer in the middle
of the operation
Press V ( ) on the control button again.
The indicator disappears from the LCD
screen.
• If you press the shutter button while standing in
front of the camera, the focus and the exposure
may not be correctly set.
60
min
101
3.1M
96
M AF
, Set the mode dial to , and
press v ( ) on the control
button repeatedly to select a
flash mode.
Each time you press v ( ), the indicator
changes as follows.
No indicator (Auto): The flash
automatically strobes when shooting
images in a dark pl ace or against a light
source.
(Forced flash): The flash strobes
regardless of the surrounding brightness.
(Slow synchro): The flash strobes
SL
regardless of the surrounding brightness.
The shutter spee d is slow in a dark plac e, so
you can clearly shoot the background that is
out of flash light.
(No flash): The flash does not strobe.
• If the menu is currently displayed, press MENU
first so that the menu disappears.
• You can also carry out this operation when the
mode dial is set to , SCN ( Soft snap
mode) or (Clip Motion).
• The recommended shooting distance using the
flash is approximately 0.8 m to 2.5 m
(31 1/2 inches to 8 feet 2 7/16 inches) (when
[ISO] is set to [Auto]).
• You can change the brightness of the flash with
[Flash Level] in the menu settings (page 102).
(You cannot change the brightness of the flash
while the mode dial is set to .)
• When using the (Slow synchro) or (No
flash) mode, the shutter speed becomes slower
in dark places, so using a tripod is
recommended.
•
While charging the flash, the /CHG lamp
SL
flashes. After the charging is complete, the
lamp goes out.
• When you press the shutter button halfway
down while the flash is strobing, the /CHG
lamp turn s on .
• Attaching a conversion lens (not supplied) may
block the light from the built-in flash or cause
the lens shadow to appear.
• This setting is maintained even when the power
is turned off.
Shooting still images
27

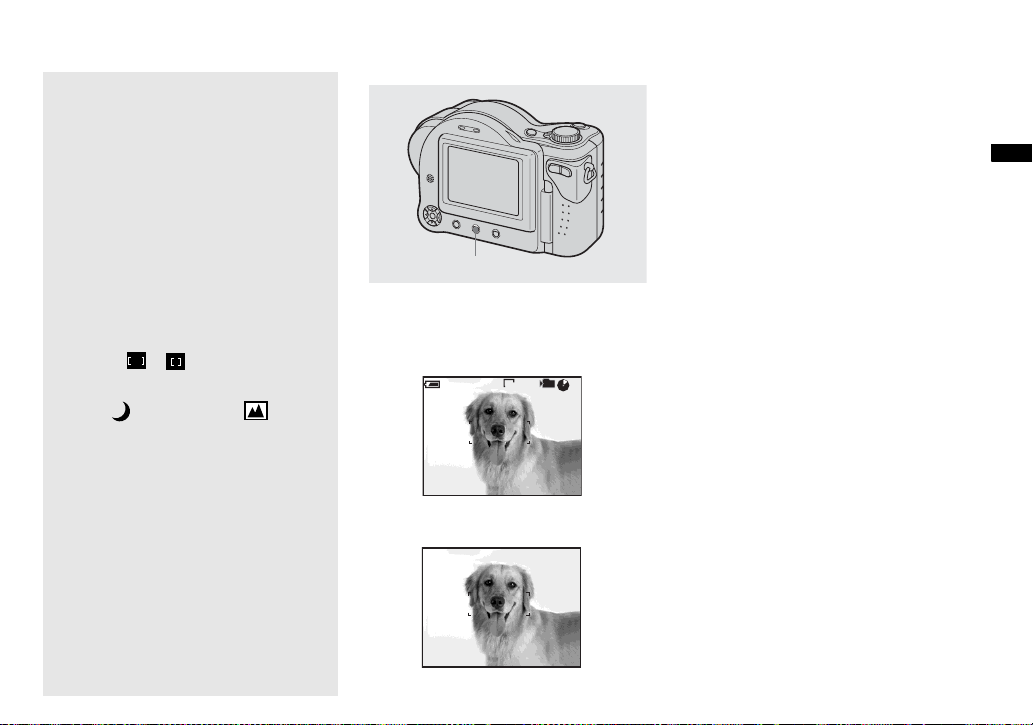
When shooting images against
a light source
If the flash is set to Auto (no indicator),
shooting against a light sou r ce
automatically flashes even when there is
enough light around the subject (Daylight
synchro).
Before flashed
When flashed
• The best performance may not be given
depending on shooting conditions.
• When you do not want to use the flash, set the
flash mode to (No flash).
To reduce the red-eye
phenomenon when shooting
live subjects
Set [Red Eye Re duction ] to [On] in the SE T
UP settings (page 105). indicator
appears on the LC D sc reen, and the flash
pre-strobes before shooting to redu ce the
red-eye phenomenon.
m
• Red-eye reduction may not produce the desired
effects depending on individual differences, the
distance to the subject, if the subject does not
see the pre-strobe, or other conditions.
Recording images with the AF
illuminator
The AF illuminator is fill light to focus
more easily on a subject in dark
surroundings. When not using this function,
set [AF Illuminator] to [Off] in the SET UP
settings (page 105).
appears on the scre en and the AF
ON
illuminator emit s red lig ht when the s hutt er
button is pressed halfway unti l the focus is
locked.
FINE
60
min
ON
101
3.1M
96
M AF
F3.8
30
28
Indicators on the screen during shooting
• If the AF illuminator light does not reach the
subject sufficiently or the subject has weak
contrast, focus will not be achieved. (An
approximate distance of 0.3 m to 2.3 m (11 7/8
inches to 7 feet 6 1/2 inches) is recommended.)
• Focus is achieved as long as AF illuminator
light reaches the subject, even if the light is
slightly off the center of the subject.
• When the focus preset distance is set (page 46),
the AF illuminator does not function.
• The AF illuminator emits very bright light.
Although there are no problems with safety,
directly looking into the AF illuminator at close
range is not recommended.
• When 9 (Focus) is set to [Multi AF] or
[Center AF], the AF range finder is not
displayed. or flashes and the centrallylocated subject has priority to focus on.
• The AF illuminator does not operate when SCN
is set to
(Twilight mode) or
(Landscape mode) in the menu settings
(page 55).
DISPLAY ON/OFF
Each time you press DISPLAY ON/OFF,
the display changes in the following order.
Indicators on
60min
Indicators off
101
3.1M
96
M AF
r
M AF
• For a detailed description of the indicators, see
page 113.
• The setting selected here is maintained even
when the power is turned off.
Shooting still images
29

Inserting the date and time on a still image
Camera
Moving Image :
1
AF Mode :
2
Smart Zoom :
Date/Time :
1
Red Eye Reduction :
2
AF Illuminator :
SELECT
MPEG Movie
Monitor
On
Off
Off
Auto
1
, Set the mode dial to SET UP.
The SET UP screen appears.
• When images are shot with the date and time
superimposed, the date and time cannot be
removed later.
• The date and time do not appear on the LCD
screen during shooting, instead, “ ” appears
in the upper left corner of the LCD screen. The
actual date and time appear in red during
playback only.
Camera
Moving Image :
1
AF Mode :
2
Smart Zoom :
Date/Time :
1
Red Eye Reduction :
2
AF Illuminator :
OK
Day&Time
Date
Off
2
, Select (Camera) with v on
the control button, then press
B.
Select [Date/Time] with v/V,
then press B.
• If you select [Date], the date is superimposed
onto the image in the order selected in “Setting
the date and time” (page 16).
Camera
Moving Image :
1
AF Mode :
2
Smart Zoom :
Date/Time :
1
Red Eye Reduction :
2
AF Illuminator :
PAGE SELECT
MPEG Movie
Monitor
On
Date
Off
Auto
3
, Select the date and time setting
with v/V on the control button,
then press z.
Day & Time: Superimposes the date, hour,
and minute onto the image.
Date: Superimposes the year, mont h and
day onto the image.
Off: Does not superimpos e th e date and
time onto the image.
After the setting has been complet ed, set the
mode dial to , and shoot the image.
• You can also superimpose the date and time
with the mode dial set to or SCN.
• This setting is maintained even when the power
is turned off.
30
 Loading...