

Sony Model CDX-3100 Operating Instructions Manual
Actual total number: SONY CDX-3100 (E, S, C) 3-810-605-31(1)
3-810-605-31 (1)
EN
Operating Instructions
Manual de instrucciones
###
ES
C
1996 by Sony Corporation
CDX-3100
For installation and connections, see the supplied installation/connections
manual.
Con respecto a la instalación y las conexiones, consulte el manual de Instalación/
conexiones suministrado.
###
FM/AM
Compact Disc
Player

2
EN
Actual total number: SONY CDX-3100 (E,S,C) 3-810-605-31(1)
Features
General
• Detachable-front panel enables you to take
the front panel away with you when you
leave your car (page 4).
• Caution alarm will be activated if you turn
off the ignition key without removing the
front panel from the unit.
• 12-hour digital clock provided (page 5).
• Built-in power amplifier (max. output:
30 W × 4 ch.) enables you to enjoy 4-speaker
systems.
• Line outputs for connecting an optional
power amplifier.
CD player section
• 1 bit DAC (Digital-to-Analog Converter) for
clear sound reproduction.
• Quick recovery mechanism for preventing
sound skipping.
• Convenient functions such as the Intro Scan
Function for locating a desired track, the
Repeat Play Function for playing a track
repeatedly, and the Shuffle Play Function
for playing tracks in random order.
Tuner section
• Up to 24 stations can be preset: 18 FM
stations and 6 AM stations .
• Automatic Memory function stores a total
of 24 stations in memory quickly and easily
(page 8).

3
EN
Actual total number: SONY CDX-3100 (E,S,C) 3-810-605-31(1)
Table of Contents
Other Functions
Adjusting the Sound Characteristics .................... 9
Enjoying Bass and Treble at Low Volume
— Loudness Function ......................................... 9
Muting the Sound Quickly
— Mute Function ................................................ 9
Muting the Beep Tone ............................................. 9
Turning on the Clock Display
— Power Select Function ................................... 9
Maintenance ........................................................... 10
Dismounting the Unit ........................................... 10
Location of Controls .............................................. 11
Specifications .......................................................... 12
Troubleshooting Guide ......................................... 13
Precautions ............................................................... 4
Detaching and Attaching the Front Panel ............ 4
Setting the Clock ...................................................... 5
CD Player Operation
Playing a CD ............................................................. 6
Ejecting the CD ........................................................ 6
Locating the Beginnings of Tracks
— AMS (Automatic Music Sensor)
Function .......................................................... 6
Locating the Desired Part of a Track
— Manual Search Function ............................... 6
Searching for the Desired Track
— Intro Scan Function ........................................ 6
Playing Tracks Repeatedly
— Repeat Play Function..................................... 6
Playing Tracks in Random Order
— Shuffle Play Function .................................... 7
Radio Reception
Searching for Stations Automatically
— Automatic Tuning .......................................... 7
If FM Stereo Reception is Poor
— Monaural Mode .............................................. 7
Tuning in by Adjusting the Frequency
— Manual Tuning ............................................... 8
Memorising Stations Automatically
— Automatic Memory Function ....................... 8
Memorising Only the Desired Stations ................ 8
Receiving the Memorised Stations ........................ 8

4
EN
Actual total number: SONY CDX-3100 (E,S,C) 3-810-605-31(1)
Precautions
• Before operating the unit for the first time or
after replacing the car battery, press the reset
button with a ballpoint pen etc., then operate
the unit.
• If your car was parked in direct sunlight
resulting in a considerable rise in
temperature inside the car, allow the unit to
cool off before operating it.
• If no power is being supplied to the unit,
check the connections first. If everything is in
order, check the fuse.
• If no sound comes from the speakers in
2-speaker systems, set the fader control to the
centre position.
If you have any questions or problems
concerning your unit that are not covered in
this manual, please consult your nearest Sony
dealer.
Notes on CDs
A dirty or defective disc may cause sound
dropouts during playback. To enjoy optimum
sound, handle the disc as follows.
Handle the disc by its edge to keep the disc
clean. Do not touch the surface.
Do not stick paper or tape on the labelled
surface.
Do not expose the discs to direct sunlight or
heat sources such as hot air-ducts. Do not leave
them in a car parked in direct sunlight where
there can be a considerable rise in the
temperature inside the car.
Before playing, clean the discs with an optional
cleaning cloth. Wipe each disc from the centre
of the disc outward.
Do not use solvents such as benzine, thinner,
commercially available cleaners or antistatic
spray intended for analog discs.
Notes on Moisture condensation
On a rainy day or in a very damp area,
moisture may condense on the lenses inside
the CD player. Should this occur, the unit will
not operate properly. In this case, remove the
disc and wait for about an hour until the
moisture has evaporated.
When you play 8 cm CDs
To use the optional Sony compact disc single
adapter (CSA-8) to protect the CD player from
damage.
Detaching and Attaching
the Front Panel
The front panel of this unit can be detached in
order to prevent the unit from being stolen.
Detaching the Front Panel
Before detaching the front panel, be sure to
press the OFF button first. Then press the
RELEASE button to open up the front panel
and detach the panel by pulling it towards you
as illustrated.
Be sure not to drop the panel after detaching it
from the unit.
Reset button
OFF button
RELEASE button
5
EN
Actual total number: SONY CDX-3100 (E,S,C) 3-810-605-31(1)
Attaching the Front Panel
Apply the right side of the front panel to the
unit by attaching part A of the front panel to
part B of the unit as illustrated, then swing
the left side into the unit until it clicks.
Notes
• Make sure that the front panel is the right way up when
attaching it to the unit as it cannot be attached upside
down.
• Do not press the front panel hard against the unit when
attaching it to the unit. It can easily be attached by
pressing it lightly against the unit.
• When you carry the front panel with you, put it in the
supplied front panel case.
• Do not press hard or give excessive pressure to the
display window of the front panel.
• Before removing the front panel, be sure to turn the
power off. However, if you press the RELEASE button to
detach the panel while the unit is still turned on, the
power will automatically turn off in order to protect the
speakers from being damaged.
• Do not expose the front panel to direct sunlight, heat
sources such as hot air ducts or leave it in a humid place.
Never leave it on the dashboard etc. of a car parked in
direct sunlight where there may be a considerable rise in
temperature inside the car.
Caution Alarm
If you turn the ignition key switch to the OFF
position without removing the front panel, the
caution alarm will be activated, and a beep
tone will be heard for a few seconds (only for
cars with an accessory position on the ignition
key switch).
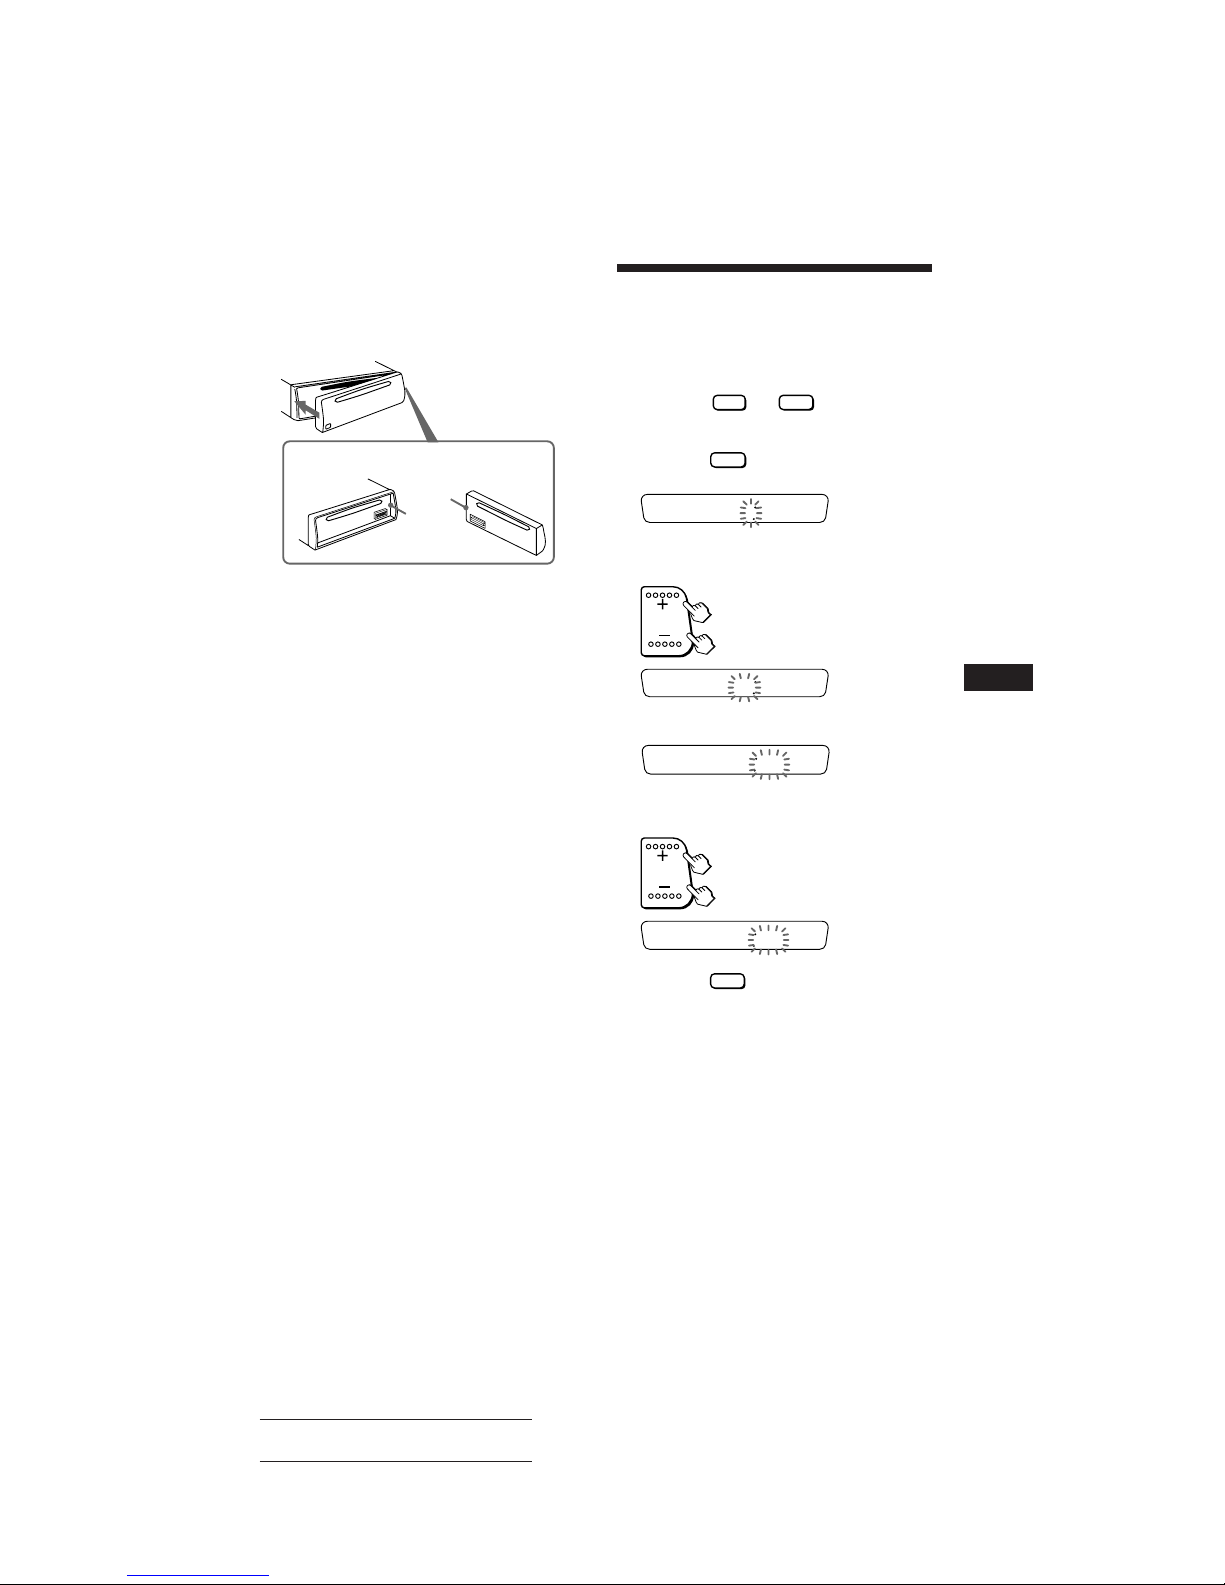
Setting the Clock
The clock has a 12-hour digital indication.
For example, setting it to 10:08
1 Display the time.
(Press the
OFF
or
DSPL
button during
unit operation.)
2 Press the
DSPL
button for more than
two seconds.
Set the hour digits.
3 Press the SEL button momentarily.
Set the minute digits.
4 Press the
DSPL
button momentarily.
The clock activates.
Note
If the car has no accessory position on the ignition key
switch, the clock cannot be set unless the power is turned
on. Set the clock after you have turned on the radio, or
started CD playback.
B
A
The hour digit(s) blinks.
to go back
to go forward
The minute digits blink.
to go back
to go forward
100
1000
1000
1008
6
EN
Actual total number: SONY CDX-3100 (E,S,C) 3-810-605-31(1)
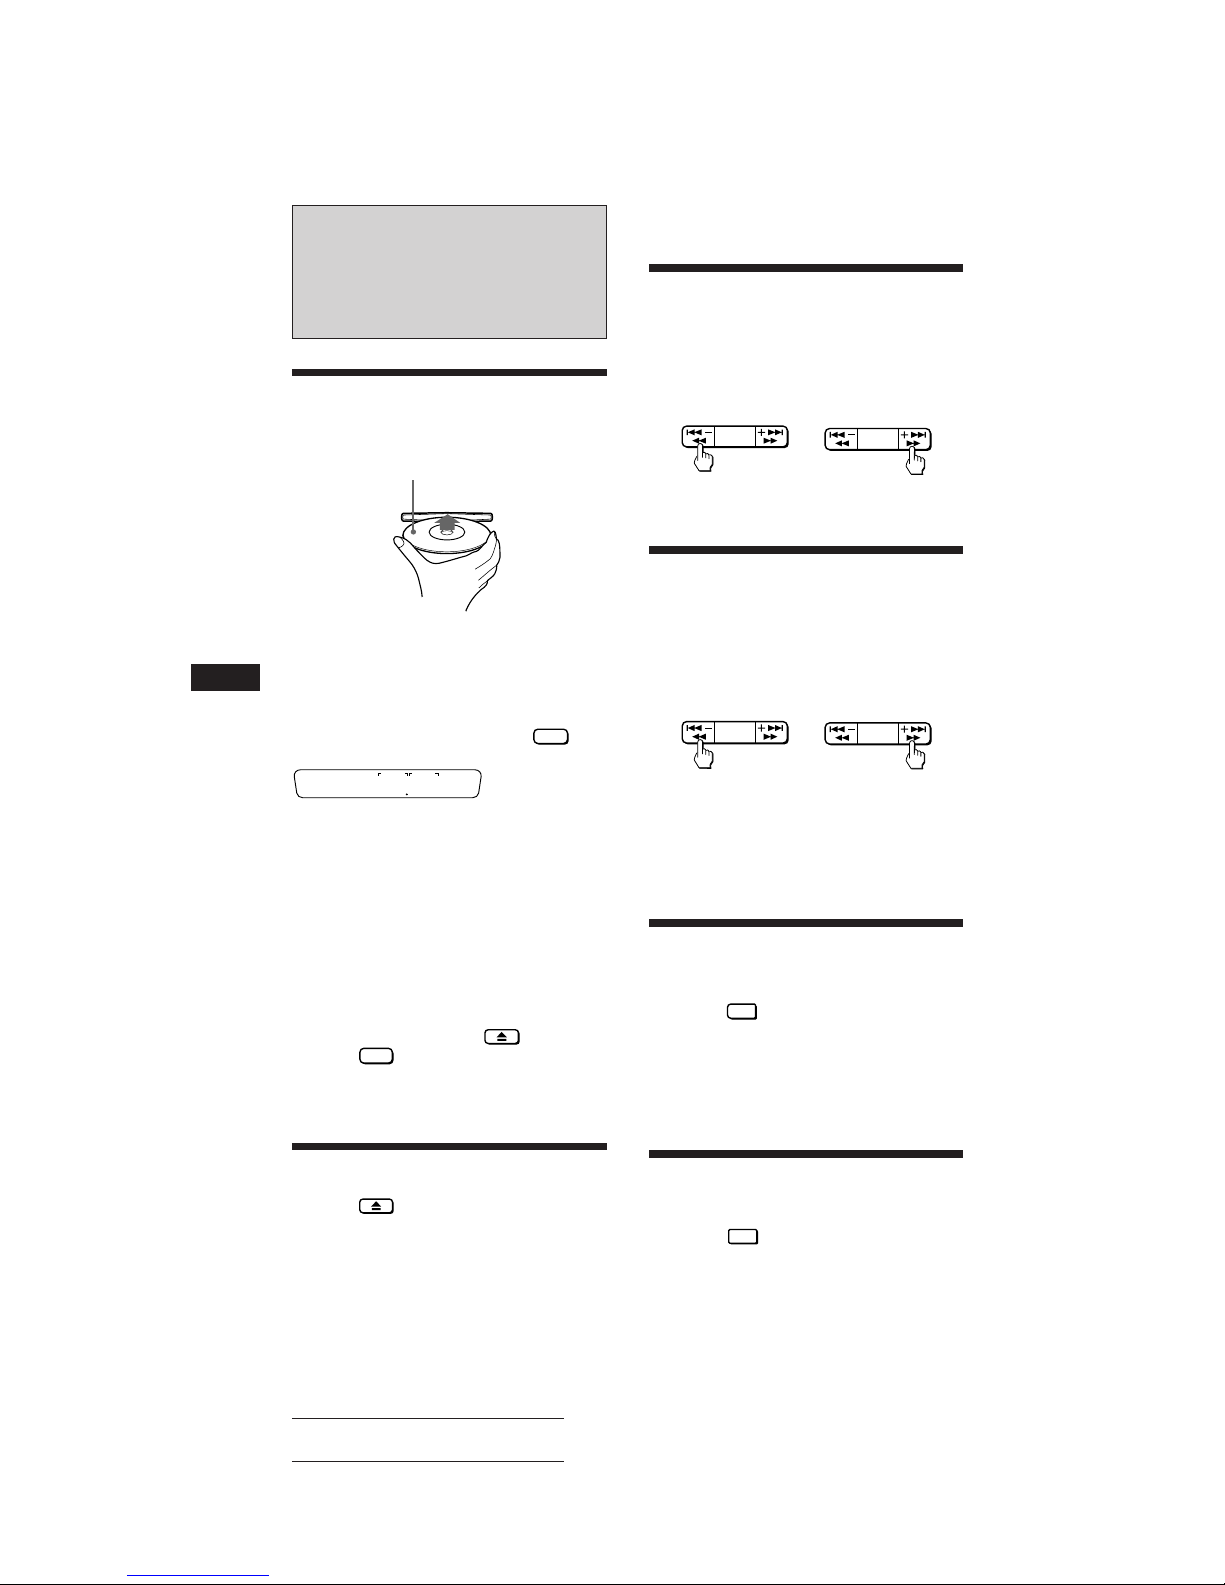
Locating the Beginnings
of Tracks
— AMS (Automatic Music Sensor) Function
During playback, press either side of
the SEEK/AMS/MANU button once for
each track you wish to skip.
Locating the Desired Part
of a Track
— Manual Search Function
During playback, press and hold either
side of the SEEK/AMS/MANU button for
more than two seconds. Release the
button when you have found the
desired part.
If you reverse to the beginning of the disc, “_ _ ” appears
on the display. Forwarding to the end of the disc causes
“ _ _” to be displayed.
In either case, you can neither proceed to the previous nor
the following track.
Searching for the Desired
Track
— Intro Scan Function
Press the
1
INTRO
button during playback.
n “INTRO” appears on the display.
The first 10 seconds of all the tracks are played.
When you find the desired track, press the
button once more. The unit returns to normal
playback mode.
Playing Tracks Repeatedly
— Repeat Play Function
Press the
2
REPEAT
button during playback.
n “REPEAT” appears on the display.
When the currently played track is over, it will
be played again from the beginning.
To cancel this mode, press the button again.
Label side up
CD Player Operation
Playing a CD
After inserting the CD, playback will
start from the first track automatically.
If an CD is already inserted, press the
CD button to start playback.
When the unit stars CD playback, the
elapsed playing time will be displayed.
To display the elapsed playing time and the
track number alternately, press the
DSPL
button.
When the last track on the CD is
over,
the track number indication will return to “1”,
and playback will continue from the first track
of the CD.
Note
To play a 8 cm CD, use the optional Sony compact disc
single adapter (CSA-8).
To stop playback,
eject the CD by pressing the button or
press the
OFF
button.
Playback stops also when you select another
source (radio) by pressing the FM/AM button.
Ejecting the CD
Press the button.
Note
If you leave the ejected disc in the disc insertion slot after
you have pressed the 6 button, the disc will automatically
retract into the unit after about 15 seconds in order to
protect it.
To locate
previous tracks
To locate
succeeding tracks
215
MIN SEC
Elapsed playing time
MANU
SEEK/AMS
MANU
SEEK/AMS
To reverse To forward
MANU
SEEK/AMS
MANU
SEEK/AMS
7
EN
Actual total number: SONY CDX-3100 (E,S,C) 3-810-605-31(1)
Playing Tracks in Random
Order
—Shuffle Play Function
Press the
3
SHUF
button during playback.
n “SHUF” appears on the display.
All tracks on the currently selected disc are
played in random order.
CD Player Operation/Radio Reception
AM
FM
AM
For lower frequencies
For higher frequencies
MANU
SEEK/AMS
MANU
SEEK/AMS
FMI n FMII n FMIII n
FMI n ···
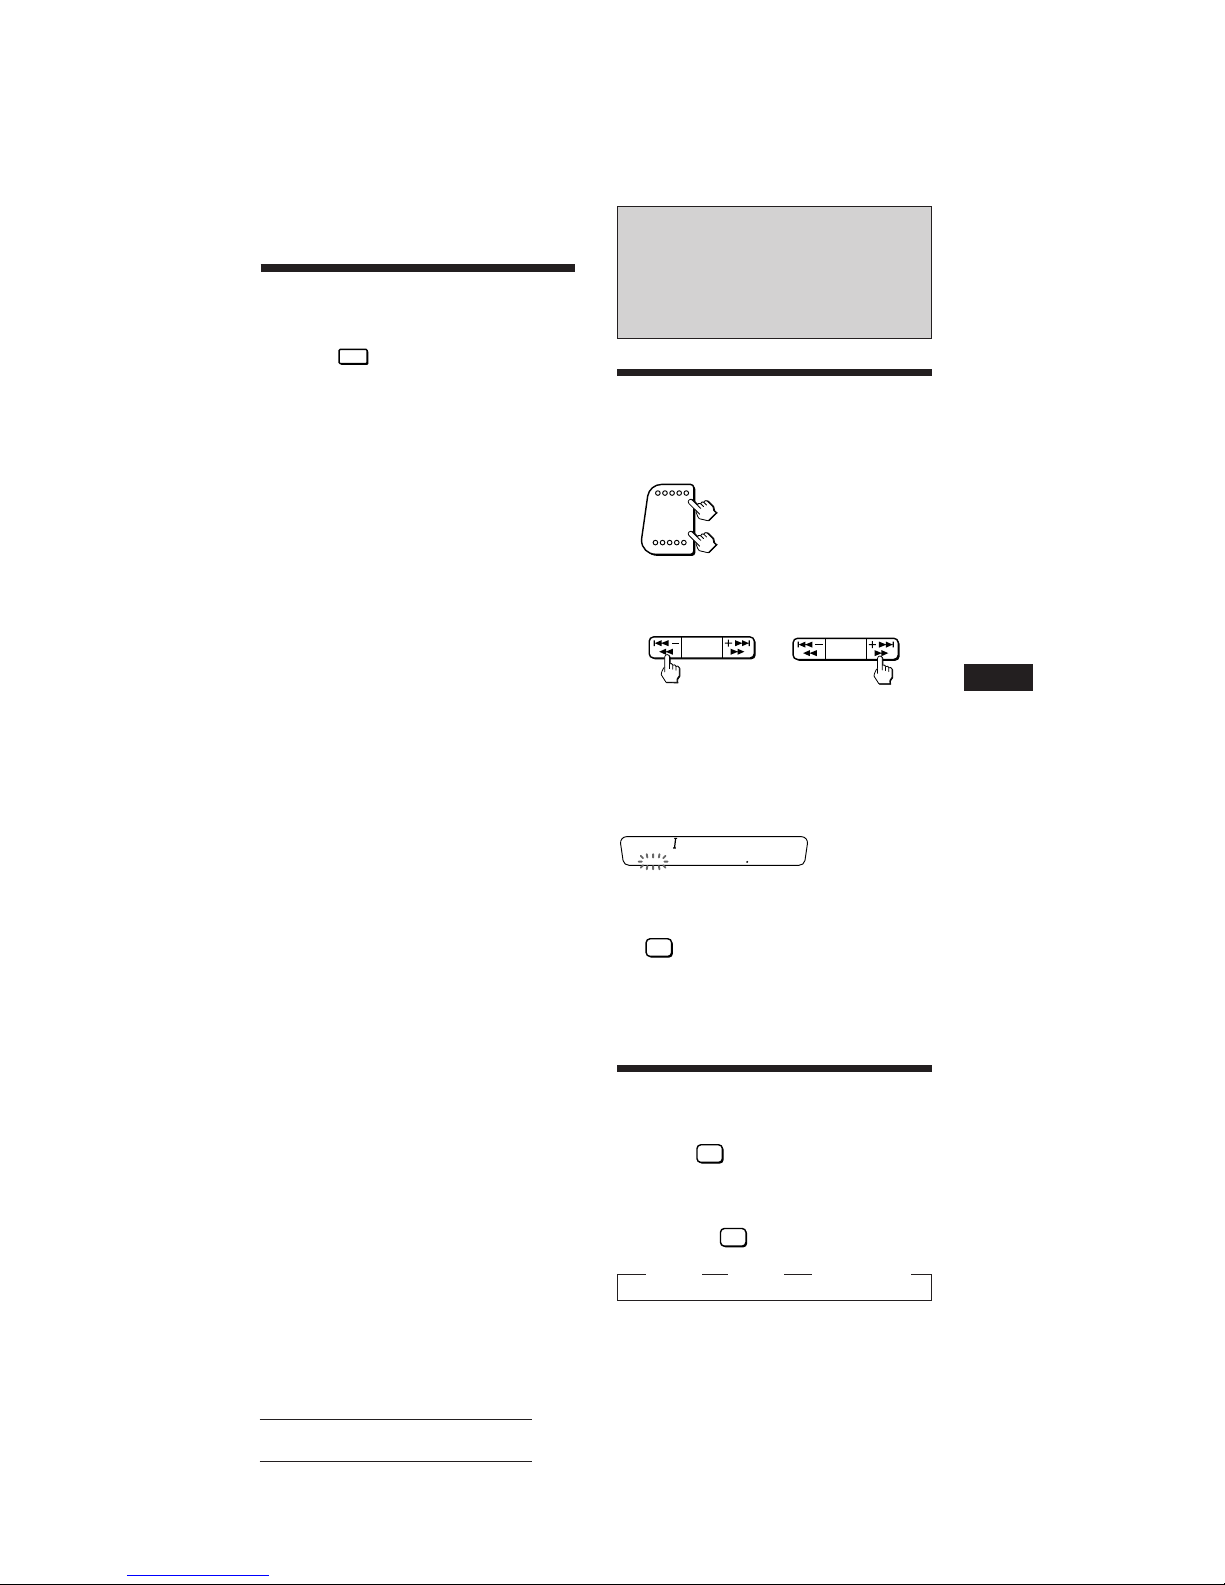
Radio Reception
Searching for Stations
Automatically
— Automatic Tuning
1 Select the desired band.
2 Press either side of the SEEK/AMS/MANU
button once to search for the next station
(automatic tuning).
The scanning stops when a station is received.
Press either side of the SEEK/AMS/MANU
button repeatedly until the desired station is
received.
When an FM stereo programme with sufficient
signal strength is tuned in,
the “STEREO" indication appears.
To keep the automatic tuning from stopping on
stations too frequently (local seek mode), press
the
SENS
button momentarily to get the “LOCAL”
indication.
Only the stations with relatively strong signals will be
tuned in. The local seek mode functions only when
automatic tuning is in operation.
If FM Stereo Reception is
Poor
— Monaural Mode
Press the
SENS
button momentarily.
n “MONO” appears on the display.
The sound will improve, but it will be
monaural.
By pressing the
SENS
button, you can change the
displayed items as follows:
z LOCAL z MONO z Normal mode
879
STEREO
FM

8
EN
Actual total number: SONY CDX-3100 (E,S,C) 3-810-605-31(1)
Tuning in by Adjusting the
Frequency
— Manual Tuning
1 Select the desired band (page 7).
2 Press and hold either side of the SEEK/
AMS/MANU button.
Release the button when the desired station
is received.
PREVENT ACCIDENTS!
When tuning in during driving, use automatic
tuning.
Memorising Stations
Automatically
— Automatic Memory Function
Stations with the clearest reception are
automatically searched and memorised on
each band (FMI, FMII, FMIII and AM). Up to 6
stations on each band can be stored on the
preset number buttons 1 to 6 in the order of
band frequency.
1 Select the desired band (page 7).
2 Press the
A.MEM
button for more than two
seconds.
The unit will be start scanning the selected
band and memorise the tuned stations on
the preset number buttons 1 through 6
automatically.
Memorising Only the
Desired Stations
1 Select the desired band (page 7).
2 Tune in the station which you wish to
store on a preset number button.
3 Press and hold the desired preset
number button (
1
INTRO
to 6) for about
two seconds until you hear a beep tone.
The number of the pressed preset number
button appears in the display window.
Up to 6 stations on each band (FMI, FMII, FMIII and
AM) can be stored on the preset number buttons in the
order of your choice. Therefore, 18 stations can be
memorised on FM.
If you try to store another station on the same preset
number button, the previously stored station will be erased.
Receiving the Memorised
Stations
1 Select the desired band (page 7).
2 Press momentarily the preset number
button (
1
INTRO
to 6) on which the
desired station is stored.
Note
If you press the preset number button for more than two
seconds, the currently received station will be memorised.
To receive the previously memorised station, make sure
that the preset number button is pressed only momentarily.
For lower frequencies For higher frequencies
MANU
SEEK/AMS
MANU
SEEK/AMS
9
EN
Actual total number: SONY CDX-3100 (E,S,C) 3-810-605-31(1)
Other Functions
Adjusting the Sound
Characteristics
1 Select the item you want to adjust by
pressing the SEL button repeatedly.
VOL (volume) n BAS (bass) n TRE
(treble) n BALANCE (balance) n FADER
(fader) n VOL (volume) n ···
2 Adjust the selected item by pressing
either side of the +/– button.
Adjust within three seconds after selecting.
(After three seconds the buttons will again
serve as volume control buttons.)
Enjoying Bass and Treble
at Low Volume
— Loudness Function
Press the
2
REPEAT
button while pressing
SEL button. n “LOUD” will appear on
the display.
The bass and treble will be boosted.
To cancel, press again.
Muting the Sound Quickly
— Mute Function
Press the
MUTE
button. n The “MUTE”
indication flashes.
The sound is muted at once.
To restore the previous volume level, press
again.
This function will be also cancelled when:
— + side of the +/– or OFF button is pressed.
— ejecting a CD by pressing the 6 button during CD
playback.
Radio Reseption/Other Functions
Muting the Beep Tone
Press the 6 button while pressing
the SEL button.
To reactivate the beep tone again, press these
buttons once more.
Note
When connecting an optional power amplifier to the LINE
OUT, the beep tone is disabled.
Turning on the Clock
Display
— Power Select Function
Only for cars with accessory position on the
ignition key switch.
To turn the Power Select Function ON
Press the
OFF
button while pressing
the SEL button.
The Power Select Function ties the clock
display power to the accessory position on the
ignition key switch.
To avoid battery wear, the clock is not
displayed while the unit is initializing.
 Loading...