

Sony Mavica MVC-FD95 User Manual
User Guide - Digital Still Camera (Sony Mavica MVC-FD95)
Introduction
The Sony Mavica (MVC-FD95) is a user friendly still camera that allows the user to take digital
photos and record short MPEG video files. The still images and video files are stored on a 1.44MB
floppy disk. The purpose of this document is to assist the novice user in using the Sony Mavica in
under twenty minutes. This document will cover the following areas:
Camera basics
Capturing still images
Recording video
Importing to PC or Mac
Menu settings
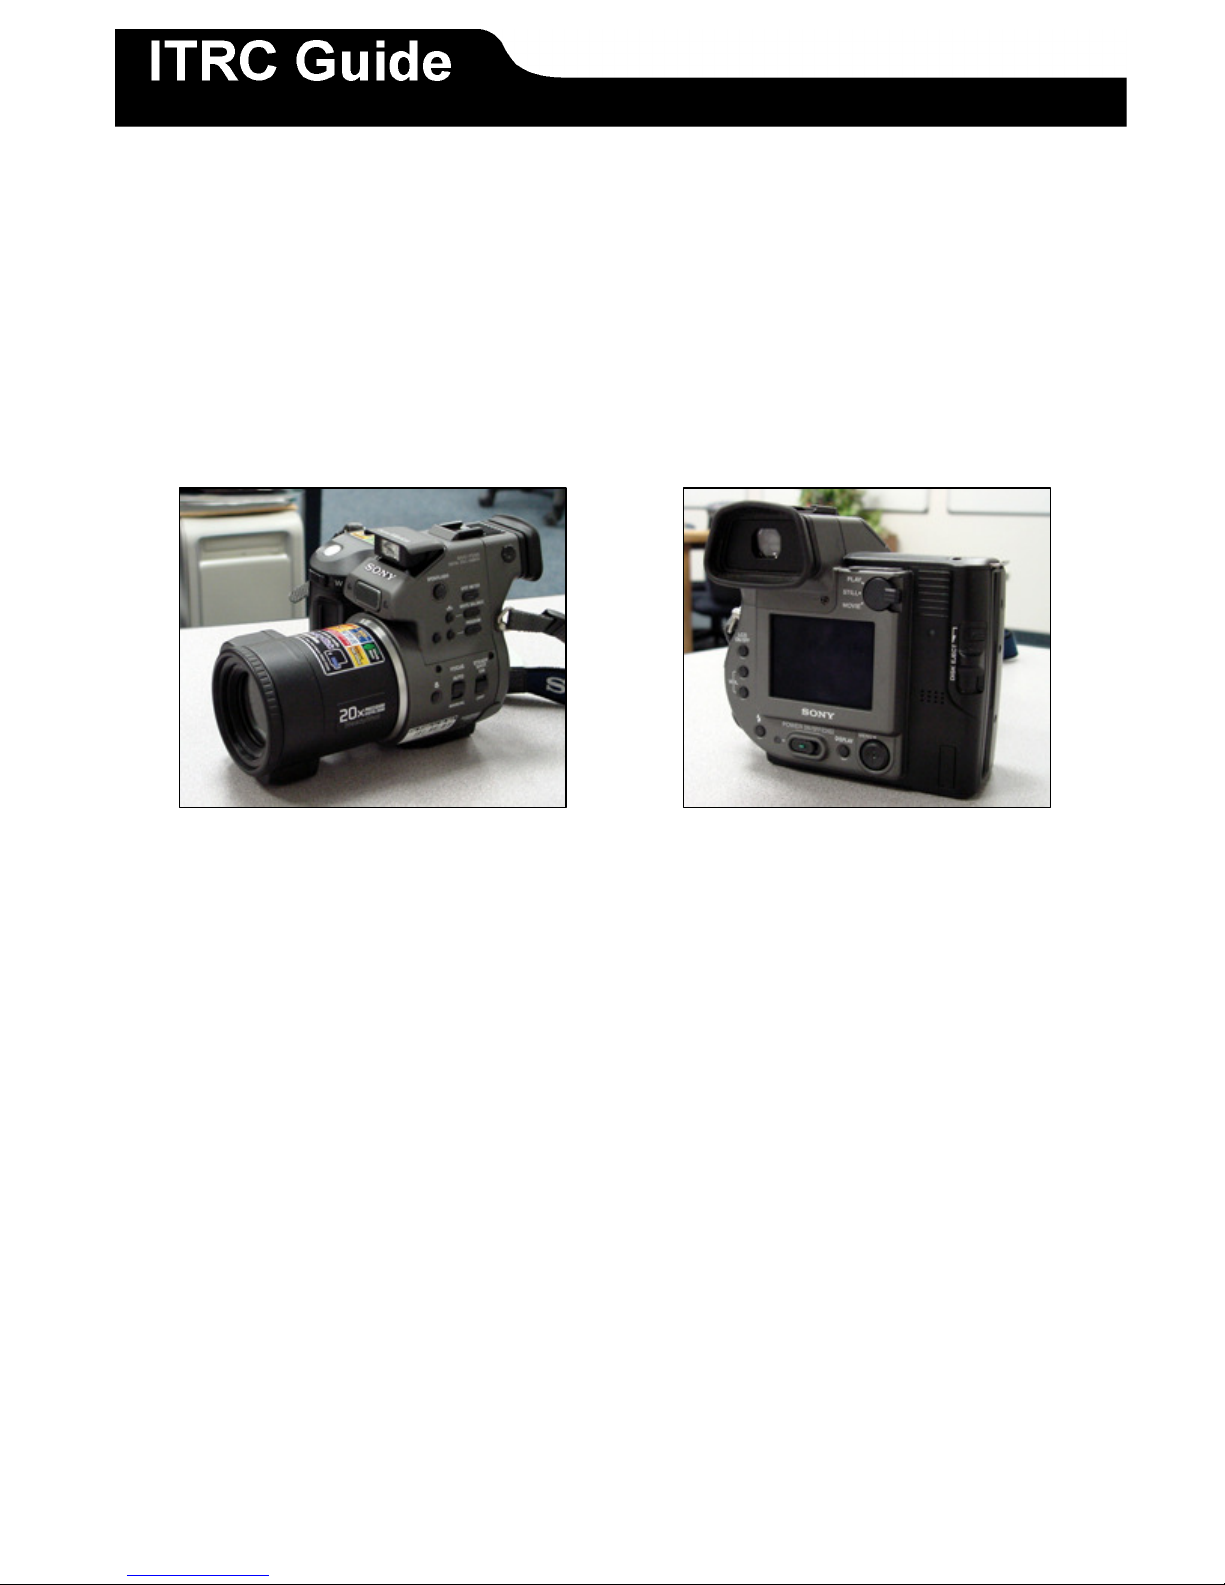
These two views give a general overview of the Sony Mavica.
Page 1 of 12 Last Modified: 06/24/2003
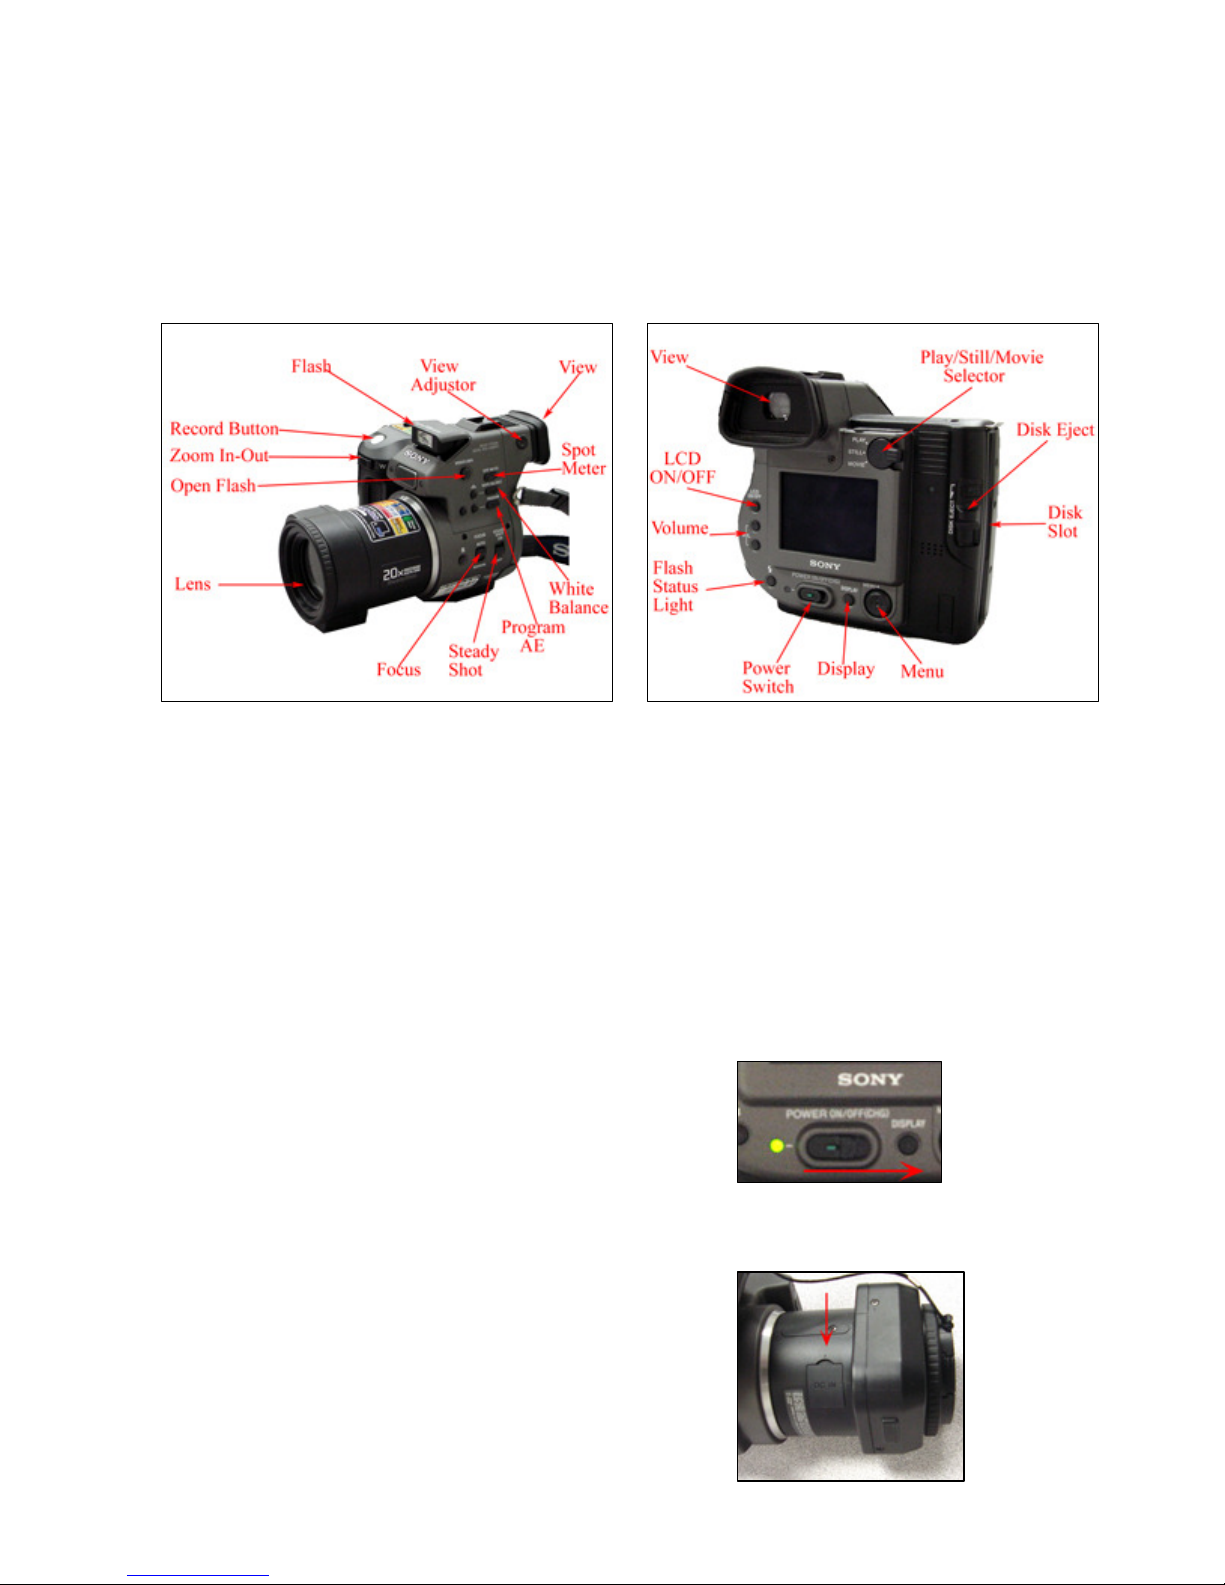
I. Camera Basics
The Sony Mavica is not a difficult camera to use, but the user will need to become familiar with the
majority of the operations and options of the camera in order to effectively use it.
Power Source
The camera uses a rechargeable battery
located at the underside of the camera.
A power cord is used to charge the
camera; therefore, the battery does not
need to be removed.
To turn On/Off the camera:
To turn on the camera, simply push the
small green button on the back of the
camera and slide the power button to
the right. To turn off the camera,
repeat the process of turning on the
camera.
To use the power cord:
The camera bag should contain a DC
power cord that connects the camera to
a power outlet.
Page 2 of 12 Last Modified: 06/24/2003
Beneath the lens is a cover labeled
“DC IN.” Open the cover and insert
the end of the cord into the camera.
Plug the other end into a power source.
To recharge the battery:
To recharge the battery, follow the
same directions from the “To use the
power cord” section of this handout.
When charging the battery, the camera
should be turned off. The orange light
will turn off when the battery is fully
charged.
Inserting a Floppy Disk
The Sony Mavica uses standard 3.5
inch floppy disks.
A floppy disk will hold:
30 jpg images (640x480)
10 jpg images (1024x768)
4 jpg images (1600x1200)
Before inserting the disk into the
camera, make sure the write protection
tab is in the unlocked position (See
image to the right).
Simply insert the disk into the side of
the camera. The label side of the
floppy disk should face the LCD
screen. When a click sound is made
the disk is properly inserted.
Page 3 of 12 Last Modified: 06/24/2003
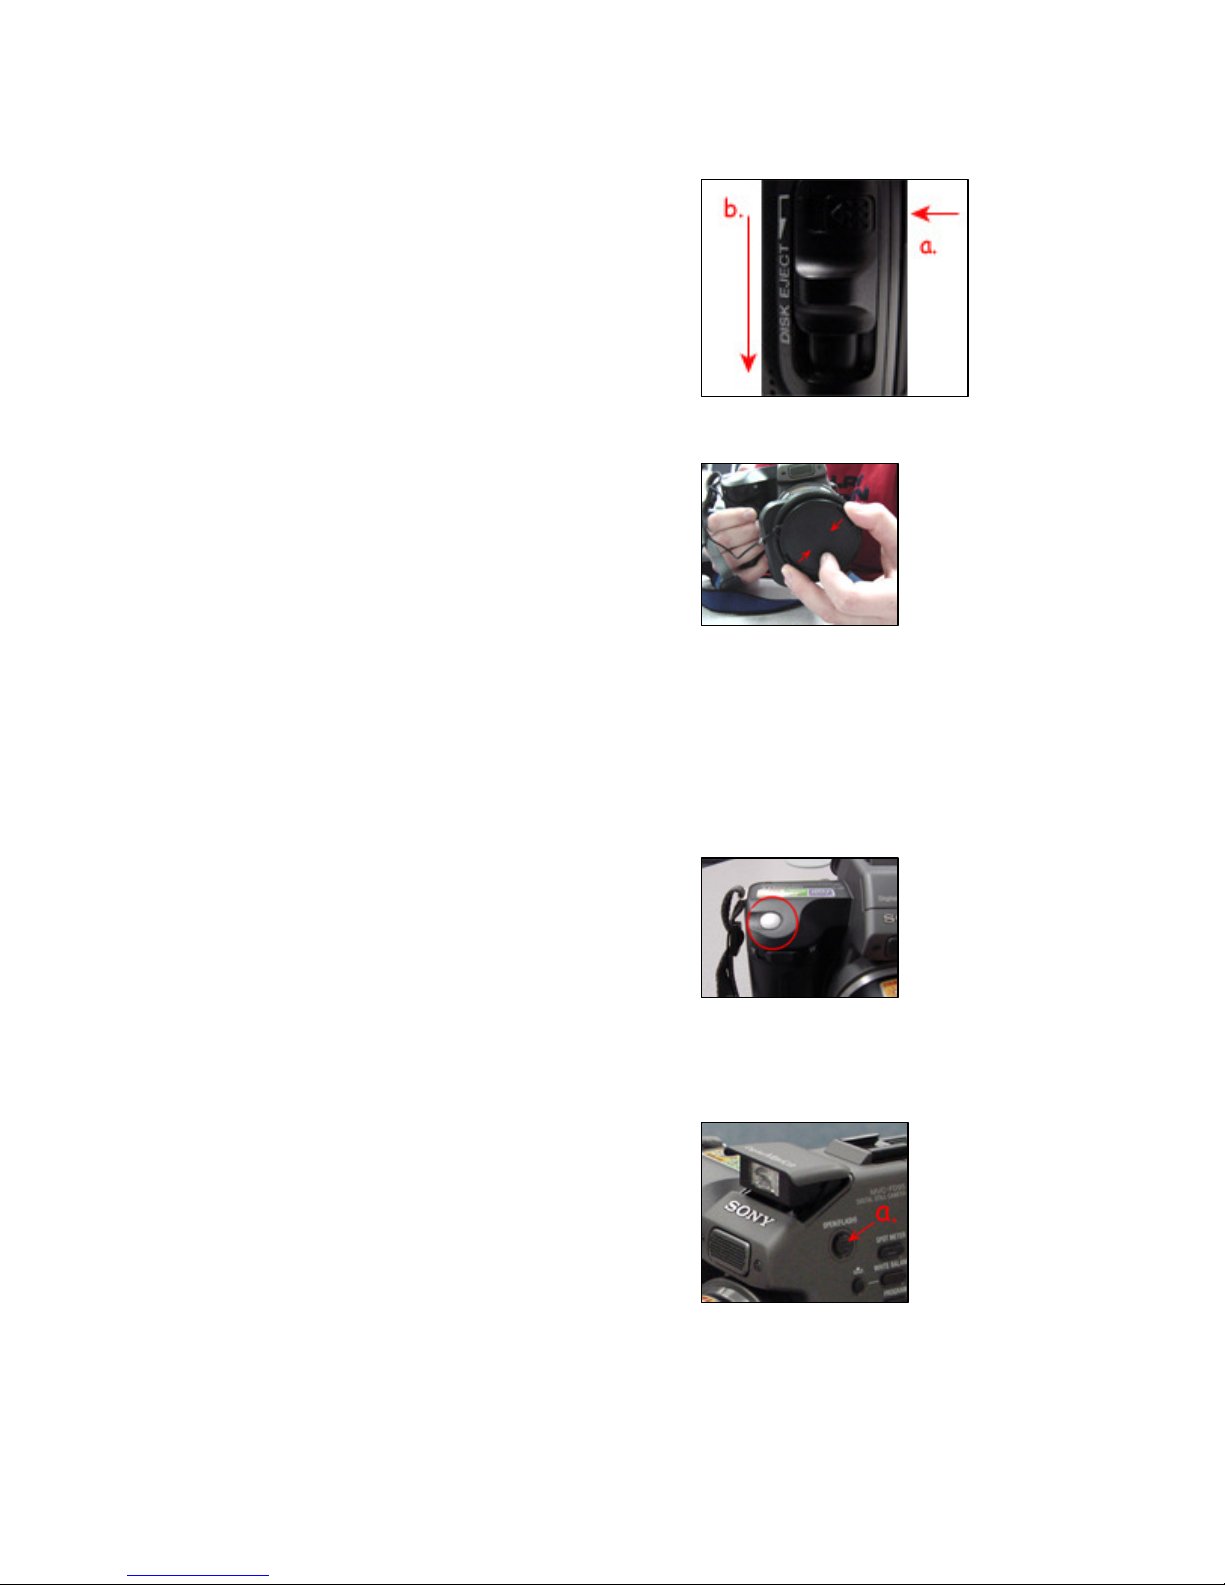
Ejecting a Floppy Disk
a. Push the tab forward.
b. Pull down the disk release.
Note: Steps a. and b. need to be performed at the same
time in order for the floppy disk to be ejected.
Lens Cover
To remove the Lens cover:
On lens cover, press the finger tabs to
release the cover.
To replace the lens cover:
Press the finger tabs and release them
when the cover is on the lens.
Record Button
The RECORD button is located at the
top of the camera. Firmly press the
button until the camera clicks and the
LCD screen displays the word
“RECORDING” in red over the image.
Flash
A flash will be required for poorly lit
areas indoor or outside.
a. Press the OPEN (FLASH) button.
The flash will open on the top of the
camera.
Page 4 of 12 Last Modified: 06/24/2003
 Loading...