

Page 1
R
FD Trinitron
Colour Television
4-205-025-11(1)
Instruction Manual
Bedienungsanleitung
Manuale d’Istruzioni
Mode d’emploi
GB
DE
IT
FR
KV-29FX201D
©1999 by Sony Corporation Printed in Spain
Page 2

Page 3

Thank you for choosing this Sony TV.
Before operating the TV, please read this manual thoroughly and retain it for
future reference.
Keys to read this Instruction Manual:
• Use Getting Started if you wish to install the TV set and to get familiar with the
basic functions.
• Use Advanced Operation if you wish to know more about the additional features
of the TV set.
• Symbols used in the manual:
• Informs you of possible hazards
Instruction Manual
GB
• Important information
• Information on a feature
• 1, 2 ... Sequence of instructions
MENU
• Shaded buttons on the remote control show the buttons you have to
K
press to follow the sequence of instructions.
• Informs you of the result of the instructions.
• The process continues on the next page to get final result.
3
Page 4

For Your Safety
WARNING
Safety Information
All TVs operate on extremely high voltages. To prevent fire or electric shock, please follow the safety
procedures indicated below.
For General Safety
• Do not expose the TV set to rain or moisture.
• Do not remove the rear cover.
• For your protection, refer all servicing to qualified personnel only.
For Safe Installation
• Do not install the TV in hot, humid or excessively dusty places.
• Do not block or cover the ventilation openings. For ventilation, leave
a space of at least 10 cm all around the set.
• Do not install the TV where it may be exposed to mechanical vibrations.
• Place the TV set only on a stable stand designed for the weight and
dimensions of the TV.
For Safe Operation
• Do not operate the TV set on anything other than a 220-240V AC, 50Hz
supply.
• Do not operate the TV if any liquid or solid objects fall in through the
ventilation slots. Have it checked immediately.
• For environmental and safety reasons, it is recommended that the TV set
is not left in standby mode when not in use. Switch off at the mains.
• Do not disconnect the TV by pulling on the power cable. Disconnect by
removing the mains plug.
• In case of a thunderstorm, disconnect the TV set from the main supply and
the aerial. Otherwise the set may be damaged by a stroke of lightning.
4
For Your Safety
For Maintenance
• Clean the TV screen with a soft dampened cloth. Do not use any abrasive
cleaners.
• Dust and nicotine deposits may cause heat accumulation inside the TV set.
In the long term this could be a safety risk and may shorten the lifetime of
your TV set. Therefore have your set serviced about every five years.
Page 5

Table of Contents
Table of Contents
Keys to read this Instruction Manual .................................................................................................. 3
For your Safety ........................................................................................................................................ 4
Getting Started
Overview
Checking the Accessories Supplied ......................................................................................... 6
Overview of TV Buttons ........................................................................................................... 6
Overview of Remote Control Buttons ..................................................................................... 7
First Time Operation
Step 1 - Installation
Inserting Batteries into the Remote Control ........................................................................... 8
Connecting the Aerial ................................................................................................................ 8
Switching on the TV .................................................................................................................. 8
Step 2 - Basic Presetting
Selecting Language .................................................................................................................... 9
Automatically Tuning the TV using the Remote Control .................................................. 10
Changing the Programme Order of the TV channels ......................................................... 11
Advanced Operation
Advanced Presetting
Automatically Tuning the TV using the TV buttons........................................................... 12
Manually Tuning the TV ......................................................................................................... 13
Fine Tuning Channels .............................................................................................................. 14
Adjusting the Picture Rotation ............................................................................................... 15
Skipping Programme positions ............................................................................................. 16
Advanced TV Operation
Adjusting the Picture ............................................................................................................... 17
Adjusting the Sound ................................................................................................................ 18
Using the Sleep Timer ............................................................................................................. 19
Teletext
Viewing Teletext ....................................................................................................................... 20
GB
Optional Connections
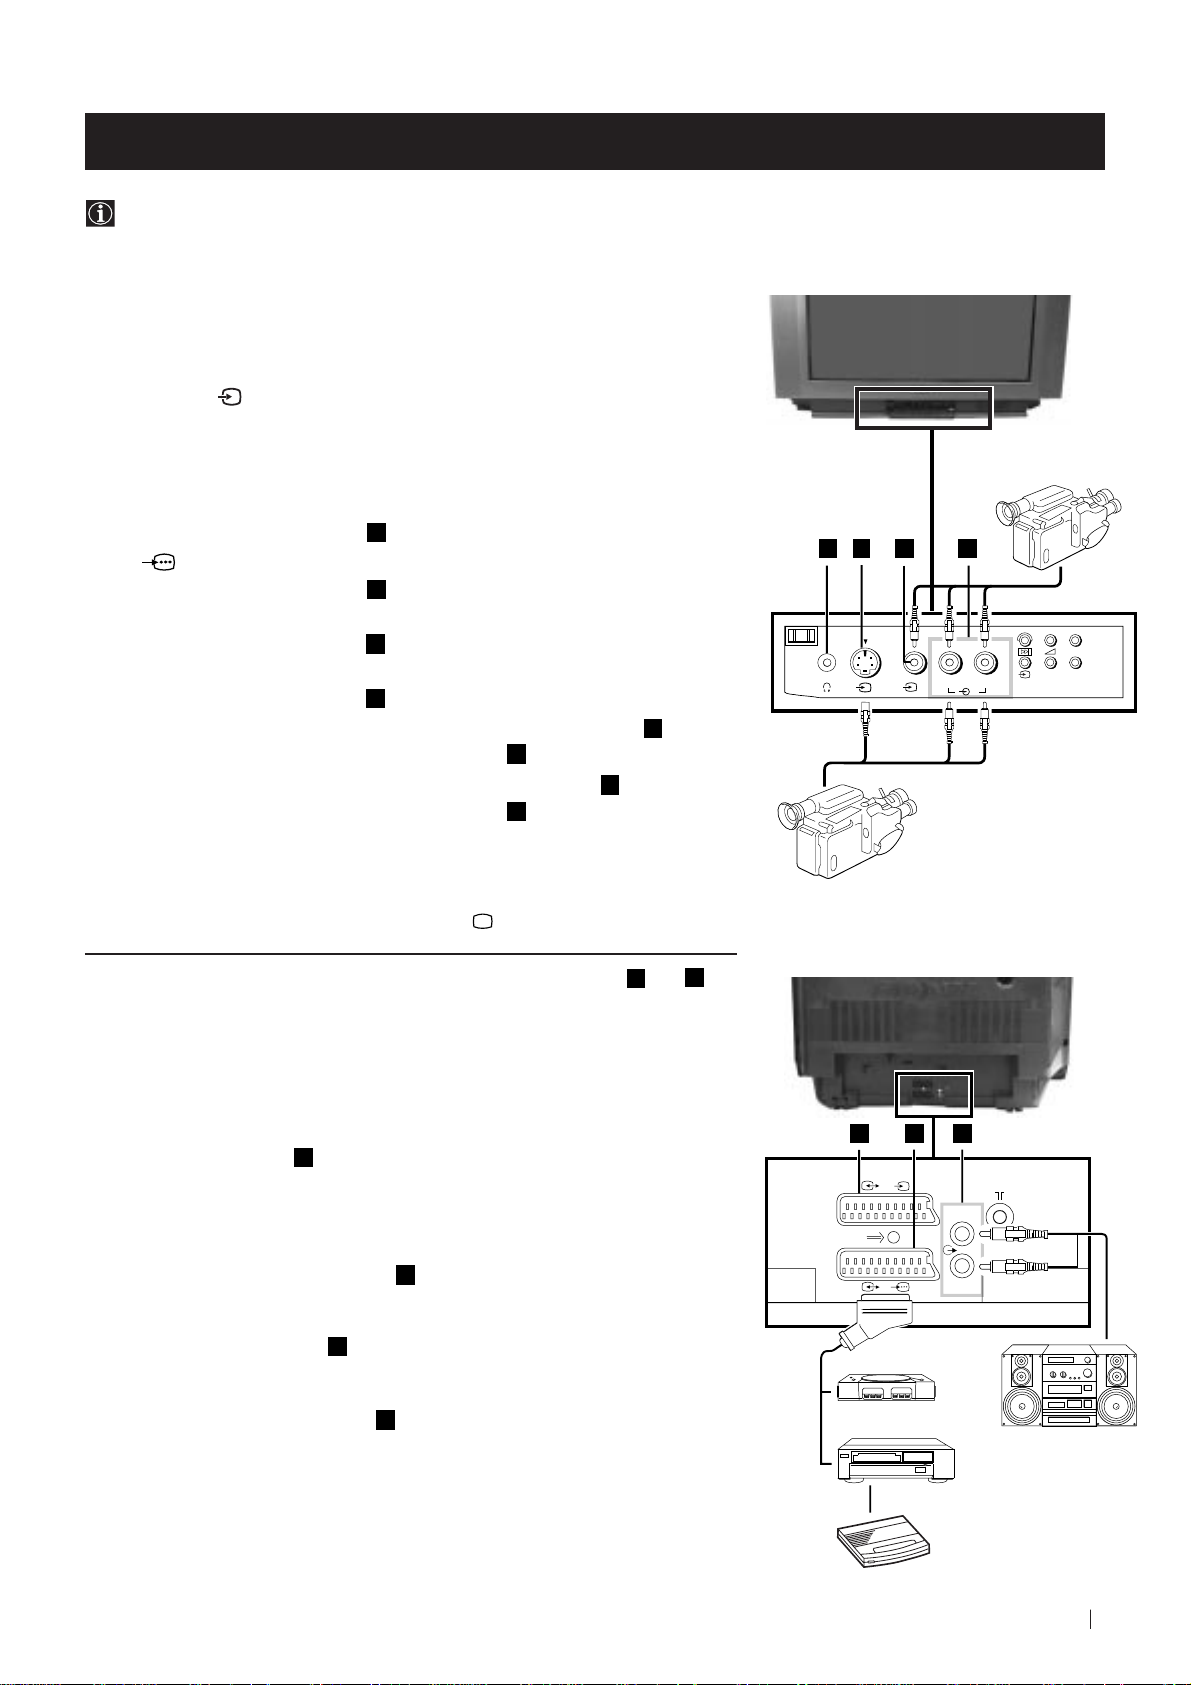
Using Optional equipment ..................................................................................................... 21
Smartlink ................................................................................................................................... 22
Additional Information
Menu Guide .............................................................................................................................. 23
Troubleshooting........................................................................................................................ 24
Specifications ............................................................................................................................ 25
Table of Contents
5
Page 6
Getting Started - Overview
Checking the Accessories Supplied
1
2
3
4
5
6
7
8
9
0
MENU
K
PROGR
Two batteries (R6 type)
RM
887
S
One Remote Control
(RM-887)
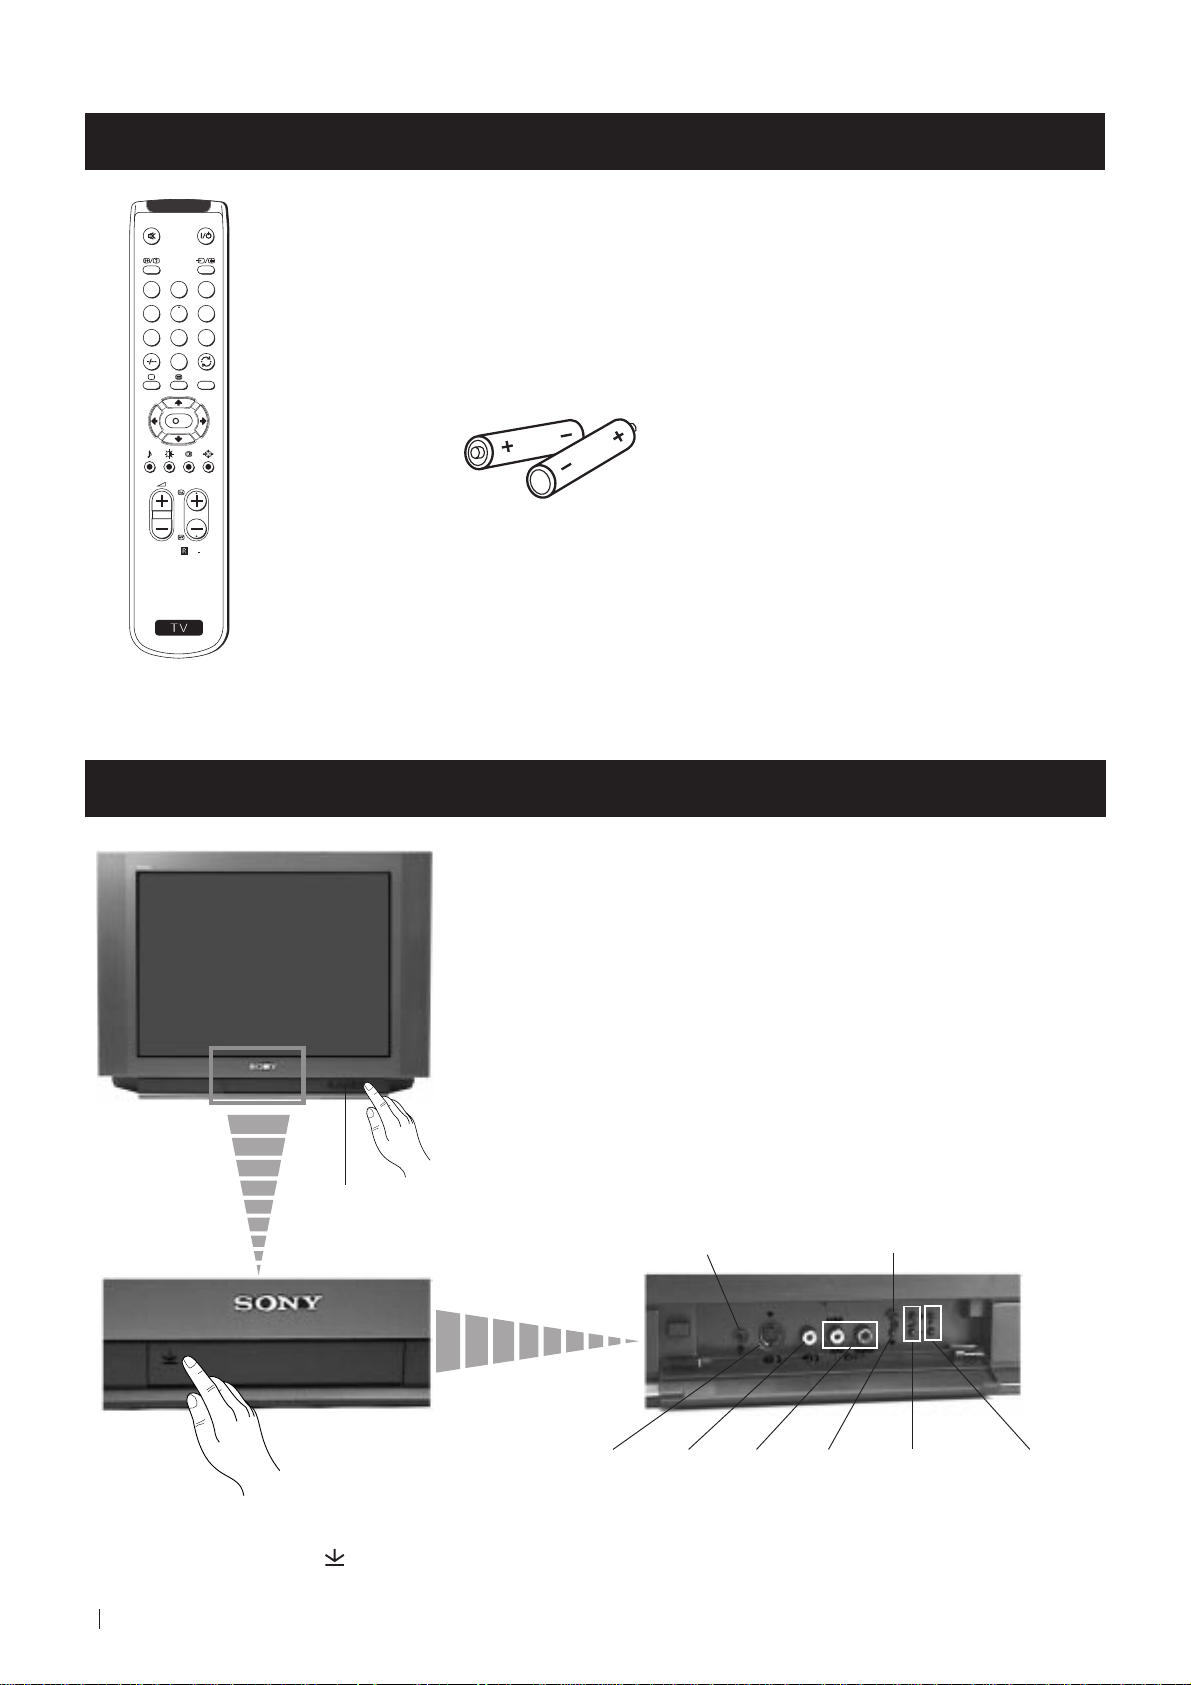
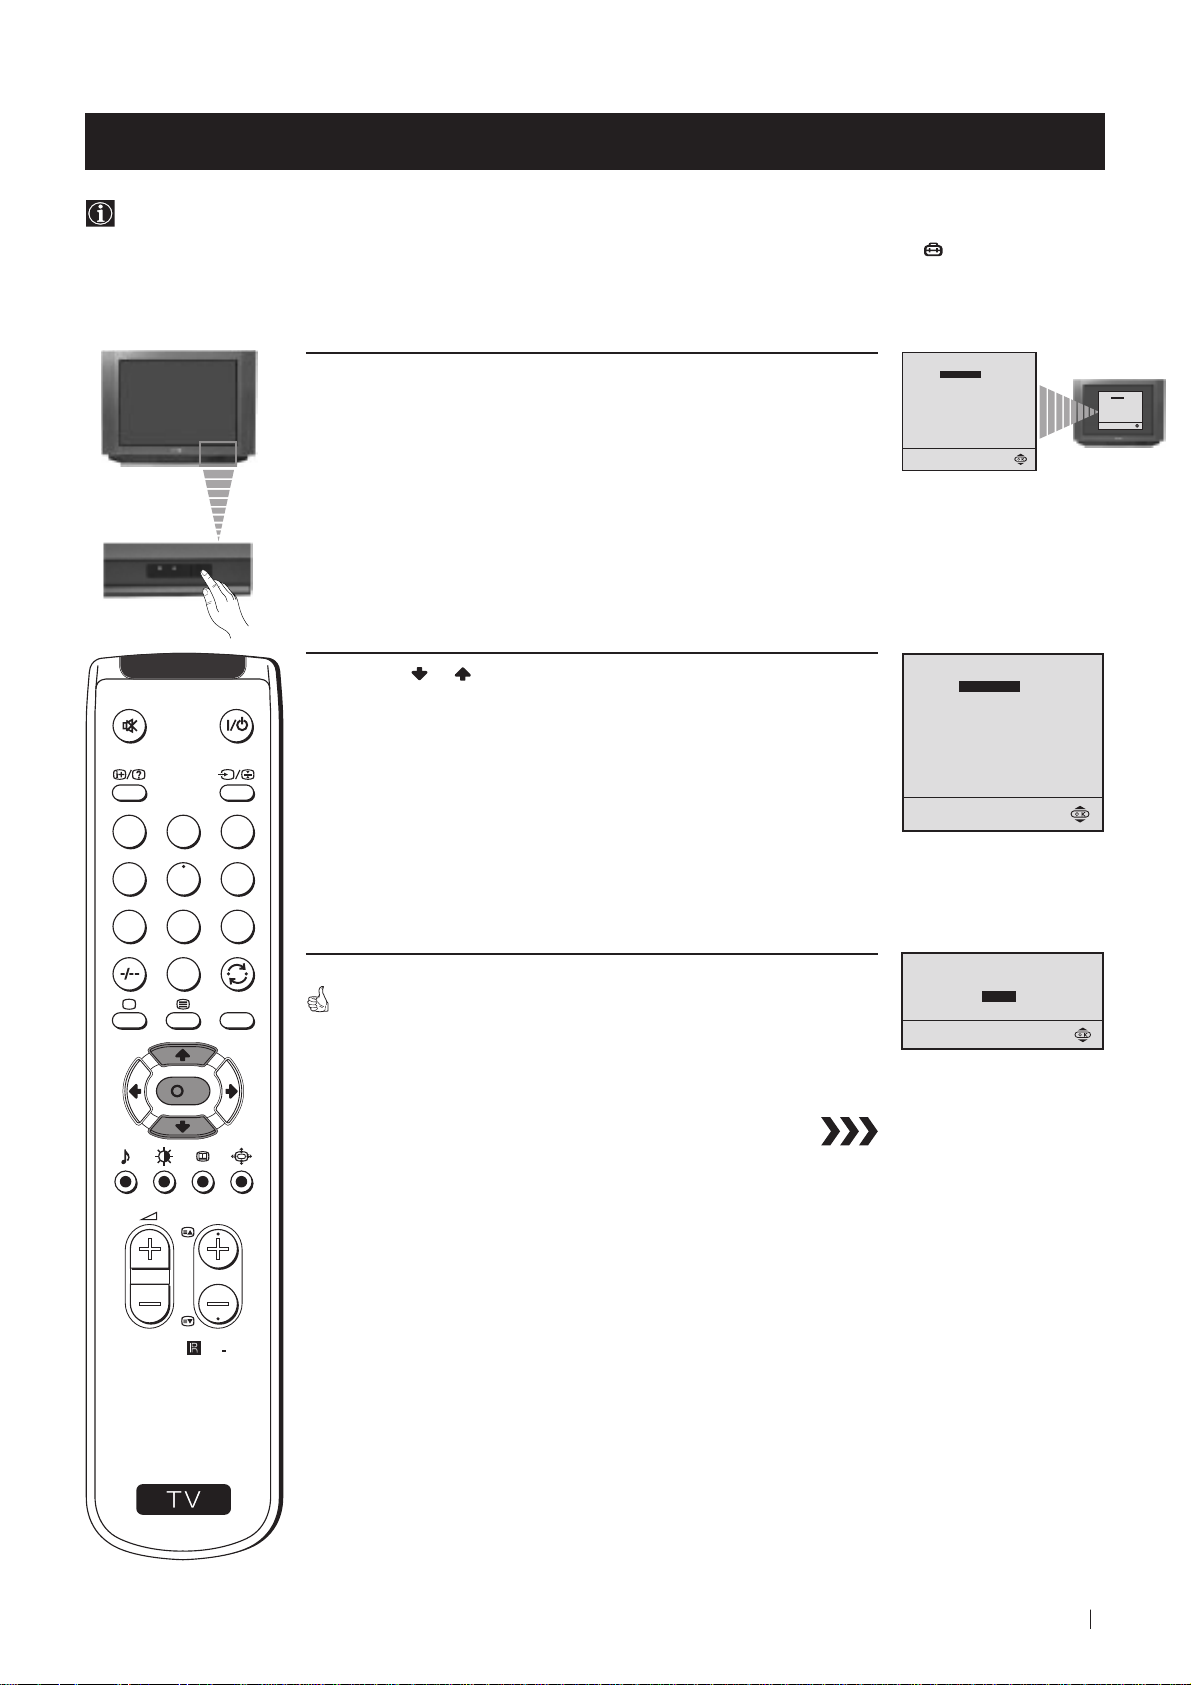
Overview of TV Buttons
On/Off Switch
Standby
indicator
Headphone jack
Auto Tune button
Press the flap on the front of the TV
to reveal the front control panel
(press on the mark )
6
Getting Started - Overview
S Video
Input
jack
Phono
Video
Input
jack
Audio
Inputs
jacks
Selecting
Input
source
Volume
control
buttons
Programme Up or
Down buttons
(Selects TV channels)
Page 7
Getting Started - Overview
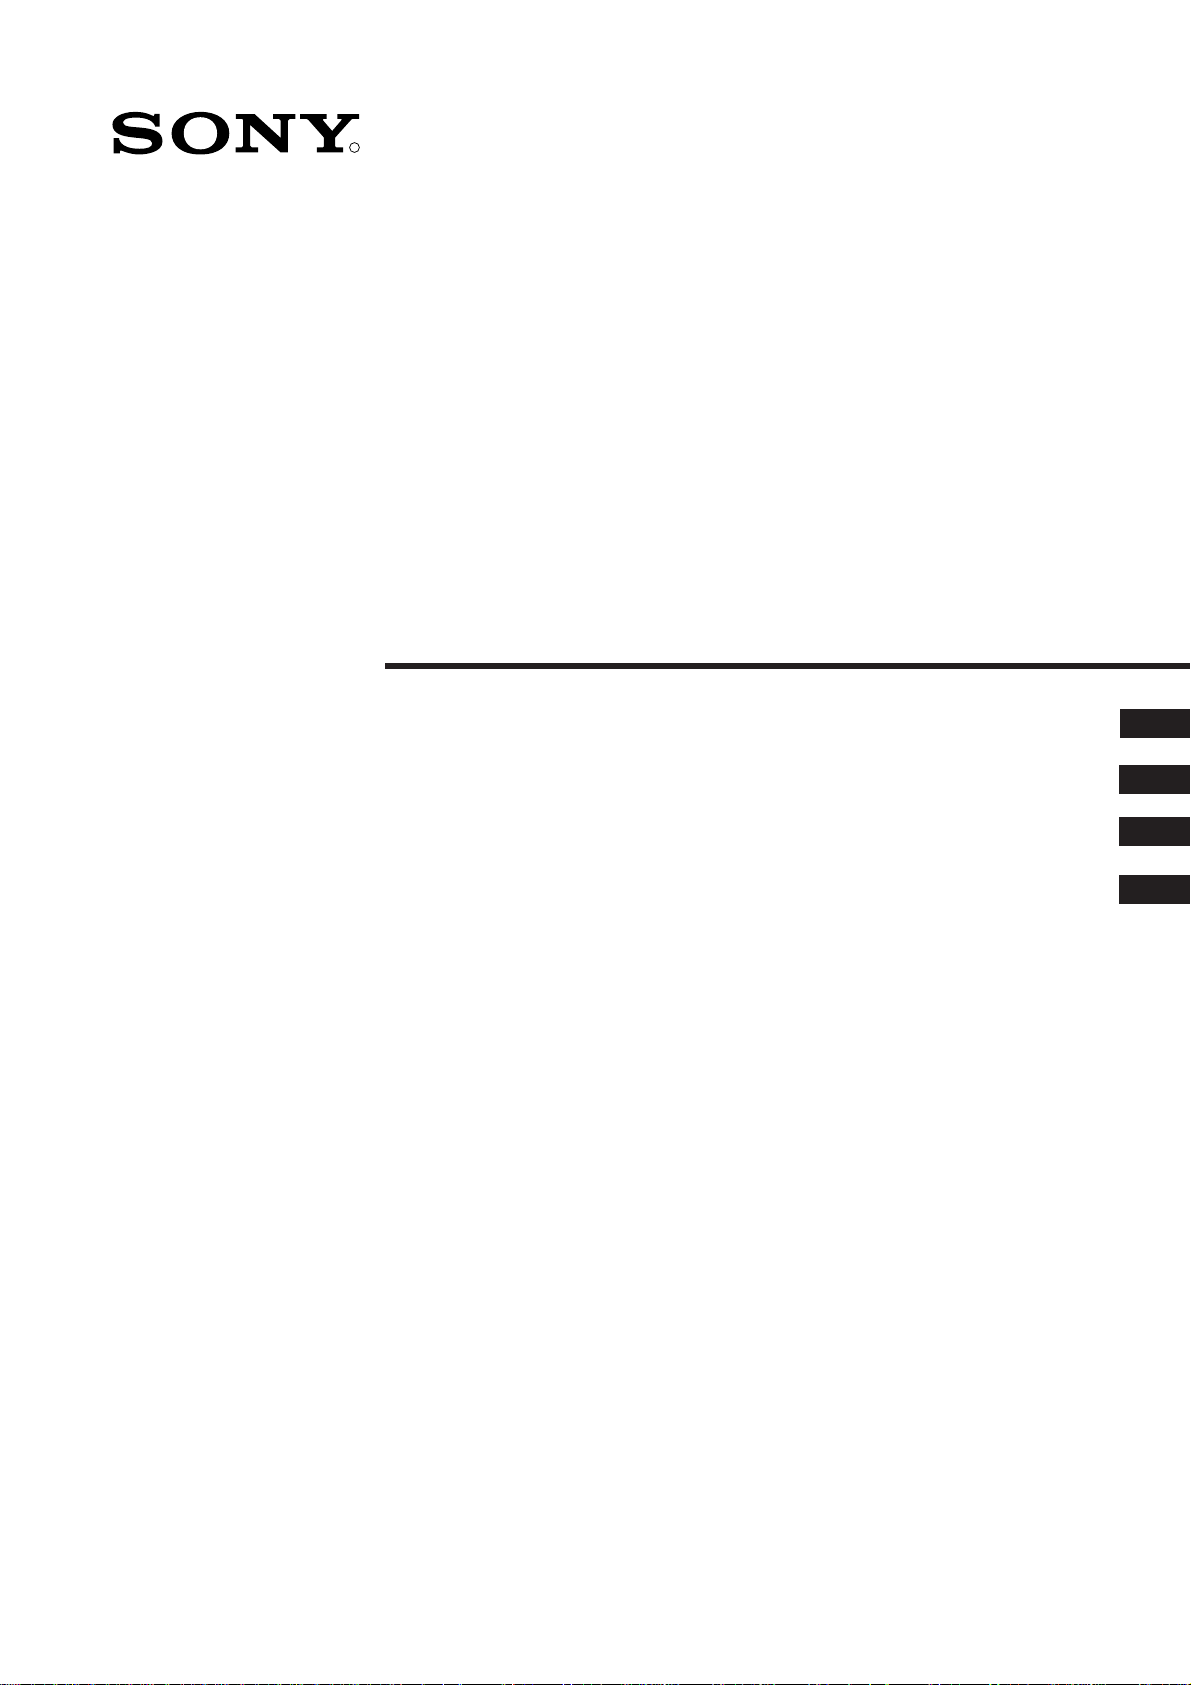
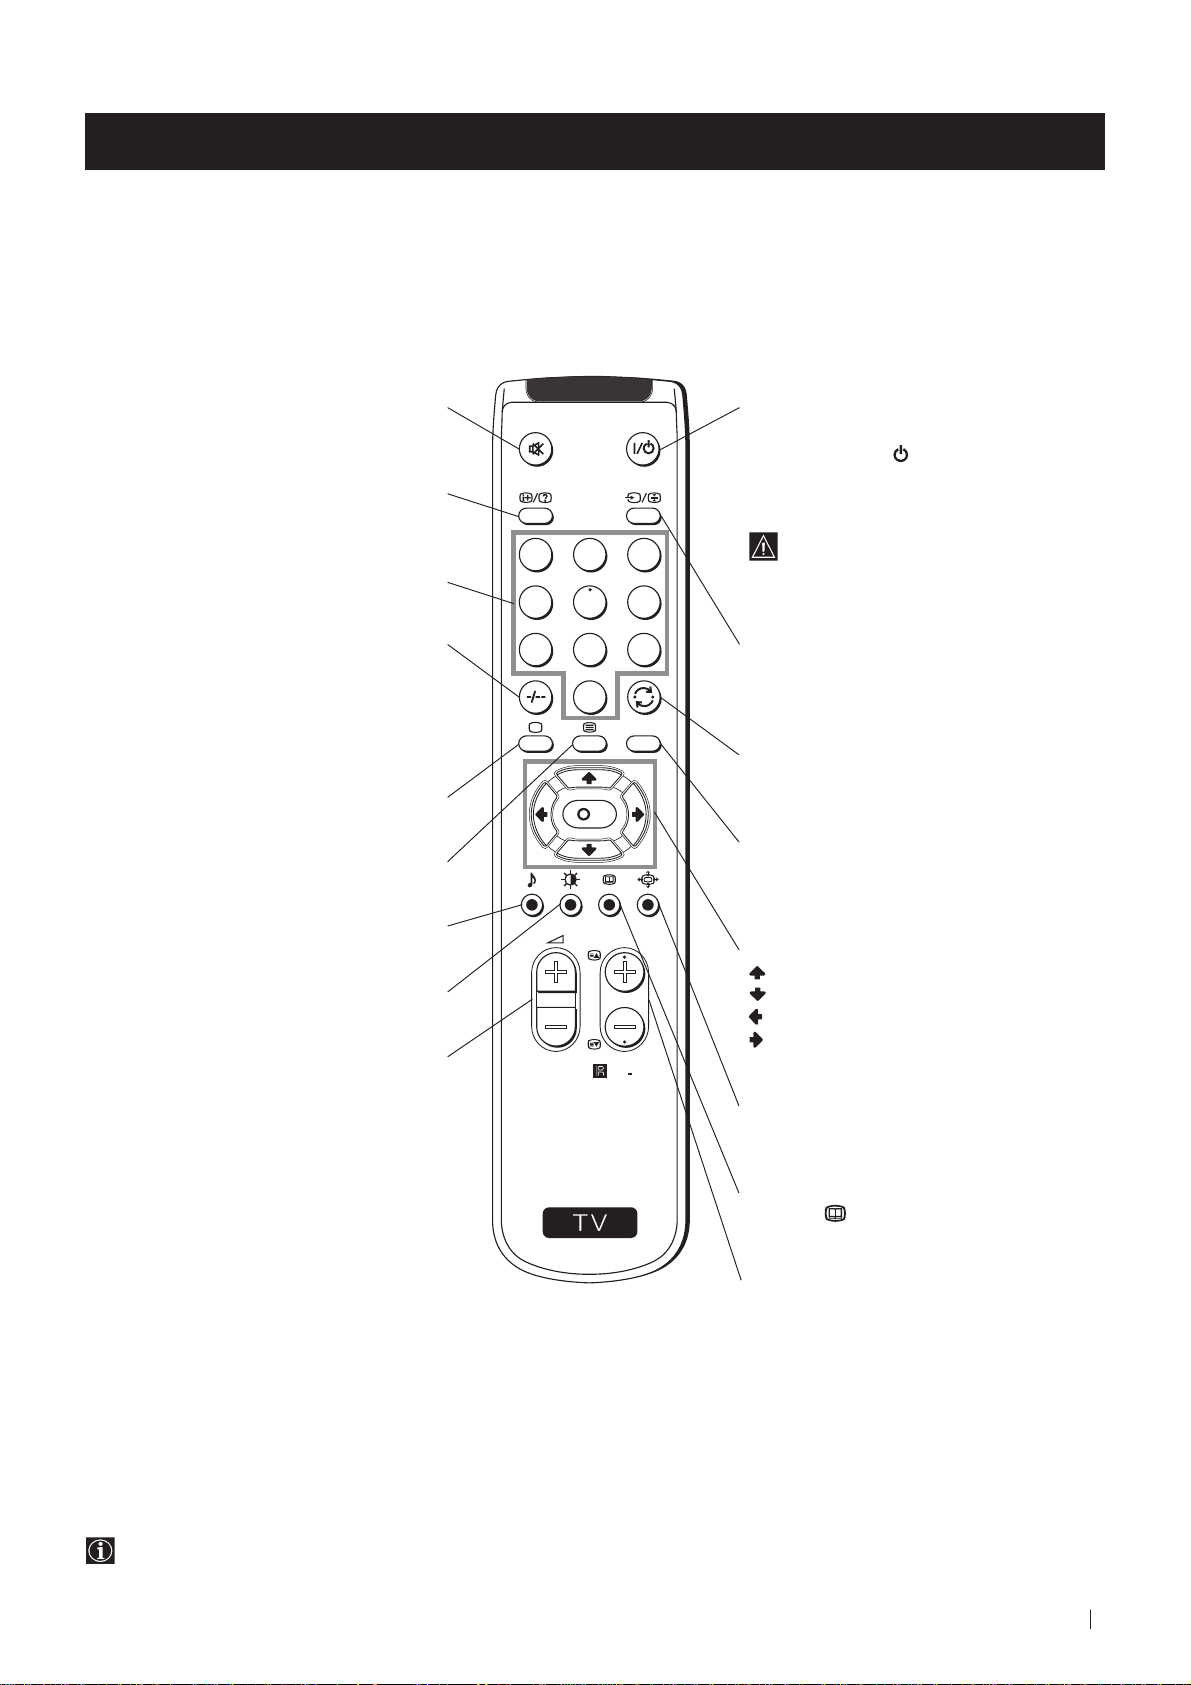
Overview of Remote Control Buttons
Muting the Sound
Press to mute TV sound.
Press again to restore the sound.
Displaying On Screen Information
Press to display all on-screen indications.
Press again to cancel. +.--+++++-++++
Selecting channels
Press to select channels.
For double-digit programme numbers, e.g. 23,
press -/-- first, then the buttons 2 and 3.
If you enter an incorrect first digit, this should
be corrected by entering another digit (0-9)
and then selecting -/-- button again to enter
the programme number of your choice.
+++++++++++++++...
Selecting TV mode
Press to switch off Teletext or video input.
+++++++++++++++++...
Selecting Teletext
Press to switch on Teletext.
Selecting Sound mode
Press to change the sound mode.
+++++++++++++++++...
Selecting Picture mode
Press to change the picture mode.
+++++++++++++++++...
Adjusting TV Volume
Press to adjust the volume of the TV.
To Temporarily Switch Off TV
Press to temporarily switch off TV (the
standby indicator on TV lights up). Press
again to switch on TV from standby mode.
To save energy we recommend switching off
completely when TV is not in use.
1
2
3
4
5
6
7
8
9
0
MENU
K
PROGR
RM
887
After 15-30 minutes without a TV
signal and without any button being
pressed, the TV switches automatically
into standby mode.
Selecting Input source
Press repeatedly until the desired input
symbol of the source appears on the TV
screen.
Back to the channel last watched
Press to watch the last channel selected
(watched for at least 5 seconds).
Displaying the menu system
Press to display the menu on the TV screen.
Press again to remove the menu display
from the TV screen.
Menu selection
Scroll Up
Scroll Down
Previous menu or selection
Next menu or selection
OK Confirms your selection
Selecting Screen format
Press to view programmes in 16:9 mode.
Press again to return to 4:3 mode.
S
Besides TV functions, all coloured buttons as well as green symbols are also used for Teletext operation. For more details,
please refer to the "Teletext" section of this instruction manual.
This button only works in Teletext mode.
Function associated to this button does
not work with this TV.
Selecting channels
Press to select the next or previous channel.
Getting Started - Overview
7
Page 8
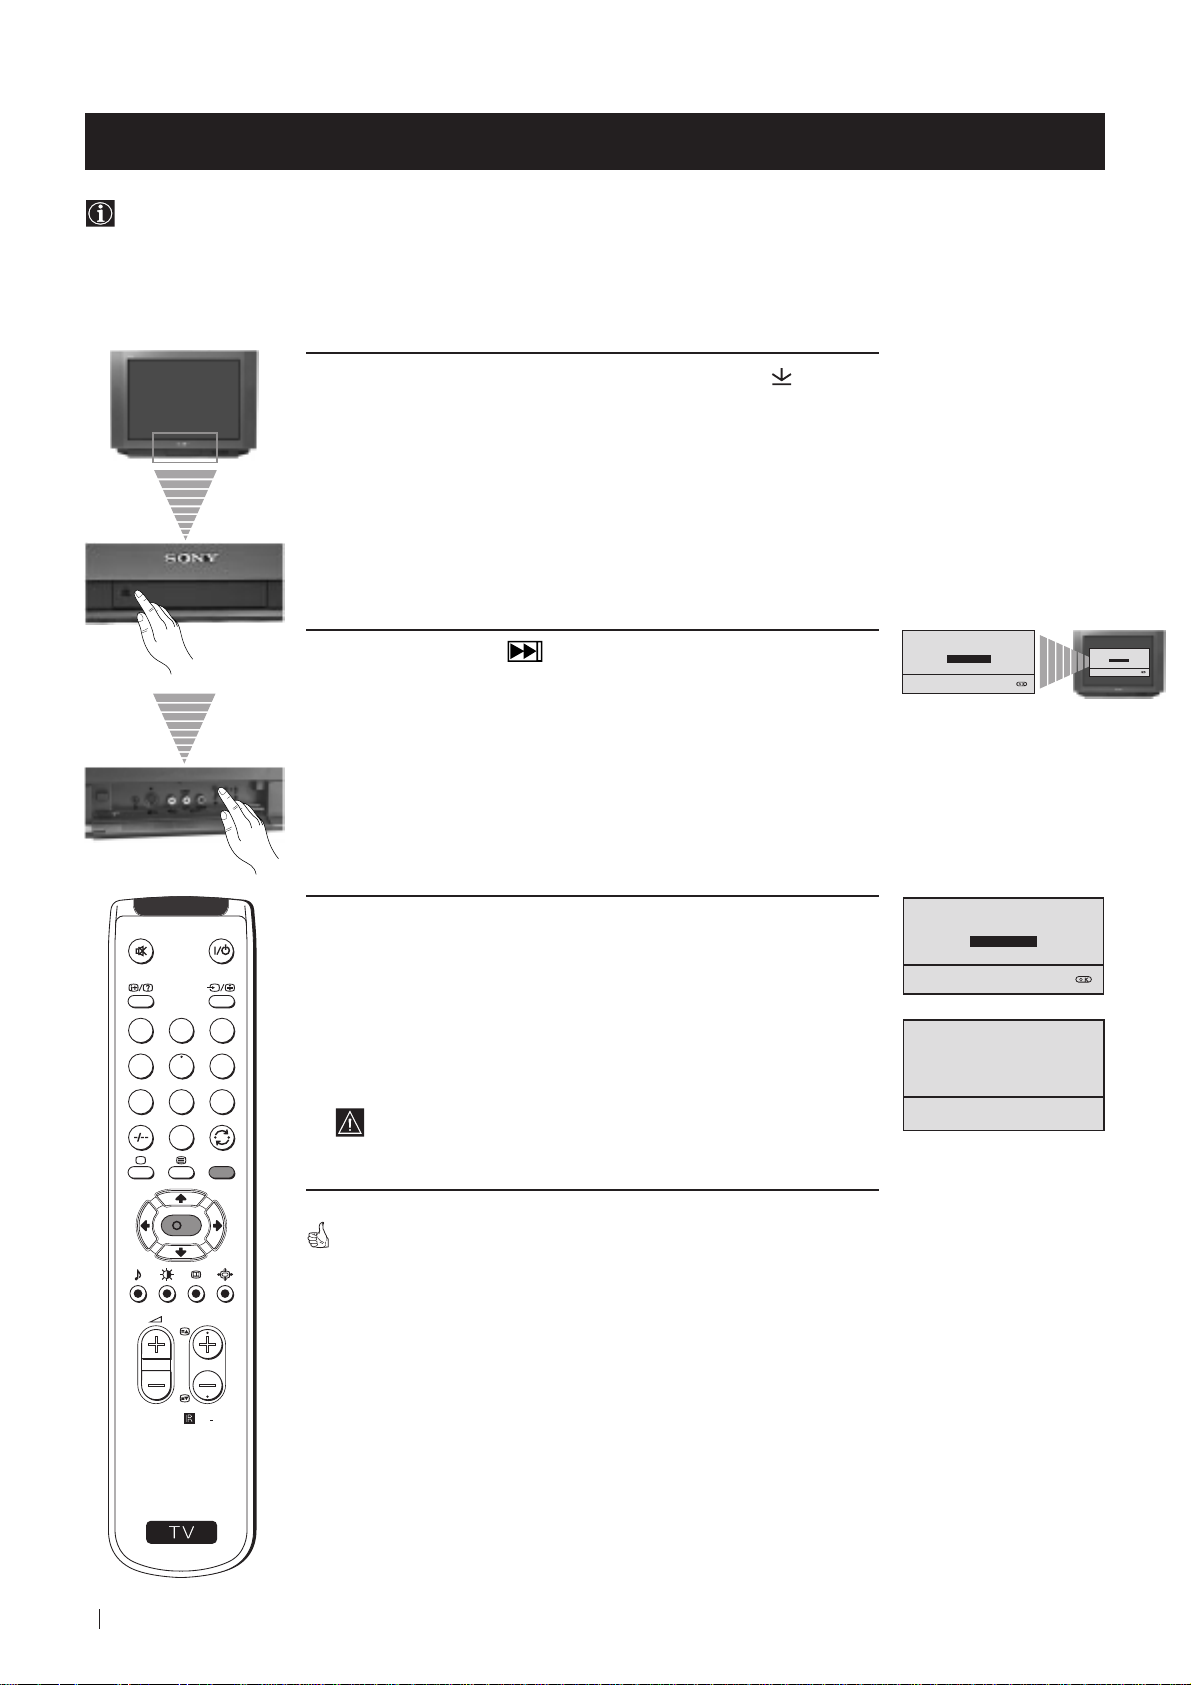
First Time Operation - Installation
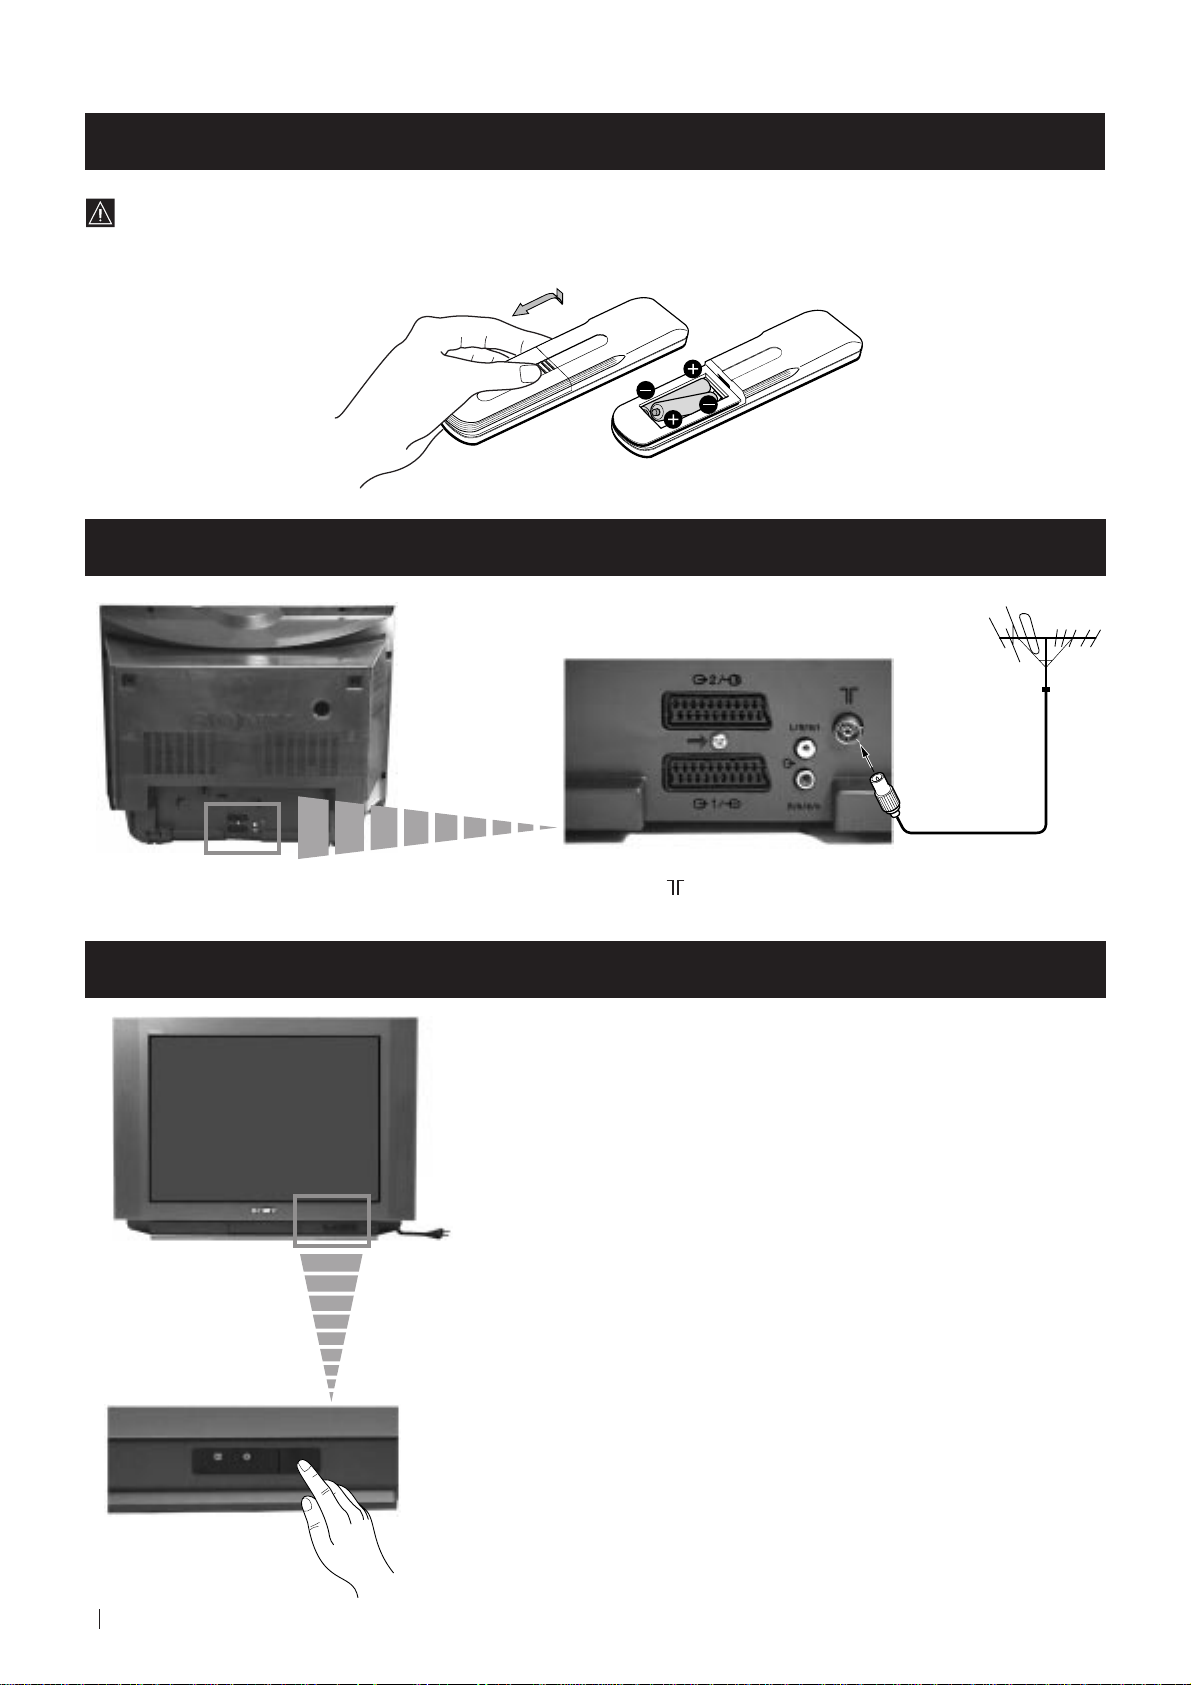
Inserting Batteries into the Remote Control
Make sure to insert the batteries using the correct polarities.
Always remember to dispose of used batteries in an environmental friendly way.
Connecting the Aerial
Switching on the TV
Connect a conventional aerial to the socket
marked on the rear of the TV.
Connect the TV plug to the mains socket (220-240V AC, 50Hz).
8
First Time Operation - Installation
Push in the On/Off switch on the front of the TV.
Page 9
First Time Operation - Basic Presetting
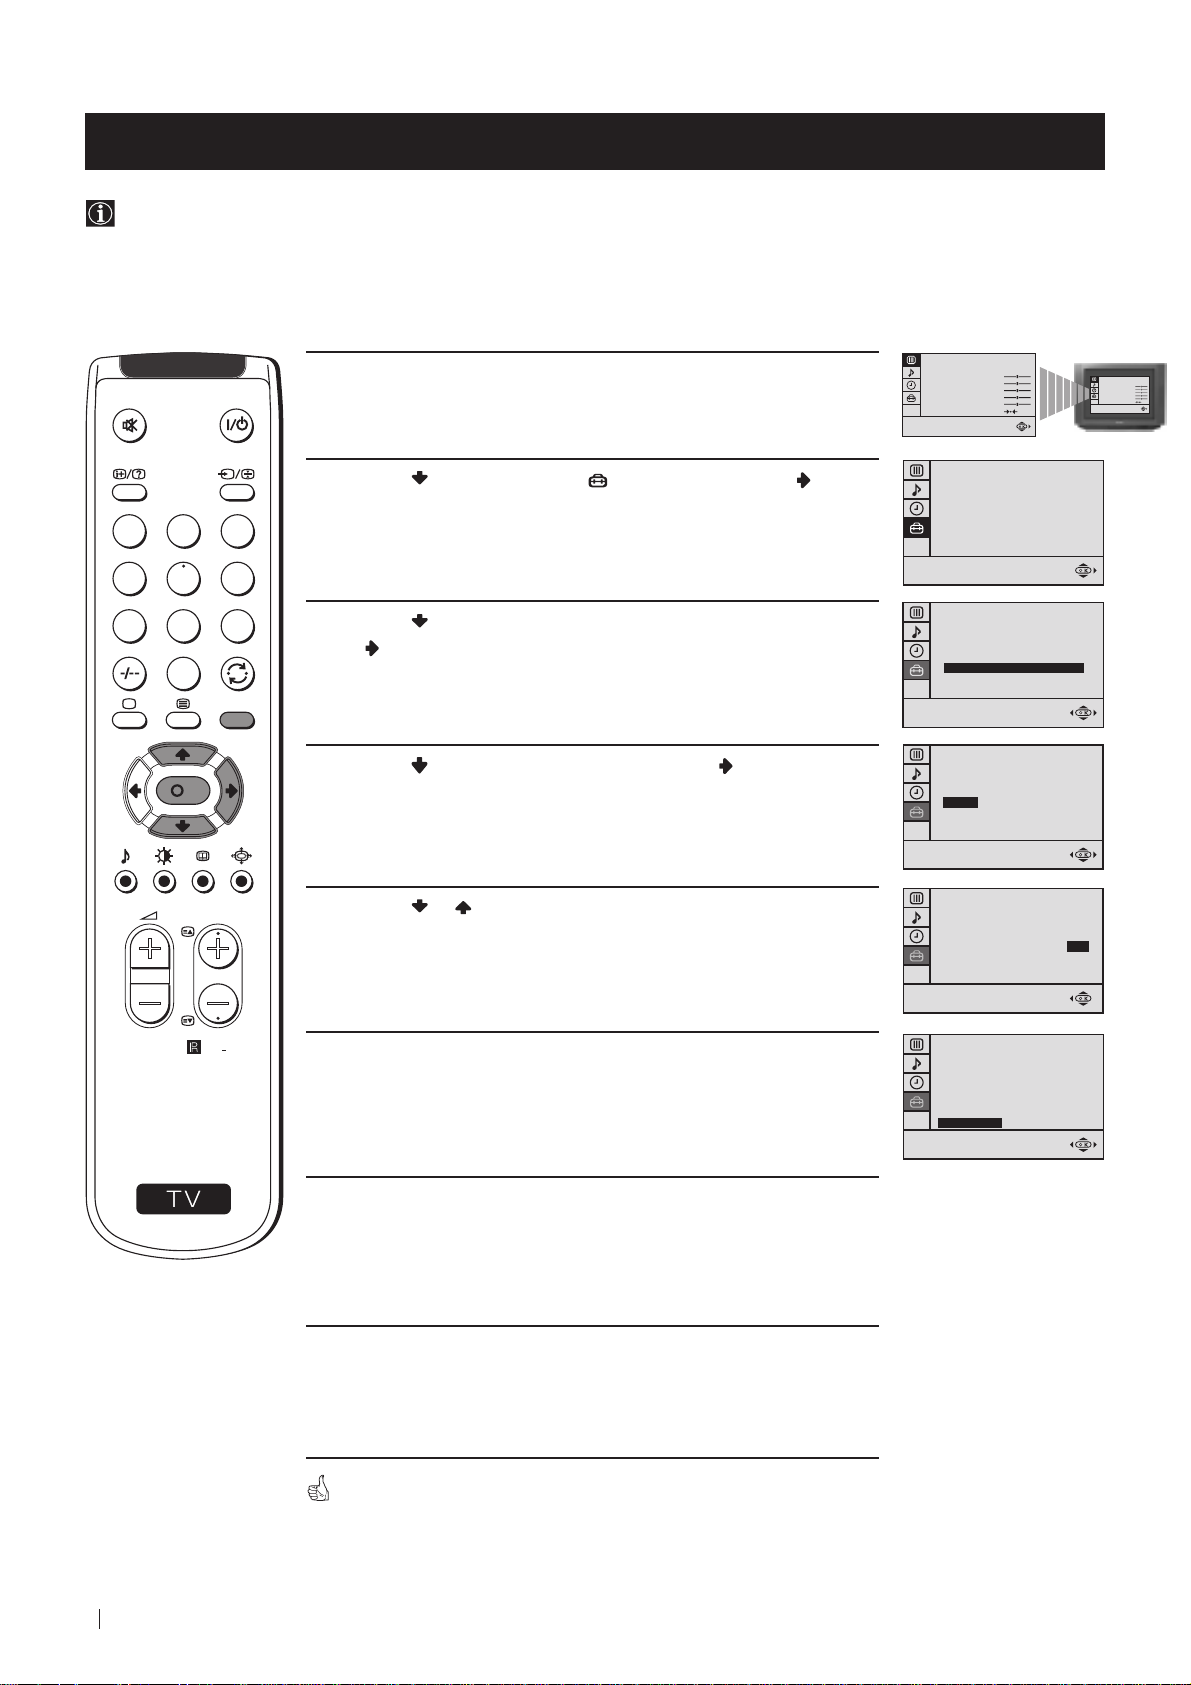
Selecting Language
Use this function to change the language of the menu screens.
The first time that you switch on your TV, the Language menu appears automatically.
However, if you need to change the language menu afterwards, select the menu LANGUAGE in the
and proceed in the same way as described below.
1 Press the on/off button on your TV set to switch on your TV. The
first time you press the on/off button on your TV set, the language
menu displays automatically on the TV screen.
(SET UP) menu
LANGUAGE
ENGLISH
DEUTSCH
FRANÇAIS
ITALIANO
ESPAÑOL
NEDERLANDS
EΛΛHNIKA
POLSKI
Č
ESKI
MAGYAR
T
Ü
RKÇE
Select language:
LANGUAGE
Select language:
ENGLISH
DEUTSCH
FRANÇAIS
ITALIANO
ESPAÑOL
NEDERLANDS
EΛΛHNIKA
POLSKI
ČESKI
MAGYAR
T
ÜRKÇE
2 Press the or button on the remote control to select the
language, then press the OK button to confirm your selection.
1
2
3
4
5
6
7
8
9
0
MENU
The Auto Tuning menu appears on the TV screen in the selected language.
LANGUAGE
ENGLISH
DEUTSCH
FRANÇAIS
ITALIANO
ESPAÑOL
NEDERLANDS
EΛΛHNIKA
POLSKI
ČESKI
MAGYAR
T
ÜRKÇE
Select language:
Do you want to start
automatic tuning?
YES
NO
K
PROGR
S
RM
887
First Time Operation - Basic Presetting
9
Page 10
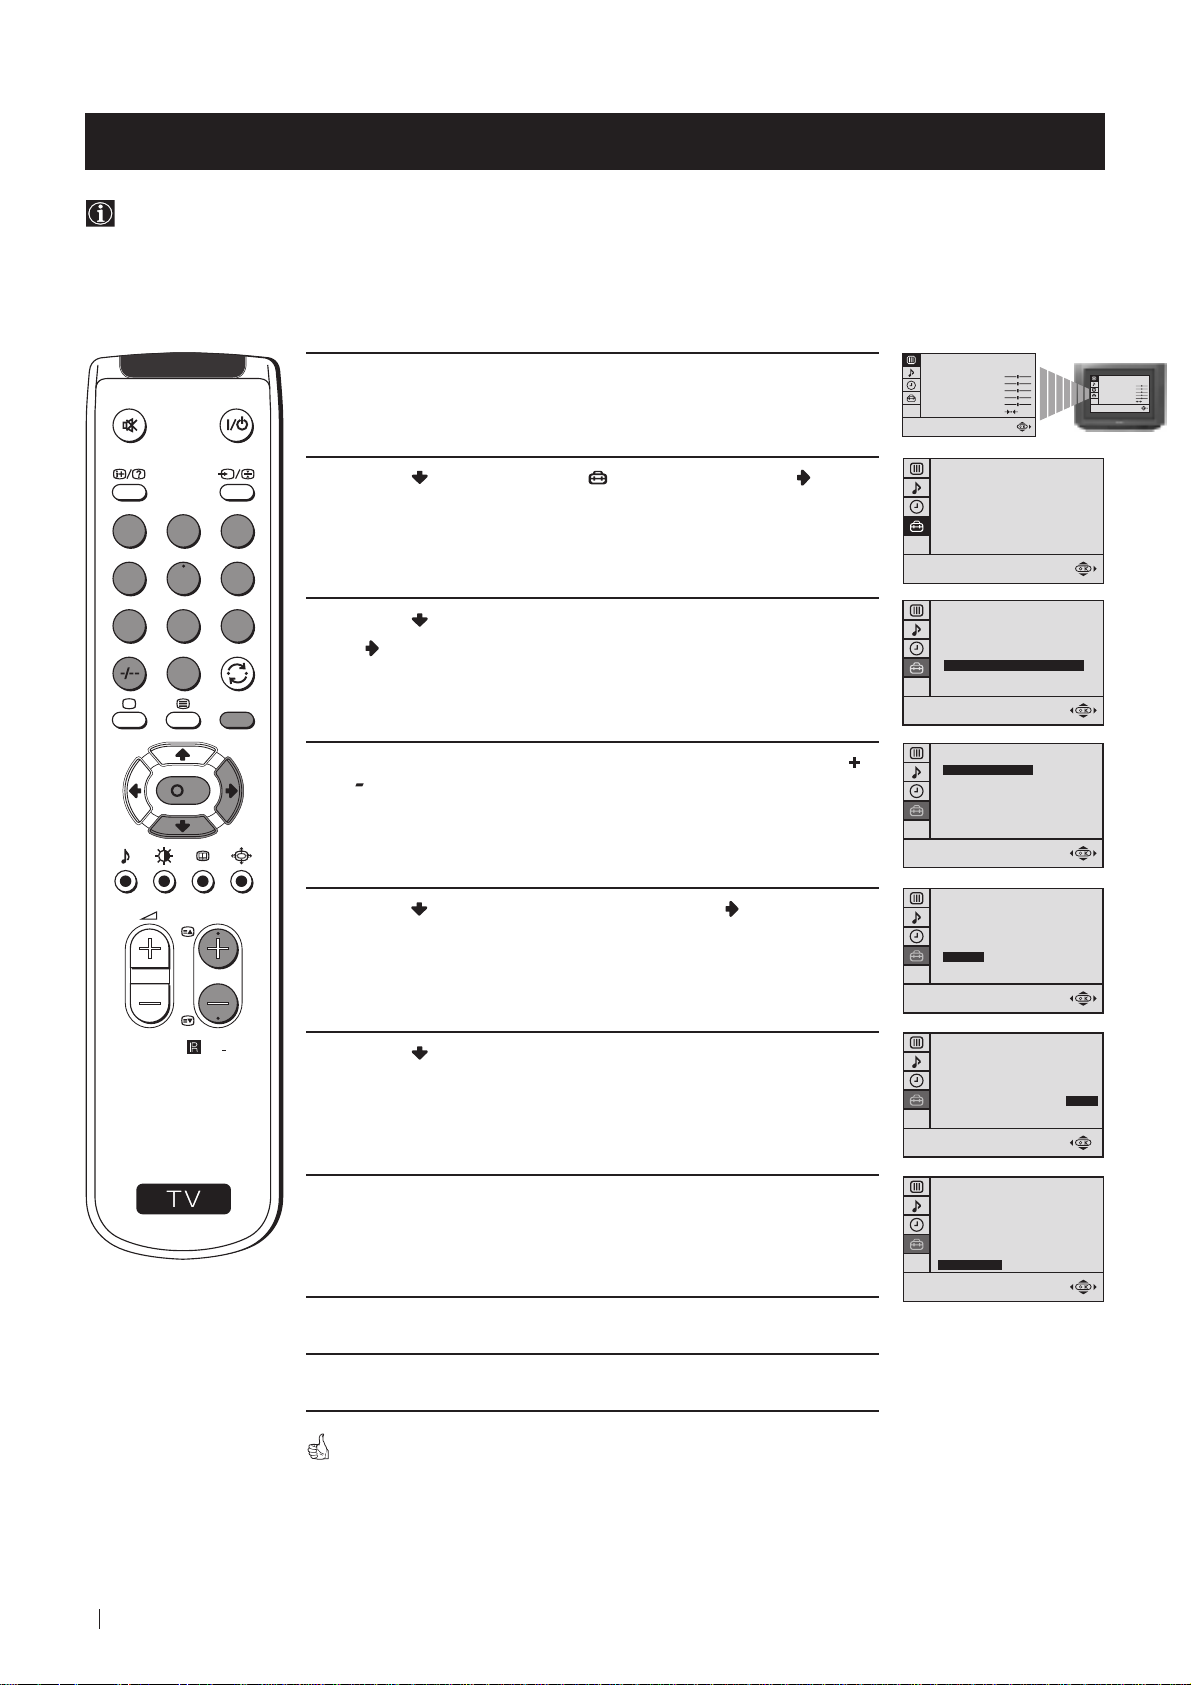
First Time Operation - Basic Presetting
Automatically Tuning the TV using the Remote Control
You need to tune the TV to receive channels (TV Broadcast). By following the instructions below, this TV automatically
searches and stores all available channels for you.
After having selected the language, a new menu appears automatically on the TV screen asking you to automatically tune
the TV. However, if you need to change or repeat the tuning afterwards (e.g. when you move house), select the menu
AUTO PROGRAMME in the (SET UP) menu and proceed in the same way as described below in step 1 or, please refer
to the section "Automatically Tuning the TV using the TV buttons" of this instruction manual.
Do you want to start
1 Press the OK button on the remote control to select YES.
A new menu appears automatically on the screen asking you to
check that the antenna is connected.
1
2
3
4
5
6
2 Confirm that the antenna is connected and then press the OK
button.
automatic tuning?
YES
NO
Please confirm that
antenna is connected
CONFIRM
Do you want to start
automatic tuning?
YES
NO
7
8
0
S
K
PROGR
MENU
RM
887
9
The automatic tuning starts and the message "Searching..." flashes
on the screen.
This procedure could take some minutes.
When the automatic tuning is finished, the Programme Sorting menu
appears on the TV screen.
Notes: • To stop the automatic tuning, press the MENU button.
• If you stop the automatic tuning by pressing the MENU
button, the Programme Sorting menu does not appear
automatically on the TV screen.
AUTO PROGRAMME
PROGRAMME:
SYSTEM:
CHANNEL:
Searching...
PROGRAMME SORTING
PROGRAMME:
CONFIRM
Select Channel:
Select new position:
Confirm:
Exit:
PROGR
MENU
01
B/G
C 21
03
01
10
First Time Operation - Basic Presetting
Page 11
First Time Operation - Basic Presetting
Changing the Programme Order of the TV channels
After all available channels (TV Broadcast) are captioned and stored, a new menu appears automatically on the screen to
change the order in which the channels appear on the screen.
However, if you wish to rearrange the order of the channels afterwards, select the menu PROGRAMME SORTING in the
(SET UP) menu and proceed in the same way as described in the b) section of this chapter.
a) If you do not wish to change the channel order:
PROGRAMME SORTING
1 Press the MENU button to exit and return to the normal TV screen.
1
2
3
4
5
6
7
8
9
Your TV is now ready for use.
b) If you wish to change the channel order:
0
MENU
K
1 Press the PROGR or button until the channel (TV Broadcast) you
wish to rearrange appears on the screen.
2 Press the or button to select the new programme number
position for your selected channel (TV Broadcast), then press the
OK button.
PROGR
The word CONFIRM is highlighted for a few seconds to
confirm that the new programme position is stored.
PROGRAMME:
CONFIRM
Select Channel:
Select new position:
Confirm:
MENU
Exit:
PROGRAMME SORTING
PROGRAMME:
CONFIRM
Select Channel:
Select new position:
Confirm:
MENU
Exit:
PROGRAMME SORTING
PROGRAMME:
CONFIRM
Select Channel:
Select new position:
Confirm:
MENU
Exit:
PROGR
PROGR
01
01
PROGR
03
03
PROGRAMME SORTING
03
01
PROGRAMME:
CONFIRM
Select Channel:
PROGR
Select new position:
Confirm:
MENU
Exit:
PROGRAMME SORTING
03
01
PROGRAMME:
CONFIRM
Select Channel:
PROGR
Select new position:
Confirm:
MENU
Exit:
04
02
S
RM
3 Repeat steps 1 and 2 if you wish to change the order of the other
channels on your TV.
887
4 Press the MENU button to exit and return to the normal TV screen.
Your TV is now ready for use.
First Time Operation - Basic Presetting
11
Page 12
Advanced Operation - Advanced Presetting
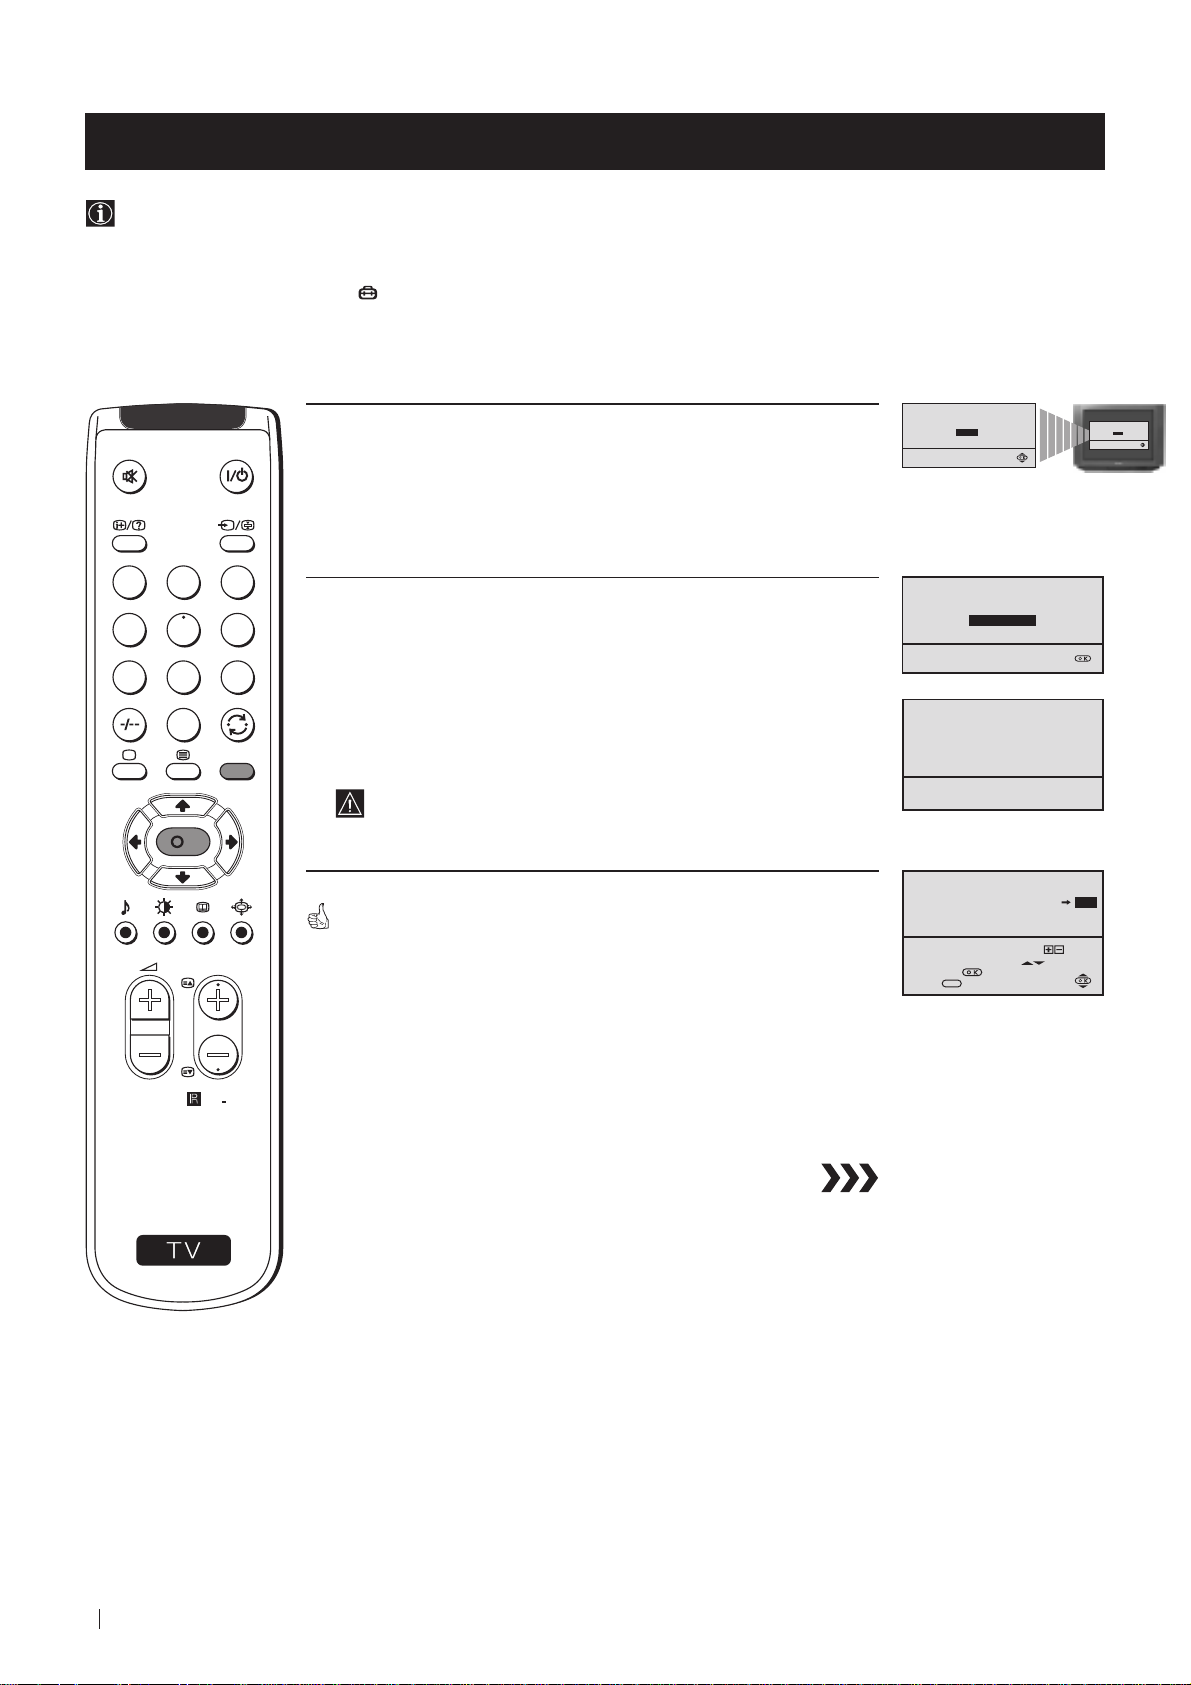
Automatically Tuning the TV using the TV buttons
Besides the explanation in the section “Automatically Tuning the TV using the Remote Control“, by following the
instructions below, this TV also searches and stores automatically all available channels using just one button of the TV set.
1 Press the flap on the front of the TV by pressing on the mark to
reveal the front control panel.
Please confirm that
2 Press and hold in the button on the TV set for some seconds,
until a menu appears automatically on the screen asking you to
check that antenna is connected.
antenna is connected
CONFIRM
Please confirm that
antenna is connected
CONFIRM
3 Confirm that the antenna is connected and then press the OK
button.
1
2
3
4
5
6
7
8
9
0
MENU
K
The automatic tuning starts and the message "Searching..." flashes
on the screen.
This procedure could take some minutes.
Please confirm that
antenna is connected
CONFIRM
AUTO PROGRAMME
PROGRAMME:
SYSTEM:
CHANNEL:
Searching...
01
B/G
C 21
When the automatic tuning procedure is complete, the menu disappears
from the TV screen and your TV is now ready for use.
PROGR
Note: To stop the automatic tuning, press the MENU button on the
remote control.
RM
887
S
12
Advanced Operation - Advanced Presetting
Page 13

Advanced Operation - Advanced Presetting
Manually Tuning the TV
Use this function to preset channels or a video input source one by one to the programme order of your choice.
PICTURE CONTROL
1 Press the MENU button on the remote control to display the
menu on the TV screen.
2 Press the button to select the symbol, then press the
button to enter to the SET UP menu.
1
2
3
4
5
6
3 Press the button to select MANUAL PROGRAMME, then
7
8
9
0
MENU
press the button.
4 With the cursor highlighting PROGRAMME, press the button
and then, press the
K
number you want to preset a channel. Press the button.
or button to select on which programme
MODE: PERSONAL
CONTRAST
BRIGHTNESS
COLOUR
SHARPNESS
HUE
RESET
SET UP
PICTURE ROTATION:
LANGUAGE: ENGLISH
AUTO PROGRAMME
PROGRAMME SORTING
MANUAL PROGRAMME
SET UP
PICTURE ROTATION:
LANGUAGE: ENGLISH
AUTO PROGRAMME
PROGRAMME SORTING
MANUAL PROGRAMME
SET UP:
MANUAL PROGRAMME
PROGRAMME:
SYSTEM:
CHANNEL:
AFT:
SKIP:
DECODER:
CONFIRM
01
B/G
C 21
ON
NO
OFF
0
0
PICTURE CONTROL
MODE: PERSONAL
CONTRAST
BRIGHTNESS
COLOUR
SHARPNESS
HUE
RESET
PROGR
S
RM
887
5 Press the button to select CHANNEL, then press the button.
Press
terrestrial channels or "S" for cable channels. Press the button.
or button to select the channel tuning, "C" for
6 Press the number buttons to enter the channel number of the TV
Broadcast or press the or button to search for the next
available channel.
If you do not wish to store this channel, press the
or button
to continue searching for the desired channel.
7 If this is the desired channel you wish to store, press the OK
button and then, with the cursor highlighting CONFIRM, press
the OK button again.
8 Repeat steps 4 to 7 if you wish to store more channels.
9 Press the MENU button to exit and return to the normal TV
screen.
SET UP:
MANUAL PROGRAMME
PROGRAMME:
SYSTEM:
CHANNEL:
AFT:
SKIP:
DECODER:
CONFIRM
SET UP:
MANUAL PROGRAMME
PROGRAMME:
SYSTEM:
CHANNEL:
AFT:
SKIP:
DECODER:
CONFIRM
SET UP:
MANUAL PROGRAMME
PROGRAMME:
SYSTEM:
CHANNEL:
AFT:
SKIP:
DECODER:
CONFIRM
01
B/G
C 21
ON
NO
OFF
01
B/G
C 21
ON
NO
OFF
01
B/G
C 21
ON
NO
OFF
Your TV is now ready for use.
Advanced Operation - Advanced Presetting
13
Page 14
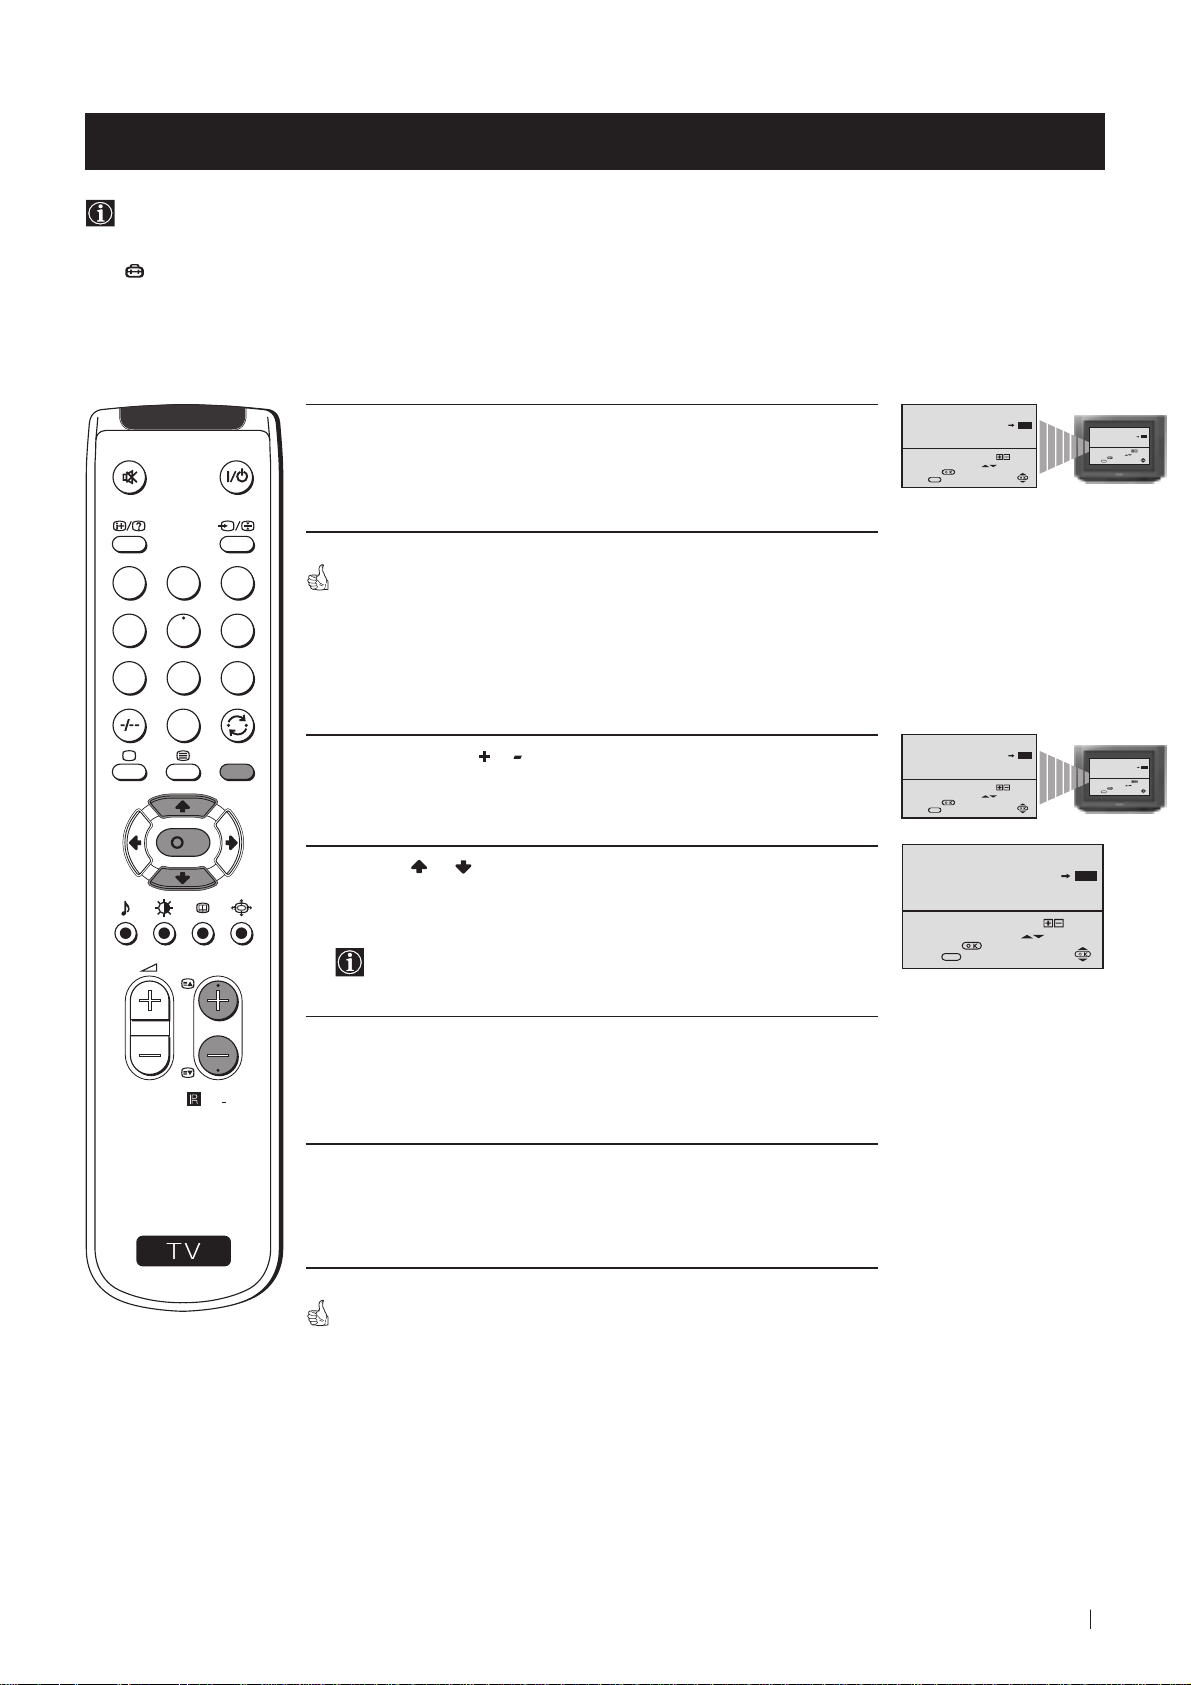
Advanced Operation - Advanced Presetting
Fine Tuning Channels
Normally, the automatic fine tuning (AFT) function is operating. If the picture is distorted, however, you can manually fine
tune the TV to obtain a better picture reception.
PICTURE CONTROL
MODE: PERSONAL
1 Select the channel (TV Broadcast) you wish to fine tune, then press
the MENU button on the remote control to display the menu on the
TV screen.
CONTRAST
BRIGHTNESS
COLOUR
SHARPNESS
HUE
RESET
PICTURE CONTROL
MODE: PERSONAL
CONTRAST
BRIGHTNESS
COLOUR
SHARPNESS
HUE
RESET
2 Press the button to select the symbol, then press the button
to enter to the SET UP menu.
1
2
3
4
5
6
7
8
9
3 Press the button to select MANUAL PROGRAMME, then press
the button.
0
MENU
4 Press the button to select AFT, then press the button.
K
PROGR
RM
887
5 Press the or button to adjust the fine tuning (-15 to +15), then
press the OK button.
6 With the cursor highlighting CONFIRM, press the OK button to
store.
SET UP
PICTURE ROTATION:
LANGUAGE: ENGLISH
AUTO PROGRAMME
PROGRAMME SORTING
MANUAL PROGRAMME
SET UP
PICTURE ROTATION:
LANGUAGE: ENGLISH
AUTO PROGRAMME
PROGRAMME SORTING
MANUAL PROGRAMME
SET UP:
MANUAL PROGRAMME
PROGRAMME:
SYSTEM:
CHANNEL:
AFT:
SKIP:
DECODER:
CONFIRM
SET UP:
MANUAL PROGRAMME
PROGRAMME:
SYSTEM:
CHANNEL:
AFT:
SKIP:
DECODER:
CONFIRM
SET UP:
MANUAL PROGRAMME
PROGRAMME:
SYSTEM:
CHANNEL:
AFT:
SKIP:
DECODER:
CONFIRM
01
B/G
C 21
ON
NO
OFF
01
B/G
C 21
+2
NO
OFF
01
B/G
C 21
+2
NO
OFF
0
0
S
7 Press the MENU button to exit and return to the normal TV screen.
8 Repeat steps 1 to 7 to fine tune other channels.
14
Advanced Operation - Advanced Presetting
Your TV is now ready for use.
Page 15

Advanced Operation - Advanced Presetting
Adjusting the Picture Rotation
Because of the earth's magnetism, the picture might slant. In this case, you can correct the picture slanting.
1 Press the MENU button on the remote control to display the menu
on the TV screen.
1
2
3
4
5
6
7
8
9
0
MENU
2 Press the button to select the symbol, then press the button
to enter to the SET UP menu.
PICTURE CONTROL
MODE: PERSONAL
CONTRAST
BRIGHTNESS
COLOUR
SHARPNESS
HUE
RESET
SET UP
PICTURE ROTATION:
LANGUAGE: ENGLISH
AUTO PROGRAMME
PROGRAMME SORTING
MANUAL PROGRAMME
PICTURE CONTROL
MODE: PERSONAL
0
CONTRAST
BRIGHTNESS
COLOUR
SHARPNESS
HUE
RESET
K
PROGR
S
RM
887
3 With the cursor highlighting PICTURE ROTATION, press the
button.
4 Press the or button to adjust the picture rotation (adjusting
range is -5 to +5), then press the OK button.
5 Press the MENU button to exit and return to the normal TV screen.
SET UP
PICTURE ROTATION:
LANGUAGE: ENGLISH
AUTO PROGRAMME
PROGRAMME SORTING
MANUAL PROGRAMME
SET UP
PICTURE ROTATION:
LANGUAGE: ENGLISH
AUTO PROGRAMME
PROGRAMME SORTING
MANUAL PROGRAMME
0
+2
Your TV is now ready for use.
Advanced Operation - Advanced Presetting
15
Page 16
Advanced Operation - Advanced Presetting
Skipping Programme positions
You can programme this TV to skip any unwanted programme numbers when they are selected with the PROGR +/buttons. To cancel this function afterwards, proceed in the same way as described below by selecting NO instead of YES in
step 6.
PICTURE CONTROL
MODE: PERSONAL
1 Press the MENU button on the remote control to display the menu
on the TV screen.
CONTRAST
BRIGHTNESS
COLOUR
SHARPNESS
HUE
RESET
PICTURE CONTROL
MODE: PERSONAL
CONTRAST
BRIGHTNESS
COLOUR
SHARPNESS
HUE
RESET
2 Press the button to select the symbol, then press the button
to enter to the SET UP menu.
1
2
3
4
5
6
7
8
9
3 Press the button to select MANUAL PROGRAMME, then press
button.
the
0
MENU
4 With the cursor highlighting PROGRAMME, press the PROGR
K
PROGR
RM
887
or button until the programme you want to skip appears on the
screen.
5 Press the button to select SKIP, then press the button.
6 Press the button to select YES, then press the OK button.
SET UP
PICTURE ROTATION:
LANGUAGE: ENGLISH
AUTO PROGRAMME
PROGRAMME SORTING
MANUAL PROGRAMME
SET UP
PICTURE ROTATION:
LANGUAGE: ENGLISH
AUTO PROGRAMME
PROGRAMME SORTING
MANUAL PROGRAMME
SET UP:
MANUAL PROGRAMME
PROGRAMME:
SYSTEM:
CHANNEL:
AFT:
SKIP:
DECODER:
CONFIRM
SET UP:
MANUAL PROGRAMME
PROGRAMME:
SYSTEM:
CHANNEL:
AFT:
SKIP:
DECODER:
CONFIRM
SET UP:
MANUAL PROGRAMME
PROGRAMME:
SYSTEM:
CHANNEL:
AFT:
SKIP:
DECODER:
CONFIRM
01
B/G
C 21
ON
NO
OFF
05
B/G
C 21
ON
NO
OFF
05
B/G
C 21
ON
YES
OFF
0
0
S
7 With the cursor highlighting CONFIRM, press the OK button.
8 Repeat steps 4 to 7 to skip other unused programme positions.
9 Press the MENU button to exit and return to the normal TV screen.
16
Advanced Operation - Advanced Presetting
When changing channels (TV Broadcasts) with the PROGR +/- buttons,
the skipped programme positions do not appear. You can, however, still
select them using the number buttons.
SET UP:
MANUAL PROGRAMME
PROGRAMME:
SYSTEM:
CHANNEL:
AFT:
SKIP:
DECODER:
CONFIRM
05
B/G
C 21
ON
YES
OFF
Page 17

Advanced Operation - Advanced TV Operation
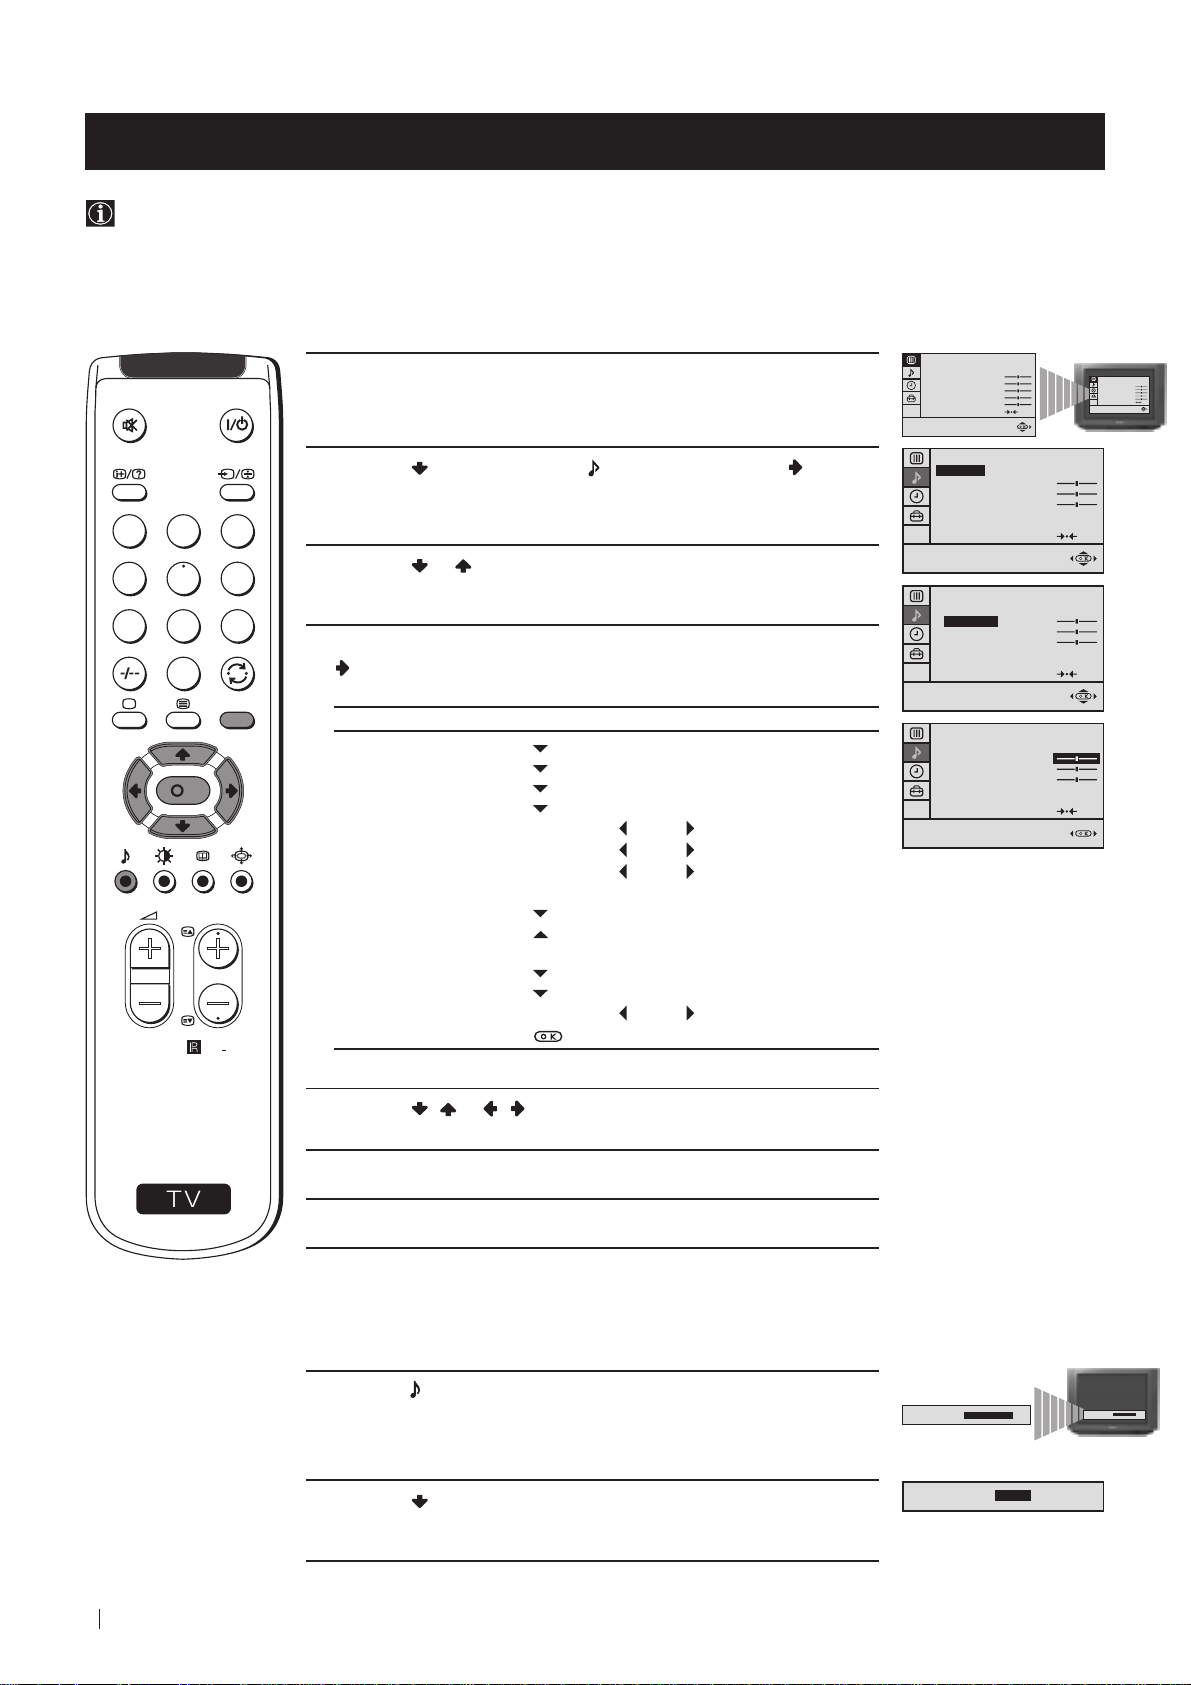
Adjusting the Picture
Although the picture is adjusted at the factory, you can modify it to suit your own taste.
1 Press the MENU button on the remote control to display the menu
on the TV screen.
PICTURE CONTROL
MODE: PERSONAL
CONTRAST
BRIGHTNESS
COLOUR
SHARPNESS
HUE
RESET
PICTURE CONTROL
MODE: PERSONAL
CONTRAST
BRIGHTNESS
COLOUR
SHARPNESS
HUE
RESET
2 Press the button to enter to the PICTURE CONTROL menu.
1
2
3
4
5
6
3 Press the or button to select the item you wish to change.
7
8
9
0
MENU
4 With the cursor highlighting the item you wish to change, press the
K
button.
(Refer to the table below for the effect of each control).
PICTURE CONTROL OPERATION / EFFECT
PICTURE CONTROL
MODE: PERSONAL
CONTRAST
BRIGHTNESS
COLOUR
SHARPNESS
HUE
RESET
PICTURE CONTROL
MODE: PERSONAL
CONTRAST
BRIGHTNESS
COLOUR
SHARPNESS
HUE
RESET
PICTURE CONTROL
MODE: PERSONAL
CONTRAST
BRIGHTNESS
COLOUR
SHARPNESS
HUE
RESET
MODE PERSONAL (for individual settings)
LIVE (for live broadcast programmes)
MOVIE (for films)
PROGR
CONTRAST Less More
BRIGHTNESS* Darker Brighter
COLOUR* Less More
SHARPNESS* Softer Sharper
HUE** Greenish Reddish
RM
887
RESET Resets picture to the factory preset levels.
* Can be only altered if PERSONAL MODE is selected.
** Only avalaible for NTSC colour signal (e.g: US video tapes).
S
5 Press the / or / button to alter the selected item, then press
the OK button to store the new adjustment.
6 Repeat steps 3 to 5 to alter the other items.
7 Press the MENU button to exit and return to the normal TV screen.
Changing Picture Mode Quickly
1 Press the button on the remote control to directly access the
PICTURE MODE.
2 Press the button to select your desired picture mode
(PERSONAL, LIVE or MOVIE).
Advanced Operation - Advanced TV Operation
PICTURE MODE:
PICTURE MODE:
PICTURE MODE:
PERSONAL
LIVE
PICTURE MODE:
PERSONAL
17
Page 18
Advanced Operation - Advanced TV Operation
Adjusting the Sound
Although the sound is adjusted at the factory, you can modify it to suit your own taste.
1 Press the MENU button on the remote control to display the menu
on the TV screen.
PICTURE CONTROL
MODE: PERSONAL
CONTRAST
BRIGHTNESS
COLOUR
SHARPNESS
HUE
RESET
PICTURE CONTROL
MODE: PERSONAL
CONTRAST
BRIGHTNESS
COLOUR
SHARPNESS
HUE
RESET
2 Press the button to select the symbol, then press the button
to enter to the SOUND CONTROL menu.
1
2
3
4
5
6
7
8
9
3 Press the or button to select the item you wish to change.
4 With the cursor highlighting the item you wish to change, press the
0
MENU
K
button.
(Refer to the table below for the effect of each control).
SOUND CONTROL OPERATION / EFFECT
MODE PERSONAL (for individual settings)
JAZZ
POP
ROCK
SOUND CONTROL
MODE: PERSONAL
TREBLE
BASS
BALANCE
DUAL SOUND:
DSP:
RESET
SOUND CONTROL
MODE: PERSONAL
TREBLE
BASS
BALANCE
DUAL SOUND:
DSP:
RESET
SOUND CONTROL
MODE: PERSONAL
TREBLE
BASS
BALANCE
DUAL SOUND:
DSP:
RESET
STEREO
ON
STEREO
ON
STEREO
ON
TREBLE* Less More
BASS* Less More
BALANCE Left Right
DUAL SOUND • For a stereo broadcast:
PROGR
MONO
STEREO
• For a bilingual broadcast:
A (for channel 1)
B (for channel 2)
DSP (Digital sound Processor) ON OFF
RM
887
RESET Resets sound to the factory preset levels.
Can be only altered if PERSONAL MODE is selected.
*
5 Press the / or / button to alter the selected item, then press
the OK button to store the new adjustment.
S
6 Repeat steps 3 to 5 to alter the other items.
7 Press the MENU button to exit and return to the normal TV screen.
Changing Sound Mode Quickly
1 Press the button on the remote control to access directly to the
SOUND MODE.
2 Press the button to select your desired sound mode
(PERSONAL, JAZZ, POP or ROCK).
18
Advanced Operation - Advanced TV Operation
SOUND MODE:
PERSONAL
SOUND MODE:
POP
SOUND MODE:
PERSONAL
Page 19

Advanced Operation - Advanced TV Operation
Using the Sleep Timer
You can select a time period for the TV to switch itself automatically into the standby mode.
1 Press the MENU button on the remote control to display the menu
on the TV screen.
PICTURE CONTROL
MODE: PERSONAL
CONTRAST
BRIGHTNESS
COLOUR
SHARPNESS
HUE
RESET
PICTURE CONTROL
MODE: PERSONAL
CONTRAST
BRIGHTNESS
COLOUR
SHARPNESS
HUE
RESET
2 Press the button to select the symbol, then press the button
TIMER
OFF TIMER:
OFF
to enter to the TIMER menu.
1
2
3
4
5
6
7
8
9
3 With the cursor highlighting OFF TIMER, press the button.
TIMER
OFF TIMER:
OFF
0
MENU
K
4 Press the or button to set the time period delay
TIMER
OFF TIMER:
0:15
OFF
0:15 min.
0:30 min.
...
PROGR
...
4:00 hours
5 Press the OK button.
RM
887
S
6 Press the MENU button to exit and return to the normal TV screen.
One minute before the TV switches into standby mode, the time remaining
is displayed on the TV screen automatically.
Notes: • When watching the TV, press the
time remaining.
• To return to normal operation from standby mode,
press the button.
button to display the
Advanced Operation - Advanced TV Operation
19
Page 20
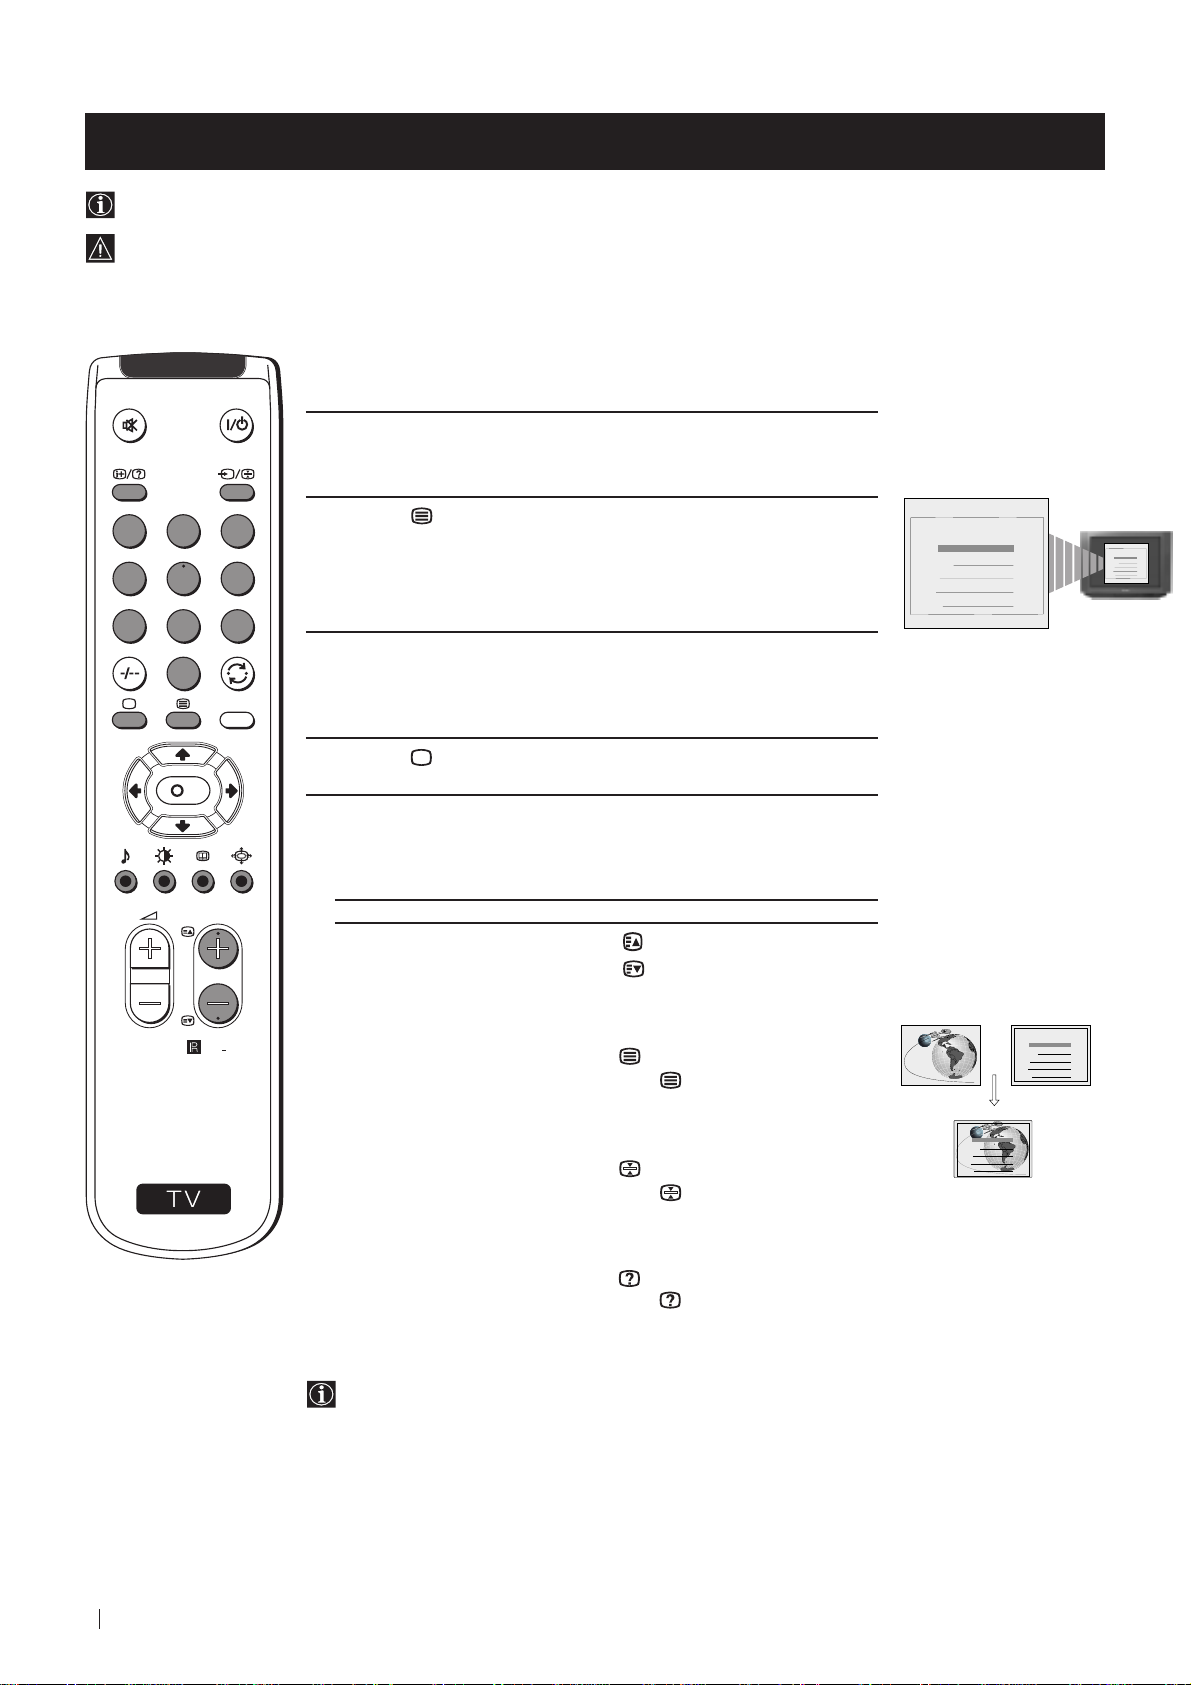
Teletext
Viewing Teletext
Teletext is an information service transmitted by most TV stations.
Make sure to use a TV channel with a strong signal, otherwise teletext errors may occur.
Selecting Teletext
1 Select the TV channel which carries the teletext service you wish to
view.
1
2
4
5
7
8
0
S
K
PROGR
MENU
RM
887
3
2 Press the button on the remote control to switch on the teletext.
6
TELETEXT
Index
Programme
News
Sport
Weather
TELETEXT
Index
Programme
25
153
101
98
25
News
153
Sport
101
Weather
98
9
3 Input three digits for the page number, using the numbered buttons
on the remote control. (if you have made a mistake, type in any
three digits and then, re-enter the correct page number).
4 Press the button to switch off teletext.
Using other Teletext functions
TO PRESS THE BUTTON
Access the next or preceding page for next page or
for the preceding page
TELETEXT
Index
Programme
25
News
Superimpose teletext on to the TV
Freeze a teletext page
Press again to cancel teletext
mode.
Press again to cancel the
freeze.
TELETEXT
Index
Programme
News
Sport
Weather
153
Sport
101
Weather
98
25
153
101
98
20
Reveal concealed information
(e.g: answer to a quiz) Press again to cancel.
Using Fastext
Fastext lets you access pages with one button stroke.
When Fastext is broadcast, a colour coded menu appears at the
bottom of the teletext page. Press the colour button (red, green,
yellow or blue) on the remote control to access the corresponding
page.
Teletext
Page 21
Optional Connections
MONO
L/G/S/I R/D/D/D
+
P
_
L/G/S/I R/D/D/D
s
3
3
3
L/G/S/I R/D/D/D
Using Optional Equipment
You can connect optional audio or video equipment to your TV, such as a VCR, a camcorder or a video game as shown
below.
Front of TV
Select and View the Input Signal
1
Connect your equipment to the designated TV socket.
2 Press
button repeatedly on your remote control until the correct
the
input symbol appears on the TV screen.
Symbol Input signals
k • Audio/video input signal through the Euro AV
K
q
K
q
connector
• RGB input signal through the Euro AV
connector
• Audio/video input signal through the Euro AV
connector
2
• S video input signal through the Euro AV
connector
3
• Video input signal through the phono socket
Audio input signal through
3
• S video input signal through the socket
Audio input signal through D.
F
F
E
E
and
C
D
B
and
3 Switch on the connected equipment.
4 To return to normal TV picture, press the
Note: To avoid picture distortion, do not connect equipment to the B and
connectors
at the same time.
button on the remote control.
B
A
C
D
8mm/Hi8
camcorder
S-VHS/Hi8
camcorder
Rear of TV
E
Additional Information
Connecting a VCR
F
Plug in VCR to the socket
We recommend you tune in the VCR signal to TV programme number ‘0’ using
the section “Manually Tuning the TV“ of this instruction manual.
Connecting Headphones
Plug in your headphones to the socket
Connecting Decoders
Plug in decoders to the socket
Connecting to External Audio Equipment
Plug in your Hi-Fi equipment to the
to amplify the audio output from the TV.
* “PlayStation” is a product of Sony Computer Entertainment, Inc.
* “PlayStation” is a trademark of Sony Computer Entertainment, Inc.
on the rear of the TV set.
A
on the front of the TV set.
F
on the rear of the TV.
G
sockets on the rear of the TV if you wish
F
E
s
2 /
1/
2
1
“PlayStation”
VCR
Decoder
Optional Connections
G
L/G/S/I
R/D/D/D
*
Hi-Fi
21
Page 22

Optional Connections
Smartlink
Smartlink is a direct link between your TV set and a VCR.
For Smartlink you need:
• A VCR which supports Smartlink, NextView Link, Easy Link or
Megalogic.
Megalogic is a trademark of Grundig Corporation.
EasyLink is a trademark of Philips Corporation.
• A fully-wired 21 pin SCART cable to connect your VCR to Scart
:1/
connector.
The features of Smartlink are:
• Tuning information such as the channel overview are downloaded
from the TV set to the VCR.
• Direct TV recording: While watching TV you need to press just one
button on the VCR to record this programme.
• TV in standby mode: Press the "Play z" button on your VCR to
switch the TV automatically on.
If you have connected a decoder to a VCR which supports
Smartlink feature, select the menu MANUAL PROGRAMME in
the (SET UP) menu and select DECODER ON to each codified
channel.
For more information on Smartlink, please refer to the Instruction
Manual of your VCR.
22
Optional Connections
Page 23
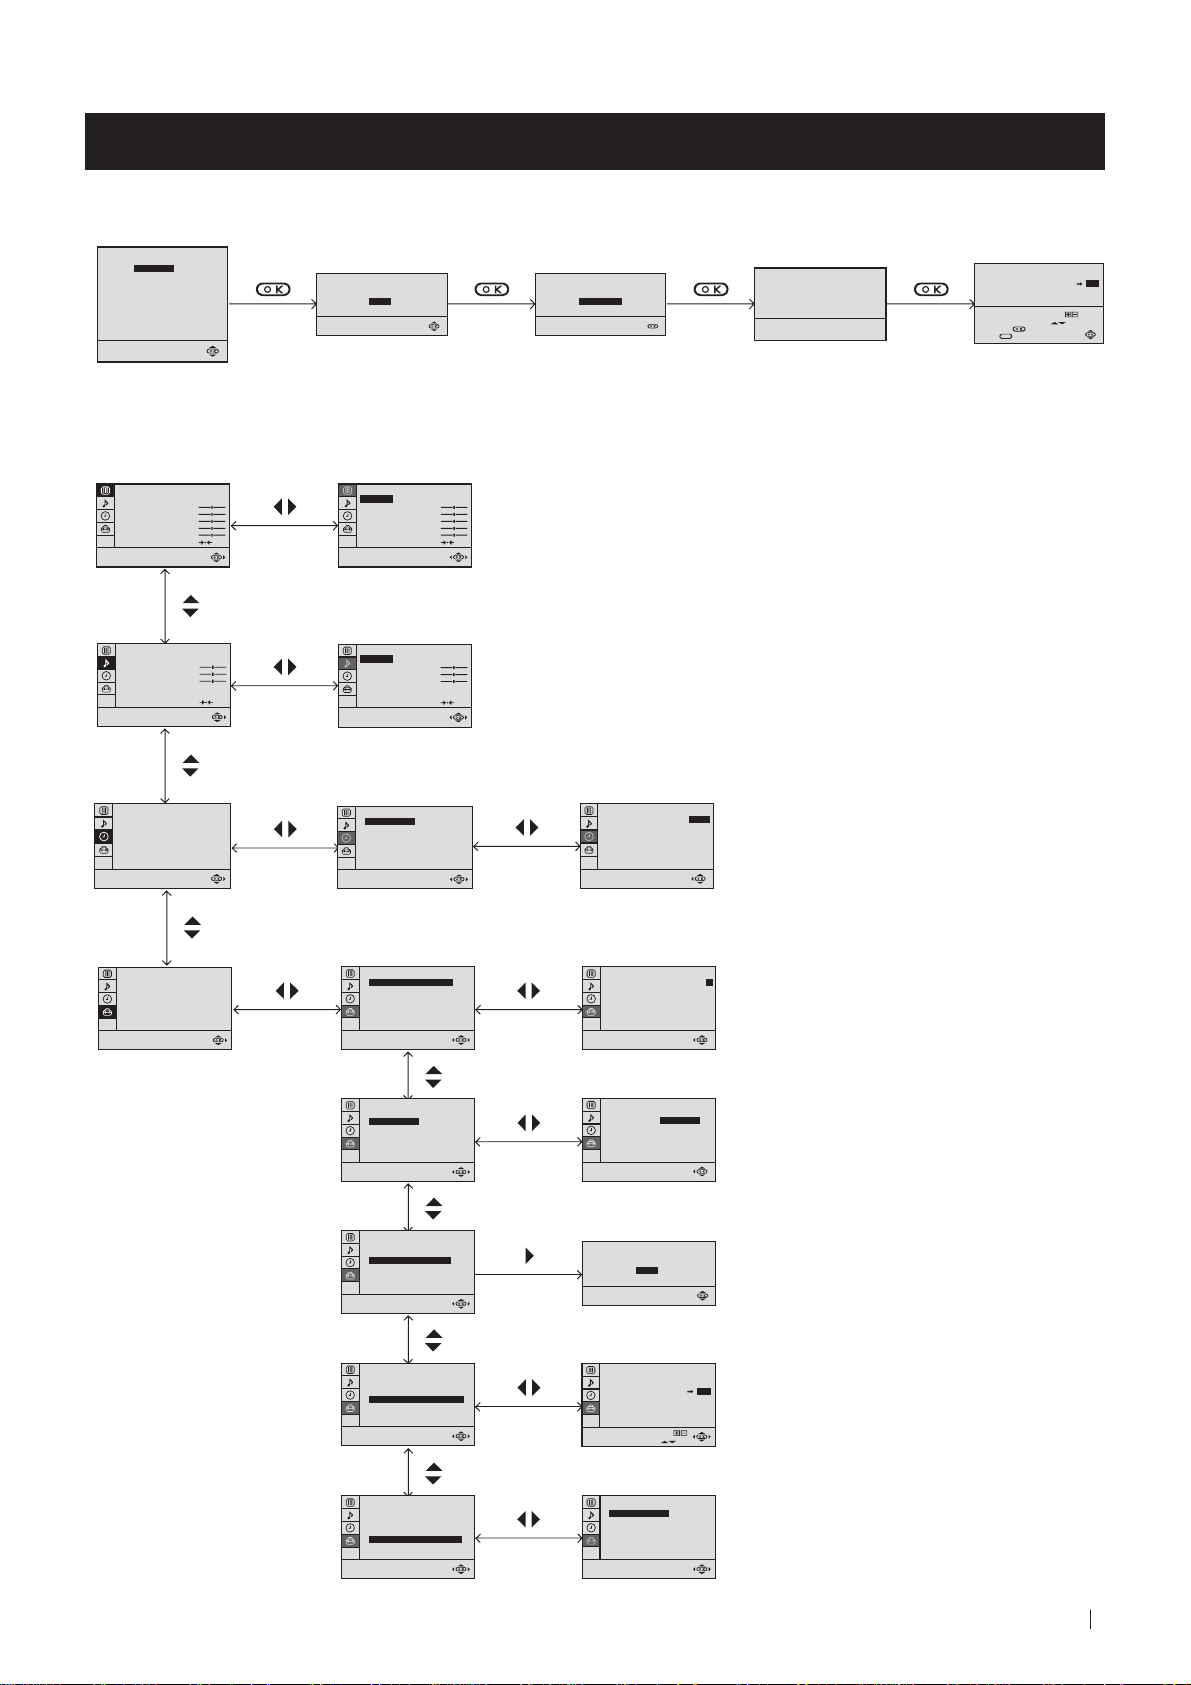
Additional Information
Menu Guide
Set Up Menus (for first time operation)
LANGUAGE
ENGLISH
DEUTSCH
FRANÇAIS
ITALIANO
ESPAÑOL
NEDERLANDS
EΛΛHNIKA
POLSKI
Č
ESKI
MAGYAR
T
Ü
RKÇE
Select language:
(For more details, please refer to the chapter "Selecting Language")
On Screen display Menus Guide
Do you want to start
automatic tuning?
YES
NO
Please confirm that
antenna is connected
CONFIRM
AUTO PROGRAMME
PROGRAMME:
SYSTEM:
CHANNEL:
Searching...
PROGRAMME SORTING
PROGRAMME:
01
B/G
C 21
CONFIRM
Select Channel:
Select new position:
Confirm:
MENU
Exit:
PROGR
03
01
PICTURE CONTROL
MODE: PERSONAL
CONTRAST
BRIGHTNESS
COLOUR
SHARPNESS
HUE
RESET
SOUND CONTROL
MODE: PERSONAL
TREBLE
BASS
BALANCE
DUAL SOUND:
DSP:
RESET
TIMER
OFF TIMER:
SET UP
PICTURE ROTATION:
LANGUAGE: ENGLISH
AUTO PROGRAMME
PROGRAMME SORTING
MANUAL PROGRAMME
STEREO
ON
OFF
PICTURE CONTROL
MODE: PERSONAL
CONTRAST
BRIGHTNESS
COLOUR
SHARPNESS
HUE
RESET
SOUND CONTROL
MODE: PERSONAL
TREBLE
BASS
BALANCE
DUAL SOUND:
DSP:
RESET
TIMER
OFF TIMER:
STEREO
ON
OFF
TIMER
OFF TIMER:
OFF
(For different adjustments,
please refer to the section
"Adjusting the Picture")
(For different adjustments,
please refer to the section
"Adjusting the Sound" )
(For more details,
please refer to the section
"Using the Sleep Timer")
SET UP
0
PICTURE ROTATION:
LANGUAGE: ENGLISH
AUTO PROGRAMME
PROGRAMME SORTING
MANUAL PROGRAMME
0
SET UP
PICTURE ROTATION:
LANGUAGE: ENGLISH
AUTO PROGRAMME
PROGRAMME SORTING
MANUAL PROGRAMME
0
(For more details,
please refer to the section
"Picture Rotation")
SET UP
PICTURE ROTATION:
LANGUAGE: ENGLISH
AUTO PROGRAMME
PROGRAMME SORTING
MANUAL PROGRAMME
SET UP
PICTURE ROTATION:
LANGUAGE: ENGLISH
AUTO PROGRAMME
PROGRAMME SORTING
MANUAL PROGRAMME
SET UP
PICTURE ROTATION:
LANGUAGE: ENGLISH
AUTO PROGRAMME
PROGRAMME SORTING
MANUAL PROGRAMME
SET UP
PICTURE ROTATION:
LANGUAGE: ENGLISH
AUTO PROGRAMME
PROGRAMME SORTING
MANUAL PROGRAMME
SET UP
0
PICTURE ROTATION:
LANGUAGE: ENGLISH
AUTO PROGRAMME
PROGRAMME SORTING
MANUAL PROGRAMME
0
(For more details,
please refer to the section
"Selecting Language")
0
Do you want to start
automatic tuning?
YES
NO
(For more details, please
refer to the section
"Automatically Tuning the TV
using the Remote Control")
0
0
SET UP:
PROGRAMME SORTING
PROGRAMME:
CONFIRM
Select channel:
Select new position:
SET UP:
MANUAL PROGRAMME
PROGRAMME:
SYSTEM:
CHANNEL:
AFT:
SKIP:
DECODER:
CONFIRM
PROGR
03
01
01
B/G
C 21
ON
NO
OFF
(For more details, please
refer to the section
"Changing the Programme
Order of the TV channels")
(For more details,
please refer to the section
"Manually Tuning the TV")
Additional Information
23
Page 24
Additional Information
Troubleshooting
Here are some simple solutions to the problems which may affect the picture and sound.
Problem Solution
No picture (screen is dark), no sound • Plug the TV in.
• Press the
• If the
programme number button on the remote control.
• Check the aerial connection.
• Check that the selected video source is on.
• Turn the TV off for 3 or 4 seconds and then turn it
on again using the
Poor or no picture (screen is dark), • Using the MENU system, select the Picture Adjustment
but good sound display.
Adjust the brightness, picture and colour balance levels.
• From the Picture Adjustment display select RESET to return
to the factory settings.
button on the front of TV.
indicator is on, press button or a
button on the front of the TV.
Poor picture quality when watching a • Press the button repeatedly on the remote control until
RGB video source. the RGB symbol is displayed on the screen.
Good picture, no sound • Press the +/– button on the remote control.
• If
No colour on colour programmes • Using the MENU system, select the Picture Adjustment
• From the Picture Adjustment display select RESET to return
Distorted picture when changing • Turn off any equipment connected to the 21 pin Euro
programmes or selecting teletext connector on the rear of the TV.
Noisy picture when viewing TV • Adjust Fine Tuning to obtain better picture reception.
channel
Remote control does not function • Replace the batteries.
The standby indicator on the TV • Contact to your nearest Sony service centre.
flashes.
is displayed on the screen, press the button on the
remote control.
display. Adjust the colour balance.
to the factory settings.
24
Additional Information
• If you continue to have these problems, have your TV serviced by qualified personnel.
• NEVER open the casing yourself.
Page 25

Additional Information
Specifications
TV system
B/G/H
Colour system
PAL, SECAM
NTSC 3.58, 4.43 (only Video In)
Channel coverage
VHF: E2-E12
UHF: E21-E69
CATV: S1-S20
HYPER: S21-S41
Picture tube
Flat Display Trinitron
Approx. 72 cm (29 inches) (Approx. 68 cm picture
measured diagonally), 104° deflection
Rear Terminals
:1/
:2/
Front Terminals
3
2
3
2
s
3
21-pin Euro connector (CENELEC
standard) including audio/video input,
RGB input, TV audio/video output
s
21-pin Euro connector (CENELEC
standard) including audio/video input,
S-video input, monitor audio/video
output
Audio outputs - phono jacks
video input - phono jack
audio inputs - phono jacks
S video input - 4 pin DIN
Headphones jack - minijack stereo
Sound output
2x7 W + 1x15 W (RMS)
Power consumption
120 W
Standby Power consumption
0.5 W
Dimensions (w x h x d)
Approx. 746 x 569 x 516 mm
Weight
Approx. 47.5 kg
Accessories supplied
1 Remote Control (RM-887)
2 Batteries (IEC designated)
Other features
TELETEXT, Fastext, TOPtext
Sleep Timer
Smartlink
Design and specifications are subject to change without notice.
Ecological Paper - Totally Chlorine Free
Additional Information
25
Page 26

Page 27
FD Trinitron
Farbfernseher
Wir gratulieren Ihnen zum Kauf Ihres Sony Fernsehgerätes.
Lesen Sie bitte vor der Inbetriebnahme des Gerätes diese Anleitung sorgfältig
durch und bewahren Sie sie gut auf.
Über diese Bedienungsanleitung
• Verwenden Sie den Teil Inbetriebnahme beim Aufstellen und um sich mit den
Grundfunktionen des Gerätes vertraut zu machen.
• Verwenden Sie den Teil Zusatzfunktionen, falls Sie die Sonder- und
Zusatzfunktionen des Gerätes interessieren.
• In der Anleitung verwendete Symbole:
• Mögliche Gefahren
• Wichtiger Hinweis
Bedienungsanleitung
DE
• Information zu einer Funktion
• 1, 2 ... Eine Aufzählung von Bedienschritten
MENU
• Farblich hervorgehobene Tasten auf der Fernbedienung beziehen sich
K
auf die zu drückenden Tasten, um eine Bedienfolge auszuführen.
• Resultat einer Bedienung.
• Text geht auf der nächsten Seite weiter.
27
Page 28

Zu Ihrer Sicherheit
Zu Ihrer Sicherheit
Sicherheitshinweis
Fernsehgeräte arbeiten mit sehr hohen Spannungen. Um ein Feuer oder einen elektrischen Schlag zu
vermeiden, sollten Sie unbedingt die folgenden Sicherheitshinweise beachten.
Allgemeine Hinweise
• Dieses Fernsehgerät ist zum Empfang und der Wiedergabe von Audio- und
Videosignalen bestimmt. Jegliche andere Verwendung des Gerätes ist nicht erlaubt.
• Setzen Sie das Gerät keinesfalls Regen oder sonstiger Feuchtigkeit aus.
• Öffnen Sie nie selbst die Rückwand des Gerätes.
• Lassen Sie Reparaturen ausschließlich von Fachpersonal ausführen!
Zur sicheren Installation
• Stellen Sie das Gerät nicht an einem heißen, feuchten oder übermäßig staubigen Platz auf.
• Decken Sie die Lüftungsschlitze des Gerätes nicht ab. Lassen Sie zur Belüftung
mindestens 10 cm um das Gerät frei (z.B. in einer Regalwand).
• Setzen Sie das Gerät keinen starken Erschütterungen aus.
• Stellen Sie das Gerät nur auf einen stabilen TV-Stand, der für das Gewicht und die
Abmessungen des Gerätes ausgelegt ist.
Zum sicheren Betrieb
• Betreiben Sie das Gerät nur an 220 - 240 V AC, 50 Hz.
• Ziehen Sie sofort den Netzstecker, falls Flüssigkeiten oder Gegenstände in das Gehäuse
gelangen. Lassen Sie das Gerät auf jeden Fall überprüfen!
• Schalten Sie das Gerät normalerweise mit dem Netzschalter ganz aus. Lassen Sie es nicht
unnötig im Bereitschaftsbetrieb. Ziehen Sie den Netzstecker, falls Sie das Gerät längere
Zeit nicht verwenden.
• Ziehen Sie beim Ausstecken immer am Stecker selbst, nicht am Kabel. Sie könnten
ansonsten das Netzkabel beschädigen.
• Ziehen Sie bei einem Gewitter Netz- und Antennenkabel. Ansonsten kann das Gerät bei
einem Einschlag beschädigt werden.
28
Zu Ihrer Sicherheit
Zur Wartung
• Reinigen Sie den Bildschirm mit einem weichen, feuchten Tuch. Verwenden Sie keine
scharfen Reiniger.
• Langfristig können Staub- und Nikotinablagerungen zu einem Wärmestau im Gerät
führen. Dies kann ein Sicherheitsrisiko sein und die Lebensdauer Ihres Fernsehgerätes
verkürzen. Wie empfehlen deshalb, das Gerät alle 5 Jahre warten zu lassen.
Page 29

Inhaltsverzeichnis
Inhaltsverzeichnis
Über diese Bedienungsanleitung .......................................................................................................27
Zu Ihrer Sicherheit ................................................................................................................................28
Als erstes
Auf einen Blick
Überprüfen des mitgelieferten Zubehörs .............................................................................30
Auf einen Blick - Tasten am Gerät .........................................................................................30
Auf einen Blick - Fernbedienung ...........................................................................................31
Erstmalige Inbetriebnahme
Schritt 1- Installation
Einlegen der Batterien in die Fernbedienung ......................................................................32
Anschluß der Antenne ............................................................................................................32
Einschalten des Fernsehgerätes ............................................................................................. 32
Schritt 2 - Abspeicherung - Grundfunktionen
Menüsprache wählen ..............................................................................................................33
Automatisches Abspeichern von Sendern mit der Fernbedienung ................................. 34
Ordnen der Programmspeicherplätze .................................................................................. 35
Weitere Funktionen
Abspeicherung - Zusatzfunktionen
Automatisches Abspeichern von Sendern mit den Tasten am Gerät ............................... 36
Manuelles Abspeichern von Sendern ................................................................................... 37
Feinabstimmen eines Senders ................................................................................................ 38
Einstellen der Bildrotation ......................................................................................................39
Überspringen von Programmspeicherplätzen .................................................................... 40
Bedienung des Fernsehgerätes - Zusatzfunktionen
Einstellen des Bildes ................................................................................................................ 41
Einstellen des Tons...................................................................................................................42
Die automatische Abschaltfunktion ......................................................................................43
Videotext
Verwenden von Videotext ......................................................................................................44
DE
Anschlußmöglichkeiten
Anschluß von anderen Geräten .............................................................................................45
“Smartlink” ...............................................................................................................................46
Weitere Informationen
Das Menüsystem ......................................................................................................................47
Fehlersuche ............................................................................................................................... 48
Technische Daten .....................................................................................................................49
Inhaltsverzeichnis
29
Page 30

Als erstes - Auf einen Blick
Überprüfen des mitgelieferten Zubehörs
1
2
3
4
5
6
7
8
9
0
MENU
K
PROGR
Zwei Batterien (R6)
RM
887
S
Eine Fernbedienung
(RM-887)
Auf einen Blick - Tasten am Gerät
Netzschalter (Ein/Aus)
Bereitschaftsanzeige
Kopfhörer-Buchse
Taste zur automatischen
Abspeicherung von Sendern
Tasten am Gerät: Zum Öffnen
Markierung auf Abdeckung vorne
am Gerät drücken.
Als erstes - Auf einen Blick
30
S-VideoEingangsbuchse
Cinchbuchse,
Videoeingang
Cinchbuchsen,
Audioeingang
Taste zur
Wahl des
Videoeingangs
Lautstärkeregelung
Programmwahl
Page 31

Als erstes - Auf einen Blick
Auf einen Blick - Fernbedienung
Ton abschalten
Einmal drücken, um Fernsehton
auszuschalten. Nochmals
drücken, um Ton wieder
einzuschalten.
Informationsanzeige im Bildschirm
Einmal drücken, um alle Anzeigen im
Bildschirm einzublenden. Nochmals
drücken, um die Anzeigen
auszublenden.
Programmwahl
Mit den Zahlentasten das gewünschte
Programm wählen.
Bei zweistelligen Programmnummern wie
z.B. 23 zuerst -/--, dann die Tasten 2 und 3
drücken. Bei einer Fehleingabe die
Ziffernfolge beliebig ergänzen und
nochmals -/-- und die zwei richtigen
Ziffern drücken.
TV-Modus
Drücken, um aus dem Videotext oder dem
Videoeingangsmodus in den TV-Modus
zurückzukehren.
Videotext
Drücken, um Videotext einzuschalten.
Ton-Modus
Drücken, um den Ton-Modus
umzuschalten.
Bild-Modus
Drücken, um den Bild-Modus
umzuschalten.
Lautstärkeregelung
Mit + oder - die Lautstärke regeln.
1
2
4
5
7
8
0
S
K
PROGR
MENU
RM
887
Kurzzeitiges Ausschalten
Drücken, um Gerät in den
Bereitschaftsbetrieb zu schalten.
Bereitschaftsanzeige leuchtet am Gerät.
Taste nochmals drücken, um Gerät wieder
einzuschalten.
Um Energie zu sparen, sollte das Fernsehgerät
normalerweise vollständig ausgeschaltet werden.
Das Gerät schaltet sich automatisch in
den Bereitschaftsbetrieb, wenn 30
Minuten kein Fernsehsignal empfangen
3
6
9
wird und keine Taste gedrückt wird.
Videoeingangs-Modus
Mehrmals drücken, bis das Symbol der
gewünschten Eingangsquelle auf dem
Bildschirm erscheint.
Zurück zum zuletzt betrachteten
Programm
Drücken, um zum zuletzt für mindestens 5
sec. betrachteten Programm zurückzukommen
Menü-System
Drücken, um das Bildschirm-Menü
einzublenden. Nochmals drücken, um das
Menü wieder auszublenden.
Bedienung des Menüs
Cursor nach oben bewegen
Cursor nach unten bewegen
Zurück zum vorherigen Menü oder zur
vorherigen Auswahl
Nächstes Menü oder nächste Auswahl
OK Auswahl bestätigen
Einstellen des Bildschirmformats
Einmal drücken, um 16:9 (Breitbildeffekt)
einzustellen. Nochmals drücken, um auf 4:3
Format umzuschalten.
Videotext-Taste, keine Funktion im TVBetrieb.
Die Fucktion kann an diesem Fernseher
im Zusammenhang mit dieser Taste nicht
angewendet werden.
Programmwahl
Drücken, um das nächste oder vorherige
Programm zu wählen
Alle farbigen Tasten und die Symbole in grün haben sowohl im TV-Betrieb als auch im Videotext eine Funktion.
Informationen über Videotext finden Sie im entsprechenden Abschnitt dieser Bedienungsanleitung.
Als erstes - Auf einen Blick
31
Page 32

Erstmalige Inbetriebnahme - Installation
Einlegen der Batterien in die Fernbedienung
Die mitgelieferten Batterien polaritätsrichtig einlegen.
Entsorgen Sie die verbrauchten Batterien bitte umweltgerecht.
Anschluß der Antenne
Ein Antennenkabel, das den einschlägigen
Vorschriften entspricht, in die
Antennenbuchse
Einschalten des Fernsehgerätes
Das Gerät an das Netz anschließen (220-240 V. AC, 50 Hz).
einstecken.
32
Erstmalige Inbetriebnahme - Installation
Den Netzschalter Ein/Aus am Gerät drücken.
Page 33

Erstmalige Inbetriebnahme - Abspeicherung - Grundfunktionen
Menüsprache wählen
Mit dieser Funktion können Sie die Sprache wählen, in der die Menübilder erscheinen sollen. Beim erstmaligen Einschalten
des Gerätes erscheint das Menü LANGUAGE (SPRACHE) automatisch auf dem Bildschirm. Sollten Sie die Sprache zu
einem späteren Zeitpunkt ändern wollen, das Menü SPRACHE im Menü
gehen.
1 Das Gerät mit dem Netzschalter Ein/Aus einschalten. Nun
erscheint beim erstmaligen Einschalten automatisch das Menü
LANGUAGE (SPRACHE) auf dem Bildschirm.
(INSTALLATION) wählen und zu Schritt 2
LANGUAGE
ENGLISH
DEUTSCH
FRANÇAIS
ITALIANO
ESPAÑOL
NEDERLANDS
EΛΛHNIKA
POLSKI
Č
ESKI
MAGYAR
T
Ü
RKÇE
Select language:
LANGUAGE
Select language:
ENGLISH
DEUTSCH
FRANÇAIS
ITALIANO
ESPAÑOL
NEDERLANDS
EΛΛHNIKA
POLSKI
Č
MAGYAR
T
ESKI
Ü
RKÇE
2 Mit den Tasten oder auf der Fernbedienung die gewünschte
Sprache auswählen. Mit der OK-Taste bestätigen.
1
2
3
4
5
6
7
8
9
0
Nun erscheint das Menü Automatisch Abspeichern in der gewählten
Sprache.
SPRACHE
ENGLISH
DEUTSCH
FRANÇAIS
ITALIANO
ESPAÑOL
NEDERLANDS
EΛΛHNIKA
POLSKI
ČESKI
MAGYAR
T
ÜRKÇE
Sprache wählen:
Automatisches Abspeichern
jetzt starten?
JA
NEIN
MENU
K
PROGR
S
RM
887
Erstmalige Inbetriebnahme - Abspeicherung - Grundfunktionen
33
Page 34

Erstmalige Inbetriebnahme - Abspeicherung - Grundfunktionen
Automatisches Abspeichern von Sendern mit der
Fernbedienung
Bevor Sie fernsehen können, müssen Sie Sender auf Programmspeicherplätze abspeichern. Mit den folgenden Schritten
sucht und speichert Ihr Fernsehgerät automatisch alle zur Verfügung stehenden Sender.
Nach Auswahl der gewünschten Sprache erscheint automatisch ein neues Menü auf dem Bildschirm, das Sie fragt, ob Sie
jetzt automatisch abspeichern möchten. Wenn Sie jedoch das Menü zu einem späteren Zeitpunkt aufrufen möchten (z.B.
nach einem Umzug), finden Sie das Menü AUTOM. ABSPEICHERN im Menü
bei Schritt 1. Sie können auch mit einem Tastendruck am Gerät selbst abspeichern. Siehe dazu Automatisches Abspeichern
von Sendern mit den Tasten am Gerät.
1 Mit der OK-Taste auf der Fernbedienung JA auswählen.
Nun erscheint automatisch ein neues Menü auf dem Bildschirm, das
Sie bittet, den Antennenanschluß zu überprüfen.
1
2
3
4
5
6
2 Überprüfen Sie, ob die Antenne korrekt angeschlossen ist und
bestätigen Sie mit der OK-Taste.
(INSTALLATION). Beginnen Sie dann
Automatisches Abspeichern
jetzt starten?
JA
NEIN
Bitte Antennenanschluss
überprüfen
BESTÄTIGEN
Automatisches Abspeichern
jetzt starten?
JA
NEIN
7
8
0
S
K
MENU
PROGR
RM
9
887
Der automatische Suchlauf startet nun und die Meldung “Suche....”
blinkt während der Dauer des Suchlaufes.
Der Suchlauf kann mehrere Minuten dauern.
Sobald der Suchlauf beendet ist, erscheint das Menü Programme ordnen
auf dem Bildschirm.
Anmerkungen: • Sie können den Suchlauf mit der MENU-Taste
unterbrechen.
• Falls Sie den Suchlauf mit der MENU-Taste
unterbrochen haben, erscheint das Menü
Programme ordnen nicht automatisch auf dem
Bildschirm.
AUTOM. ABSPEICHERN
PROGRAMM:
TV-SYSTEM:
KANAL:
Suche...
PROGRAMME ORDNEN
PROGRAMM:
BESTÄTIGEN
Kanal wählen:
Neue Pos. wählen:
Bestätigen:
Beenden:
PROGR
MENU
01
B/G
C 21
03
01
34
Erstmalige Inbetriebnahme - Abspeicherung - Grundfunktionen
Page 35

Erstmalige Inbetriebnahme - Abspeicherung - Grundfunktionen
Ordnen der Programmspeicherplätze
Nachdem alle zur Verfügung stehenden Sender abgespeichert sind, erscheint automatisch ein neues Menü auf dem
Bildschirm, in dem Sie die Reihenfolge der Sender ändern können.
Falls Sie die Reihenfolge zu einem späteren Zeitpunkt ändern möchten, finden Sie das Menü PROGRAMME ORDNEN in
dem Menü
(INSTALLATION). Beginnen Sie dann bei Abschnitt b) dieses Kapitels.
a)
Sie möchten die Reihenfolge der Sender beibehalten
PROGRAMME ORDNEN
1 Die MENU-Taste drücken, um in den normalen TV-Betrieb
zurückzukehren.
1
2
3
4
5
6
7
8
9
Ihr Gerät ist jetzt betriebsbereit.
b) Sie möchten die Reihenfolge der Sender ändern
0
MENU
K
1 Mit PROGR oder den Sender wählen, der auf einen anderen
Programmspeicherplatz soll.
2 Mit den Tasten oder den neuen Programmspeicherplatz für
den Sender wählen. Mit OK bestätigen.
PROGR
Das Wort BESTÄTIGEN wird für kurze Zeit hervorgehoben,
um anzuzeigen, daß die neue Position gespeichert ist.
PROGRAMM:
BESTÄTIGEN
Kanal wählen:
Neue Pos. wählen:
Bestätigen:
MENU
Beenden:
PROGRAMME ORDNEN
PROGRAMM:
BESTÄTIGEN
Kanal wählen:
Neue Pos. wählen:
Bestätigen:
MENU
Beenden:
PROGRAMME ORDNEN
PROGRAMM:
BESTÄTIGEN
Kanal wählen:
Neue Pos. wählen:
Bestätigen:
Beenden:
PROGR
PROGR
MENU
01
01
PROGR
03
03
PROGRAMME ORDNEN
03
01
PROGRAMM:
BESTÄTIGEN
Kanal wählen:
PROGR
Neue Pos. wählen:
Bestätigen:
MENU
Beenden:
PROGRAMME ORDNEN
03
01
PROGRAMM:
BESTÄTIGEN
Kanal wählen:
PROGR
Neue Pos. wählen:
Bestätigen:
MENU
Beenden:
04
02
S
RM
3 Falls Sie weitere Sender ordnen möchten, die Schritte 1 und 2
wiederholen.
887
4 Die MENU-Taste drücken, um in den normalen TV-Betrieb
zurückzukehren.
Ihr Gerät ist jetzt betriebsbereit.
Erstmalige Inbetriebnahme - Abspeicherung - Grundfunktionen
35
Page 36

Weitere Funktionen - Abspeicherung - Zusatzfunktionen
Automatisches Abspeichern von Sendern mit den
Tasten am Gerät
Als Alternative zum automatischen Abspeichern mit der Fernbedienung können Sie auch mit nur einem Tastendruck am
Gerät alle zur Verfügung stehenden Sender automatisch abspeichern zu lassen.
1 Drücken Sie die Markierung vorne am Gerät, um die Abdeckung
des Bedienteils zu öffnen.
Bitte Antennenanschluss
2 Die Taste so lange gedrückt halten, bis automatisch ein neues
Menü auf dem Bildschirm erscheint, das Sie bittet, den
Antennenanschluß zu überprüfen.
überprüfen
BESTÄTIGEN
Bitte Antennenanschluss
überprüfen
BESTÄTIGEN
3 Überprüfen Sie, ob die Antenne korrekt angeschlossen ist und
bestätigen Sie mit der OK-Taste.
1
2
3
4
5
6
7
8
9
0
MENU
K
Der automatische Suchlauf startet nun und die Meldung “Suche....”
blinkt während der Dauer des Suchlaufes.
Der Suchlauf kann mehrere Minuten dauern.
Bitte Antennenanschluss
überprüfen
BESTÄTIGEN
AUTOM. ABSPEICHERN
PROGRAMM:
TV-SYSTEM:
KANAL:
Suche...
01
B/G
C 21
Sobald der Suchlauf beendet ist, wird das Menü ausgeblendet und Ihr
Gerät ist jetzt betriebsbereit.
PROGR
Anmerkungen: Sie können den Suchlauf mit der MENU-Taste
unterbrechen.
RM
887
S
Weitere Funktionen - Abspeicherung - Zusatzfunktionen
36
Page 37

Weitere Funktionen - Abspeicherung - Zusatzfunktionen
Manuelles Abspeichern von Sendern
Mit dieser Funktion können Sie Sender einzeln in der von Ihnen gewünschten Reihenfolge abspeichern.
1 MENU drücken, um das Menü einzublenden.
2 Mit der Taste das Symbol auswählen, dann drücken, um
das Menü INSTALLATION aufzurufen.
1
2
3
4
5
6
7
8
9
0
MENU
K
3 Mit der Taste MANUELL ABSPEICHERN wählen, dann die
Taste drücken.
4 Der Cursor steht nun auf PROGRAMM. Die Taste drücken
und mit den Tasten oder die gewünschte
Programmnummer wählen, auf die der Sender abgespeichert
werden soll. Mit der Taste bestätigen.
BILD-MENÜ
MODUS: ANWENDER
KONTRAST
HELLIGKEIT
FARBE
BILDSCHÄRFE
FARBTON
NORMWERTE
INSTALLATION
BILDROTATION:
SPRACHE: DEUTSCH
AUTOM. ABSPEICHERN
PROGRAMME ORDNEN
MANUELL ABSPEICHERN
INSTALLATION
BILDROTATION:
SPRACHE: DEUTSCH
AUTOM. ABSPEICHERN
PROGRAMME ORDNEN
MANUELL ABSPEICHERN
INST ALLATION
MANUELL ABSPEICHERN
PROGRAMM:
TV-SYSTEM:
KANAL:
AFT:
AUSLASSEN:
DECODER:
BESTÄTIGEN
:
01
B/G
C 21
EIN
NEIN
AUS
0
0
BILD-MENÜ
MODUS: ANWENDER
KONTRAST
HELLIGKEIT
FARBE
BILDSCHÄRFE
FARBTON
NORMWERTE
PROGR
S
RM
887
5 Mit der Taste KANAL wählen, dann die Taste drücken. Mit
der Taste oder entweder C für normale Kanäle oder S für
Kabelkanäle wählen. Die Taste drücken.
6 Mit den Zahlentasten den gewünschten Kanal eingeben oder mit
oder den nächsten zur Verfügung stehenden Kanal suchen.
Falls Sie den gefundenen Sender nicht abspeichern möchten, die
Suche mit
oder fortsetzen.
7 Zum Abspeichern des eingestellten Senders die OK-Taste
drücken. Nun wird BESTÄTIGEN hervorgehoben. Mit der OKTaste nochmals bestätigen.
8 Zum manuellen Abspeichern weiterer Sender die Schritte 4 bis 7
wiederholen.
9 Die MENU-Taste drücken, um in den normalen TV-Betrieb
zurückzukehren.
Ihr Gerät ist jetzt betriebsbereit.
INST ALLATION
MANUELL ABSPEICHERN
PROGRAMM:
TV-SYSTEM:
KANAL:
AFT:
AUSLASSEN:
DECODER:
BESTÄTIGEN
INSTALLATION:
MANUELL ABSPEICHERN
PROGRAMM:
TV-SYSTEM:
KANAL:
AFT:
AUSLASSEN:
DECODER:
BESTÄTIGEN
INST ALLATION
MANUELL ABSPEICHERN
PROGRAMM:
TV-SYSTEM:
KANAL:
AFT:
AUSLASSEN:
DECODER:
BESTÄTIGEN
:
:
01
B/G
C 21
EIN
NEIN
AUS
01
B/G
C 21
EIN
NEIN
AUS
01
B/G
C 21
EIN
NEIN
AUS
Weitere Funktionen - Abspeicherung - Zusatzfunktionen
37
Page 38

Weitere Funktionen - Abspeicherung - Zusatzfunktionen
Feinabstimmen eines Senders
Normalerweise sorgt die automatische Feinabstimmung (AFT) für eine optimale Einstellung eines Senders. Bei einem
schwachen Empfangssignal können Sie jedoch mit der manuellen Feinabstimmung selbst das beste Bild einstellen.
BILD-MENÜ
MODUS: ANWENDER
1 Den Sender, der abgestimmt werden soll, mit den Zahlentasten
einstellen. MENU drücken, um das Menü einzublenden.
KONTRAST
HELLIGKEIT
FARBE
BILDSCHÄRFE
FARBTON
NORMWERTE
BILD-MENÜ
MODUS: ANWENDER
KONTRAST
HELLIGKEIT
FARBE
BILDSCHÄRFE
FARBTON
NORMWERTE
2 Mit der Taste das Symbol auswählen, dann , um das Menü
INSTALLATION aufzurufen.
1
2
3
4
5
6
7
8
9
3 Mit der Taste MANUELL ABSPEICHERN wählen, dann die
Taste drücken.
0
MENU
4 Mit der Taste AFT wählen, dann die Taste drücken.
K
PROGR
RM
887
5 Mit den Tasten oder den Sender feinabstimmen (Skala -15 bis
+ 15). Mit der OK-Taste bestätigen.
6 Der Cursor steht nun auf BESTÄTIGEN. Mit der OK-Taste
bestätigen.
INSTALLATION
BILDROTATION:
SPRACHE: DEUTSCH
AUTOM. ABSPEICHERN
PROGRAMME ORDNEN
MANUELL ABSPEICHERN
INSTALLATION
BILDROTATION:
SPRACHE: DEUTSCH
AUTOM. ABSPEICHERN
PROGRAMME ORDNEN
MANUELL ABSPEICHERN
INST ALLATION
MANUELL ABSPEICHERN
PROGRAMM:
TV-SYSTEM:
KANAL:
AFT:
AUSLASSEN:
DECODER:
BESTÄTIGEN
INSTALLATION:
MANUELL ABSPEICHERN
PROGRAMM:
TV-SYSTEM:
KANAL:
AFT:
AUSLASSEN:
DECODER:
BESTÄTIGEN
INST ALLATION
MANUELL ABSPEICHERN
PROGRAMM:
TV-SYSTEM:
KANAL:
AFT:
AUSLASSEN:
DECODER:
BESTÄTIGEN
:
:
01
B/G
C 21
EIN
NEIN
AUS
01
B/G
C 21
+2
NEIN
AUS
01
B/G
C 21
EIN
NEIN
AUS
0
0
S
7 Die MENU-Taste drücken, um in den normalen TV-Betrieb
zurückzukehren.
8 Zum Feinabstimmen weiterer Sender die Schritte 1 bis 7
wiederholen.
Ihr Gerät ist jetzt betriebsbereit.
Weitere Funktionen - Abspeicherung - Zusatzfunktionen
38
Page 39

Weitere Funktionen - Abspeicherung - Zusatzfunktionen
Einstellen der Bildrotation
Der Erdmagnetismus kann eine leichte Bildschräglage verursachen. Mit der folgenden Funktion können Sie diese
Schräglage korrigieren.
BILD-MENÜ
MODUS: ANWENDER
1 MENU drücken, um das Menü einzublenden.
KONTRAST
HELLIGKEIT
FARBE
BILDSCHÄRFE
FARBTON
NORMWERTE
BILD-MENÜ
MODUS: ANWENDER
KONTRAST
HELLIGKEIT
FARBE
BILDSCHÄRFE
FARBTON
NORMWERTE
1
2
3
4
5
6
7
8
9
2 Mit der Taste das Symbol auswählen, dann drücken, um
das Menü INSTALLATION aufzurufen.
INSTALLATION
BILDROTATION:
SPRACHE: DEUTSCH
AUTOM. ABSPEICHERN
PROGRAMME ORDNEN
MANUELL ABSPEICHERN
0
0
K
MENU
PROGR
RM
3 Der Cursor steht nun auf BILDROTATION. Mit der Taste
bestätigen.
4 Mit den Tasten oder die Bildrotation einstellen (Skala -5 bis
+5). Mit der OK-Taste bestätigen.
887
INSTALLATION
BILDROTATION:
SPRACHE: DEUTSCH
AUTOM. ABSPEICHERN
PROGRAMME ORDNEN
MANUELL ABSPEICHERN
INSTALLATION
BILDROTATION:
SPRACHE: DEUTSCH
AUTOM. ABSPEICHERN
PROGRAMME ORDNEN
MANUELL ABSPEICHERN
0
+2
5 Die MENU-Taste drücken, um in den normalen TV-Betrieb
zurückzukehren.
S
Ihr Gerät ist jetzt betriebsbereit.
Weitere Funktionen - Abspeicherung - Zusatzfunktionen
39
Page 40

Weitere Funktionen - Abspeicherung - Zusatzfunktionen
Überspringen von Programmspeicherplätzen
Bei 100 Programmspeicherplätzen kann es sein, daß es unbelegte oder doppelt belegte Positionen gibt. Diese könnnen Sie
im Menü Manuell Abspeichern markieren, so daß sie bei der Programmwahl mit PROGR +/- übersprungen werden. Falls
Sie eine Position wieder freigeben möchten, die Anweisungen wiederholen und in Schritt 6 NEIN wählen.
BILD-MENÜ
MODUS: ANWENDER
1 MENU drücken, um das Menü einzublenden.
2 Mit der Taste das Symbol auswählen, dann drücken, um
das Menü INSTALLATION aufzurufen.
1
2
3
4
5
6
7
8
9
0
MENU
3 Mit der Taste MANUELL ABSPEICHERN wählen, dann die
Taste
drücken.
KONTRAST
HELLIGKEIT
FARBE
BILDSCHÄRFE
FARBTON
NORMWERTE
INSTALLATION
BILDROTATION:
SPRACHE: DEUTSCH
AUTOM. ABSPEICHERN
PROGRAMME ORDNEN
MANUELL ABSPEICHERN
INSTALLATION
BILDROTATION:
SPRACHE: DEUTSCH
AUTOM. ABSPEICHERN
PROGRAMME ORDNEN
MANUELL ABSPEICHERN
0
0
BILD-MENÜ
MODUS: ANWENDER
KONTRAST
HELLIGKEIT
FARBE
BILDSCHÄRFE
FARBTON
NORMWERTE
K
PROGR
S
RM
887
4 Der Cursor steht nun auf PROGRAMM. Mit den Tasten PROGR
oder den Programmspeicherplatz wählen, den Sie auslassen
möchten.
5 Mit der Taste AUSLASSEN wählen, dann die Taste drücken.
6 Mit der Taste JA wählen. Mit der OK-Taste bestätigen.
7 Der Cursor steht nun auf BESTÄTIGEN. Mit der OK-Taste
bestätigen.
8 Die Schritte 4 bis 7 wiederholen, um weitere Programm-
speicherplätze zu überspringen.
INSTALLATION
MANUELL ABSPEICHERN
PROGRAMM:
TV-SYSTEM:
KANAL:
AFT:
AUSLASSEN:
DECODER:
BESTÄTIGEN
INST ALLATION
MANUELL ABSPEICHERN
PROGRAMM:
TV-SYSTEM:
KANAL:
AFT:
AUSLASSEN:
DECODER:
BESTÄTIGEN
INSTALLATION:
MANUELL ABSPEICHERN
PROGRAMM:
TV-SYSTEM:
KANAL:
AFT:
AUSLASSEN:
DECODER:
BESTÄTIGEN
INST ALLATION
MANUELL ABSPEICHERN
PROGRAMM:
TV-SYSTEM:
KANAL:
AFT:
AUSLASSEN:
DECODER:
BESTÄTIGEN
:
:
:
01
B/G
C 21
EIN
NEIN
AUS
05
B/G
C 21
EIN
NEIN
AUS
05
B/G
C 21
EIN
JA
AUS
05
B/G
C 21
EIN
JA
AUS
9 Die MENU-Taste drücken, um in den normalen TV-Betrieb
zurückzukehren.
Bei der Programmwahl mit PROGR +/- erscheinen die übersprungenen
Programmspeicherplätze nicht mehr. Sie können aber weiterhin mit den
Zahlentasten aufgerufen werden.
40
Weitere Funktionen - Abspeicherung - Zusatzfunktionen
Page 41

Weitere Funktionen - Bedienung des Fernsehgerätes - Zusatzfunktionen
Einstellen des Bildes
Die Bildwerte sind werksseitig auf Normwerte eingestellt. Im Bild-Menü können Sie jedoch das Bild individuell einstellen.
BILD-MENÜ
MODUS: ANWENDER
1 MENU drücken, um das Menü einzublenden.
KONTRAST
HELLIGKEIT
FARBE
BILDSCHÄRFE
FARBTON
NORMWERTE
BILD-MENÜ
MODUS: ANWENDER
KONTRAST
HELLIGKEIT
FARBE
BILDSCHÄRFE
FARBTON
NORMWERTE
2 Mit der Taste das BILD-MENÜ aufrufen.
1
2
3
4
5
6
7
8
9
0
MENU
K
3 Mit den Tasten oder die gewünschte Funktion wählen.
4 Der Cursor steht nun auf der gewählten Funktion. Mit der Taste
bestätigen.
(In der folgenden Tabelle finden Sie weitere Informationen zu den
einzelnen Funktionen).
BILD-MENÜ Bedienung/Effekt
MODUS ANWENDER (für individuelle Einstellungen)
LIVE (für Live-Sendungen)
FILM (für Spielfilme)
KONTRAST Weniger Mehr
HELLIGKEIT* Dunkler Heller
FARBE* Weniger Mehr
BILD-MENÜ
MODUS: ANWENDER
KONTRAST
HELLIGKEIT
FARBE
BILDSCHÄRFE
FARBTON
NORMWERTE
BILD-MENÜ
MODUS: ANWENDER
KONTRAST
HELLIGKEIT
FARBE
BILDSCHÄRFE
FARBTON
NORMWERTE
BILD-MENÜ
MODUS: ANWENDER
KONTRAST
HELLIGKEIT
FARBE
BILDSCHÄRFE
FARBTON
NORMWERTE
BILDSCHÄRFE* Weicher Schärfer
FARBTON** Grünlich Rötlich
NORMWERTE Zurücksetzen der Werte auf
PROGR
Fabrikeinstellung
* Nur einstellbar, wenn im Bild-Modus ANWENDER eingestellt ist
** Nur bei NTSC-Farbsignal (z.B. US-Videobänder)
5 Mit / oder / einstellen, mit OK die neue Einstellung
RM
887
bestätigen.
6 Die Schritte 3 bis 5 wiederholen, um weitere Einstellungen
vorzunehmen.
S
7 Die MENU-Taste drücken, um in den normalen TV-Betrieb
zurückzukehren.
Schneller Zugriff auf das Bildmenü
1 Die Taste auf der Fernbedienung drücken, um direkt das BILD-
MODUS Menü aufzurufen.
2 Mit der Taste den gewünschten Bildmodus wählen
(ANWENDER, LIVE oder FILM).
Weitere Funktionen - Bedienung des Fernsehgerätes - Zusatzfunktionen
BILD-MODUS:
BILD-MODUS:
ANWENDER
LIVE
BILD-MODUS:
ANWENDER
41
Page 42

Weitere Funktionen - Bedienung des Fernsehgerätes - Zusatzfunktionen
Einstellen des Tons
Die Tonwerte sind werksseitig auf Normwerte eingestellt. Im Ton-Menü können Sie jedoch das Bild individuell einstellen.
BILD-MENÜ
MODUS: ANWENDER
1 MENU drücken, um das Menü einzublenden.
2 Mit der Taste das Symbol wählen, dann mit der Taste das
TON-MENÜ aufrufen.
3 Mit den Tasten oder die gewünschte Funktion wählen.
1
2
3
4
5
6
7
8
9
0
MENU
K
PROGR
4 Der Cursor steht nun auf der gewählten Funktion. Mit der Taste
bestätigen.
(In der folgenden Tabelle finden Sie weitere Informationen zu den
einzelnen Funktionen).
TON-MENÜ Bedienung/Effekt
MODUS ANWENDER (für individuelle
HÖHEN* Weniger Mehr
TIEFEN* Weniger Mehr
BALANCE Links Rechts
ZWEIKANAL-TON • Bei einer Stereosendung
DSP (Digitaler Tonprozessor) EIN AUS
NORMWERTE Zurücksetzen der Werte auf
Nur einstellbar, wenn im Ton-Modus ANWENDER eingestellt ist
*
Einstellungen)
JAZZ
POP
ROCK
MONO
STEREO
• Bei einer Zweikanal-Sendung
A (für Kanal 1)
B (für Kanal 2)
Fabrikeinstellung
KONTRAST
HELLIGKEIT
FARBE
BILDSCHÄRFE
FARBTON
NORMWERTE
TON-MENÜ
MODUS: ANWENDER
HÖHEN
TIEFEN
BALANCE
ZWEIKANAL-TON:
DSP:
NORMWERTE
TON-MENÜ
MODUS: ANWENDER
HÖHEN
TIEFEN
BALANCE
ZWEIKANAL-TON:
DSP:
NORMWERTE
TON-MENÜ
MODUS: ANWENDER
HÖHEN
TIEFEN
BALANCE
ZWEIKANAL-TON:
DSP:
NORMWERTE
STEREO
EIN
STEREO
EIN
STEREO
EIN
BILD-MENÜ
MODUS: ANWENDER
KONTRAST
HELLIGKEIT
FARBE
BILDSCHÄRFE
FARBTON
NORMWERTE
RM
887
5 Mit / oder / einstellen, mit OK die neue Einstellung
bestätigen.
6 Die Schritte 3 bis 5 wiederholen, um weitere Einstellungen
S
vorzunehmen.
7 Die MENU-Taste drücken, um in den normalen TV-Betrieb
zurückzukehren.
Schneller Zugriff auf das Tonmenü
1 Die Taste auf der Fernbedienung drücken, um direkt das
TON-MODUS Menü aufzurufen.
2 Mit der Taste den gewünschten Tonmodus wählen
(ANWENDER, JAZZ, POP oder ROCK).
42
Weitere Funktionen - Bedienung des Fernsehgerätes - Zusatzfunktionen
TON-MODUS:
ANWENDER
TON-MODUS:
POP
TON-MODUS:
ANWENDER
Page 43

Weitere Funktionen - Bedienung des Fernsehgerätes - Zusatzfunktionen
Die automatische Abschaltfunktion
Mit dieser Funktion schaltet sich das Gerät nach der gewählten Zeit selbst in Bereitschaftsbetrieb.
BILD-MENÜ
MODUS: ANWENDER
1 MENU drücken, um das Menü einzublenden.
KONTRAST
HELLIGKEIT
FARBE
BILDSCHÄRFE
FARBTON
NORMWERTE
BILD-MENÜ
MODUS: ANWENDER
KONTRAST
HELLIGKEIT
FARBE
BILDSCHÄRFE
FARBTON
NORMWERTE
2 Mit der Taste das Symbol auswählen, dann drücken, um
TIMER
ABSCHALTTIMER:
AUS
das Menü TIMER aufzurufen.
1
2
3
4
5
6
7
8
9
3 Der Cursor steht nun auf ABSCHALTTIMER. Mit der Taste
TIMER
ABSCHALTTIMER:
AUS
Menü aufrufen.
0
MENU
TIMER
K
4 Mit den Tasten oder die gewünschte Abschaltzeit wählen.
ABSCHALTTIMER:
0:15
AUS
0:15 Minuten
0:30 Minuten
...
...
PROGR
4:00 Stunden
5 Mit der OK-Taste bestätigen.
RM
887
S
6 Die MENU-Taste drücken, um in den normalen TV-Betrieb
zurückzukehren.
Eine Minute bevor das Gerät sich in Bereitschaftsbetrieb schaltet, wird
automatisch die verbleibende Restzeit eingeblendet.
Anmerkungen: •Drücken Sie die Taste
fernsehen die verbleibende Restzeit einblenden
möchten.
•Drücken Sie die Taste
dem Bereitschaftsbetrieb wiedereinschalten möchten.
Weitere Funktionen - Bedienung des Fernsehgerätes - Zusatzfunktionen
, wenn sie während Sie
, wenn Sie das Gerät aus
43
Page 44

Videotext
Verwenden von Videotext
Videotext ist ein Informationsservice, der von den meisten Sendern angeboten wird.
Verwenden Sie bitte einen Sender mit einem starken Empfangssignal, da es ansonsten zu Fehlern in der Wiedergabe des
Videotextes kommen kann.
Wählen von Videotext
1 Den Sender auswählen, auf dem der gewünschte Videotext-Service
ausgestrahlt wird.
1
2
3
4
5
6
7
8
9
2 Die Taste auf der Fernbedienung drücken, um den Videotext
einzuschalten.
TELETEXT
Index
Programme
News
Sport
Weather
TELETEXT
Index
Programme
25
153
101
98
25
News
153
Sport
101
Weather
98
3 Mit den Zahlentasten die gewünschte dreistellige Seitenzahl
0
MENU
K
eingeben.
Bei einer Fehleingabe, die dreistellige Zahl beliebig ergänzen, dann
die richtige Seitenzahl eingeben.
4 Die Taste drücken, um den Videotext auszuschalten.
Verwenden anderer Videotext-Funktionen
PROGR
RM
887
FUNKTION DIE FOLGENDE TASTE DRÜCKEN
Seitenweises Umblättern für die vorherige Seite
für die nachfolgende Seite
Einblenden des Videotextes
über das Fernsehbild nochmals drücken, um den
Videotext auszuschalten.
TELETEXT
Index
Programme
News
Sport
Weather
25
153
101
98
44
S
Videotext
Automatischen Seitenwechsel bei
Unterseiten stoppen nochmals drücken, um zum
normalen Seitenwechsel
zurückzukehren.
Verborgene Informationen (z.B.
Antwort auf ein Quiz) sichtbarmachen
nochmals drücken, um die
Informationen wieder zu
verdecken.
Verwenden von TOP-Text
Mit TOP-Text können Sie bequem eine bestimmte Seite aufrufen.
Bei Ausstrahlung von TOP-Text erscheint unten im Bildschirm
eine Farbleiste. Die entsprechende farbige Taste (rot, grün, gelb
oder blau) drücken, um die dazugehörige Seite aufzurufen.
TELETEXT
Index
Programme
News
Sport
Weather
25
153
101
98
Page 45

Anschlußmöglichkeiten
MONO
L/G/S/I R/D/D/D
+
P
_
L/G/S/I R/D/D/D
s
3
3
3
L/G/S/I R/D/D/D
Anschluß von anderen Geräten
Sie können Zusatzgeräte wie z.B. einen Videorecorder, einen Camcorder oder eine Videospielkonsole an Ihr Fernsehgerät
anschließen.
Vorderseite des Geräts
Wahl des Eingangssignals
1 Das Zusatzgerät an die entsprechende Buchse am Fernsehgerät
anschließen.
2 Die Taste so oft drücken, bis das gewünschte Eingangssymbol auf
dem Bildschirm angezeigt wird.
Symbol Eingangssignal
k • Audio/Videosignal von der Euro-AV-Buchse
K
q
K
q
• RGB-Signal von der Euro-AV-Buchse
• Audio/Videosignal von der Euro-AV-Buchse
2
3
3
• S-Video-Signal von der Euro-AV-Buchse
• Videosignal von der Cinchbuchse und Audiosignal von
den Cinchbuchsen
C
D
• S-Video-Signal von der 4-poligen DIN-Buchse und
Audiosignal von den Cinchbuchsen
F
B
F
E
E
D.
3 Das angeschlossene Zusatzgerät einschalten.
4 Die Taste auf der Fernbedienung drücken, um in den normalen TV-
Betrieb zurückzukehren.
Anmerkung: Schließen Sie nie gleichzeitig Geräte an die Buchsen B und E an,
da es sonst zu Bildstörungen kommt.
Zusätzliche Informationen
Anschluß eines Videorecorders
Den Videorecorder an die Buchse
empfehlen, das Signal des Videorecorders auf Programmspeicherplatz “0”
abzulegen. Lesen Sie dazu “Manuelles Abspeichern von Sendern” in dieser
Bedienungsanleitung.
hinten am Fernsehgerät anschließen. Wir
F
B
A
C
D
S-VHS/Hi8
Camcorder
Rückseite des Geräts
G
F
E
8mm/Hi8
Camcorder
Anschluß von Kopfhörern
Die Kopfhörer in die Buchse
vorne am Fernsehgerät einstecken.
A
Anschluß eines Decoders
Den Decoder an der Buchse F hinten am Gerät anschließen.
Anschluß an eine Stereoanlage
Die Stereoanlage an die Buchsen
hinten am Gerät anschließen, falls Sie die
G
Lautsprecher der Stereoanlage für die Tonwiedergabe des Fernsehgerätes
verwenden möchten.
* “PlayStation” ist ein Produkt der Sony Computer Entertainment, Inc.
* “PlayStation” ist ein Markenzeichen der Sony Computer Entertainment, Inc.
s
2 /
1/
2
1
“PlayStation”
Videorecorder
Decoder
Anschlußmöglichkeiten
L/G/S/I
R/D/D/D
*
Hi-Fi
45
Page 46

Anschlußmöglichkeiten
Smartlink
Mit Smartlink kann Ihr Fernsehgerät mit einem angeschlossenen Videorecorder “kommunizieren”.
Bedingungen dafür sind:
• Ein Videorecoder der Smartlink, NexTView link, Easy Link oder
Megalogic unterstützt.
Megaloic ist ein Markenzeichen von Grundig
EasyLink ist ein Markenzeichen von Philips
• Der Anschluß eines vollständig verdrahteten 21-poligen Scartkabels
an die Euro-AV-Buchse :1/
.
Smartlink kann u.a.:
• Abspeicherinformation, wie z.B. die Sendertabelle vom Fernsehgerät
an den angeschlossenen Videorecorder weitergeben.
• Direkte Aufnahme: Während Sie fernsehen reicht ein Tastendruck am
Videorecorder, um die laufende Sendung aufzunehmen.
• Fernsehgerät ist in Bereitschaftsbetrieb: Die Play-Taste z am
Videorecorder drücken, um das Fernsehgerät einzuschalten.
Falls Sie einen Decoder an einem Smartlink-fähigen Videorecorder
angeschlossen haben, im Menü
ABSPEICHERN wählen und für jeden kodierten Sender
DECODER EIN wählen.
Ausführliche Information über Smartlink finden Sie in der
Bedienungsanleitung Ihres Videorecorders.
(INSTALLATION) MANUELL
46
Anschlußmöglichkeiten
Page 47

Weitere Informationen
Das Menüsystem
Installation-Menüs für das erste Einschalten des Geräts
SPRACHE
ENGLISH
DEUTSCH
FRANÇAIS
ITALIANO
ESPAÑOL
NEDERLANDS
EΛΛHNIKA
POLSKI
Č
MAGYAR
T
Sprache wählen:
ESKI
Ü
RKÇE
Automatisches Abspeichern
jetzt starten?
JA
NEIN
Ausführliche Information finden Sie im Kapitel “Menüsprache wählen”
Überblick aller Menübilder
Bitte Antennenanschluss
überprüfen
BESTÄTIGEN
AUTOM. ABSPEICHERN
PROGRAMM:
TV-SYSTEM:
KANAL:
Suche...
01
B/G
C 21
PROGRAMME ORDNEN
PROGRAMM:
BESTÄTIGEN
Kanal wählen:
PROGR
Neue Pos. wählen:
Bestätigen:
MENU
Beenden:
03
01
BILD-MENÜ
MODUS: ANWENDER
KONTRAST
HELLIGKEIT
FARBE
BILDSCHÄRFE
FARBTON
NORMWERTE
TON-MENÜ
MODUS: ANWENDER
HÖHEN
TIEFEN
BALANCE
ZWEIKANAL-TON:
DSP:
NORMWERTE
TIMER
ABSCHALTTIMER:
INSTALLATION
BILDROTATION:
SPRACHE: DEUTSCH
AUTOM. ABSPEICHERN
PROGRAMME ORDNEN
MANUELL ABSPEICHERN
STEREO
EIN
AUS
BILD-MENÜ
MODUS: ANWENDER
KONTRAST
HELLIGKEIT
FARBE
BILDSCHÄRFE
FARBTON
NORMWERTE
TON-MENÜ
MODUS: ANWENDER
HÖHEN
TIEFEN
BALANCE
ZWEIKANAL-TON:
DSP:
NORMWERTE
TIMER
ABSCHALTTIMER:
STEREO
EIN
AUS
TIMER
ABSSCHALTTIMER:
AUS
Ausführliche Information
finden Sie im Kapitel
“Einstellen des Bildes”
Ausführliche Information
finden Sie im Kapitel
“Einstellen des Tons”
Ausführliche Information
finden Sie im Kapitel “Die
automatische
Abschaltfunktion”
INSTALLATION
0
BILDROTATION:
SPRACHE: DEUTSCH
AUTOM. ABSPEICHERN
PROGRAMME ORDNEN
MANUELL ABSPEICHERN
0
INSTALLATION
BILDROTATION:
SPRACHE: DEUTSCH
AUTOM. ABSPEICHERN
PROGRAMME ORDNEN
MANUELL ABSPEICHERN
Ausführliche Information
0
finden Sie im Kapitel
“Einstellen der Bildrotation”
INSTALLATION
BILDROTATION:
SPRACHE: DEUTSCH
AUTOM. ABSPEICHERN
PROGRAMME ORDNEN
MANUELL ABSPEICHERN
INSTALLATION
BILDROTATION:
SPRACHE: DEUTSCH
AUTOM. ABSPEICHERN
PROGRAMME ORDNEN
MANUELL ABSPEICHERN
INSTALLATION
BILDROTATION:
SPRACHE: DEUTSCH
AUTOM. ABSPEICHERN
PROGRAMME ORDNEN
MANUELL ABSPEICHERN
INSTALLATION
BILDROTATION:
SPRACHE: DEUTSCH
AUTOM. ABSPEICHERN
PROGRAMME ORDNEN
MANUELL ABSPEICHERN
INSTALLATION
0
0
BILDROTATION:
SPRACHE: DEUTSCH
AUTOM. ABSPEICHERN
PROGRAMME ORDNEN
MANUELL ABSPEICHERN
Automatisches Abspeichern
jetzt starten?
JA
NEIN
Ausführliche Information
0
finden Sie im Kapitel
“Menüsprache wählen”
Ausführliche Information
finden Sie im Kapitel
“Automatisches Abspeichern
von Sendern mit den Tasten
am Gerät”
INSTALLATION
:
0
PROGRAMME ORDNEN
PROGRAMM:
BESTÄTIGEN
01
Ausführliche Information
03
finden Sie im Kapitel
“Ordnen der
Kanal wählen:
PROGR
Neue Pos. wählen:
INSTALLATION
:
0
MANUELL ABSPEICHERN
PROGRAMM:
TV-SYSTEM:
KANAL:
AFT:
AUSLASSEN:
DECODER:
BESTÄTIGEN
01
B/G
C 21
EIN
NEIN
AUS
Programmspeicherplätze”
Ausführliche Information
finden Sie im Kapitel
“Manuelles Abspeichern von
Sendern”
Weitere Informationen
47
Page 48

Weitere Informationen
Fehlersuche
Im folgenden finden Sie Hinweise zum Beheben möglicher Bild- und Tonstörungen.
Problem Lösung
Kein Bild (dunkler Bildschirm), kein Ton • Fernsehgerät anschließen.
• Taste
• Falls die Anzeige
auf der Fernbedienung drücken.
• Antennenanschluß überprüfen.
• Angeschlossenes Zusatzgerät einschalten.
• Das Fernsehgerät mit dem Netzschalter
und wieder einschalten.
Schlechtes oder kein Bild (dunkler • MENU drücken. Bild-Menü wählen. Kontrast, Helligkeit
Bildschirm), aber guter Ton und Farbe einstellen.
• Im Bild-Menü Normwerte wählen.
vorne am Gerät drücken.
leuchtet, oder eine Zahlentaste
kurz aus-
Schlechte Bildqualität bei Betrachten • Die Taste auf der Fernbedienung so oft drücken, bis
einer RGB-Videosignalquelle das Symbol
Gutes Bild, kein Ton • Die Taste +/– auf der Fernbedienung drücken.
• Falls
Keine Farbe bei Farbsendungen • MENU drücken. Bild-Menü wählen. Farbe einstellen.
• Im Bild-Menü Normwerte wählen.
Verzerrtes Bild, wenn Sie umschalten oder • Das Gerät, das an der Euro-AV-Buchse hinten am Gerät
Videotext wählen angeschlossen ist, ausschalten.
Verrauschtes Bild im TV-Betrieb bei einem • Im Menü Manuelles Abspeichern AFT AUS wählen und
bestimmten Sender den Kanal feinabstimmen.
Fernbedienung funktioniert nicht • Batterien austauschen.
Bereitschaftsanzeige am Gerät blinkt • Wenden Sie sich bitte an Ihren nächstgelegenen Sony-
Service.
auf dem Bildschirm eingeblendet ist, die Taste
auf der Fernbedienung drücken.
auf dem Bildschirm eingeblendet wird.
48
Weitere Informationen
• Falls die Probleme weiterhin bestehen sollten, das Fernsehgerät durch einen Fachmann reparieren
lassen.
• Öffnen Sie keinesfalls die Rückwand des Fernsehgerätes!
Page 49

Weitere Informationen
Technische Daten
Fernsehnorm
B/G/H
Farbsystem
PAL, SECAM
NTSC 3.58, 4.43 (nur über Videoeingang)
Kanalbereiche
VHF: E2-E12
UHF: E21-E69
CATV: S1-S20
HYPER: S21-S41
Bildröhre
FD Trinitron
Ca. 72 cm (29 ”) (ca. 68 cm Bilddiagonale),
104° Ablenkung
Anschlüsse, hinten am Gerät
:1/
:2/
Anschlüsse, vorne am Gerät
3
2
2
3
s
3
21-poliger Euro-AV-Anschluss (Scart),
Eingang von Audio- und Videosignalen,
RGB-Signalen, Ausgang von TV-Audiound Videosignalen
s
21-poliger Euro-AV-Anschluss (Scart),
Eingang von Audio- und Videosignalen,
S-Video-Signalen, Ausgang von
Monitor-Audio- und Videosignalen
Audio-Eingänge (Cinchbuchsen)
Eingang von Videosignalen - Cinchbuchse
Eingang von Audiosignalen - Cinchbuchsen
Eingang von S-Videosignalen - 4-polig DIN
Kopfhörerbuchse - Stereominibuchse
Tonausgang:
2 x 7 W + 1 x 15 W (RMS)
Leistungsaufnahme
120 W
Leistungsaufnahme im Bereitschaftsbetrieb
0.5 W
Abmessungen (B x H x T)
ca. 746 x 569 x 516 mm
Gewicht
ca. 47,5 kg
Mitgeliefertes Zubehör
1 Fernbedienung (RM-887)
2 Batterien (R6)
Weitere Merkmale
Videotext, TOP-Text, Fastext
Automatische Abschaltfunktion
Smartlink
Änderungen, die dem technischen Fortschritt dienen, bleiben
vorbehalten.
Recyceltes Papier, chlorfrei
Weitere Informationen
49
Page 50

50
Page 51

FD Trinitron
Televisore a colori
Grazie per aver scelto questo televisore Sony.
Prima di utilizzare il televisore, legga questo manuale attentamente e
lo conservi per ulteriori dubbi.
Legenda per questo Manuale di Istruzioni:
• Usi Procedura Iniziali se desidera mettere in funzione il televisore e
conoscerne le prestazioni di base.
• Usi Operazioni Avanzate se desidera conoscere meglio le caratteristiche
complementari del televisore.
• Simboli usati in questo manuale:
• Rischi potenziali.
• Informazione importante.
• Informazione sulla funzione.
• 1, 2 ... Sequenza delle istruzioni da seguire
Manuale d’ Istruzioni
IT
MENU
• I bottoni ombreggiati del telecomando mostrano i tasti che si
K
devono premere per seguire le varie istruzioni.
• Informazione sul risultato delle istruzioni.
• Il processo per ottenere il risultato finale continua alla pagina
seguente.
51
Page 52

Norme di sicurezza
AVVERTENZA
Informazioni di sicurezza
Tutti i televisori operano a voltaggi estremamente elevati. Per prevenire il rischio di incendi o scosse
elettriche, seguire le procedure di sicurezza sotto indicate.
Precauzioni di sicurezza generali
• Non esporre il televisore alla pioggia o all’umidità.
• Non rimuovere il pannello posteriore.
• Per tutte le operazioni di assistenza e riparazione, rivolgersi solo a personale qualificato.
Precauzioni per l’installazione
• Non installare il televisore in luoghi caldi, umidi o molto polverosi.
• Non ostruire le aperture di ventilazione. Per un’adeguata ventilazione, lasciare
uno spazio di almeno 10 cm intorno all’apparecchio.
• Non installare il televisore in un luogo esposto a vibrazioni meccaniche.
• Posizionare il televisore esclusivamente su un supporto stabile e in grado di sopportare il
peso dell‘apparecchio.
Precauzioni per l’utilizzo
• Usare il televisore solo con un’alimentazione a 220-240V AC, 50Hz.
• Non usare il televisore qualora sostanze liquide o solide siano penetrate
nelle aperture di ventilazione. Contattare immediatamente l’assistenza.
• Per ragioni ambientali e di sicurezza, si raccomanda di non lasciare il
televisore in modalità standby quando non è in uso. Spegnerlo utilizzando
l’interruttore generale.
• Non scollegare il televisore tirando il cavo di alimentazione. Rimuovere
la spina dalla presa di corrente.
• In caso di temporale, staccare il televisore dall‘alimentazione di rete e scollegare
l‘antenna. Se collegato, l‘apparecchio potrebbe essere danneggiato da un fulmine.
52
Norme di sicurezza
Manutenzione
• Pulire lo schermo con un panno morbido e umido. Non utilizzare detergenti abrasivi.
• I depositi di polvere e nicotina possono provocare un accumulo di calore all‘interno
dell‘apparecchio. A lungo termine, ciò potrebbe rappresentare un rischio per la sicurezza
e ridurre la durata del televisore. Pertanto, eseguire la manutenzione ogni cinque anni.
Page 53

Indice
Indice
Legenda per questo manuale d’istruzioni. ....................................................................................... 51
Norme di sicurezza ..............................................................................................................................52
Procedura iniziale
Descrizione generale
Verifica degli accessori forniti ................................................................................................54
Descrizione generale dei tasti del televisore .......................................................................54
Descrizione generale dei tasti del telecomando ................................................................ 55
Operazioni preliminari
Passo 1 - Istallazione
Inserimento delle pile nel telecomando ................................................................................ 56
Allacciamento all’antenna ......................................................................................................56
Accensione del televisore........................................................................................................56
Passo 2 - Programmazione di base
Selezione della lingua ..............................................................................................................57
Sintonia automatica del televisore, usando il telecomando...............................................58
Riordinamento dei numeri di programma dei canali TV .................................................. 59
Operazioni avanzate
Programmazione avanzata
Sintonia automatica della TV, usando i tasti del televisore ............................................... 60
Sintonia manuale della TV .....................................................................................................61
Sintonia fine manuale dei canali ............................................................................................62
Regolazione della rotazione dell’ immagine ........................................................................ 63
Omissione di posizioni di programma .................................................................................64
Operazioni avanzate della TV
Regolazione dell’ immagine ...................................................................................................65
Regolazione del suono ............................................................................................................ 66
Funzione di spegnimento automatico ..................................................................................67
Televideo
Visualizzazione del Televideo ................................................................................................ 68
IT
Collegamenti opzionali
Uso di apparecchiature opzionali .......................................................................................... 69
“Smartlink” ...............................................................................................................................70
Informazioni aggiuntive
Guida rapida per muoversi attraverso i menù ..................................................................71
Soluzione di problemi ............................................................................................................. 72
Specifiche...................................................................................................................................73
Indice
53
Page 54

Procedura iniziali - Descrizione generale
Verifica degli accessori forniti
1
2
3
4
5
6
7
8
9
0
MENU
K
PROGR
Due pile (tipo R6)
RM
887
S
Un telecomando
(RM-887)
Descrizione generale dei tasti della TV
Interruttore di
accensione/spegnimento
Indicatore di modalità
di spegnimento
temporaneo (standby)
Presa per cuffie
Tasto di sintonia automatica
Prema il coperchietto frontale del
televisore (prema sul simbolo ) per
aprire il pannello di controllo frontale.
Procedura iniziali - Descrizione generale
54
Presa
d’ingresso
S video
Presa
d’ingresso
video
Presa
d’ingresso
audio
Tasto di
selezione
della
fonte
d’ingresso
Tasti di
controllo
del
volume
Tasti di selezione
per i programmi
successivi o
precedenti
(selezionano canali
televisivi)
Page 55

Procedura iniziali - Descrizione generale
Descrizione generale dei tasti del telecomando
Eliminazione dell’audio
Premerlo per eliminare l’audio.
Premerlo di nuovo per ripristinarlo.
Mostrare informazione sullo schermo
Premerlo per mostrare tutte le indicazioni sullo
schermo. Premerlo di nuovo per eliminarle.
Selezione dei canali
Premerli per selezionare i canali.
Per numeri di programmi di due cifre, per
esempio 23, premere innanzitutto -/-- e
quindi i tasti 2 e 3.
Se ci si sbaglia ad introdurre la prima cifra,
continuare ad introdurre la seconda (dallo
0 al 9) e quindi ripetere l’operazione.
Selezione della modalità TV
Premerlo per spegnere il televideo o
l’ingresso video.
Selezione di televideo
Premerlo per visualizzare il televideo.
Selezione della modalità audio
Premerlo per cambiare la modalità
del suono.
Selezione della modalità
d’immagine
Premerlo per cambiare la modalità
d’immagine.
Regolazione del volume
Premerlo per regolare il volume del
televisore.
Spegnere temporaneamente il
televisore
Premerlo per spegnere temporaneamente il
televisore (l’indicatore di modalità d’attesa
s’illuminerà). Premerlo di nuovo per
accendere il televisore dalla modalità di
spegnimento temporaneo (standby).
Per risparmiare energia, raccomandiamo di
spegnere del tutto il televisore quando non viene
visto.
Se dopo 15-30 minuti non c’è segnale di
1
2
3
4
5
6
7
8
9
0
MENU
K
PROGR
RM
887
televisione o non si preme nessun tasto,
il televisore entrerà automaticamente
nella modalità di spegnimento
temporaneo (standby).
Selezione della fonte d’ingresso
Premerlo più volte finché il simbolo della
fonte d’ingresso desiderata non appaia sullo
schermo.
Ritorno all’ultimo canale selezionato
Premerlo per rivedere l’ultimo canale
selezionato (il canale precedente deve essere
stato visto per almeno 5 secondi)
Messa in funzione del sistema di
menù
Premerlo per vedere il menù sullo schermo.
Ripremerlo per spegnerlo e per vedere
l’immagine televisiva normale.
Selezione del menù
salire di un livello
scendere di un livello
andare al menù o selezione precedente
andare al menù o selezione successiva
OK confermare la selezione
Selezione del formato dello schermo
S
Oltre alle funzioni di televisione, tutti i tasti colorati ed i simboli di colore verde si usano anche per le operazioni di
televideo. Per ulteriori informazioni, far riferimento al capitolo su «Televideo» di questo manuale d’istruzioni.
Premerlo per vedere programmi nella
modalità 16:9.
Premerlo di nuovo per recuperare la
modalità 4:3.
Questo tasto funziona solo nella modalità
televideo.
La funzione
non funziona in questo televisore.
Selezione di canali
Premerlo per selezionare il canale
successivo o precedente.
Procedura iniziali - Descrizione generale
associata a questo pulsante,
55
Page 56

Operazioni preliminari - Istallazione
Inserimento delle pile nel telecomando
Assicuratevi di sistemare le pile con le polarità in posizione corretta
Nel rispetto dell’ambiente, depositare le batterie scariche negli appositi contenitori adibiti alla raccolta differenziata.
Allacciamento dell’antenna
Accensione del televisore
Inserire la spina del televisore nella presa di rete
(220-240V AC, 50Hz).
Inserire il connettore dell’antenna nella
presa contrassegnata con sul retro
del televisore.
Operazioni preliminari - Istallazione
56
Premere l’interruttore generale di accensione/
spegnimento posto sul frontale del televisore.
Page 57

Operazioni preliminari - Programmazione di base
Selezione della lingua
Questa funzione permette di selezionare la lingua degli schermi di menù..
La prima volta che si accende il televisore, il menù LANGUAGE (LINGUA) apparirà automaticamente sullo schermo.
Nonostante ciò, se dopo un certo tempo avete bisogno di cambiare di nuovo la lingua dei menù, selezionate di
nuovo il menù LINGUA in
1 Premere l’interruttore di accensione/spegnimento del televisore.
La prima volta che si preme il tasto d’accensione/spegnimento del
(INSTALLAZIONE) e procedete come indicato di seguito:
televisore, il menù LANGUAGE (LINGUA) apparirà
automaticamente sullo schermo del televisore.
LANGUAGE
ENGLISH
DEUTSCH
FRANÇAIS
ITALIANO
ESPAÑOL
NEDERLANDS
EΛΛHNIKA
POLSKI
Č
MAGYAR
T
Select language:
ESKI
Ü
RKÇE
LANGUAGE
Select language:
ENGLISH
DEUTSCH
FRANÇAIS
ITALIANO
ESPAÑOL
NEDERLANDS
EΛΛHNIKA
POLSKI
Č
ESKI
MAGYAR
T
Ü
RKÇE
2 Premere il tasto o del telecomando per selezionare la lingua,
quindi premere il tasto OK per confermare la scelta.
1
2
3
4
5
6
7
8
9
0
MENU
Il menù di Sintonizzazione Automatica appare sullo schermo del televisore
nella lingua scelta.
LINGUA
ENGLISH
DEUTSCH
FRANÇAIS
ITALIANO
ESPAÑOL
NEDERLANDS
EΛΛHNIKA
POLSKI
Č
ESKI
MAGYAR
T
Ü
RKÇE
Selezionare lingua:
Si desidera iniziare la
preselezione automatica?
S I
NO
K
PROGR
S
RM
887
Operazioni preliminari - Programmazione di base
57
Page 58

Operazioni preliminari - Programmazione di base
Sintonia automatica del televisore, usando il
telecomando
È necessario sintonizzare il televisore per poter di ricevere i vari canali (emittenti televisive). Si attenga alle seguenti
istruzioni affinché il televisore cerchi e conservi automaticamente tutti i canali disponibili.
Dopo aver scelto la lingua, sullo schermo appare un nuovo menù domandando se si desidera sintonizzare
automaticamente il televisore. Ciononostante, se dopo un certo tempo si volesse ripetere la sintonia dei canali (per es. in
caso di trasloco), selezionare il menù PRESELEZIONE AUTOMA. dentro (INSTALLAZIONE) e procedere esattamente
come viene indicato qui di seguito o fare riferimento al capitolo «Sintonia automatica della TV, usando i tasti del
televisore».
Si desidera iniziare la
1 Premerer il tasto OK del telecomando per selezionare SI.
Sullo schermo appare un nuovo menù, per far in modo di verificare
che l’antenna sia stata collegata.
preselezione automatica?
S I
NO
Si desidera iniziare la
preselezione automatica?
S I
NO
1
2
3
2 Verificare che l’antenna sia stata collegata e quindi premere il tasto
OK.
4
5
6
7
8
9
La sintonia automatica comincia, e mentre si stanno sintonizzando
0
MENU
tutti i canali (appaiono una alla volta tutte le emittenti televisive),
sullo schermo lampeggia il messaggio «Ricerca...».
Questo processo può durare alcuni minuti.
Controllare che l'antenna
sia collegata correttamente
CONFERMA
PRESELEZIONE AUTOMA.
PROGRAMMA:
SISTEMA:
CANALE:
Ricerca...
01
B/G
C 21
K
PROGR
Una volta terminato il processo di sintonia automatica, premere il tasto
menù di Ordinamento Canali.
ORDINAMENTO CANALI
PROGRAMMA:
CONFERMA
Selez. Canale:
Selez. nuova posiz.:
Conferma:
Uscita:
PROGR
MENU
03
01
Nota bene: • Se si desidera arrestare il procedimento di sintonia
automatica, premere il tasto MENU del telecomando.
RM
887
• Se si arresta il processo di sintonia automatica
premendo il tasto MENU il menù di Ordinamento
Canali non apparirà automaticamente sullo schermo.
S
58
Operazioni preliminari - Programmazione di base
Page 59

Operazioni preliminari - Programmazione di base
Riordinamento dei nº di programma dei canali TV.
Dopo la sintonia di tutti i canali (emittenti televisive) disponibili, sullo schermo appare automaticamente un nuovo menù
domandando se si desidera cambiare l’ordine di apparizione dei canali in televisione.
Ciononostante, se dopo un certo periodo di tempo si desidera cambiare di nuovo l’ordine dei canali, selezionare il menù
ORDINAMENTO CANALI dentro
capitolo.
(INSTALLAZIONE) e procedere seguendo gli stessi passi del punto b) di questo
1 Premere il tasto MENU per far riapparire l’immagine televisiva
normale
ORDINAMENTO CANALI
PROGRAMMA:
CONFERMA
Selez. Canale:
PROGR
Selez. nuova posiz.:
Conferma:
MENU
Uscita:
03
01
ORDINAMENTO CANALI
PROGRAMMA:
CONFERMA
Selez. Canale:
Selez. nuova posiz.:
Conferma:
MENU
Uscita:
03
01
PROGR
Il televisore è pronto per funzionare.
1
2
3
4
5
6
7
8
9
0
MENU
K
b) Se si desidera cambiare l’ordine dei canali:
1 Premere il tasto PROGR o finché il canale (emittente televisiva)
di cui si desidera cambiare la posizione non appare sullo schermo.
2 Premere il tasto o per selezionare il nuovo numero di
programma su cui si desidera memorizzare il canale scelto e quindi
premere il tasto OK.
La parola CONFERMA lampeggerà per alcuni secondi per
ORDINAMENTO CANALI
PROGRAMMA:
CONFERMA
Selez. Canale:
Selez. nuova posiz.:
Conferma:
MENU
Uscita:
ORDINAMENTO CANALI
Selez. Canale:
Selez. nuova posiz.:
Conferma:
Uscita:
01
PROGR
PROGRAMMA:
CONFERMA
PROGR
MENU
03
ORDINAMENTO CANALI
03
01
PROGRAMMA:
CONFERMA
Selez. Canale:
PROGR
Selez. nuova posiz.:
Conferma:
MENU
Uscita:
04
02
assicurare che la nuova posizione di programma è stata
PROGR
memorizzata.
S
RM
3 Ripetere i passi 1 e 2 se si desidera riordinare altri canali televisivi.
887
4 Premere il tasto MENU per far riapparire l’immagine televisiva
normale.
Il televisore è pronto per funzionare.
Operazioni preliminari - Programmazione di base
59
Page 60

Operazioni avanzate - Programmazione avanzata
Sintonia automatica della TV, usando i tasti del
televisore
Oltre a poter sintonizzare il televisore automaticamente come è stato spiegato nel capitolo di «Sintonia automatica della TV,
usando il telecomando», attenendosi alle seguenti istruzioni si possono anche sintonizzare e memorizzare
automaticamente tutti i canali (emittenti televisive) disponibili, premendo semplicemente un tasto del televisore.
1 Premere sul simbolo del coperchietto della parte frontale del
televisore per aprire il pannello di controllo frontale.
Controllare che l'antenna
2 Premere il tasto e mantenerlo premuto per alcuni secondi,
finché sullo schermo appare un nuovo menú, per far in modo di
verificare che l’antenna sia stata collegata.
sia collegata correttamente
CONFERMA
Controllare che l'antenna
sia collegata correttamente
CONFERMA
3 Verificare che l’antenna sia stata collegata e quindi premere il tasto
OK.
1
2
3
4
5
6
7
8
9
0
MENU
K
La sintonia automatica comincia, e mentre si stanno sintonizzando
tutti i canali (appaiono una alla volta tutte le emittenti televisive),
sullo schermo lampeggia il messaggio «Ricerca...».
Questo processo può durare alcuni minuti.
Controllare che l'antenna
sia collegata correttamente
CONFERMA
PRESELEZIONE AUTOMA.
PROGRAMMA:
SISTEMA:
CANALE:
Ricerca...
01
B/G
C 21
Una volta terminato il processo di sintonia automatica, il menù sparisce
dallo schermo ed il televisore è pronto per funzionare.
PROGR
Nota bene: Se si desidera arrestare il processo di sintonizzazione
automatica, premere il tasto MENU del telecomando.
RM
887
S
60
Operazioni avanzate - Programmazione avanzata
Page 61

Operazioni avanzate - Programmazione avanzata
Sintonia manuale della TV
Usare questa funzione per sintonizzare ad uno ad uno nell’ordine di programmi che si desidera, i canali (emittenti
televisive) o un ingresso video.
REGOLAZIONE IMMAGINE
MODALITÀ: PERSONALE
1 Premere il tasto MENU del telecomando per far apparire il menù
sullo schermo del televisore.
CONTRASTO
LUMINOSITÀ
COLORE
NITIDEZZA
TONALITÀ
RIPRISTINO
REGOLAZIONE IMMAGINE
MODALITÀ: PERSONALE
CONTRASTO
LUMINOSITÀ
COLORE
NITIDEZZA
TONALITÀ
RIPRISTINO
1
2
4
5
7
8
0
S
K
MENU
PROGR
RM
3
6
9
887
2 Premere il tasto per selezionare il simbolo e di seguito
premere il tasto per entrare nel menù INSTALLAZIONE.
3 Premere il tasto per selezionare PRESELEZIONE MANUALE
e quindi premere il tasto .
4 Con il cursore indicando PROGRAMMA premere il tasto e
quindi premere
(posizione) su cui si desidera sintonizzare un canale (emittente
televisiva). Premere il tasto .
o per selezionare il nº di programma
5 Premere il tasto per selezionare CANALE e quindi premere il
tasto . Premere il tasto o per selezionare il tipo di canale
(«C» per canali terrestri o «S» per canali via cavo). Premere il
tasto .
6 Premere i tasti numerici per introdurre direttamente il numero del
canale dell’emittente televisiva, o premere i tasti
cercare il successivo canale disponibile.
Se non si desidera memorizzare questo canale, premere il tasto
o per cercare un altro canale.
o per
7 Se questo è il canale che si desidera memorizzare, premere il tasto
OK e quindi, con il cursore indicando CONFERMA, premere di
nuovo OK.
8 Ripetere i passi dal 4 all’7 per sintonizzare e memorizzare altri
canali.
INSTALLAZIONE
ROTAZ. IMMAGINE:
LINGUA: ITALIANO
PRESELEZ. AUTOMA.
ORDINAMENTO CANALI
PRESELEZIONE MANUALE
INSTALLAZIONE
ROTAZ. IMMAGINE:
LINGUA: ITALIANO
PRESELEZ. AUTOMA.
ORDINAMENTO CANALI
PRESELEZIONE MANUALE
INSTALLAZIONE
PRESELEZIONE MANUALE
PROGRAMMA:
SISTEMA:
CANALE:
SFA:
SALTA:
DECODER:
CONFERMA
INSTALLAZIONE
PRESELEZIONE MANUALE
PROGRAMMA:
SISTEMA:
CANALE:
SFA:
SALTA:
DECODER:
CONFERMA
INSTALLAZIONE
PRESELEZIONE MANUALE
PROGRAMMA:
SISTEMA:
CANALE:
SFA:
SALTA:
DECODER:
CONFERMA
INSTALLAZIONE
PRESELEZIONE MANUALE
PROGRAMMA:
SISTEMA:
CANALE:
SFA:
SALTA:
DECODER:
CONFERMA
01
B/G
C 21
S I
NO
NO
01
B/G
C 21
S I
NO
NO
01
B/G
C 21
S I
NO
NO
01
B/G
C 21
S I
NO
NO
0
0
9 Premere il tasto MENU per far riapparire l’immagine televisiva
normale.
Il televisore è pronto per funzionare.
Operazioni avanzate - Programmazione avanzata
61
Page 62

Operazioni avanzate - Programmazione avanzata
Sintonia fine manuale dei canali
Di solito, la funzione di sintonia fine automatica(SFA) è in funzionamento.
Ciononostante, se l’immagine appare distorta, è possibile effettuare in modo manuale la sintonia fine del
televisore per ottenere una ricezione ottimale dell’immagine.
1 Selezionare il canale (emittente televisiva) di cui si desideri ottenere
la sintonia fine in modo manuale e quindi premere il tasto MENU
del telecomando per far apparire il menù sullo schermo del
televisore.
2 Premere il tasto per selezionare il simbolo e quindi premere il
tasto per entrare nel menù INSTALLAZIONE.
1
2
3
4
5
6
REGOLAZIONE IMMAGINE
MODALITÀ: PERSONALE
CONTRASTO
LUMINOSITÀ
COLORE
NITIDEZZA
TONALITÀ
RIPRISTINO
INSTALLAZIONE
ROTAZ. IMMAGINE:
LINGUA: ITALIANO
PRESELEZ. AUTOMA.
ORDINAMENTO CANALI
PRESELEZIONE MANUALE
REGOLAZIONE IMMAGINE
MODALITÀ: PERSONALE
0
CONTRASTO
LUMINOSITÀ
COLORE
NITIDEZZA
TONALITÀ
RIPRISTINO
7
8
0
S
K
PROGR
MENU
RM
887
9
3 Premere il tasto per selezionare PRESELEZIONE MANUALE e
quindi premere il tasto .
4 Premere il tasto per selezionare SFA e quindi premere il tasto .
5 Premere il tasto o per regolare il livello della frequenza del
canale (il margine di regolazione va da -15 a +15) e quindi premere
il tasto OK.
6 Con il cursore indicando CONFERMA, premere il tasto OK per
memorizzare la nuova regolazione.
INSTALLAZIONE
ROTAZ. IMMAGINE:
LINGUA: ITALIANO
PRESELEZ. AUTOMA.
ORDINAMENTO CANALI
PRESELEZIONE MANUALE
INSTALLAZIONE
PRESELEZIONE MANUALE
PROGRAMMA:
SISTEMA:
CANALE:
SFA:
SALTA:
DECODER:
CONFERMA
INSTALLAZIONE
PRESELEZIONE MANUALE
PROGRAMMA:
SISTEMA:
CANALE:
SFA:
SALTA:
DECODER:
CONFERMA
INSTALLAZIONE
PRESELEZIONE MANUALE
PROGRAMMA:
SISTEMA:
CANALE:
SFA:
SALTA:
DECODER:
CONFERMA
01
B/G
C 21
S I
NO
NO
01
B/G
C 21
+2
NO
NO
01
B/G
C 21
+2
NO
NO
0
7 Premere il tasto MENU per far riapparire l’immagine televisiva
normale.
8 Ripetere i passi dall’1 al 7 per effettuare la sintonia fine di altri
canali.
Il televisore è pronto per funzionare.
62
Operazioni avanzate - Programmazione avanzata
Page 63

Operazioni avanzate - Programmazione avanzata
Regolazione della rotazione dell’immagine
Se l’immagine è inclinata a causa del magnetismo terrestre, usare questa funzione per regolarla.
1 Premere il tasto MENU del telecomando per far apparire il menù
sullo schermo del televisore.
1
2
3
2 Premere il tasto per selezionare il simbolo e quindi premere il
4
5
6
7
8
9
0
MENU
tasto
per entrare nel menù INSTALLAZIONE.
REGOLAZIONE IMMAGINE
MODALITÀ: PERSONALE
CONTRASTO
LUMINOSITÀ
COLORE
NITIDEZZA
TONALITÀ
RIPRISTINO
INSTALLAZIONE
ROTAZ. IMMAGINE:
LINGUA: ITALIANO
PRESELEZ. AUTOMA.
ORDINAMENTO CANALI
PRESELEZIONE MANUALE
REGOLAZIONE IMMAGINE
MODALITÀ: PERSONALE
CONTRASTO
LUMINOSITÀ
COLORE
NITIDEZZA
TONALITÀ
RIPRISTINO
0
K
PROGR
S
RM
887
3 Con il cursore indicando ROTAZ. IMMAGINE premere il tasto .
4 Premere il tasto o per regolare la rotazione dell’immagine (il
margine di regolazione va da -5 a +5) e quindi premere il tasto OK.
5 Premere il tasto MENU per far riapparire l’immagine televisiva
normale.
INSTALLAZIONE
ROTAZ. IMMAGINE:
LINGUA: ITALIANO
PRESELEZ. AUTOMA.
ORDINAMENTO CANALI
PRESELEZIONE MANUALE
INSTALLAZIONE
ROTAZ. IMMAGINE:
LINGUA: ITALIANO
PRESELEZ. AUTOMA.
ORDINAMENTO CANALI
PRESELEZIONE MANUALE
0
+2
Il televisore è pronto per funzionare.
Operazioni avanzate - Programmazione avanzata
63
Page 64

Operazioni avanzate - Programmazione avanzata
Omissione di posizioni di programma
È possibile programmare questo televisore affinché salti i numeri di programma che non si desiderano quando si
selezionano con i tasti PROGR+/-. Se in seguito si desidera recuperare il nº di programma omesso, si procederà di nuovo
attenendosi alle seguenti istruzioni ma si dovrà selezionare NO invece di SI al punto nº6.
REGOLAZIONE IMMAGINE
MODALITÀ: PERSONALE
1 Premere il tasto MENU del telecomando per far apparire il menù
sullo schermo del televisore.
CONTRASTO
LUMINOSITÀ
COLORE
NITIDEZZA
TONALITÀ
RIPRISTINO
REGOLAZIONE IMMAGINE
MODALITÀ: PERSONALE
CONTRASTO
LUMINOSITÀ
COLORE
NITIDEZZA
TONALITÀ
RIPRISTINO
1
2
4
5
7
8
0
S
K
PROGR
MENU
RM
3
6
9
887
2 Premere il tasto per selezionare e quindi premere il tasto
per entrare nel menù INSTALLAZIONE.
3 Premere il tasto per selezionare PRESELEZIONE MANUALE e
quindi premere il tasto
.
4 Con il cursore evidenziando PROGRAMMA, premere PROGR
o fino a far apparire il programma che si desidera saltare.
5 Premere il tasto per selezionare SALTA e quindi premere il tasto
.
6 Premere il tasto per selezionare SI e quindi premere il tasto OK.
7 Con il cursore evidenziando CONFERMA, premere il tasto OK.
INSTALLAZIONE
ROTAZ. IMMAGINE:
LINGUA: ITALIANO
PRESELEZ. AUTOMA.
ORDINAMENTO CANALI
PRESELEZIONE MANUALE
INSTALLAZIONE
ROTAZ. IMMAGINE:
LINGUA: ITALIANO
PRESELEZ. AUTOMA.
ORDINAMENTO CANALI
PRESELEZIONE MANUALE
INSTALLAZIONE
PRESELEZIONE MANUALE
PROGRAMMA:
SISTEMA:
CANALE:
SFA:
SALTA:
DECODER:
CONFERMA
INSTALLAZIONE
PRESELEZIONE MANUALE
PROGRAMMA:
SISTEMA:
CANALE:
SFA:
SALTA:
DECODER:
CONFERMA
INSTALLAZIONE
PRESELEZIONE MANUALE
PROGRAMMA:
SISTEMA:
CANALE:
SFA:
SALTA:
DECODER:
CONFERMA
INSTALLAZIONE
PRESELEZIONE MANUALE
PROGRAMMA:
SISTEMA:
CANALE:
SFA:
SALTA:
DECODER:
CONFERMA
01
B/G
C 21
S I
NO
NO
05
B/G
C 21
S I
NO
NO
05
B/G
C 21
S I
S I
NO
05
B/G
C 21
S I
S I
NO
0
0
8 Ripetere i passi dal 4 al 7 per omettere altre posizioni di programma.
9 Premere il tasto MENU per far riapparire l’immagine televisiva
normale.
Quando si seleziona il canale (emittente televisiva) con il tasto PROGR+/-,
esso non apparirà. Ciononostante, tale canale potrà essere selezionato
premendo il numero di programma corrispondente per mezzo dei tasti
numerici.
64
Operazioni avanzate - Programmazione avanzata
Page 65

Operazioni avanzate - Operazioni avanzate della TV
Regolazione dell’immagine
Sebbene l’immagine sia stata regolata in fabbrica, sarà possibile modificarla secondo le proprie preferenze.
1 Premere il tasto MENU del telecomando per far apparire il menù
sullo schermo del televisore.
REGOLAZIONE IMMAGINE
MODALITÀ: PERSONALE
CONTRASTO
LUMINOSITÀ
COLORE
NITIDEZZA
TONALITÀ
RIPRISTINO
REGOLAZIONE IMMAGINE
MODALITÀ: PERSONALE
CONTRASTO
LUMINOSITÀ
COLORE
NITIDEZZA
TONALITÀ
RIPRISTINO
2 Premere il tasto per entrare nel menù REGOLAZIONE
IMMAGINE.
1
2
3
REGOLAZIONE IMMAGINE
MODALITÀ: PERSONALE
CONTRASTO
LUMINOSITÀ
COLORE
NITIDEZZA
TONALITÀ
RIPRISTINO
3 Premere il tasto o per selezionare l’elemento che si desidera
4
5
6
7
8
9
0
MENU
K
PROGR
modificare.
4 Con il cursore indicando l’elemento che si desidera modificare,
premere il tasto
(Vedi schema seguente per conoscere la funzione di ogni elemento)
REGOLAZIONE DELL’IMMAGINE
MODALITÀ PERSONALE (per preferenze individuali)
CONTRASTO Meno Più
LUMINOSITÀ* Più scura Più chiara
COLORE* Meno Più
NITIDEZZA* Più fosca Più nitida
TONALITÀ** Verdognola Rossiccia
RIPRISTINO Ripristina le regolazioni video
* Si può modificare solamente se si seleziona MODALITÀ PERSONALE
** Disponibile solo per il sistema colore NTSC (per es. nastri video
statunitensi)
OPERAZIONE/RISULTATO
LIVE (per programmi in diretta)
FILM (per film)
prestabilite in fabbrica
REGOLAZIONE IMMAGINE
MODALITÀ: PERSONALE
CONTRASTO
LUMINOSITÀ
COLORE
NITIDEZZA
TONALITÀ
RIPRISTINO
REGOLAZIONE IMMAGINE
MODALITÀ: PERSONALE
CONTRASTO
LUMINOSITÀ
COLORE
NITIDEZZA
TONALITÀ
RIPRISTINO
S
RM
887
5 Premere il tasto / o / per modificare la regolazione
dell’elemento selezionato e quindi premere il tasto OK per
memorizzare la nuova regolazione.
6 Ripetere i passi dal punto 3 al 5 per modificare altre regolazioni.
7 Premere il tasto MENU per far riapparire l’immagine televisiva
normale.
Cambiamento rapido della modalità
d’immagine
1 Premere il tasto. del telecomando per accedere direttamente alla
MODALITÀ IMMAGINE.
2 Premere il tasto per selezionare il modo d’immagine che si
desidera (PERSONALE, LIVE o FILM).
Operazioni avanzate - Operazioni avanzate della TV
MOD. IMMAGINE:
MOD. IMMAGINE:
PERSONALE
LIVE
MOD. IMMAGINE:
PERSONALE
65
Page 66

Operazioni avanzate - Operazioni avanzate della TV
Regolazione del suono
Sebbene l’audio venga regolato in fabbrica, è possibile modificarlo a seconda delle proprie preferenze.
1 Premere il tasto MENU del telecomando per far apparire il menù
sullo schermo del televisore.
REGOLAZIONE IMMAGINE
MODALITÀ: PERSONALE
CONTRASTO
LUMINOSITÀ
COLORE
NITIDEZZA
TONALITÀ
RIPRISTINO
REGOLAZIONE IMMAGINE
MODALITÀ: PERSONALE
CONTRASTO
LUMINOSITÀ
COLORE
NITIDEZZA
TONALITÀ
RIPRISTINO
2 Premere il tasto per selezionare il simbolo e quindi premere il
tasto
per entrare nel menù REGOLAZIONE AUDIO.
3 Premere il tasto o per selezionare l’elemento che si desidera
1
2
3
4
5
6
7
8
9
0
MENU
K
modificare
4 Con il cursore indicando l’elemento che si desidera modificare,
premere il tasto
(Vedi schema seguente per conoscere la funzione di ogni elemento)
REGOLAZIONE AUDIO OPERAZIONE/RISULTATO
MODALITÀ
ACUTI* Meno Più
BASSI* Meno Più
BILANCIAMENTO Sinistro Destro
PERSONALE (per preferenze individuali)
JAZZ
POP
ROCK
REGOLAZIONE AUDIO
MODALITÀ: PERSONALE
ACUTI
BASSI
BILANCIAMENTO
DOPPIO AUDIO:
DSP:
RIPRISTINO
REGOLAZIONE AUDIO
MODALITÀ: PERSONALE
ACUTI
BASSI
BILANCIAMENTO
DOPPIO AUDIO:
DSP:
RIPRISTINO
REGOLAZIONE AUDIO
MODALITÀ: PERSONALE
ACUTI
BASSI
BILANCIAMENTO
DOPPIO AUDIO:
DSP:
RIPRISTINO
STEREO
S I
STEREO
S I
STEREO
S I
DOPPIO AUDIO • Per trasmissioni in stereo:
MONO
STEREO
• Per trasmissioni bilingue:
PROGR
A (per il canale 1)
B (per il canale 2)
DSP (Processore Audio digitale)
SI NO
RIPRISTINO Ripristina le regolazioni audio
prestabilite in fabbrica
* Si può modificare solo se si seleziona MODALITÀ PERSONALE
RM
887
5 Premere il tasto / o / per modificare la regolazione
dell’elemento selezionato e quindi premere il tasto OK per
memorizzare la nuova regolazione.
S
6 Ripetere i passi dal punto 3 al 5 per modificare altre regolazioni.
7 Premere il tasto MENU per far riapparire l’immagine televisiva
normale.
Cambiamento rapido della modalità
audio
1 Premere il tasto del telecomando per accedere direttamente alla
MODALITÀ AUDIO.
2 Premere il tasto per selezionare la modalità audio che si desidera
(PERSONALE, JAZZ, POP o ROCK).
66
Operazioni avanzate - Operazioni avanzate della TV
MODALITÀ AUDIO:
MODALITÀ AUDIO:
PERSONALE
POP
MODALITÀ AUDIO:
PERSONALE
Page 67

Operazioni avanzate - Operazioni avanzate della TV
Funzione di spegnimento automatico
Si potrà selezionare un intervallo di tempo dopo il quale il televisore entra automaticamente nella modalità di spegnimento
temporaneo (standby)
REGOLAZIONE IMMAGINE
MODALITÀ: PERSONALE
1 Premere il tasto MENU del telecomando per far apparire il menù
sullo schermo del televisore.
CONTRASTO
LUMINOSITÀ
COLORE
NITIDEZZA
TONALITÀ
RIPRISTINO
REGOLAZIONE IMMAGINE
MODALITÀ: PERSONALE
CONTRASTO
LUMINOSITÀ
COLORE
NITIDEZZA
TONALITÀ
RIPRISTINO
2 Premere il tasto per selezionare il simbolo e quindi premere il
TIMER
SPEGNIMENTO:
NO
tasto per entrare nel menù TIMER.
1
2
3
4
5
6
7
8
9
3 Con il cursore indicando SPEGNIMENTO premere il tasto .
TIMER
SPEGNIMENTO:
NO
0
MENU
K
4 Premere il tasto o fino a far apparire sullo schermo l’intervallo
TIMER
SPEGNIMENTO:
0:15
di tempo dopo il quale si desidera che il televisore si spenga.
NO
0:15 min.
0:30 min.
PROGR
...
...
4:00 ore
5 Premere il tasto OK.
RM
887
S
6 Premere il tasto MENU per far riapparire sullo schermo l’immagine
televisiva normale.
Un minuto prima che il televisore entri nella modalità di spegnimento
temporaneo, sullo schermo verrà indicato il tempo rimasto.
Nota bene: • Mentre si guarda la televisione, premere il tasto
vedere il tempo rimasto prima dello spegnimento
• Per riaccendere il televisore dalla modalità di
spegnimento temporaneo, premere il tasto
telecomando.
Operazioni avanzate - Operazioni avanzate della TV
per
del
67
Page 68

Televideo
Visualizzazione del Televideo
Televideo è un servizio d’informazione che la maggior parte delle emittenti televisive propone agli utenti.
Faccia in modo di usare un canale televisivo con un segnale forte, altrimenti ci potrebbero essere errori nel televideo.
Selezione del televideo
1 Selezionare il canale televisivo che trasmette il servizio di televideo
che si desidera consultare.
1
2
4
5
7
8
0
S
K
PROGR
MENU
RM
887
3
2 Premere il tasto del telecomando per visualizzare il servizio di
televideo.
6
TELETEXT
Index
Programme
News
Sport
Weather
TELETEXT
Index
Programme
25
153
101
98
25
News
153
Sport
101
Weather
98
9
3 Introdurre le tre cifre del numero di pagina che si desidera
consultare, usando i tasti numerici del telecomando (se si commette
un errore, introdurre tre cifre a caso e quindi ripetere il numero di
pagina corretto).
4 Premere il tasto per terminare l’uso del servizio di televideo e
ripristinare la modalità televisione.
Uso di altre funzioni del televideo
PER PREMERE IL TASTO
Accedere alla pagina successiva per la pagina successiva o
o precedente per la pagina precedente
Sovrapporre televideo alla
immagine televisiva Premere di nuovo per
annullare la modalità di televideo
Bloccare una pagina del televideo
Premere di nuovo per rilasciare
la pagina
Mostrare un’informazione
nascosta (per es. risposta Premere di nuovo per
ad un quiz) nasconderla
Index
Programme
News
Sport
Weather
TELETEXT
TELETEXT
Index
Programme
News
Sport
Weather
25
153
101
98
25
153
101
98
68
Uso del Fastext
Fastext permette di accedere alle pagine del televideo premendo
un solo tasto.
Quando il Fastext viene trasmesso, sulla parte inferiore della
pagina di televideo appare un menù di codici di colore. Premere il
tasto colorato (rosso, verde, giallo o blu) del telecomando per
accedere alla pagina corrispondente.
Televideo
Page 69

Collegamenti opzionali
MONO
L/G/S/I R/D/D/D
+
P
_
L/G/S/I R/D/D/D
s
3
3
3
L/G/S/I R/D/D/D
Uso di apparecchiature opzionali
Al televisore è possibile collegare apparecchiature audio o video opzionali come videoregistratori, videocamere o
videogame.
Frontale del televisore
Selezione e visualizzazione del segnale di ingresso
1 Collegare l’apparecchio alla presa appropriata del televisore.
2 Premere il tasto del telecomando ripetutamente fino a quando sullo
schermo TV compare il simbolo di ingresso corretto.
Símbolo Segnali di ingresso
k • Segnale d’ingresso audio/video dal connettore
K
q
K
q
Euro AV
• Segnale d’ingresso RGB dal connettore Euro AV
• Segnale d’ingresso audio/video dal connettore
Euro AV
2
3
3
• Segnale d’ingresso S video dalla presa
• Segnale d’ingresso video per mezzo del connettore RCA
C
• Segnale d’ingresso video per mezzo del connettore
segnale d’ingresso audio per mezzo di D.
F
E
E
e segnale d’ingresso audio per mezzo di
D
F
D
B
e
B
A
C
.
D
Videocamera
8 mm/Hi8
3 Accendere l’apparecchio collegato.
4 Per tornare alla normale immagine TV, premere il tasto
telecomando.
Nota: Per evitare la distorsione dell’immagine, non usare contemporaneamente i
connettori
B
e E.
sul
Altre informazioni
Collegamento di un videoregistratore “via antenna”
Collergare il videregistratore all’ingresso
Raccomandiamo di assegnare il segnale del videoregistratore al numero di
programma ‘0’ usando la procedura descritta nel paragrafo ‘Preselezione manuale
dei canali’.
Collegamento di una cuffia
Collegare la cuffia all’ingresso
sul pannello frontale del televisore.
A
Collegamento di un decoder
Collegare il decoder all’ingresso F sul retro del televisore.
Collegamento di un impianto audio esterno
Per amplificare l’uscita audio del televisore, è possibile collegare un impianto
stereo Hi-Fi agli ingressi
* “PlayStation” è un prodotto della Sony Computer Entertainment, Inc.
* “PlayStation” è un marchio registrato della Sony Computer Entertainment, Inc.
sul retro del televisore.
G
sul retro del televisore.
F
Videocamera
S-VHS/Hi8
Retro del televisore
G
F
E
s
2 /
L/G/S/I
1/
1
“PlayStation”
R/D/D/D
2
*
VCR
Hi-Fi
Decoder
Collegamenti Opzionali
69
Page 70

Collegamenti opzionali
Smartlink
Smartlink è un collegamento diretto fra il televisore e un VCR.
Per utilizzare Smartlink occorre:
• Un VCR che supporti le funzioni Smartlink, NexTView Link, Easy
Link o Megalogic.
Megalogic è un marchio registrato Grundig Corporation.
EasyLink è un marchio Philips Corporation.
• Un cavo SCART a 21 poli idoneo al collegamento del VCR al
connettore Scart :1/
.
Smartlink offre:
• Informazioni sulla sintonia come ad esempio la tabella dei canali che
può essere trasferita dal televisore al VCR.
• Registrazione TV diretta: mentre si guarda un programma è
sufficiente premere un solo pulsante del VCR per registrarlo.
• Televisore sulla modalità di spegnimento temporaneo (standby):
Premere il tasto “Play z” del video ed il televisore s’accenderà
automaticamente.
Se è stato attaccato un decoder ad un video che accetta Smartlink,
selezionare il menù PRESELEZIONE MANUALE in
(INSTALLAZIONE) e selezionare DECODER sulla posizione SI
per ogni canale codificato.
Per maggiori informazioni su Smartlink, consultare il manuale
d‘uso del VCR.
70
Collegamenti Opzionali
Page 71

Informazioni aggiuntive
Guida rapida per muoversi attraverso i menù
Menù d’Installazione (Nell’accendere il televisore per la prima volta)
LINGUA
ENGLISH
DEUTSCH
FRANÇAIS
ITALIANO
ESPAÑOL
NEDERLANDS
EΛΛHNIKA
POLSKI
Č
ESKI
MAGYAR
T
Ü
RKÇE
Selezionare lingua:
Si desidera iniziare la
preselezione automatica?
S I
NO
Controllare che l'antenna
sia collegata correttamente
CONFERMA
(Per ulteriori informazioni, far riferimento al capitolo su «Selezione della lingua»)
Guida dei vari menù
PRESELEZIONE AUTOMA.
PROGRAMMA:
SISTEMA:
CANALE:
Ricerca...
01
B/G
C 21
ORDINAMENTO CANALI
PROGRAMMA:
CONFERMA
Selez. Canale:
PROGR
Selez. nuova posiz.:
Conferma:
MENU
Uscita:
03
01
REGOLAZIONE IMMAGINE
MODALITÀ: PERSONALE
CONTRASTO
LUMINOSITÀ
COLORE
NITIDEZZA
TONALITÀ
RIPRISTINO
REGOLAZIONE AUDIO
MODALITÀ: PERSONALE
ACUTI
BASSI
BILANCIAMENTO
DOPPIO AUDIO:
DSP:
RIPRISTINO
TIMER
SPEGNIMENTO:
INSTALLAZIONE
ROTAZ. IMMAGINE:
LINGUA: ITALIANO
PRESELEZ. AUTOMA.
ORDINAMENTO CANALI
PRESELEZIONE MANUALE
STEREO
S I
NO
REGOLAZIONE IMMAGINE
MODALITÀ: PERSONALE
CONTRASTO
LUMINOSITÀ
COLORE
NITIDEZZA
TONALITÀ
RIPRISTINO
Per ulteriori informazioni
riguardo alle varie regolazioni
d’immagine, far riferimento al
capitolo su «Regolazione
dell’Immagine»
REGOLAZIONE AUDIO
MODALITÀ: PERSONALE
ACUTI
BASSI
BILANCIAMENTO
DOPPIO AUDIO:
DSP:
RIPRISTINO
STEREO
S I
Per ulteriori informazioni
riguardo alle varie regolazioni
del suono, far riferimento al
capitolo su «Regolazione del
suono»
TIMER
SPEGNIMENTO:
TIMER
NO
SPEGNIMENTO:
NO
Per ulteriori informazioni, far
riferimento al capitolo su
«Funzione di spegnimento
automatico»
0
INSTALLAZIONE
ROTAZ. IMMAGINE:
LINGUA: ITALIANO
PRESELEZ. AUTOMA.
ORDINAMENTO CANALI
PRESELEZIONE MANUALE
0
INSTALLAZIONE
ROTAZ. IMMAGINE:
LINGUA: ITALIANO
PRESELEZ. AUTOMA.
ORDINAMENTO CANALI
PRESELEZIONE MANUALE
Per ulteriori informazioni, far
0
riferimento al capitolo su
«Regolazione della rotazione
dell’immagine»
INSTALLAZIONE
ROTAZ. IMMAGINE:
LINGUA: ITALIANO
PRESELEZ. AUTOMA.
ORDINAMENTO CANALI
PRESELEZIONE MANUALE
INSTALLAZIONE
ROTAZ. IMMAGINE:
LINGUA: ITALIANO
PRESELEZ. AUTOMA.
ORDINAMENTO CANALI
PRESELEZIONE MANUALE
INSTALLAZIONE
ROTAZ. IMMAGINE:
LINGUA: ITALIANO
PRESELEZ. AUTOMA.
ORDINAMENTO CANALI
PRESELEZIONE MANUALE
INSTALACION
ROTACION IMAGEN:
IDIOMA: ESPAÑOL
SINTONIZACION AUTOM.
REORDENACION DE PROGR.
SINTONIZACION MANUAL
INSTALLAZIONE
0
0
ROTAZ. IMMAGINE:
LINGUA: ITALIANO
PRESELEZ. AUTOMA.
ORDINAMENTO CANALI
PRESELEZIONE MANUALE
Si desidera iniziare la
preselezione automatica?
S I
NO
Per ulteriori informazioni, far
0
riferimento al capitolo su
«Selezione della lingua».
Per ulteriori informazioni, far
riferimento al capitolo su
«Sintonia automatica della TV,
usando il telecomando»
INSTALLAZIONE
0
ORDINAMENTO CANALI
PROGRAMMA:
CONFERMA
01
03
Per ulteriori informazioni, far
riferimento al capitolo su
«Riordinamento dei numeri di
Selez. canale:
PROGR
Selez. nuova posiz.:
INSTALLAZIONE
0
PRESELEZIONE MANUALE
PROGRAMMA:
SISTEMA:
CANALE:
SFA:
SALTA :
DECODER:
CONFERMA
01
B/G
C 21
ON
NO
OFF
programma dei canali TV»
Per ulteriori informazioni, far
riferimento al capitolo su
«Sintonia manuale della TV»
Informazioni aggiuntive
71
Page 72

Informazioni aggiuntive
Soluzione di problemi
Ecco alcuni semplici rimedi ai problemi che possono influenzare immagine e suono.
Problema Soluzione
Assenza di immagine (schermo scuro), • Inserire bene la spina del televisore.
assenza di suono • Premere il tasto
• Se l’indicatore
numero di programma sul telecomando.
• Controllare il collegamento dell’antenna.
• Controllare che la sorgente video selezionata sia accesa.
• Spegnere il televisore per 3 o 4 secondi, poi riaccenderlo
utilizzando il tasto
Immagine scadente o assente (schermo • Usando il MENU, selezionare la videata di regolazione
scuro), ma buon audio. dell’immagine e regolare i livelli di luminosità, contrasto
e colore.
• Dalla videata di regolazione dell’immagine,
selezionare RIPRISTINO per ripristinare le impostazioni
di fabbrica.
del televisore.
è acceso, premere
.
oppure un
Immagine di qualità scadente quando • Premere ripetutamente il tasto fino
si guarda una sorgente video RGB. a quando compare il simbolo RGB
Immagine buona ma assenza di audio. • Premere il tasto +/– del telecomando.
• Se viene visualizzato il simbolo
sul telecomando.
Assenza di colore nei programmi • Usando il tasto MENU, selezionare la videata di
a colori regolazione dell’immagine e regolare il bilanciamento
dei colori.
• Dalla videata di regolazione dell’imma gine, selezionare
RIPRISTINO per ripristinare le impostazioni di fabbrica.
Immagine distorta quando si cambia • Spegnere le apparecchiature collegate all’Euro
programma o si seleziona il televideo connettore 21 poli sul retro del televisore.
Immagine buona ma audio scadente • Regolare la “Sintonia fine dei canali” per ottenere una
qualità d’immagine e audio migliori.
Il telecomando non funziona • Sostituire le batterie.
L’indicatore della modalità d’attesa • Contattare il più vicino centro di assistenza tecnica
(standby) posto sul frontale del TV lampeggia autorizzato Sony.
• Se i problemi persistono, far riparare il televisore da personale tecnico qualificato.
• Non aprire mai da soli il televisore.
.
, premere il tasto
72
Informazioni aggiuntive
Page 73

Informazioni aggiuntive
Specifiche
Sistema televisivo
B/G/H
Sistema colore
PAL, SECAM Est
NTSC 3.58, 4.43 (solo ingresso video)
Copertura canale
VHF: E2-E12
UHF: E21-E69
CATV: S1-S20
HYPER: S21-S41
Cinescopio
Tubo piatto Trinitron
Circa 72 cm (29”) (diagonale schermo circa 68 cm),
deflessione 104°
Terminali sul pannello posteriore
:1/
:2/
Euro Connettore 21 poli (standard
CENELEC) con ingresso per segnali
audio e video, ingresso per RGB, uscita
per segnali TV audio e video
s
Euro Connettore 21 poli (standard
CENELEC) con ingresso per segnali
audio e video, ingresso per S-video,
Uscita audio/video monitor
Uscita audio - connettori Phono RCA
Uscita audio:
2 x 7 W + 1 x 15 W (RMS)
Potenza assorbita
120 W
Consumo in standby
0.5 W
Dimensioni (largh. x alt. x prof.)
Circa 746 x 569 x 516 mm
Peso
Circa 47.5 kg
Accessori in dotazione
Telecomando RM-887 (1)
Pile IEC (2)
Altre funzioni
Televideo, Fastext
Spegnimento automatico
"Smartlink"
Terminali sul pannello frontale
ingresso video - presa fono
3
2
ingressi audio - presa fono
2
3
s
ingresso S video - presa DIN 4 poli
3
Presa cuffia - minijack stereo
Progetto e caratteristiche tecniche sono soggetti a cambiamenti senza preavviso.
Carta Ecologica - Senza cloro 100%
Informazioni aggiuntive
73
Page 74

Page 75

FD Trinitron
Téléviseur Couleur
Merci d’avoir choisi ce téléviseur Sony.
Avant d’utiliser votre téléviseur, lisez attentivement ce manuel et
conservez-le pour vous y référer ensuite.
Comment lire ce Mode d’emploi:
• Utilisez Mise en Service si vous désirez installer le téléviseur et vous
familiariser avec ses fonctions principales.
Mode d’emploi
FR
• Utilisez Opérations Ultérieures si vous désirez mieux connaître les
caractéristiques complémentaires du téléviseur.
• Symboles utilisés dans ce manuel.
• Risques éventuels.
• Remarques importantes.
• Information concernant la fonction.
• 1, 2 ... Etapes du mode d’emploi
MENU
• Les touches noires de la télécommande indiquent sur quelles
K
touches appuyer pour exécuter les diverses fonctions.
• Résultat des instructions.
• Marche à suivre pour obtenir le résultat final : voir page
suivante.
75
Page 76

Pour votre sécurité
Precautions
Consignes de sécurité
Tous les téléviseurs fonctionnent à des tensions très élevées. Afin d’éviter tout risque d’incendie ou
de choc électrique, respectez les consignes de sécurité qui suivent.
Consignes génerales de sécurité
• N’exposez pas le téléviseur à la pluie ou à l’humidité.
• N’ouvrez pas le panneau arrière.
• Pour votre propre sécurité, n’ouvrez jamais le boîtier de votre téléviseur.
Cette opération doit être effectuée par un personnel qualifié uniquement.
Pour une installation parfaite
• N’installez pas le téléviseur dans un endroit chaud, humide ou poussiéreux.
• N’obstruez pas les orifices d’aération. Pour l’aération correcte du téléviseur, laissez un
espace de 10 cm autour du poste.
• Ne placez pas le téléviseur dans un endroit exposé aux vibrations.
• Placez le téléviseur sur un meuble stable pouvant supporter le poids du poste.
Pour un bon fonctionnement
• Ne raccordez le téléviseur que sur du 220-240V ca, 50Hz.
• Débranchez le téléviseur si une substance liquide ou un objet solide venait à pénétrer
dans les orifices d’aération du poste et faites immédiatement appel à un technicien.
• Par mesure de sécurité et pour faire des économies d’énergie, ne laissez pas le téléviseur
en mode veille si vous ne l’utilisez pas. Débranchez-le.
• Débranchez-le directement à partir de la prise sans tirer sur le cordon d’alimentation.
• Par temps d'orage, débranchez le téléviseur de la prise secteur et l'antenne pour éviter
qu'il ne soit endommagé par la foudre.
Entretien
76
Pour votre sécurité
• Nettoyez l‘écran à l‘aide d‘un chiffon doux et humide. N‘utilisez pas de produits
nettoyants abrasifs.
• La poussière et les dépôts de nicotine peuvent provoquer une accumulation de chaleur à
l‘intérieur du téléviseur ce qui, à long terme, peut présenter des risques pour votre
sécurité et réduire la durée de vie du poste. En conséquence, faites réviser votre téléviseur
tous les cinq ans.
Page 77

Table des matières
Table des matières
Comment lire ce Mode d’emploi........................................................................................................75
Consignes de sécurité...........................................................................................................................76
Mise en service
Description générale
Vérification des accessoires fournis.......................................................................................78
Présentation générale des touches du téléviseur ................................................................78
Présentation générale des touches de la télécommande ....................................................79
Mise en service
1ère étape - Installation
Insertion des piles dans la télécommande...........................................................................80
Branchement de l’antenne ...................................................................................................... 80
Mise sous tension du téléviseur .............................................................................................80
2è étape - Fonctions de base
Sélection de la langue ..............................................................................................................81
Réglage automatique du téléviseur par la télécommande.................................................82
Réorganisation des numéros des chaînes TV.......................................................................83
Opérations ultérieures
Autres fonctions
Réglage automatique du téléviseur par les touches du téléviseur ..................................84
Réglage manuel du téléviseur ................................................................................................85
Réglage fin et manuel des canaux ......................................................................................... 86
Réglage de la rotation de l’image .......................................................................................... 87
Chaînes inutilisées ................................................................................................................... 88
Autres fonctions du téléviseur
Réglage de l’image ...................................................................................................................89
Réglage du son ......................................................................................................................... 90
Déconnexion automatique ...................................................................................................... 91
Télétexte
Visualisation du télétexte ........................................................................................................92
FR
FR
Connexion des équipements en option
Utilisation des équipements en option ................................................................................. 93
“Smartlink” ...............................................................................................................................94
Informations complémentaires
Guide rapide de déplacement à travers les menus .............................................................95
Dépannage ................................................................................................................................ 96
Spécifications ............................................................................................................................ 97
Table des matières
77
Page 78

Mise en service - Description générale
Vérification des accessoires fournis
1
2
3
4
5
6
7
8
9
0
MENU
K
PROGR
Deux piles (type R6)
RM
887
S
Une télécommande
(RM-887)
Présentation générale des touches du téléviseur
Interrupteur
Marche /Arrêt
Indicateur de
mise en veille
(standby)
Prise Casque
Touche de réglage automatique
Appuyez sur le couvercle frontal du
téléviseur (appuyez sur le symbole )
pour ouvrir le panneau de contrôle.
Mise en service - Description générale
78
Prise de
S-Vidéo
Prise Vidéo Touche
Prises
audio
de
sélection
de la
source
d’entrée
Touches
de
réglage
du
volume
Touches de
séléctions des
chaînes
Page 79

Mise en service - Description générale
Présentation générale des touches de la télécommande
Coupure du son
Appuyez sur cette touche pour
couper le son.
Appuyez à nouveau pour le récupérer.
Visualisation de l’information
sur l’écran
Appuyez sur cette touche pour présenter
toutes les indications sur écran.
Appuyez à nouveau pour les faire disparaître.
Sélection des chaînes
Appuyez sur ces touches pour sélectionner
les chaînes.
Pour des numéros de chaînes à deux
chiffres (23 par exemple) appuyer d’abord
sur -/-- et ensuite sur les touches 2 et 3.
Si vous vous trompez en introduisant le
premier chiffre, introduisez cependant le
deuxième chiffre (de 0 à 9) et répétez
ensuite l’opération.
Sélection du mode TV
Appuyez sur cette touche pour désactiver le
télétexte ou une entrée audio/vidéo.
Sélection du télétexte
Appuyez sur cette touche pour afficher
le télétexte.
Sélection du mode de son
Appuyez sur cette touche pour changer de
mode de son.
Sélection du mode d’image
Appuyez sur cette touche pour changer de
mode d’image.
Réglage du volume
Appuyez sur cette touche pour régler
le volume du téléviseur.
1
2
4
5
7
8
0
S
K
PROGR
MENU
RM
887
Eteindre temporairement le
téléviseur
Appuyez sur cette touche pour éteindre
temporairement le téléviseur ( le
voyant de mise en veille s’éclairera).
Appuyez à nouveau sur cette touche
pour allumer le téléviseur à partir du
mode veille (standby).
Pour une meilleure économie d’énergie, il
est conseillé d’éteindre complètement le
téléviseur lorsqu’on ne l’utilise pas.
Si on n’appuie ni sur une touche
3
6
9
du téléviseur ni sur une touche de
la télécommande, le téléviseur
passera automatiquement en
veille (standby) au bout de 15 à 30
minutes.
Sélection de la source d’entrée
Appuyez plusieurs fois sur cette touche
jusqu’à ce que le symbole de la source
d’entrée recherchée apparaisse sur
l’écran.
Retour à la dernière chaîne
sélectionnée
Appuyez sur cette touche pour revenir
à la dernière chaîne sélectionnée (la
chaîne précédente doit avoir été
précédemment visionnée pendant 5
secondes au moins).
Activation du système de menus
Appuyez sur cette touche pour que le
menu apparaisse sur l’écran. Appuyez
à nouveau sur cette touche pour le
désactiver et voir l’écran de télévision
normal.
Sélection du menu
Monter d’un niveau
Baisser d’un niveau
Aller au menu ou à la sélection
précédente
Aller au menu ou à la sélection
suivante
OK Confirmer la sélection
Sélection du format de l’écran
Appuyez sur cette touche pour voir les
programmes en mode 16:9. Appuyez à
nouveau sur cette touche pour revenir
en mode 4:3.
Touche NextView: cette touche n'est
pas active sur ce produit.
La fonction
fonctionne pas sur ce téléviseur.
Sélection des chaînes
Appuyez sur cette touche pour
sélectionner la chaîne précédente ou
suivante.
associée à ce bouton ne
Outre les fonctions de télévision, toutes les touches de couleur et les symboles de couleur verte sont aussi utilisées pour les
opérations du télétexte. Pour tout renseignement complémentaire, consultez le chapitre «Télétexte» de ce mode d’emploi.
Mise en service - Description générale
79
Page 80

Première mise en service - Installation
Insertion des piles dans la télécommande
Vérifiez que les piles sont correctement placées.
Respectez l’environneent! Ne jetez les piles usagées que dans les réceptacles prévus à cet effet.
Branchement de l’antenne
Branchez le câble de l’antenne sur la
prise d’entrée corresponsante située
à l’arrière de votre téléviseur.
Mise sous tension du téléviseur
Branchez la prise du téléviseur sur le secteur
(220-240V ca, 50Hz).
Première mise en service - Installation
80
Appuyez sur l’interrupteur Marche/Arrêt situé à
l’avant de votre téléviseur.
Page 81

Première mise en service - Fonctions de base
Sélection de la langue
Cette fonction permet de sélectionner la langue des écrans de menu.
La première fois où vous allumerez le téléviseur, le menu LANGUAGE (LANGUE) aparaîtra automatiquement sur l’écran.
Cependant, si vous devez à nouveau changer la langue des menus au bout d’un certain temps, sélectionnez le menu
LANGUE sur
(MISE EN SERVICE) et procédez comme suit.
1 Appuyez sur l’interrupteur marche/arrêt du téléviseur.
La première fois où vous appuierez sur la touche marche/arrêt du
téléviseur, le menu LANGUAGE (LANGUE) apparaîtra
automatiquement sur votre écran.
LANGUAGE
ENGLISH
DEUTSCH
FRANÇAIS
ITALIANO
ESPAÑOL
NEDERLANDS
EΛΛHNIKA
POLSKI
Č
MAGYAR
T
Select language:
ESKI
Ü
RKÇE
LANGUAGE
Select language:
ENGLISH
DEUTSCH
FRANÇAIS
ITALIANO
ESPAÑOL
NEDERLANDS
EΛΛHNIKA
POLSKI
Č
ESKI
MAGYAR
T
Ü
RKÇE
2 Appuyez sur le bouton ou de la télécommande pour
sélectionner la langue et ensuite sur la touche OK pour confirmer la
sélection.
1
2
3
4
5
6
7
8
9
0
MENU
Le menu de Réglage Automatique apparaît sur l’écran du téléviseur dans
LANGUE
ENGLISH
DEUTSCH
FRANÇAIS
ITALIANO
ESPAÑOL
NEDERLANDS
EΛΛHNIKA
POLSKI
Č
ESKI
MAGYAR
Ü
RKÇE
T
Sélection langue:
Réglage des chaînes en
automatique?
OUI
NON
la langue que vous avez choisie.
K
PROGR
S
RM
887
Première mise en service - Fonctions de base
81
Page 82

Première mise en service - Fonctions de base
Réglage automatique du téléviseur par
la télécommande
Avant de pouvoir recevoir les différents canaux (émetteurs TV), vous devez régler le téléviseur. En vous conformant aux
instructions ci-dessous, ce téléviseur recherchera et enregistrera automatiquement tous les canaux disponibles.
Après avoir choisi la langue dans laquelle vous désirez lire les menus, un nouveau menu de réglage automatique du
téléviseur apparaît sur l’écran. Cependant, si au bout d’un certain temps, vous désirez reprendre le réglage des chaînes
(par ex. en cas de déménagement), sélectionnez le menu MEMORISATION AUTO qui se trouve dans (MISE EN
SERVICE) et procédez comme suit ou consultez le chapitre "Réglage automatique du téléviseur à l’aide des touches".
Réglage des chaînes en
1 Appuyez sur la touche OK de la télécommande pour sélectionner
OUI.
Un nouveau menu apparaît sur l’écran pour que vous puissiez
vérifier le branchement de l’antenne.
1
2
3
4
5
6
2 Vérifiez que l’antenne est branchée et, en ce cas, appuyez sur OK.
automatique?
OUI
NON
Vérifiez la connexion de
l'antenne
CONFIRMER
Réglage des chaînes en
automatique?
OUI
NON
7
8
0
S
K
MENU
PROGR
RM
9
887
Le réglage automatique commence et pendant que le téléviseur
enregistrera tous les canaux (les émetteurs TV apparaissent l’un
après l’autre), le message «En recherche...» clignotera sur l’écran.
Ce processus peut demander quelques minutes.
Lorsque ce processus de réglage automatique est terminé, le menu «Ordre
des Chaînes» apparaît à l’écran.
Remarque: • Si vous désirez arrêter le processus de réglage
automatique, appuyez sur la touche MENU de la
télécommande.
• Si vous arrêtez le processus de réglage automatique en
appuyant sur la touche MENU, le menu «Ordre des
Chaînes» n’apparaîtra pas automatiquement sur
l’écran.
MEMORISATION AUTO
CHAINE:
NORME:
CANAL:
En recherche...
ORDRE DES CHAINES
CHAINE:
CONFIRMER
Sélect. chaîne:
Sélect nouveau Nº:
Confirmer:
Quitter:
PROGR
MENU
01
L
C 21
03
01
82
Première mise en service - Fonctions de base
Page 83

Première mise en service - Fonctions de base
Réorganisation des nº des chaînes TV
Après avoir réglé tous les canaux (émetteurs de télévision) disponibles, un nouveau menu qui vous permet de changer
l’ordre des chaînes sur le téléviseur apparaît automatiquement sur votre écran. Cependant, si vous désirez changer à
nouveau l’ordre des chaînes au bout d’un certain temps, allez à
DES CHAINES, puis procédez de la même manière qu’au paragraphe b) de ce chapitre.
a)
Si vous ne désirez pas changer l’ordre des chaînes:
(MISE EN SERVICE) et sélectionnez le menu ORDRE
1 Appuyez sur la touche MENU pour revenir sur l’écran de télévision
normal.
ORDRE DES CHAINES
CHAINE:
CONFIRMER
Sélect. chaîne:
Sélect nouveau Nº:
Confirmer:
MENU
Quitter:
PROGR
03
01
ORDRE DES CHAINES
CHAINE:
CONFIRMER
Sélect. chaîne:
Sélect nouveau Nº:
Confirmer:
MENU
Quitter:
03
01
PROGR
Le téléviseur est prêt à fonctionner.
1
2
3
4
5
6
7
8
9
0
MENU
b) Si vous désirez changer l’ordre des chaînes:
1 Appuyez sur la touche PROGR ou jusqu’à ce que le canal
(émetteur TV) que vous désirez changer de place apparaisse sur
l’écran.
ORDRE DES CHAINES
CHAINE:
CONFIRMER
Sélect. chaîne:
Sélect nouveau Nº:
Confirmer:
MENU
Quitter:
PROGR
03
01
ORDRE DES CHAINES
CHAINE:
CONFIRMER
Sélect. chaîne:
Sélect nouveau Nº:
Confirmer:
MENU
Quitter:
03
01
PROGR
Le changement de l'emplacement d'une chaîne bouleversera
K
l'ordre des chaînes suivantes. Il faut donc commencer cette
réorganisation dans l'ordre croissant (ex: TF1 sur le numéro 1,
France 2 sur le numéro 2, France 3 sur le numéro 3, etc...)
PROGR
2 Appuyez sur la touche ou pour sélectionner le nouveau
numéro sous lequel vous désirez mémoriser la chaîne sélectionnée
et appuyez ensuite sur la touche OK.
Le mot CONFIRMER apparaîtra pendant quelques secondes
ORDRE DES CHAINES
CHAINE:
CONFIRMER
Sélect. chaîne:
Sélect nouveau Nº:
Confirmer:
Quitter:
PROGR
MENU
04
02
pour confirmer que la nouvelle position est entrée en mémoire.
RM
887
S
3 Reprenez de 1 et 2 si vous désirez réorganiser d’autres chaînes.
4 Appuyez sur la touche MENU pour revenir à l’image télévisée.
Le téléviseur est prêt à fonctionner.
Première mise en service - Fonctions de base
83
Page 84

Opérations Ultérieures - Autres fonctions
Réglage automatique du téléviseur par les touches
du téléviseur
Il vous est possible de régler automatiquement le téléviseur en suivant les explications du chapitre "Réglage automatique
du téléviseur par la télécommande". Mais vous pouvez aussi régler et mémoriser automatiquement tous les canaux
(émetteurs TV) disponibles en appuyant sur un seul bouton du téléviseur. Procéder comme suit.
1 Appuyer sur le symbole du couvercle de la partie frontale du
téléviseur pour ouvrir le panneau de commande frontal.
Vérifiez la connexion de
2 Appuyer sur la touche et la maintenir enfoncée pendant
quelques secondes. Un menu apparaît sur l'écran pour que vous
puissiez vérifier le branchement de l'antenne.
l'antenne
CONFIRMER
Vérifiez la connexion de
l'antenne
CONFIRMER
3 Vérifiez que l’antenne est branchée et, en ce cas, appuyez sur OK.
1
2
3
4
5
6
7
8
9
Le réglage automatique commence et pendant que le téléviseur
enregistrera tous les canaux (les émetteurs TV apparaissent l’un
après l’autre), le message «En recherche...» clignotera sur l’écran.
Ce processus peut demander quelques minutes.
Vérifiez la connexion de
l'antenne
CONFIRMER
MEMORISATION AUTO
CHAINE:
NORME:
CANAL:
En recherche...
01
L
C 21
0
MENU
K
Lorsque le processus de réglage automatique est terminé, le menu s’efface
sur l’écran et le téléviseur est prêt à fonctionner.
PROGR
Remarque: Si vous désirez arrêter le processus de réglage
automatique, appuyez sur la touche MENU de la
télécommande.
RM
887
S
84
Opérations Ultérieures - Autres fonctions
Page 85

Opérations Ultérieures - Autres fonctions
Réglage manuel du téléviseur
Utilisez cette fonction pour régler l’un après l’autre et dans l’ordre que vous désirez les canaux (émetteurs TV) ou une
chaîne réservée à un canal magnétoscope.
CONTROLE DE L'IMAGE
MODE: PERSONNEL
1 Appuyez sur la touche MENU de la télécommande pour que le
menu apparaisse sur l’écran du téléviseur.
2 Appuyez sur la touche pour sélectionner le symbole et
appuyez ensuite sur la touche pour entrer dans le menu MISE
EN SERVICE.
1
2
3
4
5
6
3 Appuyez sur la touche pour sélectionner MEMORISATION
7
8
9
0
MENU
MANUELLE et ensuite sur la touche .
4 Lorsque CHAINE devient jaune, appuyez sur la touche et
ensuite sur ou pour sélectionner le numéro de chaîne sur
K
lequel vous désirez régler un canal (émetteur TV). Appuyez sur
.
CONTRASTE
LUMINOSITE
COULEURS
NETTETE
TEINTE
RAZ
MISE EN SERVICE
ROTATION D'IMAGE:
LANGUE: FRANÇAIS
MEMORISATION AUTO
ORDRE DES CHAINES
MEMORISATION MANUELLE
MISE EN SERVICE
ROTATION D'IMAGE:
LANGUE: FRANÇAIS
MEMORISATION AUTO
ORDRE DES CHAINES
MEMORISATION MANUELLE
MISE EN SERVICE:
MEMORISATION MANUELLE
CHAINE:
NORME:
CANAL:
AFT:
SAUT:
DECODEUR:
CONFIRMER
01
L
C 21
OUI
NON
NON
0
0
CONTROLE DE L'IMAGE
MODE: PERSONNEL
CONTRASTE
LUMINOSITE
COULEURS
NETTETE
TEINTE
RAZ
PROGR
S
RM
887
5 Appuyez sur la touche pour sélectionner CANAL et ensuite,
sur la touche . Appuyez sur la touche ou pour sélectionner
le type de canal («C» pour les chaînes hertziennes ou «S» pour les
chaînes câblées). Appuyez sur la touche .
6 Appuyez sur les touches numériques pour introduire directement
le numéro du canal de l’émetteur de télévision ou appuyez sur les
touches ou pour chercher le canal disponible suivant.
Si vous ne désirez pas introduire ce canal en mémoire, appuyez
sur la touche
ou pour chercher un autre canal.
7 Lorsque vous avez le canal que vous désirez entrer en mémoire,
appuyez sur la touche OK et ensuite, lorsque CONFIRMER
apparaît en jaune, appuyez à nouveau sur OK.
8 Reprenez les étapes 4 à 7 pour régler et entrer en mémoire
d’autres canaux.
9 Appuyez sur la touche MENU pour revenir à l’image télévisée.
Le téléviseur est prêt à fonctionner.
MISE EN SERVICE:
MEMORISATION MANUELLE
CHAINE:
NORME:
CANAL:
AFT:
SAUT:
DECODEUR:
CONFIRMER
MISE EN SERVICE:
MEMORISATION MANUELLE
CHAINE:
NORME:
CANAL:
AFT:
SAUT:
DECODEUR:
CONFIRMER
MISE EN SERVICE:
MEMORISATION MANUELLE
CHAINE:
NORME:
CANAL:
AFT:
SAUT:
DECODEUR:
CONFIRMER
01
L
C 21
OUI
NON
NON
01
L
C 21
OUI
NON
NON
01
L
C 21
OUI
NON
NON
Opérations Ultérieures - Autres fonctions
85
Page 86

Opérations Ultérieures - Autres fonctions
Réglage fin et manuel des canaux
Normalement, la fonction de réglage fin automatique (AFT) est activée. Cependant, si vous observez une distorsion de
l’image, vous pouvez procéder manuellement à un réglage fin du téléviseur pour en améliorer la réception.
CONTROLE DE L'IMAGE
MODE: PERSONNEL
1 Sélectionnez le canal (émetteur TV) sur lequel vous désirez réaliser
le réglage fin et manuel et appuyez ensuite sur la touche MENU de
la télécommande pour que le menu apparaisse sur l’écran.
2 Appuyez sur la touche pour sélectionner le symbole et
appuyez ensuite sur la touche
1
2
3
4
5
6
7
8
9
EN SERVICE.
3 Appuyez sur la touche pour sélectionner MEMORISATION
MANUELLE et ensuite sur la touche .
0
MENU
pour entrer dans le menu MISE
CONTRASTE
LUMINOSITE
COULEURS
NETTETE
TEINTE
RAZ
MISE EN SERVICE
ROTATION D'IMAGE:
LANGUE: FRANÇAIS
MEMORISATION AUTO
ORDRE DES CHAINES
MEMORISATION MANUELLE
MISE EN SERVICE
ROTATION D'IMAGE:
LANGUE: FRANÇAIS
MEMORISATION AUTO
ORDRE DES CHAINES
MEMORISATION MANUELLE
0
0
CONTROLE DE L'IMAGE
MODE: PERSONNEL
CONTRASTE
LUMINOSITE
COULEURS
NETTETE
TEINTE
RAZ
K
PROGR
S
RM
887
4 Appuyez sur la touche pour sélectionner AFT et ensuite sur la
touche
.
5 Appuyez sur la touche ou pour régler le niveau de fréquence
du canal (la marge de réglage va de -15 à + 15) et ensuite appuyez
sur la touche OK.
6 Quand CONFIRMER devient jaune, appuyez sur OK pour entrer
ce nouveau réglage en mémoire.s
7 Appuyez sur la touche MENU pour revenir à l’image télévisée.
8 Reprenez de 1 à 7 pour procéder au réglage fin des autres canaux.
MISE EN SERVICE:
MEMORISATION MANUELLE
CHAINE:
NORME:
CANAL:
AFT:
SAUT:
DECODEUR:
CONFIRMER
MISE EN SERVICE:
MEMORISATION MANUELLE
CHAINE:
NORME:
CANAL:
AFT:
SAUT:
DECODEUR:
CONFIRMER
MISE EN SERVICE:
MEMORISATION MANUELLE
CHAINE:
NORME:
CANAL:
AFT:
SAUT:
DECODEUR:
CONFIRMER
01
L
C 21
OUI
NON
NON
01
L
C 21
+2
NON
NON
01
L
C 21
+2
NON
NON
86
Opérations Ultérieures - Autres fonctions
Le téléviseur est prêt à fonctionner.
Page 87

Opérations Ultérieures - Autres fonctions
Réglage de la rotation de l’image
Si, du fait du magnétisme terrestre, l’image est penchée, utilisez cette fonction pour la redresser.
1 Appuyez sur la touche MENU de la télécommande pour visualiser
le menu sur l’écran.
1
2
3
4
5
6
7
8
9
0
MENU
2 Appuyez sur la touche pour sélectionner le symbole et ensuite
sur la touche
pour entrer dans le menu MISE EN SERVICE.
CONTROLE DE L'IMAGE
MODE: PERSONNEL
CONTRASTE
LUMINOSITE
COULEURS
NETTETE
TEINTE
RAZ
MISE EN SERVICE
ROTATION D'IMAGE:
LANGUE: FRANÇAIS
MEMORISATION AUTO
ORDRE DES CHAINES
MEMORISATION MANUELLE
0
CONTROLE DE L'IMAGE
MODE: PERSONNEL
CONTRASTE
LUMINOSITE
COULEURS
NETTETE
TEINTE
RAZ
K
PROGR
S
RM
887
3 Lorsque ROTATION D’IMAGE devient jaune, appuyez sur la
touche .
4 Appuyez sur la touche ou pour régler la rotation de l’image (la
marge de réglage est comprise entre -5 et +5) et appuyez ensuite sur
OK.
5 Appuyez sur la touche MENU pour revenir à l’image télévisée.
Le téléviseur est prêt à fonctionner.
MISE EN SERVICE
ROTATION D'IMAGE:
LANGUE: FRANÇAIS
MEMORISATION AUTO
ORDRE DES CHAINES
MEMORISATION MANUELLE
MISE EN SERVICE
ROTATION D'IMAGE:
LANGUE: FRANÇAIS
MEMORISATION AUTO
ORDRE DES CHAINES
MEMORISATION MANUELLE
0
+2
Opérations Ultérieures - Autres fonctions
87
Page 88

Opérations Ultérieures - Autres fonctions
Chaînes inutilisées
Vous pouvez programmer ce téléviseur pour qu’il ignore les numéros de chaînes que vous ne désirez pas utiliser
lorsqu’elles seront sélectionnées à l’aide des touches PROGR +/-. Si vous désirez plus tard récupérer le nº des chaînes
omises, il vous suffira de procéder comme indiqué ci-dessous, mais en choisissant NON au lieu de OUI à l’étape nº 6.
CONTROLE DE L'IMAGE
MODE: PERSONNEL
1 Appuyez sur la touche MENU de la télécommande pour faire
apparaître le menu sur l’écran du téléviseur.
CONTRASTE
LUMINOSITE
COULEURS
NETTETE
TEINTE
RAZ
CONTROLE DE L'IMAGE
MODE: PERSONNEL
CONTRASTE
LUMINOSITE
COULEURS
NETTETE
TEINTE
RAZ
2 Appuyez sur la touche pour sélectionner et ensuite sur la
touche pour entrer dans le menu MISE EN SERVICE.
1
2
3
4
5
6
3 Appuyez sur la touche pour sélectionner MEMORISATION
7
8
9
MANUELLE et ensuite sur la touche
.
0
MENU
4 Lorsque CHAINE devient jaune, appuyez sur la touche PROGR
K
PROGR
RM
887
ou jusqu'à ce qu'apparaisse la chaîne que vous voulez omettre.
5 Appuyez sur la touche pour sélectionner SAUT et ensuite sur la
touche .
6 Appuyez sur la touche pour sélectionner OUI et ensuite sur la
touche OK.
MISE EN SERVICE
ROTATION D'IMAGE:
LANGUE: FRANÇAIS
MEMORISATION AUTO
ORDRE DES CHAINES
MEMORISATION MANUELLE
MISE EN SERVICE
ROTATION D'IMAGE:
LANGUE: FRANÇAIS
MEMORISATION AUTO
ORDRE DES CHAINES
MEMORISATION MANUELLE
MISE EN SERVICE:
MEMORISATION MANUELLE
CHAINE:
NORME:
CANAL:
AFT:
SAUT:
DECODEUR:
CONFIRMER
MISE EN SERVICE:
MEMORISATION MANUELLE
CHAINE:
NORME:
CANAL:
AFT:
SAUT:
DECODEUR:
CONFIRMER
MISE EN SERVICE:
MEMORISATION MANUELLE
CHAINE:
NORME:
CANAL:
AFT:
SAUT:
DECODEUR:
CONFIRMER
01
L
C 21
OUI
NON
NON
05
L
C 21
OUI
NON
NON
05
L
C 21
OUI
OUI
NON
0
0
S
7 Lorsque CONFIRMER devient jaune, appuyez ensuite sur la touche
8 Reprenez de 4 à 7 pour inutiliser d’autres numéros de chaîne.
9 Appuyez sur la touche MENU pour revenir à l’image télévisée.
88
Opérations Ultérieures - Autres fonctions
OK.
En sélectionnant le canal (émetteur TV) grâce à la touche PROGR +/-,
celui-ci ne sera pas visible sur écran. Cependant ce canal peut être
sélectionné en appuyant sur le numéro de la chaîne correspondante par les
touches numériques.
MISE EN SERVICE:
MEMORISATION MANUELLE
CHAINE:
NORME:
CANAL:
AFT:
SAUT:
DECODEUR:
CONFIRMER
05
L
C 21
OUI
OUI
NON
Page 89

Opérations Ultérieures - Autres fonctions du téléviseur
Réglage de l’image
Bien que l’image ait été réglée en usine, vous pouvez la modifier en fonction de vos préférences.
1 Appuyez sur la touche MENU de la télécommande pour afficher le
menu sur l’écran.
2 Appuyez sur la touche pour entrer dans le menu CONTROLE
DE L’IMAGE.
1
2
3
4
5
6
7
8
9
0
MENU
3 Appuyez sur la touche ou pour sélectionner le paramètre que
vous désirez modifier.
CONTROLE DE L'IMAGE
MODE: PERSONNEL
CONTRASTE
LUMINOSITE
COULEURS
NETTETE
TEINTE
RAZ
CONTROLE DE L'IMAGE
MODE: PERSONNEL
CONTRASTE
LUMINOSITE
COULEURS
NETTETE
TEINTE
RAZ
CONTROLE DE L'IMAGE
MODE: PERSONNEL
CONTRASTE
LUMINOSITE
COULEURS
NETTETE
TEINTE
RAZ
CONTROLE DE L'IMAGE
MODE: PERSONNEL
CONTRASTE
LUMINOSITE
COULEURS
NETTETE
TEINTE
RAZ
K
PROGR
S
RM
887
4 Lorsque le paramètre que vous désirez modifier devient jaune,
appuyez sur la touche
l’effet produit sur chaque paramètre)
CONTROLE DE L’IMAGE OPERATION/ EFFET PRODUIT
MODE PERSONNEL (pour préférences individ.)
CONTRASTE Moins Plus
LUMINOSITE* Plus sombre Plus claire
COULEURS* Moins Plus
NETTETE* Plus douce Plus nette
TEINTE** Dominante Dominante
RAZ Restaure les réglages d’image
* Ne peut être modifié qu’après avoir sélectionné MODE
PERSONNEL
** Uniquement disponible sur le système couleur NTSC (par ex.
bandes vidéo américaines)
. (Le tableau ci-dessous vous indiquera
SPORT (pour programmes en direct)
CINEMA (pour les films)
verte rouge
prédéterminés en usine
5 Appuyez sur la touche / ou / pour modifier le réglage du
paramètre sélectionné et appuyez ensuite sur la touche OK pour
entrer ce nouveau réglage en mémoire.
6 Reprenez de 3 à 5 pour modifier les autres réglages.
CONTROLE DE L'IMAGE
MODE: PERSONNEL
CONTRASTE
LUMINOSITE
COULEURS
NETTETE
TEINTE
RAZ
7 Appuyez sur la touche MENU pour revenir à l’image télévisée.
Changement rapide du mode d’image
1 Appuyez sur la touche de la télécommande pour accéder
directement à MODE DE L’IMAGE.
2 Appuyez sur la touche pour sélectionner le mode d’image que
vous désirez (PERSONNEL, SPORT ou CINEMA).
Opérations Ultérieures - Autres fonctions du téléviseur
MODE DE L'IMAGE:
MODE DE L'IMAGE:
PERSONNEL
SPORT
MODE DE L'IMAGE:
PERSONNEL
89
Page 90

Opérations Ultérieures - Autres fonctions du téléviseur
Réglage du son
Bien que le son ait été réglé en usine, vous pouvez le modifier en fonction de vos préférences.
1 Appuyez sur la touche MENU de la télécommande pour faire
apparaître le menu sur l’écran du téléviseur.
CONTROLE DE L'IMAGE
MODE: PERSONNEL
CONTRASTE
LUMINOSITE
COULEURS
NETTETE
TEINTE
RAZ
CONTROLE DE L'IMAGE
MODE: PERSONNEL
CONTRASTE
LUMINOSITE
COULEURS
NETTETE
TEINTE
RAZ
2 Appuyez sur la touche pour sélectionner le symbole et
appuyez ensuite sur la touche pour entrer dans le menu
CONTROLE DU SON.
1
2
3
4
5
6
7
8
9
3 Appuyez sur la touche ou pour sélectionner le paramètre que
vous désirez modifier.
4 Le curseur soulignant le paramètre que vous désirez modifier,
0
MENU
K
appuyez sur la touche . (Le tableau ci-dessous vous indiquera
l’effet produit sur chaque paramètre)
CONTROLE DU SON OPERATION/ EFFET PRODUIT
MODE PERSONNEL (pour préférences individ.)
JAZZ
POP
ROCK
CONTROLE DU SON
MODE: PERSONNEL
AIGUS
GRAVES
BALANCE
SON STEREO:
DSP:
RAZ
CONTROLE DU SON
MODE: PERSONNEL
AIGUS
GRAVES
BALANCE
SON STEREO:
DSP:
RAZ
CONTROLE DU SON
MODE: PERSONNEL
AIGUS
GRAVES
BALANCE
SON STEREO:
DSP:
RAZ
STEREO
OUI
STEREO
OUI
STEREO
OUI
AIGUS* Moins Plus
GRAVES* Moins Plus
BALANCE Gauche Droite
SON STEREO • Emissions stéréo:
PROGR
MONO
STEREO
• Emissions bilingues:
A (pour le canal 1)
B (pour le canal 2)
DSP (Processeur de son digital) OUI NON
RAZ Restaure les réglages de son
prédéterminés en usine
RM
887
* Ne peut être modifié qu’en sélectionnant MODE PERSONNEL
5 Appuyez sur la touche / ou / pour modifier le réglage du
paramètre sélectionné et appuyez ensuite sur la touche OK pour
S
entrer le nouveau réglage en mémoire.
6 Reprenez de 3 à 5 pour modifier d’autres réglages.
7 Appuyez sur la touche MENU pour revenir à l’image télévisée.
Changement rapide du mode de son
1 Appuyez sur la touche de la télécommande pour accéder
directement au MODE DU SON.
2 Appuyez sur la touche pour sélectionner le mode de son que vous
désirez (PERSONNEL, JAZZ, POP ou ROCK).
90
Opérations Ultérieures - Autres fonctions du téléviseur
MODE DU SON:
MODE DU SON:
PERSONNEL
POP
MODE DU SON:
PERSONNEL
Page 91

Opérations Ultérieures - Autres fonctions du téléviseur
Déconnexion automatique
Vous pouvez sélectionner un laps de temps après lequel le téléviseur pourra passer directement en mode veille (standby).
CONTROLE DE L'IMAGE
MODE: PERSONNEL
1 Appuyez sur la touche MENU de la télécommande pour que le
menu apparaisse sur l’écran.
CONTRASTE
LUMINOSITE
COULEURS
NETTETE
TEINTE
RAZ
CONTROLE DE L'IMAGE
MODE: PERSONNEL
CONTRASTE
LUMINOSITE
COULEURS
NETTETE
TEINTE
RAZ
2 Appuyez sur la touche pour sélectionner le symbole et ensuite
TEMPORISATION
ARRET TEMPO:
FIN
appuyez sur la touche pour entrer dans le menu TEMPORISATION.
1
2
3
4
5
6
7
8
9
3 Lorsque ARRET TEMPO. devient jaune, appuyez sur la touche .
TEMPORISATION
ARRET TEMPO:
FIN
0
MENU
TEMPORISATION
K
4 Appuyez sur la touche ou jusqu’à ce qu’apparaisse sur écran
le laps de temps après lequel vous désirez que le téléviseur
ARRET TEMPO.:
0:15
s’éteigne.
FIN
0:15 min.
0:30 min.
PROGR
...
...
4:00 heures
5 Appuyez sur la touche OK.
RM
887
S
6 Appuyez sur la touche MENU pour revenir à l'image télévisée.
Une minute avant que le téléviseur ne passe en mode veille, le temps qui
reste apparaîtra sur l’écran.
Remarques: • Pendant que vous regardez la télévision, appuyez sur
la touche
mise en veille.
• Pour allumer à nouveau la télévision à partir du
mode veille , appuyez sur la touche
télécommande.
pour voir le temps qui reste avant la
de la
Opérsations Ultérieures - Autres fonctions du téléviseur
91
Page 92

Télétexte
Visualisation du télétexte
Le télétexte est un service gratuit d’information que diffuse la plupart des chaînes télévisées.
Vérifiez que vous utilisez un canal disposant d’un signal d’émission suffisamment fort pour éviter des erreurs de télétexte.
Sélection du télétexte
1 Sélectionnez la chaîne qui diffuse le service télétexte que vous
désirez consulter.
1
2
4
5
7
8
0
S
K
PROGR
MENU
RM
887
3
2 Appuyez sur la touche de la télécommande pour afficher le
télétexte.
6
TELETEXT
Index
Programme
News
Sport
Weather
TELETEXT
Index
Programme
25
153
101
98
25
News
153
Sport
101
Weather
98
9
3 Entrez le numéro à trois chiffres de la page que vous désirez voir à
l’aide des touches numérotées de la télécommande (si vous vous
trompez, introduisez trois chiffres quelconques et réintroduisez
ensuite le numéro correct de page).
4 Appuyez sur la touche pour désactiver le télétexte et revenir à
l’image télévisée.
Autres fonctions du télétexte
POUR APPUYEZ SUR LA TOUCHE
Accéder à la page de télétexte pour la page suivante ou
suivante ou précédente pour la page précédente
Superposer la page de télétexte
sur la chaîne de télévision Appuyez à nouveau sur la
Conserver à l’écran une page
du télétexte Appuyez à nouveau sur la
.
pour désactiver le
touche
mode télétexte.
.
touche
pour annuler.
TELETEXT
Index
Programme
News
Sport
Weather
TELETEXT
Index
Programme
News
Sport
Weather
25
153
101
98
25
153
101
98
92
Télétexte
Afficher les informations cachées
.
(par ex. réponses à un questionnaire) Appuyez à nouveau sur la
touche
pour annuler.
Utilisation du Fastext
Le Fastext permet d’avoir accès aux pages de télétexte en
appuyant sur une seule touche.
En Fastext, un menu de codes couleur s’affiche au bas de la page
de télétexte. Appuyez sur la touche de couleur (rouge, verte, jaune
ou bleue) de la télécommande pour accéder à la page
correspondante.
Page 93

Connexion des équipements en option
MONO
L/G/S/I R/D/D/D
+
P
_
L/G/S/I R/D/D/D
s
3
3
3
L/G/S/I R/D/D/D
Utilisation des équipements en option
Vous pouvez connecter à votre téléviseur des équipements audio/vidéo en option, tels qu’un magnétoscope,
un camescope ou des jeux vidéo, comme illustré.
Avant TV
Sélectionner et visualiser le signal d’entrée
1
Branchez votre équipement sur la prise appropriée du téléviseur.
2 Appuyez plusieurs fois sur la touche
de la télécommande jusqu’à ce
que le symbole d’entrée correct apparaisse sur l’écran du téléviseur.
Symbole signaux d’entrée
k • Audio/vidéo via le connecteur
• RGB via le connecteur Euro AV
K
q
K
q
2
3
3
• Audio/vidéo via le connecteur
• S-vidéo via le connecteur
E
• Signal d’entrée des équipements vidéo via le connecteur
RCA
et signal d’entrée des équipements audio via D.
C
• Signal d’entrée des équipements vidéo via le connecteur
B
et signal d’entrée des équipements audio via D.
Euro AV
F
F
Euro AV
E
Euro AV.
3 Mettez l’équipement connecté sous tension.
4 Pour retourner à l’image de la télévision, appuyez sur la touche
de la télécommande.
Remarque: Pour éviter d’obtenir une distorsion de l’image, ne branchez pas
d’équipement sur les connecteurs
et E en même temps.
B
Informations complémentaires
B
A
C
D
Camescope
8 mm/VHS
Camescope
S-VHS/Hi8
Arrière TV
Connexion d’un magnétoscope
Branchez votre magnétoscope sur la prise appropriée
située à l’arrière du
F
téléviseur. Nous vous recommandons de régler le signal du magnétoscope sur le
numéro de chaîne “0” en vous reportant à la section “Réglage manuel du
téléviseur” de ce model d’emploi si votre magnétoscope n’est pas équipé d’un
connecteur Euro AV.
Connexion d’un casque
Branchez votre casque sur la prise appropriée
située à l’avant du téléviseur.
A
Connexion d’un décodeur
Branchez le décodeur sur la prise appropriée F située à l’arrière du téléviseur.
Quand un décodeur est utilisé, il est impératif de le connecter sur la prise
Péritélévision AV1.
De même, si le décodeur est connecté sur le magnétoscope et le magnétoscope sur
le téléviseur, le magnétoscope doit être connecté sur la prise Péritélévision AV1.
En effet, la sortie “moniteur”, de la deuxième prise Péritélévision AV2, ne permet
pas l’utilisation d’un décodeur.
Connexion d’un équipement audio externe
Branchez votre chaîne Hi-Fi sur les prises G situées à l’arrière du téléviseur si
vous souhaitez amplifier la sortie audio du téléviseur.
* “PlayStation” est un produit Sony Computer Entertainment, Inc.
* “PlayStation” est une marque déposée par Sony Computer Entertainment, Inc.
F
E
s
2 /
1/
2
1
“PlayStation”
Magnétoscope
Décodeur
G
L/G/S/I
R/D/D/D
*
Hi-Fi
Connexion des équipements en option
93
Page 94

Connexion des équipements en option
Smartlink
Smartlink établit un lien direct entre votre Téléviseur et un magnétoscope.
Smartlink fonctionne si :
• Votre magnétoscope prend en charge Smartlink, NexTView Link,
Easy Link, Megalogic ou NexTView download.
Megalogic est une marque déposée de Grundig Corporation.
EasyLink est une marque de Philips Corporation.
• Vous avez branché votre magnétoscope sur la prise péritélévision
Scart :1/
à l‘aide d‘un câbles complet SCART 21 broches.
Smartlink vous permet :
• De télécharger les informations telles que la liste des programmes
d‘une chaîne du téléviseur vers le magnétoscope.
• D‘enregistrer directement la chaîne que vous regardez, il suffit
d’appuyer sur la touche Enregistrement du magnétoscope.
• Téléviseur en mode veille (standby): Appuyez sur le bouton “Play z”
du magnétoscope et le téléviseur se mettra automatiquement en
marche.
Si un décodeur est branché sur un magnétoscope qui accepte
Smartlink, sélectionnez le menu MEMORISATION MANUELLE
sur
(MISE EN SERVICE) et sélectionnez DECODEUR en
position OUI pour chaque canal codé. Après ce réglage, cette
information sera envoyée directement au magnétoscope.
Connexion des équipements en option
94
Pour obtenir des informations détaillées sur Smartlink, reportezvous au mode d‘emploi de votre magnétoscope.
Page 95

Informations complémentaires
Guide rapide de déplacement à travers les menus
Menus d’Installation (Lorsque le téléviseur est connecté pour la
première fois)
LANGUE
ENGLISH
DEUTSCH
FRANÇAIS
ITALIANO
ESPAÑOL
NEDERLANDS
EΛΛHNIKA
POLSKI
Č
ESKI
MAGYAR
T
Ü
Sélection langue:
RKÇE
Réglage des chaînes en
automatique?
OUI
NON
Vérifiez la connexion de
l'antenne
CONFIRMER
(Pour toute information complémentaire, consultez le chapitre «Sélection de la langue»)
Guide des divers menus
MEMORISATION AUTO
CHAINE:
NORME:
CANAL:
En recherche...
01
L
C 21
ORDRE DES CHAINES
Sélect. chaîne:
Sélect. nouveau Nº:
Confirmer:
Quitter:
CHAINE:
CONFIRMER
MENU
PROGR
03
01
CONTROLE DE L'IMAGE
MODE: PERSONNEL
CONTRASTE
LUMINOSITE
COULEURS
NETTETE
TEINTE
RAZ
CONTROLE DU SON
MODE: PERSONNEL
AIGUS
GRAVES
BALANCE
SON STEREO:
DSP:
RAZ
TEMPORISATION
ARRET TEMPO.:
MISE EN SERVICE
ROTATION D'IMAGE:
LANGUE: FRANÇAIS
MEMORISATION AUTO
ORDRE DES CHAINES
MEMORISATION MANUELLE
STEREO
OUI
FIN
CONTROLE DE L'IMAGE
MODE: PERSONNEL
CONTRASTE
LUMINOSITE
COULEURS
NETTETE
TEINTE
RAZ
(Pour toute information
complémentaire sur les divers
réglages de l’image, consultez
le chapitre «Réglage de
l’image»)
CONTROLE DU SON
MODE: PERSONNEL
AIGUS
GRAVES
BALANCE
SON STEREO:
DSP:
RAZ
STEREO
OUI
(Pour toute information
complémentaire sur les divers
réglages du son, consultez le
chapitre «Réglage du son»)
TEMPORISATION
ARRET TEMPO.:
FIN
TEMPORISATION
ARRET TEMPO.:
FIN
(Pour toute information
complémentaire, consultez le
chapitre «Déconnexion
automatique»)
MISE EN SERVICE
0
ROTATION D'IMAGE:
LANGUE: FRANÇAIS
MEMORISATION AUTO
ORDRE DES CHAINES
MEMORISATION MANUELLE
0
MISE EN SERVICE
ROTATION D'IMAGE:
LANGUE: FRANÇAIS
MEMORISATION AUTO
ORDRE DES CHAINES
MEMORISATION MANUELLE
(Pour toute information
0
complémentaire, consultez le
chapitre «Réglage de la
rotation de l’image»)
MISE EN SERVICE
ROTATION D'IMAGE:
LANGUE: FRANÇAIS
MEMORISATION AUTO
ORDRE DES CHAINES
MEMORISATION MANUELLE
MISE EN SERVICE
ROTATION D'IMAGE:
LANGUE: FRANÇAIS
MEMORISATION AUTO
ORDRE DES CHAINES
MEMORISATION MANUELLE
MISE EN SERVICE
ROTATION D'IMAGE:
LANGUE: FRANÇAIS
MEMORISATION AUTO
ORDRE DES CHAINES
MEMORISATION MANUELLE
MISE EN SERVICE
ROTATION D'IMAGE:
LANGUE: FRANÇAIS
MEMORISATION AUTO
ORDRE DES CHAINES
MEMORISATION MANUELLE
MISE EN SERVICE
0
ROTATION DE L'IMAGE:
LANGUE: FRANÇAIS
MEMORISATION AUTO
ORDRE DES CHAINES
MEMORISATION MANUELLE
(Pour toute information
0
complémentaire, consultez le
chapitre «Sélection de la
langue»)
0
Réglage des chaînes en
automatique?
OUI
NON
(Pour toute information
complémentaire, consultez le
chapitre «Réglage
automatique du téléviseur par
la télécommande»)
MISE EN SERVICE:
0
0
ORDRE DES CHAINES
CHAINE:
CONFIRMER
Sélect. chaîne:
PROGR
Sélect. nouveau Nº:
MISE EN SERVICE:
MEMORISATION MANUELLE
CHAINE:
NORME:
CANAL:
AFT:
SAUT:
DÉCODEUR:
CONFIRMER
01
01
L
C 21
OUI
NON
NON
(Pour toute information
03
complémentaire, consultez le
chapitre «Réorganisation des
numéros des chaînes TV»)
(Pour toute information
complémentaire, consultez le
chapitre «Réglage manuel du
téléviseur»)
Informations complémentaires
95
Page 96

Informations complémentaires
Dépannage
Voici quelques solutions simples qui vous permettront de résoudre des problèmes liés à la qualité de l’image et du son.
Problème Solution
Pas d’image (écran noir), • Branchez le téléviseur.
ni de son • Appuyez sur la touche
• Si le voyant est allumé, appuyez sur la touche
ou sur un numéro de chaîne de la télécommande.
• Vérifiez que l’antenne est bien branchée.
• Vérifiez que la source vidéo sélectionnée est allumée.
• Eteignez le téléviseur 3 ou 4 secondes, puis rallumez-le
en appuyant sur l’interrupteur
téléviseur.
Mauvaise image ou pas d’image • Appuyez sur la touche MENU pour activer le menu
(écran noir), mais bonne qualité sonore. “Réglage de l’image” et réglez la luminosité, le
contraste et la balance des couleurs.
• Dans l’écran “Réglage de l’image”, sélectionnez RAZ
pour restaurer les paramètres définis par défaut en
usine.
située à l’avant du téléviseur.
situé à l’avant du
Mauvaise qualité de l’image avec • Appuyez plusieurs fois sur la touche de la
source vidéo RGB. télécommande jusqu’à ce que le symbole RGB
apparaisse sur l’écran.
Bonne image mais pas de son • Appuyez sur la touche +/– de la télécommande.
• Si le symbole
la télécommande.
Pas de couleur (programmes couleur) • Appuyez sur la touche MENU, pour activer le menu
“Réglage de l’image” et réglez la balance des couleurs.
• Dans l’écran “Réglage de l’image” sélectionnez RAZ
pour restaurer les paramètres définis par défaut en
usine.
Distorsion de l’image en changeant de • Eteignez l’équipement branché au connecteur Euro 21
chaînes ou en télétexte broches situé à activant le l’arrière du téléviseur.
Bruit dans l’image quand vous regardez • Utiliser le réglage fin pour obtenir une meilleure
une chaîne télévisée. image.
Télécommande non opérationnelle • Changez les piles.
L’indicateur de veille clignote • Veuillez contacter le Service Après-vente de votre
revendeur.
• Si ces problèmes persistent, faites appel à du personnel qualifié.
• N’ouvrez jamais le boîtier du téléviseur vous-même.
s’affiche, appuyez sur la touche de
96
Informations complémentaires
Page 97

Informations complémentaires
Spécifications
Normes de télévision
B/G/H
Standard de couleurs
PAL, SECAM
NTSC 3.58, 4.43 (entrée vidéo seul.)
Canaux
VHF: E2-E12
UHF: E21-E69
CATV: S1-S20
HYPER: S21-S41
Tube cathodique
Tube Plat Trinitron
Environ 72 cm (29 po.) (68 cm env. en diagonale image),
déflexion 104°
Branchement arrière
:1/
:2/
Branchement avant
2
3
2
3
s
3
Connecteur Euro 21 broches (norme
CENELEC) incluant entrée
audio/vidéo, entrée RGB, sortie
audio/vidéo TV
s
Connecteur Euro 21 broches (norme
CENELEC) incluant entrée
audio/vidéo, entrée S-vidéo, Sortie
moniteur audio/vidéo
sorties audio - prises cinch
entrée audio/vidéo - prise cinch
entrées audio/vidéo - prises cinch
entrée S vidéo - DIN 4 broches
Prise casque - minijack stéréo
Sortie son:
2 x 7 + 1 x 15 W (RMS)
Consommation
120 W
Consommation en mode veille
0.5 W
Dimensions (l x h x p)
Env. 746 x 569 x 516 mm
Poids
Env. 47.5 kg
Accessoires fournis
Une Télécommande RM-887
Deux Piles IEC
Autres fonctionnalités
Télétexte, Fastext
Déconnexion automatique
Smartlink
La conception et les spécifications sont susceptibles de modification sans
préavis de notre part.
Papier recyclé - Chlore: 0%
Informations complémentaires
97
Page 98

 Loading...