

Page 1

Connecting Additional Equipment
®
4-075-501-22
Trinitron Color TV
Operating Instructions
KV-20FV12
KV-24FV12
© 2001 by Sony Corporation
Page 2

User Guide
Page 3
Connecting Additional Equipment
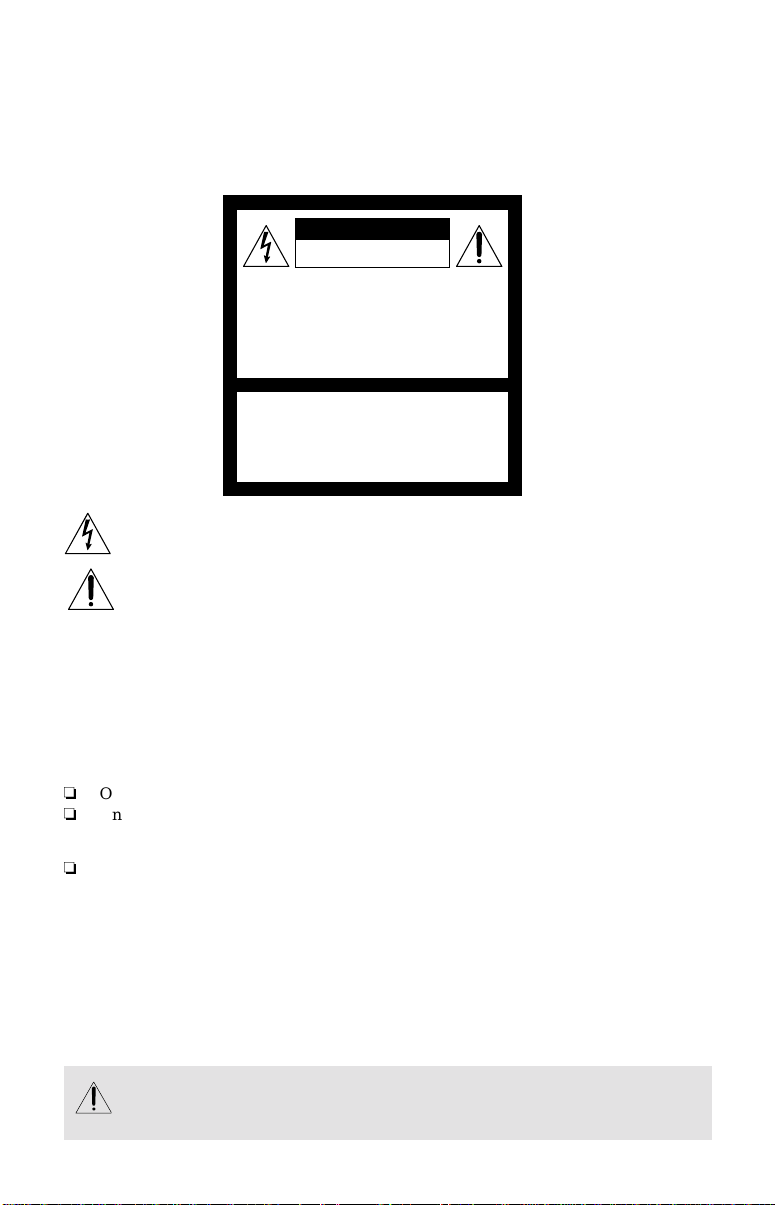
WARNING
To reduce the risk of fire or electric shock, do not expose the TV to rain or moisture.
CAUTION
RISK OF ELECTRIC SHOCK
DO NOT OPEN
ATTENTION
RISQUE DE CHOC ELECTRIQUE,
NE PAS OUVRIR
PRECAUCION
RIESGO DE CHOQUE ELECTRICO
NO ABRIR
CAUTION: TO REDUCE THE RISK OF ELECTRIC SHOCK,
DO NOT REMOVE COVER (OR BACK).
NO USER-SERVICEABLE PARTS INSIDE.
REFER SERVICING TO QUALIFIED SERVICE PERSONNEL.
This symbol is intended to alert the user to the presence of uninsulated
“dangerous voltage” within the product ’ s enc losure that may be of sufficient
magnitude to constitute a risk of electric shock to persons.
This symbol is intended to alert the user to the presence of important operating
and maintenance (servicing) ins tr u ctions in the literature accompanyi ng the
appliance.
Note to the CATV Installer
This reminder is provided to call the CATV system installer ’ s at ten t ion to Article 820-40 of
the NEC that provides guidelines for proper ground ing and, in particula r, specifies that the
cable ground shall be connected to the grounding system of the buildi ng as close to the
point of cable entry as practical.
SAFETY PRECAUTIONS
Operate the TV only on 120 V AC.
One blade of the power plug is wider than the other for safety purposes and will fit
into the power outlet only one way. If you are unable to insert the plug fully into the
outlet, contact your dealer.
If any liquid or solid object falls into the TV, unplug it and have it checked by qualified
personnel be fore operat ing it further.
CAUTION
When using TV games, computers, and similar products with your TV, keep the brightness
and contrast functions at low settings. If a fixed (non-movin g) pat t ern is left on the screen
for long periods of time at a high brightness or contrast setting, the image can be
permanently imprinted onto the screen. Conti nuously watching the same cha nnel can cause
the imprint of station logos onto the TV screen. These types of imprints are not covered by
your warranty because they are the results of misuse.
To reduce the risk of electric shock, do not use this polarized plug with an
extension cord, receptacle, or other out le t unless the blades can be fully
inserted to prevent blade exposure.
Page 4
User Guide
You are cautioned that any changes or modifications not expressly approved in this
manual could void your authority to operate this equipment.
NOTIFICATION
This equipment has been tested and found to comply with the limits for a Class B digital device
pursuant to Part 15 of the FCC Rules. These limits are designed to provide reasonable protection
against harmful interference in a residential installation. This equipment gene r ate s , u ses, and c an
radiate radio frequency energy and, if not installed and used in accordance with the instructions,
may cause harmful interference with radio communications. However, there is no guarantee that
interference will not occur in a particular installation. If this equipment does cause har mf ul
interference to radio or television reception, which can be determined by turning the equipment
off and on, the user is encouraged to try to corr ec t the interfe ren ce by one or mor e of the following
measures:
Reorient or relocate the receiving antennas.
Increase the separation between the equipment and receiver.
Connect the equipment into an outlet on a circuit different from that to which the
receiver is connected.
Consult the dealer or an experienced radio/TV technician for help.
Protecting the TV
To prevent internal heat build-up, do not block the ventilation openings.
Do not install the TV in a hot or humid place, or in a place subject to excessive dust or
mechanical vibration.
Note on Caption Vision
This television receiver provides display of television closed captioning in accordance with
§ 15.119 of the FCC rules.
Use of this te levision for other than pr ivate viewing of programs broadcast on UHF or VHF
or transmitted by cable companies for the use of the general public may require
authorization from the broadcast er-cab le co mpany and/or program owner.
Owner’s Record
The model and serial numbers are located on the front cover of this manual and the rear of
your TV.
Trademarks and Copyrigh ts
ENERGY STAR® is a registered mark.
As an ENERGY STAR® Partner, Sony has determined that this product or product
model meets the E
NERGY STAR
®
guidelines for energy efficiency.
Page 5

Connecting Additional Equipment
Important Safeguar ds
For your protection, please read these instructions completely, and keep this manual for
future reference. Carefully observe and comply with all warnings, cautions and instructions
placed on the set, or described in the operating instructions or service manual.
WARNING
To guard against injury, the following basic safety precautions should be ob se rved in the
installation, use, and servicing of th e se t.
Use
Power Sources
This set should be operat e d on l y from the
type of power source indicated on the
serial/model plate. If you are not sure of
the type of electrical power supplied to
your home, consult your dealer or local
power company. For those sets designed to
operate from battery powe r, refer to the
operating inst ructions.
Grounding or Polarization
This set is equipped with a polarized AC
power cord plug (a plug having one blade
wider than the other) , or with a three - wire
grounding type plug (a plug having a third
Page 6

User Guide
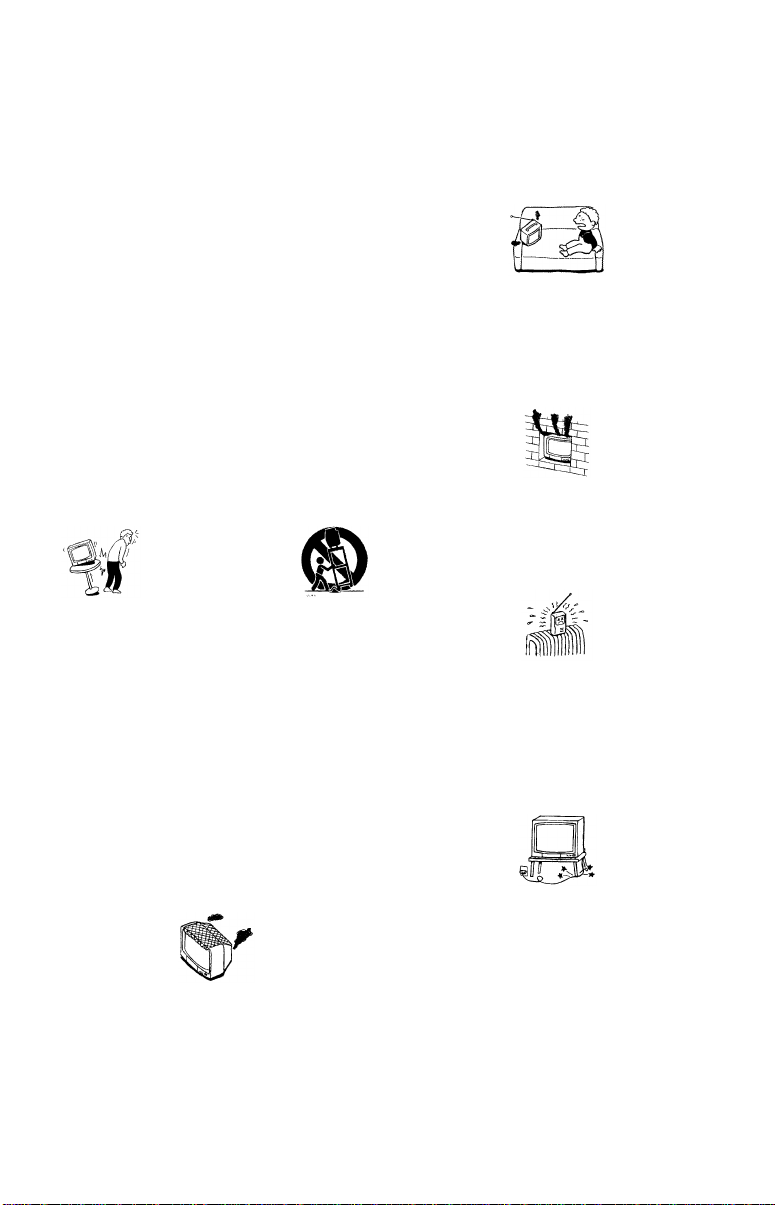
Overloading
Do not overload wall outlets, extension
cords or convenience recept ac les beyond
their capacity, since this can result in fire or
electric shock. Always turn the set off
when it is not to be used. When the set is
left unattended and unuse d for long
periods of time, unplug it from the wall
outlet as a precaution against the
possibility of an internal malfunc t ion that
could create a fire hazard.
Do not disconnect the antenna or the
power cord during a heav y st orm .
Lightning may strike while you are
holding the cable or cord, causing serious
injury. Turn off your TV and wait for the
weather to improve.
Object and Liquid Entry
Never push objects of any kind into the set
through the cabinet slots as they may touch
dangerous voltage points or short out parts
that could result in a fire or electric shock.
Never spill liquid of an y k in d on the set.
Do not place any objects, especially heavy
objects, on top of the set. The object may
fall from the set, causing injury.
Cleaning
Unplug the set from the wall outlet before
cleaning or pol ishing it. Do not use liquid
cleaners or aerosol cleaners. Use a cloth
lightly dampened with water for cleaning
the exterior of the set.
If a snapping or popping sound from a TV
set is continuous or frequent while the TV
is operating, unplug the TV and consult
your dealer or service technician. It is
normal for some TV sets to mak e
occasional snapping or popping sounds,
particularly when being turned on or off.
Installation
Always use two or more peo p le to lift or
move the set. The set is heavy and the
bottom surface is flat . Se rious injury can
result from trying to move the set by
yourself alone, or from unsteady handling.
Install the set on a stable, le v e l surface.
Attachments
Do not use attachments not recommended
by the manufacturer, as they may cause
hazards.
Water and Moisture
Do not use power-line operated sets near
water — for example, ne ar a b at h tub,
washbowl, kitchen sink, or laundry tub, in
a wet basement, or near a swimming pool,
etc.
Page 7
Connecting Additional Equipment
Accessories
Do not place the set on an unstable cart,
stand, tripod, bracket, table, or shelf. The
set may fall, causing serious injury to a
child or an adult, and serio u s d amage to
the set. Use only a cart or stand
recommended by the manufacturer for the
specific model of TV any mounting of the
product should follow the manufacturer’s
instructions, and should us e a m ounting
accessory recommended by the
manufacturer. An appliance and cart
combination should be moved with care.
Quick stops, excessive force, and uneven
surfaces may cause the appliance and cart
combination to overturn.
Disconnect all cables and cords from the
set before attempting to move the set.
Do not allow children or pets to climb u p
onto, or push against, the set. The set may
fall, causing serious injury.
Ventilation
The slots and openings in the cabinet and
in the back or bottom are provided for
necessary ventilation. To ensure reliable
operation of the set, and to prote ct it from
overheating, these slots and openings must
never be blocked or covered.
• Never cover the slots and openings
with a cloth or other materials.
• Never block the slots and openings
by placing the set on a bed, sofa, rug
or other similar surface.
• Never place the set in a confined
space, such as a bookcase, or built-in
cabinet, unless proper ventil ation is
provided.
• Do not place the set near or over a
radiator or heat register, or where it
is exposed to direct sunlight.
Power -Cord Protection
Do not allow anything to rest on or roll
over the power cord, and do not place the
set where the power cor d is subj ect to wear
or abuse.
Page 8
User Guide
Grounding or Polarization
This set may be equipped with a polarized alternating current line plug (a plug having one
blade wider than other). This plug will fit into the power outlet only one way. This is a
safety feature. If you are unable to insert the plug fully into the outlet, try reversing the
plug. If the plug should still fail t o fit, c ontact you elec tric ian to r epl ace your obsolete o utlet.
Do not defeat the safety purpose of the polarized plug.
Antennas
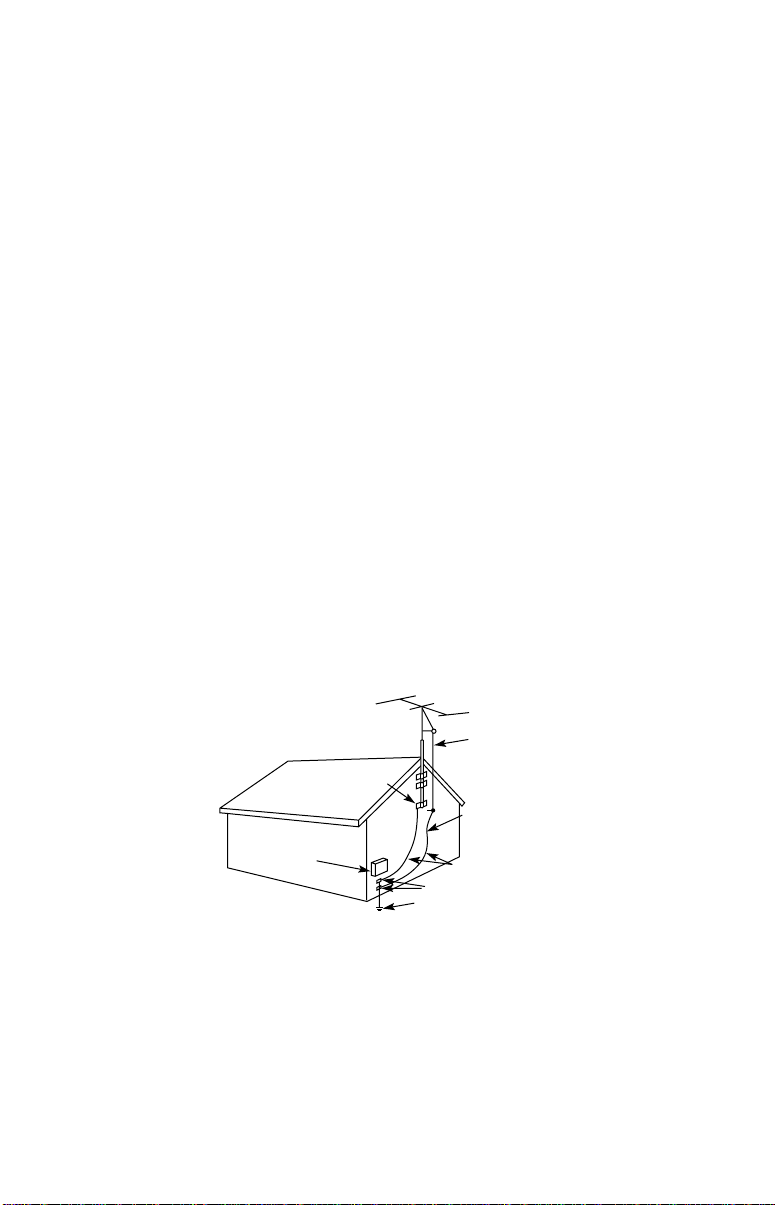
Outdoor Antenna Grounding
If an outdoor antenna is i ns ta lle d, follow the precautions below. An outdoor antenna
system should not be located in the vicinity of overhead power lines or other electric light or
power circuits, or where it can come in contact with such power lines or circuits.
WHEN INSTALLING AN OUTDOOR ANTENNA SYSTEM, EXTREME CARE SHOULD
BE TAKEN TO KEEP FROM CONTACTING SUCH POWER LINES OR CIRCUITS AS
CONTACT WITH THEM IS ALMOST INVARIABLY FATAL.
Be sure the antenna system is grounded so as to provide some prot ecti o n against vo lta ge
surges and built-up static charges. Section 810 of the National Electrical Code (NEC) in USA
and Section 54 of the Canadian Electrical Code in Canada provides information with respect
to proper grounding of the mast and supporting structure, grounding of the lead-in wire to
an antenna discharge unit, size of grounding conductors, location of antenna discharge unit,
connection to grounding electrodes, and requirements for the grounding electrode.
Antenna Grounding According to the NEC
Refer to section 54-300 of Can adian Electrical Code for Ant e nna Grounding.
ANTENNA
LEAD IN
GROUND
CLAMP
ELECTRIC
SERVICE
EQUIPMENT
NEC - NATIONAL ELECTRIC CODE
WIRE
ANTENNA
DISCHARGE UNIT
(NEC SECTION 810-20)
GROUNDING CONDUCTORS
(NEC SECTION 810-21)
GROUND CLAMPS
POWER SERVICE GROUNDING
ELECTRODE SYSTEM
(NEC ARTICLE 250, PART H)
Lightning
For added protection for this televi s io n r eceiver during a lightning storm, or when it is left
unattended and unused for long periods of time, unplug it from the wall outlet and
disconnect the antenna. This will prevent damage to the receiver due to lightning and
powe r-line s urges.
Page 9

Connecting Additional Equipment
Page 10

User Guide
Page 11
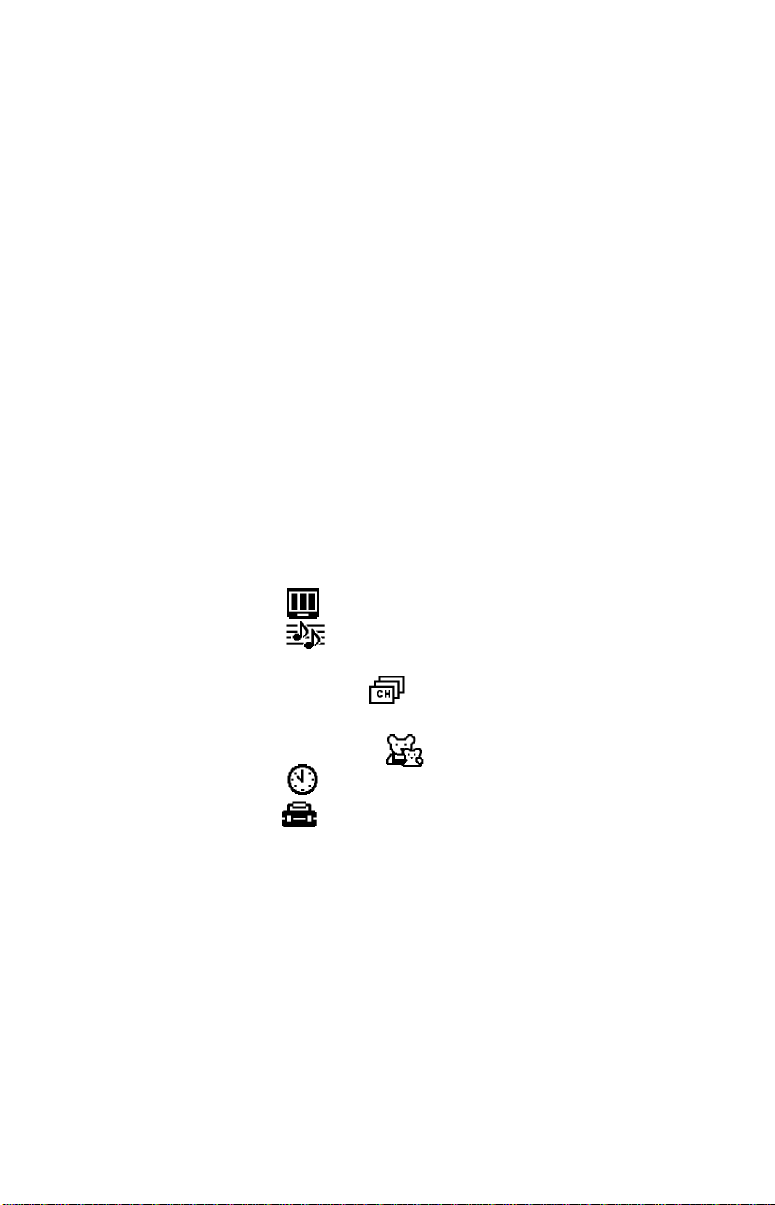
Contents
Introduction
Trinitron Color TV Features ............................1
Batteries for the Remote Control....................... 2
About this Manual ..............................................2
®
Connecting Your TV
Basic Connections................................................ 3
Connecting Additional Equipment .................. 4
Using the Remote Control and Basic Functions
Using the Remote Control................................ 13
Setting Up the TV Automatically.................... 15
Quick Start to the Menus.................................. 16
Using the Menus
Using the Video Menu............................. 20
Using the Audio Menu ............................ 21
Options Menu ........................... ......... ................ 22
Using the Channel Setup Menu.............. 23
Parental Control.................................................25
Using the Parental Control Menu .......... 28
Using the Timer Menu............................. 31
Using the Setup Menu.............................. 32
Options Menu ........................... ......... ................ 33
Other Information
Programming the Remote Control ................. 35
Troubleshooting ................................................ 38
Specifications...................................................... 40
Index.......................................................................... 41
Page 12

User Guide
Page 13
Introduction
Connecting Additional Equipment
Congratulations on your purchase of the Sony Trinitron Color TV.
Before you begin using this manual, please check the m ode l number
located on the rear of your TV or on the front cover of this manual.
Trinitron Color TV Features
Some of the features you will enjoy include:
FLAT CRT — New technologically advanced screen for optimal
picture quality.
Parenta l Control — A tool for parents to help monitor what their
children watch on TV by establishing rating limits.
Favorite Channel — Instant access to your favorite channels with the
touch of a button.
Energy Star® — A recognized symbol of energy efficiency.
S VIDEO — A video input that offers enhanced picture quality.
Direct MTS — Allows direct access to changing your Multi-Channel
TV Sound: Stereo, Mono, or Auto-SAP (Second Audio Program),
with the touch of a button.
Trilingual Menus — Choose between English, French, or Spanish
menus.
Front Panel Controls — Allows access to the on-screen menus
without the use of a remote control.
Front A/V inputs — A quick connection for video games, camcorders,
stereo/mono equipment, or headphones.
®
®
1
Page 14
Operating Instructions
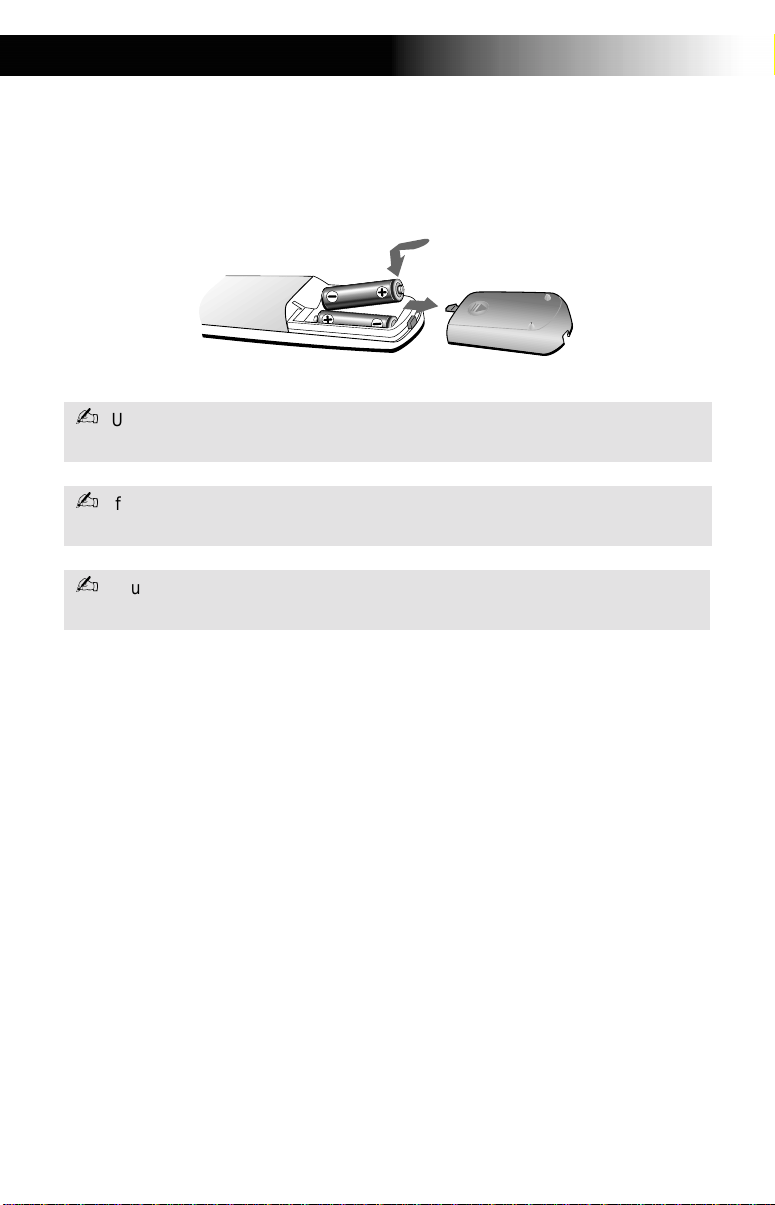
Batteries for the Remote Control
Insert two AA (R6) batteries (supplied) into the remote control using the
following illustration as a guid e.
Under normal conditions, batteries will last up to six months. If the remote
control does not operate properly, the batteries might be worn out.
If you will not be using the remote control for an extended period of time,
remove the batteries to avoid possible damage from battery leakage.
Your remote control can be programmed to operate most video equipment,
(see page 35).
About this Manual
This manual provides instructions to help you en joy your new TV. It
shows you how to connect to an antenna or cable, cable box, VCR, DVD,
satellite receiver, stereo system, or camcorder. Once you’re conne cted,
follow the instructions and use the remote control to access the on-screen
menus.
2
Page 15
Connecting Your TV
Connecting Your TV
Read this section before setting up your TV for the first time. This section
covers basic connections in addition to any optional equipment you may
be connecting.
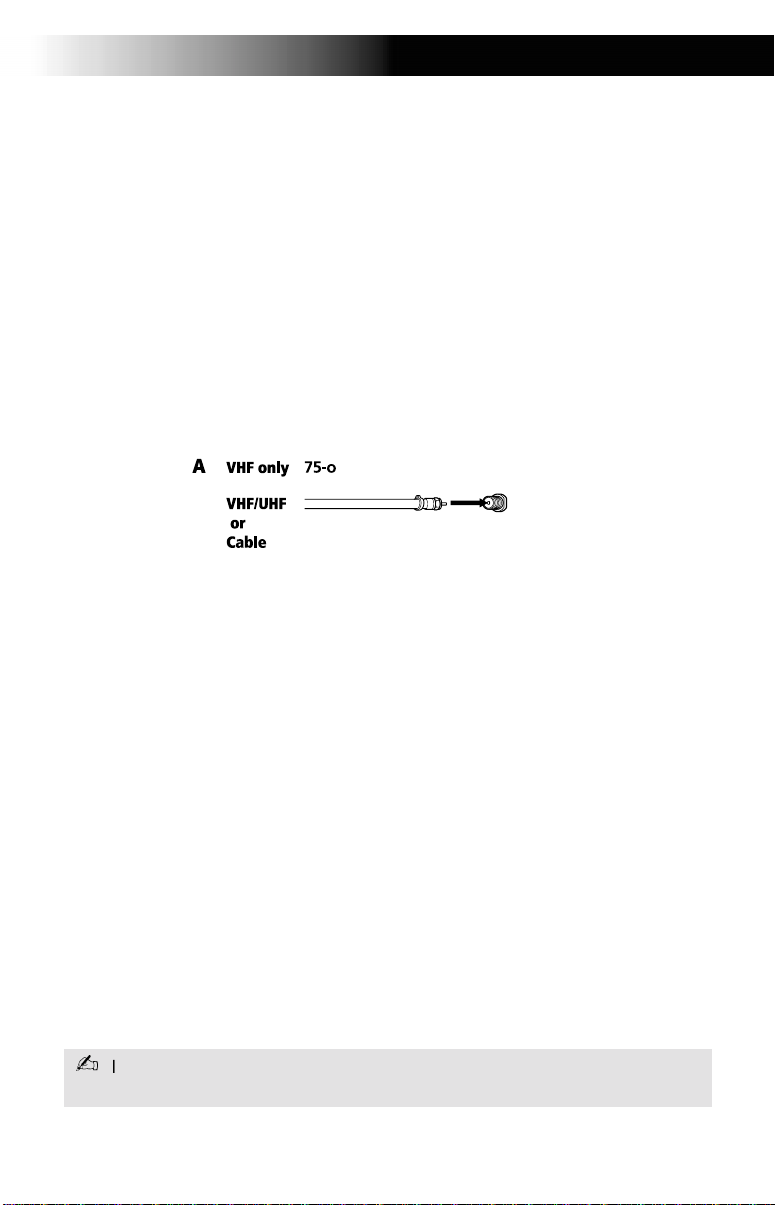
Basic Connections
TV with indoor or outdoor antenna, or CATV cable
Depending on the cable available in your home, choose one of the
connections below:
If you are connecting to an indoor or outdoor antenna, you may need to
adjust the orientation of the antenna for best reception.
3
Page 16
Operating Instructions
Connecting Additional Equipment
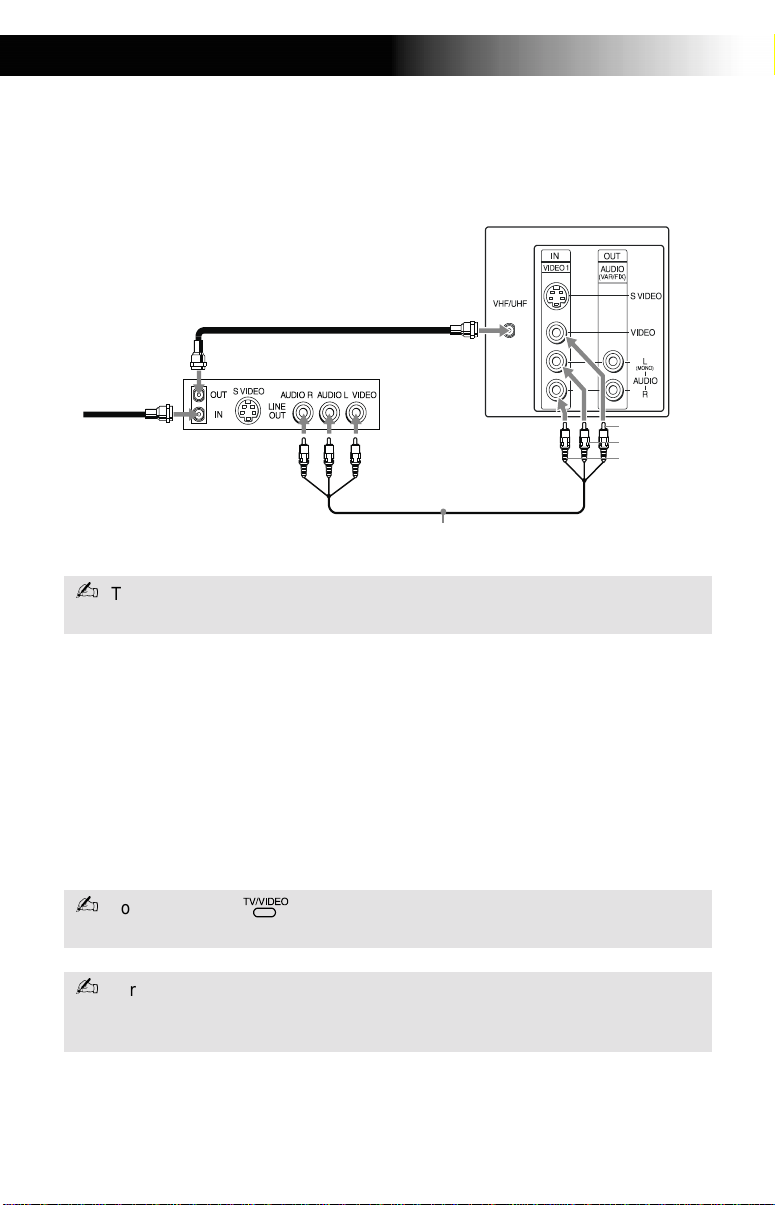
TV and VCR
Rear of TV
2
Coaxial
Cable
1
From
cable/
antenna
To watch video programs from your VCR, tune your TV to channel 3 or 4 (as
set on the rear of your VCR).
VCR
Video (yellow)
Audio L (white)
Audio R (red)
Optional connection
1 Connect the coaxial cable from your TV antenna or cable service to
the IN jack on your VCR.
2 Connect a coaxial cable (not supplied) from the OUT jack on your
VCR to the VHF/UHF jack on the TV.
Optional connection
If your VCR is equipped with video outputs, you can get better picture
quality by connecting Audio/Video cables (not supplied) from AUDIO
and VIDEO OUT on your VCR to AUDIO/VIDEO IN on your TV.
You can use the button to switch between the VHF/UHF and VIDEO
inputs.
For optimum picture quality, use S VIDEO (i f your VCR is equipped with the
S VIDEO connection) instead of the yellow Audio/ Video cable. S VIDEO does
not provide sound, the audio cables must still be connected.
4
Page 17
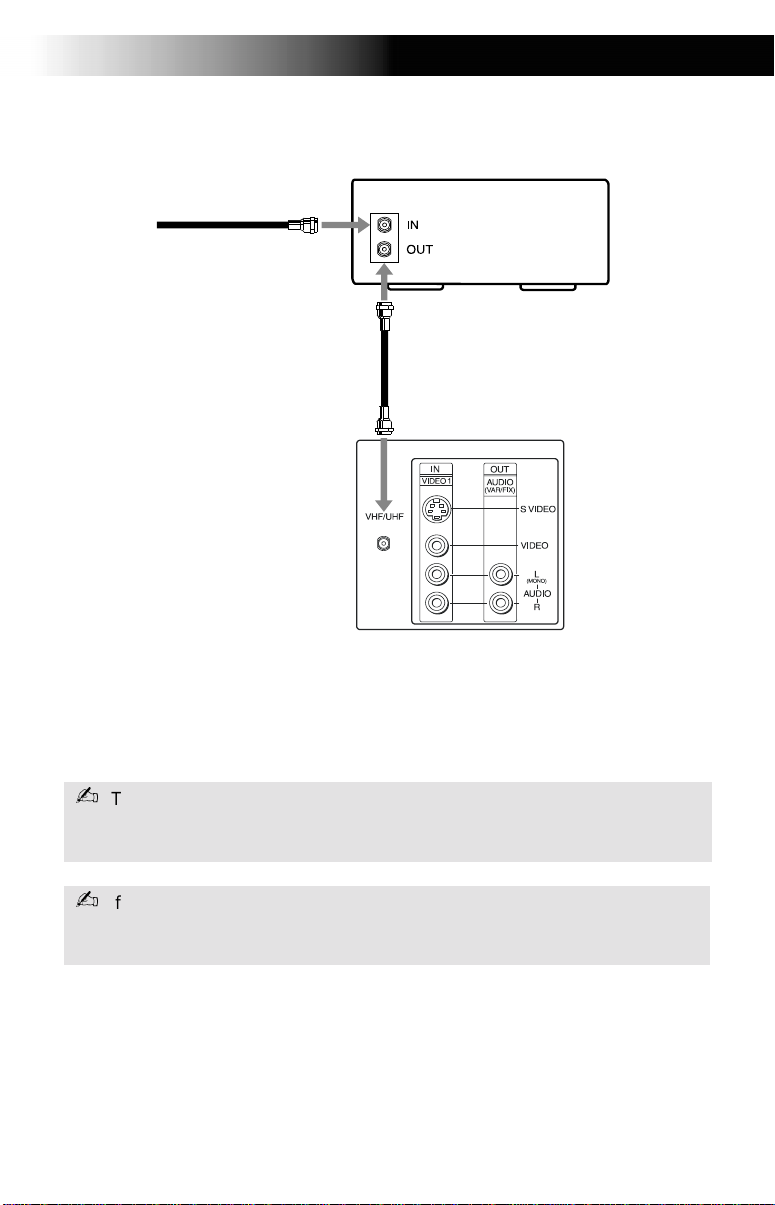
TV and Cable Box
Coaxial
Cable
1
From
cable
2
Connecting Your TV
Cable box
Coaxial
Cable
Rear of TV
1 Connect the coaxial cable from your cable service to the IN jack on
your cable box.
2 Connect a coaxial cable (not supplied) from the OUT jack on your
cable box to the VHF/UHF jack on the TV.
To view channels from your cable box, tune your TV to channel 3 or 4 (as set
on the rear pane l of yo ur cable box) and use the cable b ox’s remote contr ol to
change channels .
If you will be controlling all channel selection through your cable box, you
should consider usi ng th e Cha nn el Fix feature by setting your TV to ch an nne l
3 or 4, (see page 23).
5
Page 18

Operating Instructions
TV, VCR, and Cable Box
1 Connect the coaxial cable from your cable service to the IN jack on
your cable box.
2 Connect a coaxial cable (not supplied) from the OUT jack on your
cable box to the IN jack on your VCR.
3 Connect a coaxial cable (not supplied) from the OUT jack on your
VCR to the VHF/UHF jack on the TV.
If you will be controlling all channel selection through your cable box, you
Optional connection
If your VCR is equipped with video outputs, you can get better picture
quality by connecting Audio/Video cables (not supplied) from AUDIO
and VIDEO OUT on your VCR to AUDIO/VIDEO IN on your TV.
6
Page 19

Connecting Your TV
TV and Satellite Receiver
Rear of TV
From
2
cable/
antenna
Satellite receiver
1
Satellite
antenna
cable
SATELLITE IN
LINE OUT
AUDIO R AUDIO L VIDEO
3
VHF/UHF
IN
OUT
Video (yellow)
Audio L (white)
Audio R (red)
1 Connect the cable from your satellite antenna to SATELLITE IN on
your satellite receiver.
2 Connect the coaxial cable from your cable service or antenna to
the VHF/UHF jack on your TV.
3 Using Audio/Video cables (not supplied), connect AUDIO and
VIDEO OUT on your satellite receiver to AUDIO and VIDEO IN on
your TV.
You can use the button to switch between the VHF/UHF and VIDEO
inputs.
For optimum picture quality, use S VIDEO (if your Satellite Receiver is equipped
with the S VIDEO connection) inst ead of the yellow Audio/ Video cable.
S VIDEO does not provide sound, the audio cables must still be connected.
7
Page 20

Operating Instructions
TV, Satellite Receiver, and VCR
Satellite
antenna
cable
1
SATELLITE IN
LINE OUT
4
AUDIO R AUDIO L VIDEO
Satellite receiver
VHF/UHF
From
cable/
antenna
VCR
IN
OUT
AUDIO R AUDIO L VIDEO
LINE IN
LINE OUT
VHF/UHF
2
IN
OUT
3
Rear of TV
Video (yellow)
Audio L (white)
Audio R (red)
5
1 Connect the cable from your satellite antenna to SATELLITE IN on
the satellite receiver.
2 Connect the coaxial cable from your cable service or antenna to the
IN jack on your VCR.
3 Using a coaxial cable (not supplied), connect the OUT jack on your
VCR to the VHF/UHF jack on your TV.
4 Using Audio/Video cables (not supplied), connect AUDIO and
VIDEO OUT on your satellite receiver to AUDIO and VIDEO IN on
your VCR.
5 Using Audio/Video cables (not supplied), connect AUDIO and
VIDEO OUT on your VCR to AUDIO and VIDEO IN on your TV.
To view from the satellite receiver or VCR, select the video input to which
your satellite receiver or VCR is connected by pressing on the remote
control.
8
Page 21

Connecting Your TV
Connecting a Camcorder
Using Audio/Video cables (not supplied), connect AUDIO and VIDEO
OUT on your camcorder to AUDIO and VIDEO IN on your TV.
Front A/V Panel
F
F
Audio R (red)
Audio L (white)
A/V output
Video (yellow)
Connecting a DVD Player
Using Audio/Video cables (not supplied), connect AUDIO and VIDEO
OUT on your DVD player to AUDIO and VIDEO IN on your TV.
Rear of TV
Rear of DVD player
LINE OUT
AUDIO R AUDIO L VIDEO
For optimum picture quality, use S VIDEO instead of the yellow Audio/ Video
cable. S VIDEO does not provide sound, the audio cables must still be
connected.
SVIDEO
Video (yellow)
Audio L (white)
Audio R (red)
9
Page 22

Operating Instructions
Connecting an Audio System
Using Audio/Video cables (not supplied), connect AUDIO OUT on your
TV to one of the unused line inputs (e.g. TV, AUX, TAPE 2) on your
stereo.
To change the level of audio output on your TV can be changed between
Fixed and Variable modes, (see page 22).
Set your stereo to the chosen line input. See page 21 for additional audio
setup instructions.
10
Page 23

Connecting Your TV
Connecting Headphones
Connect the headphones to the jack on the front of your TV.
Front A/V Panel
11
Page 24

Operating Instructions
Using the Remote Control and Basic Functions
This section shows you how to use the more advanced buttons on the
remote control and how to use the on-screen menus.
12
qk
w;
Page 25

Using the Remote Control and Basic Functions
Using the Remote Control
Button Description
1MUTING Instantly turns off the sound. Press again or press
to restore sound.
2SYSTEM OFF Powers off all Sony equipment at once, (may not
3TV/VTR Press when you are finished using a VCR and you
4PICTURE MODE Cycles through the available Video Mode settings.
5SLEEP Turns the TV off automatically in approximately
6JUMP Alternates betw een the last two channels selected
7 Cycles through available Steady Sound settings,
8RESET Press to return to factory settings while in an on-
9VOL (volume) Press when you want to adjust the volume.
0 CODE SET Use to program your remote control to operate
qa POWER Press when you want to turn connected
qs FUNCTION Press when you want to control connected
qd VCR/DVD
(operating)
qf TV/VIDEO Cycles through available video inputs.
qg DISPLAY Press once to show current time, ( if set) and
qh MTS/SAP Cycles through the Multi-channel TV Sound
qj and ENTER Change channels directly, and enter numerical
0 9
work with older equipment).
want to switch to the TV input. Your VCR power
will remain on.
15, 30, 45, 60, 90, or 120 minutes. Cancel by
pressing until SLEEP OFF appears.
with the buttons.
(see page 21).
screen menu.
connected video equipment, (see page 35).
equipment on and off.
equipment with your remote control.
Operates VCR or DVD. Use when you want to
operate connected VCR or DVD with your remote
control.
channel number. Press again to turn DISPL AY off.
(MTS) options: Stereo, Mono, and Auto-SAP
(Second Audio Programming).
values in on-screen di splays.
0 9
13
Page 26

Operating Instructions
qk GUIDE Brings up the custom guide of your satellite
ql Moves the cursor in the on-screen menus. Press
w; MENU Displays the on-screen menu. Press again to exit
wa CH (channel) Press when you want to change channels.
If you lose your remote control, see page 39.
receiver.
the arrow buttons to move the cursor. Press the
center button to select or access an option.
the menu at any time.
14
Page 27

Using the Remote Control and Basic Functions
Setting Up the TV Automatically
After you have finished connecting your TV, you can perform Auto
Program to set up your channels.
1 Press to turn on the TV. The Initial Setup screen appears.
Auto Program
Exit
First please connect
cable/antenna
[CH+]
[CH-]
2 Press the TV FUNCTION button.
3 Press on the remote control or in the TV front panel to perform
CH
Auto Program or press to exit.
The Initial Se tup screen appea rs each time you turn on the TV until you
perform Auto P ro gra m.
To perform Auto Program again
CH
1 Press .
2 Press g to highlight Setup ( ).
3 Press f to highlight Options. Press to select.
4 Press f to select Cable. Press to select.
5 Press F or to select ON or OFF according to how you connected
your TV. Press .
F
6 Press f to highlight Auto Program. Press to search for channels.
After performing Auto Program, press to exit.
15
Page 28

Operating Instructions
Quick Start to the Menus
The following settings are available in your on-screen menus:
Menu Allows you to
Make adjustments to your picture
Video
Mode: Vivid
Picture Controls
VM: High
settings.
Move Select End
Audio
Treble
Bass
Balance
Steady Sound: ON
Effect: OFF
Options
Move Select End
Change your audio settings.
MENU
MENU
Options
MTS: Auto-SAP
Speaker: OFF
Audio Out: Variable
MoveMTS7.0003 00639 3. Tw0 Tc g77 n0.52117.66290982l1p72815 3. Tw(M1237165.554.63983.1911 c168.797 3574.045 324.559 Tm0.3.1911 c9 Tm0.3.54.179 c171.42 357.492 l171.42 35772 17357.639 l1757.492 l171..031 168.499 749285 3. .179357.492 l171.42 357724u57.6l5044.045 324.50982l1 5 324.50982l1 5 324.50.031.42 357554.632rc191 sc5.045 324..49269.92.577 354.098 18.8 398.52 1505 3 189 74885.42 35772 17357.639 l1757.492 l171..031 168.499 74C554.632rc191 sc5.04505 354.045 1.42 357554w c0 Tw2 12 150 -75.96 red.639 169.92rc191 sc 354.045 1.42 357545 75.121 r6c165red.42 4.518.8 39Tc0.0001 TwTceW* n/Cs42 lTw2 12 324354.037554.63507n16504.0981450rc191 5 354.2 32432rc194.5732437 Tm0 g(Sp l12 758772 17357.24375916 3437 Tm0TD0 Tc3l16 6 357.639 173.125 354.03 l171..171rc191 6c165Tc03 l171..357lred.68le)Tj6171..171rc1915c165r .0001 Tw164.65r .939d.68le)Tj6171.ceW* n1 Tw1 cN46171..1 Tw1 c5P9174928354.031..357l54.098357l54.0u68l1GS2 gs68.2011..357l54o Out: V.518.8 39n1 T.031171..1 Tw27.8 39n1 T.08 1V.5755. 3572
Customize your channel settings.
Set rating limits on your TV based on
a program’s rating or content.
16
Page 29

Using the Remote Control and Basic Functions
Menu Allows you to
Set the clock on your TV and pr ogram
Timer
Timer 1: Set
Timer 2: Set
Current Time
Daylight Saving: NO
:
Move Select End
Setup
Caption Vision: OFF
Video Label
Language: English
Demo
Options
Move Select End
AM
MENU
MENU
scheduled viewing using Timer 1 and
Timer 2.
Options
Cable: ON
Auto Program
Tilt Correction: 0
Move Select End
MENU
Program your channels, label video
inputs, select menu langu ages, or run
a demo of the menus.
The Options menu offers other setup
options.
17
Page 30

Page 31

Using the Menus
Using the Menus
This section shows the options available for setting up and adjus ting
your TV.
To access a menu
1 Press to display the on-screen menu.
2 Use the G or g buttons to highlight the desired menu, then press .
3 Use the F or buttons to highlight the desired option, then press
.
4 Press to complete the adjustment.
5 Press to exit the menu.
F
19
Page 32

Operating Instructions
Using the Video Menu
To access the Video menu, refer to the following steps:
To Display To Highlight
Video
Mode: Vivid
Picture Controls
VM: High
To Select
Move Select End
Mode
Customized
picture viewing
Press for direct Mode settings, (Vivid, Movie, Sports, Standard).
Picture
Controls
VM
Velocity
Modulation
Vivid: Select for enhanced picture contrast and sharpness.
Movie: Selec t for a finely deta iled pic ture.
Sports: Select for a bright picture.
Standard: Select for a standard picture.
With the Picture Controls menu open:
Picture:
Press G to decrease the contrast. Press g to increase
contrast.
Brightness:
Press G to darken the picture. Press g to brighten the
picture.
Color:
Press G to decrease color saturation. Press g to increase
color saturation.
Hue:
Press G to decrease the red tone s. Press g to
increase the green tones.
Sharpness:
Press G to soften the picture. Press g to sharpen the picture.
Sharpens picture definition to give objects a sharp, clean
edge. Use the F or buttons to select from one of the
following options: OFF, High, Low.
F
MENU
When you change the Mode setting the VM setting may also change
automatically.
20
Page 33

Using the Audio Menu
To access the Audio menu, refer to the following steps:
To Display To Highlight To Select
Audio
Treble
Bass
Balance
Steady Sound: ON
Effect: OFF
Options
Move Select End
MENU
Using the Menus
Treble
Press G to decrease the higher pitched sound. Press g to
increase the higher pitched sound.
Bass
Press
G to decrease the lower pitched sound. Press g to
increase the lower pitched sound.
Balance
Press G to emphasize the left speaker. Press g to
emphasize the right speaker.
Steady Sound
Stabilizes volume
Press F or
ON: Select to stabilize the volume when changing
F
to select one of the following options:
channels.
OFF: Select to turn Steady Sound off.
Press for direct Steady Sound settings.
Effect
Press F or
F
to select one of the following options:
SRS: Produces a dynamic three dimensional sound for
stereo audio signals
Simulated: Simulates theater quality sound for stereo
programs,
(KV-24FV12 only)
Surround: Add a surround-like effect to mono programs
(KV -20FV12 only).
OFF: Normal stereo or mono reception.
, (KV-24FV12 only)
.
.
,
21
Page 34

Operating Instructions
Options Menu
MTS
Multi-Channel
Sound
Speaker
Custom selection
F or to select one of the following options:
Press
Stereo: Select when viewing a broadcast in stereo.
Mono: Select to reduce noise in areas of poor reception.
Auto-SAP: Select to have the TV automatically to a Second
Audio Program (SAP) when a signal is received.
22
Page 35

Using the Menus
Using the Channel Setu p Menu
To access the Channel Setup menu, refer to the following steps:
To Display To Highlight To S elect
Channel Setup
Favorite Channel
Channel Fix: OFF
Channel Skip/Add
Channel Label
Move Select End
Favorite
Channel
Quick access
to favorite
channels
To use Favorite Channel: Exit all menus and press . Press F or f to move
the cursor to the desired channel number and press
Channel Fix 2-6: Select when you want to control all channel selection
With the Favorite Channel menu op en:
1 Press
2 Use the F or
Auto will display in gray the last five channels a ccessed by
the buttons).
3 When in Manual, press
where you want to set a favorite channel. Then press .
4 Using the F or f buttons, select the desired channel.
Press then , the TV will change to the channel
5
entered.
through a cable box or VCR. Select the appropriate channel
(usually 3 or 4) and use the cable box’s or VCR’s remote
control for channel selection.
Video: Select from available video inputs when you have
connected video equipment (e.g. satellite receiver) and you
want your TV fixed to it.
OFF: Channel Fix is not set.
to select.
f buttons to sele ct Auto or Manual (selecti ng
0 9
G then f to select the po sitio n (1 -5)
MENU
.
23
Page 36

Operating Instructions
Channel
Skip/Add
Channel
Label
Label up to 40
channels with their
call letters
Use this feature after you run Auto Program to skip unwanted
channels or add new ones.
1 Use the buttons or the [CH +/–] buttons to select
the channel, then press
2 Press
available).
With the Channel Label window open:
1
Press , then pre ss F or
channel number.
2
Press to activate the c ha nnel.
3
Press F or
caption and press
activate.
0 9
.
to Skip or Add (only one option will be
f
until you reach the desired
f
to display the first call le tt er or number of the
to select it. When finished,
press
to
24
Page 37

Using the Menus
Parental Control
The Parental Control feature is designed to help parents monitor what
their children watch on television. This section shows you the different
rating systems available and how to set your TV’s rating limit.
Overview of the Ratings
Once you have become familiar with these rating systems, you should be
ready to set y our TV’s rating limit.
TV Ratings
The TV ratings are divided into two groups: age-based and
content-based.
TV Ratings
Age
TV-Y:
TV-Y7:
TV-G:
TV-PG
TV-14:
TV-MA
Press to block
Move Select End
FV
:
D
L
S
V
S
D
:
L
L
V
V
S
Content
MENU
Age Defined as
TV-Y All children
TV-Y7 Directed to older children
TV-G General audience
TV-PG Parental Guidance
suggested
TV-14 Parents Strongly
Contents Defined as
FV Fantasy Violence
D Suggestive
dialogue
L Strong language
S Sexual situations
V Violence
cautioned
TV-MA Mature Audience only
The content ratings will increase depending on the level of the age-based
rating. For example, a program with a TV-PG V (Violence) rating may contain
moderate violence, while a TV-14 V (Violence) rating may contain intense
violence.
25
Page 38

Operating Instructions
Movie Ratings
(U.S. models only)
This system defines the rating levels of movies shown in theaters and on
prime cable channels.
Rating Defined as
G General audience
PG Parental Guidance
suggested
PG-13 Parents strongly
cautioned
Movie Rating
G:
PG:
PG-13:
R:
NC-17:
X:
Press to block
Move Select End
MENU
R Restricted
NC-17 No one 17 and under
admitted
X Adult audience only
Unrated
(U.S. models only)
You have the option of blocking TV programs or movies that are not
rated.
View All Allows all unrated
programs
Block All Blocks all unrated
programming
Block TV Blocks all unrated TV
Programs
Block Movies
Blocks all unrated
movies
Custom Ratings
TV Ratings
Movie Ratings
Unrated: View All
Select Category
Move Select End
MENU
If you choose to block unrated TV programs, please be aware that the
following programs may be blocked: emergency broadcasts, political
programs, sports, news, public service announcements, religious programs,
and weather.
26
Page 39

Using the Menus
English Ratings
(Canadian models only)
These ratings are for Canadian programs that are broadcast in English.
Rating Defined as
C Children
C8+ Children 8 years and
older
G General programming
PG Parental G ui d an c e
14+ Viewers 14 and older
18+ Adult programming
English Ratings
C:
C8+
:
G:
PG:
:
14+
:
18+
Press to block
Move Select End
MENU
French Ratings
(Canadian models only)
These ratings are for Canadian programs that are broadcast in French.
Rating Defined as
G General
8 ans+ Not recommended for
younger children
13
ans+
16
ans+
18
ans+
Not recommended for
children under age 13
Not recommended for
ages under 16
This program is restricte d
to adults
French Ratings
G:
8
ans+:
13
ans+:
16
ans+:
18
ans+:
Press to block
Move Select End
MENU
U.S.A. Ratings
(Canadian models only)
For programs from the United States. Please see “TV Ratings” on
page 25.
27
Page 40

Operating Instructions
Using the Parental Control Menu
To access the Parental Control menu, refer to the following steps:
To Display To Highlight To Selec t
Parental Control
Password:
Use [0-9] buttons to
enter new four-digit
Password
Move Select End
In the Parental Control menu, you will be asked to set a 4-digit
password for any further access into Parental Control.
MENU
1
Press
, then use the buttons to enter a 4-digit password.
Keep this manual in a safe place. If you forget your password, see page 39.
0 9
2 Confirm your password by entering it again.
Once your password is set correctly, the next Parental Control menu
appears.
28
Page 41

Using the Menus
Setting the rating
You can change the Rating by selecting one of the Lock options.
Parental Control
Lock: OFF
Change Password
Move Select End
MENU
1 Move the cursor to Lock and press .
If you are not familiar with the Parental Guidelines rating system, use
one of the following preselected categories to simplify the rating
selections, Child, Youth, Young Adult.
2 Use the F or f buttons to select the desired rating and press .
Rating TV will allow a maximum rating of:
Child TV-Y, TV-G, G (U.S. models only), G (Canadian models
only)
Youth TV-P G, PG (U. S. models only), PG (Can adi an models only)
Young Adult TV-14, PG-13 (U.S. models only), 14+ (Canadian models
only)
Custom Select to set more restrictive ratings, (see next section)
OFF No rating limit
Using the Custom menu
Before setting Custom ratings, see page 25-27, “Overview of the Ratings,”
for a description of the available rating systems.
Follow the instructions on the screen to make your custom settings. See
page 25 for U.S. models and page 27 for Canadian models for more
information.
Once you have blocked a rating or content, all higher ratings or content will
be automatically blocked.
29
Page 42

Operating Instructions
Changing your Password
1 Use the F or f buttons to move the cursor to Change Password and
press .
2 Follow steps 1 and 2 for “Using the Parental Control menu” on
page 28.
Information for Parents
To view a program that exceeds the TV rating
Press , then use the buttons to enter your password.
Entering your password to view a blocked program will temporarily turn Lock
to OFF. To reactivate your Lock settings, turn the TV off then back on. The TV
will return to the settings that you have selected.
0 9
30
Page 43

Using the Menus
Using the Timer Menu
To access the Timer menu, refer to the following steps:
To Display To Highlight To S el ect
Timer
Timer 1: Set
Timer 2: Set
Current Time
Daylight Saving: NO
:
AM
Move Select End
Current Time 1 Press F or f to select the current time, then press .
(If you are in Daylight Saving time, be sure to set the
Daylight Saving mode in “YES”)
Timer 1 and
Timer 2
Scheduled
viewing
2 Press F or
3 Press
With the menu open, set cursor on Timer 1 or Timer 2:
1 Press F or
2 Press F or
preference, then press
3 Press
f to enter the correct ti me, then press .
to exit the menu.
f to select Timer 1 or Timer 2, then press .
f to enter your time and channel of
.
to exit the menu.
MENU
You must set the Current Time before you can use Timer 1 and Timer 2.
Y o u can set th e Timer to ON, OFF, or Set. Once the timer is set, you can turn it
on or off without having to go through the settings.
Daylight
Saving
When you perform Auto Program, all Timer 1 and Timer 2 settings will be
cleared.
Any loss of power will cause Curr ent Time, Timer 1 and Timer 2 settings to be
cleared.
YES: Select in spring to compensate for Daylight Saving.
NO: Select in fall at the end of Daylight Saving.
31
Page 44

Operating Instructions
Using the Setup Menu
To access the Setup menu, refer to the following steps:
Caption
Vision
ClosedCaptioning
To Display To Highlight
Setup
Caption Vision: OFF
Video Label
Language: English
Demo
Options
Move Select End
Allows you to select from three closed caption modes (for
programs that are broadcast with closed caption).
Press F or f to select one of the following options:
CC1, 2, 3, 4: Displays printed dialogue and sound effects of a
To S elect
MENU
program.
TXT1, 2, 3, 4: Displays network/station informat ion .
XDS (Extended Data Services): Displays information about
the network and current program, if available.
OFF: Caption vision is not activated.
Video Label
Label conne cted
equipment
With the Video Label window open:
1 Press F or
press
2 Press F or
f to access the input you want to label and
.
f to choose a label and press .
Language Display all menus in your language of choice.
Use the F or f buttons to select desired language and
press .
Demo
Press to run a demonstration of the on-screen menus.
32
Page 45

Using the Menus
Options Menu
To access the Options menu, first open the Setup menu, then refer to the
following steps:
To Display To Highlight
Options
Cable: ON
Auto Program
Tilt Correction: 0
To Select
Move Select End
Cable ON: Select if you are receiving cable channels with a CATV
cable.
OFF: Select if you are using a TV antenna.
After changing your cable settings, you will need to perform Auto Program.
Auto Program Perform Auto Program whenever setting up your TV.
It will cycle through all available channels and program
receivable chan nels .
Tilt Correction
Press F or
then press
f to correct any tilt of the picture from –5 to +5,
to activate.
MENU
33
Page 46

Page 47

Other Information
Other Information
Programming the Remote Control
You can use the supplied remote control to operate Sony or non-Sony
video equipment.
1 Press .
2 Press or (FUNCTION).
3 Use the buttons to key in the code number from the following
chart.
4 Press .
VCR codes
0 9
Sony 301, 302, 303 JCPenney 309, 305, 304, 330, 314,
Admiral
(M.Ward)
Aiwa 338, 344 Kenwood 314, 336, 332, 337
Audio Dynamic 314, 337 LXI (Sears) 332, 305, 330, 335, 338
Broksonic 319, 317 Magnavox 308, 309, 310
Canon 309, 308 Marantz 314, 336, 337
Citizen 332 Marta 332
Craig 302, 332 Memorex 309, 335
Criterion 315 Minolta 305, 304
Curtis Mathis 304, 338, 309 Mitsibishi/MGA 323, 324, 325, 326
Daewoo 341, 312, 309 Multitech 325, 338, 321
DBX 314, 336, 337 NEC 314, 336, 337
Dimensia 304 Olympic 309, 308
Emerson 319, 320, 316, 317,
Fisher 330, 335 Panasonic 308, 309, 306, 307
Funai 338 Pentax 305, 304
General Electric 329, 304, 309 Philco 308, 309
Go Video 322, 339, 340 Philips 308, 309, 310
Goldstar 332 Pioneer 308
Hitachi 306, 304, 305, 338 Qua sar 308, 309, 306
Instant Replay 309, 308 RCA/PROSCAN 304, 305, 308, 309, 311,
327 JVC 314, 336, 337, 345, 346,
Optimus 327
318, 341
336, 337
347
312, 313, 310, 329
35
Page 48

Operating Instructions
VCR codes
Realistic 309, 330, 328, 335,
Sansui 314 Tashiro 332
Samsung 322, 313, 321 Tatung 314, 336, 337
Sanyo 330, 335 Teac 314, 336, 338, 337
Scott 312, 313, 321, 335,
Sharp 327, 328 Toshiba 312, 311
Shintom 315 Wards 327, 328, 335, 331, 332
Signature 2000
(M.Ward)
SV2000 338 Zenith 331
Sylvania 308, 309, 338, 310
324, 338
323, 324, 325, 326
338, 327 Yamaha 314, 330, 336, 337
Symphonic 338
Technics 309, 308
Cable box codes Satellite receiver codes
Hamlin/Regal 222, 223, 224, 225,
226
Jerrold/G. I. 201, 202, 203, 204, 205,
206, 207, 208, 218
Oak 227, 228, 229 Hitachi 805
Panasonic 219, 220, 221 Hughes 804
Pioneer 214, 215 Panasonic 803
Scientific Atlanta 209, 210, 211 RC A/ P ROSC A N 802, 808
Tocom 216, 217 Toshiba 806, 807
Zenith 212, 213
Sony 801
General Electric 802
Laser Disc Player codes DVD codes
Sony 701 Sony 751
Panasonic 704, 710 Panasonic 753
Pioneer 702 Pioneer 752
RCA 755
Toshiba 754
If more than one code number is listed, try entering them one by one until
you come to the correct code for your equipment.
Whenever you remove the batteries the code numbers may revert to the
factory setting and must be reset.
36
Page 49

Other Information
In some rare cases, you may not be able to operate your equipment with the
supplied remote control. In this case, use the equipment’s supplied remote
control.
Operating a VCR
Press To
Power on the VCR
0 9
or Search forward or backward
and
at the same time
Operating a DVD
Press To
0 9
F, , G,
G
G
Select channels directly
Change channels
Play video tape
Stop
Pause
Record
Change between VCR and TV inputs
Power on the DVD
Select chapters directly
Search chapters forward or backward
Play DVD
Stop
Pause
Move the cursor in the menu
Display the DVD menu
Operating a Laser Disc
Press To
Power on the laser disc
Search chapters forward or backward
Play disc
Stop
Pause
37
Page 50

Operating Instructions
Troubleshooting
If you are having a problem with your TV, try the suggestions below. If
the problem persists, contact your nearest Sony dealer.
No picture, no
sound
Poor or no
picture, good
sound
Good picture,
no sound
No color
Only snow
appears on the
screen
Dotted lines or
stripes
Double images
or ghosts
Make sure the power cord is plugged in.
If a red light is flashing on the front of your TV for
more than a few minutes, disconnect and reconnect
the power cord to restore the TV. If the problem
continues, call your local service center.
Check the TV/VIDEO se ttings : when watc hing TV, set
to TV; when wa tch ing video equipmen t, set t o VIDEO
(page 13).
Make sure the batteries have been inserted correctly
into the remote control (page 2).
Try another channel, it could be station trouble.
Adjust Picture in the Video menu (page 20).
Adjust Brightness in the Video menu (page 20).
Check the antenna and/or cable connections (page 3).
Press so that MUTING disappears from the
screen (page 13).
Check your Audio settings. Your TV may be set to
Auto-SAP (page 22).
Adjust Color in the Video menu (page 20).
Check the Cable setting in the Options menu under
Setup (page 33).
Check the antenna and/or cable connections (page 3).
Make sure the channel selected is currently
broadcasting.
Adjust the antenna.
Move the TV away from other electronic equipment.
Some electronic equipment can create electrical noise,
which can interfere with TV reception.
Check your outdoor antenna or call your cable service.
38
Page 51

Other Information
Cannot receive
higher number
channels (UHF)
when using an
antenna
Cable stations
don’t seem to
work
Remote control
does not
operate
The TV needs
to be cleaned
Lost password
for Parental
Control
Make sure Cable is set to OFF in the Options menu
under Setup (page 3 3).
Perform Auto Program to add channels that are not
presently in the memory (page 15).
Make sure Cable is set to ON in the Options menu
under Setup (page 3 3).
Perform Auto Program to add channels that are not
presently in the memory (page 15).
Batteries could be weak. Replace them (page 2).
Move the TV 3-4 or more feet away from fluorescent
lights.
Clean the TV with a soft dry cloth. Never use strong
solvents such as thinner or benzine, which might
damage the finish of the cabinet.
In the password screen, enter the following master
password: 4357. After using the master password, you
must create a new password, it cannot be used to
If, after reading these Operating Instructions, you have additional questions related to the use of your
Sony television, please call our Direct Response Center at 1-8 00-222-SONY (7669) (U.S. residents
only) or (416) 499-SONY (7669) (Canadian residents only).
39
Page 52

Operating Instructions
Specifications
For all models (except as noted)
Television system American TV standard/NTSC
Channel coverage VHF: 2-13/UHF: 14-69/CATV: 1-125
Antenna 75-ohm external antenna terminal fo r VHF/UHF
Picture tube
Power requirements 120V, 60 Hz
Supplied Accessories Size AA (R6) batt er ies (2)
Optional Accessories Connecting cables VMC-810S/820S, VMC-720M,
Inputs/outputs 2 video, 2 audio
KV-20FV12
Screen size Visible screen size: 20 inch es (507 mm) mea sured
Speaker output 5 W x 2
Dimensions (W/H/D)
Power Consumption 115 W in use
Mass 27 kg (59 lbs. 8 oz.)
KV-24FV12
Screen size Visible screen size: 24 inch es (598 mm) mea sured
Speaker output 10 W x 2
Dimensions (W/H/D)
Power Consumption 170 W in use
Mass 37 kg (81 lbs. 9 oz.)
Design and specifications are subject to change without notice.
FD Trinitron
Remote Control RM-Y168 (1)
YC-YC-15V/30V, RK74A
EAC-66 U/V mixer
1 S VIDEO
1 AUDIO OUT
1 headphone jack
diagonally
Actual tube size: 21 inches (533.4 mm) measured
diagonally
562 x 466 x 503 mm (22 1/4 x 18 3/8 x 19 7/8 in.)
1 W in standby
diagonally
Actual tube size: 25 in ches (635 mm) measured
diagonally
652 x 524.3 x 46 7.3 mm (25 3/4 x 20 3/4 x 18 3/8 in.)
1 W in standby
®
tube
40
Page 53

Index
Index
A
Audio menu 21
Audio Out 22
Auto Program 15, 33
Auto-SAP 22
B
Balance 21
Bass 21
Battery Installation 2
Brightness 20
C
Cable 33
Caption Vision 32
Channel Fix 23
Channel Label 24
Channel Setup menu 23
Channel Skip/Add 24
Color 20
Connections
Cable and antenna
Connecting a Camcorder 9
Connecting a DVD player 9
Connecting an Audio
System
Connecting Headphones 11
TV and Cable Box 5
TV and VCR 4
TV and Satellite Receiver 7
TV, Satellite Receiver, and
VCR
TV, VCR, and Cable box 6
Current Time 31
10
8
D
Daylight Saving 31
Demo 32
DISPLAY 13
E
Effect
Simulated
SRS 21
Surround 21
21
F
Favorite Channel 23
H
Hue 20
L
Language 32
M
Menus
Audio
Channel Setup 23
Parental Cont rol 28
Setup 32
Timer 31
3
Video 20
Mode
Vivid
Movie 20
Sports 20
Standard 20
MTS
Auto-SAP
Mono 22
Stereo 22
21
20
22
O
Options (Audio) 22
Options (Setup) 33
41
Page 54

Operating Instructions
User Guide
P
Parental Control 25
Parental Control Menu 28
Picture 20
Picture Controls
Brightness
Color 20
Hue 20
Picture 20
Sharpness 20
20
R
Ratings
English Ratings
French Ratings 27
Movie Ratings 26
Overview of the Ratings 25
TV Ratings 25
U.S.A. Ratings 27
Remote Control 13
S
Setup menu 32
Sharpness 20
SLEEP 13
Speaker 22
Specifications 40
Steady Sound 21
T
Timer menu 31
Timer 1 and Timer 2 31
Troubleshooting 38
TV Features 1
Tilt Correction 33
Treble 21
V
Video menu 20
Video Label 32
VM 20
27
42
Page 55

Page 56

User Guide
Sony Corporation Printed in U.S.A.
 Loading...