

Page 1

3-858-033-21 (1)
Operating Instructions
KV-21V4U
Trinitron Colour Video TV
GB
PAL NTSC 4.43
© 1996 by Sony Corporation Printed in Spain
Page 2
W ARNING
To prevent fire or shock hazard, do not expose the unit to
rain or moisture.
Dangerously high voltages are present inside the set. Do
not open the cabinet. Refer servicing to qualified
personnel only.
Caution
Television programmes, films, video tapes and other
materials may be copyrighted.
Unauthorized recording of such materials may be
contrary to the provisions of the copyright laws.
Colour System of Your
Set
This video TV is designed to receive TV programmes
based on PAL (I) colour system and to record and play on
PAL colour system. Also, the video TV can play tapes on
NTSC colour system.
Pr ecautions
Safety Information
For safe installation:
• Do not block the ventilation openings.
• Do not install the unit in hot, humid, or excessively dusty
places.
• Do not install the unit where it may be exposed to
mechanical vibrations.
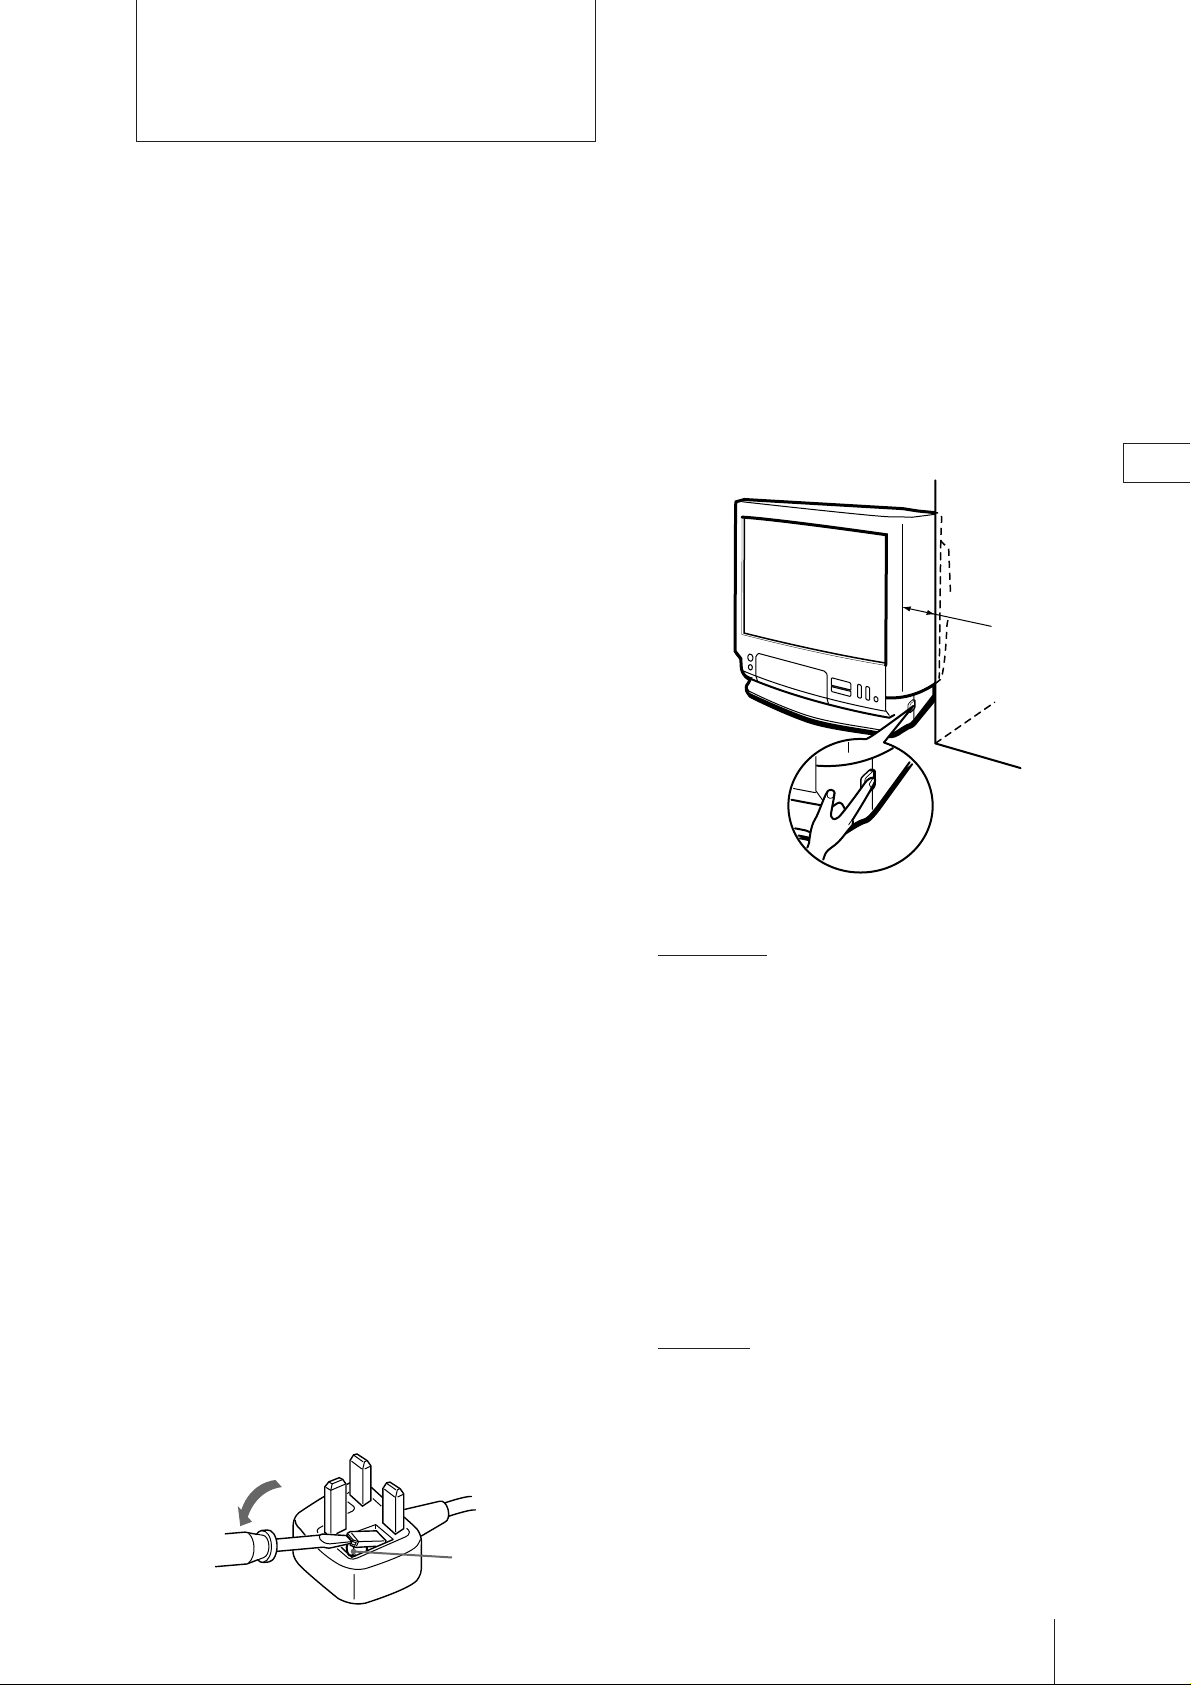
• Position the unit so that there is a clear space of 10 cm
from a wall, allowing you to press the U (MAIN
POWER) switch to turn it on and off completely.
10cm
GB
For general safety:
• Do not expose the unit to rain or moisture.
• Do not open the rear cover.
For safe operations:
• Do not operate the unit on anything but 220-240 V AC.
• Do not operate the unit if any liquid or solid object falls
in it—have it checked immediately.
• Unplug the unit from the wall outlet if you do not
intend to use it for an extended period of time. To
disconnect the cord, pull it out by the plug, never by the
cord.
NOTICE FOR CUSTOMERS IN THE UNITED
KINGDOM
A moulded plug complying with BS1363 is fitted to this
equipment for your safety and convenience.
Should the fuse in the plug supplied need to be replaced,
a 5 AMP fuse approved by ASTA or BSI to BS 1362 (i.e.
marked with 2 or @ must be used.
When an alternative type of plug is used it should be
fitted with a 5 AMP FUSE, otherwise the circuit should
be protected by a 5 AMP FUSE at the distribution board.
If the plug supplied with this equipment has a detachable
fuse cover, be sure to attach the fuse cover after you
change the fuse. Never use the plug without the fuse
cover. If you should lose the fuse cover, please contact
your nearest Sony service station.
FUSE
For your protection, refer all servicing to qualified
personnel.
r IMPORTANT
If the plug supplied is not suitable for the socket outlets
in your home, it should be cut off and an appropriate
plug fitted in accordance with the following instructions:
The wires in this mains lead are coloured in accordance
with the following code:
Blue Neutral
Brown Live
As the colours of the wires in the mains lead of this
apparatus may not correspond with the coloured
markings identifying the terminals in your plug, proceed
as follows:
The wire which is coloured blue must be connected to the
terminal which is marked with the letter N or coloured
black. The wire which is coloured brown must be
connected to the terminal which is marked with the letter
L or coloured red. Do not connect either wire to the earth
terminal in the plug which is marked by the letter E or by
the safety earth symbol Y or coloured green or green and
yellow.
r WARNING
To prevent shock hazard, do not insert the plug cut off
from the mains lead into a socket outlet. This plug
cannot be used and should be destroyed.
r To prevent fire or shock hazard, do not expose the unit to
rain or moisture.
r Dangerously high voltages are present inside the set. Do
not open the cabinet. Refer servicing to qualified
personnel only.
How to replace the fuse
Open the fuse compartment with a blade screwdriver, and
replace the fuse.
Getting Started
2
Page 3

Contents
Getting Started
Step 1—Preparation ................................................... 4
Checking the supplied accessories ....................... 4
Inserting batteries into the Remote
Commander .......................................................... 4
Step 2—Connecting the aerial...................................5
Connecting an outdoor aerial................................5
Step 3—Tuning in to TV stations ............................. 6
Selecting the language on the menu..................... 6
Presetting channels automatically ........................ 7
Presetting channels manually ............................... 8
Skipping programme positions ............................ 9
Captioning a TV station name ............................ 10
Manual fine-tuning ............................................... 11
Setting a Pay-TV channel ..................................... 12
Step 4 — Setting up VIDEO Plus+*........................ 13
Setting the guide channels ................................... 13
Step 5—Setting the clock ......................................... 15
Basic Operations
Watching the TV ....................................................... 16
Switching the video TV on and off.................... 16
Selecting TV programmes.................................... 16
Adjusting the volume ........................................... 16
Muting the sound.................................................. 17
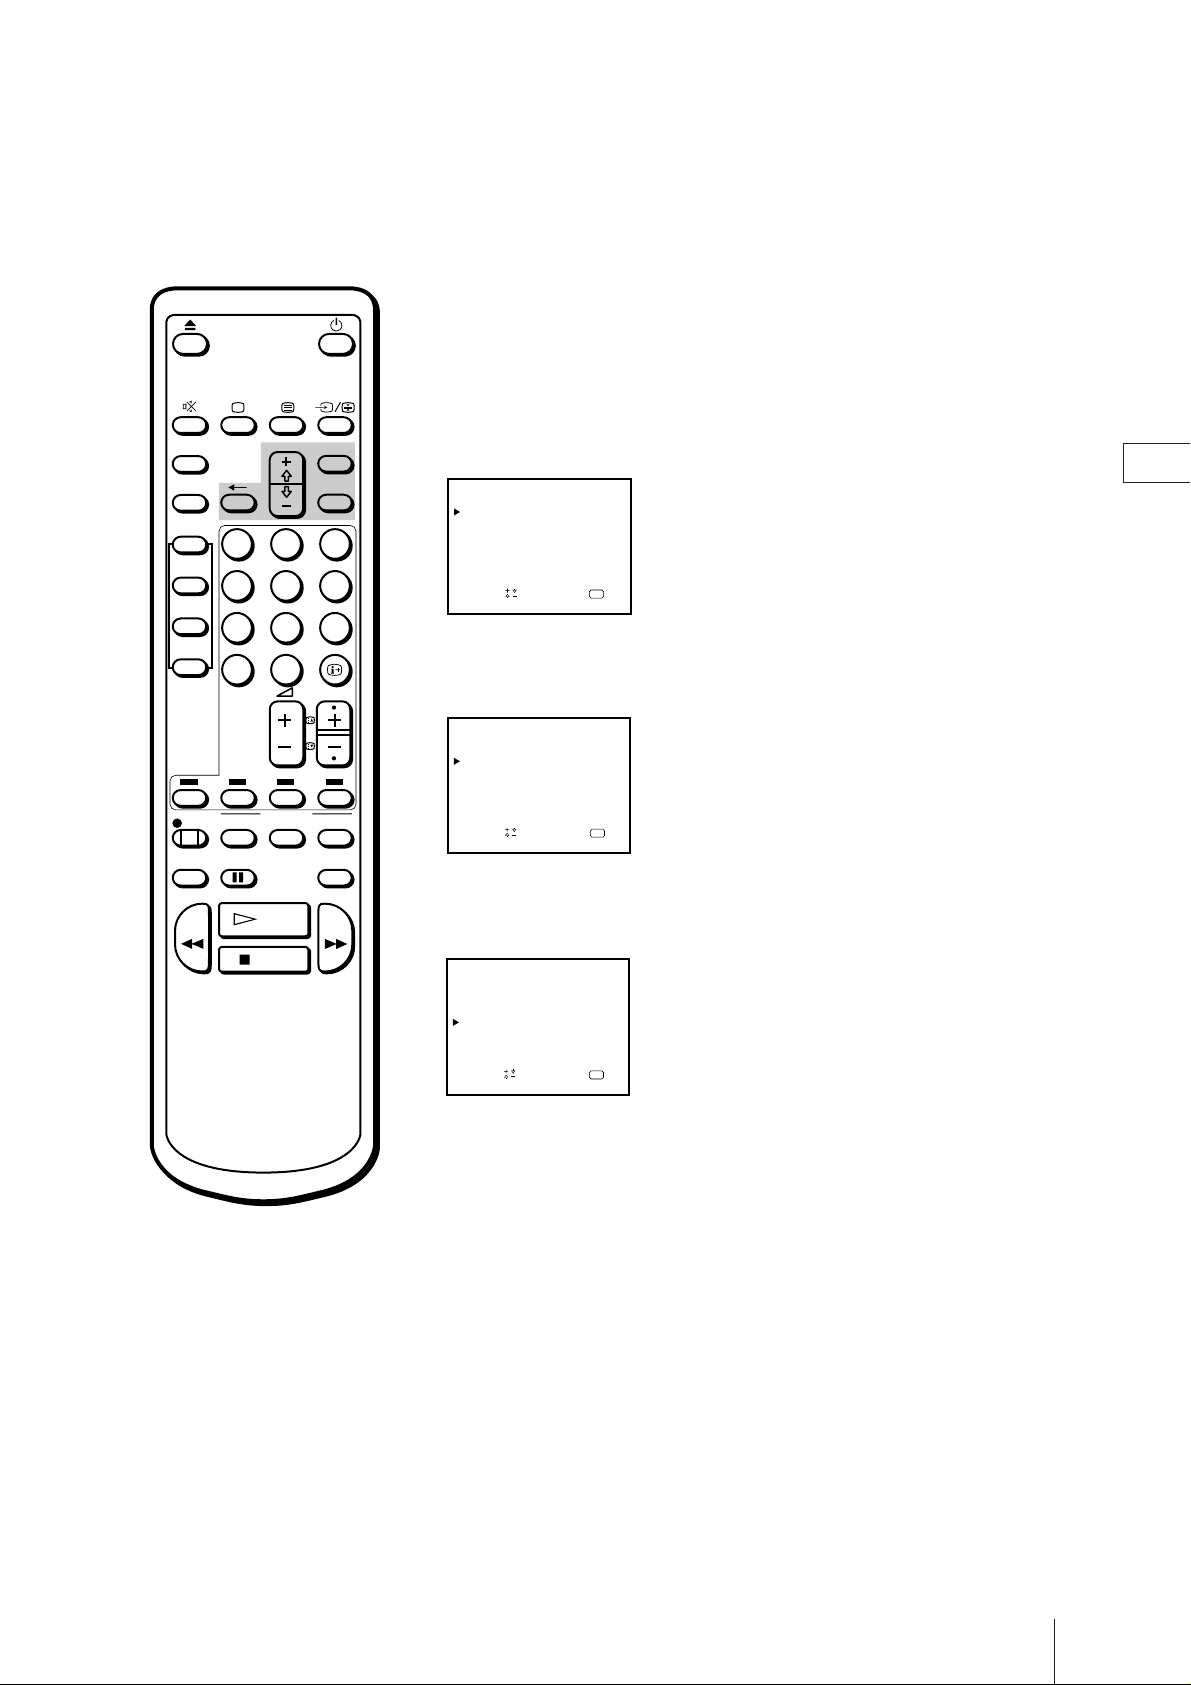
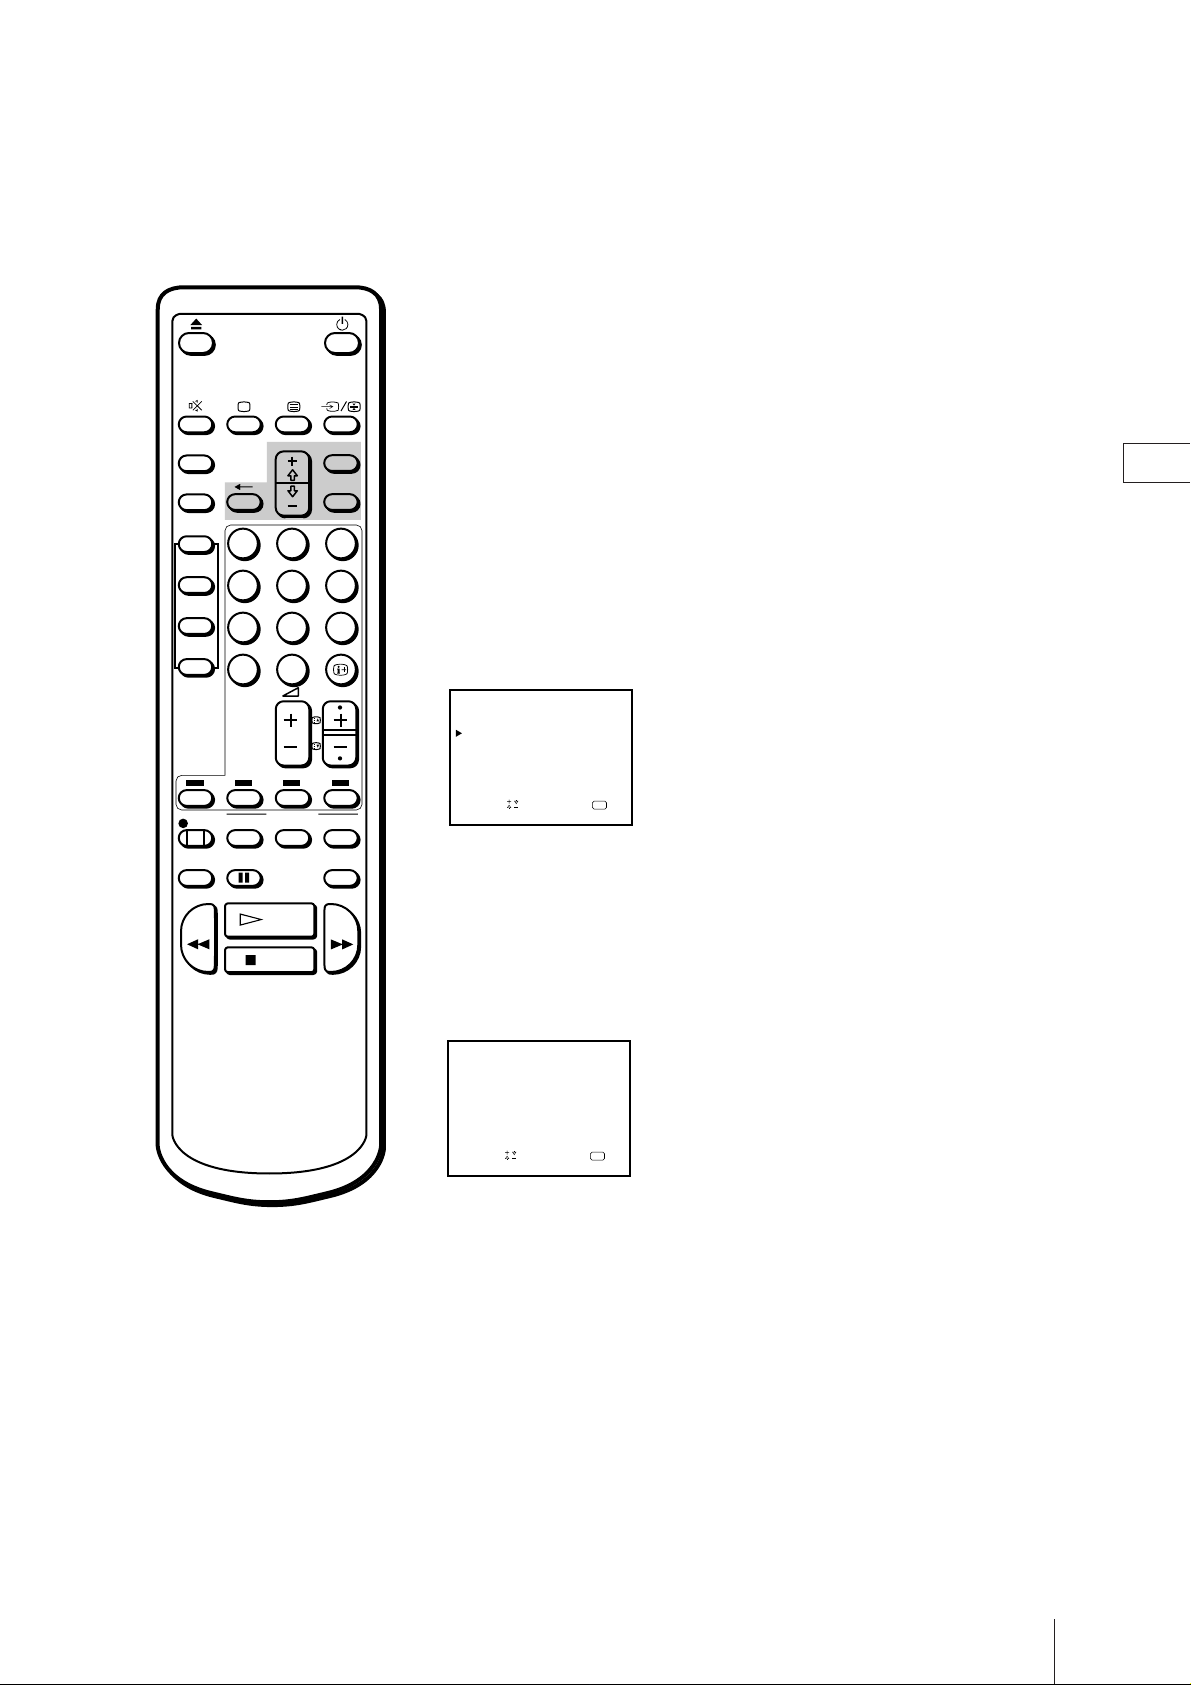
Displaying the on-screen information ............... 17
Adjusting the picture............................................ 17
Watching line input .............................................. 19
Listening with headphones ................................. 19
Viewing Teletext ....................................................... 20
Switching Teletext on and off.............................. 20
Using Fast text .......................................................20
Playing a Tape........................................................... 22
Inserting a video cassette ..................................... 22
Ejecting a video cassette ....................................... 22
Protecting your cassette against accidental
erasure ................................................................ 22
Playing a tape ........................................................ 23
Playing a tape repeatedly (Auto Repeat)........... 24
Displaying the on-screen indications ................. 24
Resetting the tape counter ................................... 24
Recording TV programmes..................................... 25
Recording TV programmes ................................. 25
Recording with the TV off ................................... 25
Watching a TV programme while recording
another................................................................. 25
Recording TV programmes using the timer ......... 26
Setting the timer ....................................................26
Using the video TV before timer recording
starts..................................................................... 28
Checking the timer settings ................................. 29
Changing or canceling the timer settings .......... 29
Recording using the quick-timer ........................ 30
Timer recording with PDC signals ..................... 31
Recording TV programmes using
VIDEO Plus+ ......................................................... 32
Additional Operations
Switching off automatically—Sleep timer ............ 34
Switching on at your desired time—On timer .....35
Enhancing video picture quality ............................36
Adjusting the tracking.......................................... 36
Adjusting with the optimum picture control
(OPC) ................................................................... 37
About the auto head cleaner ............................... 37
Connecting optional equipment............................. 38
Watching the picture input from optional
equipment ........................................................... 38
Editing with another VCR ................................... 39
Watching the Pay-TV channel............................. 39
Additional Information
Troubleshooting........................................................ 40
Taking care of your video TV ................................. 42
Video head cleaning ............................................. 42
Worn video heads ................................................. 42
Check the video heads after 1,000 hours
of use.................................................................... 42
About moisture condensation ............................. 42
Specifications............................................................. 43
Television channel number guide .......................... 44
Index to parts and controls...................................... 45
Video TV set—front .............................................. 45
Remote Commander............................................. 46
* VIDEO Plus+ and PlusCode are trademarks of Gemstar
Development Corporation. VIDEO Plus+ system is
manufactured under license from Gemstar Development
Corporation.
GB
Getting Started
3
Page 4
Getting Started
Step 1 — Pr eparation
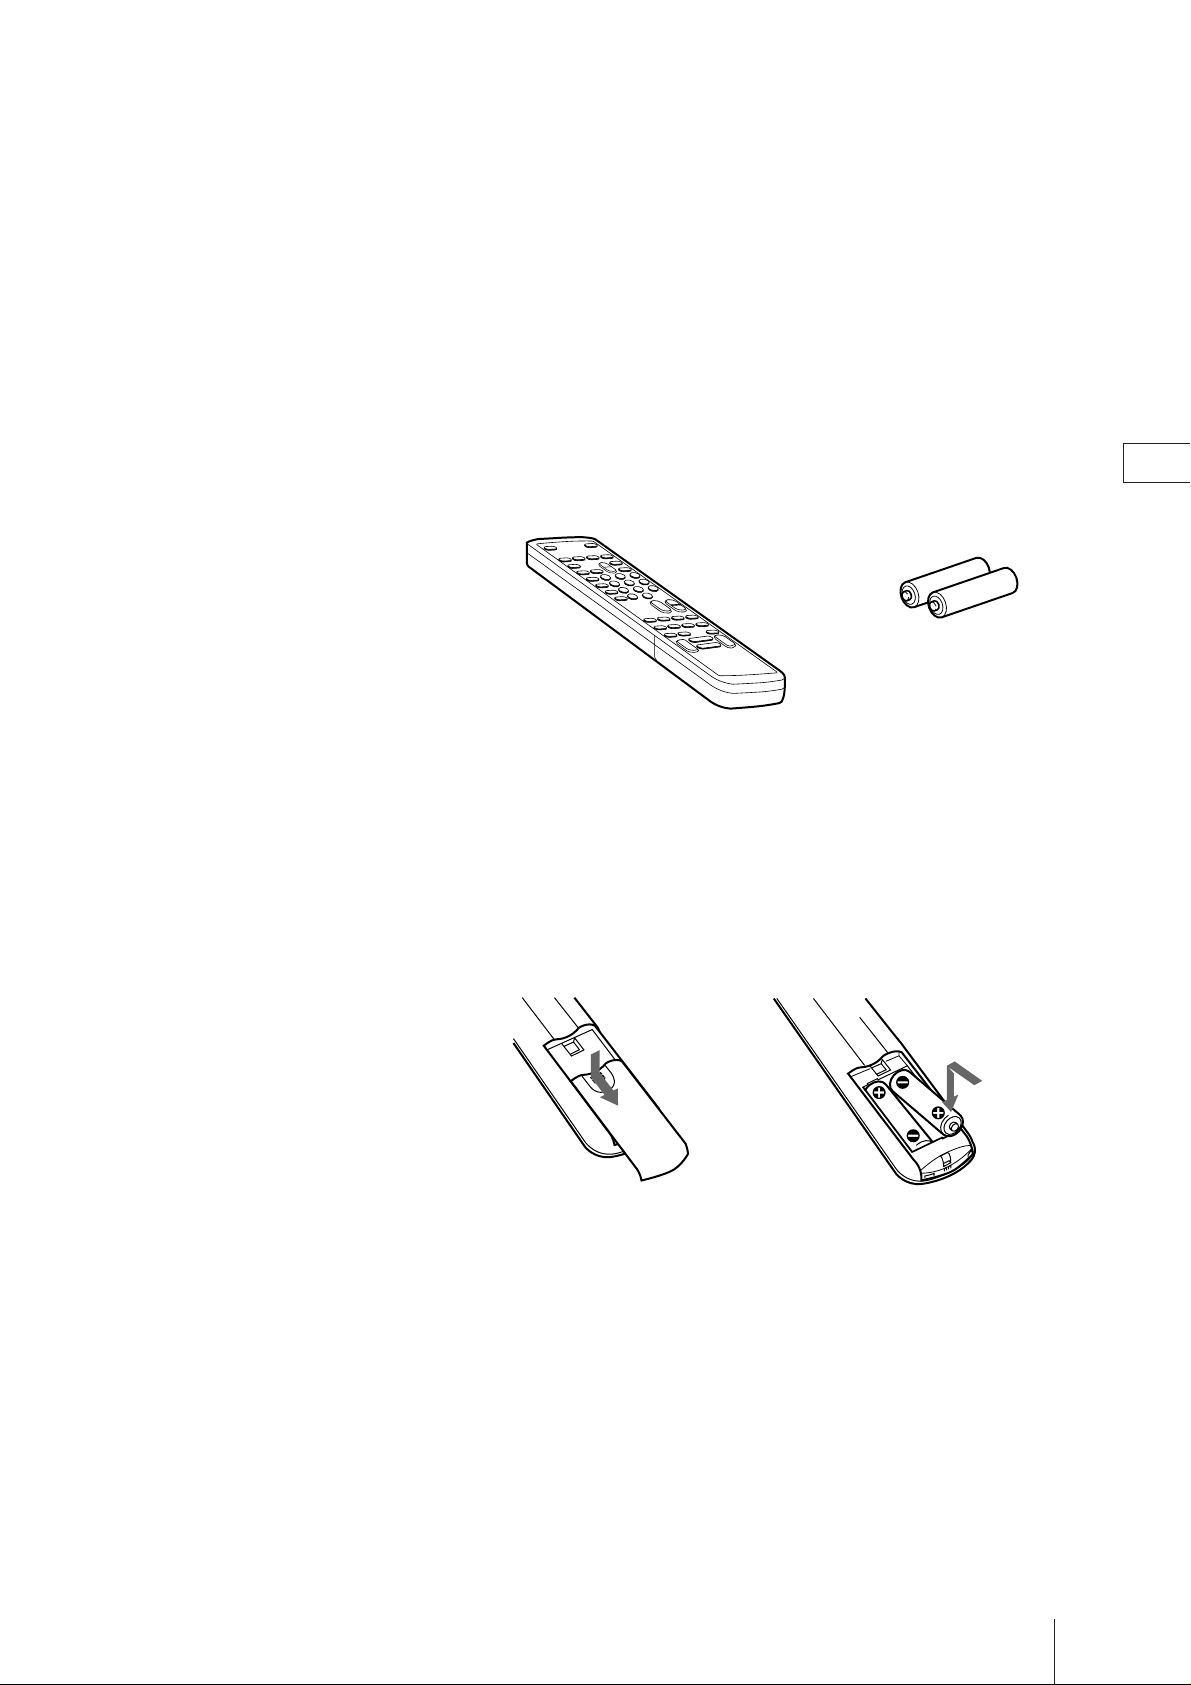
Checking the Supplied Accessories
When you have taken everything out of the carton, check that you have
these items:
• Remote Commander
• Two R6 (size AA) batteries
GB
Inserting Batteries into the Remote
Commander
Close the cover.
Turn the Commander over,
and remove the cover.
Check the polarities and
position two R6 batteries
correctly.
Getting Started
4
Page 5
Step 2 — Connecting the Aerial
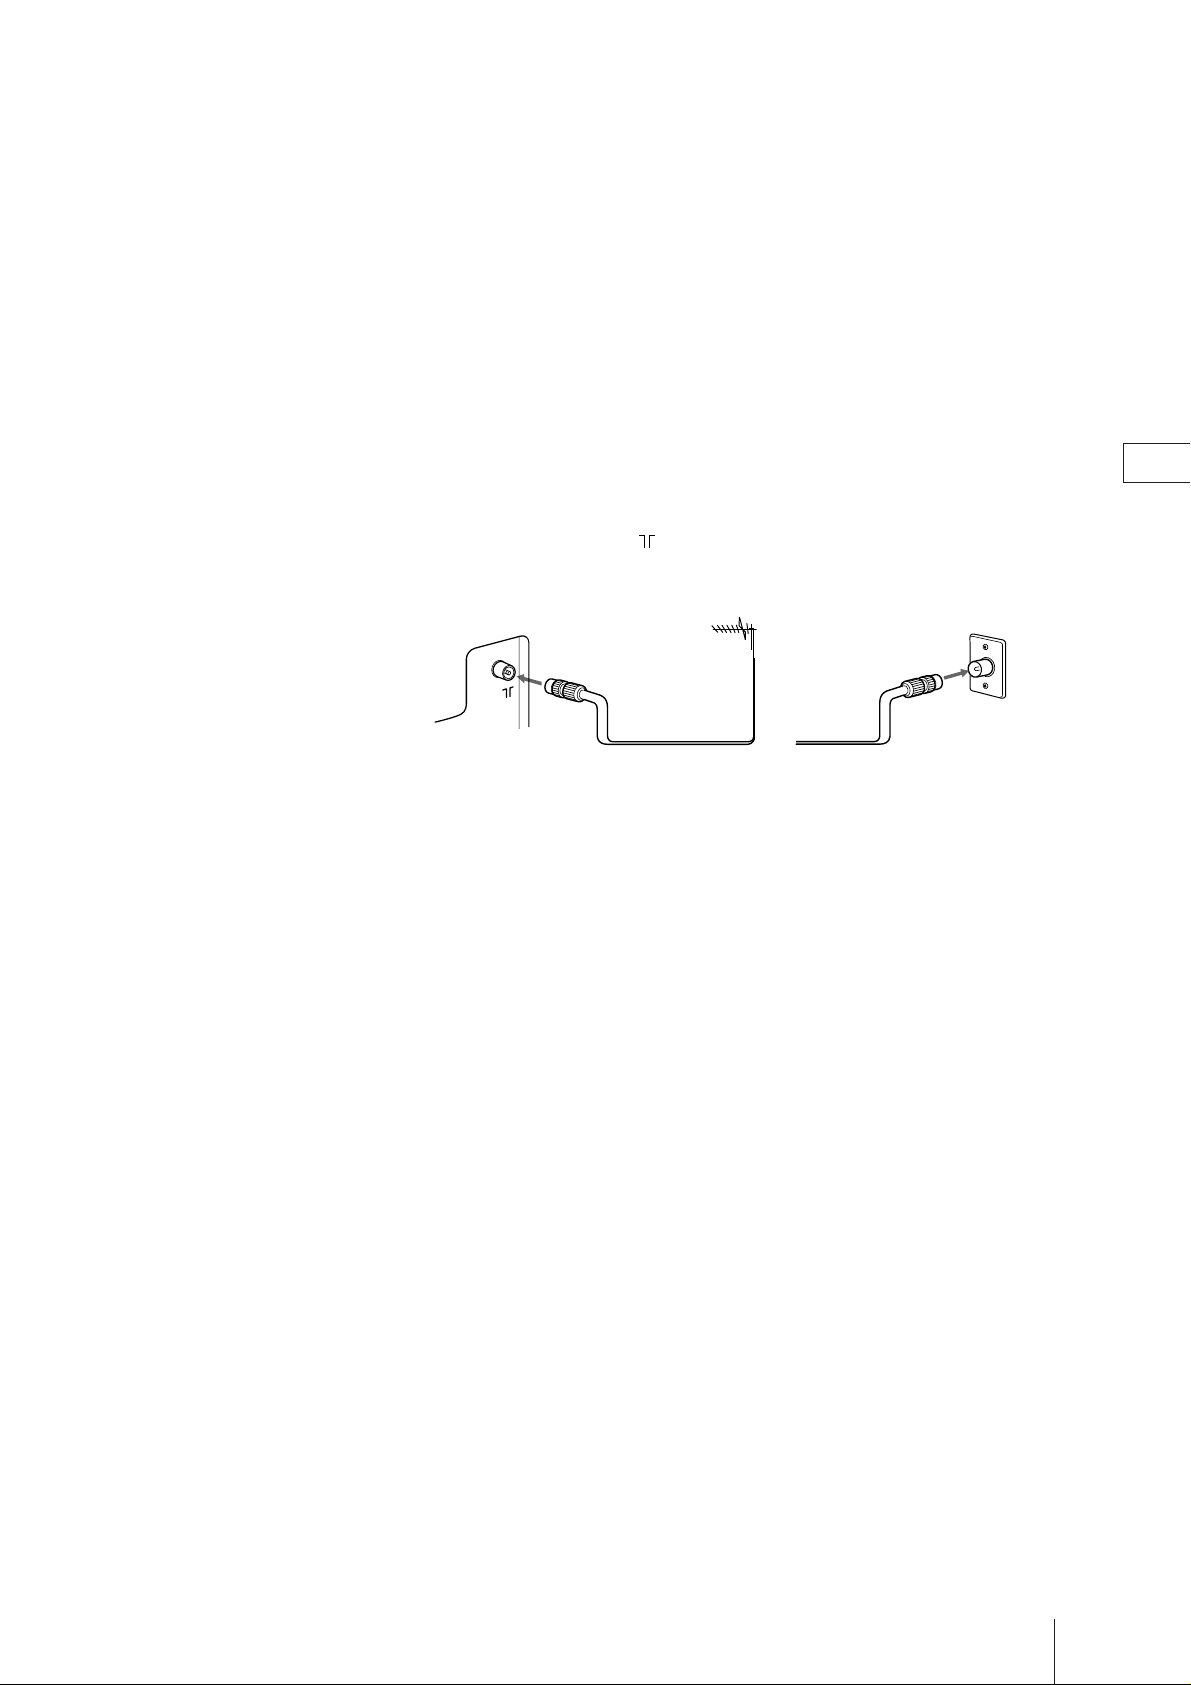
Connecting an Outdoor Aerial
For better TV reception and recording with clear video picture, connect an
outdoor aerial to your video TV.
To connect a UHF aerial — 75-ohm coaxial
cable (round)
Attach an IEC aerial connector to 75-ohm coaxial cable.
Plug the connector into the (aerial) socket of the video TV.
GB
UHF aerial
Rear
or
After connecting the aerial, connect the mains lead to a wall outlet.
On a wall
Getting Started
5
Page 6
Step 3 — Tuning in to TV Stations
You should preset the channels (up to 60 channels) by choosing either the
automatic or manual method.
The automatic method is easier if you want to preset all receivable
channels at once. Use the manual method if you want to allocate
programme numbers to the channels one by one.
ON TIMER
SLEEP
VIDEO Plus+
12
ONCE
45
DAILY
78
WEEKLY
0
TIMER REC
TIMER ON
REC
SCREEN
ON/OFF
QUICK
PAUSE
TIMER
REW FF
PLAY
STOP
MENU
MENU
MENU
OK
OK
OK
3
6
9
PROGR
CLEAR
COUNTER
RESET
Before you begin
• Depress the U (MAIN POWER) switch on the right side of the video TV
to switch it on.
If the u lamp on the video TV is lit in red, press ;, PROGR +/– or a
number button on the Remote Commander.
Selecting the Language on the
Menu
You can select one of several languages for the menu and on-screen
information.
The initial setting is English.
1 Press MENU.
The main menu appears.
MENU
VISUAL MODE
ON TIMER SET
CLOCK SET
TRACKING CONTROL
LANGUAGE
PROGRAMME PRESET
DEMONSTRATION
Sapelect nd ress
OK
GB
Note on the DEMONSTRATION
function
If you choose “DEMONSTRATION”
on the main menu and press OK,
you can see a sequential
demonstration on the menu
functions on the screen. Press any
button (e.g. MENU) to stop this
function.
2 Move the cursor (z) to “LANGUAGE” with + or – and press OK.
The LANGUAGE menu appears.
LANGUAGE
ENGLISH
DEUTSCH
FRANÇAIS
ITALIANO
ESPAÑOL
NEDERLANDS
PORTUGUÊS
Sape l ec t nd r ess
OK
3 Select the language you want with + or – and press OK.
The selected language is coloured green, and the menu appears in the
selected language.
4 Press MENU to go back to the original screen.
Getting Started
6
Page 7

ON TIMER MENU
SLEEP
VIDEO Plus+
12
ONCE
45
DAILY
78
WEEKLY
MENU
OK
OK
3
6
9
0
PROGR
TIMER REC
TIMER ON
REC
SCREEN
QUICK
PAUSE
TIMER
REW FF
STOP
ON/OFF
PLAY
CLEAR
COUNTER
RESET
Presetting Channels Automatically
1 Press MENU to display the main menu.
2 Move the cursor (z) to “PROGRAMME PRESET” with + or – and
press OK.
The PROGRAMME PRESET menu appears.
PROGRAMME PRESET
AUTO PROGRAMME
MANUAL PROGRAMME
SET UP GUIDE CH
Sapelect nd ress
3 Move the cursor (z) to “AUTO PROGRAMME” with + or – and press
OK.
The AUTO PROGRAMME menu appears.
AUTO PROGRAMME
SYSTEM
Sap
PROG CH
I
e l ec t nd r es s
–– –––
4 Press OK.
The programme number you previously watched appears in red in the
“PROG” position.
Using + or – , select the programme number from which you want to
start presetting except the programme number 00 and press OK.
The CH position turns red.
AUTO PROGRAMME
SYSTEM
PROG CH
I
01 C02
OK
OK
GB
To stop automatic channel
presetting
Press ? on the Remote
Commander.
Sapelect nd ress
OK
5 Select the channel with + or – and press OK.
The video TV starts scanning and presetting a receivable channel from the
programme number selected in step 4.
The preset programme and channel numbers are displayed on the screen
in sequence. When presetting is finished, the original screen appears. All
available channels are now stored on successive number buttons.
The preset programme and channel numbers are displayed on the screen
in sequence. When presetting is finished, the original screen appears. All
available channels are now stored on successive number buttons.
Getting Started
7
Page 8
ON TIMER MENU
SLEEP
VIDEO Plus+
12
ONCE
45
DAILY
78
WEEKLY
MENU
OK
OK
3
6
9
0
PROGR
TIMER REC
TIMER ON
REC
SCREEN
QUICK
PAUSE
TIMER
REW FF
STOP
ON/OFF
PLAY
CLEAR
COUNTER
RESET
Presetting Channels Manually
1 Press MENU to display the main menu.
2 Move the cursor (z) to “PROGRAMME PRESET” with + or – and
press OK.
The PROGRAMME PRESET menu appears.
PROGRAMME PRESET
AUTO PROGRAMME
MANUAL PROGRAMME
SET UP GUIDE CH
LABEL AFT
–– ON
ndSelect Press
LABEL AFT
–– ON
ndSelect Press
OK
D
–
–
–
–
–
–
OK
D
–
–
–
–
–
–
OK
e l ec t nd r es s
Sap
3 Move the cursor (z) to “MANUAL PROGRAMME” with + or – and
press OK.
The MANUAL PROGRAMME menu appears.
MANUAL PROGRAMME
PRG
SYS CH
I
1 C02 –– –
2
C04 ––––– ON
I
3
C06 ––––– ON
I
4
C12 ––––– ON
I
5
S06 ––––– ON
I
6
S24 ––––– ON
I
a
4 Using + or – , move the cursor (z) to the programme position
(number button) to which you want to preset the channel, and press OK.
The SYS position turns red.
MANUAL PROGRAMME
PRG
SYS CH
I
1 C02 – – –
C04 ––––– ON
2
I
C06 ––––– ON
3
I
4
C12 ––––– ON
I
5
S06 ––––– ON
I
6
S24 ––––– ON
I
a
GB
For programme positions
beyond 6
The display scrolls by pressing –
repeatedly.
If you have made a mistake
Press ? to go back to the previous
position.
5 Select the system with + or – and press OK.
The CH position turns red.
6 Select the channel you want to preset with + or – and press OK.
7 The video TV starts scanning receivable channels. When the channel is
found, it stops. If you want to preset this channel, press OK. If not, press
+ or – to search for another channel.
8 Repeat steps 4 and 5 to preset other channels.
9 After you finish presetting, press MENU to go back to the original screen.
Getting Started
8
Page 9
Skipping Programme Positions
You can skip unused programme positions when selecting programme
with PROGR +/– buttons. However, the skipped programmes may still
be called up when you select them with the number buttons.
ON TIMER
SLEEP
VIDEO Plus+
12
ONCE
45
DAILY
78
WEEKLY
0
TIMER REC
TIMER ON
REC
SCREEN
ON/OFF
QUICK
PAUSE
TIMER
REW FF
PLAY
STOP
MENU
OK
3
6
9
PROGR
CLEAR
COUNTER
RESET
1 Press MENU to display the main menu.
2 Move the cursor (z) to “PROGRAMME PRESET” with + or – and
press OK.
The PROGRAMME PRESET menu appears.
3 Move the cursor (z) to “MANUAL PROGRAMME” with + or – and
press OK.
The MANUAL PROGRAMME menu appears.
4 Using + or – , move the cursor (z) to the programme position which
you want to skip and press OK.
The “SYS” position turns red.
MANUAL PROGRAMME
PRG
SYS CH
I
1 C02 – – –
C04 ––– – – ON
I
2
C06 ––– – – ON
I
3
4
C12 ––– – – ON
I
5
S06 –– – – – ON
I
6
S24 –– – – – ON
I
LABEL AFT
ndSelect Press
a
–– ON
D
–
–
–
–
–
–
OK
5 Press + or – until “---” appears in the “SYS” position and press OK.
MANUAL PROGRAMME
PRG SYS CH
1 C02 –– –
2
3
4
5
6
I
I
C04 ––––– ON
C06 ––––– ON
–––
C12 ––––– ON
I
S06 ––––– ON
I
S24 ––––– ON
I
a
LABEL AFT
–– ON
ndSelect Press
D
–
–
–
–
–
–
OK
GB
For programme positions
beyond 6
The display scrolls by pressing –
repeatedly.
When you select programmes using the PROGR +/– buttons, the
programme position is skipped.
6 Repeat steps 4 and 5 to skip other programme positions.
7 Press MENU to go back to the original screen.
Getting Started
9
Page 10
Captioning a TV Station Name
You can name a channel using up to five characters (letters or numbers) to
be displayed on the TV screen (e.g. MTV). Using this function, you can
easily identify which channel you are watching.
ON TIMER MENU
SLEEP
VIDEO Plus+
12
ONCE
45
DAILY
78
WEEKLY
MENU
OK
OK
3
6
9
0
PROGR
TIMER REC
TIMER ON
REC
SCREEN
QUICK
PAUSE
TIMER
REW FF
STOP
ON/OFF
PLAY
CLEAR
COUNTER
RESET
1 Press MENU to display the main menu.
2 Move the cursor (z) to “PROGRAMME PRESET” with + or – and
press OK.
The PROGRAMME PRESET menu appears.
3 Move the cursor (z) to “MANUAL PROGRAMME” with + or – and
press OK.
The MANUAL PROGRAMME menu appears.
MANUAL PROGRAMME
SYS CH
PRG
I
1 C02 –– –
C04 ––– – – ON
I
2
C06 ––– – – ON
I
3
4
C12 ––– – – ON
I
5
S06 –– – – – ON
I
6
S24 –– – – – ON
I
LABEL AFT
ndSelect Press
a
–– ON
D
–
–
–
–
–
–
OK
4 Using + or – , move the cursor (z) to the programme position you want
to caption and press OK repeatedly until the first element of the “LABEL”
position turns red.
5 Select a letter or number with + or – and press OK.
The next element turns red. Select other characters in the same way. For
the element you want to leave blank, select “-” and press OK.
GB
If you have made a mistake
Press ? to go back to the previous
position.
MANUAL PROGRAMME
PRG SYS CH
I
1 C02 –– –
C04 ––––– MTV
I
2
C06 ––––– ON
3I
I4
C12 ––––– ON
5
S06 ––––– ON
I
6
S24 –––––ION
LABEL AFT
a
ndSelect Press
–– ON
D
–
–
–
–
–
–
OK
6 After selecting all the characters, press OK repeatedly until the cursor
appears. Now the caption you chose is stored.
7 Repeat steps 4 to 6 to caption other channels.
8 Press MENU to go back to the original screen.
Getting Started
10
Page 11

Manual Fine-Tuning
Normally, the automatic fine-tuning (AFT) is already working. However, if
the picture of a programme is distorted, you can use the manual finetuning function to obtain better picture reception.
ON TIMER
SLEEP
VIDEO Plus+
12
ONCE
45
DAILY
78
WEEKLY
0
TIMER REC
TIMER ON
REC
SCREEN
ON/OFF
QUICK
PAUSE
TIMER
REW FF
PLAY
STOP
MENU
OK
3
6
9
PROGR
CLEAR
COUNTER
RESET
1 Press MENU to display the main menu.
2 Move the cursor (z) to “PROGRAMME PRESET” with + or – and press
OK.
The PROGRAMME PRESET menu appears.
3 Move the cursor (z) to “MANUAL PROGRAMME” with + or – and
press OK.
The MANUAL PROGRAMME menu appears.
4 Using + or – , move the cursor (z) to the programme position which
you want to manually fine-tune, and press OK repeatedly until the AFT
position turns red.
MANUAL PROGRAMME
PRG
SYS CH
LABEL AFT
I
1 C02 –– –
2
C04 ––– – – ON
I
3
C06 ––– – – ON
I
4
C12 ––– – – ON
I
5
S06 –– – – – ON
I
6
S24 –– – – – ON
I
a
ndSelect Press
–– ON
D
–
–
–
–
–
–
OK
5 Fine-tune the channel while holding down + or – so that you get the
best TV reception. As you press these buttons, the frequency changes from
–15 to +15.
MANUAL PROGRAMME
PRG
SYS CH
I
1 C02 – – –
C04 ––– – – ON
I
2
C06 ––––– – 3
3I
I4
C12 ––––– ON
5
S06 ––––– ON
I
6
S24 –––––ION
LABEL AFT
ndSelect Press
a
–– ON
D
–
–
–
–
–
–
OK
GB
To reactivate automatic finetuning (AFT)
Repeat from the beginning and
select “ON” in step 5.
6 After fine-tuning, press OK.
The cursor (z) appears. The fine-tuned level is now stored.
7 Repeat steps 4 to 6 to fine-tune other channels.
8 Press MENU to go back to the original screen.
Getting Started
11
Page 12
Setting a Pay-TV channel
You can watch the Pay-TV channel by connecting a Pay-TV decoder to the
W connector on the rear of the video TV.
ON TIMER MENU
SLEEP
VIDEO Plus+
12
ONCE
45
DAILY
78
WEEKLY
MENU
OK
OK
3
6
9
0
PROGR
TIMER REC
TIMER ON
REC
SCREEN
QUICK
PAUSE
TIMER
REW FF
STOP
ON/OFF
PLAY
CLEAR
COUNTER
RESET
1 Press MENU to display the main menu.
2 Move the cursor (z) to “PROGRAMME PRESET“ with + or – and
press OK.
The PROGRAMME PRESET menu appears.
3 Move the cursor (z) to “MANUAL PROGRAMME“ with + or – and
press OK.
The MANUAL PROGRAMME menu appears.
4 Move the cursor (z) to the programme position to which you want to set a
pay-TV decoder, and press OK until the D position turns red.
MANUAL PROGRAMME
SYS CH
PRG
I
1 C02 –– –
C04 ––––– ON
I
2
C06 ––––– ON
3
I
4
C12 ––––– ON
I
5
S06 ––––– ON
I
6
S24 ––––– ON
I
LABEL AFT
ndSelect Press
a
–– ON
D
–
–
–
–
–
–
OK
5 Press + or – until r appears in the D position and press OK.
MANUAL PROGRAMME
PRG SYS CH
I
1 C02 –– –
C04 ––– – – ON
I
2
C06 ––– – – ON
3I
I4
C12 ––– – – ON
5
S06 –– – – – ON
I
6
S24 –– – – –ION
LABEL AFT
a
ndSelect Press
–– ON
D
–
–
–
–
–
OK
GB
Note
During recording the signal of a
programme to which the Pay-TV
decoder is set, the signal of other
programme positions cannot be
decoded.
6 Press MENU to go back to the original screen.
Getting Started
12
Page 13

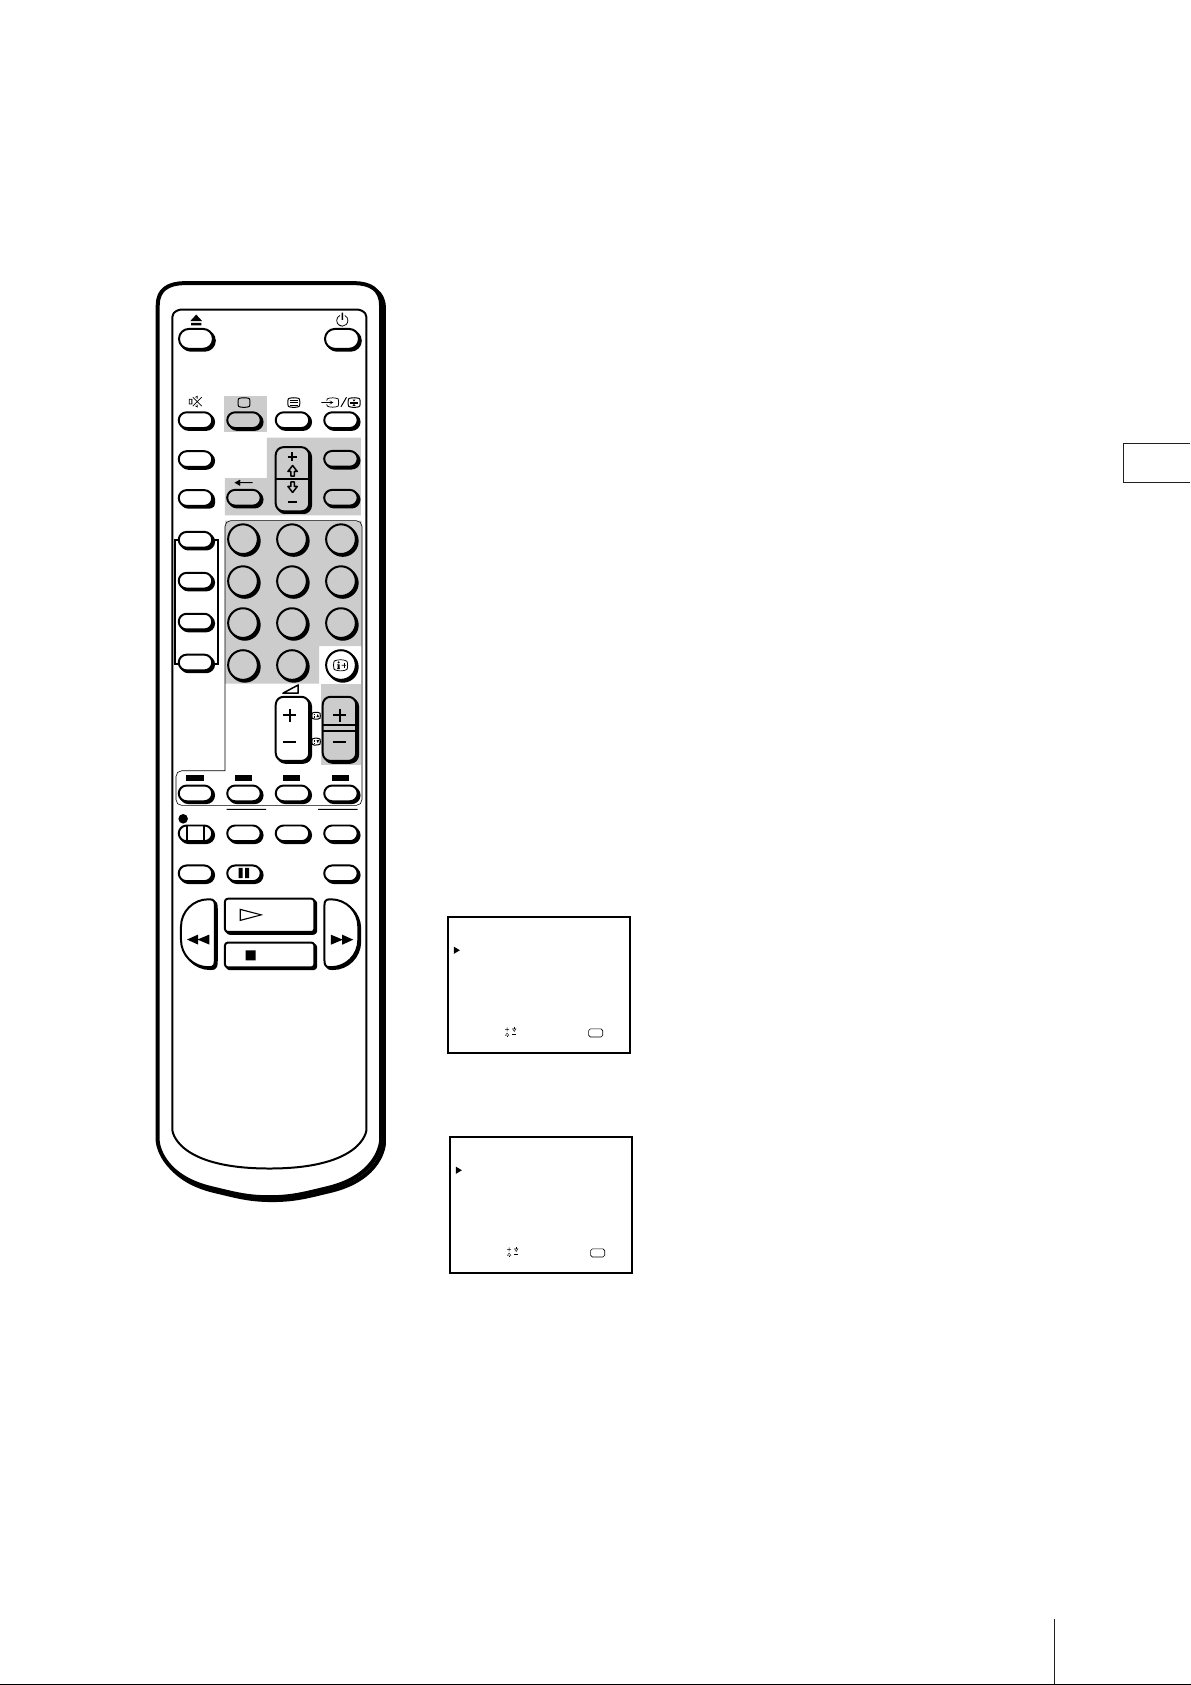
Step 4 —
Setting up Video Plus+
VIDEO plus+ is a feature that simplifies programming the video TV to
make timer recording. To use VIDEO plus+, each programme position
needs to be matched with its VIDEO plus+ guide channel. To get the
guide channel numbers, see “Guide channels for VIDEO plus+” on page
13, or look in the programme guide for your area that features PlusCodes.
ON TIMER MENU
SLEEP
VIDEO Plus+
12
ONCE
45
DAILY
78
WEEKLY
MENU
OK
OK
3
6
9
0
PROGR
TIMER REC
TIMER ON
REC
SCREEN
QUICK
PAUSE
TIMER
REW FF
STOP
ON/OFF
PLAY
CLEAR
COUNTER
RESET
Before you begin
• If the u lamp on the video TV is lit in red, press ;, PROGR +/– or a
number button on the Remote Commander.
Setting the Guide Channels
1 Press MENU to display the main menu.
The main menu appears.
MENU
VISUAL MODE
ON TIMER SET
CLOCK SET
TRACKING CONTROL
LANGUAGE
PROGRAMME PRESET
DEMONSTRATION
Sape l ec t nd r es s
2 Move the cursor (z) to “PROGRAMME PRESET” with + or – and
press OK.
The PROGRAMME PRESET menu appears.
PROGRAMME PRESET
AUTO PROGRAMME
MANUAL PROGRAMME
SET UP GUIDE CH
OK
GB
If you have made a mistake
Press ? to go back to the previous
position.
e l ec t nd r es s
Sap
OK
3 Move the cursor (z) to “SET UP GUIDE CH” with + or – and press
OK.
The SET UP GUIDE CH menu appears.
SET UP GUIDE CH
CH
PROG
1 C02
2
3
4
5
6
GUIDE CH
–––
C04
–––
C06
–––
C12 –– –
S06 – – –
S24
–––
ndSelect Press
a
OK
Getting Started
13
Page 14
4
Using + or – , move the cursor (z) to the programme position (number
button) to which you want to preset the guide channel, and press OK.
The GUIDE CH position turns red.
SET UP GUIDE CH
PROG CH
1 C02
2
3
4
5
6
GUIDE CH
–––
–––
C04
C06
–––
C12 –– –
S06 – – –
–––
S24
ndSelect Press
a
OK
5 Select the guide channel you want to preset with + or – , and press OK.
SET UP GUIDE CH
PROG
1 C02
2
C04
3
4
C12 –– –
5
S06 – – –
6
S24
CH
a
ndSelect Press
GUIDE CH
–––
–––
99C06
–––
OK
6 Repeat steps 4 and 5 to preset other channels.
7 After you finish presetting, press MENU to go back to the original screen.
GB
Guide channels for VIDEO plus+
Guide Station name
channel
001 BBC1
002 BBC2
003 ITV
004 CHANNEL 4
005 RTE (IRELAND)
006 NETWORK 2 (IRELAND)
101 SKY ONE
102 SKY NEWS
103 SKY MOVIES
104 THE MOVIE CHANNEL
105 SKY SPORT
106 NICKELODEON
VH-1 GERMANY
107 EUROSPORT
108 GALAVISION
109 MTV EUROPE
110 CHILDERN’S CHANNEL
THE FAMILY CHANNEL
111 SKY MOVIES GOLD
112 BBC WORLD SERVICE
113 RTL 4
114 SUPER SPORT
FILMNET 2
FILMNET +
115 RTL PLUS INTERNATIONAL
116 SAT 1
117 PREMIERE
118 3 SAT
119 ARD
120 PRO 7
121 TELE 5
Guide Station name
channel
122 TELECLUB
123 UK GOLD
124 DISCOVERY
125 BRAVO
126 CNN
127 EURONEWS
129 QVC
130 UK LIVING
131 RAI 1
132 RAI 2
133 TV5 EUROPE
134 TVE INTERNATIONAL
135 MBC/ARABIC
136 VTM
137 SPORTNET
138 COUNTRY MUSIC TV
139 VIDEO HITS ONE
140 SKY SPORT 2 & SOAPS &
141 TV ASIA
142 LA-5
143 LIVE TV
144 SUPERCHANNEL
145 JAPAN TV
146 SELECT TV
147 MOVIE CHANNEL FILMNET 1
149 TNT
THE LEARNING CHANNEL
ADULT CHANNEL
VH-1
TRAVEL
CARTOON NETWORK
Getting Started
14
Page 15
Step 5 — Setting the Clock
You need to set the clock for using timer recording and quick-timer
recording functions.
1 Press MENU to display the main menu.
MENU
VISUAL MODE
ON TIMER MENU
SLEEP
VIDEO Plus+
12
ONCE
45
DAILY
78
WEEKLY
MENU
OK
OK
3
6
9
0
PROGR
ON TIMER SET
CLOCK SET
TRACKING CONTROL
LANGUAGE
PROGRAMME PRESET
DEMONSTRATION
Sape l ec t nd r es s
OK
2 Move the cursor (z) to “CLOCK SET” with + or – and press OK.
The CLOCK SET menu appears.
CLOCK SET
––. ––. –––– ––– ––: ––
OK
p ress
GB
REC
SCREEN
QUICK
PAUSE
TIMER
REW FF
STOP
ON/OFF
PLAY
CLEAR
COUNTER
RESET
TIMER REC
TIMER ON
If you have made a mistake
Press ? to go back to the previous
position.
If the clock has stopped and
“--/--” is displayed
You have to re-set the clock.
3 Press OK to start setting the clock.
The day section turns red.
CLOCK SET
1. 1. 19 96 MON 0 : 00
OK
p ress
4 Set the day with + or – and press OK.
The month section turns red.
CLOCK SET
4. 1. 19 96 THU 0 : 00
Sape l ec t nd r ess
OK
5 Using + or – and OK, set the month, year, hour and minute in the
same way as in step 4.
CLOCK SET
4. 2. 19 96 WED 5: 30
11
Sapelect nd ress
OK
6 After setting the minute, press OK.
The clock starts working.
7 Press MENU to go back to the original screen.
Getting Started
15
Page 16

Basic Operations
W atching the TV
This section explains the basic functions you use while watching the TV.
Most of the operations can be done using the Remote Commander.
Switching the Video TV On and Off
ON TIMER
SLEEP
VIDEO Plus+
ONCE
DAILY
WEEKLY
REC
QUICK
TIMER
12
45
78
0
TIMER REC
TIMER ON
SCREEN
ON/OFF
PAUSE
MENU
OK
3
6
9
PROGR
CLEAR
COUNTER
RESET
Switching on
GB
Depress the U (MAIN POWER) switch on the right side of the video TV.
Press ;, PROGR +/– or number buttons on the Remote Commander, or
PROGR +/– on the video TV when the u lamp is lit in red.
Switching off temporarily
Press u.
The video TV enters standby mode and the u lamp on the front of the
video TV lights up in red.
To switch on again
Press ;, PROGR +/– or number buttons on the Remote Commander, or
PROGR +/– on the video TV.
To switch off the main power
Press the U switch on the video TV.
Selecting TV Programmes
Press PROGR +/– or number buttons on the Remote Commander, or
PROGR +/– on the video TV.
REW FF
Note
When the U switch is turned off, all the
video operations also do not work.
PLAY
STOP
To select a double-digit number using the
number buttons
Press ÷, then the numbers.
For example, if you want to choose 14, press ÷, 1 and 4.
Adjusting the Volume
Press Á +/–.
Basic Operations
16
Page 17

Muting the Sound
Press ¤.
The ¤ indicator appears and stays on the screen.
To resume normal sound, press ¤ again or Á +.
ON TIMER
SLEEP
VIDEO Plus+
12
ONCE
45
DAILY
78
WEEKLY
0
TIMER REC
TIMER ON
REC
SCREEN
ON/OFF
QUICK
PAUSE
TIMER
REW FF
PLAY
STOP
MENU
OK
3
6
9
PROGR
CLEAR
COUNTER
RESET
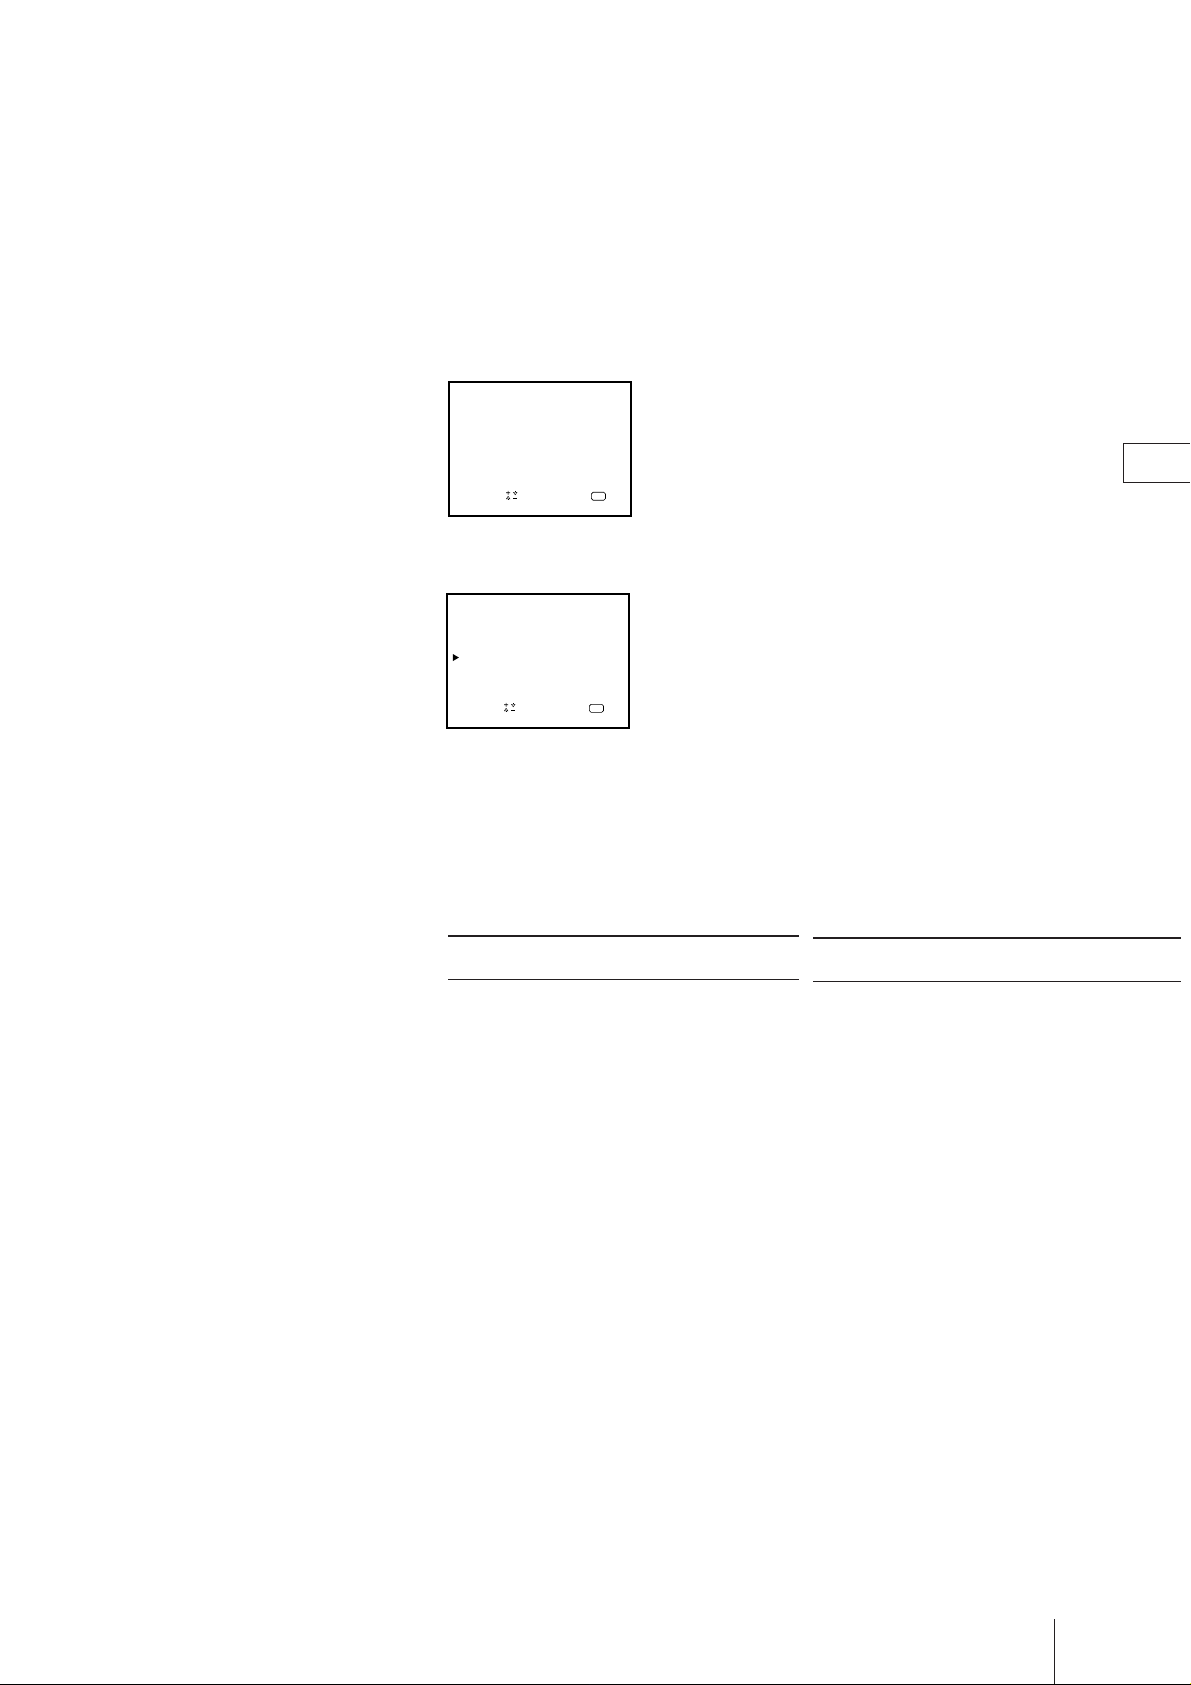
Displaying the On-screen
Information
Press to display the following on-screen information.
To have the programme number, channel number and caption stay on the
screen, press again.
To make the indications disappear, press until no indications are
displayed on the screen.
ABC
4.12WED
20:00
Current date and time
Caption
Programme position
12
C02
Channel number
Adjusting the Picture
You can select one of four settings for picture effect in the menu. You can
also adjust the picture to suit your own taste.
GB
Selecting the picture effect
1 Press MENU to display the main menu.
MENU
VISUAL MODE
ON TIMER SET
CLOCK SET
TRACKING CONTROL
LANGUAGE
PROGRAMME PRESET
DEMONSTRATION
Sap
elect nd ress
2 Move the cursor (z) to VISUAL MODE with + or – and press OK.
The VISUAL MODE menu appears.
VISUAL MODE
PICTURE CONTROL
STANDARD
MILD
MOVIE
OPC: ON
Sapelect nd ress
OK
OK
Basic Operations
17
Page 18

3 Using + or – , select the setting you want and press OK. For the effect
of each setting, see the table below.
The selected setting is stored.
Effect of each setting
ON TIMER MENU
SLEEP
VIDEO Plus+
12
ONCE
45
DAILY
78
WEEKLY
MENU
OK
OK
3
6
9
0
PROGR
TIMER REC
TIMER ON
REC
SCREEN
QUICK
PAUSE
TIMER
REW FF
STOP
ON/OFF
PLAY
CLEAR
COUNTER
RESET
Setting
PICTURE CONTROL
Picture effect
The adjusted picture control levels are stored. (See
“Adjusting the picture displayed on the screen.”)
STANDARD
MILD
MOVIE
More contrast
Less contrast
Darker
e.g. when watching a movie
Press MENU to go back to the original screen.
4
Adjusting the picture displayed on the screen
1 Press MENU to display the main menu.
2 Move the cursor (z) to VISUAL MODE with + or – and press OK.
The VISUAL MODE menu appears.
VISUAL MODE
PICTURE CONTROL
STANDARD
MILD
MOVIE
OPC: ON
e l ec t nd r es s
Sap
OK
GB
Note
The HUE adjustment is available
only for the NTSC colour system.
3 Move the cursor (z) to PICTURE CONTROL with + or – and press OK.
The PICTURE CONTROL menu appears.
PICTURE CONTROL
CONTRAST
COLOUR
BRIGHTNESS
HUE
RESET
Sap
e l ec t nd r es s
80
50
50
00
OK
4 Using + or – , select the item you want to adjust and press OK.
5 Adjust the picture with + or – and press OK.
With each press the vertical bars increase or decrease and the figure at the
right margin changes to show the control level. (See the table on the next
page.)
6 Repeat steps 4 and 5 to adjust other items.
Basic Operations
18
Page 19

ON TIMER
SLEEP
MENU
OK
7 Press MENU to go back to the original screen.
The adjusted control levels are stored.
Effect of each control
PICTURE CONTROL
CONTRAST
COLOUR
BRIGHTNESS
HUE
RESET
Effect
Less More
Less More
Darker Brighter
Greenish Reddish
Resets all the items to the factory preset levels.
Watching Line Input
Press … repeatedly until the desired input indicator appears.
To go back to the normal TV picture, press … until the programme
position appears, or press ; on the Remote Commander once. For details
of the video input picture, see page 38.
GB
VIDEO Plus+
12
ONCE
45
DAILY
78
WEEKLY
0
TIMER REC
TIMER ON
REC
SCREEN
ON/OFF
QUICK
PAUSE
TIMER
REW FF
PLAY
STOP
3
6
9
PROGR
CLEAR
COUNTER
RESET
Listening with Headphones
Plug the headphones (not supplied) to the 2 (headphones) jack inside the
front panel on the video TV.
The sound from the speaker is shut off.
Basic Operations
19
Page 20

Viewing Teletext
TV stations broadcast an information service called Teletext via the TV
channels. The teletext service allows you to receive various information
such as weather forecasts or news at any time.
Switching Teletext on and off
ON TIMER
SLEEP
VIDEO Plus+
12
ONCE
45
DAILY
78
WEEKLY
0
TIMER REC
TIMER ON
REC
SCREEN
ON/OFF
QUICK
PAUSE
TIMER
REW FF
PLAY
STOP
MENU
OK
3
6
9
PROGR
CLEAR
COUNTER
RESET
1 Select the TV channel which carries the Teletext service you want to watch.
2 Press V to display Teletext.
A Teletext page (normally the index page) is displayed. If there is no
Teletext broadcast, the indication P100 is displayed on a black screen.
3 Press the number buttons to enter the three-digit of the Teletext number
you want.
The numbers are displayed on the screen and the requested page appears
in a few seconds.
If you have made a mistake, type in any three digits, then re-enter the
correct page number.
4 Press ; to return to the TV mode.
Using Fasttext
This feature allows you to access a Teletext page with one button press.
When a Fasttext page is broadcast, a colour-coded menu appears at the
bottom of the screen. The colours of the menu correspond to the red,
green, yellow and blue buttons on the Remote Commander. These
coloured buttons functions as the fasttext buttons in Teletext mode.
GB
To change the teletext channel
• First press ; to return to the TV
mode, then repeat steps 1 to 3.
• If the signal of a TV channel is
weak, teletext errors may occur.
Press the coloured button which corresponds to the colour-coded menu.
The page is displayed after a few seconds.
Basic Operations
20
Page 21

Accessing the next or preceding page
Press (PROGR +/–/ / ).
The next or preceding page appears on the screen.
Superimposing a Teletext page on the TV
picture
Each time you press V, the screen changes as follows:
n Teletext n Teletext and TV
Preventing a Teletext page from being
updated or changed
A Teletext page may consist of several subpages. You can stop the page
scrolling in order to read the text at your own pace.
Press (HOLD).
The symbol appears on the screen and the selected subpage is held.
Press again to return normal Teletext operation.
GB
Basic Operations
21
Page 22

Playing a Tape
This section shows you how to insert a cassette and to play it. More
convenient functions you can use while playing a tape is shown in
“Additional Operations” from page 34.
Inserting a Video Cassette
1 Press ;, PROGR +/– or number buttons on the Remote Commander, or
PROGR +/– on the video TV when the u lamp is lit in red.
2 Open the front panel on the video TV.
3 Gently press the centre of the front side of a cassette with the arrow
indication facing upwards. The cassette is automatically loaded into the
cassette compartment.
The Ò indicator appears on the screen and stays until the cassette has
been loaded.
The video TV turns on automatically when it is in standby mode. If you
insert a cassette with its safety tab removed, playback starts.
ON TIMER
MENU
GB
SLEEP
VIDEO Plus+
12
ONCE
45
DAILY
78
WEEKLY
0
TIMER REC
TIMER ON
REC
SCREEN
ON/OFF
QUICK
PAUSE
TIMER
REW FF
PLAY
STOP
OK
3
6
9
PROGR
CLEAR
COUNTER
RESET
Ejecting a Video Cassette
Press EJECT 6 on the video TV or 6 on the Remote Commander.
The Ò indicator appears and stays until the cassette is ejected.
You can eject the cassette even if the power is off.
Protecting Your Cassette against
Accidental Erasure
The cassette is provided with a safety tab to protect against accidentally
erasing a previous recording. Break off the safety tab with a screw driver
or a similar tool.
If the safety tab is removed, the cassette is ejected when you try to record
on it.
To record on a cassette with the safety tab broken off, simply cover the tab
hole with adhesive tape.
Adhesive tape
Safety tab
Basic Operations
22
Page 23

Playing a Tape
1 Press ;, PROGR +/– or number buttons on the Remote Commander, or
PROGR +/– on the video TV when the u lamp is lit in red.
2 Insert a cassette.
If you insert a cassette with its safety tab removed, playback starts
automatically.
3 Set the COLOUR SYSTEM switch to conform to the colour system of the
tape to be played. Normally, set it to AUTO. If streaks appear when
playing a tape, switch it to select the colour system.
PAL: to play a tape recorded in PAL colour system
NTSC: to play a tape recorded in NTSC colour system
4 Press PLAY ·.
Playback starts. On-screen information is displayed for some seconds.
GB
ON TIMER
SLEEP
VIDEO Plus+
12
ONCE
45
DAILY
78
WEEKLY
0
TIMER REC
TIMER ON
REC
SCREEN
ON/OFF
QUICK
PAUSE
TIMER
REW FF
PLAY
STOP
MENU
OK
3
6
9
PROGR
CLEAR
COUNTER
RESET
To stop playback
Press STOP p.
The video TV goes back to the normal TV picture.
To stop playback for a moment
Press PAUSE P. The picture pauses.
Press PAUSE P again or press PLAY · to resume playback.
If you leave your video TV in pause mode, normal playback resumes after
about 5 minutes to protect the quality of video tapes.
To fast forward the tape
Press STOP p, then press FF ).
To rewind the tape
Press STOP p, then press REW 0.
To search a tape at high speed
During playback, press and hold REW 0 (rewind) or FF ) (fast
forward).
A high-speed picture appears on the TV screen.
To resume normal playback, release the button.
To view the picture in fast forward or rewind mode
Press and hold FF ) during fast forward or REW 0 during rewind.
While you hold the button, you can view the picture.
When you release the button, fast forward or rewind mode is resumed.
Basic Operations
23
Page 24

ON TIMER MENU
SLEEP
VIDEO Plus+
12
ONCE
45
DAILY
78
WEEKLY
OK
3
6
9
0
PROGR
Playing a Tape Repeatedly (Auto
Repeat)
You can play the recorded portion of the tape repeatedly.
Set the AUTO REPEAT switch on the video TV to ON, and press
PLAY ·.
Playback starts. When the tape reaches the end, the video TV rewinds the
tape to the beginning, then plays it.
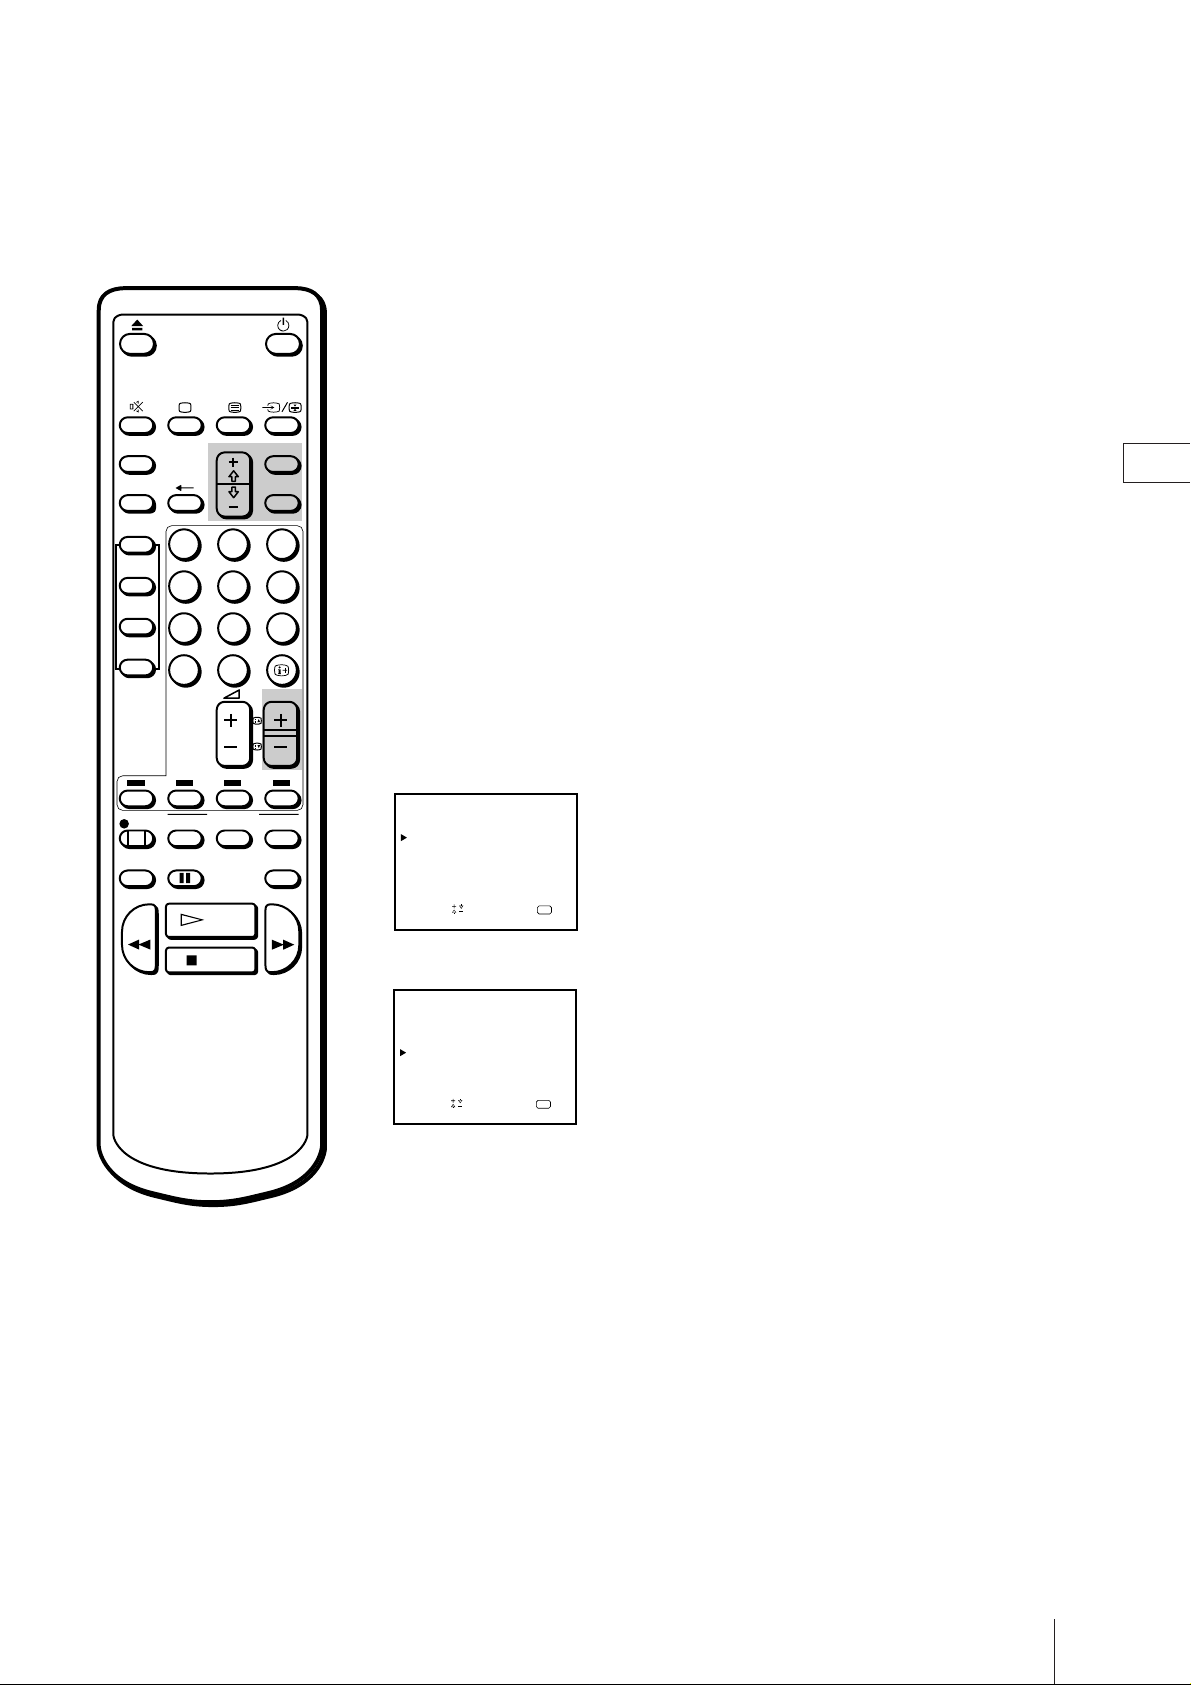
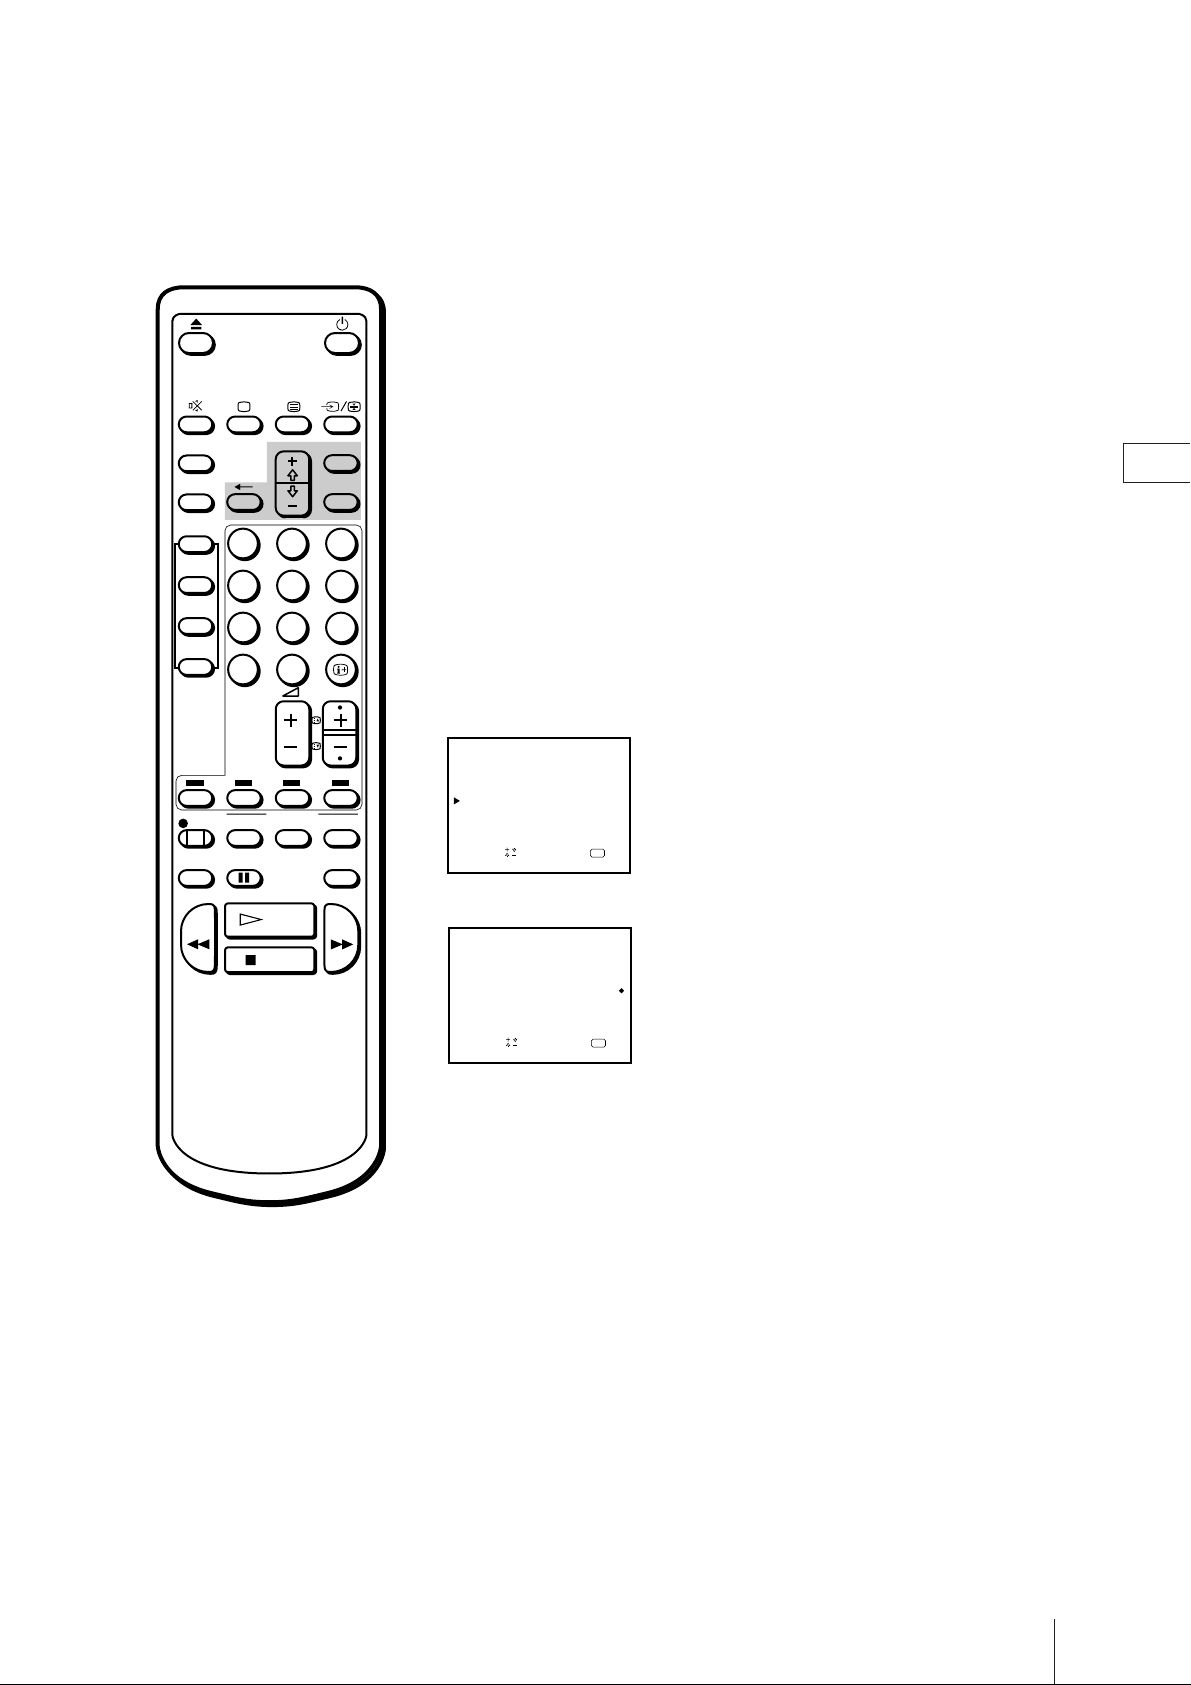
Displaying the on-Screen
Indications
Press to display the following on-screen information. To show only the
amount of tape remaining and linear tape counter on the screen, press
again.
To make the indications disappear, press until no indications appear.
Amount of tape remaining
Beginning of the tape
4.12WED
20:00
Current date and
time
S
2:05:10
Linear tape
counter
End of the tape
ES
Tape operation mode
E
GB
REC
SCREEN
QUICK
PAUSE
TIMER
REW FF
STOP
Note
The tape operation mode will be
displayed whenever you change the
mode (even when the is turned
off.)
ON/OFF
PLAY
CLEAR
COUNTER
RESET
TIMER REC
TIMER ON
Resetting the Tape Counter
The tape counter helps you to locate a certain scene after playback. Press
COUNTER RESET on the Remote Commander to set the counter to
“0:00:00” before playing the tape. The tape counter is automatically reset
to “0:00:00” whenever a cassette is inserted. The video TV keeps counting
the length of the tape being played. Note, however, that the tape counter
does not count the portions without video signals recorded.
Basic Operations
24
Page 25

Recording TV Pr ogrammes
Recording TV Programmes
1 Press ;, PROGR +/– or number buttons on the Remote Commander, or
PROGR +/– on the video TV when the u lamp is lit in red.
2 Insert a cassette with a safety tab.
ON TIMER
SLEEP
VIDEO Plus+
ONCE
DAILY
WEEKLY
12
45
78
0
MENU
MENU
MENU
OK
OK
OK
3
6
9
PROGR
3 Select the programme position with PROGR +/–. You can also use
number buttons on the Remote Commander. For double-digit numbers
(e.g.14), first press ÷, then press 1 and 4.
4 Press REC r.
The REC lamp on the front of the video TV lights up and recording begins.
To stop recording
Press STOP p.
When the tape reaches the end, the video TV rewinds the tape
automatically to the beginning, then stops. This function does not work
when the power of the video TV is off.
To pause recording
Press PAUSE P.
To resume recording, press PAUSE P again.
You can cut out an unwanted scene during recording with this button.
1 Press PAUSE P when an unwanted scene appears on the screen.
Recording pauses.
2 Press PAUSE P again to release the pause mode at the desired scene.
Recording resumes from the point set in step 1.
GB
TIMER REC
TIMER ON
REC
SCREEN
ON/OFF
QUICK
PAUSE
TIMER
REW FF
COUNTER
PLAY
STOP
CLEAR
RESET
When the recording pause mode lasts for about 5 minutes, the video TV
stops recording to protect the quality of video tapes.
Recording with the TV Off
Press u.
The TV screen is turned off and the u lamp lights up.
The video TV continues recording.
Watching a TV programme while
recording another
You can watch a TV programme and record another at the same time.
Select the desired programme position with PROGR +/– or the number
buttons on the Remote Commander or PROGR +/– on the video TV.
Basic Operations
25
Page 26

Recor ding TV Programmes Using
the Timer
The Timer Recording function allows you to preset your video TV to
record up to six programmes within a one-month period.
Before you begin
• Press ;, PROGR +/– or number buttons on the Remote Commander, or
PROGR +/– on the video TV to switch on the video TV.
ON TIMER
SLEEP
VIDEO Plus+
12
ONCE
45
DAILY
78
WEEKLY
MENU
OK
• Make sure that the time and date clock are set. If not, the message
“Please set the clock” is displayed on the screen. Refer to “Setting the
clock” on page 15.
• Make sure that the loaded cassette has its safety tab. If a cassette
3
6
without safety tab is loaded, the message “Tape with safety tab is
required for recording” is displayed.
9
0
PROGR
Setting the Timer
Example: Here is how to record a programme broadcast on programme
position 26 from 20:15 to 21:55 on Friday, 6th December 1996.
GB
TIMER REC
TIMER ON
REC
SCREEN
ON/OFF
QUICK
PAUSE
TIMER
REW FF
COUNTER
PLAY
STOP
CLEAR
RESET
1 Press TIMER ON SCREEN.
The PROGRAMME LIST appears.
PROGRAMME LIST
DATE
START STOP
––
–––
––
––
––
––
Sapelect nd ress
––::––––––––::–––
20 :00
––:––––:––
––:––––:––
––:––––:––
––:––––:––
OK
WED12.4
PROG
–––
–––
––
––
––
––
2 Press OK.
Today’s date coloured red appears.
3 Press + until “6 FRI” appears.
For daily and weekly recording see “Daily/weekly recording” on page 28.
PROGRAMME LIST
DATE
START STOP
––
––
––
––
––
Sapelect nd ress
––::––––––––::––––FRI6
20 :00
––:––––:––
––:––––:––
––:––––:––
––:––––:––
OK
WED12.4
PROG
–––
–––
––
––
––
––
4 Press OK, then set the hour of the recording start time to “20” with + or
–.
PROGRAMME LIST
DATE
START STOP
––
––
––
––
––
Sap
e l ec t nd r es s
––::––––––––::0–2–FRI6
20 :00
––:––––:––
––:––––:––
––:––––:––
––:––––:––
OK
WED12.4
PROG
–––
–––
––
––
––
––
Basic Operations
26
Page 27

Press OK, then set the minute of the recording start time to “15” with +
5
or – .
ON TIMER
SLEEP
VIDEO Plus+
12
ONCE
45
DAILY
78
WEEKLY
0
TIMER REC
TIMER ON
REC
SCREEN
ON/OFF
QUICK
PAUSE
TIMER
REW FF
PLAY
STOP
MENU
OK
3
6
9
PROGR
CLEAR
COUNTER
RESET
––::––––5–1–::0–2–FRI6
20 :00
––:––––:––
––:––––:––
––:––––:––
––:––––:––
OK
WED12.4
PROG
–––
–––
––
––
––
––
PROGRAMME LIST
START STOP
DATE
––
––
––
––
––
e l ec t nd r es s
Sap
6 Press OK, then set the hour of the recording stop time to “21” with + or
– .
PROGRAMME LIST
DATE
START STOP
––
––
––
––
––
Sap
e l ec t nd r ess
––::1–2–5–1–::0–2–FRI6
20 :00
––:––––:––
––:––––:––
––:––––:––
––:––––:––
OK
WED12.4
PROG
–––
–––
––
––
––
––
7 Press OK, then set the minute of the recording stop time to “55” with +
or – .
PROGRAMME LIST
DATE
START STOP
––
––
––
––
––
Sap
e l ec t nd r es s
5–::1–2–5–1–::0–2–FRI6
20 :00
––:––––:––
––:––––:––
––:––––:––
––:––––:––
OK
WED12.4
PROG
––5
–––
––
––
––
––
8 Press OK, then set the programme position to “26” with + or – .
PROGRAMME LIST
DATE
START STOP
––
––
––
––
––
Sap
e l ec t nd r es s
5–::1–2–5–1–::0–2–FRI6
20 :00
––:––––:––
––:––––:––
––:––––:––
––:––––:––
OK
WED12.4
PROG
265
–––
––
––
––
––
GB
If you have made a mistake
during timer setting
Press ? to go back to the previous
position and correct the setting.
If you try to enter the recording
start time prior to the current
time
All the items of the setting will be
erased.
If you try to do incorrect
operation
The video TV displays a message on
the screen to interrupt your setting.
If you turn the U switch off
The TIMER REC buttons do not
fonction.
9 Press OK.
The cursor (z) appears at the left margin.
10 When you want to set other programmes, press – to move down the
cursor to the next line, then repeat steps 2 to 9.
11 Press TIMER REC ON/OFF.
The TIMER REC lamp on the front of the video TV lights up and the video
TV enters timer recording standby mode.
Press TIMER ON SCREEN to erase the PROGRAMME LIST.
Press u to turn the video off TV if you do not want to watch the TV.
The video TV turns on automatically and starts recording at the preset
start time, and goes off at the preset stop time.
Basic Operations
27
Page 28

ON TIMER MENU
SLEEP
VIDEO Plus+
12
ONCE
45
DAILY
78
WEEKLY
OK
3
6
9
0
PROGR
Daily/weekly recording
You can preset your video TV to record the same programme every day of
the week (daily recording) or the same programme on the same day every
week (weekly recording). Press – in step 3 until the desired setting
appears in the “DATE” position. With each press, the setting changes as
follows:
GB
4 (today) n MON–SUN n MON–SAT n MON–FRI n EVERY SAT n
EVERY FRI n EVERY THU n EVERY WED n EVERY TUE n EVERY
MON n EVERY SUN n 3 (next month) n 2......
To stop timer recording
Press TIMER REC ON/OFF.
The TIMER REC lamp turns off.
Using the Video TV before Timer
TIMER REC
TIMER ON
REC
SCREEN
ON/OFF
QUICK
PAUSE
TIMER
REW FF
COUNTER
PLAY
STOP
CLEAR
RESET
Recording Starts
You can watch a TV programme, check the timer settings and reset the
counter in timer recording standby mode. However, press TIMER REC
ON/OFF to turn off the TIMER REC lamp on the front of the video TV to
do the following operations:
• ejecting the cassette
• using the tape operation buttons
• changing or cancelling the timer settings
Remember to press TIMER REC ON/OFF again to make the TIMER REC
lamp light after the above operations.
Basic Operations
28
Page 29

ON TIMER MENU
SLEEP
VIDEO Plus+
12
ONCE
45
DAILY
78
WEEKLY
OK
3
6
9
0
PROGR
Checking the Timer Settings
You can display the list of the timer settings which you preset.
Press TIMER ON SCREEN.
The PROGRAMME LIST appears.
PROGRAMME LIST
DATE
START STOP
7
SAT
MON-SAT
EVERY SUN
––
––
Sape l ec t nd r es s
51::10215013::082FRI6
20 :00
12
00:000:32
03:2155:9
––:––––:––
––:––––:––
OK
WED.4
PROG
265
505
12
––
––
1
Press TIMER ON SCREEN again to erase the PROGRAMME LIST.
Changing or Canceling the Timer
Settings
GB
TIMER REC
TIMER ON
REC
SCREEN
ON/OFF
QUICK
PAUSE
TIMER
REW FF
COUNTER
PLAY
STOP
CLEAR
RESET
1 Press TIMER REC ON/OFF to turn off the TIMER REC lamp on the front
of the video TV.
2 Press TIMER ON SCREEN to display the PROGRAMME LIST.
3 Select the setting you want to change or cancel with + or – .
PROGRAMME LIST
DATE
START STOP
SAT
7
MON-SAT
EVERY SUN
––
––
Sap
elect nd ress
51::10215013::082FRI6
20 :00
12
00:000:32
03:2155:9
––:––––:––
––:––––:––
OK
WED.4
PROG
265
505
12
––
––
1
4 To change the setting
Using + or – and OK, re-enter all the items.
Refer to “Setting the timer” steps 2 to 9 on pages 26 and 27.
To cancel the setting
Press TIMER REC CLEAR.
5 Press TIMER ON SCREEN to go back to the original screen.
6 If there are other timer settings on the list, press TIMER REC ON/OFF to
set the video TV to timer recording standby mode.
Basic Operations
29
Page 30

Recording Using the Quick-Timer
You can preset your video TV to start timer recording immediately and to
automatically stop recording after a specific time period.
If you have not set the clock, quick-timer recording cannot be done.
ON TIMER MENU
SLEEP
VIDEO Plus+
12
ONCE
45
DAILY
78
WEEKLY
OK
3
6
9
0
PROGR
TIMER REC
TIMER ON
REC
SCREEN
QUICK
PAUSE
TIMER
REW FF
STOP
ON/OFF
PLAY
CLEAR
COUNTER
RESET
If you are recording
1 Press QUICK TIMER on the Remote Commander.
The “QUICK TIMER 0:00” appears on the screen.
2 Press QUICK TIMER repeatedly to select the recording time period. With
each press, the time period changes as follows:
0:00 0:30 1:00 .... 3:30 4:00
Even if you switch off the video TV, it continues recording. After the
selected time period has elapsed, recording stops automatically.
If you are not recording
1 Press ;, PROGR +/– or number buttons on the Remote Commander, or
PROGR +/– on the video TV to switch it on.
2 Insert a cassette with its safety tab.
3 Select the programme position which you want to record.
GB
To change the recording time
period after quick-timer
recording begins
Press QUICK TIMER until the
desired time period appears.
To display the remaining time
period during quick-timer
recording
Press . The recording time
period decreases minute by minute.
To stop quick-timer recording
Press TIMER REC ON/OFF.
4 Press QUICK TIMER on the Remote Commander.
The “QUICK TIMER 0:00” appears on the screen.
5 Press QUICK TIMER repeatedly to select the recording time period. With
each press the time period changes as follows:
0:00 0:30 1:00 .... 3:30 4:00
The time period turns yellow and recording starts.
Even if you switch off the video TV, it continues recording.
When the preset time period has elapsed, the video TV stops recording.
Basic Operations
30
Page 31

Notes on PDC recording
• If you use PDC recording while
watching the TV, the programme
automatically changes to the timer
recording programme and you
cannot change programmes.
Make sure to use PDC recording
only when the video/TV set is in
standby mode or in power switch
off mode. If you watch the TV
continuously, cancel the PDC
timer recording.
• If recording times overlap due to a
PDC time shift, the programme
that was broadcast first has
priority. Recording of the second
programme begins when the first
programme has finished.
• If the video TV could not receive a
PDC signal because it was too
weak or because the station failed
to transmit PDC signals, timer
recording is made without the
PDC function.
Timer Recording with PDC Signals
The German broadcasting system transmits PDC (Programme Delivery
Control) signals with the TV programmes. These signals assure you that
your timer recordings are made regardless of broadcast delays, early starts,
or broadcast interruptions. For example, if an urgent news bulletin
interrupts a regular programme, recording stops. As soon as the
interrupted programme resumes, recording starts again.
1 If the TIMER REC lamp is lit on the front panel, press TIMER REC ON/
OFF to turn it off.
2 Before setting the timer, press PDC on the inside of the front panel so that
the PDC lamp lights up.
3 Set the timer following the steps in “Setting the timer” (pages 26 and 27).
GB
Basic Operations
31
Page 32

Recor ding TV programmes using
VIDEO Plus+
Just enter the programme’s “PlusCode” listed in the TV programme guide.
The date, times and programme position of that programme are set
automatically.
Before you begin
ON TIMER MENU
SLEEP
VIDEO Plus+
12
ONCE
45
DAILY
78
WEEKLY
OK
3
6
9
0
PROGR
TIMER REC
TIMER ON
REC
SCREEN
QUICK
PAUSE
TIMER
REW FF
STOP
ON/OFF
PLAY
CLEAR
COUNTER
RESET
• Press ;, PROGR +/– or a number button on the Remote Commander, or
PROGR +/– on the video TV to switch on the video TV.
• Make sure that the time and date clock are set correctly. If not, refer to
“Setting the clock” on page 15.
• Make sure that the loaded cassette has its safety tab.
1 Press VIDEO Plus+.
The SHOWVIEW menu appears.
SHOWVIEW
SHOWVIEW NO
[
Set 0-9 and
press ONCE DAILY WEEKLY
---------
]
20:00
4. 12WED
2 Press the number buttons to enter the desired programme’s PlusCode.
SHOWVIEW
SHOWVIEW NO
[
Set 0-9 and
press ONCE DAILY WEEKLY
82477691-
]
20:00
4. 12WED
3 Press ONCE, DAILY or WEEKLY you want to set.
For each setting, see table below.
GB
If you have made a mistake
entering programme‘s
PlusCode
Press TIMER REC CLEAR and reenter the correct number.
To record the programme Press
Only once ONCE
Monday to Friday at the same scheduled time DAILY
Every week at the same scheduled time WEEKLY
The recording information appears: date, start and stop times, programme
position number.
SHOWVIEW
SHOWVIEW NO
[
DATE START STOP PROG
Press TIMER REC
[ON/OFF]button
]
82477691-
6 FRI 20:00 22:00 58
20:00
4. 12WED
Check that the information is correct. If it is not, press TIMER CLEAR to
cancel the setting.
Basic Operations
32
Page 33

Repeat steps 2 and 3 to preset another timer setting.
4
5 Press TIMER REC ON.
The TIMER REC lamp on the front of the video TV lights up and the video
TV enters timer recording standby mode.
ON TIMER MENU
SLEEP
VIDEO Plus+
12
ONCE
45
DAILY
78
WEEKLY
OK
3
6
9
0
PROGR
TIMER REC
TIMER ON
REC
SCREEN
QUICK
PAUSE
TIMER
REW FF
STOP
STOP
ON/OFF
PLAY
CLEAR
COUNTER
RESET
To stop recording
To stop the video TV while recording a programme, press p STOP.
GB
Basic Operations
33
Page 34

Additional Operations
Switching off Automatically — Sleep
Timer
You can automatically switches the video TV into standby mode after a
selected time period.
Press SLEEP.
With each press, the time period (in minutes) changes as follows:
ON TIMER MENU
SLEEP
VIDEO Plus+
12
ONCE
45
DAILY
78
WEEKLY
OK
3
6
9
0
PROGR
TIMER REC
TIMER ON
REC
SCREEN
QUICK
PAUSE
TIMER
REW FF
STOP
ON/OFF
PLAY
CLEAR
COUNTER
RESET
OFF 30 60 90
One minute before the TV switches into standby mode, a message ‘‘Good
night’’ is displayed on the screen.
GB
To cancel the timer
Press SLEEP to select “OFF”.
Additional Operations
34
Page 35

Switching on at Your Desired T ime
— On Timer
You can preset your video TV to automatically switch on at a desired time.
You can select the TV programme or video playback to be switched on.
1 Press MENU to display the main menu.
2 Move the cursor (z) to “ON TIMER SET” with + or – and press OK.
ON TIMER
SLEEP
VIDEO Plus+
12
ONCE
45
DAILY
78
WEEKLY
MENU
OK
OKOK
OK
3
6
9
0
PROGR
The ON TIMER SET menu appears.
ON TIMER SET
TIME:
SOURCE:
ON TIMER: OFF
Sapelect nd ress
6:00
TV PROG 1
20 :00
WED12.4
OK
3 Press OK.
The timer setting hour section turns red.
4 Set the hour with + or – and press OK.
The minute section turns red.
GB
REC
SCREEN
QUICK
PAUSE
TIMER
REW FF
STOP
ON/OFF
PLAY
CLEAR
COUNTER
RESET
TIMER REC
TIMER ON
To erase the message
Press any button on the video TV or
Remote Commander.
5 Set the minutes (by one minute) with + or – and press OK.
The cursor appears beside “TIME.”
6 Move the cursor (z) to “SOURCE” with + or – and press OK.
7 Select TV or VCR (video playback) to be switched on with + or – and
press OK.
When you select TV, select the programme position with + or – and
press OK.
7:30
TV PROG 1
20 :00
WED12.4
2
OK
ON TIMER SET
TIME:
SOURCE:
ON TIMER: OFF
e l ec t nd r es s
Sap
8 Move the cursor (z) to “ON TIMER” with + or – and press OK, then
select ON with + or – and press OK.
9 Press MENU to go back to the original screen.
10 Press ON TIMER.
The ON TIMER lamp on the front of the video TV lights up.
If you are not using the video TV, press u to set the video TV in standby
mode.
At the preset time, the video TV automatically switches on and a message
“Good morning” is displayed for five minutes.
If you do not press any button for 2 hours, the video TV automatically
shuts off.
Additional Operations
35
Page 36

Enhancing V ideo Picture Quality
Adjusting the Tracking
Adjusting the Tracking Automatically
The tracking condition is automatically adjusted on this video TV. The
ON TIMER
SLEEP
MENU
OK
OKOK
OK
AUTO TRACKING indicator will appear while the video TV is searching
for best tracking condition.
GB
VIDEO Plus+
12
ONCE
45
DAILY
78
WEEKLY
0
TIMER REC
TIMER ON
REC
SCREEN
ON/OFF
QUICK
PAUSE
TIMER
REW FF
PLAY
STOP
3
6
9
PROGR
CLEAR
COUNTER
RESET
Adjusting the Tracking Manually
If streaks or snow noise appear on the video playback picture, adjust the
tracking condition manually.
1 Press MENU to display the main menu.
2 Move the cursor (z) to “TRACKING CONTROL” with + or – and
press OK.
The TRACKING CONTROL menu appears.
TRACKING CONTROL
AUTO
MANUAL
Sap
e l ec t nd r ess
3 Select MANUAL with + or – and press OK.
The tracking meter appears.
TRACKING CONTROL
AUTO
MANUAL
NORMAL TRACKING
OK
To go back to automatic
tracking
Select AUTO in the TRACKING
CONTROL menu with + or –
and press OK.
Sap
e l ec t nd r es s
OK
4 Using + or – , adjust the tracking to get the best picture.
5 Press OK.
The main menu reappears.
6 Press MENU to go back to the original screen.
Additional Operations
36
Page 37

ON TIMER
SLEEP
VIDEO Plus+
ONCE
DAILY
WEEKLY
12
45
78
0
MENU
OK
OKOK
OK
3
6
9
PROGR
Adjusting with the Optimum
Picture Control (OPC)
This function allows you to improve playback and recording quality by
adjusting the system parameter automatically according to the condition
of the video tape.
This function is set to ON at the factory. To maintain better picture
quality, it is advisable to leave the function on. The OPC function works
on all types of tapes, even on rental tapes.
To change the setting, use the menu display.
1 Press MENU to display the main menu.
2 Move the cursor (z) to VISUAL MODE with + or – and press OK.
The VISUAL MODE menu appears.
VISUAL MODE
PICTURE CONTROL
STANDARD
MILD
MOVIE
OPC: ON
GB
TIMER REC
TIMER ON
REC
SCREEN
ON/OFF
QUICK
PAUSE
TIMER
REW FF
COUNTER
PLAY
STOP
CLEAR
RESET
Sap
e l ec t nd r es s
OK
3 Move the cursor (z) to OPC with + or – and press OK.
4 Select ON or OFF with + or – and press OK.
VISUAL MODE
PICTURE CONTROL
STANDARD
MILD
MOVIE
OPC: OFF
Sap
elect nd ress
OK
5 Press MENU to erase the main menu.
About the Auto Head Cleaner
The auto head cleaner built into this set automatically cleans the video
heads when a cassette is loaded or unloaded. If the effect of head cleaning
is not sufficient even after a cassette has been loaded/unloaded several
times, clean the heads using the Sony V-25CL video head cleaning cassette.
For details on head cleaning see page 42.
Additional Operations
37
Page 38

Connecting Optional Equipment
Watching the Picture Input from
Optional Equipment
Rear
Inside the front panel
VMC-212CE EURO cable (not supplied)
to video/audio outputs
to 21-pin
EURO-AV
connector
To watch the video input signal
Press … repeatedly until the desired input indicator appears on the screen.
• … 1 for audio/video input or RGB input through the W connector
• Do not play equipment connected to the W connector, such as a VCR,
during recording a programme to which the Pay-TV decoder is set. If you
do so, the playback signal of the connected equipment will be recorded.
• … 2 for audio/video input through the … 2/ 2 jacks on the front
panel
• If you play equipment connected to the W connector, such as a VCR,
while watching a programme to which the Pay-TV decoder is set, the TV
is automatically switched to the input through the W connector. When
you are watching a programme to which the Pay-TV decoder is not set,
the TV is not automatically switched.
GB
Additional Operations
38
Page 39

Editing with Another VCR
Using an additional VCR, you can edit a tape.
Editing from another VCR
Connections are the same as in “Watching the picture input from optional
equipment.”
Editing onto another VCR
Rear
to 21-pin
EURO-AV
connector
VMC-212CE EURO cable (not supplied)
Watching the Pay-TV Channel
After connecting the pay-TV decoder to the W connector using VMC212CE EURO cable, set the Pay-TV decoder following the steps in “Setting
a Pay-TV channel“ (page 12).
GB
Rear
VMC-212CE EURO cable (not supplied)
to 21-pin
EURO-AV
connector
Additional Operations
39
Page 40

Additional Information
Troubleshooting
Function
TV reception
Clock and
timer
Playback
Problems
No picture (screen is
dark), no sound
Good picture but no
sound
No colour or poor
colour(screen is
dark) for colour
programmes, but
good sound.
No picture, no
sound
from video input
source
The clock has
stopped and “--/--”
is displayed.
Power is on, but the
tape does not run.
Poor playback
picture
The sound drops
out.
Possible causes and remedies
• The mains lead is disconnected.
/ Connect the mains lead.
• The video TV is switched off.
/ Press ;, PROGR +/– or programme number on the Remote
Commander, or PROGR +/– on the video TV.
• The headphones are connected to 2 jack.
/ Disconnect the headphones.
• The ¤ is displayed on the screen.
/ Press ¤.
• Press Á +/–.
• Adjust “CONTRAST,” “COLOUR,” and “BRIGHTNESS” in the
PICTURE CONTROL menu. (page 18)
• The connecting cord between the video TV and the input source is
disconnected.
/ Connect it firmly.
• Input is not selected correctly.
/ Press … until the desired input indicator appears. (page 38)
• The power has been interrupted, the U switch is turned off or the
mains lead is disconnected for more than a week.
/ Re-set the clock and timer settings if necessary. (pages 15, 26)
• The safety device has been activated.
/ Switch off, disconnect the mains lead, and leave the set for about
one minute.
• The COLOUR SYSTEM switch is set to incorrect position.
/ Set COLOUR SYSTEM to the position corresponding to the colour
system with which the tape is recorded. (page 23)
• Adjust the tracking. (page 36)
• The video heads are dirty.
/ Clean the heads using the Sony V-25CL video head cleaning tape
(page 42). If the cleaning tape is not available in your area, have
the heads cleaned at your nearest Sony service facility. (Do not use
a commercially available wet-type cleaning tape, as it may
damage the video heads.)
• The tape is worn out.
/ Use a new tape.
• The tape is defective.
/ Use a new tape.
GB
Additional Information
40
Page 41

Function
Recording
Timer
recording
Others
Problems
The cassette is ejected
when you press
REC r.
Recording cannot be
done.
Timer settings cannot
be made.
The cassette is ejected
when you press
TIMER REC ON/
OFF.
The TIMER REC lamp
does not light up
even though you
press TIMER REC
ON/OFF.
Timer recording was
not made.
A cassette cannot be
inserted.
The Remote
Commander does not
work.
Possible causes and remedies
• The safety tab of the cassette has been removed.
/ Cover the tab hole with adhesive tape, or use another cassette
with a safety tab. (page 22)
• No cassette has been inserted.
/ Insert a cassette with the safety tab.
• The tape is at its end.
/ Rewind the tape.
• The clock has not been set.
/ Set the current time and date. (page 15)
• You have made a mistake when setting the timer.
/ Check the setting steps. (pages 26 to 28)
• The safety tab of the cassette has been removed.
/ Cover the tab hole with adhesive tape, or use another cassette
with a safety tab.
• No cassette has been inserted.
/ Insert a cassette with its safety tab.
• The tape is at its end.
/ Rewind the tape.
• No setting is made for timer recording.
/ Set the programme for timer recording. (pages 26 to 28)
• You did not press TIMER REC ON/OFF.
• There has been a power interruption lasting more than a week.
• Another cassette is already inserted.
/ Press 6 to eject the cassette.
• The batteries are low.
/ Replace the batteries. (page 4)
• The batteries are installed incorrectly.
/ Install the batteries with correct polarities. (page 4)
GB
Additional Information
41
Page 42

Taking Car e of Your V ideo TV
Video Head Cleaning
When playback pictures are noisy and hardly visible, or when no picture
appears, the video heads may be contaminated. In such a case, clean the
video heads using the V-25CL video head cleaning tape (not supplied), or
ask Sony service personnel to clean the video heads, with this service there
would be a standard charge.
Symptoms caused by contaminated video heads
• Normal picture • Rough picture • Unclear picture • No picture (or
GB
black & white
screen appears)
Note
Do not use a commercially available
wet-type cleaning tape, as it may
damage the video heads.
initial terminal
Worn Video Heads
If your video TV displays a poor picture after you clean the video heads,
you may need to replace them. Consult your dealer or the Sony Service
Center nearest you.
Check the Video Heads after 1,000
Hours of Use
A video TV is a high precision machine. It must record on or play from
magnetic tapes on which the image signals from the colour TV or the
video camcorder are recorded.
The video heads or mechanical parts for transporting the tape are
contaminated or worn after extended use. You should have your video TV
checked after each 1,000 hours of use.
About Moisture Condensation
If the unit is brought directly from a cold place to a warm place, moisture
may condense on the video head drum. If this happens, the tape may stick
to the head drum and it may be damaged or the unit may not operate
correctly. To avoid possible damage caused by moisture condensation, be
sure not to leave a cassette inside the compartment when the unit is not in
use. When bringing the unit from a cold place to a warm place, wait for
about 10 minutes before operating it.
If the tape operation buttons do not work due to moisture condensation,
leave the unit for more than one hour with the power on.
Additional Information
42
Page 43

Specifications
TV Section
Television system I
Colour system PAL
Channel coverage See “Television channel number
guide” at the next page.
Picture tube Trinitron
Approx. 54.5 cm (21 inches)
(Approx. 51 cm picture
measured diagonally)
Aerial in UHF
Video Section
Format VHS standard
Video recording system
Rotary 2-head helical scanning
system
Audio recording system
Monaural
Video signal PAL
Tape speed PAL: 23.39 mm/sec.
NTSC (playback only): 33.35
mm/sec.
Maximum recording time
240 minutes with E-240
Inputs and Outputs
Inputs LINE IN VIDEO: phono jack (1)
1 Vp-p, 75 ohms, unbalanced,
sync negative
LINE IN AUDIO: phono jack (1)
Input level: 500 mVrms (100%
modulation)
EURO-AV: 21-pin
Output EURO-AV: 21-pin
Headphones jack Monaural minijack
General
Clock Quartz locked
Clock back up Approx. 7 days
Clock requirements
220-240 V AC, 50 Hz
Power consumption
112 W
Operating temperature
5°C to 40°C (41°F to 104°F)
Storage temperature
–20°C to 60°C (-4°F to 140°F)
Dimensions Approx. 540 × 518 × 470 mm
(w/h/d) (213/8 × 201/2 × 185/8
inches)
Mass Approx. 25 kg (55 lb 2 oz)
Accessories supplied
Remote Commander (1)
R6 (size AA) batteries (2)
Design and specifications are subject to change
without notice.
Note
This appliance conforms with the EU Directive 89/
336/EEC regarding interference suppression.
GB
Additional Information
43
Page 44

Television Channel Number Guide
Only the main transmitters are listed. Information regarding the regional sub-relay channel numbers can be
obtained by contacting The BBC Engineering Information Dept. (0181) 752 5040.
MAIN TRANSMITTERS BBC1 BBC2 ITV CH4
London & South East
1 Bluebell Hill 40 46 43 65
2 Crystal Palace 26 33 23 30
3 Dover 50 56 66 53
4 Heathfield 49 52 64 67
5 Oxford 57 63 60 53
South-West
6 Beacon Hill 57 63 60 53
7 Caradon Hill 22 28 25 32
8 Huntshaw Cross 55 62 59 65
9 Redruth 51 44 41 47
!ºStockland Hill 33 26 23 29
Channel Islands
!¡Fremont Point 51 44 41 47
South
!™ Hannington 39 45 42 66
!£ Midhurst 61 55 58 68
!¢ Rowridge 31 24 27 21
West
! Mendip 58 64 61 54
East
!§ Sandy Heath 31 27 24 21
!¶Sudbury 51 44 41 47
!•Tacolneston 62 55 59 65
Midlands (West)
!ªRidge Hill 22 28 25 32
@º Sutton Coldfiled 46 40 43 50
@¡ The Wrekin 26 33 23 29
Midlands (East)
@™ Waltham 58 64 61 54
Northern Ireland
@£ Brougher Mountain 22 28 25 32
@¢ Divis 31 27 24 21
@ Limavady 55 62 59 65
North
@§ Belmont 22 28 25 32
@¶ Emley Moor 44 51 47 41
North-West
@• Winter Hill 55 62 59 65
North-East
@ª Bilsdale West Moor 33 26 29 23
#º Caldbeck 30 34 28 32
#¡ Chatton 39 45 49 42
#™ Pontop Pike 56 64 61 54
Scotland
#£ Angus 57 63 60 53
#¢ Black Hill 40 46 43 50
# Sandale 22 67 – –
#§ Caldbeck – – 28 32
#¶ Craigkelly 31 27 24 21
#• Darvel 33 26 23 29
#ª Durris 22 28 25 32
$º Eitshal (Lewis) 33 26 23 29
$¡ Keelylang Hill 40 46 43 50
$™ Knock More 33 26 23 29
$£ Rosemalkie 39 45 49 42
$¢ Rumster Forest 31 27 24 21
$ Selkirk 55 62 59 65
Wales
$§ Blaenplwyf 31 27 24 21
$¶ Carmel 57 63 60 53
$• Llanddona 57 63 60 53
$ª Moel-y-Parc 52 45 49 42
%º Presely 46 40 43 50
%¡ Wenvoe 44 51 41 47
GB
Additional Information
44
Page 45

Index to Parts and Controls
Video TV Set—Front
This section briefly describes the buttons and controls on the video TV set and on the Remote Commander.
For more information, refer to the pages next to each description.
GB
1 Lamps
REC(recording) (page 25)
TIMER REC(recording) (page 27)
ON TIMER (page 35)
PDC (page 31)
2u (standby) lamp (page 16)
OPEN
u
REC
TIMER REC
EJECT
ON TIMER
OPC
TIMER REC
PDC
ON/OFF
ON
OFF
REC AUTO
REPEAT
PROOR
AUTO
PAL
NTSC
COLOUR
SYSTEM
9Á (volume) +/– buttons (page 16)
!ºPROGR(programme) +/– buttons (page 16)
!¡Remote sensor
!™ U (MAIN POWER) switch (page 2, 6, 16)
3u (standby) button (page 16)
4 EJECT 6 button (page 22)
5 Cassette compartment (page 22)
6…2/ 2 (video/audio input) jacks (page 38)
72 (headphones) jack (page 19)
8 Tape transport buttons (page 23)
!£… (input select) button (pages 19, 38)
!¢PDC button (page 31)
! TIMER REC ON/OFF button (pages 28, 29)
!§REC(recording) r button (page 25)
!¶AUTO REPEAT ON/OFF switch (page 24)
!•COLOUR SYSTEM switch (page 23)
Additional Information
45
Page 46

Remote Commander
ON TIMER MENU
0
ON/OFF
OK
3
6
9
PROGR
CLEAR
COUNTER
RESET
SLEEP
VIDEO Plus+
12
ONCE
45
DAILY
78
WEEKLY
TIMER REC
TIMER ON
REC
SCREEN
QUICK
PAUSE
TIMER
REW FF
PLAY
STOP
16 (eject)button (page 22)
2; (TV power on) button (pages 6, 16)
3¤ (muting) button (page 17)
4 ON TIMER button (page 35)
5 SLEEP button (page 34)
6 VIDEO Plus+ buttons
ONCE button (page 32)
DAILY button (page 32)
WEEKLY button (page 32)
7 Teletext operation buttons (page 20)
8 REC (recording) r button (page 25)
9 QUICK TIMER button (page 30)
!ºTape transport buttons (page 23)
· PLAY, p STOP, P PAUSE, 0 REW
(rewind), ) FF (fast forward)
!¡u (standby) button (page 16)
!™ (Teletext) button (page 20)
!£… (input select)/ button (pages 19, 21, 38)
!¢Menu operation buttons (pages 6, 7)
MENU
+ /–
?
OK
! Number button (page 6, 16)
!§ (on-screen display) button (pages 17, 24)
!¶PROGR (programme) +/–/ / (Teletext
page access) buttons (page 16, 21)
!•Á (volume) +/– buttons (page 16)
!ªTIMER REC buttons
TIMER ON SCREEN (pages 27, 29)
ON/OFF (pages 27, 29)
CLEAR (page 29, 32)
@º COUNTER RESET button (page 24)
GB
Additional Information
46
Page 47

GB
Additional Information
47
Page 48

Sony Corporation
 Loading...