

Sony KD-32DX100U User Manual
KD-32DX100U
Thank you for purchasing this
Sony Trinitron Digital Television.
After following this step by step guide you will be
able to:
Insert batteries into the remote control.
1
Checking the supplied
Connecting the TV
accessories
3
The following accessories are included with your TV.
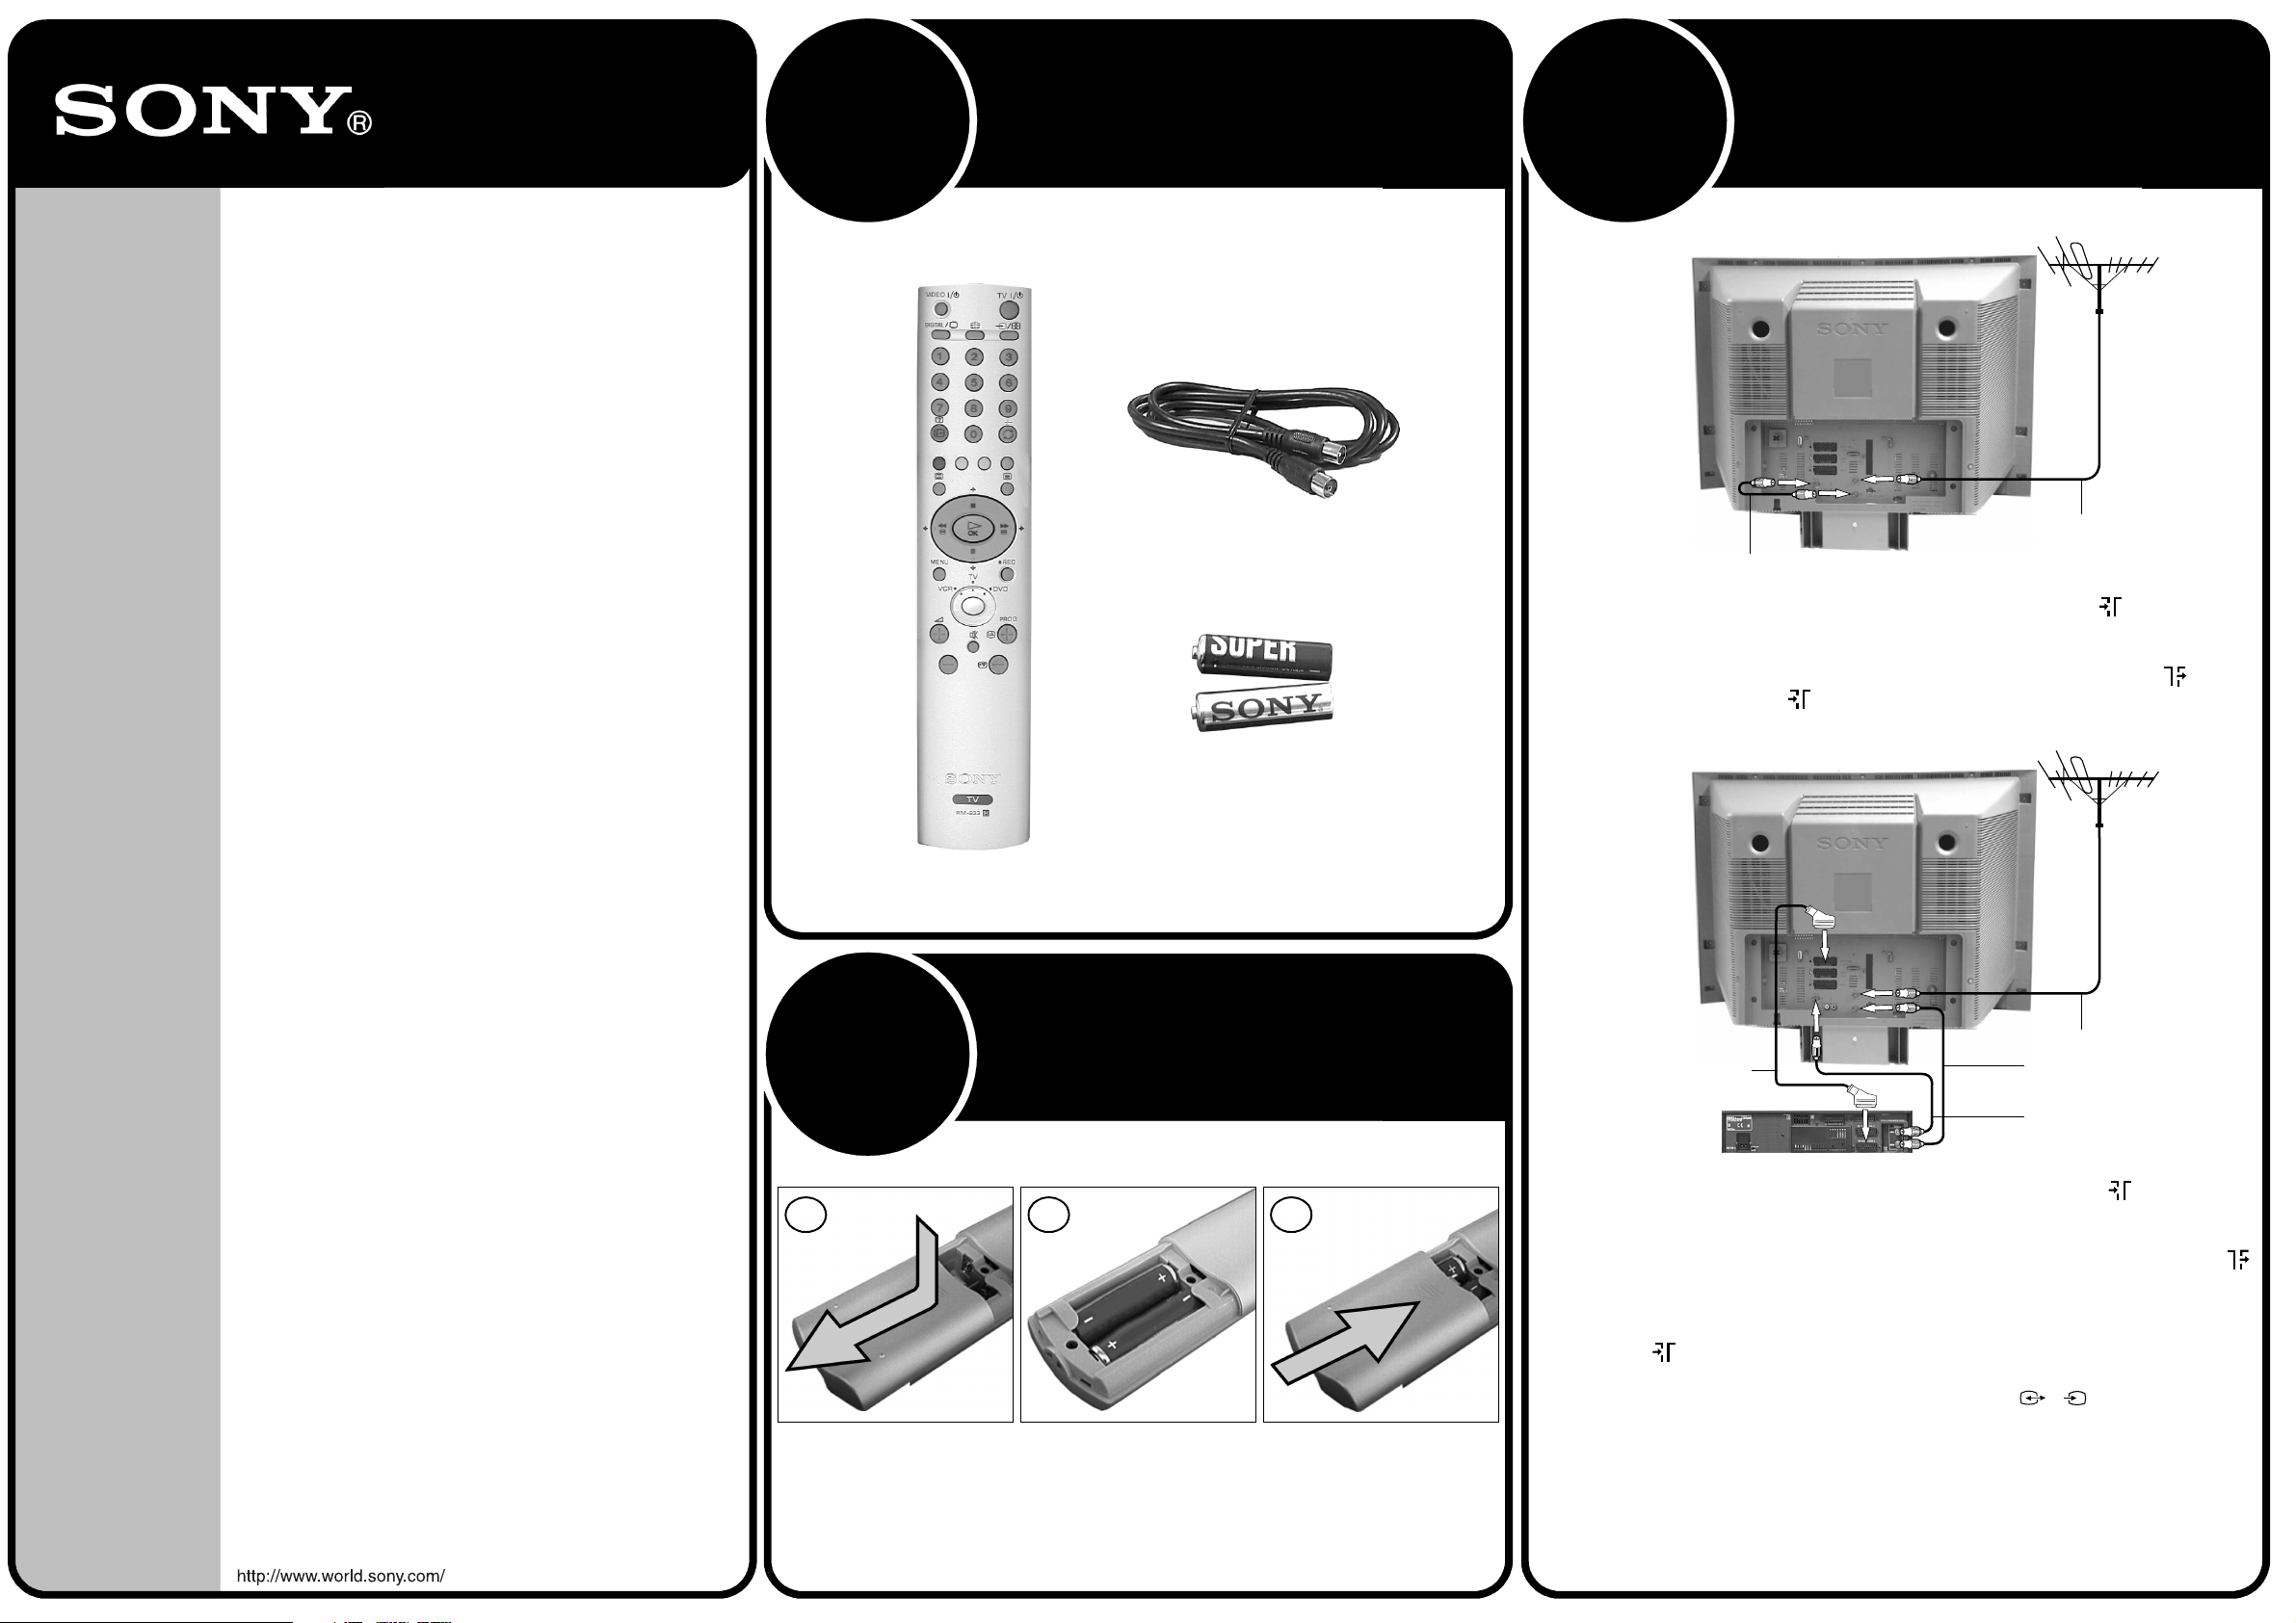
Connecting an aerial only
Connect the aerial to your TV.
Connect a video cassette recorder (VCR) to
your TV.
Tune your TV.
View TV programmes.
RF Loopthrough cable
Batteries
Remote Control
Inserting batteries into
the remote control
2
Insert the batteries as shown below.
1 2 3
Existing aerial lead
RF Loopthrough
cable (supplied)
1 Connect your existing aerial lead to the Digital socket marked on the rear of
the TV as shown.
2 Connect the supplied RF loopthrough cable from the sockets marked to the
Analogue socket marked .
Connecting an aerial and a VCR
Existing aerial lead
Scart lead
(not supplied)
Rear of VCR
1 Connect your existing aerial lead to the Digital socket marked on the rear of
the TV as shown.
RF Loopthrough
cable (supplied)
RF Lead
(not supplied)
Quick Start Guide
Always remember to:
• observe the correct polarity when inserting batteries,
• dispose of batteries in an environmentally friendly way.
4-206-495-01
2 Connect the supplied RF loopthrough cable from the aerial socket marked
on the TV to the RF input socket of your VCR.
3 Connect an RF lead from the RF output of your VCR to the Analogue TV socket
marked .
4 Connect a scart lead from the scart socket marked on the rear of the
TV to a scart socket on your VCR (Refer to the VCR instructions).
5 Connect the VCR to the mains socket and switch on.
6 Insert a pre-recorded tape into the VCR and press the ‘PLAY’ button. This
enables the TV set to locate and store the video channel during the
‘Automatically tuning the TV’ procedure.
s
3/
3
Switching on the TV
VIDEO
/
TV
/
DIGITAL
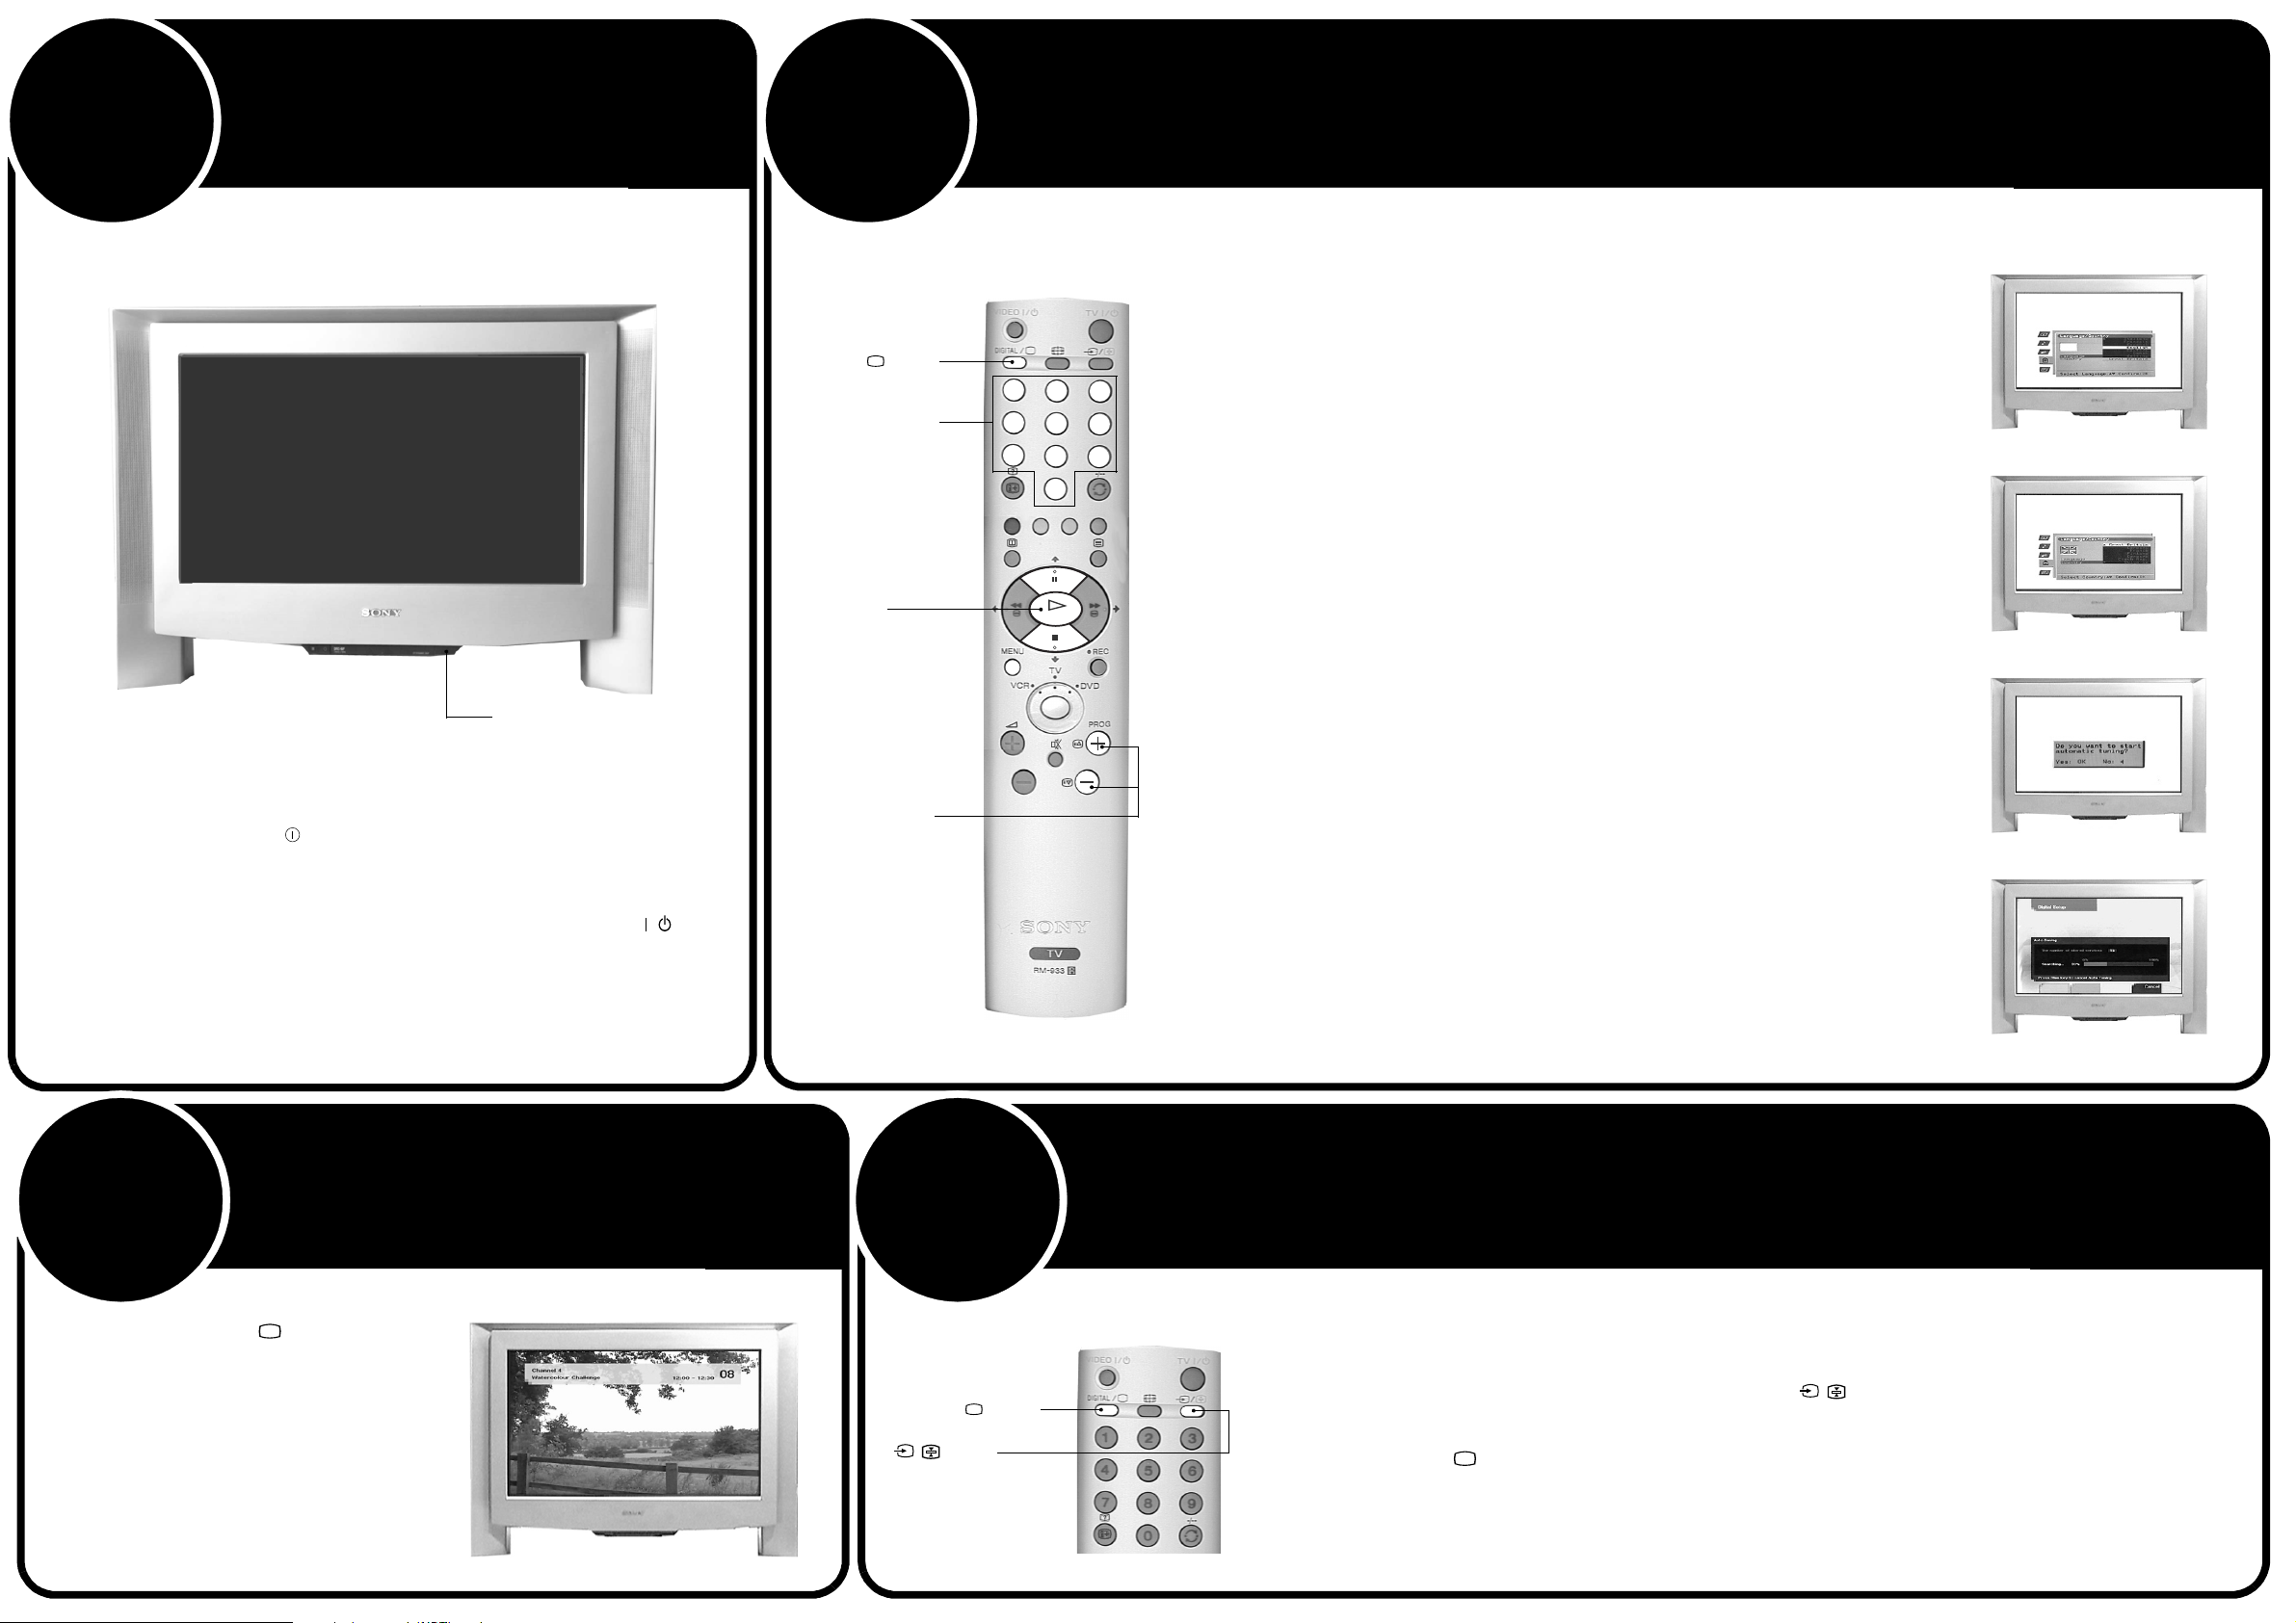
Automatically tuning the TV
4
On/Off button
1 Connect the TV plug to your mains socket (220 - 240V AC, 50 Hz) and switch on.
2 Push in the On/Off button ( ) on the front of the TV.
If the red standby mode indicator on the front of the TV is lit, press the TV button
on the remote control to switch on the TV set. Please be patient as the picture may
take a few moments to appear on the TV screen.
/
5
DIGITAL/ button
Numbered buttons
Control Pad
(v,V, OK buttons)
PROG +/- buttons
When you first switch on your new TV you need to tune in all the available channels. The ‘Auto Tune’ feature automatically searches and stores all
the available channels for you. The following instructions and illustrations will guide you through this procedure.
VIDEO
DIGITAL
/
1
4
7
TV
/
1. When you switch on the TV for the first time the Language/Country menu appears on the
TV screen with the word ‘English’ highlighted. Press the V or v buttons on the remote
2
3
5
6
8
9
0
O
K
control to choose your required language. Press the OK button to confirm.
2. The word ‘Country’ is now highlighted. Press the V or v buttons on the remote control to
choose the country in which you are using this TV. Press the OK button to confirm.
Note: The Digital features of this TV are designed for use in Great Britain only.
3. The autotune prompt screen appears. Press the OK button to select ‘Ye s ’. The autotune
procedure begins, first tuning in all available Digital channels.
As this may take some time, a display appears on the TV screen to inform you of the tuning
progress.
When all the available Digital channels are found, the analogue tuning display appears and
all the analogue channels are captured and stored.
If no Digital and no analogue channels are found, a display appears on the TV screen
asking you to confirm your aerial is connected. Check the aerial has been connected
correctly then press the OK button to repeat the tuning process.
Once all Digital and analogue channels have been captured and stored, the TV returns to
normal operation and displays the Digital channel stored on channel number 1.
Note: If no Digital channels are captured, the analogue channel that is stored on channel number 1 is displayed.
4. To view programmes, press the PROG+/- buttons or the numbered buttons.
Choosing the language.
Choosing the country.
The autotune prompt screen.
Tuning the Digital channels.
Selecting Digital
or analogue mode
6
Press the DIGITAL/ button on the
remote control to switch between
Digital and analogue mode.
To check if you are watching a Digital or
analogue mode press the PROG +/button. If you are watching a digital
programme a banner will appear
momentarily at the top of the screen. In
analogue mode, this banner is not
present.
Banner indicating TV is in Digital mode
Your television stations are now stored in your television’s memory.
Watching a pre-recorded video tape
7
1. With a pre-recorded video tape inserted into your VCR, press the ‘PLAY’ button on the VCR. The TV
automatically displays the video picture (providing that you have used a fully wired 21 pin scart lead to connect
your VCR to the TV).
DIGITAL/ button
/ button
If the video picture does not automatically appear, press the / button on the remote control repeatedly until
the video picture is displayed on the TV screen.
2. Press the DIGITAL/ button on the remote control to return to normal TV mode.
Note: Alternatively, with the TV in analogue mode, press the PROG +/- buttons on the remote control until the picture from the pre-recorded
video tape appears on the TV screen.
If you wish to move your video channel to a different channel number, refer to the ‘Programme Sorting’ feature in ‘The Set Up menu’
section of this instruction manual.
 Loading...