

Sony KD-28DL11U, KD-32DX51U, KD-32DC11U, KD-28DX51U Quick Start Manual
KD-28DL11U
KD-28DX51U
Checking the supplied
Connecting an aerial
KD-32DC11U
KD-32DX51U
Thank you for choosing this
FD Trinitron Integrated
Digital Television
This step by step guide will help you to:
Check the supplied accessories,
Insert batteries into the remote control,
Connect an aerial to the TV,
Connect a video cassette recorder (VCR) to the TV,
1
accessories
DRY BATTERY R6/3(NS) SIZE"AA" 1.5v
and VCR to the TV
3
SONY CORPORATION JAPAN/4
Rear of TV.
Batteries
Switch on the TV,
Tune the TV,
Quick Start Guide
Get to know the remote control.
Remote control
2
RF lead
Inserting batteries into
the remote control
S
O
N
Y
C
O
R
P
O
R
A
T
IO
N
J
A
P
A
N
/4
SONY CORPORATION JAPAN/4
Supplied RF Lead
Rear of VCR
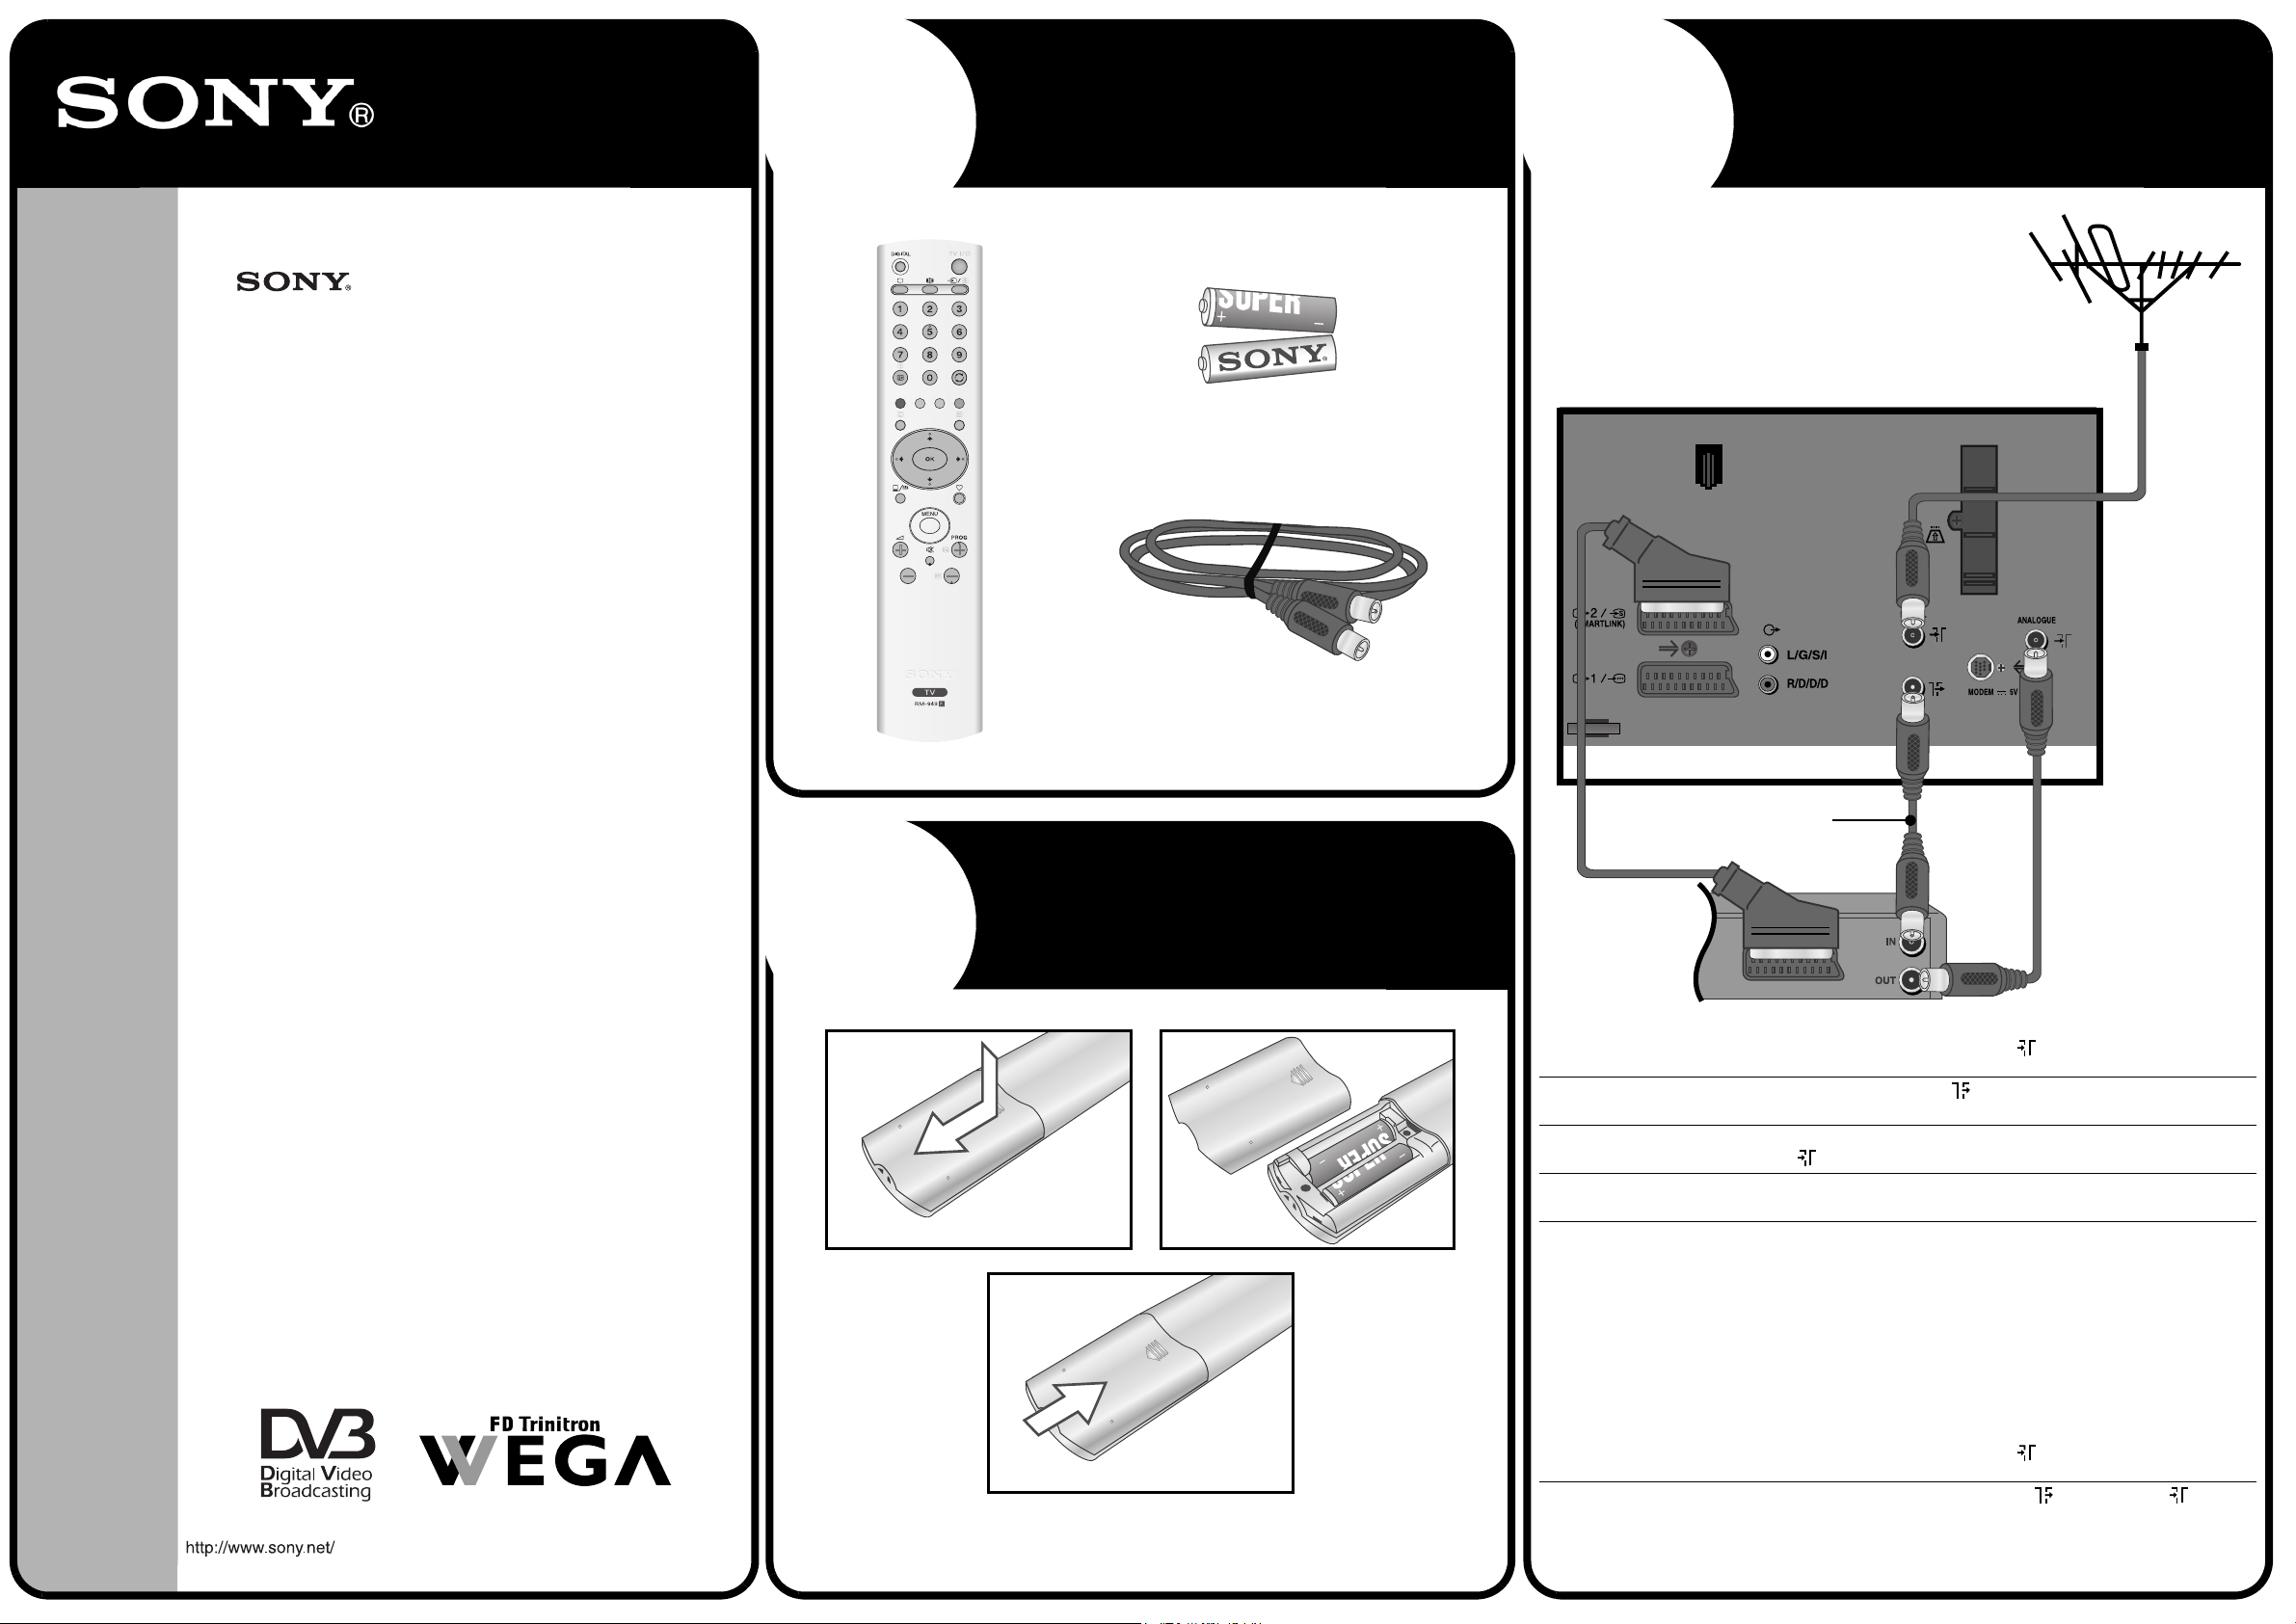
Connect your aerial lead to the socket labelled DIGITAL on the rear of the TV.
1.
Connect an RF lead from the socket labelled on the rear of the TV to the socket
2.
labelled IN* on your VCR.
Connect the supplied RF lead from the socket labelled OUT* on your VCR to the
3.
socket labelled
Connect a fully wired 21-pin scart lead from the socket labelled i2/r on the rear
4.
of the TV to socket labelled TV* on your VCR.
Insert a pre-recorded tape into the VCR and press the ‘PLAY’ button. This enables the
5.
TV to locate and store the video channel during the ‘Automatically tuning the TV’
procedure.
*Socket names may vary depending on make and model of VCR. Refer to your VCR instruction
z
manual for details.
**If your VCR does not have a scart socket follow the connecting instructions above ignoring the
scart lead connection.
ANALOGUE on the rear of the TV.
© 2004 Sony Corporation
®
Always remember to:
2-318-616-02
Printed in UK
• observe the correct polarity when inserting batteries,
• dispose of batteries in an environmentally friendly way.
Connecting an aerial only
Connect your aerial lead to the socket labelled DIGITAL on the rear of the TV.
1.
Connect the supplied RF lead from the sockets labelled and ANALOGUE on the
2.
rear of the TV.
Switching on the TV
Automatically
tuning the TV
Basic operation
4
KD-28DL11U
KD-32DC11U
On/Off button
5
V button
OK button
v button
The ‘Picture Rotation’ menu.
If picture slants, please
adjust picture rotation
Not necessary
Adjust now
The ‘Autotune’ prompt.
Do you want to start
automatic tuning?
Ye s
No
OK
OK
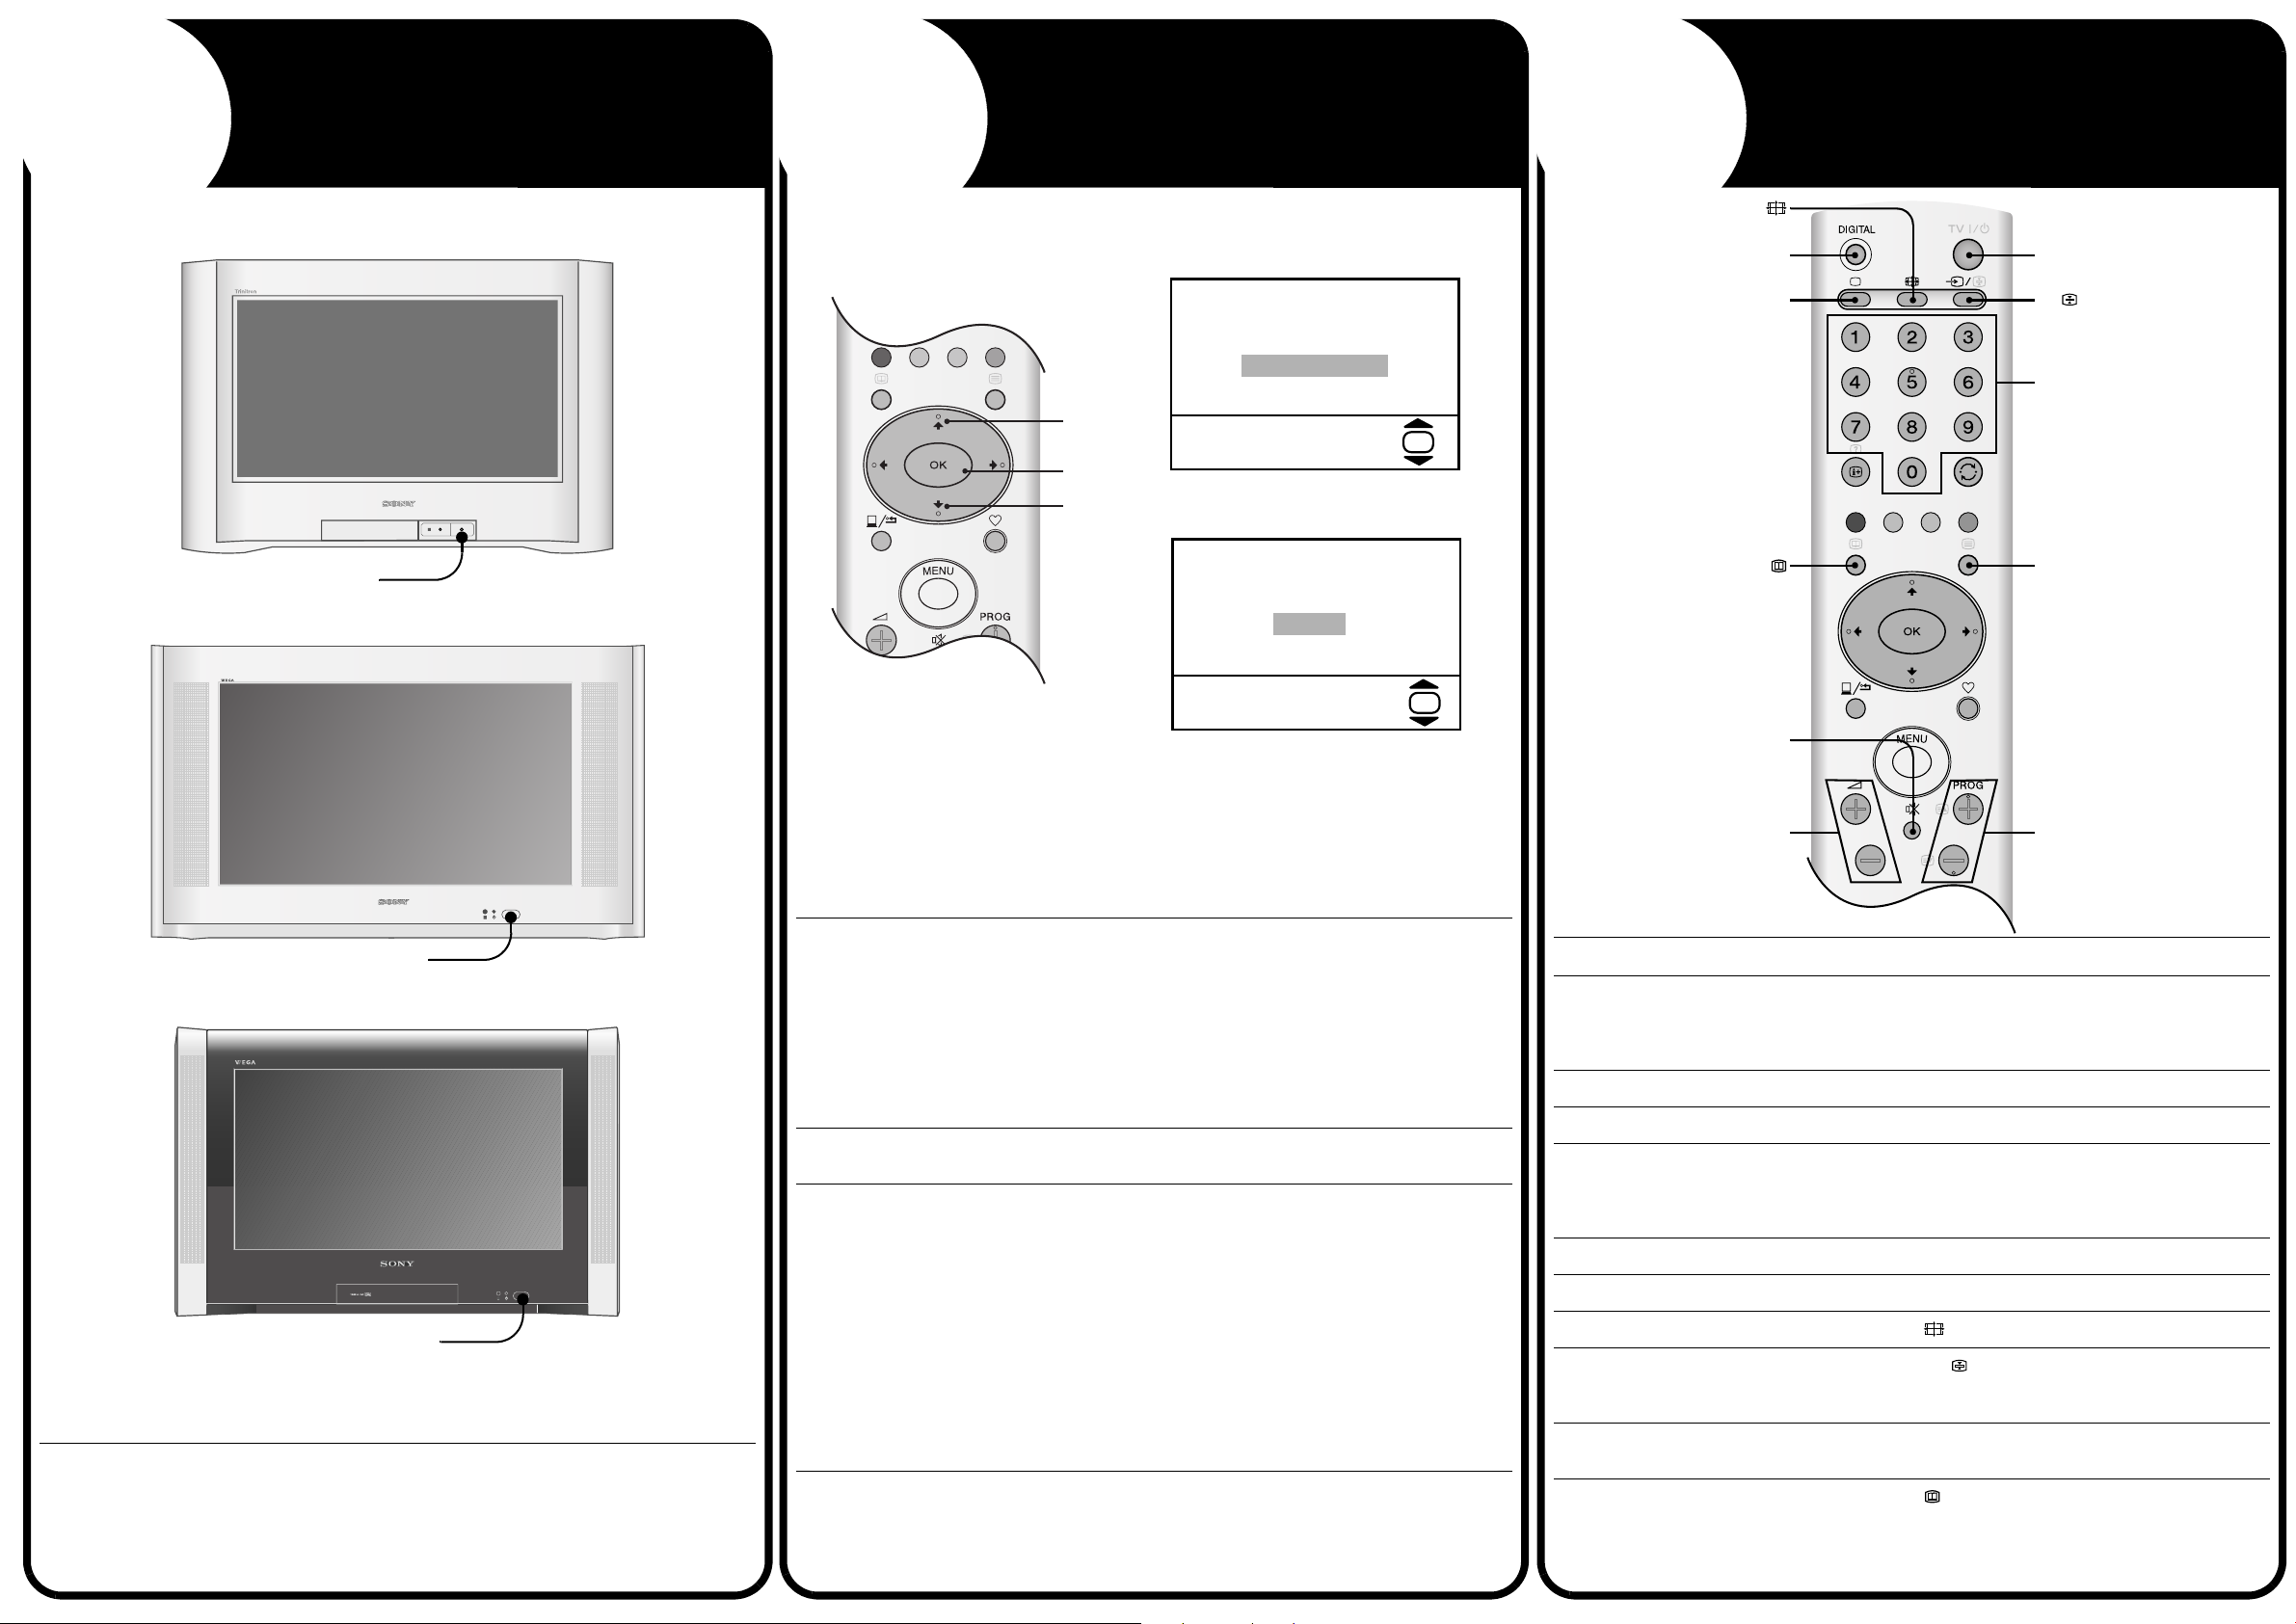
6
DIGITAL
button
button
button
button
button
a
%
TV I/1
button
t/
button
Numbered
buttons
/
button
On/Off button
KD-28DX51U / KD-32DX51U
On/Off button
Connect the TV plug to your mains socket (220 - 240V AV, 50Hz)
1.
Push in the On/Off button (labelled !) on the front of the TV.
2.
If the red standby mode indicator on the front of the TV is lit, press the TV I/1 button
on the remote control to switch on the set. Please be patient as the picture may take
a few moments to appear on the TV screen.
When you switch on the TV for the first time a language menu appear on screen with
1.
the word ‘English’ highlighted. Press the V or v button to highlight the language you
require. Press the OK button to confirm. From now on all menus will appear in your
chosen language.
The ‘Picture Rotation’ menu appears on the screen asking you to check if the picture
2.
is slanted. (Sometimes the Earth’s natural magnetism can cause the screen to look
slanted.)
a) If no correction is required, press the V or v button to highlight ‘Not necessary’.
Press the OK button to continue.
b) If some correction is required, press the V or v button to highlight ‘Adjust now’.
Press the OK button to continue. Press the V or v button to correct the slant. Press
the OK button to store.
The autotune prompt appears. Press the OK button to select ‘Yes’. The autotune
3.
procedure begins.
The digital autotune display appears on screen and the TV starts to search for all the
4.
available digital channels. This may take some time, please be patient and do not
press any buttons on the TV or remote control.
If no digital or analogue channels are found, a message appears asking you to
confirm that the aerial is connected correctly. Check all the aerial connections and
press the OK button to start the autotune procedure again.
When the digital autotune is complete, the analogue autotune starts to search for all
the available analogue channels.
Once all available digital and analogue channels have been stored, the TV returns to
normal operation, displaying the digital channel stored on channel number 1. If no
digital channels are found, the analogue channel stored on channel 1 is displayed.
The TV has now tuned
in all the available channels
2 +/-
buttons
To Press
Select channels... PROG+/- or Numbered buttons.
When selecting double digit numbers using
the Numbered buttons, enter the second
digit within two seconds.
Adjust the volume... 2 +/- buttons
Mute the sound... % button. Press again to cancel.
Turn off the TV temporarily... TV I/1 on the remote control. When the TV
is in standby mode the 1 indicator on the TV
is lit red. Press again to return to normal TV
operation.
Switch to digital mode... DIGITAL button.
Switch to analogue mode... a button.
Change the Screen Mode... button.
Watch pictures from equipment connected
to the TV’s front and rear sockets (video
input mode)...
Access text services
of service)
Access the Digital Electronic Programme
Guide (EPG)...
...
(depending on availability
Please refer to the main instruction manual
for a complete overview of the remote control.
t/ button repeatedly until the picture
appears.
/ button.
button.
PROG +/-
buttons
 Loading...