

Page 1

4-441-095-12 (1)
Network Camera
SNC easy IP setup Guide
Software Version 1.0
Before operating the unit, please read this manual thoroughly
and retain it for future reference.
© 2012 Sony Corporation
Page 2

Table of Contents
Overview
Saving SNC easy IP setup software to your
PC............................................................................ 3
Assigning the IP Address to the Camera ............ 3
SNC easy IP setup function ............................... 4
Configuring Windows Firewall............................ 6
When using Windows 7 ..................................... 6
When using Windows Vista ............................... 8
Deleting the Software............................................ 9
2
Page 3

Overview
Assigning the IP
This instruction manual is for SNC easy IP setup, the
software for assigning an IP address to Sony network
cameras.
Saving SNC easy IP setup software to your PC
1
Insert the CD-ROM in your CD-ROM drive.
Open the index.html file on the CD-ROM. A cover
page will appear automatically in your Web
browser.
2
Click Application and check the EULA.
3
Click Agree and install.
Tip
If you are using Windows XP Service Pack 2 or
later, Windows Vista or Windows 7, a message
regarding the active contents may appear.
Address to the Camera
To connect the camera to a network, you need to assign
a new IP address to the camera when you install it for the
first time.
Before starting, connect the camera, referring to
“Connection” in the supplied Installation Manual.
Consult the administrator of your network for the IP
address to be used.
Notes
• SNC easy IP setup may not operate correctly if you
use a personal firewall or antivirus software in your
computer. In this case, disable the software.
• If you are using Windows XP Service Pack 2 or later,
Windows Vista or Windows 7, disable the Windows
Firewall function. Otherwise SNC easy IP setup will
not operate correctly. For the setting, see “Configuring
Windows Firewall” in “When using Windows Vista”
on page 8 or “Configuring Windows Firewall” in
“When using Windows 7” on page 6.
Overview
4
Follow the Windows instructions to save SNC easy
IP setup to the specified folder.
The software is saved.
Saving SNC easy IP setup software to your PC / Assigning the IP Address to the Camera
3
Page 4
1
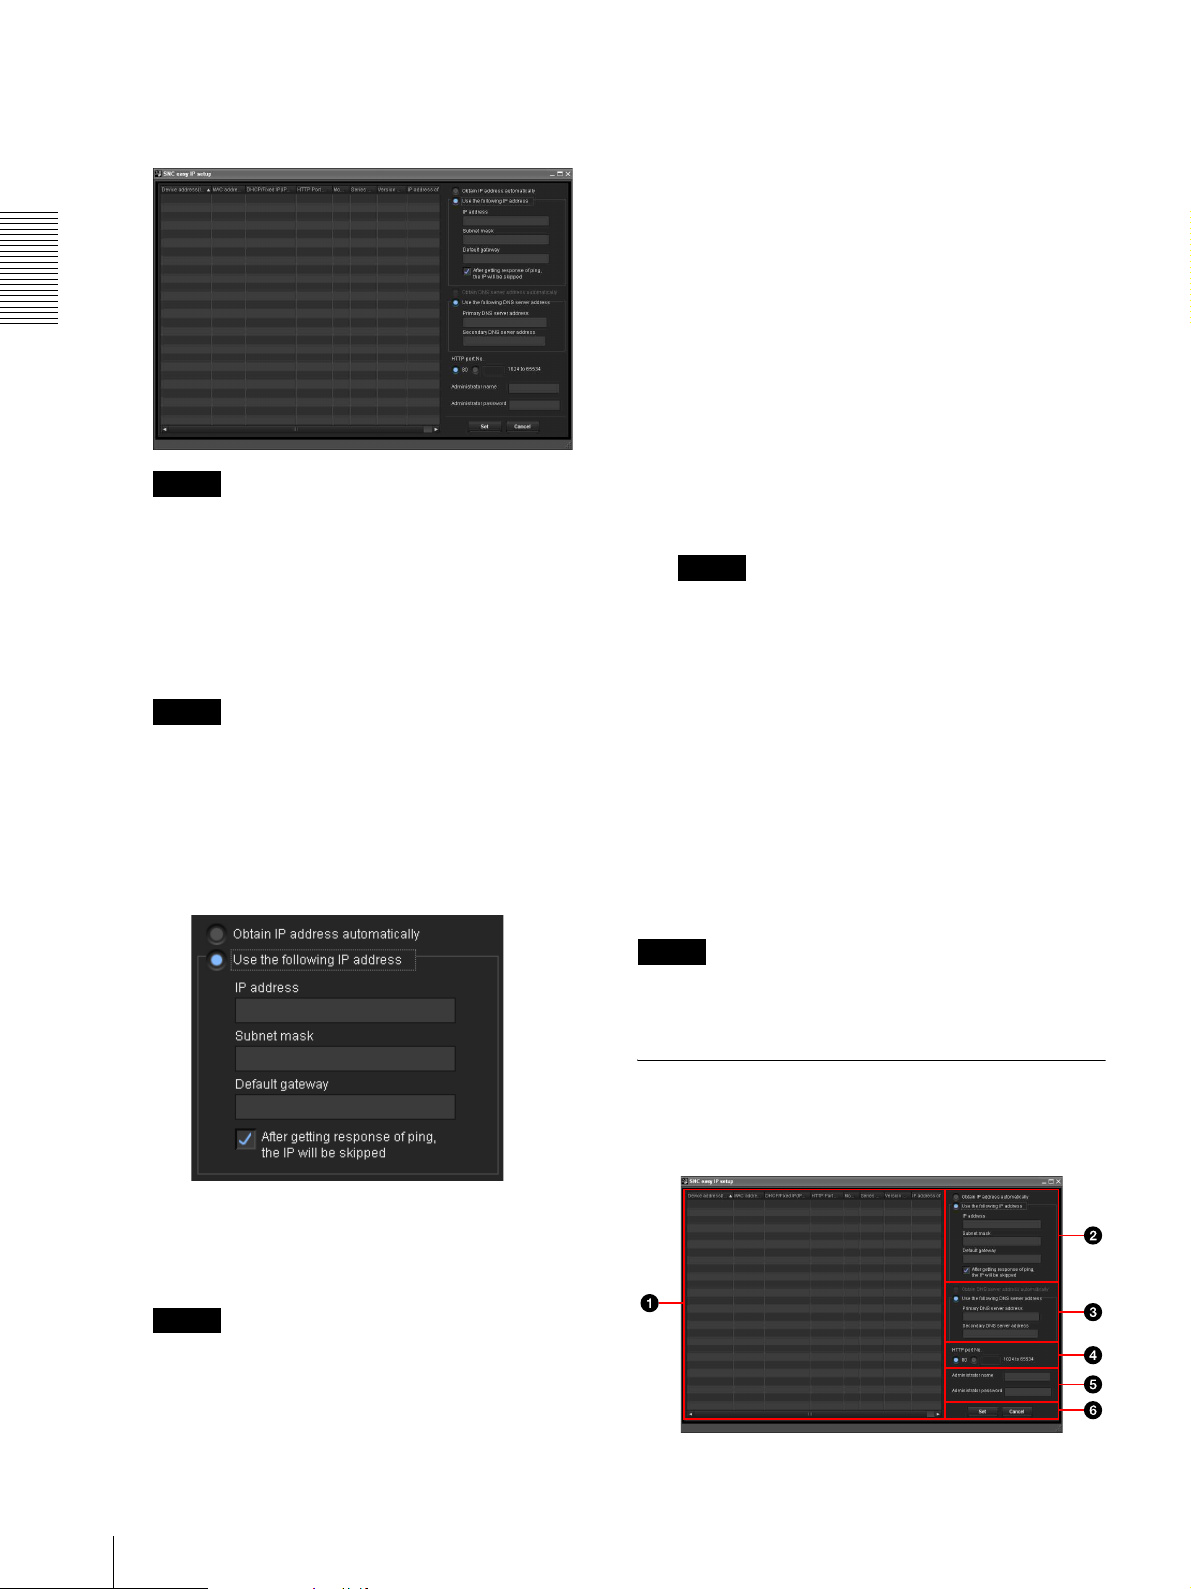
Start SNC easy IP setup.
The network cameras connected to the local
network are detected and listed on the main screen.
Overview
3
Set the DNS server address.
To obtain the DNS server addresses
automatically:
Select Obtain DNS server address automatically.
To specify the DNS server addresses manually:
Select Use the following DNS server address, and
type the Primary DNS server address and
Secondary DNS server address in the relevant
boxes.
4
Set the HTTP port No.
Normally, select 80 for the HTTP port No. To use
another port number, type a port number between
1024 and 65534 in the text box.
Note
The message “User Account Control - An
unidentified program wants access to your
computer” may appear. In this case, click “Allow”.
2
Set the IP address.
Select the camera from the list, then set the IP
address.
Tip
The factory setting of the camera network is DHCP
mode for both LAN and Wireless LAN.
To specify the IP address manually:
Select Use the following IP address, and type the
IP address, Subnet mask and Default gateway in
the relevant boxes.
5
Enter the administrator name and password.
The factory settings for both items are “admin”.
Note
The setting is not available for other users except
Administrator, which is registered on the camera
setting screen.
6
Confirm that all items are correctly set, then click
Set.
If “Setting OK” is displayed, the IP address is
correctly assigned.
7
When setting is finished, to access the camera
directly, double-click the device name in the list.
The viewer screen of the network camera is
displayed on the Web browser.
Note
If the IP address is not set correctly, the viewer does not
appear after step 7. In that case, set the IP address again.
To obtain the IP address automatically from a
DHCP server:
Select Obtain IP address automatically.
Note
When you select Obtain IP address
automatically, make sure that the DHCP server is
operating on the network.
4
Assigning the IP Address to the Camera
SNC easy IP setup function
Software screen configuration
Page 5
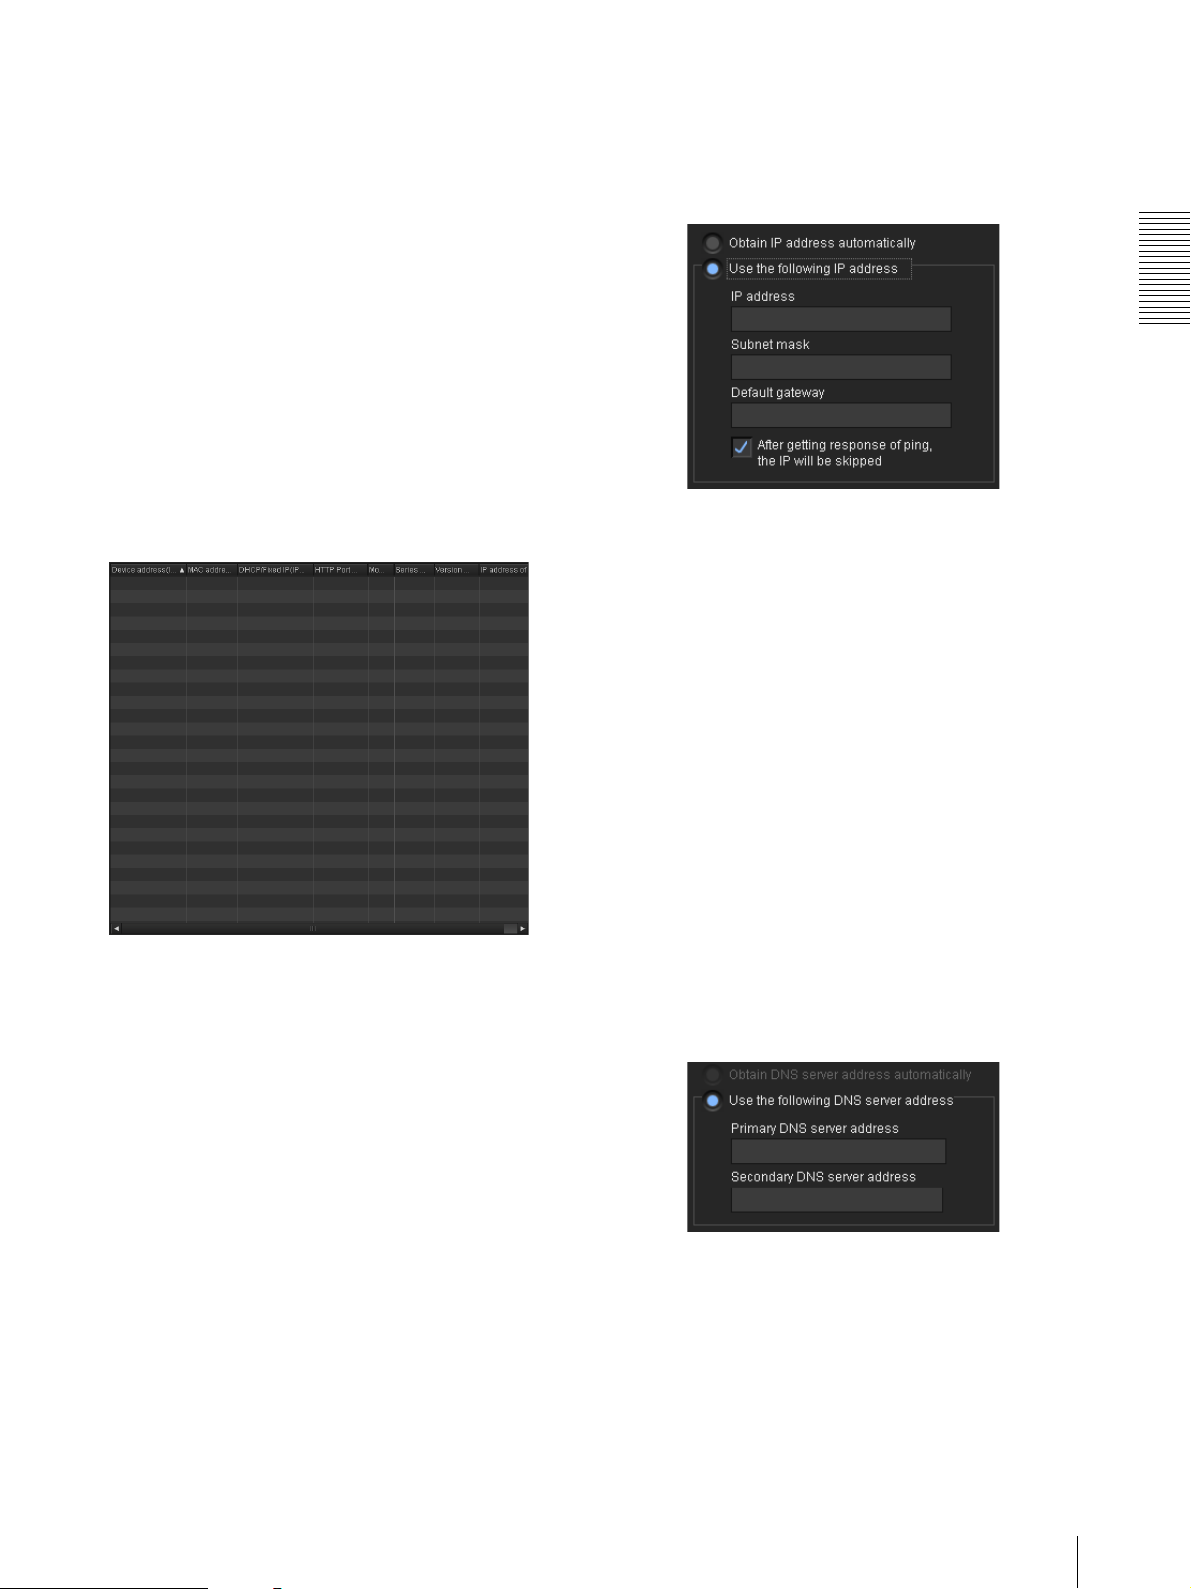
1 Camera list
Displays a list of the detected cameras.
2 IP configuration
Set the IP of the selected camera.
3 DNS configuration
Set the DNS of the selected camera.
4 Port configuration
Set the port of the selected camera.
5 Administrator configuration
Register the administrator of the selected camera.
6 Set/Cancel button
Set or cancel the configuration.
IP address of NIC
Displays the IP address of the NIC (Network Interface
Card) detected.
2 IP configuration
Overview
1 Camera list
MAC address
Displays the MAC address of the device.
Device address (IPv4)
Displays the IPv4 address of the device.
Obtain IP address automatically
Obtain the IP address automatically.
Use the following IP address
Use the following IP address.
IP address
Enter the IP address.
Subnet mask
Enter the subnet mask.
Default gateway
Enter the default gateway.
After getting response of ping, the IP will be skipped
You can check that the entered IP address is available. To
perform checking, select the checkbox.
If the specified IP address is already being used, IP
address configuration will be skipped.
3 DNS configuration
DHCP/Fixed IP (IPv4)
Displays the “DHCP” or “Fixed IP” address of the
device.
HTTP Port No.
Displays the HTTP port of the device.
Model
Displays the model name of the device.
Serial No.
Displays the serial number of the device.
Version N o .
Displays the software version of the device.
Obtain DNS server address automatically
Obtain the DNS server address automatically.
Use the following DNS server address
Use the following DNS server address.
Primary DNS server address
Enter the primary DNS server address.
Assigning the IP Address to the Camera
5
Page 6
Secondary DNS server address
Enter the secondary DNS server address.
Configuring Windows
4 Port configuration
Firewall
When using Windows 7
HTTP port No.
Overview
Use the port No. 80 or specify another port number
(between 1024 and 65534).
5 Administrator configuration
Administrator name
Enter the administrator name.
Administrator password
Enter the administrator password.
6 Set/Cancel button
Configuring Windows Firewall
SNC easy IP setup may not operate correctly depending
on the configuration of Windows Firewall. (No cameras
are shown in the list even if they are detected.) In this
case, confirm the Windows Firewall configuration as
follows:
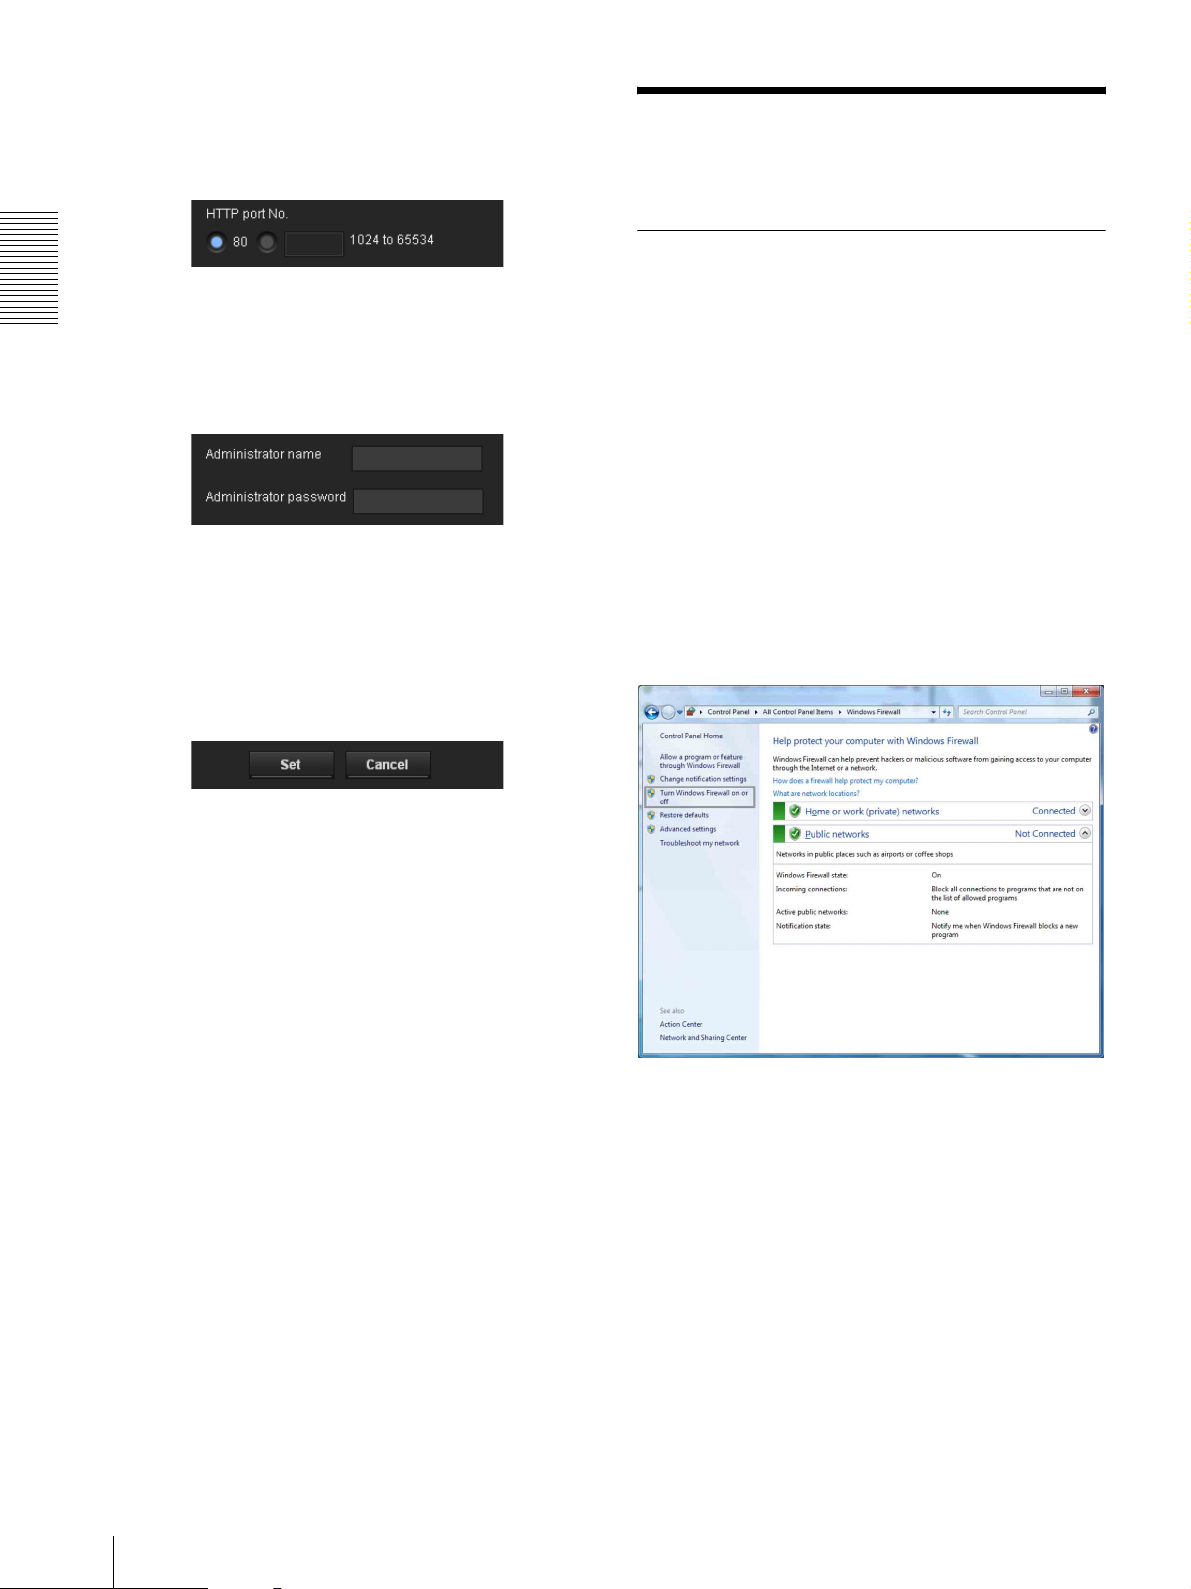
To turn Windows Firewall off
1
Select Control Panel from the Start menu of
Windows.
2
Click Windows Firewall.
3
Select Turn Windows Firewall on or off.
Set button
Set the configuration information on the camera.
Cancel button
Clear the configuration and deselect the camera.
6
Configuring Windows Firewall
Page 7
4
Select Disable Windows Firewall.
The cameras will be displayed in the list.
To turn Windows Firewall on
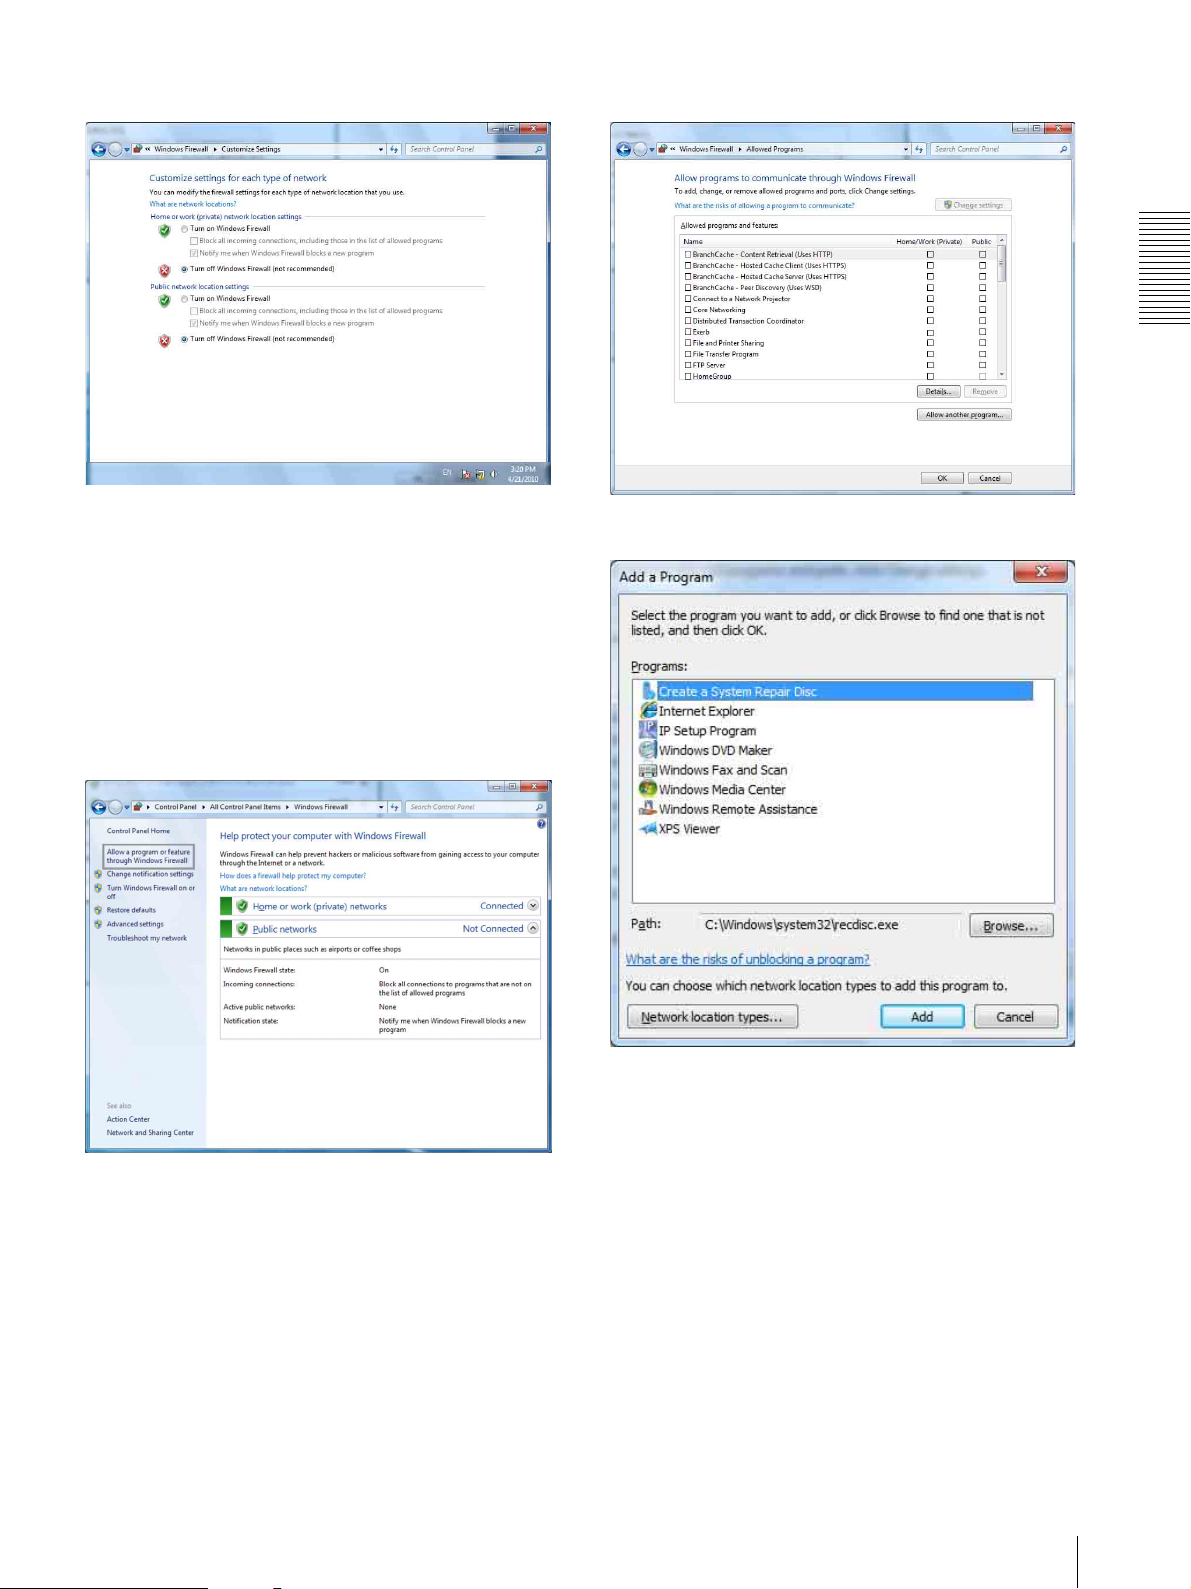
1
Select Control Panel from the Start menu of
Windows.
4
Select Allow another program....
5
Add program.
Overview
2
Click Windows Firewall.
3
Select Allow a program or feature through
Windows Firewall.
When the above procedure is completed, the
cameras connected in the local network are
displayed in SNC easy IP setup.
Configuring Windows Firewall
7
Page 8
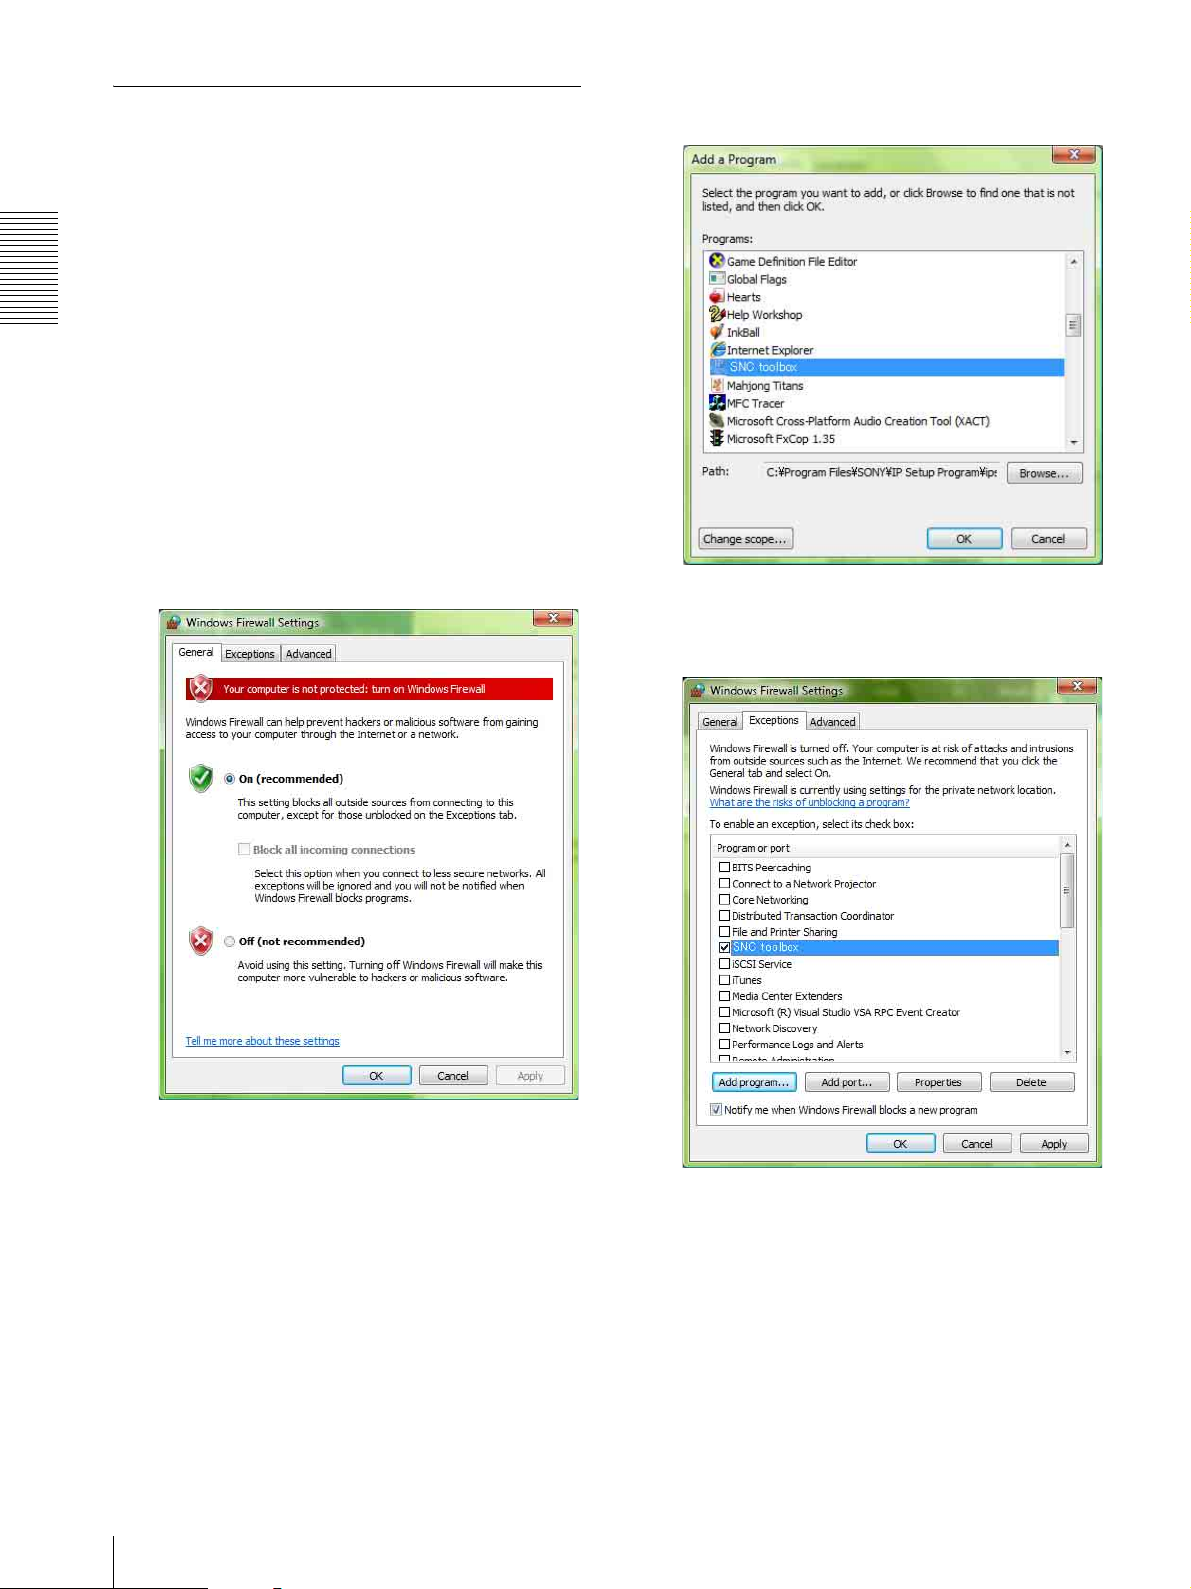
When using Windows Vista
Configuring Windows Firewall
SNC easy IP setup may not operate correctly depending
on the configuration of Windows Firewall. (No cameras
are shown in the list even if they are detected.) In this
case, confirm the Windows Firewall configuration as
follows:
7
If the Add Program dialog appears, select SNC easy
IP setup and click OK.
Overview
1
Select Control Panel from the Start menu of
Windows.
2
Click Windows Firewall.
3
Select Turn Windows Firewall on or off.
“User Account Control – Windows needs your
permission to continue” may appear. In this case,
click Continue.
4
Select Off in the General tab.
SNC easy IP setup is added to the Program or port
list.
8
Click OK.
The cameras will be displayed in the list.
If you want to keep Windows Firewall On, continue
with the following steps.
5
Select the Exceptions tab.
6
Click Add Program….
8
Configuring Windows Firewall
When the above procedure is completed, the
cameras connected in the local network are
displayed in SNC easy IP setup.
Page 9
Deleting the Software
Delete the SNC easy IP setup file from the folder
specified when it was saved.
Overview
Deleting the Software
9
Page 10

Sony Corporation
 Loading...