

Page 1

Sony Corporation Printed in Japan
Page 2

3-861-841-12 (1)
IC Recorder
Operating Instructions Page 2
Page 22
ICD-70
1997 by Sony Corporation
Page 3

English
Please refer to the illustrations in
the Japanese instruction manual as
indicated in each section.
Table of Contents
Index to parts and controls .......... 3
Getting Started
1 Installing the Batteries ............... 4
2 Setting the clock .......................... 5
Basic Operations
Recording messages ...................... 6
Playing back messages.................. 7
Erasing messages ........................... 9
Various Ways of Recording
Starting recording automatically in
response to the sound (Advanced
VOR function) .............................. 10
Adding a recording to a previously
recorded message ........................ 10
Recording with an external
microphone or other equipment 11
Organizing the Files
Renumbering the messages
according to their priority
— Priority marks ......................... 12
Moving messages to a different file
— Move function ......................... 13
Preventing confidential messages
from being played back by others
—Secret function.......................... 13
Other Functions
Playing back a message at a
desired time with an alarm
— Alarm function ........................ 14
Sounding a beep sound after a
desired duration
— Timer function ........................ 16
Preventing accidental operation
— HOLD function ....................... 16
Selecting the recording mode .... 16
Turning off the beep sound........ 17
Selecting the microphone
sensitivity ...................................... 17
Playing back all messages in a file
continuously ................................. 18
Selecting the illumination mode of
LCD back light ............................. 18
Additional Information
Precautions ................................... 19
Specifications................................ 20
Troubleshooting........................... 21
Menu map..................................... 42
2
Page 4

Index to Parts and
Controls
The numbers are keyed to the
illustrations on pages 46 and 47 in
the Japanese instruction manual.
Main unit
1 VOL (volume) control
2 MIC (built-in microphone)
3 OPR (operation) indicator
4 Jog dial
PLAY/STOP
= /+ (fast forward/fast
backward)
/ (menu selection)
5 FILE button
6 PRIORITY button
7 HOLD switch
8 MENU button
9 STOP button
!… DIGITAL 1/¤ connector (for
connecting to a computer*)
!` @ (earphone) jack
!“ Display window
!£ MIC (PLUG IN POWER)
jack
!¢ ERASE button
! REC (record) button
!⁄ Speaker
!ƒ Hand strap
5 REMAIN (Remaining
recording time) indication
REC DATE (Recording date)
indication
6 Current time/day indication
(15:30 TUE, etc.)
Recording time indication
(10:10:10, etc.)
Menu indication
(ALARM OFF, etc.)
File name
(ACTION, SCHEDULE, etc.)
Messages
(RECORD, ERASE?, etc.)
7 Battery exhausted indicator
8 HOLD indicator
9 Alarm indicator
!… Repeat play indicator
!` Digital VOR indicator
!“ Recording mode indication
* You need to use the WAV LINK
software (available in spring ‘98). See
“Optional accessories” on page 20
for more details.
English
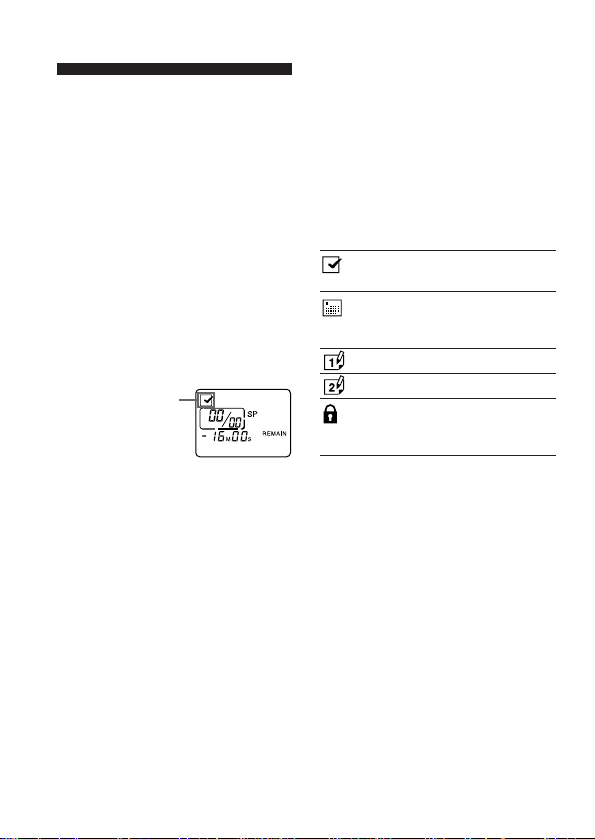
Display window
1 File icons
2 Current message number
3 Priority marks
4 Total number of messages in
a file
3
Page 5

zGetting Started
Step1: Installing the
Batteries
See the illustrations on page 8 in
the Japanese instruction manual.
1 Slide and lift the battery
compartment lid.
2 Insert two size AAA (LR03)
alkaline batteries with correct
polarity, and close the lid.
Note
• If the battery compartment lid is
accidentally detached, attach it as
illustrated on page 8 in the Japanese
instruction manual.
Clock setting display appears
when you insert batteries for the
first time, or when you insert
batteries after the unit has been
without batteries for a certain
period of time. Please refer to Step
2 – 4 in “Step 2: Setting the Clock”
on the next page to set the date and
time.
Note
• Make sure to close the lid
completely. Otherwise the unit will
not operate.
Charging the clock battery
Before using the IC recorder for the
first time, or if you have not used
the unit for a long time, you first
need to charge the built-in clock
battery. Install the batteries in the
battery compartment and leave
4
them for more than one day. The
clock battery will be automatically
charged. (You can use the unit
while charging.) If you remove the
batteries while charging the clock
battery, the unit will be reset to the
initial setting. Once you have
charged the clock battery, you do
not have to recharge it, as long as
batteries are installed. When the
clock battery is recharged, settings
such as clock setting are
maintained for about 3 minutes.
Replacing the battery
“i “ appears on the display when
the batteries become weak and it
flashes when the batteries are
exhausted. Replace the batteries
with new ones.
Battery life
Approx. 1.5 months with Sony
alkaline batteries LR03 (SG)
when recording in LIGHT OPR
mode for 2 minutes and playing
back for 3 minutes every day
Notes
• When you replace the batteries,
insert new batteries within 3
minutes after you removed the
exhausted ones, otherwise all the
settings you have made will be
reset to the initial settings.
The recorded messages, however,
will remain.
• When replacing the batteries, be
sure to replace both batteries with
new ones.
• Do not charge dry batteries.
• When you are not going to use the
unit for a long time, remove the
batteries to prevent damage from
battery leakage and corrosion.
Page 6

Step 2: Setting the
Clock
You need to set the clock to display
the date and time of recording, and
to use the alarm function.
See the illustrations on pages 9 and
10 in the Japanese instruction
manual.
1 Display the clock setting
display.
1 Press MENU to enter the
menu mode.
2 Turn the jog dial upward
to display “DATE &
TIME” once.
3 Press the jog dial.
The year digits will flash.
2 Set the date.
1 Turn the jog dial to select
the digits of the year.
2 Press the jog dial.
The month digits will
flash.
3 Set the month and day in
sequence, then press the
jog dial.
The hour digits will flash.
3 Set the time.
1 Turn the jog dial to select
the digits of the hour.
2 Press the jog dial.
The minute digits will
flash.
3 Set the minute.
4 Press the jog dial at the
time signal.
The display will return to
“DATE & TIME”.
4 Press MENU to exit from the
menu mode.
English
5
Page 7
z Basic Operations
Recording Messages
You can record up to 99 messages
in each file.
Since a newly recorded message is
automatically added after the last
recorded message, you can start
recording quickly without
searching for the end of the last
recording.
See illustrations on pages 12 and 13
in the Japanese instruction manual.
1 Press FILE repeatedly until the
icon of the desired file is
displayed.
Current file
ACTION
2 Start recording.
1 Press REC.
2 Speake into the built-in
microphone.
During recording, the OPR indicator
lights up in red.
You do not need to keep pressing
REC while recording.
3 Press STOP to stop recording.
If you do not change the file icon
after you stop recording, the next
time you record you will record in
the same file.
6
To listen to the current
recording
Press STOP to stop recording, then
press the jog dial.
To review the current
recording instantly
Press the jog dial during recording.
5 different files
Select among 5 files:
ACTION
for recording action plans
SCHEDULE
for recording appointments,
etc.
MEMO-1 free
MEMO-2 free
SECRET
for recording personal or
confidential messages*
* To prevent confidential messages
from being played back by others,
see page 13.
Notes
• When the remaining time of
recording reaches 1 minute,
“NEAR END” will flash in the
display window. When the
memory is full, recording
automatically stops and
“MemoryFull” will flash in the
display window with an alarm
sound. To continue recording, first
erase some of the messages. (Page
9)
• If you press REC when the memory
is full, “MemoryFull” will flash
with an alarm sound. Erase some of
Page 8

the messages before you start
recording again. (Page 9)
• If you press REC after you have
recorded 99 messages, “INDEX
FULL” will flash with an alarm
sound. Select another file or erase
some of the messages. (Page 9)
` Tips
• You can record for up to 16
minutes in SP (standard play)
mode and 24 minutes in LP
(long play) mode. If you record
messages in a mixture of SP and
LP modes, the recordable time
varies from 16 to 24 minutes.
To change the recording mode,
see page 16.
• You can select the microphone
sensitivity. See page 17.
• You can select the external
microphone. See page 11.
Playing Back Messages
When playing back a previously
recorded message, start from Step
1. When playing back the message
you have just finished recording,
start from Step 3.
See illustrations on pages 15 and 16
in the Japanese instruction manual.
1 Press FILE repeatedly until the
icon of the desired file is
displayed.
Current file
ACTION
2 Select the message number.
Turn the jog dial to display the
desired message number,
upward for a smaller message
number and downward for
larger message number.
Selected message
number
6:37:4
Total number of messages
in the current file
3 Press the jog dial to start
playback.
English
During playback, the OPR indicator
lights up in green.
After playing back one message, the
unit stops at the beginning of the next
message.
Continued
7
Page 9

When the last message on the file has
been played back, the unit stops at
the beginning of the last message.
4 Turn VOL to adjust the
volume.
To stop playback
To Do this
stop at the Press STOP.
beginning of
the current
message
stop at the Press the jog
current position dial.
Other operations
To Do this
skip to the Turn the jog
next message dial downward
skip to the Turn the jog
previous dial upward until
message you find the
search forward Turn the jog
during dial downward
playback while pressing it
search Turn the jog
backward dial upward
during while pressing
playback it and keep it
until you find
the message
number you
want to play.
message number
you want to play.
and keep it
pressed.
pressed.
Playing back a message
repeatedly — Repeat Play
During playback, press the jog dial
for more than 2 seconds.
“f “ will be displayed and the
selected message will be played
back repeatedly until you stop
playback by pressing STOP or the
jog dial.
Playing the beginning of
each message — Scanning
Play
During stop mode, press the jog
dial for more than 2 seconds.
“SCAN” will be displayed in the
display window and the first 5
seconds of each message in the
selected file will be played back.
When you find the desired
message, press the jog dial. The
message will be played back until
the end.
For private listening
Connect an earphone (not
supplied) to the @ jack.
The built-in speaker will be
automatically disconnected.
8
Page 10

Erasing Messages
You can erase the recorded
messages one by one or all
messages in a file at a time. Note
that once a recording has been
erased, you cannot retrieve it.
See the illustrations on pages 18
and 19 in the Japanese instruction
manual.
Erasing messages one by
one
When a message is erased, the
remaining messages will advance
and renumbered so that there will
be no blank space between
messages.
1 Press ERASE while playing
back the message you want to
erase or press ERASE for more
than 1 second during stop
mode.
A beep will sound and the
message number and “ERASE?”
will flash while the first and last
5 seconds of the message is
played back 10 times.
2 Press ERASE while the
message is being played back.
The note is erased and the
remaining messages will be
renumbered.
Erasing all messages in a
file
1 Press FILE to select the file you
want to erase.
2 Press ERASE and STOP at the
same time for more than 1
second.
The icon of the file, the message
number and “ALL ERASE?”
will flash.
3 Press ERASE.
To cancel erasing
Press STOP before step 3.
English
To cancel erasing
Press STOP before step 2.
To erase other messages
Repeat steps 1 and 2.
9
Page 11

z
Various Ways of Recording
Starting Recording
Automatically in
Response to the Sound –
Advanced VOR function
When VOR (voice operated
recording) function is set to on,
recording starts when the recorder
detects sound and stops when no
sound is heard.
See the illustrations on pages 20
and 21 in the Japanese instruction
manual.
1 Press MENU to enter the
menu mode.
2 Turn the jog dial to display
“VOR OFF (or ON)”, then
press the jog dial.
“OFF (or ON)” starts to flash.
Note
VOR function is affected by the
sound around you. Select the
microphone sensitivity according to
the situation(see page 17). If
recording is not satisfactory after you
have changed the microphone
sensitivity, set VOR to OFF.
Adding a Recording
to a Previously
Recorded Message
You can add a recording to the
message being played back.
The added recording will be
placed after the current message
and counted as a part of the
message.
See illustrations on page 22 in the
Japanese instruction manual.
During playback of Message 3
3 Turn the jog dial to flash
“ON”.
4 Press the jog dial.
The setting is completed.
5 Press MENU again to exit the
menu mode.
When you record messages with
VOR set to ON, the recording
pauses when no sound is detected,
“RecStandby” appears and “VOR”
flashes.
After adding
a recording
1 During playback, press REC
To cancel VOR
Follow the steps above and select
“OFF” in step 3.
10
Message 3
Message 3
Meeting at 2 o’clock
on December 1
for more than 1 second.
“REC PLUS” is displayed and
the OPR indicator will light in
red.
Speak into the built-in
microphone.
Message 4
Added recording
Message 4
at Conference
room A
Page 12

2 Press STOP to stop the
recording.
Note
The added message will be recorded
in the same recording mode (SP or
LP; see page 16) as the original
message, regardless of the current
recording mode setting.
When recording from
other equipment
MIC (PLUG IN
POWER)
RK-G64HG
(not
supplied)
Recording with an
External Microphone
or Other Equipment
1 Connect a plug-in-power type
microphone or other
equipment to the MIC (PLUG
IN POWER) jack.
When recording with an
external microphone
MIC (PLUG IN
POWER)
External
microphone
When you connect an external
microphone, the built-in
microphone is automatically cut
off . When a plug in power type
microphone is connected, power is
automatically supplied to the
microphone from the IC recorder.
EAR, EARPHONE,
@ or REC OUT
Tape recorder,
TV, radio, etc.
2 Follow the steps in “Recording
messages”(page 6) to record
messages.
Notes
• Make sure that the plugs are
connected securely.
• We recommend you make a trial
recording to check the connections
and volume control.
• When connecting equipment other
than Sony’s, refer to the instruction
manual of the equipment.
English
11
Page 13

Organizing the files
Renumbering the
Messages according
to their Priority —
Priority Marks
Usually the recorded messages are
lined up in the order of recording.
By adding priority marks ( ) to
important messages, you can
renumber the messages in the
order of their priority. You can add
up to three priority marks with
“ ” being the most important.
See illustrations on pages 24 and 25
in the Japanese instruction manual.
The messages with priority marks
are rearranged according to the
number of the marks.
Notes with no priority marks are
placed after those with priority
marks.
During stop mode, messages are
rearranged every time a priority
mark is added. During playback,
messages are rearranged after you
press STOP.
The notes with the same number of
priority marks are arranged in the
order of recording.
e.g.
When there are 3 messages in a file,
they are arranged as follows:
During stop mode
1 Turn the jog dial to select the
desired message.
2 Press PRIORITY to display .
Every time you press PRIORITY,
the display changes in the
following order:
n n n no mark.
During playback
1 Press PRIORITY to display .
The first and last 5 seconds of the
message will be played back.
2 Press PRIORITY repeatedly to
select the number of the
priority marks.
3 Press STOP.
12
Message 1
Message 2
Message 3
Note
While messages are being rearranged,
“– –” is displayed in the message
number display.
Page 14

Moving Messages to a
Different File — Move
Function
You can move recorded messages
to a different file.
See illustrations on page 26 in the
Japanese instruction manual.
1 Play back the message you
want to move.
2 Press FILE during playback to
select the file you want to
move the message to.
The icon of the file and “MOVE”
will flash and the first and last 5
seconds of the message will be
played back 10 times.
3 Press STOP.
To set the secret function
1 Press MENU to enter the
menu mode.
2 Turn the jog dial to display
“SECRET OFF (or ON)” and
press the jog dial.
3 Turn the jog dial to flash
“ON”.
4 Press the jog dial.
“No. ? 0∗∗∗” will be displayed.
5 Set the ID code.
Turn the jog dial to select a digit
and press the dial.
Repeat this step to select the four
digits.
6 Press the jog dial.
“LOCKED” will be displayed
and the secret function is set.
7 Press MENU to exit the menu
mode.
English
Preventing
Confidential Messages
from being Played
Back by Others —
Secret Function
You can set an ID code (4-digit
number) to prevent confidential
messages in the (SECRET) file
to be played back by others.
When the secret function is set to
on, you cannot play back the
messages unless you enter the ID
code; however, you can add new
recordings to the secret file.
See illustrations on page 24 in the
Japanese instruction manual.
To play back messages
in the SECRET file
1 Press FILE to select the
(SECRET) file.
“– – /– –” will be displayed in
the message number display.
2 Press the jog dial.
“No. ? 0∗∗∗” will be displayed.
3 Input the ID code, following
Step 5 in “To set the secret
function”.
4 Press the jog dial.
“UNLOCKED” and the message
number will be displayed.
Continued
13
Page 15

To start playback, follow the steps
in “Playing back messages” on
page 7.
If you leave the unit unoperated
after step 4, the display will turn to
the clock display after 3 seconds,
and the unit will go back to the
“LOCKED” mode after 1 minute.
If you enter a wrong ID
code
“>>WRONG<<”will be displayed.
Press the jog dial once and enter
the correct number.
If you erase all messages in
the SECRET file
Secret setting will be cancelled (the
display will show “SECRET OFF”.)
If you forget your ID code
Cancel the secret setting by erasing
all messages in the SECRET file as
mentioned above. Note that
erased messages cannnot be
retrieved.
To cancel the secret setting
1 Press MENU to enter the menu
mode.
2 Turn the jog dial to display
“SECRET ON” and press the
dial.
3 Turn the jog dial to flash “OFF”
and press the jog dial.
4 Enter the ID number and press
the jog dial.
5 Press MENU to exit the menu
mode.
14
Other functions
Playing Back a
Message at a Desired
Time with an Alarm
—
Alarm Function
You can sound an alarm and start
playback of a selected message at a
desired time.
See illustrations on page 30 in the
Japanese instruction manual.
1 Use FILE and the jog dial to
select the file and the message
you want to play back.
2 Enter the alarm setting mode.
1 Press MENU to enter the
menu mode.
2 Turn the jog dial to display
“ALARM OFF (or ON)” and
press the jog dial.
“OFF (or ON)” starts to
flash.
3 Turn the jog dial to flash
“ON”.
4 Press the jog dial.
“DATE” will flash in the
display window.
3 Set the alarm date.
to play back on a desired
date (the message will be
played back at the same time on
the same date every year until
you erase the message)
1 Press the jog dial when
“DATE” is displayed.
The month digits will flash.
2 Turn the jog dial to select
the month digits and press
Page 16

the jog dial.
The day digits will flash.
3 Turn the jog dial to select
the day digits.
to play back once a week
Turn the jog dial to select the
day of the week.
to play back at the same
time every day
Turn the jog dial to select
“EVERYDAY”.
4 Press the jog dial
The hour digits will flash.
5 Set the alarm time.
1 Turn the jog dial to select
the hour digits and press the
jog dial.
The minute digits will flash.
2 Turn the jog dial to select
the minute digits and press
the jog dial.
“ALARM ON” and “˘ ”
will be displayed to
indicate that the setting has
been completed.
6 Press MENU to exit the menu
mode.
At the set time, the alarm will
sound for about 10 seconds and the
selected note will be played back.
During playback, “ALARM” will
flash in the display window.
Playback will stop at the end of the
message.
To cancel the alarm setting
before the playback starts
Press STOP while the alarm sound
is heard. You can stop even when
the HOLD switch is set to ON.
Notes
• You cannot set the alarm if you
have not set the clock.
• If you wish to set the alarm to play
back the messages in the secret file
when the secret function is set to
ON, first enter the ID code to
unlock the secret file (see page 13)
and proceed with the alarm setting
while “UNLOCKED” is being
displayed, or cancel the secret
setting (see page 13).
• If you try to set the alarm to play
back a message at a previously set
time, “AlreadySet” will be
displayed, preventing new
settings.
• If the alarm time comes while
another message is being played
back with an alarm, the playback
stops and and the new message will
be played back.
• If more than one alarm time comes
during recording, only the first
message will be played back.
• If you erase the message you set the
alarm to play back, the alarm
setting will be cancelled.
• You can adjust the playback
volume with the VOL control.
• Alarm setting will not be cancelled
when the alarm playback finishes.
To cancel alarm setting, see “To
cancel the alarm setting before the
playback starts” above.
English
15
Page 17

Sounding a Beep
Sound after a
Desired Duration —
Timer Function
You can choose a duration from
120 minutes down to 1 minute.
See illustrations on page 34 in the
Japanese instruction manual.
1 Press MENU to enter the
menu mode.
2 Turn the jog dial to display
“TIMER OFF (or ON)” and
press the jog dial.
3 Turn the jog dial to display
“TIMER ON” and press the
jog dial.
“TIMER” and the remaining
minutes will be displayed.
4 Set the timer.
1 Press the jog dial to set the
remaining minutes.
You can choose a number
between 120 and 1.
2 Press the jog dial.
“TIMER ON “ will be
displayed to indicate that
the setting has been
completed.
5 Press MENU to exit the menu
mode.
After a few seconds, the display
will change to the remaining
minute display.
The number will decrease by one
every minute until 1 minute and
every second after that.
16
At the 0 second, “TIMER 0S” will
flash and a beep sound will sound
for one minute.
To stop the beep sound
Press STOP.
Preventing Accidental
—
Operation
HOLD
Function
See illustration on page 36 in the
Japanese instruction manual.
Slide the HOLD switch in the
direction of the arrow. “HOLD” is
displayed, indicating that all the
functions of the buttons are locked,
except for STOP to stop an alarm.
To cancel the HOLD function,
simply slide the HOLD switch in
the opposite direction.
Note
• When the HOLD function is
activated, any alarm that has been
set will still be heard.
Selecting the
Recording Mode
See illustrations on page 37 in the
Japanese instruction manual.
Rec Mode SP:
You can make up to 16
minutes of recording with
better sound.
Rec Mode LP:
You can make up to 24
minutes of recording.
Page 18

1 Press MENU to enter the
menu mode.
2 Turn the jog dial to display
“RecMode SP (or LP)” and
press the dial.
“SP (or LP)” will flash.
3 Turn the jog dial to select “SP”
or “LP” and press the dial.
Now the setting is completed.
4 Press MENU to exit the menu
mode.
Turning off the
Beep Sound
See illustrations on page 38 in the
Japanese instruction manual.
BEEP ON:
A beep will sound to indicate
that operation has been
accepted.
BEEP OFF:
No beep sound will be heard
except for the alarm and timer.
1 Press MENU to enter the
menu mode.
2 Turn the jog dial to display
“BEEP ON (or OFF)” and
press the jog dial.
“ON (or OFF)” will flash.
3 Turn the jog dial to select
“ON” or “OFF” and press the
jog dial.
The setting is completed.
4 Press MENU to exit the menu
mode.
What beep sound means
Beep patterns Meaning
- (single tone) Usual mode
-- (double tone) Enter/exit
--- (triple tone) Notice*
---- ---- Alarm or
(continuous tone) timer set time
* This pattern lets you know the
procedure is wrong or informs you
of some messages, such as:
– you are trying to record a message
when you have already recorded
up to the maximum recordable
time or the maximum number of
messages.
– the unit has stopped functioning
due to lack of battery power.
special mode
has come
Selecting the
Microphone
Sensitivity
See illustrations on page 40 in the
Japanese instruction manual.
MIC SENS H:
High sensitivity. Enables you
to record with clearer sound.
Selecting this position is
recommended for usual
recording.
MIC SENS L:
Low sensitivity. Select this
mode to eliminate the noisy
sound in the background.
(Speak closely to the
microphone when recording.)
Continued
English
17
Page 19

1 Press MENU to enter the
menu mode.
2 Turn the jog dial to display
“MIC SENS H (or L)” and
press the jog dial.
“H (or L)” will flash.
3 Turn the jog dial to select “H”
or “L” and press the jog dial.
Now the setting is completed.
4 Press MENU to exit the menu
mode.
Playing Back All
Messages in a File
Continuously
See illustrations on page 41 in the
Japanese instruction manual.
CONT ON:
You can play back all
messages in a file
continuously.
CONT OFF:
Playback stops at the end of
each message.
1 Press MENU to enter the
menu mode.
2 Turn the jog dial to display
“CONT OFF (or ON)” and
press the jog dial.
“OFF (or ON)” will flash.
3 Turn the jog dial to select
“ON” or “OFF” and press the
jog dial.
Now the setting is completed.
4 Press MENU to exit the menu
mode.
Selecting the
Illumination Mode
of LCD Back Light
See illustrations on page 42 in the
Japanese instruction manual.
LIGHT OPR:
The display window is
illuminated for 3 seconds after
each operation.
LIGHT ALL:
The display window is
illuminated at all times during
operation.
1 Press MENU to enter the
menu mode.
2 Turn the jog dial to display
“LIGHT OPR (or ALL)” and
press the jog dial.
“OPR (or ALL)” will flash.
3 Turn the jog dial to select
“OPR” or “ALL” and press the
jog dial.
Now the setting is completed.
4 Press MENU to exit the menu
mode.
When the unit is not being
operated (when the display shows
the current time), you can
illuminate the display window by
pressing STOP. This enables you to
check the time even in a dark
place.
18
Page 20

Additional
Information
Precautions
On power
•Operate the unit only on 3 V DC.
Use two size AAA (LR03)
alkaline batteries.
On safety
•Do not operate the unit while
driving, cycling or operating any
motorized vehicle.
On handling
•Do not leave the unit in a location
near heat sources, or in a place
subject to direct sunlight,
excessive dust or mechanical
shock.
•Should any solid object or liquid
fall into the unit, remove the
batteries and have the unit
checked by qualified personnel
before operating it any further.
On noise
•Noise may be heard when the
unit is placed near an AC power
source, a fluorescent lamp or a
mobile phone during recording
or playback.
Keep personal credit cards using
magnetic coding or spring-wound
watches, etc., away from the unit
to prevent possible damage from
the magnet used in the speaker.
If you have any questions or
problems concerning your unit,
please consult your nearest Sony
dealer.
English
19
Page 21

Specifications
Recording media
Recording time
Frequency response
Speaker approx. 2.8 cm (1 1/8
Power output
Output Earphone jack (mini
Input Microphone jack (mini
Power requirements
Dimensions (w/h/d)
(incl. projecting parts and controls)
Weight (not incl. batteries)
Supplied accessories
Built-in flash memory,
Monaural recording
SP: 16 minutes
LP: 24 minutes
SP: 250 Hz - 3,500 Hz
LP: 250 Hz - 2,400 Hz
in.) dia.
70 mw
jack) for 8 - 300 ohms
earphone
jack, monaural)
Plug in power
Minimum input level
0.3 mV
3 kilohms or lower
impedance
microphone
Digital I/O connector
(15-pin)
Two size AAA (LR03)
alkaline batteries: 3 V
DC
57.4 × 85 × 23.2 mm
3
/8 × 3 3/8 × 15/16 in.)
(2
Approx. 50 g (1.8 oz)
Hand strap × 1
(attached to the unit)
Size AAA (LR03)
alkaline battery × 2
Optional accessories
Active speaker SRS-T1
Connecting cable
RK-G64HG
WAV LINK software
(available in spring ‘98)
• For IBM PC/AT* or compatible PC
• For Windows
®
95/Windows®3.1**
(English version)
•To play back messages on the
computer, a sound board must be
installed in the computer.
• If an English version OS is installed
in your computer, please purchase
an English version WAV LINK
software .
Design and specifications are subject
to change without notice.
* IBM PC/AT is a registered trademark of
International Business Machines
Corporation of the U.S.A.
** Windows®95 and Windows®3.1 are
registered trademarks licensed to
Microsoft Corporation, registered in the
U.S.A. and other countries.
20
Page 22

Troubleshooting
Should any problem persist after you have made these checks, consult
your nearest Sony dealer.
Symptom
The unit does not operate.
No sound comes from the
speaker.
Noise is heard.
Recording level is low.
Recording automatically
stops.
“--:-- --” is displayed.
“- -M - -D” is displayed on
the REC DATE display.
The index number shows
“--/--”.
The unit does not operate
correctly.
Remedy
• The batteries have been inserted with incorrect
polarity.
• The batteries are weak.
• The battery compartment lid is not closed
completely.
• The buttons are locked with the HOLD switch.
• The earphone is plugged in.
• The volume is turned down completely.
• Plug of the connected microphone was dirty
when recording. Clean the plug.
• Earphone plug is dirty. Clean the plug.
• Microphone sensitivity is set to “MIC SENS L”.
Set it to “MIC SENS H” (see page 17).
• Advanced VOR (page 10) is activated. Set it to
“VOR OFF” when you do not need it.
• You have not set the clock.
• The date of recording will not be displayed if
you recorded the message when the clock was
not set.
• The messages in the SECRET file have been
locked. Cancel the secret setting (See page 14).
• Press the RESET button with a pen point. The
unit will be reset to the initial setting. The
recorded messages, however, will not be
erased and the alarm setting will not be
cancelled.
English
The RESET button
21
Page 23

Menu map
Press MENU to enter the menu mode.
: Initial setting
ALARM*
TIMER
SECRET
RecMode
BEEP
VOR
MIC SENS
CONT
LIGHT
(See page 14.)
(See page 16.)
(See page 13.)
(See page 16.)
(See page 17.)
(See page 10.)
(See page 17.)
(See page 18.)
(See page 18.)
ON
OFF
ON
OFF
ON
OFF
SP
LP
ON
OFF
ON
OFF
H
L
ON
OFF
OPR
ALL
1M
120M
DATE&TIME MinuteYear DayMonth
(See page 5.)
42
Hour
Page 24

DATE
DayMonth
Hour Minute
MONDAY
TUESDAY
WEDNESDAY
THURSDAY
FRIDAY
SATURDAY
SUNDAY
EVERYDAY
* The “ALARM” display will not appear if you have not set the date and time or if there is no
recorded message.
Hour Minute
Hour Minute
Hour Minute
Hour Minute
Hour Minute
Hour Minute
Hour Minute
Hour Minute
Menu Map
43
 Loading...