

Page 1

Home Theatre
System
Operating Instructions
4-489-714-12(1)
HT-M77/HT-M55/HT-M22
Page 2

WARNING
To reduce the risk of fire or
electric shock, do not expose this
apparatus to rain or moisture.
To reduce the risk of fire, do not cover the
ventilation opening of the appliance with
newspapers, tablecloths, curtains, etc.
Do not expose the appliance to naked flame
sources (for example, lighted candles).
To reduce the risk of fire or electric shock, do
not expose this appliance to dripping or
splashing, and do not place objects filled with
liquids, such as vases, on the appliance.
Do not install the appliance in a confined
space, such as a bookcase or built-in cabinet.
As the main plug is used to disconnect the unit
from the mains, connect the unit to an easily
accessible AC outlet. Should you notice an
abnormality in the unit, disconnect the main
plug from the AC outlet immediately.
Do not expose batteries or appliances with
battery-installed to excessive heat, such as
sunshine and fire.
The unit is not disconnected from the mains as
long as it is connected to the AC outlet, even
if the unit itself has been turned off.
To prevent injury, this apparatus must be
securely attached to the floor/wall in
accordance with the installation instructions.
This symbol is intended to
alert the user to the presence
of the Hot Surface that may be
hot if it is touched during the
normal operation.
For customers in Australia
and India
Disposal of Old
Electrical & Electronic
Equipment
(Applicable in the
European Union and
other European
countries with
separate collection
systems)
For customers in United
Arab Emirates
About This Manual
• The instructions in this manual are for
models HT-M77, HT-M55 and HT-M22. In
this manual, the HT-M77 is used for
illustration purposes unless stated
otherwise. Any differences in operation are
marked in the manual as “HT-M77 only”.
• The instructions in this manual describe the
operation of the receiver with the supplied
remote control. You can also use the buttons
or knobs on the receiver if they have the
same or similar names as those on the
remote control.
On copyrights
This receiver incorporates Dolby* Digital and
Pro Logic Surround and the DTS** Digital
Surround System.
* Manufactured under license from Dolby
Laboratories. Dolby, Pro Logic, and the
double-D symbol are trademarks of Dolby
Laboratories.
GB
2
Page 3

** Manufactured under license under U.S.
Patent Nos: 5,956,674; 5,974,380;
6,226,616; 6,487,535 & other U.S. and
worldwide patents issued & pending. DTS,
the Symbol, & DTS and the Symbol
together are registered trademarks & DTS
Digital Surround | 96/24 is a trademark of
DTS, Inc. Product includes software. ©
DTS, Inc. All Rights Reserved.
This receiver incorporates High-Definition
Multimedia Interface (HDMITM) technology.
The terms HDMI and HDMI High-Definition
Multimedia Interface, and the HDMI Logo are
trademarks or registered trademarks of HDMI
Licensing LLC in the United States and other
countries.
iPhone and iPod touch are trademarks of
Apple Inc., registered in the U.S. and other
countries. App Store is a service mark of
Apple Inc.
All other trademarks and registered
trademarks are of their respective holders. In
this manual, ™ and ® marks are not specified.
“Made for iPod” and “Made for iPhone” mean
that an electronic accessory has been designed
to connect specifically to iPod or iPhone,
respectively, and has been certified by the
developer to meet Apple performance
standards.
Apple is not responsible for the operation of
this device or its compliance with safety and
regulatory standards. Please note that the use
of this accessory with iPod or iPhone may
affect wireless performance.
Windows Media is either a registered
trademark or trademark of Microsoft
Corporation in the United States and/or other
countries.
This product is protected by certain
intellectual property rights of Microsoft
Corporation. Use or distribution of such
technology outside of this product is
prohibited without a license from Microsoft or
an authorized Microsoft subsidiary.
MPEG Layer-3 audio coding technology and
patents licensed from Fraunhofer IIS and
Thomson.
“x.v.Color (x.v.Colour)” and “x.v.Color
(x.v.Colour)” logo are trademarks of Sony
Corporation.
“BRAVIA” is a trademark of Sony
Corporation.
“PlayStation” is a registered trademark of
Sony Computer Entertainment Inc.
“WALKMAN” and “WALKMAN” logo are
registered trademarks of Sony Corporation.
MICROVAULT is a trademark of Sony
Corporation.
The Bluetooth® word mark and logos are
registered trademarks owned by Bluetooth
SIG, Inc. and any use of such marks by Sony
Corporation is under license.
Other trademarks and trade names are those of
their respective owners.
The N Mark is a trademark or registered
trademark of NFC Forum, Inc. in the United
States and in other countries.
AndroidTM and Google PlayTM are trademarks
of Google Inc.
GB
3
Page 4

Table of Contents
About This Manual ........................2
Unpacking .....................................5
Description and location of
parts .........................................7
Getting started .............................13
Connections
1: Installing the speakers .............15
2: Connecting the speakers ..........17
3: Connecting the TV ..................18
4: Connecting other
equipment ..............................19
5: Connecting the antennas
(aerials) .................................23
Preparing the Receiver
Setting the voltage selector .........24
Connecting the AC power cord
(mains lead) ...........................24
Turning on the receiver ...............24
Adjusting the speaker levels and
balance (TEST TONE) .........25
Basic Operations
Playing an input source
equipment ..............................26
Playing a USB device
(Except for South Africa
and Argentina models) ..........27
Tuner Operations
Listening to FM/AM radio ..........30
Presetting FM/AM radio stations
(Preset Memory) ...................31
Enjoying Sound Effects
Selecting the sound field .............33
Adjusting the equalizer ................33
Resetting sound fields to the
default settings ......................34
Using Bluetooth
Features
About the Bluetooth wireless
technology ............................ 34
Connecting a smartphone with
One-touch (NFC) .................. 37
Using “SongPal” via
Bluetooth .............................. 39
“BRAVIA” Sync Features
What is “BRAVIA” Sync? ......... 39
Preparing for the “BRAVIA”
Sync ...................................... 40
One-Touch Play .......................... 41
System Audio Control ................ 41
System Power-Off ...................... 42
Scene Select ................................ 42
Adjusting settings
Using the settings menu .............. 43
LEVEL settings menu ................. 45
SPEAKER settings menu ........... 46
EQ settings menu ........................ 46
TUNER settings menu ................ 46
AUDIO settings menu ................ 46
HDMI settings menu ................... 47
BT settings menu ........................ 48
SYSTEM settings menu ............. 48
Viewing information on the
display panel ......................... 49
Reverting back to the factory
default settings ...................... 49
Additional Information
Precautions .................................. 50
Troubleshooting .......................... 52
Specifications .............................. 58
Index ........................................... 64
GB
4
Page 5

Unpacking
• Operating Instructions (this manual)
•Quick Setup Guide
• Remote control (1)
• R6 (size AA) batteries (2)
•AC plug adaptor (1)
(Latin America model only)
• FM wire antenna (aerial) (1)
HT-M55 only
• Receiver (STR-KM55) (1)
• Speaker system
– Front speaker (2)
– Center speaker (1)
– Surround speaker (2)
– Subwoofer (2)
• Speaker cords (4) (red (1), white (1),
purple (2))
• AM loop antenna (aerial) (1)
HT-M77 only
• Receiver (STR-KM77) (1)
• Speaker system
– Front speaker (2)
– Center speaker (1)
– Surround speaker (2)
– Surround back speaker (2)
– Subwoofer (2)
• Speaker cords (6) (red (1), white (1), blue
(1), gray (1), purple (2))
• Foot pads
–(Big) (8)
– (Small) (12)
• Foot pads
–(Big) (8)
– (Small) (12)
HT-M22 only
• Receiver (STR-KM22) (1)
• Speaker system
– Front speaker (2)
– Center speaker (1)
– Surround speaker (2)
– Subwoofer (1)
• Speaker cords (purple) (1)
• Foot pads
– (Big) (12)
– (Small) (12)
GB
5
Page 6

Inserting batteries into
the remote control
Insert two R6 (size-AA) batteries
(supplied) in the remote control. Observe
the correct polarity when installing
batteries.
Notes
• Do not leave the remote control in an extremely
hot or humid place.
• Do not use a new battery with old ones.
• Do not mix manganese bat teries and other kinds
of batteries.
• Do not expose the remote control sensor to
direct sunlight or lighting apparatuses. Doing so
may cause a malfunction.
• If you do no t intend to use the remote control for
an extended period of t ime, remove the batteries
to avoid possible damage from battery leakage
and corrosion.
• When the receiver no longer responds to the
remote control, replace all the batteries with
new ones.
GB
6
Page 7

Description and location of parts
Front panel
* Except for South Africa and Argentina models.
A ?/1 (on/standby) (page 24, 34, 49)
B INPUT SELECTOR (page 29, 31, 32,
35, 36, 53)
C INPUT SELECTOR indicator
Flashes when you change the input
source.
D (N-Mark) (page 37)
Position the NFC-compatible device
near this indication to activate the NFC
function.
E M-TURBO indicator
Lights up when M-TURBO is
activated.
F Display panel (page 8)
G MUSIC/MOVIE, GAME, FÚTBOL
(Latin America and Argentina
models only)/FOOTBALL (other
models) (page 33)
H Remote control sensor
Receives signals from remote control.
I MASTER VOLUME (page 25, 26, 29,
52, 54)
J MASTER VOLUME indicator
Flashes when you adjust the volume.
K (USB) port (page 23)
L M-TURBO (page 11)
M SPEAKER SETTINGS (page 12)
7
GB
Page 8

Indicators on the display panel
A D.RANGE
Lights up when Dynamic Range
Compression is activated (page 45).
B BT
Lights up when Bluetooth device is
connected (page 36).
C Input indicator
Lights up to indicate the current input.
OPT
Lights up when “OPT 1” or “OPT 2” is
selected.
COAX
Lights up when “COAX” is selected.
HDMI
The receiver recognizes the equipment
connected via an HDMI IN jack.
ARC
TV input is selected and the Audio
Return Channel (ARC) signals are
detected.
D DTS indicator
Lights up the respective indicator
when the
receiver is decoding the
corresponding DTS format
signals.
DTS
DTS 96/24
DTS
DTS 96 kHz/24 bit
E Dolby Pro Logic indicator
Lights up when the receiver performs
Dolby Pro Logic processing. This
matrix surround decoding technology
can enhance input signals.
PL II
F LPCM
Dolby Pro Logic II
Lights up when the receiver is
decoding the Linear PCM signals.
G ST
Lights up when the receiver tunes to a
stereo broadcast.
H D
Lights up when the receiver is
decoding Dolby Digital signals.
I SLEEP
Lights up when the Sleep Timer is
activated (page 11).
J Playback indicator
Lights up the respective indicator
when the playback option is activated.
SHUFFLE
REPEAT
K USB*
Lights up when USB device is
connected.
* Except for South Africa and Argentina models.
GB
8
Page 9

Rear panel
2 is different
depending on the
model. See below.
A DIGITAL INPUT/OUTPUT section
HDMI IN/OUT jacks
(page 18, 21)
OPTICAL IN jacks
(page 18, 22)
COAXIAL IN jack (page 22)
B SPEAKERS section (page 17)
Speaker jacks
Subwoofer jack(s)
C AUDIO INPUT section
White (L)
Red (R)
D TUNER section
AUDIO IN jacks
(page 22)
FM ANTENNA jack
(page 23)
AM ANTENNA terminal
(page 23)
GB
9
Page 10

*
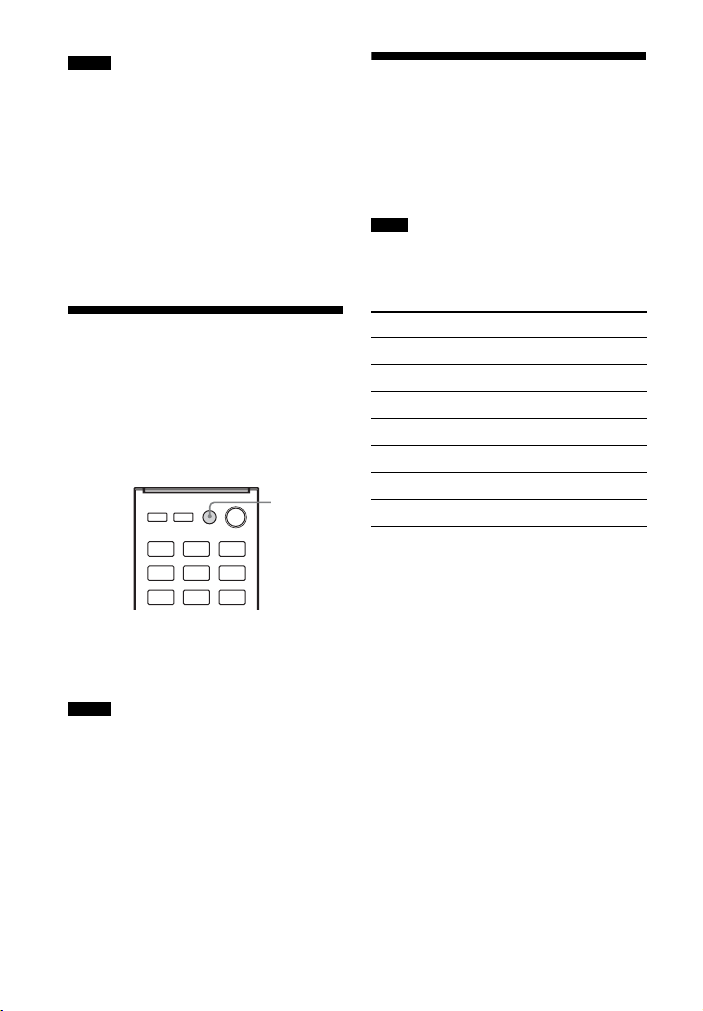
Remote control
Use the supplied remote control to operate this receiver and Sony TV.
• South Africa and Argentina
models only
• Other models
* FÚTBOL (Latin America and Argentina models only)/FOOTBALL (other models).
GB
10
Page 11

A ?/1 (on/standby)
Turns the receiver on or sets it to
standby mode.
Saving the power in standby mode
When “CTRL: HDMI” is set to
“CTRL OFF” (page 44).
B TV ?/1 (on/standby)
Turns the TV on or sets it to standby
mode.
C INPUT SELECTOR
Selects the equipment you want to use.
When you press any of the INPUT
SELECTOR buttons during standby
mode, the receiver turns on.
D Sound field buttons (page 33)
E AUTO STANDBY
(South Africa and Argentina models
only) (page 48)
SLEEP
Sets the receiver to turn off
automatically at a specified time.
Each time you press SLEEP, the
display changes cyclically as follows:
0-30-00 t 1-00-00 t 1-30-00
t 2-00-00 t OFF
When Sleep Timer is being used,
“SLEEP” indicator lights up on the
display panel.
Tip
To check the remaining time before the
receiver turns off, press SLEEP. The
remaining time appears on the display panel.
If you press SLEEP again, the Sleep Timer
will be canceled.
F EQ BASS
Adjusts the bass level (page 33).
EQ TREBLE
Adjusts the treble level (page 33).
G SPEAKERS TV AUDIO
Selects whether TV sound is output
from the system’s speaker or the TV’s
speaker(s). This function works only
when you set the control for HDMI
function to on (page 44).
H CTRL: HDMI
Turns the Control for HDMI function
on or off (page 47).
I DISPLAY
Views information on the display
panel.
J
V/v/B/b
,
Press V/v/B/b to select the menu items
then press to enter/confirm the
selection.
K TUNING MEMORY (page 31)
L M-TURBO
Turns the M-TURBO function on or
off. M-TURBO function reinforces the
bass and creates a more powerful
sound.
M m/M, NX, ./>
Backward/forward, play/pause, skip
operation.
TUNING +/–
Scans a station.
FM MODE
Selects the FM reception mode
(monaural or stereo).
PRESET +/–
Selects preset stations or channels.
N TV CH +/–
(South Africa and Argentina models
only)
Scans for the preset TV channels.
FOLDER +/–
(Other models)
Selects a folder of the USB device.
O TV VOL +/–
Adjusts the TV volume.
P DIMMER
(South Africa and Argentina models
only)
Adjusts the brightness of the display
panel (page 48).
SHUFFLE
(Other models)
Plays track from USB in shuffle mode
(page 29).
11
GB
Page 12

Q REPEAT
Plays a track or a folder repeatedly of
the USB device (page 29).
R VOL +/–
Adjusts the volume level of all
speakers at the same time.
S MUTING
Turns off the sound temporarily.
Press the button again to restore the
sound.
T RETURN
Returns to the previous menu.
U AMP MENU
Displays the menu to operate the
receiver.
V SPEAKER SETTINGS ALL FRONT,
SPEAKER SETTINGS STANDARD
Selects speaker settings according to
speaker layout (page 15, 16).
Tip
You can also use SPEAKER SETTINGS on
the receiver.
W TV INPUT
Selects the input signal (TV input or
video input).
X TV MUTING
Activates the TV’s muting function.
Notes
• The NX and VOL + buttons have tactile dots.
Use the tactile dots as references when
operating the receiver.
• The above explanation is intended to serve as
examples.
• Depending on the model of your connected
equipment, some functions explained in this
section may not work with the supplied remote
control.
12
GB
Page 13

Getting started
You can enjoy your audio/video equipment connected to the receiver by following the
simple steps below.
Before connecting cords, be sure to disconnect the AC power cord (mains lead).
Installing and connecting the speakers (page 15, 17)
Connecting the TV (page 18)
Connecting other equipment (page 19)
Preparing the receiver
See “Setting the voltage selector” (page 24), “Connecting the AC power cord (mains lead)” (page 24)
and “Turning on the receiver” (page 24).
Setting the speakers
Select the speaker layout settings (page 12), then check the speaker connection using “TEST TONE”
in LEVEL menu (page 25). If the sound is not output correctly, check the speaker connection.
Setting the audio output settings on the connected equipment
To output multi channel digital audio, check the digital audio output setting on the connected
equipment.
For a Sony Blu-ray Disc player, check that “Audio (HDMI)”, “Dolby Digital”, and “DTS” are set to
“Auto”, “Dolby Digital” and “DTS” respectively (as of September 2011).
For a PlayStation 3, check that “BD/DVD Audio Output Format (HDMI)” and “BD Audio Output
Format (Optical Digital)” are set to “Bitstream” (with system software version 3.70).
For details, refer to the operating instructions supplied with the connected equipment.
13
GB
Page 14

Digital audio formats supported by the receiver
Digital audio formats that this receiver can decode depend on digital audio output jacks of
the equipment connected. This receiver supports the following audio formats.
Audio format
[Display]
Dolby Digital
[DOLBY D]
DTS
[DTS]
DTS 96/24
[DTS 96/24]
Multi Channel Linear PCM*
[PCM]
Maximum number
of channels
5.1 aa
5.1 aa
5.1 aa
7.1 × a
Linear PCM 2.0 aa
* Audio signals are output in another format if the playback equipment does not correspond to the
format. For details, refer to the operating instructions of the playback equipment.
Connection between the playback
equipment and the receiver
COAXIAL/OPTICAL HDMI
14
GB
Page 15

Connections
1: Installing the speakers
Connections
HT-M77
This receiver allows you to use a 7 channel
speaker with 2 subwoofer system.
HT-M55
This receiver allows you to use a 5 channel
speaker with 2 subwoofer system.
HT-M22
This receiver allows you to use a 5 channel
speaker with 1 subwoofer system.
Example of speaker
system configuration
You can enjoy different sound effects from
the system by placing the speakers as
shown below.
A Front speaker (left)
B Front speaker (right)
C Center speaker
D Surround speaker (left)
E Surround speaker (right)
F Surround back speaker (left)
G Surround back speaker (right)
H Subwoofer
Installing all the speakers in
front position (Speaker
layout: All Front)
– HT-M77
– HT-M55
– HT-M22
15
GB
Page 16

Installing the surround/
surround back speakers in
rear position (Speaker
layout: Standard)
* HT-M77 only.
** HT-M77/HT-M55 only.
Notes
• Do not install the speakers on a wall.
• We recommend that you place the surround
back speakers (HT-M77 only), surround
speakers (HT-M55 and HT-M22 only), and
front speakers (HT-M22 only) on a speaker
stand (not supplied).
• Be sure to select the speaker layout setting
(page 12) according to your speakers
placement.
• Do not lean or hang on a speaker, as it may fall
down.
• For details about installing the speakers, please
refer to the supplied Quick Setup Guide.
Tips
• In order to output more effective sound when
“All Front” setting is selected, we recommend
you to install your front speakers and surround
speakers closer to each other.
• All the angles A should be the same.
– HT-M77 only
– HT-M55/HT-M22 only
• Since the subwoofer does not emit highly
directional signals, you can place it wherever
you want.
• We recommend that you place the subwoofer on
the floor for better bass performance.
Installing the speakers
on a flat surface
Attach the supplied foot pads to the bottom
of the speakers and subwoofers to prevent
vibration or movement.
16
Speaker Foot pads
Front (HT-M22 only) Big
Center Small
Surround (HT-M55 and
Small
HT-M22 only)
Surround back (HT-M77 only) Small
Subwoofer Big
GB
Page 17

2: Connecting the speakers
Before connecting cords, be sure to disconnect the AC power cord (mains lead).
When connecting the speaker cords, match the color of the connector to the color label
under the SPEAKERS jacks of the receiver. Be sure to insert the speaker connector until it
clicks.
Color label
Connector
Tan*
(Surround back
right speaker
(SBR))
Gray
(Surround
right speaker
(SR))
Red
(Front right
speaker (R))
Purple
(Subwoofer)
Connections
Green
(Center
speaker)
* HT-M77 only.
** HT-M77 and HT-M55 only.
Notes
• Check the speaker type by referring to the
speaker label on the rear panel of the speakers.
• The center speaker and subwoofers do not have
any character on the speaker label. For details
on the speaker type, see page 62.
Brown*
(Surround back
left speaker
(SBL))
Blue
(Surround
left speaker
(SL))
White
(Front left
speaker (L))
Purple**
(Subwoofer)
17
GB
Page 18

3: Connecting the TV
Before connecting cords, be sure to disconnect the AC power cord (mains lead).
TV
Audio/Video
signals
Audio signals
or
A*
A HDMI cable (not supplied)
Sony recommends that you use an
HDMI-authorized cable or Sony High
Speed HDMI cable with Cable Type
Logo.
B Optical digital cord (not supplied)
C Audio cord (not supplied)
B** C**
Recommended connection
Alternative connection
18
GB
Page 19

To enjoy the TV broadcast
in multi channel surround
sound from the receiver
* If your TV is compatible with the Audio
Return Channel (ARC) function, connect A.
Be sure to set the “CTRL HDMI” to “CTRL
ON” in HDMI settings menu (page 47).
** If your TV is not compatible with the ARC
function, connect B or C.
Be sure to turn off the TV’s volume or
activate the TV’s muting function.
Notes
• Connect a TV monitor or a projector to the
HDMI TV OUT jack on the receiver.
• Depending on the status of the connection
between the TV and the antenna (aerial), the
image on the TV screen may be distorted. If this
is the case, place the antenna (aerial) farther
away from the receiver.
• When connecting opti cal digital cords, insert the
plugs straight until they click into place.
• Do not bend or tie optical digital cords.
Tips
• All the digital audio jacks are compatible with
32 kHz, 44.1 kHz, 48 kHz, and 9 6 kHz sampling
frequencies.
• When you connect the audio output jack of the
TV to the TV IN jacks of the receiver to output
the TV sound from the speakers connected to
the receiver, set the sound output jack of the TV
to “Fixed” if it can be switched between either
“Fixed” or “Variable”.
To listen to the sound from
the TV
If your TV does not support System Audio
Control function, set the “AUDIO OUT” to
“TV+AMP” in the HDMI settings menu
(page 47).
4: Connecting other equipment
Using HDMI connection
High-Definition Multimedia Interface
(HDMI) is an interface which transmits
video and audio signals in digital format.
By connecting Sony “BRAVIA” Synccompatible equipment using HDMI cables,
operations can be simplified. See
““BRAVIA” Sync Features” (page 39).
HDMI features
• A digital audio signals transmitted by
HDMI can be output from the speakers
connected to the receiver. This signal
supports Dolby Digital, DTS, and Linear
PCM. For details, see “Digital audio
formats supported by the receiver”
(page 14).
• The receiver can receive Multi Channel
Linear PCM (up to 8 channels) with a
sampling frequency of 192 kHz or less
with an HDMI connection.
• This receiver supports Deep Color (Deep
Colour), “x.v.Color (x.v.Colour)”, and
4K or 3D transmission.
• To enjoy 3D images, connect 3Dcompatible TV and video equipment
(Blu-ray Disc player, Blu-ray Disc
recorder, PlayStation 3, etc.) to the
receiver using High Speed HDMI cables,
put on 3D glasses, and then play back a
3D-compatible content.
• To enjoy 4K (HDMI IN 1, IN 2, and IN 3
input) images, connect 4K-compatible
TV and video equipment (Blu-ray Disc
player, Blu-ray Disc recorder, etc.) to the
receiver using High Speed HDMI cables,
and then play back a 4K-compatible
content.
Connections
19
GB
Page 20

Notes on HDMI connections
• DSD signals of Super Audio CD are not
input or output.
• Depending on the TV or the video
equipment, 4K or 3D images may not be
displayed.
• Ref er to the operating instructions of each
connected equipment for details.
When connecting cords
• Before connecting cords, be sure to
disconnect the AC power cord (mains
lead).
• I t is not necessary to connect all the cords.
Connect according to the availability of
jacks on the connected equipment.
• Use a High Speed HDMI cable. If you use
a Standard HDMI cable, 1080p, Deep
Color (Deep Colour), 4K or 3D images
may not be displayed properly.
• We do not recommend using an HDMIDVI conversion cable. When you connect
an HDMI-DVI conversion cable to a
DVI-D equipment, the sound and/or the
image may be lost.
• When connecting optical digital cords,
insert the plugs straight until they click
into place.
• Do not bend or tie optical digital cords.
Tip
All the digital audio jacks are compatible with
32 kHz, 44.1 kHz, 48 kHz, and 96 kHz sampling
frequencies.
20
GB
Page 21

Connecting equipment with HDMI jacks
This HDMI connection is an example. You can connect each HDMI equipment to any
HDMI inputs.
If your equipment does not have an HDMI jack, see page 22.
Connections
Blu-ray Disc
player
Audio/video
signals
A
DVD player
Audio/video
signals
AA
A HDMI cable (not supplied)
Sony recommends that you use an
HDMI-authorized cable or Sony High
Speed HDMI cable with Cable Type
Logo.
Satellite tuner,
Cable TV tuner
Audio/video
signals
21
GB
Page 22

Connecting equipment with jacks other than HDMI
jacks
Below connection is an example. You can connect each audio/video equipment to any
digital or analog input jacks.
Blu-ray Disc player, DVD player,
Satellite tuner, Cable TV tuner
Audio signals
or
A
BCA
A Audio cord (not supplied)
B Optical digital cord (not supplied)
C Coaxial digital cord (not supplied)
Video signals
To the VIDEO
IN of the TV.
Super Audio
CD player, CD player
Audio signals
or
Recommended connection
Alternative connection
22
GB
Page 23

Connecting a USB device
(Except for South Africa and Argentina
models)
A
USB device
A USB cable (not supplied)
Note
You can use your iPhone/iPod with this receiver
via Bluetooth connection only.
5: Connecting the antennas (aerials)
Before connecting the antennas (aerials),
be sure to disconnect the AC power cord
(mains lead).
AM loop antenna (aerial)
(supplied)
* The shape of the connector varies depending on
the area of this receiver
Notes
• To prevent noise pickup, keep the AM loop
antenna (aerial) away from the receiver and
other equipment.
• Be sure to fully extend the FM wire antenna
(aerial).
• After connecting the FM wire antenna (aerial),
keep it as horizontal as possible.
FM wire antenna (aerial)
(supplied)
Connections
23
GB
Page 24

Preparing the Receiver
1
Setting the voltage selector
If your receiver has a voltage selector on
the rear panel, check that the voltage
selector is set to the local power supply
voltage. If not, use a screwdriver to set the
selector to the correct position before
connecting the AC power cord to a wall
outlet.
Depending on the area, the VOLTAGE
SELECTOR may differ.
Connecting the AC power cord (mains lead)
Connect the AC power cord (mains lead) to
a wall outlet.
AC power cord (mains lead)
Turning on the receiver
?/
Press ?/1 to turn on the receiver.
You can also turn on the receiver using ?/1
on the remote control. When you turn off
the receiver, press
“STANDBY” flashes on the display panel.
Do not disconnect the AC power cord
(mains lead) while “STANDBY” is
flashing. This may cause a malfunction.
?/1 again.
GB
24
To the wall outlet
Page 25

Adjusting the speaker
levels and balance
(TEST TONE)
You can adjust the speaker levels and
balance while listening to the test tone from
your seating position.
INPUT
SELECTOR
buttons
AMP
MENU
,
V/v/B/b
1 Press AMP MENU.
2 Press V/v repeatedly to select
“LEVEL”, then press or b.
3 Press V/v repeatedly to select
“TEST TONE”, then press or b.
4 Press V/v repeatedly to select
“AUTO xxx*”.
The test tone is output from each
speaker in sequence.
* xxx represent a speaker channel.
5 Adjust the speaker levels and
balance.
Use the LEVEL settings menu
(page 45) to adjust the speakers to
have the same sounding test tone level
for each speaker.
Tips
•To adjust the level of all speakers at the
same time, press VOL +/–. You can also
use MASTER VOLUME on the receiver.
• The adjusted value are shown on the
display panel during adjustment.
6 Exit test tone.
Press any INPUT SELECTOR buttons
or select “OFF” in step 4.
Preparing the Receiver
VOL +/–
25
GB
Page 26

Basic Operations
Playing an input source equipment
INPUT
SELECTOR
buttons
Sound field
buttons
AMP
MENU
MUTING
VOL +/–
,
V/v/B/b
4 Press sound field buttons to enjoy
the surround sound.
You can also use MUSIC/MOVIE,
GAME or FÚTBOL (Latin America
and Argentina models only)/
FOOTBALL (other models) on the
receiver.
For details, see page 33.
Tips
• You can adjust the volume differently using the
MASTER VOLUME knob on the receiver or
the VOL +/– button on the remote control.
To turn the volume up or down quickly
– Turn the knob quickly.
– Press and hold the button.
To make fine adjustment
– Turn the knob slowly.
– Press the button and release it immediately.
To activate the muting
function
Press MUTING.
The muting function will be canceled when
you do the following.
• Press the button again.
• Increase the volume.
• Turn off the receiver.
To avoid damaging your
speakers
Before you turn off the receiver, be sure to
turn down the volume level.
1 Press the INPUT SELECTOR
buttons which corresponds to the
equipment you want.
The selected input appears on the
display panel.
2 Turn on the equipment and start
playback.
3 Press VOL +/– to adjust the
volume.
You can also use MASTER VOLUME
on the receiver.
GB
26
Page 27

Naming inputs
You can enter a name of up to 8 characters
for inputs (except TUNER) to appear on
the display panel.
It is more recognizable having the
equipment named on the display than the
jacks.
1 Press the corresponding INPUT
SELECTOR button which you want
to create an index name.
2 Press AMP MENU.
3 Press V/v repeatedly to select
“SYSTEM”, then press or b.
4 Press V/v repeatedly to select
“NAME IN”, then press or b.
The cursor flashes and you can enter a
character.
5 Press V/v to select a character,
then press B/b to move the input
position backward and forward.
Tips
• You can select the character type as
follows by pressing V/v.
Alphabet (upper case) t Numbers t
Symbols
• To enter a blank space, press b without
selecting a character.
If you made a mistake
Press B/b until the character you want
to change flashes, then press V/v to
select the correct character.
6 Repeat step 5 to input a character
one by one, then press .
The name you entered is registered.
Playing a USB device
(Except for South Africa and
Argentina models)
You can enjoy music from the USB device
by connecting it to the (USB) port on
the receiver.
For details on connecting a USB device,
see “Connecting a USB device” (page 23).
The music file formats that can be played
back by this receiver are as follows:
File format Extensions
MP3 (MPEG-1 Audio
Layer III)
AAC*
WMA9 Standard*
WAV
* The receiver does not play files encoded with
DRM.
Compatible USB
devices
You can use the following Sony USB
devices on this receiver.
Verified Sony USB device
Product name Model name
®
Wal km an
NW-A857 / A860
NW-E053 / E060 / E083
NW-F800
NW-M505
NW-S756 / S760 / S770 /
S785
NW-WH303
NW-Z1000 / Z1070
NWD-W260 / W273
“.mp3”
“.m4a”, “.3gp”,
“.mp4”
“.wma”
“.wav”
Basic Operations
27
GB
Page 28

Product name Model name
NWZ-A864
NWZ-B162F / B173F
NWZ-E053 / E363 / E373 /
E385 / E463 / E575 / E585
NWZ-F805 / F885
NWZ-S755 / S764 / S774
NWZ-W262 / W272
NWZ-WH303 / WH505
NWZ-Z1040 / Z1070 /
Z1060
MICROVAULT USM1GL / 4GL / 8GL /
32GL
USM16GLX / 32GLX /
64GLX
USM512J / 8GJ
USM4GM
USM4GN / 8GN /
16(32)GN
USM64GP
USM8GQ / 32GQ / 64GQ
USM8GR / 16GR / 32GR
USM4GS / 16GS
USM8GT
USM16GU
USM4GV
Product name Model name
Digital Voice
Recorder
ICD-AX412
ICD-FX8
ICD-PX232 / PX312F /
PX333
ICD-SX813 / SX1000
ICD-UX502 / UX513F /
UX523F / UX532 / UX543
ICD-TX50
ICZ-R50 / R51
PCM-D100
Notes
• Some USB devices may not work with this
receiver.
• The receiver is unable to read data in NTFS
format.
• The receiver is unable to read data other than
that saved in the first partition of a hard disk
drive.
• Operation of models not listed here is not
guaranteed.
• Operation may not always be ensured even
when using these USB devices.
• Some of these USB devices may not be
available for purchase in certain areas.
• When formatting the above models, be sure to
format using the model itself or the dedicated
formatting software for that model.
• When connecting a Walkman
be sure to connect after the display “Creating
Library” or “Creating Database” on the
®
Walkman
has disappeared.
®
to the receiver,
28
GB
Page 29

Operating the USB
device
USB
Sound field
buttons
NX
./>
VOL +/–
REPEAT
m/M
FOLDER
+/–
1 Press USB.
You can also use INPUT SELECTOR
on the receiver.
2 Connect a USB device to the
(USB) port.
“USB” lights up on the display panel
and the playback starts automatically.
3 Press VOL +/– to adjust the
volume.
You can also use MASTER VOLUME
on the receiver.
4 Press sound field buttons to enjoy
the surround sound.
You can also use MUSIC/MOVIE,
GAME or FÚTBOL (Latin America
and Argentina models only)/
FOOTBALL (other models) on the
receiver.
For details, see page 33.
Other operations
Press Operation
NX Starts/pauses play.
m/M Fast reverses or forwards.
./> Goes to the previous/next file.
FOLDER +/– Goes to the previous/next
folder.
REPEAT Enters repeat mode.
S H U F F L E E n t e r s s h u f f l e m o d e .
Notes on the USB device
• Do not remove the USB device during
operation. To avoid data corruption or
damage to the USB device, turn the
receiver off when connecting or
removing the USB device.
• When USB cable connection is
necessary, connect the USB cable
supplied with the USB device to be
connected. Refer to the operating
instructions supplied with the USB
device to be connected for details on the
operation method.
• Do not connect the receiver and the USB
device through a USB hub.
• It may take about 10 seconds before
“READING” appears depending on the
type of USB device connected.
• When the USB device is connected, the
receiver reads all the files on the USB
device. If there are many folders or files
on the USB device, it may take a long
time to finish reading the USB device.
• The receiver can recognize up to
– 256 folders (including “ROOT” folder).
– 256 audio files for each folder.
Basic Operations
29
GB
Page 30

– 16 folder levels (tree structure of files,
including “ROOT” folder).
The maximum number of audio files and
folders may vary depending on the file
and folder structure.
Do not save other types of files or
unnecessary folders on a USB device.
• Compatibility with all encoding/writing
softwares, recording devices, and
recording media cannot be guaranteed.
Incompatible USB device may produce
noise or interrupted audio or may not play
at all.
• Some time may be needed to start
playback when:
– the folder structure is complex.
– the memory capacity is excessive.
• This receiver does not necessarily
support all the functions provided in a
connected USB device.
• The playback order for the receiver may
differ from the playback order of the
connected USB device.
• Folders that have no audio files are
skipped.
• When playing a very long track, some
operations may cause playback delay.
USB message list
Message and explanation
READING
The receiver is recognizing and reading
information of the USB device.
DEVICE ERROR
The memory of the USB device could not be
recognized (page 27).
NO SUPPORT
An unsupported USB device is connected, an
unknown device is connected, or the USB
device is connected through a USB hub
(page 27).
NO DEVICE
No USB device is connected or the connected
USB device is not recognized.
NO TRACK
No track was found.
Tuner Operations
Listening to FM/AM radio
You can listen to FM and AM broadcasts
through the built-in tuner. Before
operation, be sure you have connected the
FM and AM antennas (aerials) to the
receiver (page 23).
Tip
The tuning scale is shown below.
Area FM AM
Latin America and
Argentina
Australia, South
Africa, Middle East,
India, Thailand, and
Singapore
* The AM tuning scale can be changed (page 31).
1)
FM
AMP
MENU
FM
MODE
1)
South Africa and Argentina models only.
2)
Other models.
50 kHz 10 kHz*
50 kHz 9 kHz
AM1)/
2)
TUNER
,
V/v/B/b
TUNING +/–
30
GB
Page 31

Tuning to a station
automatically (Auto
Tuning)
1 Press TUNER repeatedly (or press
FM or AM) to select the FM or AM
band.
You can also use INPUT SELECTOR
on the receiver.
2 Press TUNING + or TUNING –.
TUNING + scans from lower to higher
frequency stations and TUNING –
scans from higher to lower stations.
The receiver stops scanning whenever
a station is received.
In case of poor FM stereo
reception
If the FM stereo reception is poor and “ST”
flashes on the display panel, select
monaural audio to lessen the sound
distortion.
Press FM MODE repeatedly to select
“MONO”.
To return to stereo mode, press FM MODE
repeatedly to select “STEREO”.
Changing the AM tuning
scale
(Latin America and Argentina
models only)
You can change the AM tuning scale to
either 9 kHz or 10 kHz.
5 Press V/v repeatedly to select “9K
STEP” or “10K STEP”.
Notes
• Depending on the settin gs, the receiver may take
some time to change the AM tuning scale.
• All preset stations will be erased when you
change the tuning scale.
Presetting FM/AM radio
stations
(Preset Memory)
You can store up to 30 FM and 30 AM
stations as your favorite stations.
FM
AMP
MENU
1)
AM1)/
TUNER
,
V/v/B/b
TUNING
MEMORY
2)
Tuner Operations
1 Press TUNER repeatedly (or
press AM) to select AM
You can also use INPUT SELECTOR
on the receiver.
.
2 Press AMP MENU.
3 Press V/v repeatedly to select
“TUNER”, then press or b.
4 Press V/v repeatedly to select “AM
STEP”, then press or b.
PRESET
+/–
1)
South Africa and Argentina models only.
2)
Other models.
1 Press TUNER repeatedly (or press
FM or AM) to select the FM or AM
band.
You can also use INPUT SELECTOR
on the receiver.
31
GB
Page 32

2 Tune to the station that you want to
preset (page 31).
3 Press TUNING MEMORY.
4 Press PRESET + or PRESET – to
select a preset number.
5 Press .
The station is stored as the selected
preset number.
6 Repeat steps 2 to 5 to store
another station.
Tuning to preset
stations
1 Press TUNER repeatedly (or press
FM or AM) to select the FM or AM
band.
You can also use INPUT SELECTOR
on the receiver.
2 Press PRESET + or PRESET –
repeatedly to select the station.
Each time you press the button, you
can select a preset station as follows:
5 Press V/v repeatedly to select
“NAME IN”, then press or b.
The cursor flashes and you can enter a
character.
6 Press V/v to select a character,
then press B/b to move the input
position backward and forward.
You can enter up to 8 characters to
name the station.
Tips
• You can select the character type as
follows by pressing V/v.
Alphabet (upper case) t Numbers t
Symbols
• To enter a blank space, press b without
selecting a character.
If you made a mistake
Press B/b until the character you want
to change flashes, then press V/v to
select the correct character.
7 Repeat step 6 to input a character
one by one, then press .
The name you entered is registered.
Naming preset stations
1 Press TUNER repeatedly (or press
FM or AM) to select the FM or AM
band.
You can also use INPUT SELECTOR
on the receiver.
2 Tune to the preset station which
you want to create an index name
(page 32).
3 Press AMP MENU.
4 Press V/v repeatedly to select
“TUNER”, then press or b.
GB
32
Page 33

Enjoying Sound Effects
Selecting the sound field
This receiver can create multi channel
surround sound. You can select one of the
optimized sound fields from the receiver’s
pre-programmed sound fields.
Sound field
buttons
Press any of the sound field buttons to
select the sound field you want.
You can also use MUSIC/MOVIE, GAME
or FÚTBOL (Latin America and Argentina
models only)/FOOTBALL (other models)
on the receiver.
Note
Before selecting the sound field, be sure to select
the speaker layout settings according to your
speaker placement (page 12).
x MUSIC ARENA
You can enjoy Live Music Concert filled
with great excitement created by Sony
unique Audio DSP technology. (Digital
Music Arena)
x MUSIC
Reproduces music sound with multi
channel output.
x MOVIE
Optimizes sound output for movie playback.
x GAME
Reproduces the sound processing of video
games for better gaming experience.
x FOOTBALL
Press FÚTBOL (Latin America and
Argentina models only)/FOOTBALL
(other models) repeatedly while watching a
football match broadcast.
You can experience a feeling of presence in
the stadium when watching the football
match broadcast.
• FOOTBALL: You can enjoy an
immersive feeling of being in a football
stadium through enhanced stadium
cheers.
• NARRATE.OFF: You can enjoy a more
immersive feeling of being in a football
stadium by minimizing the volume level
of narration in addition to the
enhancement of cheers.
• OFF: The football mode is turned off.
Notes on sound fields
• The effects provided by the Digital Music
Arena, Game and Football sound field
may cause increased noise in the
playback signal.
• We recommend you to select the football
mode when watching a football match
broadcast.
• If you hear unnatural sound in the content
when “NARRATE.OFF” is selected,
“FOOTBALL” is recommended.
• The football and digital music arena
modes are automatically set to “OFF”
when you press any of the sound field
buttons.
• Football mode does not support monaural
sound.
Tip
You can identify the encoding format of DVD
software, etc., by looking at the logo on the
package.
To turn off the surround
effect
Press MOVIE.
You can also use MUSIC/MOVIE on the
receiver to select “MOVIE”.
Adjusting the equalizer
You can use the following parameters to
adjust the tonal quality (bass/treble level)
of front speakers.
Bass Treble
Level
(dB)
Frequency
(Hz)
Enjoying Sound Effects
33
GB
Page 34

EQ BASS
EQ TREBLE
,V/v
1 Press EQ BASS or EQ TREBLE.
2 Press V/v to adjust the gain, then
press .
Resetting sound fields to the default settings
Be sure to use the buttons on the receiver to
perform this operation.
?/1 MUSIC/MOVIE
1 Press ?/1 to turn off the receiver.
2 While holding down MUSIC/
MOVIE, press ?/1.
“S.F. CLEAR” appears on the display
panel and all sound fields are reset to
their default setting.
Using Bluetooth Features
About the Bluetooth wireless technology
Bluetooth wireless technology is a shortrange wireless technology that enables
wireless data communication between
digital devices. Bluetooth wireless
technology operates within a range of about
10 meters.
Supported Bluetooth
version and profiles
Profile refers to a standard set of
capabilities for various
capabilities. This receiver supports the
following Bluetooth version and profiles.
Supported Bluetooth version:
Bluetooth Specification version 3.0
Supported Bluetooth profiles:
A2DP (Advanced Audio Distribution
Profile): Receiving audio content of highquality
AVRCP 1.3 (Audio Video Remote Control
Profile): Controlling audio/video
equipment; pausing, stopping, starting
playback, volume control, etc.
Bluetooth product
34
GB
Page 35

Notes
• To use a Bluetooth device connected to this
receiver, the Bluetooth device must support the
same profile as this receiver. Even if the device
supports the same profile, the functions may
differ depending on the specifications of the
Bluetooth device.
• The audio playback on this receiver may be
delayed from that on the Bluetooth device
because of the characteristics of the Bluetooth
wireless technology.
Pairing the receiver
with a Bluetooth device
Pairing is an operation where Bluetooth
devices register with each other
beforehand. Once a pairing operation is
performed, it does not need to b e performed
again.
1 Place the Bluetooth device within
1 meter from this receiver.
2 Press BLUETOOTH.
You can also use INPUT SELECTOR
on the receiver.
“PAIRING” appears and “BT” flashes
quickly on the display panel.
Perform step 3 within 5 minutes,
otherwise pairing will be canceled. In
this case, repeat this step.
Note
Set the Bluetooth device in pairing mode.
For details on setting the Bluetooth device in
pairing mode, refer to the operating
instructions supplied with the device.
3 Perform pairing on the Bluetooth
device to detect this receiver.
For details, refer to the operating
instructions of your Bluetooth device.
Note
When establishing a connection with this
receiver, select the audio profile (A2DP,
AVRCP) at the Bluetooth device. If the
Bluetooth device does not support the
AVRCP profile, you cannot perform
playback or other operations with this
receiver (page 34).
4 Select your receiver’s name (for
example, “HT-M77”) on the
Bluetooth device display.
If the receiver’s name is not displayed,
repeat from step 1.
Note
If passkey is required on the display of the
Bluetooth device, enter “0000”.
5 Once pairing is completed, the
device is automatically connected
to the receiver.
Device name appears and “BT” lights
up on the display panel.
6 Start playback on the Bluetooth
device.
7 Adjust the volume.
Adjust the volume of the Bluetooth
device first, if the volume level is still
too low, adjust the volume level on the
receiver.
Notes
• Passkey may be called “Passcode”, “PIN code”,
“PIN number” or “Password”.
• You can pair up to 9 Bluetooth devices. If 10th
Bluetooth device is paired, the least recently
connected device will be replaced by the new
one.
• Pairing from another Bluetooth device is not
possible when the receiver is connecting to a
Bluetooth device.
• Depending on the type of Bluetooth device, you
can adjust the volume using the controls of the
Bluetooth device.
Using Bluetooth Features
35
GB
Page 36

Connecting a Bluetooth
device
You can connect to a Bluetooth device
from this receiver.
Check the following before playing music:
–The Bluetooth function of the Bluetooth
device is turned on.
– The pairing has been completed
(page 35).
1 Place the Bluetooth device within
1 meter from this receiver.
2 Press BLUETOOTH
You can also use INPUT SELECTOR
on the receiver.
3 Perform connecting on the
Bluetooth device.
For details, refer to the operating
instructions of your Bluetooth device.
4 Press N to start playback.
5 Adjust the volume.
Adjust the volume of the Bluetooth
device first, if the volume level is still
too low, adjust the volume level on the
receiver.
To disconnect the Bluetooth device
Bluetooth connection can only be
disconnected by the Bluetooth device or if
there is a signal loss.
To delete a paired Bluetooth device
from the device list
Initialize the receiver (page 49).
Notes
• Depending on the type of Bl uetooth device, you
can adjust the volume using the controls of the
Bluetooth device.
• If you cannot connect with a paired Bluetooth
device, perform the pairing operation between
the receiver and the Bluetooth device again.
• If the input has been set to “BLUETOOTH”
when you turn on the receiver, the receiver
automatically connects to the last connected
Bluetooth device.
To operate the Bluetooth
device using the remote
control
NX*
Once the receiver and the Bluetooth device
are connected, you can control playback by
pressing NX*, m/M and ./>.
* If no Bluetooth device is connected and you
press NX, the receiver automatically
connects to the last connected Bluetooth device
and play back the music.
Note
These operations may not be available for certain
Bluetooth devices. In addition, the actual
operations may differ depending on the
connected Bluetooth device.
m/M
./>
Setting the Bluetooth
Standby mode
You can set the Bluetooth Standby mode so
that the receiver can be controlled by the
Bluetooth device even when the receiver is
in standby mode.
1 Press BLUETOOTH.
You can also use INPUT SELECTOR
on the receiver.
2 Press AMP MENU.
3 Press V/v repeatedly to select
“BT”, then press or b.
4 Press V/v repeatedly to select
“BT STANDBY”, then press or
b.
5 Press V/v repeatedly to select
“STBY ON”, then press .
The receiver turns on automatically
when you establish the Bluetooth
connection from the Bluetooth device.
36
GB
Page 37

To turn off this function
Select “STBY OFF” in step 5.
Note
You can only select this parameter when a
Bluetooth device is paired.
Setting the Bluetooth
audio codecs
You can enable and disable AAC
(Advanced Audio Coding) audio.
1 Press BLUETOOTH.
You can also use INPUT SELECTOR
on the receiver.
2 Press AMP MENU.
3 Press V/v repeatedly to select
“BT”, then press or b.
4 Press V/v repeatedly to select
“BT AAC”, then press or b.
5 Select “AAC ON” or “AAC OFF”,
then press .
• AAC ON: AAC audio is available.
• AAC OFF: AAC audio is not
available.
Notes
• You can enjoy high quality sound if the AAC is
enabled.
• When you change the setting, the Bluetooth
device is disconnected from the receiver and
reconnected automatically.
Checking the
information of a
connected Bluetooth
device
You can check the Bluetooth device
information by pressing DISPLAY
repeatedly.
Each time you press DISPLAY, the display
will change cyclically as follows:
Bluetooth device name t Bluetooth
device address t Sound field currently
applied t Volume level t Input you
selected
Connecting a
smartphone with Onetouch (NFC)
What is “NFC”?
NFC (Near Field Communication) is a
technology enabling short-range wireless
communication between various devices,
such as smartphones and IC tags. Thanks to
the NFC function, data communication can
be achieved easily just by holding the
device near the (N-mark) on the
NFC-compatible devices.
By holding an NFC-compatible
smartphone near to the N-Mark on the
receiver, the receiver automatically:
– turns on in Bluetooth function.
– completes pairing.
– completes the Bluetooth connection.
Using Bluetooth Features
37
GB
Page 38

1 Download and install the “NFC
Easy Connect” app.
Download the free Android app from
Google Play by searching for “NFC
Easy Connect” or access it by using the
two-dimensional code below. Data
communication fees may be charged.
Two-dimensional code* for direct
access
*Use a two-dimensional code reader app.
Notes
• The app may not be available in some
countries/regions.
• Depending on your smartphone, you can
use the NFC function without installing the
app. In this case, the operations and
specifications may differ. For details, refer
to the operating instructions of your
smartphone.
Compatible smartphones
Smartphones with a built-in NFC function
2 Start the “NFC Easy Connect” app
on the smartphone.
Make sure that the app screen is
displayed.
3 Hold the smartphone near to the
N-Mark on the receiver until the
smartphone vibrates.
Vibration cue is provided when the
smartphone is recognized by the
receiver.
After being recognized by the receiver,
follow the on-screen instructions
displayed on the smartphone, and
complete the procedure for Bluetooth
connection.
Notes
• The receiver only can recognizes and connects
to one NFC-compatible device at a time.
• Depending on your smartphone, you may need
to turn on the NFC function on your smartphone
in advance. For details, refer to the operating
instructions of the smartphone.
Tip
If pairing and the Bluetooth connection fail, do
the following.
– Relaunch “NFC Easy Connect” and move the
smartphone slowly over the .
– Remove the case from the smartphone if using
a commercially available smartphone case.
To listen to music
Start playback of an audio source on the
smartphone. For details on playback
operations, refer to the operating
instructions of your smartphone.
Tip
If the volume level is low, adjust the volume of
the smartphone first. If the volume level is still
too low, adjust the volume level on the receiver.
To stop playback
The playback will be stopped when you
perform any of the following items:
– Hold the smartphone near to the on
the receiver again.
– Stop the music player of the smartphone.
– Turn off the receiver or the smartphone.
– Change the function.
– Disable the Bluetooth function on the
smartphone.
38
GB
Page 39

Using “SongPal” via Bluetooth
A dedicated app for this model is available
on both Google Play and App Store.
Search for “SongPal” and download the
free App to find out more about the
convenient features.
Easy Control app, “SongPal”, supports
wireless operation. It allows you to:
– choose music/audio contents from
integrated functions of various device
and smartphone.
– control various settings intuitively.
– enhance the music visually with your
smartphone display.
Bluetooth technology works with
iPhone 5s, iPhone 5c, iPhone 5, iPhone 4s,
iPhone 4, iPhone 3GS, iPod touch
(5th generation), iPod touch
(4th generation).
“BRAVIA” Sync Features
What is “BRAVIA” Sync?
The “BRAVIA” Sync function allows
communication between Sony products
such as TV, Blu-ray Disc player, DVD
player, AV amplifier, etc. that supports the
Control for HDMI function.
By connecting Sony equipment that is
compatible with the “BRAVIA” Sync with
an HDMI cable (not supplied), operation is
simplified as follows:
• One-Touch Play (page 41)
• System Audio Control (page 41)
• System Power-Off (page 42)
• Scene Select (page 42)
Control for HDMI is a mutual control
function standard used by HDMI CEC
(Consumer Electronics Control) for HDMI
(High-Definition Multimedia Interface).
We recommend that you connect the
receiver to products featuring “BRAVIA”
Sync.
Notes
• You may use “One Touch Play”, “System
Audio Control”, and “System Power-Off”
function with non-Sony equipment. However,
compatibility with all non-Sony equipment is
not guaranteed.
• “Scene Select”
cannot operate with non-Sony equipment.
• Equipment not compatible with “BRAVIA”
Sync cannot activate these features.
• Depending on the connected equipment, the
Control for HDMI function may not work. Refer
to the operating instructions of the equipment.
is Sony proprietary function. It
“BRAVIA” Sync Features
39
GB
Page 40

Preparing for the “BRAVIA” Sync
The receiver is compatible with the
“Control for HDMI-Easy Setting”
function.
• If your TV is compatible with the
“Control for HDMI-Easy Setting”
function, you can set the Control for
HDMI function of the receiver and
playback equipment automatically by
setting the Control for HDMI function on
your TV (page 40).
• If your TV is not compatible with the
“Control for HDMI-Easy Setting”
function, set the Control for HDMI
function of the receiver, playback
equipment and TV individually
(page 40).
If your TV is compatible
with the “Control for HDMIEasy Setting” function
1 Connect the receiver, TV and
playback equipment via HDMI
connection (page 18, 21).
(The respective equipment must be
compatible with the Control for HDMI
function.)
2 Turn on the receiver, TV and
playback equipment.
3 Turn on the Control for HDMI
function of the TV.
The Control for HDMI function of the
receiver and all the connected equipment
are turned on simultaneously. Wait until
“COMPLETE” appears. The setup is
complete.
For details on setup of the TV, refer to the
operating instructions of your TV.
If your TV is not compatible
with the “Control for HDMIEasy Setting” function
AMP
MENU
,
V/v/B/b
1 Press AMP MENU.
2 Press V/v repeatedly to select
“HDMI”, then press or b.
3 Press V/v repeatedly to select
“CTRL HDMI”, then press or b.
4 Press V/v repeatedly to select
“CTRL ON”, then press .
Control for HDMI function is turned on.
5 Set the Control for HDMI function of
the connected equipment to on.
If the Control for HDMI function is
already set to on, you do not need to
change the setting.
For details on setting the TV and
connected equipment, refer to the
operating instructions of the respective
equipment.
Notes
• When you unplu g the HDMI cable or change the
connection, perform the steps given in “If your
TV is compatible with the “Control for HDMIEasy Setting” function” (page 40) or “If your
TV is not compatible with the “Control for
HDMI-Easy Setting” function” (page 40).
• Before you perform the “Control for HDMIEasy Setting” on your TV, be sure to turn on the
TV and other connected equipment including
the receiver first.
• If the playback equipment cannot function after
you have made the settings for “Control for
HDMI-Easy Setting”, check the Control for
HDMI setting of the playback equipment.
• If the connected equipment does not support the
“Control for HDMI-Easy Setting”, but still
supports the Control for HDMI, then you need
to set the Control for HDMI function of the
connected equipment before you perform the
“Control for HDMI-Easy Setting” from the TV.
40
GB
Page 41

One-Touch Play
System Audio Control
When you start playback the equipment
connected to the receiver via an HDMI
connection, the receiver and TV operation
are simplified as follows:
Receiver and TV
Turns on (if in standby mode)
Switches to appropriate HDMI input
If you set “PASS THRU” to “ON” or
“AUTO” (page 47), then set the receiver to
standby mode, sound and image can be
output only from the TV.
Notes
• Be sure that the System Audio Control function
is set to on using TV menu.
• Depending on the TV, the start of the content
may not appear.
• Depending on the settings, the receiver may not
turns on when “PASS THRU” is set to “ON” or
“AUTO”.
Tip
You can also select a connected equipment, such
as Blu-ray Disc player or DVD player from the
TV menu. The receiver and TV will automatically
switch to the appropriate HDMI input.
You can enjoy the TV sound from the
speakers connected to the receiver by a
simple operation.
You can operate System Audio Control
function using the TV menu. For details,
refer to the operating instructions of the
TV.
TV Receiver
Switches the
TV speaker
setting to
output sound
from the
receiver
Turns off the TV
sound
temporarily
• Turns on (if in
standby mode)
• Switches to
appropriate
HDMI input
Outputs TV sound
You can also use the System Audio Control
function as follows.
• If you turn on the receiver while the TV is
turned on, the System Audio Control
function will automatically activate to
output TV sound through the speakers
connected to the receiver. However, if
you turn off the receiver, the sound will
output from the TV speakers.
• When sound from the TV or other
equipment is output via the speakers
connected to the receiver, you can switch
the sound to output from the TV speakers
by pressing SPEAKERS TV AUDIO.
• When you enjoy the TV sound from the
speakers connected to the receiver, you
can adjust the volume or turn off the
sound temporarily by using the TV’s
remote control.
“BRAVIA” Sync Features
41
GB
Page 42
Notes
• If System Audio Control does not function
according to your TV setting, refer to the
operating instructions of the TV.
• When “CTRL HDMI” is set to “CTRL ON”, the
“AUDIO OUT” settings in the HDMI settings
menu will set automatically based on the
System Audio Control settings (page 47).
• Your TV must support the System Audio
Control function.
• If the TV is turned on before turning on the
receiver, the TV will momentarily loose the
sound output.
System Power-Off
When you turn the TV off, using the power
button on the TV’s remote control, the
receiver and the connected equipment turn
off automatically.
You can also use the receiver’s remote
control to turn off the TV.
TV ?/1
Scene Select
The optimum picture quality and sound
field are selected automatically according
to the scene selected on your TV.
For details on the operation, refer to the
operating instructions of the TV.
Note
The sound field may not switch depending on the
TV.
Correspondence table
Scene setting on the TV Sound field
Cinema MOVIE
Sports MOVIE
Music MUSIC
Animation MOVIE
Photo MUSIC
Game GAME
Graphics MUSIC
Press TV ?/1.
The TV, receiver and the connected
equipment are turned off.
Notes
• Set the TV power supply interlock function to
on before using the System Power-Off function.
For details, refer to the operating instructions of
the TV.
• Depending on the condition of the connected
equipment, it may not be turned off. For details,
refer to the operating instructions of the
connected equipment.
GB
42
Page 43

3 Press V/v repeatedly to select the
Adjusting settings
parameter you want to adjust, then
press or b.
4 Press V/v repeatedly to select the
Using the settings menu
You can customize the receiver by making
various adjustments using the setting menu.
AMP
MENU
RETURN
1 Press AMP MENU.
2 Press V/v repeatedly to select the
menu item you want, then press
or b.
Overview of the menus
The following options are available in each menu. For details, see the referencing page in
the parentheses.
,
V/v/B/b
setting you want, then press .
To return to the previous
display
Press B or RETURN.
To exit the menu
Press AMP MENU.
Note
Some parameters and settings may appear
dimmed on the display panel. This means that
they are either unavailable or fixed and
unchangeable.
Menu
[Display]
Level settings
[LEVEL]
(page 45)
Parameters
[Display]
Tes t tone
[TEST TONE]
Front speaker balance
[FRT BAL]
Center speaker level
[CNT LEVEL]
Surround left speaker level
[SL LEVEL]
Surround right speaker level
[SR LEVEL]
Surround back left speaker level
[SBL LEVEL]
Surround back right speaker level
[SBR LEVEL]
Subwoofer level
[SW LEVEL]
Settings
OFF, AUTO xxx
BAL. L+1 to BAL. L+6, BALANCE,
BAL. R+1 to BAL. R+6
CNT –6.0 dB to CNT +6.0 dB
(0.5 dB interval)
SL –6.0 dB to SL +6.0 dB
(0.5 dB interval)
SR –6.0 dB to SR +6.0 dB
(0.5 dB interval)
b)
SBL –6.0 dB to SBL +6.0 dB
(0.5 dB interval)
b)
SBR –6.0 dB to SBR +6.0 dB
(0.5 dB interval)
SW –6.0 dB to SW +6.0 dB
(0.5 dB interval)
a)
Adjusting settings
GB
43
Page 44

Menu
[Display]
Speaker settings
[SPEAKER]
(page 46)
EQ settings
[EQ]
(page 46)
Tuner settings
[TUNER]
(page 46)
Audio settings
[AUDIO]
(page 46)
HDMI settings
[HDMI]
(page 47)
Parameters
[Display]
Dynamic range compressor
[D. RANGE]
Front left speaker distance
[FL DIST.]
Front right speaker distance
[FR DIST.]
Center speaker distance
[CNT DIST.]
Surround left speaker distance
[SL DIST.]
Surround right speaker distance
[SR DIST.]
Surround back left speaker distance
[SBL DIST.]
Surround back right speaker distance
[SBR DIST.]
Subwoofer distance
[SW DIST.]
Front speakers bass level
[BASS]
Front speakers treble level
[TREBLE]
FM station receiving mode
[FM MODE]
Naming preset stations
[NAME IN]
AM tuning scale selection
c)
[AM STEP]
Synchronizes audio with video output
[A/V SYNC]
Digital broadcast language selection
[DUAL MONO]
Pro Logic II Decoding mode
d)
[PLII DEC.]
Control for HDMI
[CTRL HDMI]
HDMI Signal Pass Through
[PASS THRU]
Setting HDMI audio input
[AUDIO OUT]
Settings
COMP. MAX, COMP. STD,
COMP. OFF
1.00 M to 10.00 M (0.01 m interval)
b)
b)
BASS –6 dB to BASS +6 dB
(1 dB interval)
TREBLE –6 dB to TREBLE +6 dB
(1 dB interval)
STEREO, MONO
For details, see “Naming preset
stations” (page 32).
For details, see “Changing the AM
tuning scale” (page 31).
HDMI AUTO, 0 MS to 300 MS
(10 ms interval)
MAIN/SUB, MAIN, SUB
AUTO, ON, OFF
CTRL ON, CTRL OFF
OFF, AUTO, ON
AMP, TV+AMP
44
GB
Page 45

Menu
[Display]
Bluetooth
settings
[BT]
(page 48)
System settings
[SYSTEM]
(page 48)
a)
xxx represent a speaker channel.
– HT-M77 only: FL, FR, CNT, SL, SR, SBL, SBR, SW
– HT-M22/HT-M55 only: FL, FR, CNT, SL, SR, SW
b)
HT-M77 only.
c)
Latin America and Argentina models only.
d)
You can only select this parameter if the sound field is set to “MOVIE” and the speaker layout settings
is set to “STANDARD”.
e)
You can only select this parameter when a Bluetooth device is paired.
Parameters
[Display]
Fast view
[FAST VIEW]
Bluetooth standby mode
[BT STANDBY]
Bluetooth AAC
[BT AAC]
Brightness of the display panel
[DIMMER]
Main unit illumination
[MAIN ILLUM.]
Auto standby mode
[AUTO STBY]
Naming inputs
[NAME IN]
e)
Settings
AUTO, OFF
STBY ON, STBY OFF
AAC ON, AAC OFF
DIMMER OFF, DIMMER ON
ON, OFF
STBY ON, STBY OFF
For details, see “Naming inputs”
(page 27).
x CNT LEVEL, SL LEVEL, SR
LEVEL settings menu
You can adjust the level and balance of
each speaker manually.
x TEST TONE
Lets you adjust the speaker levels and
balance while listening to the test tone from
your seating position (page 25).
x FRT BAL
Lets you adjust the balance between front
left and right speakers.
LEVEL, SBL LEVEL*, SBR
LEVEL*, SW LEVEL
Lets you adjust each speaker’s level
(center, surround left/right, surround back
left/right*, subwoofer).
* HT-M77 only.
x D. RANGE (Dynamic range
compressor)
Lets you compress the dynamic range of
the soundtrack. This may be useful when
you want to watch movies at low volumes
late at night. Dynamic range compression
is possible with Dolby Digital sources only.
• COMP. MAX: The dynamic range is
compressed dramatically.
• COMP. STD: The dynamic range is
compressed as intended by the recording
engineer.
Adjusting settings
45
GB
Page 46

• COMP. OFF: The dynamic range is not
compressed.
Tip
“COMP. STD” is the standard setting, and
enacts light compression. Therefore, we
recommend using the “COMP. MAX”
setting. This greatly compresses the
dynamic range and lets you view movies
late at night at low volumes. Unlike analog
limiters, the levels are predetermined and
provide a very natural compression.
TUNER settings menu
You can set the FM station receiving mode
and name the preset stations.
x FM MODE
• STEREO: This receiver will decode the
signal as stereo signal when the radio
station is broadcast in stereo.
• MONO: This receiver will decode the
signal as mono signal regardless of the
broadcast signal.
SPEAKER settings menu
You can adjust the position and distance of
the speakers connected to this receiver.
x FL DIST., FR DIST., CNT
DIST., SL DIST., SR DIST.,
SBL DIST.*, SBR DIST.*, SW
DIST.
Lets you adjust the distance from your
seating position to each speaker (front left/
right, center, surround left/right, surround
back left/right*, subwoofer).
If both front speakers are not placed in
equal distance from your seating position,
set the distance to the closest speaker.
* HT-M77 only.
EQ settings menu
You can adjust the bass and treble level for
front speakers. For details, see “Adjusting
the equalizer” (page 33).
GB
46
x NAME IN
Lets you set the name of preset stations. For
details, see “Naming preset stations”
(page 32).
x AM STEP*
Lets you change the AM STEP to either
9 kHz or 10 kHz. For details, see
“Changing the AM tuning scale” (page 31).
* Latin America and Argentina models only.
AUDIO settings menu
You can adjust settings for the audio to suit
your preference.
x A/V SYNC
• HDMI AUTO: The time gap between
audio output and visual display for the
monitor connected via an HDMI
connection will be adjusted automatically
based on the information for the TV. This
feature is available only when the
monitor supports the A/V Sync function.
• 0 MS - 300 MS: You can adjust the delay
from 0 ms to 300 ms in 10 ms intervals.
Notes
• This function is useful when you use a large
LCD or plasma monitor or a projector.
• The delay time may vary depending on audio
format, sound field and speaker distance
settings.
Page 47

x DUAL MONO
Lets you select the language you want
when you listen to the dual audio of a
digital broadcast when available. This
feature only functions for Dolby Digital
sources.
• MAIN/SUB: Sound of the main
language will be output through the front
left speaker and sound of the sub
language will be output through the front
right speaker simultaneously.
• MAIN: Sound of the main language will
be output.
• SUB: Sound of the sub language will be
output.
x PLII DEC.
Lets you turn the Pro Logic II decoding
mode on or off.
• AUTO : Applies the Pro Logic II
decoding mode automatically when
receiving the Dolby Surround encoded
signals.
• ON: Applies the Pro Logic II decoding
mode when receiving 2 channels signals.
• OFF: Pro Logic II decoding mode is
turned off.
Note
This function works only in the following cases.
– “MOVIE” is selected.
– Speaker layout settings is set to “STANDARD”
(page 12).
HDMI settings menu
You can adjust the required settings for
equipment connected to the HDMI jacks.
x CTRL HDMI
Lets you turn the Control for HDMI
function on or off. For details, see
““BRAVIA” Sync Features” (page 39).
x PASS THRU
Lets you output the HDMI signals to the
TV even when the receiver is in standby
mode.
• ON: When the receiver is in the standby
mode, the receiver continuously outputs
HDMI signals from the receiver’s HDMI
TV OUT jack.
• AU TO: When the TV is turned on while
the receiver is in the standby mode, the
receiver outputs HDMI signals from the
receiver’s HDMI TV OUT jack. Sony
recommends this setting if you use a
“BRAVIA” Sync compatible Sony TV.
This setting saves power in the standby
mode when compared with the “ON”
setting.
• OFF: The receiver does not output
HDMI signals when in the standby mode.
Turn on the receiver to enjoy the
connected equipment’s source on the TV.
This setting saves power in the standby
mode when compared with the “ON”
setting.
Notes
• This parameter is not available when “CTRL
HDMI” is set to “CTRL OFF”.
• When “AUTO” is selected, it may take a little
more time for the image and sound to be output
to the TV than when “ON” is selected.
• When the receiver is in standby mode,
“A.STANDBY” appears on the display if
“PASS THRU” is set to “AUTO” or “ON”.
However, “A.STANDBY” will disappear when
“PASS THRU” is set to “AUTO” and no signals
are detected.
x AUDIO OUT
Lets you set the HDMI audio output from
the playback equipment connected to the
receiver via an HDMI connection.
• AMP: The HDMI audio signals from the
playback equipment are only output to
the speakers connected to the receiver.
Multi channel sound can be played back
as it is.
Adjusting settings
47
GB
Page 48

Note
Audio signals are not output from the TV’s
speaker when “AUDIO OUT” is set to “AMP”.
• TV+AMP: The sound is output from
TV’s speaker and the speakers connected
to the receiver.
Notes
• The sound quality of the playback equipment
depends on the TV’s sound quality, such as
the number of channels, and the sampling
frequency, etc. If the TV has stereo speakers,
the sound output from the receiver is also in
stereo as that of the TV, even if you play back
multi channel source.
• When you connect the receiver to an image
display equipment (projector, etc.), sound
may not be output from the receiver. In this
case, select “AMP”.
x Fast View
Lets you set the operation of Fast View.
• AU TO: You can select HDMI input
faster than the normal selection.
• OFF: This function is not available.
BT settings menu
You can adjust the settings for Bluetooth.
x BT STANDBY
Lets you set the Bluetooth standby mode.
For details, see “Setting the Bluetooth
Standby mode” (page 36).
x BT AAC
Lets you set the Bluetooth audio codes. For
details, see “Setting the Bluetooth audio
codecs” (page 37).
SYSTEM settings menu
You can customize the settings of the
receiver.
x DIMMER
Lets you adjust the brightness of the
display panel.
• DIMMER ON: The brightness of the
display is reduced.
• DIMMER OFF: The brightness of the
display remain unchanged.
x MAIN ILLUM.
Lets you adjust the lighting status of the
front panel LEDs.
• ON: The front panel LEDs lighting status
turns on.
• OFF: The front panel LEDs lighting
status turns off.
x AUTO STBY
Lets you set the receiver switch to standby
mode automatically when you do not
operate the receiver or when there is no
signals input to the receiver.
• STBY ON: Switches to standby mode
after approximately 20 minutes.
• STBY OFF: Does not switch to standby
mode.
Notes
• This function does not work when TUNER
input is selected.
• If you use the Auto standb y mode and the Sleep
Timer at the same time, the Sleep Timer has
priority.
x NAME IN
• Lets you set the name of inputs. For
details, see “Naming inputs” (page 27).
48
GB
Page 49

Viewing information on the display panel
The display panel provides various
information of the receiver status such as
sound field.
INPUT
SELECTOR
buttons
AMP
MENU
1 Press the corresponding INPUT
SELECTOR button which you want
to check the information.
2 Press DISPLAY repeatedly.
Each time you press the button, the
display changes cyclically as follows:
Index name of the input* t Input you
selected t Sound field currently
applied t Volume level t Stream
information**
DISPLAY
When listening to FM and AM
radio
Preset station name* t Frequency t
Sound field currently applied t
Volume level
* Index name appears only when you have
assigned one to the input or preset station
(page 27, 32). Index name does not appear
when only blank spaces have been entered, or
it is the same as the input name.
** Stream information may not be displayed.
Reverting back to the factory default settings
You can clear all memorized settings and
revert the receiver back to the factory
default settings by performing the
following procedure. This procedure can
also be used to initialize the receiver before
you use it for the first time.
Be sure to use the button on the receiver to
perform this operation.
?/1
1 Press ?/1 to turn off the receiver.
2 Hold down ?/1 for 5 seconds.
The “CLEARING” appears on the
display panel for a while, then changes
to CLEARED *.
Changes or adjustments made to the
settings are now reset to the defaults.
Adjusting settings
49
GB
Page 50

Additional Information
Precautions
On safety
Should any solid object or liquid fall into
the cabinet, unplug the receiver and have it
checked by qualified personnel before
operating it any further.
On power sources
• Before operating the receiver, check that
the operating voltage is identical with
your local power supply.
The operating voltage is indicated on the
nameplate on the back of the receiver.
• The unit is not disconnected from the AC
power source (mains) as long as it is
connected to the wall outlet, even if the
unit itself has been turned off.
• If you are not going to use the receiver for
a long time, be sure to disconnect the
receiver from the wall outlet. To
disconnect the AC power cord (mains
lead), grasp the plug itself; never pull the
cord.
• The AC power cord (mains lead) must be
changed only at a qualified service shop.
For the model supplied with
the AC plug adaptor
If the AC plug of your receiver does not fit
into the wall outlet, attach the supplied AC
plug adaptor.
On heat buildup
Although the receiver heats up during
operation, this is not a malfunction. If you
continuously use this receiver at a large
volume, the cabinet temperature of the top,
side and bottom rises considerably. To
avoid burning yourself, do not touch the
cabinet.
On placement
• Place the receiver in a location with
adequate ventilation to prevent heat
buildup and prolong the life of the
receiver.
• Do not place the receiver near heat
sources, or in a place subject to direct
sunlight, excessive dust, or mechanical
shock.
• Do not place anything on top of the
cabinet that might block the ventilation
holes and cause malfunctions.
• Do not place the receiver near equipment
such as a TV, VCR, or tape deck. (If the
receiver is being used in combination
with a TV, VCR, or tape deck, and is
placed too close to that equipment, noise
may result, and picture quality may
suffer. This is especially likely when
using an indoor antenna (aerial).
Therefore, we recommend using an
outdoor antenna (aerial).)
• Use caution when placing the receiver or
speakers on surfaces that have been
specially treated (with wax, oil, polish,
etc.) as staining or discoloration of the
surface may result.
On operation
Before connecting other equipment, be sure
to turn off and unplug the receiver.
If you encounter color
irregularity on a nearby TV
screen
The center speaker is magnetically shielded
to allow it to be installed near a TV set.
However, color irregularities may still be
observed on certain types of TV sets. As
the front speakers, surround/surround back
speakers and the subwoofers are not
magnetically shielded, we recommend that
you place them slightly further away from
a TV set (page 15).
If color irregularity is
observed...
Turn off the TV set, then turn it on again
after 15 to 30 minutes.
50
GB
Page 51

If color irregularity is
observed again...
Place the speakers further away from the
TV set.
On cleaning
Clean the cabinet, panel, speaker cone
surfaces and controls with a soft cloth
slightly moistened with a mild detergent
solution. Do not use any type of abrasive
pad, scouring powder, or solvent, such as
alcohol or benzine.
On Bluetooth
communication
• Bluetooth devices should be used within
approximately 10 meters (unobstructed
distance) of each other. The effective
communication range may become
shorter under the following conditions.
– When a person, metal object, wall or
other obstruction is between the
devices with a Bluetooth connection
– Locations where a wireless LAN is
installed
– Around microwave ovens that are in
use
– Locations where other electromagnetic
waves occur
• Bluetooth devices and wireless LAN
(IEEE 802.11b/g) use the same frequency
band (2.4 GHz). When using your
Bluetooth device near a device with
wireless LAN capability, electromagnetic
interference may occur. This could result
in lower data transfer rates, noise, or
inability to connect. If this happens, try
the following remedies:
– Use this receiver at least 10 meters
away from the wireless LAN device.
– Turn off the power to the wireless LAN
equipment when using your Bluetooth
device within 10 meters.
– Install this receiver and Bluetooth
device as closer to each other as
possible.
• The radio waves broadcast by this
receiver may interfere with the operation
of some medical devices. Since this
interference may result in malfunction,
always turn off the power on this receiver
and Bluetooth device in the following
locations:
– In hospitals, on trains, in airplanes, at
gas stations, and any place where
flammable gasses may be present
– Near automatic doors or fire alarms
• This receiver supports security functions
that comply with the Bluetooth
specification to ensure secure connection
during communication using Bluetooth
technology. However, this security may
be insufficient depending on the setting
contents and other factors, so always be
careful when performing communication
using Bluetooth technology.
• Sony cannot be held liable in any way for
damages or other loss resulting from
information leaks during communication
using Bluetooth technology.
• Bluetooth communication is not
necessarily guaranteed with all Bluetooth
devices that have the same profile as this
receiver.
• Bluetooth devices connected with this
receiver must comply with the Bluetooth
specification prescribed by the Bluetooth
SIG, Inc., and must be certified to
comply. However, even when a device
complies with the Bluetooth
specification, there may be cases where
the characteristics or specifications of the
Bluetooth device make it impossible to
connect, or may result in different control
methods, display or operation.
• Noise may occur or the audio may cut off
depending on the Bluetooth device
connected with this receiver, the
communications environment, or
surrounding conditions.
If you have any questions or problems
concerning your receiver, please consult
your nearest Sony dealer.
Additional
Information
51
GB
Page 52

Troubleshooting
If you experience any of the following
difficulties while using the receiver, use
this troubleshooting guide to help you
remedy the problem. Should any problem
persists, consult your nearest Sony dealer.
Note that if service personnel changes
some parts during repair, these parts may
be retained.
Power
The receiver is turned off
automatically.
• “AUTO STBY” is set to “STBY ON”
(page 48).
• The Sleep Timer function is working
(page 11).
• “PROTECTOR” is working (page 58).
Image
No image appears on the TV.
• Select the appropriate input using the
INPUT SELECTOR buttons.
• Set your TV to the appropriate input
mode.
• Move your audio equipment away
from the TV.
• Make sure that cables are correctly and
securely connected to equipment.
• Depending on the playback
equipment, you may need to set up the
equipment. Refer to the operating
instructions supplied with each
equipment.
• Be sure to use a High Speed HDMI
cable when you view images or listen
to sound, especially for the 1080p,
Deep Color (Deep Colour), 4K or 3D
transmission.
No 3D image appears on the TV.
• Depending on the TV or the video
equipment, 3D images may not be
displayed. Check the HDMI video
formats supported by the receiver
(page 60).
No 4K image appears on the TV.
• Depending on the TV or video
equipment, 4K images may not be
displayed. Check the video capability
and setting of your TV and video
device. Also, make sure to connect the
video equipment to 4K available
HDMI IN jack of the receiver.
When the receiver is in standby mode,
there is no image output from the TV.
• When the receiver enters into standby
mode, image is from the last HDMI
equipment selection before you turned
off the receiver. If you are enjoying
other equipment, play the equipment
and perform the One-Touch Play
operation, or turn on the receiver to
select the HDMI equipment you want
to enjoy.
• Make sure “PASS THRU” is set to
“ON” in the HDMI settings menu if
you connect equipment not compatible
with the “BRAVIA” Sync to the
receiver (page 47).
Sound
There is no sound, no matter which
equipment is selected, or only a very
low-level sound is heard.
• Check that all connecting cords are
inserted to their input/output jacks for
the respective jacks of the receiver,
speakers and the equipment.
• Check that both the receiver and all
equipment are turned on.
• Check that MASTER VOLUME
control is not set to “VOL MIN”.
52
GB
Page 53

• Press MUTING on the remote control
to cancel the muting function.
• Try pressing the INPUT SELECTOR
button on the remote control or turning
the INPUT SELECTOR on the
receiver to select the equipment of
your choice (page 26).
• When you want to listen to the sound
from the TV speaker, set the “AUDIO
OUT” to “TV+AMP” in the HDMI
settings menu (page 47). If you cannot
play back multi channel audio source,
set to “AMP”. However, the sound will
not output through the TV speaker.
You can also press SPEAKERS TV
AUDIO repeatedly to select
whether the sound is output via the TV
speakers or the system’s speakers.
• Sound may be interrupted when the
sampling frequency, the number of
channels or audio format of audio
output signals from the playback
equipment is switched.
There is severe hum or noise.
• Check that the spea kers and equipment
are connected securely.
• Check that the connecting cords are
away from a transformer or motor, and
at least 3 meters away from a TV set or
fluorescent light.
• Move your audio equipment away
from the TV.
• The plugs and jacks are dirty. Wipe
them with a cloth slightly moistened
with alcohol.
There is no sound, or only a very lowlevel sound is heard from specific
speakers.
• Check that all the cords are fully
inserted into the jacks on both the
receiver and the equipment.
• Make sure you have connected to both
the L and R jacks of an analog
equipment, analog equipment requires
both L and R jack connections. Use an
audio cord (not supplied).
• Adjust the speaker level (page 45).
• Check that the speaker cords
(supplied) are connected correctly and
securely (page 17).
• Check that the subwoofer is connected
correctly and securely.
There is no sound from a specific
equipment.
• Check that the equipment is connected
correctly to the audio input jacks for
that equipment.
• Check that the cord(s) used for the
connection is (are) fully inserted into
the jacks on both the receiver and the
equipment.
• Check the setting of “AUDIO OUT” in
the HDMI settings menu (page 47).
• You cannot listen to the Super Audio
CD by connecting HDMI.
• Depending on the playback
equipment, you may need to set up the
HDMI setting of the equipment. Refer
to the operating instructions supplied
with each equipment.
• Be sure to use a High Speed HDMI
cable when you view images or listen
to sound, especially for the 1080p,
Deep Color (Deep Colour), 4K or 3D
transmission.
• Audio signals (format, sampling
frequency, bit length, etc.) transmitted
from an HDMI jack may be suppressed
by the connected equipment. Check
the setup of the connected equipment if
the image is poor or the sound does not
come out of the equipment connected
via the HDMI cable.
• When the connected equipment is not
compatible with copyright protection
technology (HDCP), the image and/or
the sound from the HDMI TV OUT
jack may be distorted or may not be
output. If this is the case, check the
specification of the connected
equipment.
Additional
Information
53
GB
Page 54

• The image resolution of the playback
equipment may need to be at certain
settings before you can enjoy Multi
Channel Linear PCM. Refer to the
operating instructions of the playback
equipment.
• Make sure the TV is compatible with
the System Audio Control function.
• If the TV does not have System Audio
Control function, set the “AUDIO
OUT” settings in the HDMI settings
menu to
– “TV+AMP” if you want to listen to
the sound from the TV speaker and
receiver.
– “AMP” if you want to listen to the
sound from the receiver.
• When you connect the receiver to a
video equipment (projector, etc.),
sound may not be output from the
receiver. In this case, set the “AUDIO
OUT” to “AMP” in the HDMI settings
menu (page 47).
• You cannot listen to the sound of the
equipment connected to the receiver
while TV input is selected on the
receiver
– Be sure to change the input of the
receiver to HDMI when you want to
watch a program on the equipment
connected via HDMI connection to
the receiver.
– Change the TV channel when you
want to watch a TV broadcast.
– Be sure to select the correct
equipment or input you want when
you watch a program from the
equipment connected to the TV.
Refer to the operating instructions of
the TV on this operation.
• When using the Control for HDMI
function, you cannot control the
connected equipment using TV’s
remote control.
– Depending on the connected
equipment and TV, you may need to
set up the equipment and TV. Refer
to the operating instructions
supplied with each equipment and
TV.
– Change the input of the receiver to
the HDMI input connected to the
equipment.
The left and right sounds are
unbalanced or reversed.
• Check that the speakers and equipment
are connected correctly and securely.
• Adjust the sound level parameters
using the LEVEL settings menu
(page 45).
Dolby Digital or DTS multi channel
sound is not reproduced.
• Check that the DVD, etc. you are
playing is recorded in Dolby Digital or
DTS format.
• When connecting the DVD player,
etc., to the digital input jacks of this
receiver, make sure the digital audio
output setting of the connected
equipment is available.
• Set “AUDIO OUT” to “AMP” in the
HDMI settings menu (page 47).
• You can enjoy Multi Channel Linear
PCM only with an HDMI connection.
The surround effect cannot be
obtained.
• Make sure you have selected the
appropriate sound field (page 33).
A test tone is not output from the
speakers.
• The speaker cords may not be
connected securely. Check to see if
they are connected securely and cannot
be disconnected by pulling on them
slightly.
• The speaker cords may have shortcircuit problem.
• The MASTER VOLUME may has set
to “VOL MIN”.
54
GB
Page 55

When the receiver is in standby mode,
there is no sound output from the TV.
• When the receiver enters into standby
mode, sound is from the last HDMI
equipment selection before you turned
off the receiver. If you are enjoying
other equipment, play the equipment
and perform the One-Touch Play
operation, or turn on the receiver to
select the HDMI equipment you want
to enjoy.
• Make sure “PASS THRU” is set to
“ON” in the HDMI settings menu if
you connect equipment not compatible
with the “BRAVIA” Sync to the
receiver (page 47).
Tuner
The FM reception is poor.
• Use a 75-ohm coaxial cable (not
supplied) to connect the receiver to an
outdoor FM antennas (aerial) as shown
below.
Outdoor FM antenna (aerial)
Receiver
Radio stations cannot be tuned in.
• Check that the antennas (aerials) are
connected securely. Adjust the
antennas (aerials) and connect an
external antenna (aerial), if necessary.
• No stations have been preset or the
preset stations have been cleared
(when tuning by scanning preset
stations is used). Preset the stations
(page 31).
• Press DISPLAY repeatedly on the
remote control so that the frequency
appears on the display panel.
USB device
Are you using a supported USB
device?
• If you connect an unsupported USB
device, the following problems may
occur. See “Compatible USB devices”
(page 27) for the supported device
types.
– The USB device is not recognized.
– File or folder names are not
displayed on this receiver.
– Playback is not possible.
– The sound skips.
– There is noise.
– A distorted sound is output.
There is noise, skipping, or distorted
sound.
• Turn off the receiver and reconnect the
USB device, then turn on the receiver.
• The music data itself contains noise, or
the sound is distorted.
The USB device is not recognized.
• Turn off the receiver, then disconnect
the USB device. Turn on the receiver
again and reconnect the USB device.
• Connect the supported USB device
(page 27).
• The USB device does not work
properly. Refer to the USB device
operating instructions on how to deal
with this problem.
Playback does not start.
• Turn off the receiver and reconnect the
USB device, then turn on the receiver.
• Connect the supported USB device
(page 27).
•Press NX to start playback.
Additional
Information
55
GB
Page 56

The USB device cannot be connected
into the (USB) port.
• The USB device is being connected
upside down. Connect the USB device
in the correct orientation.
Erroneous display.
• The data stored in the USB device may
have been corrupted.
• The character codes that can be
displayed by this receiver are as
follows:
– Upper cases (A to Z)
– Numbers (0 to 9)
– Symbols (’ = < > * + , – . / [ \ ] _)
Other characters may not be displayed
correctly.
“READING” is displayed for an
extended time, or it takes a long time
before playback starts.
• The reading process can take a long
time in the following cases.
– There are many folders or files on
the USB device.
– The file structure is extremely
complex.
– The memory capacity is excessive.
– The internal memory is fragmented.
Thus, we recommend following these
guidelines.
– Total folders on USB device: 256 or
less (including “ROOT” folder)
– Total files per folder: 256 or less.
Audio file cannot be played back.
• MP3 files in MP3 PRO format cannot
be played back.
• The audio file is a multiple track audio
file.
• Some AAC files may not be played
back correctly.
• WMA files in Windows Media Audio
Lossless and Professional format
cannot be played back.
• USB device formatted with file
systems other than FAT16 or FAT32
are unsupported.*
• If you use partitioned USB device,
only audio files on the first partition
can be played back.
• Playback is possible up to 16 levels
(including “ROOT” folder).
• The number of folders has exceeded
256 (including “ROOT” folder).
• The number of files in a folder has
exceeded 256.
• Files that are encrypted or protected by
passwords cannot be played back.
* This unit supports FAT16 and FAT32, but
some USB device may not support all of
these FAT.
For details, refer to the operating
instructions of each USB device or contact
the manufacturer.
Bluetooth device
Pairing cannot be done.
•Move the Bluetooth device closer to
the receiver.
• Pairing may not be possible if other
Bluetooth devices are present around
the receiver. In this case, turn off the
other Bluetooth devices.
• Pairing from another Bluetooth device
is not possible when the receiver is
connecting to a Bluetooth device.
Disconnect the Bluetooth device
(page 36) and perform the pairing
again (page 35).
• Make sure the correct passkey was
entered at the Bluetooth device
(page 35).
Connection is not possible.
•The Bluetooth device you attempted to
connect does not support the A2DP
profile, and cannot be connected with
the receiver.
• Press BLUETOOTH to connect to the
last connected Bluetooth device.
• Turn on the Bluetooth function of the
Bluetooth device.
• Establish a connection from the
Bluetooth device.
56
GB
Page 57

• The pairing registration information
has been erased. Perform the pairing
operation again (page 35).
• Erase the pairing registration
information of a Bluetooth device
(page 36) and perform the pairing
operation again.
The sound skips or fluctuates, or the
connection is lost.
• The receiver and the Bluetooth device
are too far apart.
• If there are obstacles between the
receiver and your Bluetooth device,
remove or avoid the obstacles.
• If there is equipment that generates
electromagnetic radiation, such as a
wireless LAN, other Bluetooth device,
or a microwave oven nearby, move
them away.
The sound of your Bluetooth device
cannot be heard on this receiver.
• Turn up the volume on your Bluetooth
device first, and then adjust the volume
using VOL + (or MASTER VOLUME
on the receiver).
Severe hum or noise.
• If there are obstacles between the
receiver and your Bluetooth device,
remove or avoid the obstacles.
• If there is equipment that generates
electromagnetic radiation, such as a
wireless LAN, other Bluetooth device,
or a microwave oven nearby, move
them away.
• Turn down the volume of the
connected Bluetooth device.
“SongPal” app is closed.
• Disconnect the Bluetooth connection
on your smartphone, then reconnect it
to the receiver again (page 36).
“BRAVIA” Sync (Control
for HDMI)
The Control for HDMI function does not
work.
• Check the HDMI connection (page 18,
21).
• Make sure “CTRL HDMI” is set to
“CTRL ON” in HDMI settings menu
(page 47).
• Make sure the connected equipment is
compatible with the Control for HDMI
function.
• Check the Control for HDMI settings
on the connected equipment. Refer to
the operating instructions of the
connected equipment.
• If you unplug the HDMI cable or
change the connection, repeat the
procedures of “Preparing for the
“BRAVIA” Sync” (page 40).
• When “CTRL HDMI” is set to “CTRL
OFF”, the “BRAVIA” Sync does not
work properly, even if the equipment
is connected to the HDMI IN jack.
• The types and the number of
equipment which can be controlled by
the “BRAVIA” Sync are restricted in
the HDMI CEC standard as follows.
– Recording equipment (Blu-ray Disc
recorder, DVD recorder, etc.): up to
3 equipment
– Playback equipment (Blu-ray Disc
player, DVD player, etc.): up to 3
equipment
– Tuner-related equipment: up to 4
equipment
– AV receiver (audio system): up to 1
equipment
Additional
Information
57
GB
Page 58

Remote control
Clearing the memory
The remote control does not function.
• Point the remote control at the remote
control sensor on the receiver (page 7).
• Remove any obstacles in the path
between the remote control and the
receiver.
• Replace all the batteries in the remote
control with new ones, if they are
weak.
• Make sure you select the correct input
on the remote control.
Error messages
If there is a malfunction, a message appears
on the display panel. You can check the
condition of the system by the message. If
any problem persists, consult your nearest
Sony dealer.
If an error message appears while you use a
USB device, see “USB message list”
(page 30).
PROTECTOR
Irregular current is output to the
speakers, or the receiver is covered and
ventilation holes are blocked. The
receiver will automatically turn off after
a few seconds. Remove the object
covering the upper panel of the receiver,
check the speaker connection and turn
on the power again.
USB FAIL
An over current from the (USB) port
was detected. The receiver will
automatically turn off after a few
seconds. Check the USB device, then
unplug it and turn on the power again.
Reference sections
To clear Se e
All memorized settings page 49
Customized sound fields page 34
Specifications
Amplifier section
Power Output
• STR-KM77
Stereo mode output (rated)
(6 ohms, 1 kHz, THD 1%)
120 W + 120 W
Surround mode output2) (reference)
(6 ohms, 1 kHz, THD 30%)
RMS output
FRONT: 264 W per channel
CENTER: 266 W1)
SURROUND: 264 W per channel
SURROUND BACK: 264 W per
channel
Surround mode output2) (reference)
(4 ohms, 100 Hz, THD 30%)
SUBWOOFER: 300 W per channel
• STR-KM55
Stereo mode output (rated)
(6 ohms, 1 kHz, THD 1%)
120 W + 120 W
Surround mode output3) (reference)
(6 ohms, 1 kHz, THD 30%)
RMS output
FRONT: 270 W per channel
CENTER: 270 W1)
SURROUND: 270 W per channel
Surround mode output3) (reference)
(4 ohms, 100 Hz, THD 30%)
SUBWOOFER: 300 W per channel
1)
1)
1)
1)
1)
1)
1)
1)
1)
58
GB
Page 59

• STR-KM22
Stereo mode output (rated)
(6 ohms, 1 kHz, THD 1%)
100 W + 100 W
1)
Surround mode output3) (reference)
(6 ohms, 1 kHz, THD 30%)
RMS output
FRONT: 252 W per channel
1)
CENTER: 252 W1)
SURROUND: 252 W per channel
Surround mode output3) (reference)
(4 ohms, 100 Hz, THD 30%)
SUBWOOFER: 290 W per channel
1)
Measured under the following conditions:
Area Power requirements
South Africa,
240 V AC, 50 Hz
Latin America,
Singapore, India
Middle East 127 V AC, 60 Hz
Australia,
230 V AC, 50 Hz
Argentina,
Thailand
2)
Reference power output for front, center,
surround, surround back speakers and
subwoofers. Depending on the sound field
settings and the source, there may be no sound
output.
3)
Reference power output for front, center,
surround speakers and subwoofer(s).
Depending on the sound field settings and the
source, there may be no sound output.
FM tuner section
Tuning range
87.5 MHz – 108.0 MHz
Antenna (aerial)
FM wire antenna (aerial)
Antenna (aerial) terminals
75 ohms, unbalanced
1)
AM tuner section
Tuning range
1)
Area Tuning scale
10 kHz step 9 kHz step
Latin America,
Argentina
Middle East,
530 kHz –
1,710 kHz
– 531 kHz –
South Africa,
531 kHz –
1,710 kHz
1,602 kHz
Australia,
Thailand, India,
Singapore
Antenna (aerial)
Loop antenna (aerial)
Inputs
Analog
Sensitivity: 800 mV/50 kilohms
Digital (Coaxial)
Impedance: 75 ohms
Tone
Gain levels
±6 dB, 1 dB step
Reproduction frequency range
28 Hz – 20,000 Hz
59
Additional
Information
GB
Page 60

HDMI Video
Input/Output (HDMI Repeater block)
3D
Format 2D
4096 × 2160p @ 59.94/60 Hz a
4096 × 2160p @ 50 Hz a
3840 × 2160p @ 59.94/60 Hz a
3840 × 2160p @ 50 Hz a
4096 × 2160p @ 23.98/24 Hz a
3840 × 2160p @ 29.97/30 Hz a
3840 × 2160p @ 25 Hz a
3840 × 2160p @ 23.98/24 Hz a
Frame
packing
1)
1)
1)
1)
2)
2)
2)
2)
Side-by-Side
(Half)
(Top-and-Bottom)
–– –
–– –
–– –
–– –
–– –
–– –
–– –
–– –
Over-Under
1920 × 1080p @ 59.94/60 Hz a – aa
1920 × 1080p @ 50 Hz a – aa
1920 × 1080p @ 29.97/30 Hz aa a a
1920 × 1080p @ 25 Hz aa a a
1920 × 1080p @ 23.98/24 Hz aa a a
1920 × 1080i @ 59.94/60 Hz aa a a
1920 × 1080i @ 50 Hz aa a a
1280 × 720p @ 59.94/60 Hz aa a a
1280 × 720p @ 50 Hz aa a a
1280 × 720p @ 29.97/30 Hz aa a a
1280 × 720p @ 23.98/24 Hz aa a a
720 × 480p @ 59.94/60 Hz a –– –
720 × 576p @ 50 Hz a –– –
640 × 480p @ 59.94/60 Hz a –– –
1)
Supports YCbCr 4:2:0 / 8 bit format only.
2)
Supports 8 bit format only.
60
GB
Page 61

USB section
(Except for South Africa and Argentina
models)
Supported format*
MP3 (MPEG 1 Audio Layer-3):
32 kbps – 320 kbps, VBR
WMA:
48 kbps – 192 kbps
AAC:
48 kbps – 320 kbps
WAV:
8 kHz – 48 kHz, 16 bit PCM
* Compatibility with all encoding/writing
software, recording devices and recording
media cannot be guaranteed.
Transfer speed
Full-speed
Supported USB device
Mass Storage Class
Maximum current
500 mA
Bluetooth section
Communication system
Bluetooth Specification version 3.0
Output
Bluetooth Specification Power Class 2
Maximum communication range
Line of sight approx. 10 m
1)
Frequency band
2.4 GHz band (2.4000GHz –
2.4835 GHz)
Modulation method
FHSS (Freq Hopping Spread Spectrum)
Compatible Bluetooth profiles
2)
A2DP (Advanced Audio Distribution
Profile)
AVRCP 1.3 (Audio Video Remote
Control Profile)
Supported Codecs
3)
SBC4), AAC
Transmission range (A2DP)
20 Hz – 20,000 Hz (Sampling frequency
44.1 kHz)
1)
The actual range will vary depending on factors
such as obstacles between devices, magnetic
fields around a microwave oven, static
electricity, cordless phone, reception
sensitivity, antenna’s performance, operating
system, software application, etc.
2)
Bluetooth standard profiles indicate the purpose
of Bluetooth communication between devices.
3)
Codec: Audio signal compression and
conversion format
4)
Subband Codec
General
Power requirements
Area Power requirements
South Africa,
Thailand,
230 V AC – 240 V AC,
50/60 Hz
Singapore
Latin America 120/220/240 V AC,
50/60 Hz
Argentina 220 V AC – 230 V AC,
50/60 Hz
Middle East 120 V AC – 127/220/230 V
AC – 240 V AC, 50/60 Hz
Australia 230 V AC, 50 Hz
India 220 V AC – 240 V AC,
50/60 Hz
Power consumption
195 W (STR-KM77)
185 W (STR-KM55)
150 W (STR-KM22)
Power consumption (during standby mode)
0.3 W (When “CTRL HDMI” is set to
“CTRL OFF”)
Dimensions (width/height/depth) (Approx.)
430 mm × 178 mm × 336 mm
including projecting parts and controls
Mass (Approx.)
10.3 kg (STR-KM77/STR-KM55)
8.5 kg (STR-KM22)
Additional
Information
61
GB
Page 62

Speaker section
• Front speaker for HT-M77/HT-M55
(SS-MSP77M)
Speaker system
2-way, 3-driver, Bass reflex
Speaker unit
Woofer:
200 mm, cone type × 2
Tw eet er :
25 mm, horn type
Rated Impedance
6 ohms
Dimensions (width/height/depth) (Approx.)
280 mm × 925 mm × 265 mm
(with foot)
Mass (Approx.)
15.0 kg
• Front speaker for HT-M22
(SS-MSP22M)
Speaker system
2-way, 2-driver, Bass reflex
Speaker unit
Woofer:
160 mm, cone type
Tw eet er :
25 mm, horn type
Rated Impedance
6 ohms
Dimensions (width/height/depth) (Approx.)
280 mm × 485 mm × 290 mm
(with foot)
Mass (Approx.)
7.3 kg
• Center speaker for HT-M77/HT-M55/
HT-M22 (SS-CNP77M)
Speaker system
Full range, Bass reflex, Magnetically
shielded
Speaker unit
Woofer: 100 mm, cone type
Rated Impedance
6 ohms
Dimensions (width/height/depth) (Approx.)
430 mm × 182 mm × 178 mm
(with foot)
Mass (Approx.)
3.3 kg
• Surround speaker for HT-M77
(SS-MSP33M)
Speaker system
2-way, 2-driver, Bass reflex
Speaker unit
Woofer:
160 mm, cone type
Twe et er :
25 mm, horn type
Rated Impedance
6 ohms
Dimensions (width/height/depth) (Approx.)
280 mm × 885 mm × 265 mm
(with foot)
Mass (Approx.)
13.0 kg
• Surround back speaker for HT-M77/
Surround speaker for HT-M55/HT-M22
(SS-SRP77M)
Speaker system
Full range, Closed box
Speaker unit
Woofer: 100 mm, cone type
Rated Impedance
6 ohms
Dimensions (width/height/depth) (Approx.)
280 mm × 235 mm × 162 mm
(with foot)
Mass (Approx.)
2.4 kg
62
GB
Page 63

• Subwoofer for HT-M77 (SS-WP77M)
Speaker system
Bass reflex
Speaker unit
300 mm, cone type
Rated Impedance
4 ohms
Dimensions (width/height/depth) (Approx.)
410 mm × 555 mm × 350 mm
(with foot)
Mass (Approx.)
14 kg
• Subwoofer for HT-M55/HT-M22
(SS-WP55M)
Speaker system
Bass reflex
Speaker unit
250 mm, cone type
Rated Impedance
4 ohms
Dimensions (width/height/depth) (Approx.)
340 mm × 465 mm × 295 mm
(with foot)
Mass (Approx.)
8.5 kg
Design and specifications are subject to
change without notice.
63
Additional
Information
GB
Page 64

Index
Numerics
5 channel 15
7 channel 15
A
A/V Sync 44, 46
AM 30
AUDIO OUT 44, 47
Audio settings 44, 46
Auto Standby 45, 48
Auto Tuning 31
B
Bass 33, 44
Bluetooth 34
BRAVIA Sync
preparing 40
C
Clear
memory 49
sound field 34
Connecting
antennas 23
Blu-ray Disc player 21, 22
Cable TV tuner 21, 22
CD player 22
DVD player 21, 22
other equipment 19
Satellite tuner 21, 22
speakers 17
Super Audio CD player 22
TV 18
USB device 23
Control for HDMI 44
D
Display panel 8
Dual Mono 44, 47
Dynamic range compression 45
E
Equalizer
adjusting 33
F
Fast View 48
FM 30
FM Mode 31, 44
FOOTBALL 33
FÚTBOL 26, 33
G
GAME 33
H
HDMI settings 44
I
Input 26
M
Menu 43
AUDIO 46
BT 48
EQ 46
HDMI 47
LEVEL 45
SPEAKER 46
SYSTEM 48
64
GB
Page 65

TUNER 46
Message
Error 58
USB 30
MOVIE 33
M-TURBO 7, 11
MUSIC 33
MUSIC ARENA 33
Muting 26
N
Naming 27, 32
NFC 37
O
One-Touch Play 41
P
PASS THRU 44, 47
Preset stations 31
PROTECTOR 58
R
Remote control 10
Resetting 49
T
TEST TONE 25
Test Tone 43
Treble 33, 44
Tuner 30
Tuner settings 44
U
USB FAIL 58
S
Scene Select 42
Settings menu 43
Sleep Timer 11
Sound field
resetting 34
selecting 33
Speaker settings 44, 46
System Audio Control 41
System Power-Off 42
System settings 45, 48
65
Additional
Information
GB
Page 66

Page 67

Page 68

©2014 Sony Corporation Printed in Malaysia
4-489-714-12(1)
 Loading...