

Page 1
SONY DXC-3000 ORIENTATION
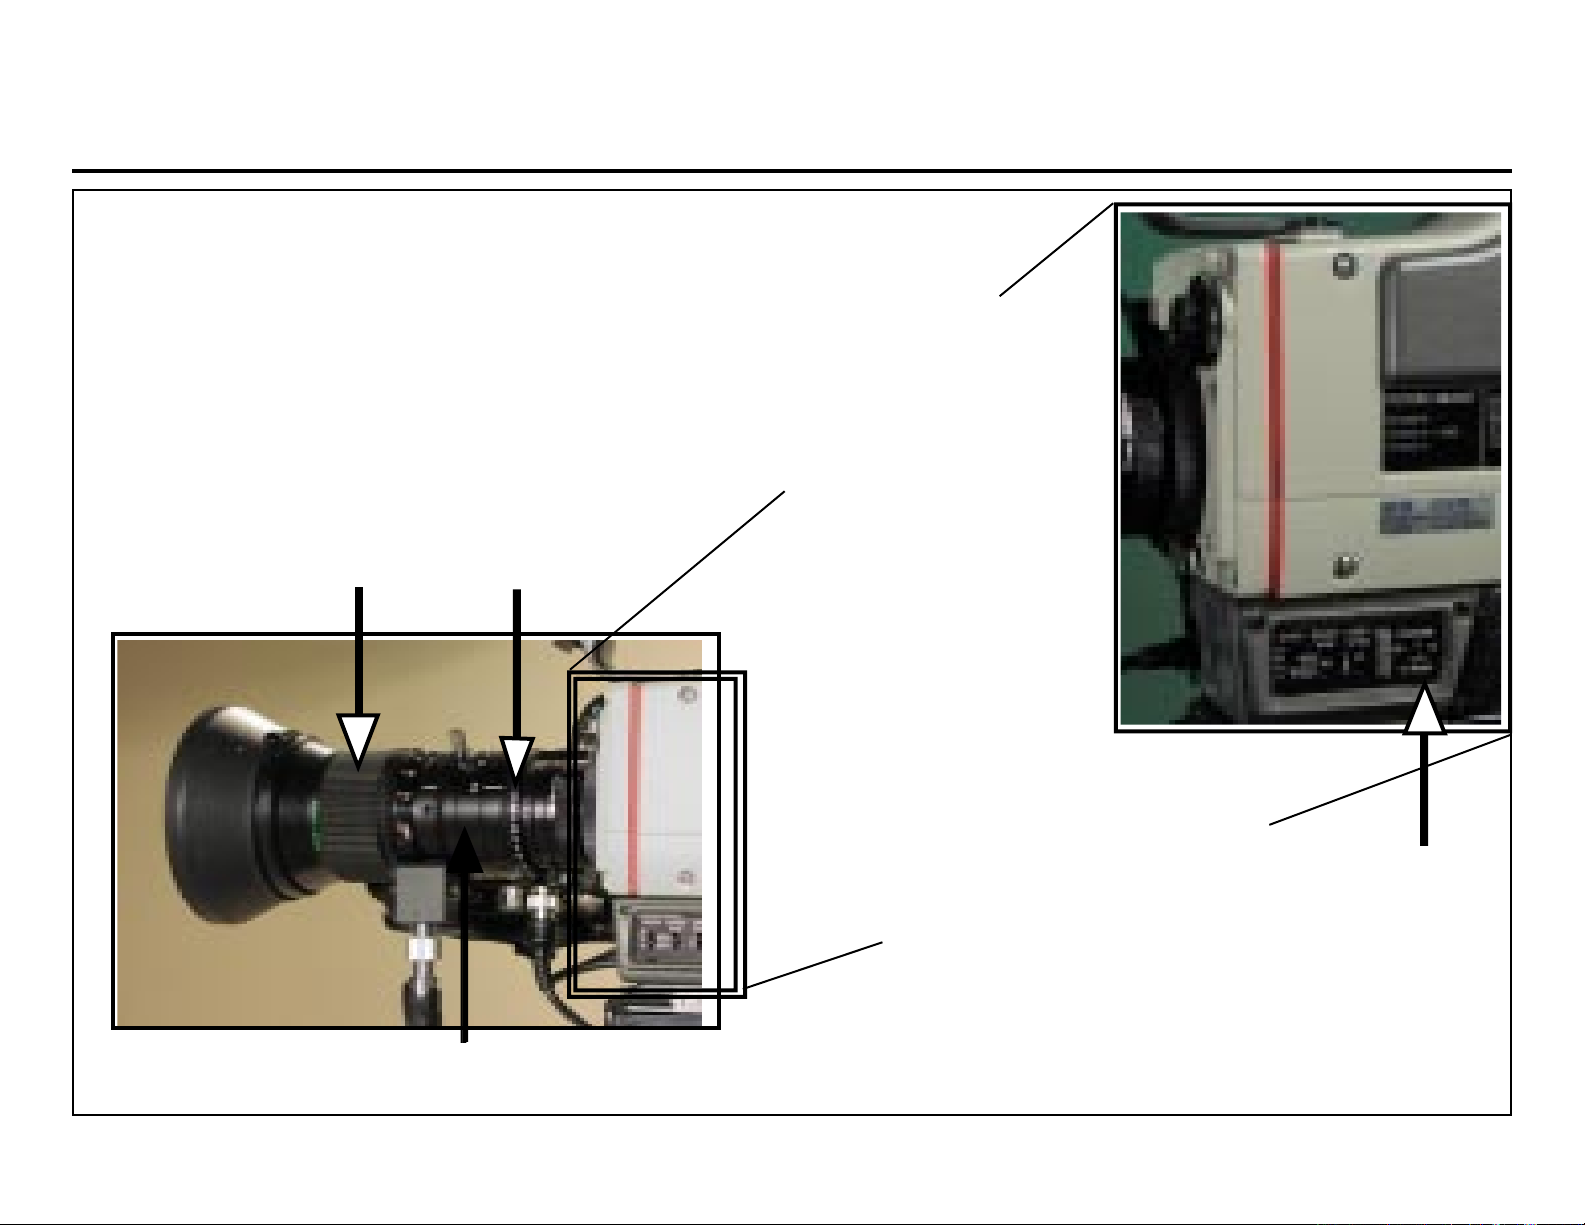
The filter wheel is used to compensate for various lighting
situations. They help to maintain proper color temperatures
when shooting indoors and outdoors. The DXC-3000 has
three filter positions.
It is recommended to use the correct filter when shooting
in the specific color temperature. Therefore, filter #1 is
Filter #1=3200 degrees Kelvin usually used when shooting indoors, and filter #2 & #3 is
Filter #2= 5600 degrees Kelvin w/1/8 ND used outdoors. The ND (Neutral Density) filter is used to
Filter #3=5600 degrees Kelvin compensate for a bright light situation, however in doing
so it does not change the color tmeperature.
Focus Ring Iris Ring
There are many cameras out
there. Some may have as many
as 20 filters. Know your filters!
It can really make or break a
production. Always double
check the settings and make sure
itʼs locked into place.
Many of the studio camera features
will be controlled by the CCUʼs. POWER
This would be the job for the technical Off/Preheat/ON
director or engineer from the control
room. Bars, gain, and white & black
balancing are usually controlled remotely.
Zoom Ring
Page 2
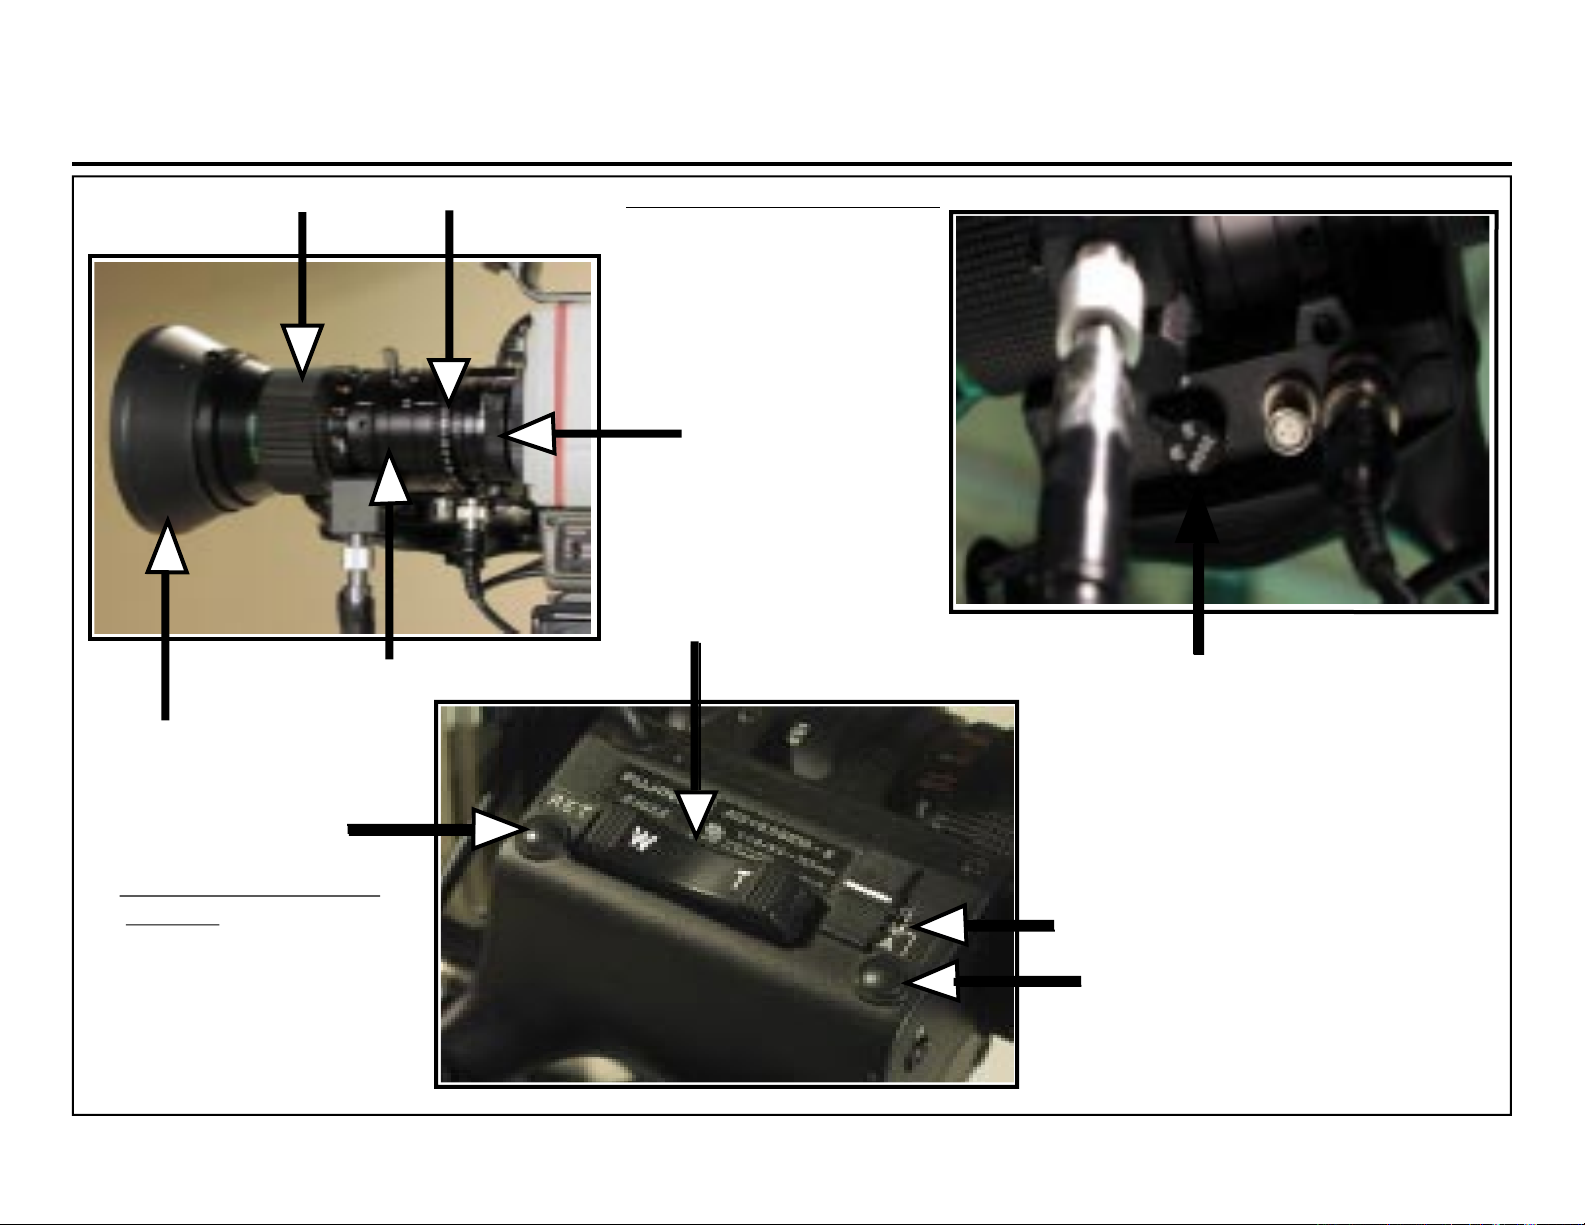
SONY DXC-3000 Lens Orientation
Focus Ring Iris Ring The Zoom Select has 2 positions
M = Manual Mode
S = Servo Mode
Macro Ring
Zoom
Zoom Ring Zoom Select
Lens Hood The incidental iris button (momentarily)
automatically adjusts the iris for optimum
setting. This is used to quickly check what the
Video Return button
cameraʼs automatic iris would be, while leaving
the iris in the camera operatorʼs control.
The Iris select switch has 3
positions:
Iris select
R= Remote control by CCU
M=Manual
Incidental Iris button
A= Auatomatic camera
control
Page 3

SONY DXC-3000 Zoom Orientation
The remote electric zoom is relatively a simple device. Aside from controlling zoom action it also contains a video return button. This button,
labeled “VTR” will allow you to see what is on the preview monitor in the control room. With this capability you can COMP (compose) a shot with
switcher setting appearing in your camera viewfinder. This is how to COMP for a box wipe or television graphic like that in a newscast program. You
can also use it to see what the up-coming event is. The video return button does not affect your camera output to the switcher so it wonʼt matter if you
decide to activate the switch during the program.
There are 2 remote video return buttons
1. Top of the handle above the zoom rocker switch
2. A depression under the rubber housing of the
handle (hidden) Zoom action switch
Video Return button
Remote zoom rocker switch
(telephoto-clockwise turn)
( wide-counter clockwise turn)
The zoom action switch changes the rocker zoom
from a clockwise zoom-in to a clockwise zoom out.
Normally a clockwise movement of the zoom rocker
performs a zoom-in or telephoto action.
The real purpose of this switch is to accomodate for
left-handed operators.
Page 4

SONY DXC-3000 Viewfinder Orientation Viewfinder
The viewfinder mounted to the top of the camera is an under-scanned monitor. This enables you to see the entire picture from one edge to the other.
When you compare the visual image you see in the viewfinder to the image you see on the television, you may notice the TV image crops off
information on all sides. This is why we must follow safe-title regions when we COMP our shots. So why have an underscanned monitor/viewfinder?
So that you can determine exactly what your camera is shooting and prevent anything from sneaking in on the sides that shouldnʼt be there. Knowing
how much to compensate and shoot for the viewing audience may be difficult at first, but you can use the COMP border markers taped on the
monitor to assist you in shooting.
COMP Border
Markers
Viewfinder controls on side
Center Mark Tally light On/Off
On/Off
Viewfinder tilt release
The side of the viewfinder contains monitor adjustment controls.
All monitors need to be adjusted correctly in order to have proper
viewing. This means to have a technical understanding of level
adjustments and industry standards.
Start to train your eye at an early stage so that you can recognize
what a properly adjusted monitor looks like.
Page 5

SONY DXC-3000 Pedestal Orientation
The Vinten Quartz two stage pedestal allows one to move the camera in three planes:
1.) Left/Right=Truck
2.) In/Out=Dolly
3.) Up/Down=Pedestal
To steer the pedestal make sure the wheel lock is off, point the red marker on the Pedestal Steering Wheel in the direction you wish to travel and apply a gentle push to the base of the pedestal.
To pedestal up or down make sure the pedestal lock is off and pull or push the pedestal ring in the direction you wish to go.
Pan & Tilt Head
Pedestal Drag
Steering Ring
Pedestal Column
Column Lock
Steering direction
indicator
Pedestal Wheel Lock
Page 6

SONY DXC-3000 Pan & Tilt Head Orientation
The Vinten 20 Pan & Tilt head controls the movement of the camera. Panning is the action that moves the camera right or left. Tilting is the action
that moves the camera up or down. The head has a Tilt lock, a Pan lock, a Tilt Drag and a Pan Drag. The pan lock should always be unlocked when
the camera is stored. When a camera operator is using the camera both the Pan and the Tilt locks should be unlocked.
Pan & Tilt Head
Tilt Lock
Pan Lock
Tilt Drag
The Pan Drag is located on the opposite side of the head.
Apply equal tilt and pan drag allowing you to move the
head in all directions with equal force.
 Loading...