

Page 1

2-684-485-31(1)
To find out useful hints, tips and information about Sony products and
services please visit: www.sony-europe.com/myproduct
Page 2

To reduce the risk of fire or electric shock, do not expose this apparatus to rain or moisture.
To avoid electrical shock, do not open the cabinet. Refer servicing to qualified personnel only.
CAUTION
The use of optical instruments with this product will increase eye hazard. As the laser beam used in this
CD/DVD player is harmful to eyes, do not attempt to disassemble the cabinet.
Refer servicing to qualified personnel only.
CAU TION : CL ASS 1M VI SIBLE AN D INVIS IBLE LA SER RAD IATION WH EN OPEN AN D
INTE RLOCK S DEFEAT ED. DO NO T VIEW DI RECTLY WI TH OPTI CAL INST RUMEN TS.
VOR SICHT : K LASSE 1M S ICHT BARE UN D UNSIC HTBAR E LASER STRAH LUNG WE NN GEÖFF NET
UND SPER REN AUSSER FUN KTION . NI CHT DIREK T MI T OPT ISCHE N IN STRUM ENTEN ANSE HEN.
ADVA RSEL : SYNL IG OG USY NLIG LA SERST RÅLIN G AF KLASS E 1M VED ÅB NING OG OM GÅEL SE
AF L ÅSEAN ORDNI NGER MÅ I KKE B ETRAG TES D IREKT E GEN NEM O PTISK E INS TRUME NTER.
ADVA RSEL : SYNL IG OG USY NLIG LA SERST RÅLIN G I KLASS E 1M NÅR ÅP EN OG
LÅSE ANORD NINGE R FJERN ET. IKKE SE D IREKT E MED OPT ISKE IN STRUM ENTER .
VARN ING : KL ASS 1M S YNLIG OC H OS YNLIG LAS ERSTR ÅLNIN G N ÄR D ENNA DEL ÄR Ö PPEN
OCH ME D SPÄRR ARNA AVSTÄ NGDA. B ETRAK TA EJ STRÅL EN DIRE KT MED OPT ISKA INS TRUME NT.
VARO ! : AVATTUNA JA LU KITUS O HITET TUNA LUO KAN 1M NÄ KYVÄÄ J A NÄKYMÄ TÖNTÄ
LAS ERSÄTE ILYÄ. ÄL Ä KATSO SÄ TEESE EN SUOR AAN OPT ISILL A LAITTE ILLA.
This CD/DVD player is a CLASS 1 LASER PRODUCT.
MARKING is located on the bottom of the unit.
Notice for customers in the
United Kingdom and Republic
of Ireland
A molded p lug complying wit h BS 1363 i s fitted to eq uipme nt for your safety
and con venience.
Shoul d the fuse in th e plug su pplie d need to be replaced , a 5 AMP fu se
appro ved by ASTA or BSI to BS 1362, (I.e ., mark ed with or mark) must
be used .
If the plug supplie d with th is equipment has a de tacha ble fuse cover, be sur e
to attach the fuse co ver aft er you change the fus e. Neve r use the plug withou t
the fuse cover. If you s hould l ose the fuse cover, pl ease co ntact your neares t
Sony service stat ion.
This label is located on the bottom of the unit.
Page 3

The power requirements of this unit a re indicate d on the AC
adaptor. Check that the u nit's opera ting voltag e is identica l
with your local power supply.
On safety
Caution The use of op tical instr uments with t his product
will increase eye hazard.
To prevent fi re or shock haz ard, do not pla ce objects fi lled
with liquids, such as va ses, on the app aratus.
Should any solid object or liquid fall into the cabinet,
unplug the player and have it checked by qualified
personnel before operating it any further.
Do not put an y foreign obj ects in the DC IN 9 .5V (extern al
power input) jack.
This car ad aptor is not in tended to be se rviced. Sho uld the
product cease to funct ion in its inte nded manner, i t should
be return ed to the manuf acturer or be d iscarded.
Install t his system so t hat the power c ord can be
unplugged from the wall socket imme diately in th e event
of troubl e.
On temper at ure incre as es
Heat may bu ild up while charging or during extended use.
This is not a m alfunctio n.
If the surr ounding tem perature is v ery high, the p rotective
functio n will turn off the player automatically.
Leave the player in a cool location for a bout 30 minut es
before using it again.
-
On power so ur ce s
Use only th e supplied AC adaptor. Do not use any other
AC adaptor. It may cause a ma lfunction .
Polarity of the plug
If the AC adap tor causes in terferenc e to radio rece ption,
move it awa y from the radi o.
Do not touc h the AC adaptor w ith wet hands .
Even when the player is tu rned off, it is still connected to
the AC power source (mains) as long as it re mains
connected to the wall ou tlet.
If you are no t going to use th e player for a lo ng time, be
sure to dis connect the p layer from th e wall outlet . To
disconnect the AC power cord (mains), grasp the plu g
itself; n ever pull the c ord.
Should the AC power cord need to be changed, have it
done at a qualified service shop only.
When necessary, depending on the design of the wall
outlet, y ou may use a comm ercially av ailable AC p lug
adaptor.
I
n
t
r
od
u
c
t
ion
3
Page 4

CAUTION
Never expose the battery pack to temperatures
above 140° F (60° C). Do not leave, for example,
in a car parked in the sun or under direct sunlight.
On the rechargeable battery
Charge the battery before you start using it.
Do not allow dust to come into contact with the
battery terminals of the player and battery.
Do not short the terminals.
Do not open the terminal covers of the player.
Do not leave the battery in a place subject to direct
sunlight, or in a car with its windows closed.
Keep the battery dry.
Use only the battery (NP-FX110) supplied with
this player (DVP-FX810). The rechargeable
batteries supplied with other models cannot be
used with this player. Note that the battery may
explode if incorrectly replaced.
Do not disassemble.
Do not incinerate.
Dispose of used batteries promptly.
To dispo se o f the recha rg eable bat tery
Certain countries may regulate disposal of the
battery used to power this product. Please consult
with your local authorities.
To store t he r echarge ab le batter y
The batte ry is consume d gradually a s time elapse s even
if is not use d. In order to pr event the bat tery from
deteriorating, sto re it as follow s:
Remove th e battery fro m the player af ter use.
(Even if th e player is off, it still uses some power.)
Use up the battery compl etely on the pl ayer before
storing i t.
Keep the ba ttery in a cool l ocation to pr event it from
deteriorating.
Charge and use the batte ry at least onc e every 6 month s.
On chargi ng t he rechar ge able batt er y
Heat may bu ild up in the battery while ch arging. This is
not a malfu nction.
When the ba ttery life of a f ully charge d battery bec omes
about half the normal li fe, you may nee d to replace th e
battery w ith a new one.
4
Page 5

Keep the lens on the player clean and do not touch it.
Touching the lens may damage the lens and cause
the player to malfunction.
Keep the player in a location with adequate ventilation
to prevent heat build-up in the player.
Do not put heavy objects on top of the player.
Doing so may damage the player and the discs.
Do not leave the player near heat sources, or in a
place subject to direct sunlight, excessive dust or
sand, moisture, rain, mechanical shock, on an
uneven surface, or in a car with its windows closed.
Do not wrap the player in a cloth or blanket during use.
Doing so may cause malfunction or serious accidents.
If the player causes interference to radio or
television reception, turn off the player or move it
away from the radio or television.
Keep the player and discs away from equipment
with strong magnets, such as microwave ovens,
or large loudspeakers.
Do not install this equipment in a confined space
such as a bookshelf or similar unit.
If the player is brought directly from a cold to a warm
location, or is placed in a very damp place, moisture
may condense on the lens of the player. Should this
occur, the player may not operate properly. When
this happens, remove the disc and leave the player
for about half an hour until the moisture evaporates.
Discs with non-standard shapes (e.g, heart,
square, star) cannot be played on this player.
Do not use such discs.
Do not move, shake or otherwise allow any shock to
the player while in operation. Doing so may cause a
malfunction.
Use this player in a stable, horizontal position
where it is not subject to vibration.
Do not touch the disc if it is still spinning when you
open the lid.
Before moving the player, remove the disc from it.
I
n
t
r
od
u
c
t
ion
5
Page 6

On handli ng t he LCD scre en
Although the LCD scree n is made with hi gh-precis ion
technology and has effective pixels of 99.99% or more,
black dots may appear or b right point s of light (red , blue,
or green) may appear con stantly on th e LCD screen. This
is a struct ural proper ty of the LCD pan el and is not a
malfunction.
Do not scratch the LCD or exert pressure on it.
Doing so could cause a malfunction.
Using the player in low temperature conditions may
produce a residual image on the screen. This is not a
malfunction. When the player returns to normal
temperature, the screen will return to normal.
A residual image may appear on the screen if the same
image is displayed for a lengthy period of time.
The residual image will disappear after a short time.
If you are going to leave the player for a long time, turn
off the power.
The screen becomes warm during operation.
This is normal and does not indicate a malfunction.
On headph on es
Preventin g hearing d am age
Avoid using headphones at high volumes. Hearing
experts advise against continuous, loud, and extended
play. If you experience a ringing in your ears, reduce
the volume or discontinue use.
Showing c on siderat io n for other s
Keep the vo lume at a moder ate level. This will allow you to
hear outside sounds and still be considerate to th e people
around you.
On adjust in g the volum e
Do not turn u p the volume wh ile listeni ng to a section w ith
very low level inputs or n o audio signal. If you do, the
speakers may be damage d when a peak-level section is
played.
Road safe ty
Do not use the monitor unit and headphones while
driving, cycling, or operating any motorized vehicle.
Doing so may create a traffic hazard and is illegal in
some areas. It can also be potentially dangerous to
play your headsets at high volume while walking,
especially at pedestrian crossings. You should exercise
extreme caution or discontinue use in potentially
hazardous situations.
Do not install the monit or display wh ere viewabl e by the
driver.
6
Page 7

On transp or tation
To transport this player, use the original carton box
and packing materials.
Before you move this player, make sure to remove
any discs from it.
On cleani ng
Clean the cabinet, panel, and controls with a soft cloth
slightly moistened with a mild detergent solution.
Do not use any type of abrasive pad, scouring powder,
or solvent such as alcohol or benzene.
On cleani ng d iscs, dis c/ lens clea ne rs
Do not use a co mm erciall y av ailable c le aning dis c or
disc/le ns c leaner (w et o r spray typ e) . These may c au se
the appar at us to malfu nc tion.
IMPORTAN T NOTICE
Caution: This player is capable of holding a still video
image or on-screen display image on your television
screen indefinitely. If you leave the still video image
or on-screen display image displayed on your TV for
an extended period of time you risk permanent
damage to your television screen. Plasma Display
Panel televisions and projection televisions are
especially susceptible to damage from such use.
If you have any questions or problems concerning
your player, please consult your nearest Sony dealer.
Caution :
Do not handle damaged or leaking Lithium-Ion batteries.
Never expose the batte ry pack to temp eratures ab ove
140°F (60 °C) such as in a ca r parked in the s un or under
direct su nlight.
Disposal o f Old E lectrical & Ele ctr onic Equip men t
(Applica ble i n the European Un ion and other Eur ope an
countrie s wit h separate coll ection system s)
This symbo l on th e product or on its p ack aging
indicate s tha t this product sh all n ot be treate d as
househol d was te. It shall be han ded over to the
applicab le co llection poin t for the recycli ng of e lectrica l
and electr oni c equipment. By e nsuring this pr odu ct is
disposed o f cor rectly, you will help p rev ent potential
negative c ons equences for th e environment a nd
human heal th, w hich could othe rwise be caused b y
inapprop ria te waste handin g of this product . The
recyclin g of ma terials will he lp to conserve na tur al
resource s. Fo r more detailed i nfo rmation ab out t he
recyclin g of th is product, ple ase c ontact you r loc al
city or town o ffice, y our h ousehold w ast e disposal
service or t he sh op where you purc hased the produ ct.
For Customers in Netherlands
7
I
n
t
r
od
u
c
t
ion
Page 8
About This Manual
The subject of this user manual is explanation of the
functions usable through the buttons of the remote
control. Remote control buttons the same as on the
DVD player itself are used in the same manner.
This user manual employs the code marked on the
right.
During operation, “ ” may appear on the LCD screen.
This symbol indicates that a function explained in the
user manual is not available on the current disc.
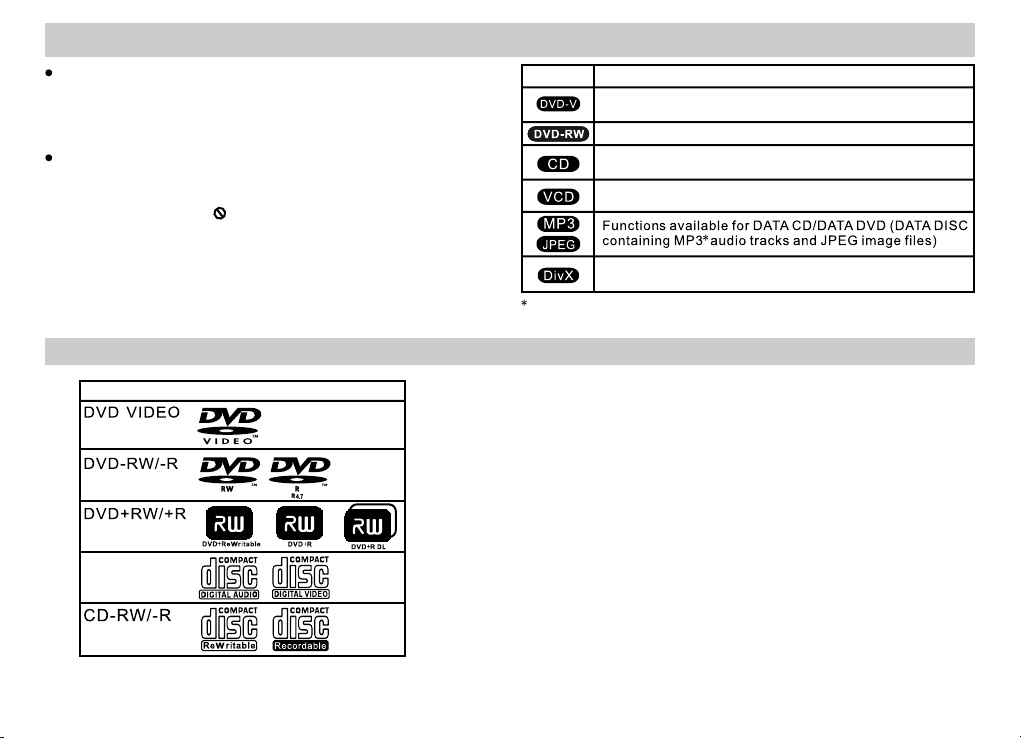
About Playable DiscsAbout Playable Discs
Disc fo rmatDisc fo rmat
Music CD/
VIDEO CD
“DVD+RW” “DVD -RW ” “DV D+R” “DVD- R” “DVD V IDEO”
“CD” “CD-RW” “C D-R” are tradem arks.
CodeCode
Function s availabl e for DVD VIDE O, DVD+RW/DVD+R
(+VR Mode) , DVD-RW/DVD- R (Vi deo Mode)
Functions available for DVD-R/DVD-RW(VR Mode)
Function s availabl e for music CD o r CD-R/ CD-RW in
music CD for mat
Function s ava ilable for VIDE O CD (i ncluding S upe r VCD
or CD-R/CD -RW in vid eo CD f ormat or Sup er VC D format)
Function s availabl e for a data dis c (Includi ng Di vX video
files)
MP3 (MPE G-1 Au dio L aye r Ⅲ) is a st and ard f orm at de fin ed by I SO (I nte rna tio nal
Org ani zat ion f or St and ard iza tio n)/ IEC ( Int ern ati ona l Ele ctr ote chn ica l
Commission) MP EG wh ich c omp res ses a udi o dat a.
DescriptionDescription
Disc related termsDisc related terms
DVD VIDEO
DVD VIDEO
A disc of animated or audio recordings with the same diameter (12 cm)
as a CD/CD-ROM. Depending on the disc, turn on multiple audio
languages and/or subtitles. There are many ways of enjoying this
product. Video recording may not be performed on this disc.
DVD-RW/-R
DVD-RW/-R
This DVD-RW/-R disc can record a DVD VIDEO disc of the same
size. In addition, DVD-RW can be rewritten.
On the DVD-RW/-R, there are two recording modes, video
mode and VR mode.
Video mode is compatible with DVD VIDEO format.
Various editing or recording impossible with video mode are
possible in VR (Video Recording) mode.
DVD+RW/+R
DVD+RW/+R
This DVD+RW/+R disc can record a DVD VIDEO disc of the same
size. In addition, DVD+RW can be rewritten.
DVD+RW employs a recording method which can take on
compatibility with DVD VIDEO format.
8
Page 9
About Playable Discs (continued)
MP3 is an audio compression format with near CD quality.
Joint Pictures Expert Group. JPEG is a type of
still picture data compression format.
This appliance is m an uf actured in compli an ce w ith
Dolby Laborator ie s Li censing. Dolby, Pro Logic,
and the double D symb ol a re r egistered trade ma rk s
of Dolby Laborato ri es .
Notes:Notes:
Depending on the state of recording on the disc, it may
not play on this appliance.
MP3 and JPEG files recorded on the second layer of a
DVD+R DL/-R DL (double layered) cannot be played.
DVD-R DL discs recorded in VR mode cannot be played.
CD-R/RW (DVD±R/±RW) written in packet format
cannot be played.
CD-R/RW written in multiple sessions ma y not be played.
CD-R/RW file names written in the UDF file system
may not be displayed properly.
To play DVD-RW/-R or DVD+R discs recorded by a
recorder or similar machine, they must be finalized.
Discs not finalized cannot be played.
Hint:
This machine will play 8 cm DVD discs.
About region codes
This is a system designed with the aim of protecting
an author's copyright. DVD Video Parts The region
code corresponding to the country of sale is displayed
in the box. If the region code from the registered
trademark includes “All” or “2”, then it is playable on
this machine.
Note on DualDiscs
A DualDisc is a two sided disc product which
mates DVD recorded material on one side with
digital audio material on the other side.
However, since the audio material side does not
conform to the Compact Disc (CD) standard,
playback on this product is not guaranteed.
I
n
t
r
od
u
c
t
ion
9
Page 10
How to operate the “playback” function
About copyright
Cautions for playing DVD and other operations.
Certain playback operations of DVD may be
intentionally set by the software producers. Since
this player plays DVD according to the disc contents
the software producers designed, some playback
features may not be available. Please make sure
also to read the instructions of any discs played.
Notes on handling discs
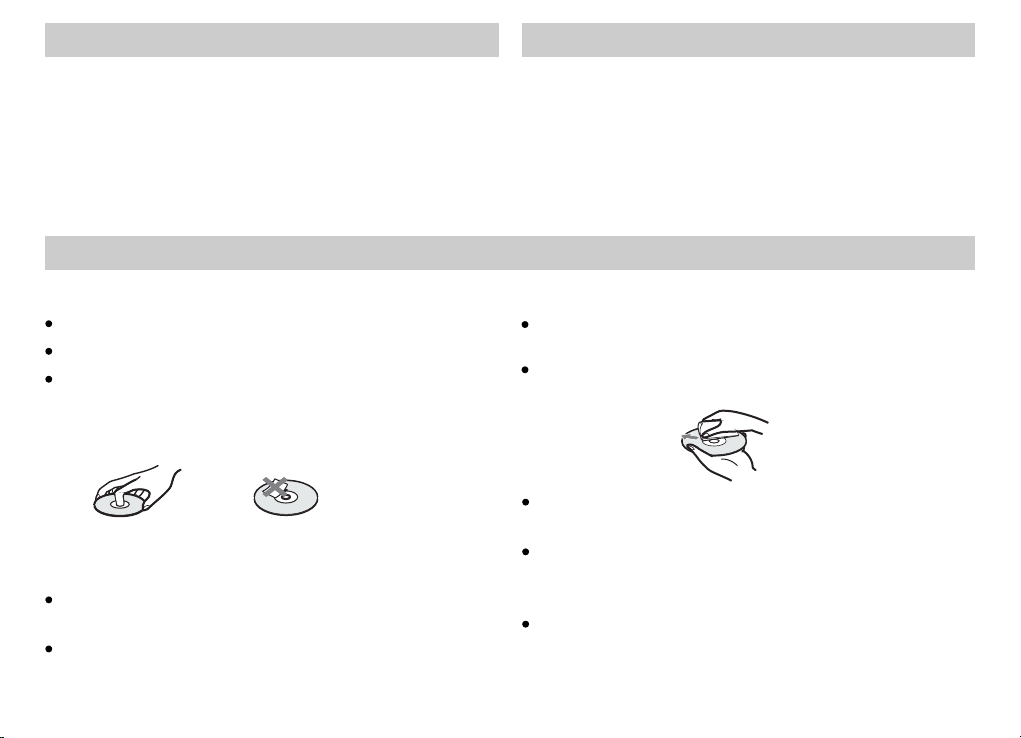
How to handle discs
Do not touch the playing surface when holding discs.
Do not stick paper or tape on discs.
Do not use any discs covered with scotch tape or
CD rental labels, or glue-marks where these have
been removed. If put in the DVD player, such discs
may become stuck or cause a malfunction.
Storing discs
Do not leave discs in places exposed to direct
sunlight, high temperature, or high humidity.
Please keep discs in their cases. Stacking uncased
discs may cause them to bend or warp.
This prod uct incorpo rates copyr ight protec tion techno logy
that is pro tected by U.S . patents and o ther intell ectual
property rights. Use o f this copyri ght protect ion technol ogy
must be aut horized by Ma crovision , and is intend ed for
home and other limited viewing uses only unless otherwise
authorized by Macrov ision. Reve rse enginee ring or
disassembly is prohibited.
Cleaning discs
Fingerprints or dust on a disc may cause the image
or sound quality to deteriorate. Use only clean discs.
For regular cleaning, wipe the disc with a soft cloth
from the center out to its edge.
If the disc is very dirty, lightly wet a cloth and wipe it,
then take off moisture with a dry cloth.
Do not use benzene, commercial record cleaning
fluid, or anti-static spray, as these may harm the
disc’s protective coating.
This player only takes conventional round music
CD discs. Using non-round discs (i.e. novelty star
or heart-shaped discs) may cause the player to
malfunction.
10
Page 11

Table of Contents
Introduction
WARNING
Precaut ions
About thi s manual
About playable discs
How to operate the “play back” funct ion
About cop yright
Notes on ha ndling discs
Table of Contents
Basic usa ge precauti ons
Identif ication of Co ntrols
Using the Remote Contr ol
About the L CD Panel
Connecting the AC adaptor
Using with batteries
Basic Operations
Playing Discs
DISPLAY Screen
Advanced operations
General Features
Playing Audio CDs and M P3 Discs
Programming Playback
Repeat Pl ayback
Random Playback
JPEG Imag e File Displa y
Playing a VCD video
Playing a DivX video
3-7
8-9
10
10
10
11
12-14
15-17
18
19
20
21-22
23-27
28
29-31
32-34
35
36
36
37-38
39
40-42
Initial Settings
2
Set Up Menu
Connections
8
Connecting the Video/Audio Cord
Using the Player with a Ca r Adaptor
Reference
In Case of Ma lfunction
Specifi cations
43-46
47
48-49
50
51
I
n
t
r
od
u
c
t
ion
11
Page 12

Basic Usage Precautions
Positioning the Player
Do not set the player in the following types of places.
Wobbly tables or other unstable surfaces
On top of rugs or futons
Damp or poorly ventilated places
About the LCD Display
Although the LCD screen is manufactured with
high-precision technology, black dots may
sometimes appear, and red, blue, or green spots
may remain on the screen. This is not a malfunction.
Do not wipe the LCD screen with anything wet.
Moisture getting into the screen may cause a malfunction.
Dusty places
Places in direct sunlight, or with high temperature
Extremely cold places
Close to tuners, televisions, or video players/decks
(Using this player near audio/video tuners,
televisions, or video players/decks may cause
sound distortions or disruptions to image quality.
Since such distortions or disruptions are more
common with an indoor antenna, use of an outdoor
antenna is recommended.)
Install this sys tem so that the power cord can be u nplugge d from the wall socket
immediately in t he event of trouble.
Do not place the dev ice anywhere it may get wet.
Do not rest flower v ases or any type of water conta iner on it.
Do not drop or place objects on the LCD screen.
Additionally, never rest your weight on the screen
with elbows or any other body part.
Carrying the player from cold to warm places, such as
from the outdoors into a warm room, may cause
condensation to form on the LCD screen. If condensation
develops, wipe up all drops before using. Tissue paper or
equivalent is recommended for wiping away drops of
condensation. When the LCD screen has been in a cold
place, even after wiping away drops of moisture,
condensation may still occur. Therefore, please wait
before until the LCD screen warms up to room
temperature before using it.
12
Page 13

Basic Usage Precautions (continued)
Rear Panel of the Player
Be carefu l that no sand, d ust or other ob jects get int o the
battery c onnection t erminal (di agram A) and th e battery
guide slot (diagram B).
B
A
About the Battery Pack
Do not short terminals and (diagram A) with
metal objects (necklaces etc.).
Be careful that no sand, dust or other objects get
into the battery connection terminals and
(diagram A) and the battery projecting guides
(diagram B).
Do not leave the player in an overheated vehicle,
under the blazing sun, or in any place 60° Celsius
or higher.
Do not let the appliance get wet.
B
Using the AC ad ap to r
Please use the AC adaptor that is included with the player.
Using an adaptor not intended for the player may cause a
malfunction.
Do not connect any type of overseas traveling
electrical transformer, as this may cause overheating
or malfunction.
When adjusting the sound volume
Compared with a record, there is extremely little
background noise or static on a disc. Adjusting the
sound by listening to a recording or portion thereof
without any vocal component may result in unintentionally
setting the volume loud, and may cause damage to the
speakers. Before playing any music, make sure to always
set the volume low.
I
n
t
r
od
u
c
t
ion
A
13
Page 14

Basic Usage Precautions (continued)
Cleaning the Player
If the cabi net or panel sc reen become s dirty, please use
a soft clot h with mild det ergent to wip e dirt away. Do not
use thinner or benzene, as they may dam age the displ ay.
Wipe the LC D screen lightly with a soft d ry cloth. Whe n
you notice that the devi ce has become d irty, make an
effort to wipe all grime away.
War ni ng :
Do not wipe the LCD screen with anythin g wet. Moistu re
getting i nto the scree n may cause a mal function.
Do not use alcohol, thinners, or other volatile substances,
as they may damage the display’s finish. When using a
pretreated dustcloth, please follow these written warnings.
Cleaning the Lens
When the im age becomes distorted or C D begin to skip ,
filth or du st may have set tled on the len s. When this
happens, please clean the lens with a c ommercial c amera
lens “blower” brush. Take care not to make direct contact
with the le ns when cleaning.
Do not use a lens cleaning disc or disc cle aner (moist ener
or spray ty pe) with this d evice, as thi s may cause a
malfunction.
Caution about residual Images (Burn Outs on the Screen)
Do not leave the LCD, tele vision, or an y screen set to t he
player inactive for a lo ng time while o n the DVD menu,
Title Menu, Set Up or similar screen. Th is may cause a
residual image (burn out of the scree n). Project ion
televisions are especially susceptible to re sidual images.
14
Page 15

Identification of Controls
Player (Main Body)
--
--
押す 閉じる押す 閉じる
PORTABLE CD/ DVD PLAYER DVP- FX810PORTABLE CD/DV D PLAYER DV P-FX 810
LCD MODELCD MODE
1. LCD Screen (page 19)
1. LCD Screen (page 19)
2. LCD MODE Button (p ages 24-25)
2. LCD MODE Button (p ages 24-25)
3. DISPLAY Button (page 28)
3. DISPLAY Button (page 28)
4. RETURN Button (page 28)
4. RETURN Button (page 28)
5. / / / But ton, ENTER Button (page 29)
1
2
3
4
5
RETURNRETURN
DISPLAYDISPLAY
MENUMENU
6
7
5. / / / Button, ENTER Button (page 29)
Use this to choose options from the DVD menu screen.
When play ing a DVD disc, the / button works as a
SCAN/SLOW button. The ENTER button works as a PLAY
button.
Note
Note:
Depending on the DVD disc menu, the / button
I
n
t
r
od
u
c
t
ion
may not perform n ormal fu nctions.
8
9
10
11
12
13
14
15
In such instances, please use the / button on the
remote controller.
6. Remote control sensor (page 18)
6. Remote control sensor (page 18)
7. MENU button (page 29)
7. MENU button (page 29)
8. Speaker
8. Speaker
9. / PREV/NEXT Button (page 29)
9. / [PREV/NEXT] Button (page 29)
10 . [STOP] Button (page 26)
10 . [STOP] Button (page 26)
11 . [PAUSE] Button (page 26)
11 . [PAUSE] Button (page 26)
12 . [PLAY] Button (page 23)
12 . [PLAY] Button (page 23)
13 . Disc lid (page 23)
13 . Disc lid (page 23)
14 . Char ge Indicator (page 22)
14 . Char ge Indicator (page 22)
[ ]
Rech arging : Orange Light
15 . Powe r Indicator (page 23)
15 . Powe r Indicator (page 23)
Powe r On : Green Light O n
Powe r Off : Gre en Light Off
15
Page 16

Identification of Controls (continued)
RP
RP
OWE
OWE
E
E
G
G
R
R
AC
AC
H
NO
NO
E
E
P
P
SE
SE
ARE
A
E
E
L
L
RE
H
DH O
D
L
L
HO
PHONESPHONES PHONESPHONES AUDIOAUDIO VIDEOVIDEO
LINE SELECTLINE SELECT IN OUTIN OU T
DC IN 9.5VDC IN 9.5V
1
1
1. Open Knob [OPEN]
. Open Knob [OPEN]
2
2. Remote Control Sensor (page 18)
. Remote Control Sensor (page 18)
3. Power/Hold Switch (page 23)
3. Power/Hold Switch (page 23)
2
3
Preventing Mistaken Main Button Commands
By sliding the HOLD swit ch to the left, t he hold funct ion is
enabled. It locks the bu ttons on the DV D player so tha t
they will not work if acci dentally to uched.
Even if Hol d is set, the rem ote control c an be used to
operate the player.
4
4. Sound Volume Knob (page 23) [VOLUME]
4. Sound Volume Knob (page 23) [VOLUME]
5. Headphone Jack 1, 2 [PHONES]
5. Headphone Jack 1, 2 [PHONES]
6. Audio Input/Output Jack [AUDIO] (page 47)
6. Audio Input/Output Jack [AUDIO] (page 47)
7. Video Input/Output Jack [VIDEO] (page 47)
7. Video Input/Output Jack [VIDEO] (page 47)
8. Input/Output Line Select Knob
8. Input/Output Line Select Knob
[LINE SELECT IN/OUT] (page 47)
[LINE SELECT IN/OUT] (page 47)
9. AC Adaptor Input Jack [DC IN 9.5 V] (page 20)
9. AC Adaptor Input Jack [DC IN 9.5 V] (page 20)
6 7
5
9
8
16
Page 17

Identification of Controls (continued)
Remote control
RMT- D182A
1. AUDIO Button (page 30)
1. AUDIO Button (page 30)
2. ANGLE Button (page 30)
2. ANGLE Button (page 30)
3. REPEAT Button (page 31)
3. REPEAT Button (page 31)
4. PROGRAM Button (page 35)
4. PROGRAM Button (page 35)
5. RANDOM Button (page 36)
5. RANDOM Button (page 36)
6. A-B Button (page 31)
6. A-B Button (page 31)
7. / [ PREV/NEXT ] Button (page 29)
7. / [ PREV/NEXT ] Button (page 29)
8. / [ SCAN/SLOW ] Button (pages 26-27)
8. / [ SCAN/SLOW ] Button (pages 26-27)
9. CLEAR Button (page 45)
9. CLEAR Button (page 45)
10. [ PLAY ] Button (page 23)
10. [ PLAY ] Button (page 23)
11. TOP MENU Button (page 29)
11. TOP MENU Button (page 29)
12. DISPLAY Button (page 28)
12. DISPLAY Button (page 28)
13. POWER Button
13. POWER Button
14. Number Buttons
14. Number Buttons
15. SET UP Button (pages 43-46)
15. SET UP Button (pages 43-46)
16 [ STOP ] Button (page 26)
.
16. [ STOP ] Button (page 26)
17. MENU Button (page 29)
17. MENU Button (page 29)
18. [ PAUSE ] Button (page 26)
18. [ PAUSE ] Button (page 26)
19. / / / Button, ENTER Button (page 29)
19. / / / Button, ENTER Button (page 29)
Use this when selecting items on the DVD and
other menu screens.
20. [ RETURN ] Button (page 28)
20. [ RETURN ] Button (page 28)
I
n
t
r
od
u
c
t
ion
17
Page 18

Using the Remote Control
Putting Batteries in the Remote ControlPutting Batteries in the Remote Control
Put and fac ing in the same d irection, i nsert the two
R6 batter ies (AA, incl uded).
Insert th e terminals f irst
Notes:
Using batteries incorrectly may result in leakage or bursting.
MAKE CERTAIN TO FOLLOW THE NEXT STEP.
1. Correc tly insert an d in the proper d irection.
2. Do not use a m ix of old and use d batteries o r batteries
of different types.
3. Do not att empt to recha rge normal ba tteries.
4. When the r emote contr ol has not been u sed for some
time, ple ase change it s batteries .
5. If there i s any leakage o f battery flu id, careful ly wipe
up any liqu id from the bat tery compar tment befor e
putting i n fresh batte ries.
When using the remote co ntrol, be car eful that no di rect
sunlight or strong lig ht from an illu mination so urce hits
the remot e sensor. The remote control may not be able
to functi on in some cond itions.
18
Page 19

About the LCD Panel
Rotation Mechanism of the LCD PanelRotation Mechanism of the LCD Panel
The LCD panel of this device can rotate a maximum of 180
degrees clockwise and still be used. After rotation of the LCD
panel, it can be folded down on the main body of the player
and still function.
Rotation of the LCD PanelRotation of the LCD Panel
1. Place th e device on a tab le or other fla t stable surf ace.
2. Push the LCD panel up with your thumbs until it is open to
the verti cal positio n. (Refer to Pi cture 1.)
3. Slowly rotate the LCD p anel 180 degrees in the dire ction
indicat ed by the arrow ( clockwise ). (Refer to Pi cture 2.)
Picture 1 Picture 2 Picture 3
Notes:Notes:
If the LCD pa nel does not co me fully open , please do not
rotate it . The LCD panel may become damaged.
DO NOT rotate the LCD panel over 180 degrees. In
addition, DO NOT rotate in the opposite direction. Doing
so will break the LCD panel.
Rotation and folding down of the LCD panelRotation and folding down of the LCD panel
After rot ating the LCD panel 180 de grees clockwise
push the LC D panel down onto the main b ody of the player.
In this pos ition the panel is facin g up. (Refer to Picture 3.)
Returning the LCD panel to its original positionReturning the LCD panel to its original position
1. Open the L CD panel to the v ertical pos ition.
2. Slowly rotate the LCD panel counter-clockwise u nt il i t
cl ic ks ..
Note:Note:
Please return the LCD pa nel to its orig inal positi on after
use. The LCD screen can be damaged by sudden shocks
or similar treatment .
I
n
t
r
od
u
c
t
ion
19
Page 20

Connecting the AC Adaptor
Please follow steps 1-3 below to connect the AC adaptor.
To disconnect, follow the steps in reverse order.
AC Adaptor (included)
To DC IN 9.5 V
AC power cord
(included)
To AC outlet
Note:
Please tu rn off the player when unplugging the AC power cord. Unplugging the AC power cord while th e player is in
use may cau se a malfunct ion.
20
Page 21

Using with Batteries
When an outlet is not avai lable, the pl ayer can be enj oyed
with the ba ttery pack in stalled (in cluded).
Please ch arge the batt ery pack befo re using it.
Installing the Battery PackInstalling the Battery Pack
1. Match th e hooks of the ba ttery pack in to the holes on t he
bottom of t he player.
2. Slide th e battery pac k in the direct ion of the arro w until
it clicks i nto place.
HooksHooks
Notes:
Please tu rn the player o ff before installing the battery
pack.
Never tou ch the connec ting points o f the main body a nd
the batte ry pack. Doin g so may cause a ma lfunction .
Removing the Battery PackRemoving the Battery Pack
1. Slide th e release kno b.
2. Slide th e battery pac k in the direct ion of the arro w until it
clicks lo ose.
Release KnobRelease Knob
Notes:
Never remove the batte ry pack while t he player is in u se.
Be carefu l not to drop the b attery pack .
I
n
t
r
od
u
c
t
ion
21
Page 22

Using with Batteries (continued)
Charging the Battery PackCharging the Battery Pack
1. Attach th e battery pac k.
2. Connec t the AC adaptor, a nd then plug it into an AC outlet .
Player (M ain Body)Player (M ain Body)
AC Adaptor Input Jack
AC Adaptor Input Jack
[D C IN 9.5V]
I[D C N 9.5V ]
3. When charging begins, the indicator light tur ns on.
4. When cha rging ends, t he indicato r light turns o ff.
5. After cha rging is fini shed, remov e the AC adaptor a nd
disconn ect the elect rical cord fr om the outlet .
Battery P ackB attery Pack
Charge IndicatorCharge Indicator
Checking the Battery Reserve LevelChecking the Battery Reserve Level
When the pl ayer is stopp ed, the batte ry mark is disp layed
on the LCD screen. When [ ] is d isplayed or t he
charge indicator fla shes, pleas e recharge th e battery.
Full
The batte ry mark is not di splayed whe n a DVD or JPEG
files are b eing played. Stop the play er and check th e
battery r eserve leve l.
Low
Recha rge
Charging Time and Playing TimeCharging Time and Playing Time
Recharging (Power Off)
With play er
Approx.
5 hours and 30 minutes
*
For the following conditions, the longest incidence of
continuous playback is at normal temperature (20°C).
Battery condition may reduce operating time.
-Headphone Use
-Set Backlight Adjustment to the Minimum
Playing Time (DVD- )
LCD
Approx.
6 hours*
VIDEO
On
Notes:
The batte ry mark is not di splayed on th e LCD screen
when the AC adaptor or input line is being used.
Charging times may differ from that indicated above due
to conditions of use, en vironment , and other fac tors.
It is recom mended to cha rge up to the max imum when the
surrounding temperature is in the 1 0-30°C rang e.
The batte ry has a limite d span of use. Wi th constant u se
and the passage of time, t he battery' s capacity wi ll
gradually diminish. If the playin g time of the bat tery
shorten s considera bly, please understand that it has
passed its span of usage a nd purchase a n ew one.
22
Page 23

Playing Discs
Playing Discs
Please sl ide the LINE SE LECT IN/OUT switch to OUT, or the
player may not work.
- Connect t he AC ada ptor or insta ll the batter y pack.
1. Open the LCD panel.
2. Slide the POWER switch of the main body to the right (ON position)
to turn power on. The power indicator light will turn green.
3. Slide the OPEN knob to the left and open the disc lid.
4. Insert the disc to be played
5. Push the [PUSH CLOSE] tab to shut the disc .
・If the disc is inserted label-side down, a “No Disc” or
“Check Disc” message will be displayed.
6. Press PLAY to begin playing the disc.
・The player may start automatically by itself.
・After all titles have been played, the player will stop itself and
the display will return to the menu screen.
7. Adjust sound volume.
・Adjust to the preferred sound level using the [VOLUME] knob
on the right side of the player.
Remove disc after use, s lide the [POW ER] switch to t he
right, an d turn off the power.
[ ]
Minimum Volume Maximu m Volume
with the label-side up.
lid
with
playing
When the Menu Screen is Displayed
Depending on the disc, the menu scree n may be displa yed.
With / / / choo se an option an d press [ENTER], or
push the number to choos e an option.
For furth er details, p lease refer t o the jacket of t he disc to
be played.
Notes:
The size of t he imag e disp layed on the LCD screen can be
adjuste d by pressing t he [LCD MODE] button .
Since thi s player has be en equipped with Viewe r
Restric tions (i.e. P arental Con trol), a pass word must be
entered to play a viewer restricted d isc.
For furth er details, p lease refer t o the parenta l control
on pages 45-46.
DVD discs are equipped with region codes.
This player can paly discs with “2” or “ALL” re gion code.
B
a
s
ic
O
per
a
t
i
o
n
s
23
Page 24

Playing Discs (continued)
Changing Picture Size
Use the [LC D MODE] butto n to change the p icture size .
After pre ssing the [LC D MODE] butto n, choose “LCD
Aspect” an d press [ENTE R]. Picture s ize can be sele cted
from different options for each of the discs below.
DVD DiscDVD Disc
Normal, Full, Off
Audio CD / MP3 / VCD / DivX / JPEG Disc (Menu)Audio CD / MP3 / VCD / DivX / JPEG Disc (Menu)
Off
JPEG Disc (Slide show)JPEG Disc (Slide show)
Normal, Full, Off
MenuMenu
LCD Aspe ct
LCD Aspe ct
Backlight
Backlight
Contrast
Contrast
Hue
Hue
Color
Color
Defau lt
Defau lt
LCD AspectLCD Aspect
Norma l
Norma l
Full
Full
Off
Off
Notes:
When playing a DVD disc, selectable p icture size d iffers
according to the disc be ing played.
When playing a DVD disc re corded in widescreen
“16:9” , “Normal” ca nnot be selec ted. mo de
Restarting When the Screen is Set to [ Off ]Restarting When the Screen is Set to [ Off ]
When the sc reen is set to [O ff], press [ENTER] or the
[LCD MODE ] button to tur n it on.
Notes:Notes:
The LCD scr een turns off automatically when the LCD
panel is closed.
When in “Line In” mode, by pre ssing the [LC D MODE]
button “No rmal” or “Full” ca n be selected .
24
Page 25

Playing Discs (continued)
Adjusting the LCD ScreenAdjusting the LCD Screen
Press the [ LCD MO DE ] button to display the menu.
MenuMenu
LCD Aspe ct
LCD Aspe ct
Backlight
Backlight
Contrast
Contrast
Hue
Hue
Color
Color
Defau lt
Defau lt
BacklightBacklight
1. Adjusting Backlight1. Adjusting Backlight
Select Backlight and press / to adjust the brightness.“ ”
2. Adjusting Contrast2 Adjusting Contrast
Select Contrast and press / to adjust “ ” the difference
between light and dark areas.
3. Adjusting the Hue3 Adjusting the Hue
Select Hue a nd press / to adj ust the red and g reen
“ ”
color balance.
4. Adjusting the Color4 Adjusting the Color
Select Color and press / to adjust the richness of colors.“ ”
5. Default5. Default
By pressing Defa ult , al l settings return to the preset fac tory
values.
“ ”
B
a
s
ic
O
per
a
t
i
o
n
s
25
Page 26

Playing Discs (continued)
Stopping PlaybackStopping Playback
When a disc i s playing, pr ess [STOP].
Notes:Notes:
Do not touc h discs that ar e still spinn ing when you op en
the lid.
Take out discs after they ha ve stopped sp inning.
Resuming PlaybackResuming Playback
If “Resume” i s displayed o n the LCD scree n after a disc
stops pla yback, then t he player has r ecorded the p oint
where playback was sto pped. Press ing [PLAY] again will
cause the d isc to resume p layback fro m that point. As l ong
as the disc l id is not opene d, even if the po wer is turned o ff,
the playe r will resume p layback fro m the point it wa s
stopped.
Notes:Notes:
If the powe r is turned off in resume mode and turned on
again, th e player will automatica lly resume pl aying from
the point where it was sto pped.
To turn off the resume function:
Press the [ STOP] button again when the player is stopped.
When the po wer is turned o n, open the dis c lid.
For VR mode d isc, the play er cannot aut omaticall y
resume playing from th e point where i t was stopped e ven
if the powe r is turned off and turned on again.
PausePause
1. P ress [PAUSE] whil e a disc is playi ng.
To exit from pa use mode, pre ss [PLAY] or [PAUSE].
SearchSearch
1. When a dis c is playing, p ress [SCAN/ SLOW], to
enter Sea rch mode.
2. R epeatedly pressing [SCAN/SLOW] or will change
the speed o f the Forward o r Reverse fun ction.
Slow >>>> Fast
Sc an F or ward
Sc an R ev er se
3. Pressi ng the or butto n on the player m ain body will
have the sa me result as [S CAN/SLOW] o r button
on the remo te control.
4. To Search Mo de, press the b utton shown b elow.
exit from
Remote Co ntrol : [PLAY]
Player Ma in Body : [PLAY] or [ENTER]
or
Notes:Notes:
There is no s ound being played when in Search Mode.
Search sp eed differs with different disc being played.
26
Page 27

Playing Discs (continued)
Slow PlaySlow Play
1. P ress [PAUSE] [ ] whil e a disc is playi ng.
The playback will pause.
2. T he desired speed can be selected by pressing
[SCAN/S LOW] or .
Fast >>>> Slow
Slow Forw ard
Slow Reverse
3. To exit from Slow Play Mode, press [PL AY].
Screen SaverScreen Saver
The scree n saver is disp layed after t he player is in S top
Mode for 15 m inutes.
Once the sc reen saver ha s been displa yed for 15 minu tes,
the power be automatic ally turned o ff.
Playing Discs Recorded in VR ModePlaying Discs Recorded in VR Mode
-Playing discs (DVD- RW/DVD-R) recorded in VR Mode
If a playli st is recorde d on a disc set by th is player, the
disc will start by displ aying the pla ylist.
If no playl ist is record ed on a disc, the d isc will star t by
displaying the original menu.
Press [TOP MENU] once when the disc is stopped to
display the current mo de. To switch between the playlist
and original list press [TOP MENU] repeatedly when the
disc is sto pped.
During playback, pre ss [DISPLAY] button to know the
current mode. On the Dis play screen u nder “Title” either
Playlist (PL) or Original(ORG) will be shown.
Notes:Notes:
Switching between Playlist and Original Menu is impossible
when the player is in Resume Mode (page 26). Pressing
[STOP] button twice and then [TOP MENU] repeatedly will
make it possible to switch between Playlist and Original Menu.
When a disc recorded without a playlist is stopped, pressing
[TOP MENU] will cause the prohibit mark to be displayed.
DVD-RW/DVD-R recorded on other DVD recorders (in
VR Mode) mu st be finaliz ed to play.
Non-finalized DVD-RW /DVD-R (in VR mode) cannot be
played.
For more ab out finaliz ed discs, ple ase refer to th e manual
of the reco rder used for r ecording.
In case of DV D-RW/DVD-R(VR Mode), depending on the
contents of the discs, t here may be a tim e lag between
setting t he disc in the pl ayer and star t of playback .
B
a
s
ic
O
per
a
t
i
o
n
s
27
Page 28

DISPLAY Screen
The curre nt play setti ngs can be disp layed on the LC D
screen.The remote co ntrol may be us ed to change so me
items.
How To Use the DISPLAY Scree n:
1. When play a DVD disc, press [DISPLAY] button on main
body or press [DISPLAY] on the remote control.
2. Press [ / ] to s elect an opti on.
Selecte d items will be come highli ghted.
3. The sub-menu can be accessed by pressing [ENTER]
after one i tem is select ed. Press [ / ] and [ENTER] to
impleme nt your chose n settings. Al so, when appl icable
(i.e. ent ering title n umbers), pl ease use the nu mber
buttons .
Example: DISPLAY while a DVD video is playing.Example: DISPLAY while a DVD video is playing.
MenuMe nu
Titl e
Titl e
Cha pter
Cha pter
Aud io
Aud io
Sub title
Sub title
01/ 07
01/ 07
17/ 33
17/ 33
01 2C H AC 3 En glish
01 2C H AC 3 En glish
01 En glish
01 En glish
Titl e Elaps ed 1:16:46: :Titl e Elaps ed 1 16 46
Items Dis played on the D ISPLAY Screen
1. Title
2. Chapte r
3. Audio
4. Subtit le
5. Angle
T. Time(Title Time)
6.
C. Time(Chapter Time)
7.
8. Repeat
9. Time Disp lay
Notes:
Notes:
When a VR mod e disc is playe d, playlist ( PL) or origin al
(ORG) is di splayed nex t to the title nu mber.
In Play, Pause, Search, or Slow mode, the corresponding icon
for each is displayed in the upper left corner of the screen.
Depending on the disc, the functions described in the following
pages may not be available.
Items in the DISPLAY can be changed during Play mode.
However, the items that can be modified depend on the disc.
To exit from th e DISPLAY screen, press [DISPLAY] or
[RETURN ].
Please use the remote co ntrol numbe r buttons to ch ange
the Title, Chapter, T. Time, C. Time, and Angle options.
The defau lt setting fo r Time Display i s “Title Elapsed”.
After sel ecting the ot her option of Ti me Display an d
exiting f rom the DISPL AY screen, the “Title Elapsed” still
appears when the DISPL AY screen is re-entered.
28
Page 29

General Features
Top MenuTop Menu
A DVD may contain several r ecorded ima ges or songs.
In this man ual, these im ages or songs a re referred t o as
“titles ”. When playi ng a DVD with sev eral titles , please
select th e preferred t itle or title s from the Top Menu.
To use the Top Me nu, press [TOP MENU] button, an d enter
the appro priate numb er with the num ber buttons o f the
remote co ntrol, or els e use / / / button to select the
desired title, then pr ess [ENTER] .
MenuMenu
DVD disc co ntents can be s elected usi ng this menu. W hen
playing this type of DVD , please sele ct the desire d item,
subtitl e language, or audio track l anguage fro m the menu.
To use the menu, press the [ME NU] button, a nd enter the
appropriate number with the numbe r buttons of th e remote
control , or else use / / / button to select the desired
item, the n press [ENTE R].
Moving to Another TitleMoving to Another Title
When a disc c ontains mul tiple title s, you can move t o another
title.
1. Press [D ISPLAY] while a disc is playing.
2. P ress [ / ] to select an item, press [ENTER] to confirm.
3. E nter the title number by pressing the number buttons.
Moving to Another ChapterMoving to Another Chapter
When a titl e has multipl e chapters, y ou can move to
another chapter.
1. Press [DISPLAY] wh ile a disc is pla ying.
2. Press [ / ] to select chapter item and press [ENTER]
to confir m.
3. Enter the title number by pressing the number buttons.
Press [PR EV ] or [NEXT ] button while a disc is
playing to return to the s tart of the cur rent chapte r or
move on to th e next one.
To return to the previous chapter, press [PREV ] twice.
Notes:Notes:
While playing a DVD, pre ss the remote c ontrol numb er
buttons t o display the “D irect Searc h Window”.
Enter the d esired chap ter number wi th the number
buttons , then press [E NTER] to conf irm.
Otherwi se, with the “Di rect Search W indow” open, p ress
the [ ] butto n to change to ti tle select mo de.
However, the “Direct Sea rch Window” wi ll not work wit h
VR Mode discs.
29
d
v
a
nce
d
op
e
r
a
t
i
oA
ns
Page 30

General Features (continued)
Time SearchTime Search
The displ ay screen can b e used to start p lay at a desire d
time.
1. P ress [DISPLAY] wh ile a disc is pla ying.
2. Press [ / ] to s elect the tit le time option or the chapter
time opti on; press [ ] to confir m. ENTER 「0:00:00」 will
appear on t he screen.
3. Use the number buttons to enter the necessary start time
from left to right, starting with hours, minutes, then seconds.
4. The device will begin playing at the selected time.
Warning:Warning:
Chapter times are not displayed when a VR Mode disc is played.
Chapter time will be displayed as “- -:- -:- -”.
Notes:Notes:
Please use the remote co ntrol to perf orm a Time Searc h.
Depending on the disc, the Time Search function may n ot
be available.
AudioAudio
For discs recorded with multiple language audio tracks, the
language played can be changed by pressing [AUDIO] on the
remote control. Otherwise, audio language can be selected from
the [DISPLAY] screen.
Note:Note:
Multiple language choices may not be available on some
discs during playback. In such case s, please rea d the disc’s
instruc tion manual .
Subtitle LanguageSubtitle Language
The subtitle language can be changed on the [DISPLAY] screen.
(For details, please see page 44). This function is only available
on discs recorded with multiple subtitle languages.
1. P ress [DISPLAY] wh ile a disc is pla ying.
2 Press [ / ] to select subtitle o ption, then p ress
.
[ ] to confirm.
ENTER
3. Repeatedly press [ / ] until the desired subtitle ha been
chosen. And then press [ENTER].
s
Camera AngleCamera Angle
When playing a DVD disc recorded with multiple camera angles,
these camera angles can be switched as the disc plays.
1. P ress [ ] while a disc is playing.ANGLE
2. P ress [ANGLE] repeatedly until the desired camera
angle has b een selecte d.
a
ngle
Or press [D ISPLAY] to select
Notes:Notes:
Camera angle cannot be changed while in Slow or Search
mode.
The angle icon appears on the LCD screen when the
angle mark option is sel ected from th e SETUP menu.
Camera angle can be changed using the remote control.
30
Page 31

General Features (continued)
RepeatRepeat
When the [R EPEAT] button on the remote control is
pressed , the current ly selected r epeat mode is d isplayed
on the LCD sc reen.
DVD Video
Chapter: The current chapter will be repeated.
Title: The c urrent titl e will be repea ted.
All: The entire disc will be repeated.
Off: Repeat is turned off.
Note:Note:
Depending on the disc, the “repeat” fun ction may not b e
available.
A-B RepeatA-B Repeat
A chosen section can also be repeated.
1. D uring playback, press [A-B] to select the start point.
“ A ” will appe ar on the scree n.
2. Press [A -B] once more t o select the en d point.
When “ AB ” appe ars on the scre en, the A-B repe at
mode has be gun.
3. T o exit the A-B repeat mode, press [A-B] once more.
Notes:Notes:
The A-B repeat mode can only be used inside a single title.
The A-B repeat mode can be se t in the follow ing play mo de s:
Play, Pause, Slow F/R, FF1, FR1
Time DisplayTime Display
To change the Time Display while a disc is playing:
1. Press [DISPLAY] while a disc is playing.
2. Press button to select “Time Disp” and press
[ENTER] t o confirm.
3. Use [ / ] button to sel ect from the Tim e Display
option below, then press [ENTER] to confirm.
Title Elapsed, Title Remain, Chapter Elapsed , Chapter
Remain.
[ / ]
s
Notes:Notes:
Chapter Elapsed and Chapter Remain are not displayed
when a VR Mode disc is played.
The defau lt setting fo r Time Display i s “Title Elapsed”.
After sel ecting the de sired time di splay optio n and exiting
the DISPL AY screen, the “Title Elapsed” will appear again
when the DISPLAY screen is re-entered.
d
v
a
nce
d
op
e
r
a
t
i
oA
ns
31
Page 32

Playing Aud io C D an d MP 3 Di sc s
This devi ce can also pla y MP3 (MPEG 1 Au dio Layer Ⅲ) or
JPEG file s recorded on d ata CD (CD-RO M/CD-R/CD -RW)
and DVD (DVD+RW/DVD+R/DVD-RW/DVD-R).However,
this devi ce can only pla y data discs re corded with a I S09660
Joliet base. For more de tailed info rmation on th e recording
process, please refe r to the manual o f the disc driv e or
softwar e with which th e disc was copi ed.
1. Press [ / ] to s elect a folde r, and press [EN TER] to
display t he folder’s contents.
2. Press [ / ] to s elect a file, t hen press [PLAY] or
[ENTER] t o confirm. The MP3 will now begin to play.
Audio CDAudio CD
When an audio CD is put in the p layer, the Trac k Number
and Elapsed Time will appear on the LCD screen. Press the
[PREV ] or [N EXT ] button while a disc is playing
to return t o the start of th e current tra ck or move on to th e
beginning of the next on e. To return to the previous track,
press [PR EV ] twice.
Trac kTrac k
Note: Note:
If you pres s DISPLAY during CD playback, the following
will appear on the LCD screen in order:
Track Remain, Disc Elapsed, Disc Remain, ff.
[ ]
Track Elap sed,
O
The curre nt folder’s name will appear here.
The folde r’s pass display will appear as “ \. .\ ”.
Notes:Notes:
To return to th e previous fo lder, use [ / ] to hig hlight
and then press [EN TE R] .
Press [PR EV ] / [NEXT ] button to move to the
previous or next page of t he file list .
32
Page 33

Playing Aud io C D an d MP 3 Di sc s (c on ti nu ed )
Audio CD and MP3 Disc FeaturesAudio CD and MP3 Disc Features
PausePause
When a disc i s playing, pr ess [PAUSE].
To play a paused disc, press [PLAY] or [PAUSE].
StopStop
When a CD disc is playing, press [STOP]. “Resume” will
appear on the screen. To resume playing from the point
where the d isc was stopp ed, press [PL AY].
If [STOP] is pressed when an MP3 is playing, “ ” change
to “ ” on the LCD s creen.
For MP3s, w hen [PLAY] or [ENTER] is pressed, the chosen
file will begin playing.
Moving to Another TrackMoving to Another Track
To move to the pr evious or nex t track durin g playback,
press the [ PREV/NEXT ] ( / ) button.
SearchSearch
1. When is a disc is playing, press [SCAN /SLOW] ( / )
to enter se arch mode.
2. Press [S CAN/SLOW] ( / ) r epeatedly t o change the
Forward /Reverse sp eed.
3. To exit search mode, pres s [PLAY].
A-B Repeat
1. When a disc is playing, press [A-B] bu tton to mark th e
startin g point of the se gment you wis h to have repea ted.
The repeat icon “ A” will appear on the LCD screen.
2. Press [A -B] once more t o select the en d point. When
the repea t icon “ AB” appea rs on the scree n, the
segment w ill be repeat ed.
3. To exit from t he A-B Repeat Mo de and return t o the
normal Pl ay Mode, pres s [A-B] butto n again. The
Repeat Ic on will disap pear from the L CD screen.
Playable Data CD and Data DVDPlayable Data CD and Data DVD
The following types of MP3 files can be played on this
The following types of MP3 files can be played on this
device.
device.
Sampling Frequency: within 11-48 kHz (MP3)
Bit Rate: w ithin 32-32 0 kbps (MP3)
MP3 forma t files endin g in “.mp3” ext ension
Recorded discs confo rming to Joli et ISO9660
d
v
a
nce
d
op
e
r
a
t
i
oA
ns
33
Page 34

Playing Aud io C D an d MP 3 Di sc s (c on ti nu ed )
This devi ce cannot pla y data CD or data DV D wr itten in
the packe t format.
Maximum filename len gth is 14 chara cters, and mu st have
.mp3 file e xtension.
They shou ld not contai n special let ters such as / ? * : < > l
etc.
Depending on the disc, filename characters tha t cannot
be displayed are shown as *.
The total n umber of file s on a readable d isc should be
approximately 648.
The total n umber of fold ers on a readab le disc shoul d be
approximately 299.
Notes:Notes:
When playing Mp3 recorded in VBR Mode, the correct
bit rate ca nnot be displ ayed.
Otherwi se, when play ing MP3 files r ecorded in VB R Mode,
the Time Search functio n will not work p roperly.
Depending on the copying conditions of the disc, the total
number of readable fil es and folders may be less tha n 648.
This player is not compa tible with la yered 1 and 2 of
MPEG 1.
Please realize that pl aying files i n these forma ts may
result in n oise.
Music discs encoded with copyrigh t protectio n
technologies.
This prod uct is design ed to playbac k discs that co nform
to the Comp act Disc (CD) s tandard. Re cently, various
music discs encoded with copyrigh t protectio n
technologies are marketed by some r ecord compa nies.
Please be aware that amo ng those disc s, there are so me
that do not c onform to the C D standard an d may not be
playable by this product.
Discs rec orded in multiple sessio ns may not play p roperly
on this dev ice.
34
Page 35

Programming Playback
Tracks can be arranged and played in any order desired.
Programming PlaybackProgramming Playback
1. Insert t he disc.
2. P ress [PROGRAM] and the Program List screen will
appear.
3. Enter the number of the track to be programmed by
pressin g the number bu ttons.
4. P ress [ENT ER] to confirm.
Trac kTra ck
Sta rtStart
Exi tExi t
Program List
5. Repeat steps 3-4 to pro gram track nu mbers.
Nex tNext
6. Select “Start” by pressing / . Th e tracks will p lay in
the progr ammed order. The disc will stop after all the
tracks in t he Program Li st have playe d one time.
To erase all program list fi les, select “A ll ” with the
[ ]
/ button s.
To end Programmed Play, use / to select “ x it”.
[ ]
Clear
[ ] E
Notes:Notes:
The maxim um number of tr acks progra mmable is 20.
When the Pr ogram List is d isplayed, t he CD will not
operate .
d
v
a
nce
d
op
e
r
a
t
i
oA
ns
35
Page 36

Repeat playback
Random Playback
Repeat
Press [RE PEAT] button while a disc is in play.
Press [RE PEAT] button repeatedly to select the desired
repeat mo de.
CD
Track: The current track will be re peated.
All: All tra cks on a disc wil l be repeated .
Off: Return to normal Play Mode.
MP3
Repeat On e: Repeat the f ile current ly playing.
Repeat Fo lder: Repea t all files con tained in the c urrently
playing folder.
Off: Return to normal Play Mode.
VCD(PBC O ff only)
Track: Repeat the current track
All: Repe at all the trac ks on a disc
Off: Return to normal playback (No display)
DivX
Repeat On e: Repeat the c urrent file
Repeat Fo lder: Repea t all the files i n the current f older
Off: Return to normal playback (No display)
Random PlaybackRandom Playback
Tracks can be played randomly.
1. Press [R ANDOM] whil e a disc is playi ng.
“Random” will appear on the LCD screen when Random
Play has be gun.
2. Press [R ANDOM] agai n to return to no rmal Play Mod e.
VCDVCD DivX
Notes:Notes:
Random playback cannot be used with DVD.
Certain discs will not play in Random Mode.
During Random Play Mode, press [ ] butt on twice
or press [ ] bu tton once to ju mp to another t rack
randomly and continue play.
The same tr ack may be repe ated severa l times in
Random Play Mode.
Random playback is possible with VCD Discs only when
PBC is Off.
36
Page 37

JPEG Image File Display
This devi ce can also pla y MP3 (MPEG1 Aud io Layer 3) or
JPEG file s recorded on d ata CD(CD-R OM/CD-R/C D-RW)
and DVD (DVD+RW/DVD+R/DVD-RW/DVD-R). However,
this devi ce can only play data discs re corded on the
IS09660 J oliet base. F or more detai ls on recordi ng formats,
refer to th e disc drive or c opying soft ware manual .
1. Put disc i nto the playe r and close the d isc lid. When t he
informa tion in the dis c has been read , the file menu w ill
appear on t he LCD screen .
2. Press [ / ] to select a folder, and press [ENTER] to confirm.
A list of files in the folder will be displayed.To return to the
previous folde list from the current file list screen, use [ / ]
button to select and press [ENTER] to confirm.
3. To display a file, press [ / ] to s elect, then p ress
[ENTER] o r [PLAY].
4. To return to t he previous f ile or move to th e next when
files are d isplayed on t he screen, pr ess [PREV/N EXT]
( or ) once.
5. Press [S TOP] to display the file list when files are
display ed on the scree n.
Displaying Files in Thumbnail M odeDisplaying Files in Thumbnail M ode
Press [ME NU]. A thumbnai l display app ears as follo ws:
1. U se [ / / / ] to show the Full Screen display and
press [EN TER] or [PLAY] to confirm.
2 To start a sl ide show,select “Slide sh ow” using
.
[ / / / ]
show ,pre ss [STOP] or [MENU].
3. Selecting “Help” on the screen will display the
“Remote Ke y Function”.
4. To move to the p revious or ne xt page of the th umbnail
display, select “ Prev ” / “ Next ” from the screen.
5. To exit Thumbnail Mod e, press [MENU].
and press [ENTER]. To cancel the slide
Pausing Slide showPausing Slide show
1. Press [PAUSE] in Slide show Mode. The player will
enter Pau se Mode.
2. To return to S lide show Mod e, press [PAUSE] again or
press [PL AY].
37
d
v
a
nce
d
op
e
r
a
t
i
oA
ns
Page 38

JPEG Image File Display (continued)
Rotating ImagesRotating Images
Press [ ] to re verse the ima ge horizont ally (left an d right),
or press [ ] to r everse imag e verticall y (up and down) .
To rotate the i mage 90 degre es counter cl ockwise or
clockwise, press [ ] or [ ].
Notes:Notes:
The size or n umber of JPEG f iles record ed on a disc may
require time to read.
If images d o not appear af ter a few minut es, some file s
may be too bi g to read.
It is recom mended that J PEG files to be d isplayed ha ve
a resolution of 6M pixel s or under. (Pro gressive JP EG
files are r ecommende d to be under 2.4 M p ixels.)
The following types of JPEG files can be played on
The following types of JPEG files can be played on
this device.
this device.
The total n umber of read able files an d folders is
approximately 648.
The total n umber of file s on a readable d isc is
approximately 299.
JPEG file s with filena mes ending in a n “ .jpg ” extens ion.
For files w ith “.jpe ” or “. jpeg ” extens ion, please c hange
the exten tion to “.jpg ” .
This player doesn’t su pport files i n the KODAK ERI J PEG
format.
Depending on the copying conditions of the disc, the total
number of readable fil es and folders may be less tha n 648.
Physica l format is dis cs recorded i n accordanc e with
Joliet IS O9660.
Depending on the disc, filename characters tha t cannot
be displayed are shown as *.
38
Page 39

Playing a VCD video
Video CD with PBC function This option may not be available on all VCD. If you
PBC (Playback Control) function makes it possible
to play Video CDs interactively according to the
menu on the LCD screen.
1. The Menu appears immediately when a Video
CD with the PBC function starts playing.
2. Press the number buttons to select the desired
item.
VCD
want to skip the index menu and playback directly
from the beginning, go to SET UP Menu and General
setup item to switch PBC Off. (Refer 43 page)
Note:Note:
The Repeat and Random fu nctions are a llowed only when
PBC is Off.
3. Perform interactive operations according to the
instructions provided in the menu.
Notes:
Press [ RETURN/TOP MENU/MENU ] to return to
the initial display of the menu.(if PBC is on).
Press [ DISPLAY ] during VCD playback. Track
number/Track total number, Track elapsed time
will display on the screen from left to right.
Press [ AUDIO ] repeatedly during VCD playback to
switch among stereo, left or right in order.
Operation varies for different Video CD.
For further information, refer to the instructions
provided with your Video CD disc.
If no operations are executed within 10 seconds
after the PBC menu is displayed, the unit will start
playing from the beginning of the first track.
d
v
a
nce
d
op
e
r
a
t
i
oA
ns
39
Page 40

Playing a DivX video
DivX® is a vi deo file comp ression tec hnology dev eloped
by DivXNetworks, Inc . This device is an official DivX®
Certifi ed product.
You can play DivX video files on DATA CD (CD-R OM/
CD-R/CD-RW) and DATA DVD (DVD+RW/DVD+R/
DVD-RW/DVD-R).
Insert a Di vX video file d isc, the file m enu appears o n the
screen.
Press [ PRE V / NEXT ] to go to the previous or next page
of the list .
Press [ / ] to se lect a folder. An d press [ ENTER ] to
see the fol der content s.
If you want t o play a partic ular file, pr ess [ / ] to select a
file, and p ress [ ENTER ] to p lay or enter. Pl ayback star ts.
Press [ PRE V / NEXT ] to go to the p revious or ne xt file.
Press [ SCA N / SLOW ] repeat edly to selec t the require d
speed for the search mod e during playback.
Press [ SCA N / SLOW ] repeat edly in pause m ode to
select th e required sl ow motion spe ed .
To return to th e previous fi le list while p laying a DivX
video file, press [ STOP ].
Note:
The slow re verse funct ion is prohib ited.
DivX vide o fi le Disc Fea tu res
Display
Div X
If you pres s [ DISPLAY ] during DivX video playback, the
following will appear on the LCD screen in this order:
Title Elapsed, Title Remain, Display Off, Subtit le.
Audio
DivX
Press [ AU DIO ] repeate dly during pl ayback to cha nge to a
different audio stream. The operation works only with discs
on which multiple audio soundtracks are record ed.
Subtitl e
DivX
Press [ DIS PLAY ] to display subtitle information on the top
right cor ner of the scre en.
Press [ / ] to mo ve the highli ght and then pr ess [ ENTER ].
When file s without sub titles are pl ayed, “Off” displays on
the top rig ht corner of th e screen afte r pressing [ DI SPLAY ].
40
Page 41

Playing a DivX video (continued)
To rent (p ur chase) Di vX ® V OD files
DivX VOD fi les are downl oaded from ce rtain comme rcial
websites after payin g a rental fee . Pr ior to downlo ading a
VOD you nee d to input the re gistratio n number of you r DVD
player on the purchase f orm on the site .
Follow th e instructi ons below to fi nd the regist ration
number of your player: i nsert a disc an d select the op tion
DivX from t he General Se tup menu. Write down the VOD
8-character regist ration numb er so that you ca n fill in the
form on the w ebsite you pu rchase your D ivX VOD files f rom.
Note:
If you cann ot play a DivX VO D file record ed on a disc afte r
downloading it, it is possible that t he recorded f ile is not
compati ble with your p layer becau se of different versions
or incorrect download parameters. The parameters used
when copying to disc may be another rea son for this.
Since it is n ot possible h ere to supply a ll the inform ation,
parameters and advice relating to t he issue of Div X VOD
files, we r ecommend th at you visit sp ecialist we bsites such
as www.divx.com/vod .
DivX Vi de o Disc comp at ibility w ith this play er is limited
as follow :
The player can play data t hat is record ed in DivX form at,
and which has the extens ion “.avi” or “ .divx”. The player
will not play files with t he extensio n “.avi” or “.d ivx” if they
do not cont ain a DivX vide o.
This player only plays DATA CD whose logical format is
ISO 9660 Jo liet, and DATA DVD of Universal Disc
Format (U DF).
Refer to th e instructi ons supplie d with the disc d rives and
the recor ding softwa re (not inclu ded) for deta ils on the
recording format.
Note that t he playback o rder may not be a pplicable ,
depending on the softw are used for cr eating the Di vX
video fil e, or if there ar e more than 299 f olders and 64 8
DivX video files in each folder.
The player may not be able t o play some DATA CD/DATA
DVD created in the Packe t Write format.
Discs rec orded in mult iple sessio ns may not play p roperly
on this device.
Maximum filename length is 14 chara cters.
d
v
a
nce
d
op
e
r
a
t
i
oA
ns
41
Page 42

Playing a DivX video (continued)
Depending on the DivX video file, the p icture may pa use
or be unclear. In which case, it is recomm ended that yo u
create th e file at a lower b it rate. If the s ound is still n oisy,
MP3 is the re commended a udio format . Note, howev er,
that this p layer does no t conform to WM A (Windows Med ia
Audio) fo rmat.
Because of the compres sion techno logy used for D ivX
video files, it may take s ome time afte r you press [ PLAY ]
for the pic ture to appea r.
Depending on the DivX video file, the s ound may not
match the p ictures on th e screen.
The player may not be able t o play a DivX vid eo file that
has been combined from two or more DivX v ideo files.
Depending on the DivX video file, the s ound may skip .
The player cannot play a D ivX video fil e of size more th an
720 (width) x 576 (height)/2 GB.
The player cannot play s ome DivX vide o files that ar e
longer than 3 hours.
This unit does not suppo rt DTS sound sy stem. If you
select DT S sound, ther e will be no soun d output.
When the se lected file i s not support ed (Codec/S ound
system) , “Data Error ( DivX)” disp lays on the LCD s creen
and the fil e will not be played.
42
Page 43

Set Up Menu
By using th e SET UP Menu, image and sound can be
adjusted in various ways. Additionally, subtitles and
languages can also be set. For furthe r details on in dividual
options in the SET UP Menu, please refer to pages 43-46.
Displaying and Exiting from SET UP MenuDisplaying and Exiting from SET UP Menu
To display the SET UP Screen, press [SET UP] b utton.
Press [SE T UP] button the second time to exit from SET UP
Menu.
Basic OperationsBasic Operations
1. Press [S ET UP]. The SET UP Menu will appear.
2. Use [ ] / [ ] to select the desired options. Press [ ] to
proceed to the next menu level. The current option setting
and possible settings will be displayed on the screen.
3. Use [ ] / [ ] to sel ect the desir ed secondar y option,
press [ ] to mo ve to the third m enu level, or p ress [ ]
to return t o the initial m enu level.
4. Use [ ] / [ ] to sel ect the desir ed setting, press
[ENTER] t o confirm you r choice. There may be
additio nal steps to ac cess certai n menu items.
5. To exit from S ET UP Menu, press [SET UP], [RE TURN],
or select E xit Setup.
General SettingsGeneral Settings
Gen eral
Gen eral
TV Di spl ay
TV Di spl ay
Angle Mark
Angle Mark
Scr een S ave r
Scr een S ave r
PBC
DivX
Default
Default
16:9
16:9
On
On
On
On
On
On
TV DisplayTV Display
Select th e screen that c orrespond s to the TV connected to
the player. Displayable screen size differs with each DVD
video. Therefore, the DVD video play image may not be
compati ble with the se lected imag e size.
Default image size val ue is 16:9.
4:3 PS (Pan Scan) : 4:3 PS (Pan Scan) :
Select th e standard 4: 3 TV image size. If the entire screen
is used it au tomatical ly becomes a wi descreen di splay,
and segments that cann ot fit onto the s creen will be c ut off.
4:3 LB (Letter Box) :4:3 LB (Letter Box) :
Select th e standard 4: 3 TV image size. The widescreen
displays a horizontal border on its top and bottom .
16 :9 : 16:9:
Select th is when conne cted to a 16:9 wi descreen te levision.
Initial
Settin
gs
43
Page 44

Set Up Menu (continued)
Angle MarkAngle Mark
When playing a DVD disc re corded with c amera angles,
the angle marks (On) or (O ff) are set to appear on the
LCD scree n when angle changes are possible.
The defau lt setting is O n.
Screen SaverScreen Saver
When the se t to (On), the sc reen will ent er Screensa ver
Mode afte r it has been sto pped for 15 min utes.
The defau lt setting is O n.
VCD
PBC
The Playb ack Control f unction offers scenes and
informa tion which ca n be selected i nteractiv ely via a
menu.
PBC reset ting betwee n “On” and “Off” works after lid is
opened.
The defau lt setting fo r the PBC is On.
DivX
Div X
Sony prov ides you the Di vX registra tion code tha t allows
you to rent a nd purchase v ideos using t he DivX servi ce.
Please re fer to page 40- 42 for detail s.
Default
Each func tion return s to its origin al factory se tting.
Select “R eset” and pre ss [ENTER]. W hen Reset fun ction
is engaged, the SET UP menu closes.
Audio SettingsAudio Settings
Aud io
Aud io
Dol by Digi tal
Dol by Digi tal
DRC (Dynamic Range Control)
To adjust for loud noises recorded on a DVD, reduce the
volume to a moderate level.
This only has effect when playing DVD with a DRC function.
Language SettingsLanguage Settings
Lan guage
Lan guage
OSD L angua ge
OSD L angua ge
Dis c Menu
Dis c Menu
Sub title
Sub title
Aud io
Aud io
ENG
ENG
ENG
ENG
ENG
ENG
ENG
ENG
OSD LanguageOSD Language
Selects t he language d isplayed on the screen.
The defau lt setting is E nglish.
Disc Menu/Subtitle/AudioDisc Menu/Subtitle/Audio
Selects Audio Language, Subtitles, or Disc Menu r ecorded
on a DVD disc.
All default settings a re in English .
44
Page 45

Set Up Menu (continued)
Parental SettingsParental Settings
Par ental
Par ental
Pas sword
Pas sword
Par ental
Par ental
PasswordPassword
A password can be entered or changed.
The passw ord default s etting is “13 6900”.
1. Select “P assword” fro m Parental, i f “Change” is c hosen
press [EN TER].
2. To chang e your passwo rd, enter your current 6-digit
passwor d in the “Old Pas sword” box, a nd your new
passwor d in the “New Pas sword” box. E nter your new
passwor d once again in t he “Verify Pas sword” box, t hen
press [EN TER] to confi rm.
Note:Note:
When the Pa ssword opti on is first acc essed, plea se enter
a new password.
If you forget your security code If you forget your security code
If you forg et your passw ord, follow t he steps belo w to
erase it.
1. Follow s tep one of the pr ocedure for e ntering a
passwor d explained o n the left.
2. Enter “13 6900” in the box m arked “Old Pas sword”.
3. Follow t he explanat ion for the new p assword in St ep
Two, and enter a new password.
Parenta lParenta l
Some DVD vi deos can limit viewing based on set level s
(i.e. the a ge of viewers ).
When the pa rental cont rol functio n is enabled, a p assword
is required to play discs under the set l evel.
1. S elect “Parental” on the Parental Control page and
press [EN TER].
2. To modify the Parental Control level, the selected
passwor d must be enter ed.
If a passwo rd is not set, Pa rental Cont rols cannot b e set,
therefo re first set th e password.
Enter the p assword and p ress [ENTER ]. If the passw ord
is mistak en, press [CL EAR] before p ressing [EN TER].
Initial
Settin
gs
45
Page 46

Set Up Menu (continued)
3. Use the [ ] / [ ] bu tton to select a Parental Control
level from 1 to 8.
Parenta l Co ntrol Lev el s 1-8:
Parenta l one (1) has the m ost restric tions and Par ental
eight (8) has the least.
4. Confir m the Parenta l Control Lev el by pressin g [ENTER].
Press [ SET UP ] to close the menu.
Exit SET UP MenuExit SET UP Menu
To exit from SE T UP Menu, select “the exit setup option”.
SET UP can also be ended by pressing [SET UP] or
[RETURN ].
46
Page 47

Connecting the Video/Audio Cord
Line outLine out
Move the kn ob to the [OUT] p osition
Audio Inp ut/Output Video Input/Output
Line inLine in
Audio Input/Output Video Input/Output
Audio/Video Cabl e (included )
Move the kn ob to the [IN] po sition
Audio/Video Cabl e (included )
Audio/Video Input Connection
Television or Monitor Line Connection
Audio/Video Output
Video P layer or Camcorder
Notes:Notes:
Please re fer to the manu al for the conn ecting devi ce.
Before co nnecting th is player to an y device, alw ays shut off the power of both devices and disconnect the power cords
of both dev ices from any e lectrical o utlets.
Do not conn ect this play er to a video dec k/VCR. Imag e quality may s uffer if the video output from this player passed
through a video deck on to a TV.
Always sw itch the LINE S ELECT IN OUT to “OUT” when playing a disc on this device.
Switchi ng Betwe en [LINE SELECT IN and LINE SELECT OUT]Switchi ng Betwe en [LINE SELECT IN and LINE SELECT OUT]
LINE S ELECT IN: In put im ages o r audio from an exterior device. The “Line In” me ssage will b e disp layed on the LCD screen
until the sign al fro m the exteri or device is imported.
LINE S ELECT OUT: E xport the pl ayback signal from this device to a TV.
47
C
o
n
n
ect
i
o
n
s
Page 48

Using this Player with a Car Ad ap to r
Use the acc essory cord i ncluded (DC C-FX110) to supply power from the cigarette lighter to this player.
Use the acc essory cord i ncluded (DC C-FX110) to supply power from the cigarette lighter to this player.
The adaptor is made for a 12 V c ar battery. Please do not use it with a 24 V car battery.
The adaptor is made for a 12 V c ar battery. Please do not use it with a 24 V car battery.
Connect the Car Adaptor included (DCC-FX110) into the cigarette lighterConnect the Car Adaptor included (DCC-FX110) into the cigarette lighter
Notes:Notes:
Plug into the cigarett e lighter soc ketPlug into the cigarett e lighter soc ket
This unitThis unit
DCC-FX11 0
(included) (included)
To a DC power Input Jack
To a DC power Input Jack
(DC IN 9.5V )
(DC IN 9.5V )
Arrange the cord so as not t o interfere w ith the drive r.
If using th is device wit h a car adaptor, w hen finishe d
using always turn the pl ayer off by its own power switch.
Turning off the car engin e with the play er ’s power on stops
the supply of electric ity to the devi ce and may dama ge it.
Do not place the monitor w here the driv er can watch it .
If image qu ality deter iorates, pl ease discon nect the car
adaptor from the main de vice.
When ther e is a danger of th e car adaptor o r its use
interfe ring with veh icle operat ion, using a co mmercial
cigarette lighter ex tension cor d is recommen ded.
After use d isconnect t he car adapto r from the ciga rette
lighter.
Since the e lectricit y supply is com ing from the ci garette
lighter, even with the ca r engine off there is a danger of
electri cal dischar ge with some ca rs.
48
Page 49

Using this Player with a Car Ad ap to r (c on ti nu ed )
MiscellaneousMiscellaneous
This car adaptor is for use with 12V car batteries.
Please do not use in cars wi th 24 V batteri es.
Automob iles may be gro unded negatively or positively.
This car ad aptor is for us e with negati vely ground ed
vehicles.
Please use this produc t with the car en gine runnin g.
If this pro duct is used wi th the car engi ne off, there is a
danger th e car battery m ay become unu sable.
When not in u se, please di sconnect th e car battery c ord
from the ci garette lig hter socket . When discon necting the
cord, ple ase hold the pl ug end to pull it out. Please do n ot
pull on the cord.
Do not use th e car adaptor i f it has been dro pped or
otherwise damaged.
Never tou ch the car adap tor’s metal parts with metal
objects. Doing this ma y cause a short c ircuit that m ay
damage th e car adaptor.
If the car ci garette lig hter is dirty w ith ash or othe r grime.
This may re sult in a bad con nection and c ause the plug
segment to heat up. Alway s clean well af ter use.
Do not disassemble or mo dify this pro duct.
Do not shake or drop this de vice.
This player may heat up wh ile charging or after a long
period of use. This is not a malfunction.
To avoid interference or static when li stening to th e car
radio remove the car bat tery cord fro m the cigaret te
lighter socket and dis tance this pr oduct from th e radio.
Do not stor e the player in a r ocking or mov ing place.
Please do not place the pr oduct in dire ct sunlight , on the
dashboard, or close to t he heater. Ple ase keep away f rom
places with high tempe rature.
C
o
n
n
ect
i
o
n
s
49
Page 50

In Case of Malfunction
Symptom sSymptoms
The po wer will not
come o n.
No image appears on
the LCD scr een or a
connected TV.
There is no sound.
The device will not
start pla ying.
When buttons are pressed nothing happens.
The remot e control is
not worki ng normally.
CausesCauses
The po wer cord is loose.
The ba ttery has been drained.
The video cable is not connected firmly.
The di splay mode is set to [OFF].
The Brigh tness is set at m inimum.
The input switch selec ted for a
connected televisi on is not corre ct.
The line input/outpu t is selected a s IN.
The input switch selec ted for a
connected audio device is not corre ct.
The audio cable is not connected firmly.
A disc in the machine will not play.
Parenta l Controls ha ve been set.
The player is set on Hold.
The remot e control did n ot come with
the device.
Direct su nlight or str ong illumin ation is
strikin g the remote se nsor.
Batteri es are depleted.
The remot e control sig nal does not
reach the p layer.
SolutionsSolutions
Insert the electric cord firmly into the outlet.
Recharge the battery.
Connect the video cable firmly to the jack.
Set the screen to a mode besides [ OFF].
Adjust Br ightness fr om LCD MODE .[ ]
Change the input switch of the connected television
so that images from the player appear on its screen.
Put line input/outpu t to the OUT side.
Change the input switch of the connected audio
device so that audio can be heard from the player.
Connect the audio cable firmly to t he jack.
Please put in a playable disc. Check the
disc type, colour system, and region code.
Reset or mo dify Parent al Controls .
Slide the [ HOLD] switc h to the right to
remove th e hold.
Point the remote control at the sensor and
stand an appropriate distance from the player.
Take care that direct sunlight or strong illumination does not striking the remote sensor.
Replace all remote control batteries with new ones.
Remove all obstacles between the rem ote
control and the sensor.
50
Page 51

CD/ DVD Pl ayer
Power Requiremen ts:
DC 9.5V (AC adaptor / Car Battery Adaptor terminal),
DC 7.4V (Ba ttery)
Power con sump tion : 23 W with Ba ttery pa ck
(DVD VI DEO Pl ayback with the LCD screen turned on.)
Weigh t: 2.244 lbs (1.02 kg) (wi thout battery pack)
Externa l di men sion s (W x H x D)
8.90 × 6.30 × 1.28 inches (226 × 160 × 32.4 mm)
Signal system: PAL /(NT SC)
Frequ ency range (audio) :
DVD linear sound: 48kHz sampl ing 20 Hz to 20 kHz
96kHz sampl ing 20 Hz to 44 kHz
Signal-to-noise ratio (audio) : Mor e than 95 dB
Dynamic range (audio) : Mor e than 90 dB
Harmon ic distortion (aud io): 0.008 %
Ope rating con di tion s:
Tempe rature: 41°F to 95 °F, Operation status: Horizontal
Connectors
Video IN/OUT:
1.0V (p-p), 75Ω, negative sync., Ø3.5mm mini jack x 1
Audio IN/OUT (analog audio):
2.0 Vrms (1 kHz, 0 dB), Ø3.5mm stereo mini jack x 1
Ear phone terminal: Ø3.5 stereo mini jack x 2
Liquid Crystal Display
Panal size: 8 inches wide (diagonal)
Projection system: R.G.B
Driving system: TFT active matrix
Resolution: 480 x 220
(effective pixel rate: more than 99.99 %)
Supplied Ac ce ss or ie s
RCA Audio / Video cable
AC Adaptor (AC-FX110)
INPUT: 100-240V AC, 50/60 Hz
AC Power Cord
Car Battery Adaptor (DCC-FX110)
INPUT: 12 V DC
Battery Pack (NP-FX110)
Remote (RMT-D182A)
Batteries for Remote (Size: ( ))R6 AA
Carry case
Design and specifications are subject to
change without notice.
1
1
1
1
1
1
2
1
R
e
fe
re
nce
51
Page 52

52
Page 53

Note
53
Page 54

Note
54
Page 55

55
Page 56

56
Printed o n 100% recycl ed paper using
VOC(Volatile Organic Compound)-free
vegetable oil based ink.
Http://www.sony.net/
 Loading...