

Page 1
Quick Start Guide
DSLR-A230
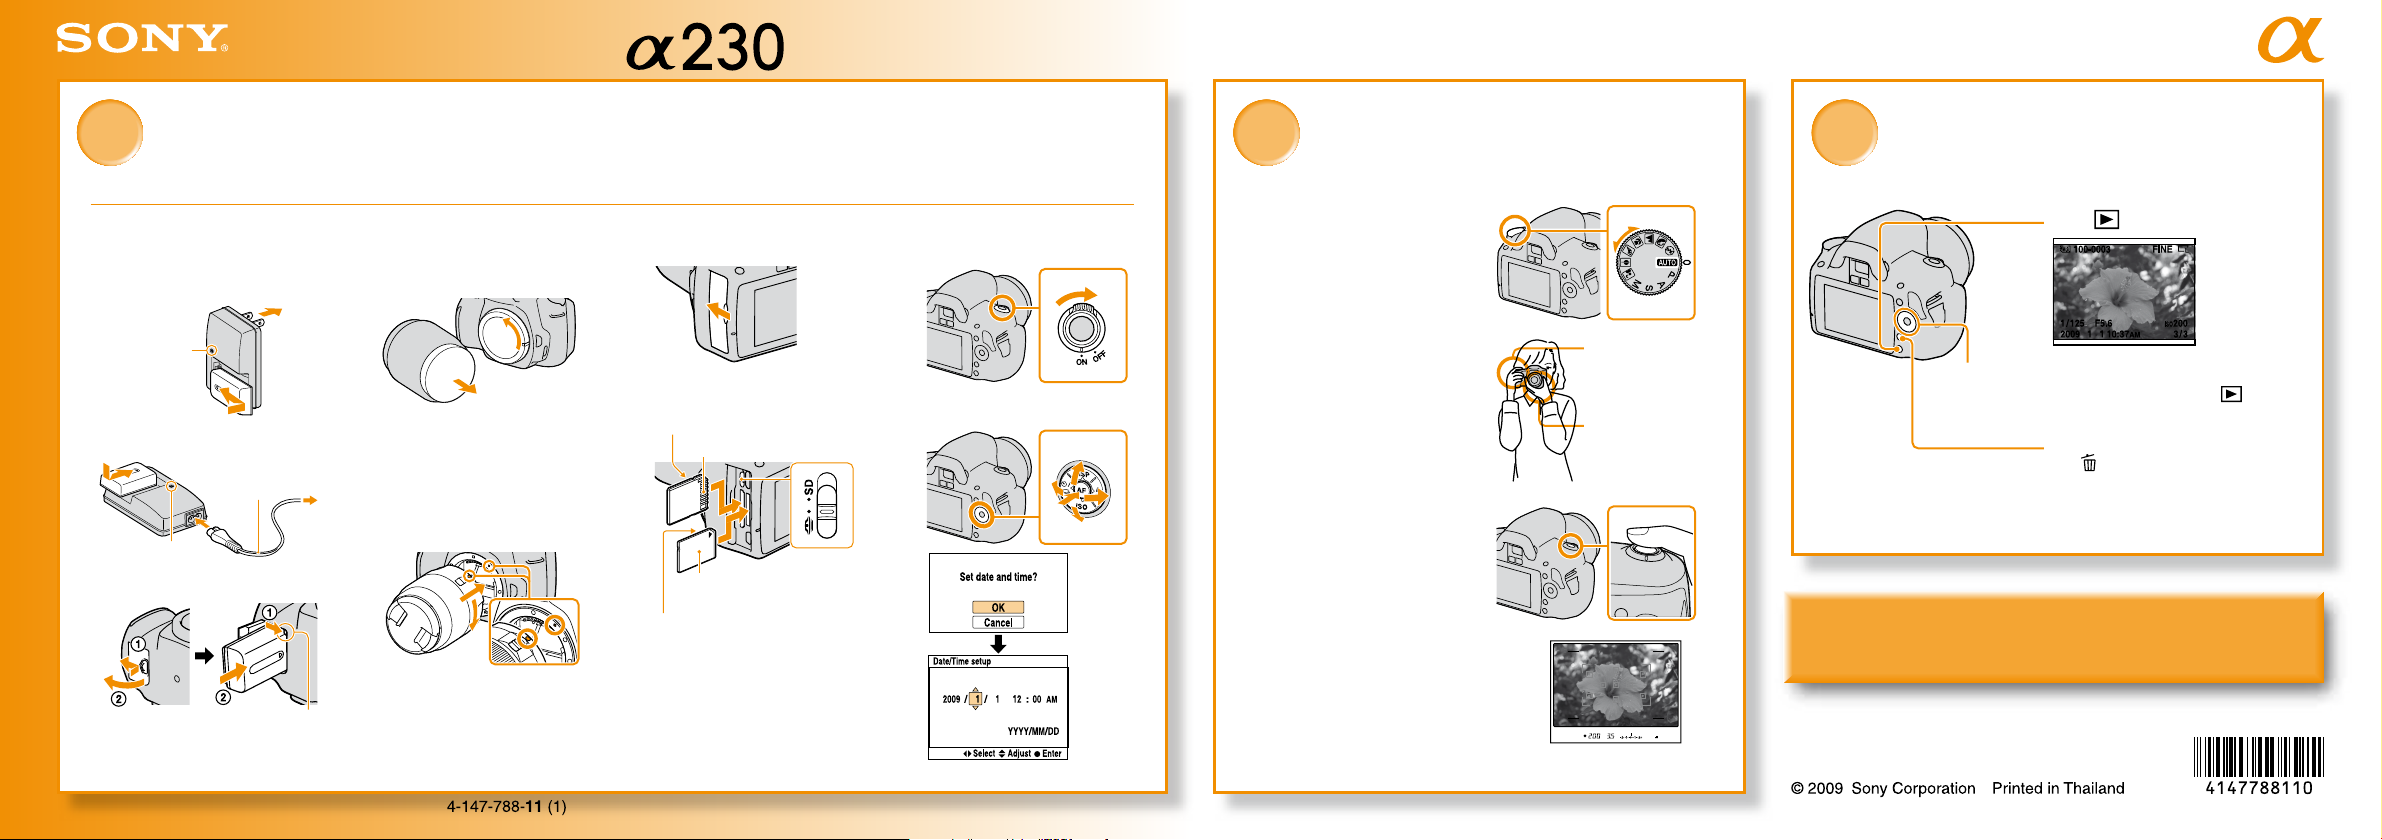
Preparation Shooting Playback
The battery pack
1 Charge the battery pack until the
CHARGE lamp lights off.
For customers in the U.S.A. and Canada
CHARGE lamp
For customers in countries/regions
other than the U.S.A. and Canada
Power cord (mains lead)
CHARGE lamp
2 Insert the battery pack into the camera.
Firmly insert the battery pack all the
way while pressing the lock lever with
the tip of the battery.
The lens
1 Remove the body cap on the camera
and packaging lid on the rear of the
lens.
Do not touch inside parts.
If dust enters the camera, it may
appear on the photo image. Do not
leave the camera and lens without
the caps. When you change the lens,
do it quickly in a location free from
dust.
2 Mount the lens by aligning the index
marks as illustrated.
Turn the lens until it clicks.
Remove the lens cap during
shooting.
The memory card
1 Open the memory card cover.
2 Insert a memory card and select the
type of the memory card you want to
use using the memory card switch.
Face side (SD memory card)
Terminal part
Face side (“Memory Stick PRO
Duo”)
Terminal part
When inserting a memory card, turn the
camera off.
For available memory cards, refer to the
Instruction Manual.
Date/time setup
1 Turn the camera on.
2 Set up the date/time.
1 Set the mode dial to AUTO.
2 Look into the viewfinder.
Adjust the diopter-adjustment dial if the
focus of the viewfinder is not achieved.
3 Press the shutter button
halfway down to focus.
Pressing the shutter button halfway
down and holding it activates the
autofocus.
4 Press the shutter button fully
down to shoot.
Hold the grip of the
camera.
Support the lens from
below.
Press .
To play back a previous or next image: press /
Control button
on the control button.
To return to the shooting mode:
To delete the image
Press .
To fully enjoy the features of your single lens reflex
camera, consult the “Instruction Manual.”
 Loading...