

Page 1
3-253-169-13 (1)
FM/AM
Portable
CD Player
Operating Instructions GB
Manual de instrucciones ES
Manual de instruções PT
“WALKMAN” is a registered trademark of Sony Corporation to represent Headphone
Stereo products.
“WALKMAN” es una marca registrada de Sony Corporation que representa los
productos audífonos estéreo.
Sony Corporation.
is a trademark of Sony Corporation.
es una marca de fábrica de
D-NS921F
© 2003 Sony Corporation
Page 2

WARNING
To prevent fire or shock
hazard, do not expose the AC
power adaptor to rain or
moisture.
Do not install the appliance in a confined
space, such as a bookcase or built-in
cabinet.
To prevent fire, do not cover the ventilation
of the apparatus with newspapers, tablecloths, curtains, etc. And don’t place lighted
candles on the apparatus.
To prevent fire or shock hazard, do not place
objects filled with liquids, such as vases, on
the apparatus.
CAUTION
The use of optical instruments with this
product will increase eye hazard.
Certain countries may regulate disposal of
the battery used to power this product. Please
consult with your local authority.
CAUTION
• INVISIBLE LASER RADIATION
WHEN OPEN
• DO NOT STARE INTO BEAM OR
VIEW DIRECTLY WITH OPTICAL
INSTRUMENTS
ATRAC3plus and ATRAC3 are trademarks
of Sony Corporation.
The validity of the CE marking is restricted
to only those countries where it is legally
enforced, mainly in the countries EEA
(European Economic Area).
2-GB
Page 3

Table of Contents
Enjoy your ATRAC CD
Walkman!
Create original ATRAC CDs!...................... 4
Music sources playable on this CD player .. 6
ATRAC3plus and ATRAC3 ......................... 6
MP3 files ..................................................... 6
Difference between ATRAC3plus/
ATRAC3 and MP3 .................................. 8
Getting started
Locating the controls ................................... 9
Checking the supplied accessories ............ 11
Playing an audio CD or
ATRAC3plus/ATRAC3/MP3 files
1.Connect your CD player........................ 12
2.Insert a CD. ........................................... 12
3.Play a CD. ............................................. 13
Playback options
Playing tracks in random order
(Shuffle play)......................................... 19
Playing all files in a selected group in
random order (Group shuffle play)
(ATRAC/MP3 CD only)........................ 19
Playing your favorite tracks by adding
Bookmarks (Bookmark track play) .......20
Playing your favorite play lists
(m3u play list play)
(MP3 CD only)...................................... 21
Playing tracks in your favorite order
(PGM play)............................................ 22
Using the radio
Listening to the radio................................. 24
Presetting your favorite radio stations ....... 26
Presetting radio stations............................. 27
Available features
The G-PROTECTION function................. 29
Checking the time remaining on the
CD and the number of tracks left
(audio CD)............................................. 29
Checking information on a CD with
ATRAC3plus/ATRAC3/MP3 files ........ 30
Emphasizing the bass sound (SOUND) .... 30
Protecting your hearing (AVLS)................ 31
Locking the controls (HOLD) ................... 31
Turning off the operation beep sound........ 31
Connecting your CD player
Connecting a stereo system ....................... 32
Connecting to a power source
Using the batteries ..................................... 33
Notes on the power source ........................ 35
Additional information
Precautions ................................................ 36
Maintenance .............................................. 37
Troubleshooting......................................... 38
Specifications ............................................ 41
Optional accessories .................................. 42
GB
3-GB
Page 4
Enjoy your ATRAC CD Walkman!
Thank you for purchasing the D-NS921F. This CD Walkman is called an “ATRAC CD
Walkman,” because you can enjoy “ATRAC CDs” on it.
Create original ATRAC CDs!
You can make your own ATRAC CD.
The procedure is very simple. Just perform Steps 1, 2 and 3.
Step 1
Install
Install the supplied
“SonicStage Simple Burner”
software.
How to use the SonicStage Simple Burner
Refer to the supplied booklet “SonicStage Simple Burner.”
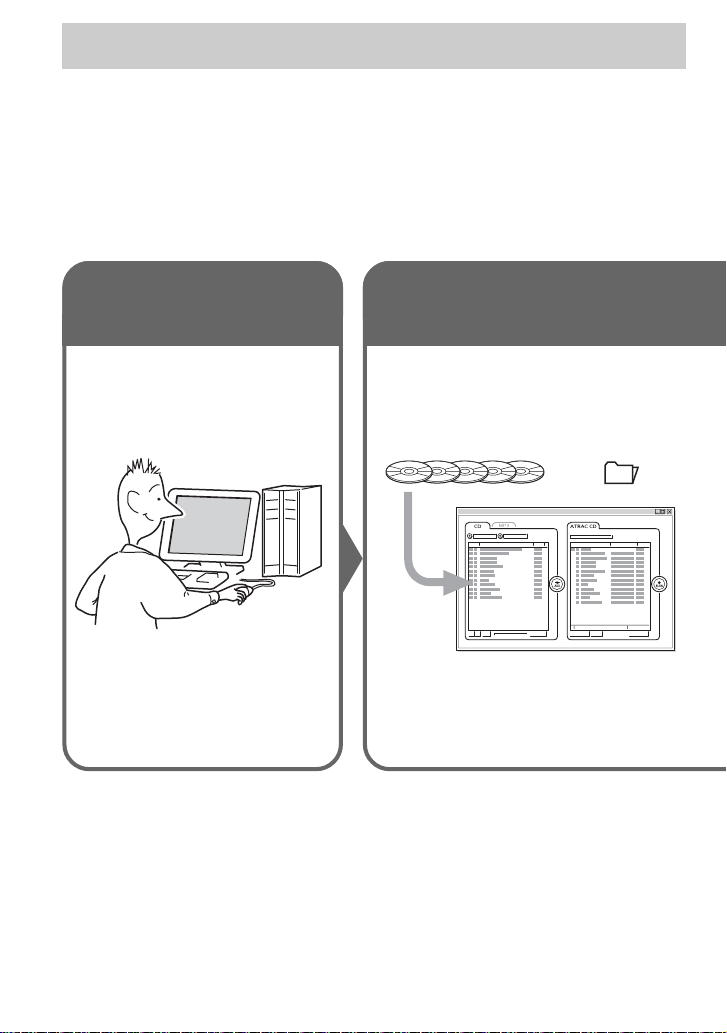
Step 2
Burn
Create a disc image and burn it on
a CD-R/RW using your PC.
Audio CDs MP3 files
Audio data is converted to the ATRAC3plus/
ATRAC3 format by the SonicStage Simple
Burner.
or
,
4-GB
Page 5
What is an ATRAC CD?
An ATRAC CD is a CD-R/RW on which audio data compressed in the ATRAC3plus/ATRAC3
format has been recorded. About 30 audio CDs can be recorded on a CD-R/RW.* You can also
record MP3 files by converting the files to the ATRAC3plus/ATRAC3 format.
* When total playing time of one CD (album) is estimated at 60 minutes and you are recording on a 700 MB
CD-R/RW at 48 kbps in ATRAC3plus format.
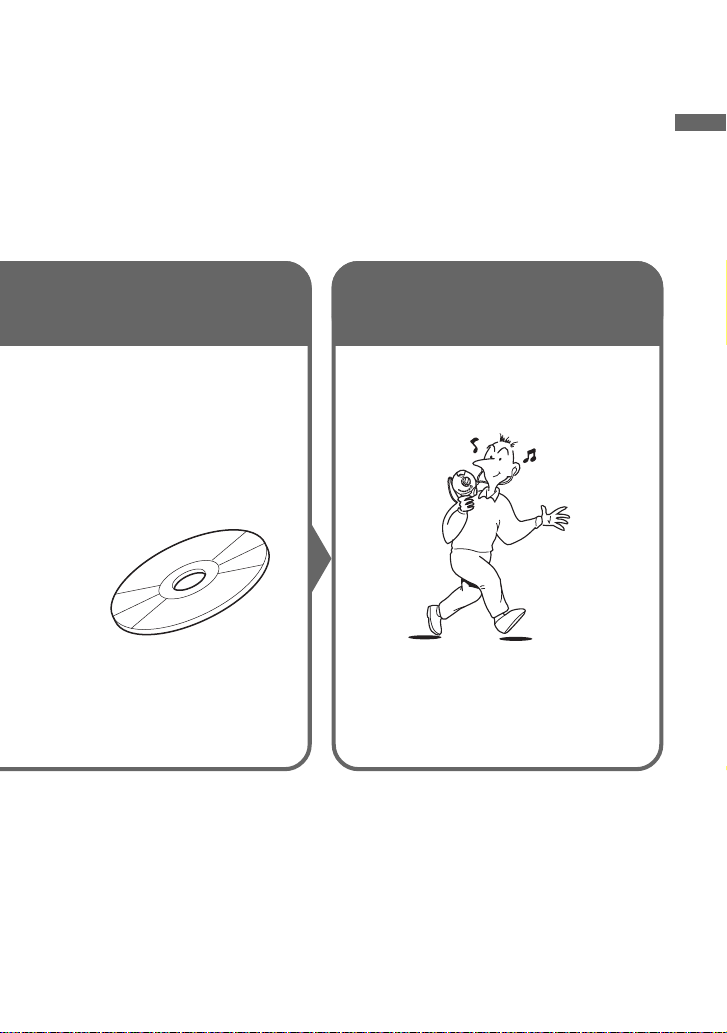
Step 3
Listen
You can enjoy listening to your
own ATRAC CDs on your ATRAC
CD Walkman.
ATRAC CD
Enjoy your ATRAC CD Walkman!
What is the ATRAC3plus/ATRAC3
format?
Refer to pages 6 - 8 of this manual.
You can also enjoy audio CDs on
your CD Walkman.
5-GB
Page 6

Music sources playable on this CD player
You can play the following 3 music sources on this CD player:
• Audio CDs
•ATRAC3plus/ATRAC3 format files
• MP3 files
Usable disc formats
You can use ISO 9660 Level 1/2 and Joliet extension format discs only.
ATRAC3plus and ATRAC3
“ATRAC3plus,” which stands for “Adaptive Transform Acoustic Coding3plus” is audio
compression technology, developed from the ATRAC3 format. Though the ATRAC3plus format
can compress music content to about 1/20 of its original size, you can still enjoy high quality
sound. The available transfer bit rates are 64 kbps and 48 kbps.
“ATRAC3,” which stands for “Adaptive Transform Acoustic Coding3” is audio compression
technology that satisfies the demand for high sound quality and high compression rates. The
ATRAC3 format can compress music content to about 1/10 of their original size, which
contributes to reduction of the media volume. The available transfer bit rates are 132 kbps,
105 kbps and 66 kbps.
The usable number of groups and files
• Maximum number of groups: 255
• Maximum number of files: 999
For details, refer to the supplied booklet “SonicStage Simple Burner.”
Note on saving files on the media
Do not save files in other formats or unnecessary groups on a disc that has ATRAC3plus/
ATRAC3 files.
MP3 files
MP3, which stands for MPEG-1 Audio Layer3, a standard for audio files compression supported
by the Motion Picture Experts Group, an ISO (International Organization for Standardization)
working group, enables compression of audio files to about 1/10 of the data size of a standard
compact disc. Since the MP3 encoding algorithm is public, there are various encoders/decoders
that are compliant with this standard, including freeware that is available for no charge. Thus, the
MP3 standard is widely used in the computer field.
6-GB
Page 7

The major specifications of the acceptable disc format are:
• Maximum directory levels: 8
• Acceptable characters for a file/folder name:
A - Z, a - z, 0 - 9, _ (underscore)
Notes
• When naming files, be sure to add the file extension “mp3” to the file name.
• If you add the extension “mp3” to a file other than an MP3 file, the player will not be able to recognize the
file properly.
• The file name does not correspond to the ID3 tag*.
*ID3 tag is a format for adding certain information (track name, album name, artist name, etc.) to MP3 files.
The usable number of groups and files
• Maximum number of groups: 100
• Maximum number of files: 400
Settings for compression and writing software
• This CD player supports MP3 files with the following specifications: transfer bit rate:
16 - 320 kbps and sampling frequencies: 32/44.1/ 48 kHz. Variable Bit Rate (VBR) is also
supported.
To compress a source for an MP3 file, we recommend setting the transfer bit rate of the
compression software to “44.1 kHz,” “128 kbps,” and “Constant Bit Rate.”
•To record up to the maximum capacity, set to “halting of writing.”
•To record at one time up to the maximum capacity on media that has nothing recorded on it,
set to “Disc at Once.”
Notes on saving files on the media
• Do not save files in other formats or unnecessary folders on a disc that has MP3 files.
• When a disc is inserted, the CD player reads all the information of folders and files on that
disc. If there are many folders on the disc, it may take a long time for play to begin or for the
next file to start playback.
Enjoy your ATRAC CD Walkman!
7-GB
Page 8

Difference between ATRAC3plus/ATRAC3 and MP3
Groups and folders
The ATRAC3plus/ATRAC3 format has a very simple structure. It consists of “files” and
“groups.” A “file” is equivalent to a “track” of an audio CD. A “group” is a bundle of files and is
equivalent to an “album.” A “group” has no directory-type structure (a new group cannot be
made within an existing group). This CD player is designed to recognize an MP3 file folder as a
“group” so that it can play CD-Rs/RWs recorded in both the ATRAC3plus/ATRAC3 format and
those recorded in the MP3 format with the same operation.
Displaying the track name, etc.
When playing a CD having ATRAC3plus/ATRAC3 files or MP3 files on this CD player, track
names, artist names and album names are displayed. This CD player conforms to Version 1.1/2.2/
2.3 of the ID3 tag format.
Notes
• This CD player cannot record music content on recordable media, such as CD-Rs/RWs.
• CD-Rs/RWs recorded in the ATRAC3plus/ATRAC3 format cannot be played on your computer.
• Playback capability may vary depending on the quality of the disc and the condition of the recording device.
8-GB
Page 9
Getting started
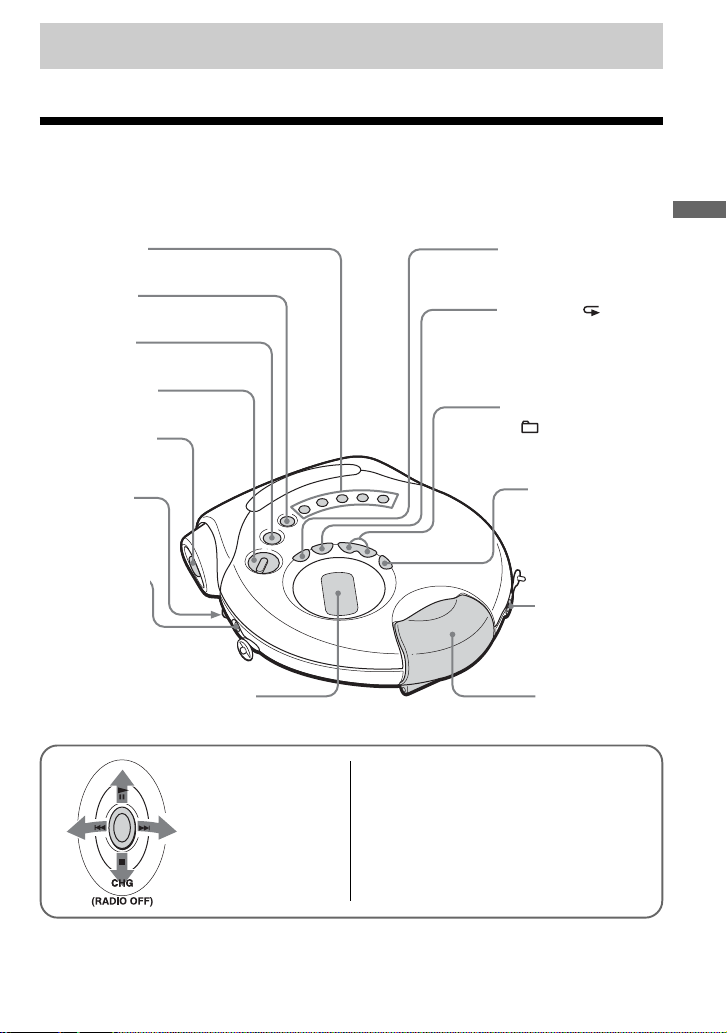
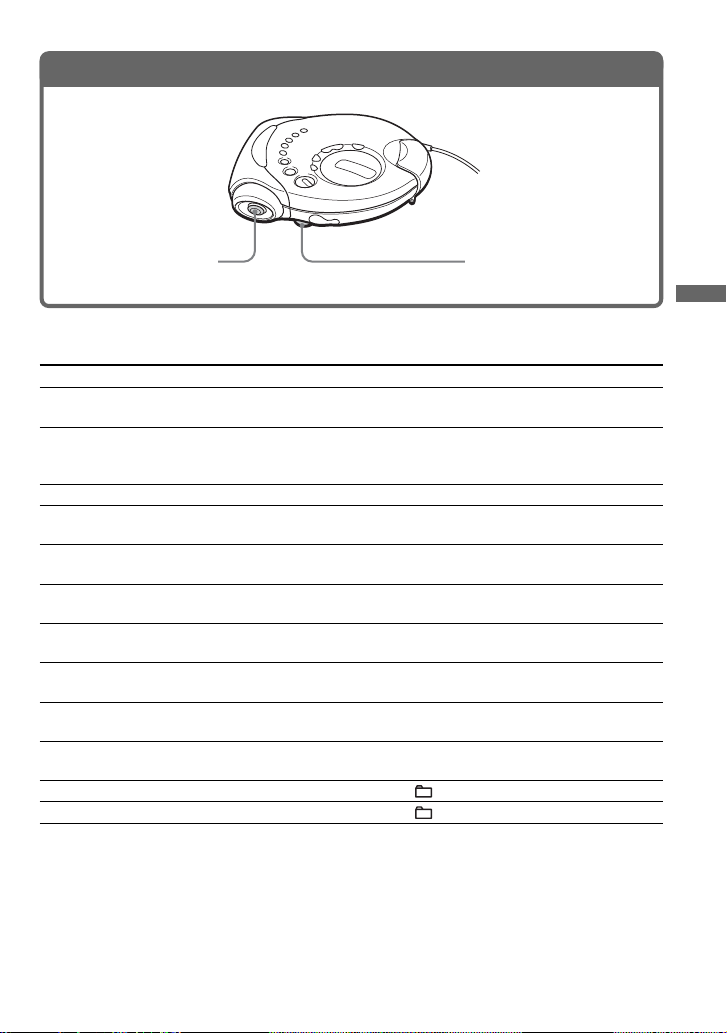
Locating the controls
For details, see pages in parentheses.
CD player (front)
1 1 - 5 buttons
(page 26)
2 AM button
(pages 24, 27, 28)
3 FM button
(pages 24, 27, 28)
4 HOLD switch
(page 31)
5 4-way control
key (see below)
6 VOL +*/–
(volume)
control
(page 13)
7 DC IN 4.5 V
(external
power input)
jack (pages
12, 33)
8 Display (pages 15,18, 21, 22,
24 - 31)
5 4-way control key
Push toward u,
., > or x•
CHG (RADIO OFF).
Getting started
9 SOUND button
(pages 30, 31)
q; P MODE/
(play mode/repeat)
(MONO/ST) button
(pages 18 - 23, 25)
qa TUNING +/–•
+/– buttons
(pages 13, 24, 28)
qs DISPLAY
(MEMORY)
button
(pages 26 - 30)
qd i (headphones)
jack
(pages 12, 32)
qf Buckle
(page 12)
u**: Play/pause (pages 13, 18, 20 - 23)
./>: AMS/search (pages 13, 18, 21,
22, 27, 28)
x•CHG (RADIO OFF):
Stop•charge (turn off the radio)
(pages 13, 24, 27, 31, 33)
* There is a tactile dot beside VOL to show the direction to turn up the volume.
** There is a tactile dot beside u.
(Continued)
9-GB
Page 10
CD player (inside)
qg G-PROTECTION
switch
(page 29)
qh Battery compartment
(pages 33, 34)
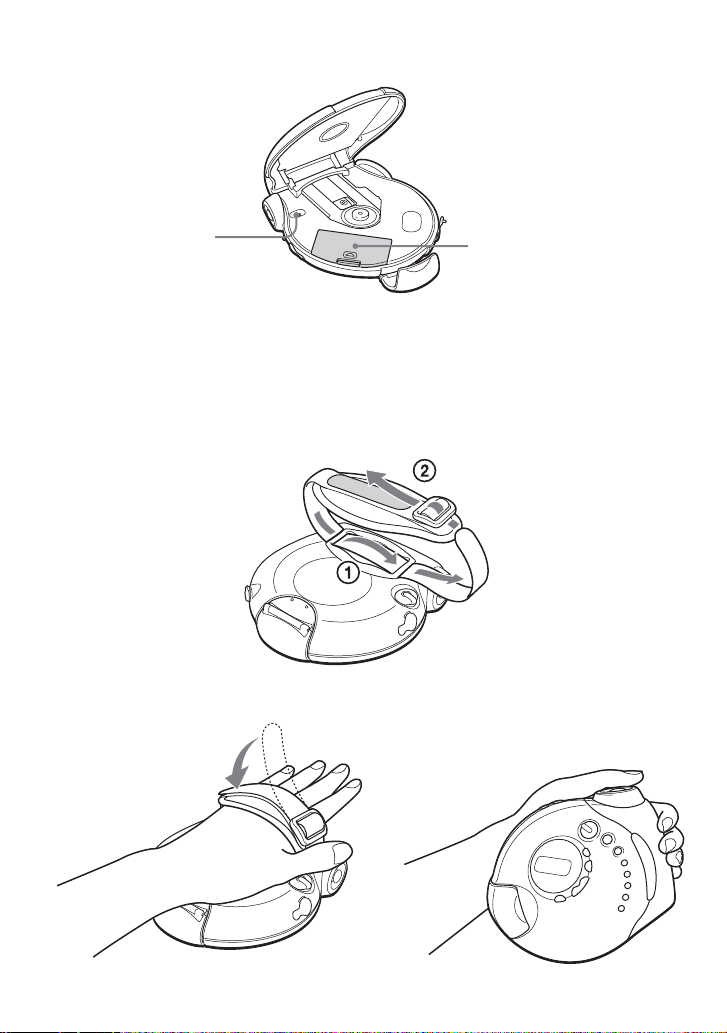
Using the hand strap
While jogging, use the supplied hand strap.
1 Pass the strap through the hooks.
2 Put your hand between the player and the strap, then adjust the length of the strap and fix it
using the Velcro tapes.
10-GB
Page 11

Checking the supplied accessories
AC power adaptor (1) Headphones/earphones (1)
Hand strap (1)
CD-ROM (SonicStage Simple Burner) (1)
User’s guide for SonicStage Simple Burner (1)
Getting started
11-GB
Page 12
Playing an audio CD or ATRAC3plus/ATRAC3/MP3 files
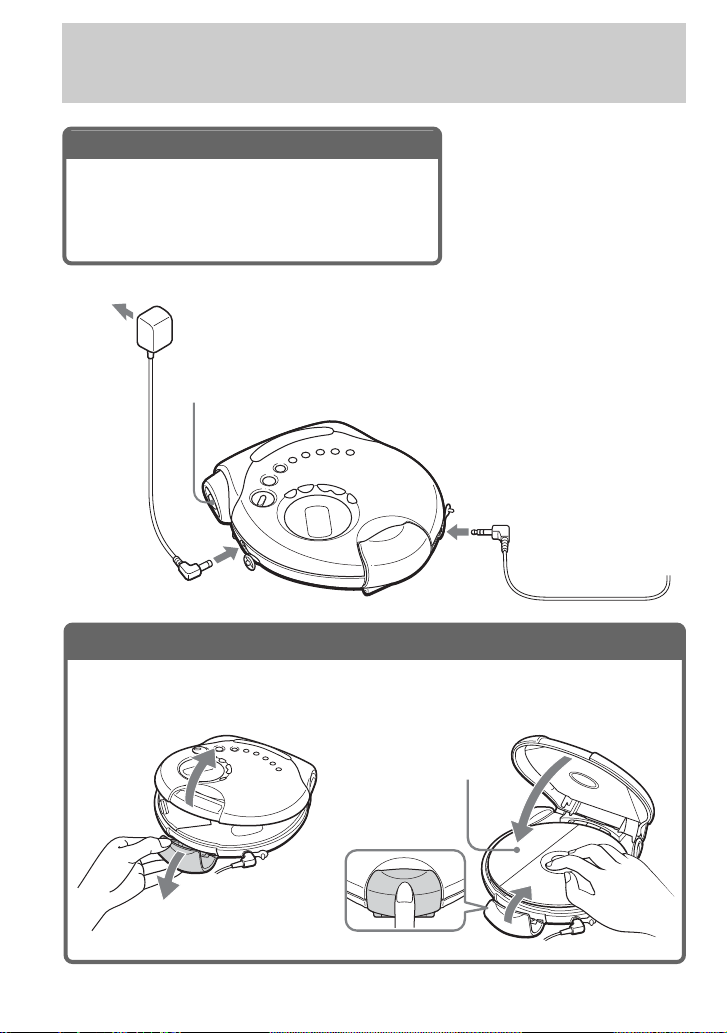
1
. Connect your CD player.
1 Connect the AC power adaptor.
2 Connect the headphones/earphones.
You can also use rechargeable batteries or dry
batteries as a power source. (See page 33.)
to an AC outlet
AC power
adaptor
2
. Insert a CD.
1 Unfasten the buckle.
2 Open the lid.
4-way control key
(u)
to i (headphones)
Headphones
or
Earphones
to DC IN
4.5V
3 Fit the CD on the pivot and close the lid.
4 While holding the lid closed, fasten the buckle
securely.
Label side up
12-GB
Page 13
3
. Play a CD.
Push the 4-way control
Adjust the volume.
key toward u.
Basic operations
To Do this
Play (from the point you stopped) Push the 4-way control key toward u.
Play (from the first track) While the CD player is stopped, push the
Pause/resume play after pause Push the control key toward u.
Stop Push the control key toward x•CHG (RADIO
Find the beginning of the current track (AMS*1) Push the control key toward . once
Find the beginning of the previous tracks (AMS) Push the control key toward .
Find the beginning of the next track (AMS) Push the control key toward > once
Find the beginning of the succeeding tracks (AMS) Push the control key toward >
Go backwards quickly Push the control key toward . and
Go forward quickly Push the control key toward > and
Jump to succeeding groups*
Jump to previous groups*
4
4
Playback starts from the point you stopped.
control key toward u and hold it for
2 seconds or more.
2
OFF).*
2
quickly.*
repeatedly.*
quickly.*
repeatedly.*
hold it.*
hold it.*
2, *3
2, *3
2, *3
2
2
Press + repeatedly.
Press – repeatedly.
Playing an audio CD or ATRAC3plus/ATRAC3/MP3 files
*1 Automatic Music Sensor
*2 These operations can be done during both play and pause.
*3 After you have played the last track, you can return to the beginning of the first track by pushing the 4-way
control key toward >. Similarly, if you are at the first track, you can locate the last track by pushing the
control key toward ..
*4 Only when you play an ATRAC/MP3 CD
(Continued)
13-GB
Page 14

Removing the CD
Remove the CD while pressing the pivot
in the center of the tray.
About CD-Rs/RWs
This CD player can play CD-Rs/RWs recorded in the CD-DA format*, but playback capability
may vary depending on the quality of the disc and the condition of the recording device.
* CD-DA is the abbreviation for Compact Disc Digital Audio. It is a recording standard used for the Audio
CDs.
Music discs encoded with copyright protection technologies
This product is designed to play back discs that conform to the Compact Disc (CD) standard.
Recently, various music discs encoded with copyright protection technologies are marketed by
some record companies. Please be aware that among those discs, there are some that do not
conform to the CD standard and may not be playable by this product.
14-GB
Page 15
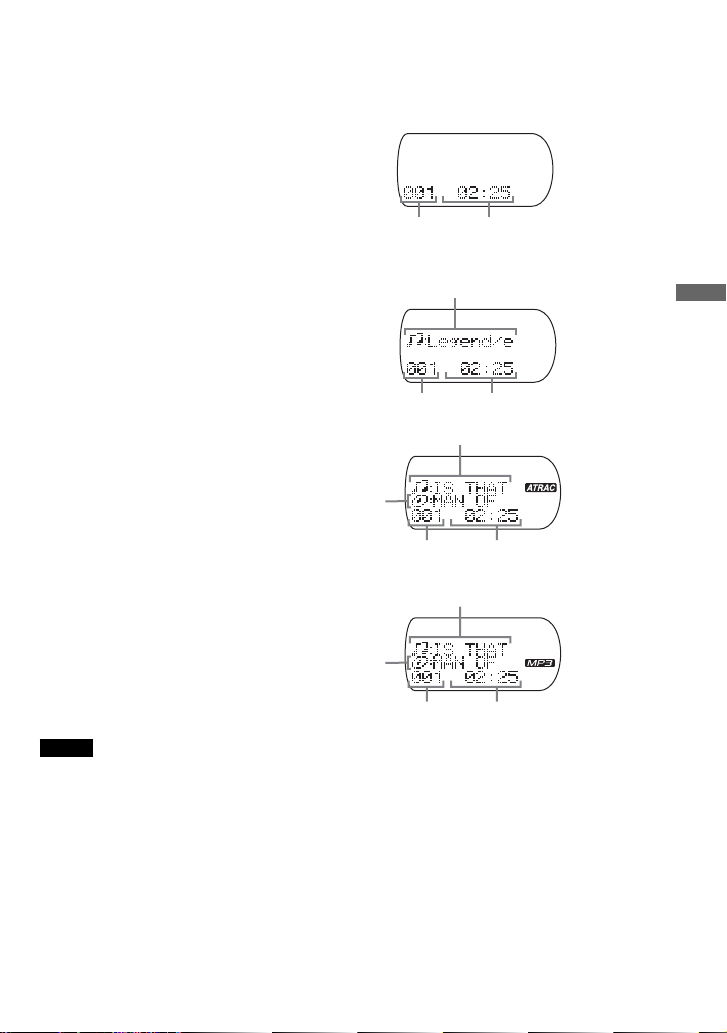
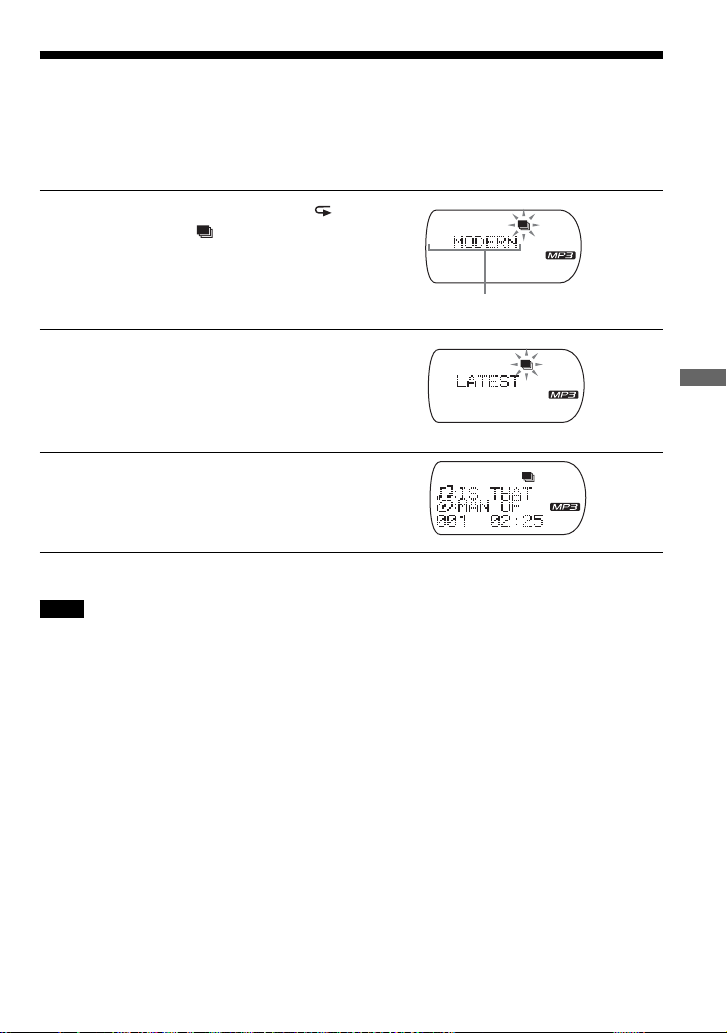
About the display
While the CD player is playing, the following indications appear in the display.
You can also check the remaining time, track name, etc. using DISPLAY (see pages 29 and 30).
While playing an audio CD
Track number Playing time
While playing an audio CD
containing CD text information
While playing an ATRAC3plus/
Track name
Track number Playing time
File name
ATRAC3 file
Group name
File number Playing time
File name
When playing an MP3 file
Group name
File number Playing time
Notes
• The characters A - Z, a - z, 0 - 9, and _ can be displayed on this CD player.
• Before playing a file, the CD player reads all file and group information on the CD. “READING” is
displayed. Depending on the content of the CD, it may take some time to accomplish this reading.
Playing an audio CD or ATRAC3plus/ATRAC3/MP3 files
(Continued)
15-GB
Page 16
Example of ATRAC3plus/ATRAC3 groups and files
Group
ATRAC3plus/ATRAC3
file
1
1
2
3
2
4
5
3
6
7
8
9
4
q;
qa
qs
File mode (normal play)
Group mode (when selected “ ” using P MODE/ (see page 18))
Notes
• Maximum number of groups: 255
Maximum number of files: 999
• When referring to ATRAC CDs, “group” is equivalent to an “album” and “file” is equivalent to a “track.”
Plays all ATRAC3plus/ATRAC3 files from 1, 2, 3...qa, qs.
Plays all ATRAC3plus/ATRAC3 files in the selected group.
16-GB
Page 17
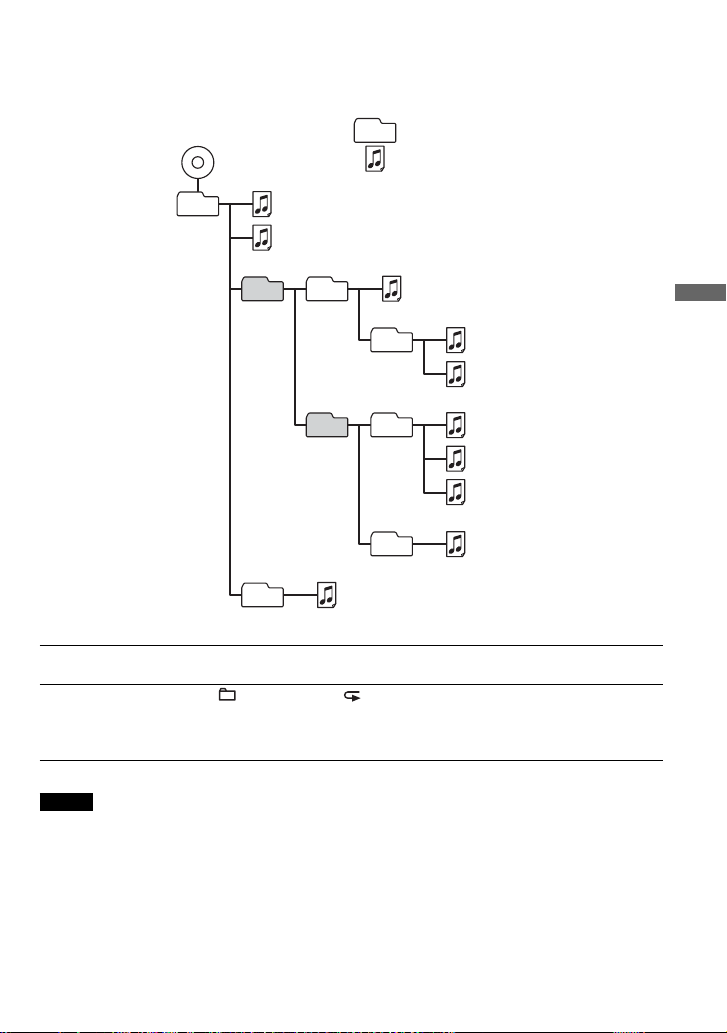
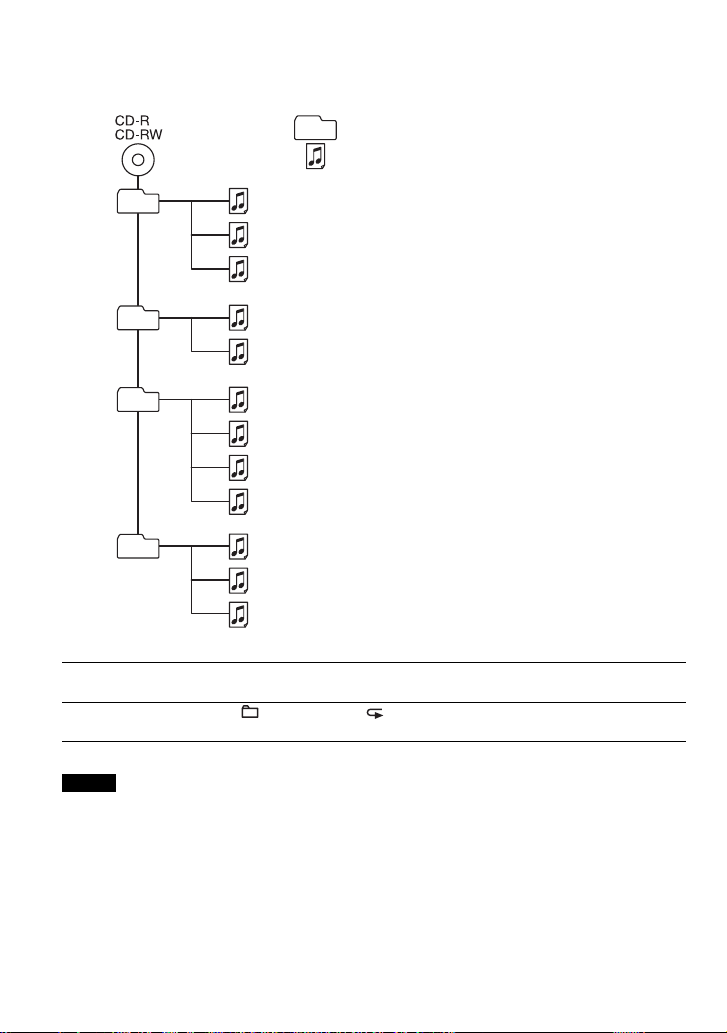
Example of group structure and playing order (MP3 CD)
The playing order of groups and files is as follows:
CD-R
CD-RW
1
1
Group
MP3 file
2
3
2
File mode (normal play)
Plays all MP3 files from 1, 2, 3...9, 0.
Group mode (when selected “ ” using P MODE/ (see page 18))
Plays all MP3 files in the selected group.
(Example: If you select group 3, the CD player plays file 4. If you select group 4,
the CD player plays files 5 and 6.)
3
4
4
5
6
Playing an audio CD or ATRAC3plus/ATRAC3/MP3 files
5
6
7
8
9
q;
Notes
•A group that does not include an MP3 file is skipped.
• Maximum number of groups: 100
Maximum number of files: 400
• Maximum directory levels: 8
• When referring to MP3 CDs, “group” is equivalent to an “album” and “file” is equivalent to a “track.”
17-GB
Page 18
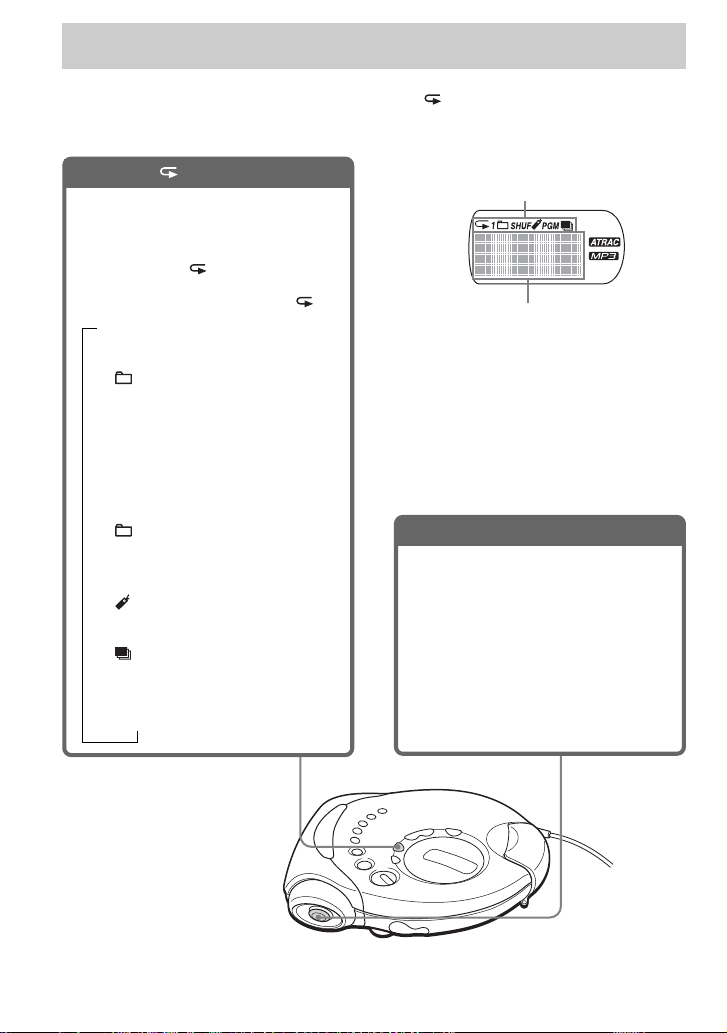
Playback options
You can enjoy various playback options using P MODE/ (play mode/repeat) and the 4-way
control key.
P MODE/ button
If you press the button during playback,
you can change the play mode.
During playback, if you press and hold
the button until “ ” appears, you can
play tracks repeatedly in the play mode
that was selected using P MODE/ .
t No indication
(Normal play)
r
1
“ ”*
(Play all files in a selected group)
r
“1”
(Play a single track)
r
“SHUF”
(Play tracks in random order)
r
“ SHUF”*
(Play files in a selected group in
random order)
“ ”*
(Play tracks with Bookmarks)
“ ”*
(Play play lists*4 selected)
“PGM”*
(Play tracks in your favorite order)
1
r
2
r
3
r
5
Display
Play mode
CD text information, ATRAC3plus/ATRAC3/
MP3 file information, playing time, etc. are
displayed.
4-way control key
• Push the 4-way control key
toward > or ..
You can select tracks, files or groups
you want. You can also select a play
list you want.
• Push the control key toward u.
You can add Bookmarks and also start
bookmark track play and play list
play. You can also enter selected
tracks for PGM play.
*1 ATRAC/MP3 CD only
*2 Only when Bookmarks have been
added to the tracks/files
*3 MP3 CD only
*4 Play lists (m3u) recorded in MP3
format only
*5 During playback, “PGM”
appears only when certain
tracks or files have been
stored in memory.
18-GB
Page 19

Playing tracks in random order (Shuffle play)
During playback, press P MODE/ repeatedly until “SHUF” appears.
When playing ATRAC3plus/ATRAC3/MP3 files
In shuffle mode, the CD player plays all files on a CD in random order.
Playing all files in a selected group in random order (Group shuffle play) (ATRAC/MP3 CD only)
During playback, press P MODE/ repeatedly until “ SHUF” appears.
When playing ATRAC3plus/ATRAC3/MP3 files
The CD player plays all files in a selected group in random order.
Playback options
19-GB
Page 20
Playing your favorite tracks by adding Bookmarks (Bookmark track play)
While playing an audio CD
You can add Bookmarks to up to 99 tracks for each CD. You can use this function for up to 10
CDs.
While playing an ATRAC CD
You can add Bookmarks to up to 999 tracks for each CD (up to 5 CDs).
While playing an MP3 CD
You can add Bookmarks to up to 400 tracks for each CD (up to 10 CDs).
To add Bookmarks
1 During playback of the track to which you want to add a Bookmark, push the 4-way control
key toward u and hold it until “ (Bookmark)” flashes in the display.
When the Bookmark has been added successfully, “ ” flashes slower.
2 Repeat step 1 to add Bookmarks to the tracks you want.
To listen to tracks with Bookmarks
1 Press P MODE/ repeatedly until “ ” flashes.
2 Push the 4-way control key toward u.
“ ” lights up in the display and the playback of the tracks with the Bookmarks starts.
To remove the Bookmarks
During playback of a track with a Bookmark, push the 4-way control key toward u and hold it
until “ ” disappears from the display.
To check tracks with Bookmarks
During playback of tracks with Bookmarks, “ ” flashes slowly in the display.
Notes
• During playback of tracks with Bookmarks, tracks are played in order of track number, and not in the order
you added the Bookmarks.
• If you try to add Bookmarks to tracks on an 11th CD (on a 6th CD when playing ATRAC CDs), the
Bookmarks of the CD you played back first will be erased.
• If you remove all power sources, all Bookmarks stored in memory will be erased.
• If you continue playing the CD player on the rechargeable batteries without charging the batteries even
though “Lo batt” is displayed, all Bookmarks stored in memory will be erased.
20-GB
Page 21
Playing your favorite play lists (m3u play list play)
(MP3 CD only)
You can play your favorite m3u play lists.*
* An “m3u play list” is a file for which an MP3 file playing order has been encoded. To use the play list
function, record MP3 files on a CD-R/RW using encoding software that supports the m3u format.
During playback, press P MODE/
1
repeatedly until “ ” appears.
Play list
Push the 4-way control key toward
2
. or > to select a play list you
want.
Push the 4-way control key toward u.
3
Note
You can only play the top two play lists displayed on your screen on this CD player.
Playback options
21-GB
Page 22
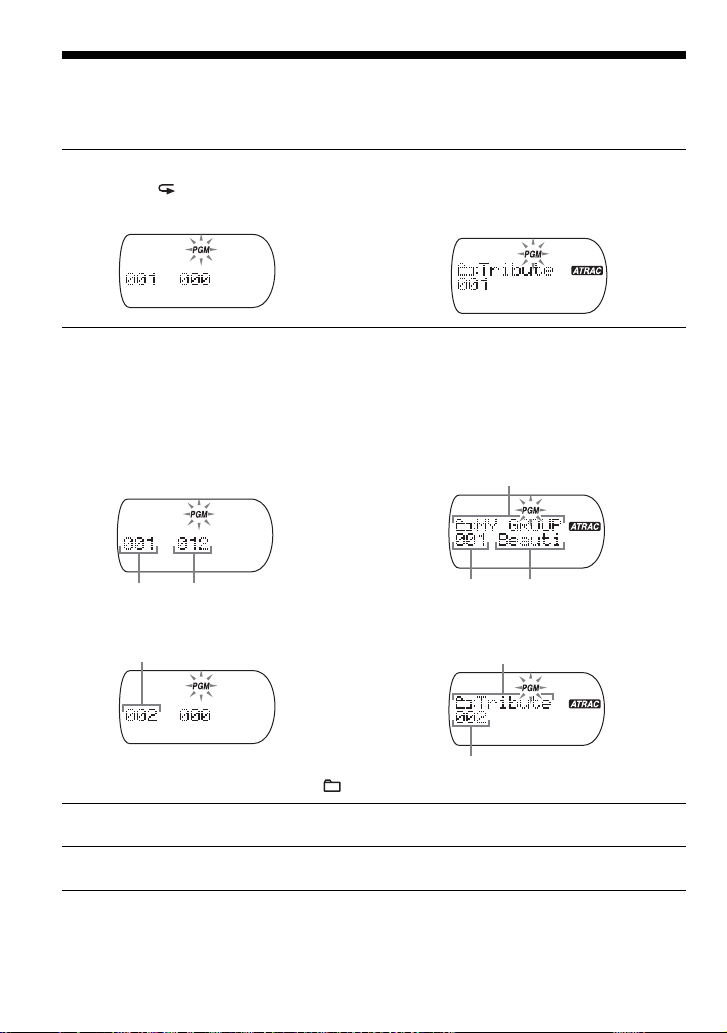
Playing tracks in your favorite order (PGM play)
You can program the CD player to play up to 64 tracks (“files” when playing an ATRAC/MP3
CD) in your favorite order.
During stop, press DISPLAY. While the indications are displayed, press
1
P MODE/ repeatedly until “PGM” appears.
Audio CD
Push the 4-way control key toward . or > to select your favorite track or
2
file, then push the control key toward u and hold it until the playing order
increases.
The playing order increases by one.
Audio CD
ATRAC/MP3 CD
ATRAC/MP3 CD*
Group name
Track numberPlaying order
Playing order
mm
Playing order
*You can also select another group using + or –.
Repeat step 2 to select the tracks or files in your favorite order.
3
Push the 4-way control key toward u to start PGM play.
4
22-GB
Group name
Playing order
File name
Page 23

To check the program
During programming:
Push the 4-way control key toward u and hold it until the playing order and the track
number programmed appear in the display.
During stop:
Press DISPLAY. While the indications are displayed, press P MODE/ repeatedly until
“PGM” flashes, then push the 4-way control key toward u and hold it until the playing order
and the track number programmed appear.
Each time you push the 4-way control key toward u and hold it, the next playing order and the
next track number programmed appear.
Notes
• When you finish entering the 64th track in step 2, the first track selected appears in the display.
• If you select more than 64 tracks, the first tracks selected are erased.
When playing ATRAC3plus/ATRAC3/MP3 files
In PGM mode, you can program up to 64 files the same as you would for audio CD tracks.
Playback options
23-GB
Page 24
Using the radio
Once you’ve stored your favorite stations, you can easily tune in the station with any band and
frequency setting by pressing one of the 1 - 5 buttons.
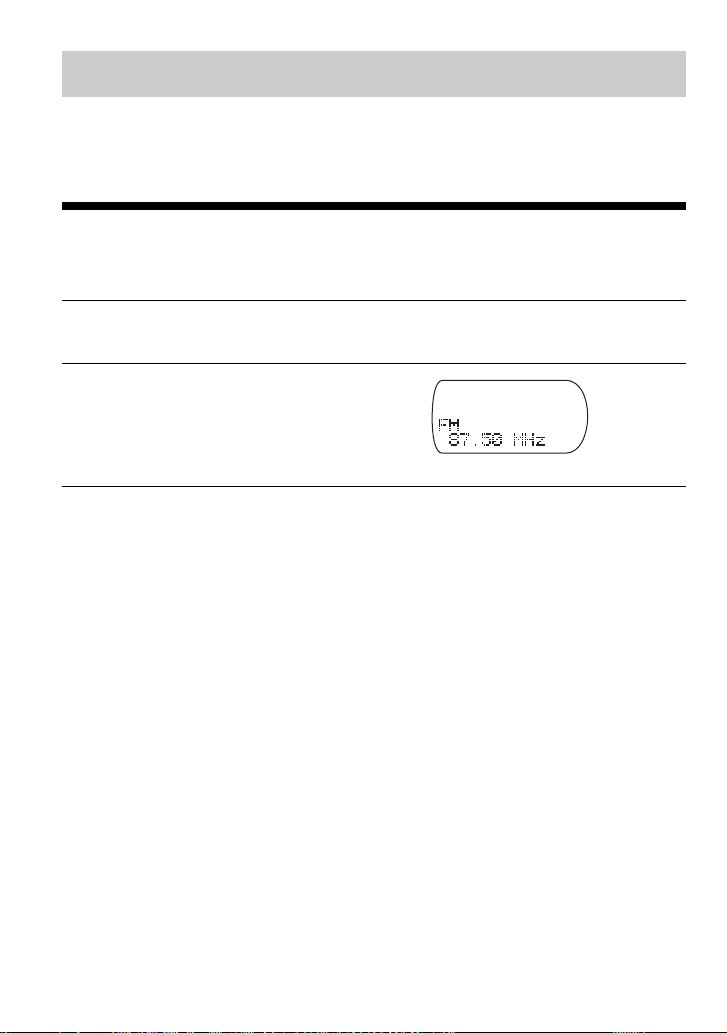
Listening to the radio
You can enjoy FM and AM programs.
Press FM or AM to select the band (direct power-on).
1
Press TUNING + or – to tune in the
2
station you want and adjust the
volume.
To turn off the radio
Push the 4-way control key toward x•CHG (RADIO OFF).
To tune in the station quickly
Press and hold TUNING + or – in step 2 until the frequency digits begin to change in the display.
The CD player automatically scans the radio frequencies and stops when it finds a clear station.
24-GB
Page 25
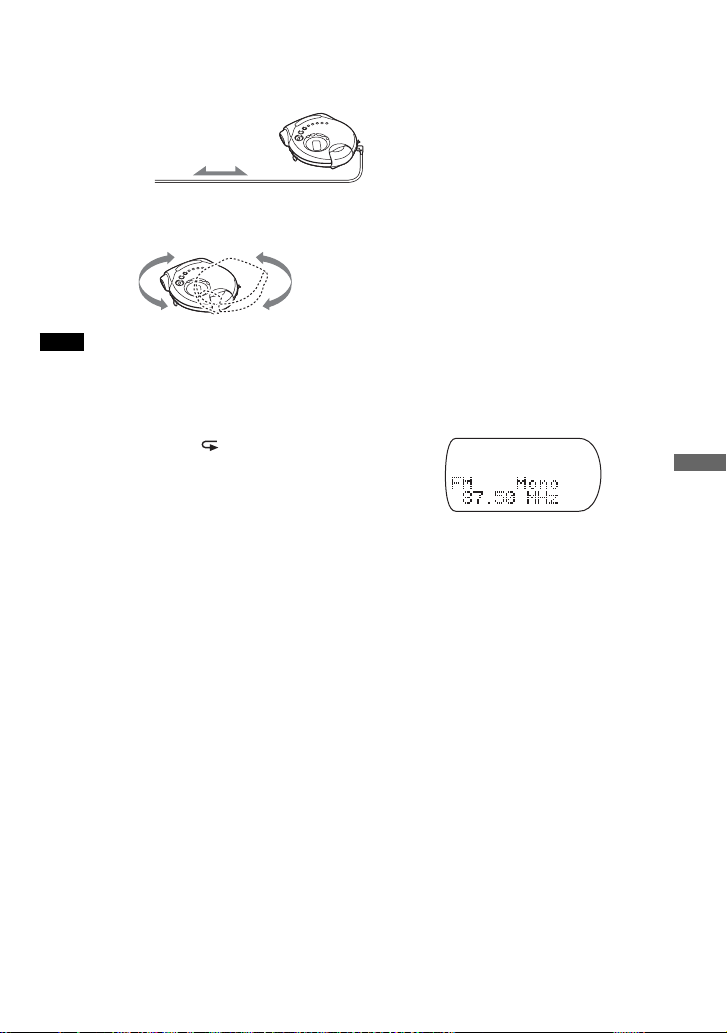
To improve broadcast reception
For FM, extend the headphones/earphones cord.
Headphones or
earphones
For AM, reorient the CD player itself.
Note
Keep the headphones/earphones connected to the i jack of the CD player. The headphones/earphones cord
works as the FM antenna.
If it is hard to hear the FM broadcast
Press and hold P MODE/ (MONO/ST) until
“Mono” appears in the display.
The noise will be reduced but the radio will play
in monaural.
When listening to the radio on batteries
If you connect the external power source plug to the DC IN 4.5 V jack of your CD player, the CD
player will turn off. Turn it on by pressing FM or AM to continue listening to it.
Using the radio
25-GB
Page 26
Presetting your favorite radio stations
You can store your favorite radio stations into the CD player’s memory. You can store up to 5
stations with any band and frequency setting.
Tune in the station you want.
1
Press and hold one of the 1 - 5 buttons that you want to store the new station
2
on for 2 seconds or more.
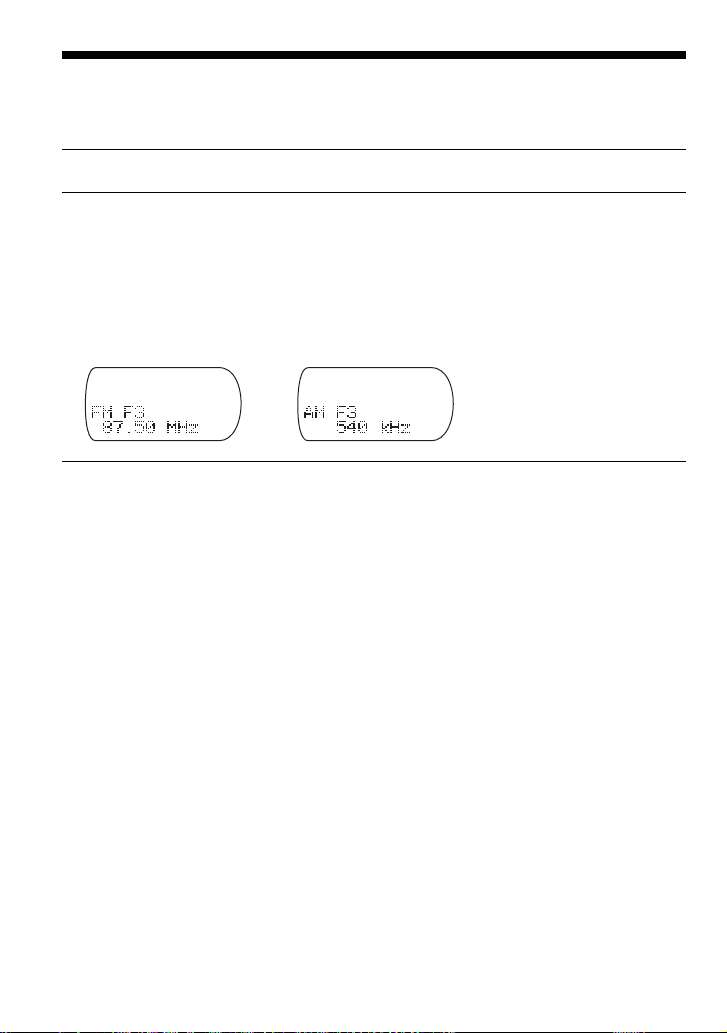
When the station is preset successfully, the beep sounds and the indication “F1,” “F2,” “F3,”
“F4” or “F5” appears in the display. The new station replaces the old one.
Example:
FM: AM:
To play your favorite stations
Press one of the 1 - 5 buttons.
To cancel all preset stations
1 Disconnect the power source (AC power adaptor, rechargeable batteries or alkaline batteries).
2 While holding down DISPLAY (MEMORY), connect the power source again.
“CLEAR” keeps flashing until all preset stations are cleared, then stops flashing and
disappears from the display.
26-GB
Page 27
Presetting radio stations
You can preset up to 40 stations: 30 for FM and 10 for AM.
Press FM or AM to select the band (direct power-on).
1
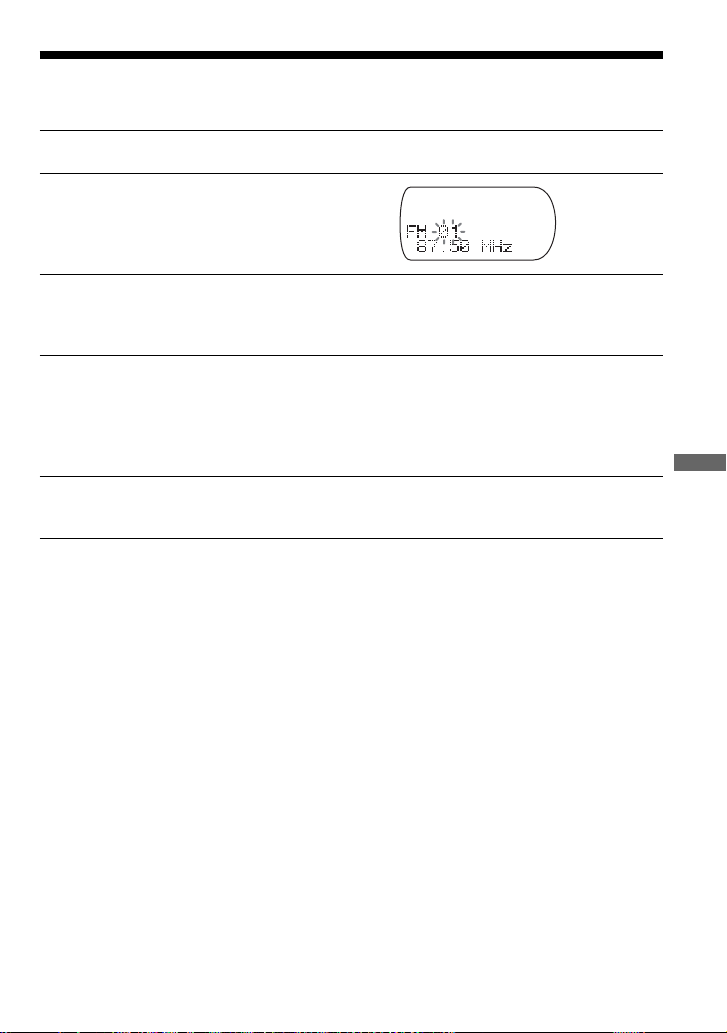
Press FM or AM for 2 seconds or more.
2
Preset number 1 will flash in the display.
Press DISPLAY (MEMORY) for 2 seconds or more.
3
The CD player starts scanning the stations from the lower frequencies and stops for about 3
seconds when a station is received.
If you want to preset the received station, press DISPLAY (MEMORY) while the
4
preset number is flashing.
The received station is preset on the preset number 1 and the CD player starts scanning for
the next receivable station. If you do not press DISPLAY (MEMORY) within the 3 seconds,
the CD player will start scanning for the next receivable station without storing the station.
Repeat step 4 until all receivable stations are preset.
5
If the stations have already been stored, the newly preset stations will replace the old ones.
To stop scanning
• Press FM or AM for 2 seconds or more.
• Push the 4-way control key toward x•CHG (RADIO OFF). The radio is turned off at the same
time.
Using the radio
To play preset stations
1 Press FM or AM.
2 Push the 4-way control key toward . or > to tune in a stored station.
(Continued)
27-GB
Page 28

To preset stations manually
If the stations cannot be preset automatically, preset the stations manually.
1 Press FM or AM to select the band (direct power-on).
2 Press FM or AM for 2 seconds or more to enter the
preset mode.
The preset number 1 will flash in the display.
3 While the preset number 1 is flashing, tune in a station you want by pressing TUNING + or –,
and select a preset number by pushing the 4-way control key toward . or >.
4 To store, press DISPLAY (MEMORY) while the preset number is flashing.
If there was a station stored on this preset number, the newly preset station will replace the old
one and the preset number increases by one.
5 To continue storing, repeat steps 3 and 4.
Note
If you cannot complete step 3 or 4 while the preset number is flashing in the display, repeat from step 2.
To stop storing
• Press FM or AM for 2 seconds or more.
• Push the 4-way control key toward x•CHG (RADIO OFF).
The radio is turned off at the same time.
To play preset stations
1 Press FM or AM.
2 Push the 4-way control key toward . or > to tune in a stored station.
28-GB
Page 29

B
Available features
The G-PROTECTION function
The G-PROTECTION function has been
developed to provide excellent protection
against sound skipping while jogging.
When you set the G-PROTECTION switch
on your CD player to “2,” the GPROTECTION function will be enhanced
compared to “1.”
To walk with the CD player and enjoy high
quality CD sound using the Gfunction, set the G-PROTECTION switch to
“1.” While taking harder exercise, it is
recommended that you set it to “2.”
Note
Sound may skip:
– if the CD player receives stronger continuous
shock than expected,
– if a dirty or scratched CD is played or
– when using poor-quality CD-Rs/CD-RWs or
if there is a problem with the original recording
device or application software.
PROTECTION
Checking the time remaining on the CD and the number of tracks left (audio CD)
Each time you press DISPLAY, the display
changes as follows.
For an audio CD containing CD text
information, information in parentheses also
appears.
B
Track number and elapsed playing time
(name of the current track)
r
Track number and remaining time of the
current track
(name of the current track/artist name)
r
The number of tracks left* and the time
remaining on the CD*
(album name/artist name)
* Not displayed during Single play, Shuffle play or
Bookmark track play.
Available features
29-GB
Page 30
Checking information
on a CD with
ATRAC3plus/ATRAC3/
MP3 files
You can check information on a CD with
ATRAC3plus/ATRAC3/MP3 files using
DISPLAY.
You can also check ID3 tag information if
the file has that information stored.
Emphasizing the bass
sound
You can emphasize the bass-boosted sound.
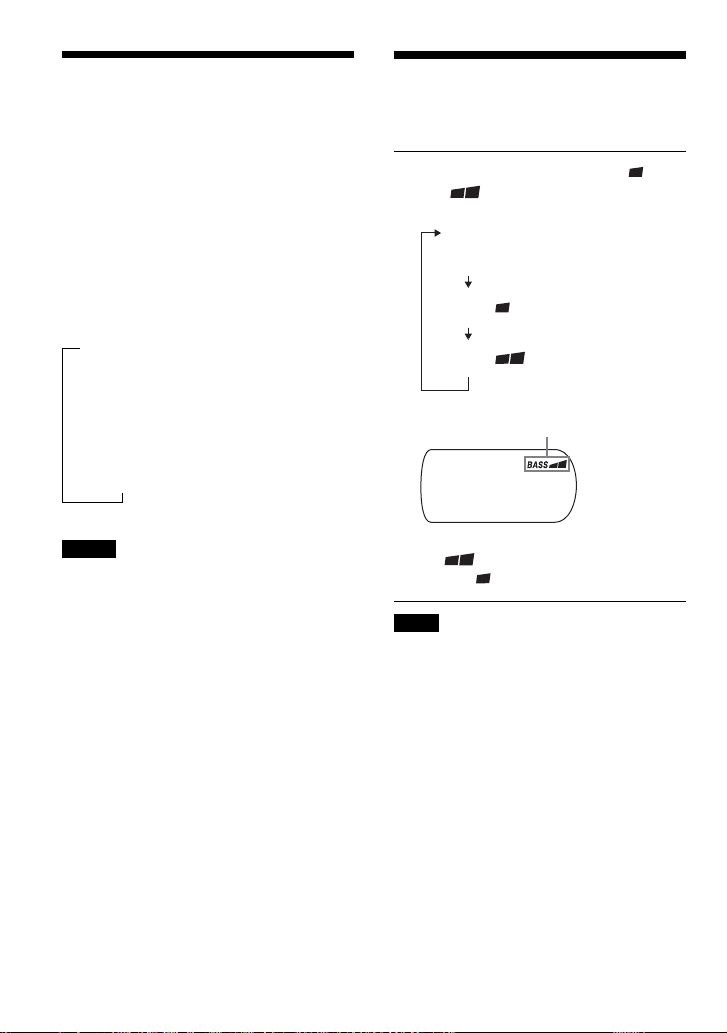
Press SOUND to select “BASS ” or
“BASS .”
(SOUND)
No indication
(Normal play)
Each time you press DISPLAY, the display
changes as follows:
B
File name, group name and elapsed
playing time
r
Artist name, CODEC information*,
remaining time of the current file
r
The total number of groups and the total
number of files
*Variable bit rate and sampling frequencies
Notes
• If the group does not have a group name,
“ROOT” appears in the display.
• If the file does not have ID3 tag information,
“- - - -” appears in the display.
“BASS ”
“BASS ”
The selected sound mode is displayed.
“BASS ” enhances the bass sound more
than “BASS .”
Note
If the sound is distorted when using the SOUND
function, turn down the volume.
30-GB
Page 31

Protecting your hearing
(AVLS)
The AVLS (Automatic Volume Limiter
System) function keeps down the maximum
volume to protect your hearing.
Turning off the operation beep sound
You can turn off the beep sound that is heard
from your headphones/earphones when you
operate your CD player.
Press and hold SOUND until “AVLS
ON” appears in the display.
Flashes when the volume is turned up
beyond a certain level.
To turn off the AVLS function
Press and hold SOUND until “AVLS OFF”
appears in the display.
Note
If you use the SOUND function and the AVLS
function at the same time, sound may be distorted.
If this happens, turn down the volume.
Locking the controls
(HOLD)
You can lock the controls on your CD player
to prevent accidental button presses.
Slide HOLD in the direction of the
arrow.
“HOLD” flashes if you press any button
when the HOLD function is activated.
Remove the power source (AC
1
power adaptor, rechargeable
batteries or dry batteries) from the
CD player.
Connect the power source while
2
pushing the 4-way control key
toward x•CHG (RADIO OFF) for
about one second or more.
To turn on the beep sound
Remove the power source and then connect
the power source without pushing the 4-way
control key toward x•CHG (RADIO OFF).
Available features
To unlock the controls
Slide HOLD in the opposite direction of the
arrow.
31-GB
Page 32

B
Connecting your CD player
Connecting a stereo system
You can listen to CDs through a stereo
system and record CDs on a cassette tape.
For details, see the instruction manual that
comes with the connected device.
Be sure to turn off all connected devices
before making connections.
to i
Adjust the volume.
Connecting cord
(not supplied)
Right (red)
Left (white)
Notes
• Before you play a CD, turn down the volume of
the connected device to avoid damaging the
connected speakers.
• Use the AC power adaptor for recording. If you
use the rechargeable batteries or dry batteries as a
power source, batteries may become completely
depleted during recording.
• Adjust the volume properly on the CD player and
the connected device so that the sound will not be
distorted or noisy.
About the G-PROTECTION function
when using the connecting cord
To record high quality CD sound, set the GPROTECTION switch to “1.”
32-GB
Stereo system,
cassette recorder,
radio cassette
recorder, etc.
Page 33

B
Connecting to a power source
You can use the following power sources:
•AC power adaptor (see “Playing an audio
CD or ATRAC3plus/ATRAC3/MP3 files”)
• Rechargeable batteries
• LR6 (size AA) alkaline batteries
For the battery life, see “Specifications.”
Using the batteries
Use only the following batteries for your CD
player.
Rechargeable batteries (not supplied)
Charge the rechargeable batteries before
using them for the first time.
• NH-WM2AA (NH-WMAA × 2)
Dry batteries
• LR6 (size AA) alkaline batteries
To insert the batteries
Open the battery compartment lid
1
inside your CD player.
Insert two batteries by matching
2
the 3 to the diagram in the battery
compartment and close the lid
until it clicks into place.
Insert # end first
(for both batteries).
To charge the rechargeable
batteries (not supplied)
1 Connect the AC power adaptor to the DC
IN 4.5 V jack of your CD player and an
AC outlet.
2 Push the 4-way control key toward
x•CHG (RADIO OFF) to start charging.
The CD player charges the batteries. The
indicator sections of light up in
succession and “Charging” appears in the
display. When the batteries are
completely charged, “Charging” and the
indicator get turned off.
If you push the 4-way control key toward
x•CHG (RADIO OFF) after the charge
has already been completed, the
indicator flashes and “FULL” appears in
the display.
3 Disconnect the AC power adaptor.
Connecting to a power source
To remove the batteries
Remove the batteries as illustrated below.
(Continued)
33-GB
Page 34

Using the batteries
To check the remaining power of the
batteries
You can check it in the display.
Replace the batteries when “ ” flashes.
t t t t t
Lo batt*
* Beep sounds.
Notes
• The indicator sections of roughly shows
the remaining battery power. One section does
not always indicate one-fourth of the battery
power.
• Depending on operating conditions, the indicator
sections of
may increase or decrease.
When to replace the rechargeable
batteries
If the battery life becomes shorter by about
half, replace the batteries with new
rechargeable batteries.
Notes on the rechargeable batteries
•To keep the original battery capacity for a
long time, charge the batteries only when
they are completely depleted.
• If the battery is new or has not been used
for a long time, it may not be charged
completely until you charge and discharge
it several times.
• When carrying the rechargeable batteries,
use the battery carrying case to prevent
unexpected heat. If the rechargeable
batteries and the metallic objects get
contacted, heat or fire may occur due to a
short circuit.
To attach the battery compartment lid
If the battery compartment lid is detached by
an accidental drop, excessive force, etc.,
attach it as illustrated below.
Notes on using the dry batteries
• Be sure to remove the AC power adaptor.
• When the batteries are depleted, replace
both batteries with new ones.
34-GB
Page 35

Notes on the power source
Disconnect all power sources when the CD
player is not used for a long time.
On AC power adaptor
• Use only the AC power adaptor supplied.
If your CD player is not supplied with the
one, use the AC-E45HG AC power
adaptor. Do not use any other AC power
adaptor. It may cause a malfunction.
Polarity of the plug
• Do not touch the AC power adaptor with
wet hands.
• Connect the AC power adaptor to an easily
accessible AC outlet. Should you notice an
abnormality in the AC power adaptor,
disconnect it from the AC outlet
immediately.
On rechargeable batteries
and dry batteries
• Do not charge the dry batteries.
• Do not throw the batteries into fire.
• Do not carry the batteries with coins or
other metallic objects. It can generate heat
if the positive and negative terminals of the
battery are accidentally contacted by a
metallic object.
• Do not mix rechargeable batteries with dry
batteries.
• Do not mix new batteries with old ones.
• Do not use different types of batteries
together.
• When the batteries are not to be used for a
long time, remove them.
• If battery leakage occurs, wipe off any
deposit in the battery compartment, and
install new batteries. In case the deposit
adheres to you, wash it off thoroughly.
Connecting to a power source
35-GB
Page 36

B
Additional information
Precautions
On safety
• Should any solid objects or liquid fall into
the CD player, unplug it and have it
checked by qualified personnel before
operating it any further.
• Do not put any foreign objects in the DC
IN 4.5 V (external power input) jack.
On the CD player
•Keep the lens on the CD player clean and
do not touch it. If you do so, the lens may
be damaged and the CD player will not
operate properly.
• Do not put any heavy object on top of the
CD player. The CD player and the CD may
be damaged.
• Do not leave the CD player in a location
near heat sources, or in a place subject to
direct sunlight, excessive dust or sand,
moisture, rain, mechanical shock,
unleveled surface, or in a car with its
windows closed.
• If the CD player causes interference to the
radio or television reception, turn off the
CD player or move it away from the radio
or television.
• Discs with non-standard shapes (e.g.,
heart, square, star) cannot be played on this
CD player. Attempting to do so may
damage the CD player. Do not use such
discs.
On handling CDs
•To keep the CD clean, handle it by its
edge. Do not touch the surface.
• Do not stick paper or tape onto the CD.
Not these ways
• Do not expose the CD to direct sunlight or
heat sources such as hot air ducts. Do not
leave the CD in a car parked under direct
sunlight.
On headphones/earphones
Road safety
Do not use headphones/earphones while
driving, cycling, or operating any motorized
vehicle. It may create a traffic hazard and is
illegal in some areas. It can also be
potentially dangerous to play your headsets
at high volume while walking, especially at
pedestrian crossings. You should exercise
extreme caution or discontinue use in
potentially hazardous situations.
Preventing hearing damage
Avoid using headphones/earphones at high
volume. Hearing experts advise against
continuous, loud and extended play. If you
experience a ringing in your ears, reduce
volume or discontinue use.
Consideration for others
Keep the volume at a moderate level. This
will allow you to hear outside sounds and to
be considerate to the people around you.
On the water resistance
• Before unfastening the buckle to open the
lid, be sure to wipe off water, dust or sand
on the exterior of the unit. Open and close
the lid where water or sand cannot fall in
the unit, and make sure that your hands are
dry. If water or sand falls in the unit,
trouble may occur.
• When closing the lid, check that there is no
dust or sand on the rubber packing around
the lid. Then close the lid firmly with the
buckle.
• The supplied headphones are not meant to
be immersed in water or come in
continuous contact with water. If they are
accidentally dropped into water or get wet,
dry them with a soft cloth. Never use an
electric hair dryer.
36-GB
Page 37

• The supplied AC power adaptor is not
water resistant. To prevent shock hazard,
avoid using the player near water during
AC operation.
•Cover the DC IN 4.5 V jack and i jack
with the attached rubber caps when
nothing is connected to these jacks. If the
inside of the jacks are contaminated with
water or sand, rust may develop and cause
trouble.
Notes
• Since the unit is airtight, you may not be able to
open the lid when there is a sudden change in air
pressure inside the unit. This happens when the
unit is transported on a plane or moved from a
warm place to a cold place. In this case, open the
rubber cap on the DC IN 4.5 V jack.
•To prevent water from leaking in, the buckle is
designed to be slightly stiff. Be careful not to
catch a fingernail on the buckle when unfastening
the lid.
Maintenance
To clean the casing
Use a soft cloth slightly moistened in water
or a mild detergent solution. Do not use
alcohol, benzine or thinner.
To clean the headphones/
earphones plug
Keep the plug of your headphones/earphones
clean to obtain optimum sound. Wipe it with
a dry, soft cloth.
To remove any dust or sand
from the rubber packing
Any sand or dust on the rubber packing will
prevent the lid from shutting tightly, and
water may leak in. Brush off the dust once in
a while.
We recommend the replacement of the
rubber packing every year which is available
optionally at an authorized Sony service
facility.
Do not hold the player with the buckle
by itself. Doing so may damage the
unit.
Additional information
37-GB
Page 38

Troubleshooting
Should any problem persist after you have checked these symptoms, consult your nearest Sony
dealer.
CD player
Symptom
The volume does not
increase even if you push the
VOL control in the + direction
repeatedly.
No sound, or noise is heard.
Certain files cannot be
played.
The playing time is too short
when powered with the dry
batteries.
The playing time is too short
when powered with the
rechargeable batteries.
“Lo batt” appears in the
display. The CD does not
play.
“HI dc In” appears in the
display.
Cause and/or corrective actions
c If “AVLS” flashes in the display, press and hold SOUND until
“AVLS OFF” appears in the display. (page 31)
c Connect the plugs firmly. (page 12)
c Plugs are dirty. Clean the plugs with a dry soft cloth periodically.
c You tried to play files saved in a format that is not compatible with
this CD player. (page 6)
c Check that you are using alkaline batteries and not manganese
batteries. (page 33)
c Replace the batteries with new LR6 (size AA) alkaline batteries.
(page 33)
c Charge and discharge the rechargeable batteries several times.
(pages 33)
c The rechargeable batteries are used up completely. Charge the
batteries. (page 33)
c Replace the batteries with new LR6 (size AA) alkaline batteries.
(page 33)
c An AC power adaptor which is rated highter than the one supplied
or recommended is being used. Use only the AC power adaptor
supplied or recommended, or the car battery cord recommended in
“Optional accessories.” (page 42)
38-GB
Page 39

CD player
Symptom
The CD does not play or
“No disc” appears in the
display when a CD is placed
in the CD player.
“HOLD” flashes on the
display when you press a
button, and the CD does not
play.
The CD player does not start
charging.
Playback starts from the point
you stopped. (resume
function)
Rustling noise is heard from
the CD.
When using with a connected
stereo system, the sound is
distorted or noisy.
Cause and/or corrective actions
c The buttons are locked. Slide the HOLD switch back. (page 31)
c The CD is dirty or defective.
c Check that the CD is inserted with the label side up. (page 12)
c Moisture condensation has occurred.
Leave the CD player aside for several hours until the moisture
evaporates.
c Close the lid of the battery compartment firmly. (page 33)
c Make sure the batteries are inserted correctly. (page 33)
c Connect the AC power adaptor to an AC outlet securely. (page 12)
c Push the 4-way control key toward u after one second or more
has passed since the AC power adaptor was connected.
c The CD-R/RW is blank.
c There is a problem with the quality of the CD-R/RW, recording
device, or application software.
c Files in two or more formats have been recorded on the CD-R/RW.
(pages 6, 7)
c The buttons are locked. Slide the HOLD switch back. (page 31)
c While the CD player is stopped, push the 4-way control key toward
x•CHG (RADIO OFF). (page 33)
c
The resume function is working. To start play from the first track,
push the 4-way control key toward u during stop until the first
track starts playing, or open the lid of the CD player. Or remove all
power sources, then insert the batteries or connect the AC power
adaptor again.
(pages 12, 13, 33)
c
Close the lid of the battery compartment firmly. (page 33)
c
Adjust the volume of the CD player and the connected device. (page
32)
(Continued)
39-GB
Additional information
Page 40

Troubleshooting
CD player
Symptom
During playback of an
CD or
MP3 CD, the CD does
not rotate but you can hear
the sound normally.
“NO FILE” appears in the
display after you push the 4way control key toward u
or you close the lid of the CD
player.
When closing the lid of the
CD player, the CD starts to
rotate.
The LCD display becomes
hard to see or slows down.
“ ” is flashing quickly in
the display, and you cannot
locate the beginning of the
track or the specific point in
the track.
ATRAC
Radio
Symptom
The audio is weak or has poor
quality.
Cause and/or corrective actions
c
The CD player is designed to stop the rotation of an ATRAC CD or
MP3 CD during playback to reduce the power consumption. The
player is not malfunctioning.
c There are no ATRAC3plus/ATRAC3/MP3 files in the CD.
c A CD-RW from which the data has been erased is being used.
c The CD is dirty.
c
The CD player is reading the information on the CD. The player is
not malfunctioning.
c You are using your CD player at high temperatures (above 40°C/
104°F) or at low temperatures (below 0°C/32°F). At room
temperature, the display will return to its normal operating
condition.
c The CD player has entered the Bookmark track play. Press
P MODE/ repeatedly until “ ” disappears from the display.
Cause and/or corrective actions
c Charge the rechargeable batteries. (page 33)
c Replace the batteries with new LR6 (size AA) alkaline batteries.
(page 33)
c Move the CD player away from the TV.
40-GB
Page 41

Specifications
CD player
System
Compact disc digital audio system
Laser diode properties
Material: GaAlAs
Wavelength: λ = 780 nm
Emission duration: Continuous
Laser output: Less than 44.6 µW
(This output is the value measured at a distance
of 200 mm from the objective lens surface on
the optical pick-up block with 7 mm aperture.)
D-A conversion
1-bit quartz time-axis control
Frequency response
20 - 20 000 Hz
307)
Output (at 4.5 V input level)
Headphones (stereo minijack)
Approx.5 mW + Approx. 5 mW at 16 Ω
(Approx. 1.5 mW + Approx. 1.5 mW
at 16 Ω)*
*For the customers in Europe
Radio
Frequency range
FM: 87.5 - 108.0 MHz
AM: 531 - 1 602 kHz
Antenna
FM: Headphones/earphones cord antenna
AM: Built-in ferrite bar antenna
General
Power requirements
For the area code of the model you
purchased, check the upper left side of the
bar code on the package.
• Sony NH-WM2AA rechargeable batteries:
1.2 V DC × 2
•Two LR6 (size AA) batteries: 1.5 V DC × 2
•AC power adaptor (DC IN 4.5 V jack):
U, U2, CA, CA2, E92, MX2, TW2 and
CA2/C models: 120 V, 60 Hz
+1–2
dB (measured by JEITA CP-
CED, CED/4, CE7, CE7/C, EE, EE1, E, E13
and E13/2 models: 220 - 230 V, 50/60 Hz
CEK model: 230 V, 50 Hz
AU2 model: 240 V, 50 Hz
EU8, EU8/C, JE.W, E18, KR4 and EE8
models: 100 - 240 V, 50/60 Hz
HK4 model: 230 V, 50 Hz
CNA model: 220 V, 50 Hz
Battery life*1 (approx. hours)
(When you use the CD player on a flat and stable
surface)
Playing time varies depending on how the CD
player is used.
When using two Sony alkaline batteries
LR6 (SG) (produced in Japan)
G-PROTECTION function
“1” “2”
Audio CD 48 43
ATRAC3plus files*
MP3 files*
RADIO ON 62
*1 Measured value by the standard of JEITA
(Japan Electronics and Information Technology
Industries Association)
*2 When recorded at 48 kbps or 64 kbps
*3 When recorded at 128 kbps
2
3
75 75
70 70
Operating temperature
5°C - 35°C (41°F - 95°F)
Dimensions (w/h/d) (excluding
projecting parts and controls)
Approx. 148.4 × 36.7 × 134.0 mm
(5 7⁄8 × 1 1⁄2 × 5 3⁄8 in.)
Mass (excluding accessories)
Approx. 345 g (12.2 oz)
US and foreign patents licensed from Dolby
Laboratories.
Design and specifications are subject to change
without notice.
Additional information
41-GB
Page 42

Optional accessories
AC power adaptor AC-E45HG
Active speaker system SRS-Z1
Car battery cord DCC-E345
Car battery cord with car connecting pack
Car connecting pack CPA-9C
Rechargeable battery NH-WM2AA
Earphones (except for the customers in France)
Earphones (for the customers in France)
Your dealer may not handle some of the
accessories listed above. Please ask the
dealer for detailed information about the
accessories in your country.
DCC-E34CP
MDR-E931LP
MDR-EX71SL
MDR-Q55SL
MDR-E808LP
42-GB
Page 43

43-GB
Page 44

REPRODUCTOR PORTATIL DE
DISCO COMPACTO
POR FAVOR LEA DETALLADAMENTE
ESTE MANUAL DE INSTRUCCIONES
ANTES DE CONECTAR Y OPERAR
ESTE EQUIPO.
RECUERDE QUE UN MAL USO DE SU
APARATO PODRÍA ANULAR LA
GARANTÍA.
ADVERTENCIA
Para evitar el riesgo de
incendios o electrocución, no
exponga el adaptador de
alimentación de ca a la lluvia o
a la humedad.
No instale el aparato en un espacio
cerrado, como una estantería para libros o
un armario empotrado.
Para evitar incendios, no cubra la ventilación
del aparato con periódicos, manteles,
cortinas, etc. No coloque velas encendidas
sobre el aparato.
Para evitar el riesgo de incendios o descargas
eléctricas, no coloque recipientes llenos de
líquido, como jarrones, sobre el aparato.
Es posible que en ciertos países se regule el
desecho de la pila que se utiliza para
alimentar este producto. Consulte con las
autoridades locales.
ATRAC3plus y ATRAC3 son marcas
comerciales de Sony Corporation.
PRECAUCIÓN
•CUANDO EL DISPOSITIVO ESTÁ
ABIERTO SE EMITE RADIACIÓN
LÁSER INVISIBLE
• NO MIRE FIJAMENTE EL HAZ DE
LUZ NI VISUALICE EL DISPOSITIVO
DIRECTAMENTE CON
INSTRUMENTOS ÓPTICOS
La validez de la marca CE se limita
únicamente a aquellos países en los que la
legislación la impone, especialmente los
países del EEE (Espacio Económico Europeo).
2-ES
Page 45

Índice
Disfrute con su ATRAC CD
Walkman
Cree discos CD de ATRAC originales......... 4
Fuentes de música que pueden reproducirse
en este reproductor de CD ....................... 6
ATRAC3plus y ATRAC3............................. 6
Archivos MP3.............................................. 6
Diferencia entre ATRAC3plus/ATRAC3 y
MP3 ......................................................... 8
Procedimientos iniciales
Localización de los controles ...................... 9
Comprobación de los accesorios
suministrados......................................... 11
Reproducción de un CD de
audio o de archivos
ATRAC3plus/ATRAC3/MP3
1.Conecte el reproductor de CD. ..............12
2.Inserte un CD. ....................................... 12
3.Reproduzca un CD. ............................... 13
Opciones de reproducción
Reproducción de pistas en orden aleatorio
(reproducción aleatoria) ........................ 19
Reproducción de todos los archivos de un
grupo seleccionado en orden aleatorio
(reproducción aleatoria de grupo)
(sólo CD de ATRAC/MP3) ................... 19
Reproducción de las pistas favoritas
mediante la inclusión de marcas
(reproducción de pistas con marcas) ..... 20
Reproducción de las listas favoritas
(reproducción de listas de reproducción
m3u) (sólo CD de MP3) ........................21
Reproducción de pistas en el orden que se
desee (reproducción PGM) ................... 22
Uso de la radio
Recepción de la radio ................................ 24
Presintonización de sus emisoras de
radio favoritas........................................ 26
Presintonización de las emisoras de
radio....................................................... 27
Funciones disponibles
Función G-PROTECTION ........................ 29
Comprobación del tiempo restante del
CD y del número de pistas restantes
(CD de audio) ........................................29
Comprobación de la información de
un CD con archivos ATRAC3plus/
ATRAC3/MP3 ....................................... 30
Potenciación de los graves (SOUND) ....... 30
Protección de los oídos (AVLS) ................ 31
Bloqueo de los controles (HOLD)............. 31
Desactivación de los pitidos ...................... 31
Conexión del reproductor de CD
Conexión de un sistema estéreo ................ 32
Conexión a una fuente de
alimentación
Para utilizar las pilas.................................. 33
Notas sobre la fuente de alimentación....... 35
Información complementaria
Precauciones .............................................. 36
Mantenimiento........................................... 37
Solución de problemas .............................. 38
Especificaciones ........................................ 41
Accesorios opcionales ............................... 42
3-ES
ES
Page 46

Disfrute con su ATRAC CD Walkman
Gracias por la compra de D-NS921F. Este CD Walkman se denomina “ATRAC CD Walkman”
porque permite reproducir “CD de ATRAC”.
Cree discos CD de ATRAC originales
Ahora puede crear sus propios CD de ATRAC.
Es muy sencillo. Sólo tiene que realizar los pasos 1, 2 y 3.
Paso 1
Instalación
Instale el software
“SonicStage Simple Burner”
suministrado.
Cómo utilizar SonicStage Simple Burner
Consulte el manual “SonicStage Simple Burner” suministrado.
Paso 2
Grabación
Cree una imagen de disco y
grábela en un CD-R/RW mediante
el ordenador.
CD de audio Archivos MP3
SonicStage Simple Burner convierte los datos
de audio al formato ATRAC3plus/ATRAC3.
o
,
4-ES
Page 47

¿Qué es un CD de ATRAC?
Un CD de ATRAC es un CD-R/RW en el cual se han grabado datos de audio comprimidos en
formato ATRAC3plus/ATRAC3. En un CD-R/RW pueden grabarse aproximadamente 30 CD de
audio.* También pueden grabarse archivos MP3 si se convierten al formato ATRAC3plus/
ATRAC3.
* Cuando el tiempo total estimado de reproducción de un CD (álbum) es de 60 minutos y graba en un
CD-R/RW de 700 MB a 48 kbps en formato ATRAC3plus.
Paso 3
Audición
En el ATRAC CD Walkman podrá
escuchar sus propios CD de
ATRAC,
ATRAC CD
Disfrute con su ATRAC CD Walkman
¿Qué es el formato ATRAC3plus/
ATRAC3?
Consulte las páginas 6 - 8 de este manual.
así como CD de audio.
5-ES
Page 48

Fuentes de música que pueden reproducirse en este reproductor de CD
En este reproductor de CD puede disfrutar de las 3 fuentes de música siguientes:
• CD de audio
• Archivos en formato ATRAC3plus/ATRAC3
• Archivos MP3
Formatos de disco compatibles
Puede utilizar discos con formato ISO 9660 nivel 1/2 y extensión Joliet.
ATRAC3plus y ATRAC3
“ATRAC3plus” (que significa “Adaptive Transform Acoustic Coding3plus”) es la tecnología de
compresión de audio desarrollada a partir del formato ATRAC3. La compresión del contenido de
música a aproximadamente 1/20 del tamaño original que ofrece este formato no afecta en
absoluto a la excelente calidad del sonido. Las velocidades de transferencia de bits disponibles
son de 64 kbps y 48 kbps.
“ATRAC3” (que significa “Adaptive Transform Acoustic Coding3”) es la tecnología de
compresión de audio que satisface los requisitos de sonido de alta calidad y velocidades de
compresión elevadas. El formato ATRAC3 puede comprimir contenido de música a
aproximadamente 1/10 del tamaño original, lo que contribuye a reducir el volumen del soporte.
Las velocidades de transferencia de bits disponibles son de 132 kbps, 105 kbps y 66 kbps.
Número de grupos y archivos que pueden utilizarse
• Número máximo de grupos: 255
• Número máximo de archivos: 999
Para obtener más información, consulte el manual “SonicStage Simple Burner” suministrado.
Nota acerca de cómo guardar archivos en el soporte
No guarde archivos con formatos distintos ni grupos innecesarios en un disco que contenga
archivos ATRAC3plus/ATRA C3.
Archivos MP3
MP3 (MPEG-1 Audio Layer3) que constituye un estándar de compresión de los archivos de
audio de Motion Picture Experts Group, un grupo de trabajo de ISO (International Organization
for Standardization, Organización internacional de estandarización), permite comprimir archivos
de audio a aproximadamente 1/10 del tamaño de datos de un disco compacto estándar. El
algoritmo de codificación de MP3 es público, por lo que existen numerosos codificadores y
descodificadores compatibles con este estándar, entre los que se incluye freeware que puede
obtenerse de forma gratuita. Por consiguiente, el uso del estándar MP3 dentro del entorno
informático está muy extendido.
6-ES
Page 49

Las principales especificaciones del formato de disco compatible son:
•Niveles de directorio máximos: 8
• Caracteres que pueden utilizarse para un nombre de archivo o carpeta:
A - Z, a - z, 0 - 9, _ (subrayado)
Notas
• Cuando asigne un nombre a un archivo, asegúrese de añadirle la extensión de archivo “mp3”.
• Si añade la extensión “mp3” a un archivo que no sea de este tipo, el reproductor no podrá reconocerlo.
• El nombre del archivo no corresponde a la etiqueta ID3*.
* La etiqueta ID3 es un formato para añadir determinada información (nombre de la pista, del álbum, del
artista, etc.) en archivos MP3.
Número de grupos y archivos que pueden utilizarse
• Número máximo de grupos: 100
• Número máximo de archivos: 400
Ajustes para el software de compresión y de escritura
• Este reproductor de CD admite los archivos MP3 que cumplan las especificaciones siguientes.
Velocidad de transferencia de bits: de 16 a 320 kbps. Frecuencias de muestreo: 32/44,1/ 48
kHz. El reproductor también admite la velocidad de bits variable (VBR, Variable Bit Rate).
Para comprimir un origen para un archivo MP3, se recomienda ajustar la velocidad de
transferencia de bits del software de compresión en “44,1 kHz”, “128 kbps” y “Constant Bit
Rate”.
•Para realizar una grabación a la capacidad máxima, ajuste el reproductor de CD en “halting of
writing”.
•Para grabar de una vez a la máxima capacidad de un soporte vacío, ajuste el reproductor en
“Disc at Once”.
Notas acerca de cómo guardar archivos en el soporte
• No guarde archivos con formatos distintos ni carpetas innecesarias en un disco que contenga
archivos MP3.
• Cuando se inserta un disco, el reproductor de CD lee toda la información de carpetas y
archivos que contiene. Si hay muchas carpetas en el disco, puede tardar cierto tiempo en
iniciarse la reproducción o comenzar la reproducción del siguiente archivo.
Disfrute con su ATRAC CD Walkman
7-ES
Page 50

Diferencia entre ATRAC3plus/ATRAC3 y MP3
Grupos y carpetas
La estructura del formato ATRAC3plus/ATRAC3 es muy sencilla. Consiste en archivos y grupos.
Un archivo equivale a una pista de un CD de audio. Un grupo es un conjunto de archivos que
equivale a un álbum. El grupo no dispone de ninguna estructura de directorios (no puede crearse
un grupo nuevo dentro de un grupo existente). Este reproductor de CD se ha diseñado para
reconocer una carpeta de archivos MP3 como un grupo, de modo que pueda reproducir los discos
CD-R/RW grabados en formato ATRAC3plus/ATRAC3 y los grabados en formato MP3 con el
mismo proceso.
Visualización del nombre de pista, etc.
Si reproduce en este reproductor un CD que contenga archivos ATRAC3plus/ATRAC3 o
archivos MP3, los nombres de las pistas, de los artistas y de los álbumes aparecerán en el visor.
Este reproductor de CD es compatible con la versión 1.1/2.2/2.3 del formato de etiqueta ID3.
Notas
• Este reproductor de CD no puede grabar música en soportes grabables como, por ejemplo, discos CD-R/RW.
• Los discos CD-R/RW grabados en formato ATRAC3plus/ATRAC3 no pueden reproducirse en el ordenador.
• La capacidad de reproducción puede variar dependiendo de la calidad del disco y del estado del dispositivo
de grabación.
8-ES
Page 51

Procedimientos iniciales
Localización de los controles
Para más información, consulte las páginas que aparecen entre paréntesis.
Reproductor de CD (parte frontal)
1 Botones 1 a 5
(página 26)
2 Botón AM
(páginas 24, 27 y 28)
3 Botón FM
(páginas 24, 27 y 28)
4 Interruptor HOLD
(página 31)
5 Tecla de control
de 4 vías
(vea más abajo)
6 Control VOL
+*/– (volumen)
(página 13)
7 Toma DC IN
4.5 V
(entrada de
alimentación
externa)
(páginas 12, 33)
8 Visor (páginas 15, 18, 21, 22, 24 - 31)
5 Tecla de control
de 4 vías
Empújela hacia
u, ., > o
x• CHG (RADIO
OFF).
Procedimientos iniciales
9 Botón SOUND
(páginas 30, 31)
q; Botón P MODE/
(modo de reproducción/
repetición) (MONO/ST)
(páginas 18 a 23 y 25)
qa Botones TUNING +/–•
+/– (páginas 13, 24
y 28)
qs Botón DISPLAY
(MEMORY)
(páginas 26 a 30)
qd Toma i
(auriculares)
(páginas 12, 32)
qf Cierre (página 12)
u**: Reproducción/pausa (páginas 13,
18, 20 - 23)
./>: AMS/buscar (páginas 13, 18,
21, 22, 27 y 28)
x•CHG (RADIO OFF):
Parada•carga (apagar la radio)
(páginas 13, 24, 27, 31 y 33)
* Junto a VOL existe un punto táctil que muestra el sentido en que se debe girar para subir el volumen.
** Existe un punto táctil junto a u.
(continuación)
9-ES
Page 52

Reproductor de CD (interior)
qg Interruptor
G-PROTECTION
(página 29)
qh Compartimiento de las pilas
(páginas 33, 34)
Uso de la correa de mano
Mientras corre, utilice la correa de mano suministrada.
1 Pase la correa por las hebillas.
2 Coloque su mano entre el reproductor y la cubierta de la correa y, a continuación, ajuste la
longitud de ésta y fíjela mediante las cintas velcro.
10-ES
Page 53

Comprobación de los accesorios suministrados
Adaptador de alimentación de ca (1) Auriculares (1)
Correa de mano (1)
CD-ROM (SonicStage Simple Burner) (1)
Manual del usuario de SonicStage Simple Burner (1)
Procedimientos iniciales
11-ES
Page 54

Reproducción de un CD de audio o de archivos ATRAC3plus/ATRAC3/MP3
1
. Conecte el reproductor de CD.
1 Conecte el adaptador de alimentación de ca.
2 Conecte los auriculares.
También puede alimentar la unidad con pilas secas o
pilas recargables (consulte la página 33).
a una toma de ca
Adaptador de
alimentación
de ca
2
. Inserte un CD.
1 Afloje el cierre.
2 Abra la tapa.
Tecla de control de
4 vías (u)
a i (auriculares)
Auriculares
a DC IN
4.5V
3 Encaje el CD en el pivote y cierre la tapa.
4 Mientras mantiene la tapa cerrada, apriete el
cierre firmemente.
Con el lado de la
etiqueta hacia arriba
12-ES
Page 55

3
. Reproduzca un CD.
Empuje la tecla de control
de 4 vías hacia u.
Ajuste el volumen.
Operaciones básicas
Para Siga este procedimiento
Reproducir (desde el punto en el que detuvo Empuje la tecla de control de 4 vías hacia u.
la reproducción) La reproducción comienza a partir del
Reproducir (desde la primera pista) Con el reproductor de CD parado, empuje la
Realizar una pausa o reanudar la reproducción Empuje la tecla de control hacia u.
después de la pausa
Detener la operación Empuje la tecla de control hacia x•CHG
Localizar el principio de la pista actual (AMS*1) Empuje la tecla de control hacia . una vez
Localizar el principio de las pistas anteriores (AMS) Empuje la tecla de control hacia .
Localizar el principio de la pista siguiente (AMS) Empuje la tecla de control hacia > una vez
Localizar el principio de las pistas posteriores (AMS) Empuje la tecla de control hacia >
Retroceder rápidamente Empuje la tecla de control hacia . y
Avanzar rápidamente Empuje la tecla de control hacia > y
Pasar a los grupos siguientes*
Volver a los grupos anteriores*
*1 Sensor de música automático
*2 Estas operaciones se pueden realizar durante la reproducción y la pausa.
*3 Una vez reproducida la última pista, puede regresar al comienzo de la primera pista empujando la tecla de
control de 4 vías hacia >. De forma similar, si está en la primera pista, puede localizar la última pista
empujando la tecla de control hacia ..
*4 Sólo al reproducir un CD de ATRAC/MP3
4
4
punto en que se detuvo.
tecla de control hacia u y manténgala en
esta posición durante 2 o más segundos.
(RADIO OFF).*
rápidamente.*
repetidamente.*
rápidamente.*
repetidamente.*
manténgala en esta posición.*
manténgala en esta posición.*
2
2
2, *3
2, *3
2, *3
2
2
Pulse + varias veces.
Pulse – varias veces.
Reproducción de un CD de audio o de archivos ATRAC3plus/ATRAC3/MP3
(continuación)
13-ES
Page 56

Extracción del CD
Extraiga el CD presionando el pivote
situado en el centro de la bandeja.
Sobre CD-R o CD-RW
Este reproductor de CD puede reproducir CD-R o CD-RW grabados en formato CD-DA*, pero
la capacidad de reproducción puede variar en función de la calidad del disco y el estado del
dispositivo de grabación.
* CD-DA es la abreviatura de Compact Disc Digital Audio, que es un estándar de grabación utilizado para los
CD de audio.
Discos de música codificados mediante tecnologías de
protección de los derechos de autor
Este producto se ha diseñado para reproducir discos que cumplen con el estándar Compact Disc (CD).
Recientemente, algunas compañías discográficas comercializan discos de música codificados
mediante tecnologías de protección de derechos de autor. Tenga en cuenta que, entre estos discos,
algunos no cumplen con el estándar CD, por lo que no podrán reproducirse mediante este producto.
14-ES
Page 57

Acerca del visor
Cuando el reproductor de CD está en funcionamiento, aparecen las siguientes indicaciones en el
visor.
También puede comprobar el tiempo restante, el nombre de la pista, etc. con el botón DISPLAY
(consulte las páginas 29 y 30).
Reproducción de un CD de audio
Número de pista Tiempo de reproducción
Reproducción de un CD de audio
que contiene información de CD
de texto
Nombre de pista
Número de pista Tiempo de reproducción
Reproducción de un CD de audio o de archivos ATRAC3plus/ATRAC3/MP3
Reproducción de un archivo
Nombre de archivo
ATRAC3plus/ATRAC3
Nombre del grupo
Número de archivo Tiempo de reproducción
Reproducción de un archivo MP3
Nombre del grupo
Número de archivo Tiempo de reproducción
Notas
• En este reproductor de CD se pueden mostrar caracteres de A - Z, a - z, 0 - 9 y el carácter _.
• Antes de reproducir un archivo, el reproductor de CD lee la información de todos los archivos y grupos del
CD, y en el visor aparece el mensaje “READING”. La lectura puede demorarse en función del contenido del
CD.
Nombre de archivo
(continuación)
15-ES
Page 58

Ejemplo de grupos y archivos ATRAC3plus/ATRAC3
Grupo
Archivo ATRAC3plus/ATRAC3
1
1
2
3
2
4
5
3
6
7
8
9
4
q;
qa
qs
Modo de archivo (reproducción normal)
Modo de grupo (cuando se selecciona “ ” mediante P MODE/ (consulte la página 18))
Reproduce todos los archivos ATRAC3plus/ATRAC3 desde 1, 2, 3...qa, qs.
Reproduce todos los archivos ATRAC3plus/ATRAC3 del grupo seleccionado.
Notas
• Número máximo de grupos: 255
Número máximo de archivos: 999
• Al hacer referencia a discos CD de ATRAC, “grupo” equivale a “álbum” y “archivo” a “pista”.
16-ES
Page 59

Ejemplo de estructura de grupo y orden de reproducción (CD
de MP3)
El orden de reproducción de los grupos y los archivos es el siguiente:
CD-R
CD-RW
1
1
Grupo
archivo MP3
2
3
4
4
5
6
5
7
8
9
6
2
Modo de archivo (reproducción normal)
Reproduce todos los archivos MP3 desde 1, 2, 3...9, 0.
Modo de grupo (cuando se selecciona “ ” mediante P MODE/ (consulte la página 18))
Reproduce todos los archivos MP3 del grupo seleccionado.
(Ejemplo: Si selecciona el grupo 3, el reproductor de CD reproduce el archivo
4. Si selecciona el grupo 4, reproduce los archivos 5 y 6.)
3
q;
Reproducción de un CD de audio o de archivos ATRAC3plus/ATRAC3/MP3
Notas
• Se omitirán los grupos que no contengan archivos MP3.
• Número máximo de grupos: 100
Número máximo de archivos: 400
•Niveles de directorio máximos: 8
• Al hacer referencia a discos CD de MP3, “grupo” equivale a “álbum” y “archivo” a “pista”.
17-ES
Page 60

Opciones de reproducción
Puede disfrutar de las diversas opciones de reproducción mediante P MODE/ (modo de
reproducción/repetición), y tecla de control de 4 vías.
Botón P MODE/
Si pulsa este botón durante la reproducción,
podrá cambiar el modo de reproducción.
Durante la reproducción, si mantiene
pulsado el botón hasta que aparezca
“ ”, podrá reproducir pistas de forma
repetida en el modo de reproducción que
seleccionó mediante P MODE/ .
B
Sin indicador
(Reproducción normal)
r
1
“ ”*
(Reproducir todos los archivos de un
grupo seleccionado)
r
“1”
(Reproducción de una sola pista)
r
“SHUF”
(Reproducir las pistas en orden aleatorio)
r
“ SHUF”*
(Reproducir todos los archivos de un
grupo seleccionado en orden aleatorio)
“ ”*
(Reproducir pistas con marcas)
“ ”*
(Reproducir una lista de
reproducción*4 seleccionada)
“PGM”*
(Reproducir pistas en el orden que desee)
1
r
2
r
3
r
5
Visualización
Modo de reproducción
Se muestra la información del CD de texto
y del archivo ATRAC3plus/ATRAC3/MP3, el
tiempo de reproducción, etc.
Tecla de control de 4 vías
• Empuje la tecla de control de 4
vías hacia > o ..
Puede seleccionar las pistas, los
archivos o los grupos que desee.
También puede seleccionar la lista de
reproducción deseada.
• Empuje la tecla de control hacia
u.
Puede añadir marcas e iniciar la
reproducción de pistas con marcas y
de listas de reproducción. También
puede introducir pistas seleccionadas
para la reproducción PGM.
*1 Sólo CD de ATRAC/MP3
*2 Sólo si se han añadido marcas
a las pistas o a los archivos
*3 Sólo CD de MP3
Sólo listas de reproducción
*4
(m3u) grabadas en
formato MP3
*5 Durante la reproducción,
“PGM” sólo aparece si se han
almacenado determinadas pistas
o archivos en la memoria.
18-ES
Page 61

Reproducción de pistas en orden aleatorio
(reproducción aleatoria)
Durante la reproducción, pulse P MODE/ varias veces hasta que aparezca
“SHUF”.
Al reproducir archivos ATRAC3plus/A TRAC3/MP3
En modo aleatorio, el reproductor de CD reproduce todos los archivos de un CD en orden
aleatorio.
Reproducción de todos los archivos de un
grupo seleccionado en orden aleatorio (reproducción
aleatoria de grupo) (sólo CD de ATRAC/MP3)
Durante la reproducción, pulse P MODE/ varias veces hasta que aparezca “
SHUF”.
Al reproducir archivos ATRAC3plus/A TRAC3/MP3
El reproductor de CD reproduce todos los archivos del grupo seleccionado en orden aleatorio.
Opciones de reproducción
19-ES
Page 62

Reproducción de las pistas favoritas mediante la inclusión de marcas (reproducción de pistas con marcas)
Al reproducir un CD de audio
Puede añadir marcas a un máximo de 99 pistas de cada CD y utilizar esta función para un
máximo de 10 CD.
Al reproducir un CD de ATRAC
Puede añadir marcas a un máximo de 999 pistas de cada CD (máximo de 5 CD).
Al reproducir un CD de MP3
Puede añadir marcas a un máximo de 400 pistas de cada CD (máximo de 10 CD).
Para añadir marcas
1 Durante la reproducción de la pista en la que desea añadir una marca, empuje la tecla de
control de 4 vías hacia u y manténgala empujada hasta que “ (marca)” parpadee en el
visor.
Una vez que se ha añadido satisfactoriamente la marca, “ ” parpadeará lentamente.
2 Repita el paso 1 para añadir marcas a las pistas que desee.
Para escuchar las pistas con marcas
1 Pulse P MODE/ varias veces hasta que “ ” parpadee.
2 Empuje la tecla de control de 4 vías hacia u.
“ ” se iluminará en el visor y se iniciará la reproducción de las pistas con marcas.
Para eliminar las marcas
Durante la reproducción de la pista con la marca, empuje la tecla de control de 4 vías hacia u y
manténgala empujada hasta que “ ” desaparezca del visor.
Para comprobar las pistas con marcas
Durante la reproducción de una pista con una marca, “ ” parpadeará lentamente en el visor.
Notas
• Durante la reproducción de las pistas con marcas, las pistas se reproducen por orden de número de pista, no
en el orden en que añadió las marcas.
• Si añade marcas a las pistas del CD número 11 (el CD número 6 al reproducir un CD de ATRAC), se
borrarán las marcas del CD que se ha reproducido en primer lugar.
• Si retira todas las fuentes de alimentación, se borrarán todas las marcas almacenadas en la memoria.
• Si continua utilizando el reproductor de CD con las pilas recargables sin cargar las pilas aunque se muestre
“Lo batt”, se borrarán todas las marcas almacenadas en la memoria.
20-ES
Page 63

Reproducción de las listas favoritas (reproducción de
listas de reproducción m3u) (sólo CD de MP3)
Puede reproducir sus listas de reproducción m3u favoritas.*
* Una lista de reproducción m3u es un archivo que tiene codificado el orden de reproducción de los archivos
MP3. Para utilizar la función de lista de reproducción, grabe archivos MP3 en un CD-R/RW mediante
software de codificación compatible con el formato m3u.
Durante la reproducción, pulse
1
P MODE/ varias veces hasta que
aparezca “ ”.
Lista de reproducción
Empuje la tecla de control de 4 vías
2
hacia . o > para seleccionar la
lista de reproducción deseada.
Empuje la tecla de control de 4 vías
3
hacia u.
Nota
Sólo puede reproducir las dos listas de reproducción superiores que se visualizan en la pantalla del reproductor
de CD.
Opciones de reproducción
21-ES
Page 64

Reproducción de pistas en el orden que se desee (reproducción PGM)
Puede programar el reproductor de CD para reproducir hasta 64 pistas (“archivos” en el caso de
un CD de ATRAC/MP3) en el orden que desee.
Durante el modo de parada, pulse DISPLAY. Mientras se visualizan las
1
indicaciones, pulse P MODE/ repetidamente hasta que aparezca “PGM”.
CD de audio
Para seleccionar su pista o archivo favoritos, empuje la tecla de control de 4
2
vías hacia . o > y, a continuación, empújela hacia u y manténgala
empujada hasta que aumente el orden de reproducción.
El orden de reproducción aumenta en una cifra.
CD de audio
ATRAC/MP3 CD
ATRAC/MP3 CD*
Nombre del grupo
Orden de
reproducción
Número de
pista
Orden de reproducción
Nombre del archivo
mm
Orden de reproducción
*También puede seleccionar otro grupo mediante + o –.
Repita el paso 2 para seleccionar las pistas o los archivos en el orden que
3
desee.
Empuje la tecla de control de 4 vías hacia u e inicie la reproducción PGM.
4
22-ES
Nombre del grupo
Orden de reproducción
Page 65

Para comprobar el programa
Durante la programación:
Empuje la tecla de control de 4 vías hacia u y manténgala empujada hasta que el orden de
reproducción y el número de pista programado aparezcan en el visor.
Durante la parada:
Pulse DISPLAY. Mientras se visualizan las indicaciones, pulse P MODE/ varias veces hasta
que parpadee “PGM”, a continuación, gire la tecla de control de 4 vías hacia u y manténgala
pulsada hasta que aparezcan el orden de reproducción y el número de pista programado.
Cada vez que empuja la tecla de control de 4 vías hacia u y la mantiene empujada, aparecen el
siguiente orden de reproducción y el número de pista programado.
Notas
• Cuando acabe de introducir la pista número 64 en el paso 2, aparecerá en el visor la primera pista
seleccionada.
• Si selecciona más de 64 pistas, se borrarán las primeras pistas seleccionadas.
Al reproducir archivos ATRAC3plus/A TRAC3/MP3
En modo PGM, puede programar hasta 64 archivos de la misma forma que lo haría en el caso de
pistas de un CD de audio.
Opciones de reproducción
23-ES
Page 66

Uso de la radio
Cuando haya almacenado sus emisoras preferidas, podrá sintonizarlas fácilmente con cualquier
ajuste de banda y frecuencia pulsando un botón del 1 al 5.
Recepción de la radio
Podrá disfrutar de programas en FM y AM.
Para seleccionar la banda, pulse FM o AM (se acciona directamente).
1
Pulse TUNING + o – para sintonizar
2
la emisora que desee y ajustar el
volumen.
Para apagar la radio
Empuje la tecla de control de 4 vías hacia x•CHG (RADIO OFF).
Para sintonizar la emisora rápidamente
Mantenga pulsado TUNING + o – en el paso 2 hasta que los dígitos de la frecuencia empiecen a
cambiar en el visor. El reproductor de CD explorará de manera automática las frecuencias de
radio y se detendrá cuando detecte una emisora de señal nítida.
24-ES
Page 67

Para mejorar la recepción de la emisora
Para FM, extienda el cable de los cascos o de los auriculares.
Cascos o
auriculares
Para AM, reoriente el reproductor de CD.
Nota
Mantenga los auriculares conectados a la toma i del reproductor de CD. El cable de los auriculares actúa de
antena de FM.
Si tiene dificultades para escuchar una emisora FM
Mantenga pulsado P MODE/ (MONO/ST)
hasta que aparezca “Mono” en el visor.
El ruido se reducirá, aunque la recepción será
monofónica.
Cuando utilice la radio con pilas
Si conecta el enchufe de la fuente de alimentación externa a la toma DC IN 4.5 V del reproductor
de CD, éste se apagará. Si desea continuar escuchándolo, pulse FM o AM para encenderlo.
Uso de la radio
25-ES
Page 68

Presintonización de sus emisoras de radio favoritas
Puede almacenar sus emisoras de radio favoritas en la memoria del reproductor de CD. Además,
puede almacenar hasta 5 emisoras con cualquier ajuste de banda y frecuencia.
Sintonice la emisora que prefiera.
1
Pulse y mantenga pulsado durante dos o más segundos un botón del 1 al 5
2
en el que desee almacenar la nueva emisora.
Si esta operación se realiza satisfactoriamente, se escucha un pitido y en el visor aparece la
indicación “F1”, “F2”, “F3”, “F4” o “F5”. De este modo, la nueva emisora sustituye a la
anterior.
Ejemplo:
FM: AM:
Para reproducir sus emisoras favoritas
Pulse un botón del 1 al 5.
Para cancelar todas las emisoras presintonizadas
1 Desconecte la fuente de alimentación (adaptador de ca, pilas recargables o pilas alcalinas).
2 Vuelva a conectar la fuente de alimentación mientras mantiene pulsado DISPLAY
(MEMORY).
“CLEAR” parpadean hasta que se hayan borrado todas las emisoras presintonizadas. A
continuación, dejan de parpadear y desaparecen del visor.
26-ES
Page 69

Presintonización de las emisoras de radio
Es posible presintonizar hasta 40 emisoras: 30 de FM y 10 de AM.
Para seleccionar la banda, pulse FM o AM (se acciona directamente).
1
Pulse FM o AM durante dos o más segundos.
2
El número 1 presintonizado parpadeará en
el visor.
Pulse DISPLAY (MEMORY) durante dos o más segundos.
3
El reproductor de CD empieza a buscar las emisoras desde las frecuencias inferiores y se
detiene durante unos tres segundos cuando recibe una.
Si desea presintonizar la emisora recibida, pulse DISPLAY (MEMORY)
4
mientras parpadee el número presintonizado.
La emisora recibida se presintonizará en el número 1 y el reproductor de CD continuará
buscando la siguiente emisora que se reciba. Si no pulsa DISPLAY (MEMORY) en 3
segundos, el reproductor de CD empezará a buscar la siguiente emisora que se reciba sin
almacenarla.
Repita el paso 4 hasta que se presintonicen todas las emisoras de recepción.
5
Si ya había presintonizado emisoras anteriormente, las nuevas sustituirán las anteriores.
Para detener la búsqueda
• Pulse FM o AM durante dos o más segundos.
• Empuje la tecla de control de 4 vías hacia x•CHG (RADIO OFF). La radio se apagará.
Uso de la radio
Para reproducir emisoras presintonizadas
1 Pulse FM o AM.
2 Empuje la tecla de control de 4 vías hacia . o > para sintonizar una emisora
almacenada.
(continuación)
27-ES
Page 70

Para presintonizar emisoras manualmente
Si no se puede presintonizar emisoras automáticamente, hágalo manualmente.
1 Para seleccionar la banda, pulse FM o AM (se acciona directamente).
2 Pulse FM o AM durante dos segundos o más para
introducir el modo de presintonía.
El número 1 presintonizado parpadeará en el visor.
3 Mientras está parpadeando el número 1 presintonizado, sintonice la emisora que desee
pulsando TUNING + o – y seleccione un número empujando la tecla de control de 4 vías hacia
. o >.
4 Para memorizarla, pulse DISPLAY (MEMORY) mientras el número presintonizado parpadea.
Si ya había memorizado una emisora en este número presintonizado, la nueva sustituirá la
anterior y el número presintonizado aumentará en una cifra.
5 Para continuar con la memorización, repita los pasos 3 y 4.
Nota
Si no puede realizar los pasos 3 ó 4 mientras está parpadeando el número presintonizado, repita todos los pasos
desde el paso 2.
Para detener la memorización
• Pulse FM o AM durante dos o más segundos.
• Empuje la tecla de control de 4 vías hacia x•CHG (RADIO OFF).
La radio se apagará.
Para reproducir emisoras presintonizadas
1 Pulse FM o AM.
2 Empuje la tecla de control de 4 vías hacia . o > para sintonizar una emisora
almacenada.
28-ES
Page 71

B
Funciones disponibles
Función G-PROTECTION
La función G-PROTECTION se ha diseñado
para proporcionar una excelente protección
contra los saltos de sonido cuando se está
corriendo.
Cuando se coloca el interruptor GPROTECTION del reproductor de CD en
“2”, se mejora la función G-PROTECTION
con respecto a la opción “1”.
Para utilizar el reproductor de CD mientras
camina y disfrutar de una alta calidad de
sonido mediante la función GPROTECTION, ajuste el interruptor GPROTECTION en “1”. Cuando se realiza un
ejercicio físico más duro, se recomienda
ajustarlo en “2”.
Nota
Es posible que se produzcan saltos de sonido:
– si el reproductor de CD recibe golpes continuos
más fuertes de lo normal,
– si se reproduce un CD sucio o rayado,
– si se usan discos CD-R o CD-RW de baja
calidad o
si se produce un problema con el dispositivo de
grabación original o con el software de la
aplicación.
Comprobación del tiempo restante del CD y del número de pistas restantes (CD de audio)
Cada vez que pulse DISPLAY, el visor
cambiará en este orden.
Si utiliza un CD de audio que contenga
información de CD de texto, también
aparecerá la información que se muestra
entre paréntesis.
B
Número de pista y tiempo de
reproducción transcurrido
(nombre de la pista actual)
r
Número de pista y tiempo restante de la
pista actual
(nombre de la pista actual y del artista)
r
Número de pistas restantes* y tiempo
restante del CD*
(nombre del álbum y del artista)
* No aparece durante la reproducción sencilla, la
reproducción aleatoria ni la reproducción de
pistas con marcas.
Funciones disponibles
29-ES
Page 72

Comprobación de la
información de un CD
con archivos
ATRAC3plus/ATRAC3/
MP3
Puede comprobar la información de un CD
con archivos ATRAC3plus/ATRAC3/MP3
mediante DISPLAY.
También puede comprobar la información de
la etiqueta ID3 si está almacenada en el
archivo.
Cada vez que pulse DISPLAY, el visor
cambiará en este orden:
B
Nombre de archivo, nombre de grupo y
tiempo de reproducción transcurrido
r
Nombre de artista, información del
CODEC* y tiempo restante del archivo
actual
r
Número total de grupos y número total
de archivos
*Velocidad de transferencia de bits y frecuencias
de muestreo variables
Notas
• Si el grupo no tiene nombre, aparecerá “ROOT”
en el visor.
• Si el archivo no tiene información de la etiqueta
ID3, aparecerá “- - - -” en el visor.
Potenciación de los
graves
Es posible potenciar los sonidos graves.
Pulse SOUND para seleccionar
“BASS ” o “BASS ”.
Aparece el modo de sonido seleccionado.
“BASS ” potencia los graves en mayor
medida que “BASS ”.
Nota
Si el sonido se distorsiona al emplear la función
SOUND, disminuya el volumen.
(SOUND)
Ninguna indicación
(Reproducción normal)
“BASS ”
“BASS ”
30-ES
Page 73

Protección de los oídos
(AVLS)
La función AVLS (Automatic Volume
Limiter System) mantiene reducido el
volumen máximo para proteger los oídos.
Pulse y mantenga pulsado SOUND
hasta que aparezca “AVLS ON” en el
visor.
Parpadea cuando se aumenta el volumen
por encima de un nivel determinado.
Desactivación de los pitidos
Es posible desactivar los pitidos que se oyen
por los auriculares al emplear el reproductor.
Retire la fuente de alimentación
1
(el adaptador de ca, las pilas
recargables o las pilas secas) del
reproductor de CD.
Conecte la fuente de alimentación
2
mientras empuja la tecla de
control de 4 vías hacia x•CHG
(RADIO OFF) durante uno o más
segundos.
Para desactivar la función AVLS
Mantenga pulsado SOUND hasta que
aparezca “AVLS OFF” en el visor.
Nota
Si utiliza las funciones SOUND y AVLS a la vez, es
posible que el sonido se distorsione. Si esto ocurre,
baje el volumen.
Bloqueo de los
controles
Es posible bloquear los controles del
reproductor de CD para evitar pulsar los
botones accidentalmente.
Deslice HOLD en la dirección de la
flecha.
Parpadeará “HOLD” si pulsa cualquier botón
mientras la función HOLD está activada.
Para desbloquear los controles
Deslice HOLD en la dirección contraria a la
flecha.
(HOLD)
Para activar los pitidos
Desconecte la fuente de alimentación y
vuelva a conectarla sin empujar la tecla de
control de 4 vías hacia x•CHG (RADIO
OFF).
Funciones disponibles
31-ES
Page 74

B
Conexión del reproductor de CD
Conexión de un sistema estéreo
Usted podrá escuchar discos compactos y
grabarlos en casetes a través de un sistema
estéreo. Para más información, consulte el
manual de instrucciones suministrado con el
dispositivo conectado.
Asegúrese de apagar todos los dispositivos
conectados antes de realizar las conexiones.
a i
Ajuste el volumen.
Cable de conexión
(no suministrado)
Derecho (rojo)
Izquierdo (blanco)
Notas
• Antes de reproducir un CD, disminuya el
volumen del dispositivo conectado para evitar
dañar los altavoces conectados.
• Emplee el adaptador de alimentación de ca para
grabar. Si utiliza las pilas recargables o las secas
como fuente de alimentación, éstas podrían
agotarse por completo durante la grabación.
• Ajuste correctamente el volumen del reproductor
de CD y el dispositivo conectado de modo que el
sonido no se distorsione o resulte excesivo.
Acerca de la función G-PROTECTION
al utilizar el cable de conexión
Para grabar sonido de CD de alta calidad,
ajuste el interruptor G-PROTECTION en
“1”.
32-ES
Sistema estéreo,
grabadora de
casetes, grabadora
de radio y casetes,
etc.
Page 75

B
Conexión a una fuente de alimentación
Es posible emplear las siguientes fuentes de
alimentación:
• Adaptador de alimentación de ca (consulte
“Reproducción de un CD de audio o de
archivos ATRAC3plus/ATRA C3/MP3”)
• Pilas recargables
• Pilas alcalinas LR6 (tamaño AA)
Con respecto a la duración de las pilas,
consulte la sección “Especificaciones”.
Inserte dos pilas de forma que la
2
polaridad 3 coincida con la del
diagrama del compartimiento de
las mismas y cierre la tapa hasta
que quede encajada.
Para utilizar las pilas
Use solamente las siguientes pilas con el
reproductor de CD.
Pilas recargables (no suministradas)
Cargue las pilas recargables antes de
utilizarlas por primera vez.
• NH-WM2AA (NH-WMAA × 2)
Pilas secas
• Pilas alcalinas LR6 (tamaño AA)
Para introducir las pilas
Abra la tapa del compartimiento
1
de pilas situado en el interior del
reproductor de CD.
Introduzca el extremo #
primero (ambas pilas).
Carga de las pilas recargables
(no suministradas)
1 Conecte el adaptador de alimentación de
ca a la toma DC IN 4.5 V del reproductor
de CD y a una toma de ca.
2 Empuje la tecla de control de 4 vías hacia
x•CHG (RADIO OFF) para iniciar la carga.
El reproductor de CD carga las pilas. Las
secciones del indicador de se
iluminan sucesivamente y aparece el
mensaje “Charging”(Cargando) en el
visor. Cuando las pilas se han cargado
completamente, este mensaje y el
indicador se apagan.
Si pulsa la tecla de control de 4 vías hacia
x•CHG (RADIO OFF) cuando la carga
ya se ha terminado, el indicador
parpadeará y aparecerá “FULL” en el
visor.
3 Desconecte el adaptador de alimentación
de ca.
Conexión a una fuente de alimentación
(continuación)
33-ES
Page 76

Para utilizar las pilas
Para extraer las pilas
Extráigalas como se ilustra a continuación.
• Al transportar las pilas recargables, utilice
el estuche de transporte para evitar
calentamientos inesperados. Si las pilas
recargables entran en contacto con objetos
metálicos, pueden producirse
calentamientos o incendios debidos a un
cortocircuito.
Notas sobre el uso de las pilas secas
• Asegúrese de retirar el adaptador de
alimentación de ca.
• Cuando las pilas se agoten, sustituya
ambas pilas por unas nuevas.
Para comprobar la energía restante
de las pilas
Puede comprobarlo en la pantalla.
Cuando “ ” parpadee, sustituya las pilas.
t t t t t
Lo batt*
* Se oye un pitido.
Notas
• Las secciones del indicador de muestran
aproximadamente la energía restante de las pilas.
Una sección no siempre indica un cuarto de
energía de la pila.
• Dependiendo de las condiciones de empleo, las
secciones del indicador de
aumentar o disminuir.
pueden
Cuándo reemplazar las pilas
recargables
Si la duración de las pilas se reduce en
aproximadamente la mitad, sustitúyalas por
nuevas pilas recargables.
Notas sobre las pilas recargables
•
Para conservar la capacidad original de las
pilas durante mucho tiempo, cárguelas
solamente cuando estén totalmente agotadas.
• Si la pila es nueva o no se ha utilizado
durante mucho tiempo, es posible que no
se cargue completamente hasta que la
cargue y descargue varias veces.
Para fijar la tapa del compartimiento
de las pilas
Si esta tapa se desprende debido a una caída
accidental, fuerza excesiva, etc., fíjela como
se ilustra a continuación.
34-ES
Page 77

Notas sobre la fuente de alimentación
Cuando no vaya a utilizar el reproductor de
CD durante mucho tiempo, desconecte todas
las fuentes de alimentación del reproductor
de CD.
Sobre el adaptador de
alimentación de ca
•
Utilice sólo el adaptador de alimentación de
ca suministrado. Si no está incluido con su
reproductor de CD, utilice el adaptador de
alimentación de ca AC-E45HG. No utilice
ningún otro adaptador, ya que podría
provocar un fallo en el funcionamiento.
Polaridad del enchufe
• No toque el adaptador de ca con las manos
mojadas.
• Conecte el adaptador de alimentación de
ca a una toma de corriente de ca de fácil
acceso. Si detecta alguna anomalía en el
adaptador de alimentación de ca,
desconéctelo inmediatamente de la toma
de corriente de ca.
• Extraiga las pilas cuando no vaya a
utilizarlas durante mucho tiempo.
• Si se producen fugas de las pilas, elimine
los posibles depósitos del compartimiento
de las mismas, e instale pilas nuevas. Si los
depósitos entran en contacto con el
usuario, deberá lavarse a fondo para
eliminarlos.
Conexión a una fuente de alimentación
Sobre las pilas recargables y
las secas
• No cargue las pilas secas.
• No arroje las pilas al fuego.
• No transporte las pilas junto con monedas
u otros objetos metálicos. Puede generarse
recalentamiento si los terminales positivo
y negativo de la pila entran
accidentalmente en contacto con un objeto
metálico.
• No mezcle pilas recargables con secas.
• No mezcle pilas nuevas con usadas.
• No utilice diferentes tipos de pilas
conjuntamente.
35-ES
Page 78

B
Información complementaria
Precauciones
Sobre seguridad
• Si se introduce algún objeto sólido o
líquido en el reproductor de CD,
desenchúfelo y haga que sea revisado por
personal especializado antes de volver a
utilizarlo.
• No coloque objetos extraños en la toma
DC IN 4.5 V (entrada de alimentación
externa).
Sobre el reproductor de CD
• Mantenga limpia la lente del reproductor
de CD y no la toque. Si lo hace, dicha lente
podría dañarse y el reproductor no
funcionará correctamente.
• No coloque objetos pesados sobre el
reproductor de CD. Éste y el CD podrían
dañarse.
• No deje el reproductor en lugares
próximos a fuentes de calor, ni sujetos a la
luz solar directa, polvo excesivo o arena,
humedad, lluvia, golpes mecánicos,
superficies desniveladas ni en un
automóvil con las ventanillas cerradas.
• Si el reproductor causa interferencias en la
recepción de radio o televisión, apáguelo o
aléjelo de la radio o del televisor.
• Los discos con formas no estándar (p.ej.,
corazón, cuadrado, estrella) no pueden
reproducirse en este reproductor de CD. Si
lo intenta, puede dañar el reproductor de
CD. No utilice tales discos.
Manejo de discos compactos
•Para mantener limpio el CD, agárrelo por
los bordes. No toque su superficie.
• No adhiera papel ni cinta adhesiva sobre el
CD.
• No exponga el CD a la luz solar directa ni
a fuentes de calor, como conductos de aire
caliente. No deje el CD en un automóvil
aparcado bajo la luz solar directa.
Sobre los auriculares
Seguridad en carretera
No utilice auriculares mientras conduzca,
monte en bicicleta o maneje cualquier
vehículo motorizado. Puede suponer un
peligro para el tráfico y es ilegal en
determinadas zonas. Igualmente, puede ser
potencialmente peligroso escuchar el sonido
por los auriculares a gran volumen mientras
camina, especialmente en los pasos de
peatones. Preste especial atención o deje de
utilizarlos en situaciones potencialmente
peligrosas.
Prevención de daños a los oídos
Evite emplear los auriculares a gran
volumen. Los expertos en audición
desaconsejan el uso continuo a gran
volumen. Si experimenta pitidos en los oídos,
reduzca el volumen o deje de utilizarlos.
Respeto por los demás
Mantenga el volumen en un nivel moderado.
De esta forma, podrá escuchar los sonidos
del exterior y será considerado con la gente
que le rodea.
Resistencia al agua
•
Antes de aflojar el cierre para abrir la tapa,
asegúrese de eliminar el agua, el polvo o la
arena del exterior de la unidad. Abra y
cierre la tapa donde no pueda caer agua o
arena en la unidad y asegúrese de tener las
manos secas. En caso de caer agua o arena
en la unidad, podrían producirse problemas.
• Al cerrar la tapa, compruebe que no hay
polvo o arena en el componente de cierre
de goma situado alrededor de la tapa. A
continuación, cierre la tapa con firmeza
con el cierre.
36-ES
Así no
Page 79

• Los auriculares suministrados no están
diseñados para sumergirse en agua ni para
entrar en contacto continuo con agua. Si se
caen al agua accidentalmente o se mojan,
séquelos con un paño suave. No utilice
nunca un secador eléctrico de pelo.
• El adaptador de alimentación de ca
suministrado no es resistente al agua. Para
evitar el riesgo de descargas eléctricas, no
utilice el reproductor cerca del agua
durante el funcionamiento con ca.
• Cubra las tomas DC IN 4.5 V y i con las
tapas de goma suministradas cuando no
haya nada conectado a las mismas. Si el
interior de las tomas se ensucia con agua o
arena, puede producirse óxido y causar
problemas.
Notas
• Puesto que la unidad es hermética, es posible que
no pueda abrir la tapa cuando se produzcan
cambios bruscos en la presión del aire del interior
de la unidad. Esto ocurre cuando la unidad se
transporta en un avión o se desplaza de un lugar
cálido a otro frío. En este caso, abra la tapa de
goma de la toma DC IN 4.5 V.
•Para evitar que se introduzca agua, el cierre está
diseñado para que tenga una ligera rigidez. Tenga
cuidado de no pillarse los dedos en el cierre
cuando afloje la tapa.
Mantenimiento
Para limpiar el exterior
Utilice un paño suave ligeramente
humedecido con agua o con una solución
detergente poco concentrada. No utilice
alcohol, bencina ni diluyente.
Para limpiar el enchufe de
los auriculares
Para obtener un sonido óptimo, mantenga
limpio el enchufe de los auriculares.
Límpielo con un paño seco y suave.
Para eliminar el polvo o la
arena del componente de
cierre de goma
La existencia de arena o polvo en el
componente de cierre de goma impedirá que
la tapa se cierre al vacío, por lo que podrían
producirse entradas de agua. Elimine el
polvo periódicamente.
Se recomienda cambiar el componente de
cierre de goma cada año; opcionalmente,
podrá encontrarlos en un centro autorizado
de servicio técnico Sony.
No agarre el reproductor por el cierre.
Si lo hace, puede dañar la unidad.
Información complementaria
37-ES
Page 80

Solución de problemas
En caso de que persista algún problema tras haber comprobado los síntomas, consulte al
distribuidor de Sony más cercano.
Reproductor de CD
Problema
No aumenta el volumen ni
girando varias veces el
control VOL en sentido +.
No se oye ningún sonido o
ruido.
Algunos archivos no se
pueden reproducir.
El tiempo de reproducción es
demasiado corto cuando se
alimenta el reproductor con
pilas secas.
El tiempo de reproducción es
demasiado corto al alimentar
la unidad con pilas
recargables.
Aparece “Lo batt” en la
pantalla. El CD no se
reproduce.
Aparece “HI dc In” en la
pantalla.
Causa y/o acciones correctivas
c Si “AVLS” parpadea en el visor, mantenga pulsado SOUND hasta
que aparezca “AVLS OFF”. (página 31)
c Conecte firmemente los enchufes. (página 12)
c Los enchufes están sucios. Limpie periódicamente los enchufes
con un paño suave y seco.
c Ha intentado reproducir archivos guardados en un formato que no
es compatible con este reproductor de CD. (página 6)
c Compruebe que utiliza pilas alcalinas y no de manganeso.
(página 33)
c Sustituya las pilas por otras nuevas alcalinas de tipo LR6 (tamaño
AA). (página 33)
c Cargue y descargue las pilas recargables varias veces.
(página 33)
c Las pilas recargables están completamente agotadas. Cárguelas.
(página 33)
c Sustituya las pilas por otras nuevas alcalinas de tipo LR6 (tamaño
AA). (página 33)
c Se está utilizando un adaptador de ca con una tensión nominal
superior a la suministrada o recomendada. Utilice sólo el
adaptador de ca suministrado o el cable de la batería del automóvil
recomendado en “Accesorios opcionales” (página 42).
38-ES
Page 81

Reproductor de CD
Problema
El CD no se reproduce o
aparece “No disc” en la
pantalla cuando se introduce
un CD en el reproductor.
Parpadea “HOLD” en la
pantalla cuando se pulsa un
botón y no se reproduce el
CD.
El reproductor de CD no inicia
la carga.
La reproducción comienza a
partir del punto en que se
detuvo. (función de
reanudación)
Se oye un crujido en el CD.
Cuando se utiliza con un
sistema estéreo conectado,
el sonido se distorsiona o
resulta excesivo.
Causa y/o acciones correctivas
c Los botones están bloqueados. Deslice el interruptor HOLD hacia
la posición original. (página 31)
c El CD está sucio o es defectuoso.
c Compruebe que haya un CD insertado y que la etiqueta esté hacia
arriba. (página 12)
c Se ha producido condensación de humedad.
No utilice el reproductor de CD durante unas horas hasta que se
evapore la humedad.
c Cierre firmemente la tapa del compartimiento de pilas.
(página 33)
c Compruebe que las pilas estén insertadas correctamente.
(página 33)
c Conecte firmemente el adaptador de ca a una toma de ca.
(página 12)
c Empuje la tecla de control de 4 vías hacia u transcurrido un
segundo o más después de conectar el adaptador de alimentación
de ca.
c El CD-R o CD-RW está en blanco.
c Existe un problema con la calidad del CD-R o CD-RW, el
dispositivo de grabación o el software de la aplicación.
c Se han grabado archivos de dos o más formatos distintos en un
mismo CD-R/RW. (páginas 6, 7)
c Los botones están bloqueados. Deslice el interruptor HOLD hacia
la posición original. (página 31)
c Cuando se detenga el reproductor de CD, empuje la tecla de control
de 4 vías hacia x•CHG (RADIO OFF) (página 33).
c La función de reanudación está activada. Para reproducir desde la
primera pista, empuje la tecla de control de 4 vías hacia u
durante el modo de parada hasta que ésta empiece a sonar. También
puede abrir la tapa del reproductor de CD o desconectar todas las
fuentes de alimentación y, después, colocar las pilas o volver a
conectar el adaptador de alimentación de ca. (páginas 12, 13 y 33)
c Cierre firmemente la tapa del compartimiento de pilas.
(página 33)
c Ajuste el volumen del reproductor de CD y del dispositivo
conectado. (página 32)
Información complementaria
(continuación)
39-ES
Page 82

Solución de problemas
Reproductor de CD
Problema
Durante la reproducción de
un CD de ATRAC o un CD de
MP3, el CD no gira pero el
sonido se emite con
normalidad.
“NO FILE” aparecerá en la
pantalla cuando empuje la
tecla de control de 4 vías
hacia u o cuando cierre la
tapa del reproductor de CD.
Al cerrar la tapa del
reproductor de CD, el CD
empieza a girar.
La pantalla LCD no puede
verse con facilidad o se
ralentiza.
“ ” parpadea con rapidez
en el visor y no es posible
localizar el principio de la
pista o un punto específico
de la misma.
Radio
Problema
El sonido es débil o de baja
calidad.
Causa y/o acciones correctivas
c El reproductor de CD se ha diseñado para detener la rotación de un
CD de ATRAC o un CD de MP3 durante la reproducción con el fin
de reducir el consumo de energía. El reproductor no está averiado.
c No hay archivos ATRAC3plus/ATRAC3/MP3 en el CD.
c Se está utilizando un CD-RW en el que se han borrado los datos.
c El CD está sucio.
c El reproductor está leyendo la información del CD. El reproductor
no está averiado.
c Está utilizando el reproductor de CD a temperaturas altas
(superiores a 40 °C) o bajas (inferiores a 0 °C). A temperatura
ambiente, la pantalla volverá a funcionar normalmente.
c El reproductor de CD ha entrado en el modo de reproducción de
pistas con marcas. Pulse P MODE/ varias veces hasta que “ ”
desaparezca del visor.
Causa y/o acciones correctivas
c Cargue las pilas recargables. (Página 33)
c Sustituya las pilas por otras nuevas alcalinas de tipo LR6 (tamaño
AA). (Página 33).
c Aleje el reproductor de CD del televisor.
40-ES
Page 83

Especificaciones
Reproductor de CD
Sistema
Audio digital de discos compactos
Propiedades del diodo láser
Material: GaAlAs
Longitud de onda: λ = 780 nm
Duración de la emisión: Continua
Salida láser: Inferior a 44,6 µW
(Esta salida es el valor medido a una distancia
de 200 mm de la superficie de la lente objetiva
del bloque de recogida óptica con una apertura
de 7 mm.)
Conversión D-A
Control tiempo-eje de cuarzo de 1 bit
Respuesta de frecuencia
20 - 20 000 Hz
Salida (con nivel de entrada de 4,5 V)
Auriculares normales (minitoma estéreo)
Aprox. 5 mW + Aprox. 5 mW a 16 Ω
(Aprox. 1,5 mW + Aprox. 1,5 mW a 16 Ω)*
*Para los clientes en Europa
Radio
Gama de frecuencias
FM: 87,5 -108,0 MHz
AM: 531 -1 602 kHz
Antena
FM: Antena del cable de los cascos/auriculares
AM: Antena de barra de ferrita incorporada
Generales
Requisitos de alimentación
Con respecto al código de zona del modelo
adquirido, consulte la parte superior
izquierda del código de barras del paquete.
• Pilas recargables Sony NH-WM2AA: cc de
1,2 V × 2
• Dos pilas LR6 (tamaño AA): cc de 1,5 V × 2
• Adaptador de alimentación de ca (toma DC
IN 4.5 V):
Modelos U, U2, CA, CA2, E92, MX2, TW2 y
CA2/C: ca 120 V, 60 Hz
+1–2
dB (medido por JEITA CP-307)
Modelos CED, CED/4, CE7, CE7/C, EE,
EE1, E, E13 y E13/2: ca 220 - 230 V, 50/60 Hz
Modelo CEK: ca 230 V, 50 Hz
Modelo AU2: ca 240 V, 50 Hz
Modelos EU8, EU8/C, JE.W, E18, KR4 y EE8:
ca 100 - 240 V, 50/60 Hz
Modelo HK4: ca 230 V, 50 Hz
Modelo CNA: ca 220 V, 50 Hz
Duración de las pilas*1 (horas
aproximadas)
(Si emplea el reproductor de CD sobre una
superficie plana y estable)
El tiempo de reproducción varía en función de
cómo utilice el reproductor de CD.
Cuando se utilizan dos pilas alcalinas Sony
LR6 (SG) (producido en Japón)
Función G-PROTECTION
“1” “2”
CD de audio 48 43
Archivos ATRAC3plus*275 75
Archivos MP3*
RADIO ON 62
*1 Valor medido por el estándar de la JEITA (Japan
Electronics and Information Technology
Industries Association)
*2 Cuando se graba a 48 kbps o 64 kbps
*3 Cuando se graba a 128 kbps
3
70 70
Temperatura de funcionamiento
5°C - 35°C
Dimensiones (an/al/prf) (partes y
controles salientes excluidos)
Aprox. 148,4 × 36,7 × 134,0 mm
Peso (accesorios excluidos)
Aprox. 345 g
Patentes de los EE.UU. y otros países usados
con licencia de Dolby Laboratories.
Diseño y especificaciones sujetos a cambios sin
previo aviso.
Información complementaria
41-ES
Page 84

Accesorios opcionales
Adaptador de AC-E45HG
alimentación de ca
Sistema de altavoces SRS-Z1
activos
Cable de batería de DCC-E345
automóvil
Cable de batería de DCC-E34CP
automóvil con paquete de
conexión para automóvil
Paquete de conexión para CPA-9C
automóvil
Pila recargable NH-WM2AA
Auriculares (salvo para los clientes en Francia)
Auriculares (para los clientes en Francia)
Es posible que su proveedor no disponga de
algunos de los accesorios anteriormente
enumerados. Pídale información detallada
sobre los accesorios disponibles en su país.
MDR-E931LP
MDR-EX71SL
MDR-Q55SL
MDR-E808LP
42-ES
Page 85

43-ES
Page 86

AVISO
Para evitar riscos de incêndio
ou choques eléctricos; não
exponha o transformador de
CA à chuva ou humidade.
Não instale o aparelho num espaço
fechado, como por exemplo, uma estante
ou um armário.
Para evitar incêndios, não cubra as aberturas
de ventilação do aparelho com jornais,
toalhas de mesa, cortinas, etc. Ademais, não
coloque velas acesas sobre o aparelho.
Para evitar riscos de incêndio ou choque
eléctrico, não coloque objectos contendo
líquidos, tais como vasos, sobre o aparelho.
Em alguns países podem existir leis sobre a
maneira de deitar fora as pilhas usadas com
este produto. Consulte as autoridades locais.
CUIDADO
• RADIAÇÃO LASER INVISÍVEL
QUANDO ABERT O
•NÃO OLHE PARA O RAIO NEM
OBSERVE DIRECTAMENTE COM
INSTRUMENTOS ÓPTICOS
A validade da marca CE aplica-se apenas aos
países onde é obrigatória por lei, sobretudo
nos países da EEE (Espaço Económico
Europeu).
ATRAC3plus e ATRAC3 são marcas
comerciais da Sony Corporation.
2-PT
Page 87

Índice
Divirta-se com o CD Walkman
ATRAC !
Crie CDs ATRAC originais ! ....................... 4
Fontes de música que pode reproduzir
neste leitor de CD .................................... 6
ATRAC3plus e ATRAC3 .............................6
Ficheiros MP3 ............................................. 6
Diferença entre ATRAC3plus/ATRAC3 e
MP3 ......................................................... 8
Como começar
Localizar os comandos ................................ 9
Verificar os acessórios fornecidos ............. 11
Reproduzir um CD de áudio ou
ficheiros de formato
ATRAC3plus/ATRAC3/MP3
1.Ligar o leitor de CD. ............................. 12
2.Colocar um CD. .................................... 12
3.Reproduzir um CD. ............................... 13
Opções de reprodução
Reproduzir faixas por ordem aleatória
(Reprodução aleatória) .......................... 19
Reproduzir todos os ficheiros de um grupo
seleccionado por ordem aleatória
(Reprodução aleatória do grupo)
(Só para CD ATRAC/MP3) ...................19
Reproduzir as suas faixas preferidas
adicionando marcadores (Reprodução
de faixas com marcadores) .................... 20
Reproduzir as suas listas de músicas
preferidas (Reprodução da lista de
músicas m3u) (Só para CD MP3) ......... 21
Reproduzir as faixas pela ordem
desejada (Reprodução PGM) ................ 22
Utilizar o rádio
Ouvir rádio ................................................ 24
Programar as suas estações de rádio
preferidas ............................................... 26
Programar estações de rádio ...................... 27
Funções disponíveis
A função G-PROTECTION ...................... 29
Verificar o tempo restante do CD e o
número de faixas restante
(CD de áudio) ........................................29
Verificar as informações de um
CD com ficheiros ATRAC3plus/
ATRAC3/MP3 ....................................... 30
Intensificar o som dos graves (SOUND) ... 30
Protecção auditiva (AVLS) ........................ 31
Bloquear os comandos (HOLD) ................ 31
Desactivar o sinal sonoro........................... 31
Ligar o leitor de CD
Ligar um sistema estéreo ........................... 32
Ligar uma fonte de alimentação
Utilizar as pilhas ........................................ 33
Notas sobre a fonte de alimentação ........... 35
Informações adicionais
Precauções ................................................. 36
Manutenção ............................................... 37
Resolução de problemas ............................ 38
Características técnicas.............................. 41
Acessórios opcionais ................................. 42
PT
3-PT
Page 88

Divirta-se com o CD Walkman ATRAC !
Obrigado por ter adquirido o D-NS921F. Este Walkman CD designado por “ATRAC CD
Walkman” permite utilizar “CDs ATRAC”.
Crie CDs ATRAC originais !
Pode criar o seu próprio CD ATRAC.
O procedimento é muito simples. Basta executar os passos 1, 2 e 3.
Passo 1
Instalar
Instale o programa
“SonicStage Simple Burner”
fornecido.
Como utilizar o SonicStage Simple Burner
Consulte o folheto “SonicStage Simple Burner” fornecido.
Passo 2
Gravar
Crie uma imagem do disco e gravea num CD-R/RW utilizando um PC.
CDs de áudio Ficheiros MP3
Os dados de áudio são convertidos para o
formato ATRAC3plus/ATRAC3 pelo programa
SonicStage Simple Burner.
ou
,
4-PT
Page 89

O que é um CD ATRAC?
Um CD ATRAC é um CD-R/RW que contém dados de áudio comprimidos gravados no formato
ATRAC3plus/ATRAC3. Pode gravar cerca de 30 CDs de áudio num CD-R/RW.* Também pode
gravar ficheiros MP3 convertendo-os para o formato ATRAC3plus/ATRAC3.
* Se o tempo total de reprodução estimado de um CD (álbum) for de 60 minutos e estiver a gravar num
CD-R/RW de 700 MB a 48 kbps no formato ATRAC3plus.
Passo 3
Ouvir
Ouça os CDs ATRAC que criou
neste ATRAC CD Walkman.
ATRAC CD
Divirta-se com o CD Walkman ATRAC !
O que é o formato ATRAC3plus/
ATRAC3?
Consulte as páginas 6 - 8 deste manual.
Pode também ouvir CDs de áudio.
5-PT
Page 90

Fontes de música que pode reproduzir neste leitor de CD
Este leitor permite ouvir as três fontes de música seguintes:
• CDs de áudio
• Ficheiros no formato ATRAC3plus/ATRAC3
• Ficheiros MP3
Formatos de disco que pode utilizar
Só pode utilizar discos no formato ISO 9660 Nível 1/2, com a extensão Joliet.
ATRAC3plus e ATRAC3
“ATRAC3plus” significa “Adaptive Transform Acoustic Coding3plus” e é uma tecnologia de
compressão de áudio, desenvolvida a partir do formato ATRAC3. Embora o formato ATRAC3plus
possa comprimir a música para cerca de 1/20 do seu tamanho original, o som continua a ter uma
qualidade elevada. A velocidade de transferência de bits é de 64 kbps e 48 kbps.
“ATRAC3” que significa “Adaptive Transform Acoustic Coding3” é uma tecnologia de
compressão de áudio que permite obter um som de alta qualidade com taxas de compressão
elevadas. O formato ATRAC3 pode comprimir a música para cerca de 1/10 do seu tamanho
original, contribuindo para a redução do volume do meio de armazenamento. As velocidades de
transferência de bits disponíveis são 132 kbps, 105 kbps e 66 kbps.
Número de grupos e ficheiros que pode utilizar
• Número máximo de grupos: 255
• Número máximo de ficheiros: 999
Para obter mais informações, consulte o folheto “SonicStage Simple Burner” fornecido.
Nota sobre gravação de ficheiros nos meios de gravação
Não grave ficheiros noutros formatos ou grupos desnecessários num disco que contenha ficheiros
ATRAC3plus/ATRAC3.
Ficheiros MP3
MP3, que significa MPEG-1 Audio Layer3, é uma norma de compressão de ficheiros de áudio
suportada pelo Motion Picture Experts Group, um grupo de trabalho da ISO (International
Organization for Standardization) que permite comprimir os ficheiros de áudio para cerca de
1/10 do tamanho dos dados de um disco compacto standard. Como o algoritmo de codificação de
MP3 é público, existem vários codificadores/descodificadores que respeitam esta norma,
incluindo programas que pode obter gratuitamente. Por isso, a norma MP3 é muito utilizada em
informática.
6-PT
Page 91

As características mais importantes do formato de disco utilizável são:
• Número máximo de níveis de directório: 8
• Caracteres que pode utilizar num nome de ficheiro/pasta:
A - Z, a - z, 0 - 9, _ (sublinhado)
Notas
• Quando der um nome aos ficheiros, tem de adicionar a extensão de ficheiro “mp3” ao nome.
• Se adicionar a extensão “mp3” a um ficheiro que não seja MP3, o leitor não consegue reconhecer
correctamente o ficheiro.
•O nome do ficheiro não corresponde ao ID3*.
* ID3 é um formato que serve para adicionar determinadas informações (nome da faixa, nome do álbum,
nome do artista, etc.) aos ficheiros MP3.
Número de grupos e ficheiros que pode utilizar
• Número máximo de grupos: 100
• Número máximo de ficheiros: 400
Definições para o programa de compressão e gravação de
ficheiros
• Este leitor de CD suporta ficheiros MP3 com as características seguintes: velocidade de
transferência de bits: 16 - 320 kbps e frequências de amostragem: 32/44,1/48 kHz. Também
suporta a velocidade de transferência de bits variável (VBR).
Para comprimir uma fonte para um ficheiro MP3, deve definir a velocidade de transferência de
bits do programa de compressão para “44,1 kHz”, “128 kbps” e “Constant Bit Rate”.
•Para gravar até à capacidade máxima, defina “halting of writing” (Paragem da gravação).
•Para gravar de uma só vez até à capacidade máxima num meio de gravação sem nada gravado,
defina para “Disc at Once”.
Notas sobre gravação de ficheiros nos meios de gravação
• Não grave ficheiros noutros formatos ou pastas desnecessárias num disco que contenha
ficheiros MP3.
• Quando introduzir um disco, o leitor de CD lê toda a informação das pastas e ficheiros
contidos nesse disco. Se houver muitas pastas, a sua reprodução ou a reprodução do próximo
ficheiro pode demorar bastante tempo a começar.
Divirta-se com o CD Walkman ATRAC !
7-PT
Page 92

Diferença entre ATRAC3plus/ATRAC3 e MP3
Grupos e pastas
O formato ATRAC3plus/ATRAC3 tem uma estrutura muito simples. É constituído por
“ficheiros” e “grupos”. Um “ficheiro” equivale a uma “faixa” de um CD de áudio. Um “grupo” é
um conjunto de ficheiros e equivale a um “álbum”. Um “grupo” não tem uma estrutura formada
por directórios (não pode criar um grupo dentro de um grupo já existente). Este leitor de CD
reconhece uma pasta de ficheiros MP3 como um “grupo” pelo que pode reproduzir os CD-Rs/
RWs gravados no formato ATRAC3plus/ATRAC3 e os gravados no formato MP3, numa só
operação.
Ver o nome da faixa, etc.
Quando reproduzir um CD com ficheiros ATRAC3plus/ATRAC3 ou MP3 neste leitor de CD, os
nomes das faixas, dos artistas e dos álbuns aparecem. Este leitor de CD é compatível com a
versão 1.1/2.2/2.3 do formato ID3.
Notas
• Este leitor de CD não pode gravar música em meios de gravação, como CD-Rs/RWs.
• Não pode reproduzir CD-Rs/RWs gravados no formato ATRAC3plus/ATRAC3 no computador.
•A capacidade de reprodução pode variar consoante a qualidade do disco e as condições do dispositivo de
gravação.
8-PT
Page 93

Como começar
Localizar os comandos
Consulte as páginas indicadas entre parêntesis para obter mais informações.
Leitor de CD (parte da frente)
1 Botões 1 - 5
(página 26)
2 Botão AM
(páginas 24, 27, 28)
3 Botão FM
(páginas 24, 27, 28)
4 Interruptor HOLD
(página 31)
5 Tecla de controlo
com 4 posições
(veja abaixo)
6 Controlo VOL
(volume) +*/–
(página 13)
7 Tomada
DC IN 4.5 V
(entrada
externa de
corrente)
(páginas 12, 33)
8 Visor (páginas 15,18, 21, 22, 24 - 31)
5 Tecla de controlo
com 4 posições
Empurre na
direcção de u,
., > ou x•
CHG (RADIO OFF).
Como começar
9 Botão SOUND
(página 30, 31)
q; Botão P MODE/
(modo de reprodução/
repetição) (MONO/ST)
(páginas 18 - 23, 25)
qa Botões TUNING +/–•
+/–
(páginas 13, 24, 28)
qs Botão DISPLAY
(MEMORY)
(páginas 26 -30)
qd Tomada i
(auscultadores)
(páginas 12, 32)
qf Fecho (página 12)
u**: Reprodução/pausa (páginas 13, 18,
20 -23)
./>: AMS/procura (páginas 13, 18,
21, 22, 27, 28)
x•CHG (RADIO OFF):
Parar•carregar (desligar o rádio)
(páginas 13, 24, 27, 31, 33)
* Existe um ponto em relevo ao lado do botão VOL para indicar a direcção de aumento do volume.
** Existe um ponto em relevo ao lado de u.
(Continua)
9-PT
Page 94

Leitor de CD (interior)
qg Interruptor
G-PROTECTION
(página 29)
qh Compartimento das pilhas
(páginas 33, 34)
Utilizar a alça para a mão
Quando fizer “jogging”, utilize a alça para a mão fornecida.
1 Passe a alça através dos ganchos.
2 Coloque a mão entre o leitor e a cobertura da alça, regule o comprimento da alça e aperte bem
com as fitas de Velcro.
10-PT
Page 95

Verificar os acessórios fornecidos
Transformador de CA (1) Auscultadores/auriculares (1)
Alça para a mão (1)
CD-ROM (SonicStage Simple Burner) (1)
Manual do utilizador do SonicStage Simple Burner (1)
Como começar
11-PT
Page 96

Reproduzir um CD de áudio ou ficheiros de formato ATRAC3plus/ATRAC3/MP3
1
. Ligar o leitor de CD.
1 Ligue o transformador de CA.
2 Ligue os auscultadores/auriculares.
Também pode utilizar pilhas recarregáveis ou secas
como fonte de alimentação. (Consulte a página 33.)
a uma tomada CA
Tecla de controlo
Transformador
de CA
com 4 posições (u)
a i (auscultadores)
Auscultadores
ou
auriculares
a DC IN
4.5V
2
. Colocar um CD.
1 Abra o fecho.
2 Abra a tampa.
12-PT
3 Coloque o CD no pivot e feche a tampa.
4 Depois de fechar a tampa, verifique se fechou
bem o fecho.
Com a etiqueta virada
para cima
Page 97

3
. Reproduzir um CD.
Empurre a tecla de
controlo com 4 posições
na direcção de u.
Regule o volume.
Operações básicas
Para Faça o seguinte
Reproduzir (a partir do ponto em que parou) Empurre a tecla de controlo com 4 posições na
Reproduzir (a partir da primeira faixa) Com o leitor de CD parado, empurre a tecla de
Fazer uma pausa/retomar a reprodução Empurre a tecla de controlo em direcção a u.
depois da pausa
Parar Empurre a tecla de controlo na direcção de x•CHG
Localizar o início da faixa actual (AMS*1) Empurre rapidamente a tecla de controlo na direcção
Localizar o início das faixas anteriores (AMS) Empurre várias vezes a tecla de controlo na direcção
Localizar o início da faixa seguinte (AMS) Empurre rapidamente a tecla de controlo na direcção
Localizar o início das faixas seguintes (AMS) Empurre várias vezes a tecla de controlo na direcção
Recuar rapidamente Empurre sem soltar a tecla de controlo na direcção de
Avançar rapidamente Empurre sem soltar a tecla de controlo na direcção de
Saltar para os grupos seguintes*
Saltar para os grupos anteriores*
*1 Sensor automático de música
*2 Estas operações podem ser executadas durante a pausa e a reprodução.
*3 Depois de reproduzida a última faixa pode voltar ao princípio da primeira faixa empurrando a tecla de
controlo com 4 posições na direcção de >. Da mesma forma, se estiver na primeira faixa pode localizar
a última faixa empurrando a tecla de controlo na direcção de ..
*4 Só quando reproduzir um CD ATRAC/MP3
4
4
direcção de u.
A reprodução começa a partir do ponto em que parou.
controlo em direcção a u e solte-a passados 2
segundos ou mais.
(RADIO OFF).*
de . uma vez.*
de ..*
de > uma vez.*
de >.*
..*
2
>.*
2
2
2, *3
2, *3
2, *3
2
Carregue várias vezes em +.
Carregue várias vezes em –.
(Continua)
Reproduzir um CD de áudio ou ficheiros de formato ATRAC3plus/ATRAC3/MP3
13-PT
Page 98

Retirar o CD
Retire o CD fazendo pressão sobre o eixo
no centro do tabuleiro.
Os CD-Rs/RWs
Este leitor de CD pode reproduzir CD-Rs/RWs gravados no formato CD-DA*, mas a capacidade
de reprodução pode variar consoante a qualidade do disco e as condições do dispositivo de
gravação.
* CD-DA é a abreviatura correspondente a Compact Disc Digital Audio. É uma norma de gravação utilizada
para os CDs de áudio.
Discos de música codificados com tecnologias de protecção
de direitos de autor
Este equipamento destina-se a reproduzir discos que respeitem a norma de discos compactos
(CD). Actualmente, algumas editoras discográficas comercializam vários discos de música
codificados com tecnologias de protecção de direitos de autor. Alguns destes discos não
respeitam a norma de CD e pode não conseguir reproduzi-los neste equipamento.
14-PT
Page 99

O visor
Enquanto o leitor de CD está a reproduzir, as indicações seguintes aparecem no visor.
Também pode verificar o tempo restante, o nome da faixa, etc. utilizando DISPLAY (consulte as
páginas 29 e 30).
Durante a reprodução de um
CD de áudio
Número da faixa Tempo de reprodução
Durante a reprodução de um CD
Nome da faixa
de áudio contendo informações
de texto do CD
Número da faixa Tempo de reprodução
Durante a reprodução de um
Nome do ficheiro
ficheiro ATRAC3plus/ATRAC3
Nome do grupo
Número do ficheiro Tempo de reprodução
Durante a reprodução de
Nome do ficheiro
um ficheiro MP3
Nome do grupo
Número do ficheiro Tempo de reprodução
Notas
• Este leitor de CD permite ver os caracteres A - Z, a - z, 0 - 9 e _ .
• Antes de reproduzir um ficheiro, o leitor de CD lê todas as informações dos ficheiros e dos grupos do CD. A
indicação “READING” aparece. Dependendo do conteúdo do CD, a leitura pode demorar algum tempo.
Reproduzir um CD de áudio ou ficheiros de formato ATRAC3plus/ATRAC3/MP3
(Continua)
15-PT
Page 100

Exemplo de ficheiros e grupos ATRAC3plus/ATRAC3
Grupo
Ficheiro ATRAC3plus/ATRAC3
1
1
2
3
2
4
5
3
6
7
8
9
4
q;
qa
qs
Modo de ficheiro (reprodução normal)
Modo de grupo (se for seleccionado “ ” utilizando P MODE/ (consulte a página 18))
Reproduz todos os ficheiros ATRAC3plus/ATRAC3 de 1, 2, 3...qa, qs.
Reproduz todos os ficheiros ATRAC3plus/ATRAC3 do grupo seleccionado.
Notas
• Número máximo de grupos: 255
Número máximo de ficheiros: 999
• No que se refere aos CDs ATRAC, “grupo” equivale a um “álbum” e “ficheiro” equivale a uma “faixa”.
16-PT
 Loading...