

Page 1

3-080-162-12(1)
Digital
Video Camera
Recorder
Operating Instructions
Before operating the unit, please read this manual thoroughly,
and retain it for future reference.
Owner’s Record
The model and serial numbers are located on the bottom. Record the
serial number in the space provided below. Refer to these numbers
whenever you call upon your Sony dealer regarding this product.
Model No. DCR-TRV Model No. AC-
Serial No. Serial No.
DCR-TRV80
DCR-TRV75/TRV80
©2003 Sony Corporation
TM
SERIES
Page 2

Congratulations on your purchase of this Sony Handycam. With your Handycam, you can
Welcome!
capture life’s precious moments with superior picture and sound quality. Your Handycam is
loaded with advanced features, but at the same time it is very easy to use. You will soon be
producing home video that you can enjoy for years to come.
WARNING
To prevent fire or shock hazard, do
not expose the unit to rain or
moisture.
This symbol is intended to
alert the user to the presence
of uninsulated “dangerous
voltage” within the product’s
enclosure that may be of
sufficient magnitude to
constitute a risk of electric
shock to persons.
This symbol is intended to
alert the user to the presence
of important operating and
maintenance (servicing)
instructions in the literature
accompanying the appliance.
CAUTION
The use of optical instruments with this
product will increase eye hazard. As the laser
beam used in this Handycam is harmful to
eyes, do not attempt to disassemble the
cabinet.
Refer to servicing to qualified personnel only.
For customers in the U.S.A.
and CANADA
CAUTION
TO PREVENT ELECTRIC SHOCK, MATCH
WIDE BLADE OF PLUG TO WIDE SLOT,
FULLY INSERT.
RECYCLING LITHIUM-ION BATTERIES
Lithium-Ion batteries are
recyclable.
You can help preserve our
environment by returning
your used rechargeable
batteries to the collection and
recycling location nearest you.
For more information regarding recycling of
rechargeable batteries, call toll free 1-800-8228837, or visit http://www.rbrc.org/
Caution: Do not handle damaged or leaking
Lithium-Ion batteries.
“Memory Stick”
This device complies with Part 15 of the FCC
Rules. Operation is subject to the following
two conditions: (1) This device may not cause
harmful interference, and (2) this device must
accept any interference received, including
interference that may cause undesired
operation.
This Class B digital apparatus complies with
Canadian ICES-003.
DCR-TRV80 only
You can only use the Bluetooth wireless
connection function in the country or area
where you purchase the devices.
For details, refer to the separate Network
Function/Application Operating Instructions.
Notice
If static electricity or electromagnetism causes
data transfer to discontinue midway (fail),
restart the application or disconnect and
connect the USB cable again.
2
Page 3

For customers in the U.S.A.
If you have any questions about this product,
you may call:
Sony Customer Information Center 1-800-222SONY (7669)
The number below is for the FCC related
matters only.
Regulatory Information
Declaration of Conformity
Trade Name: SONY
Model No.: DCR-TRV80
Responsible Party: Sony Electronics Inc.
Address: 680 Kinderkamack
Road, Oradell,
NJ07649 U.S.A.
Telephone No.: 201-930-6972
This device complies with Part 15 of the
FCC Rules. Operation is subject to the
following two conditions: (1) This device
may not cause harmful interference, and
(2)this device must accept any interference
received, including interference that may
cause undesired operation.
DCR-TRV80 only
IMPORTANT NOTE
To comply with FCC RF exposure compliance
requirements, the following antenna
installation and device operating
configurations must be satisfied: the antenna
has been installed by the manufacturer and no
changes can be made.
This device and its antenna (s) must not be colocated or operating in conjunction with any
other antenna or transmitter.
CAUTION
You are cautioned that any changes or
modifications not expressly approved in this
manual could void your authority to operate
this equipment.
Note:
This equipment has been tested and found to
comply with the limits for a Class B digital
device, pursuant to Part 15 of the FCC Rules.
These limits are designed to provide
reasonable protection against harmful
interference in a residential installation. This
equipment generates, uses, and can radiate
radio frequency energy and, if not installed
and used in accordance with the instructions,
may cause harmful interference to radio
communications. However, there is no
guarantee that interference will not occur in a
particular installation. If this equipment does
cause harmful interference to radio or
television reception, which can be determined
by turning the equipment off and on, the user
is encouraged to try to correct the interference
by one or more of the following measures:
— Reorient or relocate the receiving antenna.
— Increase the separation between the
equipment and receiver.
— Connect the equipment into an outlet on a
circuit different from that to which the
receiver is connected.
— Consult the dealer or an experienced
radio/TV technician for help.
The supplied interface cable must be used
with the equipment in order to comply with
the limits for a digital device pursuant to
Subpart B of Part 15 of FCC Rules.
For customers in CANADA
DCR-TRV80 only
The term “IC:” before the radio certification
number only signifies that Industry Canada
technical specifications were met.
3
Page 4

Main Features
Recording moving pictures
or still images, and playing
them back
Main Features
•Viewing moving pictures recorded on
the tape using the USB cable (p. 154)
•Viewing images recorded on the
“Memory Stick” using the USB cable
(p. 161, 166)
•Capturing images on the computer
from your camcorder using the USB
cable (p. 156)
•Converting an analog signal into
digital to capture images onto the
computer (p. 167)
•Recording moving pictures on the
tape (p. 25)
•Playing back the tape (p. 37)
•Recording still images on the
“Memory Stick” (p. 44, 107)
•Recording moving pictures on the
“Memory Stick” (p. 120)
•Viewing still images recorded on
the “Memory Stick” (p. 128)
•Viewing moving pictures recorded
on the “Memory Stick” (p. 130)
Capturing images on the
computer
4
4
Page 5

Main Features
•You can access the Internet using
a Bluetooth device (optional) or a
Accessing the network
and using BIP
(DCR-TRV80 only)
dedicated accessory that serves
as a USB Network Adaptor
(optional) etc.
•You can use the following
functions by connecting to a
Bluetooth device (optional) using
BIP.
–Remote Camera
–Image Transport
For details, refer to the Network
Function/Application
Operating Instructions supplied
with your camcorder. (DCRTRV80 only) (p. 169)
Other uses
Functions for adjusting exposure during recording
•Back light function (p. 32)
•NightShot/Super NightShot/Color Slow Shutter (p. 32)
•PROGRAM AE (p. 57)
•Manual exposure (p. 59)
•Flexible Spot Meter (p. 60)
•Recording images with the flash (p. 111)
Functions for giving images more impact
•Digital zoom (p. 31)
The default setting is OFF. (To zoom greater than 10×,
select the digital zoom power in D ZOOM in the menu settings.)
•Fader (p. 50)
•Picture effect (p. 53)
•Digital effect (p. 54)
•Title (p. 95)
•MEMORY MIX (p. 116)
Functions for giving a natural appearance to your recordings
•PROGRAM AE (p. 57)
– SPORTS
– LANDSCAPE
•Manual focus (p. 61)
•Expanded focus (p. 61)
•Spot Focus (p. 63)
Functions for using after recording
•End search/Edit search/Rec Review (p. 35)
•Data code (p. 38)
•Tape PB ZOOM/Memory PB ZOOM (p. 71, 133)
•Zero set memory (p. 72)
•Title search (p. 73)
•Digital program editing (p. 78, 125)
Getting Started
Main Features
5
5
Page 6

Table of contents
Main Features...................................... 4
Quick Start Guide
– Recording on tape ................................ 8
– Recording on “Memory Stick” ......... 10
Getting Started
Using this manual ................................. 12
Checking supplied accessories............ 14
Step 1 Preparing the power source..... 15
Installing the battery pack............. 15
Charging the battery pack............. 16
Connecting to a wall outlet ........... 19
Step 2 Setting the date and time ......... 20
Step 3 Using the touch panel............... 23
Recording – Basics
Recording a picture............................... 25
Shooting backlit subjects
– Back light function................ 32
Shooting in the dark
– NightShot/Super NightShot/
Color Slow Shutter .................. 32
Checking recordings
– End search/Edit search/Rec
Review ............................................. 35
Playback – Basics
Playing back tape .................................. 37
To display the screen indicators
– Display function ................... 38
Viewing a recording on TV ................. 42
Advanced Recording
Operations
Recording still images on “Memory
Stick” during tape recording
standby or tape recording ............. 44
Self-timer recording .............................. 46
Adjusting the white balance
manually .......................................... 47
Using the wide mode ........................... 48
Using the fader function ...................... 50
Using special effects
– Picture effect................................. 53
Using special effects – Digital effect... 54
Using PROGRAM AE .......................... 57
Adjusting the exposure manually ...... 59
Using spot light-metering function
– Flexible Spot Meter ..................... 60
6
Focusing manually................................ 61
Using spot focus function
– Spot Focus .................................... 63
Interval Recording ................................ 64
Frame by frame recording
– Frame recording .......................... 65
Recording with all the pixels
– Progressive Recording Mode .... 66
Using the viewfinder ............................ 67
Advanced Playback
Operations
Playing back tape
with picture effect .......................... 69
Playing back tape
with digital effect............................ 70
Enlarging images recorded on tape
– Tape PB ZOOM ........................... 71
Quickly locating a scene
– Zero set memory ......................... 72
Searching the boundaries of recorded
tape by title – Title search ............. 73
Searching a recording by date
– Date search ................................... 74
Editing
Dubbing tape ......................................... 76
Dubbing only desired scenes
– Digital program editing
(on tape) ........................................... 78
Recording video or TV programs ....... 87
Inserting a scene from a VCR
– Insert editing ................................ 89
Audio dubbing ...................................... 91
Superimposing a title on a cassette
with Cassette Memory................... 95
Making your own titles ........................ 97
Labeling a cassette on a cassette
with Cassette Memory................... 98
Erasing all the data in
Cassette Memory ............................ 99
“Memory Stick” Operations
Using “Memory Stick”
– Introduction ............................... 100
Selecting the quality and size of
image data ..................................... 103
Recording still images on
“Memory Stick”
– Memory Photo recording ......... 107
Recording an image from tape as a
still image ...................................... 114
Page 7

Table of contents
Superimposing a still image in
“Memory Stick” on an image
– MEMORY MIX .......................... 116
Interval Photo Recording................... 119
Recording moving pictures on
“Memory Stick”
– MPEG MOVIE recording ......... 120
Self-timer recording ............................ 122
Recording a picture from tape
as a moving picture...................... 123
Recording edited pictures from tape
as a moving picture
– Digital program editing
(on “Memory Stick”).................... 125
Changing the recording folder.......... 127
Viewing a still image
– Memory Photo playback .......... 128
Viewing a moving picture
– MPEG MOVIE playback .......... 130
Choosing playback folder .................. 132
Enlarging still images recorded on
“Memory Stick”
– Memory PB ZOOM ................... 133
Playing back images continuously
– Slide show .................................. 134
Preventing accidental erasure
– Image protection........................ 135
Deleting images – DELETE ............... 136
Changing image size – Resize ........... 139
Writing a print mark – Print mark ... 140
Viewing images with a
computer
Viewing images with a computer
– Introduction ............................... 141
Connecting your camcorder to a
computer using the USB cable
(For Windows users).................... 144
Viewing pictures recorded on tape
on a computer
– USB Streaming
(For Windows users).................... 154
Viewing images recorded on
“Memory Stick” on a computer
(For Windows users).................... 161
Connecting your camcorder to a
computer using the USB cable
(For Macintosh users) .................. 164
Viewing images recorded on
“Memory Stick” on a computer
(For Macintosh users) .................. 166
Capturing images from an analog
video unit on a computer
– Signal convert function............. 167
Using the Network function
(DCR-TRV80 only)
For details, refer to the Network Function/
Application Operating Instructions
supplied with your camcorder.
Accessing the network ....................... 169
Using applications .............................. 171
Customizing Your Camcorder
Changing the menu settings.............. 172
Troubleshooting
Types of trouble and how to correct
trouble ............................................ 183
Self-diagnosis display......................... 191
Warning indicators ............................. 192
Warning messages .............................. 193
Additional Information
Usable cassettes ................................... 194
About the “InfoLITHIUM” battery
pack ................................................ 197
About i.LINK ....................................... 199
Using your camcorder abroad .......... 201
Maintenance information and
precautions .................................... 202
Specifications ....................................... 208
Quick Reference
Identifying parts and controls........... 210
Index ..................................................... 217
Getting Started
7
Page 8

Quick Start Guide – Recording on tape
Connecting the power cord
Use the battery pack when using your camcorder outdoors (p. 15).
Open the DC IN jack cover.
AC Adaptor (supplied)
Connect the plug with its v mark facing up.
Quick Start Guide
1 Slide OPEN/
EJECT in the
direction of the arrow
and open the lid.
How to hold
your camcorder
8
Inserting the cassette
2 Push the center of the
cassette back to insert
the cassette. Insert the
cassette straight as far
as possible into the
cassette compartment
with the window
facing up.
To eject the cassette
Follow the procedures above, and take out the cassette after the cassette compartment
opens completely in step 3.
Note
Do not press the cassette compartment down forcibly. Doing so may cause a
malfunction.
Fastening the grip belt
Fasten the grip belt firmly.
3 Close the cassette
compartment by
pressing
cassette
compartment.
After the cassette
compartment goes
down completely,
close the lid until it
clicks.
on the
1
4
2
3
Page 9

Recording a picture on the tape (p. 25)
1Remove the lens cap.
2Set the POWER switch
to CAMERA while
pressing the small
green button.
3Press OPEN
to open the
LCD panel.
PO
The picture
appears on
the screen.
Viewfinder
When the LCD panel is closed,
use the viewfinder with your eye
against the eyecup.
4Press START/STOP. Your
camcorder starts recording. To
stop recording, press START/
STOP again.
Adjust the viewfinder lens to
your eyesight (p. 30).
When you purchase your camcorder, the clock setting is set to off. If you want to record the date
and time for a picture, set the clock setting before recording (p. 20).
VCR
W
E
OFF(CHG)
R
CAMERA
MEMORY/
NETWORK
Monitoring the playback picture on the LCD
screen (p. 37)
2Press of the touch panel to
1Set the POWER
switch to VCR
while pressing the
small green button.
VCR
OFF(CHG)
R
E
W
PO
CAMERA
MEMORY/
NETWORK
rewind the tape.
3Press of the touch panel to
start playback.
Quick Start Guide
Quick Start Guide
Do not pick up your camcorder
by holding parts as illustrated.
Note
When using the touch panel, press
operation buttons lightly with your
finger or the supplied stylus (DCRTRV80 only) supporting the LCD panel
from the back side of it. Do not press
the LCD screen with sharp objects other
than the supplied stylus (DCR-TRV80
only).
Viewfinder FlashLCD panel Battery pack
9
Page 10

Quick Start Guide – Recording on “Memory Stick”
Connecting the power cord
Use the battery pack when using your camcorder outdoors (p. 15).
Open the DC IN
jack cover.
AC Adaptor (supplied)
Connect the plug with its v
mark facing up.
Quick Start Guide
Insert the “Memory Stick” in the “Memory Stick” slot as far as it can go with the B mark
facing up as illustrated.
How to hold
your camcorder
10
Inserting the “Memory Stick” (p. 102)
Access lamp
B mark
Press the “Memory Stick”
once lightly to eject it.
While the access lamp is lit or flashing
Do not shake or strike your camcorder because your camcorder is reading the data from
the “Memory Stick” or recording the data on the “Memory Stick.” Do not turn the
power off, eject the “Memory Stick” or remove the battery pack. Otherwise, image data
breakdown may occur.
2
Fastening the grip belt
Fasten the grip belt firmly.
1
3
4
Page 11

Recording still images on the “Memory Stick”
(p. 107)
1Remove the lens cap (p. 25).
2Set the POWER switch
to MEMORY while
pressing the small green
button.
3Press OPEN
to open the
LCD panel.
The picture
Make sure that the
LOCK switch is set to
the left (unlock)
position.
appears on
the screen.
PO
VCR
W
E
OFF(CHG)
R
CAMERA
MEMORY/
NETWORK
Viewfinder
When the LCD panel is
closed, use the
viewfinder with your
eye against the eyecup.
Adjust the viewfinder
lens to your eyesight
(p. 30).
4Press PHOTO lightly.
When the green ● mark
stops flashing, then lights
up, you can record a still
image.
FINE
640
12
5Press PHOTO deeply.
The image when you
pressed PHOTO deeply will
be recorded on the “Memory
Stick.”
FINE
640
When you purchase your camcorder, the clock setting is set to off. If you want to record the date
and time for a picture, set the clock setting before recording (p. 20).
Monitoring the playback still image on the LCD
screen (p. 128)
Quick Start Guide
Do not pick up your camcorder
by holding parts as illustrated.
1Set the POWER
switch to MEMORY
while pressing the
small green button.
2Press PLAY. The last
recorded image is
displayed.
Viewfinder FlashLCD panel Battery pack
POWER
PLAY
VCR
OFF(CHG)
CAMERA
MEMORY/
NETWORK
11
Page 12

— Getting Started —
Using this manual
The instructions in this manual are for the two models listed in the table below. Before
you start reading this manual and operating your camcorder, check the model number
by looking at the bottom of your camcorder. The DCR-TRV80 is the model used for
illustration purposes. Otherwise, the model name is indicated in the illustrations. Any
differences in operation are clearly indicated in the text, for example, “DCR-TRV80
only.”
As you read through this manual, buttons and settings on your camcorder are shown in
capital letters.
After “Advanced Recording Operations” section of this manual, position of the POWER
switch is shown by the icons below.
PO
DCR-TRV80 only
The MEMORY/NETWORK position of the POWER switch is shown as MEMORY or
When you carry out an operation, you can hear a beep to indicate that the operation is
being carried out.
VCR
W
E
OFF(CHG)
R
CAMERA
MEMORY/
NETWORK
in this manual.
: Set the POWER switch to VCR.
: Set the POWER switch to CAMERA.
: Set the POWER switch to MEMORY/NETWORK
(DCR-TRV80 only).
12
Types of differences
DCR- TRV75 TRV80
Mark on the POWER switch MEMORY MEMORY/NETWORK
Network function — z
z Provided
— Not provided
Note on Cassette Memory
Your camcorder is based on the DV format. You can use only mini DV cassettes with
your camcorder. We recommend that you use a cassette with Cassette Memory .
Cassettes with Cassette Memory have the (Cassette Memory) mark.
Note on TV color systems
TV color systems differ depending on the country or area. To view your recordings on a
TV, you need an NTSC system-based TV.
Copyright precautions
Television programs, films, video tapes, and other materials may be copyrighted.
Unauthorized recording of such materials may be contrary to the copyright laws.
Page 13
Using this manual
Note on connecting to other devices
If you connect your camcorder to a VCR or computer using the USB cable or the i.LINK
cable, make sure that the jack is connected in the right direction. Pushing it forcibly may
damage the jack or cause your camcorder to malfunction.
Precautions on camcorder care
Lens and LCD screen/finder (on mounted models only)
•The LCD screen and the finder are manufactured using extremely high-precision
technology, so over 99.99% of the pixels are operational for effective use.
However, there may be some tiny black points and/or bright points (white, red,
blue or green in color) that constantly appear on the LCD screen and the finder.
These points are normal in the manufacturing process and do not affect the
recording in any way.
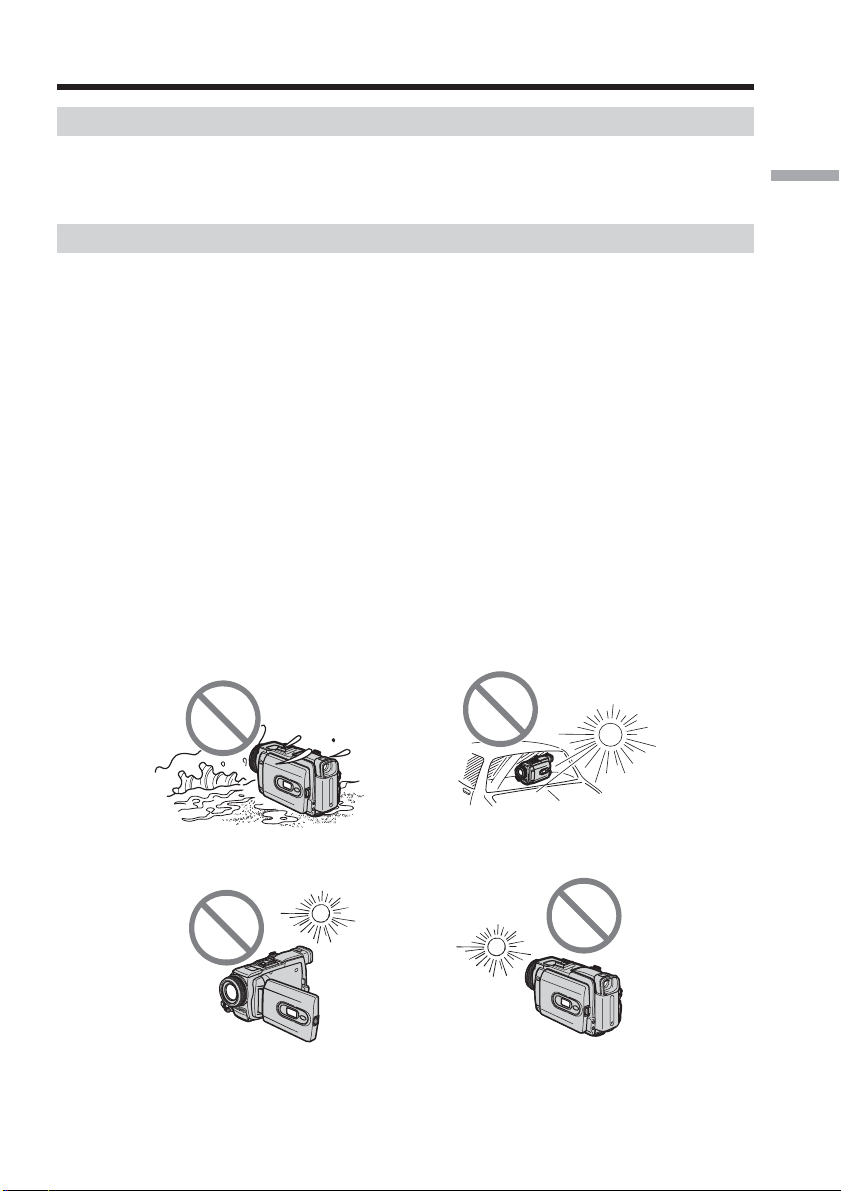
•Do not let your camcorder get wet. Keep your camcorder away from rain and sea
water. Letting your camcorder get wet may cause your camcorder to malfunction.
Sometimes this malfunction cannot be repaired [a].
•Never leave your camcorder exposed to temperatures above 60°C (140°F), such as in a
car parked in the sun or under direct sunlight [b].
•Be careful when placing the camera near a window or outdoors. Exposing the LCD
screen, the finder or the lens to direct sunlight for long periods may cause
malfunctions [c].
•Do not directly shoot the sun. Doing so might cause your camcorder to malfunction.
Take pictures of the sun in low light conditions such as dusk [d].
[a][b]
Getting Started
[c][d]
13
Page 14
Checking supplied accessories
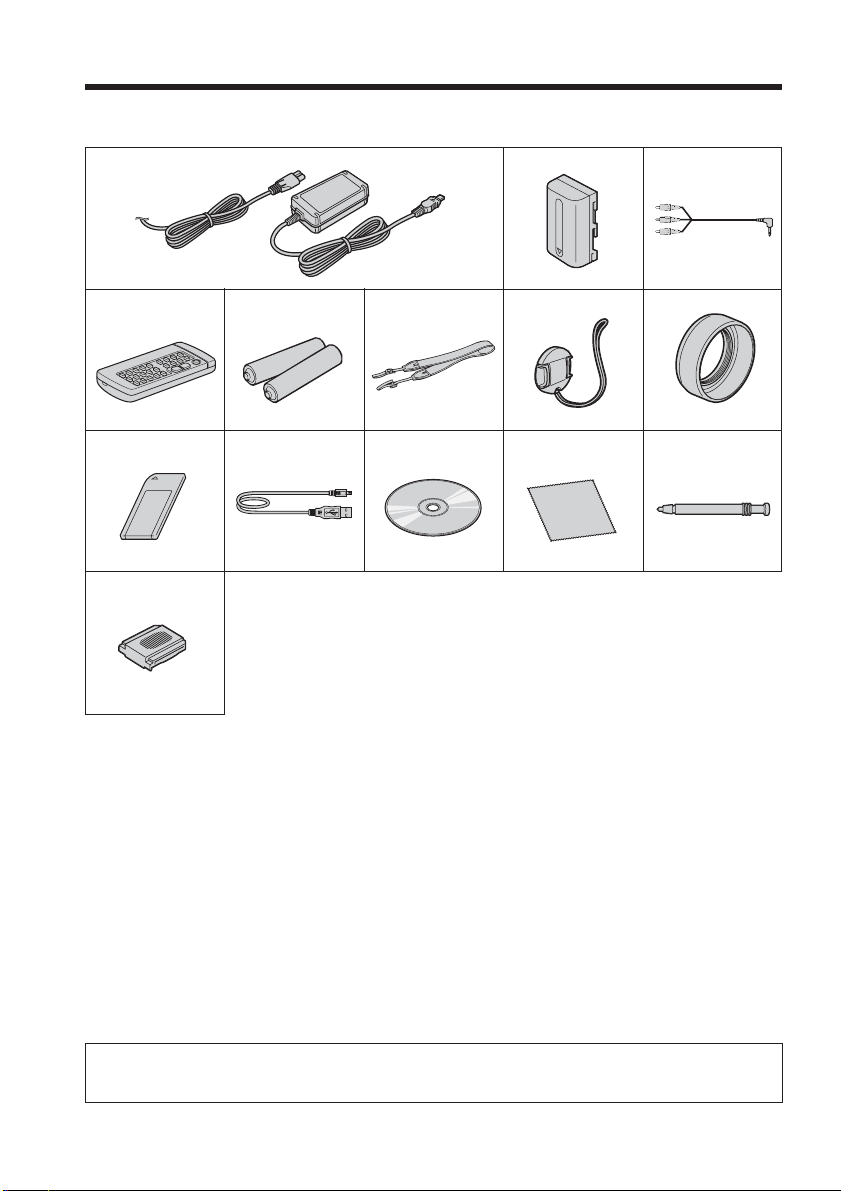
Make sure that the following accessories are supplied with your camcorder.
1
4
9
qf
5
q;
6
qa
2
7
qs
3
8
qd
1 AC-L15A/L15B AC Adaptor (1), Power
cord (1) (p. 16)
2 NP-FM50 rechargeable battery pack
(1) (p. 15, 16)
3 A/V connecting cable (1) (p. 42)
4 Wireless Remote Commander (1)
(p. 215)
5 Size AA (R6) battery for Remote
Commander (2) (p. 215)
6 Shoulder strap (1)
Contents of the recording cannot be compensated if recording or playback is not made due to a
malfunction of the camcorder, storage media, etc.
14
7 Lens cap (1) (p. 25)
8 Lens hood (1) (p. 30)
9 “Memory Stick” (1) (p. 100)
0 USB cable (1) (p. 141)
qa CD-ROM (SPVD-010 USB Driver) (1)
(p. 146)
qs Cleaning cloth (1) (p. 203)
qd Stylus (1) (DCR-TRV80 only) (p. 170)
qf Shoe cover (1) (p. 92)
Page 15

Step 1 Preparing the power source
Installing the battery pack
(1) Lift up the viewfinder.
(2) Slide the battery pack down until it clicks.
1
2
To remove the battery pack
(1) Lift up the viewfinder.
(2) Slide the battery pack out in the direction of the arrow while pressing BATT
down.
1
2
BATT release
button
Getting Started
2
If you use the large capacity battery pack
If you install the NP-FM70/QM71/QM71D/FM91/QM91/QM91D battery pack on your
camcorder, extend its viewfinder.
15
Page 16
Step 1 Preparing the power source
Charging the battery pack
Use the battery pack after charging it for your camcorder.
Your camcorder operates only with the “InfoLITHIUM” battery pack (M series).
See page 197 for details of “InfoLITHIUM” battery pack.
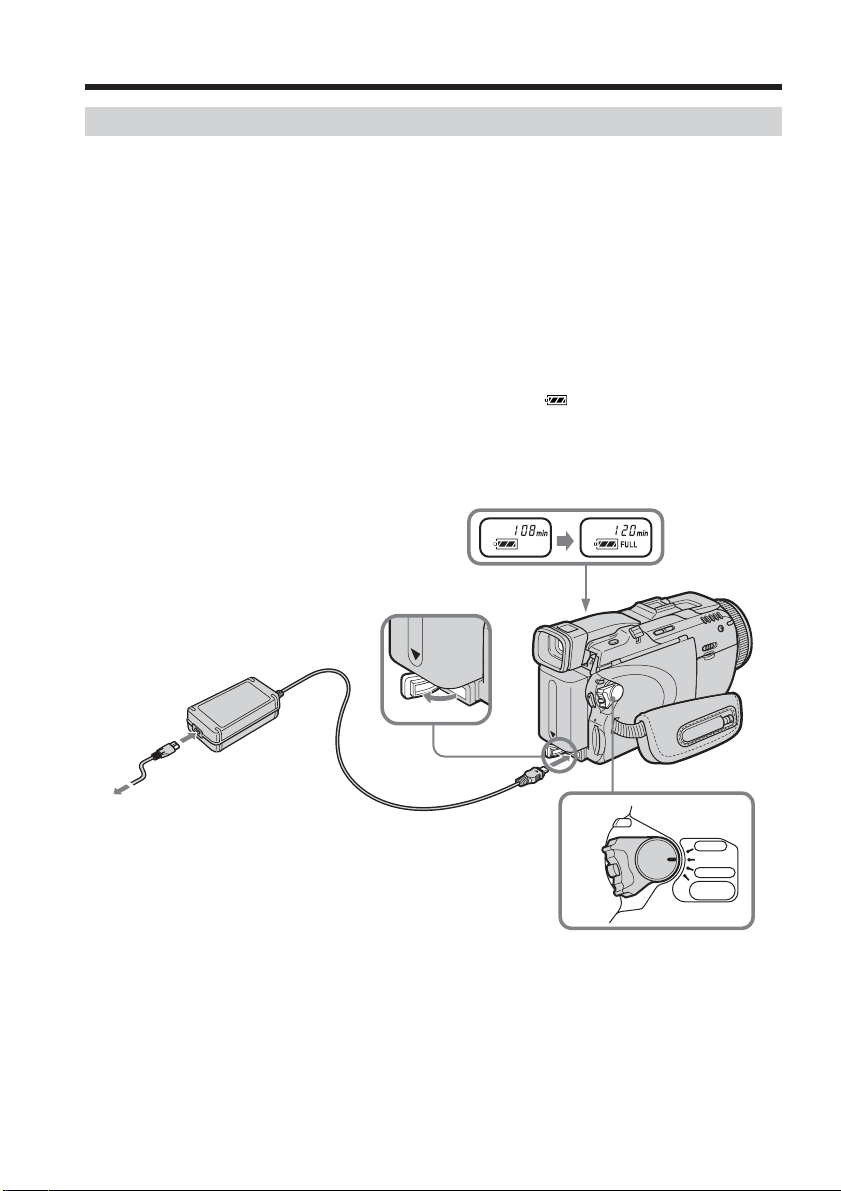
(1) Install the battery pack on your camcorder.
(2) Connect the AC Adaptor supplied with your camcorder to the DC IN jack with
the DC plug’s v mark facing up.
(3) Connect the power cord to the AC Adaptor.
(4) Connect the power cord to a wall outlet.
(5) Set the POWER switch to OFF (CHG). Charging begins. The remaining battery
time is indicated in minutes in the display window.
When the remaining battery time indicator changes to , normal charge is complete.
To fully charge the battery pack (full charge), leave the battery pack attached for about
one hour after normal charge is complete until the FULL indicator appears in the
display window. Fully charging the battery pack allows you to use the battery pack
longer than usual.
16
3
2
5
After charging the battery pack
Disconnect the AC Adaptor from the DC IN jack on your camcorder.
POWER
VCR
OFF(CHG)
CAMERA
MEMORY/
NETWORK
Page 17

Step 1 Preparing the power source
Note
Prevent metallic objects from coming into contact with the metal parts of the DC plug of
the AC Adaptor. This may cause a short-circuit, damaging the AC Adaptor.
When you use the AC Adaptor
Place the AC Adaptor near a wall outlet. While using the AC Adaptor if any trouble
occurs with this unit, disconnect the plug from a wall outlet as soon as possible to cut
off the power.
Remaining battery time indicator
The remaining battery time indicator in the display window indicates the approximate
recording time when recording with the viewfinder.
Until your camcorder calculates the actual remaining battery time
“---- min” appears in the display window.
Charging time
Battery pack Full charge (Normal charge)
NP-FM50 (supplied) 150 (90)
NP-FM70 240 (180)
NP-QM71/QM71D 260 (200)
NP-FM91/QM91/QM91D 360 (300)
Approximate minutes at 25°C (77°F) to charge an empty battery pack
The charging time may increase if the battery’s temperature is extremely high or low
because of the ambient temperature.
Getting Started
Recording time
Recording with Recording with
Battery pack the viewfinder the LCD screen
Continuous Typical* Continuous Typical*
NP-FM50 (supplied) 120 70 95 55
NP-FM70 250 145 200 115
NP-QM71/QM71D 290 170 230 135
NP-FM91/QM91/QM91D 445 260 350 205
Approximate minutes when you use a fully charged battery pack
* Approximate number of minutes when recording while you repeat recording start/
stop, zooming and turning the power on/off. The actual battery life may be shorter.
17
Page 18

Step 1 Preparing the power source
Playing time
Battery pack
NP-FM50 (supplied) 200 140
NP-FM70 415 295
NP-QM71/QM71D 485 340
NP-FM91/QM91/QM91D 725 520
Approximate minutes when you use a fully charged battery pack
Note
Approximate recording time and continuous playing time at 25°C (77°F). The battery
life will be shorter if you use your camcorder in a cold environment.
Playing time Playing time
with the LCD panel closed on the LCD screen
Checking status of battery pack – Battery Info
(1) Set the POWER switch to OFF (CHG).
(2) Press OPEN to open the LCD panel.
(3) Press DISPLAY/BATTERY INFO.
The battery charge level (the percentage of remaining battery time) and
remaining battery time when using the LCD screen or viewfinder are
displayed for about seven seconds.
If you keep pressing DISPLAY/BATTERY INFO, the Battery Info is displayed
for up to about 20 seconds.
18
3
DISPLAY/
BATTERY INFO
BATTERY INFO
BATTERY CHARGE LEVEL
0% 50%
REC TIME AVAILABLE
LCD SCREEN
VIEWFINDER::7696
100%
min
min
During charging
BATTERY INFO
BATTERY CHARGE LEVEL
0% 50% 100%
REC TIME AVAILABLE
LCD SCREEN
VIEWFINDER::95120
min
min
Fully charged
Page 19

Step 1 Preparing the power source
Note
The BATTERY INFO indicator is not displayed in the following cases:
– The battery pack is not properly installed.
– Something is wrong with the battery pack.
– The battery pack is fully discharged.
Battery Info
The number displayed as Battery Info is the approximate recording time.
While the remaining battery time is being calculated
“CALCULATING BATTERY INFO...” is displayed.
Connecting to a wall outlet
Connect in the same way as when charging the battery pack (p. 16).
PRECAUTION
The set is not disconnected from the AC power source (house current) as long as it is
connected to the wall outlet, even if the set itself has been turned off.
Notes
•The AC Adaptor can supply power from a wall outlet even if the battery pack is
attached to your camcorder.
•The DC IN jack has “source priority.” This means that the battery pack cannot supply
any power if the power cord is connected to the DC IN jack, even when the power
cord is not plugged into a wall outlet.
Getting Started
19
Page 20
Step 2 Setting the date and time
Set the date and time when you use your camcorder for the first time. The “CLOCK
SET” indicator will appear each time you set the POWER switch to CAMERA or
MEMORY unless you set the date and time settings.
If you do not set the date and time, “--- -- ----” and “--:--:--” are recorded on the tape or
the “Memory Stick” as the data code.
If you do not use your camcorder for about three months, the date and time settings
may be released (bars may appear) because the built-in rechargeable battery installed in
your camcorder will have been discharged (p. 204). In this case, charge the built-in
rechargeable battery, then set your area, the daylight saving time (DST*), the year, the
month, the day, the hour and the minute.
* Instead of DST, SUMMERTIME is displayed on the screen for some models.
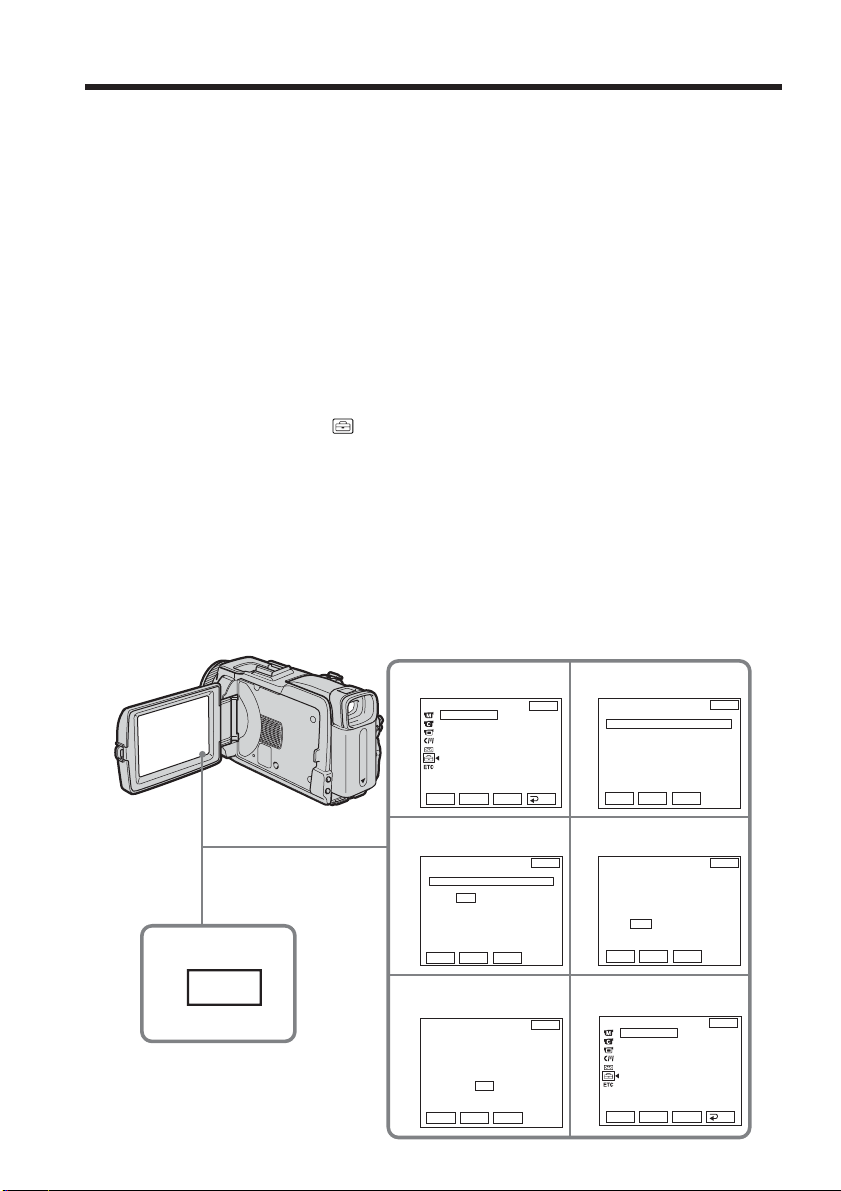
(1) Set the POWER switch to CAMERA or MEMORY.
(2) Press FN (Function) to display PAGE1 (p. 23).
(3) Press MENU to display the menu.
(4) Press r/R to select
(5) Press r/R to select CLOCK SET, then press EXEC.
(6) Press r/R to select your area, then press EXEC.
(7) Press r/R to select whether your area is in the daylight saving time or not,
then press EXEC.
(8) Press r/R to select a desired year, then press EXEC.
(9) Set the month, day and hour with the same procedure as step 8.
(10)Press r/R to set the minute, then press EXEC by the time signal. The clock
starts to move.
, then press EXEC.
20
2
FN
4
6
CLOCK SET
AREA26
DST OFF
DATE Y M D
8
CLOCK SET
AREA26
DST OFF
DATE Y M D
SETUP MENU
CLOCK SET
USB STREAM
LANGUAGE
DEMO MODE
––:––:––
Rr
EXEC
New York, Bogota
ON
– – – – – – – – – – – : – –
Rr
EXEC
New York, Bogota
2003 JAN 1 12 : 00AM
Rr
EXEC
EXIT
RET.
EXIT
GMT –5.0
EXIT
GMT –5.0
RRR R R
rrRrrrr
5
CLOCK SET
AREA 1
DST OFF
DATE Y M D
7
CLOCK SET
AREA26
DST OFF
DATE Y M D
10
SETUP MENU
R
GMT +0.0
Lisbon, London
r
– – – – – – – – – – – : – –
Rr
EXEC
GMT –5.0
New York, Bogota
RRR R R
2003 JAN 1 12 : 00AM
rrr r r
Rr
EXEC
JUL 4 2003
CLOCK SET
5:30:00 PM
USB STREAM
LANGUAGE
DEMO MODE
Rr
EXEC
EXIT
EXIT
EXIT
RET.
Page 21

Step 2 Setting the date and time
To return to FN (Function)
Press EXIT.
When using your camcorder abroad
Set the clock to the local time (p. 22).
If you use your camcorder in an area where daylight saving time is used
Set DST SET in to ON in the menu settings.
Note on the time indicator
The internal clock of your camcorder operates on a 12-hour cycle.
•12:00 AM stands for midnight.
•12:00 PM stands for noon.
Getting Started
21
Page 22

Step 2 Setting the date and time
Simple setting of clock by time difference
You can easily set the clock to the local time by setting a time difference. Select AREA
SET and DST SET* in in the menu settings.
See page 181 for details.
* Instead of DST, SUMMERTIME is displayed on the screen for some models.
World time difference
192021 2223 24 25 26 27293031 1 2346810121314161718
Area Time-zone
code differences
22
Area setting
1
GMT
2
+01:00
3
+02:00
4
+03:00
5
+03:30
6
+04:00
7
+04:30
8
+05:00
9
+05:30
10
+06:00
11
+06:30
12
+07:00
13
+08:00
14
+09:00
15
+09:30
16
+10:00
Lisbon, London
Berlin, Paris
Helsinki, Cairo
Moscow, Nairobi
Tehran
Abu Dhabi, Baku
Kabul
Karachi, Islamabad
Calcutta, New Delhi
Almaty, Dhaka
Rangoon
Bangkok, Jakarta
HongKong, Singapore
Seoul, Tokyo
Adelaide, Darwin
Melbourne, Sydney
Area Time-zone
code differences
17
+11:00
+12:00
18
–12:00
19
–11:00
20
–10:00
21
–09:00
22
–08:00
23
–07:00
24
–06:00
25
–05:00
26
–04:00
27
–03:30
28
–03:00
29
–02:00
30
–01:00
31
Area setting
Solomon Is
Fiji, Wellington
Eniwetok, Kwajalein
Midway Is., Samoa
Hawaii
Alaska
LosAngeles, Tijuana
Denver, Arizona
Chicago, MexicoCity
New York, Bogota
Santiago
St. John’s
Brasilia, Montevideo
Fernando de Noronha
Azores
Page 23
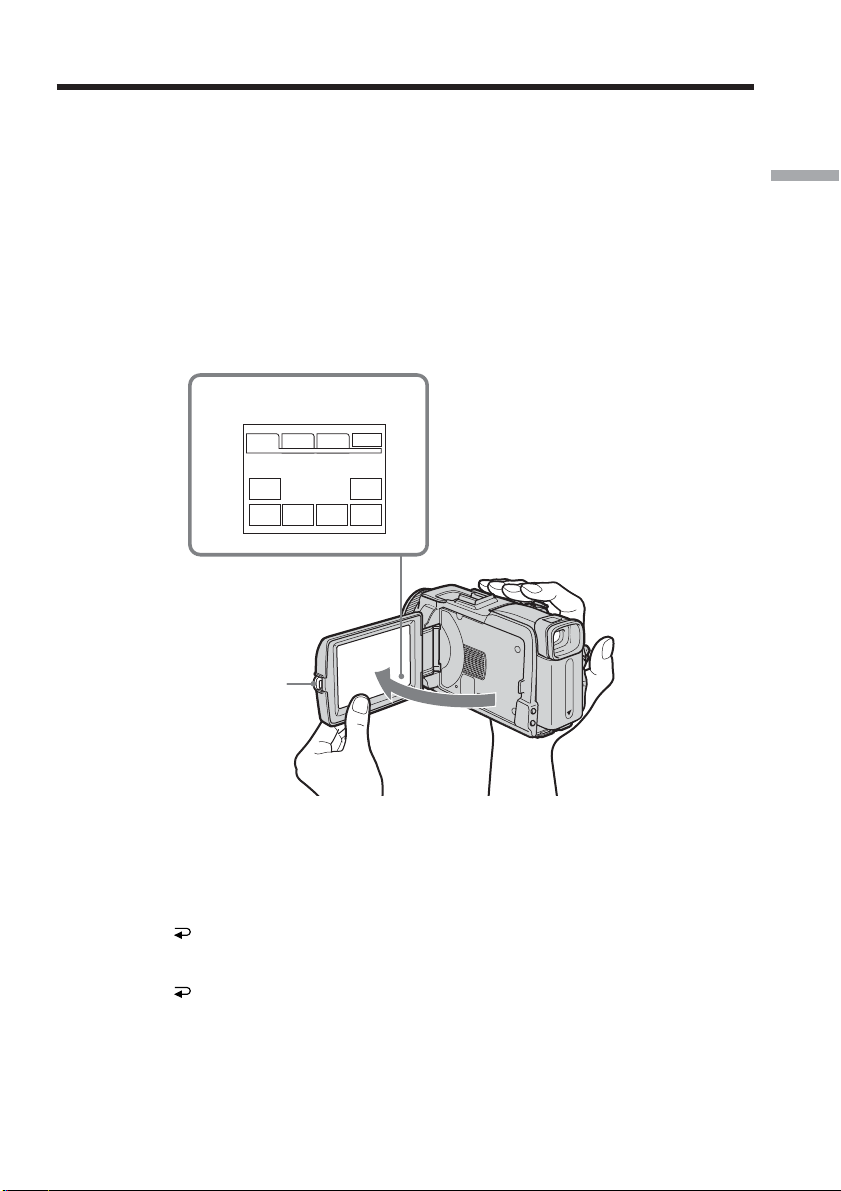
Step 3 Using the touch panel
Your camcorder has operation buttons on the LCD screen.
Touch the LCD screen directly with your finger or the supplied stylus (DCR-TRV80
only) to operate each function.
(1) Press OPEN to open the LCD panel.
(2) Set the POWER switch to CAMERA to record, VCR to play back or MEMORY
to use the “Memory Stick.”
(3) Press FN. Operation buttons on PAGE1 are displayed on the LCD screen.
(4) Press PAGE2/PAGE3 to display PAGE2/PAGE3. Operation buttons on
PAGE2/PAGE3 are displayed on the LCD screen.
(5) Press a desired operation item. See relevant pages of this manual for each
function.
When the POWER switch
3
is set to CAMERA
FADER
PAGE3
END
SCH
EXIT
SPOT
METER
EXPO-
SURE
PAGE1 PAGE2
SPOT
FOCUS
MENU
1
Getting Started
To return to FN
Press EXIT.
To execute settings
Press OK. The display returns to PAGE1/PAGE2/PAGE3.
To cancel settings
Press OFF. The display returns to PAGE1/PAGE2/PAGE3.
To make screen indicators disappear
Press DISPLAY/BATTERY INFO.
23
Page 24

Step 3 Using the touch panel
Operation buttons on each display
When the POWER switch is set to CAMERA
PAGE1 SPOT FOCUS, MENU, FADER, END SCH, SPOT METER, EXPOSURE
PAGE2 SELFTIMER, DIG EFFT, LCD BRT, VOL, MEM MIX
PAGE3 SUPER NS, COLOR SLW S, PRGRE REC, RMT CAM*
When the POWER switch is set to VCR
PAGE1 MENU, LCD BRT, VOL, END SCH
PAGE2 PB ZOOM, DIG EFFT, DATA CODE
PAGE3 V SPD PLAY, A DUB CTRL, REC CTRL
When the POWER switch is set to MEMORY
During memory camera
PAGE1 SPOT FOCUS, MENU, PLAY, PB FOLDR, SPOT METER, EXPOSURE
PAGE2 SELFTIMER, PLAY, MEM MIX
PAGE3 LCD BRT, PLAY, IMAGE TRANS*, VOL
During memory playback
PAGE1 MENU, CAM, PB FOLDR, DEL
PAGE2 PB ZOOM, CAM, RESIZE, DATA CODE
PAGE3 LCD BRT, CAM, IMAGE TRANS*, VOL
24
* DCR-TRV80 only
Notes
•When using the touch panel, press operation buttons lightly with your finger or the
supplied stylus (DCR-TRV80 only) supporting the LCD panel from the back side of it.
•Do not press the LCD screen with sharp objects other than the supplied stylus. (DCRTRV80 only)
•Do not press the LCD screen too hard.
•Do not touch the LCD screen with wet hands.
•If FN is not on the LCD screen, touch the LCD screen lightly to make it appear. You
can control the display with DISPLAY/BATTERY INFO on your camcorder.
When executing each item
The green bar appears above the item.
If the items are not available
The color of the items changes to gray.
Touch panel
You can operate with the touch panel using the viewfinder (p. 67).
Page 25

— Recording – Basics —
Recording a picture
See relevant “Step 1” and “Step 2.”
(1) Remove the lens cap and pull the lens cap string to fix it.
(2) Prepare the power source (p. 15 to 19) and insert the cassette (p. 8).
(3) Set the POWER switch to CAMERA while pressing the small green button.
This sets your camcorder to standby.
(4) Press OPEN to open the LCD panel. The picture appears on the screen.
(5) Press START/STOP. Your camcorder starts recording. The REC indicator
appears. The camera recording lamp located on the front of your camcorder
lights up. To stop recording, press START/STOP again.
Recording – Basics
3
LOCK switch
2
5
4
1
PO
VCR
W
E
OFF(CHG)
R
CAMERA
MEMORY/
NETWORK
Microphone
Camera recording
lamp
REC
50min
0:00:01
25
Page 26

Recording a picture
Note on recording
Your camcorder records and plays back in the SP (standard play) mode and in the LP
(long play) mode. Select SP or LP in the menu settings (p. 179). In the LP mode, you can
record 1.5 times as long as in the SP mode.
When you record the tape in the LP mode on your camcorder, we recommend playing
back the tape on your camcorder.
To enable smooth transition
Transition between the last scene you recorded and the next scene is smooth as long as
you do not eject the cassette even if you turn off your camcorder.
However, check the following:
– Do not mix recordings in the SP and LP modes on one tape.
– When you change the battery pack, set the POWER switch to OFF (CHG).
Self-timer recording
You can record images on the tape with the self-timer. See page 46 for details.
Note
The recording data (date/time or various settings when recorded) do not appear during
recording. However, they are recorded automatically on the tape. To display the
recording data, press DATA CODE during playback. You can also use the Remote
Commander for this operation (p. 38).
If you leave your camcorder during standby for five minutes while the cassette is
inserted
Your camcorder automatically turns off. This is to save battery power and to prevent
battery pack and tape wear. To return to standby, set the POWER switch to OFF (CHG)
and then back to CAMERA. However, your camcorder does not turn off automatically
while the cassette is not inserted.
26
When you record in the SP and LP modes on one tape or you record in the LP
mode
•The transition between scenes may not be smooth.
•The playback picture may be distorted or the time code may not be written properly
between scenes.
Note on the LOCK switch
When you slide the LOCK switch to the right, the POWER switch can no longer be set
to MEMORY accidentally. The LOCK switch is set to the left as the default setting.
Page 27
Recording a picture
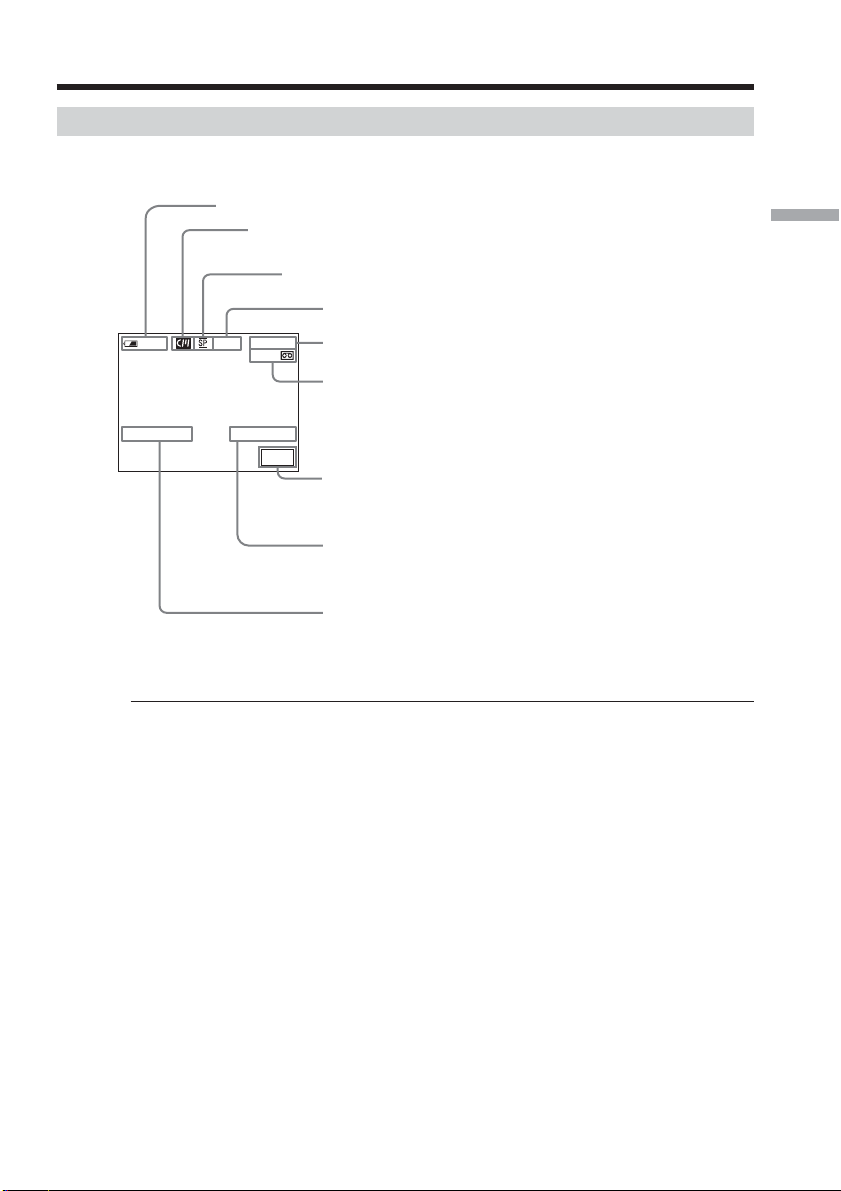
Indicators displayed during recording
Indicators are not recorded on the tape.
Remaining battery time
Cassette Memory
This appears when using the cassette with Cassette Memory.
Recording mode
STBY/REC
50
min
JUL 4 2003
REC
12:05:56PM
0:00:01
60min
Time code/Tape counter
Remaining tape
This appears after you insert the cassette.
FN
FN button
Press this button to display operation buttons on the
LCD screen.
Time
The time appears about five seconds after the
power is turned on.
Date
The date appears about five seconds after the
power is turned on.
Recording – Basics
Remaining battery time indicator during recording
The remaining battery time indicator roughly indicates the continuous recording time.
The indicator may not be correct, depending on the conditions in which you are
recording. When you close the LCD panel and open it again, it takes about one minute
for the correct remaining battery time in minutes to be displayed.
Time code
The time code indicates the recording or playback time, “0:00:00” (hours : minutes :
seconds) in CAMERA and “0:00:00:00” (hours : minutes : seconds : frames) in VCR.
You cannot rewrite only the time code.
Recording data
The recording data (date/time or various settings when recorded) are not displayed
during recording. However, they are recorded automatically on the tape. To display the
recording data, press DATA CODE during playback. You can also use the Remote
Commander for this operation (p. 38).
27
Page 28

Recording a picture
After recording
(1) Set the POWER switch to OFF (CHG).
(2) Close the LCD panel.
(3) Eject the cassette.
(4) Remove the power source.
Adjusting the LCD screen
180°
When you adjust the LCD panel, make sure if the LCD panel is opened up to 90
degrees.
Note
When using the LCD screen except in the mirror mode, the viewfinder automatically
turns off.
90°
28
When monitoring on the LCD screen
You can turn the LCD panel over and move it back to your camcorder body with the
LCD screen facing out.
Page 29

Recording a picture
Shooting with the mirror mode
This feature allows the camera subject to view him-or herself on the LCD screen.
The subject uses this feature to check his or her own image on the LCD screen while you
look at the subject in the viewfinder.
(1) Set the POWER switch to CAMERA or MEMORY.
(2) Rotate the LCD panel 180 degrees.
Picture in the mirror mode
The picture on the LCD screen is a mirror-image. However, the picture will be normal
when recorded.
Adjusting the brightness of the LCD screen
(1) When the POWER switch is set to CAMERA, press FN and select PAGE2.
When the POWER switch is set to VCR, press FN to display PAGE1.
When the POWER switch is set to MEMORY, press FN and select PAGE3.
(2) Press LCD BRT. The screen to adjust the brightness of the LCD screen appears.
(3) Adjust the brightness of the LCD screen using – (to dim)/+ (to brighten).
(4) Press
OK to return to PAGE1/PAGE2/PAGE3 in step 1.
Recording – Basics
2,3
LCD
BRT
LCD BRT
–+
The bar indicator
To return to FN
Press EXIT.
LCD screen backlight
You can change the brightness of the backlight. Select LCD B.L. in in the menu
settings when using the battery pack (p. 175).
Even if you adjust LCD BRT or LCD B.L.
The recorded picture will not be affected.
OK
29
Page 30

Recording a picture
Adjusting the viewfinder
If you record pictures with the LCD panel closed, check the picture with the viewfinder.
Adjust the viewfinder lens to your eyesight so that the images in the viewfinder come
into sharp focus.
Lift up the viewfinder and move the viewfinder lens adjustment lever.
Viewfinder backlight
You can change the brightness of the backlight. Select VF B.L. in in the menu
settings when using the battery pack (p. 175).
Even if you adjust VF B.L.
The recorded picture will not be affected.
The viewfinder lens
adjustment lever
30
Attaching the supplied lens hood
To record fine pictures under strong light, we recommend attaching the lens hood. Also
the lens cap can be attached even with the lens hood on.
Note
You cannot attach filters or other objects onto the lens hood.
If you forcibly attach these objects onto the lens hood, you will no longer be able to
remove filters or other objects from the hood.
When you use the filter (optional)
The shadow of the lens hood may appear in the corners of the screen.
Page 31
Recording a picture
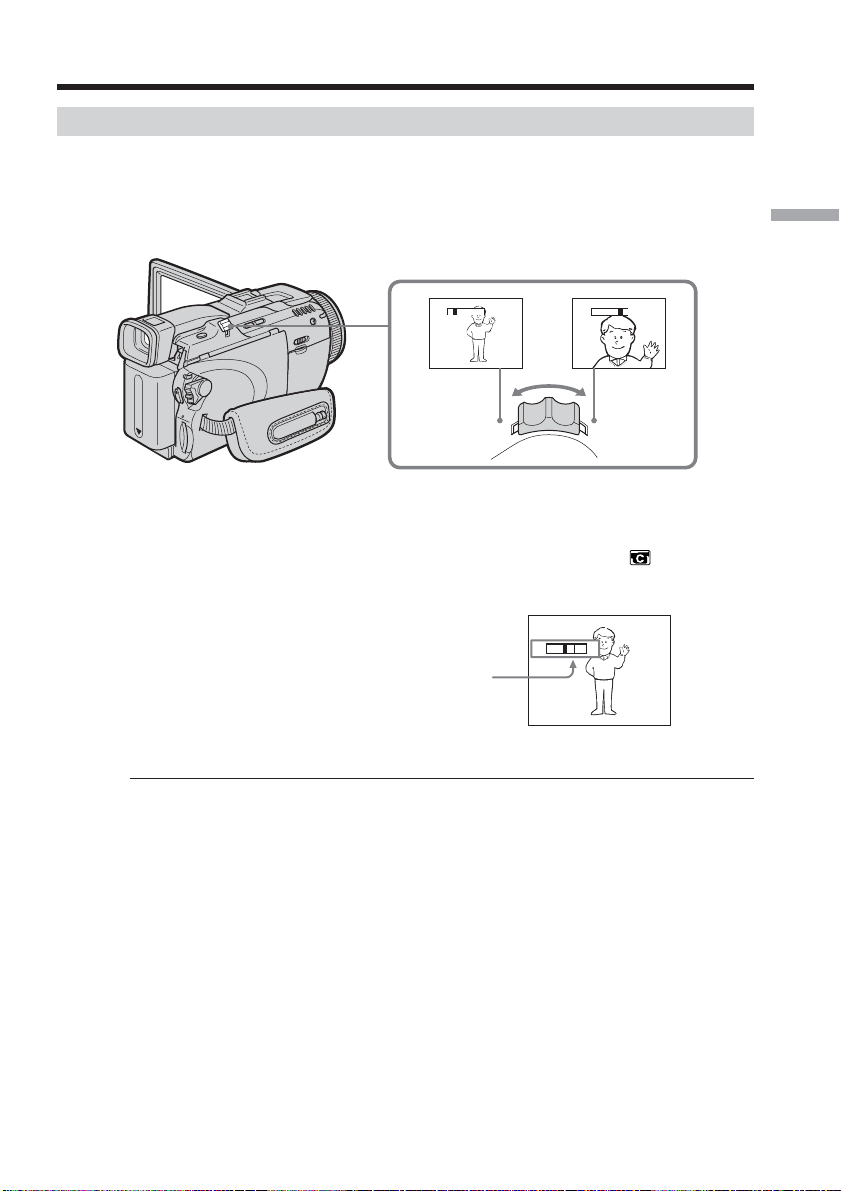
Using the zoom feature
Move the power zoom lever a little for a slower zoom. Move it further for a faster zoom.
Using the zoom sparingly results in better-looking recordings.
W: Wide-angle (subject appears farther away)
T: Telephoto (subject appears closer)
Recording – Basics
W
T
W
W
T
T
To use zoom greater than 10×
Zoom greater than 10× is performed digitally. Digital zoom can be set to 20× or 120×.
To activate digital zoom, select the digital zoom power in D ZOOM in in the menu
settings (p. 174). The digital zoom is set to OFF as a default setting.
WT
The right side of the bar shows the digital zooming
zone.
The digital zooming zone appears when you select
the digital zoom power in the menu settings.
When you shoot close to a subject
If you cannot get a sharp focus, move the power zoom lever to the “W” side until the
focus is sharp. You can shoot a subject that is at least about 80 cm (about 2 5/8 feet)
away from the lens surface in the telephoto position, or about 1 cm (about 1/2 inch)
away in the wide-angle position.
Note on digital zoom
The picture quality deteriorates as you move the power zoom lever towards the “T”
side.
When the POWER switch is set to MEMORY
You cannot use the digital zoom.
31
Page 32
Recording a picture
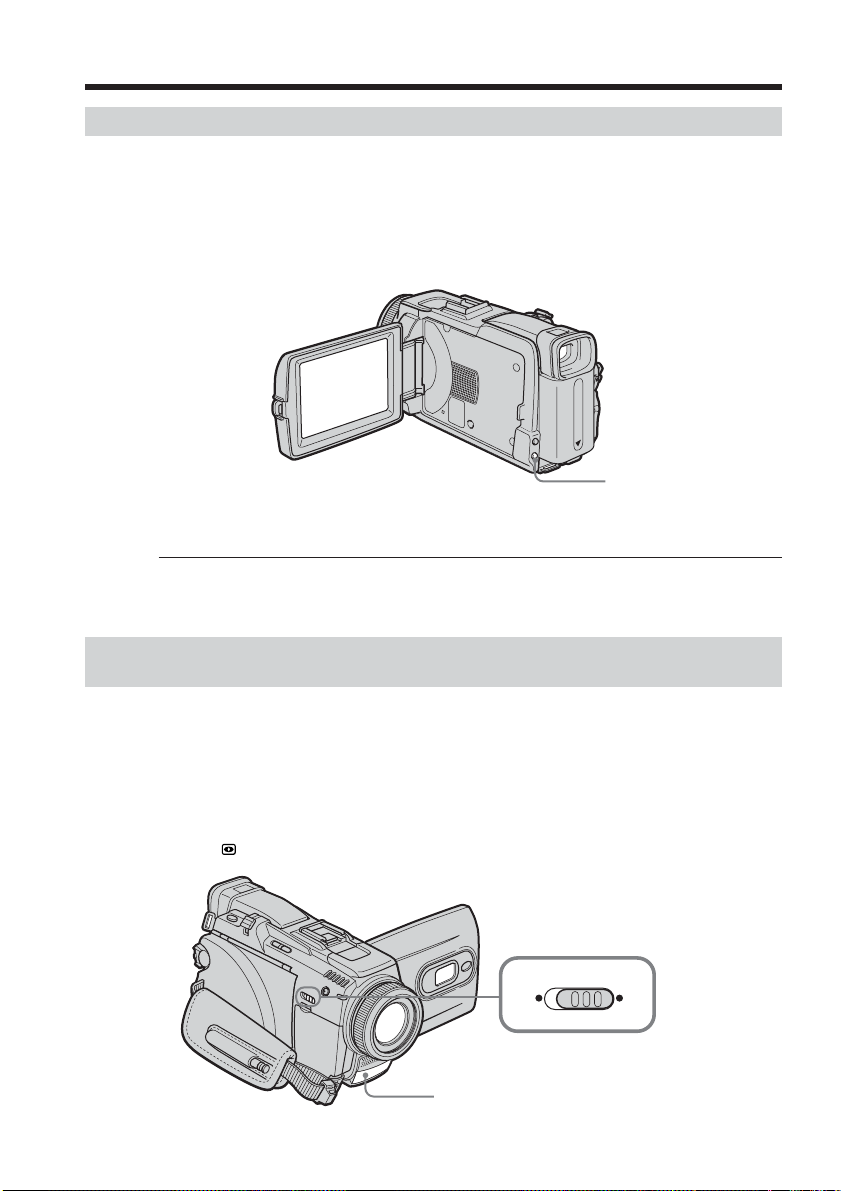
Shooting backlit subjects – Back light function
When you shoot a subject with the light source behind the subject or a subject with a
light background, use the back light function.
(1) Set the POWER switch to CAMERA or MEMORY.
(2) Press BACK LIGHT.
The . indicator appears on the screen.
To cancel the back light function
Press BACK LIGHT again.
When shooting backlit subjects
If you press MANUAL of EXPOSURE (p. 59) or SPOT METER (p. 60), the back light
function will be canceled.
BACK LIGHT
32
Shooting in the dark – NightShot/Super NightShot/Color Slow Shutter
Using NightShot
NightShot enables you to shoot a subject in the night or in a dark place.
When recording with NightShot, the picture may be recorded in incorrect or unnatural
colors.
(1) Set the POWER switch to CAMERA or MEMORY.
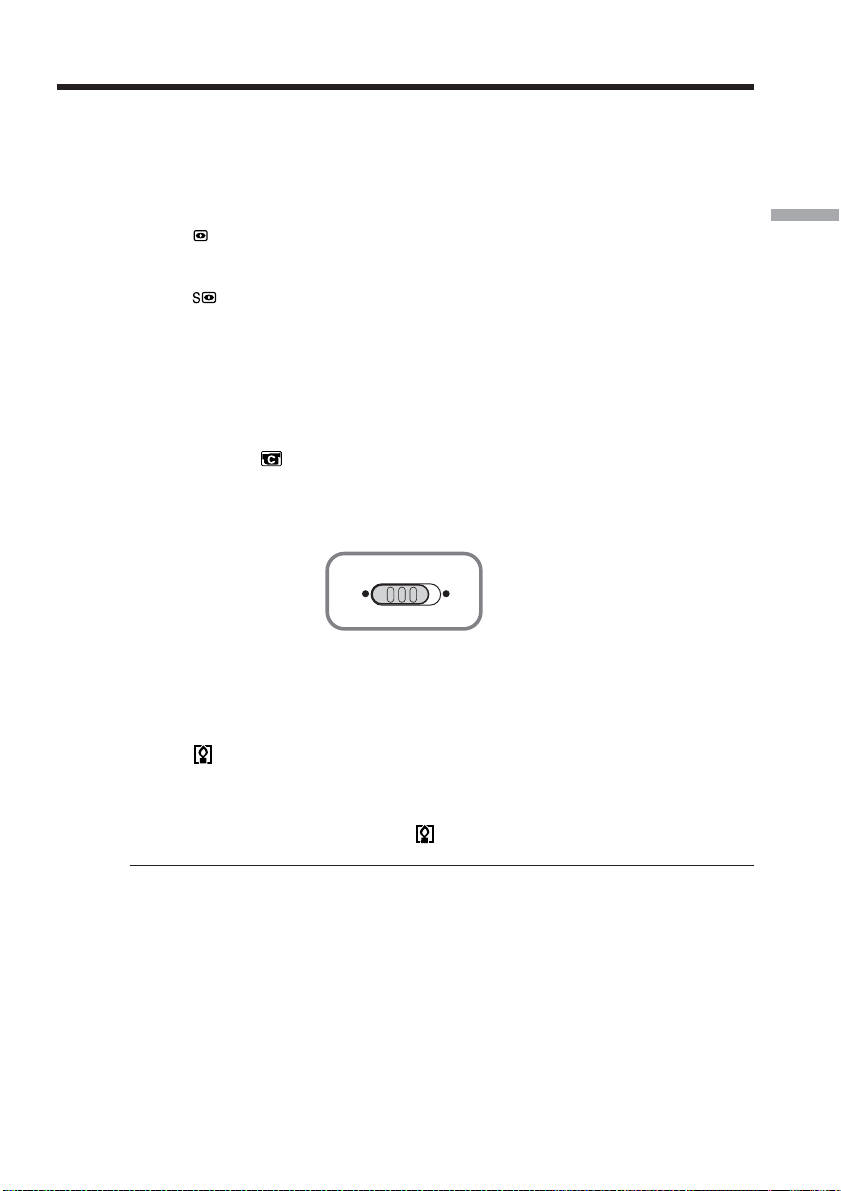
(2) Slide NIGHTSHOT to ON.
and ”NIGHTSHOT” indicators flash on the screen.
The
NIGHTSHOT
OFF ON
NightShot Light emitter
To cancel NightShot
Slide NIGHTSHOT to OFF.
Page 33
Recording a picture
Using Super NightShot
Super NightShot makes subjects more than 16 times brighter than those recorded in
NightShot.
(1) Set the POWER switch to CAMERA.
(2) Slide NIGHTSHOT to ON.
and ”NIGHTSHOT” indicators flash on the screen.
The
(3) Press FN and select PAGE3.
(4) Press SUPER NS.
indicator lights up on the screen.
The
(5) Press EXIT to return to FN.
To cancel Super NightShot
Press SUPER NS again to return to NightShot.
Using the NightShot Light
The picture will be clearer with the NightShot Light on. To enable the NightShot Light,
set N.S. LIGHT in to ON in the menu settings. (The default setting is ON.)
Using Color Slow Shutter
Color Slow Shutter enables you to record color images in a dim place.
Recording – Basics
NIGHTSHOT
OFF ON
(1) Set the POWER switch to CAMERA.
(2) Slide NIGHTSHOT to OFF.
(3) Press FN and select PAGE3.
(4) Press COLOR SLW S.
The
indicator lights up on the screen.
(5) Press EXIT to return to FN.
To cancel Color Slow Shutter
Press COLOR SLW S again to make the
Notes
•Do not use NightShot in bright places (e.g. the outdoors in the daytime). This may
cause a malfunction.
•If focusing is difficult during recording with NightShot, focus manually.
While using NightShot, you cannot use the following functions:
– White balance
– PROGRAM AE
– Manual exposure
– Flexible Spot Meter
– HOLOGRAM AF
While using Super NightShot or Color Slow Shutter
The shutter speed is automatically adjusted depending on the brightness. At this time,
the motion of the picture may slow down.
indicator disappear.
33
Page 34

Recording a picture
While using Super NightShot, you cannot use the following functions:
– White balance
– Fader
– Digital effect
– PROGRAM AE
– Manual exposure
– Flexible Spot Meter
– Progressive Recording Mode
– Recording with the flash
When the POWER switch is set to MEMORY
You cannot use the following functions:
– Super NightShot
– Color Slow Shutter
NightShot Light
The NightShot Light rays are infrared and so are invisible. The maximum shooting
distance using the NightShot Light is about 3 m (10 feet).
While using Color Slow Shutter, you cannot use the following functions:
– Fader
– Digital effect
– PROGRAM AE
– Manual exposure
– Flexible Spot Meter
– Progressive Recording Mode
– Recording with the flash
34
In total darkness
Color Slow Shutter may not work normally.
Page 35
Checking recordings – End search/Edit search/Rec Review
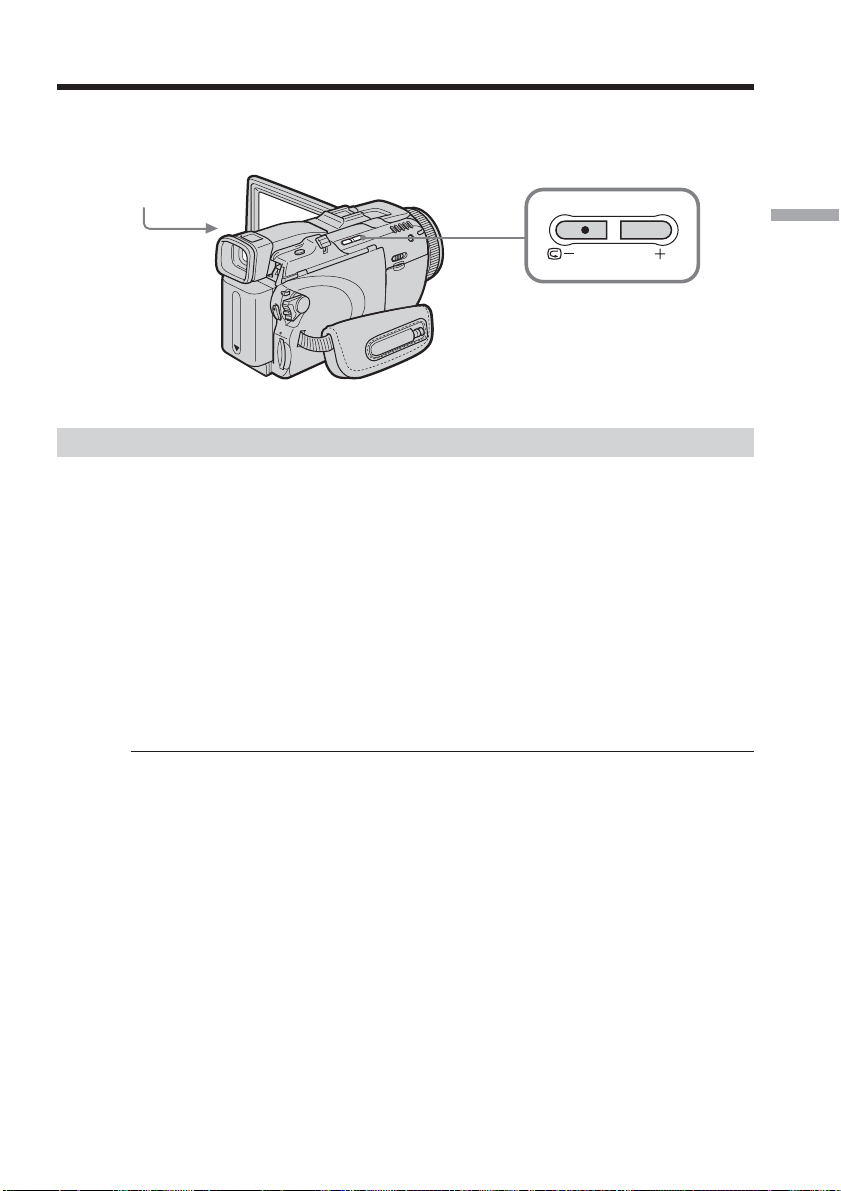
You can use these buttons to check the recorded picture or shoot so that the transition
between the last recorded scene and the next scene you record is smooth.
FN
EDITSEARCH
End search
You can go to the end of the recorded section after you record.
(1) Set the POWER switch to CAMERA.
(2) Press FN to display PAGE1.
(3) Press END SCH.
The last five seconds of the recorded section are played back and your
camcorder returns to standby.
Recording – Basics
To return to FN
Press EXIT.
To cancel end search
Press END SCH again.
End search
When you use the cassette without Cassette Memory, end search does not work once
you eject the cassette after you have recorded on the tape. If you use a cassette with
Cassette Memory, end search works even once you eject the cassette.
If the tape has a blank portion between recorded portions
End search may not work correctly.
35
Page 36

Checking recordings – End search/Edit search/Rec Review
Edit search
You can search for the next recording start point. You cannot monitor the sound.
(1) Set the POWER switch to CAMERA.
(2) Hold down the EDITSEARCH. The recorded portion is played back.
Release EDITSEARCH to stop playback. If you press START/STOP, recording
begins from the point you released EDITSEARCH.
7 –: To go backwards
+:To go forwards
Rec Review
You can check the last recorded section.
(1) Set the POWER switch to CAMERA.
(2) Press the 7 – side of EDITSEARCH momentarily.
The section you have stopped most recently will be played back for a few
seconds, and then your camcorder will return to standby.
36
Page 37
— Playback – Basics —
Playing back tape
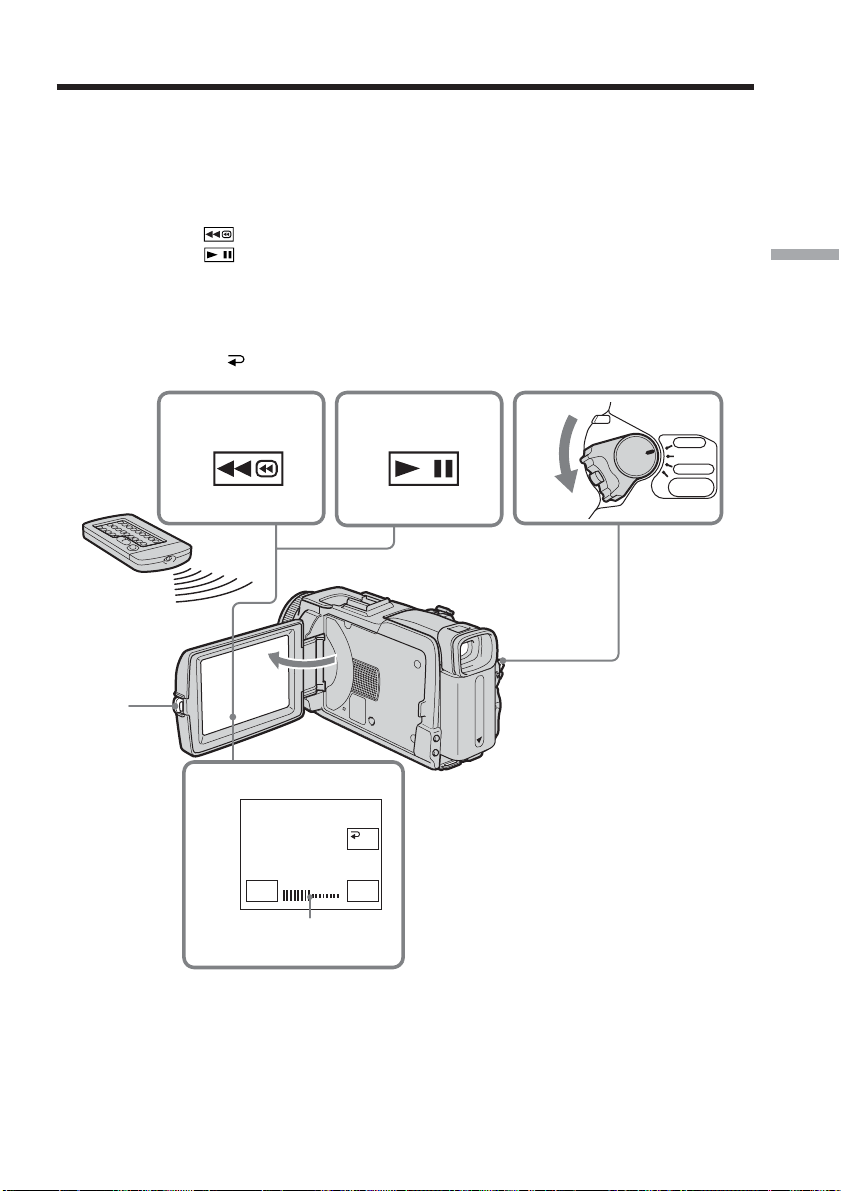
You can monitor the recorded tape on the LCD screen. If you close the LCD panel, you
can monitor the playback picture in the viewfinder. You can also control playback using
the Remote Commander supplied with your camcorder.
(1) Press the POWER switch to VCR while pressing the small green button.
(2) Press OPEN to open the LCD panel.
(3) Press
(4) Press
(5) Adjust the volume following the steps below.
1 Press FN to display PAGE1.
2 Press VOL. The screen to adjust volume appears.
3 Press – (to turn down the volume)/+ (to turn up the volume).
4 Press
to rewind the tape.
to start playback.
OK to return to PAGE1.
Playback – Basics
2
3
5
–+
The bar indicator
VOL
4
1
VCR
OFF(CHG)
POWER
CAMERA
MEMORY/
NETWORK
OK
37
Page 38
Playing back tape
To return to FN
Press EXIT.
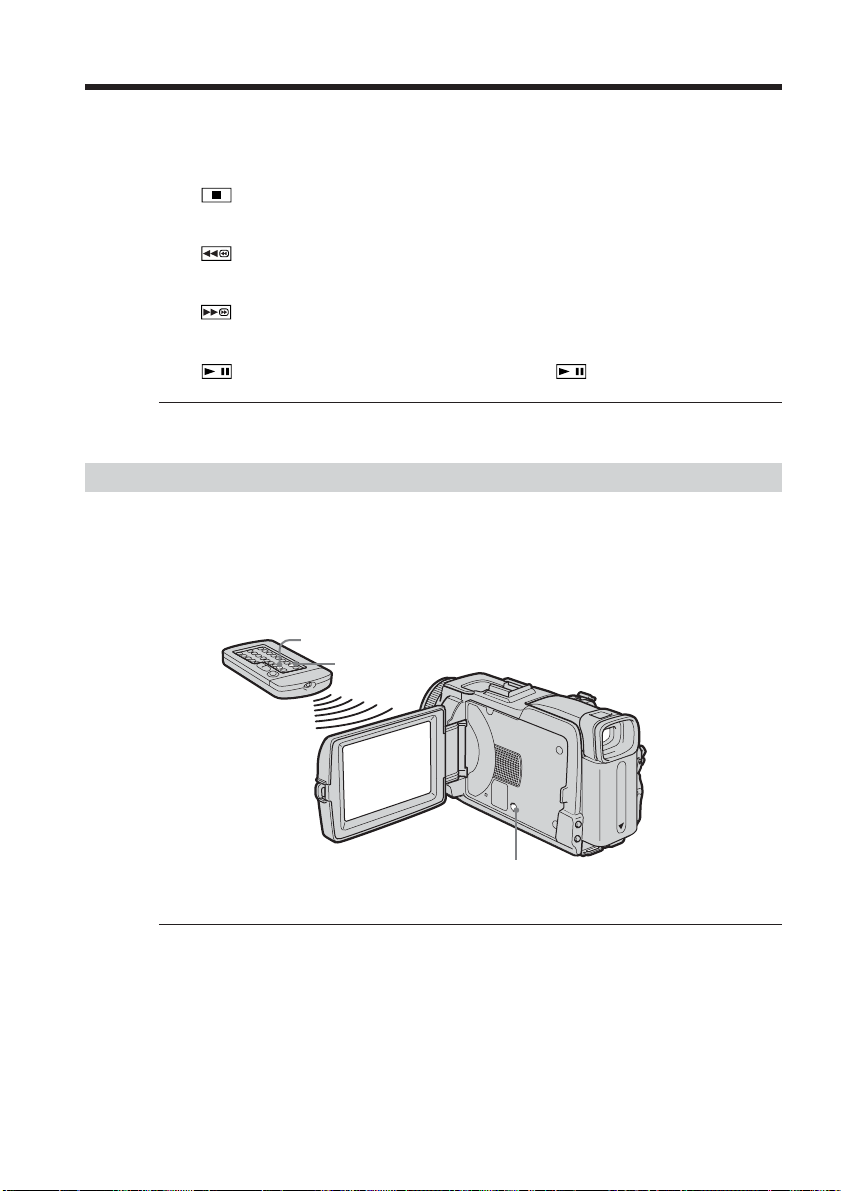
To cancel playback
Press .
To rewind the tape
Press during playback stop.
To fastforward the tape
Press during playback stop.
To view a still image (playback pause)
Press during playback. To resume playback, press again.
If you leave the power on for a long time
Your camcorder gets warm. This is not a malfunction.
To display the screen indicators – Display function
Press DISPLAY/BATTERY INFO on your camcorder or DISPLAY on the Remote
Commander supplied with your camcorder.
The indicators disappear from the screen.
To make the indicators appear, press DISPLAY/BATTERY INFO or DISPLAY on the
Remote Commander again.
DATA CODE
DISPLAY
38
DISPLAY/
BATTERY INFO
Note
Even if you press DISPLAY on the Remote Commander with the POWER switch set to
OFF(CHG), the BATTERY INFO indicator is not displayed.
Page 39
Playing back tape
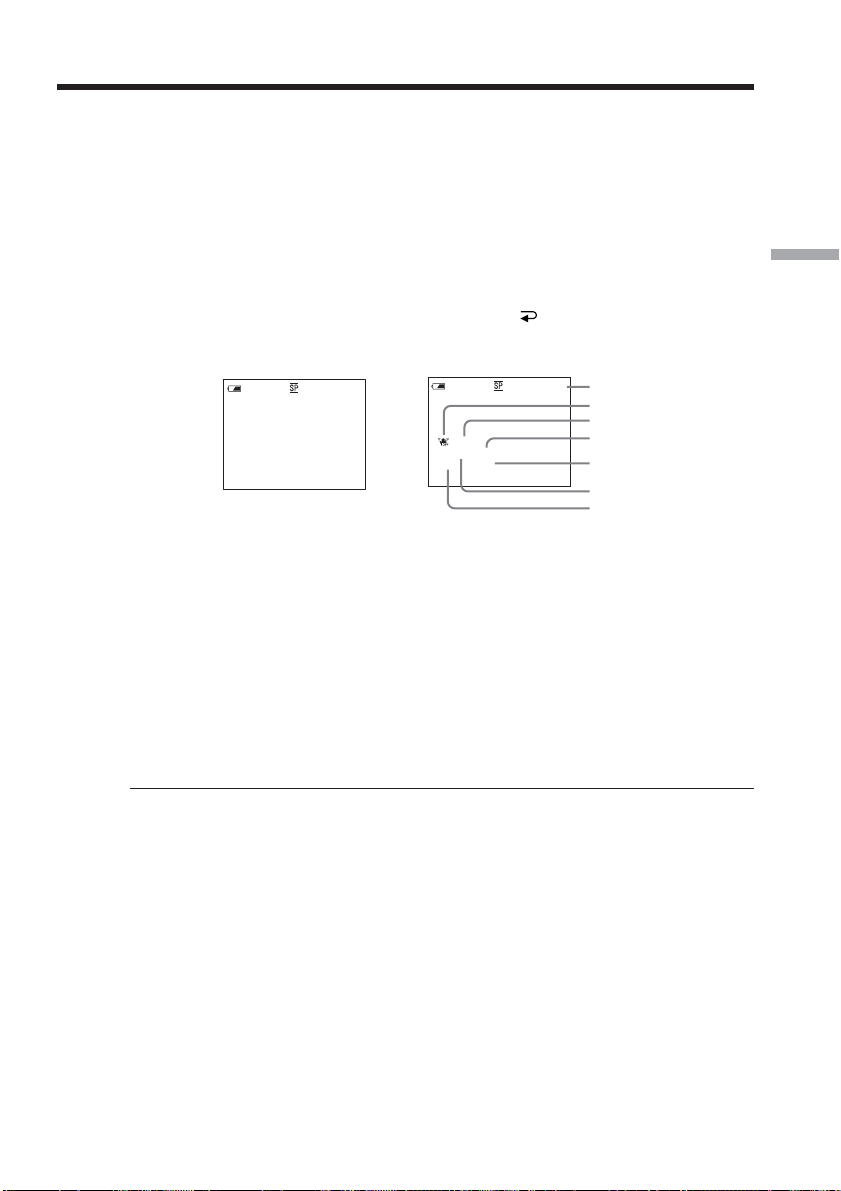
About date/time and various settings
Your camcorder automatically records not only images on the tape but also the
recording data (date/time or various settings when recorded) (Data code).
Follow the steps below to display the data code using the touch panel or the Remote
Commander.
Using the touch panel
(1) Set the POWER switch to VCR, then play back the tape.
(2) During playback, press FN and select PAGE2.
(3) Press DATA CODE.
(4) Select CAM DATA or DATE DATA, then press
(5) Press EXIT.
[a] Tape counter
[b] SteadyShot off
[c] Exposure
[d] White balance
[e] Gain
[f] Shutter speed
[g] Aperture value
Date/time
50min
JUL 4 2003
12:05:56 PM
0:00:23:01
OK.
Various settings
50min
AUTO
6 0 AWB
F1.8
0:00:23:01
9 dB
[a]
[b]
[c]
[d]
[e]
[f]
[g]
Playback – Basics
Using the Remote Commander
Press DATA CODE on the Remote Commander during playback.
The display changes as follows:
date/time t various settings (SteadyShot off, exposure, white balance, gain, shutter
speed, aperture value) t (no indicator)
Various settings
Various settings shows your camcorder’s recording information at the time of
recording. During tape recording standby, the various settings will not be displayed.
When you use data code, bars (-- -- --) appear if:
–A blank portion of the tape is being played back.
– The tape is unreadable due to tape damage or noise.
– The tape was recorded by a camcorder without the date and time set.
Data code
When you connect your camcorder to a TV, the data code also appears on the TV
screen.
39
Page 40
Playing back tape
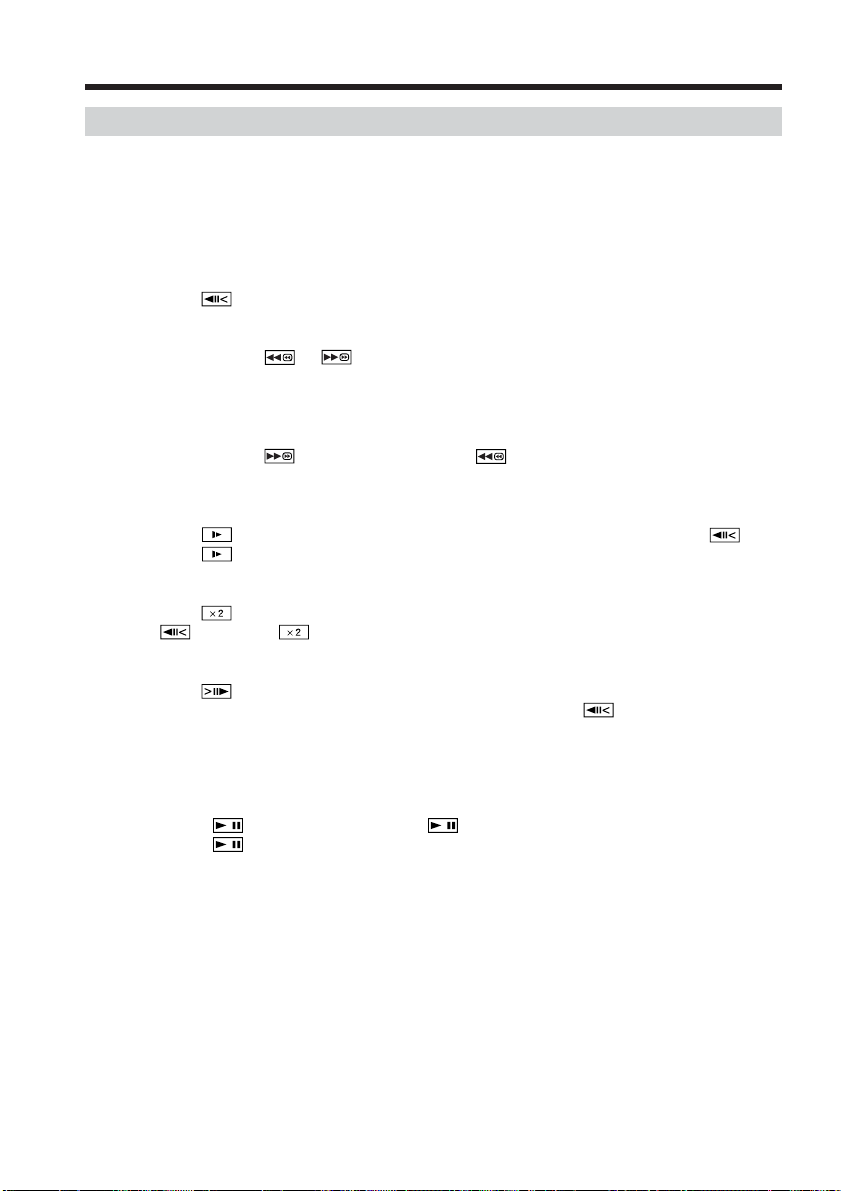
Various playback modes
To operate video control buttons, set the POWER switch to VCR.
Using the touch panel
(1) Press FN and select PAGE3.
(2) Press V SPD PLAY to display video control buttons.
To change the playback direction
Press during playback to reverse the playback direction.
1)
To locate a scene while monitoring the picture (picture search)
Keep pressing or during playback. To resume normal playback, release the
button.
To monitor the high-speed picture while fastforwarding or
rewinding the tape (skip scan)
Keep pressing while fastforwarding or while rewinding the tape. To resume
fastforwarding or rewinding, release the button.
To view the picture at slow speed (slow playback)
Press during playback. For slow playback in the reverse direction, press , then
press .
1)
To view the picture at double speed
Press during playback. For double speed playback in the reverse direction, press
, then press .
To view the picture frame-by-frame
Press during playback pause.
For frame-by-frame playback in the reverse direction, press .
1)
2)
2)
To search the last scene recorded (END SEARCH)
Press END SCH on PAGE1 during stop. The last five seconds of the recorded section
are played back then your camcorder stops.
1)
Press to pause playback. Press to resume normal playback.
2)
Press to resume normal playback.
40
Page 41

Playing back tape
Video control buttons
Marks on your camcorder are different from those on the Remote Commander supplied
with your camcorder.
On your camcorder:
To play back or pause the tape
To stop the tape
To rewind the tape
To fastforward the tape
To play back the tape slowly
To forward one frame at a time
To rewind one frame at a time
To play back the tape at double speed
On the Remote Commander:
N To play back the tape
X To pause the tape
x To stop the tape
m To rewind the tape
M To fastforward the tape
y To play back the tape slowly
C To forward one frame at a time
c To rewind one frame at a time
×2 To play back the tape at double speed
In the various playback modes
•Sound is muted.
•The previous picture may remain as a mosaic image during playback.
Playback – Basics
When playback pause lasts for five minutes
Your camcorder automatically enters the stop mode. To resume playback, press
.
When you play back the tape in reverse
Horizontal noise may appear at the center, or the top and bottom of the screen. This is
not a malfunction.
Slow playback
Slow playback can be performed smoothly on your camcorder. However, this function
does not work for an output signal from the DV Interface.
41
Page 42
Viewing a recording on TV
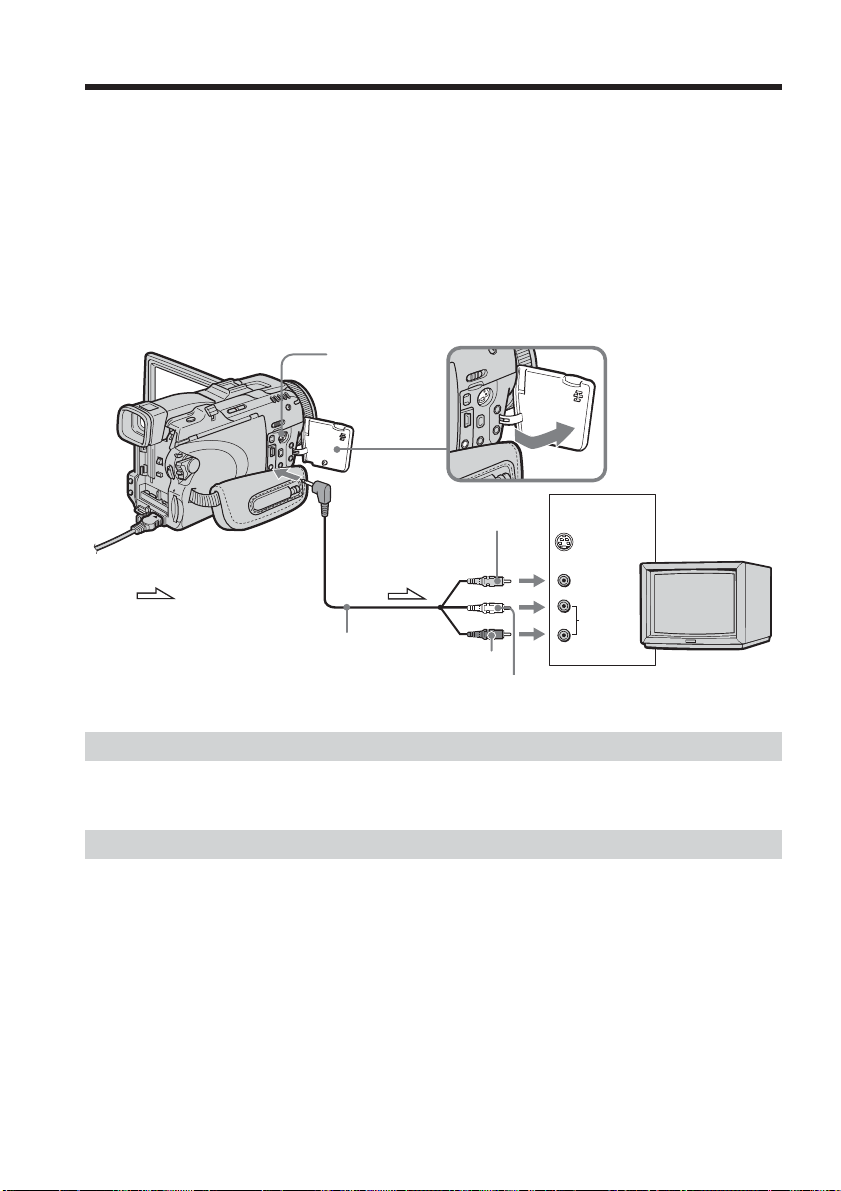
Connect your camcorder to a TV with the A/V connecting cable supplied with your
camcorder to watch the playback pictures on the TV screen. You can operate the
playback control buttons in the same way as when you view playback pictures on the
LCD screen.
When viewing the playback picture on the TV screen, we recommend that you power
your camcorder from a wall outlet using the AC Adaptor. Refer to the operating
instructions of your TV.
Open the jack cover. Connect your camcorder to the TV with the A/V connecting cable.
Then set the TV/VCR selector on the TV to VCR to be able to view images from your
camcorder.
S VIDEO
AUDIO/
VIDEO
: Signal flow
A/V connecting cable
(supplied)
Yellow
Red
White
If your TV is already connected to the VCR
Connect your camcorder to the LINE IN input on the VCR with the A/V connecting
cable supplied with your camcorder. Set the input selector on the VCR to LINE.
If your TV or VCR is a monaural type
Connect the yellow plug of the A/V connecting cable to the video input jack and the
white or the red plug to the audio input jack on the VCR or the TV.
If you connect the white plug, the sound is L (left) signal. If you connect the red plug,
the sound is R (right) signal.
IN
S VIDEO
VIDEO
AUDIO
TV
42
Page 43

Viewing a recording on TV
If the device you want to connect to has an S video jack
•Pictures can be reproduced more faithfully by using an S video cable (optional). With
this connection, you do not need to connect the yellow (video) plug of the A/V
connecting cable.
Connect the S video cable (optional) to the S video jacks on both your camcorder and
the device you want to connect to.
This connection produces higher quality DV format pictures.
•There is no sound output when connecting only with an S video cable (optional).
To display the screen indicators on TV
Set DISPLAY to V-OUT/LCD in in the menu settings (p. 181). To make the screen
indicators disappear, press DISPLAY/BATTERY INFO on your camcorder.
Playback – Basics
43
Page 44
— Advanced Recording Operations —
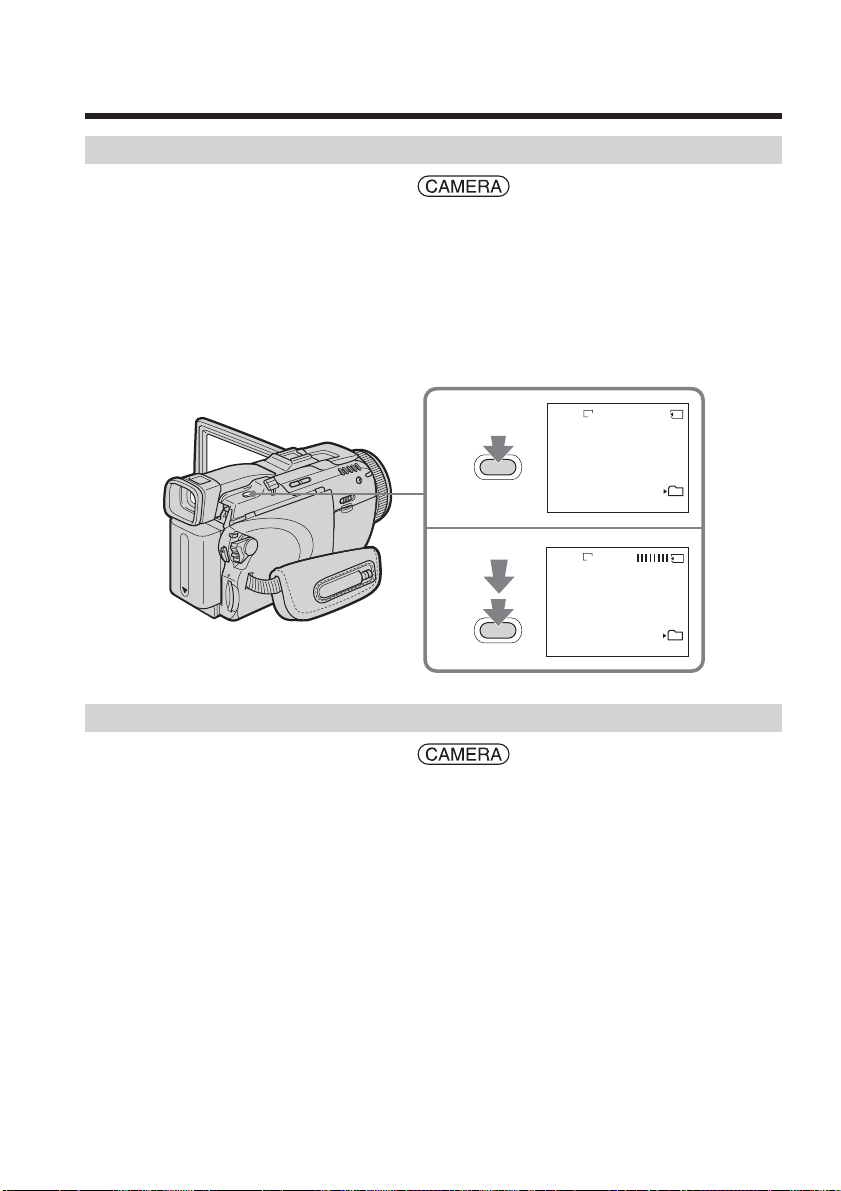
Recording still images on “Memory Stick” during tape recording standby or tape recording
During tape recording standby
The POWER switch should be set to .
(1) Keep pressing PHOTO lightly until a still image appears. The CAPTURE
indicator appears. Recording does not start yet. To change the still image,
release PHOTO, select a still image again, then press and hold PHOTO lightly.
(2) Press PHOTO deeply.
Recording is complete when the bar scroll indicator disappears.
The image displayed on the screen when you pressed PHOTO deeply will be
recorded on the “Memory Stick.”
FINE
1
2
640
640
FINE
12
CAPTURE
101
44
101
During tape recording
The POWER switch should be set to .
Press PHOTO deeply.
The image displayed on the screen when you pressed PHOTO deeply will be recorded
on the “Memory Stick.”
Recording on the “Memory Stick” is complete when the bar scroll indicator disappears.
Page 45

Recording still images on “Memory Stick” during tape recording
standby or tape recording
Note
You cannot record still images on the “Memory Stick” during following operations
(The indicator flashes):
– End search
– Wide mode
– During fading in with BOUNCE
– Progressive Recording Mode
– MEMORY MIX
“Memory Stick”
See page 100 for details.
Still images
•The image size will be 640 × 480.
•If the POWER switch is set to CAMERA, image quality cannot be changed. Images
will be recorded with image quality as set when the POWER switch is set to
MEMORY.
•When recording with higher image quality, use of Memory Photo recording is
recommended (p. 107).
During and after recording still images on the “Memory Stick”
Your camcorder continues recording on the tape.
When you press PHOTO on the Remote Commander
Your camcorder immediately records the image that is on the screen when you press
the button.
To record still images on the “Memory Stick” during tape recording
You cannot check an image on the screen by pressing PHOTO lightly. The image when
you press PHOTO deeply will be recorded on the “Memory Stick.”
Title
You cannot record the titles.
Self-timer recording
During recording standby, you can record still images on the “Memory Stick” with the
self-timer. See page 46 for details.
Recording with the flash
During recording standby, you can record still images on the “Memory Stick” with the
flash. See page 111 for details.
Advanced Recording Operations
45
Page 46
Self-timer recording
START/STOP
PHOTO
START/STOP
PHOTO
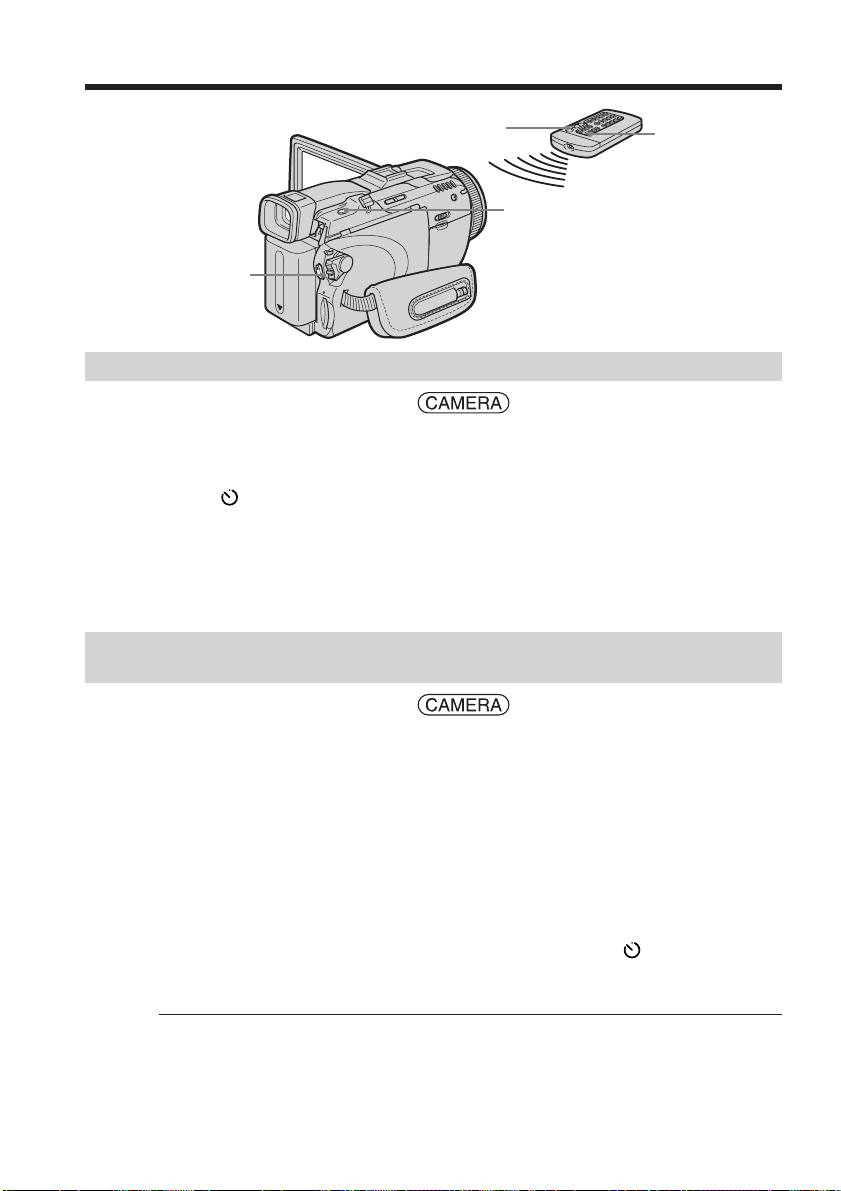
Recording on the tape
The POWER switch should be set to .
Operate by touching the panel.
(1) During standby, press FN and select PAGE2.
(2) Press SELFTIMER.
(self-timer) indicator appears on the screen.
The
(3) Press EXIT to return to FN.
(4) Press START/STOP.
The self-timer starts counting down from about 10 while beeping. In the last
two seconds of the countdown, the beep gets faster, then recording starts
automatically.
Recording still images on the “Memory Stick” during recording
standby
The POWER switch should be set to .
Operate by touching the panel.
46
(1) Follow the step 1 to 3 in “Recording on the tape.”
(2) Press PHOTO deeply.
The self-timer starts counting down from about 10 while beeping. In the last
two seconds of the countdown, the beep gets faster, then the recording starts
automatically.
To stop the countdown for recording on the tape
Press START/STOP. To restart the countdown, press START/STOP again.
To cancel the self-timer
With your camcorder during standby, press SELFTIMER and the (self-timer)
indicator disappears from the screen. You cannot cancel the self-timer using the Remote
Commander.
Notes
•The self-timer recording is automatically canceled when self-timer recording is
finished.
•You can record using the self-timer only during recording standby.
When the POWER switch is set to MEMORY
You can also record still images onto the “Memory Stick” with the self-timer (p. 122).
Page 47
Adjusting the white balance manually
Normally white balance is automatically adjusted.
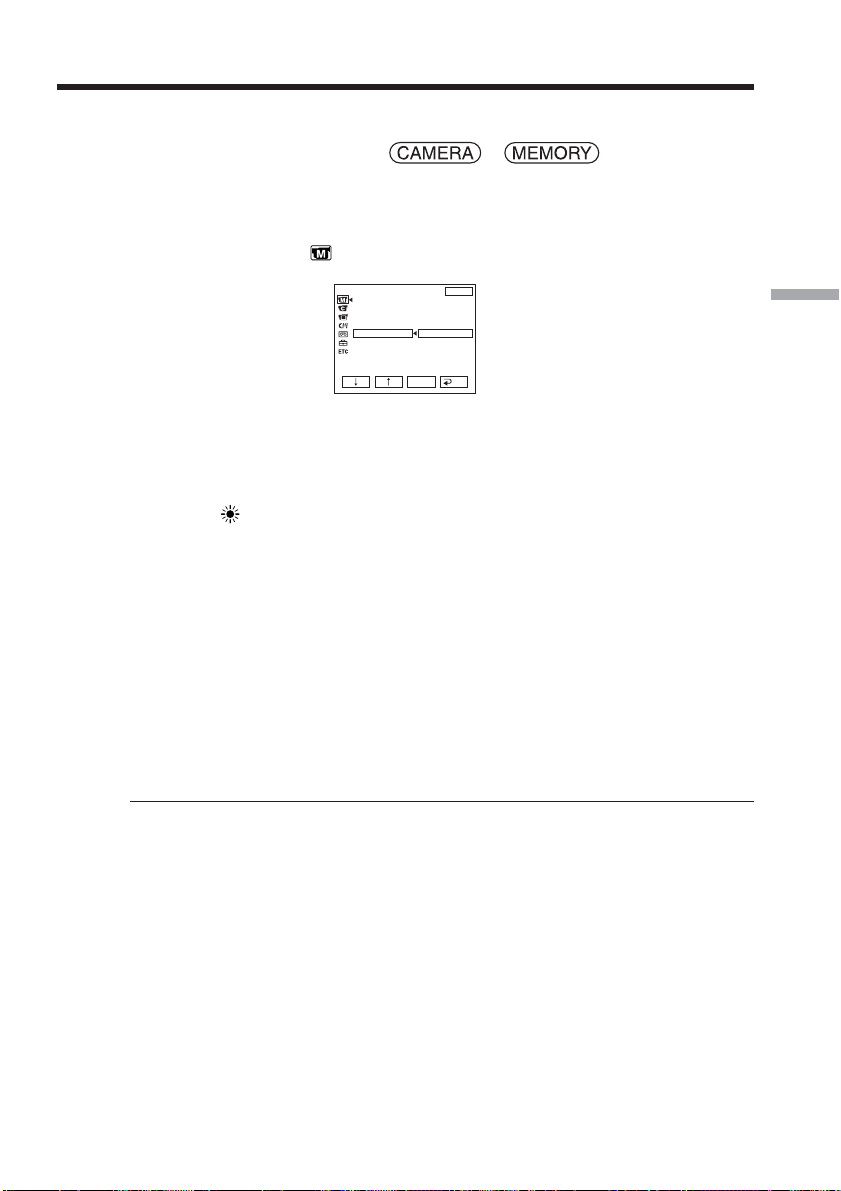
The POWER switch should be set to or .
Operate by touching the panel.
(1) Press FN to display PAGE1.
(2) Press MENU to display the menu.
(3) Select WHT BAL in
, then press EXEC (p. 173).
AUTO
HOLD
OUTDOOR
INDOOR
EXEC
EXIT
RET.
MANUAL SET
PROGRAM AE
P EFFECT
RED EYE R
FLASH LVL
WHT BAL
SHARPNESS
AUTO SHTR
(4) Select a desired mode, then press EXEC.
HOLD:
When recording a single-colored subject or background
OUTDOOR ( ):
•When recording a sunset/sunrise, just after sunset, just before sunrise, neon signs, or
fireworks
•Under a color matching fluorescent lamp
INDOOR (n):
•When lighting conditions change quickly
•In too bright places such as photography studios
•Under sodium lamps or mercury lamps
To return to FN
Press EXIT.
To return to the automatic white balance
Set WHT BAL to AUTO in the menu settings.
If the picture is being taken in a studio lit by TV lighting
We recommend that you record in the INDOOR mode.
Advanced Recording Operations
When you record under fluorescent lighting
Select AUTO or HOLD.
Your camcorder may not adjust the white balance correctly in the INDOOR mode.
In the AUTO mode
Point your camcorder at the white subject for about 10 seconds after setting the POWER
switch to CAMERA to get better adjustment when:
– You remove the battery pack for replacement.
– You bring your camcorder from indoors to outdoors holding the exposure, or vice
versa.
In the HOLD mode
Set WHT BAL to AUTO and reset to HOLD after few seconds when:
– You change the mode of PROGRAM AE.
– You bring your camcorder from indoors to outdoors, or vice versa.
47
Page 48
Using the wide mode
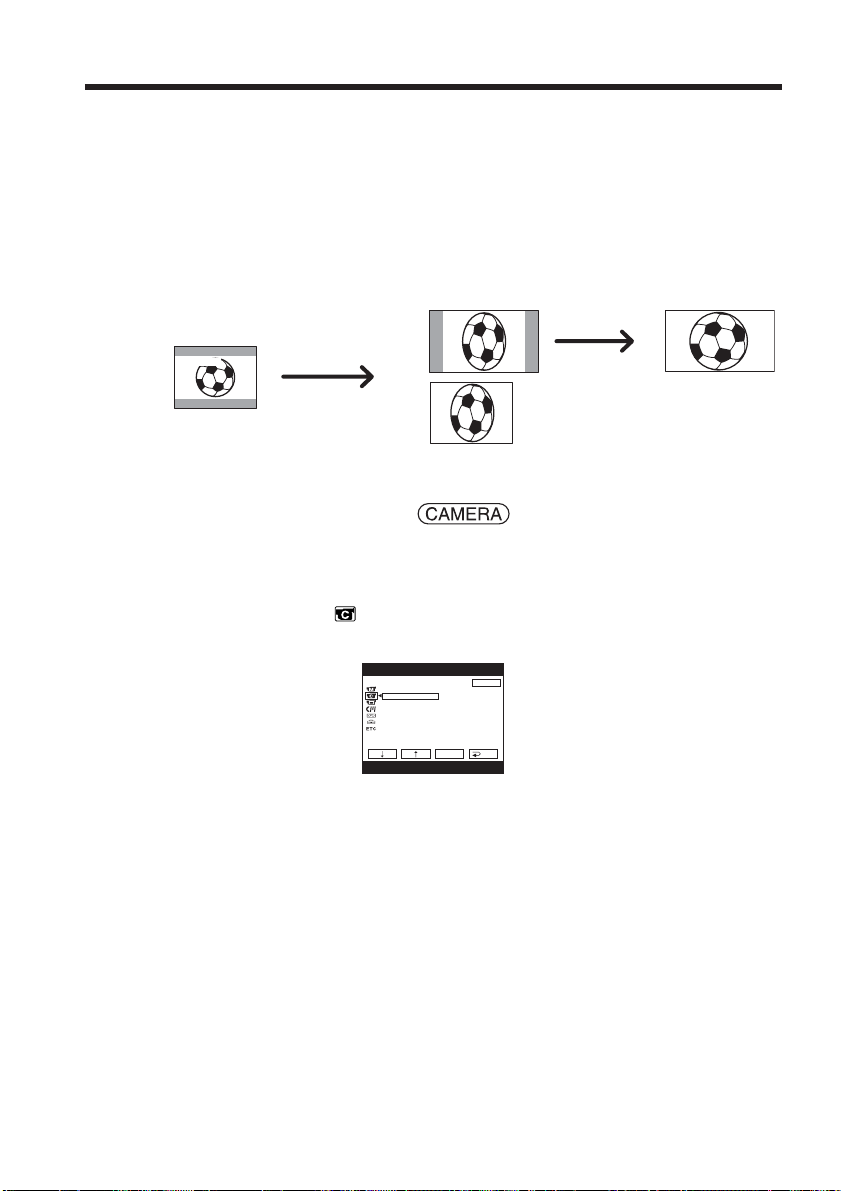
If you move the power zoom lever to “W” side, you can record with a wider angles
than normal tape recording.
You can record a 16:9 wide picture to watch on the 16:9 wide-screen TV (16:9WIDE).
Black bands appear on the screen during recording in the 16:9WIDE mode [a]. The
picture during playing back in the 4:3 mode on a wide-screen TV [b] or a normal TV
[c]* are compressed in the widthwise direction. If you set the screen mode of the widescreen TV to the full mode, you can watch pictures of normal images [d].
*The picture played back in the wide mode on a normal TV appears the same as the
picture played back in the wide mode on your camcorder [a].
[a]
16:9
WIDE
[b]
[c]
The POWER switch should be set to .
Operate by touching the panel.
(1) During recording standby, press FN to display PAGE1.
(2) Press MENU to display the menu.
(3) Select 16:9WIDE in
, then press EXEC (p. 174).
(4) Select ON, then press EXEC.
EXEC
EXIT
ON
RET.
CAMERA SET
D ZOOM
16:9WIDE
STEADYSHOT
N. S. LIGHT
RMTCAM SET
To return to FN
Press EXIT.
To cancel the wide mode
Set 16:9WIDE to OFF in the menu settings.
[d]
48
Page 49

Using the wide mode
Notes
•In the wide mode, you cannot operate the following functions:
– Recording still images on the “Memory Stick” during tape recording or tape
recording standby
– BOUNCE
– OLD MOVIE
– Progressive Recording Mode
•Pictures recorded on the tape in wide mode cannot be returned to normal size.
Connection for a TV
Pictures recorded in the 16:9WIDE mode automatically appear on the TV screen at full
size when:
– You connect your camcorder to a TV that is compatible with the video ID (ID-1/ID-2)
system.
– You connect your camcorder to the S video jack on a TV.
ID-1 system
The ID-1 system sends aspect ratio information (16:9, 4:3, or letter box) with video
signals. If you connect a TV compatible with the ID-1 system, the screen size is
automatically selected.
ID-2 system
The ID-2 system sends a copyright protection signal with ID-1 signals inserted between
video signals when you connect your camcorder to other equipment using the A/V
connecting cable.
Advanced Recording Operations
49
Page 50
Using the fader function
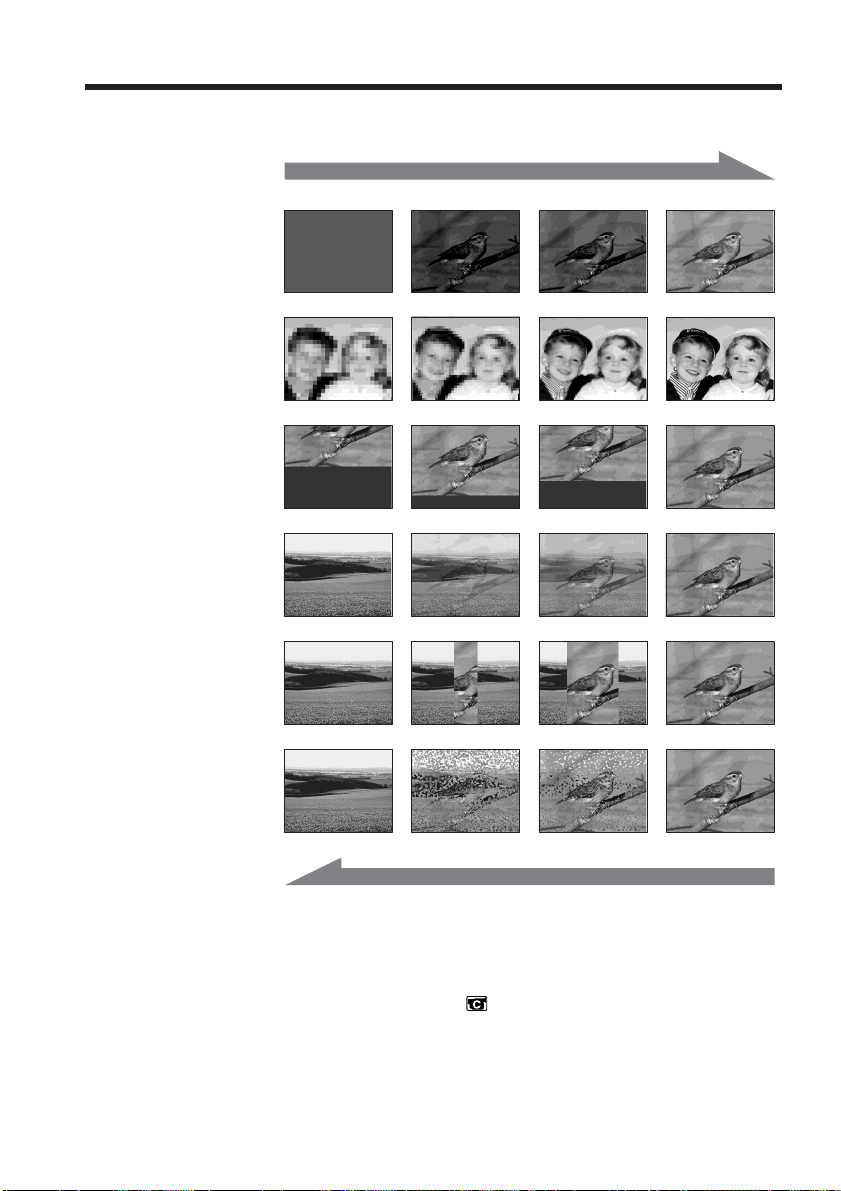
You can fade in or out to give your recording a professional appearance.
[a]
NORM. FADER
(normal)
MOSC. FADER
(mosaic)
BOUNCE
OVERLAP
WIPE
1) 2)
2)
2)
RECSTBY
50
2)
DOT
[b]
MONOTONE
When fading in, the picture gradually changes from black-and-white to color.
When fading out, the picture gradually changes from color to black-and-white.
1)
You can use BOUNCE when D ZOOM in is set to OFF in the menu settings.
2)
You can fade in only.
RECSTBY
Page 51
Using the fader function
The POWER switch should be set to .
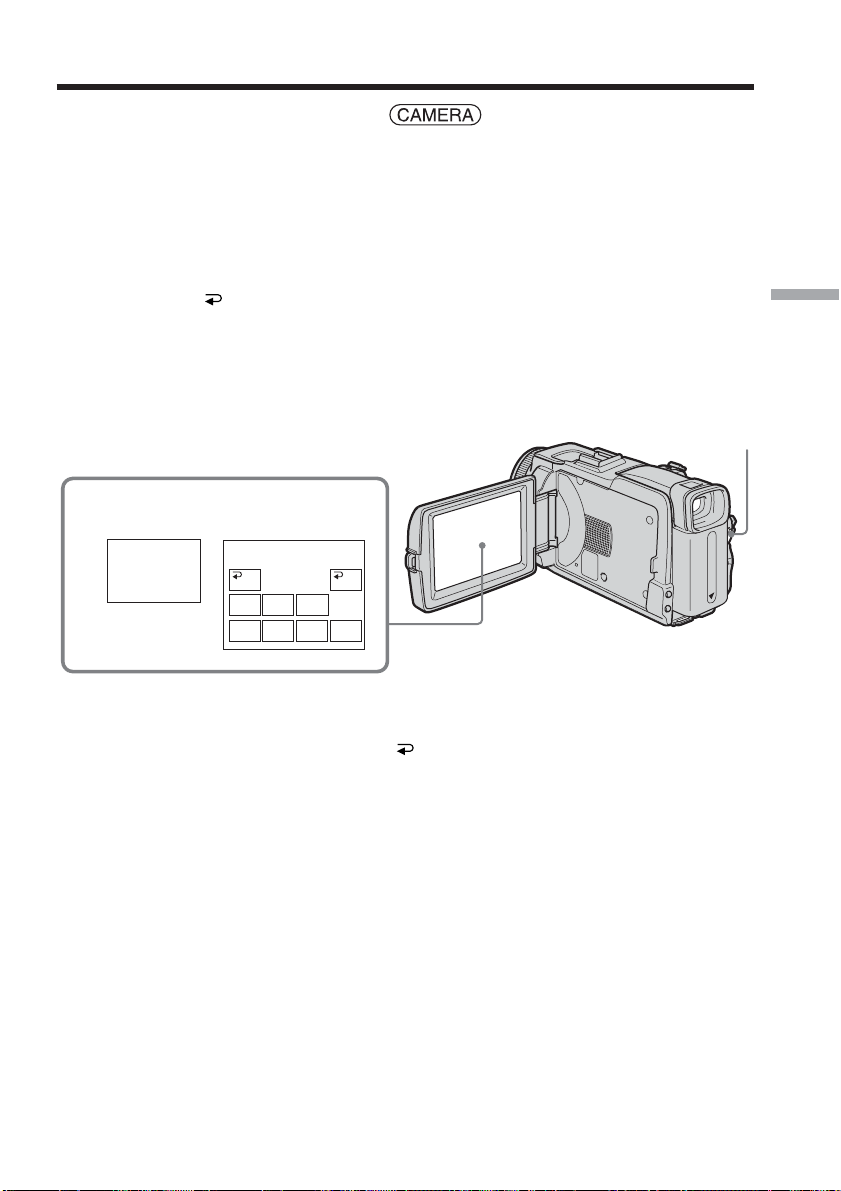
Operate by touching the panel.
(1) When fading in [a]
Press FN to display PAGE1 during recording standby.
When fading out [b]
Press FN to display PAGE1 during recording.
(2) Press FADER. The screen to select the fader mode appears.
(3) Press a desired mode.
(4) Press
OK to return to PAGE1.
(5) Press EXIT to return to FN.
The fader indicator you selected flashes.
(6) Press START/STOP.
After the fade in/out is carried out, your camcorder automatically returns to
the normal mode.
2
Advanced Recording Operations
START/STOP
FADER
FADER
OFF OK
MOSC.
FADER
OVER–
LAP
BOUN–
CE
NORM.
FADER
MONO–
TONE
DOTW I PE
To cancel the fade in/out
Before pressing START/STOP, press OFF to return to PAGE1.
51
Page 52

Using the fader function
Note
You cannot use the following functions while using fader. Also, you cannot use fader
while using following functions:
– Super NightShot
– Color Slow Shutter
– Digital effect
– Interval Recording
– Frame recording
– Recording with the flash
When you select OVERLAP, WIPE or DOT
Your camcorder automatically stores the image recorded on the tape. As the image is
being stored, the indicator becomes fast flashing, then the playback picture disappears.
During fading in with BOUNCE, you cannot use the following functions:
– Zoom
– Recording still images on the “Memory Stick”
– Picture effect
– PROGRAM AE
– Manual exposure
– Flexible Spot Meter
– Manual focus
Note on the BOUNCE mode
You cannot select BOUNCE in the followings:
–D ZOOM is activated in the menu settings
– Wide mode
– Picture effect
– PROGRAM AE
– Progressive Recording Mode
52
Page 53
Using special effects – Picture effect
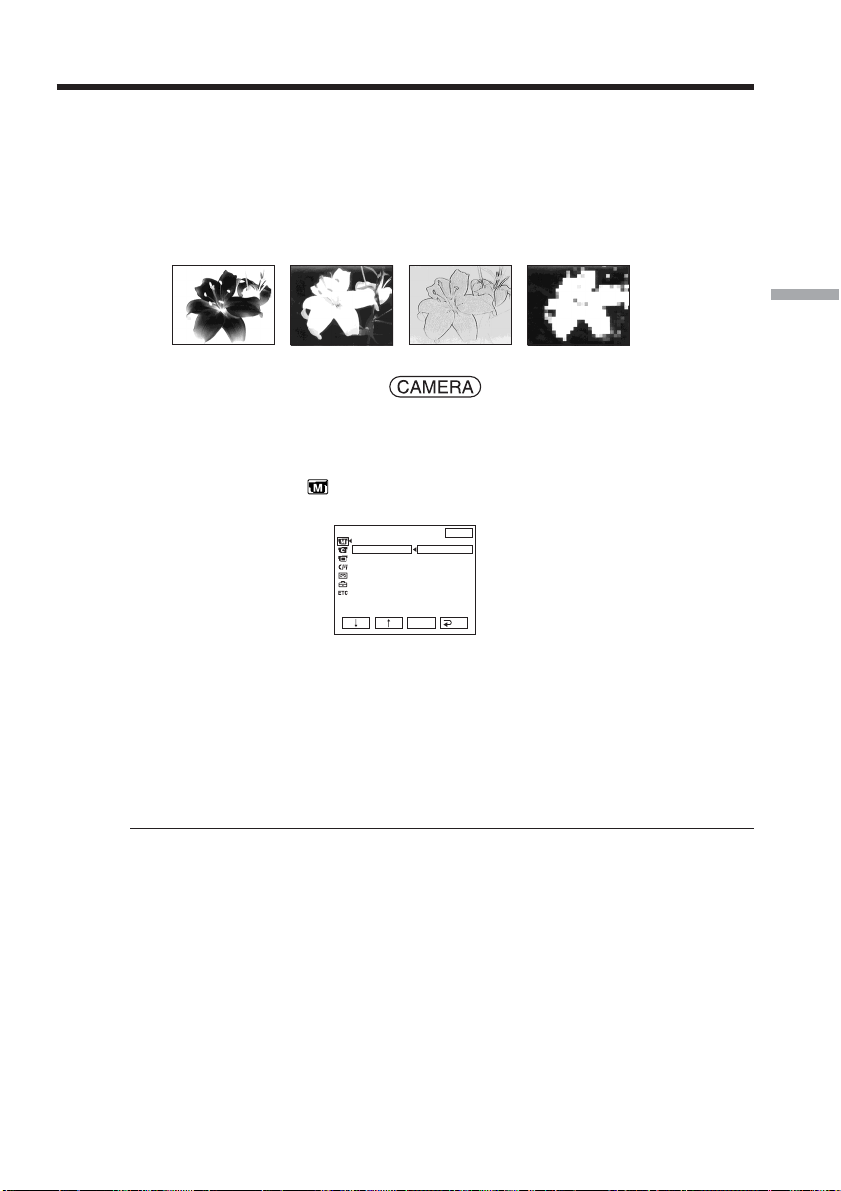
NEG. ART [a] : The color and brightness of the picture are reversed.
SEPIA : The picture is sepia.
B&W : The picture is monochrome (black-and-white).
SOLARIZE [b] : The picture looks like an illustration with a strong contrast.
PASTEL [c] : The picture looks like a pale pastel drawing.
MOSAIC [d] : The picture is mosaic.
[a] [b] [c] [d]
The POWER switch should be set to .
Operate by touching the panel.
(1) Press FN to display PAGE1.
(2) Press MENU to display the menu.
(3) Select P EFFECT in
, then press EXEC (p. 173).
Advanced Recording Operations
MANUAL SET
PROGRAM AE
P EFFECT
RED EYE R
FLASH LVL
WHT BAL
SHARPNESS
AUTO SHTR
OFF
NEG. ART
SEPIA
B&W
SOLARIZE
PASTEL
MOSAIC
EXEC
EXIT
RET.
(4) Select a desired mode, then press EXEC.
To return to FN
Press EXIT.
To cancel picture effect
Set P EFFECT to OFF in the menu settings.
Note
While using picture effect, you cannot use following functions:
– BOUNCE
– OLD MOVIE
53
Page 54
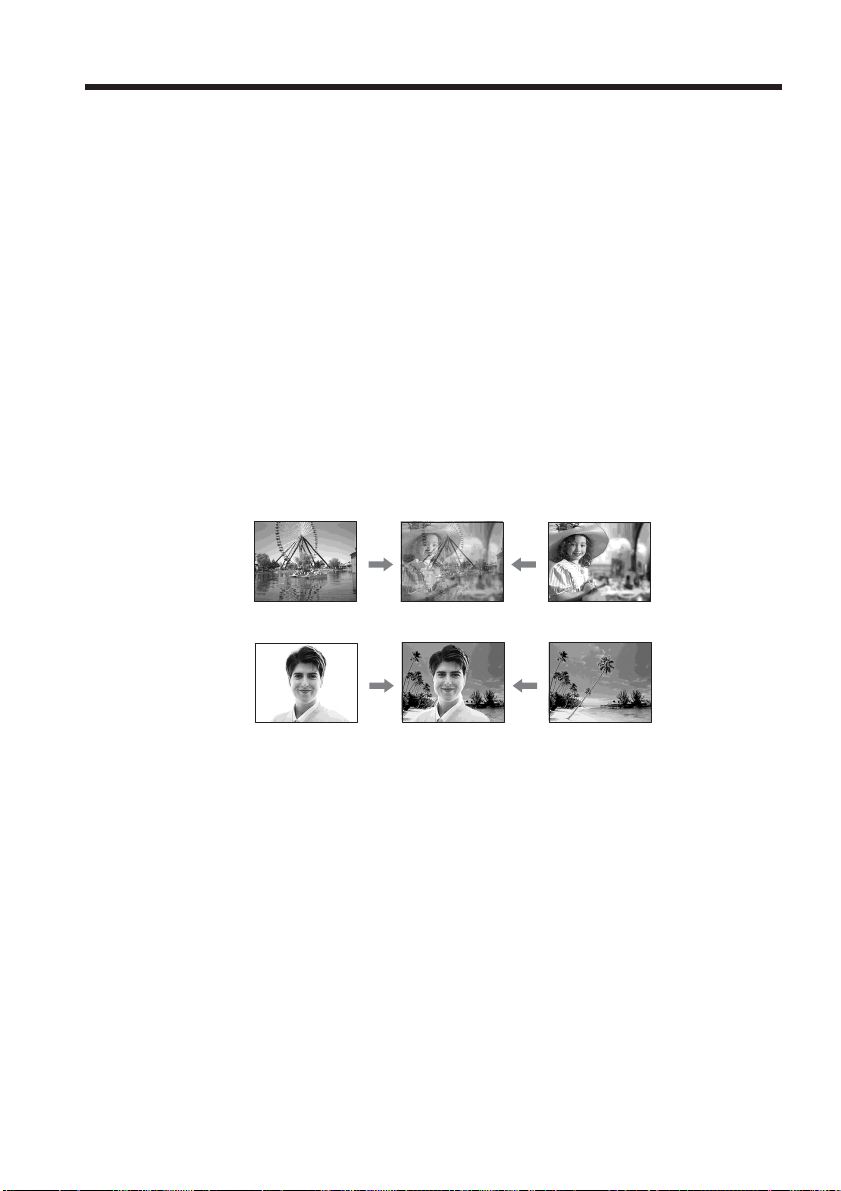
Using special effects – Digital effect
STILL
You can record a still image so that it is superimposed on a moving picture.
FLASH (flash motion)
You can record still images successively at regular intervals.
LUMI. (luminance key)
You can swap the brighter area in a still image with a moving picture.
TRAIL
You can record a picture so that an incidental image like a trail is left.
SLOW SHTR (slow shutter)
You can slow down the shutter speed. The SLOW SHTR mode is good for recording
dark pictures more brightly.
OLD MOVIE
You can add an old movie type atmosphere to pictures. Your camcorder automatically
sets the 16:9WIDE mode, picture effect to SEPIA, and the appropriate shutter speed.
Still image Moving picture
STILL
Still image Moving picture
54
LUMI.
Page 55
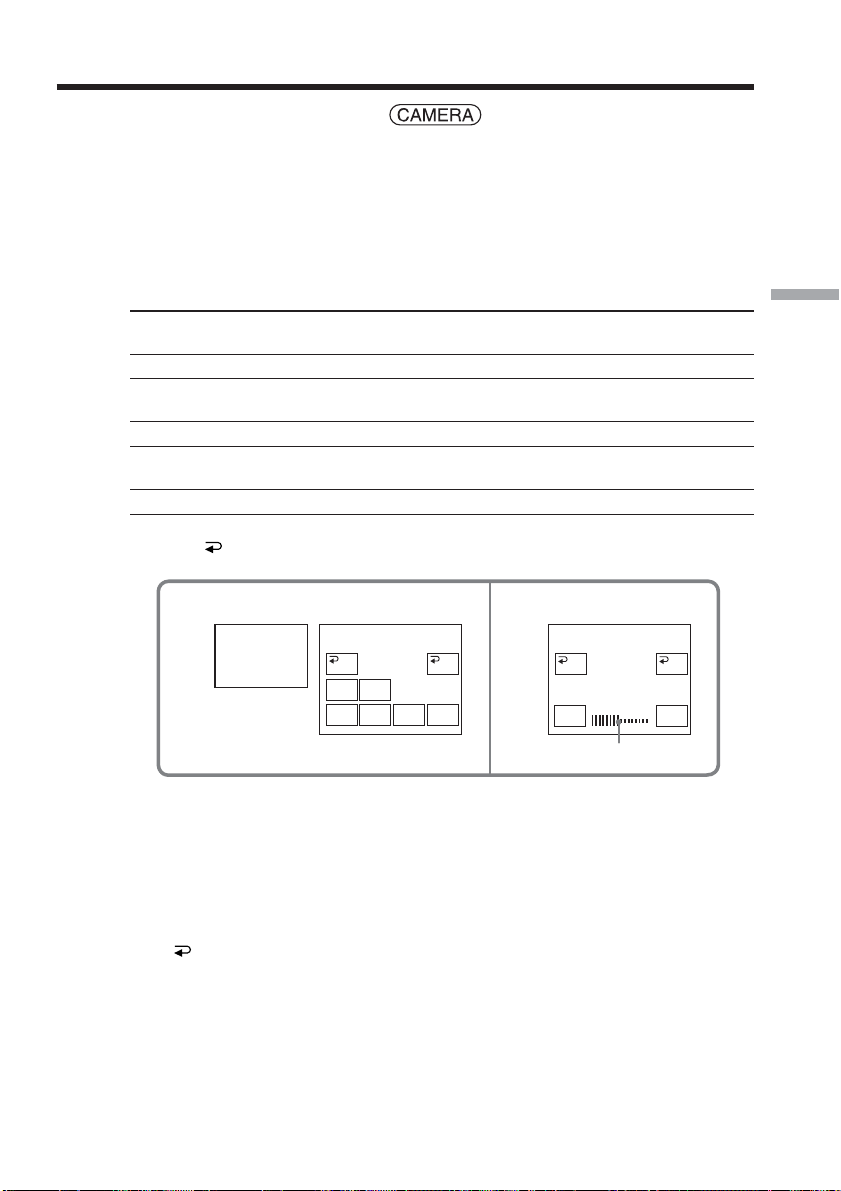
Using special effects – Digital effect
The POWER switch should be set to .
Operate by touching the panel.
(1) Press FN and select PAGE2.
(2) Press DIG EFFT. The screen to select a digital effect is displayed.
(3) Press a desired mode. When you select STILL or LUMI., the still image is
stored in memory.
(4) Press – (to decrease the effect)/+ (to increase the effect) to adjust the effect.
Items to adjust
STILL The rate of the still image you want to superimpose on the moving
picture
FLASH The interval of flash motion
LUMI. The color scheme of the area in the still image which is to be swapped
with a moving picture
TRAIL The vanishing time of the incidental image
SLOW SHTR Shutter speed. The larger the shutter speed number, the slower the
shutter speed.
OLD MOVIE No adjustment necessary
(5) Press OK to return to PAGE2.
24
DIG
EFFT
DIG EFFT
OFF OK
SLOW
OLD
SHTR
MOVIE
STILL
LUMI.FLASH TRAIL
[a] The bar appears when setting following digital effect modes: STILL,
FLASH, LUMI., TRAIL.
To return to FN
Press EXIT.
DIG EFFT
OFF
LUMI.
–+
OK
[a]
Advanced Recording Operations
To cancel digital effect
Press OFF to return to PAGE2.
55
Page 56

Using special effects – Digital effect
Notes
•While using digital effect, you cannot use the following functions:
– Super NightShot
– Color Slow Shutter
– Fader
•PROGRAM AE does not work in the SLOW SHTR mode.
•The following functions do not work in the OLD MOVIE mode:
– Wide mode
– Picture effect
– PROGRAM AE
When recording in the SLOW SHTR mode
Auto focus may not be effective. Focus manually using a tripod.
Shutter speed
Shutter speed number Shutter speed
SLOW SHTR 1 1/30
SLOW SHTR 2 1/15
SLOW SHTR 3 1/8
SLOW SHTR 4 1/4
56
Page 57
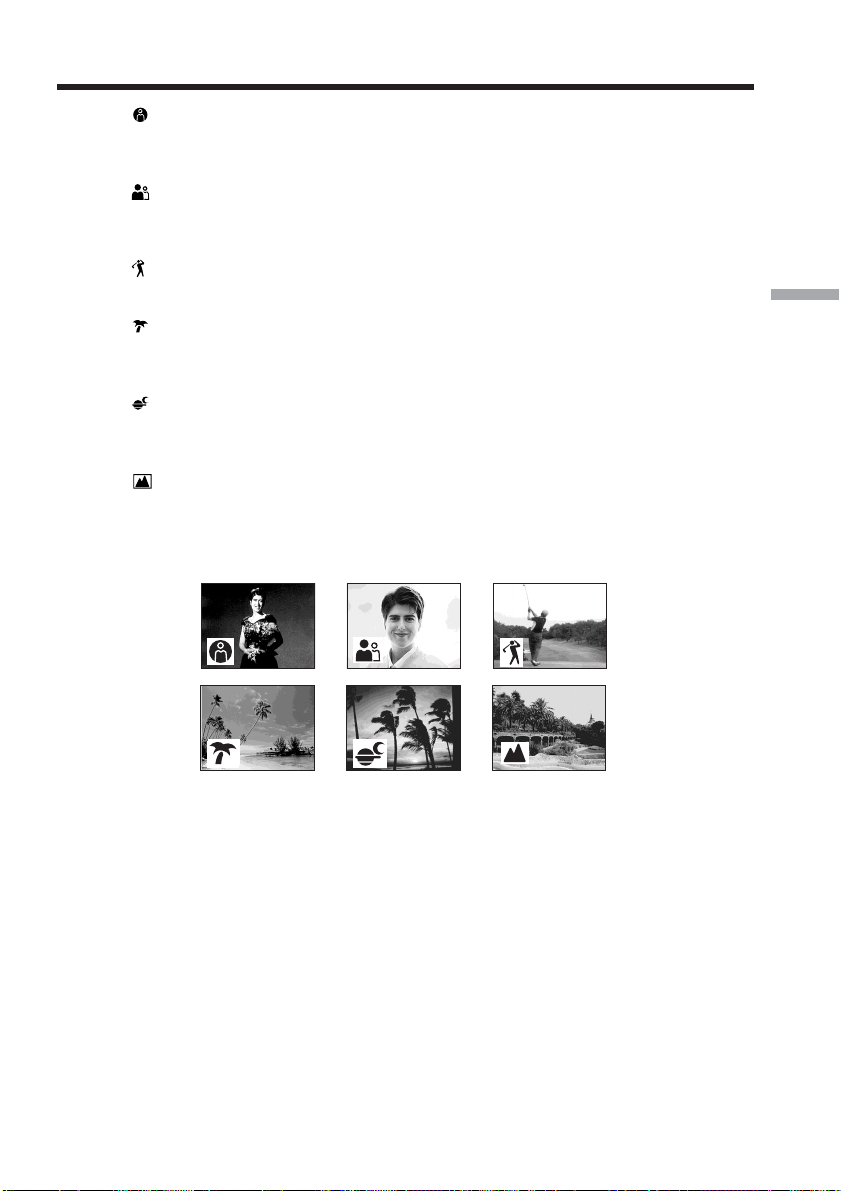
Using PROGRAM AE
SPOTLIGHT
1)
This mode prevents people’s faces, for example, from appearing excessively white
when shooting subjects lit by strong light in the theater.
PORTRAIT (soft portrait)
This mode brings out the subject while creating a soft background for subjects such as
people or flowers.
SPORTS (sports lesson)
1)
This mode minimizes shake on fast-moving subjects such as in tennis or golf.
BEACH&SKI
1)
This mode prevents people’s faces from appearing dark in strong light or reflected light,
such as at a beach in midsummer or on a ski slope.
SUNSETMOON (sunset & moon)
2)
This mode allows you to maintain atmosphere when you are recording sunsets, general
night views, fireworks displays and neon signs.
LANDSCAPE
2)
This mode is for when you record distant subjects such as mountains. Also it prevents
your camcorder from focusing on glass or metal mesh in windows when you record a
subject behind glass or a screen.
Advanced Recording Operations
1)
Your camcorder focuses only on subjects in the middle to far distance.
2)
Your camcorder focuses only distant subject.
57
Page 58
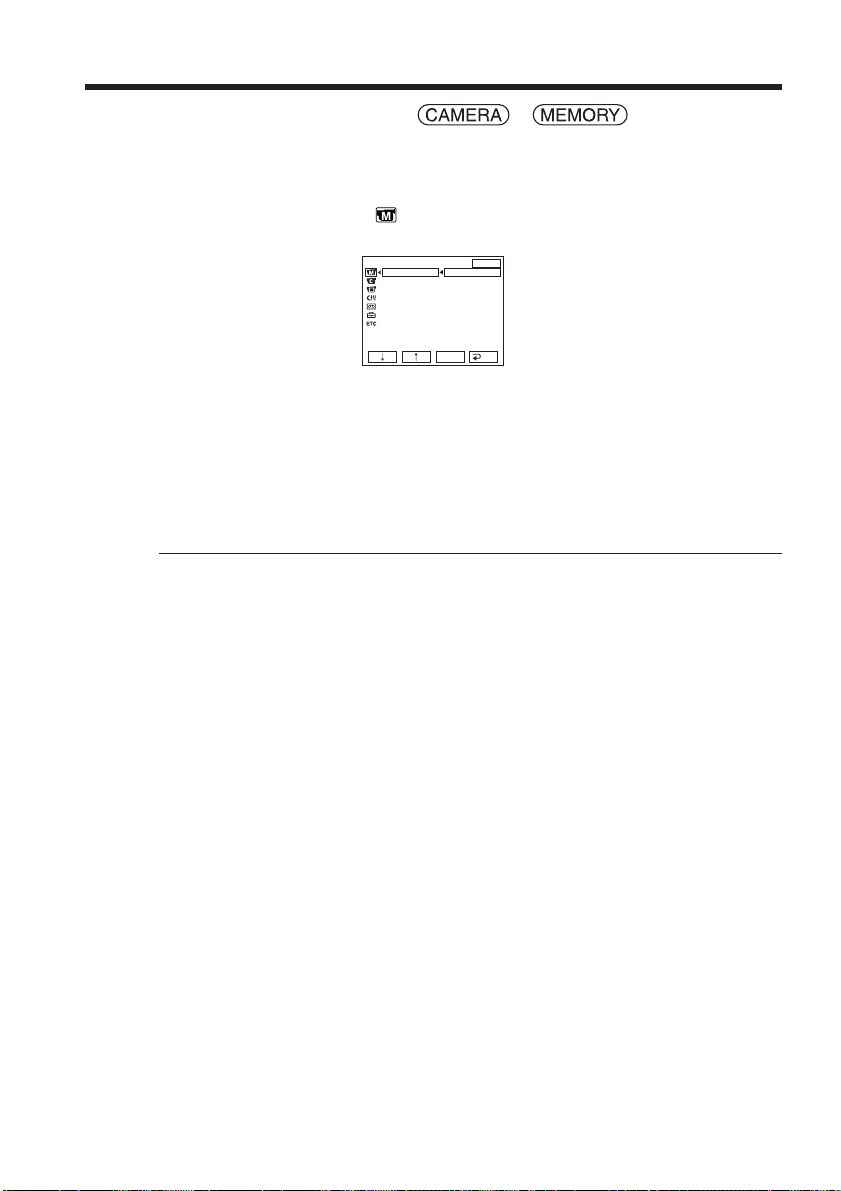
Using PROGRAM AE
The POWER switch should be set to or .
Operate by touching the panel.
(1) Press FN to display PAGE1.
(2) Press MENU to display the menu.
(3) Select PROGRAM AE in
, then press EXEC (p. 173).
MANUAL SET
PROGRAM AE
P EFFECT
RED EYE R
FLASH LVL
WHT BAL
SHARPNESS
AUTO SHTR
EXIT
AUTO
SPOTLIGHT
PORTRAIT
SPORTS
BEACH&SKI
SUNSETMOON
LANDSCAPE
EXEC
RET.
(4) Select a desired mode, then press EXEC.
To return to FN
Press EXIT.
To cancel PROGRAM AE
Set PROGRAM AE to AUTO in the menu settings.
Notes
•The following functions do not work in PROGRAM AE:
– Color Slow Shutter
– During fading in with BOUNCE
– SLOW SHTR
– OLD MOVIE
– Spot Focus
•PROGRAM AE does not work in the following cases (The indicator flashes):
– NightShot
– When the POWER switch is set to MEMORY, you use MEMORY MIX.
•When you set the POWER switch to MEMORY, the SPORTS mode does not work.
(The indicator flashes.)
58
Page 59
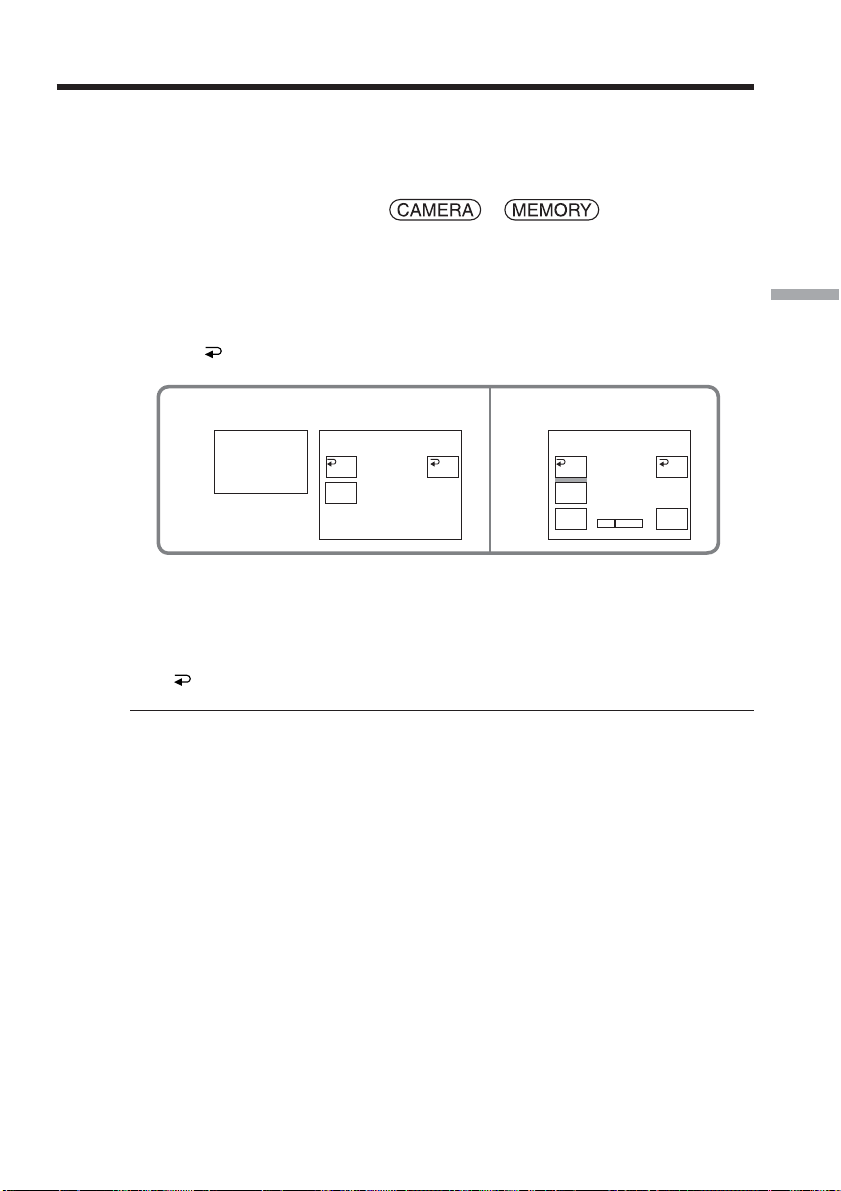
Adjusting the exposure manually
We recommend adjusting the exposure manually in the following cases:
– When the subject is backlit
– When the subject is too bright against the background
– When recording dark pictures (e.g. night scenes) faithfully
The POWER switch should be set to or .
Operate by touching the panel.
(1) Press FN to display PAGE1.
(2) Press EXPOSURE. The screen to adjust the exposure appears.
(3) Press MANUAL.
(4) Adjust the exposure using – (to dim)/+ (to brighten).
(5) Press
OK to return to PAGE1.
24
EXPO–
SURE
To return to FN
Press EXIT.
AUTO
MANU–
AL
EXPOSURE
OK
AUTO
MANU–
AL
–+
–+
Advanced Recording Operations
OK
EXPOSURE
To return to the automatic exposure
Press AUTO to return to PAGE1.
Note
When you adjust the exposure manually, the following functions do not work:
– Back light function
– Color Slow Shutter
59
Page 60
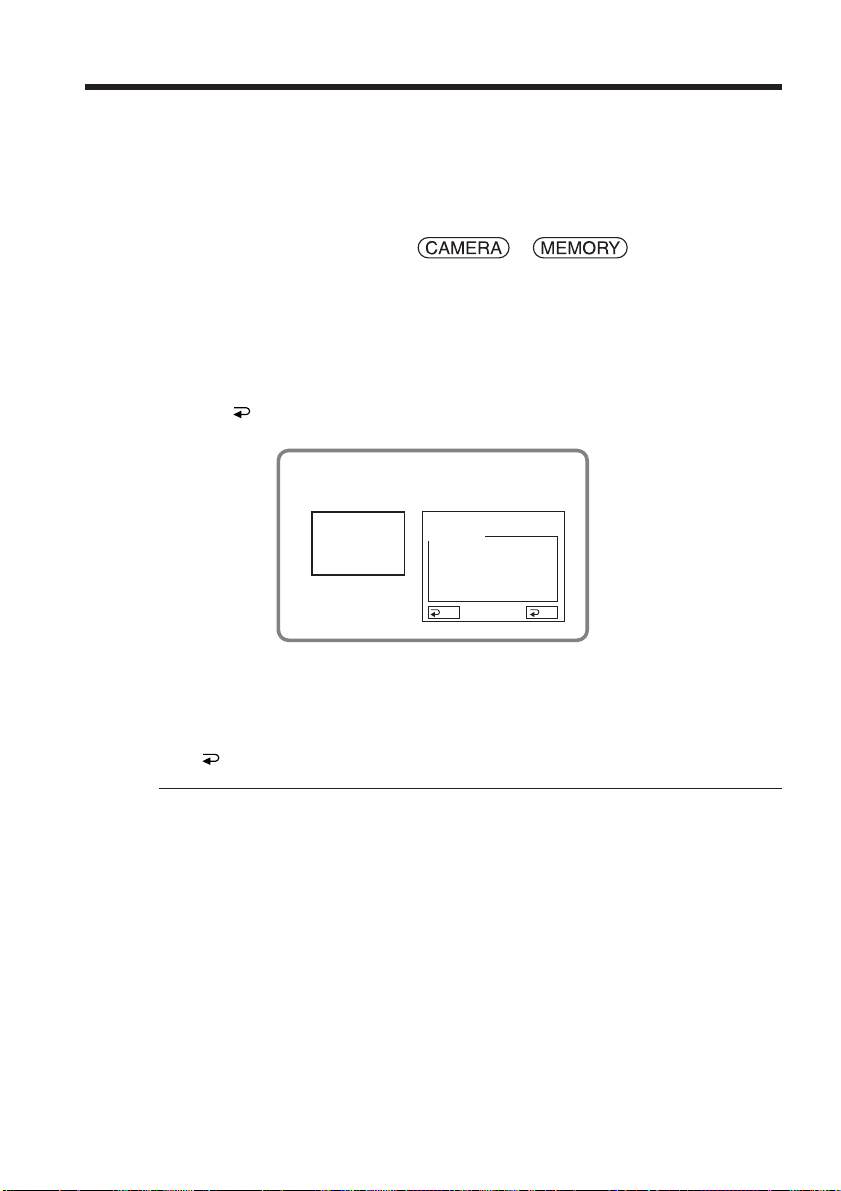
Using spot light-metering function – Flexible Spot Meter
You can take a picture with the appropriate exposure automatically for just the point
you want to focus on and with its exposure fixed.
Use Flexible Spot Meter in the following cases:
– The subject is backlit.
– When there is strong contrast between the subject and background such as with a
subject that is on stage and lit by a spotlight.
The POWER switch should be set to or .
Operate by touching the panel.
(1) Press FN to display PAGE1.
(2) Press SPOT METER. The SPOT METER screen appears.
(3) Press the desired area in the frame.
The SPOT METER indicator flashes on the screen. The exposure of the point
you selected is adjusted.
(4) Press
OK to return to PAGE1.
2
SPOT
SPOT METER
METER
AUTO
To return to FN
Press EXIT.
To return to the automatic exposure
Press AUTO to return to PAGE1.
Note
The following functions do not work during Flexible Spot Meter:
– Back light function
– Color Slow Shutter
– Spot Focus
OK
60
Page 61
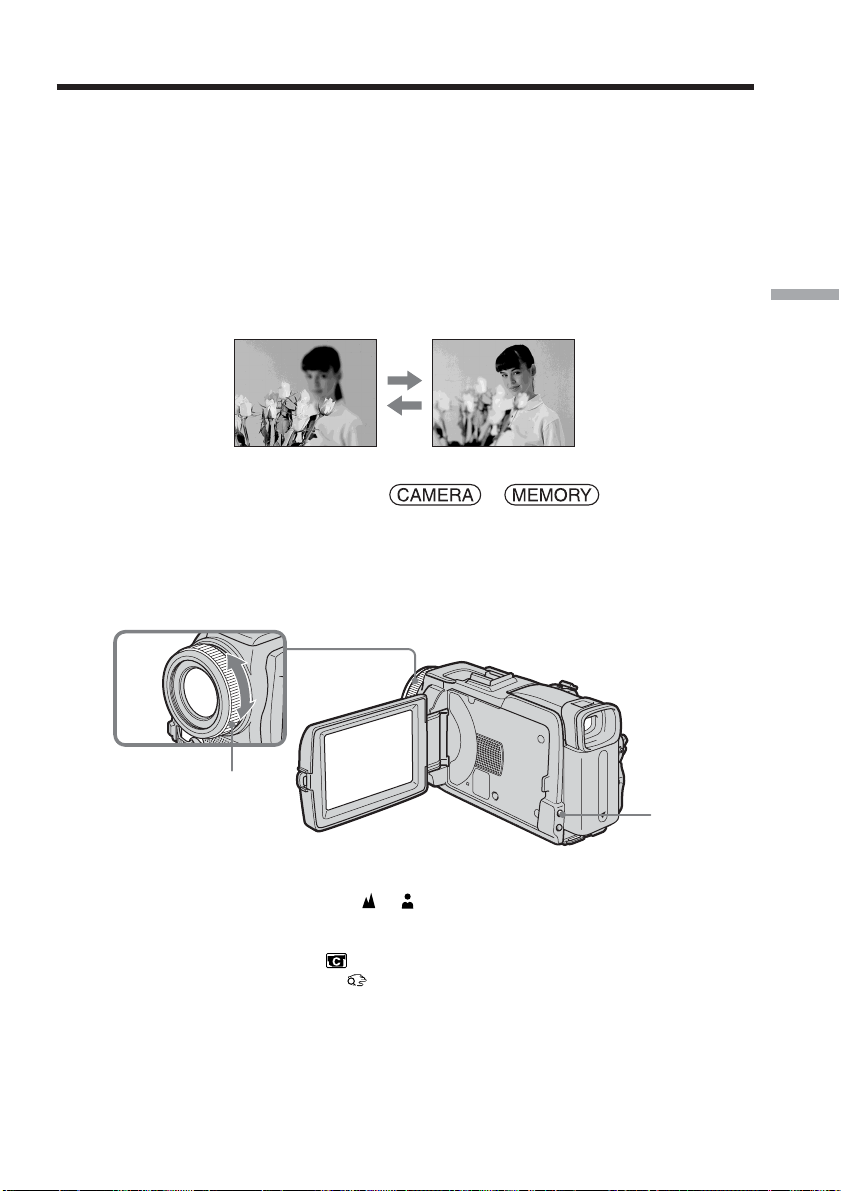
Focusing manually
You can gain better results by manually adjusting the focus in the following cases.
Normally, focus is automatically adjusted.
When the POWER switch is set to MEMORY, you can adjust the focus manually with
the image enlarged to twice the size (Expanded focus).
•The autofocus mode is not effective when shooting:
– Subjects through glass coated with water droplets
– Horizontal stripes
– Subjects with little contrast with backgrounds such as walls or the sky
•When you want to change the focus from a subject in the foreground to a subject in
the background
•Shooting a stationary subject when using a tripod
The POWER switch should be set to or .
(1) Press FOCUS.
The 9 (focus) indicator appears on the screen.
(2) Turn the focus ring to sharpen focus.
Advanced Recording Operations
2
Focus ring
FOCUS
To return to the autofocus
Press FOCUS to turn off the 9, or indicator.
About expanded focus
If you set EXPANDED F in to ON in the menu settings (p. 174) when the POWER
switch is set to MEMORY, the
ring is turned and the image will be enlarged to twice its size. The focal distance
information is also displayed. Adjustment is complete, the image returns to its original
size automatically.
(expanded focus) indicator appears when the focus
61
Page 62

Focusing manually
To focus precisely
It is easier to focus on the subject if you adjust the zoom to shoot at the “W” (wideangle) position after focusing at the “T” (telephoto) position.
When you shoot close to the subject
Focus at the end of the “W” (wide-angle) position.
9 changes as follows:
when recording a distant subject
when the subject is too close to focus on
Focal distance information is displayed for about three seconds on the LCD screen
in the following cases:
– When switching the focus adjustment mode from autofocus to manual
– When turning the focus ring
Focal distance information
You cannot get correct information if you have attached a conversion lens (optional) to
your camcorder.
62
Page 63
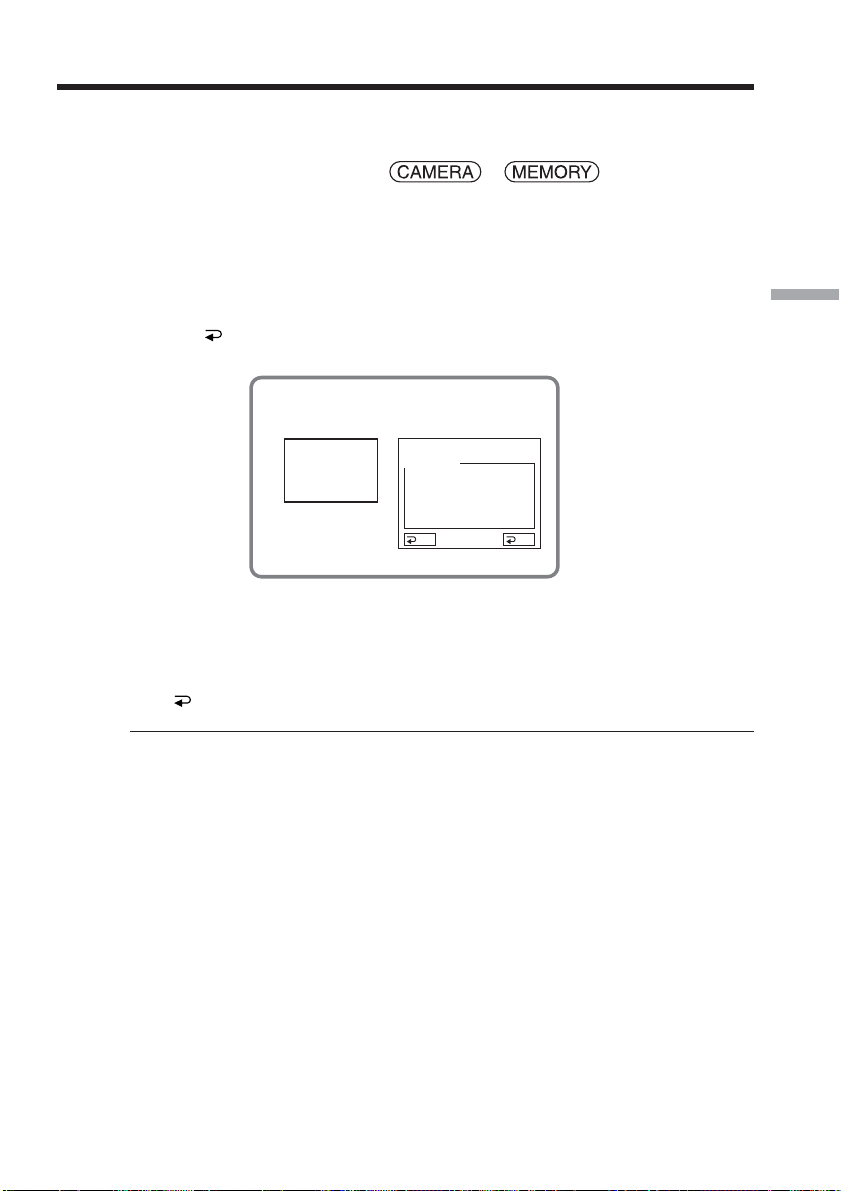
Using spot focus function – Spot Focus
You can take a picture with the appropriate focus automatically for just the point you
want to focus on and with its focus fixed.
The POWER switch should be set to or .
Operate by touching the panel.
(1) Press FN to display PAGE1.
(2) Press SPOT FOCUS. The SPOT FOCUS screen appears.
(3) Press the desired area in the frame.
The SPOT FOCUS indicator flashes on the screen. The focus of the point you
selected is adjusted.
(4) Press
OK to return to PAGE1.
2
Advanced Recording Operations
SPOT
SPOT FOCUS
FOCUS
AUTO
To return to FN
Press EXIT.
To return to the autofocus
Press AUTO to return to PAGE1.
Note
The back light function does not work during Spot Focus.
Focal distance information
It is not displayed on the screen.
OK
63
Page 64
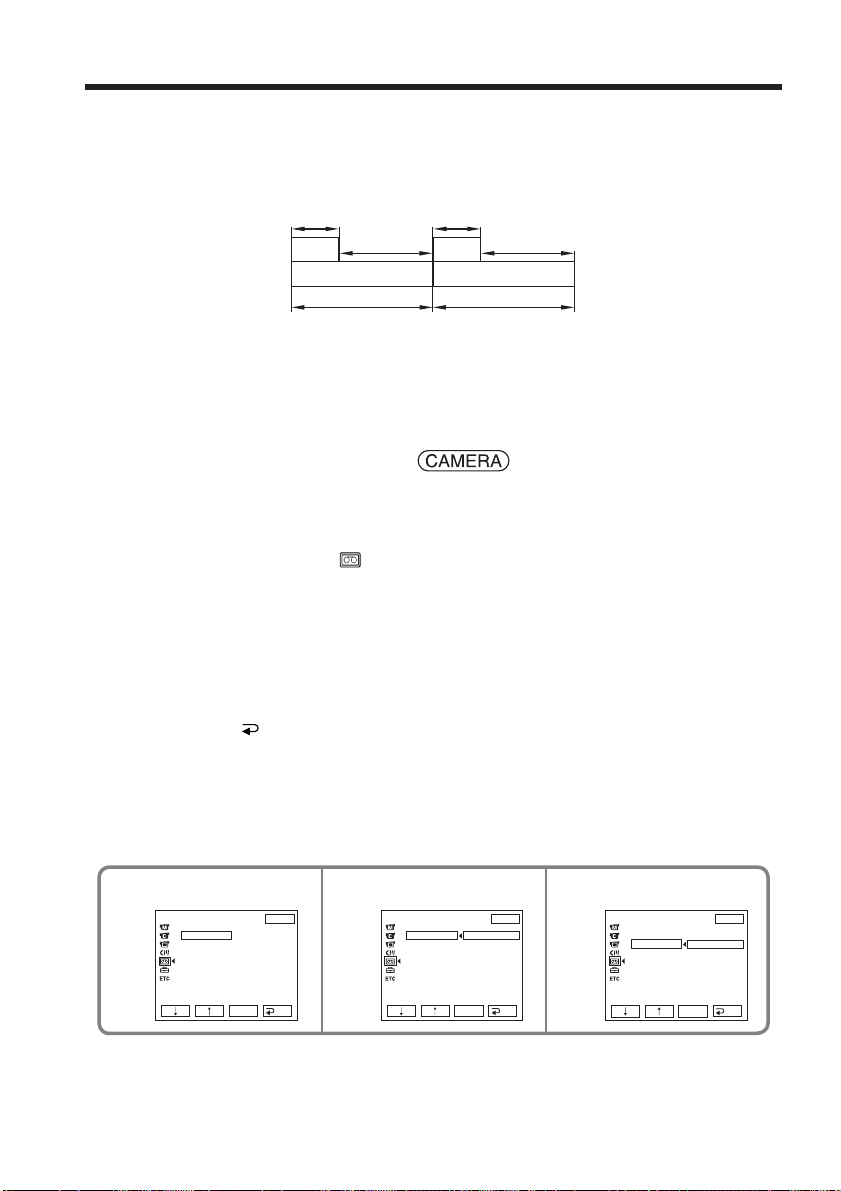
Interval Recording
You can make a time-lapse recording by setting your camcorder to automatically record
and standby sequentially. You can achieve an excellent recording for flowering,
emergence, etc. with this function.
Example
1 s 1 s
9 min 59 s 9 min 59 s
[a][a]
[b][b]
10 min 10 min
[a] REC TIME
[b] INTERVAL
There may be a discrepancy in recording time of up to +/– six frames from the selected
time.
The POWER switch should be set to .
Operate by touching the panel.
(1) Press FN to display PAGE1.
(2) Press MENU to display the menu.
(3) Select INT. REC in
(4) Select SET, then press EXEC.
(5) Select INTERVAL, then press EXEC.
(6) Select a desired interval time, then press EXEC.
The time: 30SEC y 1MIN y 5MIN y 10MIN
(7) Select REC TIME, then press EXEC.
(8) Select a desired recording time, then press EXEC.
The time: 0.5SEC y 1SEC y 1.5SEC y 2SEC
(9) Press
RET.
(10) Set INT. REC to ON, then press EXEC.
(11) Press EXIT to return to FN.
The INTERVAL TAPE indicator flashes on the screen.
(12) Press START/STOP to start Interval Recording.
The INTERVAL TAPE indicator lights up during Interval Recording.
, then press EXEC (p. 179).
64
457
TAPE SET
I
NT. REC
I
NTERVAL
REC T
EXIT
30SEC
I
ME
RET.
EXEC
TAPE SET
I
NT. REC
I
NTERVAL
REC T
I
ME
To cancel Interval Recording
Set INT. REC to OFF in the menu settings.
EXEC
30SEC
1M
5M
10M
EXIT
I
N
I
N
I
N
RET.
TAPE SET
I
NT. REC
I
NTERVAL
REC T
I
ME 0 . 5SEC
1SEC
1
.
2SEC
EXEC
EXIT
5SEC
RET.
Page 65
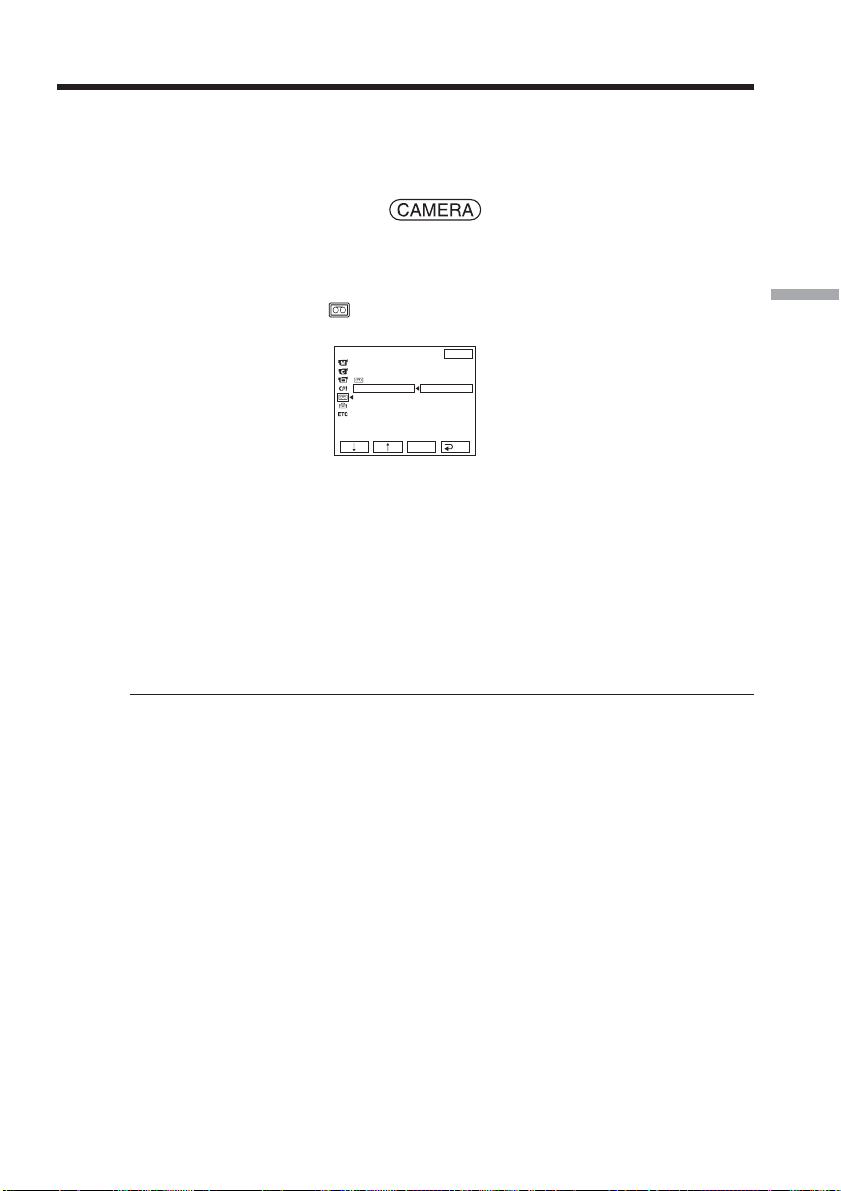
Frame by frame recording – Frame recording
You can make a recording with a stop-motion animated effect using frame recording.
To create this effect, alternately move the subject a little and make frame recording. We
recommend that you use a tripod, and operate your camcorder using the Remote
Commander after step 6.
The POWER switch should be set to .
Operate by touching the panel.
(1) Press FN to display PAGE1.
(2) Press MENU to display the menu.
(3) Select FRAME REC in
, then press EXEC (p. 179).
Advanced Recording Operations
EXEC
OFF
ON
EXIT
RET.
TAPE SET
REC MODE
AUDI O MODE
REMAIN
FRAME REC
I NT. REC
(4) Select ON, then press EXEC.
(5) Press EXIT to return to FN.
The FRAME REC indicator lights up.
(6) Press START/STOP to start frame recording. Your camcorder makes a
recording for about six frames, and returns to recording standby.
(7) Move the subject, and repeat step 6.
To cancel frame recording
Set FRAME REC to OFF in the menu settings.
Note
The proper remaining tape time is not indicated if you use frame recording
continuously.
When using frame recording
The last recorded frame is longer than other frames.
65
Page 66
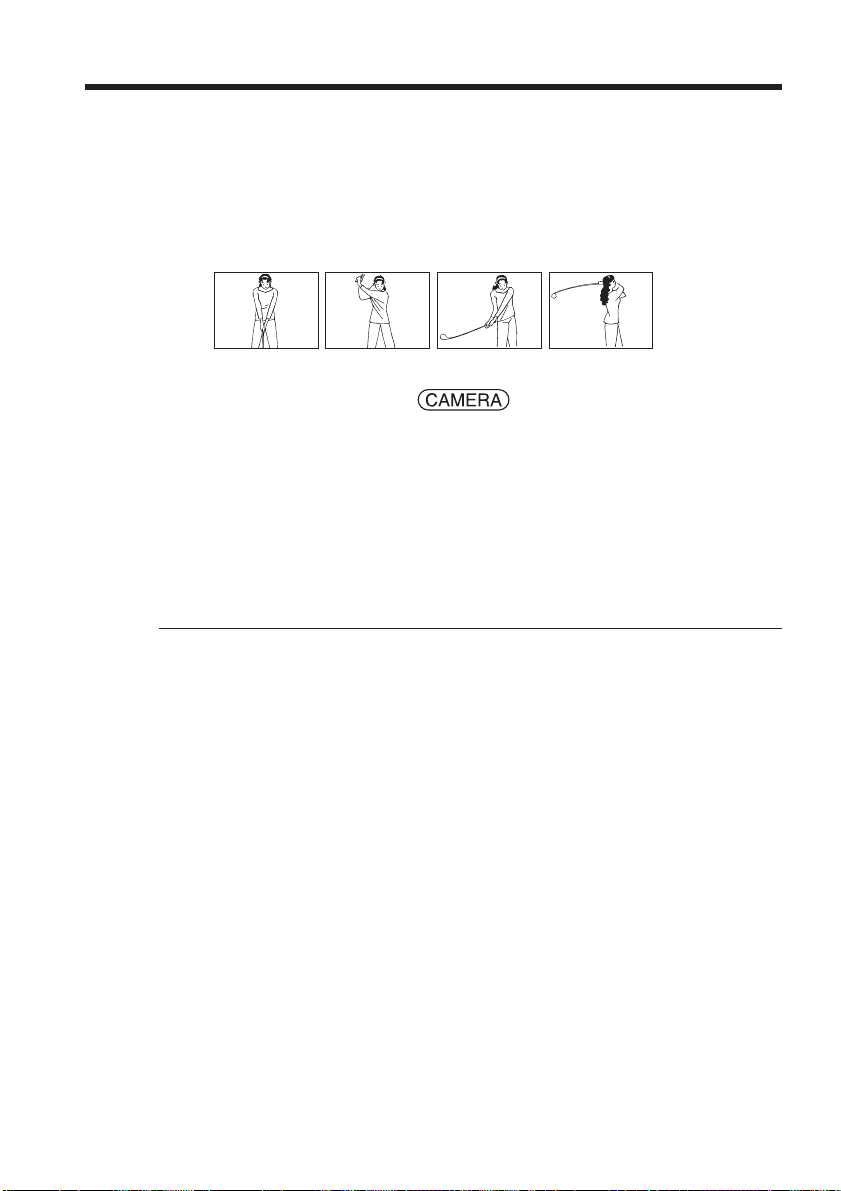
Recording with all the pixels – Progressive Recording Mode
To import moving pictures to a computer to view still images, we recommend you
record in Progressive Recording Mode. To use Progressive Recording Mode, follow the
procedure below. Still images produced this way are more stable than those recorded in
normal mode, and thus are more suitable for analyzing high-speed action such as sports
scenes. (Since your camcorder takes in an image every 1/30 of a second in Progressive
Recording Mode, moving pictures recorded in this mode may be subject to too much
jitter. To view moving pictures, we recommend recording in normal mode.)
The POWER switch should be set to .
Operate by touching the panel.
(1) Press FN and select PAGE3.
(2) Press PRGRE REC.
To cancel Progressive Recording Mode
Press PRGRE REC again.
To return to FN
Press EXIT.
66
Note on Progressive Recording Mode
The normal TV broadcast divides the screen into two finer fields and displays them in
turns every 1/60 of a second. Thus, the actual image displayed in an instant covers only
half of the apparent image area. Displaying the whole image simultaneously on a full
screen is called displaying with all the pixels. In this function the picture is clearer than
one in normal function, but moving objects appear jerky since the picture is read/
output every about 1/30 second.
When recording under fluorescent light
When recording in Progressive Recording Mode under fluorescent light or light bulb, a
rare phenomenon may happen in which the screen lights up brightly (Flicker
phenomenon). This is not a malfunction. If you want to stop this phenomenon, cancel
Progressive Recording Mode.
When you record with Progressive Recording Mode
The angle of view is slightly larger than normal recording.
During Progressive Recording Mode, you cannot use the following functions:
– Digital zoom
– Recording still images on the “Memory Stick” during tape recording or tape recording
standby
– Wide mode
– BOUNCE
– SLOW SHTR
– OLD MOVIE
– SteadyShot
Page 67
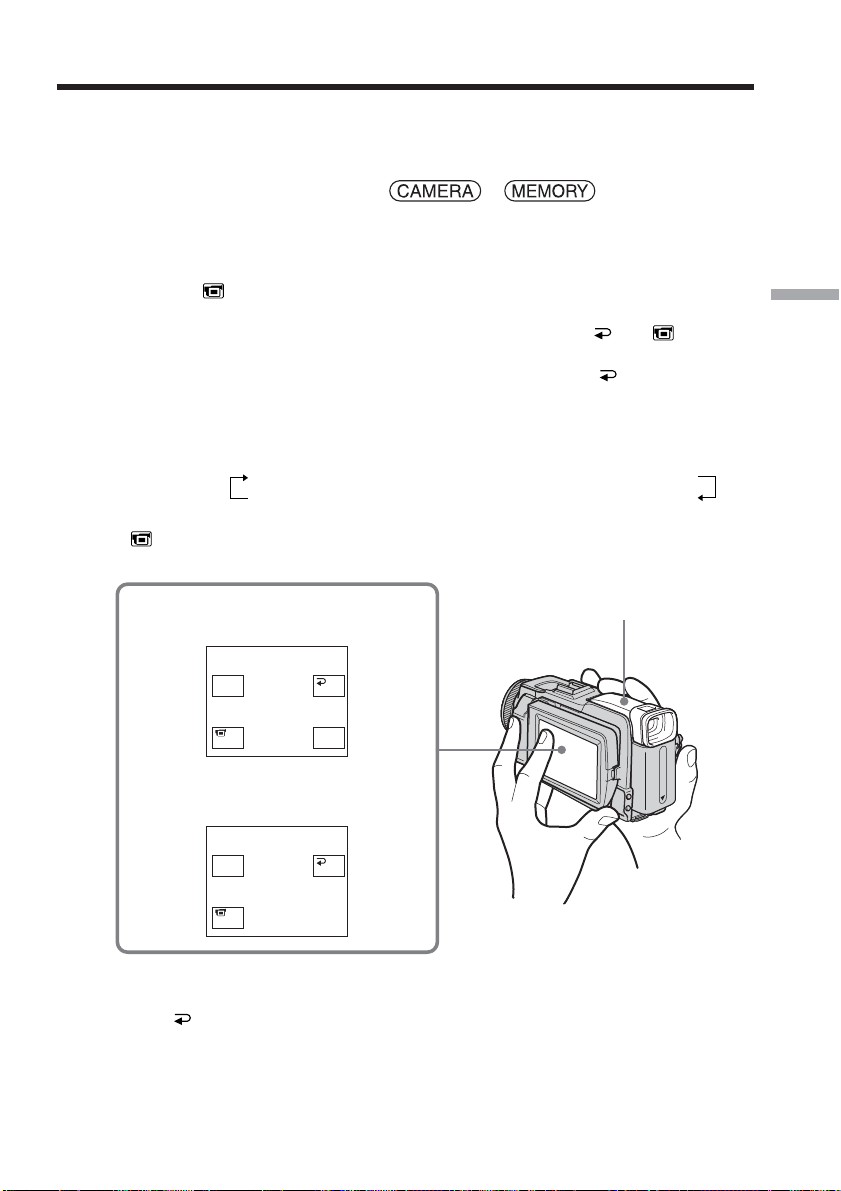
Using the viewfinder
Turn the LCD panel over and move it back to your camcorder body with the LCD
screen facing out. You can operate with the touch panel using the viewfinder.
Use the viewfinder when operating camera brightness and fader on the touch panel.
The POWER switch should be set to or .
Operate by touching the panel.
(1) Turn the LCD panel over and move it back to your camcorder body with the
LCD screen facing out.
(2) Press
(3) Press OK. The LCD screen is turned off.
(4) Using the viewfinder, press the LCD screen. EXPOSURE,
FADER (only when the POWER switch is set to CAMERA) appear.
(5) Press the LCD screen and select a desired item, then press
EXPOSURE: Adjust the exposure by pressing –/+.
FADER: Press FADER until a desired fader mode appears.
ON: The LCD screen lights up.
OFF. The PANEL OFF indicator appears on the screen.
The indicator changes as follows:
FADER t M. FADER t BOUNCE t MONOTONE
(no indicator) T DOT T WIPE T OVERLAP
Advanced Recording Operations
OK, ON and
OK.
4
When the POWER
switch is set to CAMERA
EXPO–
SURE
ON FADER
When the POWER
switch is set to MEMORY
EXPO–
SURE
ON
OK
OK
Viewfinder
To make the buttons on the LCD screen disappear
Press OK.
67
Page 68

Using the viewfinder
Note
When the POWER switch is set to VCR or during memory playback, you cannot
operate with the touch panel using the viewfinder.
To operate the items that do not appear
Set the LCD panel back to the previous position. Operate the items using the LCD
screen.
Available recording time
This is the time when you record pictures using the viewfinder (p. 17).
68
Page 69
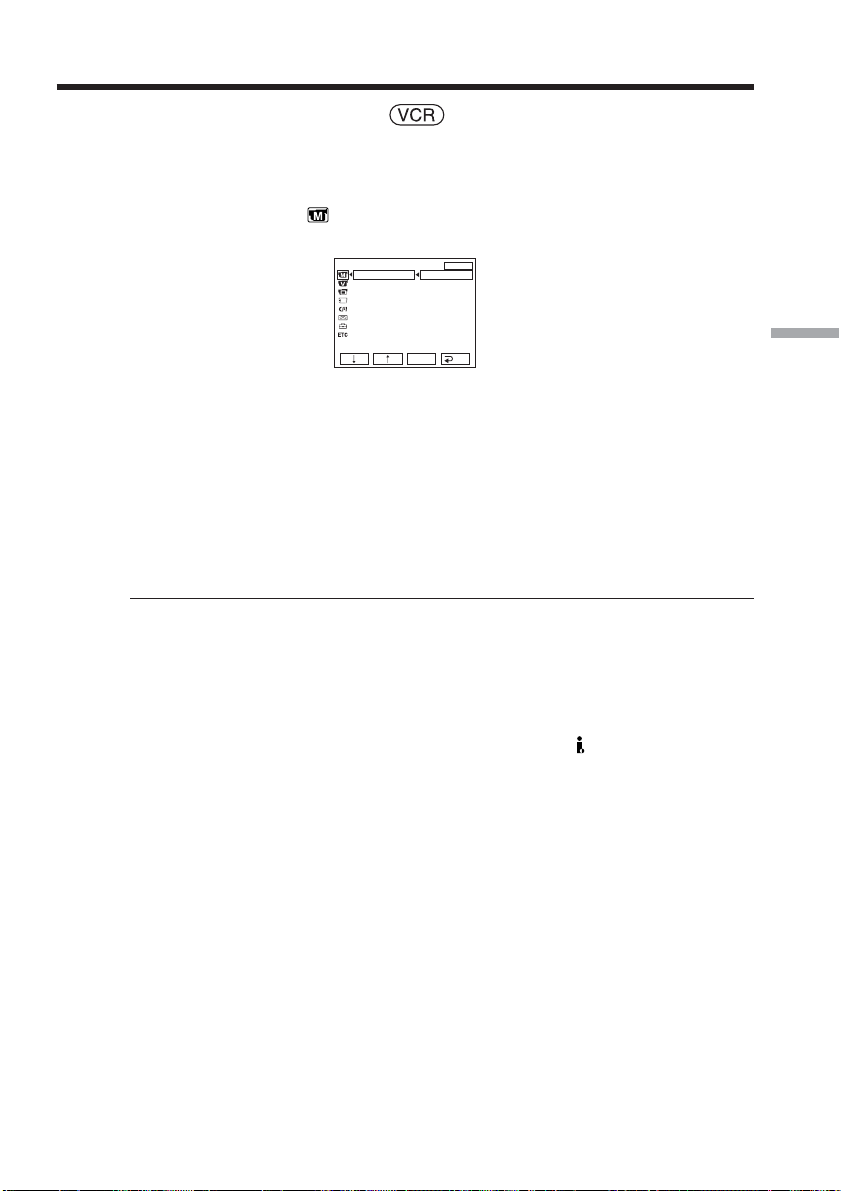
— Advanced Playback Operations —
Playing back tape with picture effect
The POWER switch should be set to .
Operate by touching the panel.
(1) During playback or playback pause, press FN to display PAGE1.
(2) Press MENU to display the menu.
(3) Select P EFFECT in
, then press EXEC (p. 173).
MANUAL SET
P EFFECT
OFF
NEG. ART
SEPIA
B&W
SOLARIZE
EXEC
EXIT
RET.
(4) Select a desired mode, then press EXEC.
You can use NEG. ART, SEPIA, B&W and SOLARIZE.
See page 53 for details of each mode.
To return to FN
Press EXIT.
To cancel picture effect
Set P EFFECT to OFF in the menu settings.
Notes
•You cannot process externally input scenes using picture effect.
•You cannot record images on the tape on your camcorder while you are processing
the image using picture effect. Record images on the “Memory Stick” (p. 114, 123), or
on a VCR using your camcorder as a player.
Pictures processed by picture effect
Pictures processed by picture effect are not output through the DV Interface.
Advanced Playback Operations
69
Page 70
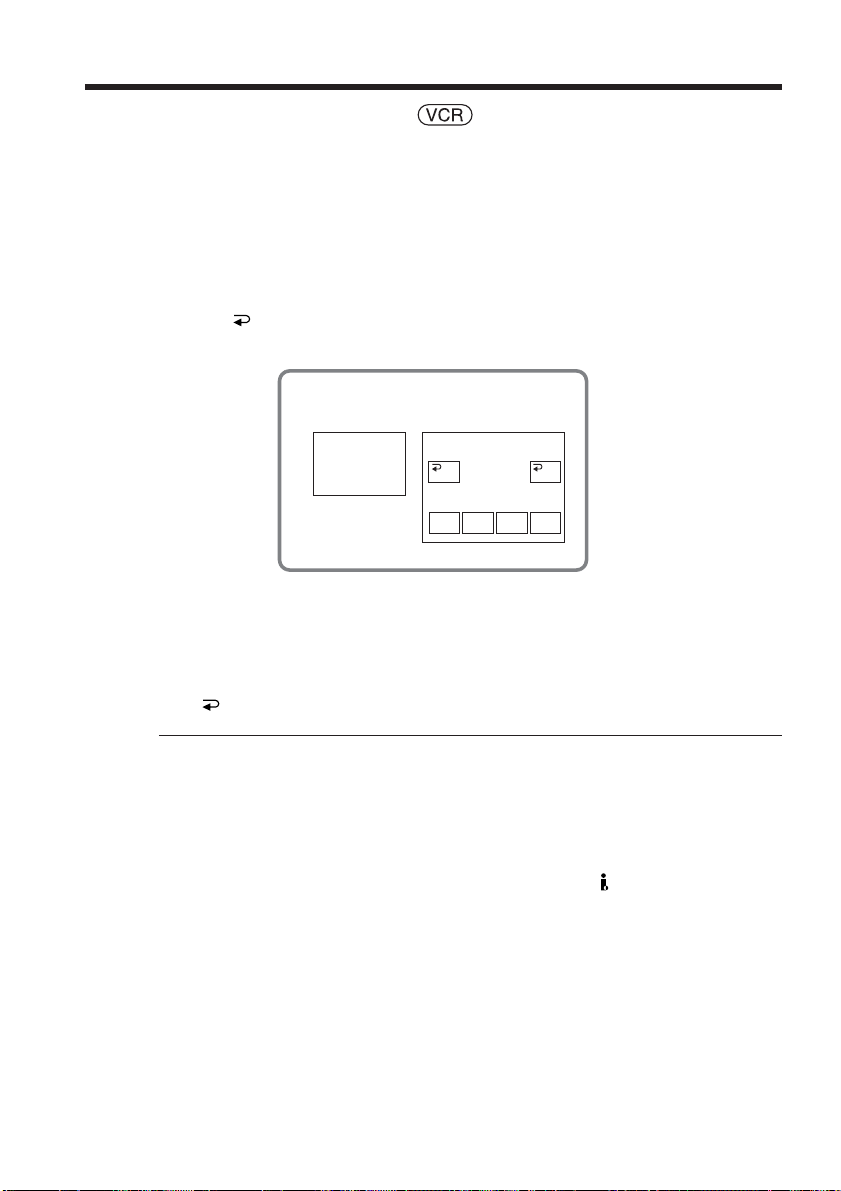
Playing back tape with digital effect
The POWER switch should be set to .
Operate by touching the panel.
(1) During playback or playback pause, press FN and select PAGE2.
(2) Press DIG EFFT. The screen to select a digital effect is displayed.
(3) Select a desired mode. You can use STILL, FLASH, LUMI. and TRAIL. See
page 54 for details of the each mode.
When you select STILL or LUMI., the picture that you select the mode to is
stored in memory as a still image.
(4) Press –/+ to adjust the effect.
(5) Press
OK to return to PAGE2.
2
DIG
DIG EFFT
OKOFF
EFFT
STILL FLASH
To return to FN
Press EXIT.
To cancel digital effect
Press OFF to return to PAGE2.
Notes
•You cannot process externally input scenes using digital effect.
•You cannot record images on the tape on your camcorder while you are processing
the image using digital effect. Record images on the “Memory Stick” (p. 114, 123), or
on a VCR using your camcorder as a player.
Pictures processed by digital effect
Pictures processed by digital effect are not output through the DV Interface.
LUMI. TRAIL
70
Page 71
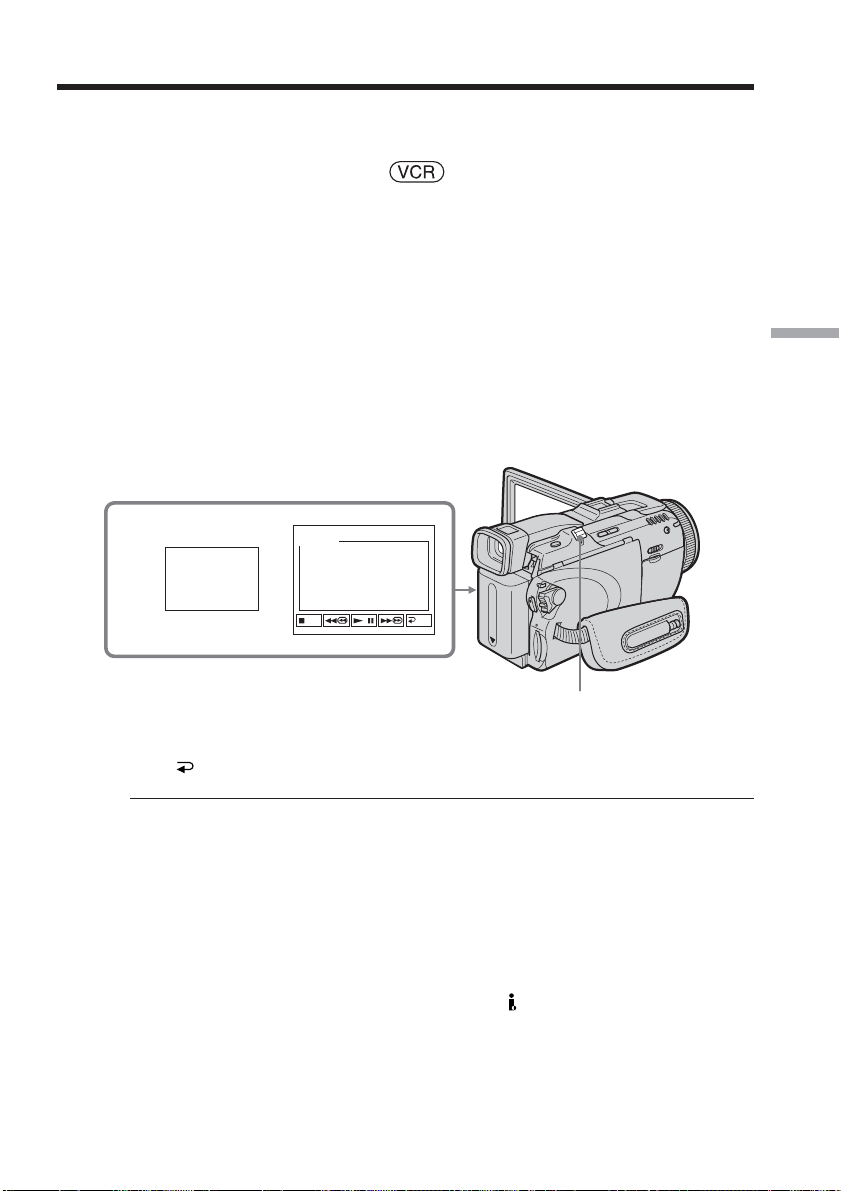
Enlarging images recorded on tape – Tape PB ZOOM
Besides the operation described here, your camcorder can enlarge still images recorded
on the “Memory Stick” (p. 133).
The POWER switch should be set to .
Operate by touching the panel.
(1) During playback or playback pause, press FN and select PAGE2.
(2) Press PB ZOOM. The PB ZOOM screen appears.
(3) Press the area you want to enlarge in the frame.
The area you pressed moves to the center of the screen, and the playback
image is enlarged to about twice the size. If you then press another area, that
area moves to the center of the screen.
(4) Adjust the zoom ratio by the power zoom lever.
You can select the zoom ratio from approximately 1.1 times up to 5 times its
size.
W: Decrease the zoom ratio.
T:Increase the zoom ratio.
Advanced Playback Operations
2
PB ZOOM
PB
ZOOM
END
Power zoom lever
To cancel tape PB ZOOM
Press END.
Notes
•You cannot process externally input scenes using tape PB ZOOM with your
camcorder.
•You cannot record images on the tape on your camcorder while you are processing
the image using tape PB ZOOM. However, you can record images on the “Memory
Stick” (p. 114), or on a VCR using your camcorder as a player.
•You cannot record moving pictures on the “Memory Stick” on your camcorder when
you have processed the picture using tape PB ZOOM.
Images in tape PB ZOOM
Images in tape PB ZOOM are not output through the DV Interface.
In tape PB ZOOM
If you press DISPLAY/BATTERY INFO, the frame on the PB ZOOM screen disappears.
You cannot move the part you pressed to the center of the screen.
Edge of the enlarged image
The edge of the enlarged image cannot be displayed at the center of the screen.
71
Page 72
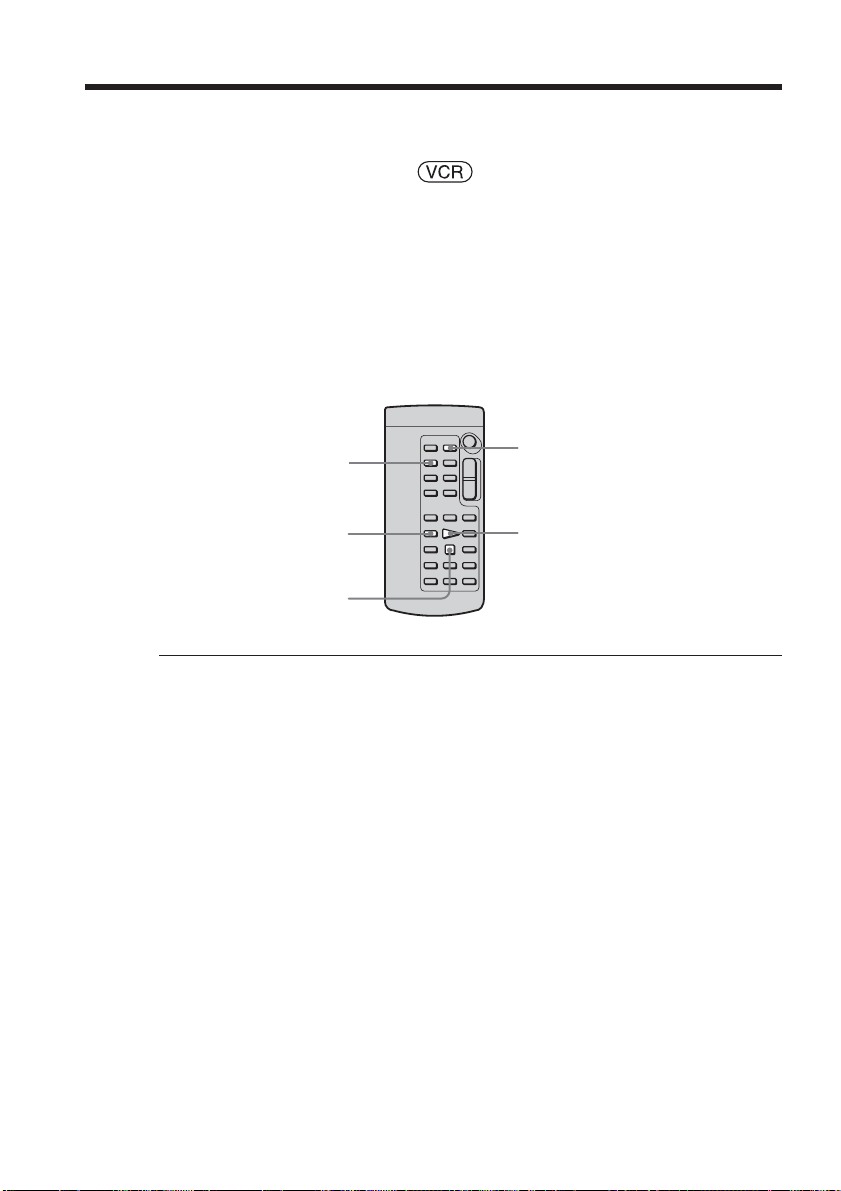
Quickly locating a scene – Zero set memory
Your camcorder automatically searches for a desired scene having the tape counter
value of “0:00:00.” Use the Remote Commander for this operation.
The POWER switch should be set to .
(1) During playback, press ZERO SET MEMORY on the Remote Commander at
the point you want to locate later. The tape counter shows “0:00:00,” then starts
counting. If the indicators do not appear, press DISPLAY. The ZERO SET
MEMORY indicator flashes.
(2) Press x when you want to stop playback.
(3) Press m to rewind the tape to the tape counter’s zero point. The tape stops
automatically when the tape counter reaches approximately zero.
(4) Press N. Playback starts from the counter’s zero point.
DISPLAY
m
x
Notes
•When you press ZERO SET MEMORY before rewinding the tape, the zero set memory
function will be canceled.
•There may be a discrepancy of several seconds between the time code and the tape
counter.
•The ZERO SET MEMORY indicator disappears when you press FN.
If the tape has a blank portion in the recorded portions
The zero set memory function may not work correctly.
ZERO SET MEMORY
N
72
Page 73
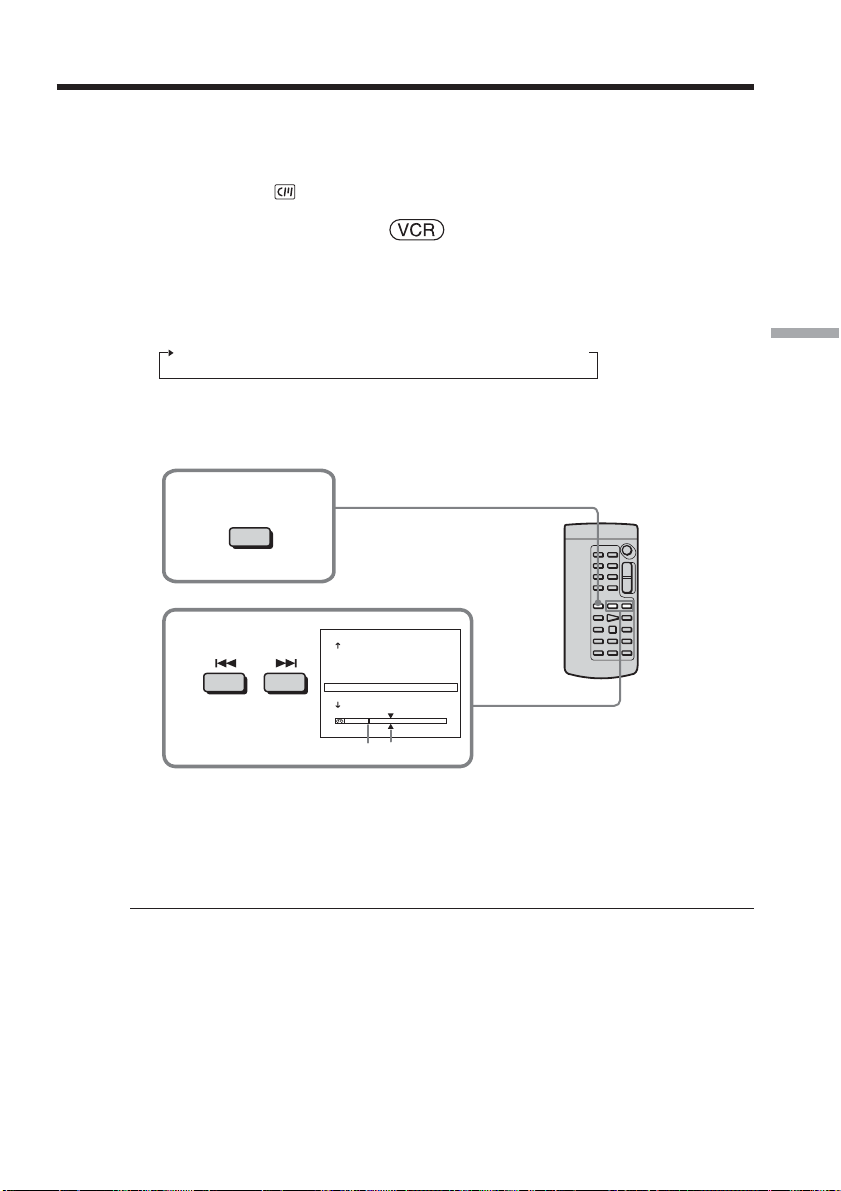
Searching the boundaries of recorded tape by title – Title search
Use the cassette with Cassette Memory for this operation.
Use the Remote Commander for this operation.
Before operation
Set CM SEARCH in to ON in the menu settings. (The default setting is ON.)
The POWER switch should be set to .
(1) Press SEARCH MODE on the Remote Commander repeatedly, until the TITLE
SEARCH indicator appears.
The title search screen appears.
The indicator changes as follows:
TITLE SEARCH t DATE SEARCH t (no indicator)
(2) Press . or > on the Remote Commander to select the title for playback.
Your camcorder automatically starts playback of the scene having the title that
you selected.
1
SEARCH
MODE
Advanced Playback Operations
2
[a] Actual point you are trying to search for
[b] Present point on the tape
TITLE SEARCH
3 HAPPY NEW YEAR!
4 PRESENT
5 GOOD MORNING
6 WEDDING
7 NIGHT
8 BASEBALL
[b]
[a]
To cancel searching
Press x on the Remote Commander.
If the tape has a blank portion between recorded portions
Title search may not work correctly.
To superimpose a title
See page 95.
73
Page 74
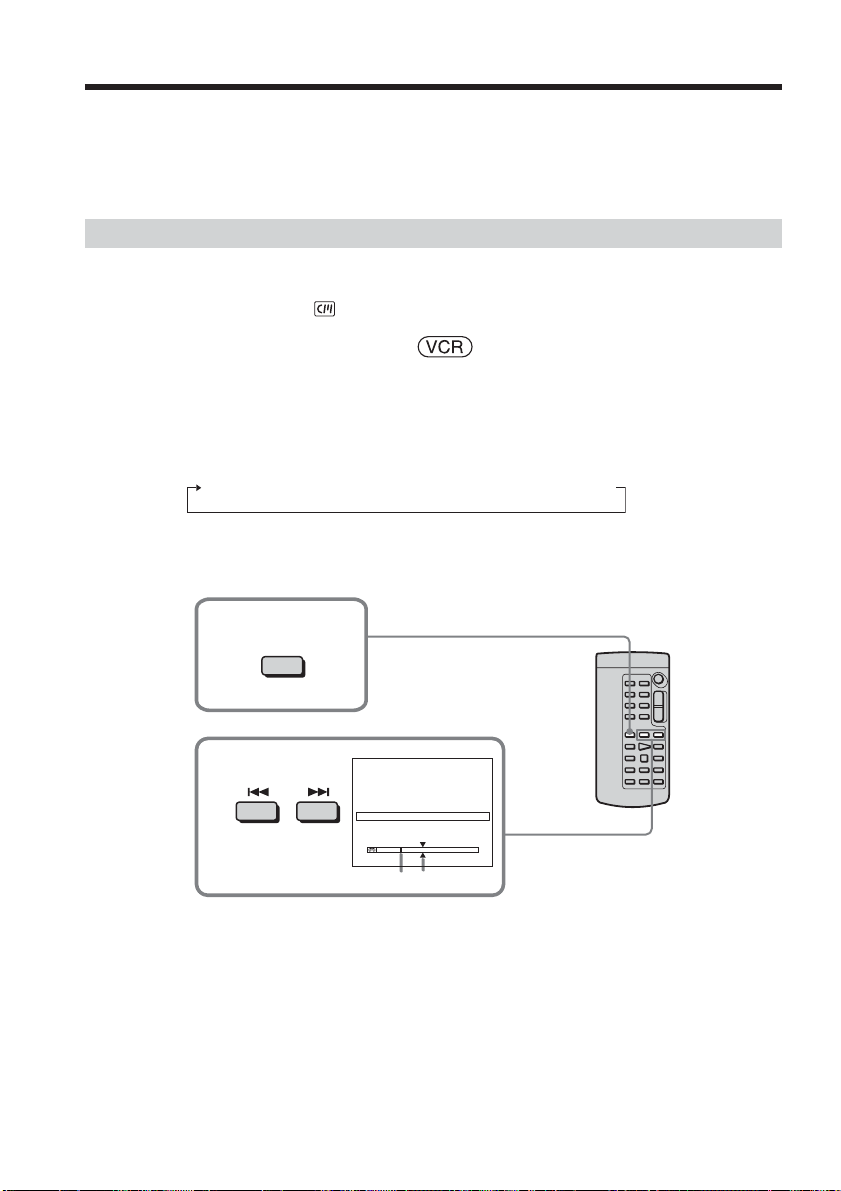
Searching a recording by date – Date search
•DATE SEARCH by using Cassette Memory
c Cue by selecting the recording date on the screen
•DATE SEARCH without using Cassette Memory
c Cue to changing point of recording date
Use the Remote Commander for this operation.
Searching for the date by using Cassette Memory
Before operation
•You can use this function only when playing back the cassette with Cassette Memory.
•Set CM SEARCH in to ON in the menu settings. (The default setting is ON.)
The POWER switch should be set to .
Operate by touching the panel.
(1) Press SEARCH MODE on the Remote Commander repeatedly, until the DATE
SEARCH indicator appears.
The date search screen appears.
The indicator changes as follows:
TITLE SEARCH t DATE SEARCH t (no indicator)
(2) Press . or > on the Remote Commander to select the date for playback.
Your camcorder automatically starts playback at the beginning of the selected
date.
74
1
SEARCH
MODE
2
[a] Actual point you are trying to search for
[b] Present point on the tape
DATE SEARCH
1 SEP / 5 / 03
2 SEP / 6 / 03
3 DEC / 24 / 03
4 JAN / 1 / 04
5 FEB / 11 / 04
6 APR / 29 / 04
[b][a]
To cancel searching
Press x on the Remote Commander.
Page 75
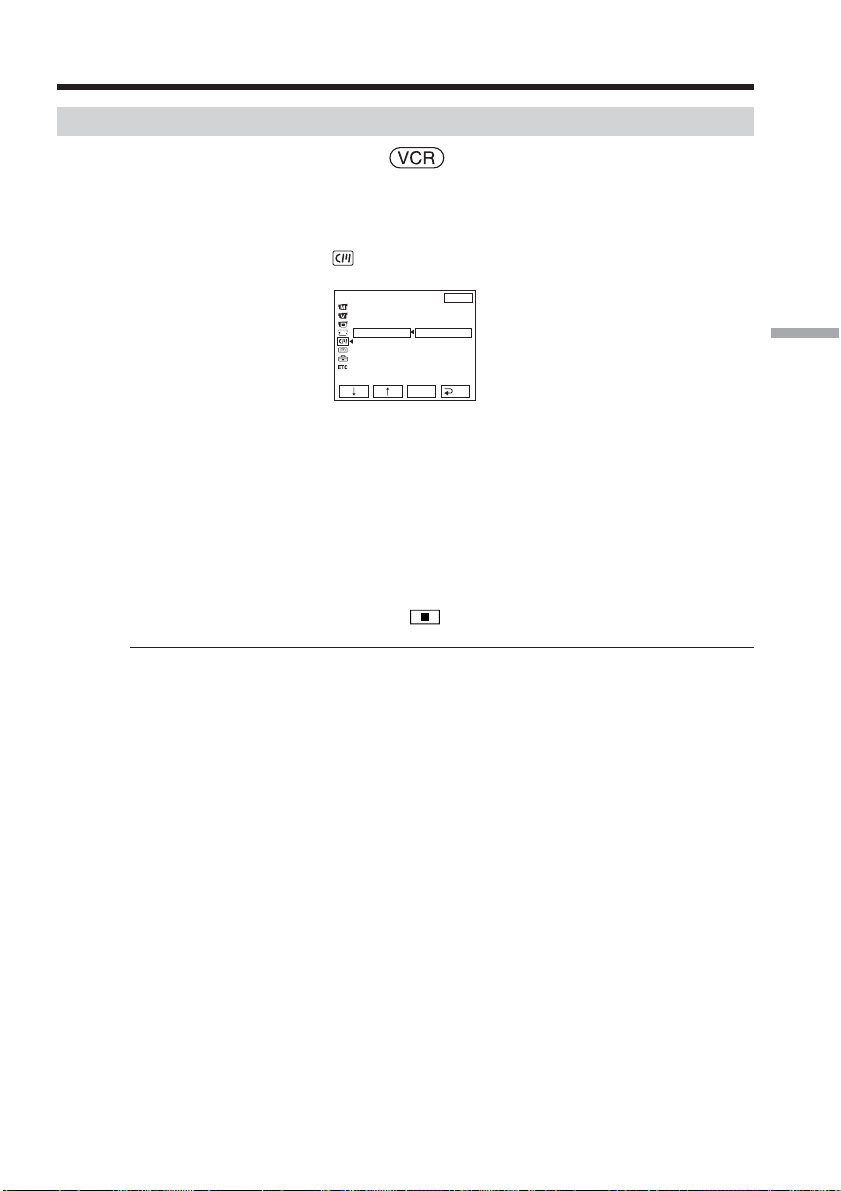
Searching a recording by date – Date search
Searching for the date without using Cassette Memory
The POWER switch should be set to .
Operate by touching the panel.
(1) Press FN to display PAGE1.
(2) Press MENU to display the menu.
(3) Select CM SEARCH in
, then press EXEC (p. 178).
ON
OFF
EXEC
EXIT
RET.
CM SET
TITLE
TITLEERASE
TITLE DSPL
CM SEARCH
TAPE TITLE
ERASE ALL
(4) Select OFF, then press EXEC.
(5) Press SEARCH MODE on the Remote Commander, until the DATE SEARCH
indicator appears.
(6) Press . on the Remote Commander to search for the previous date or press
> on the Remote Commander to search for the next date. Your camcorder
automatically starts playback at the point where the date changes. Each time
you press . or >, your camcorder searches for the previous or next date.
To cancel searching
Press x on the Remote Commander or on your camcorder.
Note
If one day’s recording is less than two minutes, your camcorder may not accurately find
the point where the recording date changes.
If the tape has a blank portion between recorded portions
Date search may not work correctly.
Cassette Memory
The cassette with Cassette Memory can hold six recording date data. If you search the
date among seven or more data, see “Searching for the date without using Cassette
Memory.”
Advanced Playback Operations
75
Page 76
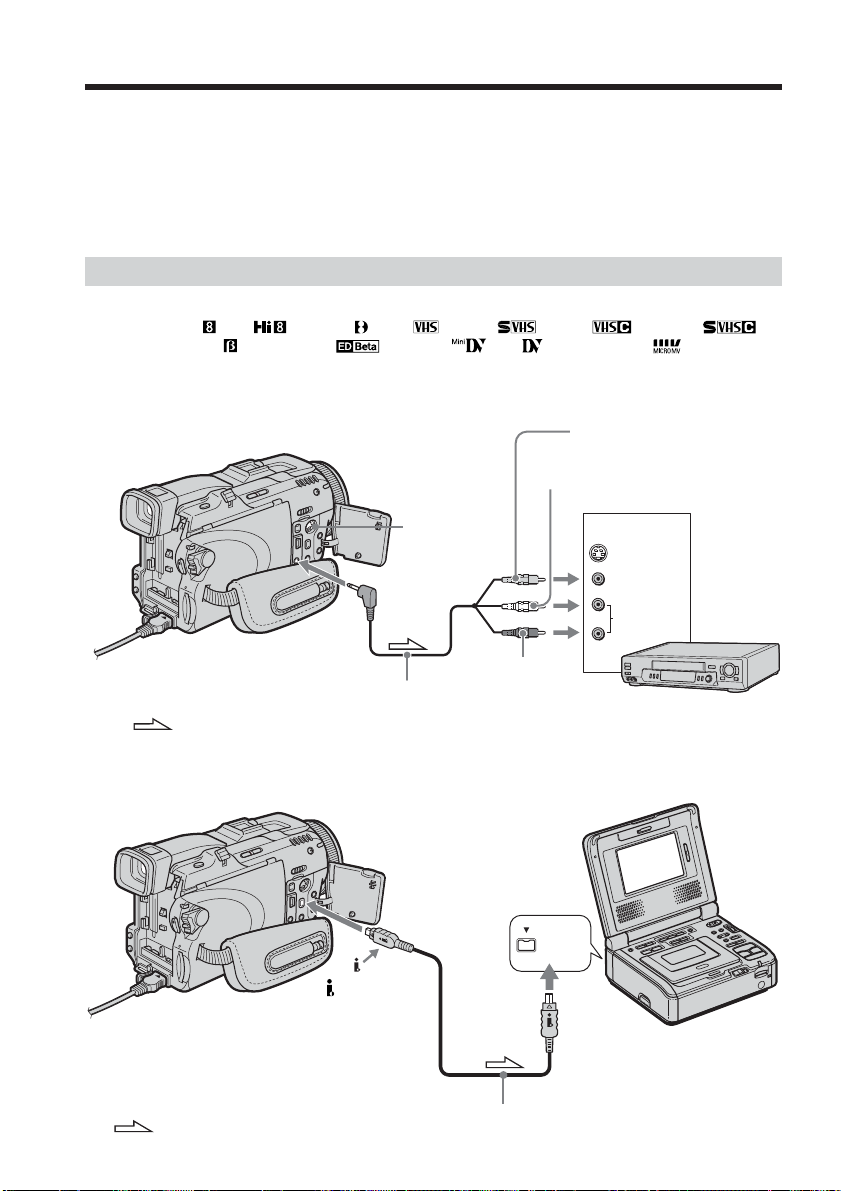
— Editing —
Dubbing tape
You can dub or edit on the VCR connected to your camcorder using your camcorder as
a player.
You can connect either the A/V connecting cable (supplied) or i.LINK cable (optional).
If you connect with the i.LINK cable (optional), video and audio signals are transmitted
in digital form for high-quality editing.
Titles, screen indicators, Cassette Memory contents, and “Memory Stick” index screen
lettering cannot be recorded.
Connecting to the VCR
You can edit on VCRs that support the following systems:
8 mm , Hi8 , Digital8 , VHS , S-VHS , VHSC , S-VHSC ,
Betamax , ED Betamax , mini DV , DV or MICROMV
Connecting with the A/V connecting cable
Yellow
White
S VIDEO
AUDIO/
VIDEO
A/V connecting cable (supplied)
: Signal flow
Connecting with the i.LINK cable
DV Interface
Red
i.LINK
IN
S VIDEO
VIDEO
AUDIO
VCR
76
: Signal flow
i.LINK cable (optional)
Page 77

Dubbing tape
Dubbing a tape
Before operation for connecting with the A/V connecting cable
•Set DISPLAY in to LCD in the menu settings. (The default setting is LCD.)
•Press the following buttons to make the indicator disappear so that they will not be
superimposed on the edited tape:
On your camcorder:
DISPLAY/BATTERY INFO, DATA CODE
On the Remote Commander:
DISPLAY, DATA CODE, SEARCH MODE
The POWER switch should be set to .
(1) Insert the blank tape (or the tape you want to record over) into the VCR, and
insert the recorded tape into your camcorder.
(2) Prepare the VCR for recording. If the VCR has an input selector, set it to input
mode.
Refer to the operating instructions of the VCR.
(3) Play back the recorded tape on your camcorder.
(4) Start recording on the VCR.
Refer to the operating instructions of your VCR.
When you have finished dubbing the tape
Press x on both your camcorder and the VCR.
If your VCR is a monaural type
Connect the yellow plug of the A/V connecting cable to the video input jack and the
white or the red plug to the audio input jack on the VCR or the TV. When the white
plug is connected, the left channel audio is output, and when the red plug is connected,
the right channel audio is output.
If your VCR has an S video jack
See page 43 for details.
About i.LINK
See page 199 for details.
Pictures processed by picture effect, digital effect or PB ZOOM
These are not output through the DV Interface.
If you record a paused playback picture
•The recorded picture becomes rough with the DV Interface.
•The picture may jitter when you play back the picture using other video equipment.
Editing
If you connect with the i.LINK cable
Recording of only the picture or sound cannot be done.
77
Page 78
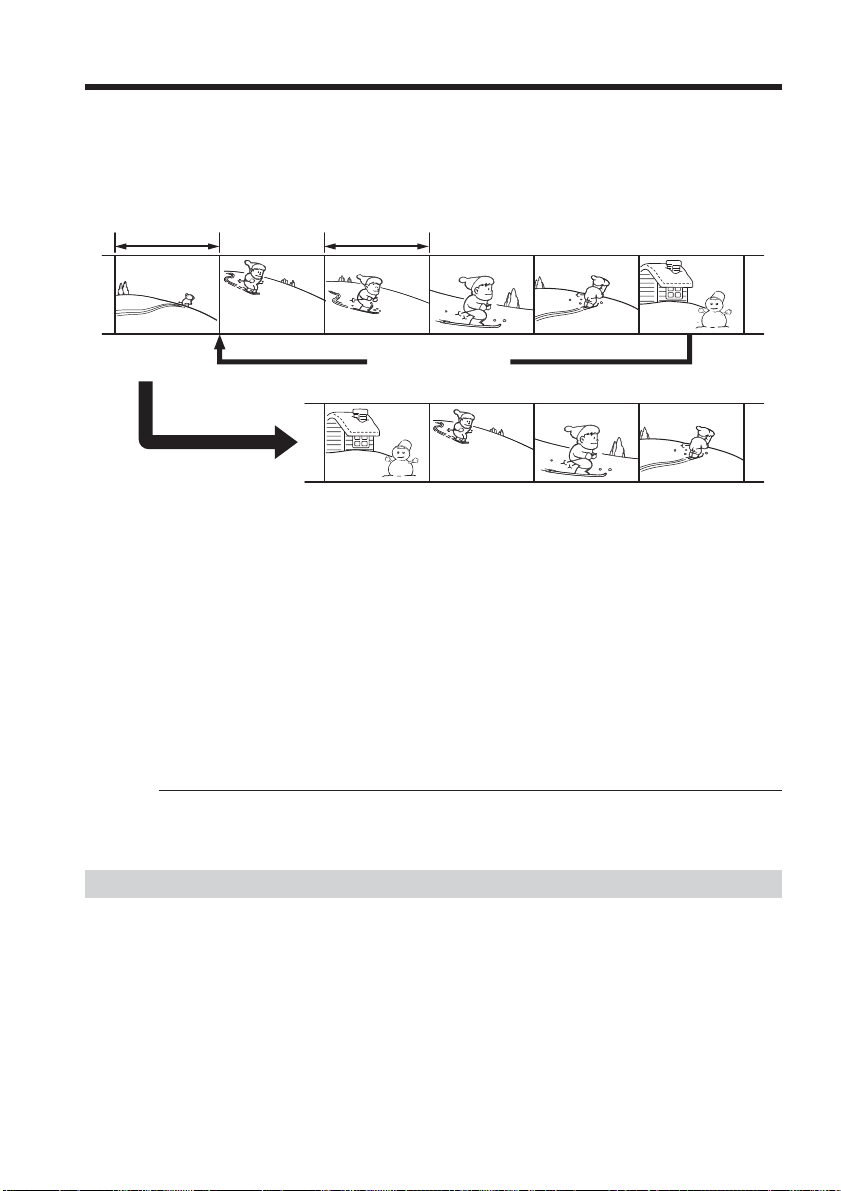
Dubbing only desired scenes – Digital program editing (on tape)
You can duplicate selected scenes (programs) for editing onto the tape without
operating the VCR.
Scenes can be selected by frame. You can set up to 20 programs.
Your camcorder can dub on the “Memory Stick.” See page 125 for details.
Unwanted
scene
Unwanted
scene
Switch the order
Before operating Digital program editing on the tape recorded
on other equipment
Step 1 Connecting to the VCR (p. 78).
Step 2 Setting the VCR to operate (p. 79).
Step 3 Adjusting the synchronization of the VCR (p. 82).
When you dub using the same VCR again, you can skip step 2 and 3.
Using Digital program editing on the tape recorded on other
equipment
Operation 1 Making a program (p. 84).
Operation 2 Performing Digital program editing (Dubbing the tape) (p. 86).
78
Note
When editing digital video, the operation signals to the VCR cannot be sent with
LANC jack.
Step 1: Connecting to the VCR
You can connect either the A/V connecting cable or the i.LINK cable.
Connect the devices as illustrated on page 76.
Page 79
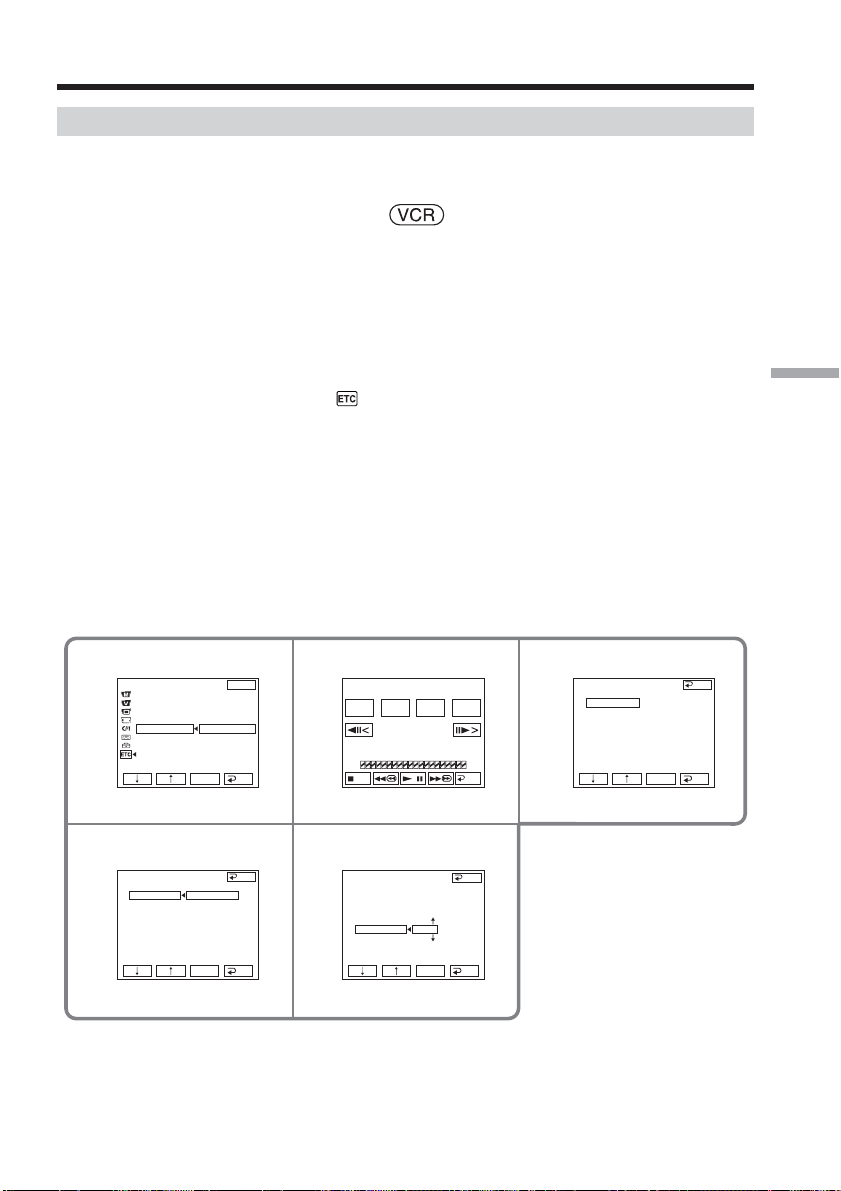
Dubbing only desired scenes – Digital program editing (on tape)
Step 2: Setting the VCR to operate
To connect using the A/V connecting cable, send the control signal by infrared rays to
the remote sensor on the VCR.
The POWER switch should be set to .
Operate by touching the panel.
(1) Turn the power of the connected VCR on.
If the VCR has an input selector, set it to input mode.
When you connect a video camera recorder, set its power switch to VCR/
VTR.
(2) Press FN to display PAGE1.
(3) Press MENU to display the menu.
(4) Select VIDEO EDIT in
(5) Select TAPE, then press EXEC.
(6) Press EDIT SET.
(7) Select CONTROL, then press EXEC.
(8) When connecting with the A/V connecting cable, select IR, then press EXEC.
When connecting with the i.LINK cable, select i.LINK, press EXEC, then go
to “Step 3: Adjusting the synchronization of the VCR” on page 82.
(9) Select IR SETUP, then press EXEC.
(10)Select the IR SETUP code of your VCR, then press EXEC. Check the code in
“About the IR SETUP code” (p. 81).
, then press EXEC (p. 182).
Editing
45
OTHERS
DATA CODE
BEEP
COMMANDER
D I SPL AY
I
DEO ED I T
V
RETURN
TAPE
MEMORY
EXEC
EXIT
RET.
V I DEO ED I T
MARK
START
I
N
TOTAL
0:00:00:00
SCENE
0
ED I T
SET
0:32:30:14
UNDO
END
79
VIDEO EDIT
ED I T SET
CONTROL
ADJ TEST
”CUT
- I
N”
”CUT
-OUT”
I
R SETUP
PAUSEMODE
I
R TEST
I
R
i. L I NK
EXEC
END
RET.
VIDEO EDIT
ED I T SET
CONTROL
ADJ TEST
- I
N”
”CUT
”CUT
-OUT”
I
R SETUP
PAUSEMODE
I
R TEST
EXEC
END
3
RET.
6
VIDEO EDIT
ED I T SET
CONTROL
ADJ TEST
- I
N”
”CUT
-OUT”
”CUT
I
R SETUP
PAUSEMODE
I
R TEST
END
I
R
RET.
EXEC
79
Page 80
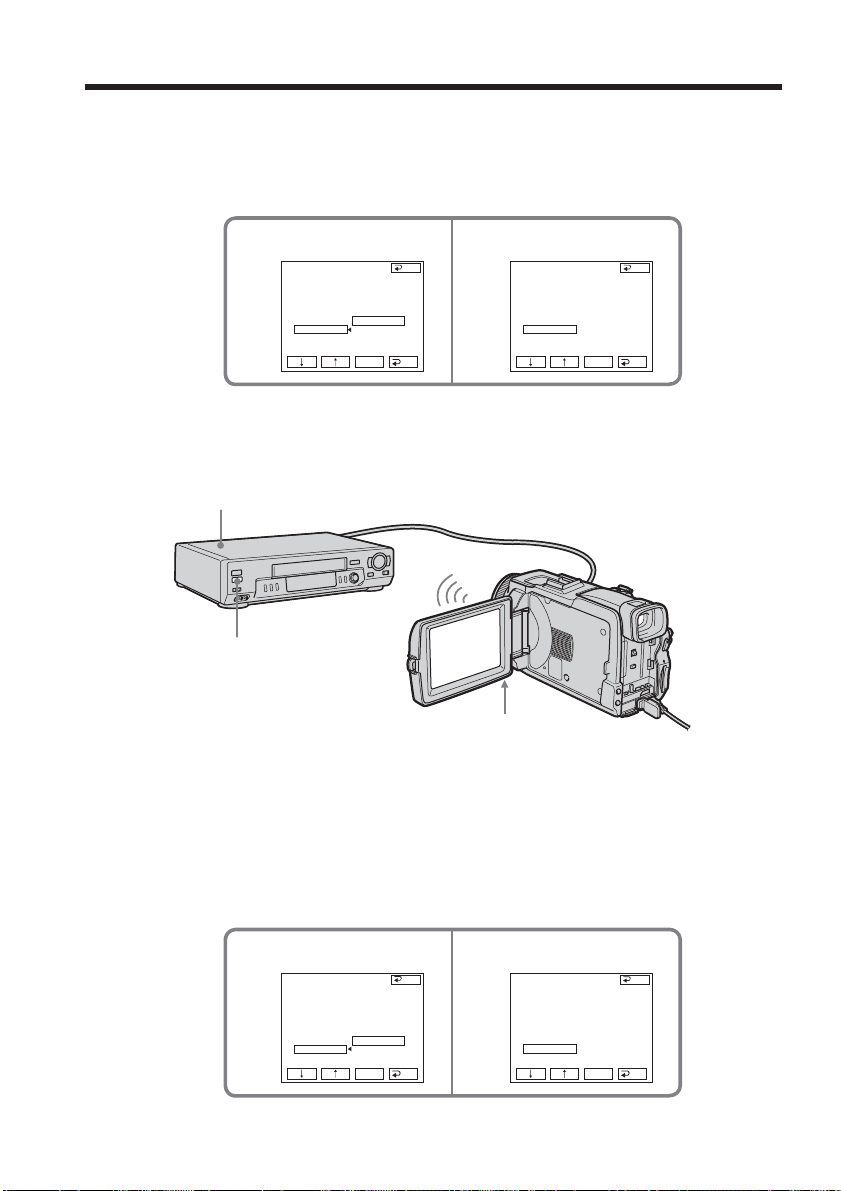
Dubbing only desired scenes – Digital program editing (on tape)
(11) Select PAUSEMODE, then press EXEC.
(12) Select the mode to cancel recording pause on the VCR, then press EXEC.
The correct button depends on your VCR.
Refer to the operating instructions of your VCR.
11 12
VIDEO EDIT
ED I T SET
CONTROL
ADJ TEST
- I
N”
”CUT
”CUT
-OUT”
I
R SETUP
PAUSEMODE
I R TEST
PAUSE
REC
PB
EXEC
END
RET.
VIDEO EDIT
ED I T SET
CONTROL
ADJ TEST
”CUT
- I
N”
”CUT
-OUT”
I
R SETUP
PAUSEMODE
I R TEST
PAUSE
EXEC
END
RET.
(13) Locate the infrared rays emitter of your camcorder and face it towards the
remote sensor of the VCR about 30 cm (12 in.) apart.
VCR
Remote sensor
Infrared rays emitter
(14) Insert the recordable tape into the VCR, then set the VCR to recording
pause.
(15) Select IR TEST, then press EXEC.
(16) Select EXECUTE, then press EXEC.
If the VCR starts recording, the setting is correct.
The indicator you selected to cancel recording pause on the VCR flashes
on the screen. When finished, the indicator changes to COMPLETE.
80
15 16
VIDEO EDIT
ED I T SET
CONTROL
ADJ TEST
”CUT
- I
N”
”CUT
-OUT”
I
R SETUP
PAUSEMODE
I R TEST
ENGAGE
REC PAUSE
RETURN
EXECUTE
EXEC
END
RET.
VIDEO ED I T
ED I T SET
CONTROL
ADJ TEST
”CUT
- I
N”
-OUT”
”CUT
I
R SETUP
PAUSEMODE
I R TEST
COMPLETE
EXEC
END
RET.
Page 81

Dubbing only desired scenes – Digital program editing (on tape)
Note
When you connect with an i.LINK cable, you may not be able to operate the dubbing
function correctly, depending on the VCR.
Set CONTROL to IR in the menu settings of your camcorder.
About the IR SETUP code
The IR SETUP code is stored in the memory of your camcorder. Be sure to set the
correct code, depending on your VCR. Default setting is code number 3.
Brand IR SETUP code
Sony 1, 2, 3, 4, 5, 6
Admiral (M. Wards) 89
Aiwa 47, 54, 80
Akai 49, 51
Audio Dynamic 21, 35
Bell&Howell 36
(M. Wards)
Broksonic 21, 70, 82
Canon 77, 78
Citizen 47
Craig 47, 73
Curtis Mathis 8, 77, 80
Daewoo 26, 40, 77
DBX 21, 33, 35
Dimensia 8
Emerson 26, 48, 59, 70, 80, 81, 82
Fisher 36, 37, 44, 45
Funai 80
General Electric 8, 32*, 77, 94*, 101
Goldstar/LG 47
GO VIDEO 71
Hitachi 8, 42, 78
HQ 40
Instant Replay 77, 78
JC Penny 8, 21, 33, 35, 36, 42, 77
JVC 12, 13, 14, 21, 33, 35
Kenwood 21, 33, 35, 47
LXI (Sears) 36, 37, 42, 44, 45, 47, 49, 80
Magnavox 17, 77, 78, 83
Marantz 21, 33, 35
Marta 47
Memorex 37, 77
Minolta 8, 42
Brand IR SETUP code
Mitsubishi/MGA 22, 23, 24, 28, 29
Multitech 23, 32, 80
NEC 21, 33, 35
Olympic 77, 78
Optimus 22
Orion 60
Panasonic 16, 17, 77, 78
Pentax 8, 42
Philco 26, 70, 77, 78
Philips 47, 77, 78, 83
Pioneer 78
Quasar 6, 16, 17, 77, 78
RCA/PROSCAN 7, 8, 16, 40, 41, 42, 77, 78, 78*,
83, 101
Realistic 22, 36, 37, 77, 80, 88
Sansui 21
Singer 73
Samsung 24, 24*, 32, 32*, 41, 94, 94*
Sanyo 26, 36, 37, 47
Scott 22, 23, 24, 28, 32, 37, 40, 41
Sharp 88, 89
Shintom 73
Signature 2000 80, 89
Sylvania 77, 78, 80, 83
Symphonic 80
Tashiro 47
Tatung 21, 33, 35
Teac 21, 33, 35, 80
Technics 77, 78
Toshiba 7, 40, 49
Wards 37, 47, 88, 89, 95
Yamaha 21, 33, 35, 36
Zenith 95
Editing
* TV/VCR component
Note on the IR SETUP code
Digital program editing is not possible if the VCR does not support IR SETUP codes.
81
Page 82

Dubbing only desired scenes – Digital program editing (on tape)
When the VCR does not operate correctly
•After checking the code in “About the IR SETUP code” (p. 81), set the IR SETUP or the
PAUSEMODE again.
•Place your camcorder at least 30 cm (12 in.) away from the VCR.
•Refer to the operating instructions of your VCR.
Step 3: Adjusting the synchronization of the VCR
You can adjust the synchronization of your camcorder and the VCR.
Prepare a pen and paper for notes.
Before operation, eject the cassette from your camcorder (if inserted).
(1) Insert the recordable cassette into the VCR, then set the VCR to recording
pause.
When you select i.LINK in CONTROL, the recording pause is not necessary.
(2) Select ADJ TEST, then press EXEC.
(3) Select EXECUTE, then press EXEC.
IN and OUT are recorded on an image for five times each to calculate the
number values for adjusting the synchronization.
The EXECUTING indicator flashes on the screen. When finished, the
indicator changes to COMPLETE.
(4) Rewind the tape in the VCR, then start slow playback.
Five IN numbers and corresponding OUT numbers are displayed.
Take a note of the opening number value of each IN and the closing number
value of each OUT.
(5) Calculate the average of five opening number values of five IN, and the
average of all the closing number values of each OUT.
(6) Select ”CUT-IN,” then press EXEC.
(7) Select the average number value of IN, then press EXEC.
The calculated start position for recording is set.
(8) Select ”CUT-OUT,” then press EXEC.
(9) Select the average number value of OUT, then press EXEC.
The calculated stop position for recording is set.
(10) Press
RET. to execute.
82
Page 83
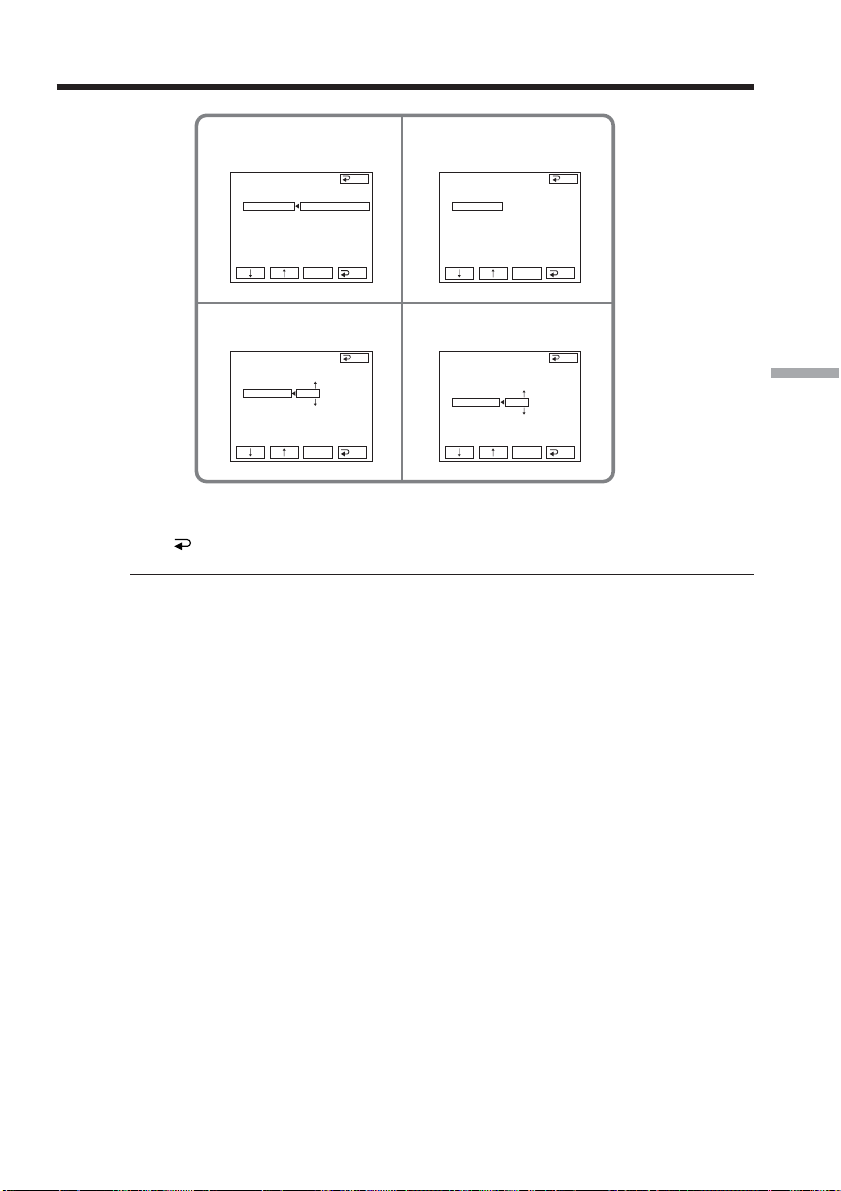
Dubbing only desired scenes – Digital program editing (on tape)
23
VIDEO ED I T
ED I T SET
CONTROL
ADJ TEST
”CUT
- I
N”
”CUT
-OUT”
I
R SETUP
PAUSEMODE
I
R TEST
RETURN
EXECUTE
ENGAGE
REC PAUSE
EXEC
END
RET.
VIDEO ED I T
ED I T SET
CONTROL
ADJ TEST
”CUT
- I
N”
”CUT
-OUT”
I
R SETUP
PAUSEMODE
I
R TEST
COMPLETE
EXEC
END
RET.
6
VIDEO ED I T
ED I T SET
CONTROL
ADJ TEST
- I
N”
”CUT
-OUT”
”CUT
I
R SETUP
PAUSEMODE
I
R TEST
0
EXEC
END
RET.
8
VIDEO ED I T
ED I T SET
CONTROL
ADJ TEST
- I
N”
”CUT
”CUT
-OUT”
I
R SETUP
PAUSEMODE
I
R TEST
EXEC
END
0
RET.
To return to FN
Press END to return to PAGE1, then press EXIT.
Notes
•When you complete step 3, the image to adjust the synchronization is recorded for
about 50 seconds.
•If you start recording from the very beginning of the tape, the first few seconds of the
tape may not be recorded properly. Be sure to allow about 10 seconds’ lead before
starting the recording.
•When the recording unit cannot be operated properly by the i.LINK cable, leave the
connection as it is, and make the A/V connecting cable settings (p. 79). Video and
audio are sent by digital signals.
Editing
83
Page 84
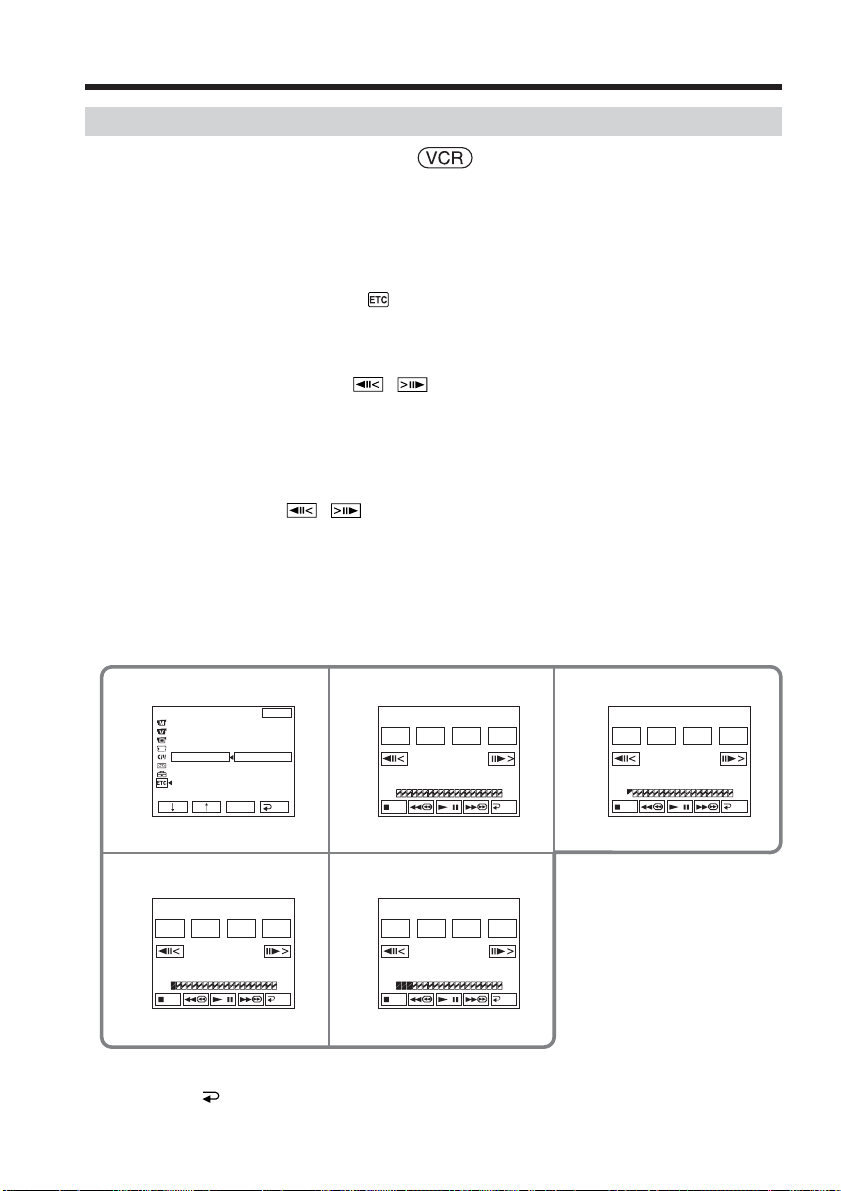
Dubbing only desired scenes – Digital program editing (on tape)
Operation 1: Making a Program
The POWER switch should be set to .
Operate by touching the panel.
(1) Insert the cassette for playback into your camcorder, and insert the tape for
recording into the VCR.
(2) Press FN to display PAGE1.
(3) Press MENU to display the menu.
(4) Select VIDEO EDIT in
(5) Select TAPE, then press EXEC.
(6) Search for the beginning of the first scene you want to insert using the video
control buttons on the screen, then pause playback. You can fine-adjust one
frame at a time with
(7) Press MARK IN on the screen or MARK on the Remote Commander.
The IN point of the first program is set, and the upper part of the program
mark changes to light blue.
(8) Search for the end of the first scene you want to insert using the video control
buttons on the screen, then pause playback. You can fine-adjust one frame at
a time with
/ .
(9) Press MARK OUT on the screen or MARK on the Remote Commander.
The OUT point of the first program is set, then the lower part of the program
mark changes to light blue.
(10) Repeat step 6 to 9.
When one program is set, the program mark changes to light blue.
You can set 20 programs in maximum.
, then press EXEC (p. 182).
/ .
84
45
OTHERS
DATA CODE
BEEP
COMMANDER
D I SPLAY
V
I
DEO ED I T
RETURN
TAPE
MEMORY
EXEC
EXIT
RET.
V I DEO ED I T
MARK
START
I
N
TOTAL
0:00:00:00
SCENE
0
ED I T
SET
0:32:30:14
UNDO
END
910
V I DEO ED I T
MARK
I N
TOTAL
SCENE
START
0:00:13:00
1
ED I T
SET
0:09:07:06
UNDO
END
To finish making programs
Press END.
The program is stored in memory until the tape is ejected.
V I DEO ED I T
MARK
I N
0:00:47:12
TOTAL
3
SCENE
START
ED I T
SET
0:10:01:23
UNDO
END
7
V I DEO ED I T
MARK
START
OUT
0:00:00:00
TOTAL
0
SCENE
ED I T
SET
0:08:55:06
UNDO
END
Page 85

Dubbing only desired scenes – Digital program editing (on tape)
Note
You cannot operate recording during Digital program editing.
On a blank portion of the tape
You cannot set IN or OUT.
If there is a blank portion between the IN point and the OUT point on the tape
The total time may not be displayed correctly.
Erasing the program you have set
Erase OUT mark first, and then IN mark of the last set program.
(1) Press UNDO.
(2) Press ERASE 1 MARK. The last set program mark flashes, then the DELETE ?
indicator appears.
(3) Press EXEC. The last set program is deleted.
To cancel erasing
Press CANCEL in step 3.
Erasing all programs
(1) Follow the step 2 to 5 on page 84.
(2) Press UNDO.
(3) Press ERASE ALL. All the set program marks flash, then the DELETE ?
indicator appears.
(4) Press EXEC. All the set programs are deleted.
Editing
To cancel erasing all programs
Press CANCEL in step 4.
85
Page 86

Dubbing only desired scenes – Digital program editing (on tape)
Operation 2: Performing Digital program editing
(Dubbing the tape)
(1) When you use a digital video camera recorder, set the power switch of VCR to
VCR/VTR.
(2) Make sure your camcorder and the VCR are connected, and that the VCR is set
to recording pause.
When you use an i.LINK cable the following procedure is not necessary.
(3) Press FN to display PAGE1.
(4) Press MENU to display the menu.
(5) Select VIDEO EDIT in
(6) Select TAPE, then press EXEC.
(7) Press START.
(8) Press EXEC.
Search for the beginning of the first program, then start dubbing.
The program mark flashes.
The SEARCH indicator appears during searching, and the EDITING indicator
appears during editing on the screen.
The program mark changes to light blue after the dubbing is complete.
When the dubbing ends, your camcorder and the VCR automatically stop.
, then press EXEC (p. 182).
To cancel dubbing during editing
Press CANCEL.
To end Digital program editing
Your camcorder stops when the dubbing is complete. Then the display returns to
VIDEO EDIT in the menu settings.
Press END to end the video edit function.
86
You cannot record on the VCR in the following
Indicator Cause
No indicator •The write-protect tab on the cassette is set to lock.
•The IR SETUP code is not correct. (When IR is
selected.)
•The button to cancel recording pause is not
correct. (When IR is selected.)
CHECK ”i.LINK” & REC STATUS • i.LINK is selected but an i.LINK cable is not
connected.
•The power of the connected VCR is not turned
on. (When i.LINK is selected.)
When the program has not been set
You cannot press START.
Page 87
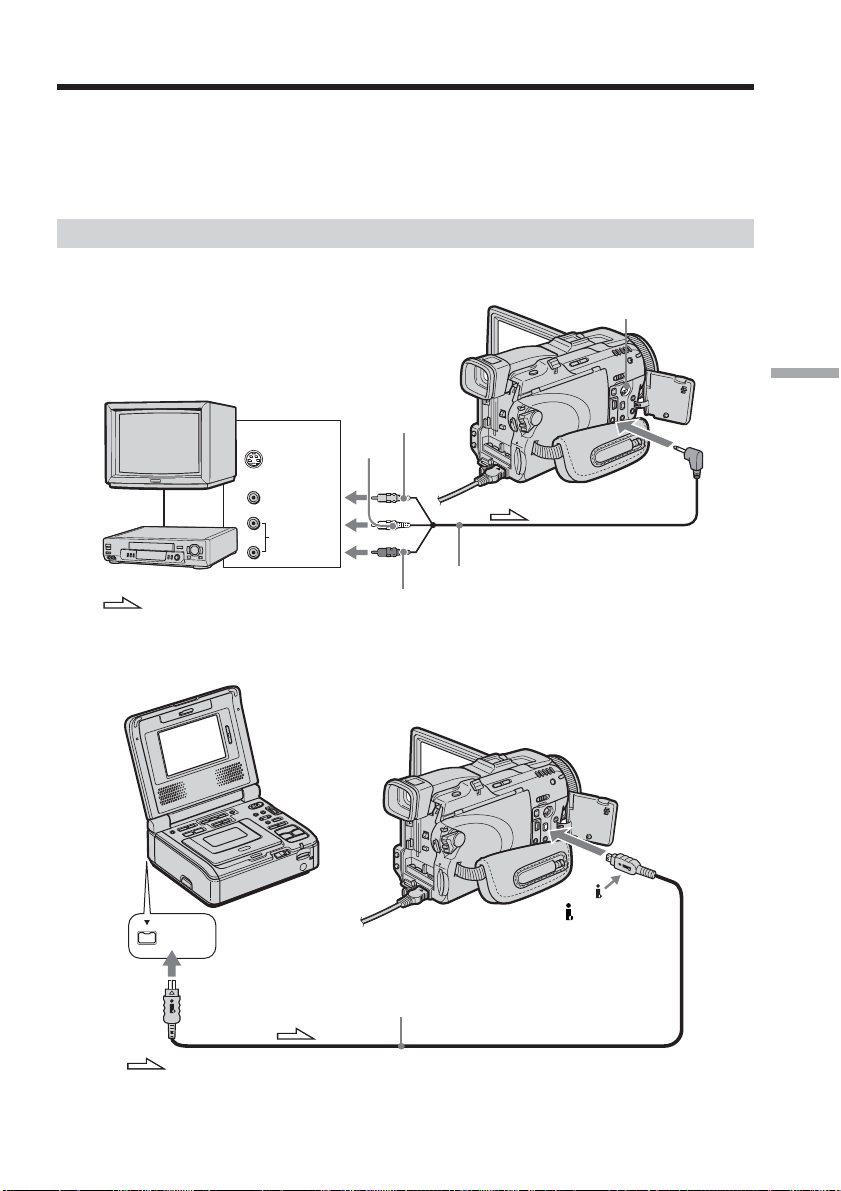
Recording video or TV programs
You can record the tape from another VCR or a TV program from a TV that has video/
audio outputs. Use your camcorder as a recorder. You can connect either the A/V
connecting cable (supplied) or i.LINK cable (optional).
If you connect with the i.LINK cable (optional), video and audio signals are transmitted
in digital form for high-quality editing.
Connecting to the VCR or the TV
Connecting with the A/V connecting cable
S VIDEO
TV
OUT
S VIDEO
VIDEO
VCR
AUDIO
: Signal flow
Yellow
White
Red
Connecting with the i.LINK cable
i.LINK
Editing
AUDIO/VIDEO
A/V connecting cable (supplied)
DV Interface
: Signal flow
i.LINK cable (optional)
87
Page 88
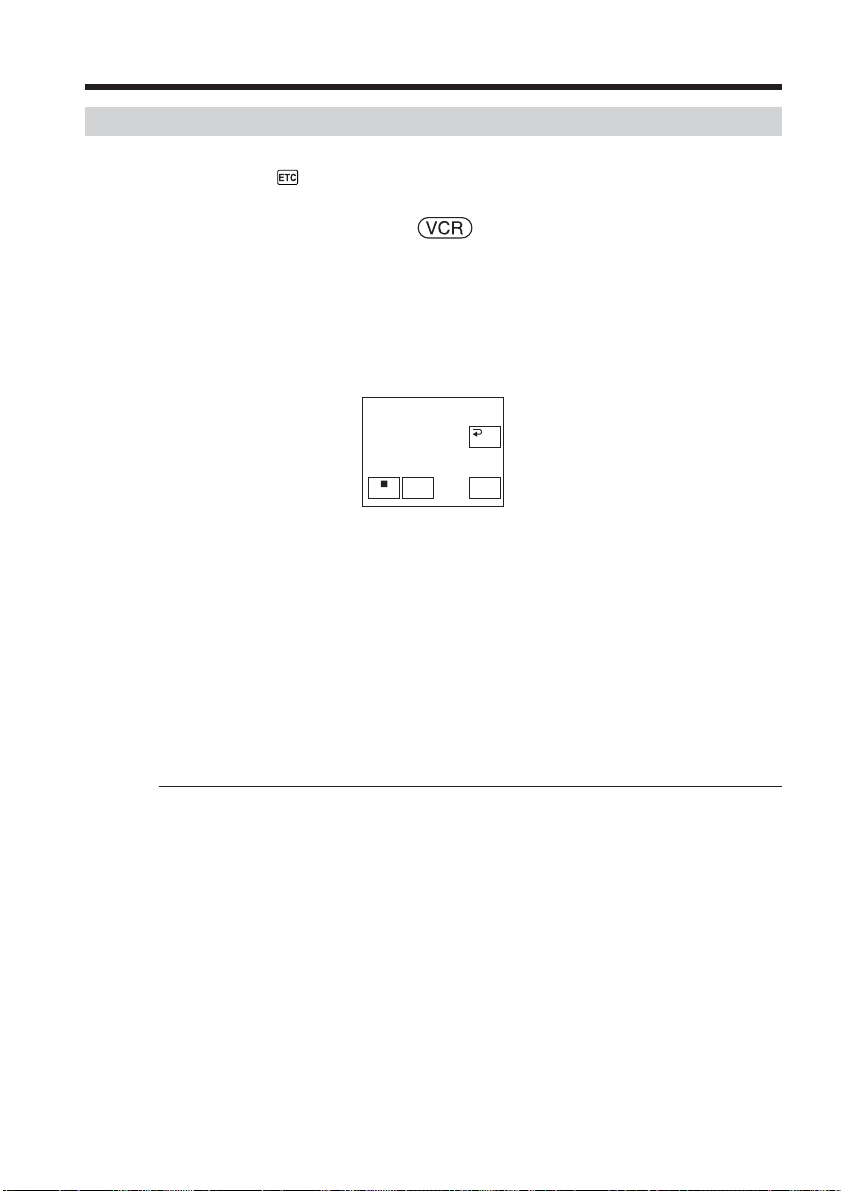
Recording video or TV programs
Recording video or TV programs
Before operation for connecting with the A/V connecting cable
Set DISPLAY in to LCD in the menu settings when using the A/V connecting cable.
(The default setting is LCD.)
The POWER switch should be set to .
Operate by touching the panel.
(1) Insert the blank tape (or the tape you want to record over) into your
camcorder. If you are recording the tape from the VCR, insert the recorded
tape into the VCR.
(2) Press FN and select PAGE3.
(3) Press REC CTRL.
88
REC CTRL
PAUSE
REC
RET.
REC
START
(4) Press REC PAUSE.
(5) Press N on the VCR to start playback if you record the tape from a VCR.
Select a TV program if you record from a TV. The picture from playback side
appears on the screen.
(6) Press REC START at the scene where you want to start recording from.
When you have finished dubbing the tape
Press x on your camcorder, and then press the stop button on the VCR.
Using the Remote Commander
In step 2 to 4, press z REC and MARK simultaneously, then immediately press X. In
step 6, press X at the scene where you want to start recording from.
Note on the Remote Commander
Your camcorder works in the commander mode VTR 2. Commander modes 1, 2 and 3
are used to distinguish your camcorder from other Sony VCRs to avoid erroneous
remote control operation. If you use another Sony VCR in the commander mode VTR 2,
we recommend changing the commander mode or covering the sensor of the VCR with
black paper.
If your VCR is a monaural type
Connect the yellow plug of the A/V connecting cable to the video output jack and the
white or the red plug to the audio output jack on the VCR or the TV. When the white
plug is connected, the left channel audio is output, and when the red plug is connected,
the right channel audio is output.
If your VCR has an S video jack
See page 43 for details.
When using the i.LINK cable
•Before recording, make sure if the DV IN indicator appears on the screen. The DV IN
indicator may appear on both equipment.
•Recording of only the picture or sound cannot be done.
Page 89
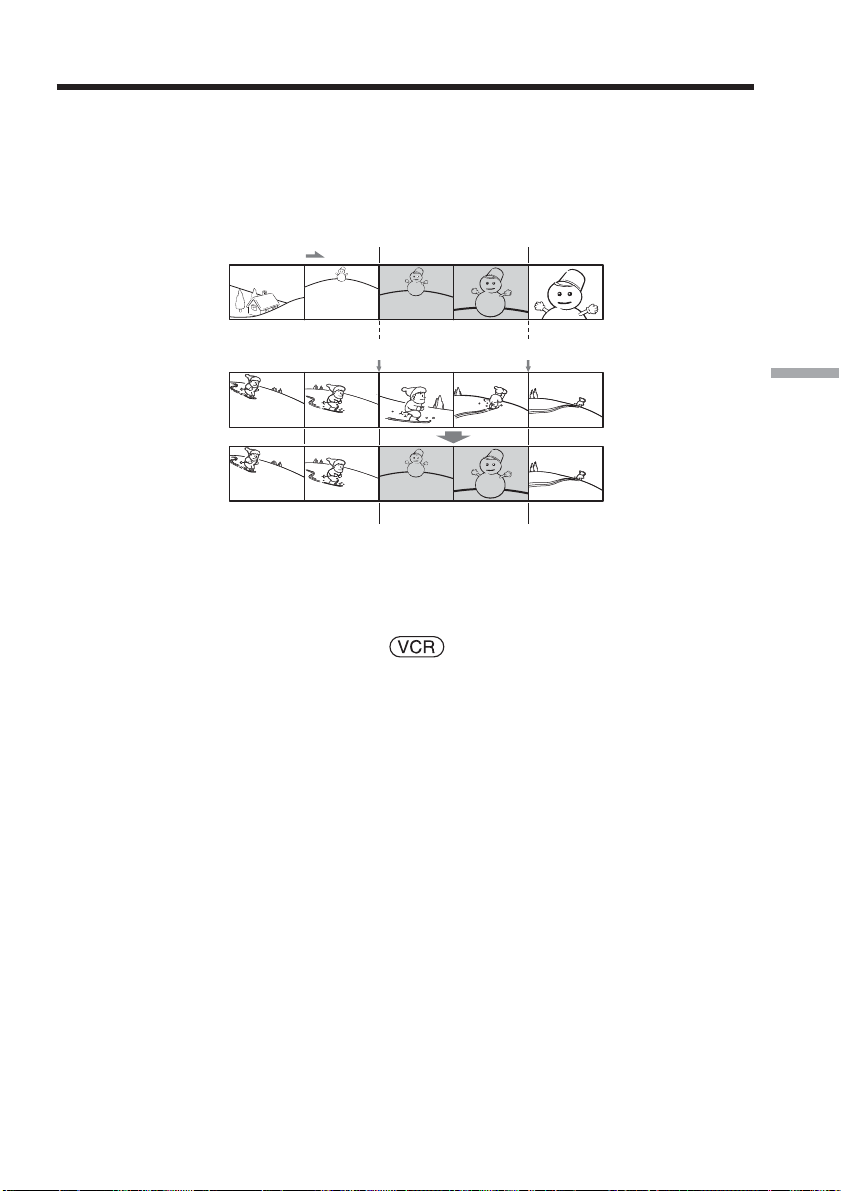
Inserting a scene from a VCR – Insert editing
You can insert a new scene with sound from a VCR onto the originally recorded tape by
specifying the insert start and end points. Use the Remote Commander for this
operation.
Connections are the same as on page 87. Insert a cassette containing the desired scene to
insert into the VCR.
[a]
[A]
[b]
[B]
[C]
[A]The tape that contains the scene to be superimposed
[B] The tape before editing
[C] The tape after editing
The POWER switch should be set to .
Operate by touching the panel.
(1) On the VCR, locate just before the insert start point [a], then set the VCR to
playback pause.
(2) On your camcorder, locate the insert end point [c], then set it to playback
pause.
(3) Press ZERO SET MEMORY on the Remote Commander. The ZERO SET
MEMORY indicator flashes and the end point of the insert is stored in memory.
The tape counter shows “0:00:00.”
(4) On your camcorder, locate the insert start point [b].
(5) Press FN and select PAGE3.
(6) Press REC CTRL.
(7) Press REC PAUSE.
(8) First press X on the VCR, and after a few seconds press REC START on your
camcorder to start inserting the new scene with sound.
Inserting automatically stops near the zero point on the tape counter. Your
camcorder automatically stops recording. The zero set memory function will be
canceled.
[c]
Editing
89
Page 90
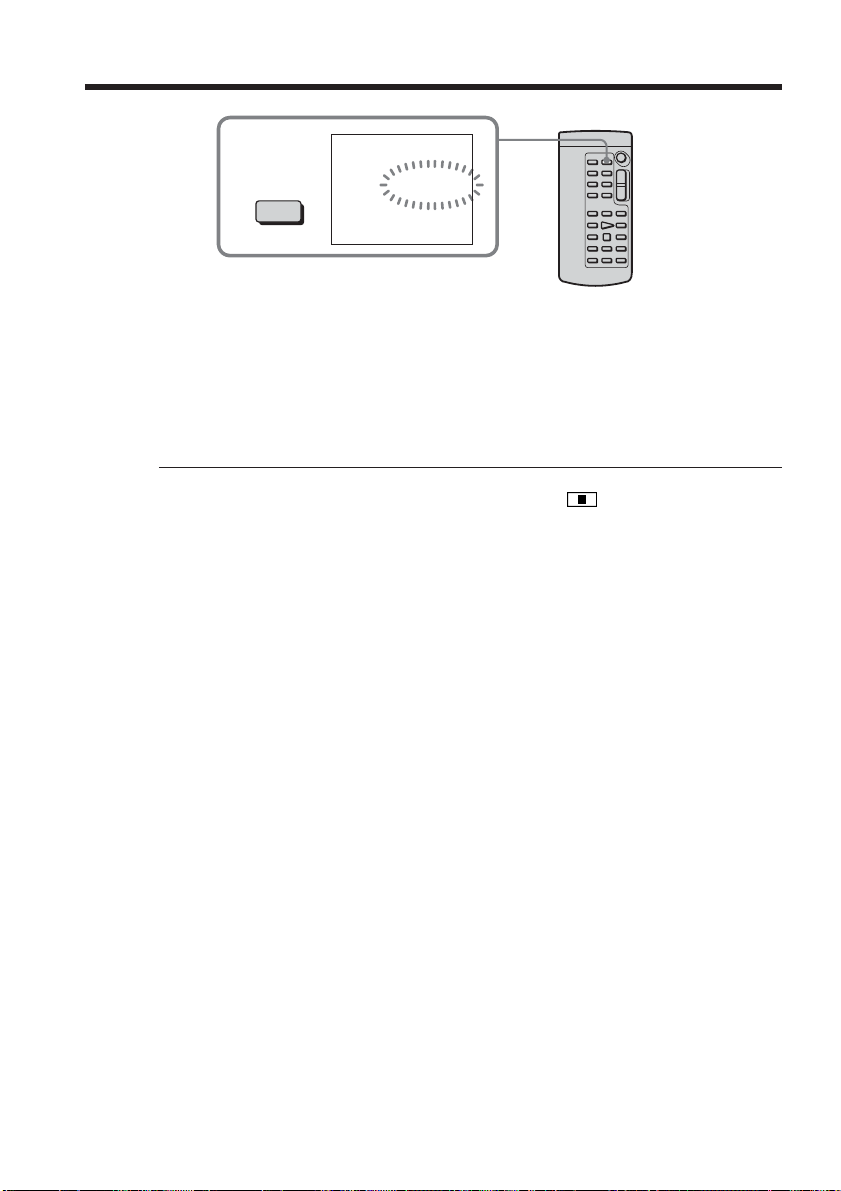
Inserting a scene from a VCR – Insert editing
3
ZERO SET
MEMORY
0:00:00
ZERO SET
MEMORY
To change the insert end point
Press ZERO SET MEMORY on the Remote Commander again after step 4 to erase the
ZERO SET MEMORY indicator and begin from step 2.
Using the Remote Commander
In step 5 to 7, press z REC and MARK simultaneously, then immediately press X. In
step 8, press X at the scene where you want to start recording from.
To insert a scene without setting the insert end point
Skip step 2 and 3. Press x on the Remote Commander or on your camcorder when
you want to stop inserting.
90
Page 91
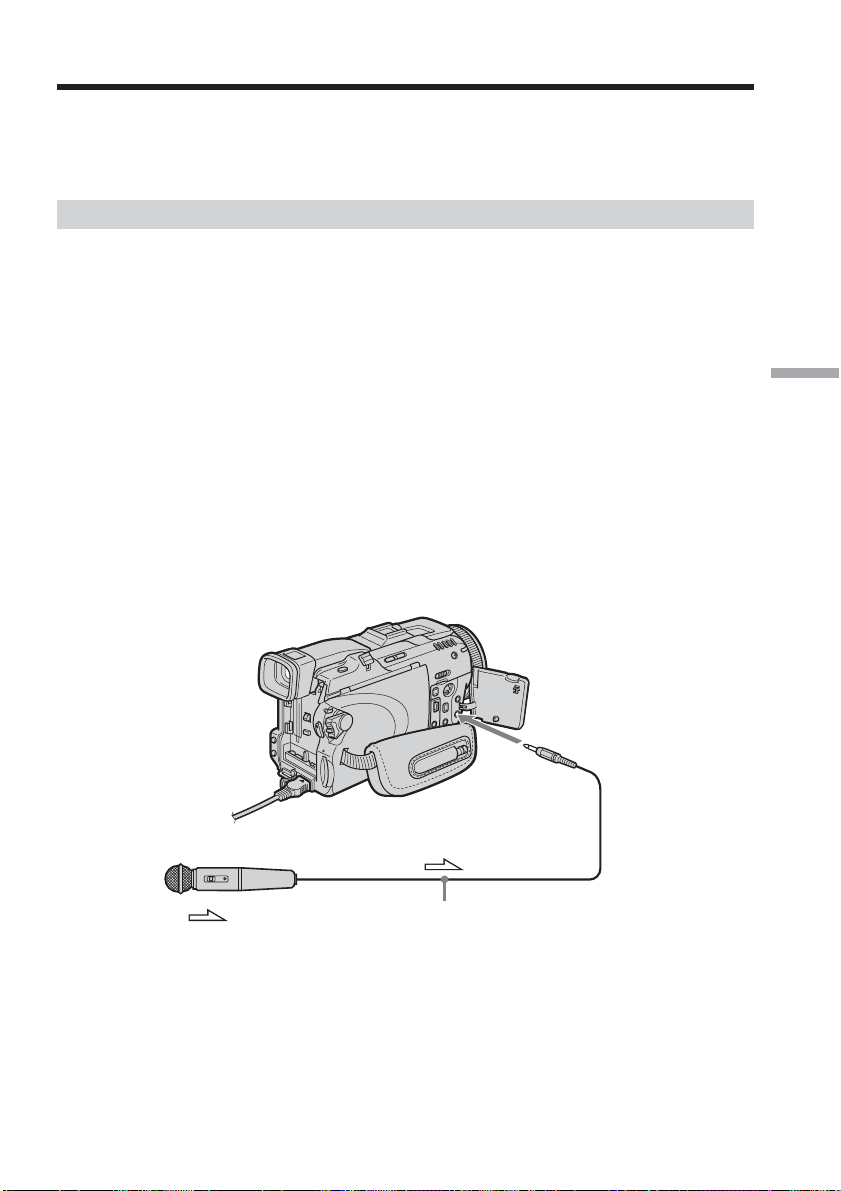
Audio dubbing
You can record additional audio to the original sound on the tape by connecting audio
equipment or a microphone. If you connect the audio equipment, you can add sound to
the tape already recorded in the 12-bit mode by specifying starting and ending points.
The original sound will not be erased.
Preparing for audio dubbing
You can record additional audio in the following:
• Dubbing with the built-in microphone
• Connecting the microphone (optional) to the MIC jack
• Connecting the microphone (optional) to the intelligent accessory shoe
• Connecting the A/V connecting cable to the AUDIO/VIDEO jack
The audio input to be recorded will take precedence over others in the following order:
•MIC jack
•Intelligent accessory shoe
•AUDIO/VIDEO jack
•Built-in microphone
Dubbing with the built-in microphone
No connection is necessary.
If no external microphone (optional) is connected, sound is recorded via the built-in
microphone.
Connecting the microphone (optional) to the MIC jack
Editing
MIC (PLUG IN
POWER) jack
: Signal flow
You can check the recorded picture and sound by connecting the AUDIO/VIDEO jack
to a TV.
The recorded sound is not output from a speaker. Check the sound by using the
headphones or TV.
Microphone (optional)
91
Page 92
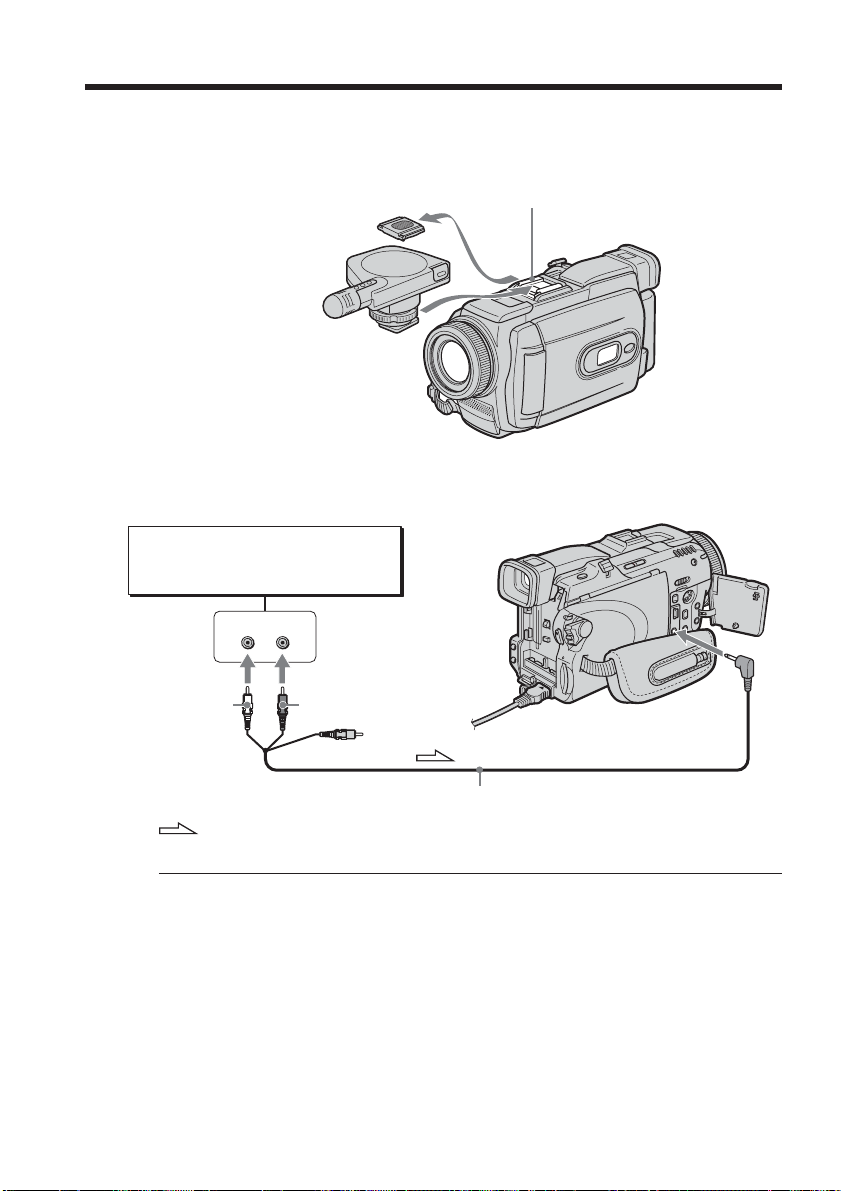
Audio dubbing
Connecting the microphone (optional) to the intelligent
accessory shoe
Install the Microphone after removing the shoe cover.
Microphone (optional)
Connecting the A/V connecting cable to the AUDIO/VIDEO jack
Audio equipment
Intelligent accessory shoeShoe cover
Do not connect the
video (yellow) plug.
92
AUDIO L AUDIO R
Note
When dubbing with the AUDIO/VIDEO jack or the built-in microphone, pictures are
not output through the S VIDEO jack or AUDIO/VIDEO jack. Check the recorded
picture on the screen. You can check the recorded sound by using headphones.
LINE OUT
L
White Red
: Signal flow
R
AUDIO/VIDEO
A/V connecting cable (supplied)
Page 93
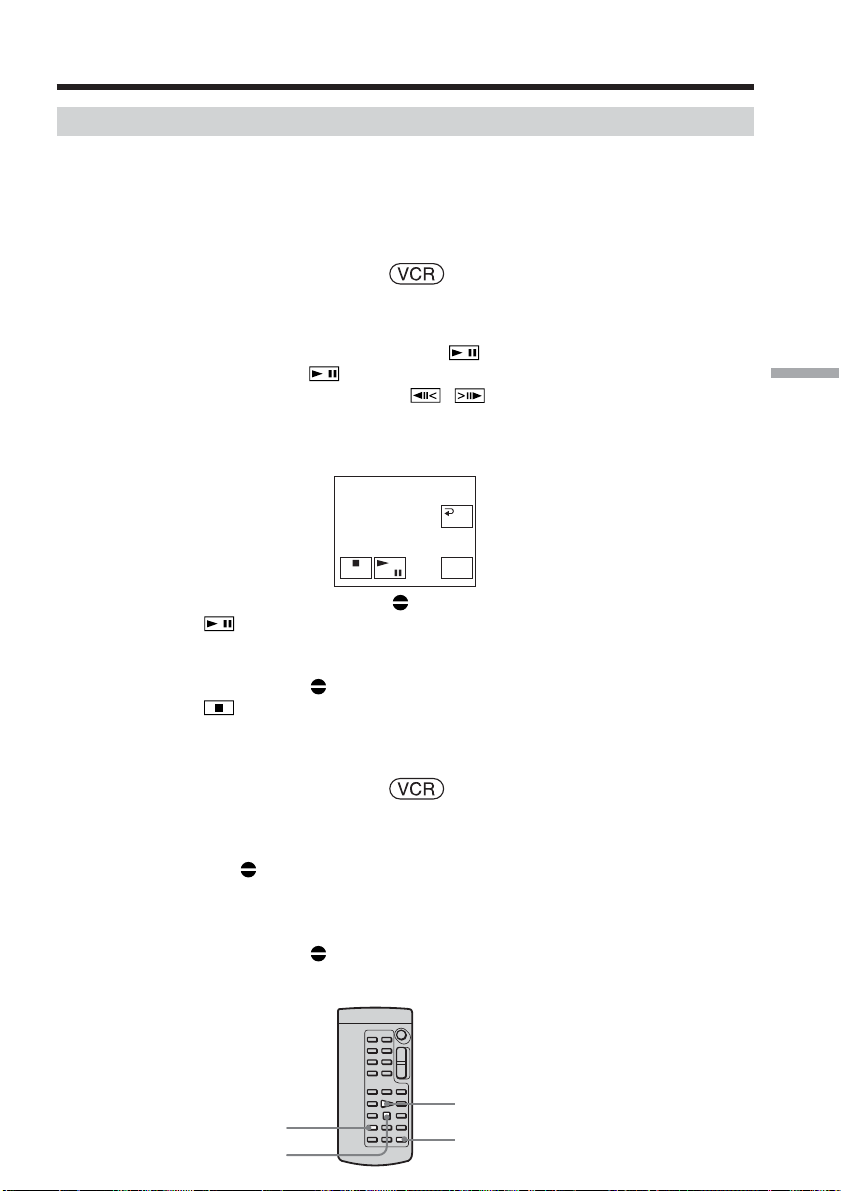
Audio dubbing
Adding an audio sound on the recorded tape
Choose a connection mentioned on page 91, and connect audio equipment or
microphone to your camcorder. Then follow the procedure below using the touch panel
or the Remote Commander supplied with your camcorder.
Using the touch panel
The POWER switch should be set to .
Operate by touching the panel.
(1) Insert the recorded tape into your camcorder.
(2) Locate the recording start point. Press
playing back, press
at the recording start point. You can fine-adjust the
recording start point by pressing
(3) Press FN and select PAGE3.
(4) Press A DUB CTRL.
The A DUB CTRL screen appears.
to start playing back. To pause
/ .
Editing
A DUB CTRL
RET.
AUDIO
DUB
(5) Press AUDIO DUB. The green X indicator appears on the screen.
(6) Press
on your camcorder and at the same time start playing back the
audio you want to record.
The new sound is recorded in stereo 2 (ST2) during playback. While recording
new sound, the red
(7) Press
on your camcorder at the point where you want to stop recording.
indicator appears on the screen.
Using the Remote Commander
The POWER switch should be set to .
(1) Follow the step 1 and 2 in “Using the touch panel.”
(2) Press AUDIO DUB on the Remote Commander.
The green
(3) Press X on the Remote Commander and at the same time start playing back
the audio you want to record.
The new sound is recorded in stereo 2 (ST2) during playback. While recording
new sound, the red
(4) Press x on the Remote Commander at the point where you want to stop
recording.
X indicator appears on the screen.
indicator appears on the screen.
N
X
x
AUDIO DUB
93
Page 94
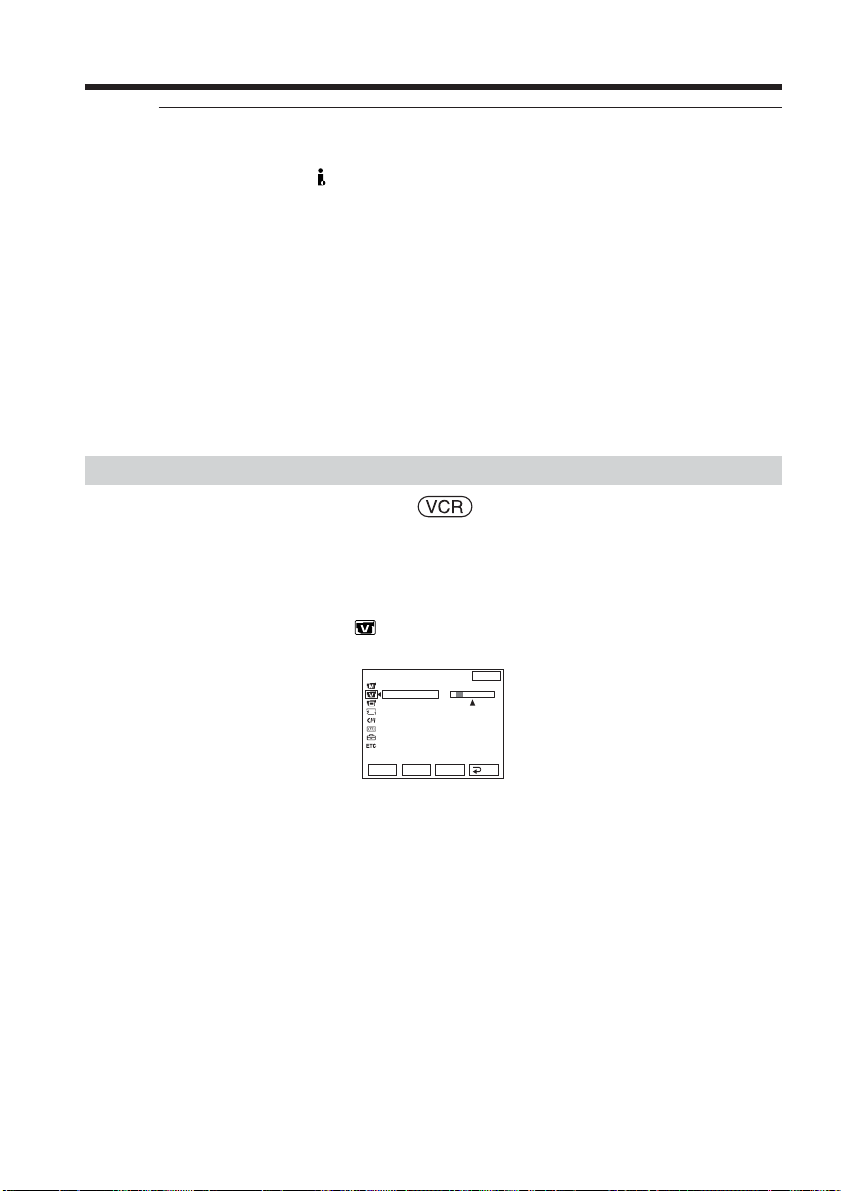
Audio dubbing
You cannot audio dubbing in the following cases:
•The tape recorded in the 16-bit mode
•The tape recorded in the LP mode
•Connecting with the DV Interface
•The blank portions of the tape
•The cassette set the write-protect tab to lock
To add new sound more precisely
Press ZERO SET MEMORY at the point where you want to stop recording later during
playback.
Follow the step 2 in “Using the touch panel.” Recording automatically stops at the point
where ZERO SET MEMORY was pressed.
We recommend that you add new sound on the tape recorded with your
camcorder
If you add new sound on the tape recorded with another camcorder (including other
DCR-TRV75/TRV80), the sound quality may become worse.
Monitoring the new recorded sound
The POWER switch should be set to .
Operate by touching the panel.
(1) Play back the tape on which you added audio.
(2) Press FN to display PAGE1.
(3) Press MENU to display the menu.
(4) Select AUDIO MIX in
, then press EXEC (p. 175).
94
VCR SET
H i F i SOUND
AUD
I
O M I X
A
/
VcDV OUT
Rr
EXIT
ST1 ST2
EXEC
RET.
(5) Press r/R to adjust the balance between the original sound (ST1) and the new
sound (ST2), then press EXEC.
About five minutes after you disconnect the power source or remove the
battery pack, the setting of AUDIO MIX returns to the original sound (ST1)
only. The default setting is original sound only.
Page 95
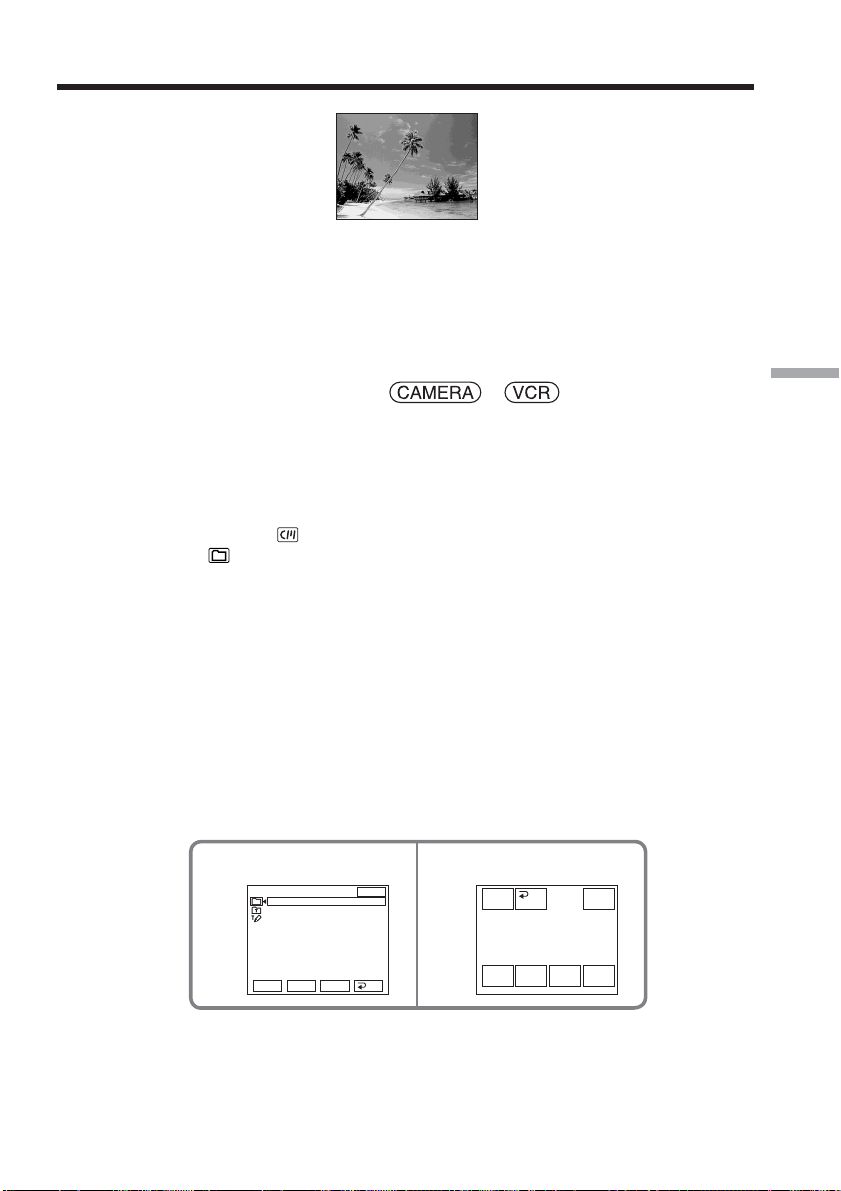
Superimposing a title on a cassette with Cassette Memory
VACATION
One cassette can have up to about 20 titles, if one title consists of five characters.
However, if the Cassette Memory is full with date and cassette label data, one cassette
can have only up to about 11 titles with five characters each.
Cassette Memory capacity is as follows:
– Six date data (maximum)
– One cassette label (maximum)
The POWER switch should be set to or .
Operate by touching the panel.
(1) Insert the cassette with Cassette Memory.
(2) During standby, recording, playback or playback pause, press FN to display
PAGE1.
(3) Press MENU to display the menu.
(4) Select TITLE in
(5) Select
, then press EXEC.
(6) Select a desired title, then press EXEC. The title appears on the screen.
(7) If necessary, change the color, size, or position by pressing COLOR, SIZE,
POS r or POS R.
(8) Press TITLE OK.
(9) Press SAVE TITLE.
During playback, playback pause or recording:
The TITLE SAVE indicator appears on the screen for about five seconds and
the title is set.
During recording standby:
The TITLE indicator appears. And when you press START/STOP to start
recording, the TITLE SAVE indicator appears on the screen for about five
seconds and the title is set.
, then press EXEC (p. 178).
Editing
56
PRESET TITLE
HELLO!
HAPPY BIRTHDAY
HAPPY HOLIDAYS
CONGRATULATIONS!
OUR SWEET BABY
WEDDING
VACATION
THE END
Rr
EXEC
EXIT
RET.
TITLE
OK
COLOR
RET.
VACATION
POS rSIZE
EXIT
POS R
95
Page 96
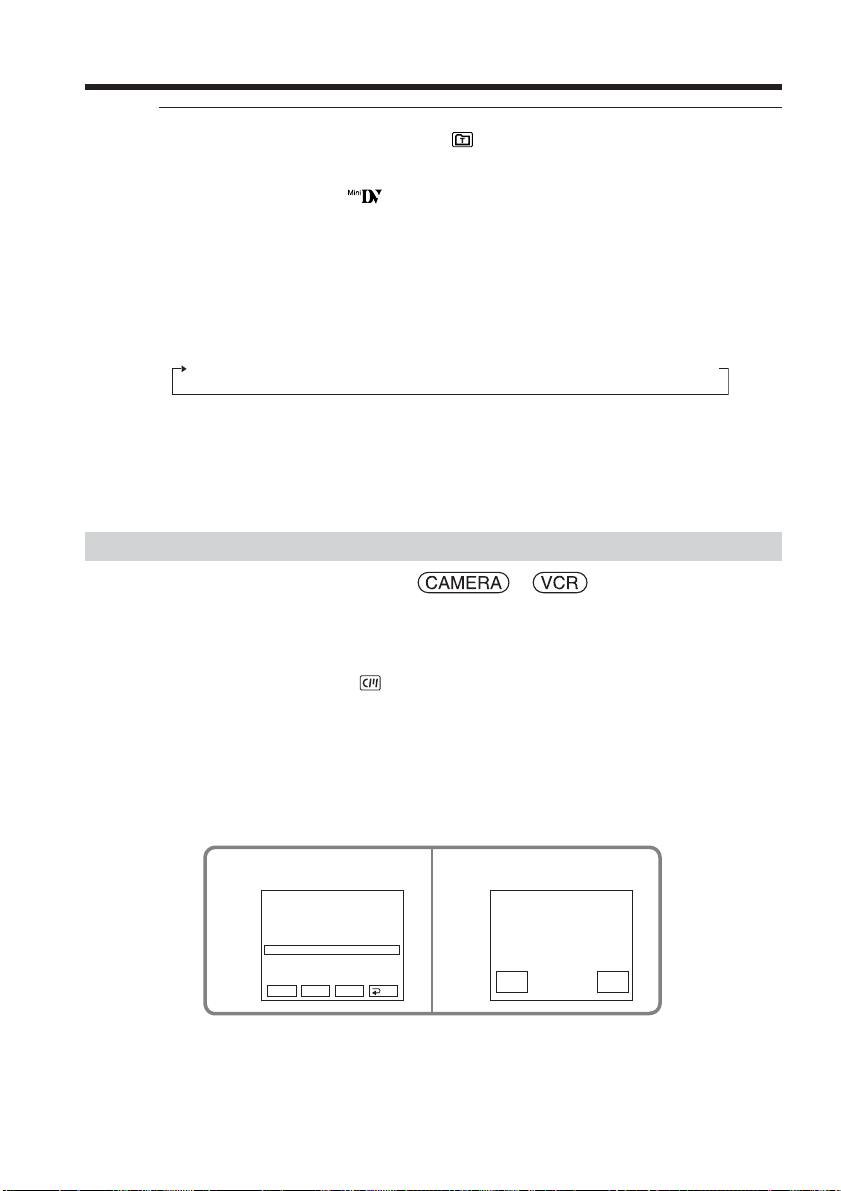
Superimposing a title on a cassette with Cassette Memory
To use the custom title
If you want to use the custom title, select in step 5.
The titles superimposed with your camcorder
•They appear only by DV format video equipment with index titler function.
•The point you superimposed the title may be detected as an index signal when
searching a recording with other video equipment.
To not display title
Set TITLE DSPL to OFF in the menu settings (p. 178).
Title setting
•The title color changes as follows:
WHITE t YELLOW t VIOLET t RED t CYAN t GREEN t BLUE
•The title size changes as follows:
SMALL y LARGE
You cannot input 13 characters or more in LARGE size.
•The title position as follows:
If you select the title size SMALL, you have nine choices for the title position.
If you select the title size LARGE, you have eight choices for the title position.
Erasing a title
The POWER switch should be set to or .
Operate by touching the panel.
(1) Press FN to display PAGE1.
(2) Press MENU to display the menu.
(3) Select TITLEERASE in
appears.
(4) Select the title you want to erase, then press EXEC.
The ERASE OK? indicator appears.
(5) Make sure the title is the one you want to erase, then press OK.
The ERASING indicator flashes on the screen.
When the title is erased, the COMPLETE indicator appears.
, then press EXEC (p. 178). The TITLE ERASE screen
96
34
T I TLE ERASE
1 HELLO !
2 CONGRATULAT
3 HAPPY NEW YEAR
4 PRESENT
5 GOOD MORN
6 WEDD
I
NG
Rr
To return to FN
Press EXIT.
To cancel erasing
Press CANCEL in step 5.
I
NG
EXEC
I
ONS !
!
END
T
I
TLE ERASE
PRESENT
4
OK
ERASE OK?
CAN–
CEL
Page 97
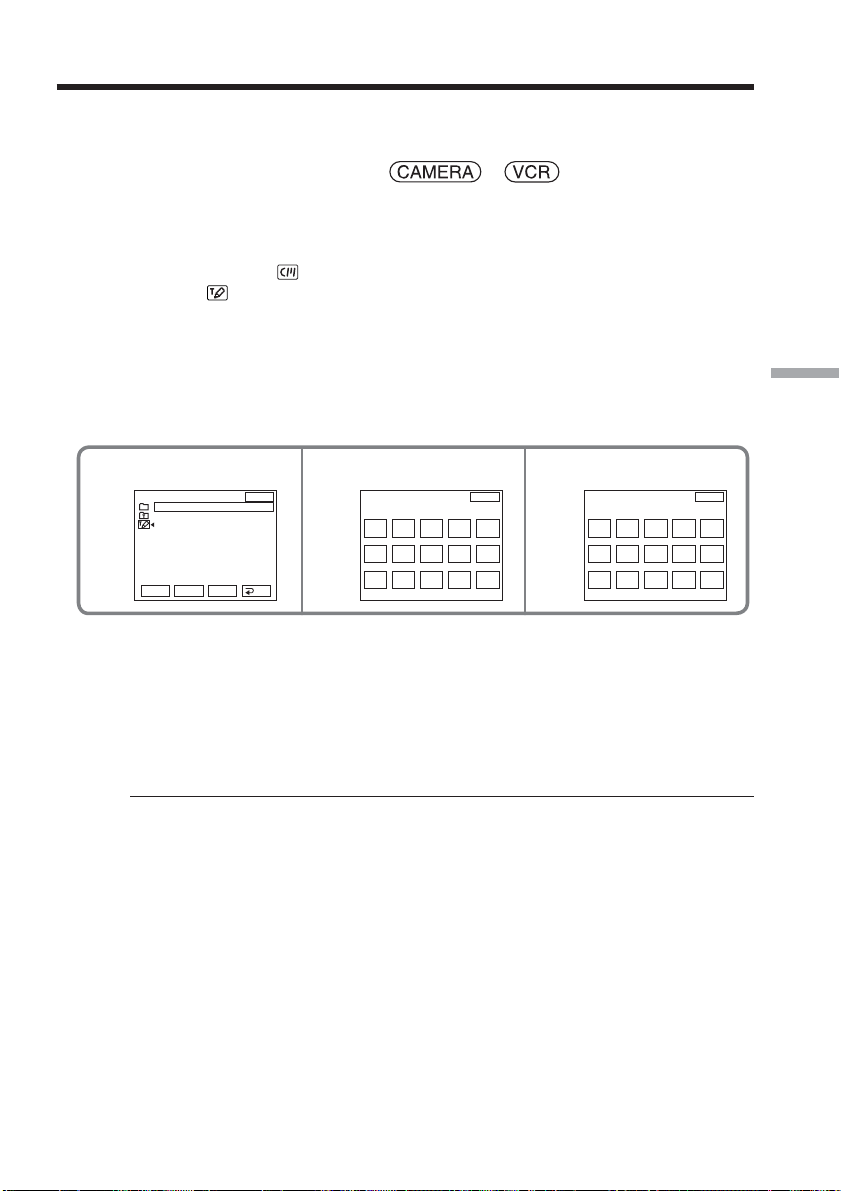
Making your own titles
You can make up to two titles and store them in the memory of your camcorder. Each
title can have up to 20 characters.
The POWER switch should be set to or .
Operate by touching the panel.
(1) Press FN to display PAGE1.
(2) Press MENU to display the menu.
(3) Select TITLE in
(4) Select
, then press EXEC.
(5) Select CUSTOM1 SET or CUSTOM2 SET, then press EXEC.
(6) Select a desired character. Repeat pressing a key to select a desired character
on the key.
(7) Press c to move the cursor for the next character. Repeat the same procedure
as step 6 and 7 to complete your title.
(8) Press SET. The title is stored in memory.
, then press EXEC (p. 178).
Editing
457
TITLE SET
CUSTOM1 SET
CUSTOM2 SET
Rr
EXEC
EXIT
RET.
TITLE SET
[
____________________
&? !
S
ABC DEF
MNO
J
KLGH I
WXY
TUVPQR
Z
T t
123
45
’ . ,
/
–
EXIT
678
90
SET
MNOJKLGH I
WXY
Z
T t
123
45
’ . ,
/
–
EXIT
678
90
SET
]
TITLE SET
[
]
_______________
PARTY
&? !
ABC DEF
TUVPQR
S
To return to FN
Press EXIT.
To change a title you have stored
In step 5, select CUSTOM1 SET or CUSTOM2 SET, depending on which title you want
to change, then press EXEC and enter the new title as desired.
If you take five minutes or longer to enter characters during tape recording
standby with the cassette inserted in your camcorder
The power automatically goes off. The characters you have entered remain stored in
memory. Set the POWER switch to OFF (CHG) once and then to CAMERA again, then
start again from step 1.
We recommend setting the POWER switch to VCR or removing the cassette so that
your camcorder does not automatically turn off while you are entering title characters.
To erase the character
Press C. The last character is erased.
To enter a space
Press c.
97
Page 98
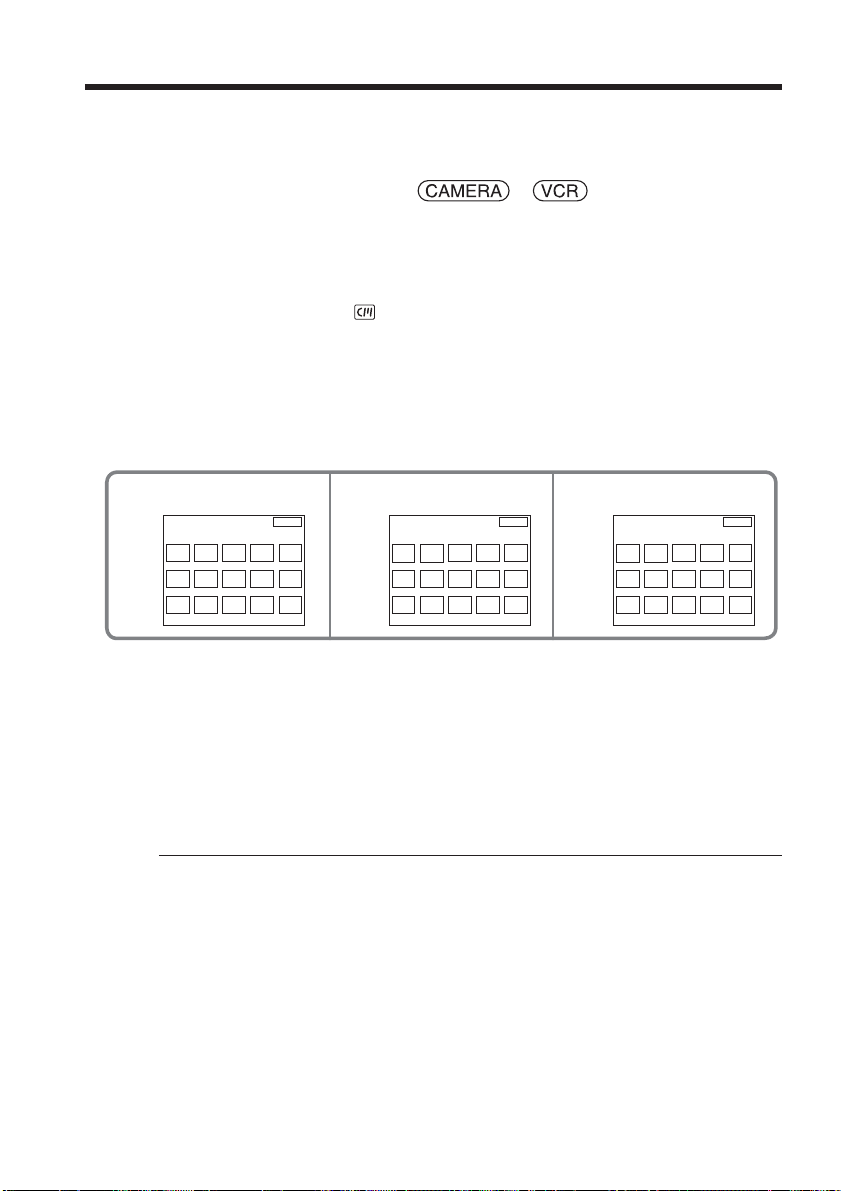
Labeling a cassette on a cassette with Cassette Memory
The label can consist of up to 10 characters and are stored in Cassette Memory. When
you insert the labeled cassette with the POWER switch set to CAMERA, or the POWER
switch is set to VCR, the label is displayed for about five seconds.
The POWER switch should be set to or .
Operate by touching the panel.
(1) Insert the cassette with Cassette Memory you want to label.
(2) Press FN to display PAGE1.
(3) Press MENU to display the menu.
(4) Select TAPE TITLE in
appears.
(5) Select a desired character. Repeat pressing a key to select a desired character
on the key.
(6) Press c to move the cursor for the next character. Repeat the same procedure
as step 5 and 6 to complete the label.
(7) Press SET. The label is stored in memory.
, then press EXEC (p. 178). The TAPE TITLE screen
456
TAPE TITLE
[
__________
&? !
ABC DEF
J
KLGH I
TUVPQR
S
MNO
WXY
Z
]
T t
123
45
’ . ,
/
–
EXIT
678
90
SET
TAPE TITLE
[G_________
&? !
ABC DEF
J
KLGH I
TUVPQR
S
MNO
WXY
Z
]
T t
123
45
’ . ,
/
–
EXIT
678
90
SET
TAPE TITLE
[
GRADU
&? !
ABC DEF
TUVPQR
S
MNOJKLGH I
WXY
Z
_____
]
T t
123
45
’ . ,
/
–
EXIT
678
90
SET
To return to FN
Press EXIT.
To erase the label you have made
Select C to erase the label in step 5, then press SET.
To change the label you have made
Insert the cassette to change the label, and operate in the same way to make a new label.
If you have superimposed titles in the cassette
When the label appears, up to four titles also appear.
To erase the character
Press C. The last character is erased.
To enter a space
Press c.
98
Page 99
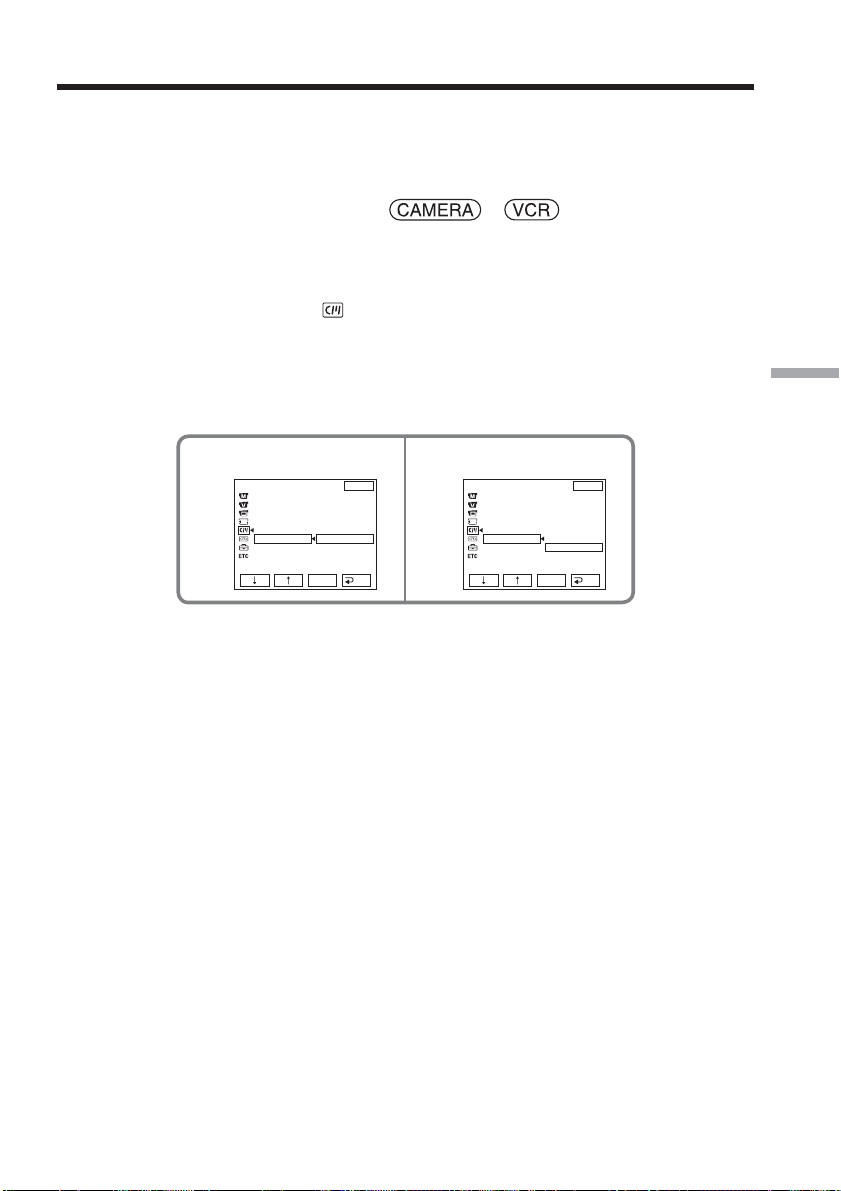
Erasing all the data in Cassette Memory
The following data saved in Cassette Memory can be completely erased once:
– Date data
– Title data
– Cassette label
The POWER switch should be set to or .
Operate by touching the panel.
(1) Press FN to display PAGE1.
(2) Press MENU to display the menu.
(3) Select ERASE ALL in
(4) Select OK, then press EXEC.
The OK indicator changes to EXECUTE.
(5) Select EXECUTE, then press EXEC. The ERASING indicator flashes on the
screen. Once erasing is complete, the COMPLETE indicator appears.
, then press EXEC (p. 178).
Editing
34
CM SET
TITLE
TITLEERASE
TITLE DSPL
CM SEARCH
TAPE TITLE
ERASE ALL
RETURN
OK
EXEC
EXIT
RET.
CM SET
TITLE
TITLEERASE
TITLE DSPL
CM SEARCH
TAPE TITLE
ERASE ALL
To return to FN
Press EXIT.
To cancel erasing
Select RETURN in step 5, then press EXEC.
RETURN
EXECUTE
EXEC
EXIT
RET.
99
Page 100
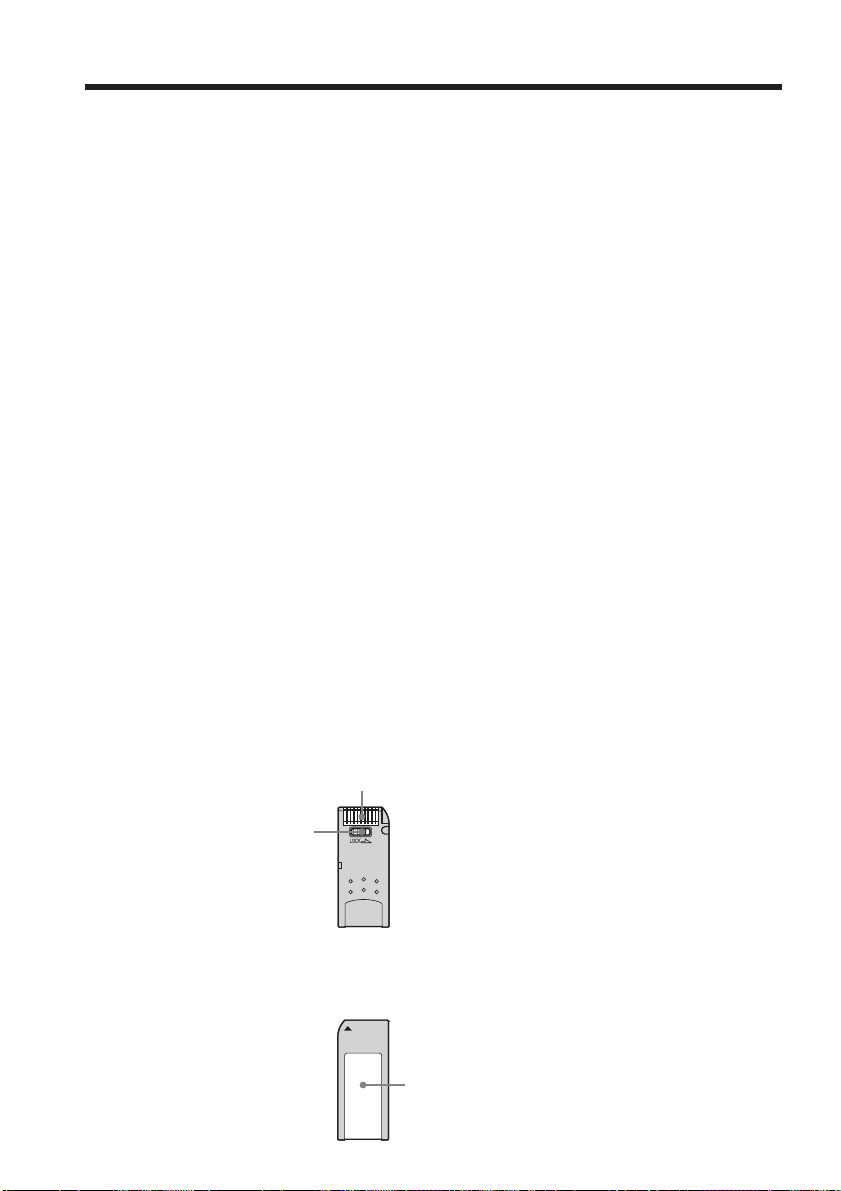
— “Memory Stick” Operations —
Using “Memory Stick” – Introduction
The “Memory Stick” is a new light and small recording media which, despite of the
size, can store greater data than a floppy disk.
The “Memory Stick” can, in addition to recording images and easily playing back
images you want to see, follow operations such as:
– Copying images into the “Memory Stick” from the tape
– Capturing images into the computer using the supplied USB cable
– Allow image deletion, protection and writing (with a print mark).
File format
Still image (JPEG)
Your camcorder compresses and records image data in JPEG (Joint Photographic
Experts Group) format. The file extension is .jpg.
Exif *Ver.2.2 JPEG compliant, DPOF compatible.
*Exif: Exif is a file format for still images, established by the Japan Electronics and
Information Technology Industries Association(JEITA). Files in this format can have
additional information such as your camcorder’s setting information at the time of
recording.
Moving picture (MPEG)
Your camcorder compresses and records picture data in MPEG (Moving Picture Expert
Group) format. The file extension is .mpg.
Typical image data file name
Still image
101-0001: This file name appears on the screen of your camcorder.
DSC00001.JPG: This file name appears on the display of a computer.
Moving picture
MOV00001: This file name appears on the screen of your camcorder.
MOV00001.MPG: This file name appears on the display of a computer.
To prevent from erasing images accidentally
Rear part of the “Memory Stick”
Slide the write-protect tab on the “Memory Stick” to LOCK.
The position and shape of the write-protect tab may be different depending on the
model.
Some kinds of “Memory Stick” have no write-protect tab.
Terminal
100
Write-protect tab
Notes on the “Memory Stick”
Labeling position
Stick its label on the labeling position.
Labeling position
 Loading...