

Page 1
3-089-181-11(1)
Camera Operations Guide [US]
Camera
Operations Guide
Read this first
Digital Video Camera Recorder
© 2004 Sony Corporation
DCR-PC108/PC109
Page 2
Read this first
Before operating the unit, please read this
manual thoroughl y, and retain it for future
reference.
For customers in the U.S.A. and
CANADA
CAUTION
TO PREVENT ELECTRIC SHOCK, MATCH WIDE
BLADE OF PLUG TO WIDE SLOT, FULLY
INSERT.
WARNING
To prevent fire or shock hazard, do no t
expose t h e u nit to rain o r moisture.
This symbol is intended to alert the
user to the presence of uninsulated
“dangerous voltage” within the
product’s enclosure that may be of
sufficient magnitude to c onstitute a
risk of electric shock to persons.
This symbol is inten d e d to alert the
user to the presence of importa nt
operating and maintenance
(servicing) instructions in the
literature accompanying the
appliance.
b
Notice
If static electricity or electromagnetic interference
causes data transfer to disc ontinue midway (fail),
restart the application or disconnect and connect the
USB cabl e again.
RECYCLING LITHIUM-ION BATTERIES
Lithium-Ion batteries are recyclable.
You can help preserve our
environment by returning your used
rechargeable batteries to the
collection and recycling location
nearest you.
For more information regarding recycli ng of
rechargeable batteries, call toll free 1-800-822- 8837,
or visit http://www.rbrc.org/
Caution: Do not handle damaged or leak ing LithiumIon batteries.
“Memory Stick” and battery pack
This device complies with Part 15 of the FCC Rules.
Operation is subject to the following two conditions:
(1) This device may not cause harmful interference,
and (2) this device must accep t an y inte r f ere nc e
received, including int erference that may cause
undesired operation.
This Class B digital apparatus complies with Canadian
ICES-003.
2
Page 3
For customers in the U.S.A.
If you have any questions about this product, you may
call:
Sony Customer Information Center 1-800-222-SONY
(7669)
The number below is for FCC related mat ters only.
Regulatory Information
Declaration of Conformity
Trade Name: SONY
Model No.: DCR-PC109
Responsible Party: Sony Electr oni cs Inc.
Address: 680 Kinderkamack Road, Oradell,
NJ 07649 U.S.A.
Telephone No.: 201-930-6972
This device complies wi th Part 15 of the FCC Rule s.
Operation is subject to the following two conditions:
(1) This device may not cause harmful i nterfe rence,
and (2) this device must accept a ny interference
received, inclu d ing interference that may cause
undesired operation.
Note:
b
DCR-PC109 is to be used with Handycam Station
Model DCRA-C111 and AC Power Adaptor Model
AC-L25A/L25B.
Owner’s Record
The model and serial numbers are located on the
bottom. Record the serial numb er in the sp ace
provided below. Refer to these numbers whenever you
call upon your Sony dealer regar ding this product.
Model No.DCR-PC
Serial No.
Model No.AC-
Serial No.
CAUTION
You are cautioned that any changes or mo dif ica tions
not expressly approved in this manual could void your
authority to operate this equipment.
does cause harmful interferenc e to radio or television
reception, which can be determined by tur ni ng the
equipment off and on, the user is encouraged to try to
correct the interference by one or more of the
following measures:
– Reorient or relocate the receiving antenna.
– Increase the separation between the equipment and
receiver.
– Connect the equipment to an outlet on a circuit
different from that to which the receiver is
connected.
– Consult a Sony dealer or an experienced radio/TV
technician for help.
The supplied interface cable must be use d with the
equipment in order to comply with the limits f or a
digital device pursuant to Subpart B of Part 15 of FCC
Rules.
Notes on use
Note on Cassette Memory
Your camcorder is based on the DV format. You can
use only mini DV cassettes in your camcorder. Use of
mini DV cassette s w ith Cassette Memory is
recommended as you can use Title search (p. 61), Date
search (p. 62), [ TITLE] (p. 81), [ TAPE
TITLE] (p. 83).
Cassettes with Cassette Memory are marked
with .
Note on the type of “Memory Stick” you
can use in your camcorder
You can use only a “Memory Stick Duo,” which is
about half the size of a standard “M emor y Stick,” in
your camcorder (p. 128).
The mark is indicated on the
“Memory Stick Duo.”
b
Note:
This equipment has been teste d an d fou nd to c o mply
with the limits for a Class B digital device, pursuant to
Part 15 of the FCC Rules.
These limits a re de signed to provide reasonable
protection agains t harmful i nterferenc e in a residen tial
installation. This equipm ent generates, uses, and can
radiate radio frequency energy and, if not installed and
used in accordance with the in s tructions, may cause
harmful interference to radio communications.
However, there is no guarantee that interference will
not occur in a particular installation. If this equipment
,continued
3
Page 4
Notes on recordin g
• Before starting to record, test the recording function
to make sure the picture and sound are record e d
without any problems.
• Compensation for the contents of recordings cannot
be provided, even if recording or playback is not
possible due to a malfunction of the camc ord e r,
storage media, etc.
• TV color systems differ depending on the countries/
regions. To view your recordings on a TV, you need
an NTSC system-based TV.
• Television programs, films, vide o ta pe s, and other
materials may be copyrighted. Unauthorized
recording of such materials ma y be con tr ary to the
copyright laws.
Notes on the LCD panel, viewfinder, and
lens
• The LCD screen and the viewfinder are
manufactured using extreme ly hig h -p recision
technology, so over 99.99% of the pixels are
operational for effective use.
However, there may be some tiny black points and/
or bright points (white, red, blue, or gree n in c olor )
that appear constantly on the LCD screen and the
viewfinder.
These points are normal results of the manufacturing
process and do not affect the recordin g in an y way.
• Exposing the LCD screen, the viewfinder, or the lens
to direct sunlight for long periods of time may cause
malfunctions. Be careful when placing the camera
near a window or outdoors.
• Do not aim at the sun. Doing so might cause your
camcorder to malfunction. Take pictur e s of the sun
only in low light conditions, such as at dusk .
Notes on usi ng the camcorder
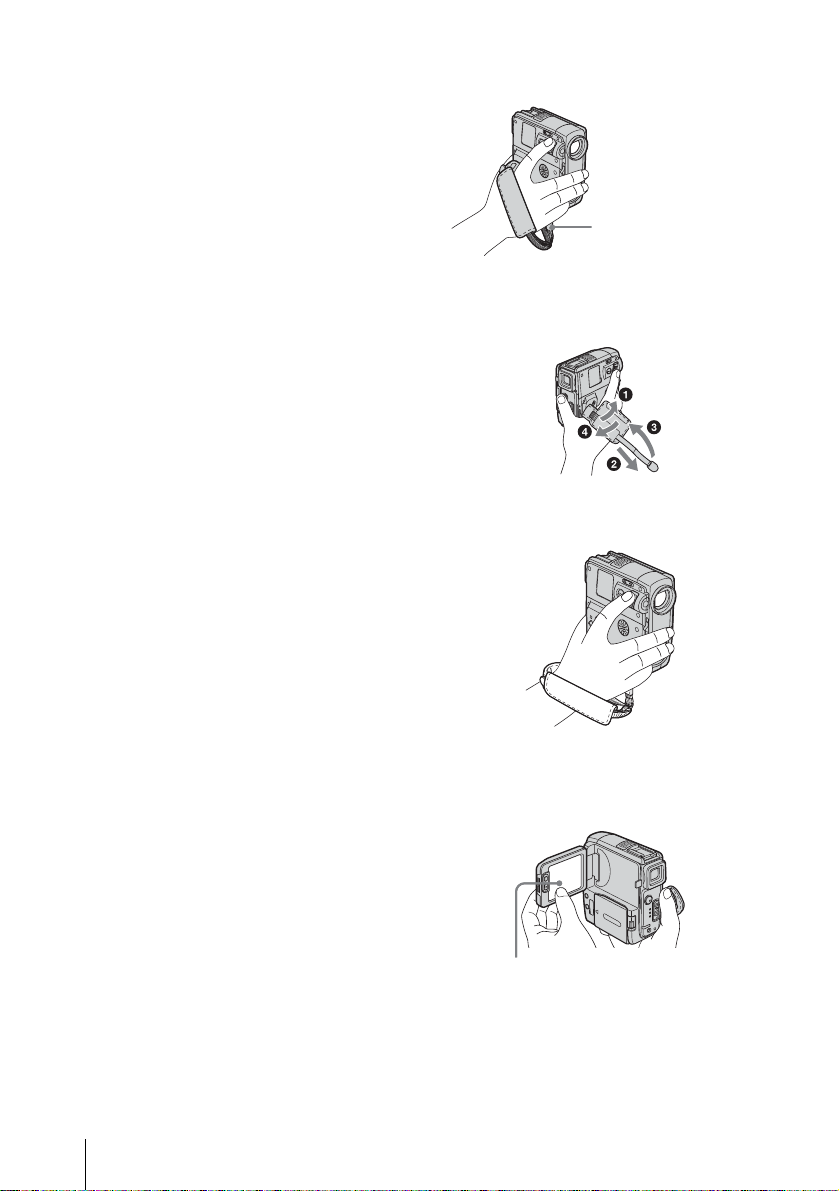
• Hold the camcorder, putting you r wrist through the
belt and your fingers lightly on the finger rest.
Finger rest
• To ensure a good grip, fasten the Strap Belt as shown
in the following illustration. If the St r ap Bel t hangs
out too far, tuck it in the hand pad.
• The Strap Belt can also be used as a wrist strap
(p. 142).
Note on connecting other device
Before connecting your camcord er to other device
such as a VCR or a computer with a USB or i.LINK
cable, be sure to i nsert the co nnector pl ug in the proper
direction. If you insert the con nector plug forcibly in
the wrong direction, the terminal may be damaged, or
this may cause a malfunction of your camcorder.
Notes on using this manual
• The images of the LCD screen and the viewfinder
used on this manual are captured using a digital still
camera, and thus may appear different from wh at
you see.
• The illustrations used on this ma nual are based on
the model DCR-PC109.
4
• When you are using the touch panel, place your hand
on the back side of the LCD panel to support it.
Then, touch the buttons displayed on the screen.
Touch the button on the LCD screen.
• You can ch ange the language to be used for sc r een
display on your camcorder (p. 25).
• Be careful not to press buttons on the LCD frame
accidentally when you open or close the LCD panel,
or when you adjust the angle of the LCD panel.
• Do not hold the camcorder by the following parts.
Page 5
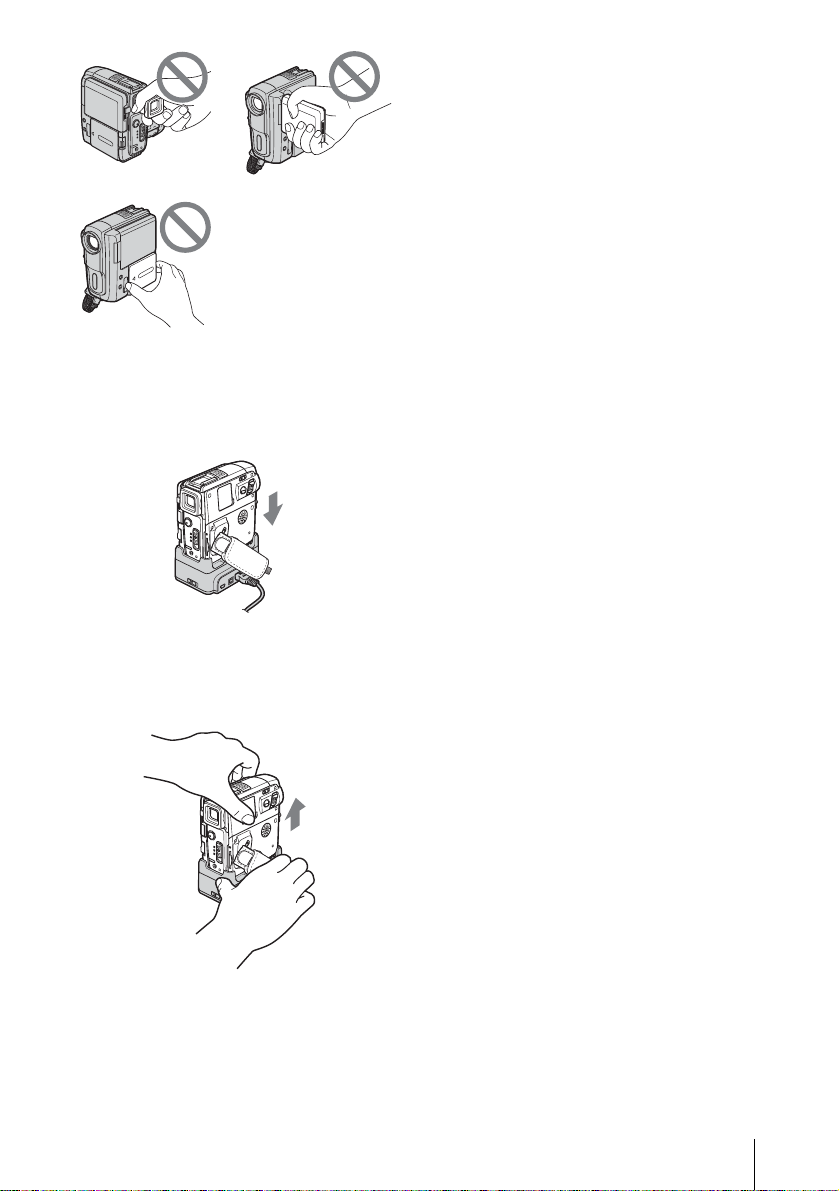
Viewfinder
Battery pack
LCD panel
Notes on handling the Handycam Station
• When attaching your camcord er to th e Handyc a m
Station, insert your camcorder in the direction of the
arrow as shown in the following illustration. Be sure
to insert it all the way.
• Be sure to turn the power of your camcorder off
before inserting it into or removing it from the
Handycam Station.
• Your camcorder may not attach prop erl y to the
Handycam Station if the camcord er’s DC IN jack
cover is open or the Strap Belt is caught between
your camcorder and the Handycam Statio n.
• Do not connect the A/V connecting cables or the AC
Adaptors to both your camcorder and the Handycam
Station simultaneously while using your camcorder.
This may cause a malfunction.
• When removing your camcorder from the
Handycam Station, hold both your cam c orde r and
the Handycam Station as shown in the following
illustratio n , an d remove it from the Han d ycam
Station.
Notes
b
• When disconnecting the AC Adaptor from the
Handycam Station, hold both th e DC plug and the
Handycam Station and disconne c t the A C Adaptor.
5
Page 6

Table of Contents
: Features available for tape only.
: Features ava ilable for “Me mory Stick Duo”
only.
Read this first............................................................................................. 2
Quick Start Guide
Recording movies .................................................................................... 10
Recording still images.............................................................................. 12
Recording/Playing back with ease ............... ....... ..................................... 14
Getting started
Step 1: Checking supplied items.............................................................. 15
Step 2: Charging the battery pack............................................................ 16
Using an outside power source .................................................................................19
Step 3: Turning the power on................................................................... 20
Step 4: Adjusting the LCD panel and viewfinder...................................... 21
Adjusting the LCD panel ............................................................... .... .. .... .. .... ....... .. ....21
Adjusting the viewfinder .............................................................................................21
Step 5: Setting the date and time............................................................. 22
Step 6: Inserting the recording media...................................................... 23
Inserting a cassette tape ...........................................................................................23
Inserting a “Memory Stick Duo” .................................................................................24
Step 7: Setting the screen language........................................................ 25
Recording
Recording movies .................................................................................... 27
Recording for a longer time .......................................................................................29
Using zoom ................................................................................................................29
Recording in mirror mode .......................................................................................... 30
Using the self-timer ....................................................................................................31
Recording still images – Memory photo recording............................. 32
Selecting image quality or size ..................................................................................33
Using the self-timer ....................................................................................................34
Recording a still image on a “Memory Stick Duo”
while recording movies on a tape .................................... .. ....... .... .. .. .. .... ....... .. .. ..35
Recording with ease – Easy Handycam .................................................. 35
Recording a movie ...............................................................................................35
Recording a still image .......................................................................................36
Making full use of Easy Handycam operation ...........................................................37
6
Page 7

Adjusting the exposure............................................................................. 38
Adjusting the exposure fo r ba ck l it subjects ......... ......................................................38
Fixing the exposure for the selected subject – Flexible spot meter ..........................38
Adjusting the exposure man ually ...................... ........................................................39
Recording in dark places – NightShot plus, etc. ...................................... 40
Adjusting the focus................................................................................... 41
Adjusting the focus for an off - cen ter subject – SPOT FOCUS ........ ..........................41
Adjusting the focus manually ....................................................................................42
Recording a picture using various effects ................................................ 43
Fading in and out of a scene – FADER ..............................................................43
Using special effects – Digital effect ............ ............... ............... .............. ..........44
Overlaying still images on movies on a tape – MEMORY MIX .................................46
Searching for the starting point .......................................................... 48
Searching for the last scene of the most recent recording – END SEARCH ............48
Searching manually – EDIT SEARCH ...................................................................... 48
Reviewing the most recently recorded scenes – Rec review .................................... 49
Playback
Viewing movies recorded on a tape ................................................... 50
Playing back in various modes ................................................................................. 51
Viewing recordings with added effects – Digital effect .............................................. 52
Viewing recordings on a “Memory Stick Duo” .................................... 53
Playing back in various modes from a “Memory Stick Duo” ...................................... 54
Playing back with ease – Easy Handycam .............................................. 55
Making full use of Easy Handycam operation ...........................................................56
Various playback functions ...................................................................... 57
Magnifying pictures – Tape playback zoom/Memory playback zoom ....................... 57
Displaying the screen indi cators ......... ...................................................................... 58
Displaying the date/time and camera settings data – Data code .............................. 58
Playing the picture on a TV...................................................... ....... ...... ... 60
Locating a scene on a tape for playback ........................................... 61
Searching quickly for a desired scene – Zero set memory ....................................... 61
Searching for a scene using Cassette Memory – Title search .................................. 61
Searching for a scene by date of recording – Date search ....................................... 62
,continued
7
Page 8
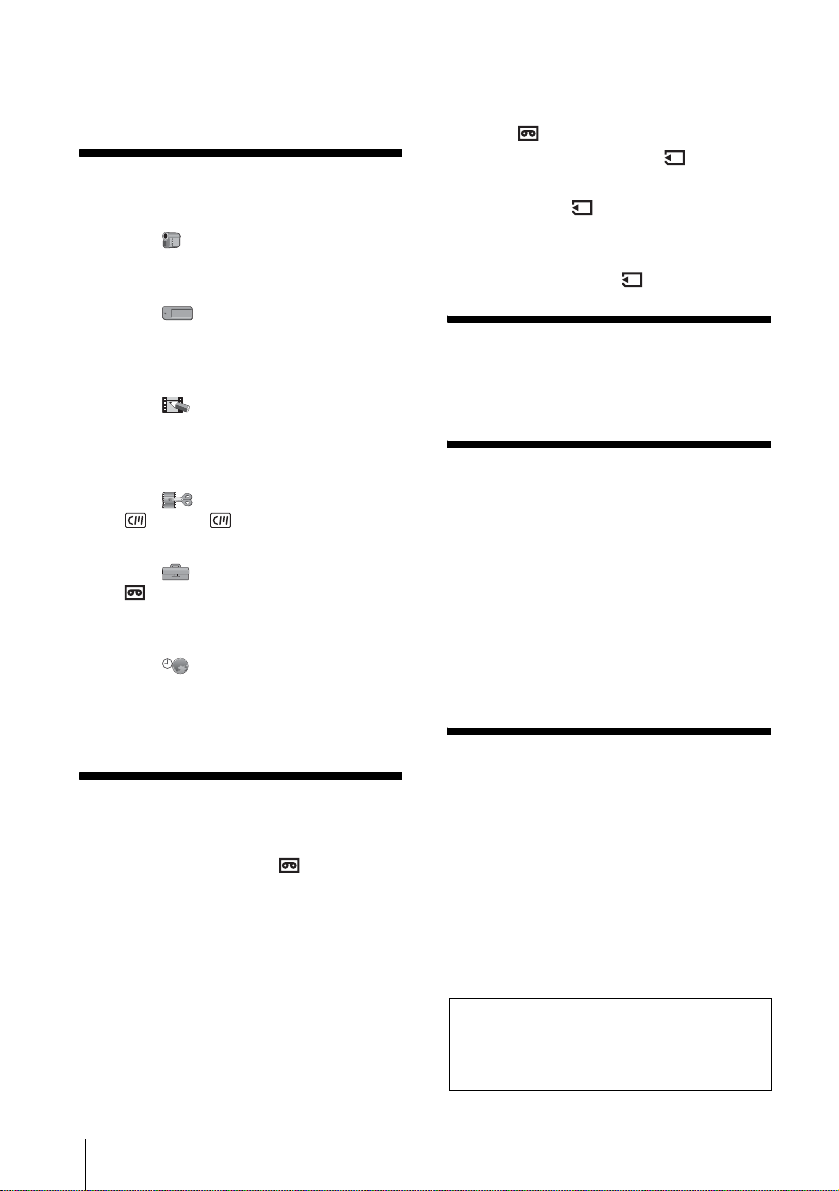
Advanced operations
Using the Menu
Selecting menu items ........................63
Using the (CAMERA SET) menu
– PROGRAM AE/WHITE BAL./16:9
WIDE, etc. ....................................65
Using the (MEMORY SET) menu
– BURST/QUALITY/IMAGE SIZE/
ALL ERASE/NEW FOLDER,
etc. ...............................................71
Using the (PICT. APPLI.) menu
– PICT. EFFECT/SLIDE SHOW/
FRAME REC/INTERVAL REC/INT.
REC–STL, etc. .............................75
Using the (EDIT/PLAY) menu
– TITLE/ TAPE TITLE, etc.
......................................................80
Using the (STANDARD SET) menu
– REC MODE/MULTI-SOUND/
AUDIO MIX/USB-CAMERA,
etc. ...............................................84
Using the (TIME/LANGU.) menu
– CLOCK SET/WORLD TIME,
etc. ...............................................89
Customizing Personal Menu ..............90
Dubbing sound to a recorded
tape ......................................105
Deleting recorded pictures .........107
Marking recorded images with specific
information – Image protection/
Print mark ...................................108
Printing recorded images (PictBridge
compliant printer) .................110
Troubleshooting
Troubleshooting ...............................113
Warning indicators and messages ...121
Additional Information
Using your camcorder abroad .........126
Usable cassette tapes .....................127
About the “Memory Stick” ................128
About the “InfoLITHIUM” battery
pack ............................................131
About i.LINK .....................................132
Maintenance and precautions ..........133
Specification ....................................136
Quick Reference
Dubbing/Editing
Connecting to a VCR or TV ...............93
Dubbing to another tape ..............94
Recording pictures from a VCR or
TV ................................................95
Dubbing pictures from a tape to a
“Memory Stick Duo” .....................96
Dubbing still images from a “Memory
Stick Duo” to a tape .....................97
Dubbing selected scene s from a tape
– Digital program editing ..............98
8
Identifying parts and controls ...........139
Index ................................................147
Refer also to other operating instr uctions supplied
with your camcorder:
• Editing images with your com pute r
cComputer Applications Guide
Page 9

9
Page 10
Quick Start Guide
Recording movies
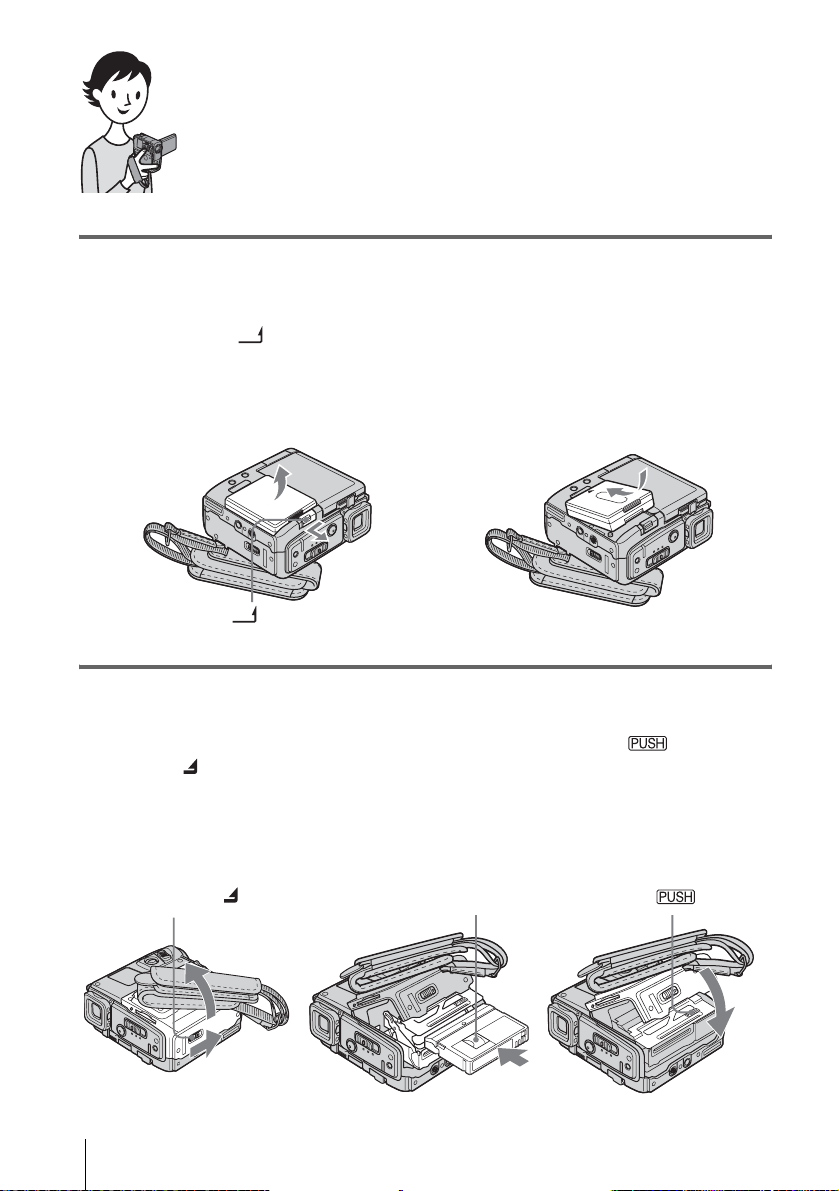
1 Attach the charged battery pack to the camcorder.
To charge the battery, see page 16.
a Slide the BATT (battery release)
lever and remove the battery
terminal cover.
BATT (battery release) lever
b Attach the battery pack with its
terminal side facing your camcorder
as shown in the illustration and press
down the battery pack until it clicks.
2 Insert a cassette into the camcorder.
a Slide the OPEN/
ZEJECT lever in
the direction of the
arrow to open the lid.
The cassette compartment
comes out automatically.
OPEN/ZEJECT lever
Quick Start Guide
10
b Insert the cassette with
its window-side facing
up, then push the center
of the back of the
cassette.
Window-side
c Press .
Close the cassette lid after
the cassette co m partment
slides back in by itself.
Page 11
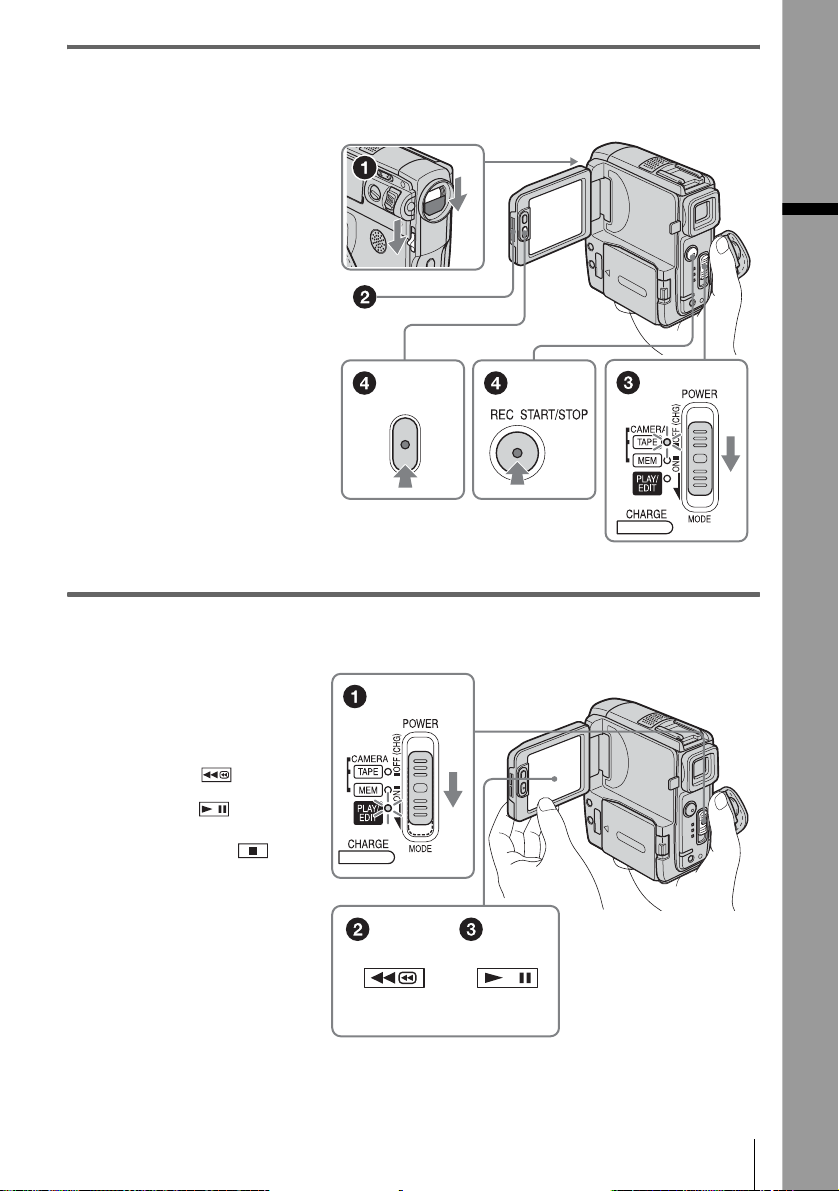
3 Start recording while checking the subject on the LCD screen.
The date and time is not set up in the default setting. To set the date and time, see page 22.
a Set the LENS COVER
switch to OPEN.
b Open the LCD panel.
c While pressing the
green button, slide
the POWER switch
down to light up the
CAMERA-TAPE lamp.
The power turns on.
d Press REC START/
STOP.
Recording starts. To
change to standb y m ode,
press REC START/STOP
again.
You can also use REC
START/STOP of the LCD
panel.
4 View the recorded picture on the LCD screen.
Quick Start Guide
a Slide the POWER
switch rep eatedly
until the PLAY/EDIT
lamp lights up.
b Touch (rewind).
c Touch (play) to
start the playback.
To stop, press .
To turn off the power, slide the
POWER switch up to OFF
(CHG).
Set the LENS COVER switch
to CLOSE.
Quick Start Guide
11
Page 12
Recording still images
r
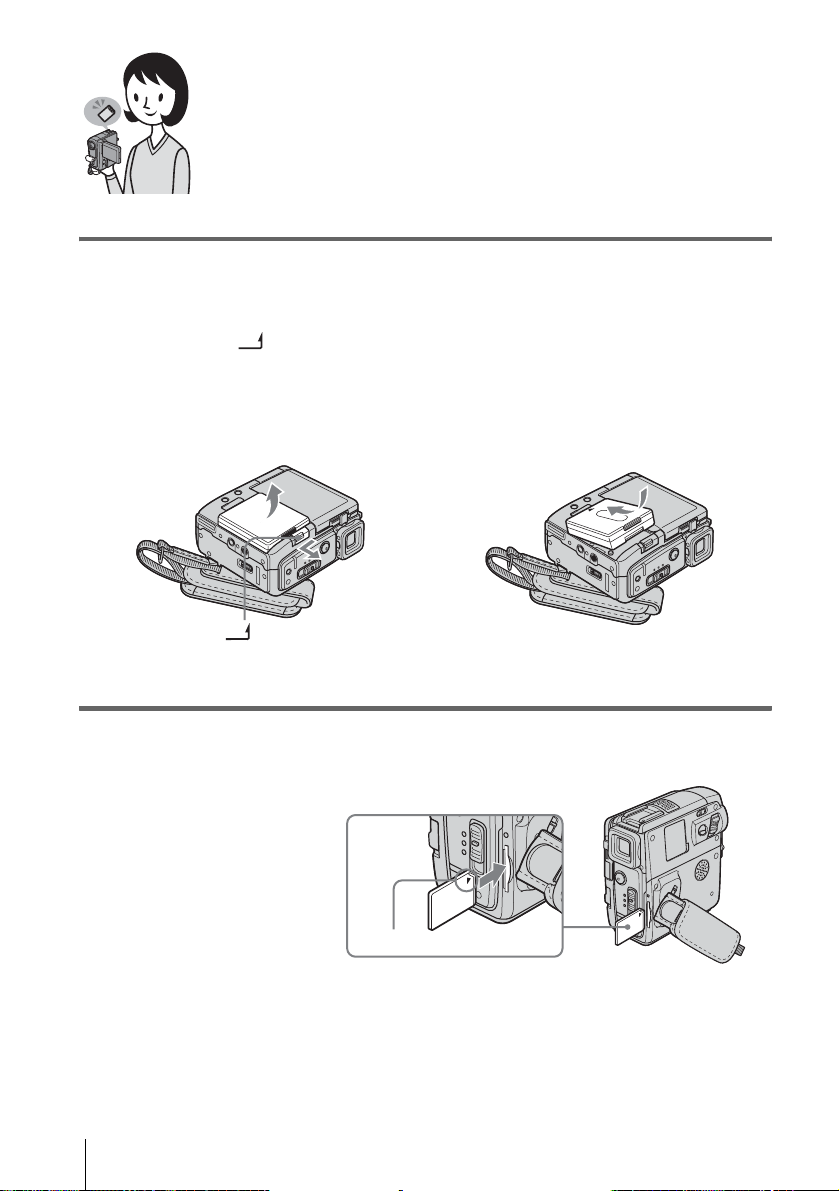
1 Attach the charged battery pack to the camcorder.
To charge the battery, see page 16.
a Slide the BATT (battery release)
lever and remove the battery
terminal cover.
BATT (battery release) leve
b Attach the battery pack with its
terminal side facing your camcorder
as shown in the illustration and press
down the battery pack until it clicks.
2 Insert a “Memory Stick Duo” into the camcorder.
Insert it so that the B mark
is at the upper right corner.
Push in until it clicks.
Quick Start Guide
12
B mark
Page 13
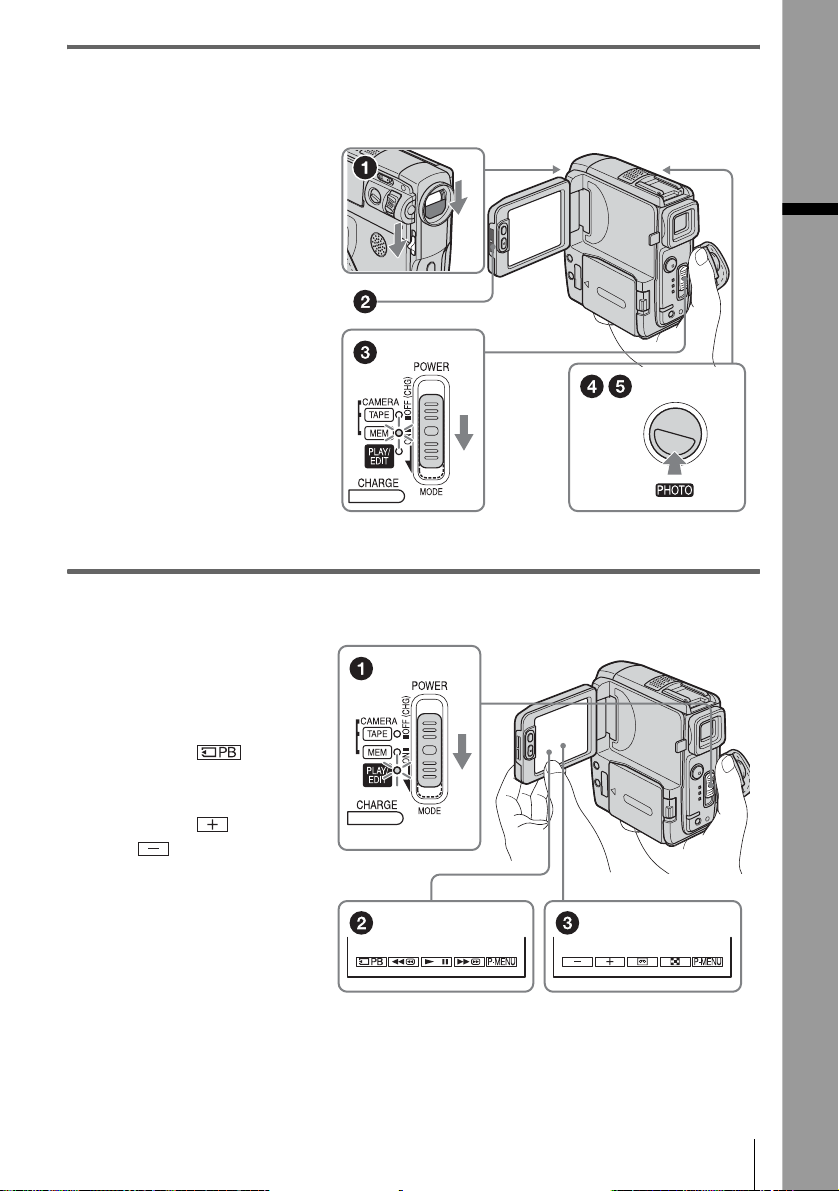
3 Start recording while checking the subject on the LCD screen.
The date and time is not set up in the default setting. To set the date and time, see page 22.
a Set the LENS COVER
switch to OPEN.
b Open the LCD panel.
c While pressing the
green button, slide
the POWER switch
repeatedly until the
CAMERA-MEM lamp
lights up.
The power turns on.
d Press PHOTO lightly.
A short beep sound is heard
when the focus is adjusted.
e Press PHOTO fully.
A shutter sound is heard
and the still image is
recorded.
4 View the recorded picture on the LCD screen.
a Slide the POWER
switch rep eatedly
until the PLAY/EDIT
lamp lights up.
Quick Start Guide
b Touch .
The most recently recorded
image is d isplayed.
c Touch (next) or
(previous) to
view images in
sequence.
To turn off the power, slide the
POWER switch up to OFF (CHG).
Set the LENS COVER switch to
CLOSE.
Quick Start Guide
13
Page 14
Recording/Playing back with ease
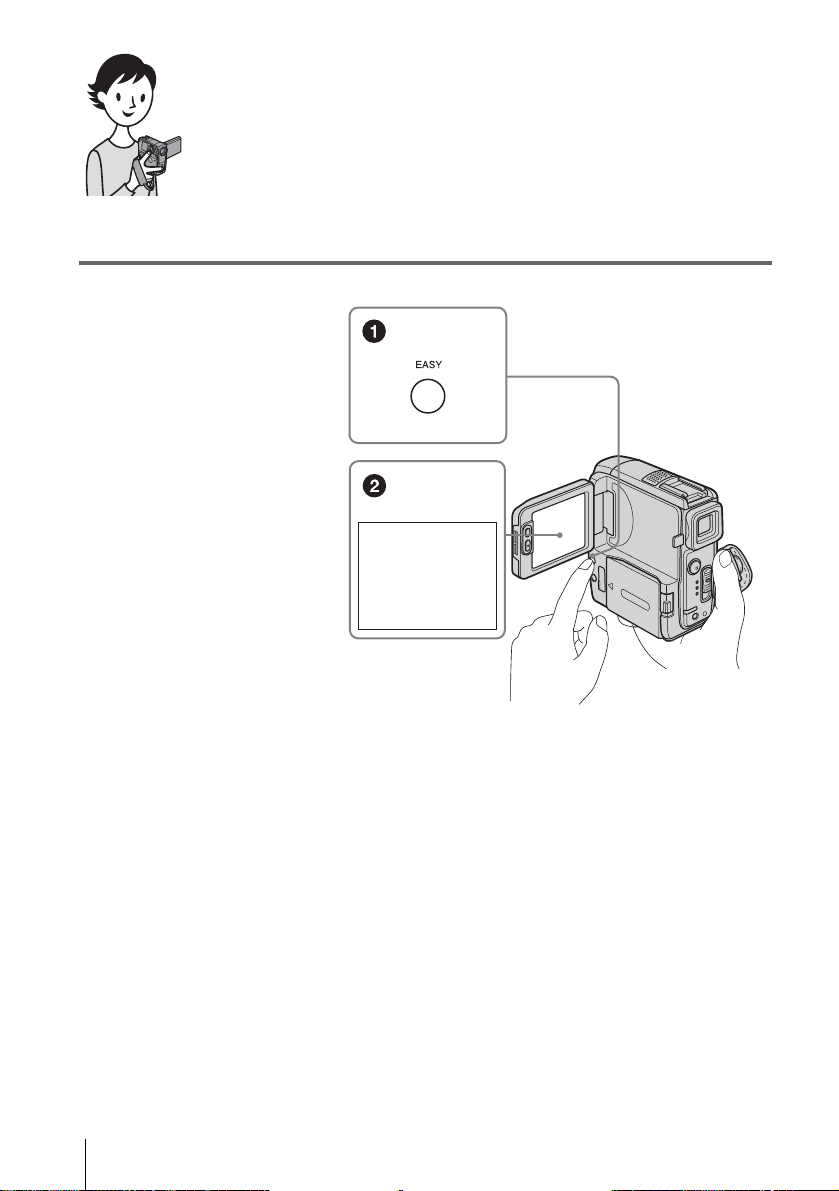
By switching to Easy Handycam operation, recording/playback operation
becomes even easier.
Easy Handycam operation allows easy recording/playback for even first
time users by providing only the basic functions for recording/playback.
Press EASY when recording/
playing back.
EASY lights up in blue (1) and
screen font size increases (2)
during Easy Ha ndycam operati on.
Easy Handycam
operation
ON
For details, se e i nstructions for each operation.
See page 35 for recording, page 55 for pl ayback.
Quick Start Guide
14
Page 15
Getting started
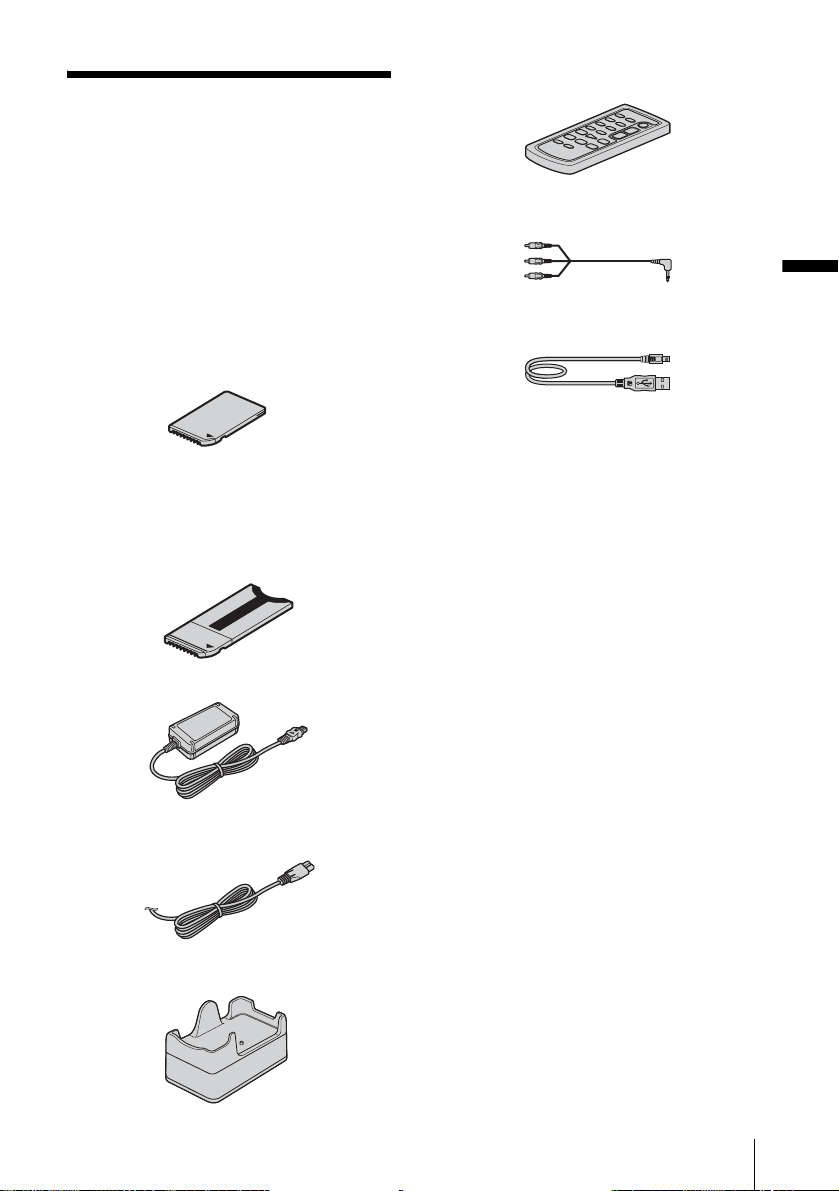
Step 1: Checking supplied items
Wireless Remote Commander (1)
A button-type lithium battery is already installed.
Make sure you have following ite ms supplied
with your camcorder.
The number in parentheses indicates the number
of that item supplied.
“Memory Stick Duo” 8MB (1 )
You can use only a “Memory Stick Duo,” which is
about half the size of a standard “Memory Stick,” in
your camcorder. See page 128 fo r deta il s.
Memory Stick Duo adaptor (1)
If you attach a Memory Stick Duo adaptor to a
“Memory Stick Duo,” you can use a “Memory Sti ck
Duo” with an y o f the devices compatible with a
standard “Memory Stick.”
AC Adaptor (1)
A/V connecting cable (1)
Getting started
USB cable (1)
Rechargeable battery pack NP-FF5 1 (1)
The silver-colored model of battery pack NP-FF51 is
sold only with the camcorder.
Battery terminal cover (1)
Attached to the camcorder.
CD-ROM “SPVD-012 USB Driver” (1)
Cleaning cloth (1)
Camera Operations Guide (This manual)
(1)
Computer Applications Guide (1)
Power cord (1)
Handycam Station (1)
Getting started
15
Page 16
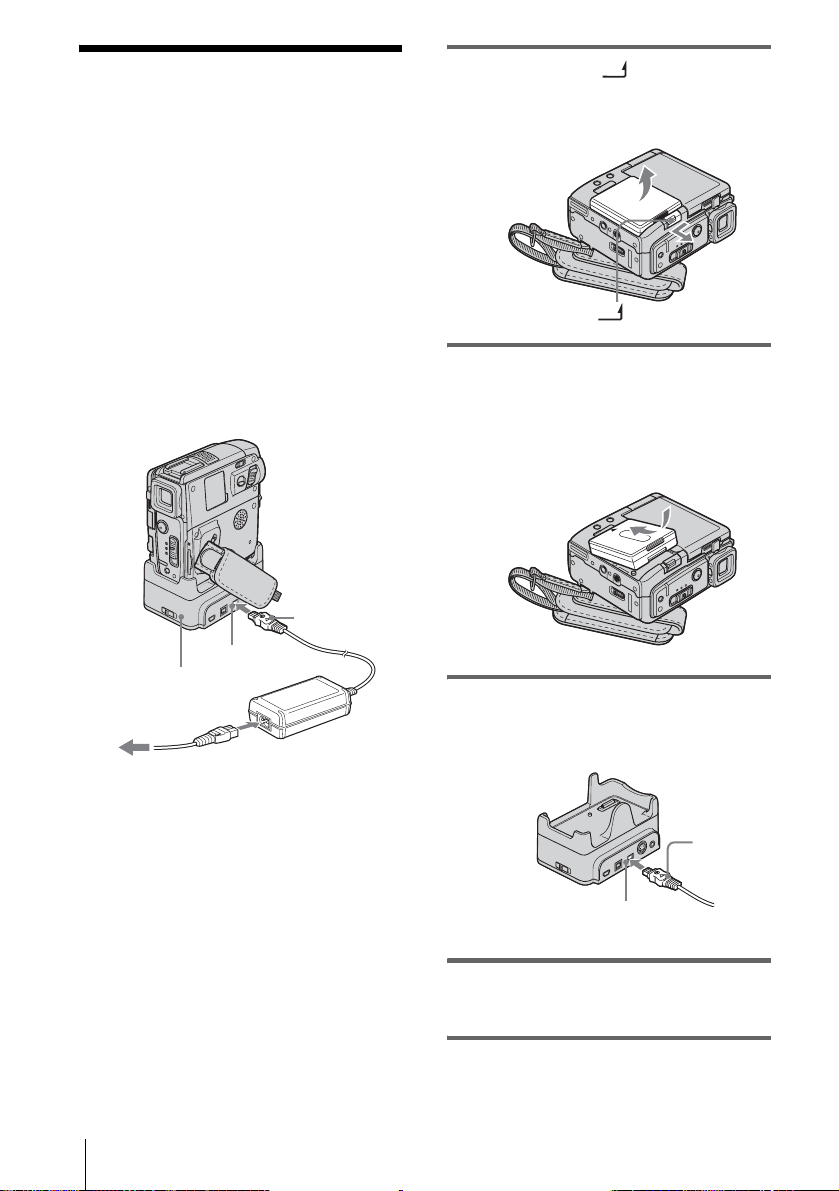
Step 2: Charging the battery pack
You can charge the battery by attaching the
“InfoLITHIUM” battery pack (F series) to
your camcord er .
b Notes
• You cannot use batteries other tha n the
“InfoLITHIUM” battery pack (F series) (p. 131).
• Do not short-circuit the DC plug of the AC Adaptor
or battery terminals with any metallic objects. This
may cause a malfunction.
• Use a nearby wall outlet when using the AC
Adaptor. Disconnect the AC Adaptor from the wall
outlet immediatel y if a ny ma lfunction occurs.
DC plug
1 Slide the BATT (battery release)
lever and remove the battery terminal
cover.
BATT (battery release) lever
2 Attach the battery pack with its
terminal side facing your camcorder as
shown in the following illustration and
press down the battery pack until it
clicks.
To the wall outlet
Getting started
16
DC IN jack
Handycam S tation
Power cord
AC Adaptor
3 With the v mark on the DC plug facing
up, connect the AC Adaptor to the DC
IN jack on the Handycam Station.
v mark
DC IN jack
4 Connect the power cord to the AC
Adaptor.
5 Connect the power cord to the wall
outlet.
Page 17
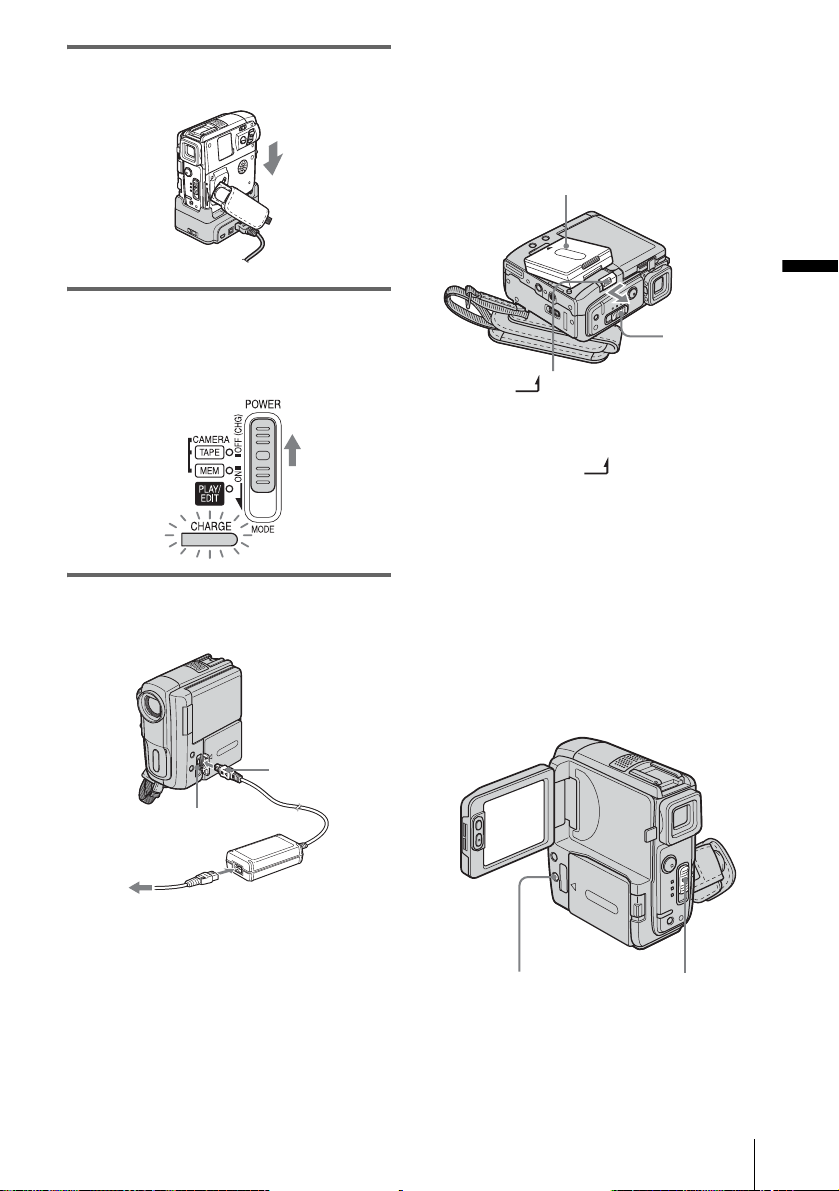
6 Insert your camcorder into the
Handycam Station.
7 Slide the POWER switch up to OFF
(CHG) .
The CHARGE lamp lights up and charging
starts.
To charge the battery pack using only
the AC Adaptor
After charging the battery
The CHARGE lamp turns off when the battery
is fully charged. D i sconnect the AC Adap tor
from the DC IN jack.
To remove the battery pack
Battery pack
POWER
switch
BATT (battery release) lever
1
Set the POWER switch to OFF (CHG) .
2 Slide the BATT (battery release)
lever in the direct i o n of the arrow as
shown in the illustration and remove th e
battery pack.
b Note
• Always attach th e terminal cover to prot ec t the
battery terminal. If you do not use the battery pack
for a long time, use up the battery pack completely
before storing it. See page 131 about storage of the
battery pack.
Getting started
DC plug
DC IN jack
Power cord
To the wall outlet
You can charge the battery pack on a trip, even
if you have not brought t he H andycam Station
along. With the
up, connect the AC Adaptor to the DC IN jack
on your camcorder as shown in the illu stration.
AC Adaptor
v mark on the DC plug facing
To check the remaining battery – Battery
Info
DISPLAY/BATT INFO
You can check the battery’s current charge level
and its current remaining recording time both
during charging or when the power is turned off.
POWER switch
,continued
Getting started
17
Page 18
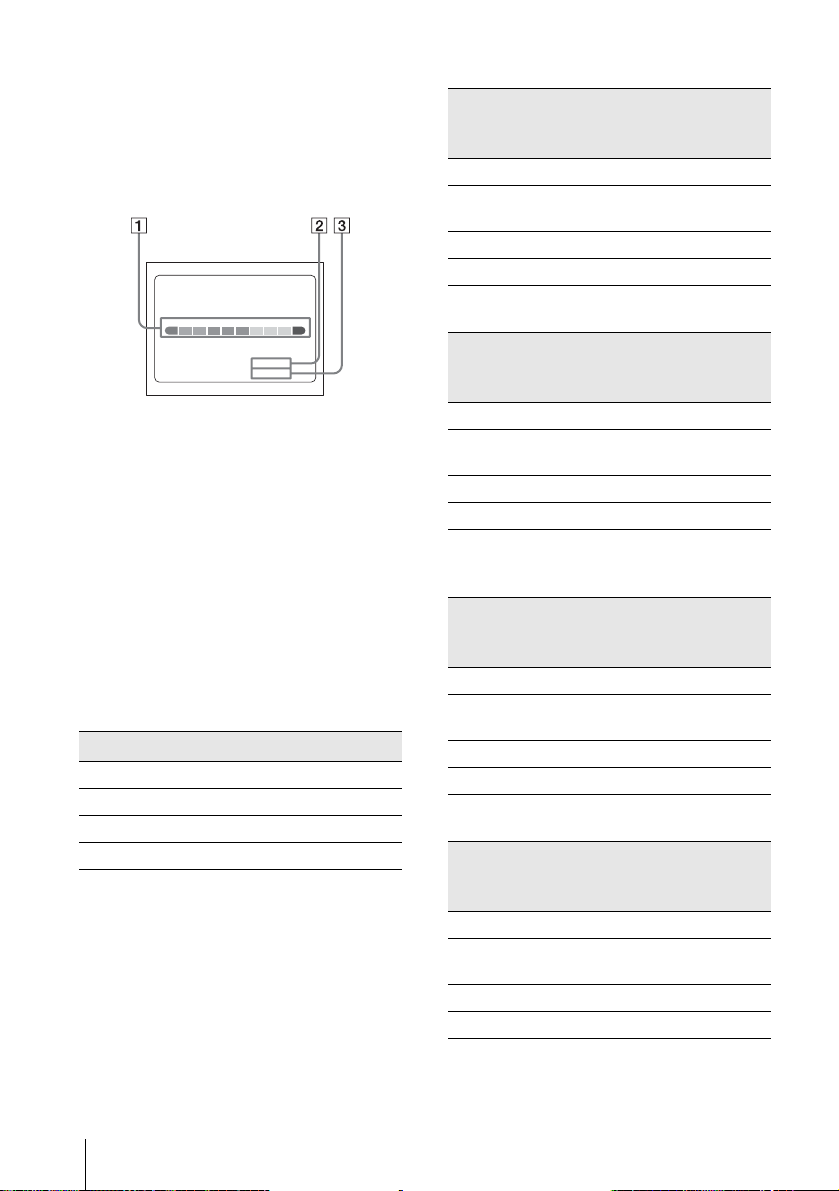
1 Set the POWER switch to OFF (CHG).
2 Open the LCD panel.
3 Press DISPLAY/BATT INFO.
The battery information appears for about 7
seconds.
Keep the button pressed to view it for about
20 seconds.
BATTERY INFO
BATTERY CHARGE LEVEL
REC TIME AVAILABLE
LCD SCREEN
VIEWFINDER::
50%0% 100%
90 min
99 min
A Battery charge level: Displays
approximat e remaining amount of
power left in the batt ery pack.
B Approximate possible re cording time
using the LCD panel.
C Approximate possible re cording time
using the viewfinder.
Charging t ime
Approximate number of minutes require d when
you fully charge a fully discharged battery pack
at 25°C (77°F). (10 – 30°C (50 – 86°F)
recommended.)
Battery pack
NP-FF50 120
NP-FF51 (supplied) 130
NP-FF70 150
NP-FF71 170
Recording time when recordi ng with the
LCD screen on
Approximate nu m ber of minutes available
when you use a fully charged battery pack at
25°C (77°F).
With LCD BACKLIGHT set to ON
For DCR-PC10 9:
Battery pack Continuous
recording
time
NP-FF50 85 45
NP-FF51
(supplied)
NP-FF70 185 100
NP-FF71 205 110
100 55
Typical*
recording
time
For DCR-PC10 8:
Battery pack Continuous
recording
time
NP-FF50 110 60
NP-FF51
(supplied)
NP-FF70 225 120
NP-FF71 250 135
125 65
Typical*
recording
time
With LCD BACKLIGHT set to OFF
For DCR-PC10 9:
Battery pack Continuous
recording
time
NP-FF50 95 50
NP-FF51
(supplied)
NP-FF70 205 110
NP-FF71 225 125
110 60
Typical*
recording
time
For DCR-PC10 8:
Battery pack Continuous
recording
time
NP-FF50 125 65
NP-FF51
(supplied)
NP-FF70 260 140
NP-FF71 285 155
140 75
Typical*
recording
time
Getting started
18
Page 19

Recording time when recording with the
viewfinder
Approximate nu m ber of minutes availabl e
when you use a full y charged battery pack at
25°C (77°F).
For DCR-PC109:
Battery pack Continuous
recording
time
NP-FF50 95 50
NP-FF51
(supplied)
NP-FF70 205 110
NP-FF71 225 125
110 60
For DCR-PC108:
Battery pack Continuous
NP-FF50 125 65
NP-FF51
(supplied)
NP-FF70 260 140
NP-FF71 285 155
* Approximate num be r of minutes when recording
while you repeatedly rec or d, sta r t/stop, slide the
POWER switch to change the power mode, an d
zoom. The actual battery li fe ma y be shor te r .
recording
time
140 75
Typical*
recording
time
Typical*
recording
time
For DCR-PC108:
Battery pack LCD panel
opened*
NP-FF50 125 145
NP-FF51
(supplied)
NP-FF70 260 295
NP-FF71 285 325
* With LCD BACKLIGHT set to ON.
b Notes
• The power will not be supplied from the battery pack
even when the power cord is disconnected from the
wall outlet in the following cases:
– When the AC adaptor is connected to the DC IN
jack of your camcorder
– When the AC adaptor is connected to the DC IN
jack of the Handycam Station and your camcorder
is attached to the Han d ycam Station
• The recording and playback time will be shor te r
when you use your camcorder in low temperatur e .
• The CHARGE lamp flashes during charging, or the
battery information will not be correctly displayed in
following conditions.
– The battery pack is not attached correctly.
– The battery pack is damaged.
– The battery pack is fully disc ha r ged . (For Battery
information only.)
• With a large capacity battery pack (NP-FF70/FF71)
installed, your camcorder will be les s bala nced support it properly when placing your camcorder on
a table etc., in this case.
140 160
LCD panel
closed
Using an outside power source
Getting started
Playing time
Approximate nu m ber of minutes availabl e
when you use a full y charged battery pack at
25°C (77°F).
For DCR-PC109:
Battery pack LCD panel
NP-FF50 110 125
NP-FF51
(supplied)
NP-FF70 225 260
NP-FF71 250 285
opened*
125 140
LCD panel
closed
You can use the AC Adaptor as the power
source when you do not wan t the battery to
run out. While you ar e using the AC Adaptor,
the battery pack will not lose it s char ge e ven
when it is attached to your camcorder.
PRECAUTION
Even if your camcorder is turned off , AC power
(house current) is still supplied to it while
connected to the wall outlet via the AC Adaptor.
Connect your camcorder as s hown in
“Charging the battery pack” (p. 16).
Getting started
19
Page 20
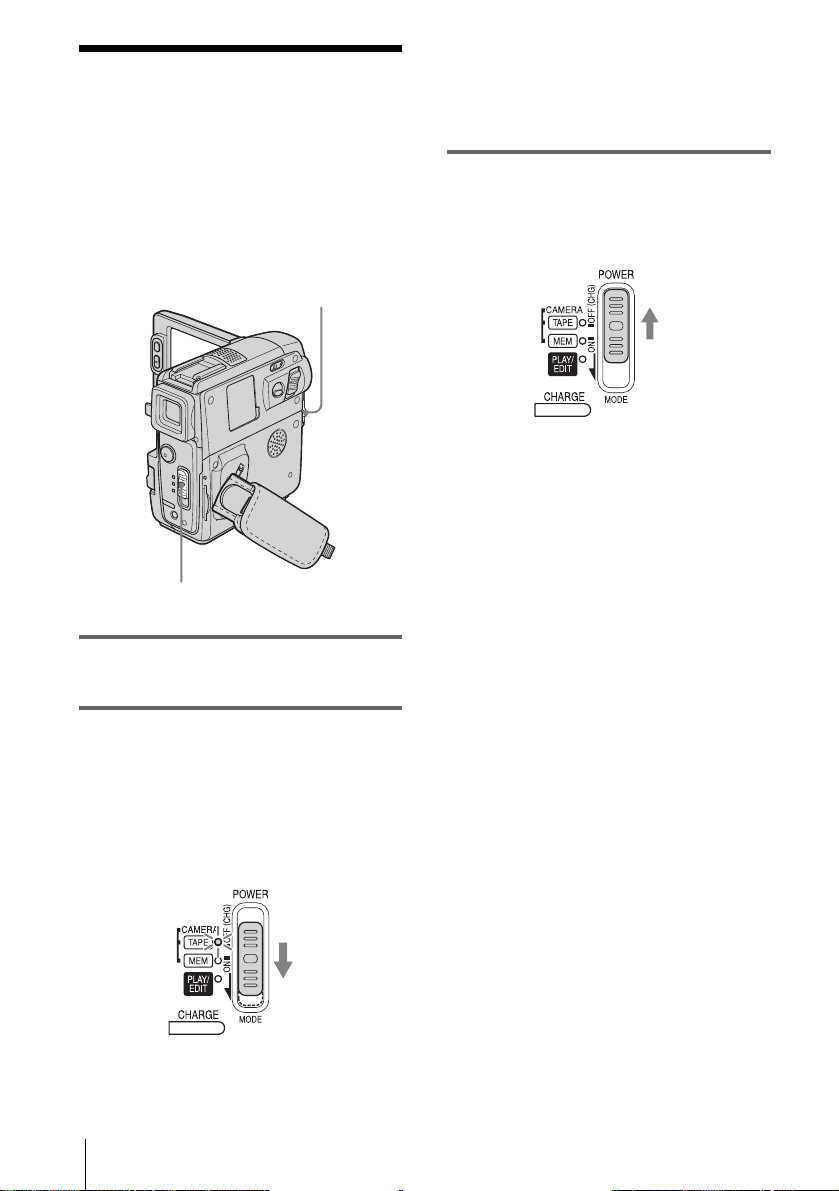
Step 3: Turning the power on
You need to slide the POWER switch
repeatedly to select the desired power mode
to record or play.
When using this camcorder for the first time,
the [CLOCK SET] screen appears (p. 22).
LENS COVER switch
POWER switch
• CAMERA-TAPE mode: To record on a tape.
• CAMERA-MEM mode: To record on a
“Memory Stick Du o.”
• PLAY/EDIT mode: To play or edit pictures on
a tape or “Memory St i ck Duo.”
To turn off the power
Slide the POWER switch up to OFF (CHG).
Set the LENS COVER switch to CLOSE.
1 Set the LENS COVER switch to
OPEN.
2 While pressing the gr een button, slide
the POWER switch down.
The power turns on.
To enter the recording or playing mode,
slide the switch repeatedly until the
respective lamp for the desired power mode
lights up.
Getting started
20
Page 21
Step 4: Adjusting the LCD panel and viewfinder
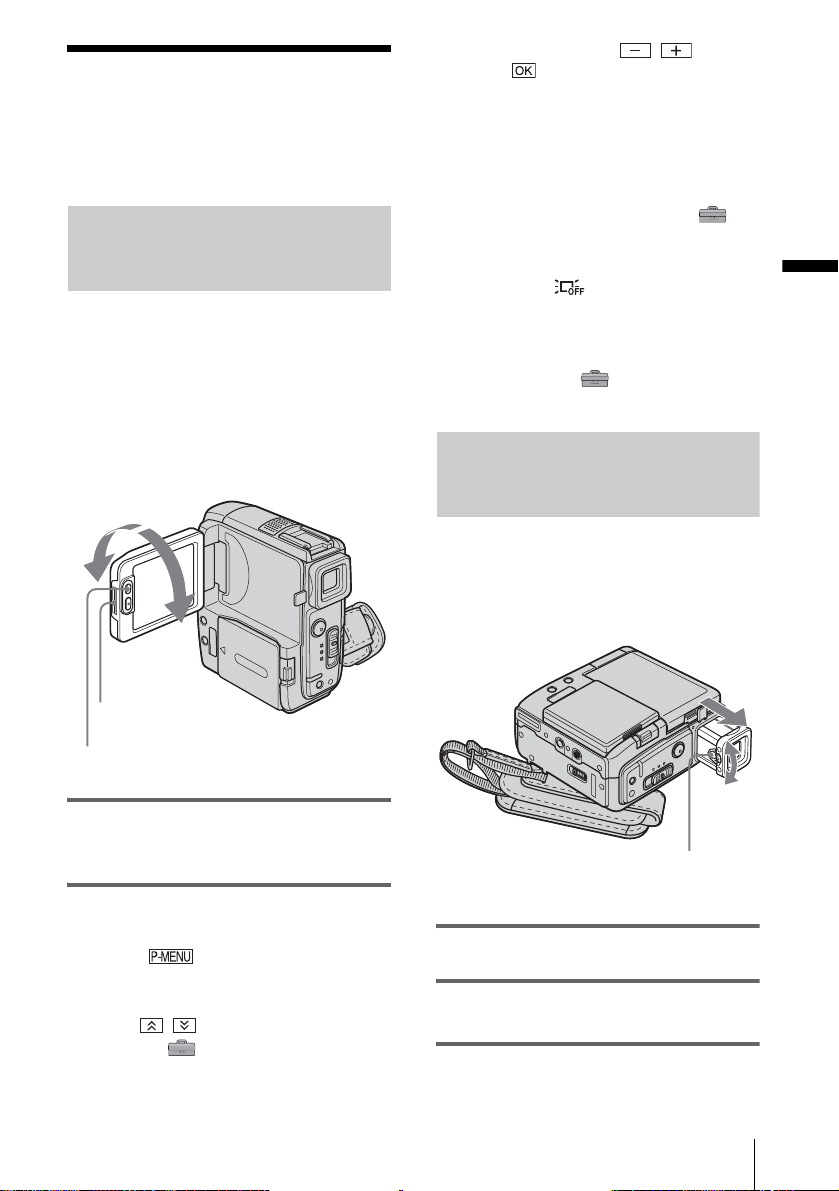
Adjusting the LCD panel
You can adjust the angle and brightness of
the LCD panel to meet various recording
situations.
Even when there are obstructions bet ween you
and the subject , you can check t he subject on the
LCD screen during recording by adjusting the
angle of the LCD pa nel.
Maximum
180 degrees
3 Adjust the item with / , then
touch .
z Tips
• If you rotate the LCD panel 180 degrees to the lens
side, you can close the LCD panel with the LCD
screen facing out.
• If you are using the battery pack for power source,
you can adjust the brightness by selecting [LCD BL
LEVEL] from the [LCD/VF SET] on the
(STANDARD SET) menu (p. 85).
• When you use your camcorder in bright conditions,
press LCD BACKLIGHT to switch off the LCD
screen backlight ( appears on the screen .). Thi s
setting saves battery power.
• Even if you adjust the LCD screen backlight, the
recorded picture will not be affected.
• You can turn off the operation confirmation beep by
setting [BEEP] in the (STANDARD SET)
menu to [OFF] (p. 87).
Adjusting the viewfinder
You can view images using the viewfinder
when you close the LCD panel. Use the
viewfinder wh en the batter y is running ou t, or
when the screen is hard to see.
Getting started
Maximum
90 degrees
Open the LCD panel.
LCD BACKLIGHT
Open the LCD panel 90 degrees to the
camcorder, then rotate it to the desired
position.
To adjust the brightness of the LCD screen
1
Touch .
2 Touch [LCD BRIGHT].
If the item is not displayed on the screen,
touch / . If you cann ot fin d it , to uch
[MENU], (STANDARD SET) menu,
then touch [LCD/VF SET] (p. 85).
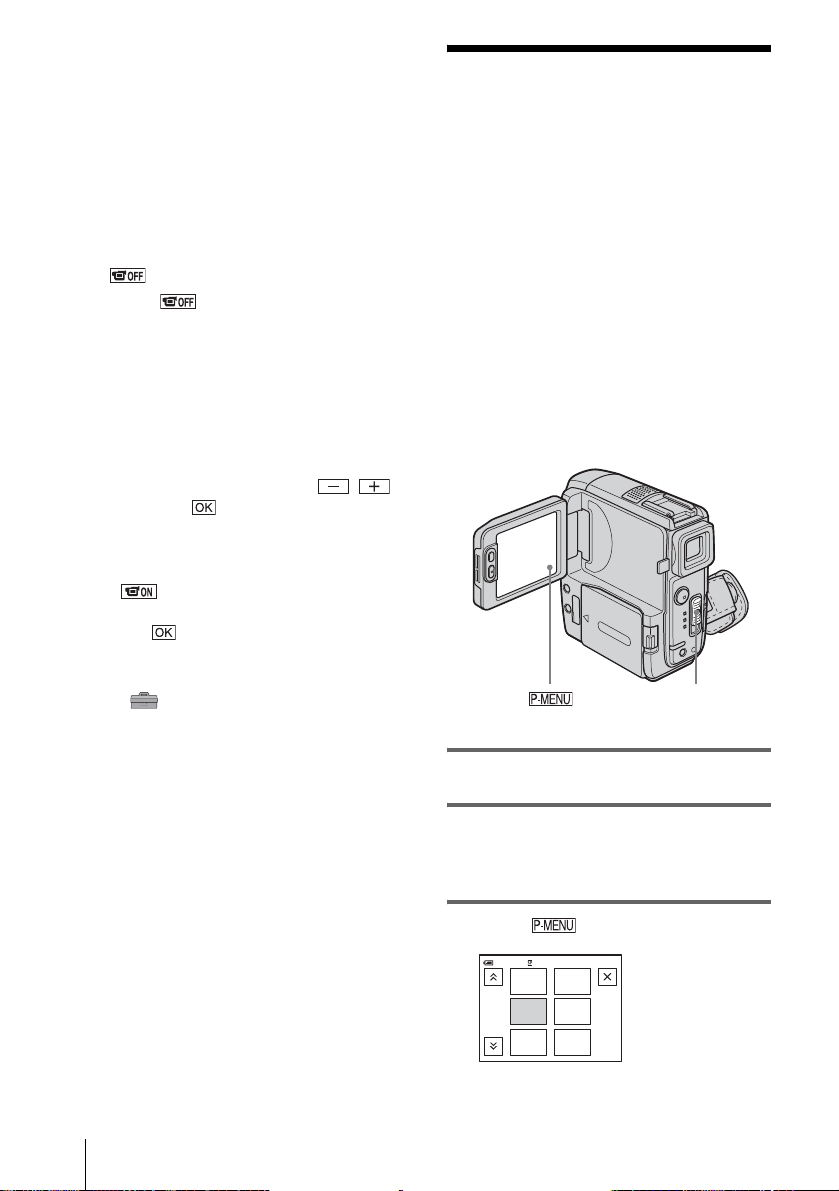
Viewfinder lens
adjustment lever
1 Extend the viewfinder until it clicks.
2 Adjust the viewfinder lens adjustment
lever until the picture is clear.
,continued
Getting started
21
Page 22
To use the viewfinder during operation
When you are recordin g on a tape or a “Mem ory
Stick Duo,” yo u can adj ust th e expos ure (p.38)
and fader (p.43) while checking the image on
the viewfinder. Have the LCD panel rotated 180
degrees and closed with the screen facing out.
1 Set the power mo de to CAME RA-TAPE
or CAMERA-MEM (p. 20).
2 Extend the viewfind er, and close the
LCD panel with the screen facing out.
appears on the sc reen.
3 Touch .
[Set LCD off? ] appears on the screen.
4 Touch [YES].
The LCD screen is turned off.
5 Touch the LCD screen whil e checking
the display in th e vi ewfinder.
[EXPOSURE], etc. are displayed.
6 Touch the button you want to set.
• [EXPOSURE]: Adjust with /
and touch .
• [FADER]: Touch it re peatedly to select a
desired effect (only in the CAMERATAPE mode).
• : The LCD screen lights up.
To hide the buttons on the LCD screen,
touch .
z Tip
• To adjust the brightness of the viewfinder backlight,
select (STANDARD SET) menu, [LCD/VF
SET], then [VF B.LIGHT] (when you are using the
battery pack, p. 85).
Step 5: Setting the date and time
Set the date and time when using this
camcorder for the first time. If you do not set
the date and time, the [CLOCK SET] screen
appears eve ry t im e yo u tur n on your
camcorder.
b Note
• If you do not use your camcorder for about 3
months, the built-in rechargeable button-t ype
battery gets discharged and the date and time
settings may be cleared from the memory. In tha t
case, charge the rechargeable button-type battery
(p. 136) and then set the date and time again.
POWER switch
Getting started
22
1 Turn on your camcorder (p. 20).
2 Open the LCD panel.
Proceed to step 7 when you set the clock for
the first time.
3 Touch .
EXPO–
SURE
FOCUS
SPOT
METER
–:––:––
1/3
60min
MENU
FADER
SPOT
FOCUS
Page 23
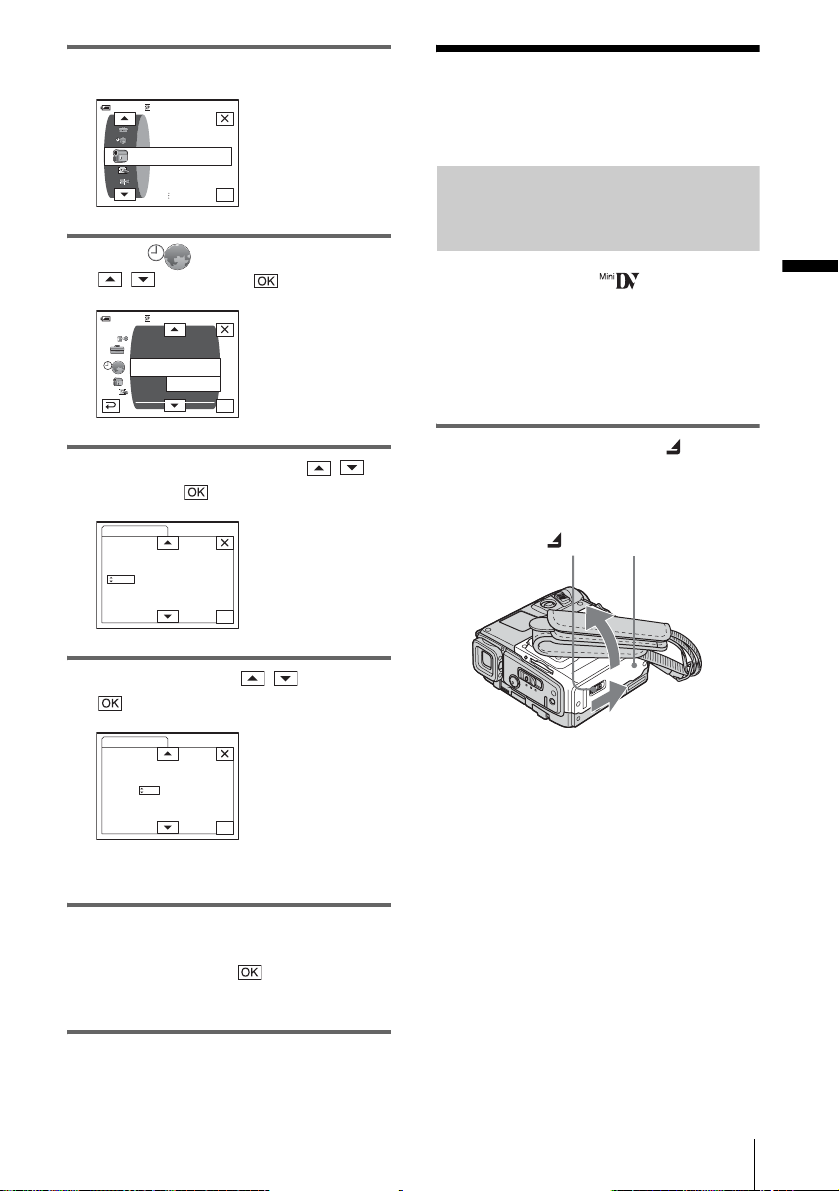
4 Touch [ME NU].
60min
–:––:––
CAMERA SET
PROGRAM AE
SPOT METER
EXPOSURE
Step 6: Inserting the recording media
OK
Inserting a cassette tape
5 Select (TIME/LANGU.) with
/ , then touch .
DISPLAY
MENU ROT ATE
LANGUAGE
PROGRAM AE
–:––:––
––:––:––
OK
60min
A. SHUT OFF
CLOCK SET
WORLD
6 Select [CLOCK SET] with / ,
then touch .
CLOCK SET
DATE
Y JAN M 1D 0: 00AM
2004
–:––:––
OK
7 Set [Y] (year) with / , then touch
.
CLOCK SET
DATE
Y JAN M 1D 0: 00AM
2004
–:––:––
OK
You can use mini DV cassettes only.
For details on these cassettes (such as writeprotection), see page 127.
b Note
• Do not force the cassette into the compartment. This
may cause a malfunction of your cam co rd er.
1 Slide the OPEN/ZEJECT lever in
the direction of the arrow and open the
lid.
OPEN/ZEJECT lever
The cassette compartment automatically
comes out and opens up.
Lid
Getting started
You can set any yea r up to the year 2079.
8 Set [M] (month), [D] (day), hour and
minute in the same way as was done in
step 7, then touch .
For midnight, set it to 12:00AM.
For midday, set it to 12:00PM.
,continued
Getting started
23
Page 24
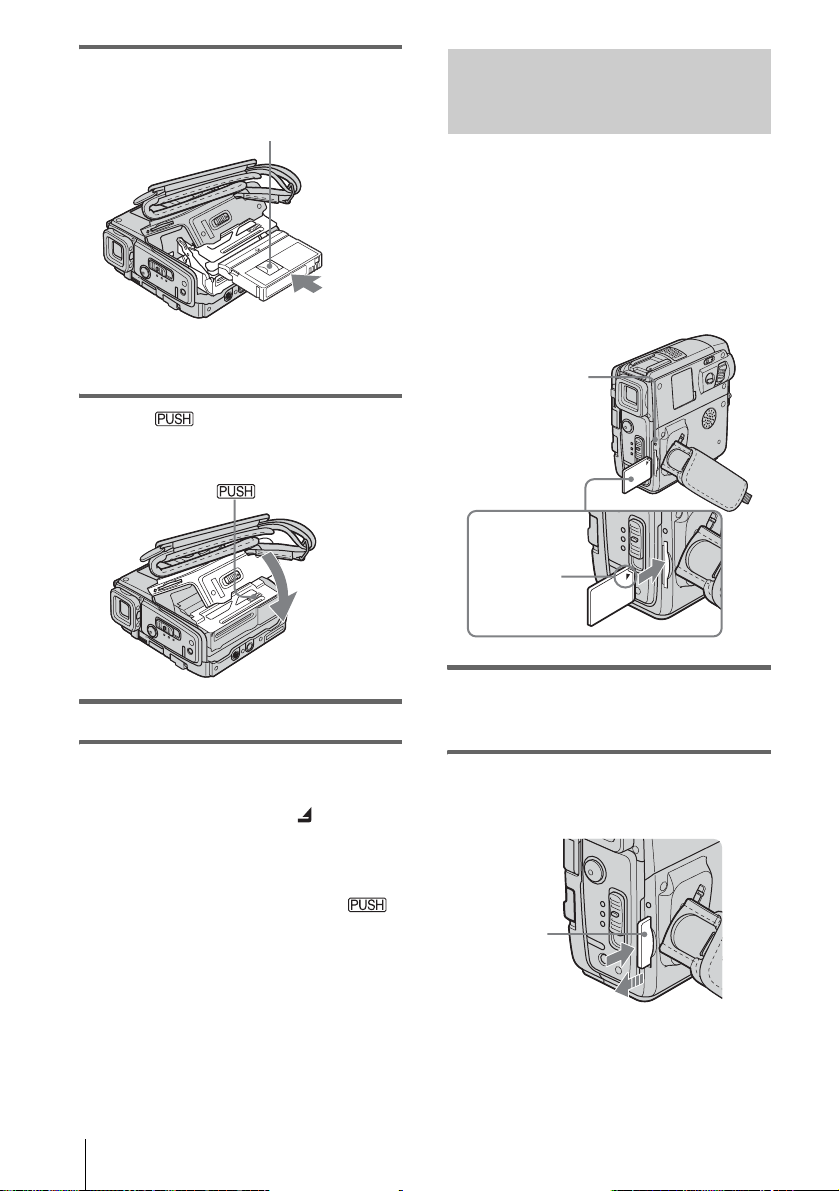
2 Insert a cassette with its window-side
facing up.
Window-side
Push the center of the
back of the cassette
lightly.
3 Press .
The cassette compartment automatically
slides back in.
Inserting a “Memory Stick Duo”
For details on the “Memory Stick Duo” (such
as write-protection), see page 128.
b Note
• You can use only a “Memory Stick Duo,” which is
about half the size of a standard “Memory Stick,” in
your camcorder (p. 128). Do not try to force any
other type of “Memory Stick” in to the “M e mory
Stick Duo” s lot.
Access lamp
B mark
4 Close the lid.
To eject the cassette
Slide the OPEN/ZEJECT lever in the
1
direction of the arrow and open the lid.
The cassette compartment automatically
comes out.
2 Take out the cassette, then press .
The cassette compartment automatically
slides back in.
3 Close the lid.
Getting started
24
Insert the “Memory Stick Duo” with the B
mark at the upper right corner until it
clicks.
To eject a “Memory Stick Duo”
Lightly push the “Mem ory Stick Duo” in once.
Lightly push in
once.
Page 25
b Notes
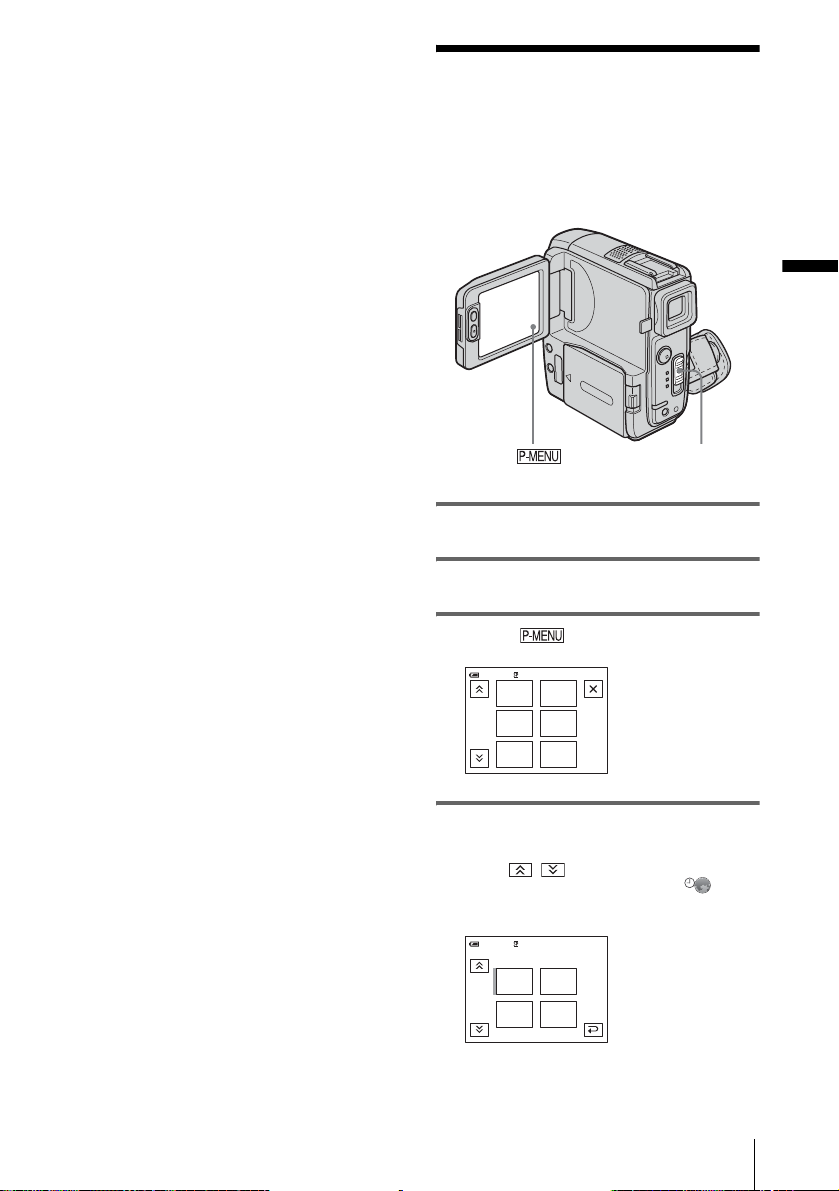
• If you force the “Memory Stic k Duo” into the
“Memory Stick Duo” slot in the wrong direction, the
“Memory Stick Duo” slot may be dam ag ed .
• Do not insert anything other than a “Memory Stick
Duo” into the “Memory Stick Duo” slot. Doing so
may cause a malfunction of your camc or de r.
• When the access lamp is lit or flashing, your
camcorder is reading/writing data from/ to the
“Memory Stick Duo.” Do not shake or knock your
camcorder, turn the power off, ejec t th e “Me mor y
Stick Duo,” or remove the battery pack. Otherwise,
image data may be damaged.
Step 7: Setting the screen language
You can select the language to be used on the
LCD screen.
Getting started
POWER switch
1 Turn on your camcorder.
2 Open the LCD panel.
3 Touch .
60 min STBY
MENU
1/3
FADER
SPOT
FOCUS
EXPO–
SURE
FOCUS
SPOT
METER
0:00:00
4 Touch [LANGUAGE].
If the item is not displayed on the screen,
touch / . If you cannot find it, touch
[MENU], and select it from the
(TIME/LANGU.) menu (p. 89).
ENG
[
SIMP
ESPA
ÑOL
0:00:00
]
60 min STBY
LANGUAGE: ENGLISH
ENG
LISH
1/2
FRAN
ÇAIS
,continued
Getting started
25
Page 26

5 Select the desired language with /
, then touch .
z Tip
• Your camcorder offers [ENG [SIMP]] (simplified
English) for when you cannot find your nativ e
tongue among the options.
Getting started
26
Page 27
Recording
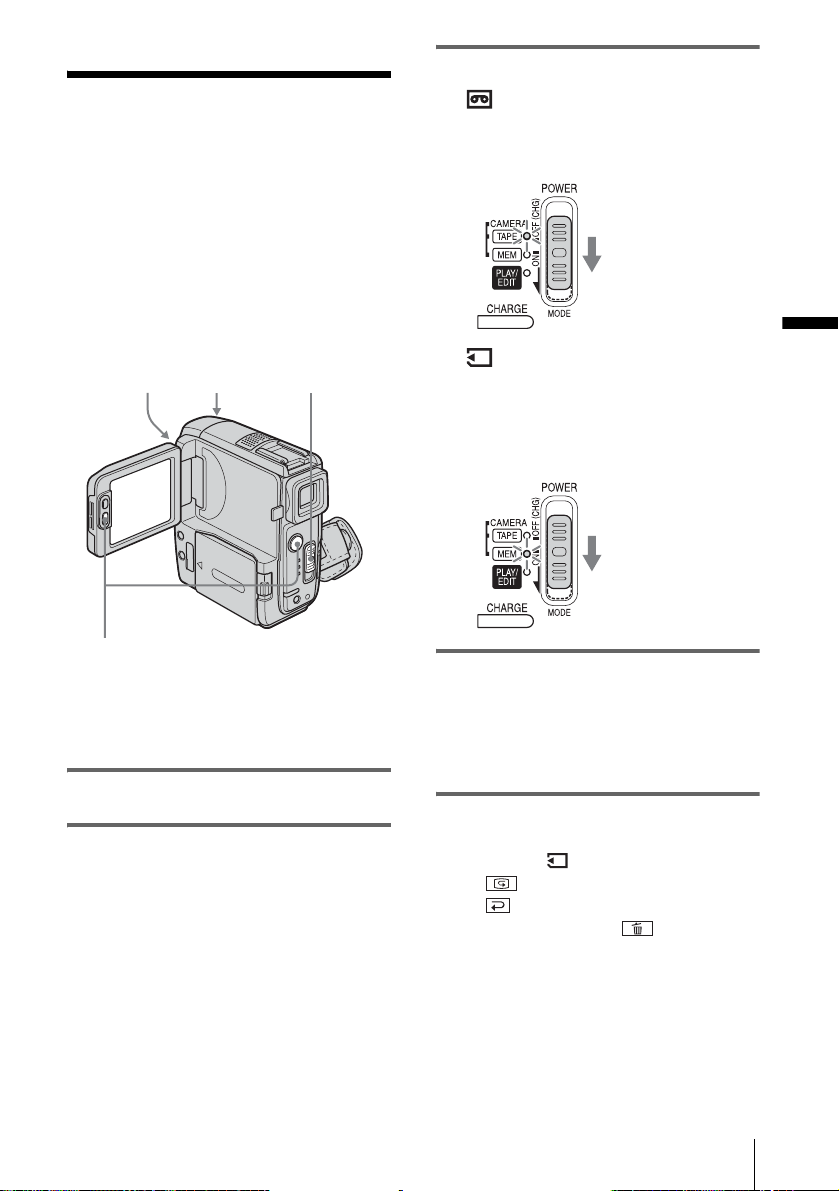
Recording movies
You can record movies on a tape or a
“Memory Stick Duo.”
Before recording, follow steps 1 to 7 in
“Getting star ted” (p. 15 to p. 25).
When you are recordi ng on a tape, movies
will be recorded along with stereo sound.
When you are recording on a “Memory Stick
Duo,” the movie will be recorded with
monaural sound.
Camera recording
lamp
LENS COVER
switch
POWER switch
3 Select the recording mode.
To record on a tape
Slide the POWER switch until the
CAMERA-TAPE lamp lights up, and your
camcorder is set to the standby mode.
Slide the POWER
switch while
pressing the green
button.
To record on a “Memory St i ck
Duo” – MPEG MOVIE EX
Slide the POWER switch repeatedly until
the CAMERA-MEM lamp lights up, and
the currently selected record in g fo lder
appears on the sc reen.
Slide the POWER
switch while
pressing the green
button.
Recording
REC START/STOP
z Tip
• Performing Easy Handycam operation, even fir st time
users can record easily. For details, see page 35.
1 Set the LENS COVER switch to OPEN .
2 Open the LC D panel.
4 Press REC START/STOP.
Recording star ts. [REC] appears on the
LCD screen and the Camera recording l amp
lights up.
Press REC START/STOP aga in to st op
recording.
To check the most recently recorded
MPEG movie – Review
Touch . Playback starts automatically.
Touch again to return to standby.
To delete the movie, touch after playback
is finished, then [YES].
To cancel deleting, touch [NO].
To turn the power off
1
Slide the POWER switch up to the OFF
(CHG) position.
2 Set the LENS COVER switch to CLOSE .
,continued
Recording
27
Page 28
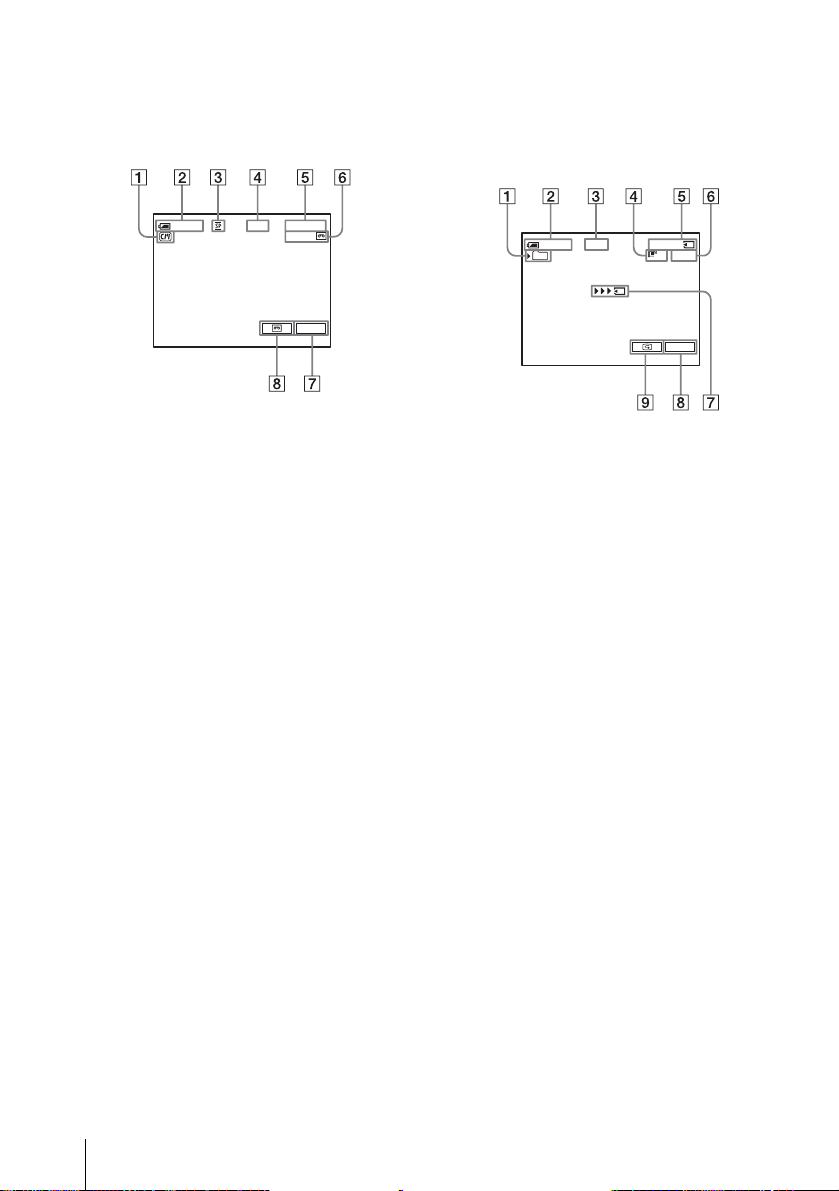
Indicators displayed during recording
on a tape
The indicators will not be recorded on the tape.
Date/time and the camera settings data (p. 58)
will not be displayed during recording.
Indicators displayed during recording
on a “Memory Stick Duo”
The indicators will not be recorded on the
“Memory Stick Duo. ”
Date/time (p. 58) will not be displayed during
recording.
60min
0:00:00REC
60min
P-MENU
A Indica tors for Cas sette Me mory cass ettes
B Remaining battery
The indicated time may not be correct
depending on the environment of use.
When you opene d or closed t he LCD panel,
it takes about 1 minute to display th e correct
remaining battery time.
C Recording mode (SP or LP)
D Recording status ([STBY] (standby) or
[REC] (recor d i n g))
E Time code or tape counter (hou r:
minute: second)
F Recording capacity of the tape (p.87)
G Personal Menu button (p.63)
H END SEARCH/EDIT SEARCH/Rec
review display switc h but t on (p. 48)
60min REC
101
0:00:00
320
P-MENU
2min
A Recording folder
B Remaining battery
The indicated time may not be correct
depending on the environment of use.
When you opened or closed the LCD panel,
it takes about 1 minute to display the correct
remaining battery time.
C Recording status ([STBY] (standby) or
[REC] (recording))
D Movie size
E Recorded time (hour: minute: second)
F Recording capacity of the “Memory
Stick Duo”
G “Memory Stick Duo” recording start
indicator (appears for about 5 seco nds)
H Personal Menu button (p . 63)
I Review button (p. 27)
b Notes
• Before changing the battery p ack, slid e the POWER
switch up to OFF (CHG).
• In the default setting, when you do not operate the
camcorder for more than about 5 minutes, the power
will automatically turn off to prevent battery loss
([A.SHUT OFF], p. 88). To restart recording, slide
the POWER switch down to select CAMERA-TAPE
or CAMERA-MEM, and then press REC START/
STOP.
• While recording movies on a “Memory Stick Duo,”
the only menu items availabl e wil l be those wit h
short cuts on the Personal Menu. In orde r to use
other menu items, add them to the Personal Menu.
28
Recording
Page 29
• When you are recording on a “Memory Stick Duo”
with an external flash (optional) connected to the
accessory shoe, turn off the power of the external
flash to prevent charging noise being recorded.
z Tips
• If you do not use your camcorder for a lo ng time,
remove the cassette and store it.
• You can also use REC START/STOP of the LCD
panel to record moving pictures. It is use f ul whe n
you record from a low-angle or record yourself in the
mirror mode.
• To press REC START/STOP on LCD frame,
support the LCD panel with your hand.
• To ensure smooth tran sition on a tape from the last
recorded scene to the next, note the following.
– Do not remove the cassette . (The picture will be
recorded continuously without a break even when
you turn the power off).
– Do not record pictures in SP mode and LP mode on
the same tape.
– Avoid stopping then recording a movie in the LP
mode.
• See “To record for a longer time on a “Memory Stick
Duo”” (p. 29) for the approximate length of time it is
possible to record on a “Memory Stic k Duo” of
different capacities.
• The recording time, date, and the camera settings
data (for tape only) are recorded automatically on
the recording media without being displayed on the
screen. You can view this information duri ng
playback by selecting [DATA CODE] in the menu
setting (p. 58).
Recording for a longer time
To record for a longer time on a tape
In the (STANDARD SET) menu, select
[ REC MODE], then [LP] (p. 84).
In the LP mode, you can record 1.5 times longer
than you can when recording in the SP m ode.
A tape recorded in the LP mode should be
played back only on this camcorder.
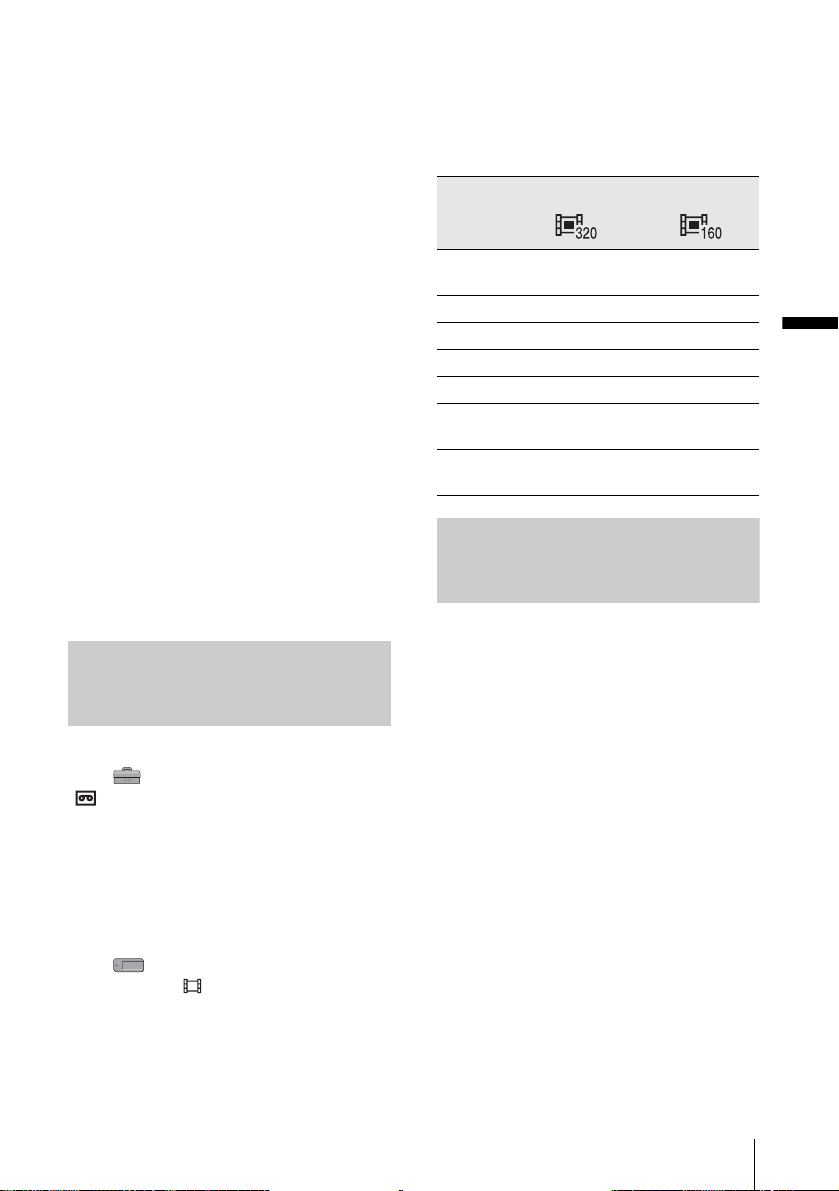
Refer to the following list for approximate length
of time you can record movi es o n a “Mem ory
Stick Duo” formatted on yo ur camcorder.
Image size and time
(hour: minute: second)
320 × 240 160 × 112
8MB
(supplied)
16MB 00:02:40 00:10:40
32MB 00:05:20 00:21:20
64MB 00:10:40 00:42:40
128MB 00:21:20 01:25:20
256MB
(MSX-M256)
512MB
(MSX-M512)
00:01:20 00:05:20
00:42:40 02:50:40
01:25:20 05:41:20
Using zoom
When the CAMERA-TAPE mode is
selected, you can choose zo om to
magnification levels greater than 10 times,
and from that point activ ate th e dig ita l zo om
([DIGITAL ZOOM], p. 68).
Occasional use of the zoom is effective, but
use it sparingly for best results.
Recording
To record for a longer time on a
“Memory Stick Duo”
In the (MEMORY SET) menu, select
[MOVIE SET], [ IMAGE SIZE], then [160 ×
112] (p. 72).
The length of time y ou can record on a
“Memory Stick Duo” varies depending on the
image size and the recording environment.
,continued
Recording
29
Page 30
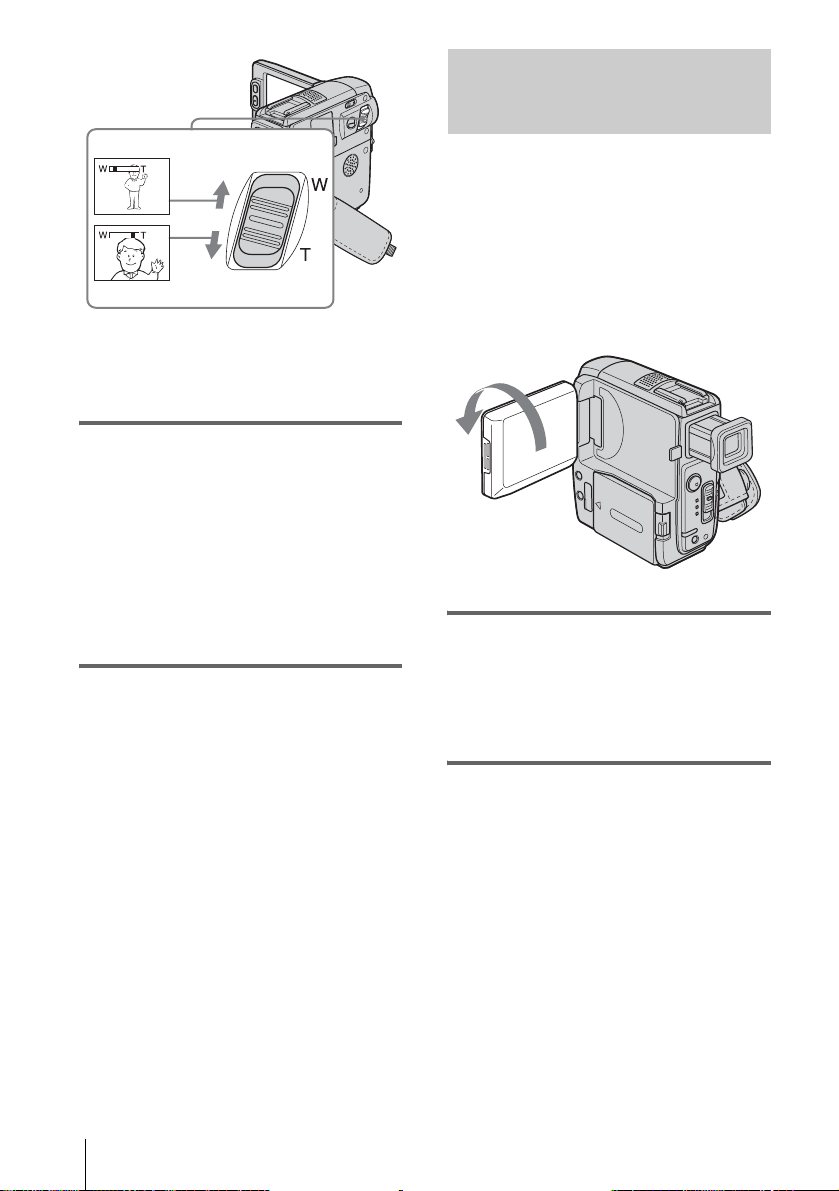
1 cm (approx . 1/2 inch)*
80 cm (approx. 2 5/8 feet)*
Recording in mirror mode
You can turn the LCD panel towards the
subject so that you and your subject can share
the image being recorded. You can also
utilize this function when recording yourself,
to keep the attention of small children
attracted to the camcorder while you record
them.
* The minimum distance required between your
camcorder and the subject to get a sharp focus in
that position of the lever.
Move the power zoom lever slightly for a
slower zoom. Move it further for a faster
zoom.
To record wider range of view
Move the power zoom lever toward s W.
The subject appears farther away (Wide
angle).
To record closer view
Move the power zoo m lever towards T.
The subject appear s closer (Telephoto) .
Extend the viewfinder.
Open the LCD panel 90 degrees to the
camcorder, then rotate it 180 degrees
towards the subject.
A mirror-image of the subject appears on the
LCD screen, but the picture will be normal
when recorded.
30
Recording
Page 31
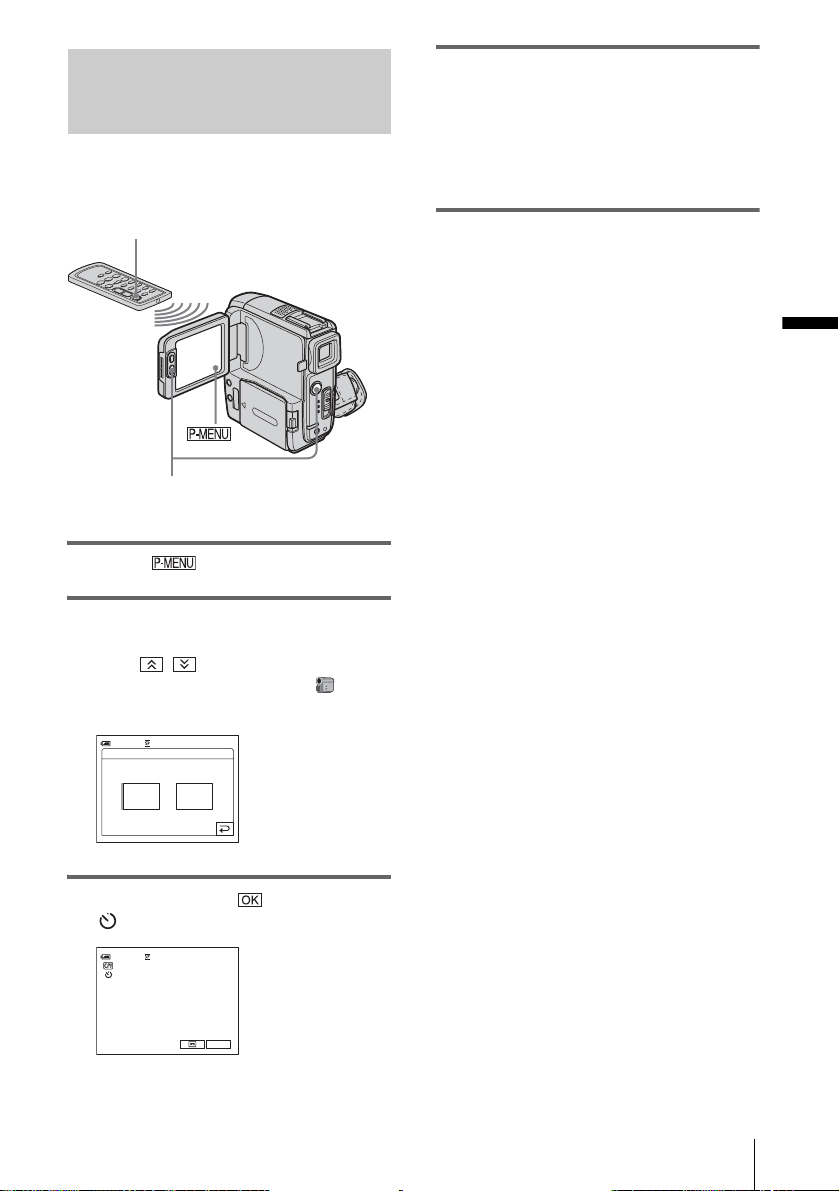
Using the self-timer
With the self-timer, you can start recording
after a delay of about 10 seconds.
REC START/STOP
4 Press REC START/STOP.
You will hear a beep sound counting down
for about 10 seconds (The count dow n
indication begins fr om 8).
The recording st ar ts.
To stop recording, pres s REC START/
STOP.
To cancel the count down
Touch [RESET] or press REC START/STOP.
REC START/STOP
1 Touch .
2 Touch [SELF-TIMER].
If the item is not displayed on the screen,
touch / . If you cann ot fin d it , to uch
[MENU], and select it from the
(CAMERA SET) menu.
SELF–TIMER: OFF
0:00:0060 min STBY
ONOFF
To cancel the self-timer
Follow steps 1 and 2, th en select [OFF] in step
3.
Recording
3 Touch [ON] , then .
appears.
60min
0:00:00STBY
P-MENU
Recording
31
Page 32
Recording still
images
– Memory photo recording
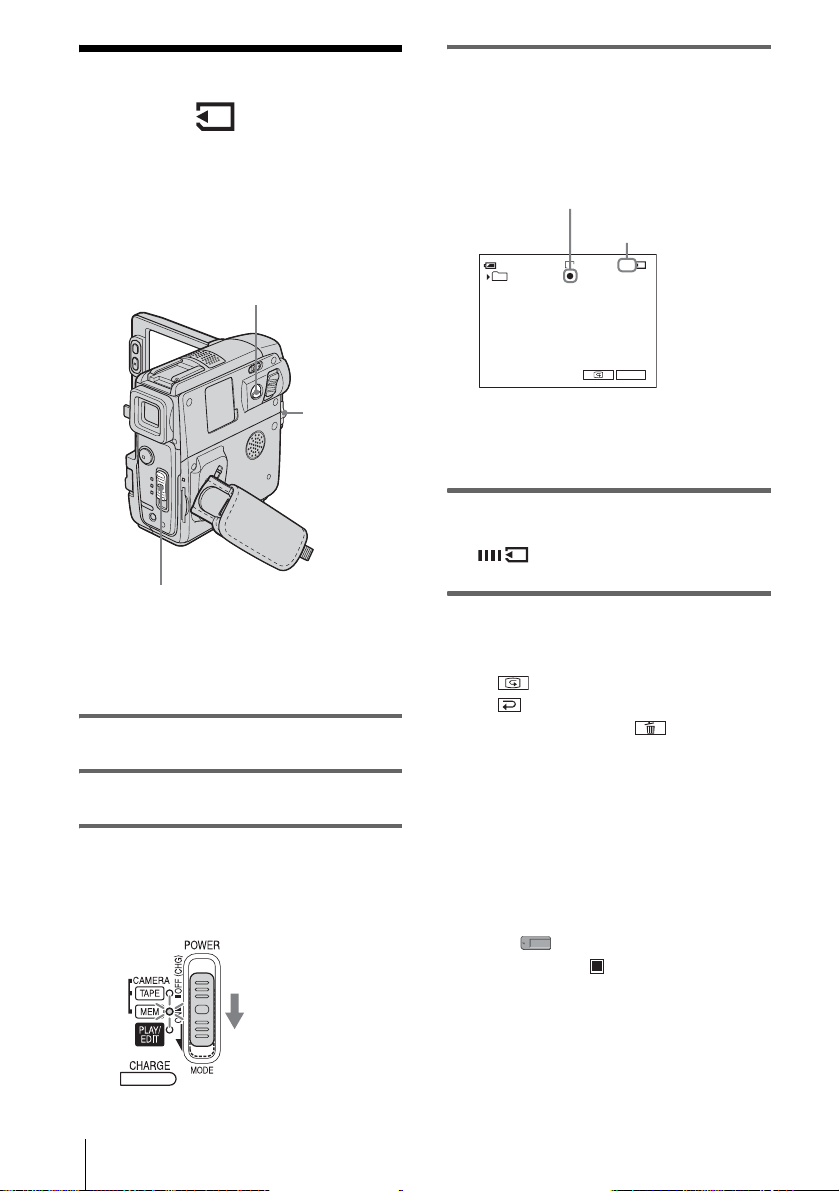
You can record still images on a “Memory
Stick Duo.” Before recording, follow steps 1
to 7 in “Getting started” (p. 15 to p. 25).
PHOTO
4 Press and hold PHOTO lightly.
You will hear a light be eping sound when
the focus and brigh t ness settings are
adjusted. Recording does not start at this
point.
The indicator
stops flashing.
The number of images
that can be recorded.*
60min
101
30
FINE
1152
P-MENU
LENS COVER
switch
POWER switch
z Tip
• Performing Easy Handycam operati on, even first time
users can record easily. For details, see page 35.
1 Set the LENS COVER switch to OPEN .
2 Open the LCD panel.
3 Slide the POWER switch repeatedly
until the CAMERA-MEM lamp lights
up.
The selected recording folder is displa yed.
Slide the POWER
switch while pressing
the green button.
*The number of images that can be recorded
varies depending on the image quality setting
and the recording environme nt.
5 Press PHOTO fully.
A shutter sound is heard. When bars of
disappear, the image is recorded on
the “Memory Sti c k Duo.”
To check the most recently recorded
image – Review
Touch .
Touch to return to standby.
To delete the image, touch , then [YES].
To cancel deleting, to uch [NO].
To turn the power off
Slide the POWER swi t ch up to the OFF
1
(CHG) position.
2 Set the LENS COVER switch to CLOSE.
To record still images continuously – B urst
For DCR-PC10 9:
Select th e (MEMORY SET) menu,
[STILL SET], then [ BURST] (p. 71).
You can record 3 to 13 images continuously in
a time interval of about 0.5 seconds.
32
Recording
Page 33
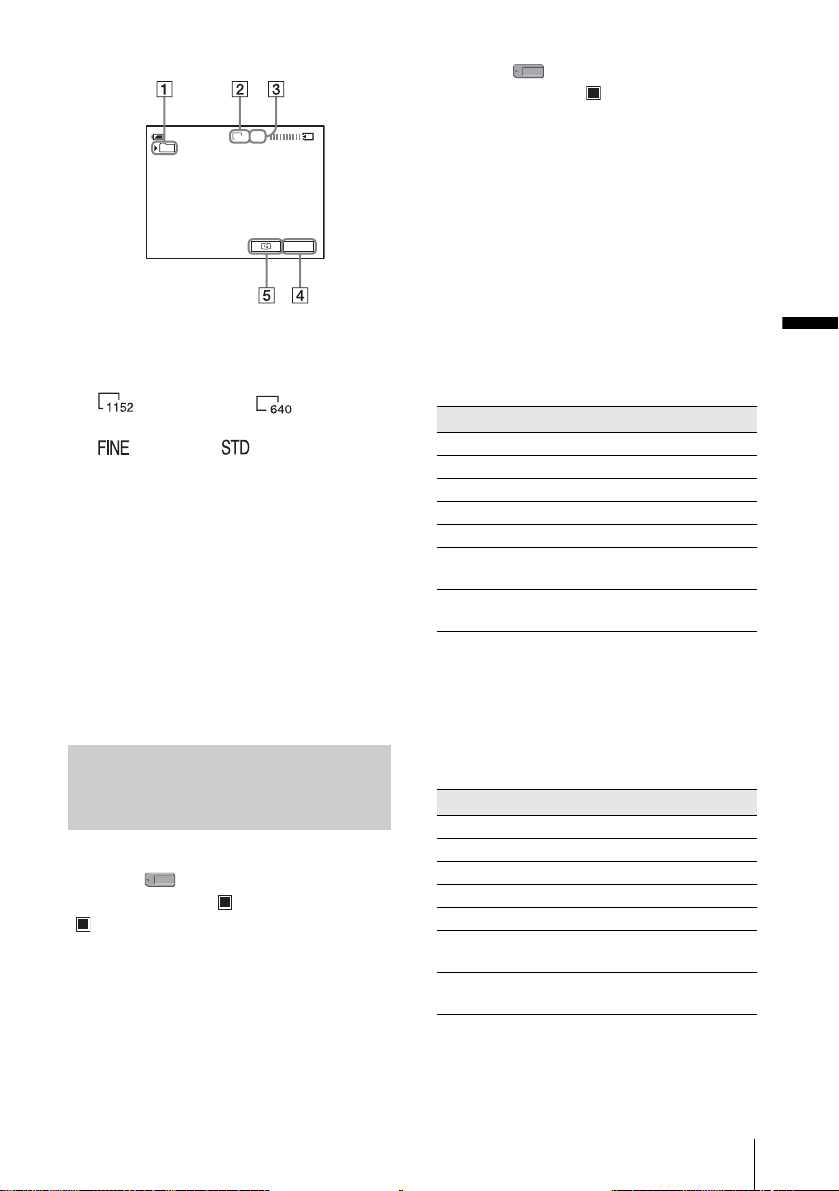
Indicators displayed during recording
60min
101
A Recording folder
B Image size
For DCR-PC109:
(1152 × 864) or (640 × 480)
C Quality
([FINE]) or ([STANDARD])
D Personal Menu button (p. 63)
E Review button (p. 32)
z Tips
• When you press PHOTO on your Remote
Commander, the image dis pla y ed on th e screen at
that timing is recorded.
• The recording time, date, and the camera settings
data are recorded automatically on the recording
media without being displayed on the screen. You
can view this information duri ng pla yba c k by
selecting [DATA CODE] on the screen (p. 58).
• The recording angle is wide r than that of the
CAMERA-TAPE mode.
FINE
1152
P-MENU
Selecting image quality or size
For DCR-PC109:
Select the (MEMORY SET) menu,
[STILL SET], then [ QUALITY] or
[ IMAGE SIZE] (p. 7 2).
For DCR-PC108:
Select the (MEMORY SET) menu,
[STILL SET], then [ QUALITY] (p. 72).
The image size is set to [640 × 480].
The number of pictur es you can record on a
“Memory Stick Duo” varies depending on
the quality/size of the image and the
recording environment.
Refer to the following list for the approximate
number of pictures that can be recorded on a
“Memory Stick Duo” formatted on your
camcorder.
When the image quality is [FINE]
(number of images)
The image size of 1152 × 864 for DCR-PC109
is 500kB, that of 640 × 480 is 150kB.
1152 × 864* 640 × 480
8MB (supplied) 15 50
16MB 30 96
32MB 61 190
64MB 120 390
128MB 245 780
256MB
(MSX-M256)
512MB
(MSX-M512)
* The image size of 1152 × 864 is availabl e for DCR -
PC109 only.
445 1400
900 2850
When the image quality is [STANDARD]
(number of images)
The image size of 1152 × 864 for DCR-PC109
is 200kB, that of 640 × 480 i s 60kB.
1152 × 864* 640 × 480
8MB (supplied) 37 120
16MB 74 240
32MB 150 485
64MB 300 980
128MB 600 1970
256MB
(MSX-M256)
512MB
(MSX-M512)
1000 3550
2050 7200
Recording
* The image size of 1152 × 864 is availabl e for DCR -
PC109 only.
,continued
Recording
33
Page 34
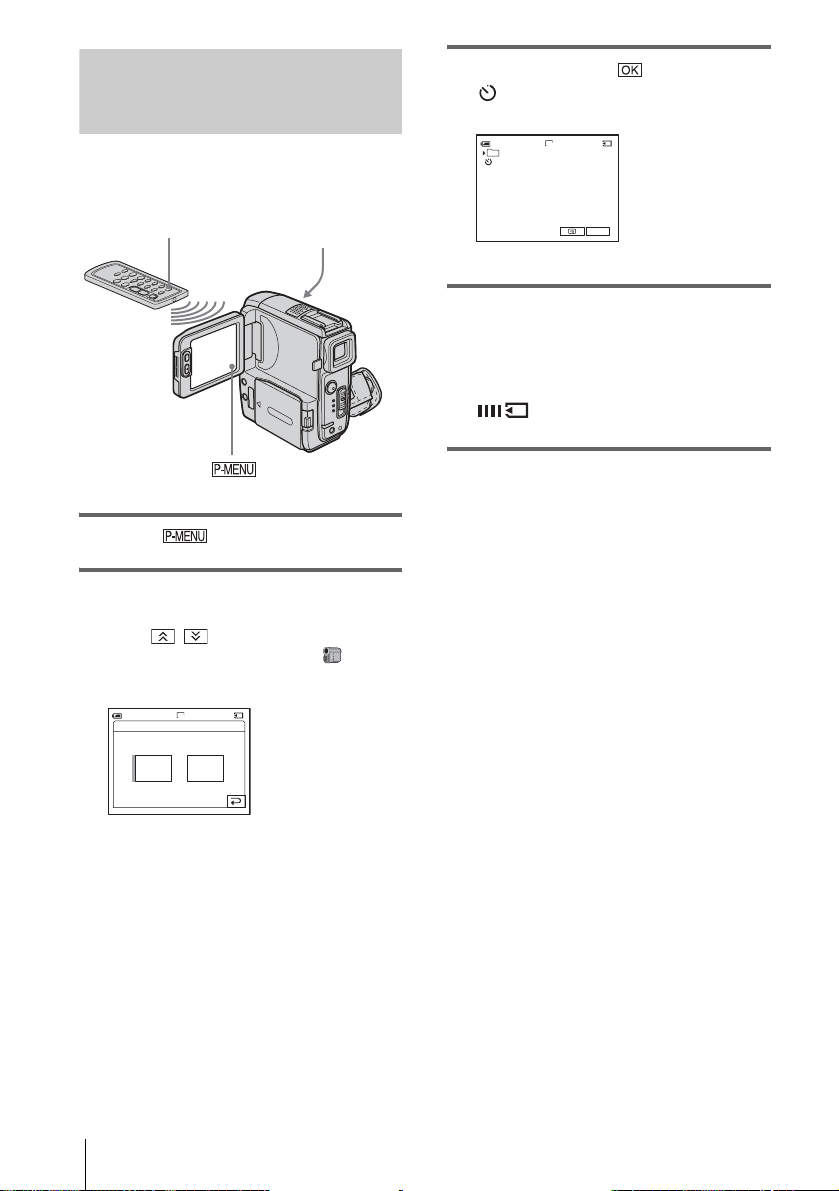
Using the self-timer
3 Touch [ON], then .
appears.
With the self-timer, you can record a still
image after a delay of about 10 seconds.
PHOTO
PHOTO
1 Touch .
2 Touch [SELF-TIMER].
If the item is not displayed on the screen,
touch / . If you cannot find it, touch
[MENU] and select it from the
(CAMERA SET) menu.
60min
SELF–TIMER: OFF
FINE
30
1152
101
60min
FINE
30
1152
P-MENU
4 Press PHOTO.
You will hear a beep sound counting down
for about 10 seconds (The count down
indication begins from 8).
The image is recorded. When bars of
disappear, the image is recorded on
the “Memory Sti c k Duo.”
To cancel the count down
Touch [RESET].
To cancel the self-timer
Follow steps 1 and 2, then select [OFF] in s te p
3.
34
ONOFF
Recording
Page 35
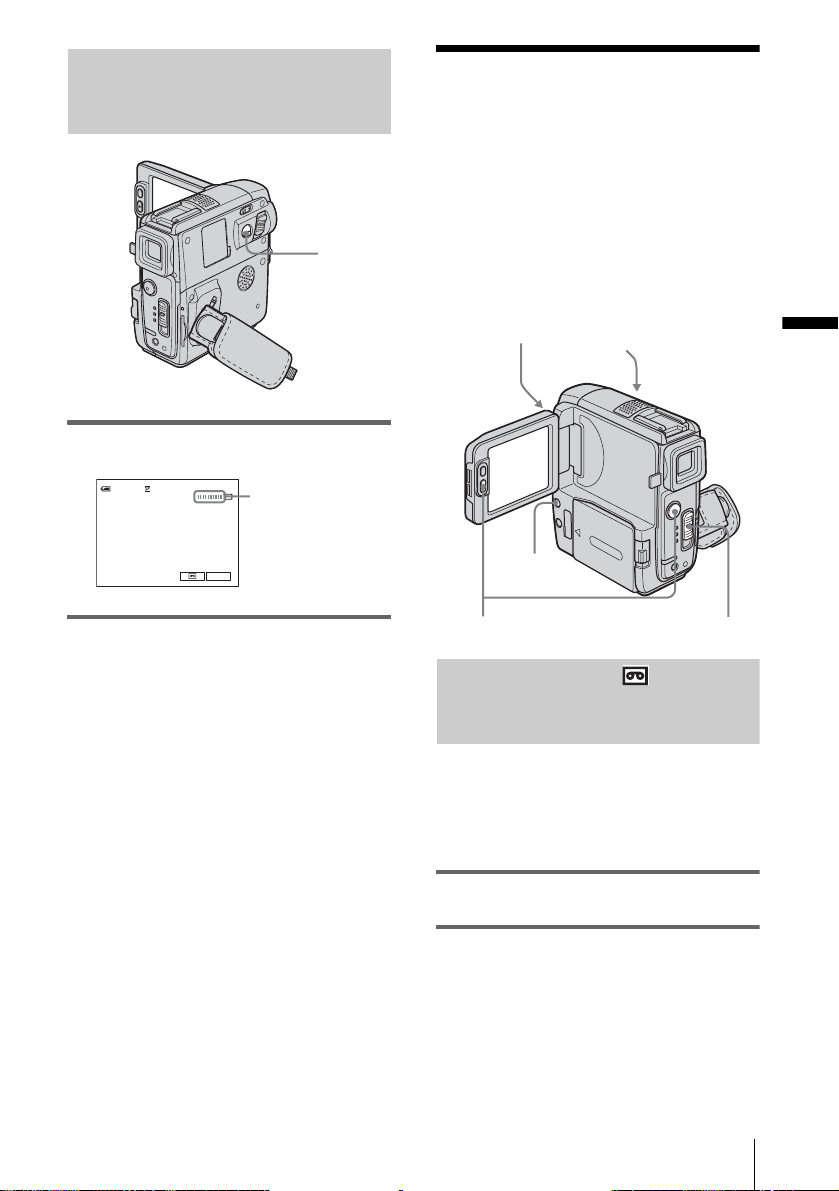
Recording a still image on a “Memory Stick Duo” while recording movies on a tape
PHOTO
Press PHOTO fully during ta pe recording.
Recording with ease
– Easy Handycam
With this Easy Handyca m operation, most of
the camera settings are set to automatic
mode, only b asic functi ons become a vailable,
and screen font size increases for easy
viewing. Even first time users can enjoy easy
recording. Before recording, follow steps 1 to
7 in “Getting started” (p. 15 to p. 25).
Camera recording lamp
PHOTO
Recording
60min 0:00:10REC
Recording is
complete when the
scrolling stops.
P-MENU
To record still images in standby mode
Press and hold PHOTO lightly. Ch eck the
image and press it fully.
b Notes
• You cannot record a still image on a “Memory Stick
Duo” during the following opera ti ons:
– [16:9 WID E ] mode
– Memory overlap
– MEMORY MIX function
– [INTERVAL REC] (interval recording)
• Titles are not recorded on a “Memory Stick Duo.”
z Tip
• For DCR-PC109:
The image size is set to [640 × 480].
If you want to record a still i mage in a dif ferent siz e,
use the Memory photo recording fu nc tion (p. 32).
EASY
REC START/STOP
POWER switch
Recording a movie
During Easy Handycam operation, you can
record movies on a tape only. To re cord
movies on a “Memory Stick Duo,” see
page 27 (MPEG MOVIE EX).
1 Set the LENS COVER switch to OPEN.
2 Open the LCD panel.
,continued
Recording
35
Page 36
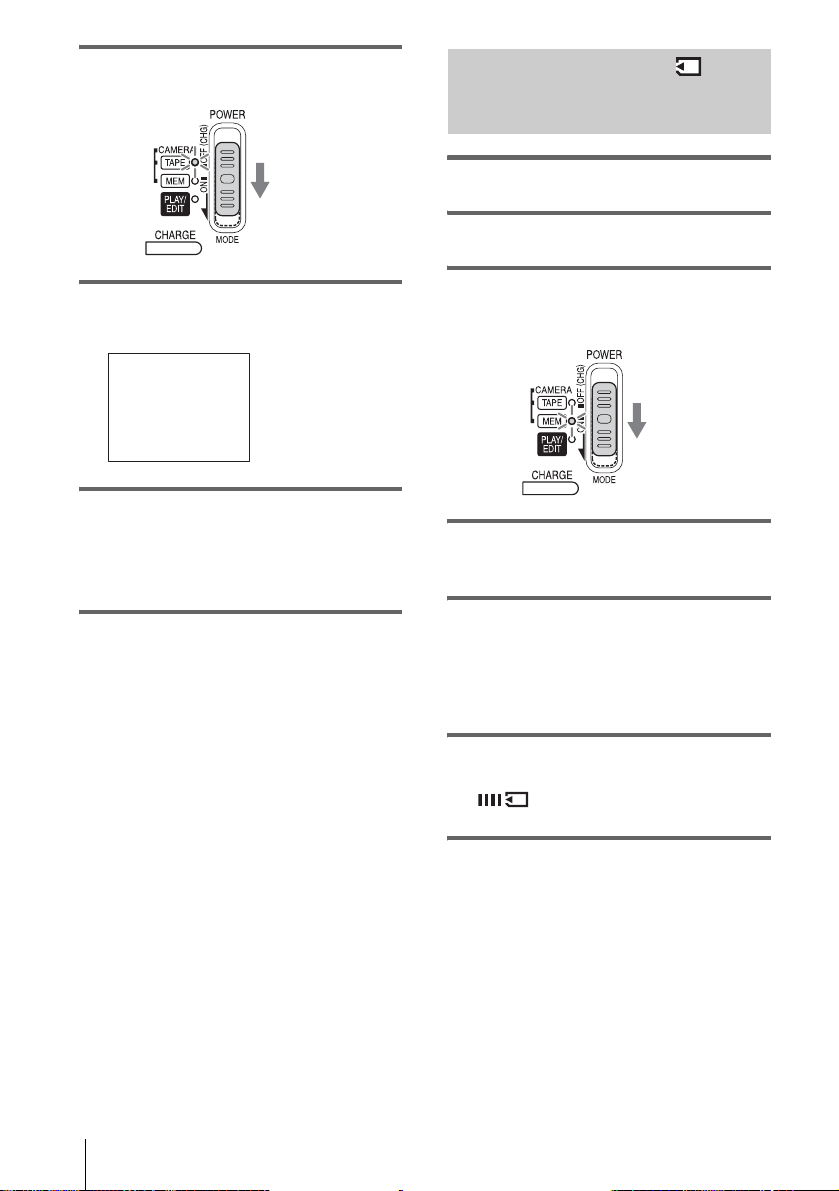
3 Slide the POWER switch until the
CAMERA-TAPE lamp lights up.
Slide the POWER
switch while
pressing the green
button.
Recording a still image
1 Set the LENS COVER switch to OPEN.
2 Open the LCD panel.
4 Press EASY.
The EASY lights up in bl ue.
Easy Handycam
operation
ON
5 Press REC START/STOP.
Recording starts . [REC] appears on the
LCD screen and the Camera recording lamp
lights up. Press REC START/STOP again
to stop recording.
To turn the power off
1
Slide the POWER swi tch up to the OFF
(CHG) posi tion.
2 Set the LENS COVER switch to CLOSE.
To cancel Easy Handycam operation
Press EASY again.
b Notes
• You cannot turn Easy Handycam operation on or off
during:
– Recording
– USB Streaming
• During Easy Handycam operation, the following
buttons are not available:
– LCD BACKLIGHT (p. 21)
– BACK LIGHT (p. 38)
• During Easy Handycam operation, the settings of the
functions that are not displayed on the screen return
to their defaults. Previously made settings are
restored when you cancel Easy Handycam
operation.
3 Slide the POWER switch repeatedly
until the CAMERA-MEM lamp lights
up.
Slide the
POWER switch
while pressing
the green button.
4 Press EASY.
The EASY lights up in blu e.
5 Press and hold PHOTO lightly.
You will hear a light be eping sound when
the focus and brigh t ness settings are
adjusted. Recording does not start at this
point.
6 Press PHOTO fully.
A shutter sound is heard. When bars of
disappear, the image is recorded on
the “Memory Sti c k Duo.”
To turn the power off
1
Slide the POWER swi t ch up to the OFF
(CHG) position.
2 Set the LENS COVER switch to CLOSE.
To cancel Easy Handycam operation
Press EASY again.
36
Recording
Page 37
b Notes
• You cannot turn Easy Handycam operation on or off
during recording.
• During Easy Handycam opera tion, the following
buttons are not available:
– LCD BACKLIGHT (p.21)
– BACK LIGHT (p. 38)
• During Easy Handycam operation, the settings of the
functions that are not displayed on the screen return
to their defaults. Previously made settings ar e
restored when you cancel the E as y Hand yc am
operation.
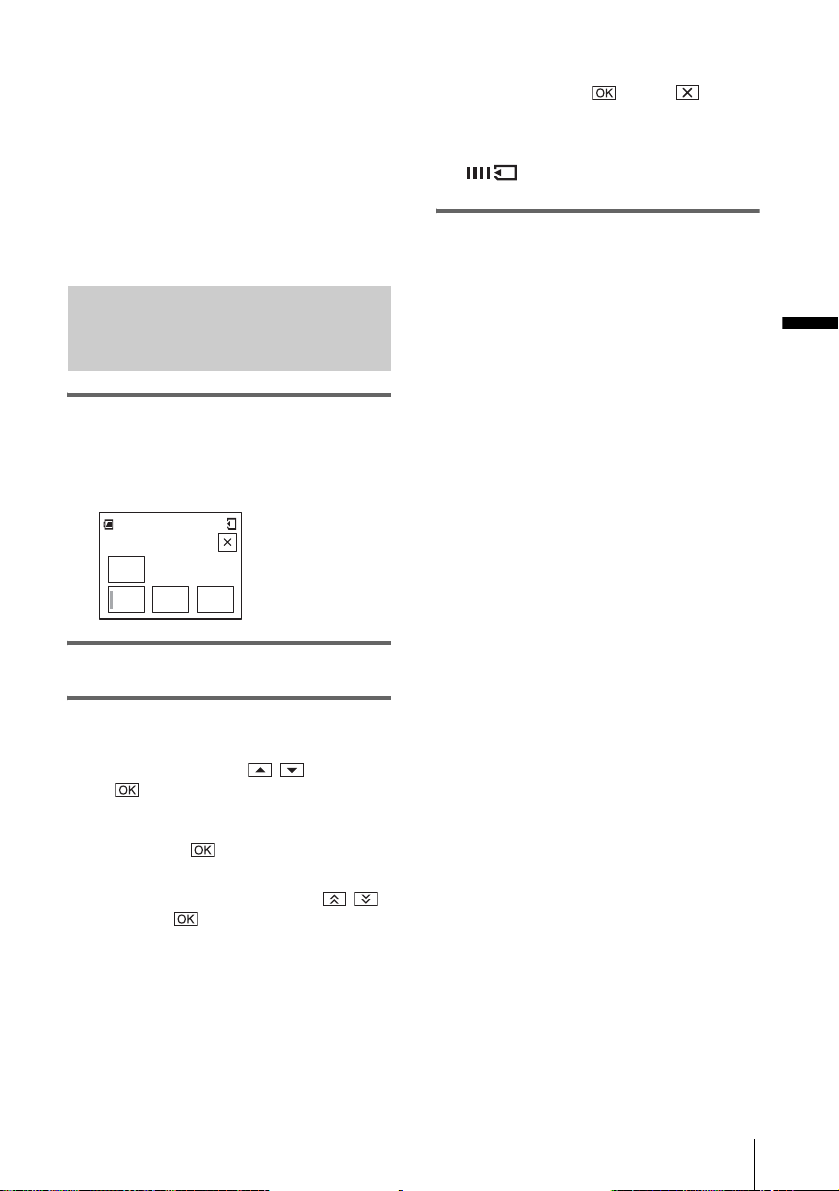
Making full use of Eas y Handycam operation
1 Touch [ME NU].
The available menu items are displayed on
the screen.
Example: In the CAMERA-MEM mode
60min
SELFTIMER
BEEP
CLOCK
SET
LAN-
GUAGE
30
For [SELF-TIMER] (in the CAMERAMEM mode only)
Touch [ON], then . Touch .
Press PHOTO ful ly .
You will hear a beep sound counting down
for about 10 seconds. When the bars of
disappear, the image is recorded on
the “Memory Stick D uo. ”
Recording
2 Touch the de sired item.
3 Select the desired setting.
For [CLOCK SET]
1 Set [Y] (year) with / , then touch
.
2 Set [M] (month), [D] (day), hour and
minutes in the same way as [Y] (year),
then touch .
For [LANGUAGE]
Select the desired language with / ,
then touch .
For [BEEP]
See page p. 87.
Recording
37
Page 38
Adjusting the exposure
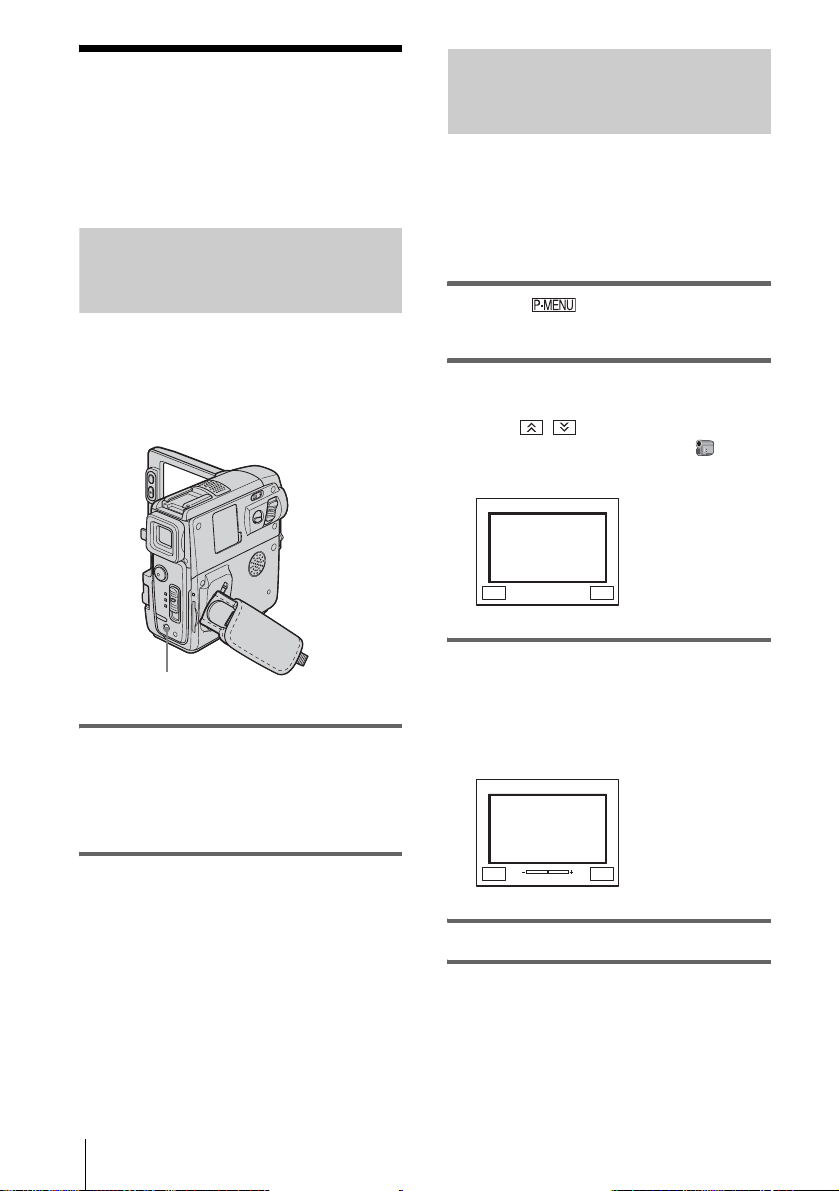
Fixing the exposure for the selected subject – Flexible spot meter
The exposure is adjusted automatically in the
default setting.
Adjusting the exposure f or backlit subjects
When your subject has its back to the sun or
other light, you can adjust the exposure to
prevent the subject from becoming
shadowed.
BACK LIGHT
Press BACK LIGHT during recording or
in the standby mode.
. appears.
To cancel the back ligh t fun ct io n, press BACK
LIGHT again.
You can adjust and fix the exposure t o t he
subject, so that it is recorded in suitable
brightness even when there is strong contrast
between the subject and the background
(such as subjects in the limel ight on stage).
1 Touch during recording or in
the standby mode.
2 Touch [SPOT METER].
If the item is not displayed on the screen,
touch / . If you cannot find it, touch
[MENU], and select it from the
(CAMERA SET) menu.
SPOT METER STBY
0:00:00
ENDAUTO
3 Touch the point you want to adjust and
fix the exposure on the screen.
[SPOT METER] flashes while the camera
is adjusting the exposure for the select ed
point.
SPOT METER STBY
0:00:00
b Note
• The back light function is canceled whe n you se t
[EXPOSURE] to [MANUAL] (p. 39) or select
[SPOT METER] (p. 38).
Recording
38
ENDAUTO
4 Touch [END].
To return the setting to automatic
exposure
Follow steps 1 and 2, th en select [AUTO] in
step 3. Or set [EXPOSURE] to [AUTO] (p. 39).
Page 39
b Notes
• You cannot use the Flexible spot meter together
with:
– NightShot plus function
– Super NightShot plus function
– Color Slow Shutter function
• If you set [PROGRAM AE], [SPOT METER] is
automatically set to [AUTO].
z Tip
• If you set [SPOT METER], [EXPOSURE] is
automatically set to [MANUAL].
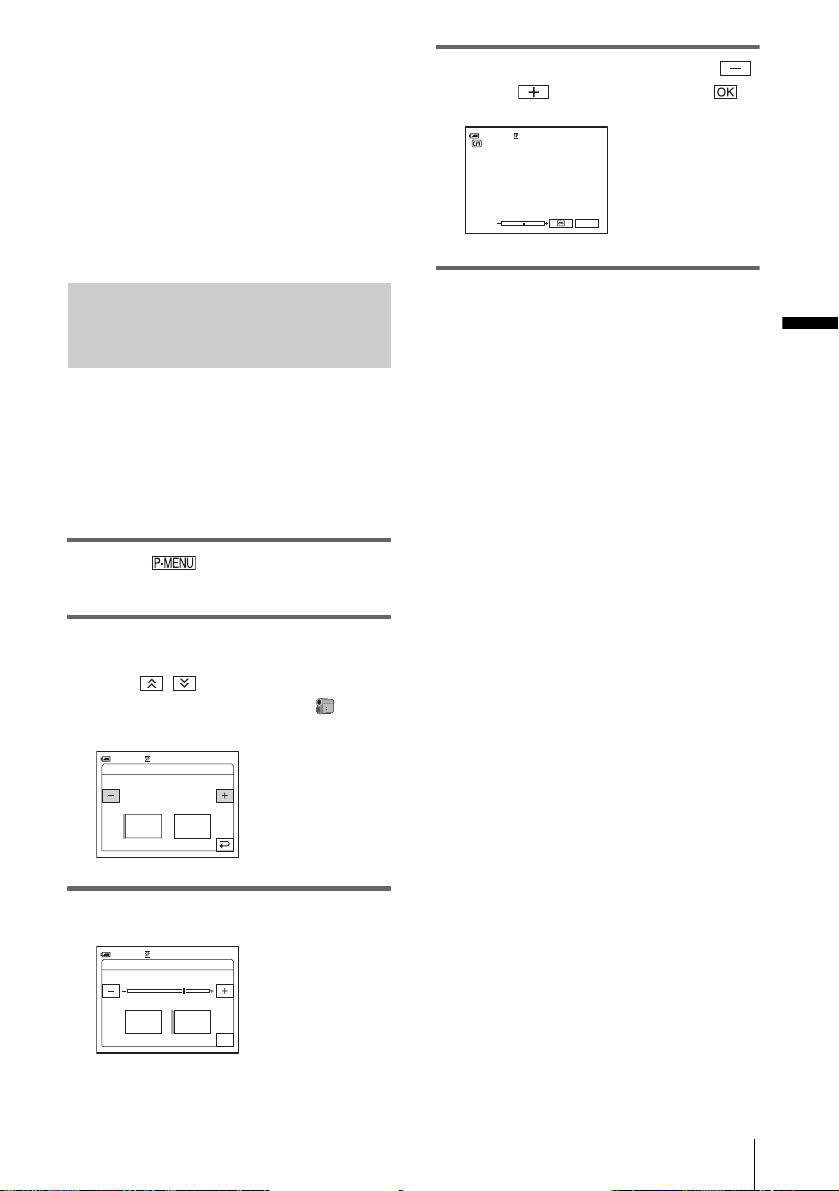
4 Adjust the exposure by touching
(dim)/ (bright), then touch .
60min
0:00:00STBY
P-MENU
Adjusting the exposure manually
You can fix the brightness of a picture at the
best exposure. When recording indoors on a
clear day, for instance, you can avoid
backlight shadows on people next to the
window by manual ly f ixing the exposure to
that of the wall side of the room.
1 Touch during recording or in
the standby mode.
2 Touch [EXPOSURE].
If the item is not displayed on the screen,
touch / . If you cann ot fin d it , to uch
[MENU], and select it from the
(CAMERA SET) menu.
EXPOSURE: AUTO
0:00:006 0min STBY
MANUALAUTO
To return the setting to automatic
exposure
Follow steps 1 and 2, th en s el ect [AUTO] in
step 3.
b Note
• You cannot use the manual exposure toge the r with:
– NightShot plus function
– Super NightShot plus function
– Color Slow Shutter function
Recording
3 Touch [MANUAL].
EXPOSURE: MANUAL
0:00:006 0min STBY
MANUALAUTO
OK
Recording
39
Page 40
Recording in dark
places
You can record subjects in dark places (such
as when capturing the face of your baby
sleeping) with the NightShot plus, Super
NightShot p lus or Color Slow Shut ter
function.
The NightShot plus and Super NightShot
plus function enable yo u to record an image
brighter and smoother.
The Color Slow Shutter function enable s you
to record an image more faithful to the
original colors.
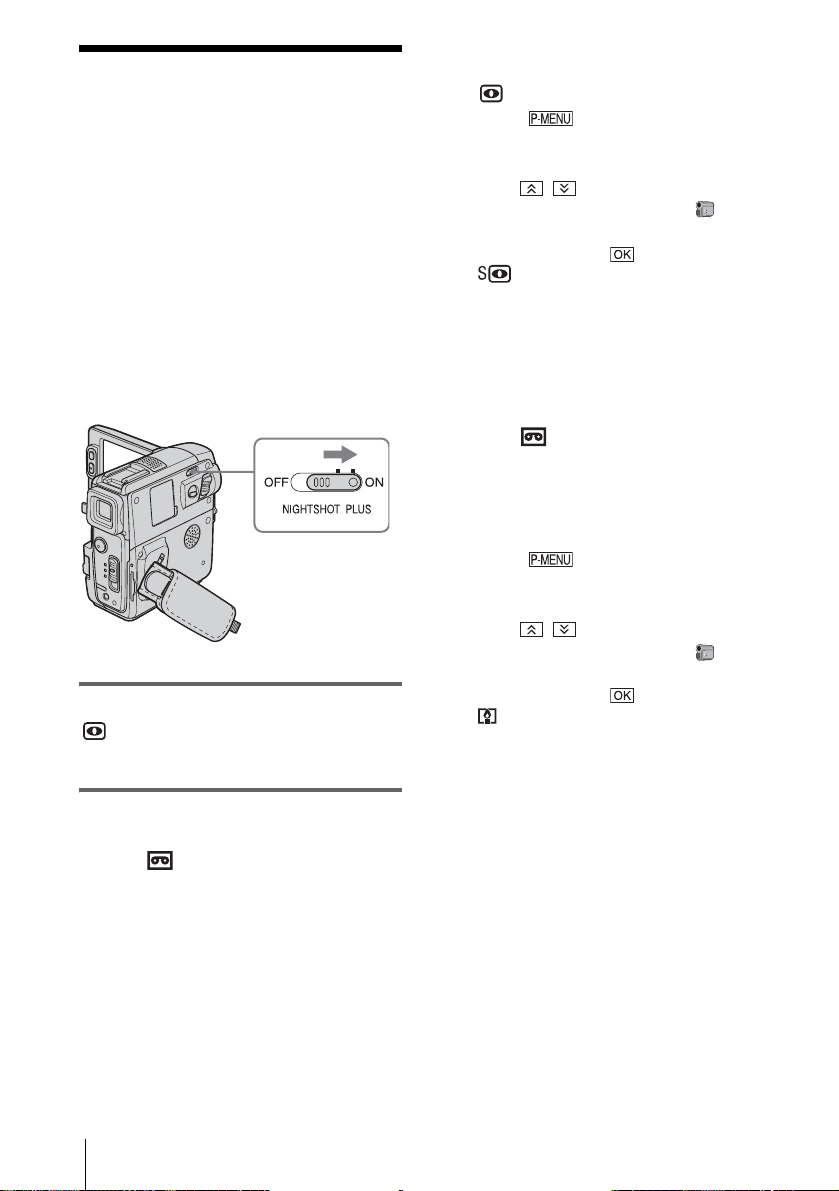
Set the NIGHTSHOT PLUS switch to ON.
and [“NIGHTSHOT PLUS”] appear.
To cancel NightShot plus, set the NIGHTSHOT
PLUS switch to OFF.
To record higher sensitivity pictures on
the tape – Super NightShot plus
The Super Nigh tSho t plus func tion enab les yo u
to use the NightShot plus function more
effectively.
The picture will be recorded at a maximum of
16 times the sensitivity of NightShot plus
recording.
1 Slide the POWER swi tch to select the
CAMERA-TAPE mode.
– NightShot plus, etc.
2 Set the NIGHTSHOT PLUS switch to
ON.
and [“NIGHTSHOT PLUS”] appear.
3 Touch .
4 Touch [SUPER NSPLUS].
If the item is not displayed on the screen,
touch / . If you cannot find it, touch
[MENU], and select it from the
(CAMERA SET) menu.
5 Touch [ON], then .
and [“SUPER NIGHTSHOT PLUS”]
appear.
To cancel Super NightShot plus, follow
steps 3 and 4, then select [OFF] in step 5.
Or, set the NIGHTSHOT PLUS switch to
OFF.
To record a clearer picture in color on
the tape – Color Slow Shutter
1
Slide the POWER switch to select the
CAMERA-TAPE mode.
2 Make sure the NIGHTSHOT PLUS
switch is set to OFF.
3 Touch .
4 Touch [COLOR SLOW S].
If the item is not displayed on the screen,
touch / . If you cannot find it, touch
[MENU], and select it from the
(CAMERA SET) menu.
5 Touch [ON], then .
and [COLOR SLOW SHUTTER]
appear.
To cancel Color Slow Shutter, follow steps
3 and 4, then select [O FF] in step 5.
b Notes
• Do not use the NightShot plus/Super NightShot plus
function in bright places. This may cause a
malfunction.
• The Color Slow Shutter functio n ma y not ope r a te
correctly in total darkness. When you are recording
in a place with no light at all, use the NightShot plus
or Super NightShot plus functions.
• You cannot use the Super NightShot plus/Color
Slow Shutter function together with:
– FADER function
– Digital ef fect
• You cannot use the Color Slow Shutter function
together with:
– [PROGRAM AE]
– Manual exposure
– Flexible spot mete r
40
Recording
Page 41
• When using the Super NightShot plus or Color Slow
Shutter function, the shutter speed of your
camcorder changes depend ing on the brightness.
The motion of the picture may slow down at this
time.
• Adjust the focus manua ll y when it is hard to focus
automatically.
• Do not cover the infrared port with you r fingers or
other objects. Remove the conversion lens (optional)
if it is attached.
• Depending on the shooti ng co nditions or
circumstances, colors may not be reproduced
properly.
z Tip
• If you record subjec ts in c omplete darkness, setting
[NS LIGHT] to [ON] in the menu setting is
recommended. The maxim u m shooting distance
using the NightShot Light is about 3 m (10 feet ).
(The default setting is [ON].)
If you record subjects in dark places (such as night
scene or in moonlight), s et [NS LIGHT] to [OFF ] in
the menu setting. You can make image color deeper
(p. 68).
Adjusting the focus
The focus is adjusted automatically in the
default setting.
Adjusting the focus for an offcenter subject – SPOT FOCUS
You can select and adjust the focal point to
aim it at a subject not located in the center of
the screen.
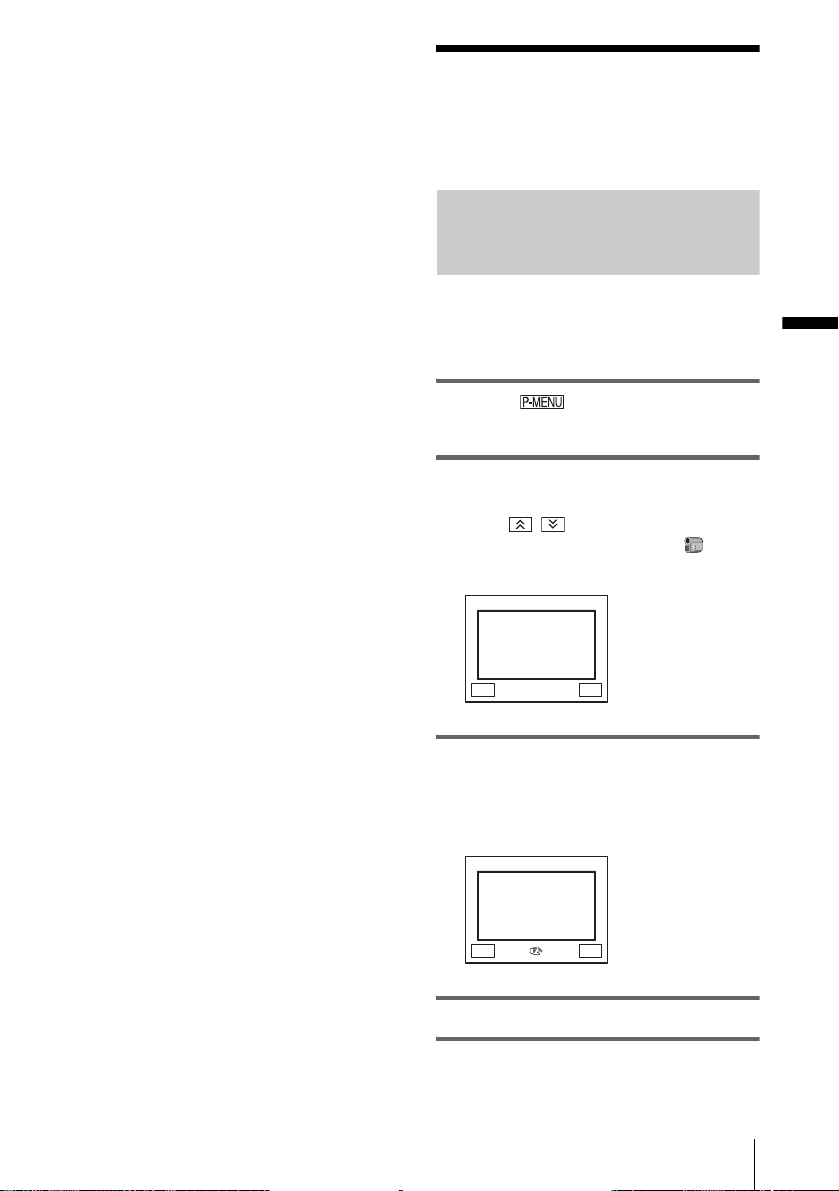
1 Touch during recording or in
the standby mode.
2 Touch [SPOT FOCUS].
If the item is not displayed on the screen,
touch / . If you cannot find it, touch
[MENU], and select it from the
(CAMERA SET) menu.
Recording
SPOT FOCUS STBY
0:00:00
ENDAUTO
3 Touch the subject for which you want
to adjust the focus on the screen.
[SPOT FOCUS] flashes while the camera is
adjusting the focus.
SPOT FOCUS STBY
9 appears.
0:00:00
ENDAUTO
4 Touch [END].
,continued
Recording
41
Page 42
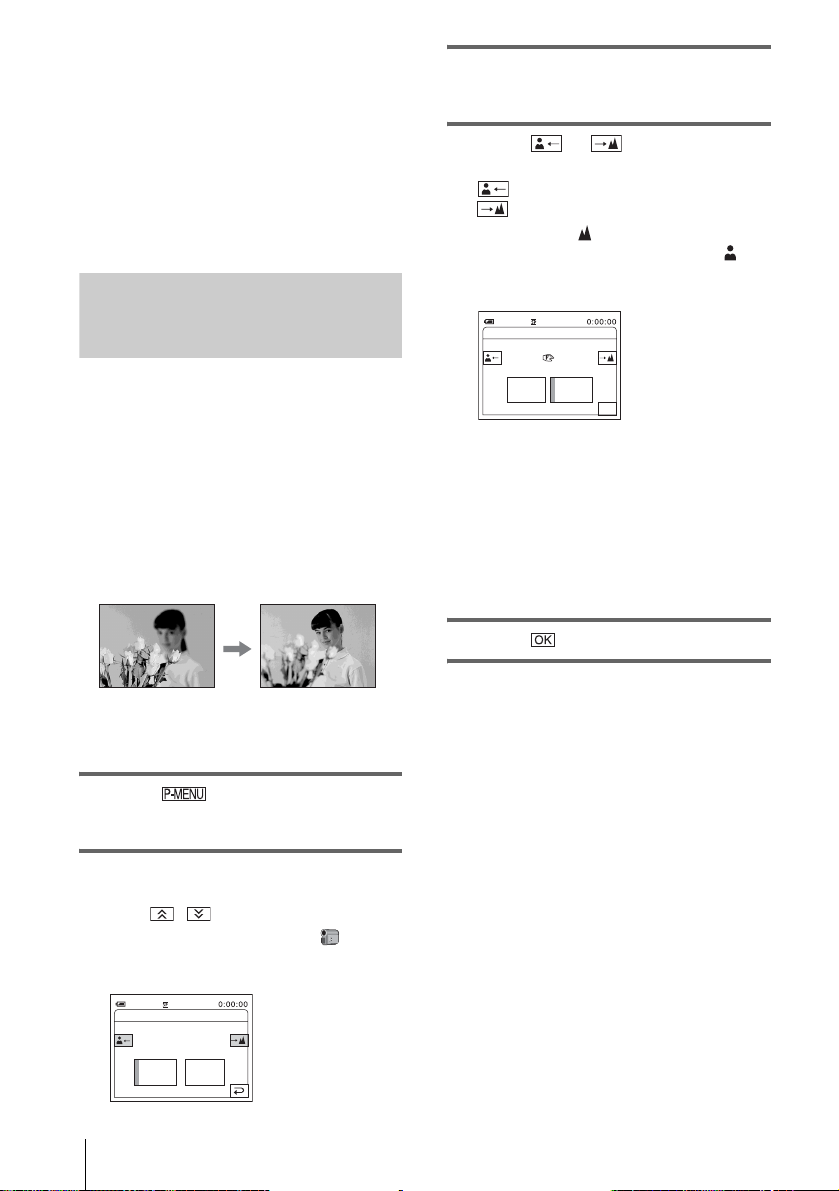
To adjust the focus automatically
Follow steps 1 and 2, then touch [AUTO] i n step
3. Or set [FOCUS] to [AUTO] (p. 42).
b Note
• You cannot use the SPOT FOCUS function together
with [PROGRAM AE].
z Tip
• If you set [SPOT FOCUS], [FOCUS] is
automatically set to [MANUAL].
Adjusting the focus manually
3 Touch [MANUAL].
9 appears.
4 Touch or to sharpen the
focus.
: To focus on close su bjects.
: To focus on dist ant subjects.
9 changes to when the focus cannot be
adjusted any further. 9 changes to
when the focus cannot be adjusted any
closer.
60min
FOCUS: MANUAL
STBY
You can adjust the focus manually according
to the recording conditions.
Use this function in the following cases.
– To record a subject behind a window covered
with raindrops.
– To record horizontal stripes.
– To record a subject with little contrast
between the subje ct and its background.
– When you want to foc us on a subject in the
background.
– To record a stationary subject us i ng a tripod.
1 Touch during recording or in
the standby mode.
2 Touch [FOCUS].
If the item is not displayed on the screen,
touch / . If you cannot find it, touch
MENU, then select it from the
(CAMERA SET) menu.
MANUALAUTO
OK
Tips for focusing manually
• It is easier to focus on the subject when you use the
zoom function. Move the power zoom lever towards
T (telephoto) to adjust the foc us, and then, towards
W (wide angle) to adjust the zoom for recording .
• When you want to record a close-up image of a
subject, move the power zoom lever to wards W
(wide angle) to fully magnify the image, then adjust
the focus.
5 Touch .
To adjust the focus automatically
Follow steps 1 and 2, th en select [AUTO] in
step 3.
42
60min
FOCUS: AUTO
Recording
STBY
MANUALAUTO
Page 43
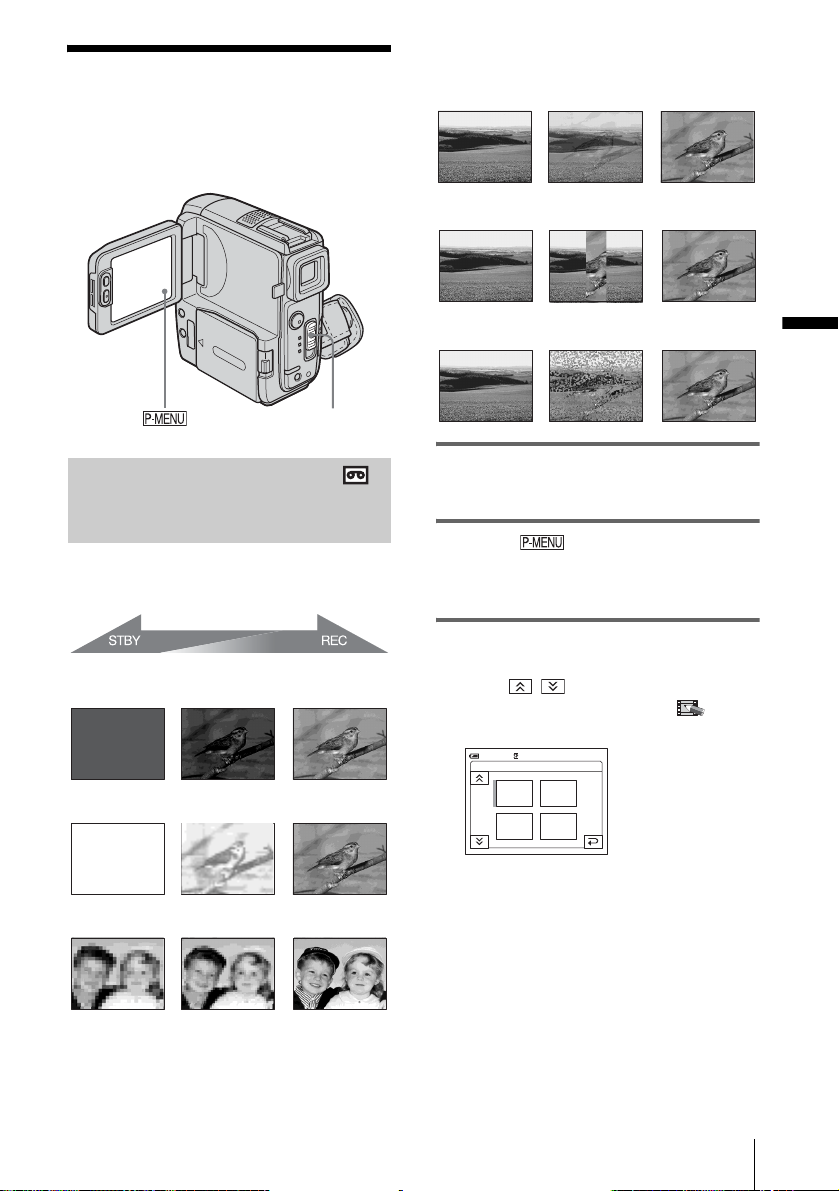
Recording a picture using various effects
When fading out , th e p ict ur e gr ad ua ll y ch an ges
from color to black-and-white.
[OVERLAP] (fade in only)
[WIPE] (f a d e in only)
POWER switch
Fading in and out of a scene – FADER
You can add the following effects to
currently recording pictures.
[BLACK FADER]
[WHITE FADER]
[DOT FADER] (fade in only)
1 Slide the POWER switch to select the
CAMERA-TAPE mode.
2 Touch in the standby mode (to
fade in) or during recording (to fade
out).
3 Touch [FADER].
If the item is not displayed on the screen,
touch / . If you cannot find it, touch
[MENU], and select it from the (PICT.
APPLI.) menu.
BLACK
FADER
MOSAIC
FADER
0:00:00
60 min STBY
FADER: OFF
OFF
1/2
WHITE
FADER
Recording
[MOSAIC FADER]
[MONOTONE]
When fading in, the pi ct ure gradually change s
from black-and-white to color.
,continued
Recording
43
Page 44
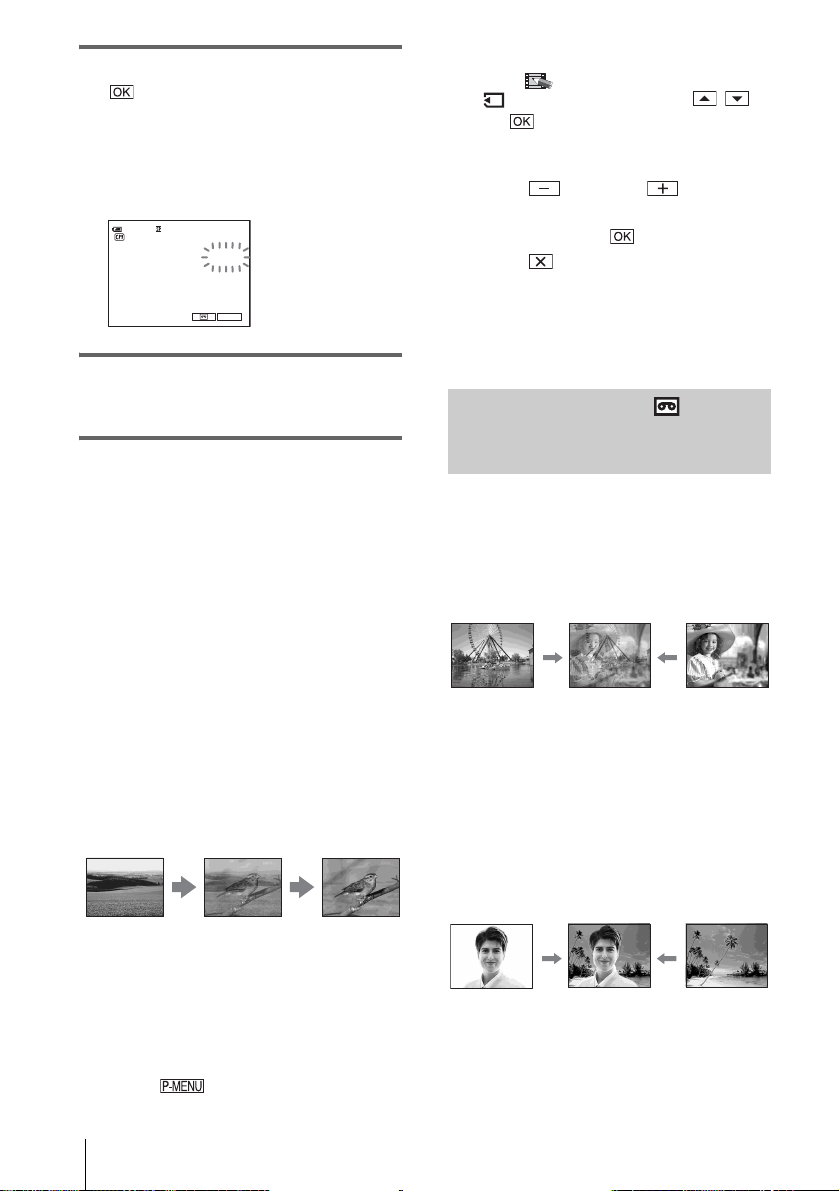
4 Touch the desired effect, then touch
.
When you touch [OV ER L A P], [WIPE] or
[DOT FADER], the image on the tape in
your camcorder is st ored as a still image.
(While storing the i mage, the screen tu rns to
blue.)
60min
0:00:00STBY
MOSAIC
FADE R
P-MENU
5 Press REC START/STOP.
The fader indicator stops flashing and
disappears when the fade is complete.
4 Touch [MENU].
5 Select (PICT. APPLI.), then
[ OV ERLAP] by touching /
and .
The recorded image appears on the
thumbnail scree n.
6 Touch (previous)/ (next) to
select the still image to be superimposed.
7 Touch [ON], then .
8 Touch .
9 Press REC START/STOP to start
recording.
[M. OVRLAP] stops flashing, and
disappears wh en fading is finish ed.
Using special effects – Digital effect
To cancel the operation
Follow steps 2 and 3, t hen select [OFF] i n st ep
4.
b Note
• You cannot use the FADER function toge t h er wit h:
– Self-timer
– Super NightShot plus function
– Color Slow Shutter functio n
– Digital effect
– [FRAME REC] (Frame recording)
– [INTERVAL REC] (Interval recording)
Fading in from still image on the
“Memory Stick Duo” – Memory overlap
You can fade in from the still image on the
“Memory Stick Duo” to the movie currently
being recorde d on the tape.
Still image
Movie
1 Check that you have a “Memor y Stick
Duo” with the still image to be
superimposed and a tape in your
camcorder.
2 Slide the POWER swi tch to select the
CAMERA-TAPE mode.
3 Touch .
You can add digital effects to the record ings.
[STILL]
You can record a movie while superimposing it
on a previously recorded still image.
[FLASH] (flash moti o n)
You can record a movi e with a serial -still-image
effect (strobe effect).
[LUMI. KEY] (luminance key)
You can replace a br i g hter area in a previously
recorded still image, such as the background of
a person or a title written on white paper, with a
movie.
[TRAIL]
You can record a picture so that an incidental
image like a trail is left.
44
Recording
Page 45
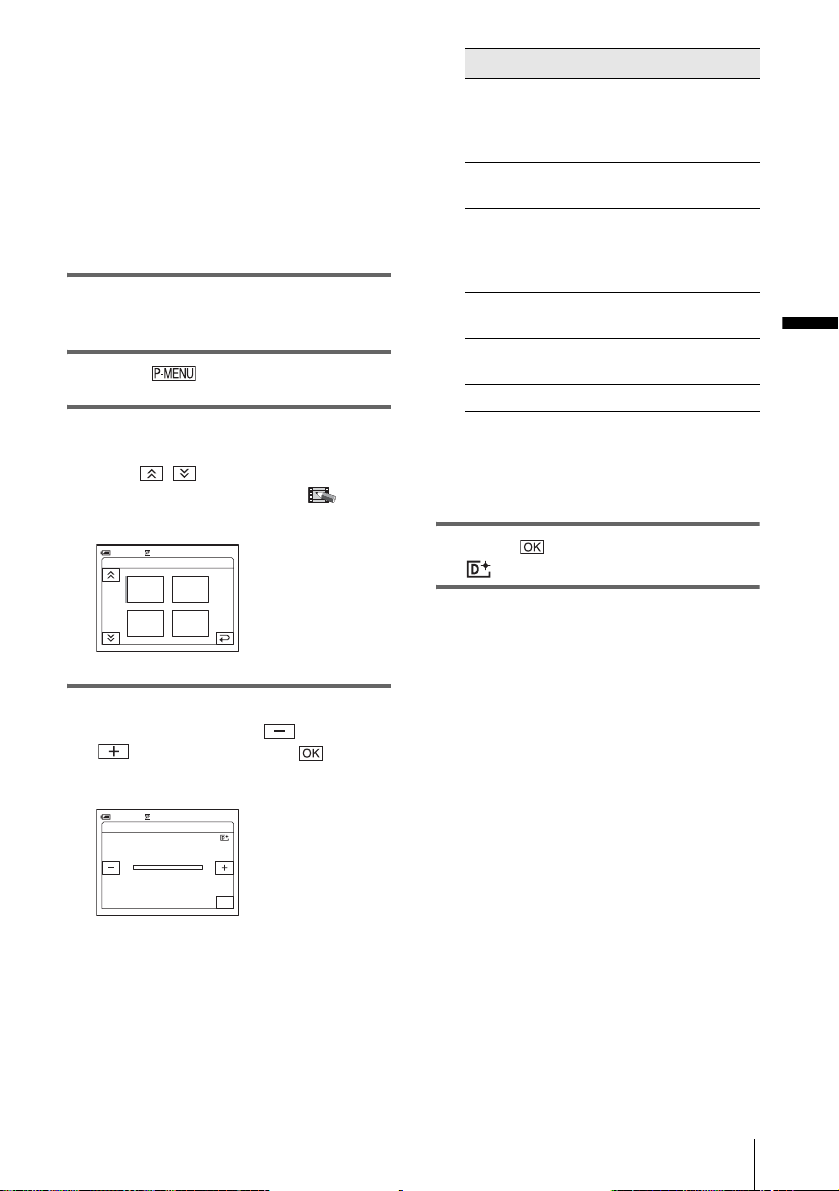
[SLOW SHUTTR] (slow shutter)
You can slow down the shutter speed. This
mode is suitable for shooting a subject more
clearly in a dark place.
[OLD MOVIE]
You can add an old movie-type atmosphere to
pictures. Yo ur camcorde r automati cally reco rds
pictures in the letterbox mode for all screen size,
sepia in color, an d at a slower shutter sp eed.
1 Slide the POWER switch to select the
CAMERA-TAPE mode.
2 Touch .
3 Touch [D. EFFECT].
If the item is not displayed on the screen,
touch / . If you cann ot fin d it , to uch
[MENU], and select i t from the (PICT.
APPLI.) me nu.
LUMI.
KEY
0:00:00
60 min STBY
D. EFFECT: OFF
OFF STILL
1/2
FLASH
4 Touch the desired effect, then adj ust
the effect by touching (decrease) /
(increase) and touch .
Adjustment screen example:
60 min STBY
D. EFFECT: STILL
When you touch [STILL] or [LUMI. KEY],
the image displayed on the screen at that
time is saved as a still image.
0:00:00
OK
Effect Items to adjust
[STILL] The degree of transpar ency
[FLASH] The interval of frame-by-
[LUMI. KEY] The color scheme of the
[TRAIL] The fade time of the
[SLOW
SHUTTR]*
[OLD MOVIE] No adjustment necessary.
* It is hard to adju st the f ocus a utomati cally w hen
you choose this effect. Adjust th e foc u s
manually using a tripod to stead y the
camcorder.
of the still image you want
to superimpose on a
movie.
frame playback.
area in the still image
which is to be swapped
with a movie.
incidental image.
Shutter speed (1 is 1/30, 2
is 1/15, 3 is 1/8, 4 is 1/4).
5 Touch .
appears.
To cancel Digital effect
Follow steps 2 and 3, th en select [OFF] in step
4.
b Notes
• You cannot use Digital effect tog eth e r with:
– Super NightShot plus function
– Color Slow Shutter function
– FADER function
– Memory overlap
– MEMORY MIX function
• You cannot use [SLOW SHUTTR]/[OLD MOVIE]
together with [PROGRAM AE] (except [AUTO]).
• You cannot use [OLD MOVIE] together with:
– [16:9 WIDE] mode
– Picture effect ([PICT. EFFECT])
z Tip
• You can create a picture with color and brightness
reversed or a picture that looks like a pastel drawing
while recording on a tape. For details, refer to
Picture effect ([PICT. EFFECT], p. 75).
Recording
,continued
Recording
45
Page 46
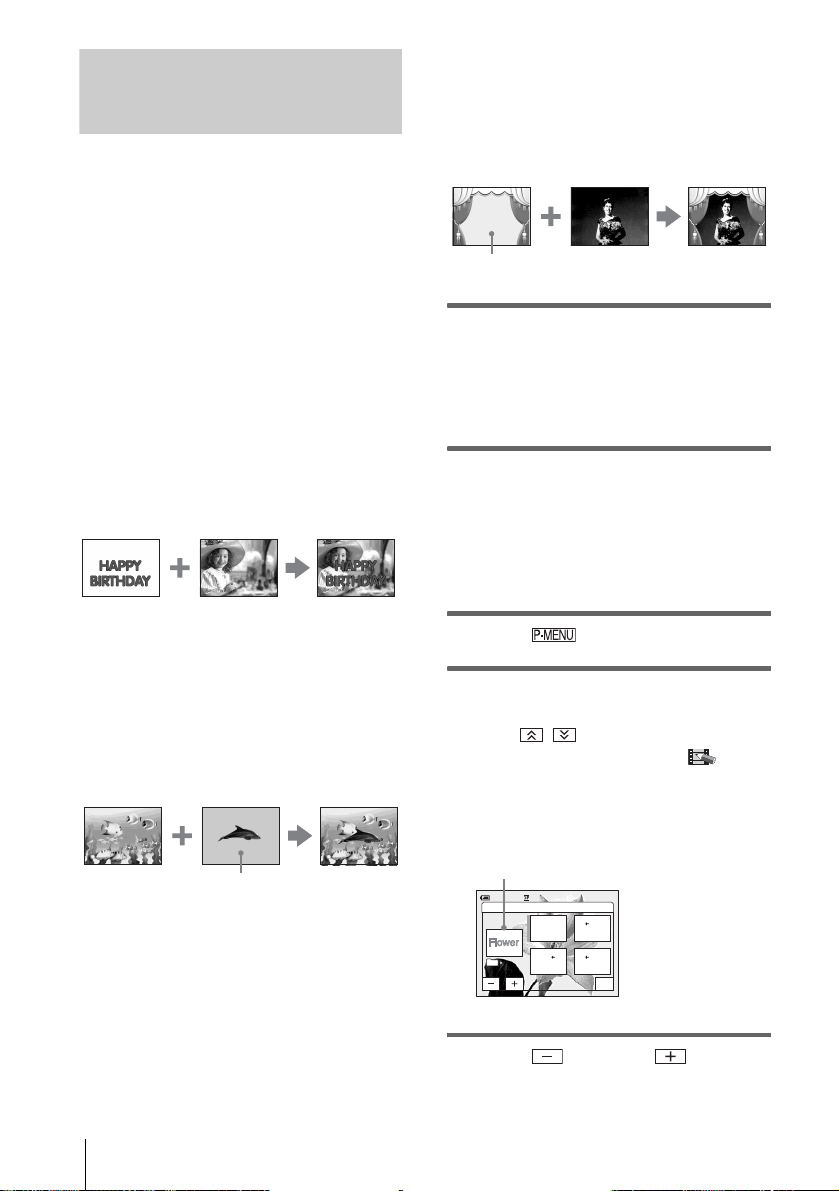
Overlaying still images on mov ies on a tape – MEMORY MIX
You can superimpose a still image you have
recorded on a “Memory Stick Duo” over the
movie you are cu r r e ntl y r e co r d ing on a tape.
You can then record the superimposed
pictures on a tape or a “Memory Stick Duo.”
(You cannot superimpose a st ill image on a
tape which you ha ve already finished
recording.)
[MTCAM LUMI.] (Memory Luminance
key)
You can swap the brighter (white) area of a still
image into a movie. To use this function, have a
still image of an illustr ation or t itle h andwritt en
on white paper recorded on a “Memory Stick
Duo” beforehan d.
Still image
Movie
[MTCAM CHROMA] (Memory Chroma
key)
You can have the movie swap into the blue area
of a still image such as an illustration or into a
frame with a blue area enclosed by the frame.
Still image
Blue
Movie
1 Check that yo u hav e a “ Mem ory Stick
Duo” with the still image to be
superimposed and a tape (only if you
are recording on tape) in your
camcorder.
2 Slide the POWER switch repeatedly to
select the CAMERA-TAPE mode
(when you are recording on a tape) or
the CAMERA-MEM mode (whe n yo u
are recording on a “Memory Stick
Duo”).
[CAMTM CHROMA] (Camera Chroma
key)
You can superimp ose a movie on top of a still
image, such as an image which can be used as
background. Shoot the movie with the subject
against a blue background. Only the blue area of
the movie will be swapped with the still image.
46
Still image
Recording
Movie
Blue
3 Touch .
4 Touch [MEMORY MIX].
If the item is not displayed on the screen,
touch / . If you cannot find it, touch
[MENU], and select it from the (PICT.
APPLI.) menu.
The still image stored in th e “Memory Stick
Duo” will be displa yed on the thumbnail
screen.
Thumbnail screen
OFF
CAM M
CHROMA
0:00:00
M CAM
LUMI.
M CAM
CHROMA
OK
60 min STBY
MEMORY MIX: OFF
101
101–0001
5 Touch (previous)/ (next) to
select the still image to overlap.
Page 47
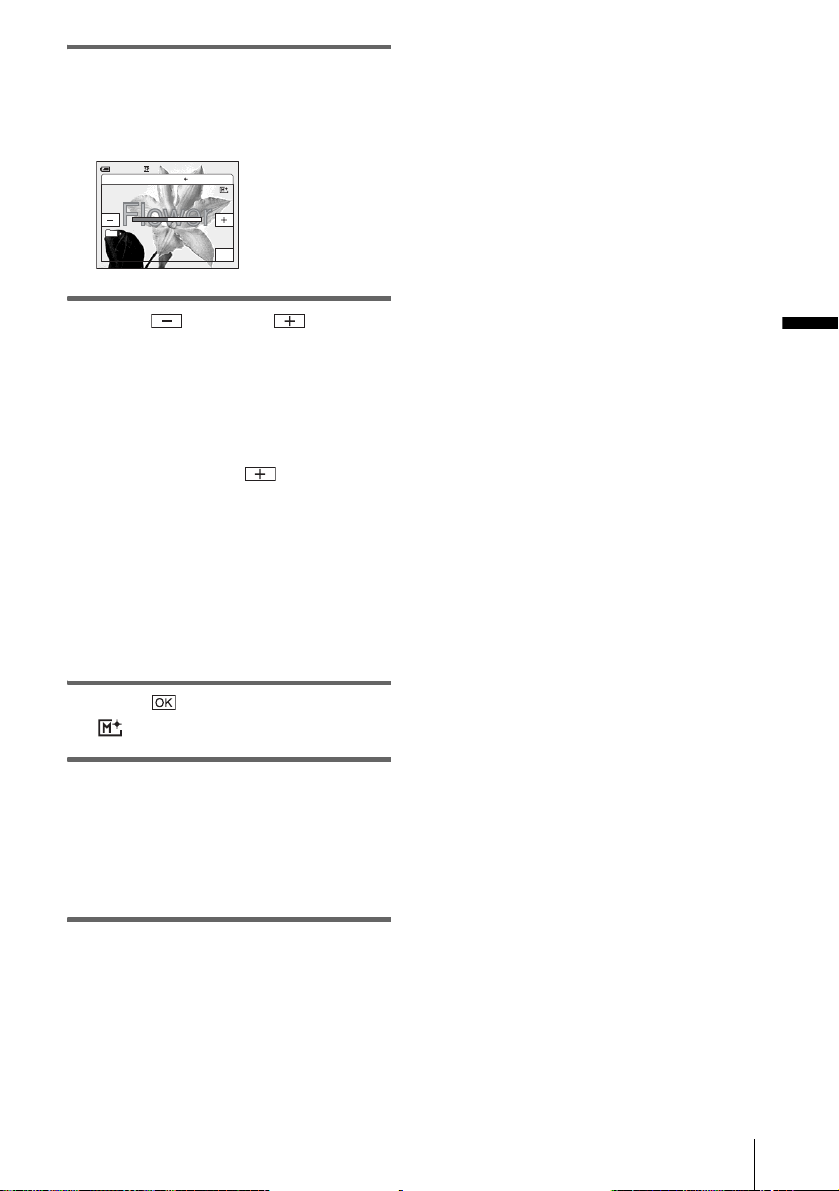
6 Touch the desired effect.
The still image is superimposed on the
movie which is currently displayed on the
LCD screen.
60 min STBY
MEMORY MIX: CAM M CHR OMA
101
101–0001
0:00:00
OK
• When you use the MEMORY MIX function in the
mirror mode (p. 30), the picture on the LCD screen
appears normally, without being mirror-reversed.
• You may not be able to play back pictures modified
on your computer or recorded with other camcorders
on your camcorder.
z Tip
• The supplied SPVD-012 USB Driver CD-ROM
contains sample images for use in MEMORY MIX
operations. Refer to the supplied “Computer
Applications Guid e” fo r de ta ils.
7 Touch (decrease)/ (increase)
to adjust the following.
For [MTCAM LUMI.]
The color scheme of the bright area in the
still image which is to be swapped into a
movie. When you want to record only the
still image stored on the “Memory Stick
Duo” to a tape, touch on the screen in
[MTCAM LUMI.] until the bar indicator
is extended fully to the right side.
For [CAMTM CHROMA]
The color scheme of the blue area in the
movie.
For [M
TCAM CHROMA]
The color scheme of the blue area in the s till
image which is to be swapped into a movie.
8 Touch twice.
appears.
9 Start recording.
When you are recording on a tape
Press REC START/STOP.
When you are recording on a
“Memory Stick Duo”
Press PHOTO fully.
Recording
To cancel MEMORY MIX
Follow steps 3 and 4, then to uch [OFF] in st ep 5.
b Notes
• When the overlapping still image ha s a large amount
of white, the image in the thumbnail screen may not
be clear.
Recording
47
Page 48
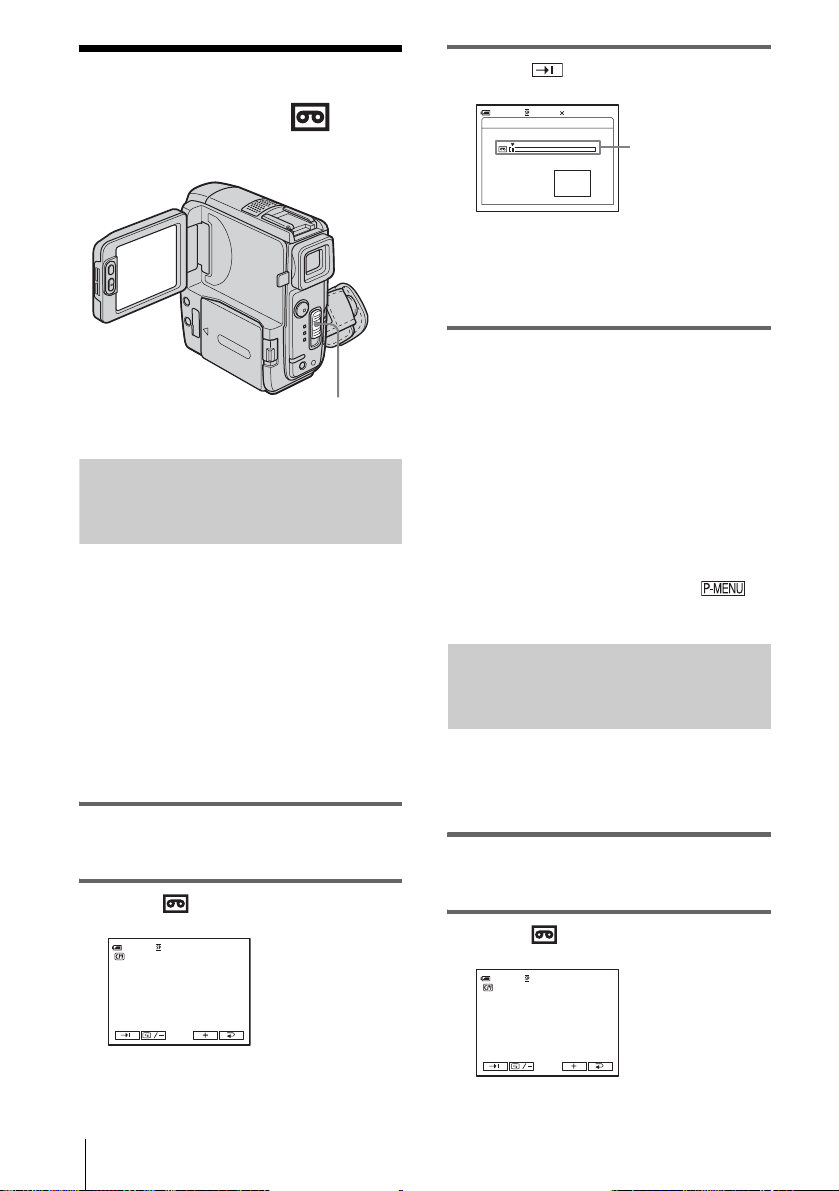
Searching for the starting point
Searching for the las t scene of the most recent recording – END SEARCH
This function is hand y when you hav e played
back the tape, for example, but wan t to start
recording right after the most recently
recorded scene. When you use a cassette
without Cassette Memory, the END
SEARCH function will not work once you
eject the cassette after you have reco rded on
the tape. If you use a cassette with Cassette
Memory, it will fun ction even when you have
ejected the cassette.
1 Slide the POWER switch repeatedly to
select the CAMERA-TAPE mode.
2 Touch .
0:00:00STBY60min
POWER switch
3 Touch .
CANCEL
0:00:00160min
Appears only with a
cassette with
Cassette Memory
END SEARCH
EXECUTING
The last scen e of the most re ce nt recording
is played back for about 5 seconds, and the
camcorder ente rs the standby mode at th e
point where the last recording has finished.
To cancel the operation
Touch [CANCEL].
b Note
• The END SEARCH function will not work correctly
when there is a blank section between recorded
sections on the tape.
z Tip
• You can do this operation by selec ting [END
SEARCH] in the menu setting. When P L A Y /E D I T
mode is selected, you can do this operat ion by
selecting [END SEARCH] short-cut on
(p. 63).
Searching manually – EDIT SEARCH
You can search for the start point while
viewing the pictures on the screen. The sound
is not played back during the search.
1 Slide the POWER switch to select the
CAMERA-TAPE mode.
2 Touch .
0:00:00STBY60min
48
EDIT
EDIT
Recording
Page 49
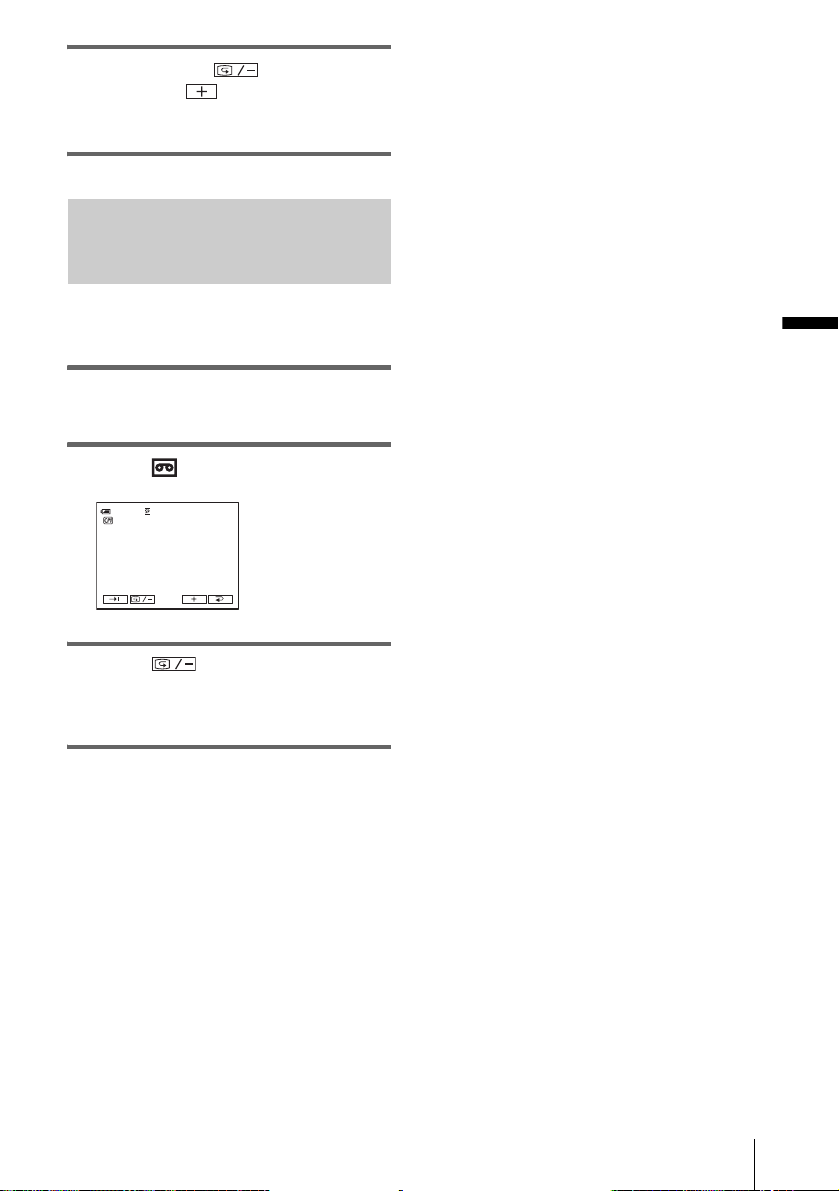
3 Keep touching (to go
backward)/ (to go forward) and
release it at the point where you want
the recording to start.
Reviewing the most recently recorded scenes – Rec review
You can view a few seconds of the scene
recorded just before you stopped the tape.
1 Slide the POWER sw itch re peate dly to
select the CAMERA-TAPE mode.
2 Touch .
0:00:00STBY60min
EDIT
Recording
3 Touch once.
The last few seconds of the most recently
recorded scene are played back. Then, your
camcorder is set to the standby mode.
Recording
49
Page 50
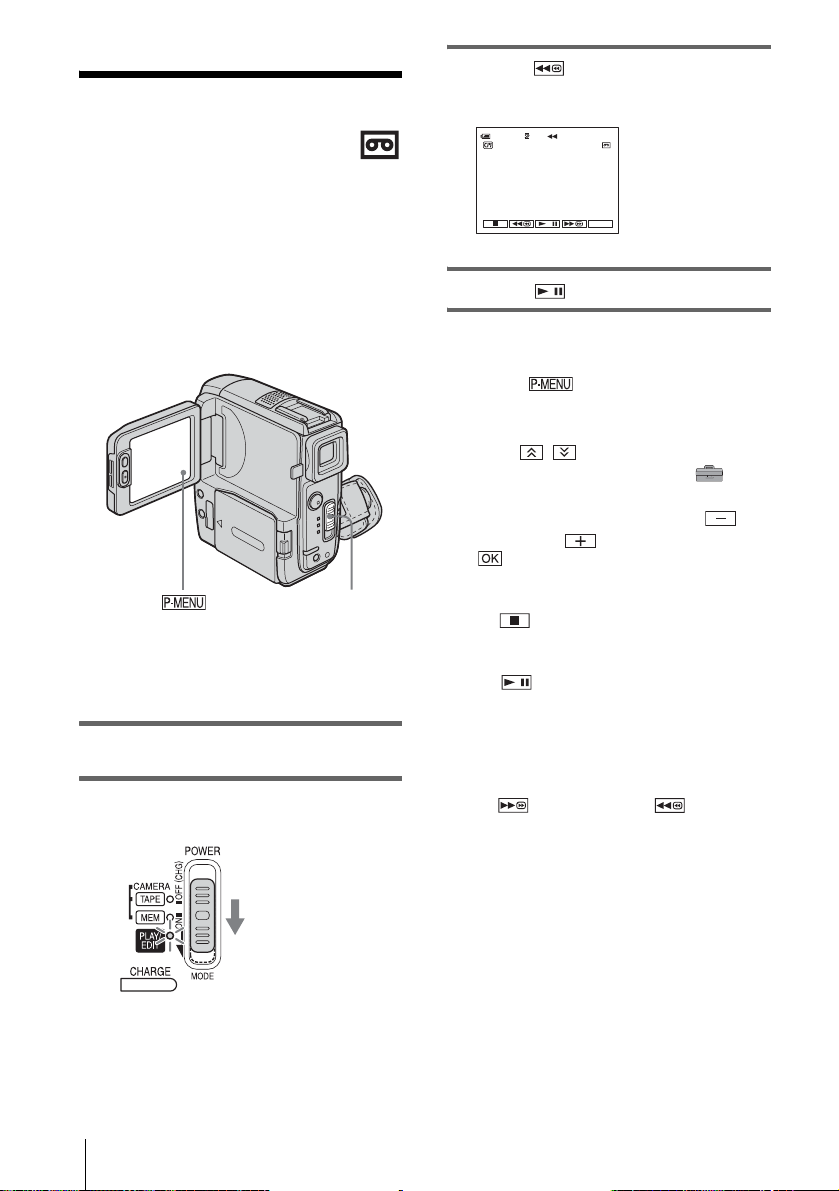
Playback
Viewing movies recorded on a tape
Make sure you have a reco r ded cassette
inserted into your camcorder.
Some of the operations are possible using the
Remote Commander or us in g the tou ch
panel.
When you want to play back recordings on
your TV, see page 60.
3 Touch (rewind) to go to the point
you want to view.
0:00:00:0060min
60min
P-MENU
4 Touch (play) to start playback.
To adjust the volume
1
Touch .
2 Touch [VOLUME].
If the item is not displayed on the screen,
touch / . If you cannot find it, touch
[MENU], and select it from the
(STANDARD SET) menu.
3 Adjust the volume by touc hi ng
(decrease) / (incre ase), then touch
.
POWER switch
z Tip
• Performing Easy Handycam operati on, even first time
users can play back easily. For details, see page 55.
1 Open the LCD panel.
2 Slide the POWER switch repeatedly to
select the PLAY/EDIT mode.
Slide the POWER
switch while
pressing the green
button.
Playback
50
To stop playback
Touch (stop).
To pause
Touch (pause) during playback. Touch it
again to restart the playback.
Playback stops au to m at ically when the pause
mode continues for more than 5 minutes.
To fast forward or rewind
Touch (fast forward) or (rewind) in
stop mode.
To review movies on the viewfinder
Close the LCD panel. Then, extend the
viewfinder.
Page 51
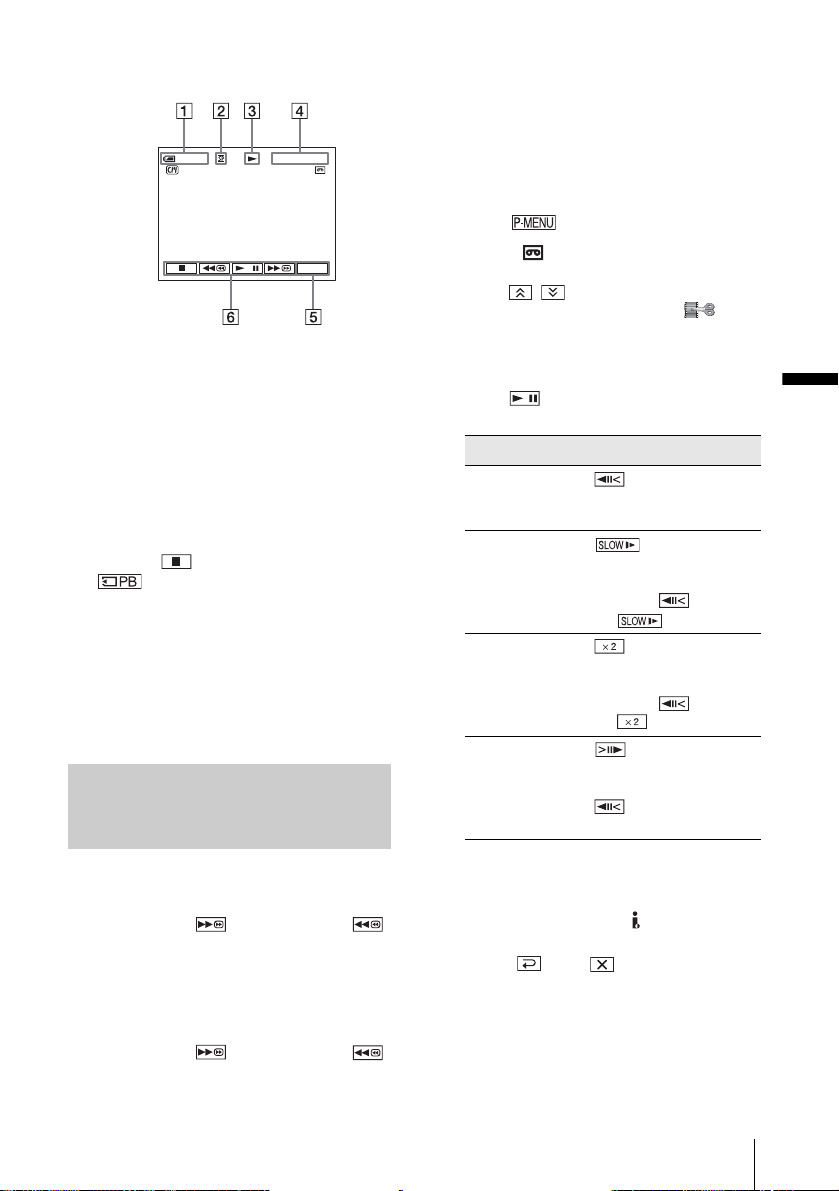
Indicators displayed during tape
playback
0:00:00:1560min
60min
P-MENU
A Remaining battery
B Recording mode (SP or LP)
C Tape transport indicator
D Time code (h our: minute: se cond: frame)
or tape counter (hour: minute: second)
E Personal Menu button (p. 63)
F Video operation buttons
When a “Memory Stick Duo” has been
inserted, (stop) changes to
(“Memory Sti ck” playback) wh en
you stop playback.
b Note
• If you press REC START/STOP (p. 139) dur ing
tape playback, a movie recorded on the ta pe is
recorded on the “Memory Stick Duo” (MPEG
MOVIE EX).
Playing back in various modes
To resume fast forwarding or rewinding, release
the button.
To play back in various modes
You will not hear the recorded sound. Also, you
may see mosaic-like images of the previously
played picture remaining on the screen.
1 During playback or playbac k pa use,
touch .
2 Touch [ VAR. SPD PB].
If the item is not displayed on the screen,
touch / . If you cannot find it, touch
[MENU], and select it from the
(EDIT/PLAY) menu.
3 Select a playback mode.
To return to the normal playback mode,
touch (play/pause) twi ce (once from
frame playback) .
To Touch
change the
playback
direction*
play back
slowly**
play back 2 times
faster (double
speed)
play back frame
by frame
(frame) during
playback.
(slow) during
playback.
To reverse direction
1 Touch (frame).
2 (slow).
(double speed)
during playback.
To reverse direction
1 Touch (frame).
2 (doubl e sp eed) .
(frame) during
playback pause.
To reverse direction, touch
(frame) again during
frame playback.
Playback
To fast forward or rewind during
playback – Picture search
Keep on touching (fast forward) or
(rewind) during playback.
To resume normal playback, release the button.
To view the picture while fast
forwarding or rewinding – Skip scan
Keep on touching (fast forward) or
(rewind) while fast forwarding or rewinding the
tape.
*Horizontal lines ma y appear at the top, bottom,
or in the center of the screen. This is not a
malfunction.
**Pictures output from the DV Interface
cannot be played back smoothly in slow mode.
4 Touch , then .
,continued
Playback
51
Page 52
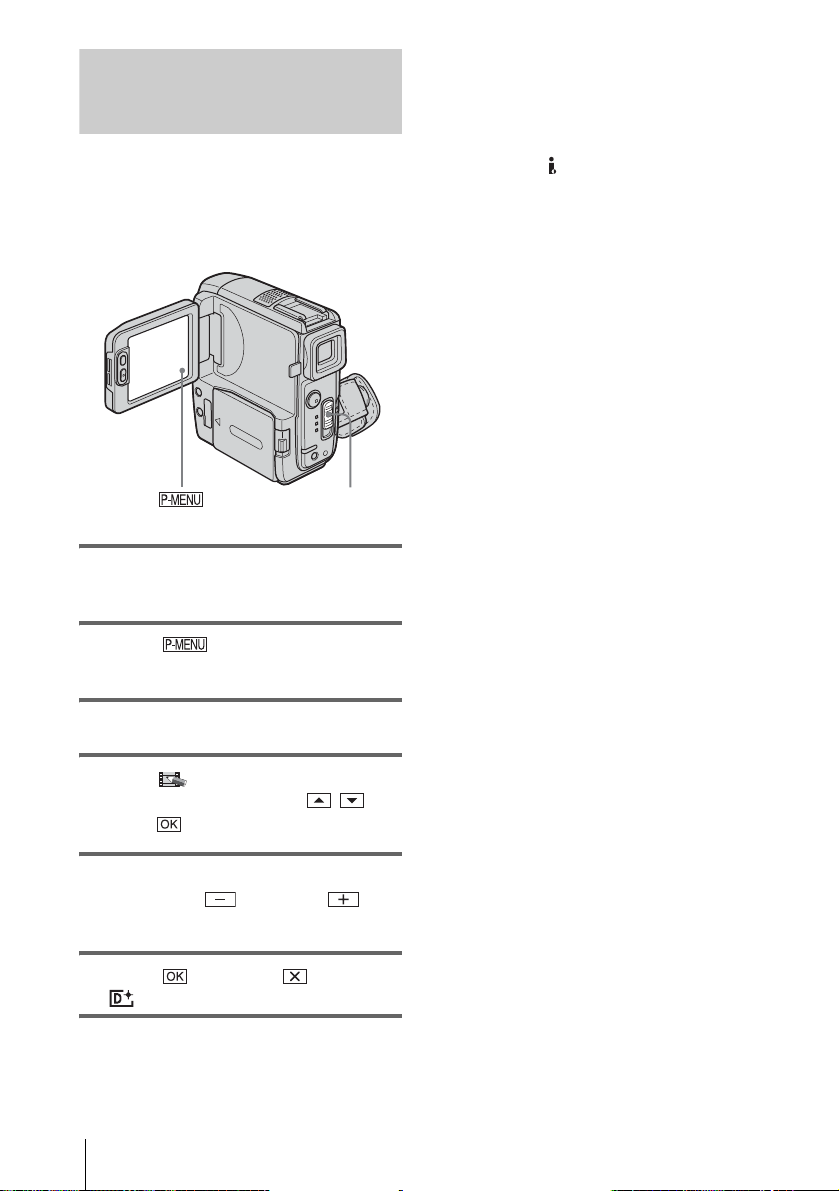
Viewing recordings with added effects – Digital effect
You can apply [STILL], [FLASH], [LUMI.
KEY], and [TRAIL] effects when viewing
recorded pictures. For details on each effect,
see page 44.
POWER switch
1 Slide the POWER switch repeatedly to
select the PLAY/EDIT mode.
To cancel Digital effect
Follow steps 2 to 4, then select [OFF] in step 5.
b Note
• You cannot add effects to externally input pictures.
Also, you cannot output pictures edit e d with di git al
effects via the DV Interface.
z Tip
• You cannot record the pictures edited using special
effects on the tape in your camcorder, but you can
copy them to a “Memory Stick Duo” (p. 96) or
another tape (p. 94).
2 Touch while the picture you
want to add the effect to is displayed.
3 Touch [MENU].
4 Select (PICT. APPLI.), then
[D.EFFECT] by touchin g / and
touch .
5 Select an effect, then adjust the effect
by touching (decrease)/
(increase).
6 Touch twice, then .
appears.
Playback
52
Page 53
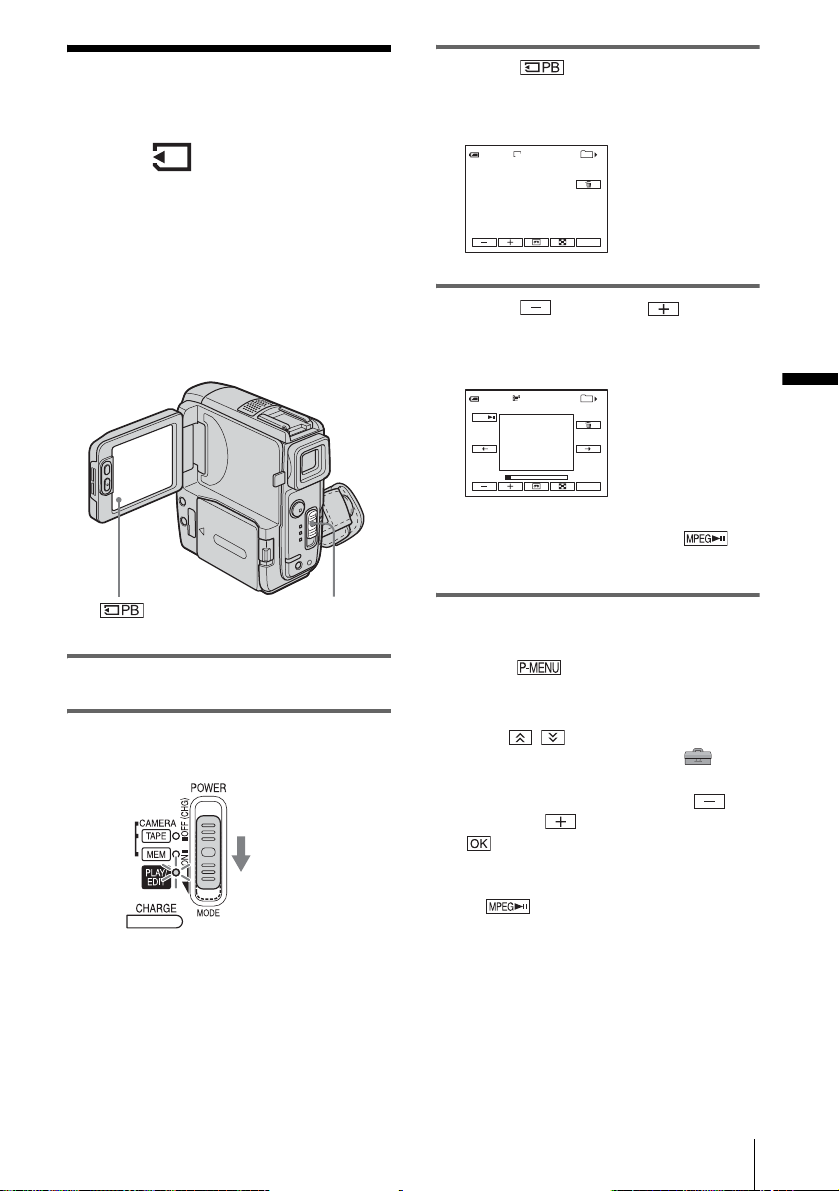
Viewing recordings on a “Memory Stick Duo”
You can view pictures one at a time on the
screen. When you have a lot of pictures, you
can list them to search through them easily.
Make sure you have a recorded “Memory
Stick Duo” inserted into your camcorder.
When you want to play back a recorded
picture on your TV, see page 60.
POWER switch
1 Open the LC D panel.
2 Slide the POWER sw itch re peate dly to
select the PLAY/EDIT mode.
Slide the POWER
switch while
pressing the
green button.
3 Touch .
The most recently recorded picture appears
on the screen.
101
1152
1/10
MEMORY PLAY
P-MENU
60min
101–0001
4 Touch (previous)/ (next) to
select a picture.
Screen example (movies):
101
320
2/10
MEMORY PLAY
P-MENU
60min
MOV00002
MPEG
When you view a mo vi e, to uch
when the selected movie appears on the
screen.
To adjust the volume of movies
Touch .
1
2 Touch [V OLUME].
If the item is not displayed on the screen,
touch / . If you cannot find it, touch
[MENU], and select it from the
(STANDARD SET) menu.
3 Adjust the volume by tou chi n g
(decrease)/ (incr eas e), then touch
.
To stop or pause movies
Touch . Touch it again to restart the
playback.
Playback
To delete pictures
See “Deleting re corded pictures” (p. 107).
,continued
Playback
53
Page 54
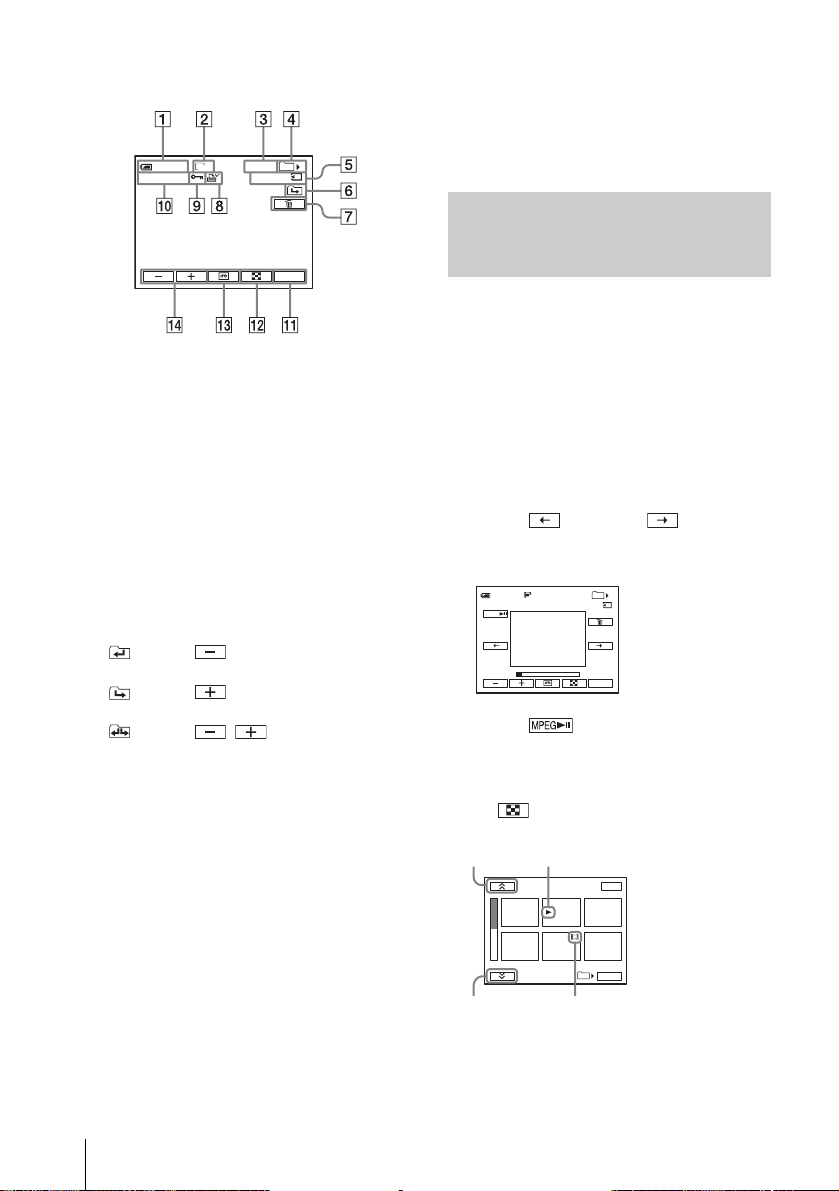
Indicators displayed during “Memory
Stick Duo” playback
101
60min
101–0010
A Remaining battery
B Image size
C Picture number/Total number of
recorded pictures in t he current
playback folder
D Playback folder
E Playing time (movies only)
F Previous/next folder icon
The following indicators appear when the
first or last picture of the current folder is
displayed and when there are multiple
folders on the same “Memory Stick Duo.”
: Touch to move to the previous
folder.
: Touch to move to the next
folder.
: Touch / to move to either
the previous or the next folder.
G Image delete button
H Print mark (still images only) (p. 109)
I Image protection mark (p. 10 8)
J Data file name
K Personal Menu button
L Index screen display button
M Tape playback select button
N Picture select button
b Notes
• Folders that you have created on a compute r ,
renamed folders, and modified pictures may not
appear on the screen.
• While playing back movies on a “Memory S tic k
Duo,” the only menu items availabl e wil l be those
10/10
1152
0:00:00
P-MENU
with short cuts on the Personal Menu. In order to use
other menu items, add them to the Personal Menu.
z Tip
• Once you record a picture in a folder, the same folder
will be set as the default folder for playba ck. You
can select a playback folder in th e menu (p. 74).
Playing back in various modes from a “Memory Stick Duo”
Using the screen in step 4 in “Viewing
recordings on a “Memory Stick Duo”” (p. 53),
the followin g op erations are available.
To search for a scene in a movie
You can divide a movie into a maximum of 60
scenes in order to start playback from a
particular scene. The number of scenes you can
divide the movie int o depends on the length of
the movie.
1 Touch (previous)/ (next) to
select a scene from which to start the
playback.
101
320
101–0002
2/10
0:00:00
N mark*
101
2/10
Movie icon
P-MENU
END
SET
60min
MOV00002
MPEG
2 Touch .
To display 6 pictures at a time,
including movies – Index Screen
Touch .
Previous
6 pictures
Next
6 pictures
* The picture displayed before switching to the index
screen.
54
Playback
Page 55
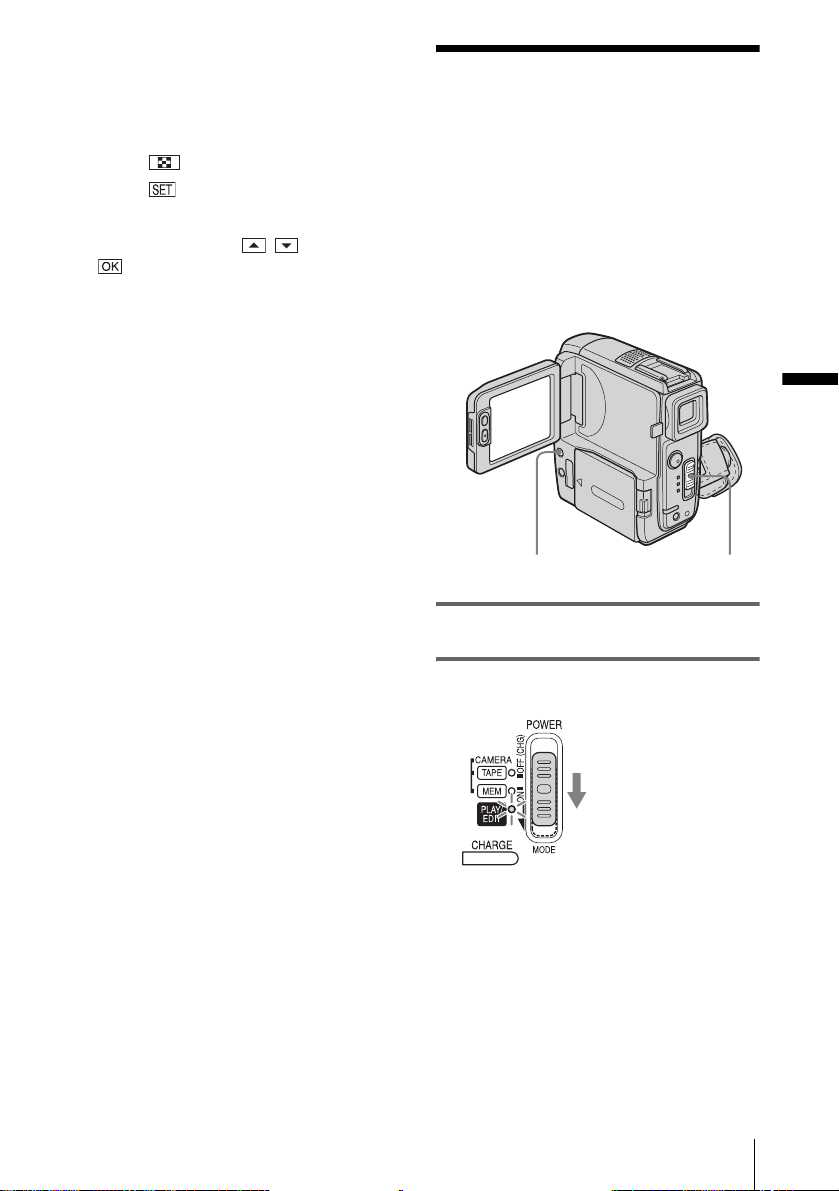
To return to the single display mo de, touch the
picture that you w ant to display.
To view pictures in other folders in the
index screen
1
Touch .
2 Touch .
3 Touch [PB FOLDER].
4 Select a folder with / , then touch
.
Playing back with
ease
Easy Handycam operation allows ea sy
playback for even first time users by
providing only the basic functio ns for
playback. Also screen font size increases for
easy viewing. Make sure you have a recorded
cassette or a recorded “Memory Stick Duo”
inserted into your camcorder.
1 Open the LCD panel.
– Easy Handycam
EASY POWER switch
Playback
2 Slide the POWER switch repeatedly to
select the PLAY/EDIT mode.
Slide the POWER
switch while pressing
the green button.
,continued
Playback
55
Page 56
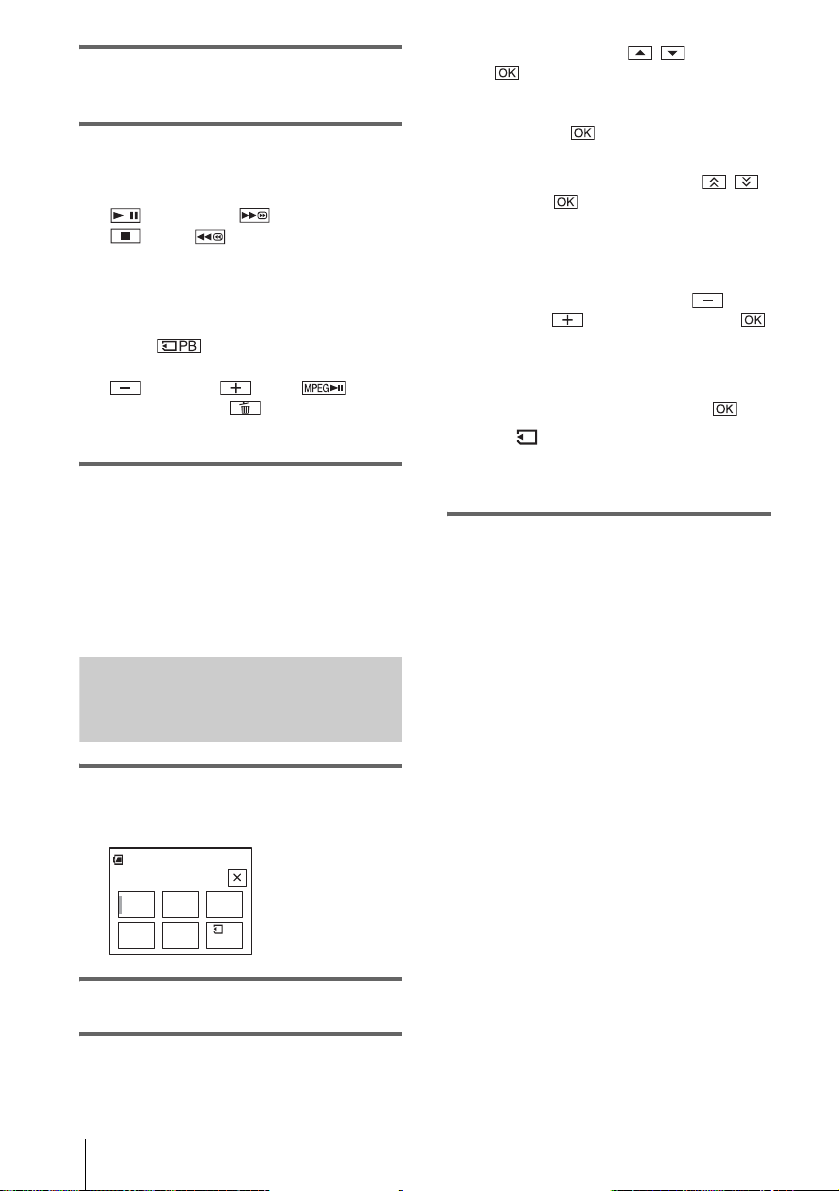
3 Press EASY.
The EASY lights up in bl ue.
4 Play back pictures.
When playing back on a tape
The following button s ca n be operated.
(play/pause)/ (fast forward)/
(stop)/ (rewind)
You can operate these operations and
SLOW y on the Remote Commander.
When playing back on a “Memor y
Stick Duo”
Touch .
The following button s ca n be operated.
(previous)/ (next)/ (play/
pause for movie)/ ( delete)
You can control playback with the Remote
Commander.
To cancel Easy Handycam operation
Press EASY again.
b Note
• You cannot turn Easy Handycam operation on or off
during communication with another device via USB
cable.
1 Set [Y] (year) with / , then touch
.
2 Set [M] (mon th), [D] (day), hour and
minutes in the same way as [Y] (year),
then touch
For [LANGUAGE]
Select the desired la nguage with / ,
then touch .
For [BEEP]
See page p. 8 7.
For [VOLUME]
Adjust the volum e by touching
(decrease)/ (increase), then touch .
For [DATA CODE]
During playbac k , you can view the date/
time data.
Touch [DATE/TIME ] , the n to uch .
For [ ALL ERA SE]
You can delete all the images on the
“Memory Stick Duo. ”
Touch [YES].
z Tip
• During Easy Handycam operation, you can also do
the followings:
– “Playing the picture on a TV” (p. 60)
– “Dubbing to a nother tape ” ( p.94)
Making full use of Easy Handycam operation
1 Touch [MENU].
The available menu item s are displayed on
the screen.
60min
BEEP
VOLUME
0:00:00:00
CLOCK
SET
DATA
CODE
LAN-
GUAGE
ALL
ERASE
2 Touch the desired item.
3 Select the desired setting.
For [CLOCK SET]
Playback
56
Page 57
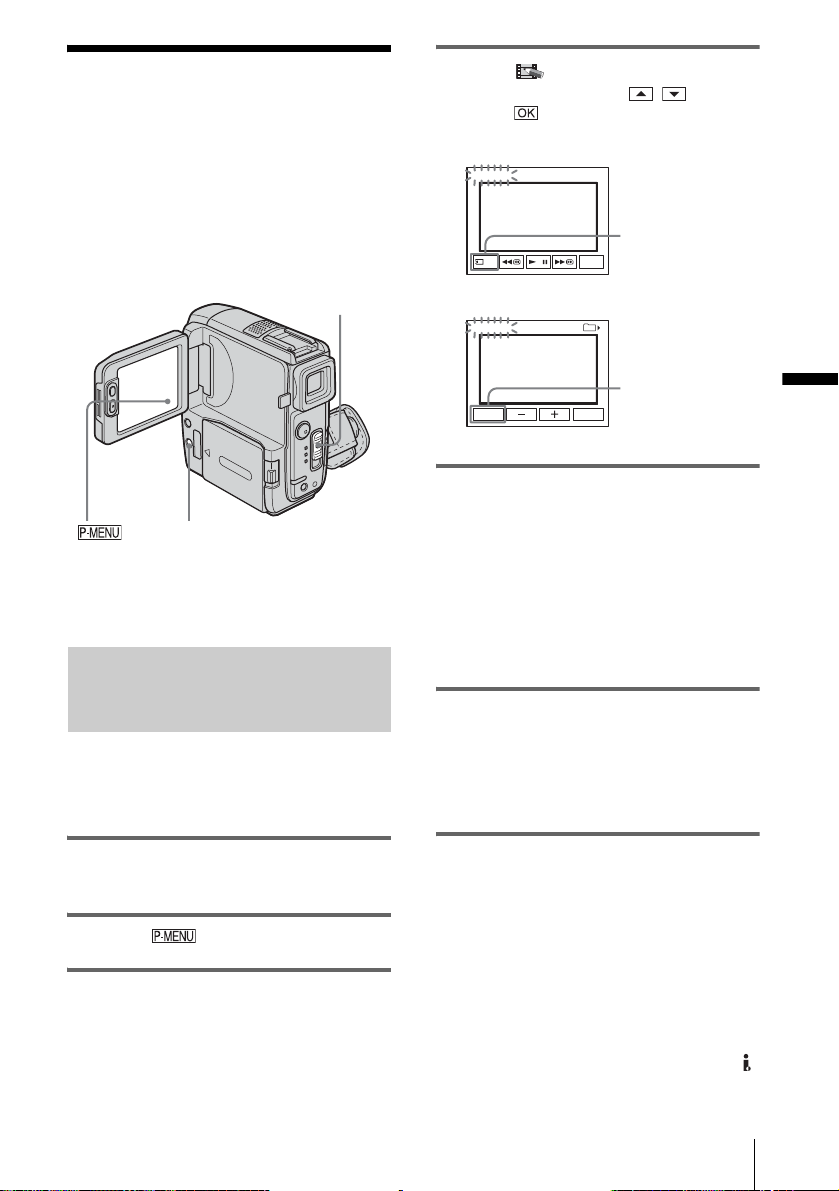
Various playback functions
You can magnify a small subject in a
recording and display it on the screen. You
can also display the recorded date and the
name of the folder in which the picture is
recorded.
4 Select (PICT.APPLI.), then [PB
ZOOM] by touching / and
touch .
Tape playback zoom screen
PB ZOOM
PB
Play back
the image.
0:00:00:00
END
“Memory Stick
Duo” playback
select button
POWER switch
DISPLAY/BATT INFO
Magnifying pictures – Tape playback zoom/Memory playback zoom
You can magnify movies recorded on a tape
or still images stored on a “Memory Stick
Duo.”
1 Slide the POWER sw itch re peate dly to
select the PLAY/EDIT mode.
2 Touch .
3 Touch [ME NU].
Memory playback zoom screen
101
1/10PB ZOOM
MEMORY PLAY
101–0001
VIDEO
END
Tape playback
select button
5 Play back the still picture or movie,
and touch the screen at the point you
want to magnify within the displayed
frame.
The picture is magnif ie d approximately
twice the original size and centered at the
point you touched on the screen. When you
touch another pla ce, t he point you touched
becomes the center.
6 Adjust the zoom ratio using the power
zoom lever.
You can select the zoom ratio from
approximately 1. 1 t o 5 t imes the original
size. Touch W to decrease, or T to increase
the ratio.
To cancel the operation
Touch [END].
b Notes
• You cannot use Tape PB zoom together with:
– Digital effect
– Picture effect ([PICT. EFFECT])
• Pictures edited with PB zoom cannot be recorded on
a “Memory Stick Duo” in your camcorder.
• You cannot magnify externally input pictures. Also,
you cannot output the magnified pictures via the
DV Interface.
Playback
,continued
Playback
57
Page 58
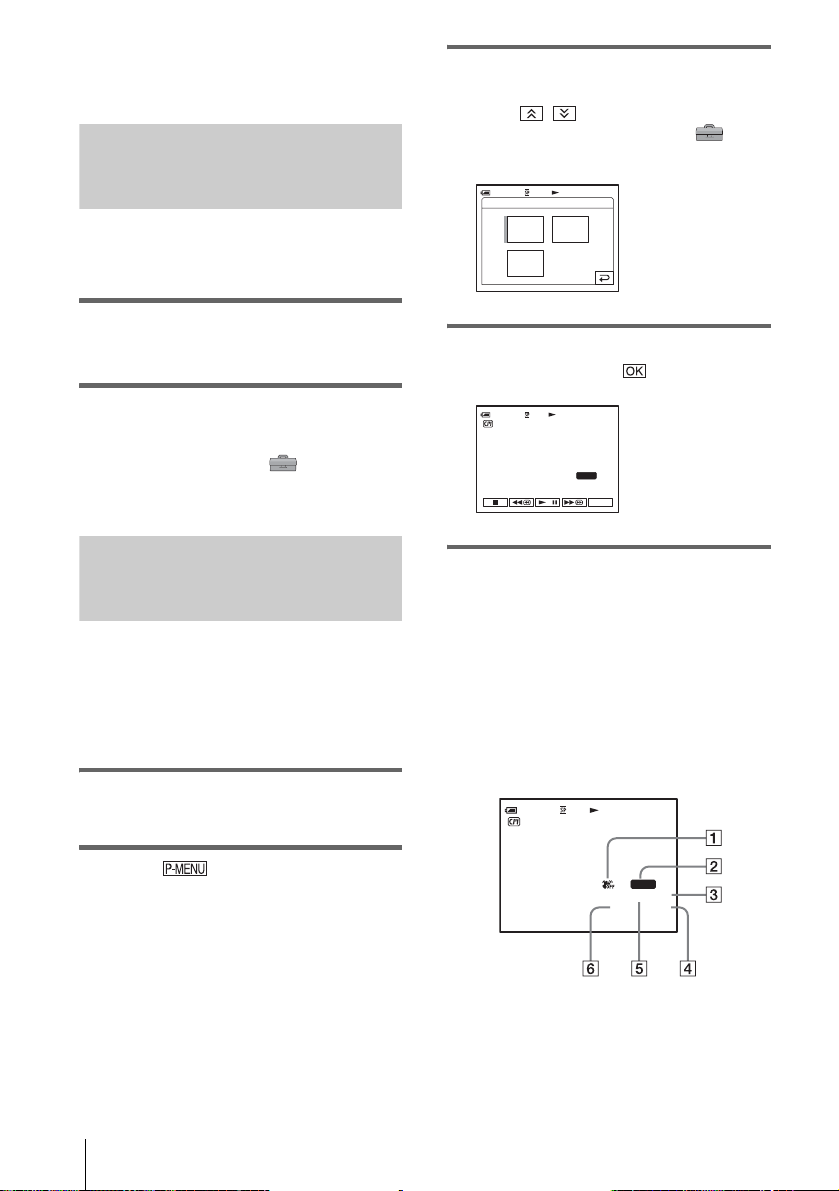
z Tip
• If you press DISPLAY/BATT INFO during the
playback zoom operation, th e fr ame will disappear.
Displaying the screen indicators
3 Touch [DATA CODE].
If the item is not displayed on the screen,
touch / . If you cannot find it, touch
[MENU], and select it from the
(STANDARD SET) menu.
You can choose to display the time code, tape
counter, and oth er information on the screen.
Press DISPLAY/BATT INFO.
The indicator switches on or off as you press the
button.
z Tip
• You can display the screen indicator s dur i ng
playback on a TV. Select the (STANDARD
SET) menu, [DISPLAY], then [V-OUT/PANEL]
(p. 88).
Displaying the date/time and camera settings data – Data code
During playback, you can view the date/time
data and the camera settings data
([CAMERA DATA]) that are automatically
recorded while recording pictures on a tape or
a “Memory Stick Duo.”
1 Slide the POWER switch repeatedly to
select the PLAY/EDIT mode.
OFF
DAT A
0:00:00:00
DATE/
TIME
60min
DATA CODE: OFF
CAMERA
4 Select [CAMERA DATA] or [DATE/
TIME] then touch .
60min
To hide the date/time or camera
settings data
Follow steps 2 and 3, an d sel ect [OF F] in step 4.
Camera settings data display
In the date/time data display, the date and time
is displayed in the same area.
If you record the picture without setting the
clock, [--- -- ----] and [--:--:--] will appear.
0:00:00:00
AUTO
AWB100
0dBF3. 4
P-MENU
0:00:00:0060min
2 Touch during playback or
playback pause.
Playback
58
A SteadyShot off*
B Exposure*
C White balance*
D Gain*
AUTO
AWB100
9dBF1. 8
Page 59

E Shutter speed
F Aperture value
* Appears only during tape playback
b Note
• Camera setting data do not appear when movies on a
“Memory Stick Duo” are played ba ck.
z Tips
• Exposure adjustment value (0E V) appe ars when a
“Memory Stick Duo” is played ba c k.
• appears for t he picture rec orded using an external
flash (optional).
Playback
Playback
59
Page 60
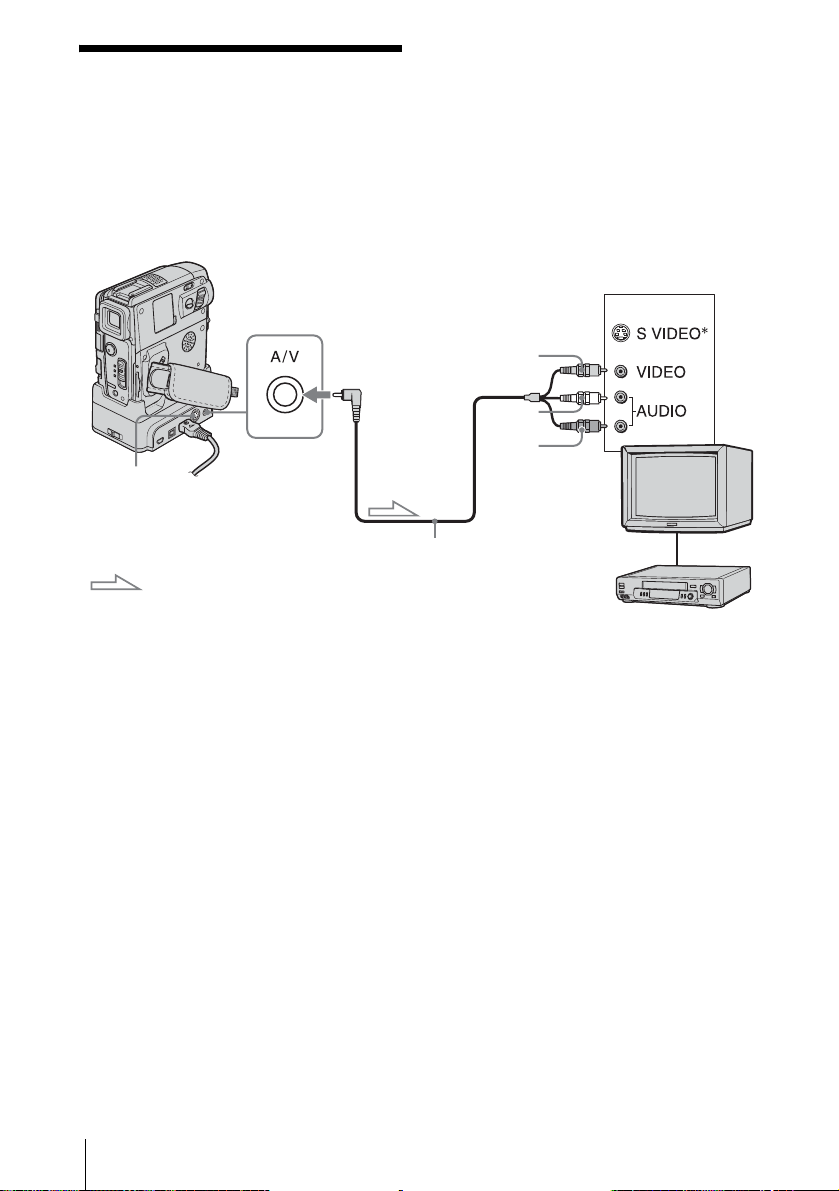
Playing the picture on a TV
Connect your ca m c or d e r via the Ha n dycam
Station or the A/V jack of your camcorder to
a TV using the supplied A/V connect ing
cable.
Connect the supplied AC Adaptor to the wall
outlet for the power supply (p. 16).
Refer also to the instruction manuals supplied
with the devices to be conne cted.
To copy to another tape, see page 94.
A/V jack
S VIDEO jack
A/V connecting cable (supplied)
Signal flow
* By using an S video cable (optional), higher quality
DV format pictures can be produced.
When there is an S video jack on the device to be
connected, connecting the S video cable (optional)
to the S video jacks on both your camcorder and the
device instead of using the yellow plug is
recommended. The audio will not be outpu t whe n
you connect with the S video plug alone.
When your TV is connected to a VCR
Connect your camcorder to the LINE IN input
on the VCR using the A/V connecting cable. Set
the input selecto r o n the VCR to LINE.
IN
Yellow
White
Red
VCRs or TVs
When your TV is monaural (When your
TV has only one audio input jack)
Connect the yellow plug of the A/V connecting
cable to the video input jack and connect the
white or the red plug t o the audio input jack of
your TV or VCR.
When you want to play the sound in monaural
mode, use a connecting cable (optional) for that
purpose.
b Note
• Do not connect A/V connecting cables to both your
camcorder and the Handycam Station. The image
might be distorted.
60
Playback
Page 61
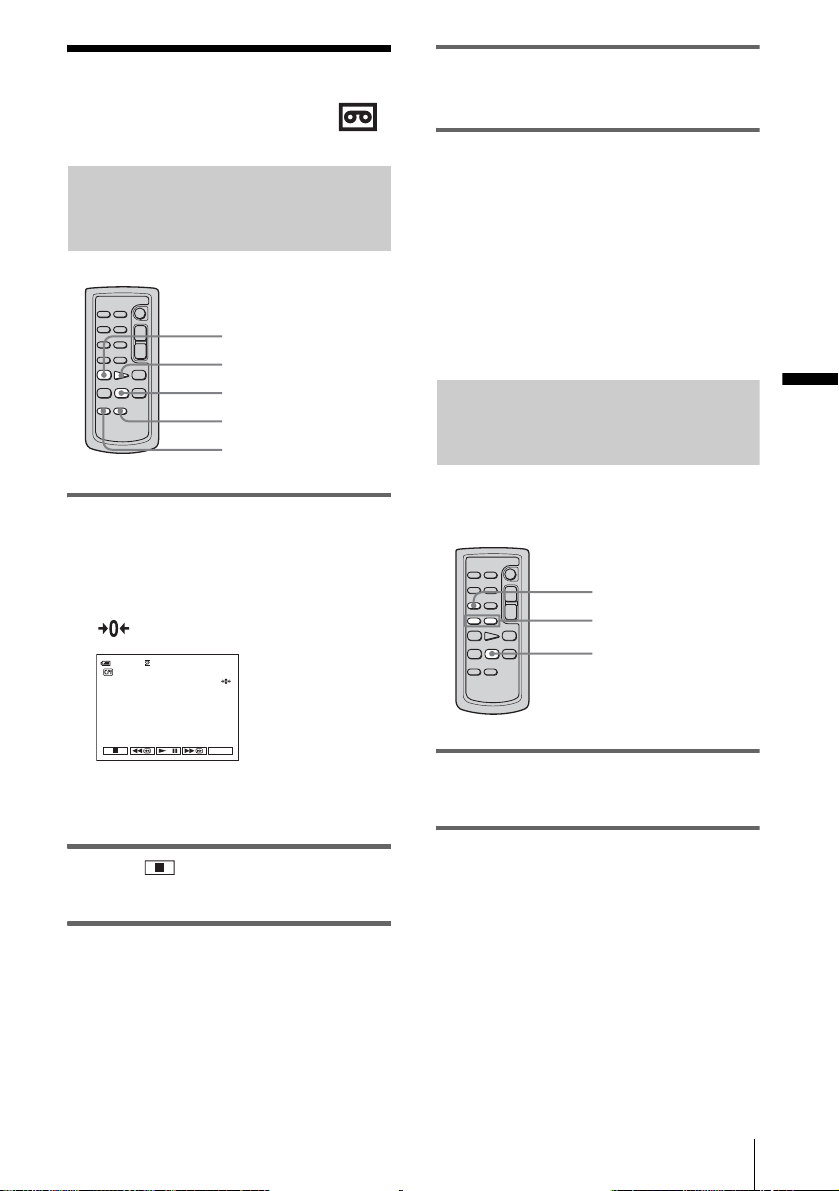
Locating a scene on a tape for playback
4 Press PLAY.
The playback starts fro m th e point
designated “0:00:00” on the tape coun te r.
Searching quickly for a desired scene – Zero set memory
m REW
PLAY
STOP
DISPLAY
ZERO SET MEMORY
1 During playback, press ZERO SET
MEMORY on the Remote
Commander at the point you want to
locate later on.
The tape counter is reset to “0:00:00” and
appears on the sc reen.
0:00:0060min
P-MENU
If the tape counter is not displayed, press
DISPLAY on the Remote Commander.
To cancel the operation
Press ZERO SET MEMORY on the Remote
Commander agai n.
b Notes
• There may be a discrepancy of several sec onds
between the time code and the tape count er.
• Zero set memory will not function correctly if there
is a blank section between recor de d se c tions on the
tape.
Searching for a scene using Cassette Memory – Title search
You can locate a scene where you have added a
title (p. 81).
SEARCH M.
. / >
STOP
1 Slide the POWER switch repeatedly to
select the PLAY/EDIT mode.
Playback
2 Press (stop) when you want to
stop playback.
3 Press m REW.
The tape stops automatical ly when the tape
counter reache s “0:00:00.”
2 Press SEARCH M. on the Remote
Commander repeatedly to select
[TITLE SEARCH].
,continued
Playback
61
Page 62
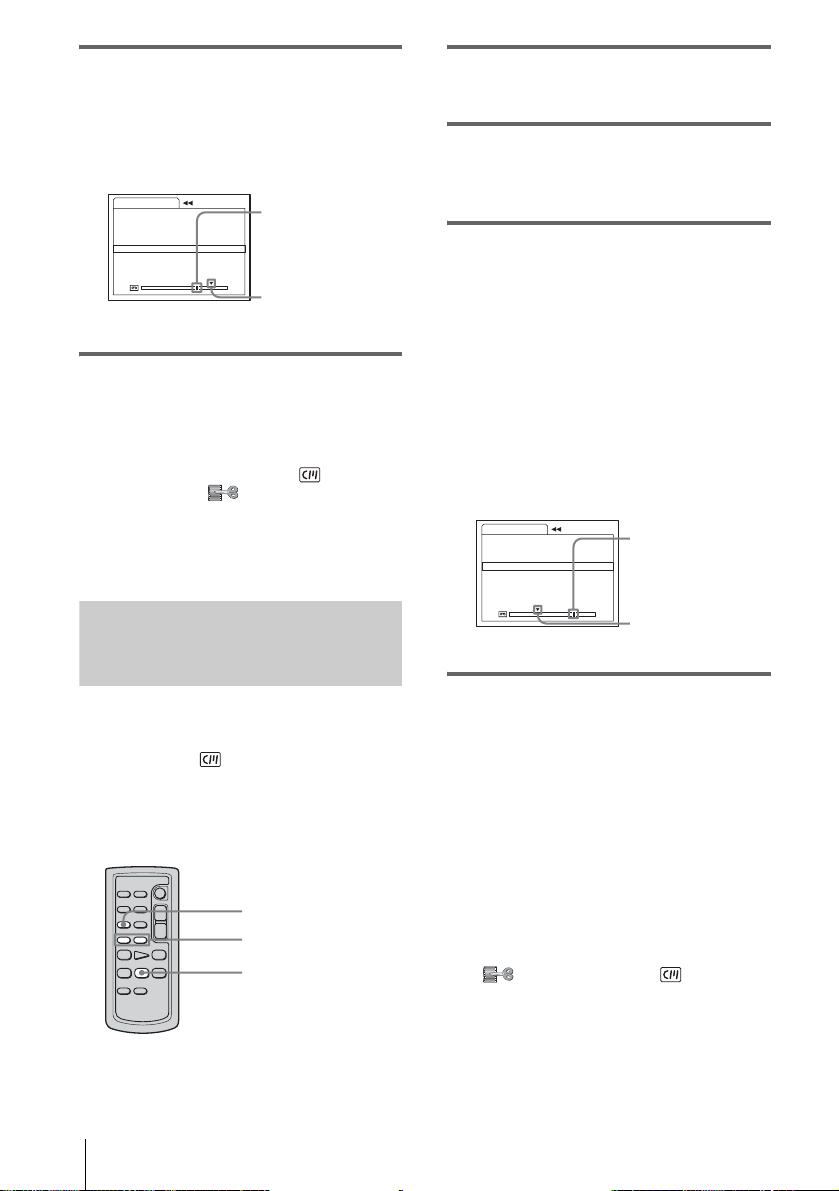
3 Press .(previous)/> (next) on
the Remote Commander to select a
title that you want to play.
Playback starts automatically from the
selected title.
TITLE SEARCH 0:00:00:00
1 HELLO !
HAPPY BIRTHDA Y
2
3
HAPPY HOLIDAYS
CONGRATULATIONS !4
OUR SWEET BABY5
WEDDING6
To cancel the operation
Press STOP on the Remote Commander.
b Notes
• You cannot use Title search when [ SEARCH] is
set to [OFF] on the (EDIT/PLAY) menu (it is
set to [ON] by default) (p. 81).
• The Title search will not function correctly when
there is a blank sectio n between recorded se ctions on
the tape.
Present point on
the tape
Point where the
playback starts
1 Slide the POWER switch repeatedly to
select the PLAY/EDIT mode.
2 Press SEARCH M. on the Remote
Commander repeatedly to select
[DATE SEARCH].
3 Press . (previous)/> (next) on
the Remote Commander to select a
recording date.
When your cassette has Cassette Memory ,
you can select the recording date itself.
When your cassette does no t have Cassette
Memory, you can sel ect th e previ ous or t he
next date of the present point on the tape.
Playback starts automatically from the
point where the date changes.
Screen example (when your cassette has
Cassette Memory):
DATE SEARCH 0:00:00:00
14/JAN/ 0 4
4/JAN/ 04
2
3
5/JAN/ 04
Present point on
the tape
Searching for a scene by date of recording – Date search
When you are using a cassette with Cassette
Memory, you can locate a sc ene by the
recording date ([ SEARCH] is set to [ON]
by default). When you are us in g a ca s s e tte
that does not have Cas sette Memory , you can
locate the point where the recording date
changes.
SEARCH M.
. / >
STOP
Playback
62
Point where the
playback starts
To cancel the operation
Press STOP on the Remote Commander.
b Notes
• If one day’s recording is less than 2 minutes, your
camcorder may not accurately find the point where
the recording date changes.
• The Date search will not function correctly when
there is a blank section between recorded sections on
the tape.
• You can record date/time da ta for up to 6 da ys.
When you have recorded for more than 7 days on a
tape, locate the date w ithout using the Cassette
Memory. To turn of f the Cassette Memory , se lect
the (EDIT/PLAY) menu, [ SEARCH],
and then [OFF] (p. 81).
Page 63
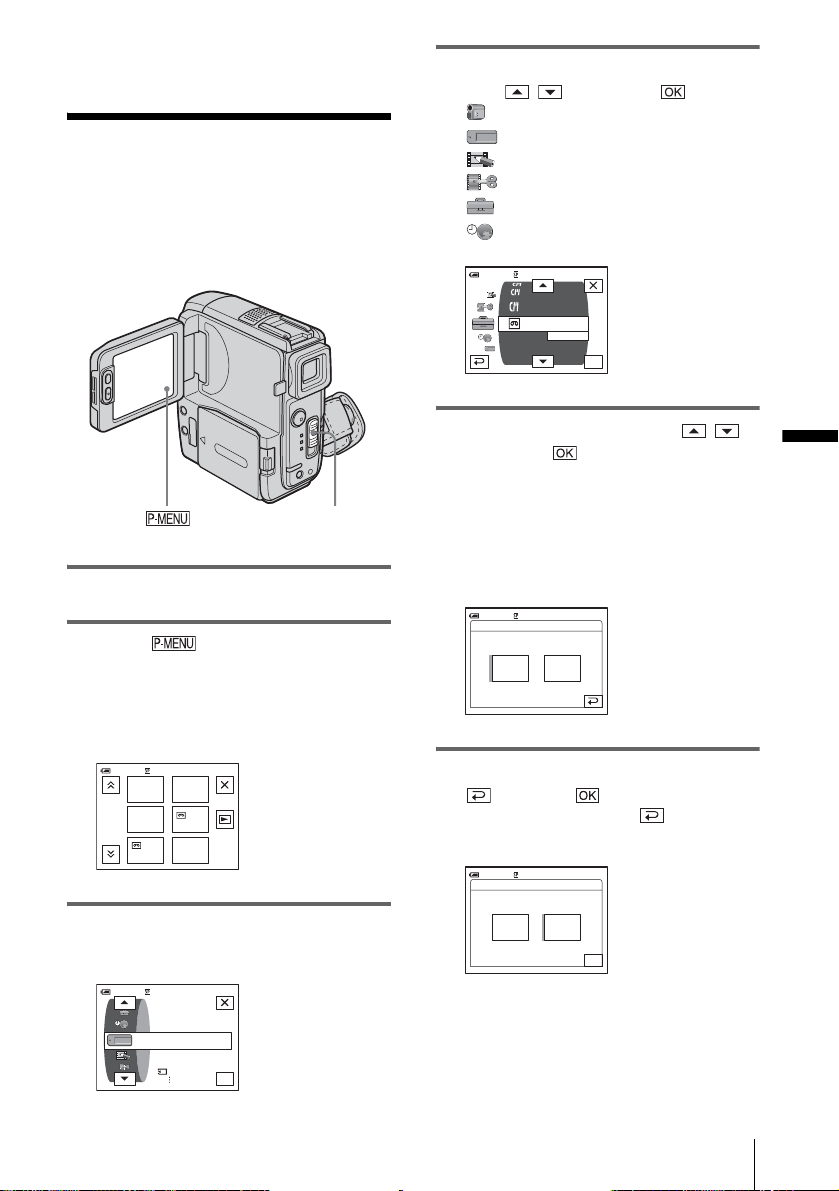
B
Advanced operations
Using the Menu
Selecting menu items
You can change various settings or make
detailed adjustments using the menu items
displayed on the screen.
4 Select the icon of the desired menu
with / , then touch .
CAMERA SET (p. 65)
MEMORY SET (p. 71)
PICT. APPLI. (p. 75)
EDIT/PLAY (p. 80)
STANDARD SET (p. 84)
TIME/LANGU. (p. 89)
0:00:00:0060min
TITLE ERASE
T APE TITLE
ALL ERASE
REC MODE
AUDIO MODE
VOLUME
MULTI SOUND
SP
OK
POWER switch
1 Turn on the power (p. 20).
2 Touch .
The Personal Menu appears. Item s that are
used often are displayed as short-cuts.
Example: PLAY/EDIT mode’ s
Personal Menu
MENU
0:00:00:00
END
SEARCH
VAR.
SPD PB
DATA
CODE
60min
1/3
VOLUME
REC
CTRL
3 Touch [MEN U] to display the menu
index screen.
60min
0:00:00:00
5 Select the desired item with / ,
then touch .
You can also touch the item directly to
select it.
You can scroll and see all items.
The available items vary depending on the
power mode of your camcorder.
Unavailable items will be grayed out.
REMOTE CTRL: ON
0:00:00:0060min
OFFON
6 Select the desired setting.
changes to . If you decide not to
change the setting, touch to return to
the previous screen.
60min
REMOTE CTRL: OFF
0:00:00:00
OFFON
OK
Using the Menu
MEMORY SET
STILL SET
MOVIE SET
ALL ERASE
OK
,continued
Using the Menu
63
Page 64

7 Touch , then to hide the menu
screen.
You can also tou ch (return) to go ba ck
a screen each time you touch the button.
To use the short-cuts of the Personal
Menu
The available items vary depending on the
power mode of your camcorder. Una vailable
items will be grayed out.
You can customize the short-cuts (p. 90).
1 Touch .
2 Touch the desired item.
3 Select the desired setting, then touch .
z Tips
• When the PLAY/EDIT mode is selected, touch
on the screen displayed after step 2 (p. 63) to display
the video operation screen. Touch to return to
the previous screen.
• It is convenient if the items you often us e appe ar as
short-cuts on the Personal Menu. To cust omi ze the
Personal Menu, see page 90.
Using the Menu
64
Page 65
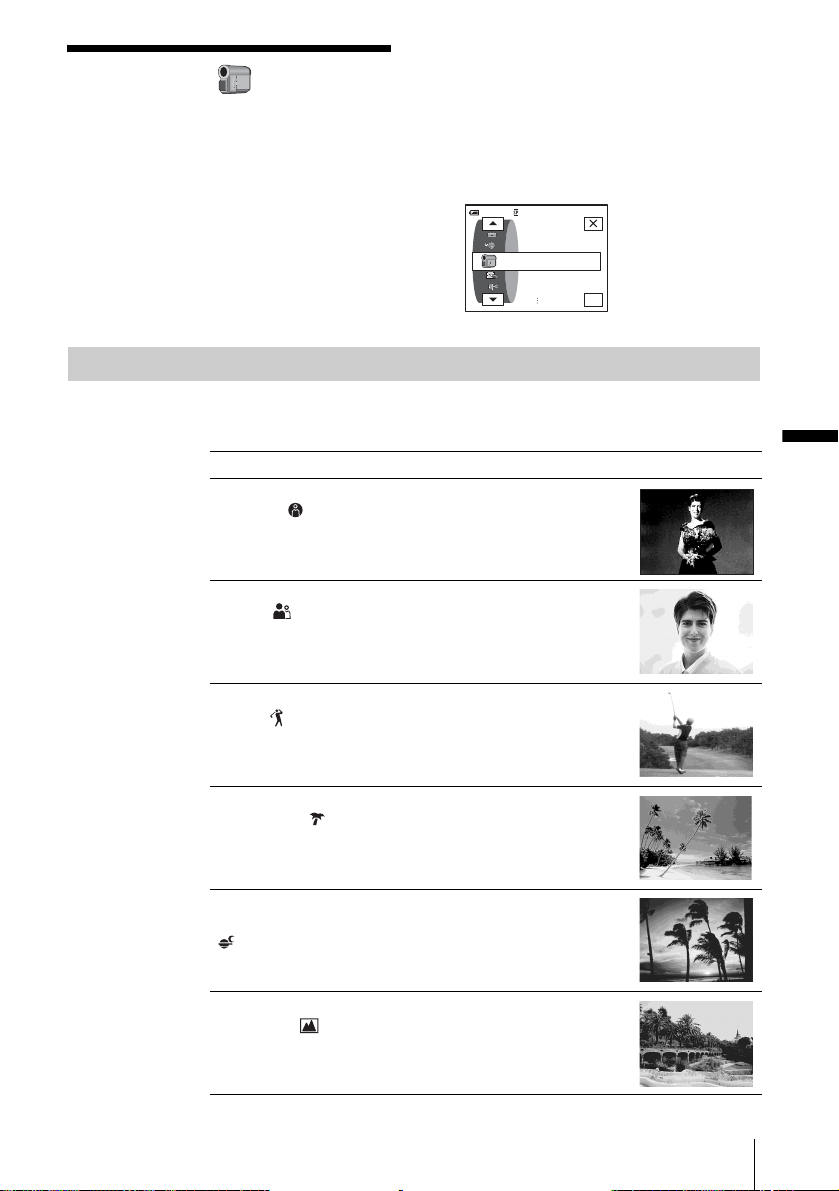
Using the
(CAMERA SET) menu
– PROGRAM AE/WHITE BAL./16:9 WIDE,
etc.
You can select items listed below on the
CAMERA SET menu. To select items, see
“Selecting menu items” (p. 63).
PROGRAM AE
You can record pic tures easily in a situation that requires vari ous techniques by
selecting the following settings.
G AUTO Select this when not using PROGRAM AE.
SPOTLIGHT*
(spotlight) ( )
Select to prevent people’s f aces from appearing
excessively white when subjects are lit by strong
light, such as in a theater or at a wedding.
The default settings are marked with G. The
indicators in paren t heses appear when the
setting is selected. The settings you can adjust
vary depending on th e power mode of your
camcorder. The scree n shows the it ems you ca n
currently operat e. Unavailable item s w ill be
grayed out.
0:00:0060min STBY
CAMERA SET
PROGRAM AE
SPOT METER
EXPOSURE
OK
Using the Menu
PORTRAIT (soft
portrait) ( )
SPORTS* (sports
lesson) ( )
BEACH&SKI*
(beach & ski) ( )
SUNSET&MOON
** (sunset & moon)
( )
LANDSCAPE**
(landscape) ( )
Select to bring out the subject such as people or
flowers while creating a soft background.
Select to minim iz e shake when shooting fastmoving subjects such as in tenn is or golf .
Select to prevent people’s f aces from appearing
dark in strong light or reflected light, such as at a
beach in midsummer or on a ski slope.
Select to maintain the atmosphere of situations
such as sunsets, general night views, fireworks,
and neon signs.
Select when shooting distant subjects such as
mountains. This setting also prevents your
camcorder from focusi ng on gl ass o r metal m esh
in windows that comes in between the camcorder
and the subject.
,continued
Using the Menu
65
Page 66
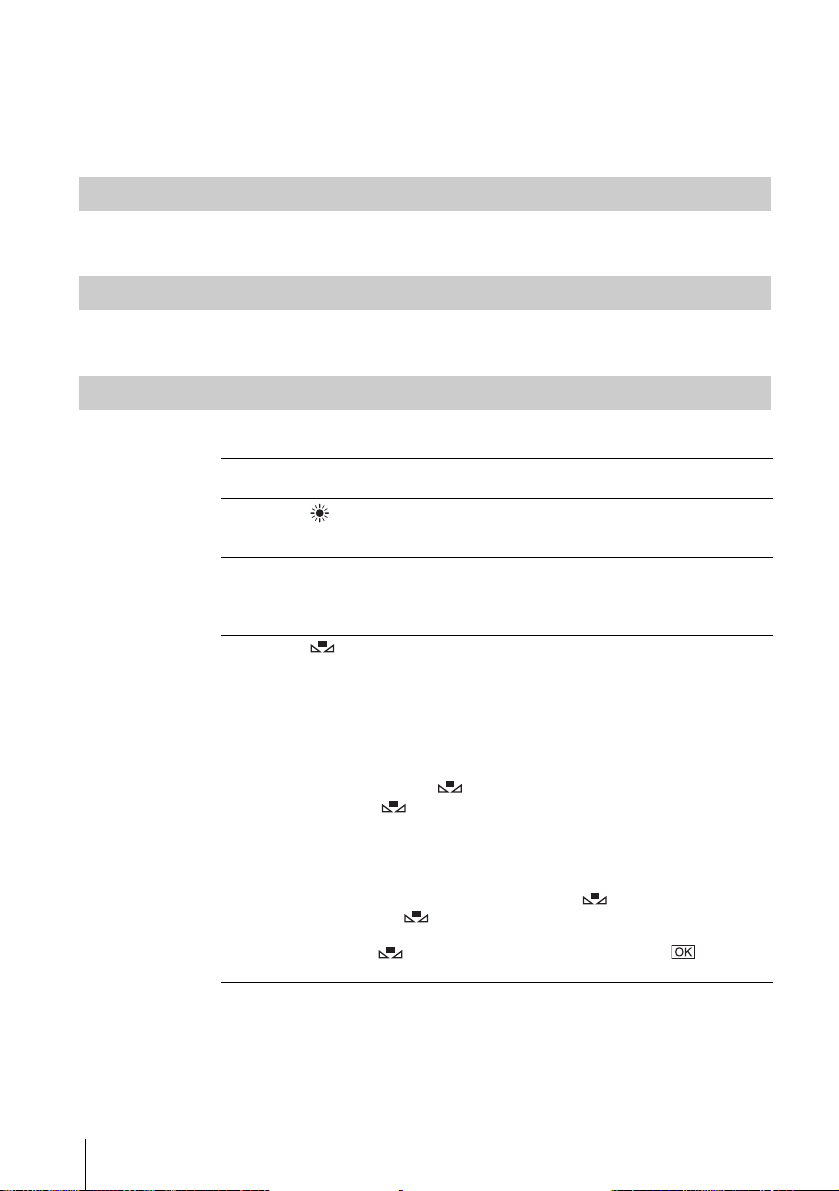
SPOT METER
EXPOSURE
WHITE BAL.
* Your camcorder is adjusted to focus only on subjects in the middle to far distance.
**Your camcorder is adjusted to f oc us only on distant subjects.
Note
b
• [SPORTS] (spor ts le sson) will not work whe n th e PO W E R switch is set to CAMERAMEM.
See page 3 8 for details.
See page 3 9 for details.
You can adjust the color balance to the brightness of the recording environment.
G AUTO Select when you want to record with the white balance adjusted
OUTDOOR ( ) • Select when recording a sunset/sunrise, general night views, neon
INDOOR (n) • Select when recording at a party or in studios where lighting
ONE PUSH ( ) Select when you want to record with the white balance adjusted
automatically.
signs, or fireworks.
• Select when under daylight fluorescent lamps.
conditions change quickly.
• Select when under video lamps such as those in a studio, under
sodium lamps, mercury lam ps or w arm white fluorescent lamp s.
according to the ambient ligh t.
1 Select [ONE PUSH].
2 Frame a white object such as a piece of paper, to fill
the screen unde r the same lighting co nditions as you
will shoot the subject.
3 Touch [ ].
flashes quickly.
When the white balance has been adjus ted and stored in
the memory, the indicator stops flashing.
b Notes
• Do not shake your camcorder while is flashing qui ck ly.
• When flashes slowly, the white balanc e has not been se t, or
could not be set.
• If keeps flashing even after you have touched , set
[WHITE BAL.] to [AUTO].
Using the Menu
66
b Notes
• You cannot use the white balance together with the NightShot plus or Super NightShot plus
function.
• The setting returns to [AUTO] when you disconnect the power source from your camcorder
for more than 5 minutes.
Page 67

AUTO SHUTTER
z Tips
• For better color balance adju s tm en t when [WHITE BAL .] is set to [ AUTO], aim your
camcorder at a nearby white object for about 10 seconds after setting the POWER switch
to CAMERA-TAPE when:
– You remove the battery pack for replacement.
– You bring your camcorder outdoors from inside the house while using fixed exposure, or
bring your camcorder in from outside.
• Redo the [ONE PUSH] procedure when:
– You changed the [PROGRAM AE] settings when [WHITE BAL.] is set to [ONE PUSH].
– You brought your camcorder outdoors from inside the house, or vice versa.
• Set [WHITE BAL.] to [AUTO] or [ONE PUSH] under white or cool white fluorescent
lamps.
SPOT FOCUS
FOCUS
FLASH SET
FLASH MODE
GON Select to automatically activate the electronic shutter to adjust the
shutter speed when recording in bright conditions.
OFF Select when recording without using the electronic shutter.
Using the Menu
See page 4 1 for details.
See page 4 2 for details.
Note that these sett ings will not funct ion with e xternal fla shes tha t do not su pport
the following settings.
GON Select to trigger the flash (optional) regardless of the brightness of the
surroundings.
ON For DCR-PC109:
Select to trigger the flash (optional) regardless of the brightness of the
surroundings. The flash goes off pr ema tur e ly to re duc e the red-eye
phenomenon.
AUTO Select to trigger the flash (optional) automatically.
AUTO For DCR-PC109:
Select to trigger the flash (optional) automatically. The flash goes off
prematurely to reduce the red-eye phen ome non.
,continued
Using the Menu
67
Page 68

FLASH LEVEL
SUPER NSPLUS
NS LIGHT
b Note
• For DCR-PC109:
If the flash is not capable of preventing the red-eye phenomenon, you can select only [ON]
or [AUTO].
You can select an appropriate flash setting for recording with an ext ernal flash
(optional).
HIGH ( ) Select to make the flash level higher than the standard sett ing.
GNORMAL ( ) Standard setting.
LOW ( ) Select to make the flash level lowe r tha n the sta nda rd setting.
b Note
• The setting returns to [NORMAL] when you disconnect the power source from your
camcorder for more than 5 minutes.
See page 40 for details.
When using the NightShot plus function to record, you can record clearer pictures
by using the NightS hot Light to emit infrared rays (invisible).
GON Select to use the NightSh ot Light (p. 40).
OFF Select to disable the NightShot Light (p. 40).
COLOR SLOW S
SELF-TIMER
DIGITAL ZOOM
Using the Menu
68
See page 40 for details.
See page 31, 34 for details.
You can select the maximum zoom level in case you want to zoom to a level
greater than 10 times while recording on a tape. Note that the image quality
decreases when you are using the digit al zoom. This function is us eful when
recording enlarged pictures of a distant subject, such as a bird.
Page 69
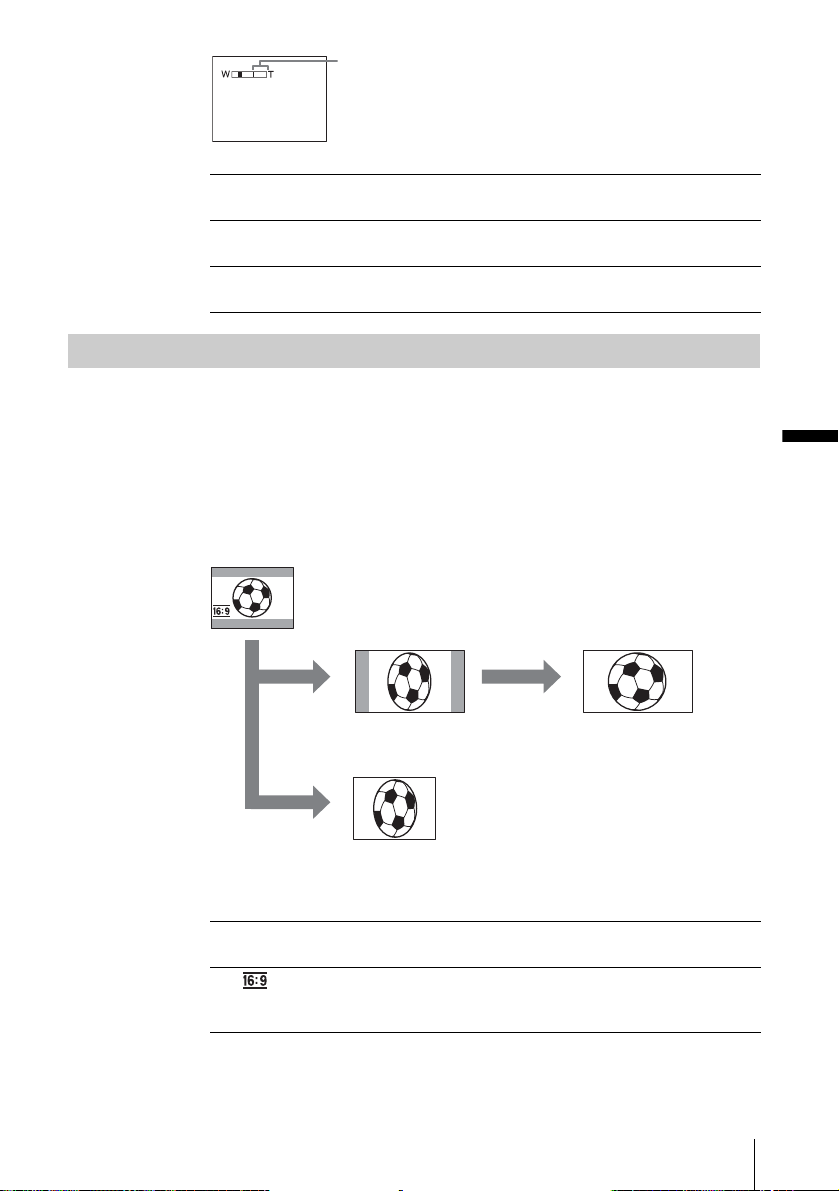
The right side of the bar shows the digital zooming
zone.
The zooming zone appears when you select the
zooming level.
16:9 WIDE
GOFF Select to deactivate the digital zoom. U p to 10 times zoom is
performed optically.
20 × Select to activate the digital zoom. 10 times through 20 times zoom is
performed digitally.
120 × Select to activate the digital zoom. 10 times through 120 times zoom
is performed digitally.
You can record a 16:9 wide picture on the tape to watch on a 16:9 wide-screen TV
([16:9WIDE ] m ode).
With this function [ON], your camcorde r offers even wider ang le s w hen you
move the power zoom lever to the “W” side than recording in [OFF].
When you connect your camcorder to a TV compatible with the ID-1/I D-2 system
and play the tape, the TV switches to full mode automatically.
Refer also to the manuals supplied with your TV.
When viewed on the LCD screen/viewfinder
When viewed on a 16:9 wide screen TV*
When viewed on a standard TV**
Using the Menu
* Picture appears in full screen when the wide-screen TV switches to full mode.
**Played in 4:3 mode. When you play a picture in the wide mode, it appears as you have seen
on the LCD screen or in the viewfinder.
GOFF Standard setting (to record pictur es to pla y back on a 4:3 TV). The
ON (
) Select to recor d a picture to be played back on a 16:9 wide TV. The
recorded picture will not be wide.
recorded picture will be played in full mode when you connect to your
TV compatible with ID-1/ID-2 system s.
,continued
Using the Menu
69
Page 70

STEADYSHOT
z Tips
• The ID-1 system sends aspect rati o inf or m at ion ( 16:9, 4:3, or letter box) by inserting
signals between video signals.
• The ID-2 system sends a copyright protection signal with the ID-1 signals inserted between
video signals in an analog connection.
You can se lect this fun ction to com pensate for camera-shake.
GON Standard setting (enable the SteadyShot function).
OFF ( ) Select to deactivate the SteadyShot function.
Select to shoot a stationary subje ct with a tripod, or when using a
conversion lens (optional). Natur a l pictur e s are pr oduc e d.
Using the Menu
70
Page 71
Using the
(MEMORY SET) menu
– BURST/QUALITY/IMAGE SIZE/ALL
ERASE/NEW FOLDER, etc.
The default settings are marked with G. The
indicators in paren t heses appear when the
setting is selected. The settings you can adjust
vary depending on th e power mode of your
camcorder. The scree n shows the it ems you ca n
currently operat e. Unavailable item s w ill be
grayed out.
You can select items listed below on the
MEMORY SET menu. To select items, see
“Selecting menu items” (p. 63).
STILL SET
BURST
For DCR-PC109:
You can record several still images one after another. The number of images you
can record changes with the image size and space available on the “Memory Stick
Duo” you are using .
1 Select [NORMAL] or [EX P. BR K T G ] , a nd t hen touch .
GOFF Select when not recording continuously.
NORMAL ( ) Select to record from 4 (1152 × 864 image size) to 13 (640 × 480
EXP. BRKTG
()
2 Touch .
3 Press PHOTO fully.
In the [NORMAL] setting, the maximum number of images are recorded as
long as you are pr essing PHOTO fully.
60min
MEMORY SET
image size) images continuously at approximately 0.5-second
intervals.
Select to record 3 images consec utively wit h different exposures
at approximately 0.5-second intervals. You can compare the 3
images and select an image recorded in the best exposure.
FINE
1152
STILL SET
MOVIE SET
FORMAT
30
OK
Using the Menu
b Notes
• The flash (optional) will not func tion while you are recording images cont inuously.
• The maximum number of images will be recorded in the self-timer mode or when you are
operating with the Rem o te Commander.
• [EXP. BRKTG] will not function when you have space for fewer than 3 images remaining
on the “Memory Stick Duo.”
• When it is hard to see the d ifference betwe en the images reco rded in [EXP. BRKTG] mod e
on the LCD screen, connect your camcorder to your TV or a com pute r.
,continued
Using the Menu
71
Page 72
QUALITY
IMAGE SIZE
MOVIE SET
IMAGE SIZE
REMAINING
GFINE ( ) Select to record still images with the fine image quality (compressed
STANDARD
()
to about 1/4).
Select to record still images with the standard image quality
(compressed to about 1/10).
For DCR-PC109:
G1152 × 864
()
640 × 480 ( ) Select to record many still ima ge s or fo r playing on a small screen.
G320 × 240
()
160 × 112 ( ) Select to record for longer tim e.
GAUTO Select to display the remaining capacity of the “M e mory Stick Duo”
ON
Select to record still im ages for playi ng on a larg e screen. Thi s setting
can be selected only in the CAMERA- MEM mode .
Select to record movies for playing on a large screen, or to record
clearer pictures.
in the following cases:
• After inserting a “Memory Stic k Duo” with the POWER switch in
the CAMERA-MEM mode (for about 5 seconds).
• When the remaining capacity of the “Memory Stick Duo” is less
than 2 minutes after the CAMERA-MEM mode is selected.
• At the starting or ending point of the movi e (fo r appr oximately 5
seconds).
Select to always display the remaining capacity of the “Memory Stick Duo.”
Using the Menu
72
ALL ERASE
You can delete all the pictures on a “Memory Stick Duo” that are no t wr iteprotected. To delete pictures one by one, see page 107.
1 Select [ALL FILES] or [CURRNT FOLDER].
ALL FILES Select to delete all the images on th e “ Me mory Stick Duo.”
CURRNT
FOLDER
Select to delete all the images in the selected play back folder.
2 Touch [YES] twice.
To cancel deletion of all pictures, select [NO].
3 Touch .
Page 73

FORMAT
FILE NO.
b Notes
• The folder will not be deleted even when you delete all the pictures in the folder.
• Do not do any of the following while [ Erasing all data...] is displ aye d:
– Move the POWER switch to select other power modes.
– Operate any buttons.
– Eject the “Memory Stick Duo.”
The supplied or newly purchased “Memory Stick Duo” has been formatted at the
factory, and does not require form at ti ng.
For details on the “M em ory Stick Duo,” see page 128.
1 Touch [YES] twice.
To cancel formatting , select [NO].
2 Touch .
b Notes
• Do not do any of the following while [ Formatting ...] is displayed:
– Move the POWER switch to select other power modes.
– Operate any buttons.
– Eject the “Memory Stick Duo.”
• Formatting erases everything on the “Memory Stick Duo” including protected image data
and newly created folders.
Using the Menu
NEW FOLDER
GSERIES Sele ct to as sign file numbers in sequence even if the “Mem or y S tic k
Duo” is replaced with another one. The file number is reset when a
new folder is created or the recording folder is replaced with another.
RESET Select to reset the file num be r to 0001 ea c h time the “Memory Stick
Duo” is changed.
You can create a new folder (102MSDCF to 999MSDCF) on a “Memory Stick
Duo.” When a folder is full (a maximum of 9999 imag es are st ored) a new folder
is automatically created.
1 Touch [YES].
A newly created folder will be numbe re d in sequence after th e l ast folder
number.
To cancel creation, select [NO].
2 Touch .
b Notes
• You cannot delete the created folder s using your camcorder. You will have to format th e
“Memory Stick Duo” (p. 73), or delete them usi ng your co mputer.
• The number of pictures that can be record ed on a “Memory Stick Duo” decreases as the
number of folders increases on the “Memory Stick Duo.”
,continued
Using the Menu
73
Page 74

REC FOLDER
PB FOLDER
As the default setting, pi ctures are saved in the 101MSDCF folder. You ca n select
a folder to save your pictures. Create new folders from the [NEW FOLDER]
menu, then select the folder to be used for recordi ng with / and touch .
When you have a lot of pictures, you can search for the desired picture easily when
you sort them in folders.
Select the playback folder with / , then touch .
Using the Menu
74
Page 75
Using the (PICT.
APPLI.) menu
EFFECT/SLIDE SHOW/F RA ME REC /
INTERVAL REC/INT. REC–STL, etc.
– PICT.
The default settings are marked with G. The
indicators in paren t heses appear when the
setting is selected. The settings you can adjust
vary depending on th e power mode of your
camcorder. The scree n shows the it ems you ca n
currently operat e. Unavailable item s w ill be
grayed out.
You can select items listed below on the PICT.
APPLI. menu. To se le ct it ems, see “Selecting
menu items” (p. 63).
FADER
See page 4 3 for details.
OVERLAP
See page 4 4 for details.
D. EFFECT
See page 44 and 52 for detai l s.
PICT. EFFECT
You can add special effects (such as films) to a picture before or after recording
on a tape. appears when the effect is selected.
GOFF Select when not using the Picture effect setting.
NEG.ART Select to record/play the picture with the color
and brightness of the picture reverse d.
PICT. APPLI.
FADE R
OVERLAP
D. EFFECT
0:00:0060min STBY
OK
Using the Menu
SEPIA Select to record/play the pi cture appearing in sepia.
B&W Select to record/play the picture appeari n g in mo n ochrome (black-
and-white).
SOLARIZE Select to record/play the picture looking like an
illustration with strong contrast.
,continued
Using the Menu
75
Page 76
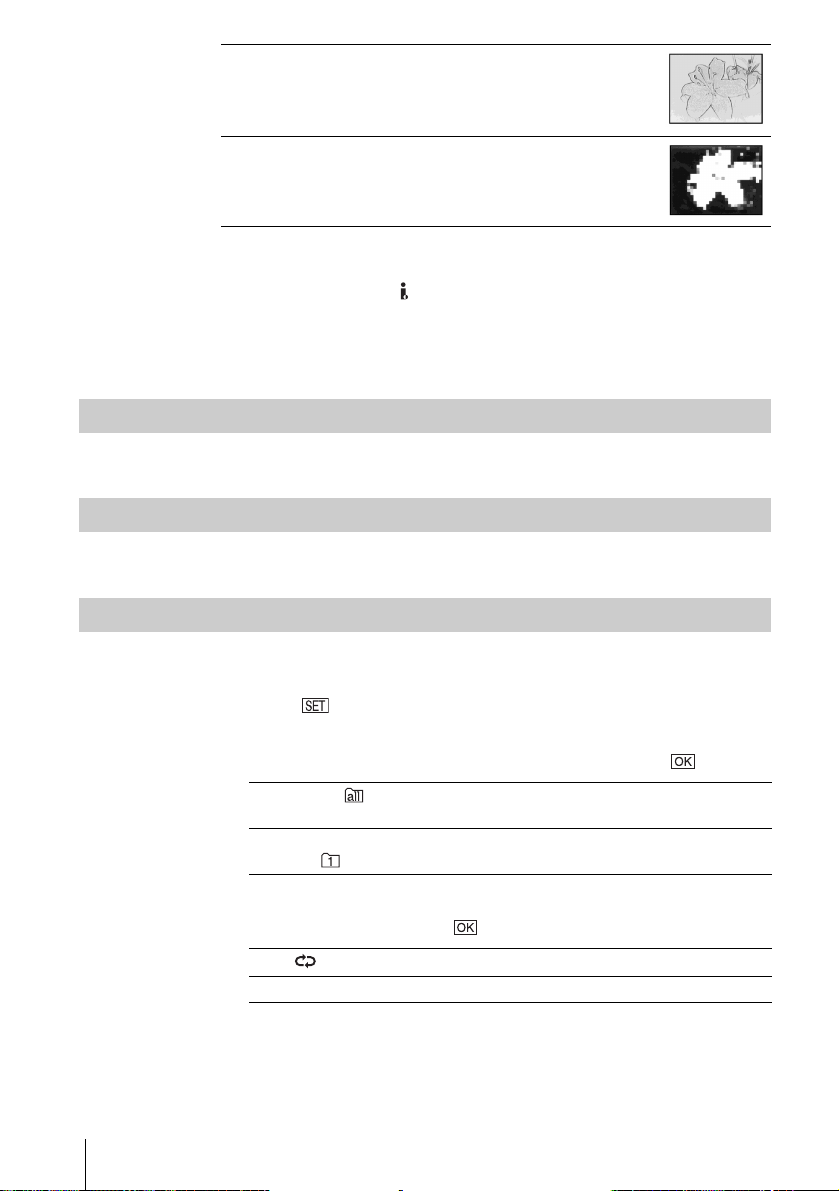
PASTEL Select to record the picture looking like a pale
pastel drawing. (This effect is not available
during playback.)
MEMORY MIX
PB ZOOM
SLIDE SHOW
MOSAIC Select to record picture appearing mosaic-
b Note
• You cannot add effects to externally input pictures. Also, you cannot output pictures edited
with Picture effects via the DV Interface.
Tip
z
• You can copy pictures edited using pi ct ur e ef fec ts to a “Memory Stick Duo” (p. 96) or to
another tape (p. 94).
patterned. (This effect is not available during
playback.)
See page 4 6 for details.
See page 5 7 for details.
You can play back the images stored in a “Memory Stick Duo” (or a selected
playback folder) in sequence (slide show).
1 Touch .
2 Touch [PB FOLDER].
3 Select [ALL FILES] or [CURRNT FOLDER], then touch .
GALL FILES ( ) Select to execute a slide sho w by p laying back all the ima ges on
CURRNT
FOLDER ( )
the “Memory Stick Duo.”
Select to execute a slide show by playing back all the images in
the current playback folder selected in [PB FOLDER] (p.74).
Using the Menu
76
4 Touch [REPEAT].
5 Touch [ON] or [O F F], then .
GON ( ) Select to repeat the slide show.
OFF Select to execute the slide show only once.
6 Touch [END].
7 Touch [START].
Your camcorder plays back the images recorded on the “Memory Stick Duo”
in sequence.
Page 77

FRAME REC
To cancel the slide sh ow , to uc h [END]. To pause, touch [ PA U SE].
z Tips
• You can select the first picture for the slide show by touching / before touching
[START].
• If movies are played in the slide show , you ca n adju st the volume by touching
(decrease)/ (increase).
You can record pict ur es with a stop-motion animated effect by alter nately frame
recording and then moving the subject a little. Operate your camcord er us in g t he
Remote Commander to prevent cam er a shake.
GOFF Select to record in the standard recording mode.
ON ( ) Select to record pictures using the FRAME REC function.
1 Select [ON], then touch .
2 Touch .
3 Press REC START/STOP.
A picture (approximately 6 frames) is recorded, and your
camcorder enters the standby mode.
4 Move the subject and repeat step 3.
b Notes
• When you use frame recording continuously, the remaining tape time will not be indicated
correctly.
• The last scene will be longer than other scenes.
Using the Menu
,continued
Using the Menu
77
Page 78
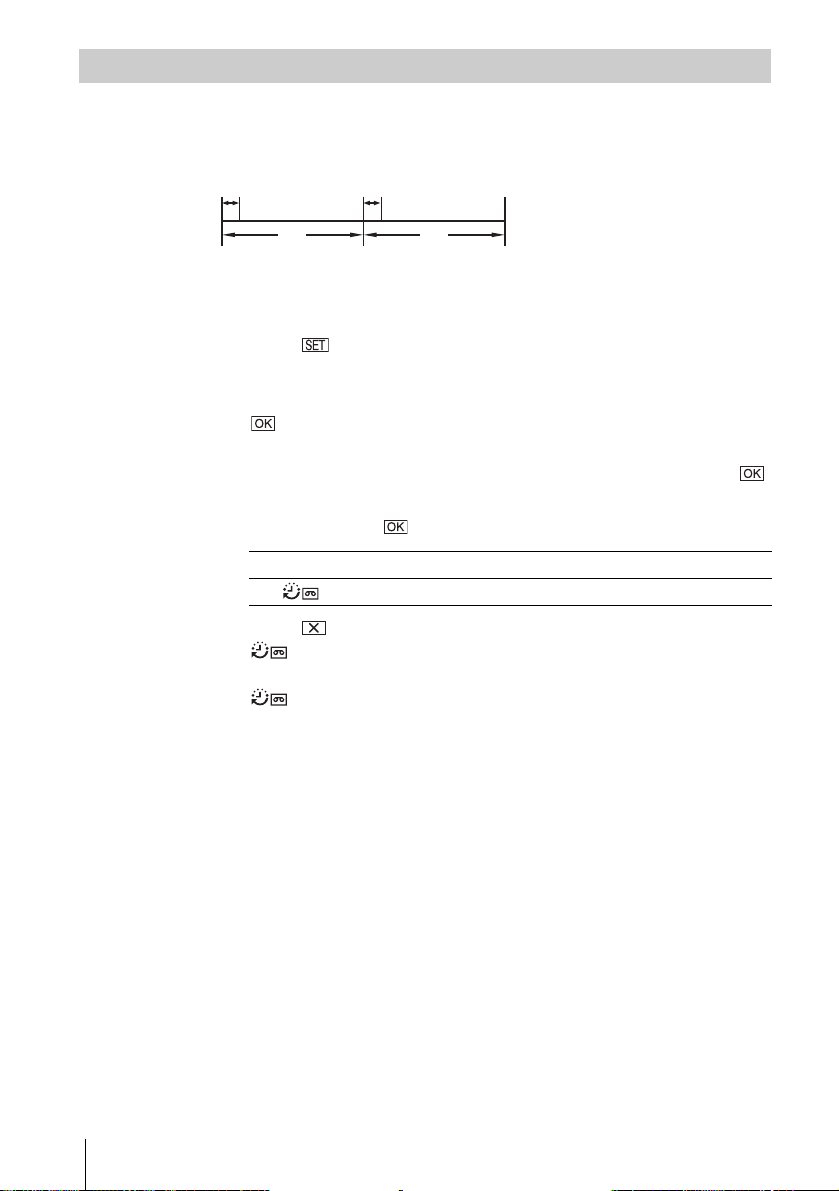
INTERVAL REC.
You can record pict ures on a ta pe at a se le ct ed int erv al , whe n you re cord flo wer s
blooming, etc. Connect your camcorder t o th e w all outlet using the sup pl ie d A C
Adaptor during the operation.
[a] [a]
[b]
a: [REC TIME]
b: [INTERVAL]
[b]
1 Touch .
2 Touch [INTERVAL].
3 Select a desired interval time (30 seconds, 1, 5 or 10 minutes), then touch
.
4 Touch [REC TIME].
5 Select a desired recording time (0.5, 1, 1.5 or 2 seconds), then touch .
6 Touch [END].
7 Touch [ON], then .
GOFF To deactiva te interval recording.
ON ( ) To record movi n g pic tu res on a t ap e in th e se lected interval.
8 Touch .
flashes on the sc reen.
9 Press REC START/STOP.
stops flashing and the interval recording starts.
To cancel interval recording, select [OFF] in step 7.
b Notes
• You cannot use the interval reco rd ing with:
– MEMORY MIX function
– Memory overlap
• There may be a discrepancy in recording time of up to ± 6 frames from the sele c te d tim e .
Using the Menu
78
Tips
z
• If you adjust the focus manually, you may be able to record clear pictures even if the light
changes (p. 42).
• You can silence the beeps during re cordi ng ( p. 87).
Page 79
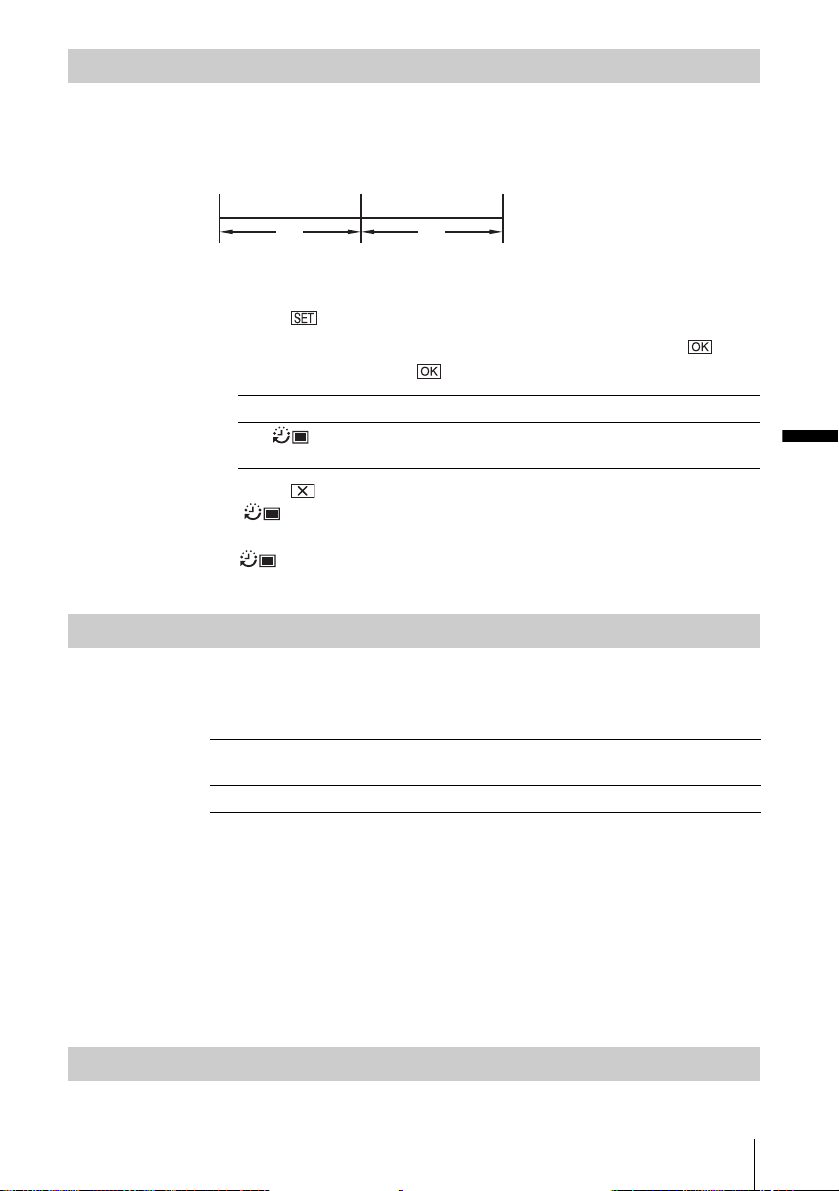
INT. REC-STL
This function is useful to observe the movement of clouds or t he change of
daylight. Your camcorder will sh oot a still i mage at a selec ted interv al and record
it on a “Memory Stick Duo.”
[a] [a] [a]
DEMO MODE
[b]
a: Shooting time
b: Interval
[b]
1 Touch .
2 Select a desired interval time (1, 5, or 10 minutes), the n touch .
3 Touch [ON], then touch .
GOFF To deactivate interval recording.
( ) To record still images on a “Memory Stick Duo” in the selected
ON
interval.
4 Touch .
flashes.
5 Press PHOTO fully.
stops flashing and the interval photo reco rding starts.
To cancel interval ph ot o recording, select [OFF] in step 3.
When you remove both cassette and “Memory Stick Duo” from your camcorder,
and select the CAME RA -TAPE mode, you can vie w th e demonstration in about
10 minutes.
GON
OFF Select when you do no t intend to use the DEMO MODE.
Select to see an overview of the functions available such as when you
are using this camcorder for the first time.
Using the Menu
PRINT
b Note
• You cannot view the demonstration when the NIGHTSHOT PLUS switch is set to ON.
Tips
z
• The demonstration will be suspe nde d in sit u a tions such as those described below.
– When you touch the screen during the demonstration. (The demonstration starts again in
about 10 minutes.)
– When a cassette or “Memory Sti ck Duo ” is inse r te d.
– When a mode other than CAMERA -T AP E is sele ct ed .
• If [A.SHUT OFF] is set to [5 min] when the cam co rd er is use d on the battery pack, the
power will be turned off after approximately 5 minutes (p. 88).
See page 110 for detail s.
Using the Menu
79
Page 80
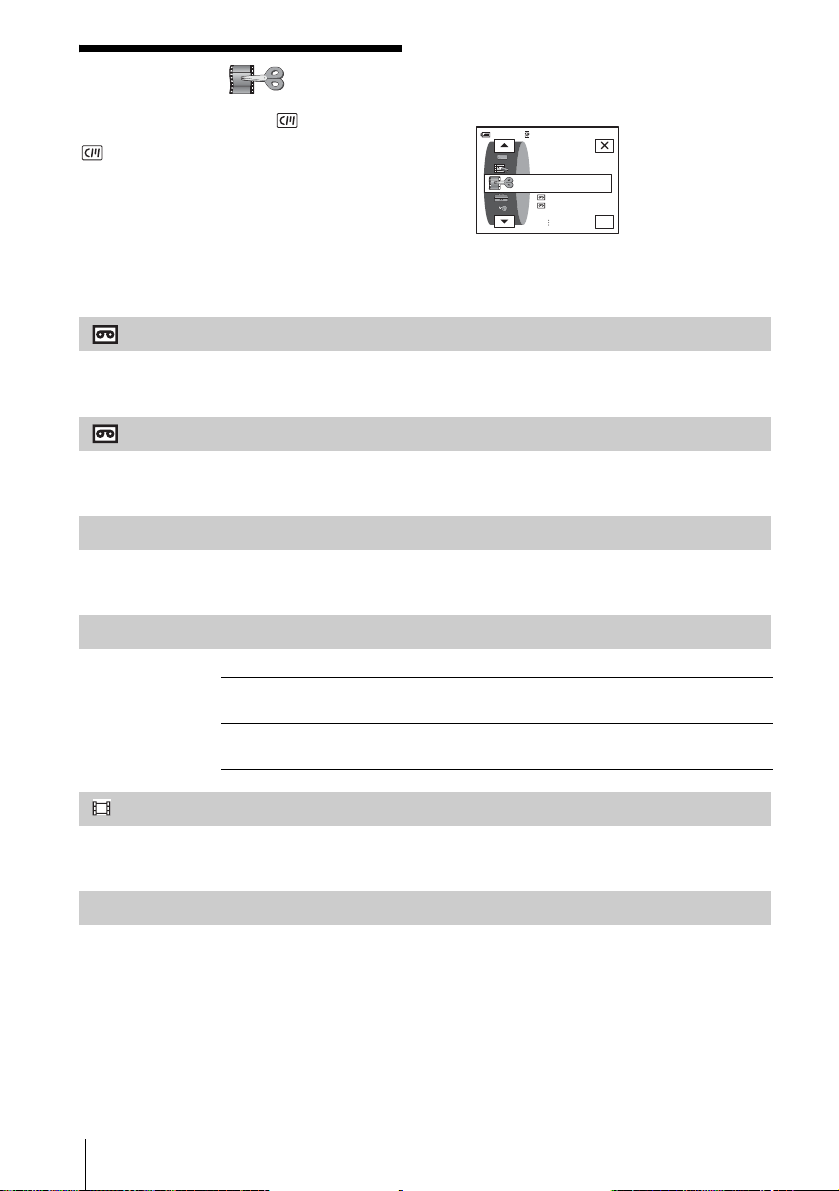
Using the (EDIT/
PLAY) menu
TAPE TITLE, etc.
You can select items listed below on the EDIT/
PLAY menu. To select items, see “Selecting
menu items” (p. 63).
The default settings are marked with G. The
settings you can adj ust vary depending on the
VAR. SPD PB
REC CTRL
AUD DUB CTRL
– TITLE/
See page 5 1 for details.
See page 95 and 97 for details.
See page 106 f or details.
power mode of your camcorder. The screen
shows the items y ou can currently opera t e.
Unavailable item s w ill be grayed out.
0:00:00:0060min
EDIT/PLA Y
VAR. SPD PB
REC CTRL
AUD DUB CTRL
OK
PROG. EDIT
REC CTRL
BURN DVD
Using the Menu
80
OTHER DEVICE Select to make programs and dubbing the selected scenes to a tape on
a VCR (p. 98).
MEMORY STICK S e le c t to ma ke pr ogr a ms a nd dubbing the selected scenes to a
“Memory Stick Duo” (p. 102).
See page 95 and 96 for details.
When your camcorder is connected t o a Sony VAIO series personal computer,
you can easily burn the picture re co rd ed on th e ta p e on a DVD (Dire ct Ac cess to
“Click to DVD”) using this comman d. S ee th e supplied “Computer Applications
Guide” for details.
Page 81
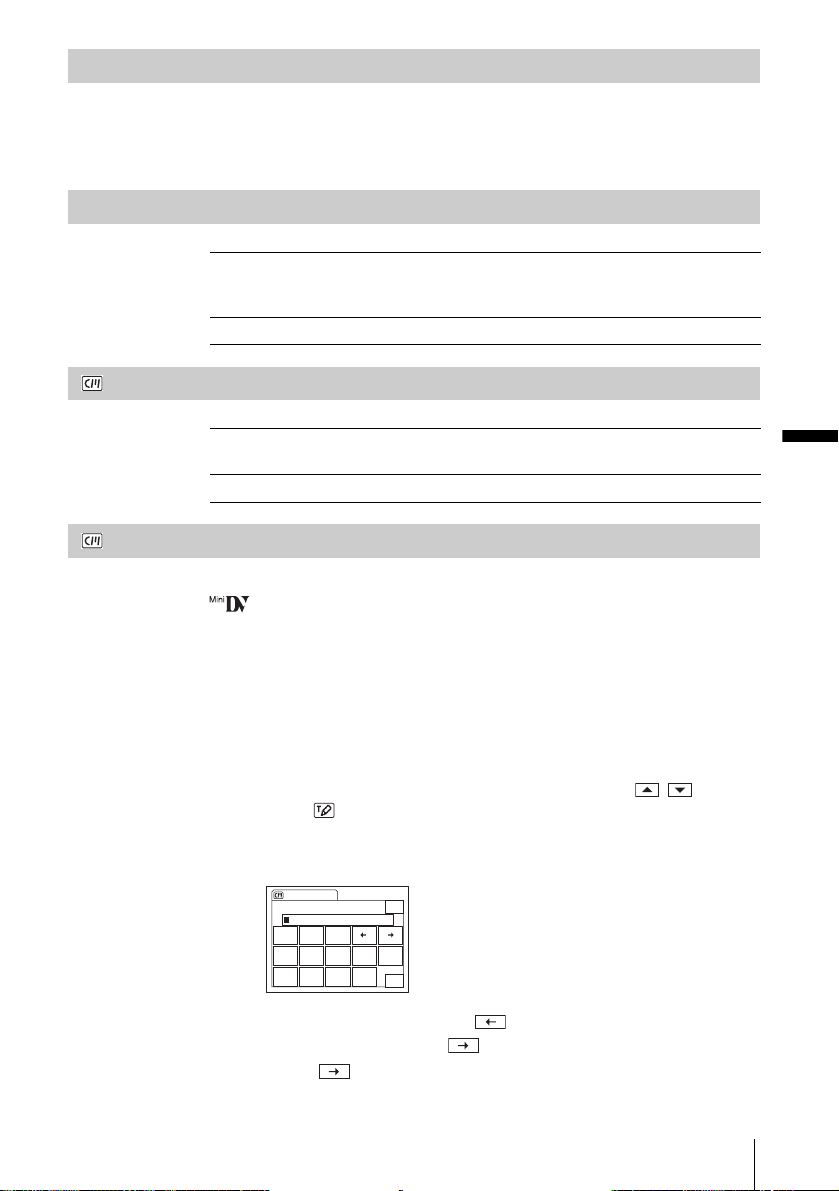
BURN VCD
END SEARCH
When your camcorder is connected to a per sonal computer, you c an easily burn
the picture recor ded on the tape on a CD-R (Direct Access to V ideo CD Burn)
using this command. See the supplied “Computer Applications Guide” for details.
SEARCH
TITLE
EXEC Select to activate the END SEARCH function. The most recently
recorded picture is played back for about 5 seconds and then stops
automatically.
CANCEL Select to stop the END SEARCH function.
GON Select when you want to search for a scene, title, etc. using the
Cassette Memory (p. 61, 62).
OFF Select to search w ithout using Cassette Memory.
Any titles you have superimposed using th is camcorder can only be view ed on a
video cassette device with the index titler function. If you superimpose a
title, you will be able to se ar ch f or it using Title search. You can superimpose up
to about 20 titles (about 5 letters per title) on a cassette with Cassette Memory.
Note, however, that only 11 titles can be recorded when other data (6 date/time
data/1 cassette label) is record ed.
1 Select a desired title from the displayed ti tles (2 original tit le s t hat you
have created before and the preset titles that have been stored in your
camcorder). You can create original titles (up to 2 types of title of within
20 characters ea ch) in the following pr ocedure.
1 Select [C USTOM 1 ” ”] or [CUSTOM 2 ” ”] using / , then
touch .
2 Touch th e but ton repeatedly to select the desired character on th e
button.
Using the Menu
TITLE
GHI
PQRSWXYZ' . ,
STBY 0:00:00
E___________________
&?!
ABC
DEF
12345678
JKL
MNO
TUV
/ –
END
90
OK
To erase a charac ter: Touch .
To insert a space: Touch .
3 Touch to move s to se lect the next charac ter, and enter the
character in the same manner.
,continued
Using the Menu
81
Page 82
4 When you have finished enteri ng characters, touch .
2 Touch .
3 Touch (color ), / (position), [SIZE] as n ecessary to select a
desired color, position or size.
Color
white t yellow t violet t red t cyan t green t blue
Position
You can select fr om 8 to 9 choices.
Size
small y large
(You can only select the small size when you are entering more than 13
characters.)
4 Touch .
5 Touch [SAVE].
During playback, playback pause, or reco rding
[TITLE SAVE] is displayed on the screen for about 5 seconds and the title is
set.
During recording standby
[TITLE] appears. When you press REC ST ART/STOP to start recording,
[TITLE SAVE] is displayed on the screen for about 5 seconds, and the title is
set.
b Notes
• The point you superimposed the title may be detected as an index signal when searching a
recording with other video device.
• When you are using your camcorder on the battery pack and do not operate it for 5 minutes,
the power automatically goes off as the default setting. If you may take 5 minutes or longer
to enter characters, set [A.SHUT OFF] on the (STANDARD SET) menu to
[NEVER] (p. 88). The power will not be turned off. Even though the power goes off, the
characters you have entered remain stored in memory. Turn the power back on, then start
again from s t ep 1 to continue superimp osing the titl e.
z
Tip
• To change a created title, select the title in st ep 1, then touch . Then, reselect the
characters again.
TITL ERASE
TITLE DISP
Using the Menu
82
1 Select the title that you want to d elete using / , then touch .
2 Confirm the t itle is the one you want to er ase, then touch [YES].
To cancel the operation, touc h [N O ].
3 Touch .
You can view the title when you play back the picture.
GON Select to display the title when a scen e superimposed with a title
appears.
OFF Select when you do not want to display the title.
Page 83
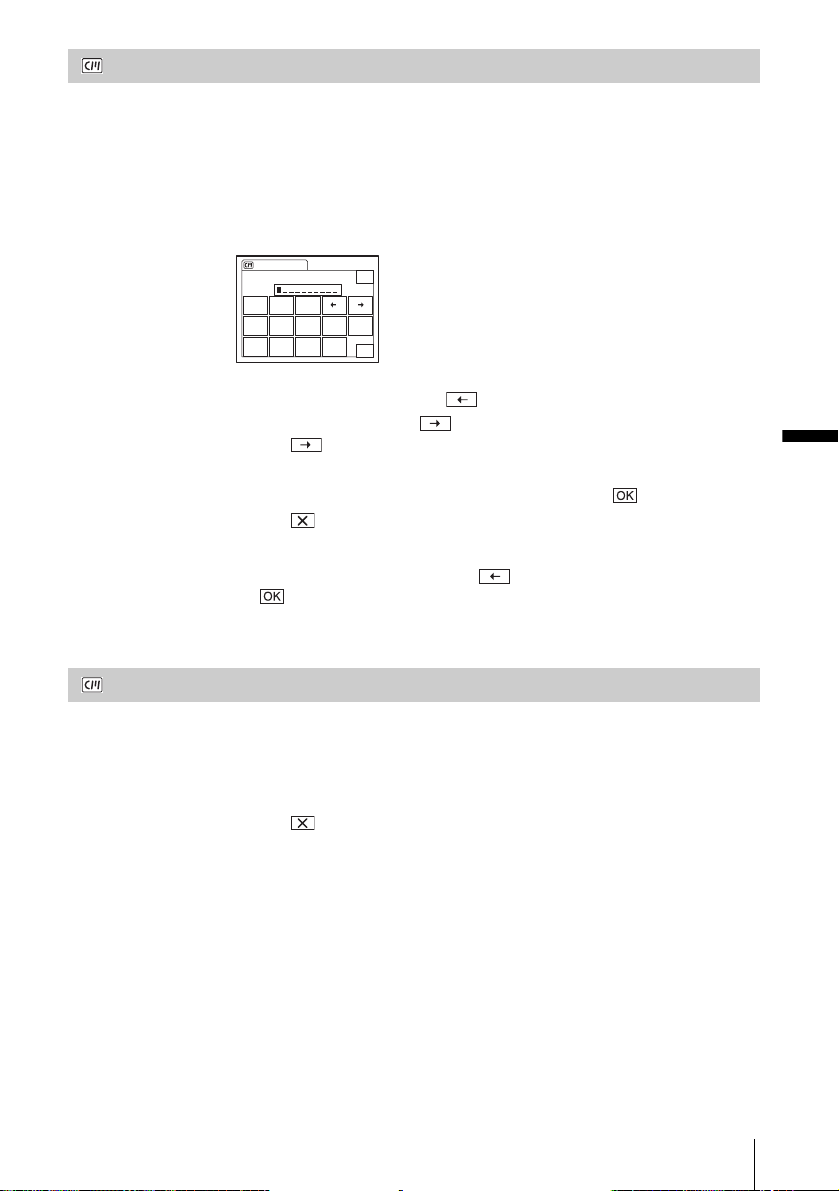
TAPE TITLE
You can label a cassette with Cassette Memory (up to 10 letters).
The label will be displayed for approximately 5 seconds wh en you select the
CAMERA-TAPE mode and insert a cassette, or when you select the PLAY/EDIT
mode. Up to 4 titles will be displayed at the same time if the cassette has titles
superimposed.
1 Touch the button repeatedly to select the desired character on the button.
ALL ERASE
T APE TITLE
GHI
PQRSWXYZ' . ,
STBY 0:00:00
END
&?!
ABC
DEF
12345678
JKL
MNO
TUV
90
/ –
OK
To erase a charac ter: Touch .
To insert a space: Touch .
2 Touch to move s to select the next character, and enter the
character in the same manner.
3 When you have finished entering characters, touch .
4 Touch .
z Tips
• To erase the label you have created, to uc h repeatedl y to e rase the char a ct e rs , then
touch .
• To change the label you have created, inse r t the c as se tte into your camcorder and go
through the procedure from step 1.
You can delete all data such as date, title, and casset te label s aved in the Cassett e
Memory at one time.
1 Touch [YES] twice.
To cancel deletion of al l da t a, sel ect [NO].
2 Touch .
Using the Menu
Using the Menu
83
Page 84
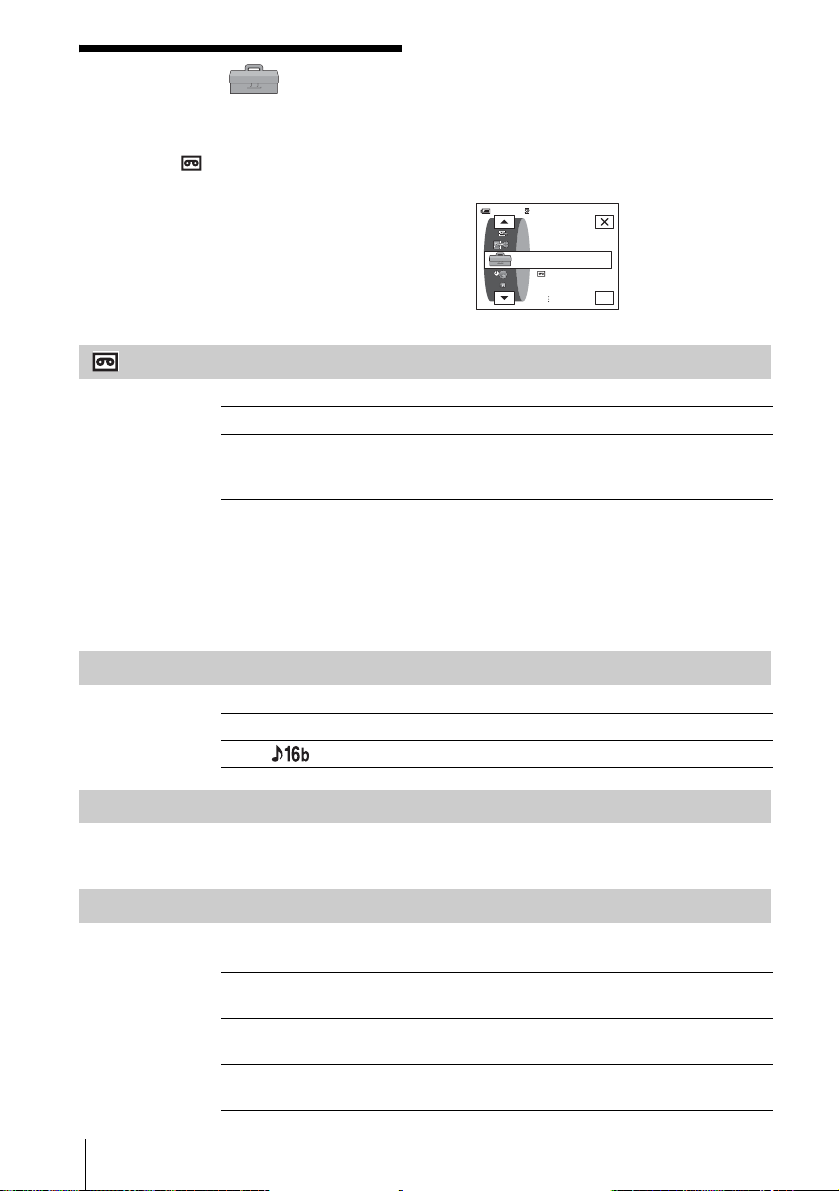
Using the
(STANDARD SET)
menu – REC MODE/MULTI-
SOUND/AUDIO MIX/USB-CAMERA, etc.
You can select the items listed below on the
STANDARD SET menu. To select these
items, see “Selecting menu items” (p. 63).
REC MODE
GSP ( SP ) Select to record in the SP (Standard Play) mode on a cassette.
LP ( LP ) Select to increas e the recording time to 1.5 ti mes the SP mode (Long
Play). The use of Sony Excellence/Master mini DV cassette is
recommended to get the most out of your c am c or der.
b Notes
• You cannot add sound on the tape recor de d in the LP mode .
• If you record in the LP mode, a mosaic-like noise may appear or sound may be interrupted
when you play back the tape on other camcorders or VCRs.
• When you mix recordings in the SP mode and in the LP mode on one tape, the playback
picture may be distorted or the time code may not be written properly between the scenes.
The default settings are marked with
indicators in parentheses appear w hen the
setting is selected. Th e settings you c an adjust
G. The
vary depending on the power mode of your
camcorder.
currently operate. Unavailable items will be
grayed out.
The screen show s the items you c an
0:00:0060min STBY
ST AND ARD SET
REC MODE
A UDIO M ODE
LCD/VF SET
OK
AUDIO MODE
VOLUME
MULTI-SOUND
Using the Menu
84
G12BIT Select to record in the 12-bit mode (2 stereo sounds).
16BIT ( ) Select to record in the 16-bit mode (1 stereo sound with high quality).
See page 50, 53 for details.
You can select how t o pl ay back audio recorded on a tape in stereo mode.
GSTEREO Select to play back a stere o tape or dual sound track tape with main
and sub sound.
1 Select to play back a stereo tape with th e l eft channel sound or a d u al
sound track tape with main sound.
2 Select to play back a stereo tape with the right channel sound or a dual
sound track tape with sub sound.
Page 85
AUDIO MIX
LCD/VF SET
b Notes
• You can play back a dual sound track cassette on this camcorder. However, you cannot
record a dual sound track on this camcorder.
• The setting returns to [STEREO] when you disconnect the power source from your
camcorder for more than 5 minutes.
You can adjust the audio balance between the originally recorded sound (ST1)
and sound added afterwards (ST2) o n the tape (p. 10 7) .
b Notes
• You cannot adjust sound recorded in 16 bit audio mode.
• Only the originally recorded sou nd will be heard when you disconnect the power source
from your camcorder for more than 5 minutes.
LCD BRIGHT
LCD BL LEVEL
LCD COLOR
VF B.LIGHT
The recorded picture will not be affected by this setting.
See page 2 1 for details.
You can adjust th e brightness of the LCD sc reen’s backlight.
GNORMAL Standard brightness.
BRIGHT Select to brighten the LCD screen.
b Notes
• When you connect your camcorder to outside power sources, [BRIGHT] is automatically
selected for the setting.
• When you select [BRIGHT], battery life is r e duc ed by abou t 10 pe rce nt during recording.
Touch / to adjust the colo r on the LCD sc reen.
Low intensity
High intensity
You can adjust the brightness of the viewfinder.
GNORMAL Standard brightness.
BRIGHT To brighten the viewfinder screen.
Using the Menu
,continued
Using the Menu
85
Page 86

A/V c DV OUT
USB-CAMERA
b Notes
• When you connect your camcorder to outside powe r sour ces, [BRIGHT] is automatically
selected for the setting.
• When you select [BRIGHT], battery life is reduced by ab out 10 pe r cent during recording.
You can connect a di gi t al device and an analog device to your camcorde r and
convert the signal transm itted from th e connected de vices to th e appropriat e signal
on your camcorder.
GOFF Select whe n no t usi ng the Digital convert function.
ON ( ) To outpu t analog images and sound in digital format using your
camcorder.
The analog signal input to the A/V jack of your camcorder will be
converted and output from the DV Interface of your camcorder.
For details, refer to the “Compute r Applications Guide.”
You can conn ec t a US B ca bl e ( su ppl i ed) to yo ur cam cor de r, an d vi ew the p ict ur e
displayed on the screen of your camcorder on your computer (USB Streaming).
For details, refer to the “Computer Applications Guide.”
GOFF Select to deactivate the USB Streaming function.
USB STREAM Select to activate the USB Stre a mi ng f unction.
USB-PLY/EDT
DATA CODE
Using the Menu
86
You can conn ec t a US B ca bl e ( su ppl i ed) to yo ur cam cor de r, an d vi ew the p ict ur e
on the tape or “Memory Stick Duo” in your camcorder on your co mputer. For
details, refer to the “Computer Applications Guide.”
GSTD-USB Select to view the pic ture on the “Memory Stick Duo.”
PictBridge Select to connect the PictBridge compliant printer (p. 110).
USB STREAM Select to view the picture on the tape.
GOFF Select not to display date, tim e a nd the camera settings data during
playback.
DATE/TIME Select to display the date and time during playba ck (p. 58).
CAMERA DATA Select to display the camera se tti ngs data during playback (p. 58).
Page 87
REMAINING
REMOTE CTRL
REC LED
GAUTO Select to display the remaining tape indicator for about 8 seconds:
• After you select the CAMER A - TAP E mode with the cassette
inserted, and your camcorder calculates the remaining amount of
tape.
• When you touch (play/pause).
ON Select to always display the remaining tape indicator.
GON Select when using the Remote Commander supplied with your
camcorder.
OFF Select to deactivate th e Remote Commander to prevent yo u r
camcorder from responding to a command sent by another VCR
remote control unit.
b Note
• The setting returns to [ON] when you have the power sour c e disc onne c ted from your
camcorder for more than 5 minutes.
GON Select to turn on the camera recor ding lamp on the front of your
camcorder during recording.
OFF Select this setting in the following re cording situations. The camera
recording lamp will not light up during recording.
• When you do not want the subject to be nervous about being
recorded.
• When you are recording clos e to the subject.
• When the subject reflects the recording lamp.
Using the Menu
BEEP
GMELODY Select to sound a melody when you start/stop recording, operate the
touch panel, or when an unusual condition occurs on your camcorder.
NORMAL Select to sound a beep instead of the mel ody.
OFF Select to cancel the melody, the beep sound, the shutter sound or touch
panel operation confirma tion beep.
,continued
Using the Menu
87
Page 88
DISPLAY
MENU ROTATE
A.SHUT OFF
GLCD PANEL Select to show the displays such as the time code on the LCD scree n
and in the viewfinder.
V-OUT/PANEL Select to show the displays such as the time code on the TV scree n ,
LCD screen, and in the viewfinder.
b Note
• You cannot input a signal to your camcorder if you pre ss DI SPLAY/BATT INFO while
[V-OUT/PANEL] is selected.
You can select the scrolling direction (up or down) of the menu items on the LCD
screen when you touch or .
GNORMAL Select to sc r oll the menu items downwards by touching .
OPPOSITE Select to scr oll the menu items upwards by touching .
G5 min Select to activate the Auto shut off. When approximatel y 5 minutes
have elapsed while you do not operate your camcorder, the camcorder
is automatically turned off to prevent the ba tte ry from becoming
consumed.
NEVER Select to deactivate the Auto shut off.
b Note
• When you connect your camcorder to the wall outlet, [A.SHUT OFF] is automatically set
to [NEVER].
Using the Menu
88
Page 89
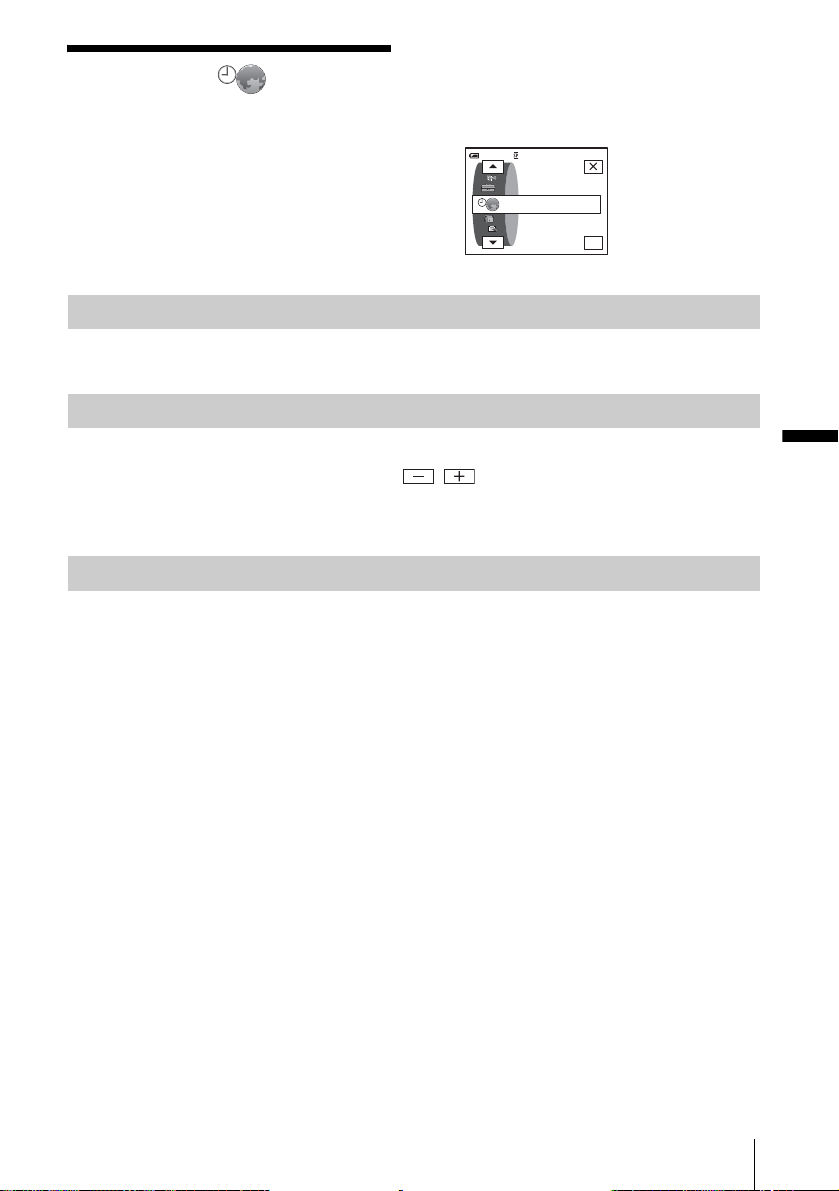
Using the (TIME/
LANGU.) menu
WORLD TIME, etc.
– CLOCK SET/
The settings you can adjust vary depending
on the power mode of yo ur camcorder.
screen shows the items you can currently
operate. Unavail able items will be graye d out .
0:00:0060min STBY
The
You can select items listed below on the TIME/
LANGU. menu. To select items, see “Selecting
menu items” (p. 63).
CLOCK SET
You can set the date and time (p. 22).
WORLD TIME
You can adjust the t i m e difference when using your camcorde r ab road. Set the
time differ ence by touc hin g / , the clock will be adjuste d in acco rd anc e
with the time difference. If you set the time difference to 0, the clock returns to
the originally set time.
LANGUAGE
You can selec t or chan ge the lan guage us ed for the on-scr een disp lay (p.25). You
can select from Engl i sh , Sim plified English, Canadia n- F r ench, Latin American
Spanish, Brazilian-Portuguese, Traditional-Chinese, or Korean.
TIME/LANGU.
CLOCK SET
WORLD TIME
LANGUAGE
OK
Using the Menu
Using the Menu
89
Page 90
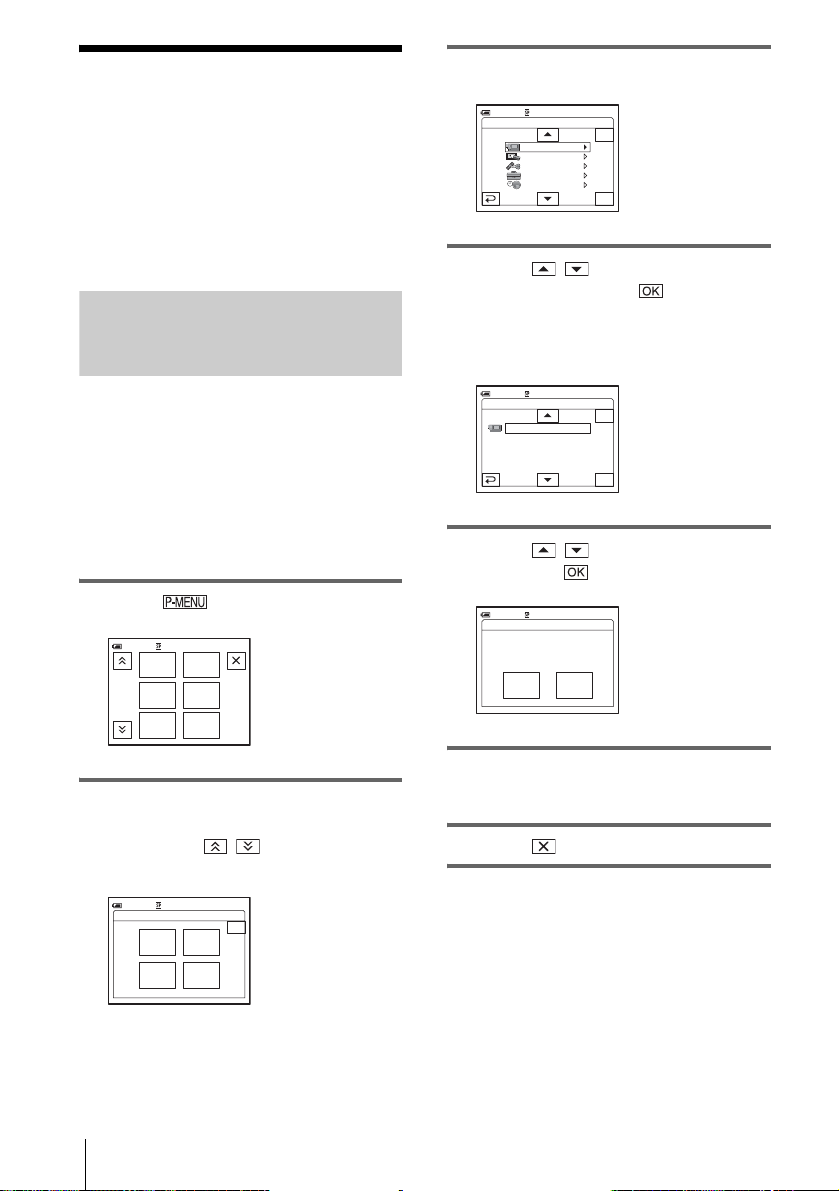
Customizing Personal Menu
You can add frequ ent l y us ed menu items to
Personal Menu, or sor t them in the order you
like (customizing). You can customize the
Personal Menu for each power mode of your
camcorder.
Adding a menu – Add
You can add frequ ent l y us ed menu items to
Personal Menu for ea sier and faster access.
b Note
• You can add up to 28 menu items each for th e
CAMERA-TAPE, CAMERA-MEM, and PLAY/
EDIT modes. If you want to add more, you must
delete a less important menu item before adding a
new menu item (p. 91).
1 Touch .
STBY
EXPO–
SURE
FOCUS
SPOT
METER
0:00:00
60 min STBY
MENU
1/3
FADER
SPOT
FOCUS
3 Touch [ADD].
0:00:0060min
Select the category.
STBY
CAMERA SET
PICT. APPLI.
EDIT/PLAY
STANDARD SET
TIME/LANGU.
END
OK
4 Touch / to select a menu
category, then touch .
The available items vary depending on the
power mode of the camcorder.
Only the available items are displayed.
0:00:0060min
Select the item.
STBY
PROGRAM AE
SPOT METER
EXPOSURE
WHITE BAL.
AUTO SHUTTER
END
OK
5 Touch / to select a menu item,
then touch .
0:00:0060min
ADD
STBY
Add this item to
CAMERA-TAPE mode's
P-MENU?
NOYES
2 Touch [P-MENU SET UP].
If the desired menu is not displayed on the
screen, touch / until the menu is
displayed.
P–MENU SET UP
Using the Menu
90
60min
ADD
SORT
STBY
DELETE
RESET
0:00:00
END
6 Touch [YES].
The menu is added to th e end of the list.
7 Touch .
Page 91
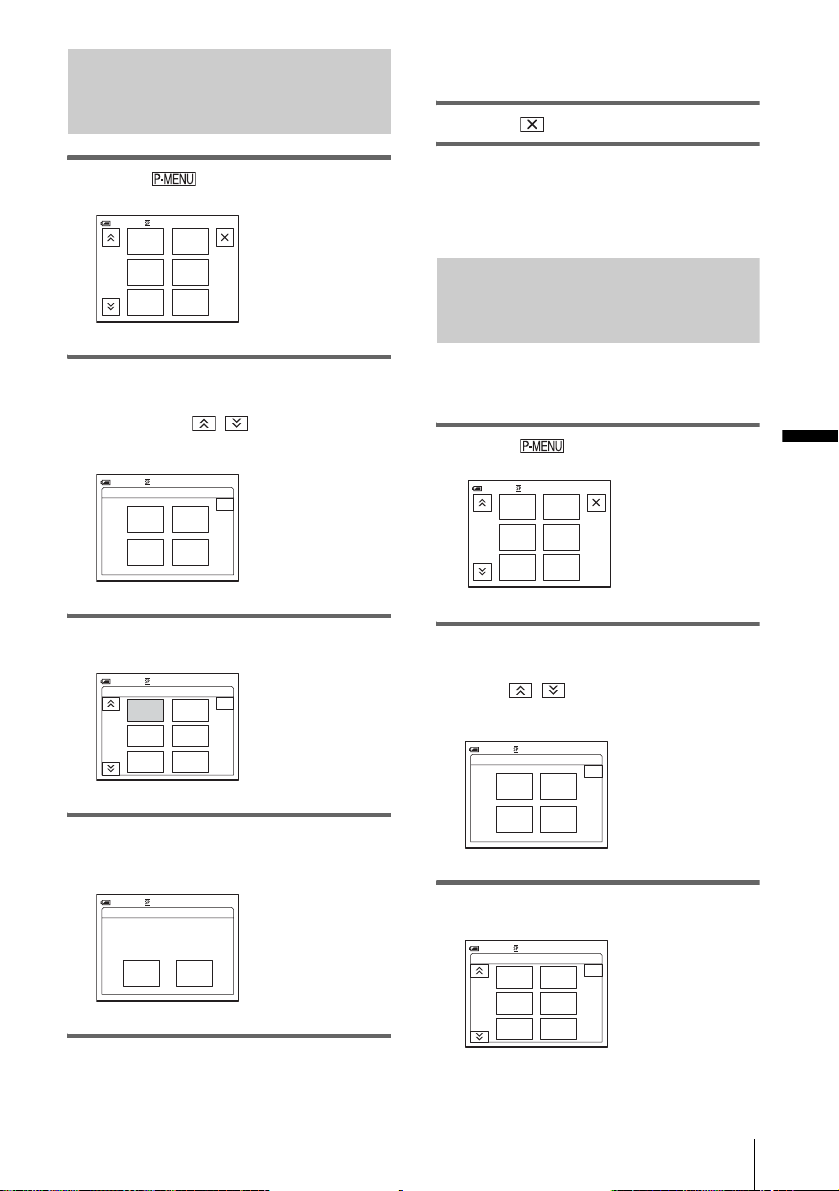
Deleting menu – Delete
The selected menu is deleted from Perso nal
Menu.
1 Touch .
STBY
EXPO–
SURE
FOCUS
SPOT
METER
0:00:00
60 min STBY
MENU
1/3
FADER
SPOT
FOCUS
2 Touch [P-MENU SET UP].
If the desired menu is not displayed on the
screen, touch / until the menu is
displayed.
STBY
DELETE
RESET
0:00:00
END
60min
P–MENU SET UP
ADD
SORT
3 Touch [DELETE].
STBY
EXPO–
SURE
FOCUS
SPOT
METER
0:00:00
END
60min
Select button to delete.
MENU
FADER
1/3
SPOT
FOCUS
4 Touch the menu that you want t o
delete.
6 Touch .
b Note
• You cannot delete [MENU] and [P-MENU SET
UP].
Arranging the order of menus
displayed on Personal Menu
– Sort
You can sor t the menu s added t o Person al Menu
in the desired orde r.
1 Touch .
STBY
EXPO–
SURE
FOCUS
SPOT
METER
0:00:00
60 min STBY
MENU
1/3
FADER
SPOT
FOCUS
2 Touch [P-MENU SET UP].
If the menu is not displayed on the screen,
touch / until the desired menu is
displayed.
STBY
DELETE
RESET
0:00:00
END
60min
P–MENU SET UP
ADD
SORT
Using the Menu
DELETE
STBY
Delete this from
CAMERA-TAPE mode's
P-MENU?
YES NO
5 Touch [YES].
0:00:0060min
3 Touch [SORT].
60min
MENU
FADER
SPOT
FOCUS
STBY
EXPO–
SURE
FOCUS
SPOT
METER
Select button to move.
1/3
0:00:00
END
,continued
Using the Menu
91
Page 92
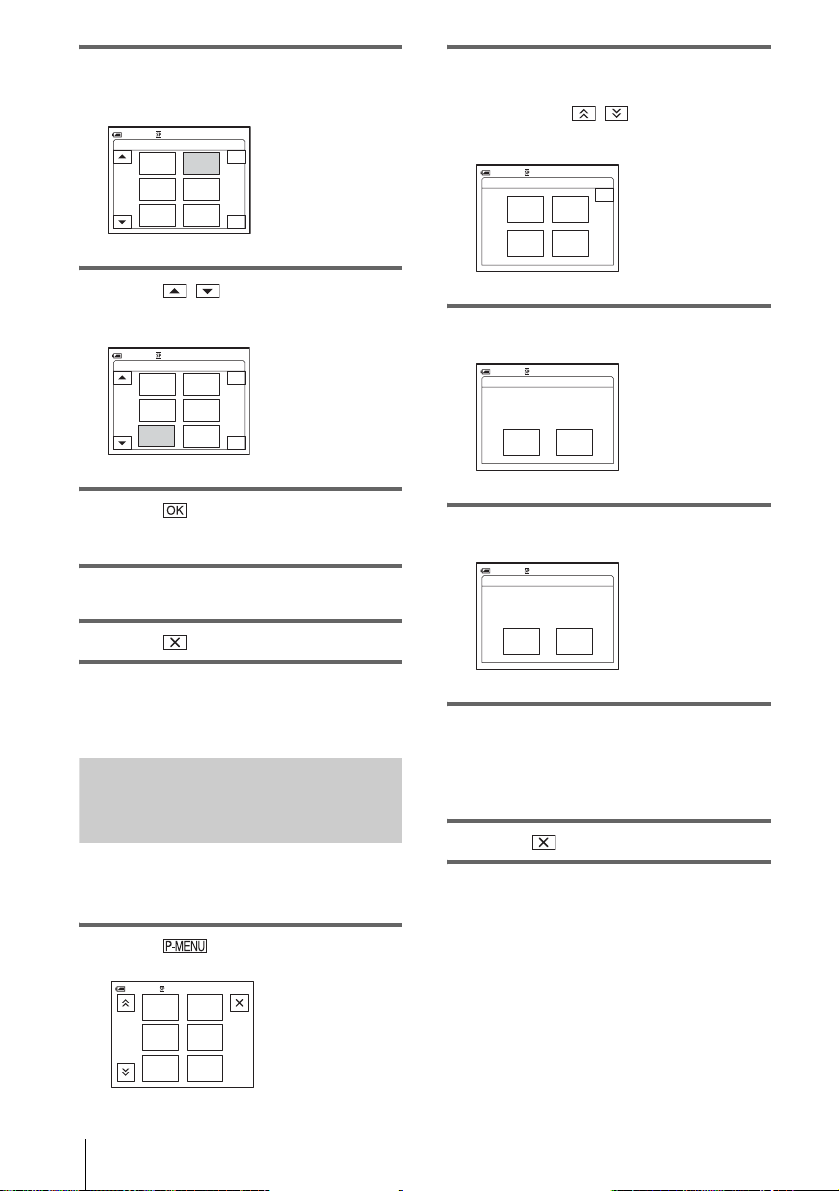
4 Touch the menu item you want to
move.
60min
Select new location.
12
MENU
34
1/3
FADER
56
SPOT
FOCUS
STBY
EXPO–
SURE
FOCUS
SPOT
METER
0:00:00
END
OK
5 Touch / to move the menu item
to the desired place.
60min
Select new location.
12
MENU
34
1/3
FOCUS
56
EXPO–
SURE
STBY
FADER
SPOT
FOCUS
SPOT
METER
0:00:00
END
OK
2 Touch [P-MENU SET UP].
If the desired menu is not di splayed on the
screen, touch / until the menu is
displayed.
STBY
DELETE
RESET
0:00:00
END
60min
P–MENU SET UP
ADD
SORT
3 Touch [RESET].
0:00:0060min
RESET
STBY
Initialize
CAMERA-TAPE mode's
P-MENU setting?
YES NO
6 Touch .
To sort more items, repeat steps 4 to 6.
7 Touch [END].
8 Touch .
b Note
• You cannot move [P-MENU SET UP].
Initializing the settings – Reset
You can initialize Personal Menu to the default
settings after a ddi ng or deleting menus.
1 Touch .
0:00:0060min STBY
STBY
FADER
MENU
FOCUS
EXPO–
SURE
SPOT
FOCUS
SPOT
METER
1/3
4 Touch [YES].
0:00:0060min
RESET
STBY
Are you sure?
YESNO
5 Touch [YES].
The Personal Menu settings return to the
default settings.
To cancel reset, t ouch [NO].
6 Touch .
Using the Menu
92
Page 93
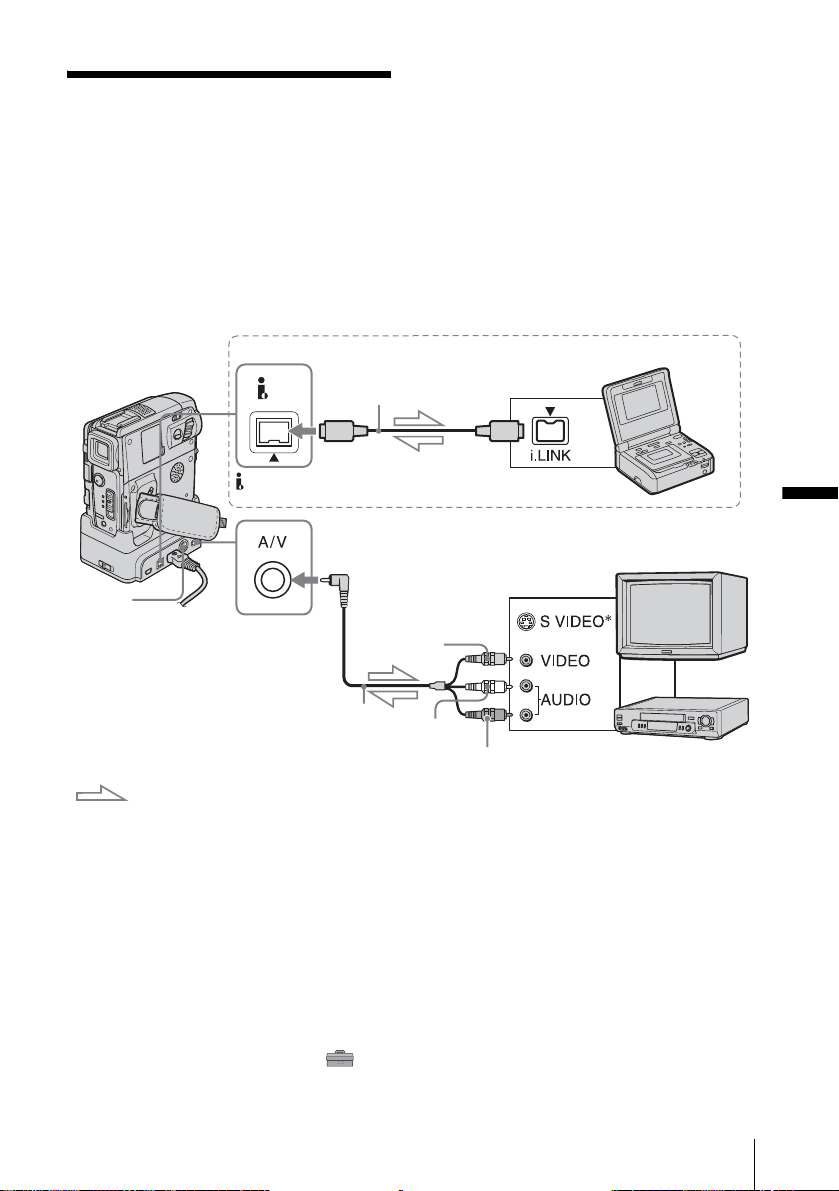
Dubbing/Editing
Connecting to a VCR or TV
Connecting with an i.LINK cable
You can record the picture from a VCR or TV
to a tape or a “Memory Stick Duo” inserted
into your camcorder ( p. 95). You can also
create a copy of the picture recorded on your
camcorder on other recording device (p. 94).
Connect your camco r der via the Handycam
Station or the A/V jack of your camcorder to
a TV or VCR using the supplied A/V
connecting cable.
Connect your camcorder to the wall outlet
using the supplied AC Adaptor during the
operation.
DV
DV Interface
S VIDEO
jack
Signal flow
* By using an S video cable (optional), higher quality
DV format pictures can be produced.
When there is an S video jack on the device to be
connected, connecting the S video cable (optional)
to the S video jacks on both your camcorder and the
device instead of using the yellow plug is
recommended. The audio will not be output when
you connect with the S video plug alone .
b Notes
• Use the A/V connecting cable (supplied) to connect
your camcorder to other devices. Before connecting,
make sure the [DI SP L A Y] setting in the
(STANDARD SET) menu is set to [LCD PANEL]
(the default setting) (p. 88).
A/V jack
A/V connecting cable
(supplied)
i.LINK cable (optional)
i.LINK jack
Yellow
White
Red
• Connect the A/V connecting cable to the output jack
of a device you are dubbing a picture from, or to the
input jack of another device for dubbing a picture
from your camcorder.
• When you are connecting your camcorde r to a
monaural device, connect the yellow plug of the
A/V connecting cable to the video jack, and the red
(right channel) or the white (left channel) plug to the
audio jack on the VCR or the TV.
• Do not connect A/V connecting cables to both your
camcorder and the Handycam Statio n. The image
might be distorted.
VCRs or TVs
Dubbing/Editing
Dubbing/Editing
,continued
93
Page 94

To use an i.LINK cable for connection
Use an i.LINK cable (optional) to connect your
camcorder to ot her device via the DV
Interface. Th e video and sound signals are
transmitted digitally, producing high quality
pictures. Note that you cannot record the picture
and sound separately. For details, see page 132.
Dubbing to another tape
You can copy and edit the pict ure played
back on your camcorder to other recording
devices (such as VCRs).
1 Connect your VCR to your camcorder
as a recording device (p. 93).
2 Prepare your VCR for recording.
• Inse rt a cassette for recording.
• If your VCR has an inpu t selector, se t it to
the input mode.
3 Prepare your camcorder for playback.
• Insert the recorded cassette.
• Slide the POWER switch to select the
PLAY/EDIT mode.
4 Start the playback on your camcorder,
and record it on the VCR.
Refer to the operating instructions su pplied
with your VCR for details.
Dubbing/Editing
94
5 When the dubbing is finished, stop
your camcorder and the VCR.
b Notes
• When your camcorder is connected to the VCR via
the DV Interface, you cannot record the title,
indicators, information for the Cass et te Memo ry,
and words entered on the index screen of the
“Memory Stick Duo.”
• When dubbing using the A/V connecting cable,
press DISPLAY/BATT INFO to hide indicators
such as time cod e ( p. 58). Otherwise, they will b e
recorded on the tape.
• To record the date/time and camera settings data,
have them displayed on screen (p. 58).
• Pictures edited wi th Picture effec t ([PICT. EFFECT]
p. 75), Digital effect (p. 44, 52), or Playback zoom
(p. 57) cannot be output via the DV Interface.
• When connected using the i.LINK cable , th e
recorded picture becomes rough when a pict ur e is
paused on your camcorder while recording to a
VCR.
Page 95
Recording pictures from a VCR or TV
You can record and edit pictures or TV
programs from a VCR or TV on a t a pe or a
“Memory Stick Duo” inserted in your
camcorder. You can also record a scene as a
still image on a “Memory Stick Duo.”
Insert a cassette or a “Memory Stick Duo” for
recording in your camcorder.
Recording movies
5 Start playing th e cassette on your
VCR, or select a TV program.
The picture played on the connected device
appears on the LCD s creen of your
camcorder.
6 Touch [REC START] at the point you
want to start recording.
7 Stop recording.
When recording on a tape
Touch (stop) or [REC PAUSE].
When recording on a “Memory Stick
Duo”
Touch [REC S T O P].
1 Connect your TV or VCR to your
camcorde r ( p.93).
2 If you are recording from a VCR,
insert a cassette.
3 Slide the POWER switch to select the
PLAY/EDIT mode.
4 Operate your camcorder to record
movies.
When recording on a tape
1 Touch .
2 Touch [ REC CTRL].
If the item is not disp layed on th e screen ,
touch / . If you cannot find it,
touch [MENU], and select it from the
(EDIT/PLAY) menu (p. 80).
3 Touch [REC PAUSE].
When record in g on a “M emor y S t ick
Duo”
1 Touch .
2 Touch [MENU].
3 Select the (EDIT/PLAY) menu,
then [ REC CTRL].
8 Touch , then .
z Tips
• The indicator appears when you connect your
camcorder and other devices via an i.LINK cabl e.
(This indicator may also appear on your TV.)
• When recording movies on a “Memory Stick Duo,”
you can skip st ep 4 a nd press REC START/ S TO P in
step 6.
Recording still images
1 Perform steps 1 to 3 in “Recording
movies” (p. 95).
2 Play the video, or receive the TV
program you want to record .
The pictures on the VCR or TV appear on
the screen of your camcorder.
3 Press PHOTO lightly at the scene you
want to record. Check the image and
press it fully.
The image is not recorded unless you pres s
PHOTO fully. Release it if you do not want
Dubbing/Editing
,continued
Dubbing/Editing
95
Page 96
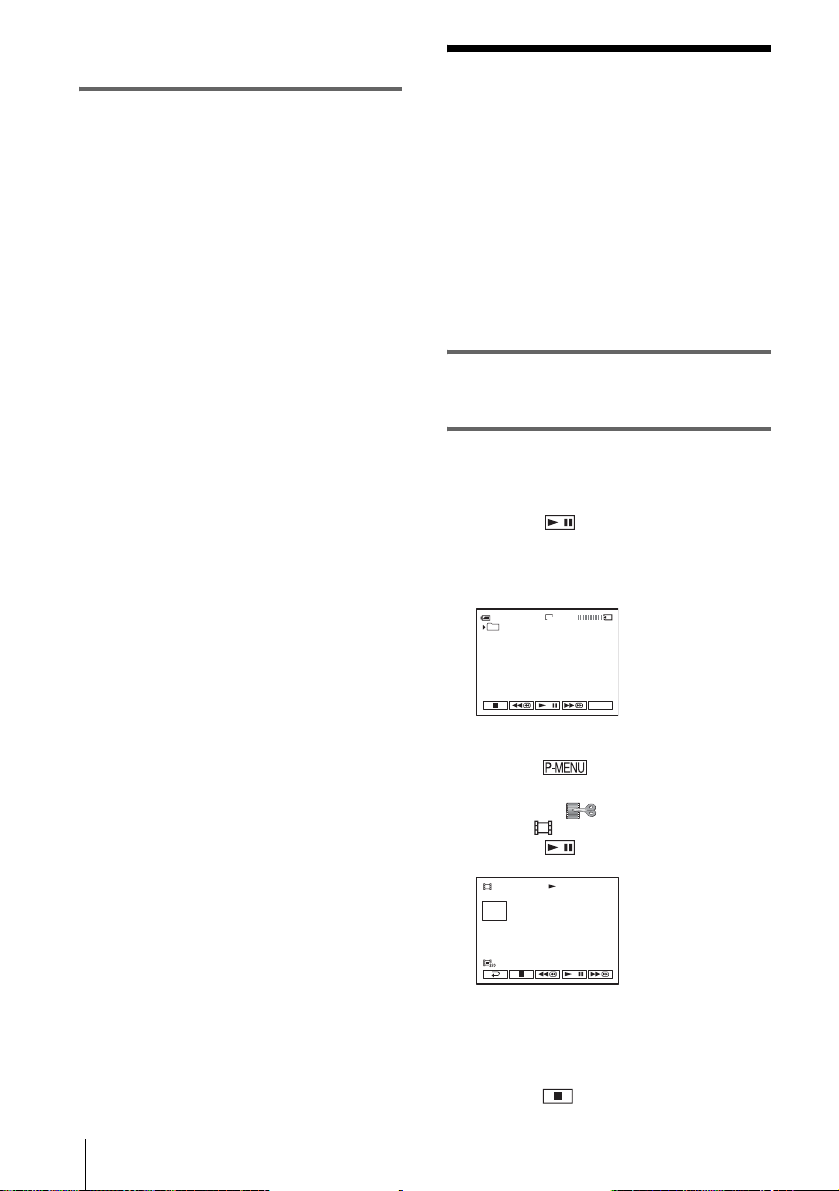
to record the scene, and select other scene
as described above.
Dubbing pictures from a tape to a “Memory Stick Duo”
You can record movies (with sound recorded
in monaural) or still images on a “Memory
Stick Duo.”
Make sure you have a recorded tape and a
“Memory Stick Duo” inserted into your
camcorder.
1 Slide the POWER switch to select the
PLAY/EDIT mode.
2 Search and record the scene you want
to record.
When recording a still image
1 Touch (play) to play back the tape.
2 Press PHOTO lightly at the scene you
want to record. Check the image and
press it fully.
101
60min
FINE
1152
Dubbing/Editing
96
P-MENU
When recording a movie
1 Touch .
2 Touch [MENU].
3 Select the (EDIT/PLAY) menu,
then [ REC CTRL].
4 Touch (play) to play back the tape.
REC CTRL
REC
START
2min
0:00:00:00
5 Touch [REC START] at the poi nt yo u
want to start recording.
6 Touch [REC STOP] at the point you
want to stop recording.
7 Touch (stop) to stop tape playback.
Page 97
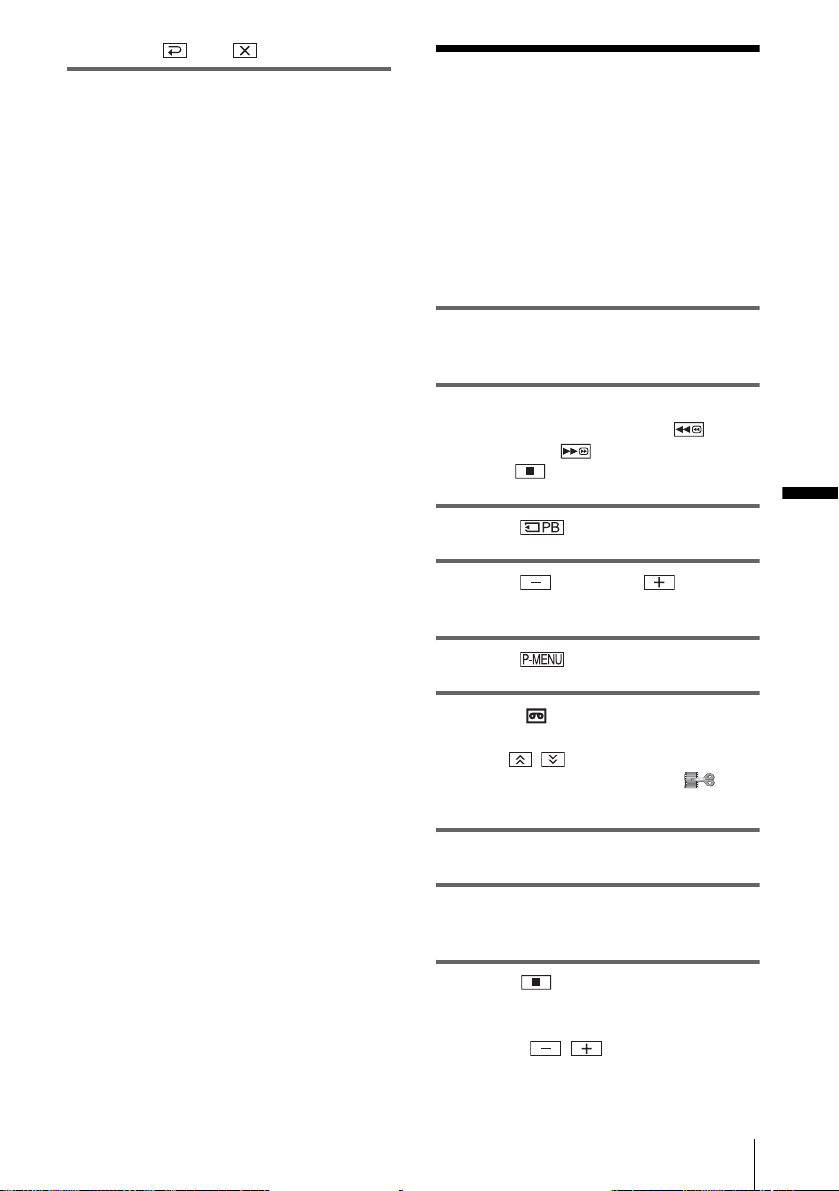
8 Touch , then .
b Notes
• For DCR-PC109:
You can record still images f ixe d to im age size
[640 × 480].
• The Data code and titles recorded on the tape cannot
be recorded on the “Memory Stick Duo.” The time
and date the picture is recorded on the “Memory
Stick Duo” will be recorded.
• The sound is recorded in 32kHz monaural.
z Tips
• You can also record a movie by pressing REC
START/STOP during tape playback.
• For the recording time of mo vie s, see pa ge 29.
Dubbing still images from a “Memory Stick Duo” to a tape
You can record still images on a tape.
Make sure you have the “Memory Stick Duo”
with the images and a tape inse rted into y our
camcorder.
1 Slide the POWER switch to select the
PLAY/EDIT mode.
2 Search for the point where you want to
start dubbing by touching
(rewind) or (fast forward), then
touch (stop).
Dubbing/Editing
3 Touch .
4 Touch (previous)/ (next) to
select the image you want to dub.
5 Touch .
6 Touch [ REC CTRL].
If the item is not displayed on the screen,
touch / . If you cannot find it, touch
[MENU], and select it from the
(EDIT/PLAY) menu.
7 Touch [REC PAUSE].
8 Touch [REC START].
The selected image is dubbed to the tape.
9 Touch (stop) or [REC PAUSE]
when you want to stop recording.
To dub other still imag es, select images by
touching / , then repeat steps 7 to
9.
,continued
Dubbing/Editing
97
Page 98
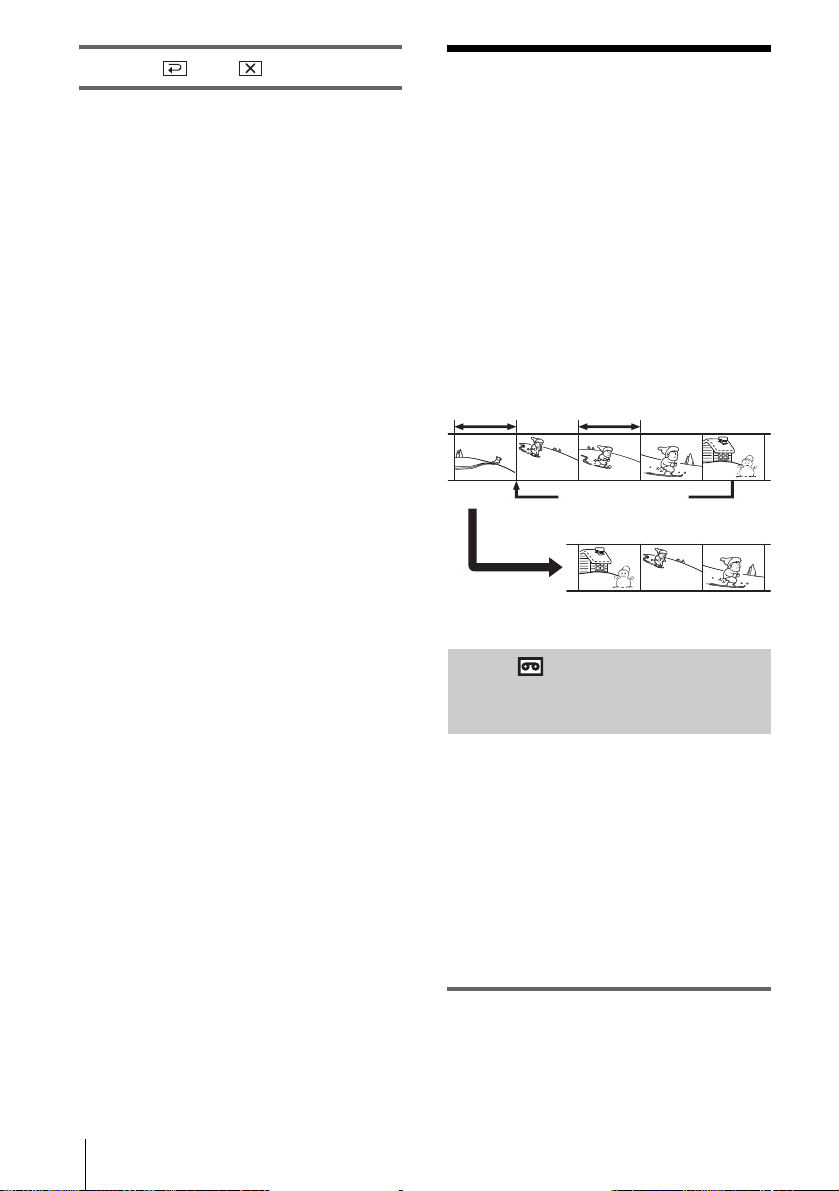
10Touch , then .
Dubbing selected
b Notes
• You cannot dub the index screen.
• You may not be able to dub images modified on your
computer or recorded with other camcorders on your
camcorder.
• You cannot dub MPEG movies on the tape.
scenes from a tape
– Digital program editing
You can select up to 20 scenes (programs)
and record them in the desired order to other
recording device such as VCRs or to a
“Memory Stick Duo” inserted in your
camcorder.
When you are recording on a “Memory Stick
Duo,” skip steps 1 and 2 and start from
“Recording the selected scenes as programs”
(p. 102).
Delete unwanted scene
Change the order
Results of editing
Step 1 : Preparing your
camcorder and VCR for operation
Dubbing/Editing
98
Follow the steps below when you are
performing a digital program edit for the first
time to a tape in a VCR. You can skip this
setting if you have set up the VCR by the
following procedure before.
b Notes
• You cannot perform the Digital program editing on
a VCR that does not support [IR SETUP] codes.
• The operating signal for the Digital program editing
cannot be transferred via the LANC jack.
1 Connect your VCR to the camcorder
as a recording device (p. 93).
You can use either t he A / V connecting
cable or the i.LINK cable to make the
Page 99
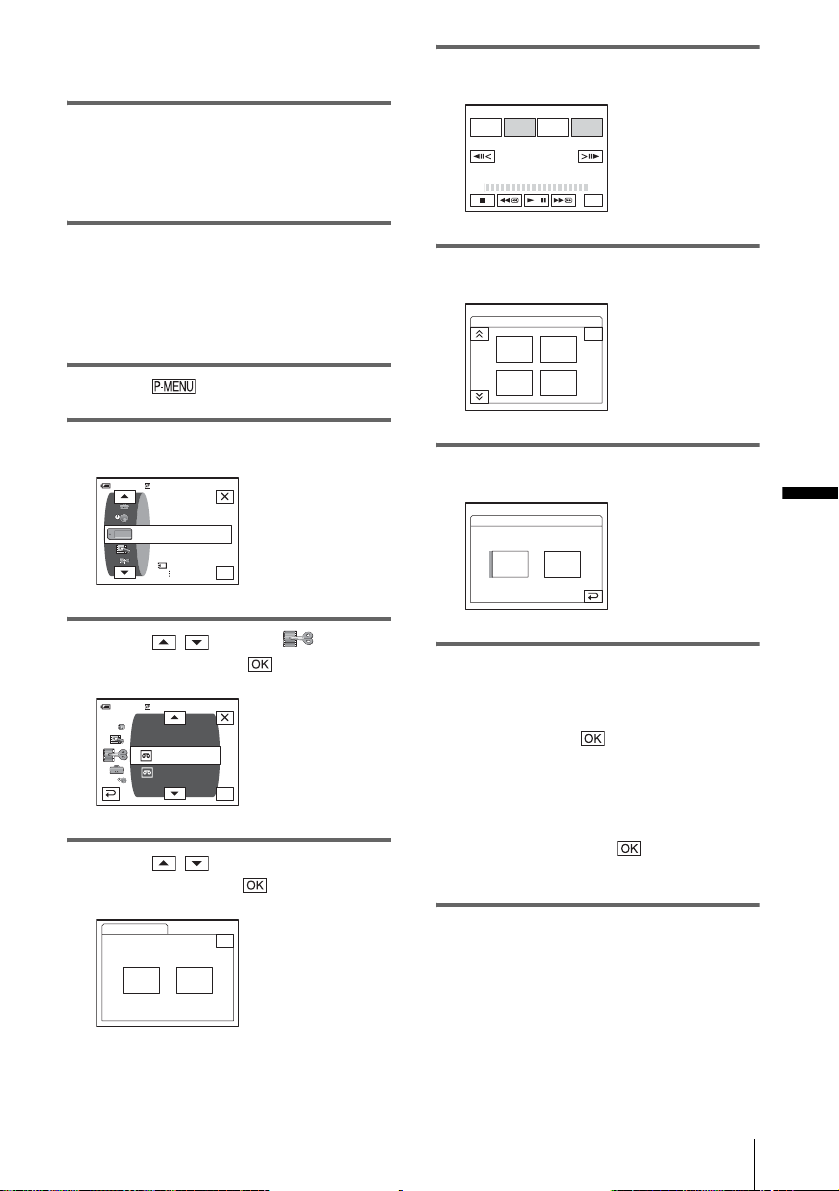
connection . The dubbing procedure is
easier with the i.LINK connection.
2 Prepare your VCR.
• Insert a cassette for recording.
• Set the input s elector to input mode if your
VCR has one.
3 Prepare you r camcorder (playing
device).
• Insert a cassette for editing.
• Slide the POWER switch to select the
PLAY/EDIT mode.
4 Touch .
5 Touch [ME NU].
60min
0:00:00:00
MEMORY SET
STILL SET
MOVIE SET
ALL ERASE
OK
8 Touch [OTHER DEVICE].
PROG. EDIT 0:00:00:00
MARK
IN
TOTAL
SCENE
EDI T
START UNDO
SET
0:00:00:00
0
END
9 Touch [EDIT SET].
CON–
TROL
CUT–
IN
0:00:00:00
ADJ
TEST
CUT–
OUT
END
PROG. EDIT
EDIT SET
1/2
10Touch [CONTROL].
PROG. EDIT
CONTROL:
IR
0:00:00:00
i. LINKIR
Dubbing/Editing
6 Touch / to select (EDIT/
PLAY), then touch .
0:00:00:0060min
D. EFFECT
PICT. EFFECT
PRINT
VAR. SPD PB
REC CTRL
AUD DUR CTRL
PROG. EDIT
OK
7 Touch / to select [PROG.
EDIT], then touch .
PROG. EDIT
OTHER
DEVICE
Select the media.
MEMORY
0:00:00:00
STICK
END
11Select [IR] or [i.LINK].
When connecting with an A/V
connecting cable
Touch [IR], then . Follow the procedure
described in “To set the [IR SETUP] code”
(p. 100).
When connecting with an i.LINK
cable
Touch [i.LINK ], then . Go on to “Step
2 : Adjusting the synchronization of the
VCR” (p. 101).
,continued
Dubbing/Editing
99
Page 100
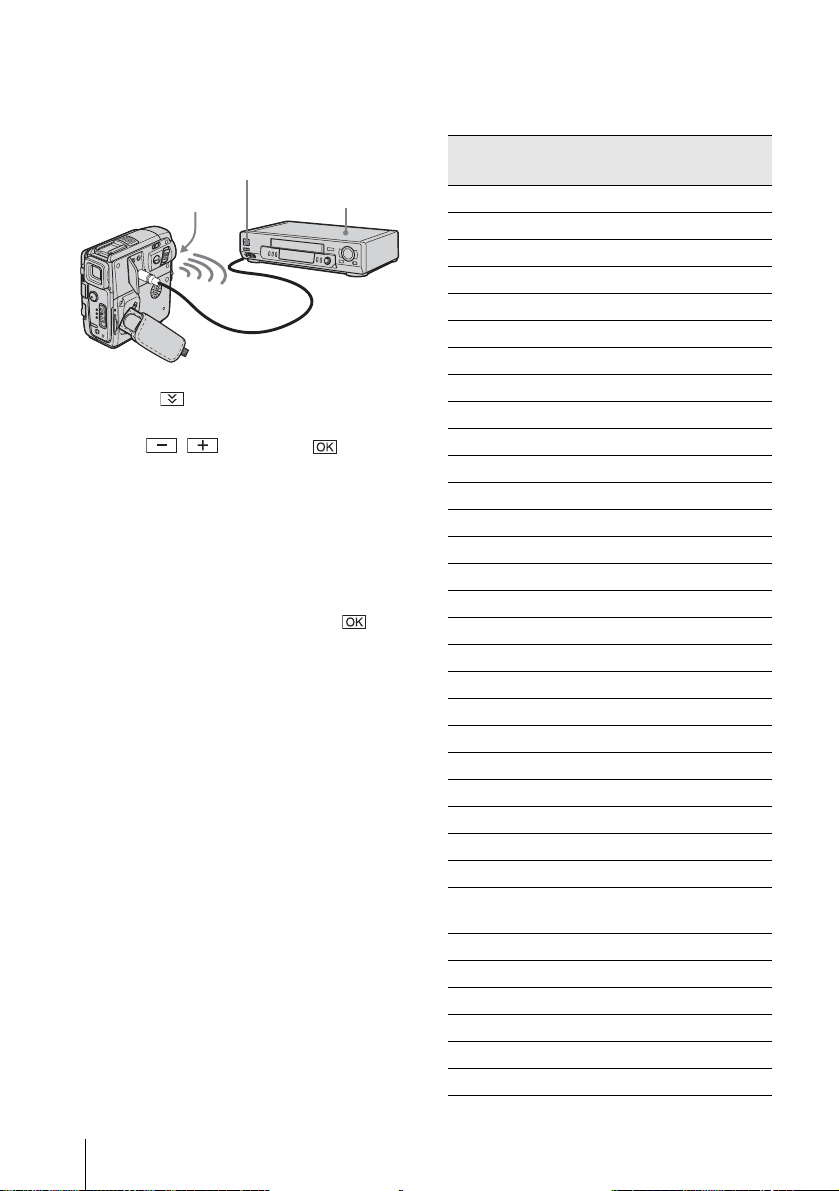
To set the [IR SETUP] code
When you connect with an A/V connecting
cable, you need to check the [IR SETUP] code
signal to see if yo ur VCR can be operated by
your camcorder (infrared ray emitter).
Remote sensor
Infrared ray emitter
VCR
1 Touch , then [IR SETUP].
2 Select the [IR SETUP] code of your VCR
/, then touch .
with
For the [IR SETUP] code of your V CR,
refer to “[IR S E T U P] code list” (p. 100).
When there is more than one code listed for
the manufacturer of yo ur V CR, try each
code and find the mo st appropriate one.
3 Touch [PAUSEMODE].
4 Select the mode to cancel recording
pause on your VCR, the n to uc h .
Refer to the operating instru ctions suppl ied
with your VCR for details on operation.
5 Point the infrared ray emitter of your
camcorder towards the remote sensor on
your VCR, from about 30 cm (12 in.)
away, with no obstructions.
6 Insert a cassette into your VCR, and set
the VCR to recording pause.
7 Touch [IR TEST].
8 Touch [EXEC].
The recording starts on your VCR when the
setting is correct. [ Completed.] appears
when the [IR SETUP ] co de test is finished.
Go on to “Step 2 : Adjusting the
synchronization of th e VCR” (p. 101).
When recording fails to start, select another
[IR SETUP] code and try again.
[IR SETUP] code list
The following [IR SETUP] codes are recorded
on your camc orde r by defau lt. (It is se t at “3” as
the default setting.)
Manufacturing
company
Sony 1, 2, 3, 4, 5, 6
Admiral (M. Wards) 89
Aiwa 47, 54, 80
Akai 49, 51
Audio Dynamic 21, 35
Bell&Howell (M. Wa rds) 36
Broksonic 21, 70, 82
Canon 77, 78
Citizen 47
Craig 47, 73
Curtis Mathis 8, 77, 80
Daewoo 26, 40, 77
DBX 21, 33, 35
Dimensia 8
Emerson 26, 48, 59, 70, 80, 81, 82
Fisher 36, 37, 44, 45
Funai 80
General Electric 8, 32*, 77, 94*, 101
Goldstar/LG 47
GO VIDEO 71
Hitachi 8, 42, 78
HQ 40
Instant Replay 77, 78
JC Penny 8, 21, 33, 35, 36, 42, 77
JVC 12, 13, 14, 21, 33, 35
Kenwood 21, 33, 35, 47
LXI (Sears) 36, 37, 42, 44, 45, 47,
Magnavox 17, 77, 78, 83
Marantz 21, 33, 35
Marta 47
Memorex 37, 77
Minolta 8, 42
Mitsubishi/MGA 22, 23, 24, 28, 29
[IR SETUP] code
49, 80
Dubbing/Editing
100
 Loading...