

Page 1
3-867-254-11 (1)
Trinitron Color
Computer Display
Operating Instructions
Mode d’emploi
Manual de instrucciones
US
FR
ES
CPD-E200
© 1999 by Sony Corporation
Page 2
Owner’s Record
The model and serial numbers are located at the rear of the unit.
Record these numbers in the spaces provided below. Refer to them
whenever you call upon your dealer regarding this product.
Model No.
Serial No.
WARNING
To prevent fire or shock hazard, do not expose the
unit to rain or moisture.
Dangerously high voltages are present inside the
unit. Do not open the cabinet. Refer servicing to
qualified personnel only.
FCC Notice
This equipment has been tested and found to comply with the limits
for a Class B digital device, pursuant to Part 15 of the FCC Rules.
These limits are designed to provide reasonable protection against
harmful interference in a residential installation. This equipment
generates, uses, and can radiate radio frequency energy and, if not
installed and used in accordance with the instructions, may cause
harmful interference to radio communications. However, there is no
guarantee that interference will not occur in a particular installation.
If this equipment does cause harmful interference to radio or
television reception, which can be determined by turning the
equipment off and on, the user is encouraged to try to correct the
interference by one or more of the following measures:
– Reorient or relocate the receiving antenna.
– Increase the separation between the equipment and receiver.
– Connect the equipment into an outlet on a circuit different from
that to which the receiver is connected.
– Consult the dealer or an experienced radio/TV technician for
help.
You are cautioned that any changes or modifications not expressly
approved in this manual could void your authority to operate this
equipment.
IMPORTADOR
Sony Electronicos de Mexico, S.A. de C.V.
Henry Ford No.29
Fraccionamiento San Nicolas, Tlalnepantla
Estado de Mexico, CP54030
Tel.: 321-1000
R.F.C. SEM-941001-BJA
(Para Mexico unicamente/For Mexico only)
Hinweise
• Aus ergonomischen Gründen wird empfohlen, die
Grundfarbe Blau nicht auf dunklem Untergrund zu verwenden
(schlechte Erkennbarkeit, Augenbelastung bei zu geringem
Zeichenkontrast).
• Aus ergonomischen Gründen (flimmern) sollten nur
Darstellungen bei Vertikalfrequenzen ab 70 Hz (ohne
Zeilensprung) verwendet werden.
• Die Konvergenz des Bildes kann sich auf Grund des
Magnetfeldes am Ort der Aufstellung aus der korrekten
Grundeinstellung verändern. Zur Korrektur empfiehlt es sich
deshalb, die Regler an der Frontseite für Konvergenz so
einzustellen, daß die getrennt sichtbaren Farblinien für Rot,
Grün und Blau bei z.B. der Darstellung eines Buchstabens
zur Deckung (Konvergenz) gelangen.
Siehe hierzu auch die Erklärungen zu Konvergenz.
NOTICE
This notice is applicable for USA/Canada only.
If shipped to USA/Canada, install only a UL LISTED/CSA
LABELLED power supply cord meeting the following
specifications:
SPECIFICATIONS
Plug Type Nema-Plug 5-15p
Cord Type SVT or SJT, minimum 3 × 18 AWG
Length Maximum 15 feet
Rating Minimum 7 A, 125 V
NOTICE
Cette notice s’applique aux Etats-Unis et au Canada
uniquement.
Si cet appareil est export* aux Etats-Unis ou au Canada, utiliser
le cordon d’alimentation portant la mention UL LISTED/CSA
LABELLED et remplissant les conditions suivantes:
SPECIFICATIONS
Type de fiche Fiche Nema 5-15 broches
Cordon Type SVT ou SJT, minimum 3 × 18 AWG
Longueur Maximum 15 pieds
Tension Minimum 7 A, 125 V
IMPORTANTE
Para prevenir cualquier mal funcionamiento y evitar daños, por
favor, lea detalladamente este manual de instrucciones antes de
conectar y operar este equipo.
INFORMATION
This product complies with Swedish National Council for Metrology
(MPR) standards issued in December 1990 (MPR II) for very low
frequency (VLF) and extremely low frequency (ELF).
INFORMATION
Ce produit est conforme aux normes du Swedish National Council
for Metrology de décembre 1990 (MPR II) en ce qui concerne les
fréquences très basses (VLF) et extrêmement basses (ELF).
Hinweis
Dieses Gerät erfüllt bezüglich tieffrequenter (very low frequency)
und tiefstfrequenter (extremely low frequency) Strahlung die
Vorschriften des „Swedish National Council for Metrology (MPR)“
vom Dezember 1990 (MPR II).
INFORMACIÓN
Este producto cumple las normas del Consejo Nacional Sueco
para Metrología (MPR) emitidas en diciembre de 1990 (MPR II)
para frecuencias muy bajas (VLF) y frecuencias extremadamente
bajas (ELF).
Dieses Garät entspricht den folgenden europäischen EMVVorschriften für Betrieb in Wohngebieten, gewerblicher Gebleten
und Leichtindustriegebieten.
EN55022/1994 Klasse B
EN50082-1/1997
EN61000-3-2/1995
E
NERGY STAR Partner, Sony
As an
Corporation has determined that this
product meets the
guidelines for energy efficiency.
E
NERGY STAR
Declaration of Conformity
Trade Name: Sony
Model No.: CPD-E200
Responsible Party: Sony Electronics Inc.
Address: 1 Sony Drive, Park Ridge, NJ. 07656 USA
Telephone No.: 201-930-6970
This device complies with Part 15 of the FCC Rules. Operation is
subject to the following two conditions: (1) This device may not
cause harmful interference, and (2) this device must accept any
interference received, including interference that may cause
undesired operation.
2
Page 3
Table of Contents
Precautions. . . . . . . . . . . . . . . . . . . . . . . . . . . . . . . . . . . . . . . . . . . . 4
Identifying parts and controls . . . . . . . . . . . . . . . . . . . . . . . . . . . . . . 5
Setup. . . . . . . . . . . . . . . . . . . . . . . . . . . . . . . . . . . . . . . . . .6
Step 1:
Step 2:
Step 3:
Connect your monitor to your computer . . . . . . . . . . . . . . . 6
Connect the power cord. . . . . . . . . . . . . . . . . . . . . . . . . . . . 6
Turn on the monitor and computer . . . . . . . . . . . . . . . . . . . 7
Selecting the on-screen menu language (LANG). . . . . . . . . . . . . . . 7
Customizing Your Monitor . . . . . . . . . . . . . . . . . . . . . . . .8
Navigating the menu. . . . . . . . . . . . . . . . . . . . . . . . . . . . . . . . . . . . . 8
Adjusting the brightness and contrast. . . . . . . . . . . . . . . . . . . . . . . . 9
Adjusting the centering of the picture (CENTER) . . . . . . . . . . . . . . . 9
Adjusting the size of the picture (SIZE) . . . . . . . . . . . . . . . . . . . . . . 9
Enlarging or reducing the picture (ZOOM) . . . . . . . . . . . . . . . . . . . 10
Adjusting the shape of the picture (GEOM) . . . . . . . . . . . . . . . . . . 10
Adjusting the color of the picture (COLOR) . . . . . . . . . . . . . . . . . . 10
Adjusting the convergence (CONV) . . . . . . . . . . . . . . . . . . . . . . . . 10
Additional settings (OPTION) . . . . . . . . . . . . . . . . . . . . . . . . . . . . . 11
Helpful hints and information (HELP) . . . . . . . . . . . . . . . . . . . . . . . 12
Resetting the adjustments . . . . . . . . . . . . . . . . . . . . . . . . . . . . . . . 12
Technical Features . . . . . . . . . . . . . . . . . . . . . . . . . . . . .13
Preset and user modes. . . . . . . . . . . . . . . . . . . . . . . . . . . . . . . . . . 13
Power saving function. . . . . . . . . . . . . . . . . . . . . . . . . . . . . . . . . . . 13
US
• Trinitron is a registered trademark of
Sony Corporation.
• Macintosh is a trademark license d to
Apple Computer, Inc., registered in the
U.S.A. and other countries.
• Windows
trademarks of Microsoft Corporation in
the United States and other countries.
• IBM PC/AT and VGA are registered
trademarks of IBM Corporation of the
U.S.A.
• VESA and DDC
Video Electronics Standard
Association.
•
E
mark.
• All other product names m ent i one d
herein may be the trademarks or
registered trademarks of their respective
companies.
• Furthermo re, “” and “” are not
mentioned in each case in this manual.
and MS-DOS are registered
are trademarks of the
NERGY STAR is a U.S. registered
Troubleshooting. . . . . . . . . . . . . . . . . . . . . . . . . . . . . . . .13
If thin lines appear on your screen (damper wires). . . . . . . . . . . . . 13
On-screen messages . . . . . . . . . . . . . . . . . . . . . . . . . . . . . . . . . . . 13
Trouble symptoms and remedies . . . . . . . . . . . . . . . . . . . . . . . . . . 14
Self-diagnosis function . . . . . . . . . . . . . . . . . . . . . . . . . . . . . . . . . . 16
Specifications. . . . . . . . . . . . . . . . . . . . . . . . . . . . . . . . . .16
Appendix. . . . . . . . . . . . . . . . . . . . . . . . . . . . . . . . . . . . . . . i
Preset mode timing table . . . . . . . . . . . . . . . . . . . . . . . . . . . . . . . . . .i
3
Page 4
Precautions
90°
5°
90°
15°
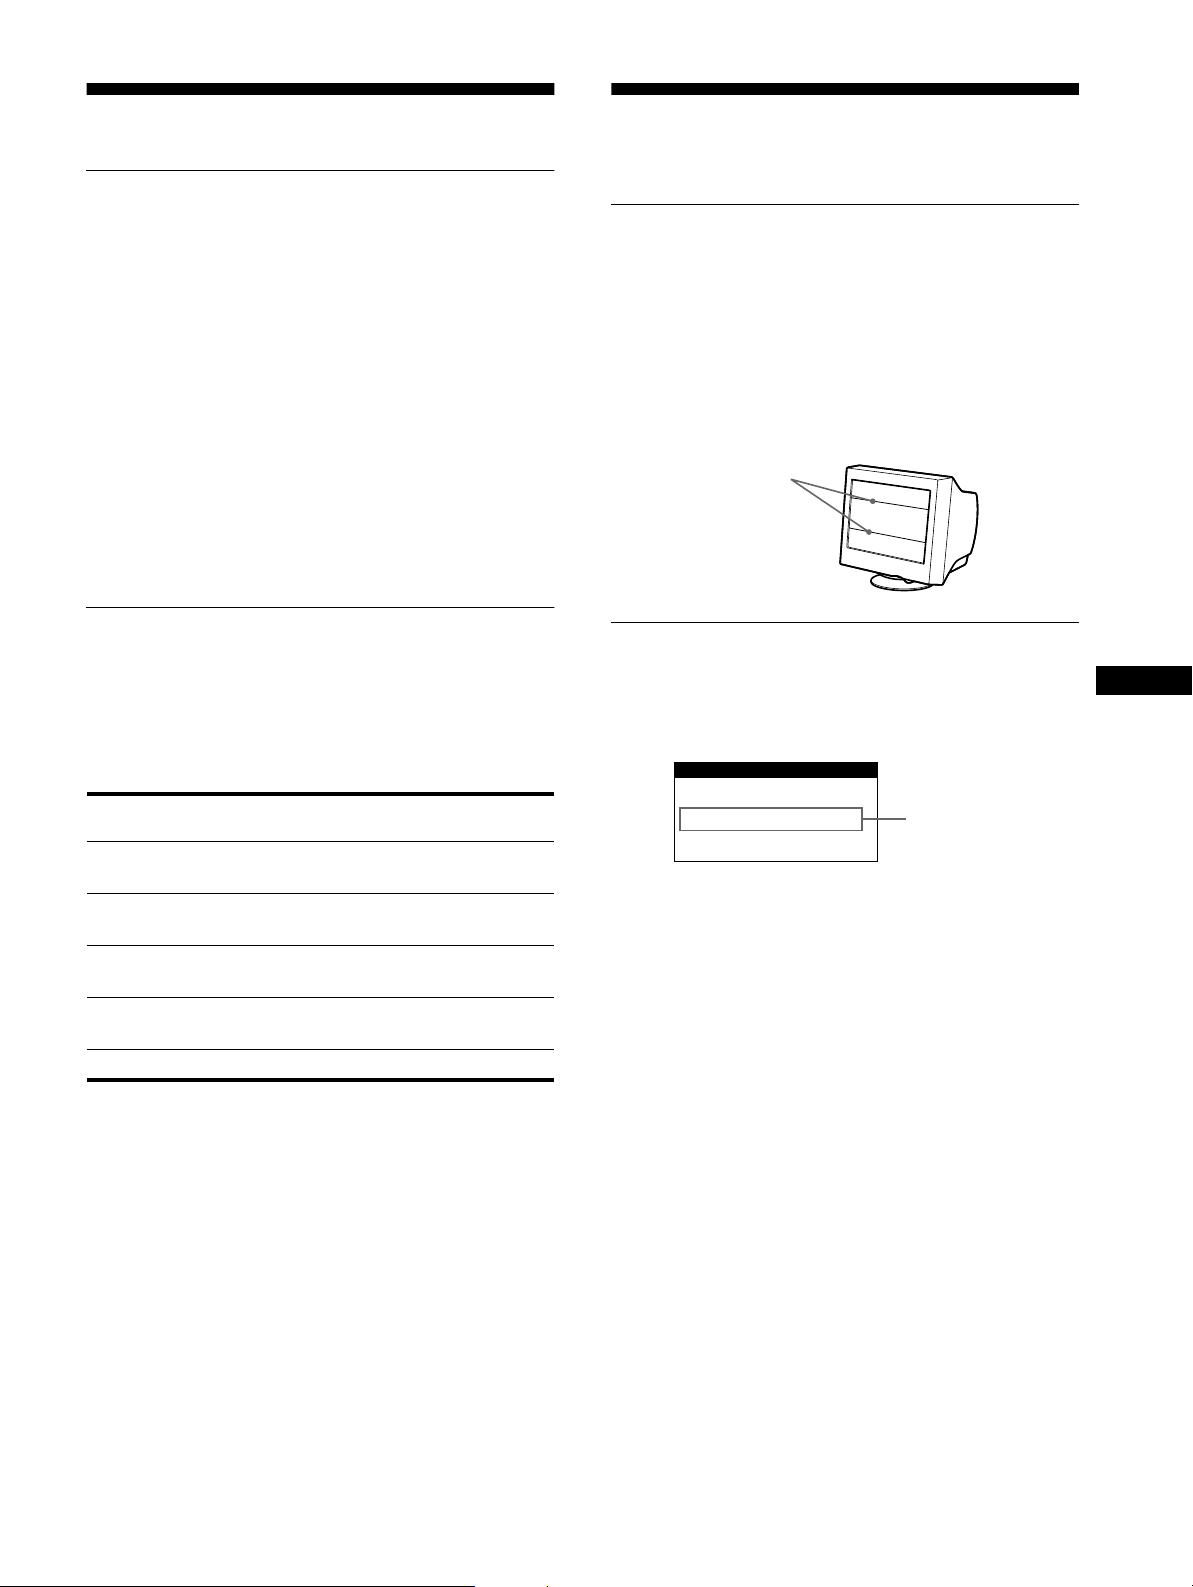
Centering dots
Warning on power connections
• Use the supplied power cord. If you use a different power cord,
be sure that it is compatible with your local power supply.
For the customers in the U.S.A.
If you do not use the appropriate cord, this monitor will not
conform to mandatory FCC standards.
Example of plug types
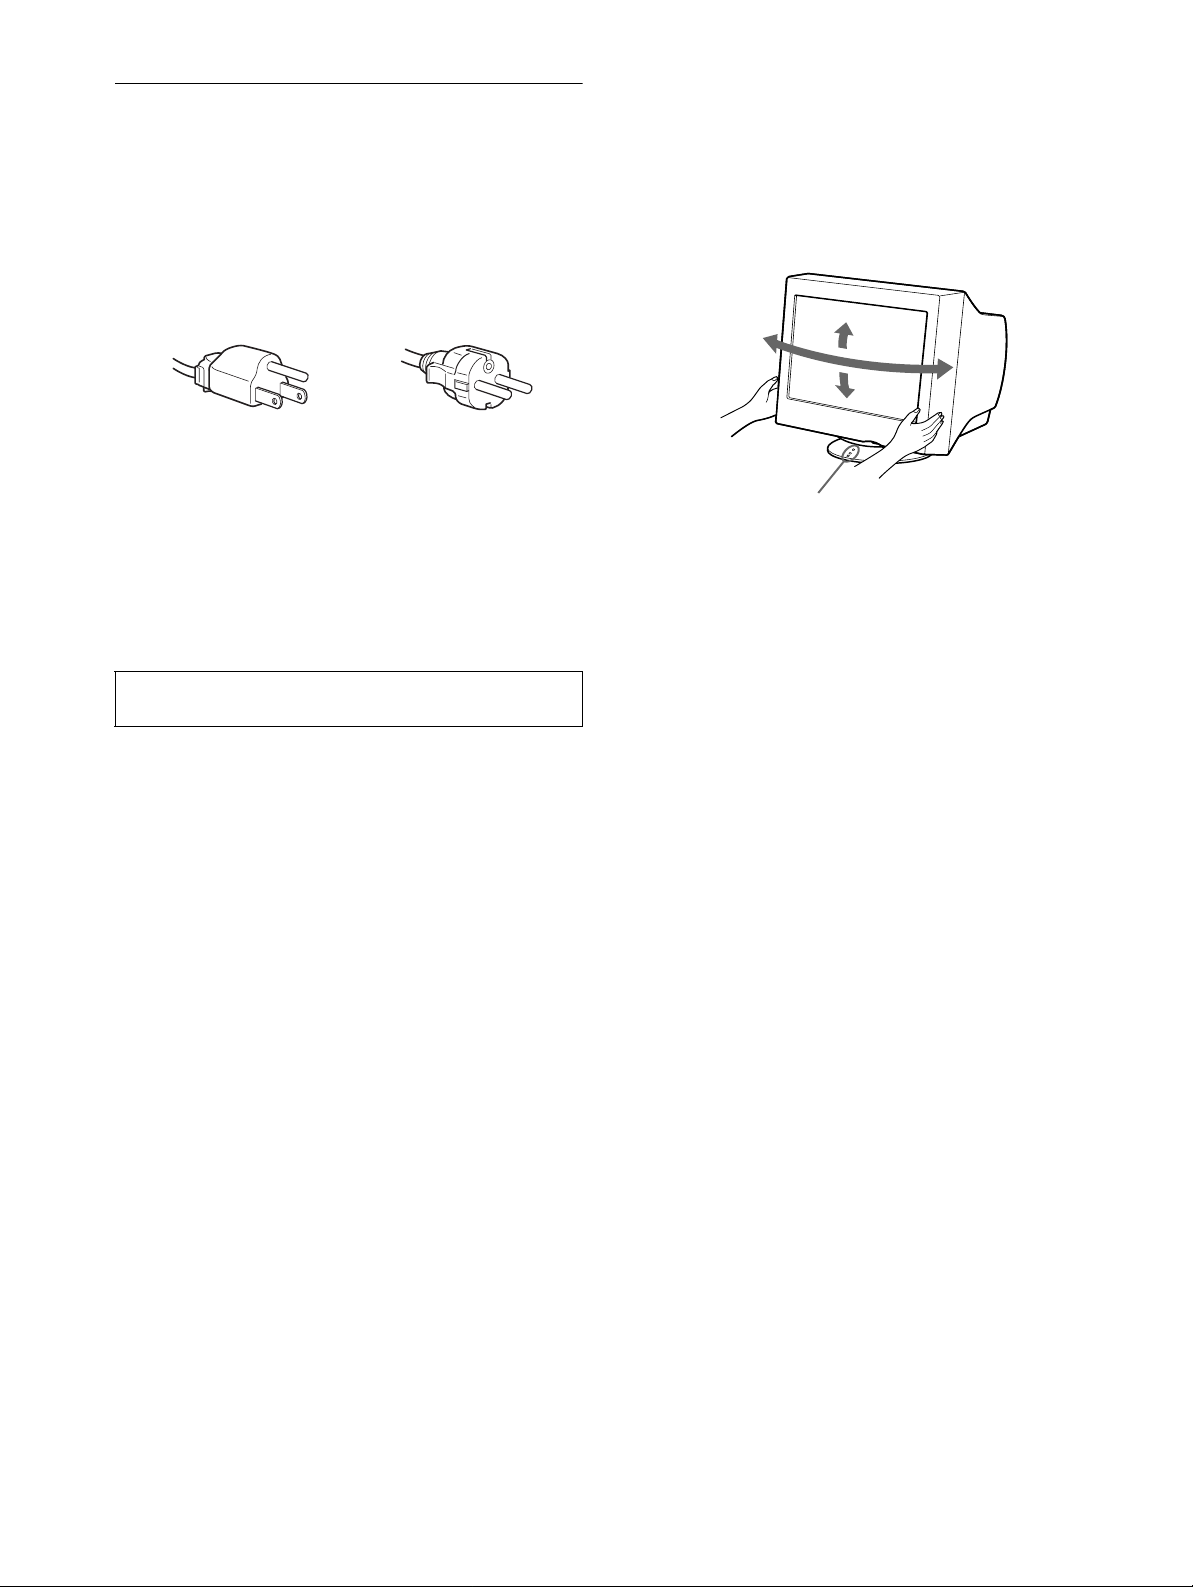
Use of the tilt-swivel
This monitor can be adjusted within the angles shown below. To
find the center of the mon itor’ s turnin g radius, a lign the ce nter of
the monitor’s screen with the centering dots on the stand.
Hold the monitor at the bott om with bo th ha nd s whe n yo u tu rn it
horizontally or vertically. Be careful not to pinch your fingers at
the back of the monitor when you tilt the monitor up vertically.
for 100 to 120 V AC
• Before disconnecting the power cord, wait at least 30 seconds
after turning off the power to allow the static elec tricity on the
screen’s surface to discharge.
• After the power is turned on, the screen is demagnetized
(degaussed) for about 5 seconds. This generates a strong
magnetic field around the screen which may affect data stored
on magnetic tapes and disks placed near the monitor. Be sure to
keep magnetic recording equipment, tapes, and disks away
from the monitor.
The equipment should be in stalled near an easily accessible
outlet.
for 200 to 240 V AC
Installation
Do not install the monitor in the following places:
• on surfaces (rugs, blankets, etc.) or near materials (curtains,
draperies, etc.) that may block the ventilation holes
• near heat sources such as radiators or air ducts, or in a place
subject to direct sunlight
• in a place subject to severe temperature changes
• in a place subject to mechanical vibration or shock
• on an unstable surface
• near equipment which generates magnetism, such as a
transformer or high volta g e po w er lines
• near or on an electrically charged metal surface
Maintenance
• Clean the screen with a soft cloth. If you use a glass cleaning
liquid, do not use any t ype of cleaner containing an anti-static
solution or similar additive as this may scratch the screen’s
coating.
• Do not rub, touch, or tap the surface of the screen with sharp or
abrasive items su ch as a ballpoint pe n or screwdrive r. This type
of contact may result in a scratched picture tube.
• Clean the cabin e t, pane l and co nt rols wi th a soft cloth ligh tly
moistened with a mild detergent solution. Do not use any type
of abrasive pa d, sc ouring powder or solv ent, s uch as a lcohol o r
benzene.
Transportation
When you transport this monitor for repair or shipment, use the
original carton and packing materials.
4
Page 5

Identifying parts and controls
1 2 3 4
5
876
11 12 13 14 15
10
9
See the pages in parentheses for further details.
MENU
RESET
RearFront
AC IN
RESET
MENU
1 RESET button (page 12)
This button resets the adjustments to the factory settings.
2 Control button (page 9)
The control button is used to display the menu and make
adjustments to the monitor, including brightn ess and contrast
adjustments.
3 1 (power) switch and indicator (pages 7, 13, 16)
This button turns the monitor on and off. The power ind icator
lights up in green when the monitor is turned on, and either
flashes in green and orange, or lights up in orange when the
monitor is in power saving mode.
4 AC IN connector (page 6)
This connector provides AC power to the monitor.
5 Video input connector (HD15) (page 6)
This connector inputs RGB video signal s (0.700 Vp-p,
positive) and sync signals.
Pin No. Signal
1Red
2 Green
(Sync on Green)
3Blue
4 ID (Ground)
5 DDC Ground*
6 Red Ground
7 Green Ground
8 Blue Ground
9–
10 Ground
11 ID (Ground)
12 Bi-Directional Data (SDA)*
13 H. Sync
14 V. Sync
15 Data Clock (SCL)*
US
* DDC (Displ a y Dat a Ch annel) is a standard of VESA.
5
Page 6

Setup
AC IN
You will need a Macintosh adapter (not supplied).
Macintosh adapter (not supplied)
Macintosh or
compatible computer
to video
output
AC IN
to AC IN
to a power outlet
power cord (supplied)
Before using your monitor, check that the following accessories
are included in your carton:
• Power cord (1)
• Windows Monitor Information Disk (1)
• Warranty card (1)
• Notes on cleaning the screen’s surface (1)
• This instruction manual (1)
Step 1:Connect your monitor to
your computer
Turn off the monitor and computer before connecting.
Note
Do not touch the pins of the video cable connector as this might bend the
pins.
Connecting to an IBM PC/AT or compatible
x
computer
AC IN
Connecting to a Macintosh or compatible
x
computer
to video output
IBM PC/AT or
compatible computer
Step 2:Connect the power cord
With the monitor and computer switched off, first connect the
power cord to the monitor, then connect it to a power outlet.
6
Page 7
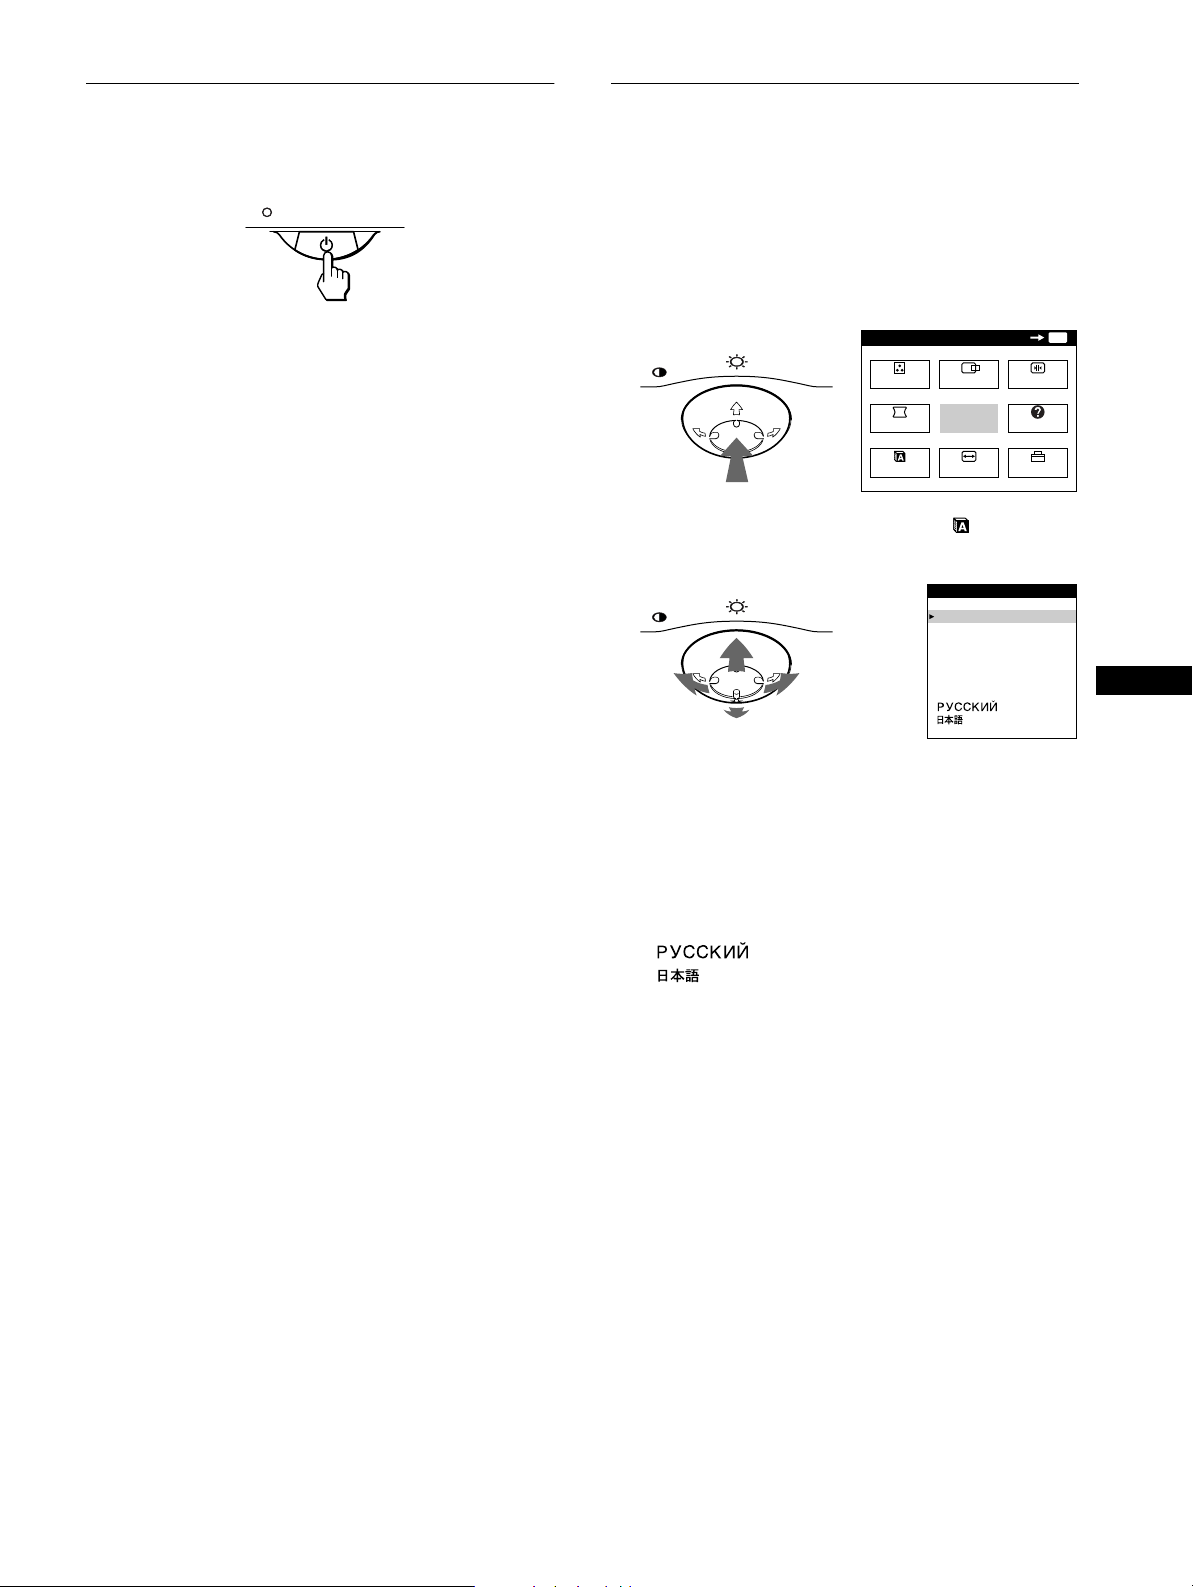
Step 3:Turn on the monitor and
Selecting the on-screen menu
computer
First turn on the monitor, then turn on the computer.
The installation of your monitor is complete.
If necessary, use the monitor’s controls to adjust the picture.
If no picture appears on your screen
• Check that the monitor is correctly connected to the computer.
• If NO INPUT SIGNAL appears on the screen, confirm that the
video signal cable is properly connected and all plugs are firmly
seated in their sockets.
• If MONITOR IS IN POWER SAVE MODE appeared on the
screen, try pressin g any key on the computer ke yboard.
• If you are replacing an old monitor with this model and OUT
OF SCAN RANGE appears on the screen, reconnect the old
monitor. Then adjust the computer’s graphic board so that the
horizontal frequency is between 30 – 85 kHz, and the vertical
frequency is between 48 – 120 Hz.
For more information about the on-screen messages, see “Trouble
symptoms and remedies” on page 14.
language (LANG)
English, French, German, Spanish, Italian, Dutch, Swedish,
Russian and Japanese versions of the on-screen menus are
available. The default setting is English.
1
Press the center of the control button.
See page 9 for more information on using the control button.
MENU
2
Move the control button to highlight LANG and
MENU
COLOR
GEOM
LANG
CENTER
press the center of the control button again.
MENU
LANGUAGE
ENGL I SH
FRANÇA I S
DEUTSCH
ESPAÑOL
ITALIANO
NEDERLANDS
SVENSKA
EXIT
SIZE
OK
CONV
HELP
OPTION
MENU
US
For customers using Windows 95/98
To maximize the potential of your monitor, install the new model
information file from the supplied Windows Monitor Informat ion Disk
onto your PC.
This monitor complies with the “VESA DDC” Plug & Play stan dard. If
your PC/graphics board complies with DDC, select “Plug & Play Monitor
(VESA DDC)” or this monitor’s mode l na m e a s the mo nitor type in the
“Control Panel” of Windows 95/98. If your PC/graphics board has
difficulty commu nicating with this monitor, loa d the Windows Monitor
Information Disk and select this monitor’s model name as the monitor
type.
For customers using Windows NT4.0
Monitor setup in Windows NT4.0 is different from Windows 95/98 an d
does not involve the sele c ti on of monitor type. Refer to the W indows
NT4.0 instruction ma nual for further details on ad just ing the resolution,
refresh rate, and number of col ors.
Adjusting the monitor’s resolution and color number
Adjust the monitor’s resolution and color number by referring to your
computer’s instruction manual. The color number may vary according to
your computer or video board. The color palette setting and the actu al
number of colors are as follows:
• High Color (16 bit) t 65,536 colors
• True Color (24 bit) t about 16.77 mi ll ion col ors
In true color mode (24 bit), speed may be slower.
3
Move the control button m/M to select a language.
• ENGLISH
• FRANÇAIS: French
• DEUTSCH: German
• ESPAÑOL: Spanish
• ITALIANO: Italian
• NEDERLANDS: Dutch
• SVENSKA: Swedish
• : Russian
• : Japanese
To close the menu
Press the center of the control button once to return to the main MENU,
and twice to return to normal viewing. If no buttons are pressed, the menu
closes automa tically after about 30 s econds.
To reset to English
Press the RESET button while the LANGUAGE menu is displayed on the
screen.
7
Page 8
Customizing Your Monitor
MENU
MENU
EXIT
CENTER
SIZE
GEOM
COLOR
LANG
HELP
CONV
OPTION
OK
68.7kHz/ 85Hz
1024
768
the horizontal
and vertical
frequencies of
the current
input signal
the r
esolution
of the curre
nt
input signal
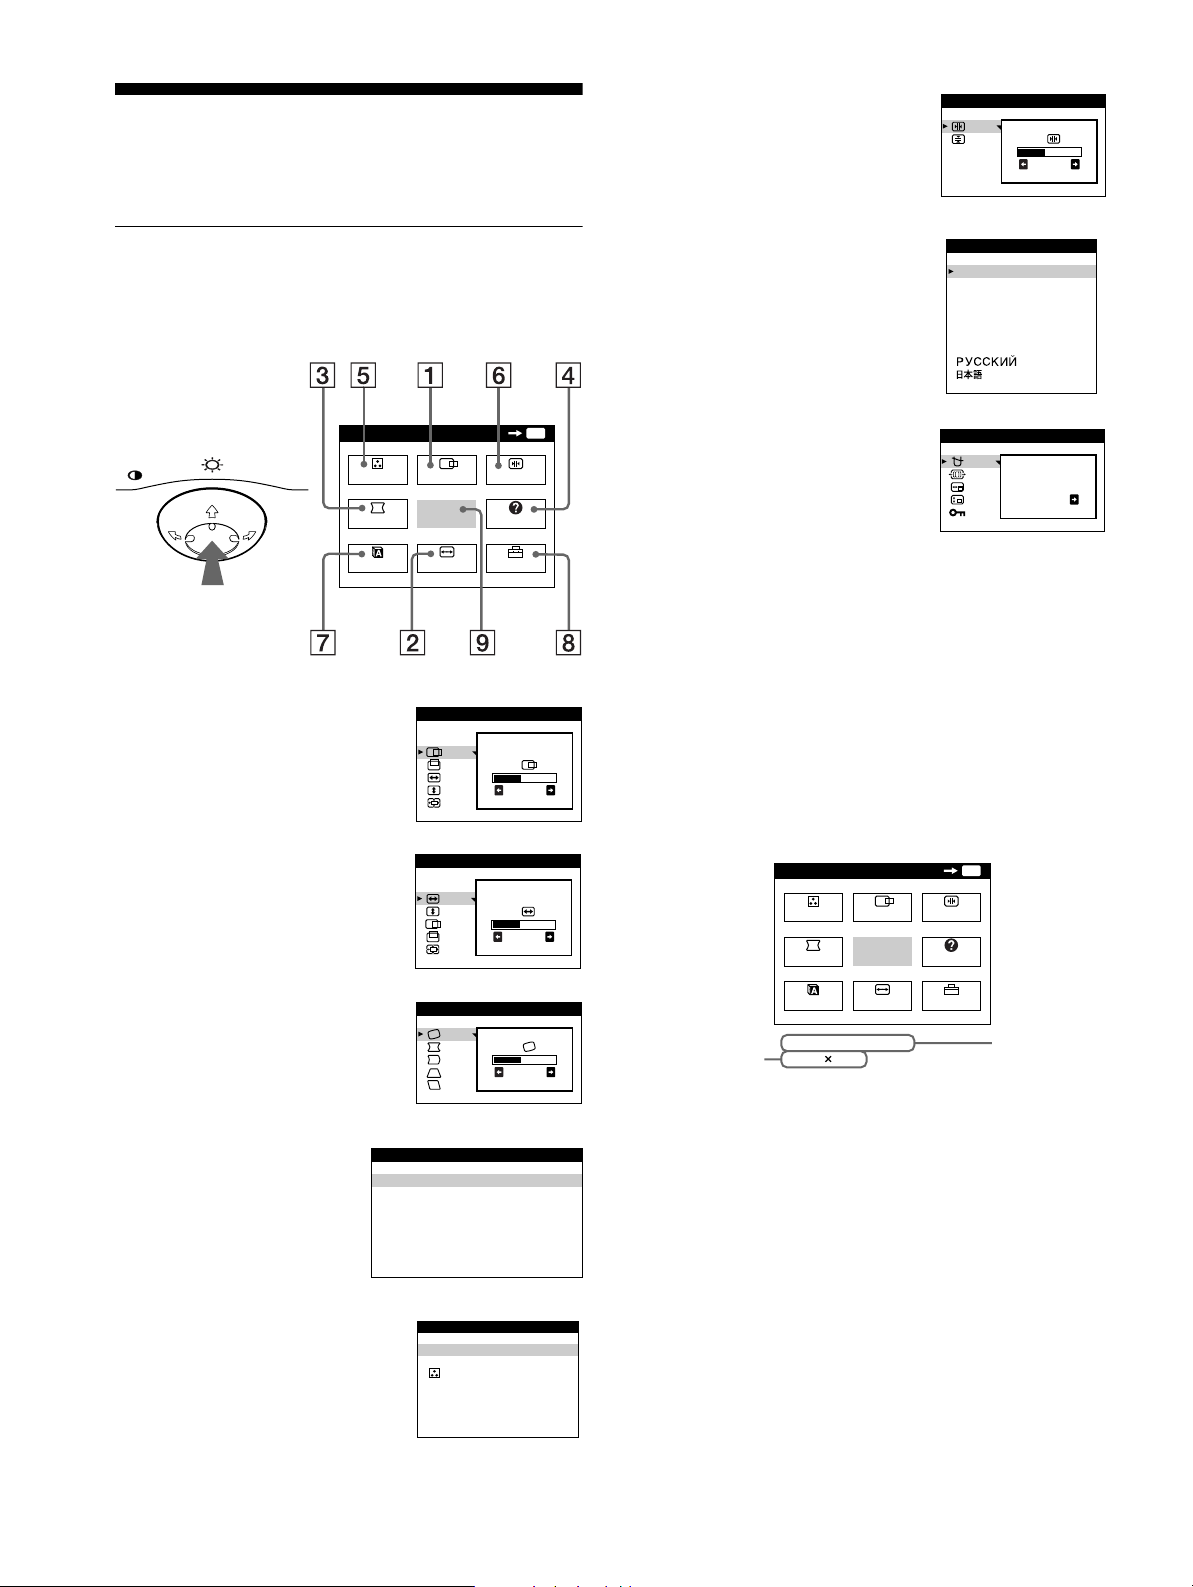
You can make numerous adj ustments to your monitor u s ing the
on-screen menu.
CONV (page 10)
6
Select the CONV menu to adjust the
picture’s horizontal and vertical
convergence.
CONVERGENCE
26
Navigating the menu
Press the center of the control button to display the main MENU
on your screen. See page 9 for more information on using the
control button.
MENU
MENU
COLOR
GEOM
LANG
CENTER
EXIT
SIZE
Use the control button to select one of the following menus.
CENTER (page 9)
1
SI ZE/CENTER
Selects the CENTER menu to adjust
the picture’s cent ering, size or
zoom.
SIZE (page 9)
2
SI ZE/CENTER
Selects the SIZE menu to adju st the
picture’s size, centering or zoom.
OK
CONV
HELP
OPTION
MENU
26
26
LANG (page 7)
7
Select LANG to choose the onscreen menu’s language.
OPTION (page 11)
8
Select OPTION to adjust the
LANGUAGE
ENGL I SH
FRANÇA I S
DEUTSCH
ESPAÑOL
ITALIANO
NEDERL ANDS
SVENSKA
OPT ION
DEGAUSS
monitor’s options . The opt ion s
include:
ON
• degaussing the screen
• a djusting the moire cancellation
level
• changing the on-screen menu
position
• locking the controls
EXIT
9
Select EXIT to close the menu.
Displaying the current input signal
x
The horizontal and vertical frequencies of the current input signal
are displayed in the main MENU. If the sign al matches one of this
monitor’s factory preset modes, the resolution is also displayed.
3
4
5
8
GEOM (page 10)
Select the GEOM menu to adjust the
picture’s rotation and shape.
HELP (page 12)
Select the HELP menu to
display helpful hints an d
information about this
monitor.
HELP
RETURN TO MA I N MENU
RECOMMENDED RESOL UT I ON
FL ICKER
TH I N HOR I Z ONTAL L I NE
D I STORTED SHAPE
OUT OF FOCUS
DI SCOLORAT ION
COLOR (page 10)
Select the COLOR menu to adjust
the picture’s color temperature. You
can use this to match the monitor’s
colors to a printed picture’s colors.
GEOMETRY
COLOR
9300K
5000K
26
Page 9

Using the control button
26 26
BR I GHTNESS / CONTRAST
x
1
Display the main MENU.
Press the center of the control button to display the main
MENU on your screen.
MENU
2
Select the menu you want to adjust.
Highlight the desired menu by moving the control button
towards the rear to go up (M), towards the front to go down
(m), and left (<) or right (,) to move sideways.
FRONT
MENU MENU
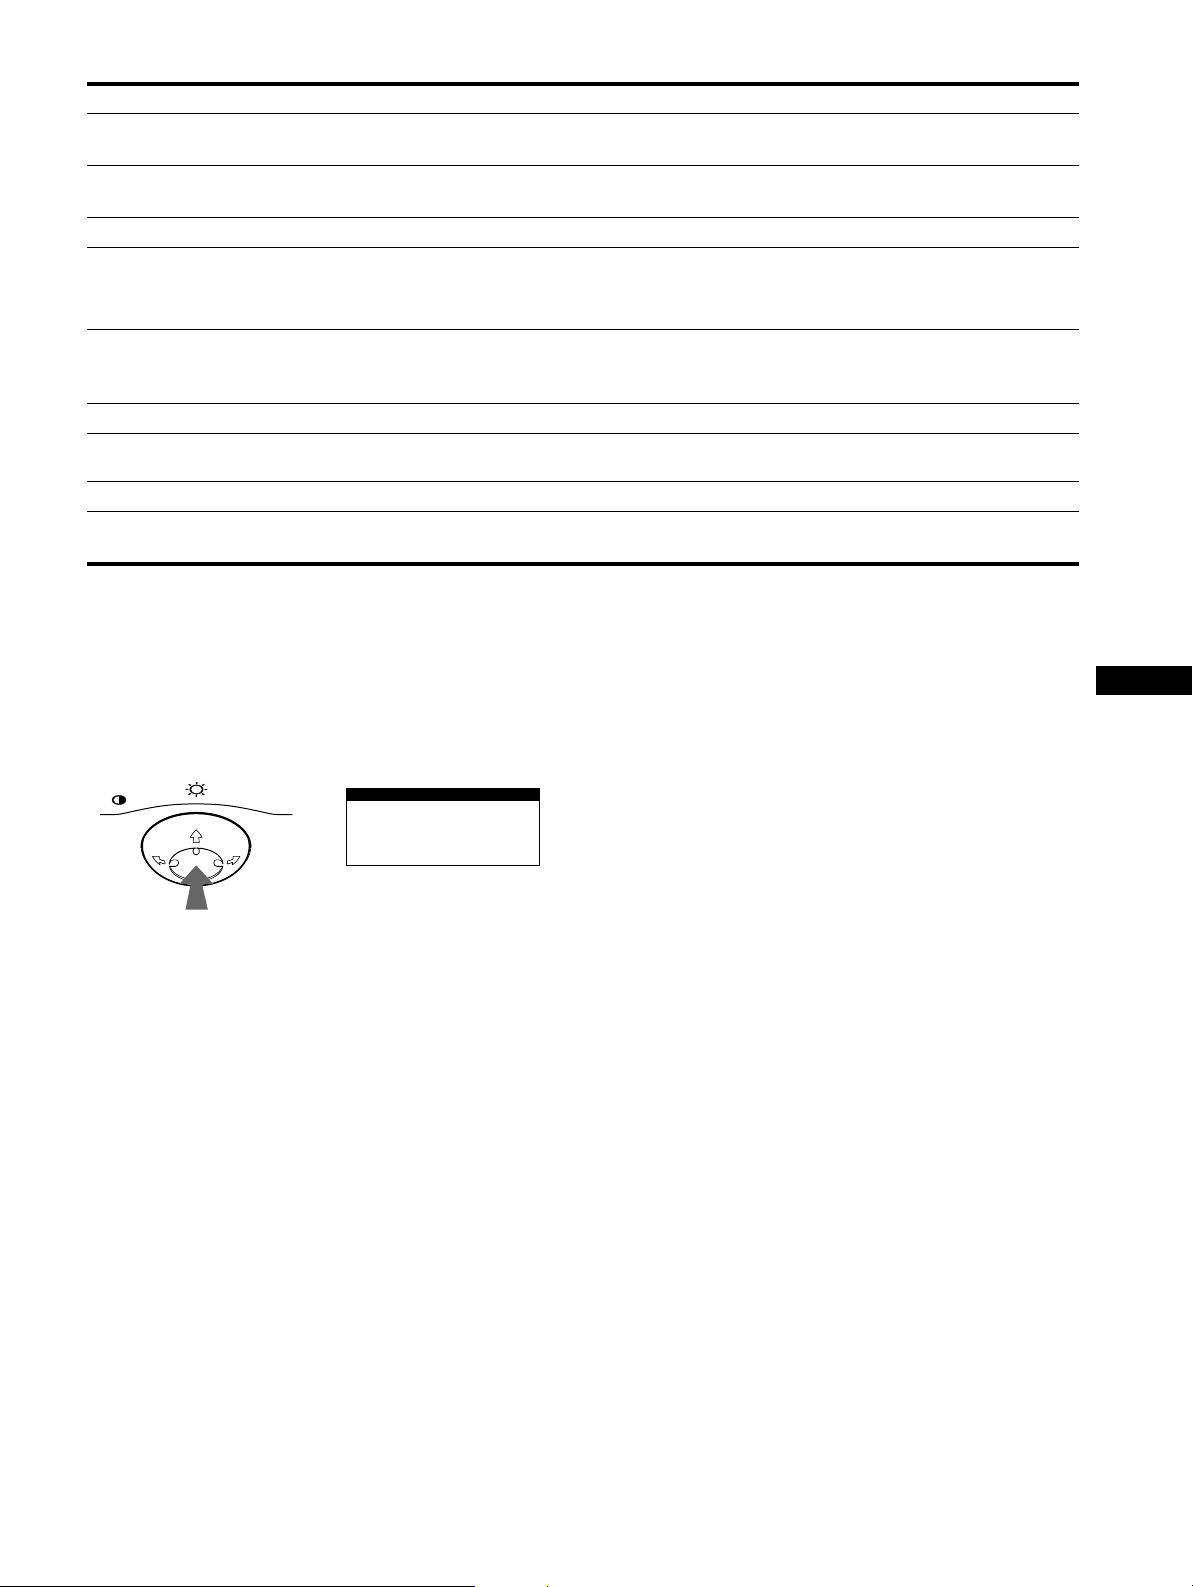
Adjusting the brightness and contrast
Brightness and contrast adjust ments are made using a separate
BRIGHTNESS/CONTRAST menu.
These settings are stored in memory for all input signals.
1
Move the control button in any direction.
The BRIGHTNESS/CONTRAST menu appears on the
screen.
2
Move the control button m/M to adjust the
brightness ( ), and </, to adjust the contrast
(6).
The menu automatically disappears after about 3 seconds.
Adjusting the centering of the picture (CENTER)
REAR
3
Adjust the menu.
Move the control button left (<) or right (,) to make the
adjustment.
MENU
4
Close the menu.
Press the center of the control button once to return to the
main MENU, and twice to return to normal viewing. If no
buttons are pressed, the menu closes automatically after about
30 seconds.
MENU
Resetting the adjustments
x
Press the RESET button. See page 12 for more information on
resetting the adjustments.
RESET
This setting is stored in memory for the current input signal.
1
Press the center of the control button.
The main MENU appears on the screen .
2
Move the control button to highlight CENTER
and press the center of the control button again.
The SIZE/CENTER menu appears on the screen.
3
First move the control button m/M to select for
horizontal adjustment, or for vertical adjustment.
Then move the control button </, to adjust the
centering.
Adjusting the size of the picture (SIZE)
This setting is stored in memory for the current input signal.
1
Press the center of the control button.
The main MENU appears on the screen .
2
Move the control button to highlight SIZE and
press the center of the control button again.
The SIZE/CENTER menu appears on the screen.
3
First move the control button m/M to select for
horizontal adjustment, or for vertical
adjustment. Then move the c ontrol button </, to
adjust the size.
US
9
Page 10
Enlarging or reducing the picture
9300K
5000K
26
COLOR
Adjusting the color of the picture
(ZOOM)
This setting is stored in memory for the current input signal.
1
Press the center of the control button.
The main MENU appears on the screen .
2
Move the control button to highlight SIZE or
CENTER and press the center of the control
button again.
The SIZE/CENTER menu appears on the screen.
3
Move the control button m/M to select (zoom),
and move </, to enlarge or reduce the picture.
Notes
• Adjustment stops when either the horizontal or vertical size reaches its
maximum or minimum value.
• The horizontal adjustment value is not displayed in the menu.
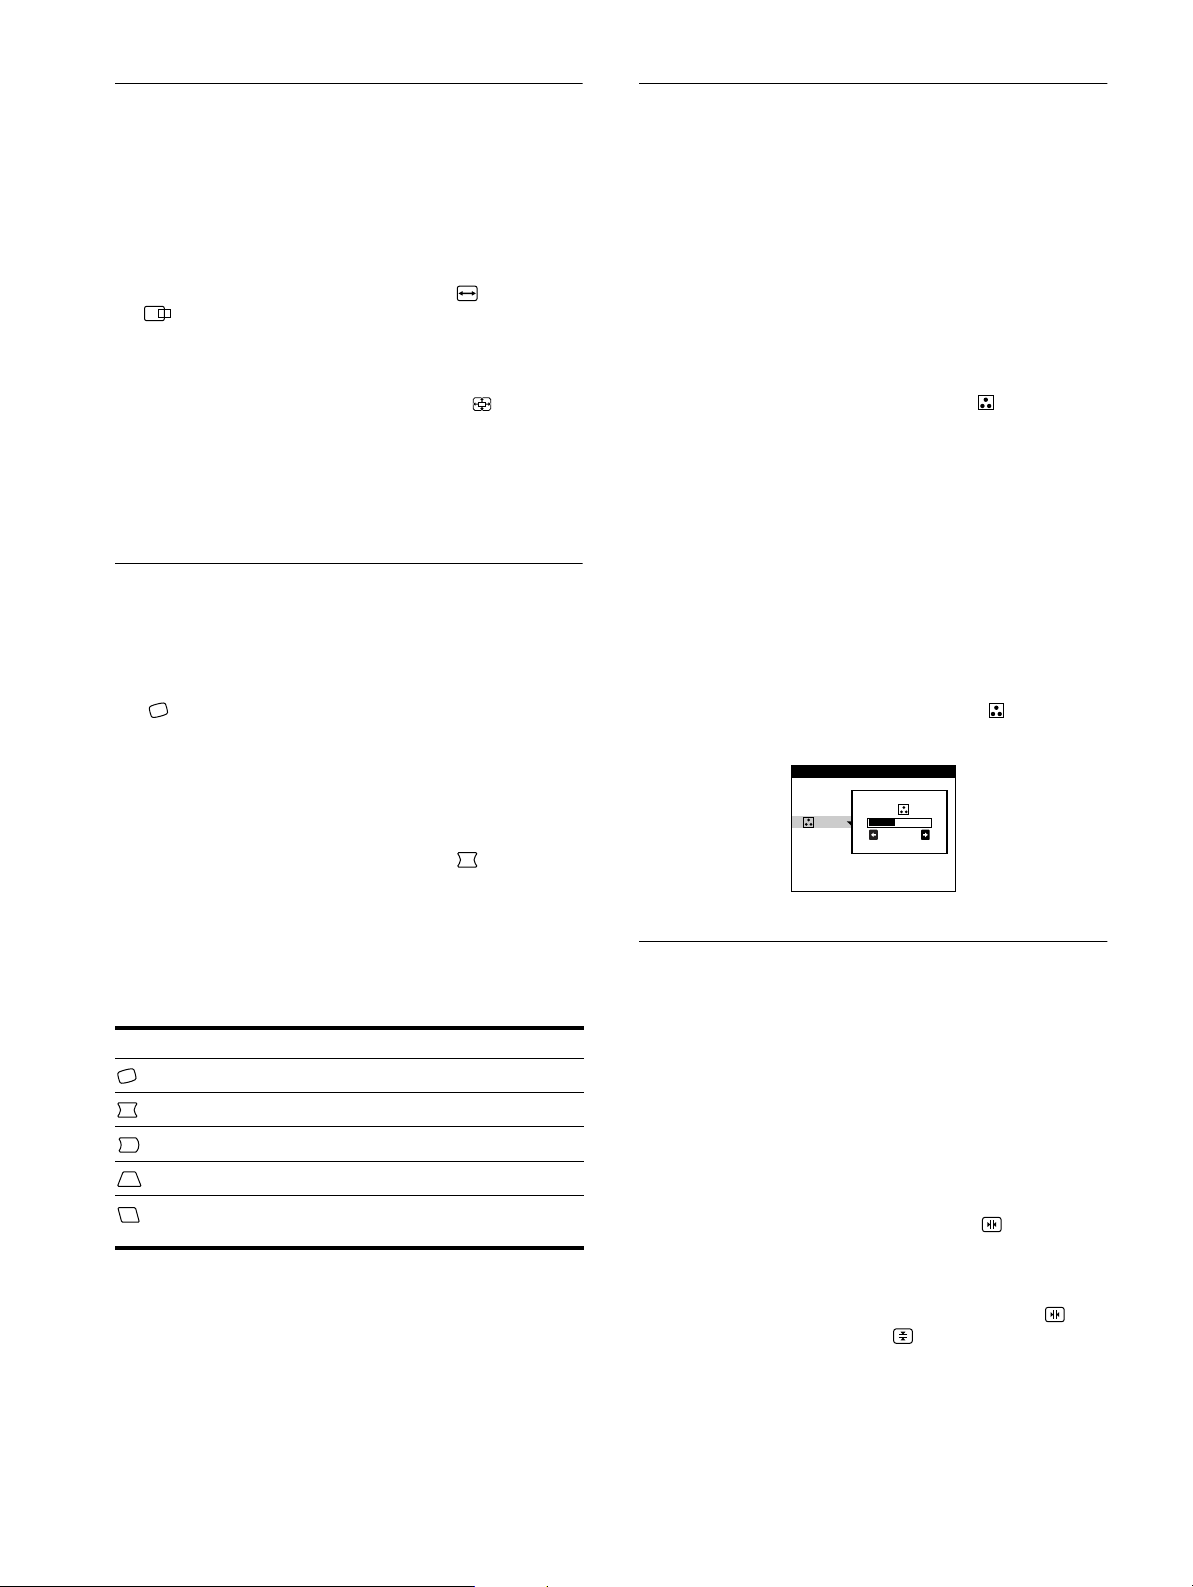
Adjusting the shape of the picture (GEOM)
The GEOM settings allow you to a djust the ro tatio n and sh ape of
the picture.
The (rotation) setting is store d in memory for all input signals.
All other settings are stored in memory for the current input
signal.
(COLOR)
The COLOR settings allow you to adjust the picture’s color
temperature by changing the color level of the white color field.
Colors appear reddish if the temperature is low, and bluish if the
temperature is high. This adjustment is useful for matching the
monitor’s colors to a printed picture’s colors.
This setting is stored in memory for all input signals.
1
Press the center of the control button.
The main MENU appears on the screen.
2
Move the control button to highlight COLOR and
press the center of the control button again.
The COLOR menu appears on the screen.
3
Move the control button m/M to select a color
temperature.
The preset color temperatures are 5000K and 9300 K. Since
the default setting is 9300K, the whites will change from a
bluish hue to a reddish hue as the temperature is lowered to
5000K.
4
If necessary, fine tune the color temperature.
You can select your own color temperature between 9300K
and 5000K.
First move the control button m/M to select . Then move
the control button </, to adjust the color temperature.
1
Press the center of the control button.
The main MENU appears on the screen .
2
Move the control button to highlight GEOM and
press the center of the control button again.
The GEOMETRY menu appears on the screen.
3
First move the control button m/M to select the
desired adjustment item. Then move the control
button </, to make the adjustment.
Select To
rotate the picture
expand or co ntract the picture sides
shift the picture sides to the left or right
adjust the picture width at the top of the screen
shift the picture to the left or right at the top of the
screen
Adjusting the convergence (CONV)
The CONV settings allow you to adjust the quality of the picture
by controlling the convergence. The convergence refers to the
alignment of the red, green, and blue color signals.
If you see red or blue shadows around letters or lines, adjust the
convergence.
These settings are stored in memory for all input signals.
1
Press the center of the control button.
The main MENU appears on the screen.
2
Move the control button to highlight CONV and
press the center of the control button again.
The CONVERGENCE menu appears on the screen.
3
First move the control button m/M to select for
horizontal adjustment, or for vertical
adjustment. Then move the co ntrol button </, to
adjust the convergence.
10
Page 11

Additional settings (OPTION)
You can manually degauss (demagnetize) the monitor, adjust the
moire cancellation level, change the men u posi tio n, and lock the
controls.
1
Press the center of the control button.
The main MENU appears on the screen.
2
Move the control button to high light OPTION and
press the center of the control button again.
The OPTION menu appears on the screen.
3
Move the control button m/M to select the desired
adjustment item.
Adjust the selected item according to the following
instructions.
Degaussing the screen
The monitor is automatically de magnetized (degaussed) when the
power is turned on.
To manually degauss the monitor, first move the
control button m/M to select (DEGAUSS). Then move
the control button ,.
The screen is degausse d f o r a b ou t 5 seconds. If a s ec o nd degauss
cycle is needed, allow a mini mum interval of 20 minutes for the
best result.
Changing the menu’s position
Change the menu’s position if it is blocking an image on the
screen.
To change the menu’s on-screen position, first move
the control button m/M to select (OSD H POSITION)
for horizontal adjustment, or (OSD V POSITION) for
vertical adjustment. Then move the control button
</, to shift the on-screen menu.
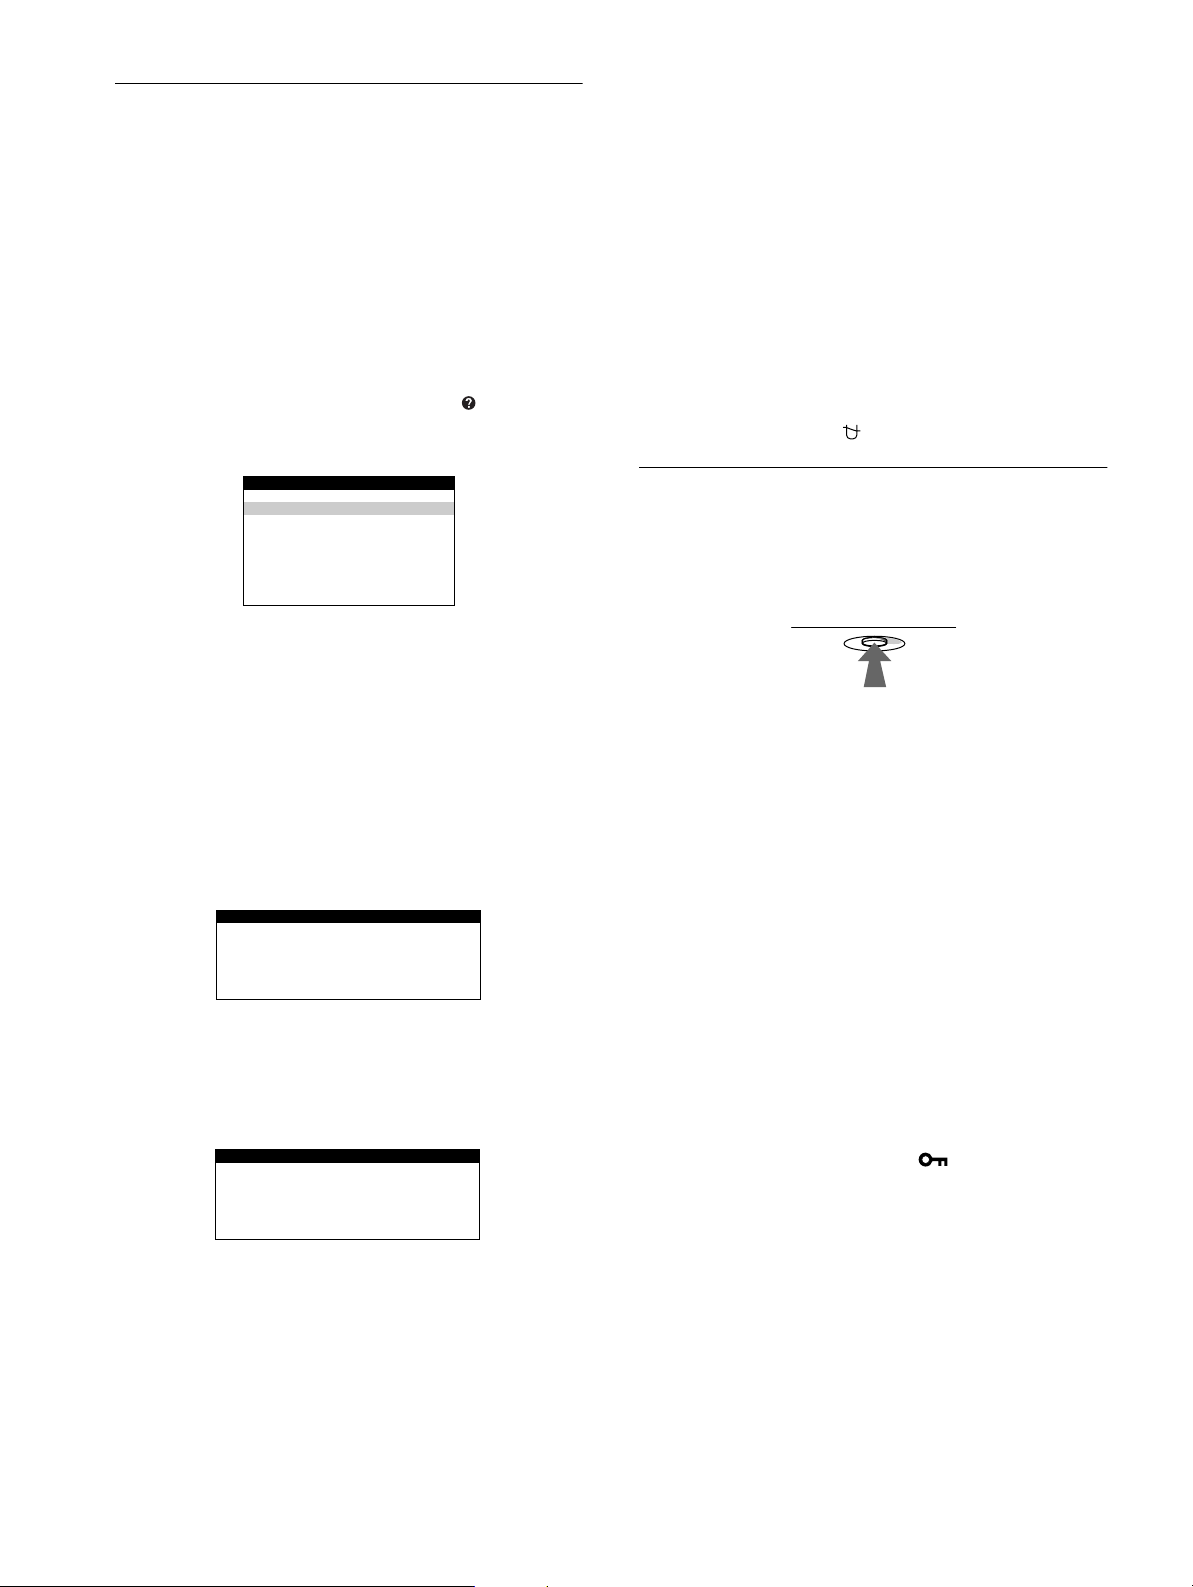
Locking the controls
To protect adjustment data by locking the cont rols, first
move the control button m/M to select (CONTROL
LOCK). Then move the control button ,, to select ON.
Only the 1 (power) switch, EXIT, and (CONTROL LOCK)
of the OPTION menu will operate. If any other items are
selected, the mark appears on the screen.
To cancel the control lock
Repeat the procedure above and set (CONTROL LOCK) to OFF.
US
Adjusting the moire*
If elliptical or wavy patterns appear on the screen, adjust the
moire cancellation level.
To adjust the amount of moire cancellation, first move
the control button m/M to select (MOIRE ADJUST).
Then move the control button </, until the moire
effect is at a minimum.
* Moire is a type of natural interference which produces soft, wavy lines
on your screen. It may app ea r due to interference between the pat te rn
of the picture on the screen a nd t he phosphor pitch pattern of the
monitor.
Example of moire
11
Page 12
Helpful hints and information
RESET
(HELP)
The HELP menu conta ins helpful hin ts and information about this
monitor. If your monitor is displaying symptoms that match those
listed in the HELP menu, follow the on-screen instructions to
resolve the problem. If th e symptoms do not ma tch those li sted in
the HELP menu or if the problem persists, see “Trouble
symptoms and remedi es” on page 14.
1
Press the center of the control button.
The main MENU appears on the screen .
2
Move the control button to highlight HELP and
press the center of the control button again.
The following HELP menu appears on the screen.
OUT OF FOCUS
The picture may see m to be out of focus when the red and blue
color signals are not aligned properly, causing red or blue
shadows to appear around letters and lines. Try adjusting the
picture’s convergence to make the shadows disappear. Move the
control button , to jump directly to the CONVERGENCE
menu. When the CONVERGNECE menu is displayed, the
contrast, brightness and moire adjustment settings are
automatically reset for all input signals.
DISCOLORATION
If the picture’s color appears abnormal in certai n areas of the
screen, first check f or any loose signal cables. After you have
checked the cables, try degaussing (demagnetizing) the screen
manually. Move the control button , to jump directly to the
OPTION menu, then select (DEGAUSS).
HELP
RETURN TO MA I N MENU
RECOMMENDED RESOL UT I ON
FL ICKER
TH I N HOR I Z ONTAL L I NE
D I STORTED SHAPE
OUT OF FOCUS
DI SCOLORAT I ON
3
Move the control button m/M to select a HELP menu
item and press the center of the control button
again.
Instructions or informatio n to resolv e the pro blem appe ars on
the screen. An explanation of each menu item is given below.
RECOMMENDED RESOLUTION
If the picture does no t fill the sc reen to th e ed ges o r if th e picture
appears too large for the screen, adjust the re solution to the figures
shown in the menu using your computer. If the input signal
matches one of this monitor’s factory preset modes, the resolution
and refresh rate of the current input signal are displayed.
RECOMMENDED RESOL UT I ON
SET RESOLUT I ON TO
1024X768 AT 85Hz USING PC.
CURRENT SET T I NG I S
1280X1024 AT 75Hz.
FLICKER
If the picture is flickering, adjust the refresh rate to figures show n
in the menu. If the input signal matches one of this monitor’s
factory preset modes, the refresh rate of the current input signal is
displayed.
FL ICKER
SET REF RESH RAT E TO
75Hz OR 85Hz USING PC.
CURRENT SET T I NG I S 60H z .
Resetting the adjustments
This monitor has the following three reset methods. Use the
RESET button to reset the adjustments.
Resetting a single adjustment item
Use the control button to select the adjustment item you want to
reset, and press the RESET button.
Resetting all of the adjustment data for the
current input signal
Press the RESET button when no menu is displ ayed on the sc reen.
Note that the following items are not reset by this method:
• on-screen menu language (page 7)
• on-screen menu position (page 11)
• control lock (page 11)
Resetting all of the adjustment data for all input
signals
Press and hold the RESET button for more than two seconds.
Note
The RESET button does not function when
is set to ON.
(CONTROL LOCK)
THIN HORIZONTAL LINE
The lines that appear on your screen are damper wires. See
page 13 for more information about the damper wires.
DISTORTED SHAPE
If the shape of the picture on the screen seems distorted, try
adjusting the picture’s geo metry. Move the cont rol butto n , to
jump directly to the GEOMETRY menu.
12
Page 13
Technical Features
INFORMATION
OUT OF SCAN RANGE
Preset and user modes
Troubleshooting
Before contacting technical support, refer to this section.
When the monitor receives an input signal, it automatically
matches the signal to one of the factory preset modes stored in the
monitor’s memory to provide a high quality picture at the center of
the screen.
For input signals that do not match one of the factory preset modes,
the digital Multiscan technology of this monitor ensures that a
clear picture appears on the screen for any timing in the monitor’s
frequency range (horizontal: 30 – 85 kHz, vertical: 48 – 120 Hz).
If the picture is adjusted, the adjustment data is stored as a user
mode and automatically recalled whenever the same input signal
is received.
(See Appendix for a list of the factory preset modes.)
Note for Windows users
For Windows users, ch eck you r vide o b oard m anual or th e uti lity
program which co m es with your graphic boa r d and sele ct the
highest available refresh rate to maximize monitor performance.
Power saving function
This monitor meets the power-saving guidelines set by VESA,
E
NERGY STAR, and NUTEK. If the monitor is connected to a
computer or video graphics board that is DPMS (Display Power
Management Signaling) compliant, the monitor wi ll automatically
reduce power consumption in three stages as shown below
Power mode Power consumption 1 (power)
normal
operation
1 standby ≤ 15 W green and orange
2 suspend
(sleep)*
3 active off**
(deep sleep)*
power off 0 W off
* “Sleep” and “deep sleep” are power saving modes defined by the
Environmental Protection Agency.
** When your computer is in a power saving mode, MONITOR IS IN
POWER SAVE MODE appears on the screen if you press any button
on the monitor. After a fe w seco nds, the monitor enters the power
saving mode again.
≤ 120 W green
≤ 15 W green and orange
≤ 3 W orange
indicator
alternate
alternate
.
If thin lines appear on your screen (damper wires)
The lines you are experiencing on your screen are normal for the
Trinitron monitor and are not a malfunction. Th ese are shad ows
from the damper wires used to stabilize the aperture gri lle and are
most noticeable when the s creen’s background is light (usually
white). The aperture grille is the essential element that makes a
Trinitron picture tub e un ique by allowing more lig ht to reach the
screen, resulting in a brighter, more detailed picture.
Damper wires
On-screen messages
If no picture appears on the screen, one of the following messages
appears on the screen. To solve the problem, see “Trouble
symptoms and remedi es” on page 14.
Input signal
condition
The input signal condition
OUT OF SCAN RANGE
indicates that the input signal is not supported by the monitor’s
specifications.
NO INPUT SIGNAL
indicates that no signal is input.
MONITOR IS IN POWER SAVE MODE
indicates that the computer is in power saving mode. This
message is displayed only when your computer is in a power
saving mode and yo u press any one of th e buttons on the monito r.
US
13
Page 14

Trouble symptoms and remedies
If the problem is caused by the con nected computer or other equipmen t, please refer to the connected equipment’s instruction manual.
Use the self-diagnosis function (page 16) if the following recommendations do not resolve the problem.
Symptom Check these items
No picture
If the 1 (power) indicator is not lit • Check that the power cord is properly connected.
• Check that the 1 (power) switch is in the “on” position.
If the NO INPUT SIGNAL message
appears on the screen, or if the 1
(power) indicator is either orange or
alternating between green and
orange
If the MONITOR IS IN POWER
SAVE MODE message appeared on
the screen, or if the 1 (power)
indicator is either orange or
alternating between green and
orange
If the OUT OF SCAN RANGE
message appears on the screen
If no message is displayed and the 1
(power) indicator is green or flashing
orange
If using Windows 95/98 • If you replaced an old monitor with this monitor, reconnect the old monitor and do the
If using a Macintosh system • Check that the Macintosh adapter (not supplied) and the video signal cable are properly
Picture flickers, bounces,
oscillates, or is scrambled
Picture is fuzzy
• Check that the video signal cable is properl y connected and all plugs are firmly seated in
their sockets (page 6).
• Check that the HD15 video in put connector’s pins are not bent or pushed in.
Problems caused by the connected computer or other equipment
x
• Check that the computer’s power is “on.”
• Check that the graphic board is completely seated in the proper bus slot.
Problems caused by the connected computer or other equipment
x
• The computer is in power saving mode. Try pressing any key on the comp uter keyboard.
• Check that the computer’s power is “on.”
• Check that the graphic board is completely seated in the proper bus slot.
Problems caused by the connected computer or other equipment
x
• Check that the video frequency range is within that specified for the monitor. If you
replaced an old monitor with this monitor, reconnect the old monitor and adjust the
frequency range to the following.
Horizontal: 30 – 85 kHz
Vertical: 48 – 120 Hz
• Use the Self-diagnosis function (page 16).
following. Install the Windows Monitor Information Disk (page 7) and select this monitor
(“CPD-E200”) from among the Sony moni tors in the Windows 95/98 monitor selection
screen.
connected (page 6).
• Isolate and eliminate any potential sources of electric or magnetic fields such as other
monitors, laser printers, electric fans, fluorescent lighting, or televisions.
• Move the monitor away from power lines or place a magnetic shield near the monitor.
• Try plugging the monitor into a differen t AC outlet, preferably on a different circuit.
• Try turning the monitor 90° to the left or right.
Problems caused by the connected computer or other equipment
x
• Check your graphics board manual for the proper monitor setting.
• Confirm that the graphics mode (VESA, Macintosh 16" Color, etc.) and the frequency of
the input signal are su pp ort ed by this monitor (Appen dix ). Even if the frequency is within
the proper range, some video boards may have a sync pulse that is too narrow for the
monitor to sync correctly.
• Adjust the computer’s refresh rate (vertical frequency) to obtain the best possible picture.
• Adjust the brightness and contrast (page 9).
• Degauss the monitor* (page 11).
• Select MOIRE ADJUST and adjust the moire cancellation effect (page 11).
14
Page 15
Symptom Check these items
Picture is ghosting • Eliminate the use of video cable extensions and/or video switch boxes.
• Check that all plugs are firmly seated in their sockets.
Picture is not centered or sized
properly
Edges of the image are curved • Adjust the geometry (page 10).
Wavy or elliptical pattern (moire)
is visible
Color is not uniform • Degauss the monitor* (page 11). If you place equipment tha t g enerates a magnetic field,
White does not look white • Adjust the color temperature (page 10).
Letters and lines show red or blue
shadows at the edges
Monitor buttons do not operate • If the control lock is set to ON, set it to OFF (page 11).
A hum is heard right after the
power is turned on
* If a second degauss cycle is needed , all ow a minimum interval of 20 mi nut es for the best result. A humming noi se m a y be heard, but this is not a
malfunction.
• Adjust the size (page 9) or centering (page 9). Note that some video modes do not fill the
screen to the edges.
• Select MOIRE ADJUST and adjust the moire cancellation effect (page 1 1).
xProblems caused by the connected computer or other equipment
• Change your desktop pattern.
such as a speaker, nea r the monitor, or if you change the direction the monito r faces, color
may lose uniformity.
• Adjust the convergence (page 10 ).
• This is the sound of the auto-degauss cycle. When the power is turned on, the moni tor is
automatically degaussed for five seconds.
Displaying this monitor’s name, serial number,
and date of manufacture.
While the monitor is receiving a video signal, press and hold the
center of the control button for more than five seconds to display
this monitor’s information box.
MENU
Example
INFORMATION
MODEL : CPD - E 200
SER NO:1234567
b
MANUF ACTURED: 1 9 9
9-52
If the problem persists, call your authorized Sony dealer and give
the following information.
• Model name: CPD-E200
• S erial number
• Name and specifications of your computer and graphics board.
US
15
Page 16

Self-diagnosis function
This monitor is equipped with a self-diagnosis function . If there is
a problem with your monitor or computer, the screen will go
blank and the 1 (power) indicator will either light up green or
flash orange. If the 1 (power) indicator is lit in orange, the
computer is in power saving mode. Try pressing any key on the
keyboard.
(power) indicator
1
MENU
MENU
RESET
If the 1 (power) indicator is green
1
Disconnect the video input cable or turn off the
connected computer.
2
Press the 1 (power) button twice to turn the monitor
off and then on.
3
Move the control button , for 2 seconds before the
monitor enters power saving mode.
Specifications
CRT 0.24 mm apertu re grille pi tch (cent er)
17 inches measured diag onally
90-degree deflection
FD Trinitron
Viewable image size Approx. 327 × 243 mm (w/h)
Resolution
Maximum Horizontal: 1600 dots
Recommended Horizontal: 1024 dots
Standard image area Approx. 312 × 234 mm (w/h)
Deflection frequency* Horizontal: 30 to 85 kHz
AC input voltage/current 100 to 240 V, 50 – 60 Hz, Max. 1.7 A
Power consumption 120 W
Dimensions
Mass Approx. 20 kg (44 lb 1 oz)
Plug and Play DDC1/DDC2B/DDC2Bi
Supplied accessories See page 6
* Recommended horizontal and vertical timing c ondition
• Horizontal sync width should be more t han 1.0 µsec.
• Horizontal bla nking width should be more than 3.0 µsec.
• Vertical blanking width should be more than 500 µsec.
3
/4 × 9 5/8 inches)
(14
16.0" viewing image
Vertical: 1200 lines
Vertical: 768 lines
3
/8 × 9 1/4 inches)
(12
Vertical: 48 to 120 Hz
Approx. 404 × 413.5 × 419.5 mm (w/h/
d)
(16 × 16 3/8 × 16 5/8 inches)
If all four color bars appear (white, red, green, blue), the monitor
is working proper ly. Reconnect the video input cable and check
the condition of your co m pu t e r.
If the color bars do not appear, there is a potential m onitor failure.
Inform your authorized Sony dealer of the monitor’s condition.
If the 1 (power) indicator is flashing orange
Press the 1 (power) button twice to turn the monitor off
and then on.
If the 1 (power) indicator l ights up green , the monitor i s working
properly.
If the 1 (power) indicator is still flashing, there is a potential
monitor failure. Count the number of seconds between orange
flashes of the 1 (power) indicator and inform your authorized
Sony dealer of the mo nitor’s condi tion. Be sure to note the m odel
name and serial number of your monitor. Also note the make and
model of your c omputer and video boar d.
Design and specifications are subject to change without notice.
16
Page 17

Table des Matières
Précautions. . . . . . . . . . . . . . . . . . . . . . . . . . . . . . . . . . . . . . . . . . . . 4
Identification des composants et des commandes. . . . . . . . . . . . . . 5
Installation . . . . . . . . . . . . . . . . . . . . . . . . . . . . . . . . . . . . .6
• Trinitron est une marque comm ercial e
déposée de Sony Corporation .
• Macintosh est une marque commerciale
sous licence d’Apple Com puter, Inc.,
déposée aux Etats-Unis et dans d’autres
pays.
• Windows
marques déposées de Microsoft
Corporation aux Etats-Unis et dans
d’autres pays.
• IBM PC/AT et VGA sont des marques
commerciales déposées d’IBM
Corporation aux Etats-Unis.
• VESA et DDC
commerciales de Video Electronics
Standard Association.
•
E
déposée aux Etats-Unis.
• Tous les autres noms de produ its
mentionnés dans le pré sent mode
d’emploi peuvent ê tre de s m a rques
commerciales ou des marqu es
commerciales déposées de leurs
sociétés respectives.
• Les symboles “” et “” ne sont pas
mentionnés systématiquement dans le
présent mode d’emploi.
et MS-DOS sont des
sont des marques
NERGY STAR est une marque
1re étape:
2e étape:
3e étape:
Raccordez le moniteur à votre ordinateur. . . . . . . . . . . . 6
Branchez le cordon d’alimentation. . . . . . . . . . . . . . . . . . 6
Mettez le moniteur et l’ordinateur sous tension . . . . . . . . 7
Sélection de la langue d’affichage des menus (LANG) . . . . . . . . . . 7
Personnalisation de votre moniteur. . . . . . . . . . . . . . . . .8
Pilotage par menus. . . . . . . . . . . . . . . . . . . . . . . . . . . . . . . . . . . . . . 8
Réglage de la luminosité et du contraste . . . . . . . . . . . . . . . . . . . . . 9
Réglage du centrage de l’image (CENTRE). . . . . . . . . . . . . . . . . . . 9
Réglage de la taille de l’image (TAILLE) . . . . . . . . . . . . . . . . . . . . . 9
Agrandir ou réduire l’image (ZOOM) . . . . . . . . . . . . . . . . . . . . . . . 10
Réglage de la forme de l’image (GEOM) . . . . . . . . . . . . . . . . . . . . 10
Réglage de la couleur de l’image (COUL.). . . . . . . . . . . . . . . . . . . 10
Réglage de la convergence (CONV) . . . . . . . . . . . . . . . . . . . . . . . 10
Réglages supplémentaires (OPTION) . . . . . . . . . . . . . . . . . . . . . . 11
Conseils et informations utiles (AIDE) . . . . . . . . . . . . . . . . . . . . . . 12
Réinitialisation des réglages. . . . . . . . . . . . . . . . . . . . . . . . . . . . . . 12
Caractéristiques techniques. . . . . . . . . . . . . . . . . . . . . .13
Modes présélectionné et utilisateur . . . . . . . . . . . . . . . . . . . . . . . . 13
Fonction d’économie d’énergie. . . . . . . . . . . . . . . . . . . . . . . . . . . . 13
Dépannage . . . . . . . . . . . . . . . . . . . . . . . . . . . . . . . . . . . .13
Si de fines lignes apparaissent à l’écran (fils d’amortissement). . . 13
Messages affichés à l’écran . . . . . . . . . . . . . . . . . . . . . . . . . . . . . . 13
Symptômes et remèdes . . . . . . . . . . . . . . . . . . . . . . . . . . . . . . . . . 14
Fonction d’autodiagnostic. . . . . . . . . . . . . . . . . . . . . . . . . . . . . . . . 16
Spécifications. . . . . . . . . . . . . . . . . . . . . . . . . . . . . . . . . .16
Appendix. . . . . . . . . . . . . . . . . . . . . . . . . . . . . . . . . . . . . . . i
Preset mode timing table . . . . . . . . . . . . . . . . . . . . . . . . . . . . . . . . . .i
FR
3
Page 18

Précautions
90°
5°
90°
15°
Points de centrage
Avertissement sur le raccordement à la source
d’alimentation
• Utilisez le cordon d’alimentation fourni. Si vous utilisez un
cordon d’alimentation différent, assurez-vous qu’il est
compatible avec votre tension d’alimentation secteur locale.
Pour les clients aux Etats-Unis
Si vous n’utilisez pas le cordon d’alimentation approprié, ce
moniteur ne sera pas conforme aux normes FCC en vigueur.
Exemple de types de fiches
pour 100 à 120 V CA
• Avant de débrancher le cordon d’ alimentation, attendez au
moins 30 secondes après avoir actionné le commutateur
d’alimentation de manière à permettre la décharge de
l’électricité statique à la surface de l’écran.
• Ap r ès que le courant a été branché, l’écran est démagnétisé
pendant environ 5 secondes. Cela génère un puissant champ
magnétique autour de l’encadrement métallique qui peut
affecter les données mémorisées sur une bande magnétique ou
des disquettes situées à proximité. Placez ces systèmes
d’enregistrem e nt ma g né tiq u e, ba n de s e t dis q ue tte s à l ’ éc a rt d u
moniteur.
pour 200 à 240 V CA
Entretien
• Nettoyez l’écran à l’aide d’un chiffon doux. Si v ous util isez un
produit nettoyant pour vitres, n’utilisez aucun type de produit
contenant une solution antistatique ou des additifs similaires
parce que vous risquez de rayer le revêtement de l’écran.
• Ne frottez pas, ne touchez pas et ne tapotez pas la surface de
l’écran avec des objets abrasifs ou aux arêtes vives comme un
stylo à bill e o u un tournevis. Ce ty pe de contact r i s qu e e n ef fe t
de rayer le tube image.
• Nettoyez le châssis, l e panne au et le s comma ndes à l ’aid e d’un
chiffon doux légèrement imprégné d’une solution détergente
neutre. N’utilisez jamais de tampons abrasifs, de poudre à
récurer ou de solv ants tels que de l’alcool ou du benzène.
Transport
Pour transpor ter ce moniteur en vue d e réparations ou de son
expédition, utilisez le carton d’emballage et les matériaux de
conditionne ment d’origine.
Utilisation du support pivotant
Ce moniteur peut êtr e réglé su ivant le s angles p récisés ci-dess ous.
Pour localiser le centre du rayon de pivotement du moniteur,
alignez le centre de l’écran du mon iteur sur les point s de centr age
du support.
Pour faire pivoter le moniteur horizontalement ou verticalement,
saisissez-le des deux mains par la base. Veillez à ne pas vous
coincer les doigts à l’arrière du moniteur lorsque vous le faites
pivoter verticalement.
L’appareil doit être installé à proximité d’une prise murale
aisément accessible.
Installation
N’installez pas le moniteur dans les endroits suivants:
• sur des surfaces molles (moquette, nappe, etc.) ou à proximité
de tissus (rideaux, t entures, etc.) qui risque nt d’obstruer les
orifices de ventilation
• à proximité de source s de c haleu r com me des r adiat eurs ou des
conduits d’air, ni dans un endr oi t di re cte m e nt ex po s é au
rayonnement solaire
• sujet à de fortes variations de température
• so umi s à des vibrations ou à des chocs mécan iques
• sur une su rface instable
• à proximité d’appare ils généra nt un cha mp magné tique com me
un transformateur ou des lignes à haute tension
• à proximi t é de ou sur une surface métallique chargée
électriquement
4
Page 19

Identification des composants et
1 2 3 4
5
876
11 12 13 14 15
10
9
des commandes
Pour plus de détails, reportez-vous au pages indiquées entre
parenthèses.
MENU
RESET
ArrièreAvant
AC IN
RESET
Touche RESET (réinitialisation) (page 12)
1
MENU
Cette touche réinitialise les réglages aux valeurs par défaut.
Manette de commande (page9)
2
La manette de commande sert à affic her l e menu et à ajuster
les paramètres de réglage du moniteur, y compris la
luminosité et le contraste.
Commutateur et indicateur 1 (alimentation)
3
(pages 7, 13, 16)
Cette touche met le moniteur sous et hors tension.
L’indicateur d’alimentation s’allume en vert lorsque le
moniteur est sous tension et clignote en vert et en orange ou
s’allume en orange lorsque le moniteur se trouve en mode
d’économie d’énergie.
Connecteur AC IN (page 6)
4
Ce connecteur assure l’alimentation du moniteur.
Connecteur d’entrée vidéo (HD15) (page 6)
5
Ce connecteur assure l’entrée des signaux vidéo RVB
(0,700 Vp-p, positifs) et des signaux de synchronisation.
Broche n° Signal
1 Rouge
2Vert
(Synchronisation sur le vert)
3Bleu
4 ID (masse)
5 Masse DDC*
6 Masse rouge
7 Masse vert
8 Masse bleu
9–
10 Masse
11 ID (masse)
12 Données bidirectionnelles (SDA)*
13 Synchro H
14 Synchro V
15 Données d’horloge (SCL)*
FR
* DDC (Displ a y Dat a Ch annel) est une norme de VESA.
5
Page 20

Installation
AC IN
Vous avez besoin d’un adaptateur Macintosh (non fourni).
Adaptateur Macintosh (non fourni)
Macintosh ou ordinateur
compatible
vers la sortie
vidéo
AC IN
vers AC IN
vers une prise murale
cordon d’alimentation (fourni)
Avant de mettre ce moniteur en service, vérifiez si tous les
accessoires suivants se trouvent bien dans le carto n:
• Cordon d’alimentation (1)
• Windows Monitor Information Disk (1)
• Carte de garantie (1)
• Remarques sur l’entretien de la surface de l’ écran (1)
• Ce mode d’emploi (1)
1re étape:Raccordez le moniteur à
vo tre ordinate ur
Mettez le moniteur et l’o rdina teur hor s tens ion av ant de procéd er
au raccordement.
Remarque
Ne touchez pas les broches du connecteur de câble vidéo, car vous
risqueriez de les plier.
Raccordement à un PC/AT IBM ou à un ordi-
x
nateur compatible
AC IN
Raccordement à un ordinateur Macintosh
x
ou compatible
vers la
sortie vidéo
PC/AT IBM ou
ordinateur compatible
2e étape:Branchez le cordon
d’alimentation
Le moniteur et l’ordina te ur étant hors tension, bra n ch e z d’a b or d
le cordon d’alimentation sur le moniteur et ensuite sur une prise
murale.
6
Page 21

3e étape:Mettez le moniteur et
Sélection de la langue d’affichage
l’ordinateur sous tension
Mettez d’abord le moniteur sous tension et pu is l’ord ina teu r .
L’installation de votre moniteur est à présent terminée.
Si nécessaire, utilisez les commandes du moniteur pour régler
l’image.
Si aucune image n’apparaît à l’écran
• Vérifiez si le moniteur est correctement raccordé à l’ordinateur.
• Si l’indication PAS ENTREE VIDEO apparaît à l’écran,
vérifiez si le câble de signal vidéo est correctement connecté et
que est correctement connecté et que toutes les fiches sont
fermement introduites dans les pri ses.
• S i l’indication MONITEUR EN MODE D’ECONOMIE
D’ENERGIE apparaît à l’écran, essayez d’appuyer sur une
touche quelconque du clavier de l’ordinateur.
• Si vous remplacez un ancien moniteur par ce modèle et si
l’indication HORS PLAGE DE BALAYAGE apparaît à
l’écran, rebranchez l’ancien moniteur. Ajustez ensuite la carte
graphique de l’ordinateur de façon à ce que la fréquence
horizontale soit comprise entre 30 et 85 kHz et la fréquence
verticale entre 48 et 120 Hz.
Pour plus d’informations sur les messages affichés à l’écran,
reportez-vous à la section “Symptômes et remèdes” à la page 14.
des menus (LANG)
Les écrans de menu peuvent être affichés en franç ais, anglais,
allemand, espagnol, italien, néerlandais, suédois, russe et
japonais. La sélection par défaut est l’anglais.
1
Appuyez au centre de la manette de commande.
Voir page 9 pour plus d’informations sur l’utilisation de la
manette de commande.
MENU
2
Déplacez la manette de commande de façon à
MENU
COUL.
GEOM
LANG
CENTRE
SORTIR
TAILLE
mettre LANG en évidence et appuyez à nouveau
au centre de la manette de commande.
MENU
LANGUAGE
ENGL I SH
FRANÇA I S
DEUTSCH
ESPAÑOL
ITALIANO
NEDERL ANDS
SVENSKA
OK
CONV
AIDE
OPTION
MENU
FR
Pour les clients utilisant Windows 95/98
Pour maximaliser le po tentiel de votre moniteur, installez su r vo tre
ordinateur le nouvea u fichier d’informations m odèle depuis la disquette
Windows Monitor Information Disk.
Ce moniteur est conforme à la norme Plug & Play “VESA DDC”. Si votre
PC/carte graphiqu e est conforme à la norme DDC, séle ct ionnez “Plug &
Play Monitor (VESA DDC)” ou la désignation de ce moniteur comme
type de moniteur dans le “Control Panel” de Windows 95/98. Si votre PC/
carte graphique a des di ffi cultés à communiquer a v ec ce moniteur,
chargez la disquette W indows Monitor Information Disk et séle c ti onnez
la désignation de ce moni teur comme type de moniteur.
Pour les clients utilisant Windows NT4.0
L’installation du moniteu r sous Wi ndows NT4.0 est différente de
Windows 95/98 et n’im plique pas la sélection du type de moniteur.
Reportez-vous au mode d’emploi de Windows NT4.0 pour plus de détails
sur le réglage de la résolution, le taux de régénération et le nom bre de
couleurs.
Réglage de la résolution du moniteur et du nombre de couleurs
Ajustez la résolution du moniteur et le nombre de coul eurs en vous
référant au mode d’em pl oi de votre ordinateur. Le nom bre de couleurs
peut varier selon votre ordinateur ou votre carte vidéo. Le réglage de la
palette de couleurs et le nombre réel de couleurs se présentent comme suit:
• High Color (16 bit) t 65.536 couleurs
• True Color (24 bit) t environ 16,77 millions de couleurs
En mode True Color (24 bi ts), la vit esse peut être inférieure.
3
Déplacez la manette de commande vers le haut ou
le bas m/M pour sélectionner une langue.
• E NGLISH: Anglais
• FRANÇAIS
• DEUTSCH: Allemand
• ESPAÑOL: Espagnol
• ITALIANO: Italien
• NEDERLANDS: Née rlandais
• SVENSKA: Suédois
• : Russe
• : Japonais
Pour quitter le menu
Appuyez une fois au centre de la manette de commande pour revenir au
MENU principal et deux fois po ur re ve nir à la visualisation normale. Si
vous n’actionnez aucune touche, le menu se referme automatiquement au
bout de 30 secondes environ.
Pour restaurer l’anglais
Appuyez sur la touche RESET pendant que le menu LANGUAGE est
affiché à l’écra n.
7
Page 22

Personnalisation de votre
MENU
MENU
SORTIR
CENTRE
TAILLE
GEOM
COUL.
LANG
AIDE
CONV
OPTION
OK
68.7kHz/ 85Hz
1024
768
les fréquences
horizontale et
verticale du
signal d’entrée
en cours
la résolution du
sign
al d’entrée
en cours
moniteur
Vous pouvez effectuer d e multiples régla ges sur votre moniteur à
l’aide des écrans de menu.
Pilotage par menus
Appuyez au centre de la manette de commande pour afficher le
MENU principal à l’écran. Voi r pa g e9 pour plus d’informations
sur l’utilisation de la manette de commande.
COUL. (page 10)
5
Sélectionne le menu COUL. pour
régler la température de cou leur de
l’image. Vous pouvez utiliser ce
menu pour faire cor respondre les
couleurs du moniteur aux couleurs
d’une image imprimée.
CONV (page 10)
6
Sélectionne le menu CONV pour
régler la convergence horizontale et
verticale de l’image.
COULEUR
9300K
5000K
CONVERGENCE
26
MENU
MENU
COUL.
GEOM
LANG
CENTRE
SORTIR
TAILLE
OK
CONV
AIDE
OPTION
MENU
Utilisez la manette de commande pour sélectionner l’un des
menus suivants.
CENTRE (page 9)
1
TA I LLE /CENTRE
Sélectionne le menu CENTRE p our
régler le centrage de l’image, la
taille ou le zoom.
TAILLE (page 9)
2
TA I LLE /CENTRE
26
Sélectionne le menu TAILLE pour
régler la taille de l’image, le
centrage ou le zoom.
GEOM (page 10)
3
GEOMETR I E
26
Sélectionne le menu GEOM pour
régler la rotation et la forme de
l’image.
26
LANG (page 7)
7
Sélectionne LANG po ur ch oisir la
langue d’affichage des menus.
OPTION (page 11)
8
Sélectionne OPTION pour régler
LANGUAGE
ENGL I SH
FRANÇA I S
DEUTSCH
ESPAÑOL
ITALIANO
NEDERLANDS
SVENSKA
OPT ION
DEGAUSS
les options du mo niteur. Les opt ions
comprenne nt:
ON
• d émagnétisation de l’écran
• réglage du niveau de suppress ion
du moiré
• c hangement de la position des
écrans de menu
• verrouillage des commandes
SORTIR
9
Sélectionne SORTIR pour quitt er le
menu.
Affichage du signal d’entrée en cours
x
Les fréquences horizontale et verticale du signal d’entrée actuel
sont affichées dans le MENU principal. Si le signal correspond à
l’un des modes présélectionnés de ce moni teur, la résolution est
également affichée.
AIDE (page 12)
4
Sélectionne le menu
AIDE pour afficher
des conseils et
informations utiles
concernant ce
moniteur.
8
AIDE
RETOURNER AU MENU PRI NC I PA L
RESOLUT I ON RECOMMANDEE
SCINTILLEMENTS
F I NE L I GNE HOR I ZON T A L E
I MAGE DEFORMEE
IMAGE FLOUE
I MAGE DECOLOREE
Page 23

Utilisation de la manette de commande
26 26
LUMI NOSI TE / CONTRASTE
x
1
Affichez le MENU principal.
Appuyez au centre de la manette de commande pour afficher
le MENU principal sur l’écran.
MENU
2
Sélectionnez le menu que vous voulez régler.
Mettez en évidence le menu de votre c hoix en déplaçant la
manette de comman de ver s l’ a r ri è re po ur mo nter (M), vers
l’avant pour descendre (m) et vers la gauche (<) ou vers la
droite (,) pour vous déplacer latéralement.
AVANT
MENU MENU
ARRIERE
3
Réglez le menu.
Déplacez la manette de commande vers la gauche (<) ou la
droite (,) pour effectuer le réglage.
MENU
Réglage de la luminosité et du
contraste
Les réglages de la luminosit é et du contraste sont effectués au
moyen d’un menu LUMINOSITE/CONTRASTE séparé.
Ces réglages sont enregistrés dans la mémoire pour tous les
signaux entrants.
1
Déplacez la manette de commande dans n’importe
quel sens.
Le menu LUMINOSITE/CONTRASTE apparaît à l’écran.
2
Déplacez la manette de commande vers le haut ou
le bas m/M pour régler la luminosité ( ), et vers la
gauche ou la droite </, pour régler le contraste
(6).
Le menu disparaît automatiquement au bout d’environ 3
secondes.
Réglage du centrage de l’image
(CENTRE)
Ce réglage est enregistré dans la mémoire pour le signal d’entrée
en cours.
1
Appuyez au centre de la manette de commande.
Le MENU principal apparaît à l’écran.
2
Déplacez la manette de commande pour mettre
CENTRE en évidence et appuyez à nouveau au
centre de la manette de commande.
Le menu TAILLE/CENTRE apparaît à l’écran.
FR
4
Quittez le menu.
Appuyez une fois au centre de la manette de commande pour
revenir au MENU principal et deux fois pour revenir à la
visualisation normale. Si vous n’actionnez au cune touche, le
menu se referme automatiquement au bout de 30 secondes
environ.
MENU
Réinitialisation des réglages
x
Appuyez sur la touch e RESET. Voir page 12 pour pl us
d’informations sur la réinitialisation des réglages.
RESET
3
Déplacez d’abord la manette de commande vers le
haut ou le bas m/M afin de sélectionner pour le
réglage horizontal ou pour le réglage vertical.
Déplacez ensuite la manette de commande vers la
gauche ou la droite </, pour régler le centrage.
Réglage de la taille de l’image
(TAILLE)
Ce réglage est enregistré dans la mémoire pour le signal d’entrée
en cours.
1
Appuyez au centre de la manette de commande.
Le MENU principal apparaît à l’écran.
2
Déplacez la manette de commande pour mettre
TAILLE en évidence et appuyez à nouveau au
centre de la manette de commande.
Le menu TAILLE/CENTRE apparaît à l’écran.
3
Déplacez d’abord la manette de commande vers le
haut ou le bas m/M afin de sélectionner pour le
réglage horizontal ou pour le réglage vertical.
Déplacez ensuite la manette de commande vers la
gauche ou la droite </, pour régler la taille.
9
Page 24

Agrandir ou réduire l’image
9300K
5000K
26
COULEUR
Réglage de la couleur de l’image
(ZOOM)
Ce réglage est enregistré dans la mémoire pour le signal d’entrée
en cours.
1
Appuyez au centre de la manette de commande.
Le MENU principal apparaît à l’écran.
2
Déplacez la manette de commande pour mettre
TAILLE ou CENTRE en évidence et appuyez
à nouveau au centre de la manette de commande.
Le menu TAILLE/CENTRE apparaît à l’écran.
3
Déplacez la manette de commande vers le haut ou
le bas m/M afin de sélectionner (zoom), et
déplacez-la vers la gauche ou la droite </, pour
agrandir ou réduire l’image.
Remarques
• Le réglage s’arrête lorsque la plage de réglage ho riz o ntal ou vertical
atteint sa valeur limite maximum ou minimum.
• La valeur de réglage hori zontal n’est pas affichée dans le m enu.
Réglage de la forme de l’image
(GEOM)
Les réglages GEOM vous permettent de régler la rotation et la
forme de l’image.
Le réglage de la rotation est enregistré dans la mémoire pour
tous les signaux d’entrée. Tous les autres réglages sont enregistrés
dans la mémoire pour le signal d’entrée en cours.
1
Appuyez au centre de la manette de commande.
Le MENU principal apparaît à l’écran.
(COUL.)
Les réglages COUL. permettent de régler la température de
couleur de l’image en chang eant le niveau de couleur du champ
de couleur blanc. Les couleurs apparaissent rougeâtres lorsque la
température est basse et bleuâtres lorsqu’elle est élevée. Ce
réglage est pratiqu e pour faire correspondre les couleurs du
moniteur aux couleurs d’une image imprimée.
Ce réglage est enregis t r é da ns la mém o ir e pour tous les sig na ux
d’entrée.
1
Appuyez au centre de la manette de commande.
Le MENU principal apparaît à l’écran.
2
Déplacez la manette de commande pour mettre
COUL. en évidence et appuyez à nouveau au
centre de la manette de commande.
Le menu COULEUR apparaît à l’écran.
3
Déplacez la manette de commande vers le haut ou
le bas m/M pour sélectionner une température de
couleur.
Les températures de couleur présélectionnées s ont 5000K et
9300K. Comme le réglage par défaut est 9300K, les blancs
passent d’une teinte bleuâtre à une teinte rougeâtre lorsque la
température est abaissée à 5 000K.
4
Si nécessaire, accordez finement la tempéra ture de
couleur.
Vous pouvez sélectionner votre propre température de
couleur entre 9300K et 5000K.
Déplacez d’abord la manette de commande vers le haut ou le
bas m/M afin de sélectionner . Déplacez ensuite la manette
de commande vers la gauche ou la droite </, pour régler
la température de couleur.
2
Déplacez la manette de commande pour mettre
GEOM en évidence et appuyez à nouveau au
centre de la manette de commande.
Le menu GEOMETRIE apparaît à l’écran.
3
Déplacez d’abord la manette de commande vers le
haut ou le bas m/M pour sélectionner le paramètre
de réglage voulu. Déplacez ensuite la manette de
commande vers la gauche ou la droite </, pour
exécuter le réglage.
Sélectionnez pour
faire pivoter l’image
élargir ou rétrécir les côtés de l’image
décaler les côtés de l’image vers la gauche ou
la droite
régler la largeur de l’image dans le haut de
l’écran
décaler l’image vers la gauche ou la droite
dans le haut de l’écran
10
Réglage de la convergence (CONV)
Les réglages CONV permettent de régler la qualité de l’image en
contrôlant la convergence. La convergence est l’alignement des
signaux de couleur rouge, vert et bleu.
Si vous voyez des ombres rouges ou bleues autour des l ettres ou
des lignes, réglez la convergence.
Ces réglages so nt en r e gistrés dans la mé m oire pour tous les
signaux d’entrée.
1
Appuyez au centre de la manette de commande.
Le MENU principal apparaît à l’écran.
2
Déplacez la manette de commande pour mettre
CONV en évidence et appuyez à nouveau au
centre de la manette de commande.
Le menu CONVERGENCE apparaît à l’écran.
3
Déplacez d’abord la manette de commande vers le
haut ou le bas m/M afin de sélectionner pour le
réglage horizontal ou pour le réglage vertical.
Déplacez ensuite la manette de commande vers la
gauche ou la droite </, pour régler la
convergence.
Page 25

Réglages supplémentaires
(OPTION)
Vous pouvez maintena nt démagnétiser manuellement le
moniteur, régler le niveau de suppression du moiré, changer la
position du menu et verrouiller les commandes.
1
Appuyez au centre de la manette de commande.
Le MENU principal apparaît à l’écran.
2
Déplacez la manette de commande pour mettre
OPTION en évidence et appuyez à nouveau au
centre de la manette de commande.
Le menu OPTION apparaît à l’écran.
3
Déplacez la manette de commande vers le haut ou
le bas m/M pour sélectionner le paramètre de
réglage voulu.
Procédez au réglage du paramètre sélectionné en suivant les
instructions ci-dessous.
Démagnétisation de l’écran
L’écran du moniteur est auto matiq ue me nt d éma g nétisé à la mi se
sous tension.
Pour démagnétiser manuellement l’écran, déplacez
d’abord la manette de comm ande vers le haut o u le bas
afin de sélectionner (DEGAUSS). Déplacez
m/M
ensuite la manette de commande vers la droite ,.
L’écran est démagnétis é pendant environ 5 secondes. S i un
second cycle de démagnétisat ion s’avère nécessaire, laissez
s’écouler un intervalle de 20 minutes pour obtenir de meilleurs
résultats.
Changement de la position d’affichage des
écrans de menu
Changez la position du menu s’il bloque une image à l’écran.
Pour changer la position d’affichage des écrans de
menu, déplacez d’abord la m anette d e comma nde ve rs
le haut ou le bas m/M afin de sélectionner
(POSITION H OSD) pour le réglage horizontal ou
(POSITION V OSD) pour le réglage vertical.
Déplacez ensuite la manette de commande vers la
gauche ou la droite </, pour déplacer le menu.
Verrouillage des commandes
Pour protéger les données de réglage en verrouillant
les commandes, déplacez d’abord la manette de
commande vers le haut ou le bas m/M afin de
sélectionner (MENU VERROUILLE). Déplacez
ensuite la manette de commande vers la droi te ,, pour
sélectionner ON.
Seuls le commutateur 1 (alimentation), et les paramètres
SORTIR et (MENU VERROUILLE) du menu OPTION
restent opérationnels. Si d’autres paramètres sont sélectionnés, le
symbole apparaî t à l’écran.
Pour désactiver le verrouillage des commandes
Répétez la proc édure ci-des s us et réglez (MENU VERROUILLE)
sur OFF.
FR
Réglage du moiré*
Si des motifs elliptiques ou ondulés apparaissent sur l’écran,
réglez le niveau de suppression du moiré.
Pour régler le niveau de suppression du moiré,
déplacez d’abord la mane tte de commande ve rs le haut
ou le bas m/M afin de sélectionner (REGLAGE
MOIRE). Déplacez ensuite la manette de commande
vers la gauche ou la droite </, jusqu’à ce que l’ effet
de moiré soit minimal.
* L ’effet de moiré est un type d’int erférence naturelle qui produit de
légères lignes ondulé es sur l’ écran. Il peut résulter d’une in terférence
entre le motif de l’image à l’écran et l a di s pos ition des points du
moniteur.
Exemple de moiré
11
Page 26

Conseils et informations utiles
RESET
(AIDE)
Le menu AIDE contient des conseils et informations utiles
concernant ce moniteur. Si votre moniteur présente des
symptômes semblables à ceux indiqués dans le menu AIDE,
suivez les instructions à l’écran po ur résoudr e le prob lème. Si le s
symptômes n’apparaissent pas dans le menu AIDE ou si le
problème persiste, voir “Symptômes et remèdes” à la page 14.
1
Appuyez au centre de la manette de commande.
Le MENU principal apparaît à l’écran.
2
Déplacez la manette de commande pour mettre
AIDE en évidence et appuyez à nouveau au
centre de la manette de commande.
Le menu AIDE suivant apparaît à l ’écran.
AIDE
RETOURNER AU MENU PRI NC I PA L
RESOLUT I ON RECOMMANDEE
SCINTILLEMENTS
F I NE L I GNE HOR I ZON T A L E
I MAGE DEFORMEE
IMAGE FLOUE
I MAGE DECOLOREE
3
Déplacez la manette de commande vers le haut ou
le bas m/M afin de sélectionner une option du menu
AIDE et appuyez à nouveau a u centre de la manette
de commande.
Des instructions ou des informations sur la façon de résoudre
le problème apparaissent à l’écran. Les différentes o ptions de
ce menu sont expliquées ci-dessous.
IMAGE DEFORMEE
Si la forme de l’image à l’écran semble distordue, essayez de
régler la géométrie de l’image. Déplacez la manette de commande
vers la droite , pour accéder directement au menu
GEOMETRIE.
IMAGE FLOUE
L’image peut paraître floue lorsque les signaux roug e et bleu ne
sont pas correctement alignés, provoquant l’apparition d’ombres
rouges ou bleues autour des lettres et de s lignes. Essa yez de régle r
la convergence de l’image pour faire disparaître ces ombres.
Déplacez la manette de commande vers la droite , pour accéder
directement au menu CONVERGENCE. Lorsque le menu
CONVERGENCE est affiché, les réglages du contraste, de la
luminosité et du moiré sont automatiquement réinitialisés pour
tous les signaux d’en tr ée.
IMAGE DECOLOREE
Si la couleur de l’image semble anormale dans certaines zones de
l’écran, commencez par vérifi er que les câbles de signaux sont
correctement branchés. Cela fait, essayez d e démagnétiser
l’écran manuellement. Déplacez la manette de commande vers la
droite , pour accéder directement au menu OPT I ON, puis
sélectionnez (DEGAUSS).
Réinitialisation des réglages
Ce moniteur offre trois méthodes de réinitialisation. Utilisez la
touche RESET pour réinitialiser les réglages.
RESOLUTION RECOMMANDEE
Si l’image ne remplit pas l’écran jusqu’aux bords ou si l’image
apparaît trop grande pour l’écran, réglez la résolution sur votre
ordinateur en f onction des chiffres donnés dans le menu. Si le
signal d’entrée correspond à l’un des modes présélectionnés de ce
moniteur, la résolution et le taux de régénération du signal
d’entrée en cours sont affichées.
RESOLUT I ON RECOMMANDEE
RAMENER LA RESOL UT I ON A
1024X768 A 85Hz AVEC LE PC .
LE REGLAGE ACTUEL EST DE
1280X1024 A 75Hz .
SCINTILLEMENTS
Si l’image scintille, réglez le taux de régénération selon les
chiffres indiqués dans le menu. Si le signal d’entrée correspond à
l’un des modes présélectionnés de ce moniteur, le taux de
régénération du signal d’entrée en cours est affiché.
SCINTILLEMENTS
REGLER TAUX DE REGENERAT I ON
SUR75HzOU85HzAVECLEPC.
LE REGLAGE ACTUEL EST 6 0 Hz .
FINE LIGNE HORIZONTALE
Les lignes qui apparaissent sur l’écran sont des fils
d’amortissement. Voir page 13 pour plus d’informations sur les
fils d’amortissement.
Réinitialisation d’un seul paramètre de réglage
Utilisez la manette de commande pour sélectionner le paramètre
de réglage que vous voulez réinitialiser et appuyez sur la touche
RESET.
Réinitialisation de toutes les données de réglage
pour le signal d’entrée en cours
Appuyez sur la touche RESET lorsqu’aucun menu n’est affiché
sur l’écran.
Attention que les paramètres su ivants n e sont pas réinitialisés par
cette méth od e:
• langue d’affichage des menus (page 7)
• position d’affichage des menus (page 11)
• verrouillage des commandes (page 11)
Réinitialisation de toutes les données de réglage
pour tous les signaux d’entrée
Maintenez la touche RESET enfoncée pendant au moins deux
secondes.
Remarque
La touche RESET ne foncti onne pas lorsque
VERROUILLE) est réglé sur ON.
(MENU
12
Page 27

Caractéristiques
INFORMATIONS
HORS PLAGE
DE BALAYAGE
Dépannage
techniques
Modes présélectionné et utilisateur
Lorsque le moniteur reçoit un signal d’entrée, il fait
automatiquement correspondre le signal à l’un des modes
présélectionnés qui sont enregistrés sont enregistrés dans la
mémoire du moniteur de manière à offrir une image de haute
qualité au centre de l’écran. (Voir Appendix pour une liste des
modes présélectionnés.) Pour les signaux d’entrée qui ne
correspondent pas à l’un des mod es présélectionnés, la
technologie Multiscan numérique intégrée dans ce moniteur fait
en sorte qu’une image claire apparaisse à l’écran pour toutes les
synchronisations dans la plage de fréquences du moniteur
(horizontale: 30 à 85 kHz ; verticale: 48 à 120 Hz). Lorsque
l’image est réglée, les données de réglage sont mémorisées
comme un mode utilisateur et sont rappelées automatiquement
chaque fois que le même signa l d ’entrée est reçu.
Remarque à l’intention des utilisateurs de
Windows
Vérifiez le mode d’emploi de votre carte vidéo ou le programme
utilitaire fourni avec la c art e gr aph iq ue e t sél ectio n nez le taux de
régénération le plus élevé de manière à maximiser les
performances du moniteur.
Consultez cette section avant de faire appel au service
d’assistance technique.
Si de fines lignes apparaissent à
l’écran (fils d’amortissement)
Les lignes que vous apercevez sur votre écran sont une
caractéristique normale des monite u rs Trinitro n et n e consti tue n t
donc pas un dysfonctionnement. Il s’agit de l’ombre des fils
d’amortissement employés pour stabiliser la grille d’ouverture
qui sont le plus facilement visibles lorsque l’arrière-plan de
l’écran est clair (généralement blanc). La grille d’ouverture est
l’élément essentiel qui rend les tub e s i mag e T rinit ron un iq ue s en
permettant le passage d ’u ne p lus grande quantité de lu mièr e v e rs
l’écran, ce qui garantit une image plus lumineuse et plus finement
détaillée.
Fils d’amortissement
Messages affichés à l’écran
FR
Fonction d’économie d’énergie
Ce moniteur satisfa it aux critères d’économie d’ énergie VESA,
E
NERGY STAR et NUTEK. Lorsque le moniteur est raccordé à
un ordinateur ou une carte graphique vidéo compatible DPMS
(Display Power Management Signaling), le moniteur réduit
automatiquement sa conso mmation d’énergie en trois étapes
comme indiqué ci-dessous.
Mode
d’alimentation
fonctionnement
normal
1 veille ≤ 15 W vert et orange en
2 interruption
(sommeil)*
3 inactif**
(sommeil profond)*
hors tension 0 W désactivé
* “Sommeil” et “sommeil profond” sont des mod es d’é conomie
d’énergie définis par l’Environmental Protection Agency.
** Lorsque vot re ordinateur se trouve dans un mode d’économie
d’énergie, l’indication MONITEUR EN MODE D’ECONOMIE
D’ENERGIE apparaît sur l’ écran si vous appuyez sur une to uche
quelconque du monite ur. Au bout de quelques secondes, le moniteur
passe de nouveau en mode d’é conomie d’énergie.
Consommation
d’énergie
≤ 120 W vert
≤ 15 W vert et orange en
≤ 3 W orange
L’indicateur 1
(alimentation)
alternance
alternance
Si aucune image n’apparaît à l’écran, l’un des messages suivants
s’affiche. Pour r emédier au problème, voi r “Symptômes et
remèdes” à la page 14.
Condition du
signal d’entrée
Condition du signal d’entrée
HORS PLAGE DE BALAYAGE
indique que le signal d’entr ée n’est pas supporté par les
spécifications du moniteu r .
PAS ENTREE VIDEO
indique qu’aucun signal n’est entré.
MONITEUR EN MODE D’ECONOMIE D’ENERGIE
indique que l’ordinateur est en mode d’économie d’énergie. Ce
message ne s’affiche que lorsque votre ordinateur se trouve dans
un mode d’économie d’énergie et que vous appuyez sur l’une des
touches du monite ur .
13
Page 28

Symptômes et remèdes
Si le problème est provoqué par l’ordinateur ou tout autre appareil raccordé, veuillez vous référer au mode d’emploi de l’appareil raccordé.
Utilisez la fonction d’autodiagnostic (page 16) si les recommandations suivantes ne vous permettent pas de résoudre le problème survenu.
Symptôme Vérifiez
Pas d’image
Si l’indicateur 1 (alimentation) ne
s’allume pas
Si le message PAS ENTREE
VIDEO apparaît à l’écran ou si
l’indicateur 1 (alimentation) est
orange ou clignote alternativement
en vert et en orange
Si le message MONITEUR EN
MODE D’ECONOMIE
D’ENERGIE apparaît à l’écran ou si
l’indicateur 1 (alimentation) est
orange ou clignote alternativement
en vert et en orange
Si le message HORS PLAGE DE
BALAYAGE apparaît à l’écran
Si aucun message ne s’affiche et si
l’indicateur 1 (alimentation) est vert
ou clignote en orange
Si vous utilisez Windows 95/ 98 • Si vous remplacez un ancien moni teur par ce moniteur, reconnectez l’ancien moniteur et
Si vous utilisez un système
Macintosh
L’image scintille, sautille, oscille
ou est brouillée
• Vérifiez si le cordon d’alimentation est correctement branché.
• Vérifiez si le commutateur 1 (alimentation) est réglé sur la position “on”.
• Vérifiez si le câble de signal vidéo est correctement branché et si les fiches sont
fermement enfoncées dans leurs prises resp ectives (page 6).
• Vérifiez si les broches du connecteur d’entrée vidéo HD15 ne sont pas faussées ou
enfoncées.
Problèmes causés par l’ordinateur ou tout autre appareil raccordé
x
• Vérifiez si le commutateur d’alimentation de l’ordinateur est sur “on”.
• Vérifiez si la carte graphique est complètement enfoncée dans la fente de bus appropriée.
Problèmes causés par l’ordinateur ou tout autre appareil raccordé
x
• L’ordinateur est en mode d’économie d’énerg ie. Essayez d’appuyer sur une touche du
clavier de l’ordinateur.
• Vérifiez si le commutateur d’alimentation de l’ordinateur est sur “on”.
• Vérifiez si la carte graphique est complètement enfoncée dans la fente de bus appropriée.
Problèmes causés par l’ordinateur ou tout autre appareil raccordé
x
• Vérifiez si la plage de fréquence vidéo correspond aux spécifications du moniteur. Si vous
remplacez un ancien moniteur par ce moniteur, reconnectez l’ancien moniteur et ajustez la
plage de fréquence comme suit.
Horizontale: 30 à 85 kHz
Verticale: 48 à 120 Hz
• Activez la fonction d’autodiagnostic (page 16).
procédez comme suit. Installez la disquette Windows Monitor Information Disk (page 7 )
et sélectionnez ce moniteur (“CPD-E200”) parmi les moniteurs Sony dans l’écran de
sélection de mon it eur de Windows 95/98.
• Vérifiez si l’adaptateur Macintosh (non fourni) et le câble de sign al vidéo sont
correctement raccordés (page 6).
• Isolez et éliminez les sources potentielles de champs électriques ou magnétiques tels que
d’autres moniteurs, des imprimantes laser, des ventilateurs électriques, des lampes
fluorescentes ou des téléviseurs.
• Éloignez le moniteur des lignes à haute tension ou placez un blindage magnétique à
proximité du moniteur.
• Branchez le moniteur sur une autre prise sect eur, de préférence raccordée à un autre
circuit.
• Faites pivoter le mon iteur de 90° vers la ga uche ou la droite.
Problèmes causés par l’ordinateur ou tout autre appareil raccordé
x
• Vérifiez le réglage adéquat pour le moniteur dans le mode d’emploi de votre carte
graphique.
• Assurez-vous que le mode graphique (VESA, Macintosh 16" Color, etc.) et la fréquence
du signal d’entrée sont supportés par ce moniteur (Appendix). Même si la fréquence est
comprise dans la plage adéquate, il arrive que certaines cartes vidé o présentent une
impulsion de synchronisation trop étroite pour que le moniteur puisse se synchroniser
correctement.
• Ajuste z le taux de régénération de l’ordinateur (fréquence verticale) de façon à obtenir la
meilleure image possible.
14
Page 29

Symptôme Vérifiez
L’image est floue
Des images fantômes
apparaissent
L’image n’est pas centrée ou de
taille incorrecte
Les bords de l’image sont
incurvés
Un motif ondulatoire ou elliptique
(moiré) est visible
Les couleurs ne sont pas
uniformes
Le blanc n’est pas blanc
Les lettres et les lignes sont
soulignées d’une ombre rouge ou
bleue
Les touches du moniteur sont
inopérantes
Un souffle est audible juste après
la mise sous tension
* Si un second cycle de démagnéti s at ion s’avère nécessaire, laissez s’écouler un intervalle de 20 mi nut es pour obtenir de meilleurs résultats. Un bruit de
souffle peut se faire entend re, m ai s il ne s’agi t pas d’un dysfonctionnement.
• Ajustez la luminosité et le contraste (page 9).
• Démagnétisez le moniteur* (page 11).
• Sélectionnez REGLAGE MOIRE et réglez le niveau de sup pression de moiré (page 11).
• N’utilisez pas de prolongateurs de câble vidéo et/ou de boîtiers de commutation vidéo.
• Vérifiez si toutes les fiches sont fermement connectées dans leurs prises respectives.
• Ajustez la taille (page 9) ou le centrage (page 9) de l’image. Attention que certains modes
vidéo ne remplissent pas l’écran jusqu’aux bords.
• Ajustez la géométrie (page 10).
• Sélectionnez REGLAGE MOIRE et réglez le niveau de sup pression de moiré (page 11).
Problèmes causés par l’ordinateur ou tout autre appareil raccordé
x
• Changez le motif de votre bureau.
• Démagnétisez le moniteur* (page 11). Si vous placez à côté du moniteur un appareil qui
génère un champ magnétique, comme un haut-parleur, ou si vous changez l’orientation du
moniteur, il se peut que les couleurs perdent leur uniformité.
• Ajustez la température de couleur (page 10).
• Ajustez la convergence (page 10).
• Si la fonction de verrouillage des commandes est réglée sur ON, réglez-la sur OFF
(page 11).
• C’est le son provoqué par le cycle de démagnétisation automatique. Lorsque le moniteur
est mis sous tension, il est automatiquement démagnétisé pendant cinq secondes.
FR
Affichage de la désignation, du numéro de série et
de la date de fabrication de ce moniteur.
Pendant que le moniteur reçoit un signal vidéo, maintenez le
centre de la manette de commande enfoncé pendant au moins cinq
secondes pour afficher la case d’informations relatives à ce
moniteur.
MENU
Exemple
INFORMATI ONS
MODEL : CPD - E 200
SER NO:1234567
b
MANUF ACTURED: 1 9 9
9-52
Si le problème persiste, appelez votre revendeur Sony agréé et
fournissez-lui les informations suivantes.
• Désignation du modèle: CPD-E200
• Numéro de série
• M arque et spécifications de votre ordinateur et de votre carte
graphique.
15
Page 30

Fonction d’autodiagnostic
Ce moniteur est doté d’une fonction d’autodiagnostic. S’il y a un
problème avec vo tre moniteur ou or dinateur, l’écra n devient
blanc et l’indicateur 1 (alimentation) s’allume en vert ou clignote
en orange. Si l’indicateur 1 (alimentation) s’allume en orange,
c’est que l’ordinateur se trouve en mode d’économie d’énergie.
Appuyez sur une touche quelconque du clavier.
RESET
Si l’indicateur 1 (alimentation) est allumé en vert
1
Débranchez le câble d’entrée vidéo ou mettez
l’ordinateur raccordé hors tension.
2
Appuyez deux fois sur la touche 1 (alimentation)
pour mettre le moniteur hors et sous tension.
3
Déplacez la manette de com mande vers la droite ,
pendant 2 secondes avan t que le moniteur passe en
mode d’économie d’énergie.
Si les quatre barres de couleur apparaissent (blanc, rouge, vert,
bleu), c’est que le moniteur fonctionne correctement. Rebranchez
le câble d’entrée vidéo et vérifiez l’état de votre ord inateur.
Si les barres de couleur n’apparaissent pas, c’est probablement
parce qu’une anomalie s’est pr oduite au niveau du moniteur.
Informez votre revendeur Sony agréé de l’état du moniteur.
MENU
L’indicateur 1 (alimentation)
MENU
Spécifications
Tube cathodique Pas d’ouv er ture de gril le de 0 ,24 mm
(central)
17 pouces mesurés en diagonale
Déflexion de 90 degr é s
Trinitron FD
Taille de l’image affichée Approx. 327 × 243 mm (l/h)
Résolution
Maximum Horizontale: 1600 points
Recommandée Ho rizontale: 1024 points
Zone d’image standa rd Approx. 312 × 234 mm (l/h)
Fréquence de déflexion* Horizontale: 30 à 85 kHz
Tension/courant d’entrée 100 à 240 V, 50 – 60 Hz,
Consommation él ectrique 120 W
Dimensions Approx
Mass Approx. 20 kg (44 lb 1 oz)
Plug & Play DDC1/DDC2B/DDC2Bi
Accessoires fournis Voir page 6
* Condition de synchronisation horizontale et vertical e
• La largeur de synchronisation horizontale doit être
supérieure à 1,0 µsec.
• La largeur de suppression horizontale doit être supérieure à
3,0 µsec.
• La largeur de suppression verticale doit être supérieure à
500 µsec.
La conception et les spécifications sont sujettes à modifications
sans préavis.
3
/4 × 9 5/8 po)
(14
Zone de visualisation de 16,0"
Verticale: 1200 lignes
Verticale: 768 lignes
3
/8 × 9 1/4 po)
(12
Verticale: 48 à 120 Hz
Max. 1,7 A
. 404 × 413,5 × 419,5 mm
l/h/p) (16 × 16 3/8 × 16 5/8 po)
(
Si l’indicateur 1 (alimentation) clignote en orange
Appuyez deux fois sur la touche 1 (alimentation) pour
mettre le moniteur hors et puis sous tension.
Si l’indicateur 1 (alimentation) s’allume en vert, c’est que le
moniteur fonctionne correctement.
Si l’indicateur 1 (alimentation) clignote toujours, c’est
probablement parce qu’il y a une anomalie au niveau du moniteur.
Comptez le nombre de secondes ent re les clignotements oranges
de l’indicateur 1 (alimentation) et informez votre revendeur
Sony agréé de l’état du moniteur. Notez également la désignation
du modèle et le numéro de série de votre moniteur. Notez
également la marque et le mod è le de votre ordinateur et de votre
carte vidéo.
16
Page 31

Índice
Precauciones . . . . . . . . . . . . . . . . . . . . . . . . . . . . . . . . . . . . . . . . . . 4
Identificación de los componentes y los controles . . . . . . . . . . . . . . 5
Instalación . . . . . . . . . . . . . . . . . . . . . . . . . . . . . . . . . . . . .6
Paso 1:
Paso 2:
Paso 3:
Conexión del monitor al ordenador. . . . . . . . . . . . . . . . . . . 6
Conexión del cable de alimentación . . . . . . . . . . . . . . . . . . 6
Encendido del monitor y del ordenador . . . . . . . . . . . . . . . 7
Selección del idioma de los menús en pantalla (LANG). . . . . . . . . . 7
Personalización del monitor. . . . . . . . . . . . . . . . . . . . . . .8
Navegación por el menú. . . . . . . . . . . . . . . . . . . . . . . . . . . . . . . . . . 8
Ajuste del brillo y del contraste. . . . . . . . . . . . . . . . . . . . . . . . . . . . . 9
Ajuste del centrado de la imagen (CENTRO). . . . . . . . . . . . . . . . . . 9
Ajuste del tamaño de la imagen (TAMAÑO). . . . . . . . . . . . . . . . . . . 9
Ampliación o reducción de la imagen (ZOOM). . . . . . . . . . . . . . . . 10
Ajuste de la forma de la imagen (GEOM). . . . . . . . . . . . . . . . . . . . 10
Ajuste del color de la imagen (COLOR) . . . . . . . . . . . . . . . . . . . . . 10
Ajuste de la convergencia (CONV). . . . . . . . . . . . . . . . . . . . . . . . . 10
Ajustes complementarios (OPCION) . . . . . . . . . . . . . . . . . . . . . . . 11
Sugerencias e información útiles (AYUDA) . . . . . . . . . . . . . . . . . . 12
Restauración de los ajustes . . . . . . . . . . . . . . . . . . . . . . . . . . . . . . 12
Características técnicas . . . . . . . . . . . . . . . . . . . . . . . . .13
Modos predefinidos y de usuario . . . . . . . . . . . . . . . . . . . . . . . . . . 13
Función de ahorro de energía . . . . . . . . . . . . . . . . . . . . . . . . . . . . 13
ES
• Trinitron es una marca comercial
registrada de Sony Corporation.
• Macintosh es una marca comercial de
Apple Computer, Inc., registrada en
EE.UU. y otros países.
• Windows
comerciales registrada s de Mi crosoft
Corporation en Estad os Unidos y otros
países.
• IBM PC/AT y VGA son marcas
comerciales registradas de IBM
Corporation de EE.UU.
• VESA y DDC
de Video Electronics Standard
Association.
•
E
registrada de EE.UU.
• El resto de los nombres de produc t os
mencionados en este manual pueden ser
marcas comerc iales o marcas
comerciales registradas de sus
respectivas compañías.
•Además, “” y “” no se mencionan en
cada caso en este manual.
y MS-DOS son marcas
son marcas comerciales
NERGY STAR es una marca
Solución de problemas . . . . . . . . . . . . . . . . . . . . . . . . . .13
Si aparecen líneas finas en pantalla (hilos de amortiguación) . . . . 13
Mensajes en pantalla . . . . . . . . . . . . . . . . . . . . . . . . . . . . . . . . . . . 13
Problemas y soluciones . . . . . . . . . . . . . . . . . . . . . . . . . . . . . . . . . 14
Función de autodiagnóstico . . . . . . . . . . . . . . . . . . . . . . . . . . . . . . 16
Especificaciones . . . . . . . . . . . . . . . . . . . . . . . . . . . . . . .16
Appendix. . . . . . . . . . . . . . . . . . . . . . . . . . . . . . . . . . . . . . . i
Preset mode timing table . . . . . . . . . . . . . . . . . . . . . . . . . . . . . . . . . .i
3
Page 32

Precauciones
90°
5°
90°
15°
Puntos de centrado
Advertencia sobre las conexiones de
alimentación
• Utilice el cable de alimentación suministrado. Si emplea otro
tipo de cable, asegúrese de que es compatible con el suministro
de alimentación local.
Para los usuarios en EE.UU.
Si no utiliza el cable apropiado, este monitor no cumplirá con
las normas obligatorias de la FCC.
Ejemplo de tipos de enchufes
Uso del soporte basculante giratorio
Este monitor puede ajustarse en los ángulos mostrados a
continuación. Para encontrar el centro del radio de giro del
monitor, alinee el centro de la pantalla de dicho monitor con los
puntos de centrado del soporte.
Agarre el monitor por su parte inferior con las dos manos cuando
lo gire horizontal o verticalmente. Tenga cuidado de no pillarse
los dedos en la parte trasera del monitor cuando lo incline hacia
arriba verticalmente.
para 100 a 120 V CA
• Antes de desconectar el cable de alimentación, espere al menos
30 segundos después de desactivar la alimentación para que se
descargue la electricidad estática de la super ficie de la pan talla.
• Una vez activada la alimentación, la pantalla se desmagnetiza
durante unos 5 segundos. Esto genera un intenso campo
magnético alrededor de la pantalla que puede afectar a los datos
almacenados en discos y cin tas magnéticas situados cerca del
monitor. Asegúr e s e de ma nte n er dis c o s, cintas y equipos de
grabación magnéticos alejados del monitor.
El equipo debe instalarse cerca de una toma de fácil acceso.
para 200 a 240 V CA
Instalación
No instale el monitor en los siguientes lugares:
• sobre superficies (mantas, colchas, etc.) ni cerca de materiales
(cortinas, tapices, etc.) que puedan bloquear los orifici os de
ventilación
• cerca de fuentes de calo r, c omo ra di ador es o con duct os de air e
caliente, ni en lugares sujetos a la luz solar directa
• en lugares sujetos a cambios bruscos de temperatura
• en lugares sujetos a golpes o vibraciones mecánicas
• sobre superficies inestables
• cerca de equipos que generen magnetismo, como
transformadores o líneas eléc tricas de alta tensión
• ce r ca o sobre una superficie metálica con ca rga eléctrica
Mantenimiento
• Limpie la pantalla con un paño suave. Si utiliza algún líquido
limpiador de cri s tales, no emplee ningú n tipo de producto de
limpieza que contenga soluciones antiestáticas o aditivos
similares, ya que pueden rayar la superficie de la pa ntalla.
• No frote, toque ni manipule la superficie de la pantalla con
objetos afilados o abrasivos, como un bolígrafo o un
destornillador. Este tipo de contacto puede rayar el tubo de
imagen.
• Li mpi e el exterior, el panel y los controles con un paño suave
ligeramente humedecido con una solución detergente poco
concentrada. No utilice estropajos abrasivos, detergente en
polvo ni disolventes , com o alc oh ol o benc in a .
Transporte
Cuando transporte este monitor para su reparación o traslado,
utilice la caja y materiales de embalaje originales.
4
Page 33

Identificación de los componentes
1 2 3 4
5
876
11 12 13 14 15
10
9
y los controles
Consulte las página s in dic a da s entre paréntesis pa ra ob te ne r m ás
información.
MENU
RESET
Parte posteriorParte frontal
AC IN
RESET
Botón RESET (restauración) (página 12)
1
MENU
Este botón recupera los valores de fábrica.
Botón de control (página 9)
2
El botón de control se utiliza para most rar el men ú y rea liz ar
ajustes del monitor, incluidos los de brillo y contraste.
Interruptor e indicador 1 (alimentación)
3
(páginas 7, 13, 16)
Este botón enciende y a paga el monitor. El indicador d e
alimentación se ilumina en verde cuando el monitor está
encendido, y parpadea en verde y en naranja, o se ilumina en
naranja cuando dicho monitor se encuentra en el modo de
ahorro de energía.
Conector AC IN (página 6)
4
Este conector proporciona alimentación CA al monitor.
Conector de entrada de vídeo (HD15) (página 6)
5
Este conector in troduce las señales de vídeo RGB
(0,700 Vp-p, positivas) y de sincronización.
Terminal nº Señal
1Roja
2Verde
(Sincronización en verde)
3Azul
4 Identificación (Masa)
5 Masa DDC*
6Masa roja
7 Masa verde
8 Masa azul
9–
10 Masa
11 Identificación (Masa)
12 Datos bidireccionales (SDA)*
13 Sincronización H.
14 Sincronización V.
15 Reloj de datos (SCL)*
ES
* DDC (Display Data Channel) es un estándar de VESA.
5
Page 34

Instalación
AC IN
Es necesario un adaptador Macintosh (no suministrado).
Adaptador Macintosh
(no suministrado)
Ordenador Macintosh o
compatible
a salida de
vídeo
AC IN
a AC IN
a una toma de
corriente
Cable de alimentación
(suministrado)
Antes de utilizar el monitor, compruebe que los siguientes
accesorios se hayan incluido en la caja:
• Cable de alimentación (1)
• Windows Monitor Information Disk (1)
• Tarjeta de garantía (1)
• Notas sobre la limpieza de la supe rf ic i e de la pa ntalla (1)
• Est e manual de instrucciones (1)
Paso 1:Conexión del monitor al
ordenador
Apague el monitor y el ordenador antes de real izar la conexión.
Nota
No toque los terminales de l conector de cable de vídeo, ya que podría
dañar dichos terminales.
Conexión a un ordenador IBM PC/AT o
x
compatible
AC IN
Conexión a un ordenador Macintosh o
xxxx
compatible
a salida de
vídeo
Ordenador IBM PC/AT
o compatible
Paso 2:Conexión del cable de
alimentación
Con el monitor y el ordenador apagados, primero conecte el cable
de alimentación al monitor y, a continuación, a una toma de
corriente.
6
Page 35

Paso 3:Encendido del monitor y
Selección del idioma de los menús
del ordenador
Primero encienda el monitor y, a continuación, el ord enador.
La instalación del monitor ha finalizado.
Si fuese necesario, utilice los cont roles del monitor p ara ajustar la
imagen.
Si las imágenes no aparecen en pantalla
• Compruebe que el monitor esté correctamente conectado al
ordenador.
• Si el mensaje SIN SEÑAL DE ENTRADA aparece en pantalla,
confirme que el cable de señal de ví deo esté correctamente
conectado y que todos los en c hu f es es t é n firmemente
conectados en las tomas.
• Si el mensaje MONITOR EN MODO AHORRO ENERGIA
aparece en pantalla, pulse cual quier tecla del teclado del
ordenador.
• Si sustituye un monitor antiguo por este modelo y el mensaje
FUERA DEL RANGO DE AJUSTE aparece en pantalla,
vuelva a conectar el monitor antiguo. A continuación, ajuste la
tarjeta gráfica del ordenador de forma que la frecuencia
horizontal se encuentre entre 30 – 85 kHz, y la vertical entre
48 – 120 Hz.
en pantalla (LANG)
Los idiomas disponibles para los menús en pantalla son inglés,
francés, alemán, español, italiano, holandés, sueco, ruso y
japonés. El ajuste por omisión es el idioma inglés.
1
Pulse el centro del botón de control.
Consulte la pági na 9 para obtener más infor m ación sobre el
uso del botón de control.
MENU
2
Desplace el botón de control para resal tar LANG
MENU
COLOR
GEOM
LANG
CENTRO
SALIR
TAMAÑO
y vuelva a pulsar el centro de dicho botón.
MENU
LANGUAGE
ENGL I SH
FRANÇA I S
DEUTSCH
ESPAÑOL
ITALIANO
NEDERL ANDS
SVENSKA
OK
CONV
AYUDA
OPCION
MENU
Para obtener más información sobre los mensajes en pantalla,
consulte “Problemas y soluciones” en la página 14.
Para los usuarios que utilicen Windows 95/98
Para maximiza r el potencial del monitor, instale en el PC el archivo de
información sobre el nuevo modelo del disquete Windows Monitor
Information Disk suministrado.
Este monitor cumple con el estándar Plug & Play “VESA DDC”. Si el PC/
tarjeta gráfica cumple con DDC, seleccione “Plug & Play Monitor (VESA
DDC)” o el nombre de mode lo de este monitor como tipo de mo nitor en
el “Control Panel” de Windows 95/98. Si el PC/tarjeta gráfica pre senta
problemas de com uni cación con este moni tor, cargue el disquete
Windows Monitor Information Disk y seleccione el nombre de modelo de
este monitor com o ti po de monitor.
Para los usuarios que utilicen Windows NT4.0
La instalación del mo ni tor en Windows NT4.0 difiere de la uti li za da en
Windows 95/98 y no implica selección de tipo de monitor. Consulte el
manual de instrucciones de Windows NT4.0 para obtener más
información sobre el ajuste de la resolución, frecuencia de barrido y
número de colores.
Ajuste de la resolución y el número de colores del monitor
Ajuste la resolución y el número de colores del monitor. Para ello,
consulte el manual de instruc ciones del ordenador. El núme ro de colores
puede variar de acuerdo con el ordenador o la tarjeta de vídeo. El ajuste
de la paleta de colores y el número real de colores son de la siguiente
forma:
• High Color (16 bit) t 65.536 colores
• True Color (24 bit) t aproximadamente 16,77 mill ones de colores
En el modo True color (2 4 bit s ), la velocidad puede ser más lenta.
3
Desplace el botón de control m/M para seleccionar
algún idioma.
• E NGLISH: Inglés
• FRANÇAIS: Francés
• DEUTSCH: Alemán
• ESPAÑOL
• ITALIANO: Italiano
• NEDERLANDS: Holandés
• SVENSKA: Sueco
•: Ruso
• : Japonés
Para cerrar el menú
Pulse el centro del botón de con tro l una vez para volver al MENU
principal, y dos veces para volver a la visualización norma l. Si no pulsa
ningún botón, el menú se cerrará automáticamente transcurridos unos 30
segundos.
Para restaurar el idioma inglés
Pulse el botón RESET mientras el menú LANGUAGE se encuentra en
pantalla.
ES
7
Page 36

Personalización del
MENU
MENU
SALIR
CENTRO
TAMAÑO
GEOM
COLOR
LANG
AYUDA
CONV
OPCION
OK
68.7kHz/ 85Hz
1024
768
frecuencias
horizontal y
vertical de la
señal de
entrada actual
res
olución de
la señal d
e
entrada actual
monitor
Es posible realizar diversos ajustes del monitor mediante el menú
en pantalla.
Navegación por el menú
Pulse el centro del botón de control para que aparezca el MENU
principal en pantalla. Consulte la página9 para obtener más
información sobre el empleo del botón de control.
MENU
MENU
COLOR
CENTRO
OK
CONV
MENU
COLOR (página 10)
5
Seleccione el menú COLOR para
ajustar la temperatura del color de la
imagen. Puede utilizarlo para hacer
coincidir los colores del monitor
con los de una imagen impresa.
CONV (página 10)
6
Seleccione el menú CONV para
ajustar la convergencia horizontal y
vertical de la imagen.
LANG (página 7)
7
Seleccione LANG para elegir el
idioma de los menús en pantalla.
COLOR
9300K
5000K
CONVERGENC I A
LANGUAGE
ENGL I SH
FRANÇA I S
DEUTSCH
ESPAÑOL
ITALIANO
NEDERL ANDS
SVENSKA
26
GEOM
LANG
SALIR
TAMAÑO
AYUDA
OPCION
Utilice el botón de control para seleccionar uno de los siguientes
menús.
CENTRO (página 9)
1
TAMAÑO / CENTRO
Seleccione el menú CENTRO para
ajustar el centrado, tamaño o zoom
de la imagen.
TAMAÑO (página 9)
2
TAMAÑO / CENTRO
26
Seleccione el menú TAMAÑO para
ajustar el tamaño, centrado o zoom
de la imagen.
GEOM (página 10)
3
GEOMETR I A
26
Seleccione el menú GEOM para
ajustar la rotación y forma de la
imagen.
26
OPCION (página 11)
8
Seleccione OPCION para ajustar la s
OPC I ON
DESMAGNET
opciones del monitor. Éstas
incluyen:
SI
• la desmagnetización de la
pantalla
• el ajuste del nivel de cancelación
de muaré
• el cambio de la posición del menú
en pantalla
• el bloqueo de los controles
SALIR
9
Seleccione SALIR para cerrar el
menú.
Visualización de la señal de entrada actual
xxxx
Las frecuencias horizontal y vertical de la señal de entrada actual
aparecen en el MENU principal. Si la señal se corresponde con
uno de los modos predefin idos en fábrica de es te monitor, también
aparecerá la resolución.
4
8
AYUDA
(página 12)
Seleccione el menú
AYUDA para
visualizar suger encia s
e información útiles
sobre este monitor.
AYUDA
VOLVER A MENU PRINCIPAL
RESOLUC I ON RECOMENDADA
PARPADEO
L I NEA F I NA HOR I ZONTAL
FORMA DI STORS I ONADA
DESENFOCADO
DECOLORAC I ON
Page 37

Uso del botón de control
26 26
BR I L LO / CONTRAST E
x
1
Muestre el MENU principal.
Pulse el centro del botón de control para que aparezca en
pantalla el MENU principal.
MENU
2
Seleccione el menú que desee ajustar.
Resalte el menú de se ado desplazando el botón de control
hacia atrás para subir (M), hacia delante para bajar (m), y
hacia la izquierda (<) o la derecha (,) para desplazarse
hacia los lados.
FRONTAL
MENU MENU
POSTERIOR
3
Ajuste el menú.
Desplace el botón de cont rol hacia la izquierda (<) o la
derecha (,) para realizar el ajuste.
MENU
Ajuste del brillo y del contraste
Los ajustes de brillo y contraste se realizan mediante un menú de
BRILLO/CONTRASTE independiente.
Estos ajustes se almacenan en la memoria para todas las señales
de entrada.
1
Desplace el botón de control en cualq uier dirección.
El menú de BRILLO/CONTRASTE aparece en pantalla.
2
Desplace el botón de control m/M para ajustar el
brillo ( ), y </, para ajustar el contraste (6).
El menú desaparece automá ticamente transcurridos unos 3
segundos.
Ajuste del centrado de la imagen
(CENTRO)
Este ajuste se almacena en la memoria para la señal de entrada
actual.
1
Pulse el centro del botón de control.
El MENU principal aparece en pantalla.
2
Desplace el botón de control para resaltar
CENTRO y vuelva a pulsar el centro de dicho
botón.
El menú TAMAÑO/CENTRO aparece en pantalla.
ES
4
Cierre el menú.
Pulse el centro del botón de control una vez para volver al
MENU principal, y dos veces para vo lv er a la visualización
normal. Si no pulsa ningún botón , el menú se cerrará
automáticamente transcurridos unos 30 segundos.
MENU
Restauración de los ajustes
xxxx
Pulse el botón RESET. Consulte la página 12 para obtener más
información sobre la restauración de los ajustes.
RESET
3
Primero, desplace el botón de control m/M con el fin
de seleccionar para el ajuste horizontal, o
para el vertical. A continuación, desplace el botón
de control </, para ajustar el centrado.
Ajuste del tamaño de la imagen
(TAMAÑO)
Este ajuste se almacena en la memoria para la señal de entrada
actual.
1
Pulse el centro del botón de control.
El MENU principal aparece en pantalla.
2
Desplace el botón de control para resaltar
TAMAÑO y vuelva a pulsar el centro de dicho
botón.
El menú TAMAÑO/CENTRO aparece en pantalla.
3
Primero, desplace el botón de control m/M con el fin
de seleccionar para el ajuste horizontal, o
para el vertical. A continuación, desplace el botón
de control </, para ajustar el tamaño.
9
Page 38

Ampliación o reducción de la
9300K
5000K
26
COLOR
Ajuste del color de la imagen
imagen (ZOOM)
Este ajuste se almacena en la memoria para la señal de entrada
actual.
1
Pulse el centro del botón de control.
El MENU principal aparece en pantalla.
2
Desplace el botón de control para resaltar
TAMAÑO o CENTRO y vuelva a pulsar el
centro de dicho botón.
El menú TAMAÑO/CENTRO aparece en pantalla.
3
Desplace el botón de control m/M con el fin de
seleccionar (zoom), y desplace </, para
ampliar o reducir la imagen.
Notas
• El ajuste s e detien e cuando el tama ño hori zontal o el vert ical al canza su
valor máximo o mínimo.
• El valor de ajuste horizontal no aparece en el menú.
Ajuste de la forma de la imagen
(GEOM)
Los ajustes de GEOM permiten ajustar la rotación y la forma de
la imagen.
El ajuste (rotación) se almacena en la memoria para todas las
señales d e entrada. El resto de aj ustes se alma cenan en la me moria
para la señal de entrada actual.
1
Pulse el centro del botón de control.
El MENU principal aparece en pantalla.
(COLOR)
Los ajustes de COLOR permiten ajustar la temperatura del color
de la imagen mediante el cam bio del niv el de co lor del ca mpo de
color blanco. Los colores se mostrarán rojizos si la temperatura es
baja, y azulados si ésta es alta. Este ajuste resulta útil para hacer
coincidir los colores del monitor con los de una imagen impresa.
Este ajuste se almacena en la memoria para todas las señales de
entrada.
1
Pulse el centro del botón de control.
El MENU principal aparece en pantalla.
2
Desplace el botón de control para resaltar
COLOR y vuelva a pulsar el centro de dicho
botón.
El menú COLOR aparece en pantalla.
3
Desplace el botón de control m/M para seleccionar
una temperatura del color.
Las temperaturas del color predefinidas son 5000K y 9300K.
Puesto que el ajuste por omisión es de 9300K, los blancos
pasarán de un tono azulado a uno rojizo al disminuir la
temperatura hasta 5000K.
4
Si fuese necesario, ajuste con precisión la
temperatura del color.
Puede seleccionar su propi a temperatura del color entre
9300K y 5000K.
Primero, desplace el botón de control m/M para seleccionar
y, a continuación, desplace el botón < /, para ajustar la
temperatura del color.
2
Desplace el botón de co ntrol para resaltar GEOM
y vuelva a pulsar el centro de el botón.
El menú GEOMETRIA aparece en pantalla.
3
Primero, desplace el botón de control m/M para
seleccionar la opción de ajuste que desee. A
continuación, desplace el botón </, para realizar
el ajuste.
Seleccione Para
girar la imagen
expandir o contraer los lados de la imagen
desplazar los lados de la imagen hacia la
izquierda o la derecha
ajustar la anchura de la imagen en la parte
superior de la pantalla
desplazar la imagen hacia la izquierda o la
derecha en la parte superior de la pantalla
10
Ajuste de la convergencia (CONV)
Los ajustes de CONV permiten ajustar la calidad de la imagen
mediante el control de la convergencia. Ésta se refiere al
alineamiento de las señales de color rojo, verde y azul.
Si se aprecian sombras rojas o azules alrededor de las letras o de
las líneas, ajuste la convergencia.
Estos ajustes se almacenan en la memoria para todas las señales
de entrada.
1
Pulse el centro del botón de control.
El MENU principal aparece en pantalla.
2
Desplace el botón de control para resaltar CONV
y vuelva a pulsar el centro de dicho botón.
El menú CONVERGENCIA aparece en pantalla.
3
Primero, desplace el botón de control m/M con el fin
de seleccionar para el ajuste horizontal, o
para el vertical. A continuación, desplace el botón
de control </, para ajustar la convergencia.
Page 39

Ajustes complementarios
(OPCION)
Es posible desmagnetizar el monitor, ajustar el nivel de
cancelación de muaré, cambiar la posición del menú y bloquear
los controles manualmente.
1
Pulse el centro del botón de control.
El MENU principal aparece en pantalla.
2
Desplace el botón de control para resaltar
OPCION y vuelva a pulsar el centro de dicho
botón.
El menú OPCION aparece en pantalla.
3
Desplace el botón de control m/M para seleccionar
la opción de ajuste que desee.
Ajuste la opción se le cc io na d a de ac uer d o con las siguientes
instrucciones.
Desmagnetización de la pantalla
El monitor se desmagnetiza automáticamente al activar la
alimentación.
Para desmagnetizarlo man ualmente , primero despla ce
el botón de control m/M para seleccionar
(DESMAGNET). A continuación, desplace dicho
botón ,.
La pantalla se desmagnet iza durante unos 5 segundos . Si es
preciso aplicar un segundo ciclo de desmagnetización, espere al
menos 20 minutos antes de ap licarlo para obtener los mejores
resultados posibles.
Cambio de la posición del menú
Cambie la posición del menú si bloquea la imagen en pantalla.
Para cambiar la posición del menú en pantalla, primero
desplace el botón de control m/M con el fin de
seleccionar (POSICION MENU H) para el ajuste
horizontal, o (POSICION MENU V) para el vertical. A
continuación, desplace el botón </, para desplazar
el menú en pantalla.
Bloqueo de los controles
Para proteger datos de ajuste mediante el bloqueo de
los controles, primero desplace el botón de control
para seleccionar (BLOQUEO DE AJUSTES). A
m/M
continuación, desplace el bot ón , para seleccionar SI.
Sólo funcionarán el interruptor 1 (alimentación), SALIR y
(BLOQUEO DE AJUSTES) del menú OPCION. Si se
seleccionan otras opciones, la marca aparecerá en pantalla.
Para cancelar el bloqueo de los controles
Repita el anterior procedimiento y ajuste (BLOQUEO DE
AJUSTES) en NO.
ES
Ajuste del muaré*
Si aparecen patron es elíp tic o s u ondu la do s en pant alla, ajuste el
nivel de cancelación del muaré.
Para ajustar la cantidad de cancelación de muaré,
primero desplace el botón de control m/M para
seleccionar (AJUSTE MUARE). A continuación,
desplace el botón </, hasta que el efecto de muaré
sea mínimo.
* E l muaré es un tipo de interferencia natural que produce líneas suaves
y onduladas en la pantalla. Puede aparecer debido a la interferencia
entre el patrón de l a im agen en pantalla y el de paso de fósforo del
monitor.
Ejemplo de muaré
11
Page 40

Sugerencias e información útiles
RESET
(AYUDA)
El menú AYUDA contiene sugerencias e información útiles sobre
este monitor. Si éste muestra síntomas que coincidan con los
enumerados en el menú AYUDA, siga las instrucciones en
pantalla para solucionar el problema. Si los síntomas no coinciden
con los enumerados en dicho menú AYUDA o si el problema
persiste, consulte “Problemas y soluciones” en la página 14.
1
Pulse el centro del botón de control.
El MENU principal aparece en pantalla.
2
Desplace el botón de control para resaltar
AYUDA y vuelva a pulsar el centro de dicho botón.
El siguiente menú de AYUDA aparece en pantalla.
AYUDA
VOLVER A MENU PRINCIPAL
RESOLUC I ON RECOMENDADA
PARPADEO
L I N EA F I NA HOR I ZONT A L
FORMA DI STORS I ONADA
DESENFOCADO
DECOLORAC I ON
FORMA DISTORSIONADA
Si la forma de la imagen en pantalla aparece distorsionada, ajuste
la geometría de la imagen. Desplace el botón de control , para
acceder directamente al menú GEOMETRIA.
DESENFOCADO
La imagen puede aparecer desenfocada si las señales de color rojo
y azul no están correctamente alineadas, produciendo sombras
rojas o azules alrededor de las letras y las líneas. Ajuste la
convergencia de la imagen para que las sombras desaparezcan.
Desplace el botón de control , para acceder directamente al
menú CONVERGENCIA. Al aparecer éste, los ajustes de
contraste, brillo y muaré se restaurarán automáticamente para
todas las señales de entrada.
DECOLORACION
Si el color de l a ima gen s e mu estra an ormal en c iert as p artes de l a
pantalla, compruebe en primer lugar si hay algún cable de señal
suelto. Una vez examinados lo s cables, desmagnetice la pantalla
manualmente. Desplace el botón de control , para acceder
directamente al menú OPCION y, a continuación, seleccione
(DESMAGNET).
3
Desplace el botón de control m/M para seleccionar
una opción del menú AYUDA y vuelva a pulsar el
centro de dicho botón.
La pantalla muestra instrucciones o información para
solucionar el problema. Más abajo se proporciona una
descripción de cada opción de menú.
RESOLUCION RECOMENDADA
Si la imagen no llen a la pantalla hasta los bordes o si dich a imagen
aparece con un tamaño excesivo con respecto a la pantalla, ajuste
la resolución con el ordenad or t eniendo en cuenta los datos
mostrados en el menú. Si la señal de entrada se correspon de con
uno de los modos de este monitor predefinidos en fábrica,
aparecerán la resolución y la frecuencia de barrido de la señal de
entrada actual.
RESOLUC I ON RECOMENDADA
AJUSTE RESOLUCI ON EN
1024X768 A 85Hz CON PC.
EL AJUSTE ACTUAL ES
1280X1024 A 75Hz .
PARPADEO
Si la imagen parpadea, ajuste la frecuencia de barrido teniendo en
cuenta los datos mostrados en el menú. Si la señal de entrada se
corresponde con uno de los modos de este monitor predefinidos
en fábrica, aparecerá la frecuencia de barrido de la señal de
entrada actual.
PARPADEO
AJUS TE F RECUENC I A BARRI DO
EN 7 5 H z O 85 H z CON PC .
EL A JUST E ACTUAL ES 6 0H z .
Restauración de los ajustes
Este monitor dispone de los siguientes métodos de restauración.
Utilice el botón RESET para restaurar los ajustes.
Restauración de una sola opción de ajuste
Emplee el botón de control para seleccionar la opción de ajuste
que desee restaurar, y pulse el botón RESET.
Restauración de todos los datos de ajuste para la
señal de entrada actual
Pulse el botón RE SET cuando la pantalla no muestre ningún
menú.
Tenga en cuenta que las sigu ientes opciones no se restauran
mediante este método:
• idioma de los menús en pantalla (página 7)
• posición de los menús en pant alla (página 11)
• bloqueo de los controles (página 11)
Restauración de todos los datos de ajuste para
todas las señales de entrada
Pulse y mantenga pulsado el botón RESET durante más de dos
segundos.
LINEA FINA HORIZONTAL
Las líneas que aparecen en pant alla son hilos de amortiguación.
Consulte la página 13 para obtener más inf ormación sobre éstos.
12
Nota
El botón RESET no funcionará si
ajustado en SI
.
(BLOQUEO DE AJUSTES) está
Page 41

Características técnicas
INFORMACION
FUERA DEL
RANGO DE AJUSTE
Modos predefinidos y de usuario
Solución de problemas
Antes de ponerse en contact o con personal de servicio técnico,
consulte esta sección.
Cuando el monitor recibe una se ñal de entrada, hace coincidir
automáticamente dicha señal con uno de los modos predefinidos
en fábrica almacenados en la memoria para mostrar imágenes de
alta calidad en el centro de la pantalla. (Consulte Appendix para
comprobar la lista de los modos predefinidos en fábrica.) Con
respecto a las señales de entrad a que no se correspondan con
ninguno de los modos predefinidos de fábrica, la tecnología
digital Multiscan de este monitor garantiza la presentación en
pantalla de imágenes nítida s para cualquier sincroni zación dentro
del margen de frec uencias del monitor (horizontal: 30 – 85 kHz,
vertical: 48 – 120 Hz). Si la imagen se ajusta, los datos de ajuste
se almacenan como modo de usuari o y se recuperan
automáticamente al recibirse la misma señal de entrada
.
Nota para los usuarios de Windows
Consulte el manual de la tarjeta de vídeo o el programa de
utilidades suministrado con la tarjeta gráfica, y seleccione la
frecuencia de barrido más alta disponible para maximizar el
rendimiento del monitor.
Función de ahorro de energía
Este monitor cumple las directrices de ahorro de energía
establecidas por VESA,
monitor se conecta a un ordenador o tarjeta gráfica de vídeo
conforme con DPMS (Di s play Power Management Signaling),
dicho monit or reducirá aut omáticame nt e el co ns umo de energí a
en tres etap a s como se muestra a continu a ción.
E
NERGY STAR y NUTEK. Si el
Si aparecen líneas finas en pantalla
(hilos de amortiguación)
Las líneas que se aprecian en la p antalla son normales en el
monitor Trinitron y no son ningún fallo de funcionamiento. Son
las sombras de los hilos de amortiguación utilizados para
estabilizar la rejilla de apertura y se aprecian en mayor medida
cuando el fondo de la pantalla es luminoso (normalmente blanco).
La rejilla de apertura es el elem ento esencial p or el que el tubo de
imagen Trinitron es único, permitien do que la pantalla reciba más
iluminación, por lo que las imágenes aparecen con más brillo y
más detalle.
Hilos de
amortiguación
Mensajes en pantalla
Si no aparece ninguna imagen en la pantalla, ésta mostrará uno de
los siguientes mensajes. Para solucionar el problema, consulte
“Problemas y soluciones” en la página 14.
ES
Modo de
alimentación
funcionamiento
normal
1 espera ≤ 15 W alternación entre
2 reposo
(sleep)*
3 activo inactivo**
(deep sleep)*
alimentación
desactivada
* “Sleep” y “deep sleep” son modos de ahorro de energía definidos por
la Agencia de protecc ión del medio ambient e (E nvironmental
Protection Agency).
** Cuando el ordenador se encuentra en el modo de ahorro de energía, el
mensaje MONITOR EN MODO AHORRO ENERGIA aparece en
pantalla al pulsar cualq ui er botón del monitor. Tran scurridos unos
segundos, éste entra de nuevo en el mo do de ahorro de energía.
Consumo de
energía
≤ 120 W verde
≤ 15 W alternación entre
≤ 3 W naranja
0 W apagado
Indicador 1
(alimentación)
verde y naranja
verde y naranja
Condición de
la señal de
entrada
Condición de la señal de entrada
FUERA DEL RANGO DE AJUSTE
indica que las especificacio nes del monito r no admiten la señal de
entrada.
SIN SEÑAL DE ENTRADA
indica que no se introduce ninguna señal.
MONITOR EN MODO AHORRO ENERGIA
indica que el ordenador se encuentra en el modo de ahorro de
energía. Este mensaje sólo aparece cuando el ordenador se
encuentra en algún modo de ahorro de energía y pulsa cualquier
botón del monitor.
13
Page 42

Problemas y soluciones
Si el problema lo causa el ordenador conectado u otr o equipo, consulte el manu al de instrucciones del equipo conectado.
Utilice la función de autodiagnóstico (página 16) si las siguientes recomendaciones no ayudan a solucionar el problema.
Problema Compruebe lo siguiente
Ausencia de imagen
Si el indicador 1 (alimenta c ión ) no
está iluminado
Si el mensaje SIN SEÑAL DE
ENTRADA aparece en pantalla, o si
el indicador 1 (alimentación) se
iluminado en naranja o alterna entre
verde y naranja
Si el mensaje MONITOR EN
MODO AHORRO ENERGIA
aparece en pantalla, o si el indica dor
1 (alimentación) está iluminado en
naranja o alterna entre verde y
naranja
Si el mensaje FUERA DEL RANGO
DE AJUSTE aparece en pantalla
Si no aparece ningún mensaje y el
indicador 1 (alimentación) se
ilumina en verde o parpadea en
naranja
Si utiliza Windows 95/98 • Si ha sustituido un monitor antiguo por este, vuelva a conectar el antiguo y realice lo
Si utiliza un sistema Macintosh •
La imagen parpadea, se ondula,
oscila o aparece codificada
La imagen aparece borrosa
• Compruebe que el cable de alimentación est é correctamente conectado.
• Compruebe que el interruptor 1 (alimentación) esté en la posición de “activado”.
• Asegúrese de que el cable de señal de vídeo esté correct amente conectado y de que todos
los enchufes estén firmemente insertados en sus tomas (página 6).
• Compruebe que los terminal es del conector de entrada de vídeo HD15 no estén doblados
ni arrancados.
Problemas causados por el ordenador u otro equipo conectado
x
• Compruebe que la alimentación del ordenador esté activada.
• Compruebe que la tarjeta gráfica esté complet amente insertada en la ranura bus adecuada.
Problemas causados por el ordenador u otro equipo conectado
x
• El ordenador se encuentra en el modo de ahorro de energía. Pulse cualquier tecla del
teclado del ordenador.
• Compruebe que la alimentación del ordenador esté activada.
• Asegúrese de que la tarjeta gráfica esté completamente inserta da en la ranura bus
adecuada.
Problemas causados por el ordenador u otro equipo conectado
x
• Compruebe que el margen de frecuencia de vídeo se encuentre dentro del especificado
para el monitor. Si ha sustitu ido un monitor antiguo por es te, vu e lva a co nec ta r el anti gu o
y ajuste el margen de frecuencia de acuerdo con lo sigu iente.
Horizontal: 30 – 85 kHz
Vertical: 48 – 120 Hz
• Utilice la función de autodiagnóstico (página 16).
siguiente. Instale el disquete Windows Monitor Information Disk (página 7) y seleccione
este monitor (“CPD-E200”) entre los monitores de Sony en la pantalla de selecci ón de
éstos de Windows 95/98.
Compruebe que e l ad aptador Macintosh (no suministrado) y el cable de señales de ví deo estén
correctament e conectados
• Aísle y elimine las fuentes potenciales de campos eléctricos o magnéticos, como otros
monitores, impresoras láser, ventiladores eléctricos, lámparas fluorescentes o televisores.
• Aleje el monitor de líneas eléctricas o instale una protección magnética cerca del monitor.
• Enchufe el monitor en una to ma de CA diferente, preferiblemente de otro circuito.
• Gire el monitor 90° hacia la izquierda o la derecha.
Problemas causados por el ordenador u otro equipo conectado
x
• Consulte el manual de la tarjeta gráfica para obtener información sobre el ajuste adecuado
al monitor.
• Confirme que este monitor admite el modo gráfico (VESA, Macinto sh 16" Color, etc.) y
la frecuencia de la señal de entrada (Appendix). Aunque la frecuencia se encuentre dentro
del margen adecuado, ciertas t arjetas de vídeo pueden presentar un impulso de
sincronización demasiado estrecho para que el monitor se sincronice correctamente.
• Ajuste la frecuencia de barrido del ordenador (frecuencia vertical ) para que la imagen
presente la mejor calidad posible.
• Ajuste el brillo y el contraste (página 9).
• Desmagnetice el monitor* (página 11).
• Seleccione AJUSTE MUARE y ajuste el efecto de cancelación de muaré (página 11).
(página 6).
14
Page 43

Problema Compruebe lo siguiente
Aparecen imágenes fantasma
La imagen aparece descentrada o
con un tamaño incorrecto
Los bordes de la ima gen apare cen
curvos
Se aprecian patrone s ondulados o
elípticos (muaré)
El color no es uniforme
El blanco no parece blanco
Las letras y las líneas muestran
sombras rojas o azules en los
bordes
Los botones del monitor no
funcionan
Se oye un zumbido
inmediatamente después de
activar la alimentación
* Si es necesario aplicar un segundo ciclo de desmagnetización, deje que transcurran al menos 20 minutos antes de volver a aplicarlo para obtener el mejor
resultado posible. Es po sibl e que se oiga un zumbido, pero no es un fallo de funcionamiento.
• No utilice cables prolongadores de vídeo ni dispositivos de conmutación de vídeo.
• Compruebe que todos los enchufes estén firmemente insertado en sus tomas.
• Ajuste el tamaño (página 9) o el centrado (págin a 9). Ten ga en cuenta que ciertos modos
de vídeo no llenan la pantalla hasta los bordes.
• Ajuste la geometría (página 10) .
• Seleccione AJUSTE MUARE y ajuste el efecto de cancelación de muaré (página 11).
Problemas causados por el ordenador u otro equipo conectado
x
• Cambie el patrón de escritorio.
• Desmagnetice el monitor* (página 11). Si coloca equipos que generen c ampos
magnéticos, como altavoces, cerca del monitor, o si cambia la orientación del monitor, el
color puede perder uniformidad.
• Ajuste la temperatura del color (página 10).
• Ajuste la convergencia (página 10).
• Si la función de bloqueo de los controles está ajustada en SI, ajústela en NO (página11).
• Se trata del sonido producido por el ciclo de desmagnetización automática. Al activar la
alimentación, el monitor se desmagnetiza automáticamente durante cinco segun dos.
Visualización del nombre, número de serie y
fecha de fabricación de este monitor.
Mientras el monitor recibe una señal de vídeo, pulse y mantenga
pulsado el centro del botón de control durante más de cinco
segundos para que aparezca el cuadro de información de este
monitor.
MENU
Ejemplo
INFORMACI ON
MODEL : CPD - E 200
SER NO:1234567
b
MANUF ACTURED: 1 9 9
9-52
Si el problema persiste, póngase en contacto con un proveedor
Sony autorizado y proporciónele la siguiente información.
• Nombre del modelo: CPD-E200
• Número de serie
• Nombre y especifi cacione s del ord enador y de la t arjet a gráfic a.
ES
15
Page 44

Función de autodiagnóstico
Este monitor dispone de una fu nción de autodiag nóstico. Si existe
algún problema con el monitor o con el ordenador, la pantalla se
mostrará en blanco y el indicador 1 (alimentación) se iluminará
en verde o parpadeará en naranja. Si el indicador 1
(alimentación) está iluminado en naranja, significa que el
ordenador se encuentra en el modo de ahorro de energía. Pulse
cualquier tecla del teclad o.
RESET
Si el indicador 1 (alimentación) está iluminado en
verde
1
Desconecte el cable de entrada de vídeo o apague
el ordenador conectado.
2
Pulse el botón 1 (alimentación) dos veces para
apagar el monitor y, a continuación, enciéndalo.
3
Mantenga desplazado el botón de control ,
durante 2 segundos antes de que el monitor entre
en el modo de ahorro de energía.
Si aparecen las cuatro barras de color (bl anco, rojo, verde, azul),
significa que el monitor funciona correctamente. Vuelva a
conectar el cable de entrada de vídeo y compruebe el estado del
ordenador.
MENU
Indicador 1 (alimentación)
MENU
Especificaciones
TRC paso de la rejilla de apertura de
0,24 mm (central)
17 pulgadas, medida diagonal
90 grados de deflexión
FD Trinitron
Tamaño de imagen vis ualizable
Aprox. 327 × 243 mm (an/al)
3
/4 × 9 5/8 pulgadas)
(14
Imagen de visualización de 16,0"
Resolución
Máxima Horizontal: 1600 puntos
Vertical: 1200 líneas
Recomendada Horizontal: 1024 puntos
Vertical: 768 líneas
Área de imagen estándar Aprox. 312 × 234 mm ( a n/al)
Frecuencia de deflexión* Horizontal: 30 – 85 kHz
Corriente/tensión de entrada de CA
Consumo de energí a 120 W
Dimensiones Aprox. 404 × 413,5 × 419,5 mm
Peso Aprox. 20 kg
Plug and Play DDC1/DDC2B/DDC2Bi
Accesorios suministrados Consulte la página 6
* Condición d e sinc roni zaci ón ho rizon tal y vertic al re come ndada
• La anchura de sincronización horizontal debe ser superior a
1,0 µseg.
• La anchura de supresión hor izontal debe ser supe rior a
3,0 µseg.
• La anchura de supresión vertical debe ser superior a
500 µseg.
Diseño y especificaciones sujetos a cambios sin previo aviso.
3
/8 × 9 1/4 pulgadas)
(12
Vertical: 48 – 120 Hz
100 a 240 V, 50 – 60 Hz, Máx. 1,7 A
(an/al/prf)
(16 × 16
3
/8 × 16 5/8 pulgadas)
Si las barras de color no aparecen, sig ni fica que hay un fallo
potencial del monitor. Info rme al prov e ed or Sony au to rizad o del
estado del monitor.
Si el indicador 1 (alimentación) parpadea en
naranja
Pulse el botón 1 (alimentación) dos ve ces para apagar
el monitor y, a continuación, encenderlo.
Si el indicador 1 (alimentación) se ilumina en verde, significa
que el monitor funciona correctamente.
Si el indicador 1 (alimentación) sigue parpadeando, significa que
hay un fallo potencial del monitor. Cuente el número de segundos
entre los parpadeos en naranj a del indicador 1 (alimentación) e
informe al proveedor Sony autorizado sobre el estado del monitor.
Asegúrese de anotar el nombre del modelo y el número de serie
de dicho monitor. Tome nota también del fabricante y del modelo
del ordenador y de la tarjeta de vídeo.
16
Page 45

Appendix
Preset mode timing table
No. Resolution
(dots × lines)
1640 × 480 31.5 kHz 60 Hz VGA-G
2640 × 480 43.3 kHz 85 Hz VESA
3720 × 400 31.5 kHz 70 Hz VGA-Text
4800 × 600 53.7 kHz 85 Hz VESA
5832 × 624 49.7 kHz 75 Hz Macintosh 16"
6 1024 × 768 60.0 kHz 75 Hz VESA
7 1024 × 768 68.7 kHz 85 Hz VESA
8 1280 × 1024 80.0 kHz 75 Hz VESA
Horizontal
Frequency
Vertical
Frequency
Graphics
Mode
Color
i
Page 46

ii
Page 47

iii
Page 48

Sony Corporation Printed in U.S.A
 Loading...