

Page 1

Trinitmn" Color
Computer Display
3-864-414-11 (1)
Operating Instructions
Mode d'emploi
Manual de instrucciones
__________
E
CPD-220GS
© 1998 by Sony Corporation
Page 2

Owner's Record
The model and serial numbers are located at the rear of the unit.
Record the serial number in the space provided below. Refer to
these numbers whenever you call upon your dealer regarding this
product.
Model No,
Serial No.
WARNING
To reduce fire or shock hazard, do not expose the unit to rain or moisture.
Dangerously high voltages are present inside the unit. Do not open the cabinet. Refer servicing to qualified personnel only.
FCC Notice
This equipment has been tested and found to comply with the
limits for a Class B digital device, pursuant to Part 15 of the FCC
Rules. These limits are designed to provide reasonable protection
against harmful interference in a residential installation. This
equipment generates, uses, and can radiate radio frequency
energy cmd, if not installed and used in accordance with the
instructions, may cause harmful interference to radio
communications. However, there is no guarantee that
interference will not occur in a particular installation. If this
equipment does cause harmful interference to radio or television
reception, which can be determined by turning the equipment
off and on, the user is encouraged to try to correct the
interference by one or more of the following measures:
- Reorient or relocate the receiving antenna.
- Increase the separation between the equipment and receiver.
- Connect the equipment into an outlet on a circuit different
from that to which the receiver is connected.
- Consult the dealer or an experienced radio/TV technician for help.
Declaration of Conforrriity
According to 47CFR Parts 2 and 15 for
Class B Personal Computer^, and Peripherals
Trade Name;
Model No.;
Resp>onsible Party:
Address;
Telephone No.: -
Sony
CPD-220GS
Sony Electronics Inc.
1 Sony Drive, Park Ridge,
NJ. 07656
201-930-6972
Hinweise
• Aus ergonomischen Gründen wird empfohlen, die
Grundfarbe Blau nicht auf dunklem Untergrund zu
verwenden (schlechte Erkennbarkeit, Augenbelastung bei zu
geringem Zeichenkontrast).
• Aus ergonomischen Gründen (flimmern) sollten nur
Darstellungen bei Vertikalfrequenzen ab 70 Hz (ohne
Zeilensprung) verwendet werden.
• Die Konvergenz des Bildes kann sich auf Grund des
Magnetfeldes am Ort der Aufstellung aus der korrekten
Grundeinstellung verändern. Zur Korrektur empfiehlt es sich
deshalb, die Regler an der Frontseite für Konvergenz so
einzustellen, daß die getrennt sichtbaren Farblinien für Rot,
Grün und Blau bei z.B. der Darstellung eines Buchstabens zur
Deckung (Konvergenz) gelangen.
Siehe hierzu auch die Erklärungen zu Konvergenz.
NOTICE
This notice is applicable for USA/Canada only.
If shipped to USA/Canada, install only a UL LISTED/CSA
LABELLED power supply cord meeting the following
specifications:
SPECIFICATIONS
Plug Type Nema-Plug 5-15p
Cord Type SVT or SJT, minimum 3 X 18 AWG
Length Maximum 15 feet
Rating Minimum 7 A, 125 V
NOTICE
Cette notice s'applique aux Etats-Unis et au Canada
urüquement.
Si cet appareil est exporté aux Etats-Unis ou au Canada,
utiliser le cordon d'alimentation portant la mention UL
LIS'TED/CSA LABELLED et remplissant les conditions
suivantes;
SPECIFICATIONS
Type de fiche
Cordon
Longueur
Tension
Fiche Nema 5-15 broches
Type SVT ou SJT, minimum 3 x 18 AWG
Maximum 15 pieds
Minimum 7 A, 125 V
rnniili' —'
tí
Ululili > ~
1 r3CT0a%^
---------------
As an ENERGY STAR Partner, Sony
Corporation has determined that this
product meets the ENERGY STAR
guidelines for energy efficiency.
-
This device complies with Part 15 of the FCC Rules. Each product
marketed, is identical to the representative unit tested and found
to be compliant with the standards. Records maintained continue
to reflect the equipment being produced can be expected to be
within the variation accepted, due to quantity production and
testing on a statistical basis. Operation is subject to the following
two conditions; (1 )This device may not cause harmful interference,
and (2) this device must accept any interference received, including
interference that may cause undesired operation.
IMPORTADOR (Para Mexico unicamente/For Mexico only)
Sony Electrónicos de Mexico, S.A. de C.V.
Henry Ford No. 29
Fraccionamiento San Nicolas, Tlalnepantla
Estado de Mexico, CP54030
Tel.: 321-1000
R.F.C. SEM-941001-BJA
You are cautioned that any changes or modifications not expressly
approved in this manual could void your authority to operate this
equipment.
^ ? IÍ iSCi C ¿1 D ^ "S'o
The monitor fulfills the TCO-95
recommendations on emissions if the
monitor has this marking on the back
cover.
IMPORTANTE
Para prevenir cualquier mal funcionamiento y evitar daños,
por favor, lea detalladamente este manual de instrucciones
antes de conectar y operar este equipo.
Page 3

Table of contents
Getting Started
Precautions
Identifying Parts and Controls.........................................................................................5
Setup.................................................................................................................................5
Selecting the On-screen Display Language.....................................................................5
Connecting Your Monitor's Speaker...............................................................................7
Customizing Your Monitor
Adjusting the Picture Brightness and Contrast................................................................8
Introducing the On-screen Display System.....................................................................8
Using the CENTER On-screen Display
Using the SIZE On-screen Display
Using the GEOM (Geometry) On-screen Display
Using the ZOOM On-screen Display.............................................................................11
Using the COLOR On-screen Display...........................................................................11
Using the SCREEN On-screen Display..........................................................................12
Using the OPTION On-screen Display
Resetting the Adjustments..............................................................................................15
Selecting the Graphic Picture Enhancement (GPE) Mode.............................................16
........
...
...........................................................................................................4
..........................................................................
.................................................................................
.........................................................
..........................................................................
9
9
10
13
Technical Features
Preset and User Modes.................................................................................................. 16
"Displaying the Monitor's Information..........................................................................17
Power Saving Function..................................................................................................17
Damper Wires................................................................................................................17
Additional Information
Warning Messages.........................................................................................................18
Troubleshooting.............................................................................................................18
Self-diagnosis Function.................................................................................................20
Specifications.................................................................................................................20
Macintosh is a trademark licensed to Apple Computer, Inc., registered
in the U.S.A. and other countries.
Windows* is a registered trademark of Microsoft Corporation in the
United States and other countries.
IBM PC/AT and VGA are registered trademarks of International
Business Machines Corporation of the U.S.A.
VESA is a trademark of Video Electronics Standard Association.
All other product names mentioned herein may be the trademarks or
registered trademarks of their respective companies.
Furthermore, and ''®" are not mentioned in each case in this
manual
Page 4
Getting Started
Precautions
Prevent internal heat build-up by allowing adequate air
circulation. Do not place the monitor on surfaces (rugs,
blairkets, etc.) or near materials (curtains, draperies) that
may block the ventilation holes.
Do not install the monitor near heat sources such as
radiators or air ducts, or in a place subject to direct
sunlight, excessive dust, mechanical vibration or shock.
Do not place the monitor near equipment which generates
magnetism, such as a transformer or high voltage power
lines.
Clean the cabinet, panel and controls with a soft cloth
lightly moistened with a mild detergent solution. Do not
use any type of abrasive pad, scouring powder or solvent,
such as alcohol or benzine.
Do not rub, touch, or tap the surface of the screen with
sharp or abrasive items such as a ballpoint pen or
screwdriver. This type of contact may result in a scratched
picture tube.
Use an appropriate power cord for your local power
supply.
For the customers in the U.S.A.
If you do not use the appropriate cord, this monitor will
not conform to mandatory FCC standards.
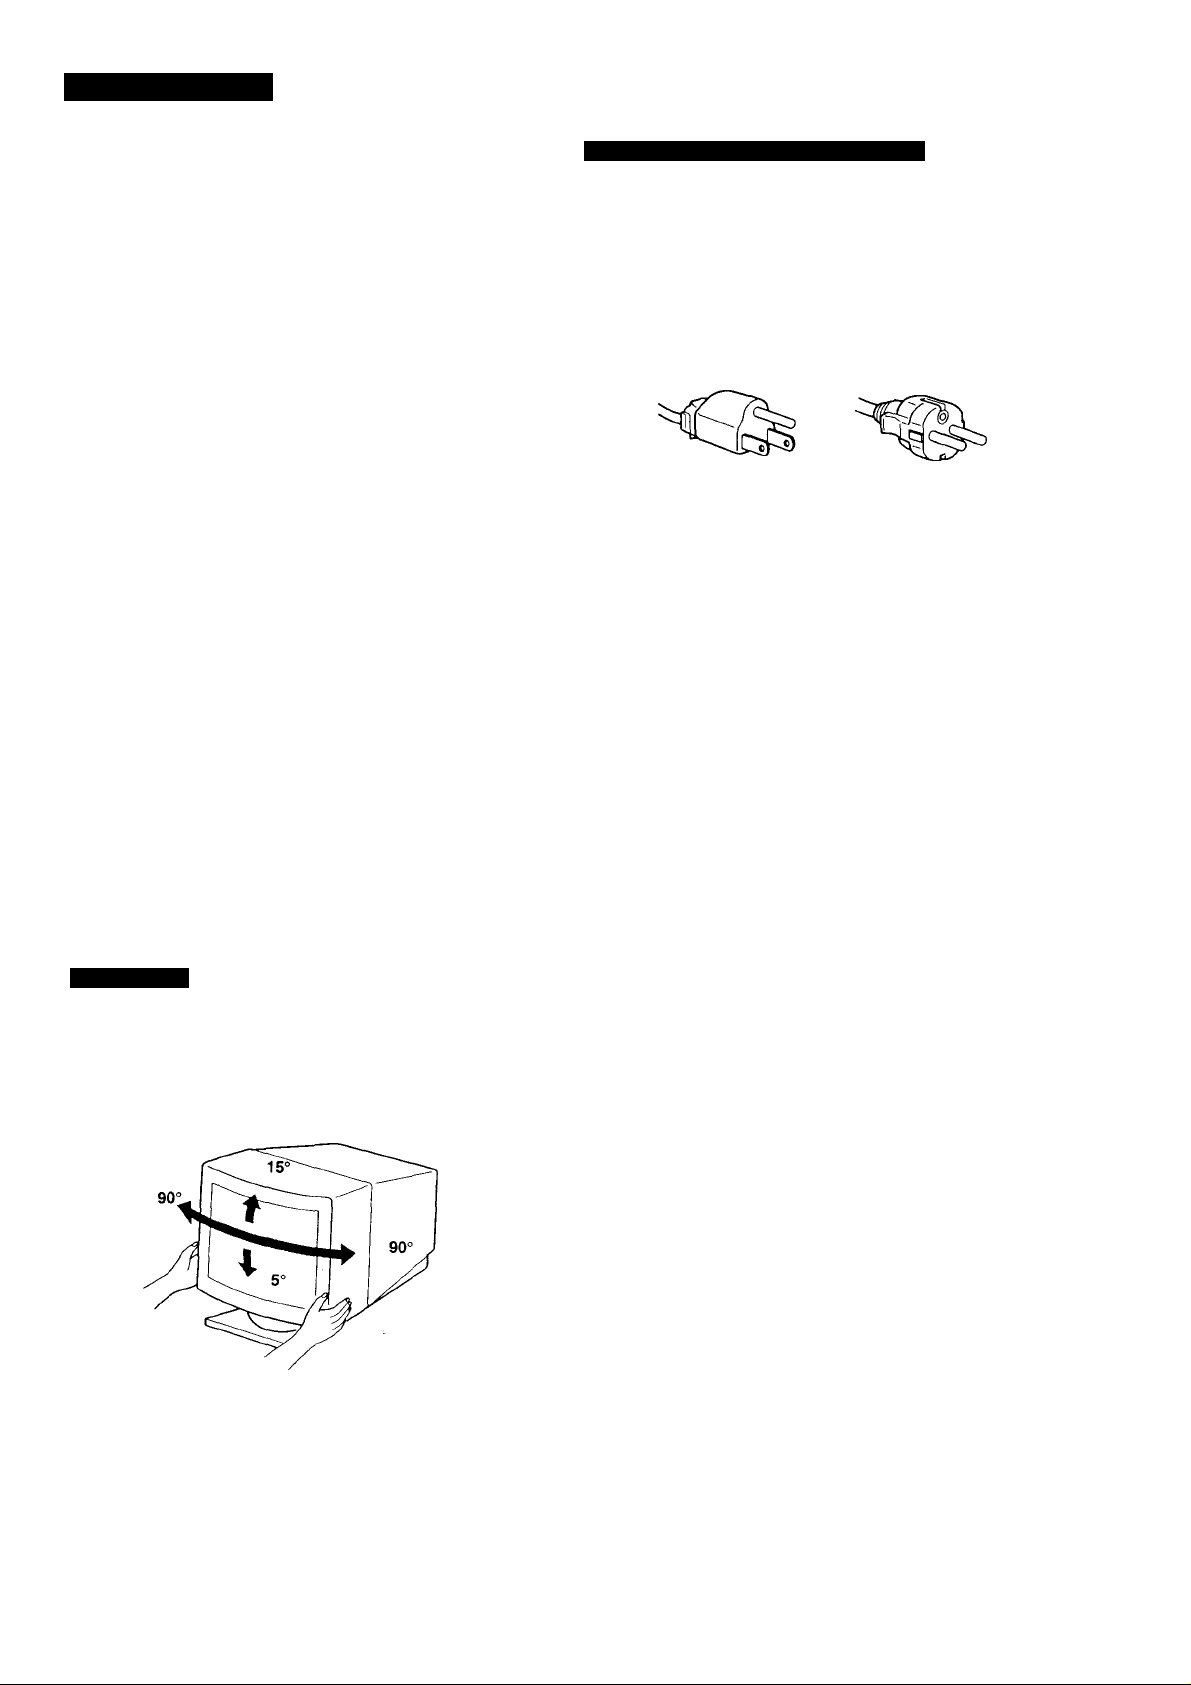
Examples of plug types:
for 100 to 120 VAC
• Before disconnecting the power cord, wait at least 30
seconds after turning off the power to allow the stahc
electricity on the CRT display surface to discharge.
• After the power has been turned on, the CRT is
demagnetized (degaussed) for about 5 seconds. This
generates a strong magnetic field around the metal frame,
which may affect the data stored on magnetic tapes and
disks near the bezel. Place magnetic recording equipment,
tapes and disks away from this moiutor.
The outlet should be installed near the equipment
and be easily accessible.
for 200 to 240 V AC
When you transport this monitor for repair or shipment, use
the original carton and packing materials.
With the tilt-swivel, this monitor can be adjusted to the
desired angle within 180° horizontally cind 20° vertically.
To turn the monitor vertically and horizontally, hold it at
the bottom with both hands as illustrated below.
Page 5
Identifying Parts and Controls
See the pages in parentheses for further details.
Front
Getting Started
MUTING button (page 7)
m
Mutes the sound.
RESET button (page 15)
Resets the adjustments to the factory settings.
GPE button (page 16)
Selects the Graphic Picture Enhancement (GPE) mode.
MENU button (pages 7 -15, 17)
a
Displays the MENU OSD.
3 (contrast) (◄"/■►) buttons (pages 7-15,
20)
Adjust the contrast.
Function as the (•^/^) buttons when adjusting other
•items. ■
-d- (brightness) (•f/f) buttons (pages 7 -
15)
Adjust the picture brightness.
Function as the (■f / ■♦) buttons when adjusting other
items.
(!) (power) switch and indicator (pages 17,
m
20)
Turns the monitor on or off.
The indicator lights up in green when the monitor is
turned on, and lights up in orange when the monitor is
in power saving mode.
AC IN connector
Provides AC power to the monitor.
Video input connector (HD15)
Inputs RGB video signals and SYNC signals.
[iS AUDIO IN jack
Inputs audio signals when cormected to the computer's
audio out jack.”
[ll] 0 Headphones jack
Outputs audio signals to headphones (not supplied).
Page 6

etting Started
Setup
Before using this monitor, check that the following items are
included in your carton:
• Monitor (1)
• Power cord (1)
• Macintosh adapter (1) »
• Windows® Monitor Irdormation Disk (1)
» Warranty card (1)
• These operating instructiorrs (1)
• Audio nriniplug cord (1)
This monitor works with any IBM or compatible system
equipped with VGA or greater graphics capability.
Although this monitor works with other platforms running
at horizontal frequencies between 30 and 85 kHz including
Macintosh and Power Macintosh systems, a cable adapter is
required. Please consult your dealer for advice on which
adapter is suitable for your needs.
About the supplied Macintosh adapter
The supplied Macintosh adapter is compatible with Macintosh LC,
Performa, Quadra and Power Macintosh series computers.
Macintosh II series and some older versions of Power Book models
may need an adapter with micro switches (not supplied).
Note
Do not short the pins of the video signal cable.
With the monitor switched off, connect one end of the
power cord to the morutor and the other end to a power
outlet.
to a power outlet to AC IN
teli w
Connecting to an IBM PC/AT, Macintosh or
compatible computer
With the computer switched off, connect the video signal
cable to the computer's video output.
Power cord (supplied)
The installation of your monitor is complete.
Note
If "OUT OF SCAN RANGE" or "NO INPUT SIGNAL" appears on
the screen, see "Warning Messages" on page 18.
For customers using Windows* 95/98
Install the new model information from the "Windows* Monitor
Information Disk" into your PC.
Selecting the On-screen Display Language
If you need to change the OSD language, see "Selecting the
on-screen display language" on page 15.
The default setting is English.
Page 7

Connecting Your Monitor's
Speaker
You can listen to music, sounds, and other audio files using
the speaker in your monitor.
Connect the AUDIO IN jack to the audio out jack of your
computer's sound card using the miniplug cord (supplied).
Getting Started
3 Press the buttons to adjust the volume.
The OSD automatically disappears after about 30 seconds.
To close the OSD, press the MENU button again.
To reset, press the RESET button while the OSD is on.
Press the MUTING button.
No sound comes from the speaker.
The ii8( mark appears at the bottom of the screen.
MUTING
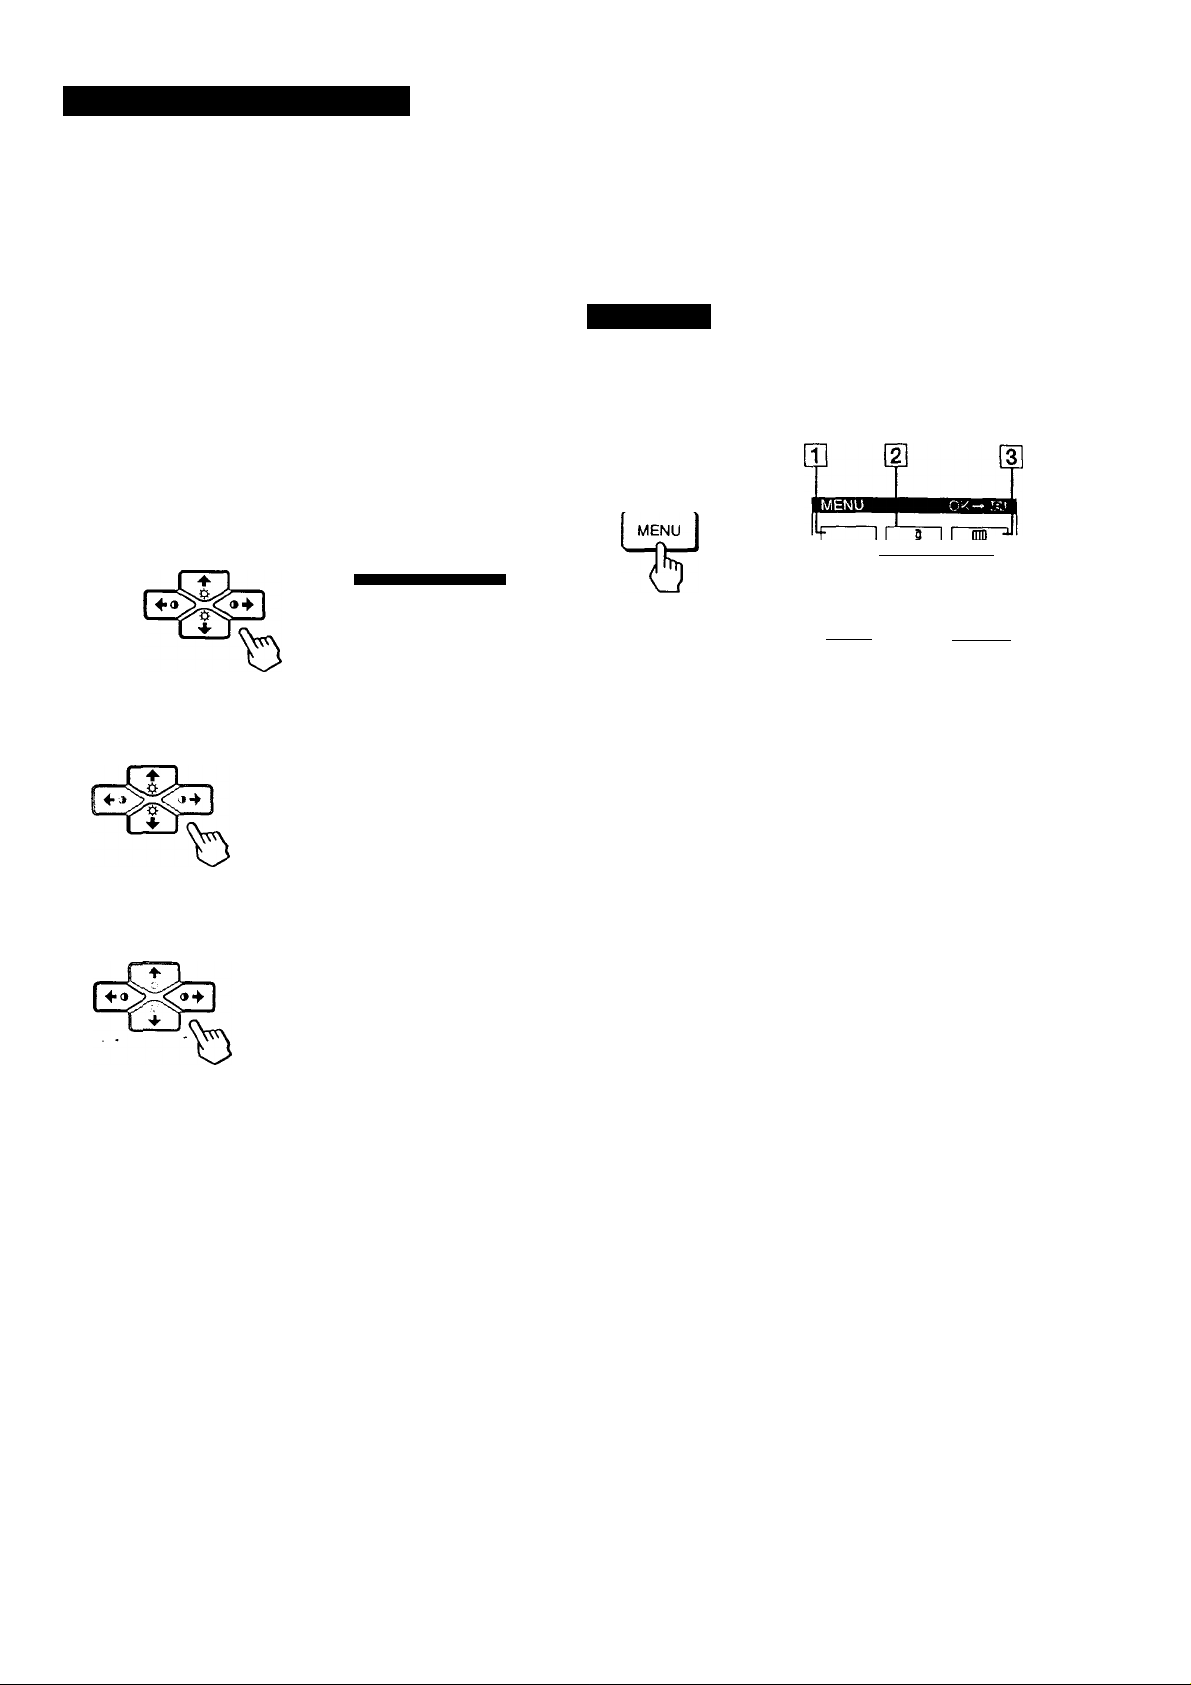
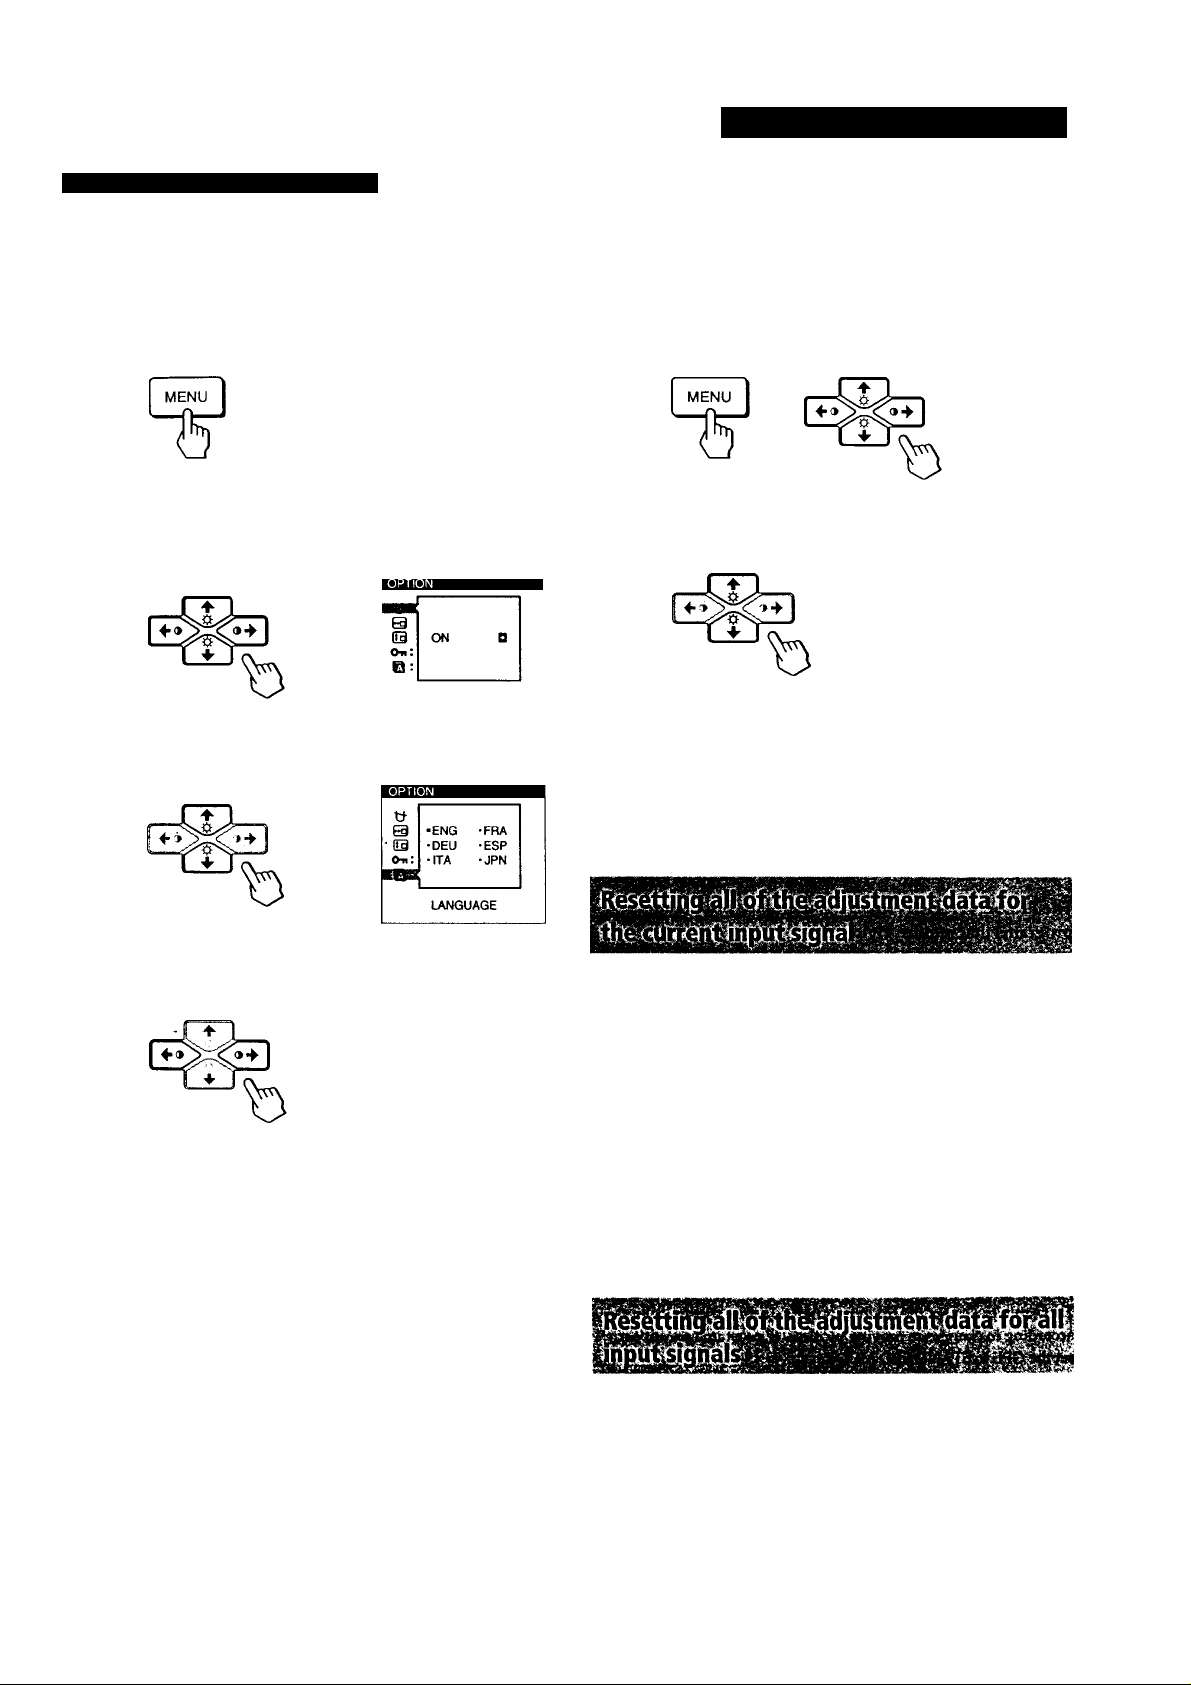
1 Press the MENU button.
The MENU OSD appears.
B
SIZE
L ™ J
SCREEN
SS
ZOOM
a
OPTION
I ° I
COLORIce^erI
n-
GEOM
<3
SOONQ
2 Press the and buttons to select
"<l SOUND," and press the MENU button again.
The SOUND OSD appears.
D
26
D
Note
While muting the sound, the mark appears in the SOUND OSD
instead of the ^ mark. Increase the volume to cancel the ijX mark
and activate the speaker.
To cancel, press the MUTING button again.
You can listen to the audio signals from your computer
using headphones (not supplied). The speaker turns off
when headphones are connected to the headphones jack.
Adjust the volume using the SOUND OSD.
Note
If the volume from the speaker was too low, you can adjust the
input level (average of 500 mv) by the computer.
7
Page 8
Customizing Your Monitor
Before adjusting
• Connect the monitor and the computer, and turn them on.
• Select " B (LANGUAGE)" in the OPTION OSD, then
select "ENG" (English) (see page 15).
Introducing the On-screen Display System
Most adjustments are made using the MENU OSD.
Adjusting the Picture Brightness and Contrast
Once the setting is adjusted, it will be stored in memory for
all input signals received.
1 Press the O- (brightness) 4/4^ or G (contrast)
buttons.
The BRIGHTNESS/CONTRAST OSD appears.
BRIGHTNESS/CONTRAST
□
□ 26 0 D 26 a
2 For brightness adjustment
Press the buttons.
't'... for more brightness
for less brightness
For contrast adjustment
Press the ^ buttons.
MENU OSD
Press the MENU button to display the MENU OSD.
This MENU OSD contains links to the other OSDs described
below.
□ ' C3> _
ICQLQRl CENTEPi bCREEtJ
{4]
. «1
m
SOUND
Horizontal Vertical
Frequency* Frequency*
e
lOPTION
.SIZE.
60.0kHz/ 85Hz ^
e -1
[3 S COLOR
Displays the COLOR OSD for adjusting the color
temperature.
[H CENTER
Displays the CENTER OSD for adjusting the centering
of the picture.
. for more contrast
,. for less contrast
The OSD automatically disappears after about 3 seconds.
To reset, press the RESET button while the OSD is on. The
brightness and contrast are both reset to the factory settings.
8
[3]
(HD
SCREEN
Displays the SCREEN OSD for adjusting the vertical
and horizontal convergence, etc.
0 ^ ZOOM
Displays the ZOOM OSD for enlarging and reducing
the picture. ‘
[5] e OPTION
Displays the OPTION OSD for adjusting the OSD
position, degaussing the screen, selecting the OSD
language, etc.
[g B ■ SIZE
Displays the SIZE OSD for adjusting the picture size.
[7] <1 SOUND
Displays the SOUND OSD for adjusting the sound.
[g U GEOM
Displays the GEOMETRY OSD for adjusting the picture
rotation and pincushion, etc.
[g EXIT
Closes the MENU OSD.
* The horizontal and vertical frequencies for the received input
signal appear beneath the MENU OSD.
Page 9

Customizing Your Monitor
Using the CENTER On-screen Display
The CENTER settings allow you to adjust the centering of
the picture.
Once the setting is adjusted, it will be stored in meitiDry for
the current input signal.
1 Press the MENU button.
The MENU OSD appears.
2 Press the and buttons to select
" Q] CENTER," and press the MENU button again.
The CENTER OSD appears.
o
:\
a 26 □
Using the SIZE On-screen Display
The SIZE settings allow you to adjust the size of the picture.
Once the setting is adjusted, it will be stored in memory for
the current input signal.
1 Press the MENU button.
The MENU OSD appears.
2 Press the and buttons to select
" Q SIZE," and press the MENU button again.
The SIZE OSD appears.
D 26 □
3 For horizontal adjustment
Press the buttons.
3 For horizontal adjustment
Press the 9^buttons.
■... tojnove.the picture right
'... to move the picture left
For vertical adjustment
Press the buttons.
■^ ... to move the picture up
■^ ... to move the picture down
The OSD automatically disappears after about 30 seconds.
To close the OSD, press the MENU button again.
To reset, press the RESET button while the OSD is on.
The horizontal and vertical centerings are both reset to the
factory settings.
... to increase picture size
'... to decrease picture size
For vertical adjustment
Press the buttons.
•^ ... to increase picture size
-^ ... to decrease picture size
The OSD automatically disappears after about 30 seconds.
To close the OSD, press the MENU button again.
To reset, press the RESET button while the OSD is on.
The horizontal and vertical sizes are both reset to the factory
settings.
Page 10
Customizing Your Monitor
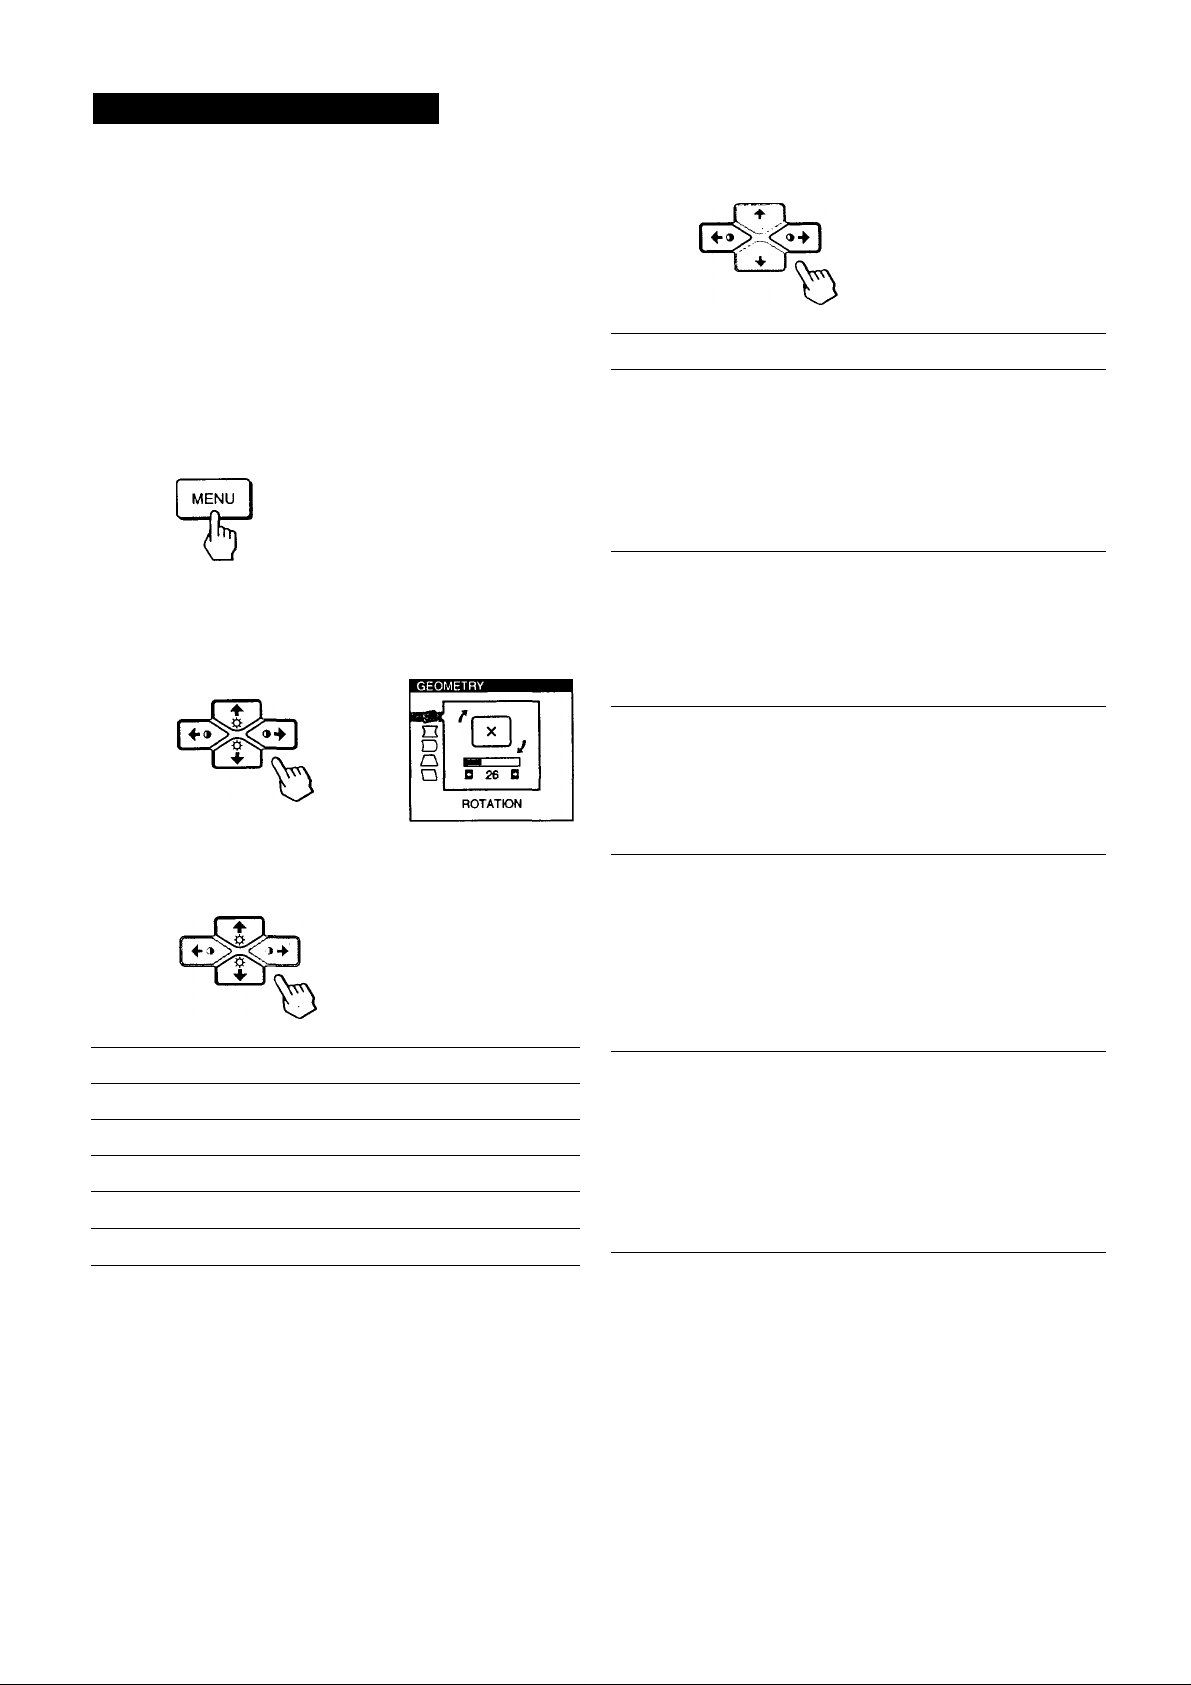
Using the GEOM (Geometry) On
screen Display
The GEOM (geometry) settings allow you to adjust the
shape and orientation of the picture.
Once the rotation is adjusted, it will be storeddn memory for
all input signals received. All other adjustments will be
stored in memory for the current input signal.
1 Press the MENU button.
The MENU OSD appears.
4 Press the 9^/"^ buttons to adjust the settings.
For
O ROTATION
Press
... to rotate the picture clockwise
'E,
... to rotate the picture counterclockwise
2 Press the iii-4/^ and buttons to select
“ □ GEOM," and press the MENU button again.
The GEOMETRY OSD appears.
3 Press the buttons to select the item you want
to adjust.
Select
ROTATION
O
PINCUSHION
n
PIN BALANCE adjust the picture side balance
D
KEYSTONE adjust the picture width
O
To
adjust the picture rotation
adjust the picture sides
O PINCUSHION
D
PIN BALANCE
r\ KEYSTONE
O KEY BALANCE
“^ ... to expand the picture sides
*-0-*
... to contract the picture sides
^ ... to move the picture sides to the right
•4“ ... to move the picture sides to the left
-a-
"4-... to increase the picture width at the
top
^ ... to decrease the picture width at the
top
^ ... to move the top of the picture to
the right
to move the top of the picture to
the' left
KEY BALANCE adjust the picture shape balance
10
The OSD automatically disappears after about 30 seconds.
To close the OSD, press the MENU button again.
To reset, press the RESET button while the OSD is on.
The selected item is reset to the factory setting.
Page 11
Customizing Your Monitor
Using the ZOOM On-screen
Display
The ZOOM settings allow you to enlarge or reduce the
picture.
Once the setting is adjusted, it will be stored in meinory for
the current input signal.
1 Press the MENU button.
The MENU OSD appears.
2 Press the and buttons to select
" ^ ZOOM,” and press the MENU button again.
The ZOOM OSD appears.
&■
□ 26
□ 73
Using the COLOR On-screen Display
You can change the monitor's color temperature. For
example, you can change the colors of a picture on the
screen to match the actual colors of the printed picture.
Once the setting is adjusted, it will be stored in memory for
all input signals received.
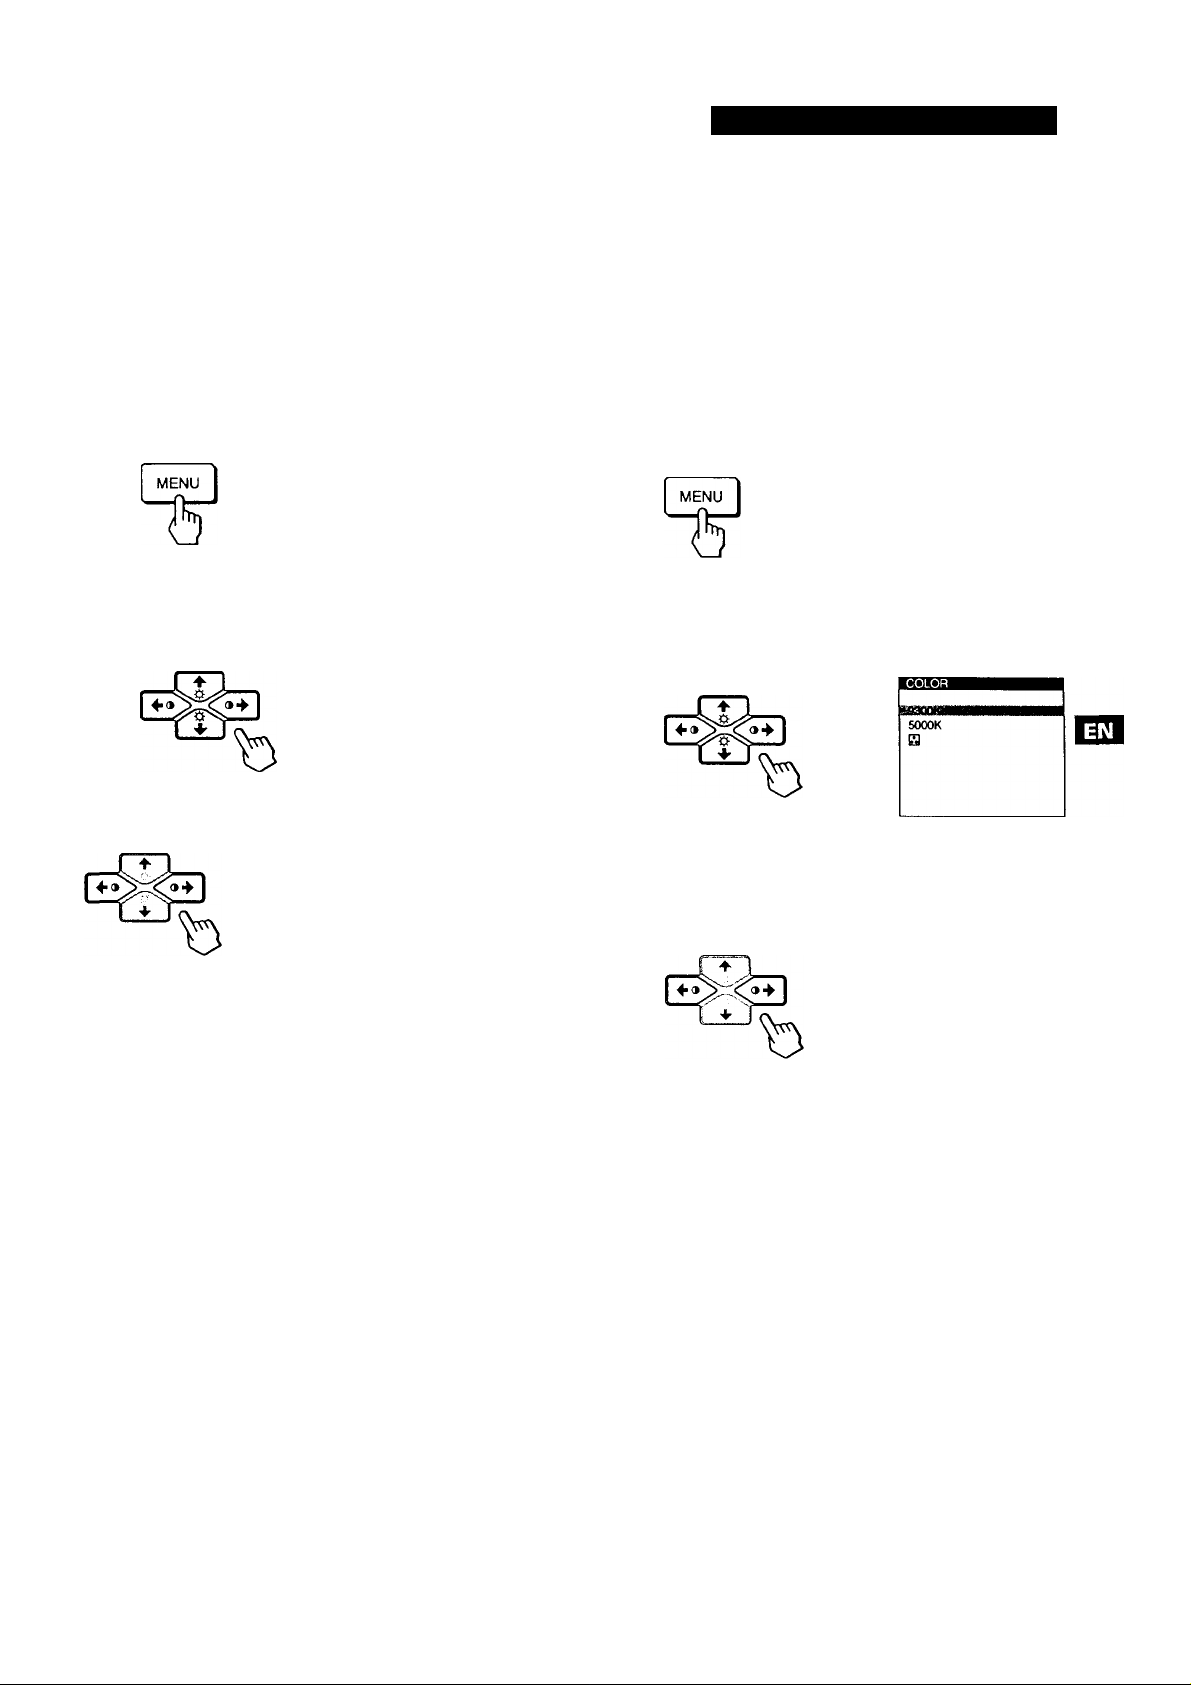
1 Press the MENU button.
The MENU OSD appears.
2 Press the ICi 'f/♦ and buttons to select
COLOR,” and press the MENU button again.
The COLOR OSD appears.
3 Press the 3>“/^buttons to adjust the picture zoom.
... to enlarge the picture
'... to reduce the picture
The OSD automatically disappears after about 30 seconds.
To close the OSD, press the MENU button again.
To reset, press the RESET button while the OSD is on.
Note
The picture zoom adjustment will stop as soon as either the
horizontal or vertical size reaches its maximum or minimum value.
If you are using Graphic Picture Enhancement (GPE)
If you are in one of the GPE modes, the following
COLOR OSD appears when " @ COLOR" is selected.
[£
□
□ 26 □
This OSD allows you to reduce the color temperature
from 11,OOOK to 9,300K. Press the buttons to
adjust the color temperature.
For more information on using GPE, see "Selecting the
Graphic Picture Enhancement (GPE) Mode" on page 16.
(continued)
11
Page 12
Customizing Your Monitor
3 Press the buttons to select the color
temperature.
There are two color temperature modes in the OSD.
The preset adjustments are 9,300K and 5,000K.
Using the SCREEN On-screen Display
Adjust convergence settings to eliminate red or blue
shadows that may appear around objects on the screen.
Adjust the CANCEL MOIRE function to eliminate wavy or
elliptical lines that may appear on the screen.
Once the setting is adjusted, it will be stored in memory for
all input signals received.
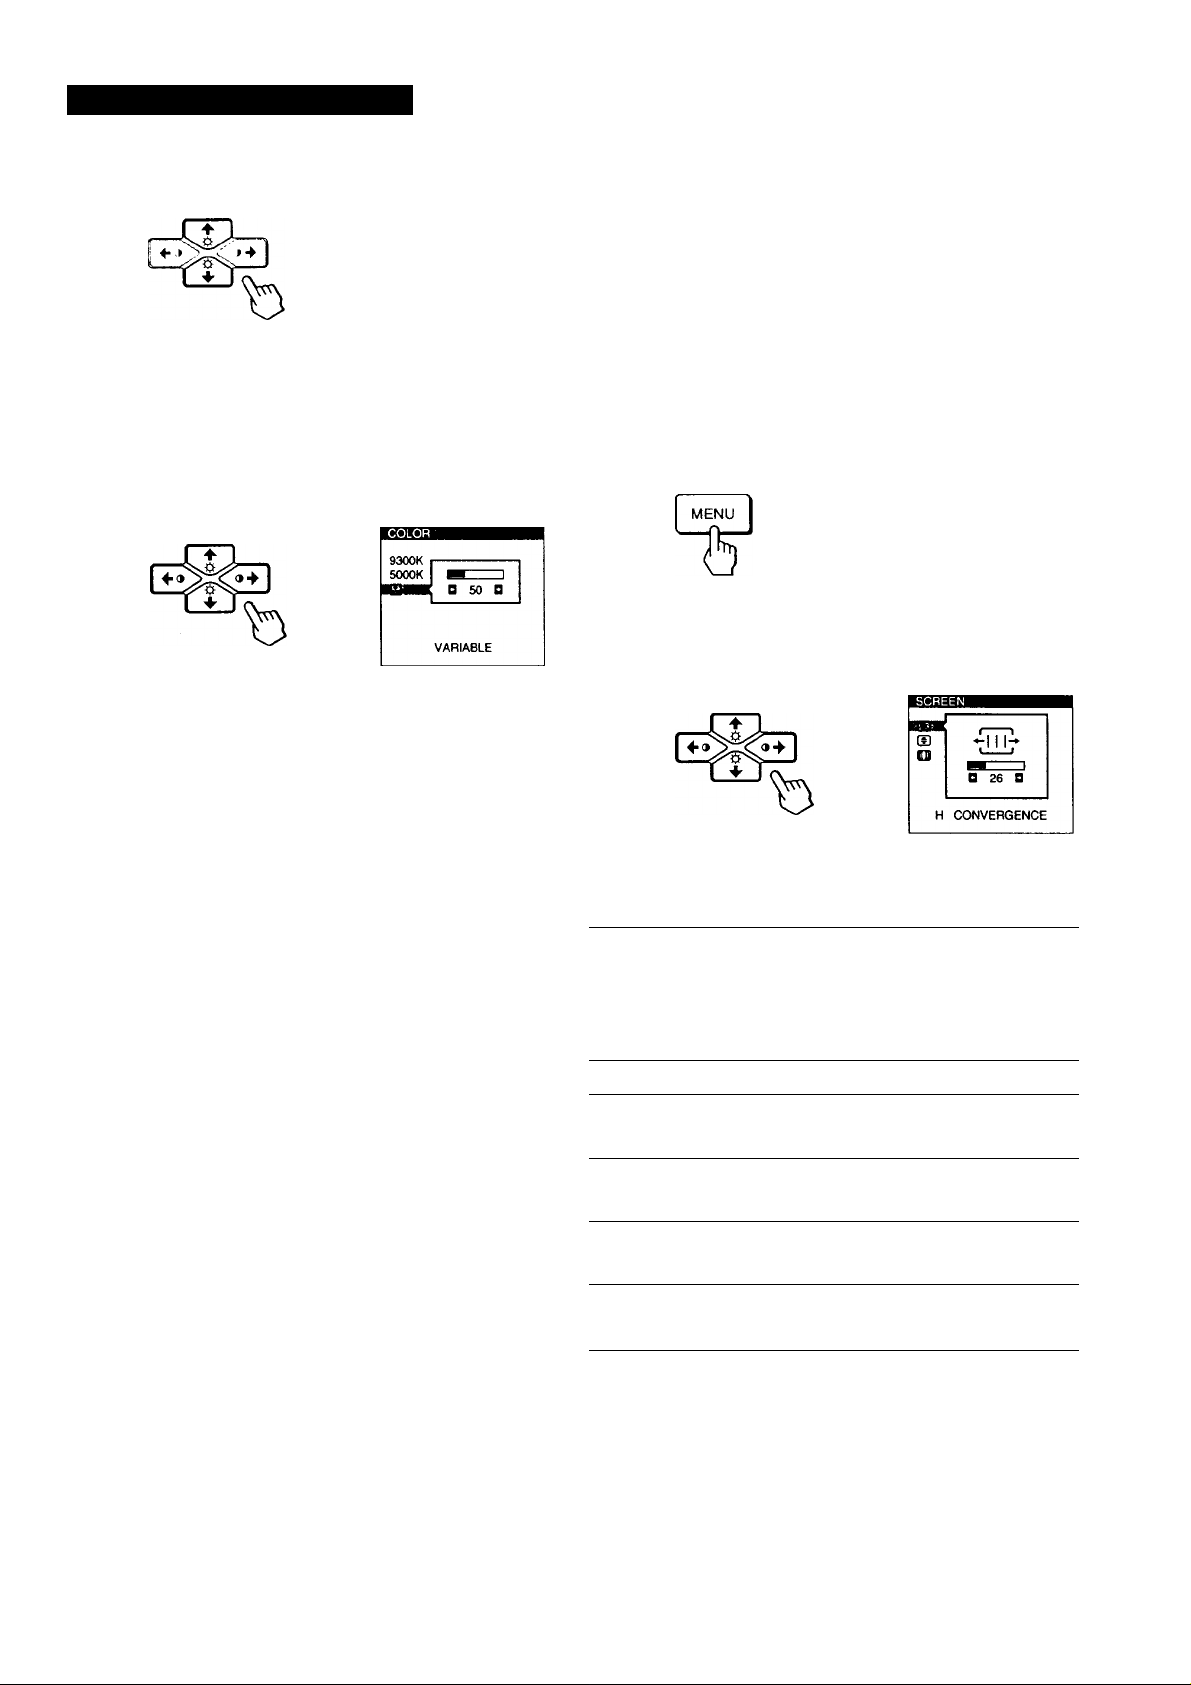
Selecting your own color temperature between
9.300K and 5.000K
Press the /1 buttons to select " g] (VARIABLE)"
and adjust by pressing the ^ buttons.
■♦•... for a higher temperature (bluish)
•^ ... for a lower temperature (reddish)
The OSD automatically disappears after about 30 seconds.
To close the OSD, press the MENU button again.
To reset, press the RESET button while the OSD is on. The
selected color temperature is reset to the factory settings.
1 Press the MENU button.
The MENU OSD appears.
2 Press the and /-♦ buttons to select
- (UD SCREEN,” and press the MENU button again.
The SCREEN OSD appears.
3 Press the buttons to select the item you want
to adjust.
12
Select To
adjust the hqrizontal convergence
H CONVERGENCE
CD
V CONVERGENCE
lol
CANCEL MOIRE
•JOB- *
MOIRE ADJUST
‘ CANCEL MOIRE must be "ON" for " HB- (MOIRE ADJUST)"
to appear on the screen.
adjust the vertical convergence
eliminate elliptical or wavy lines on
the screen
adjust the degree of moire
cancellation
(continued)
Page 13
4 Press the buttons to adjust the settings.
Customizing Your Monitor
Using the OPTION On-screen Display
The OPTION OSD allows you to manually degauss the
screen and adjust settings such as the OSD position and
OSD language. It also allows you to lock the controls.
EH
H CONVERGENCE
m
V CONVERGENCE
CANCEL MOIRE
s-
MOIRE ADJUST
■. .. to shift red shadows to the right
and blue shadows to the left
'to shift red shadows to the left
and blue shadows to the right
-TiTr
■... to shift red shadows up and blue
shadows down
. to shift red shadows down and
blue shadows up
. to turn CANCEL MOIRE "ON"
. to turn CANCEL MOIRE "OFF"
. to increase the moire cancellation
effect
The monitor screen is automatically degaussed
(demagnetized) when the power is turned on.
You can also manually degauss the monitor.
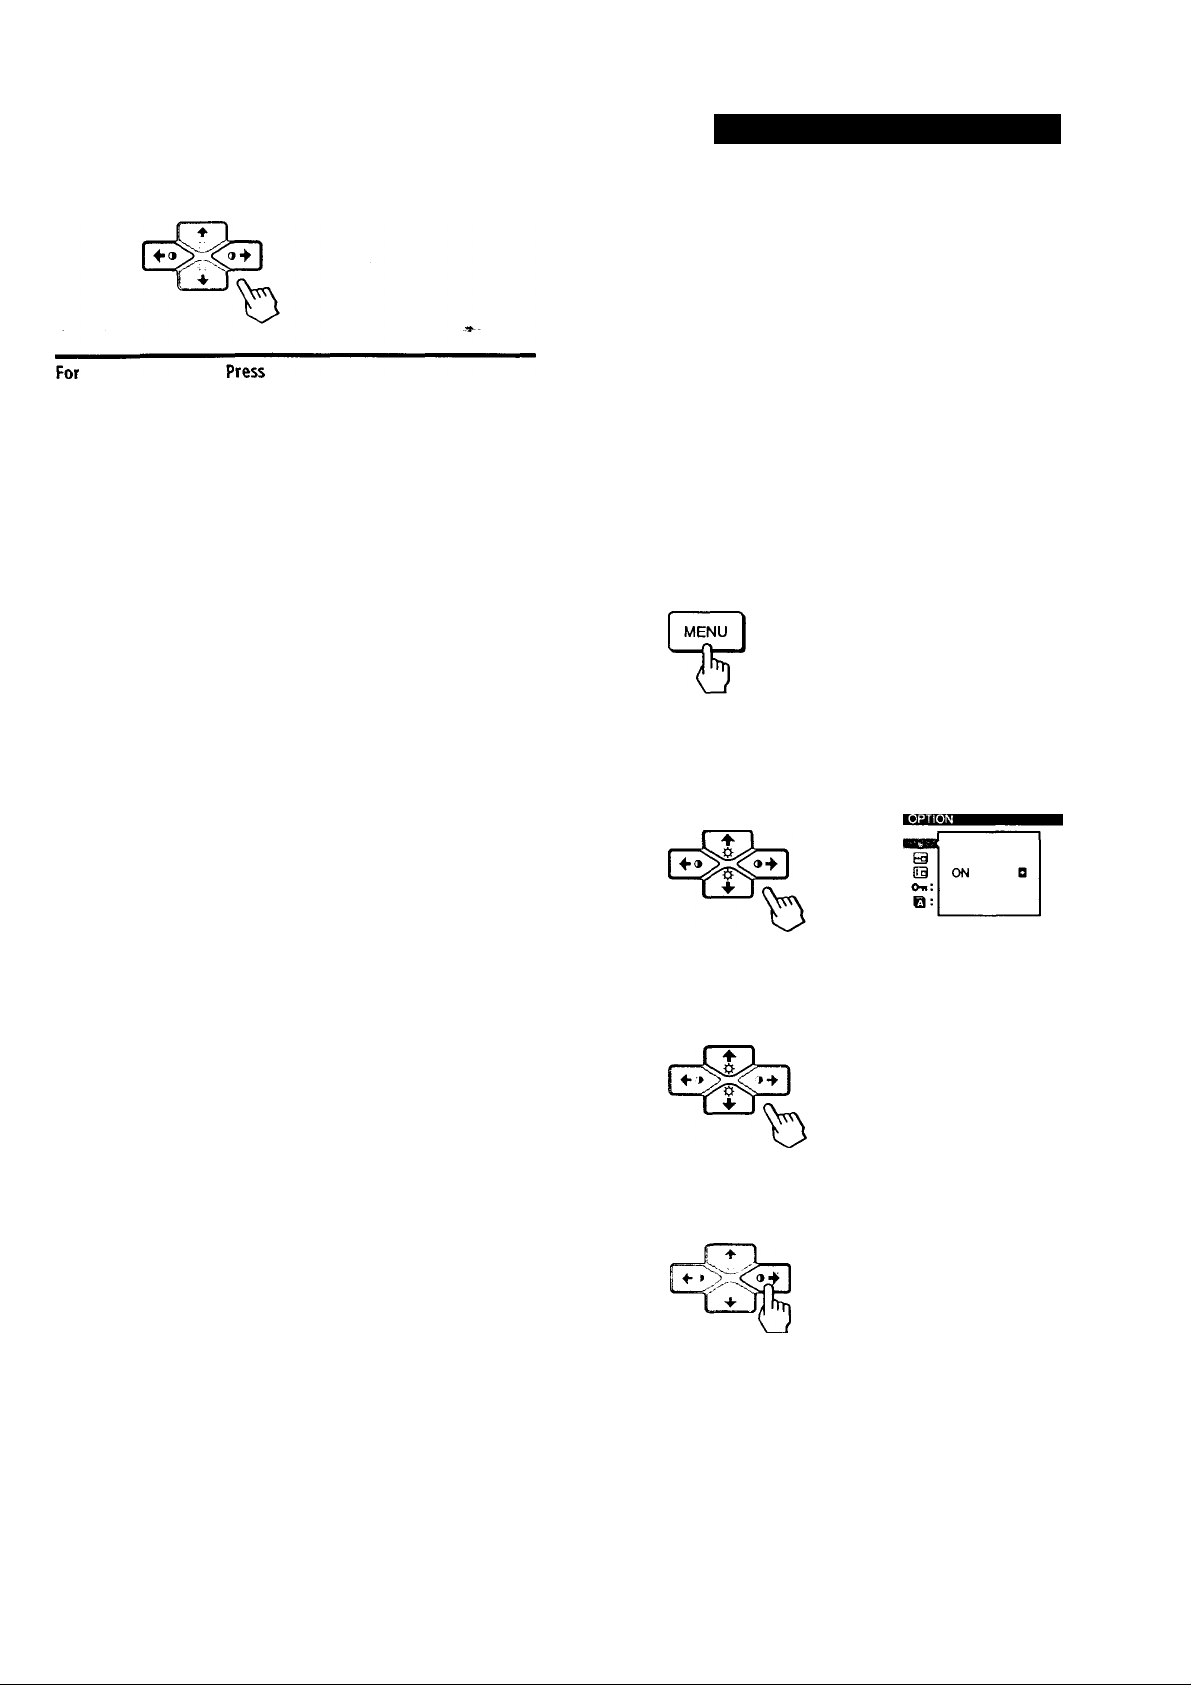
1 Press the MENU button.
The MENU OSD appears.
2 Press the and buttons to select
” S OPTION," and press the MENU button again.
The OPTION OSD appears.
MANUAL DEGAUSS
3 Press the buttons to select" th (MANUAL
DEGAUSS)".
'... to decrease the moire cancellation
effect
The OSD automatically disappears after about 30 seconds.
To close the OSD, press the MENU button again.
To reset, press the RESET button while the OSD is on.
The selected item is reset to the factory setting.
4 Press the 3 -► button.
The screen is degaussed for about 5 seconds.
If you need to degauss the screen a second hme, wait for at
least 20 minutes before repeating the steps above.
The OPTION OSD automatically disappears after about 30
seconds.
To close the OSD, press the MENU button again.
13
Page 14
Customizing Your Monitor
l • » ' 1 f-i
You can change the OSD position (for example, when you
want to adjust the picture behind the OSD).
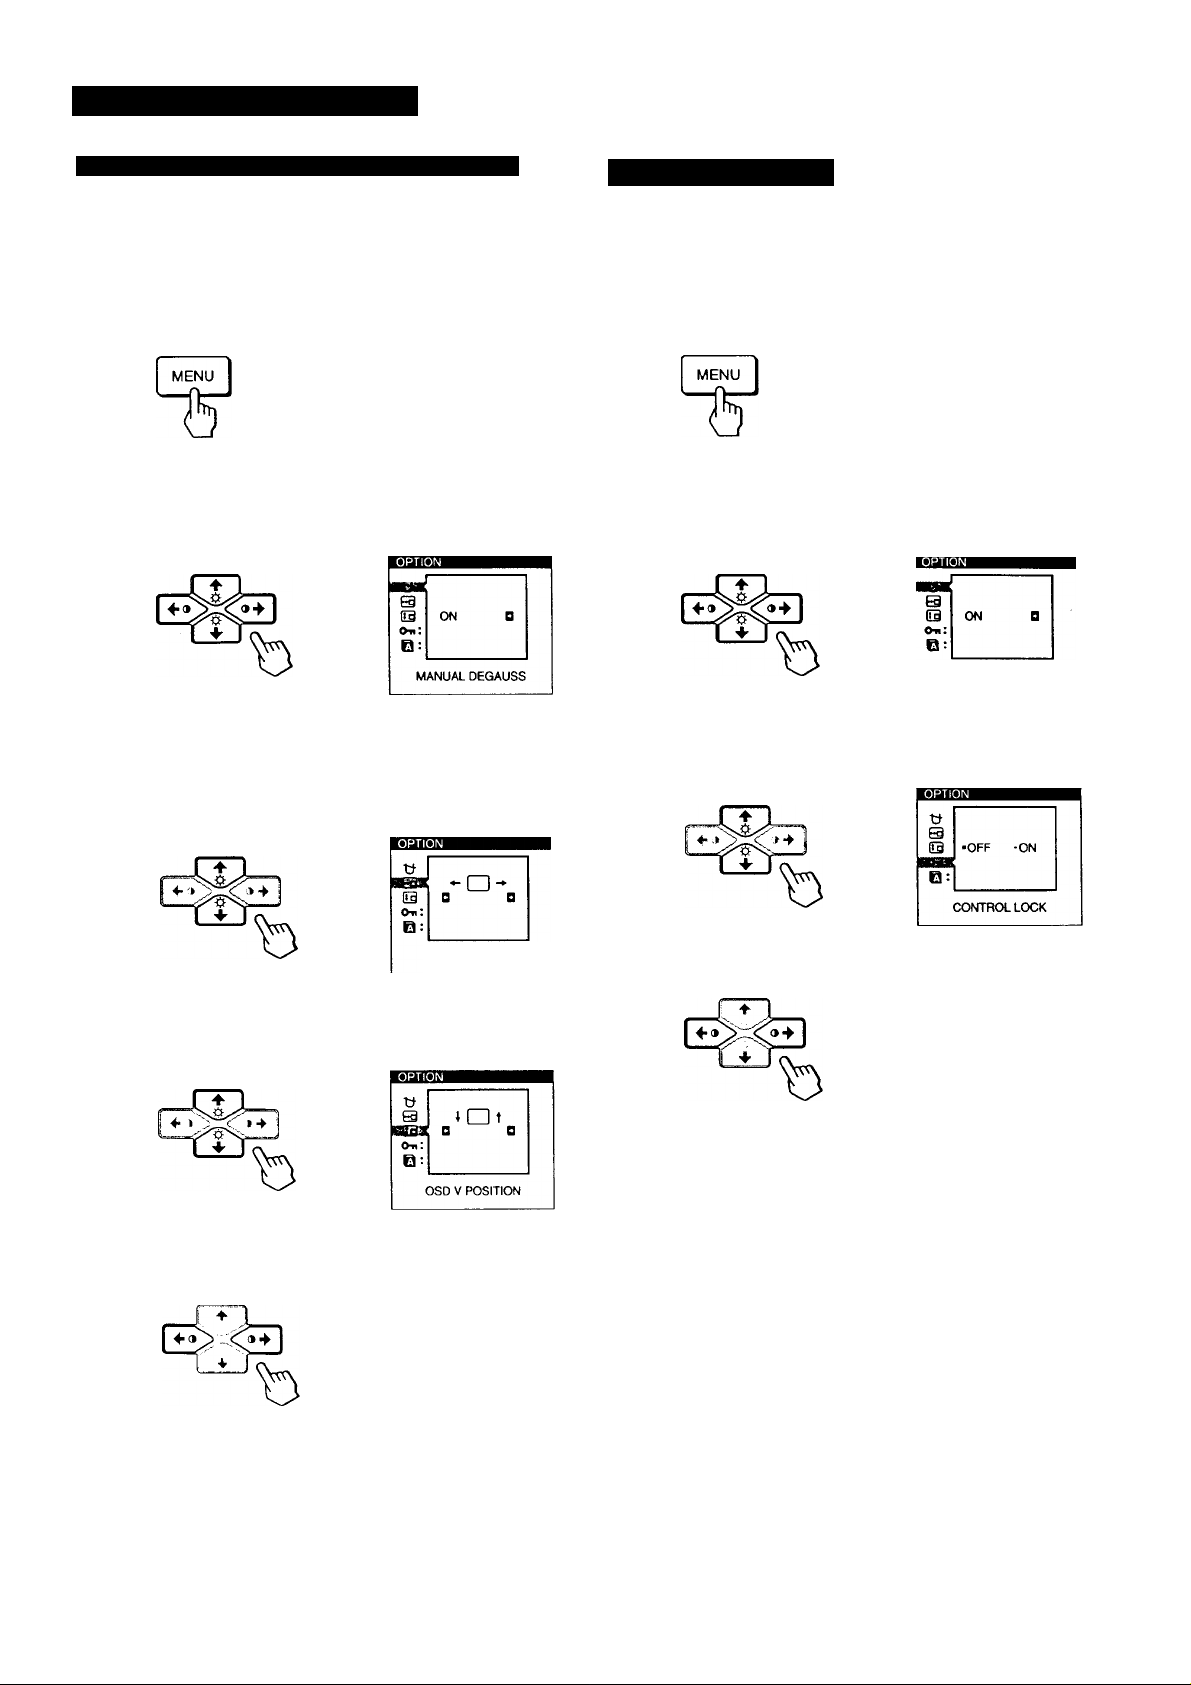
1 Press the MENU button.
The MENU OSD appears.
2 Press the D and buttons to select
“ S OPTION,” and press the MENU button again.
The OPTION OSD appears.
3 Press the buttons to select
“ g (OSD H POSITION)” or “ g (OSD V POSITION)”.
Select " g (OSD H POSITION)" to adjust the horizontal
position.
The control lock function disables all of the buttons on the
front panel except the Cl) (power) switch and MENU button.
1 Press the MENU button.
The MENU OSD appears.
2 Press the D 4'/^^ and buttons to select
" S OPTION," and press the MENU button again.
The OPTION OSD appears.
MANUAL DEGAUSS
3 Press the buttons to select ”Om (CONTROL
LOCK)".
OSD H POSITION
Select " g (OSD V POSITION)" to adjust the vertical
position.'
4 Press the buttons to move the OSD to the
desired position.
The OPTION OSD automatically disappears after about 30
seconds.
To close the OSD, press the MENU button again.
4 Press the buttons to select "ON”.
The OPTION OSD automatically disappears after about 30
seconds.
To close the OSD, press the MENU button again.
Once you select "ON," you cannot select any items except
"EXIT" and " S OPTION" in the MENU OSD.
If you press any button other than the (!) (power) switch and
MENU button, the Om rnark appears on the screen.
To cancel the control lock
Repeat steps 1 through 3 above and press the
buttons to select "OFF".
To reset, press the RESET button while the OSD is on.
14
Page 15
English, French, German, Spanish, Italian and Japanese
versions of the OSDs are available.
Customizing Your Monitor
Resetting the Adjustments
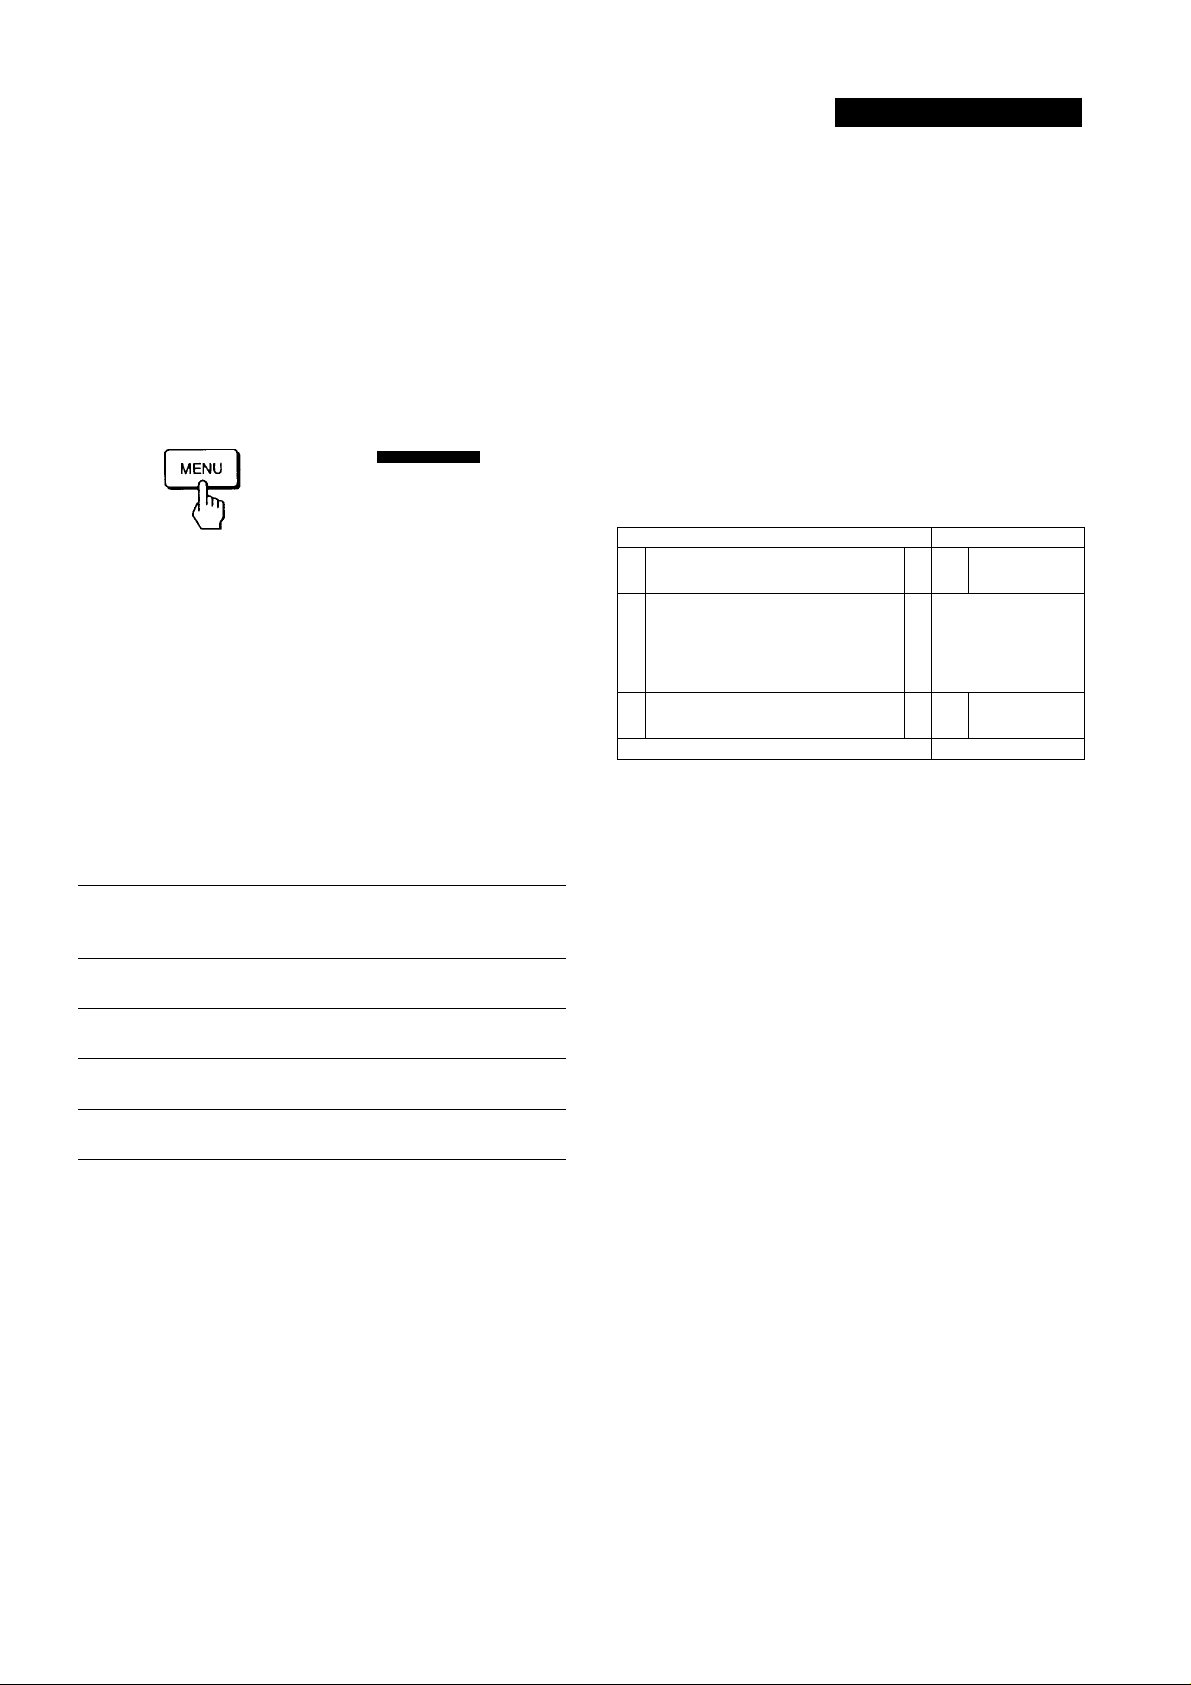
1 Press the MENU button. ^
The MENU OSD appears.
2 Press the and buttons to select
" S OPTION," and press the MENU button again.
The OPTION OSD appears.
MANUAL DEGAUSS
3 Press the buttons to select" Q (LANGUAGE)".
1 Press the MENU, •D’f/'t' and 3^"/"^buttons to select
the OSD containing the item you want to reset.
2 Press the buttons to select the item you want
to reset.
3 Press the RESET button.
RESET
m
4 Press the buttons to select the desired
language.
ENG: English, FRA: French, DEU: German,
ESP: Spanish, TTA: Italian or JPN: Japanese.
The OPTION OSD automatically disappears after about 30
seconds.
To close the OSD, press the MENU button again.
To reset to English, press the RESET button while the OSD
is on.
When there is no OSD displayed, press the RESET
button.
AU of the adjustment data for the current input signal is
reset to the factory settings.
Note that adjustment data not affected by changes in input
signal (OSD language, OSD position and the control lock
function) is not reset to the factory settings.
RESET
Press and hold the RESET button for more than two seconds.
All of the adjustment data, including the brightness and
contrast, is reset to the factory settings.
RESET
15
Page 16

Customizing Your Monitor
Technical Features
Selecting the Graphic Picture Enhancement (GPE) Mode
The Graphic Picture Enhancement (GPE) button allows you
to automatically change the characteristics of the picture on
the screen to match the use of your monitor. Simply press
the GPE button to scroll between the three moSes.
1 Turn on the monitor and computer.
2 Press the GPE button to set the mode.
Each time you press the GPE button, the mode appears on
the screen and changes as follows.
STANDARD MODE
I
PRESENTATION MODE
I
GRAPHICS/VIDEO MODE
Preset and User Modes
The monitor has factory preset modes for the 10 most
popular industry standards for true "plug and play"
capability.
Recommended horizontal and vertical timing conditions
Horizontal sync width duty should be 1.0 fisec of total horizontal
time.
Horizontal blanking width should be >3.0 ¡4sec for CPD-220GS.
Vertical blanking width should be >500 ¡4sec for CPD-220GS.
Note for Windows users
For Windows users, check your video board manual or the utility
program which comes with your graphic board and select the
highest available refresh rate to maximize monitor performance.
CPD-220GS
Resolution
(dots X lines)
No.
640 x 480 31.5 kHz
1
640x480
2
720 x 400 31.5 kHz
3
800x600 46.9 kHz
4
Horizontal
Frequency
43.3 kHz
Vertical
Frequency
60 Hz VGA Graphic
85 Hz VESA
70 Hz
75 Hz VESA
Graphics
Mode
VGA Text
The STANDARD MODE is ideal for spreadsheets, word
processing, and other text oriented applications.
The PRESENTATION MODE is useful for presentation
programs that require vivid colors. '
The GRAPHICS/VIDEO MODE gives movies and games
enhanced visual appeal by increasing the sharpness and
brightness. ^
The selected mode indication appears on the screen for
about 3 seconds.
If the screen appears too white, adjust the color temperature
as explained in "Using the COLOR On-screen Display" on
page 11.
Note
The PRESENTATION MODE and GRAPHICS/VIDEO MODE may
produce ghost images when displaying text oriented applications.
These modes change the brightness of the picture dynamically
according to changes in moving pictures. If ghost images appear,
set the GPE to STANDARD MODE.
800 x 600 53.7 kHz
5
832 x 624 49.7 kHz
6
1024 X 768
7
1024 X 768 60.2 kHz
8
1024 X 768
9
1280 X1024 80.0 kHz
10
60.0 kHz
68.7 kHz
85 Hz VESA
75 Hz
75 Hz VESA
75 Hz Macintosh
85 Hz
75 Hz VESA
Macintosh
16" Color
19" Color
VESA
16
Page 17
Technical Features
Displaying the Monitor's Information
You can display the model name, serial number and year of
manufacture using the monitor's INFORMATION OSD.
Press and hold the MENU button for 5 seconds.
The INFORMATION OSD appears.
Example:
INFORMATION
MODEL :CPD-220GS
SER NO: 1234567
MANUFACTURED : 1998-32
The INFORMATION OSD includes the model name, serial
number, manufactured year and week.
The OSD automatically disappears after about 30 seconds.
Power Saving Function
Damper Wires
When viewing a white background, very thin horizontal
lines are visible on the screen as shown below. These lines
are damper wires.
The Trinitron tube has a vertically striped aperture grille
inside. The aperture grille allows more light to pass through
to the screen giving the Trinitron CRT more color and
brightness.
These damper wires are attached to the aperture grille to
prevent vibration of the aperture grille and keep the screen
image constantly stable.
Damper wire
Approx. 8cm
^ 7/Ì
/ I
Approx. 6cm
LJ
This monitor has three modes of reduced power
consumption. By sensing the absence of video signal
coming from the computer, it reduces power consumption
as follows.
Power Power
consumption
mode
1
Normal
operation
2
Standby <15W
(1st mode) 3 sec.
3
Suspend <15W Approx.
(2nd mode)
4
Active-off
(3rd mode)
consumption
< 120 W )
<8 W
•Recovery
time
—
Approx. Green and orange
3 sec.
Approx.
10 sec.
(!) indicator
Green
alternate
Green and orange
alternate
Orange
Note
If the video signal cable is not connected properly, the "NO INPUT
SIGNAL" message (page 18) appears. After 30 seconds, the power
saving function automatically puts the monitor into the active-off
mode and the (!) indicator lights up orange. Once the horizontal
and vertical sync signals are detected, the monitor automatically
resumes its normal operation mode.
17
Page 18
Additional Information
Warning Messages
If there is something wrong with the input signal, one of the
following messages appears.
The input signal condition
"OUT OF SCAN RANGE" indicates that the input signal
is not supported by the monitor's specifications.
"NO INPUT SIGNAL" indicates that no signal is input.
Input signal condition
INFORMATION
OUT OF SCAN RANGE
To solve these problems, see "Troubleshooting" below.
Troubleshooting
This section may help you isolate the cause of a problem and as a result, eliminate the need to contact technical support.
Symptom Check these items
No picture
If the
cl )
indicator is not lit • Check that the power cord is properly connected.
If the "NO INPUT SIGNAL"
message appears on the
screen, or if the (1) indicator is
either orange or alternating
between green and orange
If the "OUT OF SCAN
RANGE" message appears on
the screen
• Check that the
• Try pressing any key on the computer keyboard.
• Check that your computer power switch is in the "on" position.
• Check that the video signal cable is properly connected and all plugs are firmly seated
in their sockets.
• Ensure that no pins are bent or pushed in the HD15 video input connector.
• Check that the video board is completely seated in the proper bus slot.
•
Check that the video frequency range is within that specified for the monitor.
Horizontal: 30 - 85 kHz
Vertical: 48 -120 Hz
Refer to your computer's instruction manual to adjust the video frequency range.
•
If you are using a video signal cable adapter, check that it is the correct one.
(1 )
(power) switch is in the "on" position.
If no message is displayed
and the
(! )
indicator is green
or flashing orange
Picture is scrambled
Color is not uniform
You cannot adjust the
monitor with the buttons on
the front panel
•
See "Self-diagnosis Function" (page 20).
•
Check your graphics board manual for the proper monitor setting.
•
Check this manual and confirm that the graphics mode and the frequency you are
trying to operate at is supported. Even if the frequency is within the proper range,
some video boards may have a sync pulse that is too narrow for the monitor to sync
correctly.
•
Degauss the monitor (page 13).
If you place equipment which generates a magnetic field, such as a loudspeaker, near
the monitor, or you change the direction of the monitor, color may lose uniformity.
The degauss function demagnetizes the metal frame of the CRT to obtain a neutral
field for uniform color reproduction. If a second degauss cycle is needed, allow a
minimum interval of 20 minutes for the best result.
•
If the control lock function is set to on, set it to off using the OPTION OSD (page 14).
18
Page 19

Additional Information
Symptom
Screen image is not centered
or sized properly
Edges of the image are
curved
White lines show red or blue
shadows at edges
Picture is fuzzy
Picture bounces or has wavy
oscillations
Check these items
• Adjust the size or centering (page 9).
• Some video modes do not fill the screen to the edges. This problem tends to occur with
certain video boards.
• Adjust the geometry (page 10).
• Adjust the convergence (pages 12 -13).
• Adjust the contrast and brightness (page 8).
• Degauss the monitor (page 13).
If you place equipment which generates a magneHc field, such as a loudspeaker, near
the monitor, or you change the direction of the monitor, color may lose uniformity.
The degauss function demagnetizes the metal frame of the CRT to obtain a neutral
field for uniform color reproduction. If a second degauss cycle is needed, allow a
rrunimum interval of 20 minutes for the best result.
• If red or blue shadows appear along the edges of images, adjust the convergence
(pages 12 -13).
• If the moire is cancelled, the picture may become fuzzy. Decrease the moire
cancellation effect (pages 12 -13).
• Isolate and eliminate any potential sources of electric or magnetic fields. Common
causes for this symptom are electric fans, fluorescent lighting or laser printers.
• If you have «mother monitor close to this monitor, increase the distance between them
to reduce the interference.
• Try plugging the monitor into a different AC outlet, preferably on a different circuit.
• Try the monitor on a different computer in a different room.
Picture is flickering
• Set the refresh rate on the computer to obtain the best possible picture by referring to
your computer's manual.
Picture appears to be
ghosting
Wavy or elliptical (moire)
pattern is visible
• Eliminate the use of video cable extensions and / or video switch boxes if this symptom
occurs. Excessive cable length or a weak cormection can produce this symptom.
• Cancel the moire (pages 12 -13).
The moire may be modified depending on the cormected computer.
• Due to the relationship between resolution, monitor dot pitch and the pitch of some
image patterns, certain screen backgrounds sometimes show moire. Change your
desktop pattern.
Two fine horizontal lines
(wires) are visible
• These wires stabilize the vertically striped aperttire grille (page 17). This aperture grille
allows more light to pass through to the screen giving the Trinitron CRT more color
and brightness.
Hum is heard right after the
power is turned on
• When the power is turned on, the auto-degauss cycle is activated. While the auto
degauss cycle is activated, a hum may be heard. The same hum is heard when the
monitor is manually degaussed. This is not a malfunction.
If the problem persists, call your authorized Sony dealer from a location near your monitor.
Note the model name and the serial number of your monitor. Also note the make and name of your video board.
19
Page 20

Additional Information
Self-diagnosis Function
This monitor is equipped with a self-diagnosis function. Use
this function if there is a problem with your monitor or
computer.
1 Disconnect the video input cable or turn ofTthe
connected computer.
2 Turn the monitor off and on.
3 Press and hold the button for 2 seconds.
If all four color bars app>ear (white, red, green, blue) after
a few seconds, the monitor is working properly but there
might be a problem with your computer. Contact your
computer's manufacturer.
If the color bars do not appear, there is a potential
morutor failure. Inform your authorized Sony dealer of
the monitor's condition.
Specifications
CPD-220GS
Picture tube
Viewable image size
Resolution
Standard image area
Deflection frequency
Plug & Play
Speaker
Headphones output
Audio input
AC input voltage/current
Power consumption
Dimensions
Mass
Supplied accessories
0.25 mm aperture grille pitch
17 inches measured diagonally
90-degree deflection
Approx. 327 X 243 mm (w/h)
(12^/8x9^/8inches)
16.0" viewing image
Horizontal: Max. 1280 dots
Vertical: Max. 1024 lines
Approx. 312 X 234 mm (w/h)
(12 ^/8 X 9 '/4 inches)
Horizontal: 30 to 85 kHz
Vertical: 48 to 120 Hz
DDCl/2B/2Bi,GTF
0.25 W (monaural)
Stereo minijack. Accepts
impedance of 8il or more
Stereo minijack
100-120-1.9 A 50/60 Hz
220-240-1.1 A 50-60 Hz
Max. 120 W
406 x 432 x 420 mm (w/h/d)
(16 X17 Vs x 16 ®/8 inches)
Approx. 18 kg (39 lb 11 oz)
See page 6
Design and specifications are subject to change without
notice.
20
Page 21

Table des matières
Préparation
Précautions.......................................................................................................................4
Identification dgs. composants et des commandes..........................................................5
Installation........................................................................................................................5
Sélection de la langue d'affichage des menus..................................................................6
Raccordement du haut-parleur de votre moniteur...........................................................7
Personnalisation de l'affichage
Réglage de la luminosité et du contraste de l'image
Présentation du système d'écrans de menu
......................................................................
Utilisation de l'écran de menu CENTRE (centrage)........................................................9
Utihsation de l'écran de menu TAILLE...........................................................................9
Utilisation de l'écran de menu GEOM (géométrie)
Utilisation de l'écran de menu ZOOM...........................................................................11
Utilisation de l'écran de menu COUL. (couleur).............................,
Utilisation de l'écran de menu ECRAN
.........................................................................
Utilisation de l'écran de menu OPTION.........................................................................13
Réinitialisation des réglages...........................................................................................15
Sélection du mode Graphie Picture Enhancement (GPE)
........................................................
.......................................................
.............................
.............................................
8
8
10
11
12
16
Caractéristiques techniques
Modes présélectionné et utilisateur
...............................................................................
Affichage des informations sur le moniteur..................................................................17
Fonction d'économie d'énergie......................................................................................17
Fils d'amortissement......................................................................................................17
Informations complémentaires
Messages d'avertissement..............................................................................................18
Guide de dépannage.......................................................................................................18
Fonction d'autodiagnostic..............................................................................................20
Spécifications.................................................................................................................20
Macintosh est une marque de commerce de Apple Computer, Inc.,
déposée aux Etats-unis et dans d'autres pays.
Windows* est une marque de commerce de Microsoft Corporation
déposées aux Etats-Unis et dans d'autres pays.
IBM PC/AT et VGA sont des marques de commerce de International
Business Machines Corporation déposées aux Etats-Unis.
VESA est une marque de commerce de Video Electronics Standard
Association.
Tous les autres noms de produits mentionnés dans ce mode d'emploi
sont des marques de commerce ou des marques déposées de leur
détenteurs respectifs.
Par ailleurs, "™" et "®" ne sont pas repris à chaque fois dans le mode
d'emploi.
15
Page 22

Préparation
Précautions
Veillez à assurer une circulation d'air adéquate pour
éviter une surchauffe interne de l'appareil. Ne pKcez pas
le moniteur sur des surfaces textiles (tapis, couvertures,
etc.) ni à proximité de rideaux ou de draperies
susceptibles d'obstruer les orifices de ventilation.
N'installez pas le moniteur à proximité de sources de
chaleur comme un radiateur ou une bouche d'air, chaud,
ni dans un endroit exposé au rayonnement solaire direct,
à des poussières en excès, à des vibrations ou à des chocs
mécaniques.
’ N'installez pas le moniteur à proximité d'équipements qui
génèrent un champ magnétique tels im convertisseur ou
des lignes à haute tension.
Nettoyez le châssis, le panneau et les commandes à l'aide
d'un chiffon doux légèrement imprégné d'une soluHon
détergente neutre. N'utilisez jeûnais de tampons abrasifs,
de poudre à récurer ou de solvants tels que de l'alcool ou
du benzine.
Ne frottez pas, ne touchez pas et ne tapotez pas la surface
de l'écran avec des objets abrasifs ou aux euêtes vives
comme im stylo à bille ou un tournevis. Ce type de
contact risque en effet de rayer le tubelmage.
Utilisez un cordon d'alimentation convenant à votre
alimentation secteur locale.
Pour les clients aux Etats-Unis
Si vous ne vous cordonnez pas à cette condition, votre
moniteur ne satisfera pas au règlement FCC.
Modèles de fiches :
pour 100 à 120 V CA
Avcmt de débrancher le cordon d'alimentation, attendez
au moins 30 secondes après avoir actionné le
coimnutateiu d'alimentation de manière à permettre la
décharge de l'électricité stahque à la surface de l'écran à
tube cathodique (CRT).
Après que le courant a été branché, le CRT est
démagnétisé p>endant environ 5 secondes. Cela génère un
puissant champ magnétique autour de l'encadrement
métallique qui peut affecter les données mémorisées sur
une bande magnétique ou des disquettes situées à
proximité. Placez ces systèmes d'eruegistrement
magnétique et ces bandes/ disquettes à l'écart de ce
moniteur.
La prise murale doit être installée à proximité de
l'équipement et être aisément accessible.
pour 200 à 240 V CA
Pour transporter ce moniteur èn vue de réparations ou de
son expédition, utilisez le carton d'emballage et les
matériaux de conditionnement d'origine.
sationdu supportiiiv^^tl
Le support pivotant permet de régler ce moniteur suivant
l'angle de vision de votre préférence dans une plage de 180°
horizontalement et 20° verticalement.
Pour faire pivoter le moniteur verticalement et
horizontalement, maintenez-le des deux mains par la base
comme illustré ci-dessous.
Page 23

Identification des composants et
des commandes
Pour plus de détails, reportez-vous aux pages indiquées
entre parenthèses.
Préparation
Partie frontale
[T] Touche MUTING (coupure) (page 7)
Coupe le son.
[2] Touche RESET (réinitialisation) (page 15)
Réinitialise les réglages aux valeurs par défaut.
[3] Touche GPE (page 16)
Sélectionne le mode GPE d'optimisation de l'image
graphique (Graphie Picture Enhancement).
Partie arrière
Connecteur AC IN
Assure l'alimentation du moniteur.
Connecteur d'entrée vidéo (HD15)
Entrée des signaux vidéo RVB et des signaux SYNC.
Partie latérale
[4] Touche MENU (menu) (pages 7 -15,17)
Affiche l'écran MENU.
[U Touches 3 (contraste) (-♦■/"►) (pages 7-15,
20)
Règlent le contraste de l'image.
Servent de touches (•♦■/^) pour le réglage d'autres
paramètres.
[H Touches Çi (luminosité) (4/f) (pages 7-15)
Règlent la luminosité de l'image.
Servent de touches ('♦/'t) pour le réglage d'autres
paramètres.
[T] Commutateur et indicateur d'alimentation
C!) (pages 17, 20)
Met le moniteur sous et hors tension.
L'indicateur s'allume en vert lorsque le moniteur est
sous tension et en orange lorsque le moniteur se trouve
en mode d'économie d'énergie.
Prise AUDIO IN
Entrée des signaux audio dans le cas d'une connexion
via la prise de sortie audio d'un ordinateur.
[T]] 0 Prise pour casque d'écoute
Sortie des signaux audio vers le casque d'écoute
(non fourni).
Page 24

Préparation
Installation
Avant de mettre ce moniteur en service, vérifiez si tous les
accessoires suivants se trouvent bien dans le carton :
• Moniteur (1)
• Cordon d'alimentation (1)
• Adaptateur Macintosh (1) »
• Windows® Monitor InformaHon Disk (1)
• Carte de garantie (1)
• Ce mode d'emploi (1)
• Cordon audio à minifiche (1)
Ce moniteur fonctionne avec n'importe quel système IBM
ou compatible doté d'une capacité graphique VGA ou
supérieure. Bien que ce moniteur fonctionne avec d'autres
plate-formes tournant à des fréquences horizontales
comprises entre 30 et 85 kHz y compris des systèmes
Macintosh et Power Macintosh, un adaptateur de câble est
nécessaire. Veuillez consulter votre revendeur pour des
conseils sur l'adaptateur correspondant à vos besoins.
Le moniteur étant hors tension, branchez le cordon
d'alimentation au moniteur et l'autre extrémité à une prise
murale.
fri iji-lijih iil iJl'Mltmir il
Raccordement à un PC/AT IBM, à un ordinateur
Macintosh ou compatible
L'ordinateur étant hors tension, raccordei le câble de signal
vidéo à la sortie vidéo de l'ordinateur.
L'installaHon de votre moniteur est à présent terminée.
Remarque
Si le message "HORS PLAGE DE BALAYAGE" ou "PAS ENTREE
VIDEO" apparaît à l'écran, voir "Messages d'avertissement" à la
page 18.
Pour les clients utilisant Windows* 95/98
Installez les informations de nouveau modèle de la "Windows®
Monitor Iirformation Disk" sur votre PC.
Sélection de la langue d'affichage des menus
Pour changer la langue d'affichage des écrans de menu, voir
la section "Sélection de la lemgue d'affichage des menus" à
la page 15.
Le réglage par défaut est l'anglais.
Macintosh (fourni)
A propos de l'adaptateur Macintosh fourni
L'adaptateur Macintosh fourni est compatible avec les ordinateurs
Macintosh LC, Performa, Quadra et Power Macintosh.
11 se peut que les ordinateurs Macintosh 11 et certaines anciennes
versions de Power Book requièrent un adaptateur doté de
microcommutateurs (non fourni).
Remarque
Ne court-circuitez pas les broches du câble de signal vidéo
Page 25

Raccordement du haut-parleur de votre moniteur
Vous pouvez écouter de la musique, des sons et d'autres
fichiers audio via le haut-parleur de votre moniteur.
Raccordez la prise AUDIO IN à la prise de sortie atrdio de la
carte son de votre ordinateur à l'aide du cordon à minifiches
(fourni).
Préparation
3 Appuyez sur les touches pour régler le
volume.
L'écran disparaît automatiquement au bout d'environ 30
secondes.
Pour refermer l'écran, appuyez à nouveau sur la touche
MENU.
Pour réinitialiser, appuyez sur la touche RESET pendant
que l'écran est affiché.
Appuyez sur la touche MUTING.
Aucun son n'est diffusé par le kaut-parleur.
L'indication ^ apparaît dans le bas de l'écran.
Appuyez sur la touche MENU.
L'écran MENU apparaît.
MENU
1 cœt. 1
1 SON 1 1 TA^LE 1
1_______________________
Appuyez sur les touches et pour
sélectionner “O SON” et appuyez ensuite à nouveau
sur MENU.
O
GEOM
CENTRE
OK—SI
C3=
IoptonI
L'écran SON apparaît.
O 26 0
Remarque
Pendant que le son est coupé, l'indication apparaît dans l'écran
SOUND au lieu de l'indication Augmentez le volume pour
désactiver l'indication et activer le haut-parleur.
OIB
ECRAN
3S
ZOOM
MUTING
Pour désactiver la fonction, appuyez à nouveau sur la
touche MUTING.
Vous pouvez écouter les signaux audio de votre ordinateur
à l'aide d'un casque d'écoute (non fourni). Le haut-parleur
est désachvé lorsque vous branchez im casque d'écoute sxrr
la prise pour casque d'écoute. Réglez le volume via l'écran
SON.
Remarque
Si le volume du haut-parleur est trop faible, vous pouvez
augmenter le niveau de sortie (moyenne de 500 mv) sur
l'ordinateur.
7
Page 26

Personnalisation de l'affichage
Avant le réglage
• Raccordez le moniteur et l'ordinateur et mettez-les sous
tension.
• Sélectionnez " B (LANGUAGE)" dans le menu OPTION
et sélectiormez ensuite "ENG" (anglais) (voir page 15).
Présentation du système d'écrans de menu
La plupart des réglages sont effectués à l'aide de l'écran de
menu MENU.
Réglage de la luminosité et du contraste de l'image
Une fois le réglage effectué, il sera conservé en mémoire
pour tous les signaux d'entrée reçus.
1 Appuyez sur les touches Ip: (luminosité) |'/f ou
G (contraste)
L'écran LUMINOSITE/CONTRASTE apparaît.
LUMINOSITE'CONTRASTE
O
a 26 a
2 Pour le réglage de la luminosité
Appuyez sur les touches iÇI'J
■T .. • pour augmenter la luminosité
4-. •. pour diminuer la luminosité
Pour le réglage du contraste
Appuyez sur les touches <34^/*
i_^
a 26 □
Ecran "MENU*
Appuyez sur la touche MENU pour afficher l'écran
MENU.
Cet écran MENU contient des liens avec les autres écrans de
menu décrits d-dessous.
Fréquence Fréquence
horizontale* verticale*
[H 0 COUL.
Affiche l'écran de menu COULEUR pour le réglage de
la température des couleurs.
[2] O CENTRE
Affiche l'écran de menu CENTRAGE pour le réglage du
centrage de l'image.
\ . pour augmenter le contraste
'... pour diminuer le contraste
L'écran de menu disparaît automatiquement au bout
d'environ 3 secondes.
Pour ramener le réglage à sa valeur par défaut, appuyez sur
la touche RESET alors que le menu est affiché. La luminosité
est simultanément ramenée à la valeur de réglage par
défaut.
" Les fréquences horizontale et verticale pour le signal d'entrée
reçu apparaissent dessous l'écran MENU.
8
¡3] (m) ECRAN
Affiche l'écran de menu ECRAN pour le réglage de la
convergence verticale et horizontale, etc.
[4] SS ZOOM
Affiche l'écran de menu ZOOM pour agrandir et
réduire la taille de l'image.
[5] â OPTION
Affiche l'écran de menu OPTION pour le réglage de la
position des écrans de menu, la démagnétisation de
l'écran, la sélection de la langue d'affichage des menus,
etc.
[6] Q TAILLE
Affiche l'écran de menu TAILLE pour le réglage de la
taille de l'image.
H] Î] SON
Affiche l'écran SON pour le réglage du son.
H] U GEOM
Affiche l'écran de menu GEOMETRIE pour régler la
rotation et la distorsion en coussin de l'image, etc.
[9] QUITTE
Referme l'écran MENU.
Page 27

Personnalisation de l'affichage
Utilisation de l'écran de menu CENTRE (centrage)
Les réglages CENTRE vous permettent d'ajuster le centrage
de l'image.
Une fois que le réglage est effectué, il sera conservé-en
mémoire pour le signal d'entrée en cours.
1 Appuyez sur la touche MENU.
L'écran MENU apparaît.
2 Appuyez sur les touches Ç et pour
sélectionner "Qd CENTRE" et appuyez ensuite à
nouveau sur la touche MENU.
L'écran de menu CENTRAGE apparaît.
“0 r
73| -I
□ 1
__
□ 26 a
Utilisation de l'écran de menu
TAILLE
Les réglages TAILLE vous permettent d'ajuster la taille de
l'image.
Une fois que le réglage est effectué, il sera conservé en
mémoire pour le signal d'entrée en cours.
1 Appuyez sur la touche MENU.
L'écran MENU apparaît.
2 Appuyez sur les touches et pour
sélectionner " Q TAILLE" et appuyez ensuite à
nouveau sur la touche MENU.
L'écran de menu TAILLE apparaît.
□ 26
D
3 Pour le réglage horizontal
Appuyez sur les touches
... pour déplacer l'image vers
la droite
'... pour déplacer l'image vers
la gauche
Pour le réglage vertical
Appuyez sur les touches iSi-f / ■
... pour déplacer l'image vers
le haut
pour déplacer l'image vers
le bas
L'écran de menu disparaît automatiquement au bout
d'environ 30 secondes.
Pour refermer l'écran de menu, appuyez à nouveau sur la
touche MENU.
Pour réinitialiser les valeurs de réglage, appuyez sur la
touche RESET pendant que l'écran est affiché.
Les centrages horizontal et vertical sont tous deux ramenés
aux valeurs de réglage par défaut.
3 Pour le réglage horizontal
Appuyez sur les touches 3-^/*
pour augmenter la taille de
l'image
pour réduire la taille de
l'image
Pour te réglage vertical
Appuyez sur les touches 'Çi4 / ■
... pour augmenter la taille de
l'image
——' ■.. pour, réduire la taille de
V_,> l'image
L'écran de menu disparaît automatiquement au bout
d'environ 30 secondes.
Pour refermer l'écran de menu, appuyez à nouveau sur la
touche MENU.
Pour réinitialiser les valeurs de réglage, appuyez sur la
touche RESET pendant que l'écran est affiché.
Les tailles horizontale et verticale sont toutes deux ramenées
aux valeurs de réglage par défaut.
Page 28

Personnalisation de l'affichage
Utilisation de l'écran de menu GEOM (géométrie)
La GEOM (géométrie) vous permet d'ajuster la forme et
l'orientation de l'image.
Une fois que la rotation est réglée, elle sera coneservée en
mémoire pour tous les signaux d'entrée reçus. Tous les
autres réglages seront mémorisés pour le signal d'entrée en
cours.
1 Appuyez sur la touche MENU.
L'écran MENU apparaît.
4 Appuyez sur les touches pour ajuster les
réglages.
Pour Appuyez sur
O ROTATION “^ ... pour faire pivoter Timage dans le
sens horaire
pour faire pivoter Timage dans le sens
antihoraire
2 Appuyez sur les touches et pour
sélectionner " O GEOM" et appuyez ensuite à
nouveau sur la touche MENU.
L'écran GEOMETRIE apparaît.
BItt
O
'H.
D
n
□ 26 P
O
ROTATION
3 Appuyez sur les touches "f/t pour sélectionner le
paramètre que vous voulez régler.
Sélectionnez
ROTATION
O
COUSSIN
n
CORK CYL
D
TRAPEZE
O
CORR PARAL
Q
Pour
régler la rotation de l'image
régler les côtés de Timage
régler la correction cylindrique de
Timage
régler la largeur de Timage
régler l'inclinaison de Timage
n COUSSIN
D CORRSYL
Cl TRAPEZE •♦ ... pour augmenter la largeur de
\Z\ CORRPARAL
^ ... pour élargir les côtés de Timage
-O-
♦“ ... pour resserrer les côtés de Timage
“♦ ... pour déplacer les côtés de Timage
vers la droite
-D-
4“ ... pour déplacer les côtés de Timage
vers la gauche
-Or
Timage dans le haut
4“ . . . pour diminuer la largeur de Timage
dans le haut
"4 ... pour déplacer le haut de Timage
vers la droite
4“ ... pour déplacer le haut de Timage vers
la gauche
'O"
10
L'écran de menu disparaît automatiquement au bout
d'environ 30 secondes.
Pour refermer l'écran de menu, appuyez à nouveau sur la
touche MENU.
Pour réinitialiser les valeurs de réglage, appuyez sur la
touche RESET pendant que l'écran est affiché.
Le paramètre sélectionné est ramené à la valeur de réglage
par défaut.
Page 29

Personnalisation de l'affichage
Utilisation de l'écran de menu
ZOOM
Les réglages ZCX)M vous permettent d'agrandir ou de
réduire l'image. ^
Une fois que le réglage est effectué, il sera conservé en
mémoire pour le signal d'entrée en cours.
1 Appuyez sur la touche MENU.
L'écran MENU apparaît.
2 Appuyez sur les touches et pour
sélectionner "gS ZOOM" et appuyez ensuite à
nouveau sur la touche MENU.
L'écran de menu ZOOM apparaît.
Utilisation de l'écran de menu COUL (couleur)
Vous pouvez changer la température des couleurs du
moniteur. Ainsi, vous pouvez changer les couleurs d'une
image à l'écran de façon à ce qu'elles correspondent aux
couleurs réelles de l'image imprimée.
Une fois le réglage effectué, il sera conservé en mémoire
pour tous les signaux d'entrée reçus.
Appuyez sur la touche MENU.
1
L'écran MENU apparaît.
2 Appuyez sur les touches Çt'f/♦ et pour
sélectionner "g COUL" et appuyez ensuite à
nouveau sur la touche MENU.
L'écran de menu COULEUR apparaît.
3 Appuyez sur les touches poür régler le zoom
sur l'image.
^ ... pour agrandir l'image
? • ■4“ ... pour réduire l'image
L'écran de menu disparaît automatiquement au bout
d'environ 30 secondes.
Pour refermer l'écran de menu, appuyez à nouveau sur la
touche MENU.
Pour réinitialiser les valeurs de réglage, appuyez sur la
touche RESET pendant que l'écran est affiché.
Remarque
Le zoom sur l'image s'arrête dès que la taille horizontale ou
verticale atteint sa valeur maximum ou minimum.
Si vous utilisez le mode GPE d'optimisation de l'image graphique (Graphie Picture Enhancement)
Lorsque vous vous trouvez dans l'un des modes GPE,
l'écran COULEUR suivant apparaît quand vous
sélectionnez " 0 COUL".
œ
□
a 26 □
Cet écran vous permet de diminuer la température des
couleurs de 11,OOOK à 9,300K. Appuyez sur les touches
pour régler la température des couleurs.
Pour plus de détails sur l'utilisation du mode GPE, voir
"Sélection du mode Graphie Picture Enhancement
(GPE)" à la page 16.
(suite page suivante)
11
Page 30

Personnalisation de l'affichage
3 Appuyez sur les touches Îh|/'t pour sélectior^ner la
température des couleurs.
L'écran vous propose deux modes de température des
couleurs.
Les réglages par défaut sont 9.300K et 5.000K.
Utilisation de l'écran de menu ECRAN
Procédez au réglage de la convergence pour éliminer les
ombres rouges ou bleues qui peuvent apparaître autour des
sujets affichés sur l'écran. Procédez au réglage de la fonction
ELIM MOIRAGE pour éliminer les lignes ondulatoires ou
elliptiques qui peuvent apparaître sur l'écran.
Une fois que le réglage est effectué, il sera conservé en
mémoire pour tous les signaux d'entrée reçus.
Sélection de votre propre température des couleurs entre 9.300K et 5.000K
Appuyez sur les touches -O. ^ / pour sélectionner
" g) (VARIABLE)" et procédez au réglage en appuyant
sur les touches
93UUK I---------------------
5000K mÊcmzi
Ba—^ g 50 Q
VARIABLE
. pour une température plus élevée (vers le bleu)
•4“ ... pour une température moins élevée (vers le
rouge)
L'écran de menu disparaît automatiquement au bout
d'environ 30 secondes.
Pour refermer l'écran de menu, appuyez à nouveau sur la
touche MENU.
Poiu réinitialiser les valeurs de réglage, appuyez sur la
touche RESET pendant que l'écran est affiché. La
températiue des couleurs sélectionnée est ramenée à la
valeur de réglage par défaut.
1 Appuyez sur la touche MENU.
L'écran de menu MENU apparaît.
2 Appuyez sur les touches et 04-/^ pour
sélectionner “ |ïïD ECRAN" et appuyez ensuite à
nouveau sur la touche MENU.
L'écran de menu ECRAN apparaît.
am
3
□ 26 □
CONVERGENCE H
3 Appuyez sur les touches pour sélectionner le
paramètre à régler.
12
Sélectionnez
QD
CONVERGENCE H -
d)
CONVERGENCE V
n
ELIM MOIRAGE
'ÎÜ} *
REGLAGE MOIRE
* ELIM MOIRAGE doit être réglé sur “OUI" pour que
" -¡m} (REGLAGE MOIRE)" apparaisse à l'écran.
Pour
régler la convergence horizontale
régler la convergence verticale
éliminer les lignes ondulatoires ou
elliptiques sur l'écran
régler le degré de suppression du
moiré
(suite page suivante)
Page 31

4 Appuyez sur les touches pour ajuster les
réglages.
Pour
(TTI . pour décaler les ombres rouges vers la
CONVERGENCE H droite et les ombres bleues vers la
Appuyez sur
gauche
<-,111,-
... pour décaler les ombres rouges vers la
gauche et les ombres bleues vers la
droite
-Tiïr
Personnalisation de l'affichage
Utilisation de l'écran de menu OPTION
L'écran de menu OPTION vous permet d'activer
manuellement la démagnétisation de l'écran et de régler les
paramètres tels que la position et la langue d'affichage des
écrans de menu. Il vous permet également de verrouiller les
commandes.
.oipelecraa#^^ ; 4
L'écran du moniteur est automatiquement démagnétisé à la
mise sous tension.
Vous pouvez aussi démagnétiser manuellement l'écran.
1 Appuyez sur la touche MENU.
L'écran MENU apparaît.
Œ)
CONVERGENCE V
EUM MOIRAGE
•is-
REGLAGE MOIRE
. pour décaler les ombres rouges vers le
haut et les ombres bleues vers le bas
S
. pour décaler les ombres rouges vers le
bas et les ombres bleues vers le haut
S
. pour activer ELIM MOIRAGE ("OUI")
. pour désachver ELIM MOIRAGE
("NON")
. pour augmenter l'effet de réduction du
. pour diminuer l'effet de réduction du
MENU
B
2 Appuyez sur les touches et pour
sélectionner " S OPTION" et appuyez ensuite à
nouveau sur la touche MENU.
L'écran de menu OPTION apparaît.
3 Appuyez sur les touches pour sélectionner
"tl (DEGAUSS MANUEL)".
4 Appuyez sur la touche 3
L'écran est démagnéhsé pendant environ 5 secondes.
L’écran de menu disparaît automatiquement au bout
d'environ 30 secondes.
Pour refermer l'écran de menu, appuyez à nouveau sur la
touche MENU.
Pour réirdtialiser les valeurs de réglage, appuyez sur la
touche RESET pendant que l'écran est affiché.
Le paramètre sélectionné est ramené à la valeur de réglage
par défaut.
Si vous devez démagnétiser l'écran une seconde fois,
attendez au moins 20 minutes avant de répéter cette
procédure.
L'écran de menu OPTION disparaît automahquement au
bout d'environ 30 secondes.
Pour refermer l'écran de menu, appuyez à nouveau sur la
touche MENU. .j ^
Page 32

Personnalisation de Paffichage
Vous pouvez changer la position d'affichage des écrans de
menu (par exemple, lorsque vous voulez régler l'image
derrière un écran de menu).
1 Appuyez sur la touche MENU.
L'écran MENU apparaît.
La fonction de verrouillage des commandes désactive toutes
les touches du panneau frontal à l'exception du
commutateur d'alimentation (!) et de la touche MENU.
1
Appuyez sur la touche MENU.
L'écran MENU apparaît.
2 Appuyez sur les touches 0-fet pour
sélectionner " S OPTION" et appuyez ensuite à
nouveau sur la touche MENU.
L'écran de menu OPTION apparaît.
i9№ai{
1
Appuyez sur les touches pour sélectionner
" g (POSITION OSD H)" ou " g (position OSD V)"
s
OUI
0
On :
Q:
DEGAUSS MANUEL
Sélectiormez " g (POSITION OSD H)" pour ajuster la
position horizontale.
Sélectionnez " g (POSITION OSD V)" pour ajuster la
position verticale.
2 Appuyez sur les touches et pour
sélectionner “ g OPTION" et appuyez ensuite à
nouveau sur la touche MENU.
L'écran de menu OPTION apparaît.
Appuyez sur les touches i
"0-n (VERROU REGLAGE)
4 Appuyez sur les touches 3^/^ pour sélectionner
"OUI".
pour sélectionner
POSITION OSD V
4 Appuyez sur les touches pour amener l'écran
de menu à la position voulue.
L'écran de menu OPTION disparaît automatiquement au
bout d'environ 30 secondes.
Pour refermer l'écran de menu, appuyez à nouveau sur la
touche MENU.
Pour réinitialiser les valeurs de réglage, appuyez sur la
touche RESET pendant que l'écran est affiché.
14
L'écran de menu'OPTION disparaît automatiquement au
bout d'environ 30 secondes.
Pour refermer l'écran de menu, appuyez à nouveau sur la
touche MENU.
Lorsque vous avez sélectionné "OUI", vous ne pouvez plus
sélectionner de paramètres à l'exception de "QUITTE" et
" S OPTION" dans l'écran MENU.
Si vous appuyez sur une touche autre que le commutateur
d'alimentation (!) ou la touche MENU, l'indication
apparaît à l'écran.
Pour désactiver le verrouillage des commandes
Répétez les étapes 1 à 3 ci-dessus et appuyez sur les touches
3'4—/—► pour sélectionner "NO".
Page 33

Personnalisation de
Réinitialisation des réglages
Vous pouvez sélectionner l'affichage des écrans de menu en
anglais, français, allemand, espagnol, italien et japonais.
1 Appuyez sur la touche MENU. »
L'écran MENU apparaît.
2 Appuyez sur les touches P;^/^ et 3^/*^ pour
sélectionner " g OPTION" et appuyez ensuite à
nouveau sur la touche MENU.
L'écran de menu OPTION apparaît.
3 Appuyez sur les touches
“B (LANGUAGE)".
pour sélectionner
Réinrtialisationd'un parainètr^l
1 Appuyez sur les touches MENU, ifet
pour sélectionner l'écran de menu contenant le
paramètre que vous voulez réinitialiser.
2 Appuyez sur les touches D! Vf pour sélectionner le
paramètre que vous voulez réinitialiser.
3 Appuyez sur la touche RESET.
RESET
4 Appuyez sur les touches pour sélectionner la
langue d'affichage de votre choix.
ENG: anglais, FRA: français, DEU: allemand,
ESP: espagnol, ITA; italien ou JPN: japonais.
L'écran de menu OPTION disparaît automatiquement au
bout d'environ 30 secondes. Pour refermer l'écran de menu,
appuyez à nouveau sur la touche MENU.
Pour restaurer l'affichage en anglais, appuyez sur la touche
RESET pendant que l'écran est affiché.
Alors qu'aucun écran de menu n'est affiché, appuyez sur
la touche RESET.
Toutes les dormées de réglage pour le signal d'entrée en
cours sont ramenées aux valeurs de réglage par défaut.
Attention que les données de réglage qui ne sont pas
affectées par les changements du signal d'entrée (langue
d'affichage, position des écrans de menu et fonction de
verrouillage des commandes) ne sont pas ramenées aux
valeurs par défaut.
RESET
l'Réinitialisation' dé.toutèsJeédôri
jUlage pour,touffes signe
Maintenez la touche RESET enfoncée pendant au moins deux secondes.
.ent
Toutes les dormées de réglage, y compris la luminosité et le
contraste, sont ramenées aux valeurs de réglage par défaut.
RESET
15
Page 34

Personnalisation de l'affichage
Caractéristiques techniques
Sélection du mode Graphie Picture Enhancement (GPE)
La touche d'optimisation de l'image graphique (GPE) vous
permet de changer automatiquement les caractéristiques de
l'image à l'écran en fonction de l'utilisation de vptre
moniteur. Appuyez simplement sur la touche GPE pour
faire défiler les trois modes.
1 Mettez le moniteur et l'ordinateur sous tension.
2 Appuyez sur la touche GPE pour sélectionner le
mode.
Chaque fois que vous appuyez sur la touche GPE, le mode
affiché change selon la séquence suivante :
STANDARD MODE
i
PRESENTATION MODE
i
GRAPHICS/VIDEO MODE
Le STANDARD MODE est idéal pour 1'utiHsation d'un
tableur, d'un traitement de texte et d'autres applications
basées sur le texte.
Le PRESENTATION MODE est bien pratique pour les
programmes de présentation requérant des couleurs
éclatantes.
Le GRAPHICS/VIDEO MODE renforce la dynamique des
films et des jeux vidéo en augmentant la netteté et la
luminosité de l'image.
Modes présélectionné et utilisateur
Ce moniteur est présélectionné pour les dix normes
industrielles les plus fréquentes de manière à garantir une
véritable compatibilité "plug and play".
Conditions de synchronisation horizontale et verticale préconisées
La largeur de synchronisation horizontale doit être de 1,0 ys de la
durée horizontale totale.
La largeur de neutralisation horizontale doit être > à 3,0 ¡4s pour le
CPD-220GS.
La largeur de neutralisation horizontale doit être > à 500 fjs pour le
CPD-220GS.
Remarque pour les utilisateurs Windows
Vérifiez le mode d'emploi de votre carte vidéo ou le programme
utilitaire fourni avec la carte graphique et sélectionnez le taux de
régénération le plus élevé de manière à maximiser les performances
du moniteur.
CPD-220GS
Résolution
№
(points X lignes)
1 640 x 480
2 640 x 480
3 720 X 400
4 800 x 600
5 800 x 600
832 X 624
6
7 1024 X 768
8 1024 X 768
9 1024 X 768
1280 X1024
10
Fréquence
horizontale
31,5 kHz
43,3 kHz
31,5 kHz
46,9 kHz
53,7 kHz
49,7 kHz
60,0 kHz
60,2 kHz
68,7 kHz
80,0 kHz ^ 75 Hz
Fréquence
verticale
60 Hz
85 Hz
70 Hz
75 Hz
85 Hz
75 Hz
75 Hz
75 Hz
85 Hz
Mode
graphique
VGA Graphie
VESA
VGA Texte
VESA
VESA
Macintosh
16" Color
VESA
Macintosh
19" Color
VESA
VESA
L'indication du mode sélectionné apparaît sur l'écran
pendant environ 3 secondes.
Si l'écran apparaît trop blanc, réglez la température des
couleurs comme expliqué dans la section "Utilisation de
l'écran de menu COUL. (couleur)" à la page 11.
Remarque
Les modes PRESENTATION MODE et GRAPHICS/VIDEO MODE
peuvent produire des images fantôme lors de l'affichage
d'applications axées sur le texte.
Ces modes changent la luminosité de l'image dynamiquement en
fonction des changements des images animées. Si des images
fantôme apparaissent, réglez GPE sur STANDARD MODE.
16
Page 35

Caractéristiques techniques
Affichage des informations sur le
moniteur
Vous pouvez afficher la désignation du modèle, le numéro
de série et l'année de fabrication à l'aide de l'écran
INFORMATIONS du moniteur. *
Maintenez la touche MENU enfoncée pendant 5 secondes. ’
L'écran INFORMATIONS apparaît.
Exemple:
INFORMATIONS
MODEL ; CPD-220GS
SER N0:1234567
MANUFACTURED : 1998-32
L'écran INFORMATIONS mentionne la désignation du
modèle, le numéro de série, l'année de fabrication et la
semaine.
L'écran disparaît automatiquement au bout de 30 secondes.
Fil d'amortissement
Sur un fond blanc, il se peut que vous observiez sur l'écran
de très fines lignes horizontales comme illustré ci-dessous. Il
s'agit des fils d'amortissement.
Le tube Trinitron comporte une grille d'ouverture intérieure
rayée verHcalement. Cette grille d'ouverture permet le
passage d'une plus grande quantité de lumière au travers
de l'écran, ce qui confère au tube cathodique Trinitron des
couleurs plus denses et une luminosité plus intense.
Ces fils d'amortissement sont fixés à la grille d'ouverture de
façon à amorhr les vibrahons de la grille et à garantir une
stabilité constante de l'image à l'écran.
Fil d’amortissement
Approx. 6 cm
i
I
V
__________
J
Approx. 6 cm
Fonction d'économie d'énergie
Ce moniteur est doté de trois modes de réduction de la
consommation d'énergie. Lorsqu'il détecte l'absence de
signaux vidéo provenant de l'ordinateur, il réduit la
consommation électrique de la façon suivante.
Mode de
consommation
d'énergie
1
Fonctkmnement
normal
2
Veille
(1er mode)
3
Interruption <15W
(2e mode) 3 s
4
Inactif <8W
(3e mode)
Remarque
Si le câble de signal vidéo n'est pas correctement raccordé, le
message "PAS ENTREE VIDEO" (page 18) apparaît. Au bout de 30
secondes, la fonction d'économie d'énergie met automatiquement le
moniteur en mode inactif et l'indicateur Ô s'allume en orange.
Lorsque des signaux de synchronisation horizontale et verticale
sont détectés, le moniteur repasse automatiquement en mode de
fonctionnement normal.
Consommation
électrique
<120W
<15W Approx. Vert et orange en
Temps de
reprise
—
3s alternance
Approx. Vert et orange en
Approx.
10 s
Indicateur Cl)
Vert
alternance
Orange
17
Page 36

Informations complémentaires
Messages d'avertissement
Lorsqu'une anomalie du signal d'entrée est détectée, l'un
des messages suivants apparaît.
INFORMATIONS
Condition du signal d'entrée
"HORS PLAGE DE BALAYAGE" indique que le signal
d'entrée n'est pas supporté par les spécifications du
moniteur.
"PAS ENTREE VIDEO" indique qu'aucun signal n'est
transmis.
Condition du signai
d’entrée
HORS PLAGE DE BALAYAGE
Pour remédier à ces problèmes, reportez-vous à la section
de "Guide de dépaitnage" ci-dessous.
Guide de dépannage
Cette section peut vous aider à localiser un problème et, par conséquent, vous éviter de consulter un service technique.
Symptôme Vérifiez
Pas d'image
Si l'indicateur
allumé
Si le message "PAS ENTREE
VIDEO" apparaît à l'écran ou
si l'indicateur (1) est orange ou
passe alternativement de
l'orange au vert
Si le message "HORS PLAGEDE BALAYAGE" apparaît à
l'écran
(1 )
n'est pas
Vérifiez si le cordon d'alimentation est correctement branché.
Vérifiez que l'interrupteur (!) (alimentation) est réglé sur la position "on"
• Appuyez sur une touche quelconque du clavier de l'ordinateur.
• Vérifiez si l'interrupteur d'alimentation de votre ordinateur est réglé sur la position "on"
• Vérifiez si le câble de signal vidéo est correctement branché et si toutes les fiches sont
fermement enfoncées dans les prises.
• Assurez-vous qu'aucune broche n'est pliée ou enfoncée dans le cormecteur d'entrée
vidéo HD15.
• Vérifiez si la carte vidéo est correctement enfoncée dans la fente de bus adéquate.
Vérifiez si la plage de fréquence vidéo est conforme à la plage spécifiée pour le
moniteur.
Horizontal.: 30-85 kHz
Vertical.:'48-120 Hz
Reportez-vous au mode d'emploi de votre ordinateur pour régler la plage de fréquence
vidéo.
Si vous utilisez tm adaptateur de câble de signal vidéo, vérifiez s'il est correct.
Si aucun message n'est affiché
et si l'indicateur (!) est vert ou
clignote en orange
L'image est brouillée.
Les couleurs ne sont pas uniformes
18
Voir "Fonction d'autodiagnostic" (page 20).
Consultez le mode d'emploi de votre carte graphique pour le réglage approprié du
moniteur.
Consultez ce mode d'emploi et vérifiez si le mode graphique et la fréquence que vous
essayez d'utiliser sont supportés. Même si la fréquence est comprise dans la plage
requise, certaines cartes vidéo peuvent avoir une impulsion de synchronisation trop
étroite pour une synchronisation correcte du moniteur.
Démagnéhsez le moniteur (page 13).
Si vous placez près du moniteur un appareil qui génère un champ magnétique comme
un haut-parleur ou si vous changez l'orientation du moniteur, il est possible que les
couleurs perdent leur uniformité. Cette fonction sert à démagnétiser le cadre métallique
du tube cathodique de façon à obtenir un champ neutre pour une reproduction uniforme
des couleurs. Si un second cycle de démagnétisation est nécessaire, laissez s'écouler un
intervalle d'au moins 20 minutes pour obtenir les meilleurs résultats.
Page 37

Informations complémentaires
Symptôme
Vous ne parvenez pas à régler
le moniteur à l'aide des
touches du panneau frontal
L'image à l'écran n'est pas
centrée ou dimensionnée
correctement
Les bords de l'image sont
incurvés
Le rebord des lignes blanches
est ombré de rouge ou de
bleu
L'image est floue
L'image sautille ou oscille
fortement
L'image scintille
Apparition d'images
fantômes
Apparition d'un motif
ondulatoire ou elliptique
(moiré)
Deux fines lignes horizontales
(fils) sont visibles
Un souffle est audible juste
après la mise sous tension
Vérifiez
• Si la fonction de verrouillage des commandes est activée, désactivez-la dans le menu
OPTION (page 14).
• Réglez le centrage ou la taille de l'image (page 9).
• Certains modes vidéo ne remplissent pas l'écran jusqu'aux bords. Ce problème a
tendance à sitmanifester avec certaines cartes vidéo.
• Réglez la géométrie (page 10).
• Réglez la convergence (pages 12 - 13).
• Réglez le contraste et la luminosité (page 8).
• Démagnétisez le moniteur (page 13).
Si vous placez près du moniteur un appareil qui génère un champ magnétique comme
un haut-parleur ou si vous changez l'orientation du moniteur, il est possible que les
couleurs perdent leur uniformité.
Cette fonction sert à démagnétiser le cadre métallique du tube cathodique de façon à
obtenir un champ neutre pour ime reproduction uniforme des couleurs. Si un second
cycle de démagnétisation est nécessaire, laissez s'écouler un intervalle d'au moins 20
minutes pour obtenir les meilleurs résultats. ^
• Si le contour des images est ombré de bleu ou de rouge, procédez au réglage de la
convergence (pages 12 -13).
• Lorsque le moiré a été supprimé, il arrive que l'image devienne floue. Réduisez l'effet
de suppression du moiré (pages 12 -13).
• Isolez et éliminez toute source potentielle de champs électriques ou magnétiques. C'est
généralement le cas des ventilateurs électriques, des éclairages fluorescents, des
imprimantes laser.
• Si un autre moniteur se trouve à proximité de celui-ci, éloignez-les de façon à réduire
les interférences.
• Branchez le moniteur sur une autre prise d'alimentation, de préférence sur un circuit
différent.
• Essayez le moniteur sur un ordinateur différent dans vme autre pièce.
• Réglez lé taux de régénération de l'ordinateur pour obtenir la meilleure image possible
en vous référant au mode d'emploi de l'ordinateur.
• Si ce s)rmptôme se manifeste, débranchez les câbles prolongateurs vidéo et/ou les
boîtiers de commutation vidéo. Une longueur de câble excessive ou des connexions
lâches peuvent être à l'origine de l'apparition de ce symptôme.
• Supprimez le moiré (pages 12 -13).
Le moiré peut varier suivant l'ordinateur connecté.
• Suivant le rapport entre la résolution, le pas des points du moniteur et le pas de
certaines trames d'image, il arrive que des arrière-plans présentent un effet de moiré.
Cet effet de moiré ne peut être éliminé qu'en changeant le motif de votre bureau.
• Ces fils stabilisent la grille d'ouverture rayée verticalement (page 17). Cette grille
d'ouverture permet le passage de plus de lumière au travers de l'écran, ce qui confère
au tube cathodique Trinitron des couleurs plus denses et une luminosité plus intense.
• Le cycle de démagnétisation est activé à la mise sous tension. Pendant que le cycle de
démagnétisation est activé, un souffle peut se faire entendre. Ce même souffle est
audible lors de la démagnétisation manuelle. Il ne s'agit pas d'un dysfonctionnement.
Si le problème persiste, appelez votre distributeur Sony agréé depuis un téléphone situé à proximité de votre moniteur.
Inscrivez la désignation du modèle et le numéro de série de votre moniteur, de même que la marque et la désignation de
votre ordinateur et de la carte vidéo.
19
Page 38

Informations complémentaires
Fonction d'autodiagnostic
Ce moniteur est doté d'une fonction d'autodiagnostic.
Utilisez cette fonction s'il y a un problème avec votre
moniteur ou ordinateur.
1 Déconnectez le câble d'entrée vidéo ou mettez
l'ordinateur raccordé hors tension.
2 Mettez le moniteur hors et sous tension.
3 Maintenez la touche enfoncée pendant 2
secondes.
Si les quatre barres de couleur apparaissent (blanc,
rouge, vert, bleu) après quelques secondes, le morùteur
fonctionne correctement, mais il se peut qu'il y ait un
problème avec votre ordinateur. Adressez-vous au
fabriccint de votre ordinateur.
Si les barres de couleur n'apparaissent pas, dest qu'il y a
une défaillance potentielle du moniteur. Informez votre
revendeur Sony agréé de l'état du moniteur.
Spécifications
CPD-220GS
Tube image Pas d'ouverture de grille de
Taille de l'image affichée
Résolution
Zone d'image standard
Fréquence de déflexion
Plug & Play
Haut-parleur
Sortie de casque d'écoute
Entrée audio Miniprise stéréo
Tension/courant CA d'entrée
Consommation électrique
Dimensions
Masse
Accessoires fournis
La conception et les spécifications sont sujettes à
modifications sans préavis.
0,25 mm
17 pouces mesurés en diagonale
Déflexion de 90 degrés
Approx. 327 X 243 mm (1/h)
(12'/8 X 9 ^/s pouces)
Zone de visualisation de 16,0"
Horizontale ; Max. 1280 points
Verticale : Max. 1024 lignes
Approx. 312 X 234 mm (1/h)
(12^/8 x9 '/4 pouces)
Horizontale : 30 à 85 kHz
Verticale ; 48 à 120 Hz
DDCl/2B/2Bi,GTF
0,25 W (monaural)
Miniprise stéréo, accepte des
impédances de 8 Î2 ou plus
100-120-1.9 A 50/60 Hz
220-240-1.1 A 50-60 Hz
Max. 120 W
406 X 432 X 420 mm (1/h/p)
(16 X17 */8 X16 ®/s pouces)
Approx. 18 kg (39 Ib 11 oz)
Voir page 6
20
Page 39

Indice
Procedimientos iniciales
Precauciones....................................................................................................................4
Funciones de los controles...............................................................................................5
Instalación........................................................................................................................6
Selección del idioma de la indicación en pantalla...........................................................5
Conexión del altavoz del monitor....................................................................................7
Personalización del monitor
Ajuste del brillo y contraste de la imagen........................................................................8
Introducción al sistema de indicación en pantalla...........................................................8
Uso de la indicación en pantalla CENTR (Centrado)......................................................9
Uso de la indicación en pantalla TAMAÑO....................................................................9
Uso de la indicación en pantalla GEOM (Geometría)...................................................10
Uso de la indicación en pantalla ZOOM........................................................................11
Uso de la indicación en pantalla COLOR
Uso de la indicación en pantalla PANT AL (Pantalla)
Uso de la indicación en pantalla OPCION
Restauración de los ajustes de fábrica
Selección del modo GPE (Mejoramiento gráfico de imágenes)
.............................................v......................
..................................................
....................................................................
...........................................................................
...................................
11
12
13
15
16
Funciones técnicas
Modos predefinidos y de usuario
ViBualizadón de información sobre el monitor.............................................................17
Fimción de ahorro de energía........................................................................................17
Hilos de amortiguación..................................................................................................17
..................................................................................
Información adicional
Mensajes de aviso..........................................................................................................18
Solución de problemas...................................................................................................18
Función de autodiagnóstico...........................................................................................20
Especificaciones............................................................................................................20
Macintosh es una marca comercial licenciada a Apple Computer, Inc.,
registrada en EE.UU. y otros países.
Windows® es una marca comercial registrada de Microsoft Corporation
en Estados Unidos y otros países.
IBM PC/AT y VGA son marcas comerciales registradas de
International Business Machines Corporation de EE.UU.
VESA es una marca comercial de Video Electronics Standard
Association.
El resto de los productos mencionados en este manual pueden ser
marcas comerciales o marcas comerciales registradas de sus respectivas
compañías.
Además, v "®" no se mencionan en cada caso en este manual.
16
Page 40

roceaimientos iniciales
!
Precauciones
Coloque el monitor en un lugar debidamente ventilado
para evitar el recalentamiento intemo-?No lo sitúe sobre
superficies (alfombras, mantas, etc.) o cerca de materiales
(cortinas, tapices) que puedan bloquear los orificios de
ventilación.
No instale el monitor cerca de fuentes de calor como
radiadores o tubos de ventilación, ni lo exponga a la luz
directa del sol, a polvo excesivo, o a vibraciones o
sacudidas mecánicas.
' Mantenga el monitor alejado de equipos que generan
campos magnéticos, como transformadores o líneas
eléctricas de alto voltaje.
• Limpie el exterior, el panel y los controles con un paño
suave ligercimente humedecido en una solución
detergente poco concentrada. No utilice ningún tipo de
estropajo, productos de limpieza en polvo rú disolventes,
como alcohol o bencina.
• Procure no friccionar, tocar ni golpear la superficie de la
pantalla con objetos puntiagudos o abrasivos, como un
bolígrafo o rm destornillador. De lo contrario, este tipo de
contacto puede dañar el tubo de imagen.
Utilice un cable de alimentación adecuado al suministre
eléctrico local.
Para los clientes de EE.UU.
Si no emplea un cable apropiado, este monitor no
cumplirá las normas obligatorias de la FCC.
Ejemplos de formas de enchufes;
para 100 hasta 120 V CA para 200 hasta 240 V CA
Para desconectar el cable de alimentación, espere al
menos 30 segundos después de apagar la urúdad para
permitir la descarga de la electricidad estática acumulad«
en la superficie del TRC.
Tras activar la alimentación, el TRC se desmagnetiza
durante 5 segundos aproximadamente. Este proceso
genera un intenso campo magnético alrededor del marco
metálico, que puede eJterar los datos conterúdos en las
cintas o discos magnéticos situados en las proximidades.
Por este motivo, es aconsejable mantener los equipos de
grabación magnéticos y las cintas y discos alejados de este
monitor.
La toma de corriente debe instalarse cerca de la
urúdad en una zona accesible.
Al transportar este monitor para su reparación o traslado,
embálelo en la caja de cartón y con los materiales de
embalaje originales. '
El soporte basculante giratorio permite ajustar el ángulo de
visuaLización del morútor dentro de un rango de 180° en
sentido horizontal y 20° en sentido vertical.
Para girar el monitor en sentido vertical y horizontal,
sujételo por la parte inferior con ambas manos, tal como se
muestra en la ilustración.
Page 41

Funciones de los controles
Zonsulte las páginas que se indican entre paréntesis para
:)btener descripciones más detalladas.
Procedimientos iniciales
Parte frontal
[T] Botón MUTING (silenciamiento) (página 7)
Desactiva el sonido.
[2] Botón RESET (restauración) (página 15)
Recupera los niveles predefinidos de fábrica.
Botón GPE (página 16)
Selecciona el modo GPE (Mejoramiento gráfico de
imágenes).
[4] Botón MENU (menú) (páginas 7-15, 17)
Muestra la indicación en pantalla MENU.
Parte posterior
Conector AC IN
Permite enchufar un cable de alimentación de CA al
monitor.
Conector de entrada de vídeo (HD15)
Introduce las señales de vídeo RGB y SYNC.
Lateral
d] Botones 3 (contraste) (•♦■/■♦•) (páginas
7-15,20)
Ajustan el contraste.
Funcionan como los botones (■*
opciones.
■/^) al ajustar otras
[6] Botones iCF (brillo) (4/'!') (páginas 7 - 15)
Ajustan el brillo de la imagen.
Funcionan como los botones (♦/ ♦) al ajustar otras
opciones.
[7] Interruptor e indicador de encendido Cl)
(páginas 17, 20)
Enciende o apaga el monitor.
El indicador se ilumina en color verde cuando el
monitor está encendido y en color naranja cuando se
encuentra en modo de ahorro de energía.
Toma AUDIO IN
Introduce señales de audio al conectarse a la toma de
salida de audio del ordenador.
O Toma de auriculares O
Envía señales de audio a los auriculares (no
suministrados).
Page 42

Procedimientos iniciales
Instalación
Antes de utilizar este monitor, compruebe que en el paquete
se incluyen los siguientes artículos:
• Monitor (1)
• Cable de alimentación (1)
• Adaptador Macintosh (1)
• Windows® Monitor Information Disk (1)
• Tarjeta de garantía (1)
• Este manual de instrucciones (1)
• Cable con minienchufe de audio (1)
Este monitor funciona con cualquier sistema IBM o
compatible equipado con capacidad gráfica VGA o superior.
Aunque este monitor funciona con otras plataformas que
empleen frecuencias horizontales comprendidas entre 30 y
85 kHz incluidos los sistemas Macintosh y Power
Macintosh, es preciso utilizar un adaptador de cable.
Póngase en contacto con su proveedor para obtener
información sobre el adaptador más apropiado para su
sistema.
Conexión de un ordenador IBM PGAT, Macintosh
o compatible
Con el ordenador apagado, conecte el cable de señal de
vídeo a la salida de vídeo del ordenador.
C i) 11 L; »'i u t i 1Ì í ; iH; 11 r-It! j
Con el monitor apagado, conecte un extremo del cable de
alimentación al monitor y el otro a una toma de corriente.
?nTÍ-=3jtvKt BÎ 7 ‘-5^ Of 'JBíb't'lO'
La instalación del monitor está finalizada.
Nota
Si aptirece en pantalla el mensaje "FUERA DE RANGO
EXPLORACION" o "NO SEÑAL", consulte "Mensajes de aviso" en
la página 18.
Para los clientes que utilizan Windows* 95/98
Instale en el PC la información sobre el modelo nuevo contenido en
el "Windows* Monitor Information Disk".
Ordenador IBM
PC/AT o
compatible
Ordenador
Macintosh o
compatible
OO O (=)
PI PI
LI
a-
a la salida de vídeo
a la salida de video
n [§
y
(suministrado)
—fiTTR
Acerca del adaptador Macintosh^ suministrado
El adaptador Macintosh suministrado es compatible con los
ordenadores de las series Macintosh LC, Performa, Quadra y Power
Macintosh.
Es posible que las series Macintosh 11 y algunas versiones anteriores
de Power Book requieran un adaptador con microinterruptores (no
suministrado).
Nota
No cortocircuite los terminales del cable de señal de vídeo.
Selección del idioma de la
indicación en pantalla
Si necesita cambiar el idioma de la indicación en pantalla,
consulte "Selección del idioma de la indicación en pantalla"
en la página 15.
El ajuste por omisión es el idioma inglés.
Page 43

Conexión del altavoz del monitor
Es posible escuchar música, sonidos y otros archivos de
audio mediante el altavoz del monitor.
Conecte la toma AUDIO IN a la toma de salida de audp de
la tarjeta de sonido del ordenador mediante el cable con
minienchufe (suministrado).
Procedimientos iniciales
3 Pulse los botones para ajustar el volumen.
La indicación desaparece automáhcamente después de unos
30 segundos.
Para cerrar la indicación en pantalla, vuelva a pulsar el
botón MENU.
Para reajustar, pulse el botón RESET mientras la indicación
en pantalla se éncuentra activada.
v'iTf
•iPáfá^désá^n/a*
w»<antiiw>
Pulse el botón MUTING.
El altavoz no emitirá sonido.
La marca [j8( aparece en la parte inferior de la pantalla.
МММ ÉaáHeiieiii
1 Pulse el botón MENU.
Aparece la indicación en pantalla MENU.
Q C3>
COLOR
П
QEOM_
<
SONIDO
СЕМШ
Q
TAMAÑOaOPCION
(Ш
PANTAL
IzSmJ
2 Pulse los botones y para seleccionar
"<l SONIDO", y vuelva a pulsar el botón MENU.
Aparece la indicación en pantalla SONIDO.
□ 26 o
Nota
Cuando se desactiva el sonido, aparece la marca ^ en la
indicación en pantalla SONIDO en lugar de la marca Aumente
el volumen para cancelar la marca y activar el altavoz.
MUTING
Para cancelar, vuelva a pulsar el botón MUTING.
Es posible escuchar las señales de audio del ordenador
mediante auriculares (no suministrados). El altavoz se
desactiva cuando los auriculares están conectados a la toma
correspondiente. Ajuste el volumen con la indicación en
pantalla SONEXD.
Nota
Si el volumen del altavoz es demasiado bajo, puede ajustar el nivel
de entrada (media de 500 mv) mediante el ordenador.
7
Page 44

Personalización del monitor
Antes de realizar los ajustes
• Conecte el monitor y el ordenador y enciéndalos.
• Seleccione " B (LANGUAGE)" en la indicación en
pantalla OPCION y, a continuación, seleccione "ENG"
(inglés) (consulte la página 15).
Introducción al sistema de indicación en pantalla
La mayoría de los ajustes se realizan con la indicación en
pantalla MENU.
Ajuste del brillo y contraste de la
imagen
Una vez realizado el ajuste, se almacenará en la memoria
para todas las señales de entrada recibidas.
1 Pulse los botones (brillo) o
3 (contraste)
Aparece la indicación en pantalla BRILLO/
CONTRASTE.
BRILLO/COfMTRASTE
o
□ 26 □ □ 26 a
2 Para realizar el ajuste de brillo
Pulse los botones
•T ■. • para aumentar el briUo
4 • • ■ para disminuir el brillo
Para realizar el ajuste de contraste
Pulse los botones 3'4“/^.
•... para aumentar el contraste
'... para disminuir el contraste
La indicación desaparece automáticamente después de unos
3 segundos.
Para reajustar, pulse el botón RESET mientras la indicación
en pantalla aún se encuentre activada. Se restauran los
valores de brillo y contraste predefinidos de fábrica.
Indicación MENU
Pulse el botón MENU para visualizar la indicación MENU.
Este MENU contiene vínculos con las otras indicaciones en
pantalla descritas a continuación.
Frecuencia
horizontal*
@ COLOR
m
Muestra la indicación COLOR para ajustar la
temperatura de color.
O CENTR
Muestra la indicación CENTRADO para ajustar el
centrado de la imagen.
Frecuencia
vertical*
m PANTAL
Muestra la indicación PANTALLA para ajustar la
convergencia vertical y horizontal, etc.
gs ZOOM
a
Muestra la indicación ZOOM para ampliar y reducir la
imagen. ,
a OPCION
Muestra la indicación OPCION para ajustar la posición
de las indicaciones en pantalla, desmagnetizar la
pantalla, seleccionar el idioma de las indicaciones en
pantalla, etc.
e TAMAÑO
Muestra la indicación TAMAÑO para ajustar el tamaño
de la imagen.
Las frecuencias horizontal y vertical para la señal de entrada
recibida aparecen debajo de la indicación MENU.
8
SONIDO
m
Muestra la indicación SONIDO para ajustar el sonido.
U GEOM
m
Muestra la indicación GEOMETRIA para ajustar la
rotación y distorsión de la imagen, etc.
SALIR
Cierra la indicación MENU.
Page 45

Personalización dei monitor
Uso de la indicación en pantalla CENTR (Centrado)
Los parámetros de CENTRADO permiten ajustar el
centrado de la imagen. ^
Una vez realizado el ajuste, se almacenará en memoria para
la señal de entrada actual.
1 Pulse el botón MENU.
Aparece la indicación MENU.
2 Pulse los botones 0 /t y para seleccionar
" Q] CENTR" y vuelva a pulsar el botón MENU.
Aparece la indicación CENTRADO.
:r ’
a 26 o
Uso de la indicación en pantalla
TAMAÑO
Los ajustes de TAMAÑO permiten ajustar el tamaño de la
imagen.
Una vez realizado el ajuste, se almacenará en memoria para
la señal de entrada actual.
1 Pulse el botón MENU.
Aparece la indicación MENU.
2 Pulse los botones y para seleccionar
" Q TAMAÑO” y vuelva a pulsar el botón MENU.
Aparece la indicación TAMAÑO.
S 26 □
3 Para el ajuste horizontal
Pulse los botones
... para desperazar la imagen
hacia la derecha
'... para desplazar la imagen
hacia la izquierda •
Para el ajuste vertical
Pulse los botones /1.
't'... para desplazar la imagen
hacia arriba
para desplazar la imagen
hacia abajo
*
La indicación desaparece automáticamente después de unos
30 segundos.
Para cerrar la indicación en pantalla, vuelva a pulsar el
botón MENU.
Para reajustar, pulse el botón RESET mientras la indicación
aún esté activada.
Se restauran los valores predefinidos de fábrica de centrado
horizontal y vertical.
3 Para el ajuste horizontal
Pulse los botones
para aumentar el tamaño de
la imagen
para reducir el tamaño de la
imagen
Para el ajuste vertical
Pulse los botones íÍÍ-4’ / 'f.
i'... para aumentar el tamaño de
la imagen
4;_) ... para reducir el tamaño de la
\ ^ imagen
La indicación desaparece automáticamente después de unos
30 segundos.
Para cerrar la indicación en pantalla, vuelva a pulsar el
botón MENU.
Para reajustar, pulse el botón RESET mientras la indicación
aún esté activada.
Se restauran los valores predefinidos de fábrica de tamaño
horizontal y vertical.
Page 46

Personalización del monitor
Uso de la indicación en pantalla GEOM (Geometría)
Los ajustes de GEOM (geometría) permiten ajustar la forma
y orientación de la imagen.
Una vez ajustada la rotación, se almacenará en memoria
para todas las señales de entrada recibidas. El resto de
ajustes se almacenarán en memoria para la señal de entrada
actual.
1 Pulse el botón MENU.
Aparece la indicación MENU.
4 Pulse los botones para realizar los ajustes.
Para
O ROTACION
Pulse
para rotar la imagen en el sentido
las agujas del reloj
'Q.
para rotar la imagen en el sentido
contrario a las agujas del reloj
2 Pulse los botones y para seleccionar
" n GEOM" y vuelva a pulsar el botón MENU.
Aparece la indicación GEOMETRIA.
am
Li
L)
lA
o 26 a
Q
ROTACION
3 Pulse los botones para seleccionar la opción
que desee ajustar. .
Seleccione
ROTACION
O
DIST COJIN
n
BAL COJIN ajustar el balance lateral de la imagen
D
DIST TRAP
O
Para
ajustar la rotación de la imagen
ajustar los lados de la imagen
ajustar la anchura de la imagen
n DIST COJIN
D BAL COJIN . para desplazar los lados de la
C\ DISTTRAP
Q BALTRAP
para ampliar los lados de la imagi
-O-
. para contraer los lados de la imag'
-n-
imagen hacia la derecha
-D-
. para desplazar los lados de la
imagen hacia la izquierda
-Ur
-*■..
. para aumentar la anchura de la
imagen en la parte superior
. para reducir la anchura de la imag
..
en la parte superior
-*■..
. para desplazar la parte superior d'
la imagen hacia la derecha
\3
10
BAL TRAP
ajustar el balance de la forma de la imagen
.. . para desplazar la parte superior d<
la imagen hacia la izquierda
‘'O*'
La indicación desaparece automáticamente después de unos ?
segundos.
Para cerrar la indicación en pantalla, vuelva a pulsar el botón
MENU.
Para reajustar, pulse el botón RESET mientras la indicación ai
esté activada.
La opción seleccionada recupera el valor predefinido de fábru
Page 47

Uso de la indicación en pantalla
Uso de la indicación en pantalla
ZOOM
Los ajustes de ZOOM permiten ampliar o reducir el tamaño
de la imagen.
Una vez realizado el ajuste, se almacenará en memoria para
la señal de entrada actual. *-
1 Pulse el botón MENU.
Aparece la indicación en pantalla MENU.
MENU
15
2 Pulse los botones y para seleccionar
" ^ ZOOM" y vuelva a pulsar el botón MENU.
Aparece la indicación en pantalla ZOOM.
3 Pulse los botones para ajustar el zoom de la
imagen.
•... para ampliar la imagen
'... parí reducir la imagen
COLOR
Es posible cambiar la temperatura de los colores del monitor.
Por ejemplo, puede modificar los colores de una imagen en
pantalla para que coincidan con los de la imagen impresa.
Una vez realizado el ajuste, se almacenará en memoria para
todas las señales de entrada recibidas.
1 Pulse el botón MENU.
Aparece la indicación MENU.
Pulse los botones iít'f/‘f y para seleccionar
COLOR" y vuelva a pulsar el botón MENU.
Aparece la indicación COLOR.
Si emplea el modo GPE (Mejoramiento gráfico de imágenes)
Si se encuentra en uno de los modos GPE, aparecerá la
indicación en pantalla COLOR al seleccionar " 0
COLOR".
La indicación desaparece automáticamente después de unos
30 segundos.
Para cerrar la indicación en pantalla, vuelva a pulsar el
botón MENU.
Para reajustar, pulse el botón RESET mientras la indicación
aún se encuentre activada.
Nota
El ajuste de zoom de la imagen se detendrá en cuanto el tamaño
horizontal o vertical alcanza su valor máximo o mínimo.
œ
□ 26 a
Esta indicación en pantalla permite reducir la
temperatura del color de ll.OOOK a 9.300K. Pulse los
botones para ajustar la temperatura del color.
Para obtener más información sobre el uso del modo
GPE, consulte "Selección del modo GPE (Mejoramiento
gráfico de imágenes)" en la página 16.
(continúa)
11
Page 48

Personalización del monitor
3 Pulse los botones para seleccionar la
temperatura del color.
Existen dos modos de temperatura del color en la
indicación en pantalla.
Los ajustes predefinidos son 9,300K y 5,000K.
Uso de la indicación en pantalla
PANTAL (Pantalla)
Ajuste los valores de convergencia para elimincir las
sombras rojas o azules que pueden aparecer alrededor de
los objetos en la pantalla. Ajuste la función CANCELAR
MUARE para eliminar las líneas onduladas o elípticas que
pueden aparecer en pantalla.
Una vez realizado el ajustado, se almacenará en memoria
para todas las señales de entrada recibidas.
Selección de la temperatura del color entre 9,300K y 5,000K
Pulse los botones Ó! para seleccionar " g]
(VARIABLE)" y realice el ajuste pulsando los botones
9300K I
---------------
5000K I H
50 D
n
VARIABLE
^ ... para obtener temperaturas mayores (azulado)
... para obtener temperaturas menores (rojizo)
La indicación desaparece automáticamente después de unos
30 segundos.
Para cerrar la indicación en pantalla, vuelva a pulsar el
botón MENU.
Para reajustar, pulse el botón RESET mientras la indicación
aún esté activada. Se restauran los valores predefinidos de
fábrica para la temperatura de color seleccionada.
1 Pulse el botón MENU.
Aparece la indicación en pantalla MENU.
2 Pulse los botones tì-f/■f y para seleccionar
" OIB PANTAL" y vuelva a pulsar el botón MENU.
Aparece la indicación PANTALLA.
3 Pulse los botones para seleccionar la opción
que desee ajustar.
12
Seleccione
CONVERGENCIA H
(S
CONVERGENCIA V
n
CANCELAR MUARE
-JOB- *
AJUSTE MUARE
CANCELAR MOIRE debe estar activado ("SI") para que
aparezca " -lïüïr (AJUSTE MUARE)" en la pantalla.
Para
ajustar la convergencia horizontal
ajustar la convergencia vertical
eliminar las líneas elípticas u
onduladas de la pantalla
ajustar el grado de cancelación del
efecto muaré
(continúa)
Page 49

4 Pulse los botones para realizar los ajustes.
Uso de la ¡ndicación en pantalla OPCION
La indicación en pantalla OPCION permite desmagnetizar
manualmente la pantalla y ajustar elementos como la
posición y el idioma de las indicaciones en pantalla.
También permite bloquear los controles.
QD
CONVERGENCIA H
S]
CONVERGENCIA V
CANCELAR MUARE
s-
AJUSTE MUARE
•... para desplazar las sombras rojas
hada la derecha y las azules hada la
izquierda
.111;
. para desplazar las sombras rojas
hada la izquierda y las azules hada
la derecha
•lllr
•... para desplazar las sombras rojas
hada arriba y las azules hada abajo
, para desplazar las sombras rojas
hada abajo y las azules hada arriba
■... para activar CANCELAR MUARE
. para desactivar CANCELAR MUARE
■... para aumentar el efecto de
canceladón de muaré
La pantalla del monitor se desmagnetiza automáticamente
cuando se enciende la unidad.
También es posible desmagnetizarla de forma manual.
1 Pulse el botón MENU.
Aparece la indicación MENU.
2 Pulse los botones .Ot-f/ih y para seleccionar
” S OPCION" y vuelva a pulsar el botón MENU.
Aparece la indicación OPCION.
Hn
s
C3
Oti r
Q:
DESMAGNET MANU
•... para redudr el efecto de canceladón
de muaré
La indicación desaparece automáticamente después de unos
30 segundos.
Para cerrar la indicación en pantalla, vuelva a pulsar el
botón MENU.
Para reajustar, pulse el botón RESET mientras la indicación
aún esté activada.
Se restaura el ajuste predefinido de fábrica de la opción
seleccionada.
3 Pulse los botones iÍ! ♦/f para seleccionar " tJ
(DESMAGNET MANU)".
4 Pulse el botón 3
La pantalla se desmagnetiza durante unos 5 segundos.
Si necesita desmagnetizar la pantalla por segunda vez,
espere al menos 20 minutos antes de repetir los pasos
anteriores.
La indicación OPCION desaparece automáticamente
después de unos 30 segundos.
Para cerrar la indicación en pantalla, vuelva a pulsar el
botón MENU.
13
Page 50

Personalización del monitor
Es posible cambiar la posición de la indicación (por ejemplo,
si desea ajustar la imagen que se encuentra detrás de ella).
La función de bloqueo de los controles desactiva todos los
botones del panel frontal, excepto el interruptor (!) (de
encendido) y el botón MENU.
1 Pulse el botón MENU. »
Aparece la indicación MENU.
2 Pulse los botones -Ó- f/t y 9^/^ para seleccionar
" Q OPCION" y vuelva a pulsar el botón MENU.
Aparece la indicación OPCION.
wkbÍ
S
(S
:
Q:
DESMAGNET MANU
3 Pulse los botones para seleccionar
(POSICION MENU H)" o " 0 (POSICION MENU V)".
Seleccione " @ (POSIQON MENU H)" para ajustar la
posición horizontal.
1 Pulse el botón MENU.
Aparece la indicación MENU.
2 Pulse los botones y 34-/^ para seleccionar
" g OPCION" y vuelva a pulsar el botón MENU.
Aparece la indicación OPCION.
DESMAGNET MANU
3 Pulse los botones 4/'f para seleccionar
"O-n (BLOQUEO DE AJUS)".
Seleccione " (Tg (POSICION MENU V)" para ajustar la
posición vertical.
4 Pulse los botones para desplazar la
indicación en pantalla hasta la posición que desee.
La indicación OPCION desaparece automáticamente
después de unos 30 segundos.
Para cerrar la indicación en pantalla, vuelva a pulsar el
botón MENU.
Para reajustar, pulse el botón RESET mientras la indicación
aún se encuentre activada.
BLOQUEO DE AJUS
4 Pulse los botones 9^/^ para seleccionar "SI".
La indicación OPCION desaparece automáticamente
después de unos 30 segundos.
Para cerrar la indicación en pantalla, vuelva a pulsar el
botón MENU.
Una vez seleccionado "SI", no será posible seleccionar
ningún elemento, excepto "SALIR" y " S OPCION" en la
indicación en pantalla MENU.
Si pulsa cualquier botón, excepto el interruptor (1) (de
encendido) y el botón MENU, la marca Oti aparecerá en la
pantalla.
Para cancelar el bloqueo de los controles
Repita los anteriores pasos 1 a 3 y pulse los botones
para seleccionar "NO".
14
Page 51

ys idiomas disponibles para las indicaciones en pantalla
>n inglés, francés, alemán, español, italiano y japonés.
Personalización del monitor
Restauración de los ajustes de
fábrica
Heájuste dé ima opción.»d -.,. ?
Pulse el botón MENU.
Aparece la indicación en pantalla MENU.
Pulse los botones Q'f/♦ y para seleccionar
" S OPCION", y vuelva a pulsar el botón MENU.
Aparece la indicación en pantalla OPCION.
DESMAGNET MANU
{ Pulse los botones para seleccionar
"© (LANGUAGE)".
1 Pulse los botones MENU, P y para
seleccionar la indicación que contiene la opción que
desee reajustar.
2 Pulse los botones P>4’/^ para seleccionar la opción
que desee reajustar.
3 Pulse el botón RESET.
RESET
LANGUAGE
!■ Pulse los botones para seleccionar el idioma
que desee.
ENG: inglés, ERA; francés, DEU: alemán,
ESP: español, ITA: italiano o JPN: japonés.
La indicación OPCION desaparece automáñcamente
después de unos 30 segundos.
Para cerrar la indicación en pantalla, vuelva a pulsar el
botón MENU.
Para recuperar el idioma inglés, pulse el botón RESET
mientras la indicación en pantalla se encuentre activada.
Sin ninguna indicación en pantalla, pulse el botón RESET.
Se restauran los ajustes predefinidos de fábrica de todos los
datos de ajuste para la señal de entrada actucd.
Observe que los datos de ajuste que no se vean afectados
por cambios en la señal de entrada (idioma y posición de la
indicación en pantalla y función de bloqueo de los
controles) no recuperan los ajustes de fábrica.
RESET
MSÂWîK".Pulse y mantenga pulsado el botón RESET durante más
de dos segundos.
Se restauran los ajustes predefinidos de fábrica de todos los
datos de ajuste, incluidos el brillo y contraste.
RESET
15
Page 52

Personalización del monitor Funciones técnicas
Selección del modo GPE (Mejoramiento gráfico de imágenes)
El botón GPE (Mejoramiento gráfico de imágenes) permite
cambiar automáticamente las características de'lá imagen en
pantalla para adaptarlas al uso del monitor. Basta con
pulsar el botón GPE para desplazarse por los tres modos.
Encienda el monitor y el ordenador.
1
Pulse el botón GPE para ajustar el modo.
2
Cada vez que pulse el botón GPE, el modo aparece en la
pantalla y cambia de la siguiente forma.
■ STANDARD MODE
i
PRESENTATION MODE
i
GRAPHICS/VIDEO MODE
________
El modo STANDARD MODE resulta idóneo para hojas de
cálculo, tratamiento de texto y otras aplicaciones de texto.
El modo PRESENTATION MODE resulta útil para
programas de presentación que requieran colores vivos.
El modo GRAPHICS/VIDEO MODE proporciona a las
películas y a los juegos un aspecto visual mejorado
mediante el aumento de la nitidez y el brillo.
La indicación del modo seleccionado aparece en pantalla
durante unos 3 segxmdos.
I
Modos predefinidos y de usuario
Este monitor dispone de modos ajustados de fábrica para
los 10 estándares más uhlLzados en el sector para auténticas
capacidades "plug and play".
Condiciones recomendadas de sincronización horizontal y vertical
El rendimiento de anchura de sincronización horizontal debe ser 1,0
pseg del tiempo total horizontal.
La anchura de supresión horizontal debe ser > 3,0 pseg para el
modelo CPD-220GS.
La anchura de supresión vertical debe ser > 500 pseg para CPD-
220GS.
Nota para los usuarios de Windows
Consulte el manual de la tarjeta de vídeo o el programa de utilidad
suministrado con la tarjeta y seleccione el índice de barrido más alto
disporúble para optimizar el rendimiento del monitor.
CPD-220GS
Resolución
(puntos X
líneas)
N”
640 x 480
1
640 x 480
2
720 x 400
3
4 800 x 600
800 x 600
5
832 X 624
6
1024 X 768
7
1024 X 768
8
1024 X 768
9
1280 X1024
10
Frecuencia
horizontal
31,5 kHz
43,3 kHz
31,5 kHz
46,9 kHz
53,7 kíiz
49,7 kHz
60,0 kHz
60,2 kHz
68,7 kHz
80,0 kHz
Frecuencia
vertical Modo gráfico
60 Hz VGA Graphic
85 Hz VESA
70 Hz
75 Hz VESA
85 Hz VESA
75 Hz Macintosh
75 Hz VESA
75 Hz
85 Hz
75 Hz
VGA-Texto
16" Color
Macintosh
19" Color
VESA
VESA
Si la pantalla aparece demasiado blanca, ajuste la
temperatura del color como se describe en "Uso de la
indicación en pantalla COLOR" en la página 11.
Nota
Los modos PRESENTATION MODE y GRAPHICS/VIDEO MODE
pueden producir imágenes fantasma cuando se utilizan
aplicaciones orientadas a textos.
Estos modos cambian dinámicamente el brillo de la imagen, según
tos cambios en las imágenes en movimiento. Si aparecen imágenes
fantasma, ajuste GPE en el modo STANDARD MODE.
16
Page 53

Funciones técnicas
Vísualización de información sobre el monitor
Es posible visualizar el nombre del modelo, número de serie
y año de fabricación mediante la indicación en pantalla
INFORMACION del monitor. ^
Pulse y mantenga pulsado el botón MENU durante 5 segundos.
Aparece la indicación INFORMACION.
Ejemplo:
INFORMACION
MODEL : CPD-220GS
SER NO : 1234567
MANUFACTURED : 1998-32
La indicación INFORMACION incluye el nombre del
modelo, el niimero de serie, el año de fabricación y la
semana.
La indicación desaparece automáticamente después de unos
30 segundos.
Hilos de amortiguación
Cuando se emplea un fondo blanco, hay unas líneas
horizontales muy finas visibles en la pantalla, tal como se
muestra a continuación. Estas líneas se denominan hilos de
amortiguación.
El tubo Trinitron tiene una rejilla de apertura con rayas
verticales en su interior. Esta rejilla de apertura admite el
paso de mayor cantidad de luz a través de la pantalla,
aumentando así la intensidad de color y el brillo del TRC de
Trinitron.
Estos hilos de amortiguación están conectados a la rejilla de
apertura para evitar que vibre el hilo de la rejilla, de forma
que la imagen de la pantalla permanezca estable.
Hilos de amortiguación
Aprox. 6 cm
í ^T\
/'I
Aprox. 6 cm
V
__________
J
Función de ahorro de energía
Este monitor dispone de tres estados de ahorro de energía.
Al detectar la ausencia de señal de vídeo procedentes del
ordenador, reducirá el consumo de energía tal como se
describe a continuación.
Modo de
ahorro de
energía
Funcionamiento
1
normal
2 Modo de espera <15W
(1er estado)
Modo de rejx)so <15W Aprox.
3
(2° estado)
4 Activo-inactivo
(3er estado)
Nota
Si el cable de señal de vídeo no está correctamente conectado,
aparecerá el mensaje "NO SEÑAL" (página 18). Transcurridos 30
segundos, la función de ahorro de energía introduce
automáticamente al monitor en el modo activo-inactivo y el
indicador (1) se ilumina en naranja. Una vez detectadas las señales
de sincronización horizontal y vertical, el monitor recupera
automáticamente el modo de funcionamiento normal.
Consumo de
energía
<120W
<8 W
Tiempo de
recuperación
—
Aprox.
3seg.
3seg.
Aprox.
10 seg.
indicador Ò
Verde
Verde/naranja
Verde/naranja
Naranja
17
Page 54

Información adicional
El estado de la señal de entrada
Mensajes de aviso
Si existe algún problema con la señal de entrada, aparece
uno de los siguientes mensajes.
INFORMACION
Estado de la
señal de entrada
FUERA DE RANGO EXPLORACION
'FUERA DE RANGO EXPLORACION" indica que las
especificaciones del monitor no admiten la señal de
entrada,
"NO SEÑAL" indica que no se recibe ninguna señal.
Para resolver estos problemas, consulte "Solución de
problemas" a continuación.
Solución de problemas
Esta sección puede ayudarle a localizar un problema y, por consiguiente, eliminar la necesidad de llamar al soporte técnico.
Síntoma
No aparece ninguna imagen
No está iluminado el
indicador (!)
Si el mensaje "NO SEÑAL"
aparece en la pantalla, o si el
indicador (!) se ilumina en
naranja o alterna entre el
verde y el naranja
Si el mensaje "FUERA DE
RANGO EXPLORACION"
aparece en pantalla
Si no aparece ningún mensaje
y el indicador (!) se ilumina en
color verde o parpadea en
color naranja
La imagen aparece codificada • Consulte el ajuste de monitor apropiado en el manual de la tarjeta gráfica.
i
Compruebe lo siguiente
• Asegúrese de que el cable de alimentación está correctamente conectado.
• Compruebe que el interruptor (!) (de encendido) se encuentra en la posición "on".
• Pulse cualquier tecla en el teclado del ordenador.
• Cerciórese de que el interruptor de encendido del ordenador está en la posición "on".
• Asegúrese de que el cable de señal de vídeo está debidamente conectado y que todos
los enchufes están perfectamente encajados en las clavijas.
• Asegúrese de que el conector de entrada de vídeo HD15 no tiene pines torcidos o
arrancados.
• Compruebe que la tarjeta de vídeo está perfectamente encajada en la ranura de bus
apropiada.
• Compruebe que el rango de frecuencia de vídeo se encuentra dentro del especificado
para el monitor.
' Horizontal: 30 - 85 kHz
Vertical: 48 -120 Hz
Consulte el manual de instrucciones del ordenador para ajustar el rango de frecuencia
de vídeo.
• Si utiliza un adaptador de cable de señal de vídeo, compruebe que sea correcto.
• Consulte "Función de autodiagnóstico" (página 20).
• Revise este manual y confirme que se admiten el modo gráfico y la frecuencia a la que
está operando. Incluso si la frecuencia está en el intervalo adecuado, algunas tarjetas
de vídeo pueden tener un impulso de sincronización demasiado estrecho para que el
monitor se sincronice correctamente. '
El color no es uniforme
18
• Desmagnetice el monitor (página 13).
Si sitúa un equipo que genera un campo magnético, como un altavoz, cerca del
monitor 0 cambia la dirección de éste, el color puede dejar de ser uniforme.
Esta función permite desmagnetizar el armazón metálico del TRC a fin de obtener un
campo neutro en el que la reproducción de los colores es uniforme. Si necesita aplicar
un segundo ciclo de desmagnetización, deje que transcurran al menos 20 minutos para
obtener unos resultados óptimos.
Page 55

Síntoma Compruebe lo siguiente
No puede ajustar el monitor
con los botones del panel
frontal
• Si la función de bloqueo de los controles está activada, desactívela mediante la
indicación en pantalla OPCION (página 14).
Información adicional
La imagen no está centrada
en pantalla o tiene un
tamaño incorrecto
Los bordes de la imagen son
curvos
Las líneas blancas muestran
sombras rojas o azules en los
bordes
La imagen aparece borrosa
La imagen salta o sufre
oscilaciones
• Ajuste el tamaño o centrado (página 9).
• En algunos modos de vídeo la imagen no ocupa toda la pantalla hasta los bordes. Este
problema suele pfbducirse con determinadas tarjetas de vídeo.
• Ajuste la geometría (página 10).
• Ajuste la convergencia (páginas 12 -13).
• Ajuste el contraste y brillo (página 8).
• Desmagnetice el morútor (página 13).
Si sitúa un equipo que genera un campo magnético, como un altavoz, cerca del morútor
0 cambia la dirección de éste, el color puede dejar de ser urúforme.
Esta función permite desmagnetizar el armazón metálico del TRC a fin de obtener un
campo neutro en el que la reproducción de los colores es urúforme. Si necesita apliccU" un
segundo dclo de desmagnetización, deje que trartócurran al menos 20 minutos para
obtener unos resultados óptimos.
• Si aparecen sombras rojas o azules a lo largo de los bordes de laé imágenes, ajuste la
convergencia (páginas 12 -13).
• Si se cancela el efecto muaré, la imagen puede aparecer borrosa. Reduzca el efecto de
cancelación de muaré (páginas 12 - 13).
• Aísle y elimine las fuentes potenciales de campos eléctricos o magnéticos. Algunas
causas frecuentes de este síntoma son los ventiladores eléctricos, las lámparas
fluorescentes y las impresoras láser.
• Si ha instalado otro monitor en las inmediaciones, aumente la distancia entre ambos para
reducir la interferencia.
• Enchufe el morútor a rma toma de CA diferente, a ser posible en un circuito distinto.
• Pruebe el morútor con otro ordenador y en una habitación distinta.
La imagen parpadea
• Defina el índice de barrido en el ordenador para obtener una imagen con la mayor
calidad posible; para ello, consulte el manual del ordenador.
Aparecen imágenes fantasma
• Si detecta este síntoma, evite el uso de cables prolongadores de vídeo y/o de cajas
conmutadoras. Puede deberse a la longitud excesiva de los cables o a una conexión débil.
Se observa en pantalla una
trama ondulada o elíptica
(muaré)
• Cancele el efecto muaré (páginas 12 -13).
El efecto muaré puede modificarse en función del ordenador conectado.
• Debido a la relación entre la resolución, el paso de puntos del monitor y el paso de
algunos patrones de imagen, determinados fondos de pantalla muestran ocasionalmente
efecto muaré. Cambie el patrón de escritorio.
Se observan dos líneas
horizontales finas
• Estas líneas sirven para estabilizar la rejilla de apertura vertical (página 17). La rejilla de
apertura adrrúte el paso de mayor cantidad de luz a través de la pantalla, aumentando
así la intensidad de color y el brillo del TRC de Trirútron.
Se oye un zumbido tras
encender la unidad
• Cuando se enciende el morútor, se activa el ciclo de desmagnetización. Es posible que
oiga un zumbido mientras este ciclo se encuentra activado. Se oye el mismo zumbido al
desmagnetizar el morútor manualmente. No se trata de un funcionamiento defectuoso.
Si el problema continúa, póngase en contacto con el proveedor autorizado de Sony más próximo.
Tome nota del modelo y número de serie de su monitor, así como de la marca y modelo del ordenador y la tarjeta de vídeo.
19
Page 56

Información adicional
Función de autodiagnóstíco
Este monitor está equipado con una función de
autodiagnóstico. Utilícela si el monitor o el ordenador
presenta algún problema.
1 Desconecte el cable de entrada de vídeo o apague el
ordenador conectado.
2 Apague y encienda el monitor.
3 Pulse y mantenga pulsado el botón 3^ durante 2
segundos.
Si aparecen las cuatro barras de color (blanca, roja,
verde, azul) después de irnos segundos, significa que el
monitor funciona correctamente, aunque el ordenador
podría presentar algún problema. Póngase en contacto
con el fabricante de éste.
Si no aparecen las barras de color, es posible que se haya
producido un fallo del monitor. Póngase en contacto con
el proveedor Sony más próximo.
Especificaciones
CPD-220GS
Tubo de imagen Paso de rejilla de apertura de
Area de la imagen Aprox. 327 x 243 mm (an/al)
Resolución Horizontal; Máx. 1280 puntos
Area estándar de la imagen
Frecuencia de deflexión Horizontal; 30 a 85 kHz
Plug & Play
Altavoz
Salida de auriculares
Entrada de audio
Tensión/intensidad de entrada CA
Consumo de energía
Dimensiones
Peso
Accesorios suministrados
Diseño y especificaciones sujetos a cambios sin previo aviso.
0,25 mm
17 pulgadas en diagonal
Deflexión, 90 grados
(12^/8x9^/s pulgadas)
Imagen de visualización de
16,0 pulgadas
Vertical: Máx. 1024 líneas
Aprox. 312 X 234 mm (an/al)
(12^/sx9'/4 pulgadas)
Vertical: 48 a 120 Hz
DDCl/2B/2Bi,GTF
0,25 W (monofònico)
Minitoma estéreo, acepta impedancia
de 8 Í2 o superior
Minitoma estéreo
100-120-1.9 A 50/60HZ
220-240-1.1 A 50-60HZ
Máx. 120 W
406 X 432 X 420 mm (an/al/pf)
(16 X 17 Vs X 16 ^/s pulgadas)
Aprox. 18 kg (39 Ib 11 oz)
Consulte la página 6.
20
Page 57

SiS
.........................
-.........................................................................................................4
........................................................................................................5
...............................................................................................................................6
.........................................................................................................5
i£S«§IWa^^..................................................................................................................... 7
..................................................................................................s
...............................................................................................8
CENTER C+'C') 9
SIZE (R^) mmKrn....................................................................................................9
GEOM 10
ZOOM ($H ) ....................................................................................11
COLOR () JSWSS.......................................................................;.........................11
SCREEN (#*) W#M/T^..........................................................................................12
{iffl OPTION (j^iS) 13
.......................................................................................................15
(gpe) ..............................................................................................is
............................................................................................................ie
...........................................................................................................17
Ti%*t6............................................................................................................................17
..........................................................................................................................17
PtiijnMm
S'S-faS...........................................................................................................................18
....................................................................................................................... 18
g^*tl............................................................................................................................. 20
............................................................................................................................20
Windows*
IBM PC/AT itl VGA IHE
VESA
Wo
"™" ifl "®"
IBiDJiffeBSiifflWWTc.
;W®tTo
Page 58

шш. ш^щщ^ì^шшzш^íш. vm
its^tctaMìiRp о
ÌDg^>tsEìÌRjI^. ta
v:-::?;ir-:;^:V3:>j ;•; •
^USlBÜ^
Що
ШИс'ШШШШИ^Ш-^, ШШ!ЖШтШ^
т<,
йтштшт&о
§Ро
ffitöfqg^j^o i«áü
n?Ü^?S^Jc
180“ тшж 20“ МЙЯ
jSfflí 100-120 VAC
• WffiCRT
МжР*ШЙ^Й»й[о
• CRT^fâ4^5##„ Й4^й^ДЙ5§09ДЙ;^
№:Йп1^1Ч^ййЖ^ЩШМШШ0
Page 59

[U MUTING (;^^) il (^7®)
AGIN ($3itStA) mn
[2] RESET (g^)
' '¡»mmmmms.mxrTSi&o
[U GPEfI (mi6|5)
(GPE)
[4] MENU (m^) ^ (^7-15, 17^)
MENU OSD „
[5] 3 (3titkJt) (◄-/-♦) li (^.7-15, 20S)
(>-/-►) affifflo
[l] p: (^it) ('I’/f) H (^7-15®)
ftiSS^ftkiSSW, (f/f) ilfiefflc
d] c!) ((^ 17, 20 ®)
SUSailiSAliEt:^
^BtMSfeo
(HD15)
RGB sync
fiJM
AUDIO IN (W®HA) a?L
M 0
^iil^«iB-§-s:?til (A»«) o
Page 60

( 1 )
ti«iS (1)
Macintosh (1)
Windows* Monitor Information Disk (1) »-
(1)
(1)
(1)
IBM VGA
m^o 30 M 85 kHz ¿I'BlWztc^S^jiiT
a (feS Macintosh iP Power Macintosh
¡AC IN
tCl
(ffijg )
T^mM IBM PC/AT, Macintosh
(m®)
Macintosh
Macintosh if Macintosh LC, Performa, Quadra
ft Power Macintosh
Macintosh II #,?iJft*glB)igM Power Book
(AWH) o
ip^ “OUT OF SCAN RANGE” ^ “NO INPUT SIGNAL” tHSS
SS»±, it#£IM8SKl “Sf^fsE” e
Windows*95/98
ft “Windows* Monitor Information Disk” PC
tflc,
ip^^sa:$osD (;P*S7k) MtSs, #jiL^i5:R±
W “j4#№»s^igw” o
ii
i* ^ ft a ® is ^ £& fig M1= w g is o
Page 61

fto
° ;fl^i!«^EtSE (Pfi«) AUDIO IN «?LJgit»tajs-f?
OSD (J»»S/^)
ig^g^fflosD (ip#as). sa-TMENuSo
■ its OSD (M ^ s.^ ) fr m m reset
^ MUTING Slo
MUTING
15
1 SMENUllo
MENU OSD tiiaio
a
MENU
COLOR
GEOM ZOOM
15
SOUND
2 “ i] SOUND” ,
T MENU Ho
SOUND OSD (^lfJS#S^) tiiaic
/i
^ ^ SOUND osd (?s^)
WStS) ±0 « UMPiB^ikP^o
CENTER
G
«c
C3>
B
SIZE
□ 26 □
(QD
SCREEN
a
OPTION
SS-T MUTING
»^#^№0 ;b SOUND OSD
7J\)
ii
pJWiiiiit»tn.i^1ii«A!6¥ (¥i^500
mv)
7
Page 62

• S OPTION OSD (“ B
(LANGUAGE)" , “ENG” (^i§) (#£lg
15 ®) o
1 ^$ p;-(^®) |-/tH£3 (5Fftbit)'^/“►fiio
BRIGHTNESS/CONTRAST OSD / ^ittS^S^a
S) liiSlo
BRIGHTNESS/CONTRAST
MENU OSD m'fic
MENU OSD
m MENU HSS MENU OSD () o
iDT№ii, ilt MENU OSD (limp#a/^)
№osD (#*as^)
□ C3> (HD
I COLOR I CENTERI ¡screen
a 26 a D 26 a
2
S T>f/f Ho
S Ho
'... AfltK/h
Xi^3OSD (mm&rn)
HiiaiitBi. its OSD (S*a/T^) RESET
%&mxt&ii3S.iiL^Tr]Si&o
, <1
SOUND
60.0kHz/ 85Hz
t
[H S COLOR
a^ COLOR OSD iiSfea»
[2] O CENTER
a^ CENTER OSD (‘t'-DJ^*a^)
[3] m SCREEN
a^ SCREEN OSD (#*S#a^) iiSSiWA^i
a SS ZOOM
a^ ZOOM OSD ($^M*a/T^)
a e OPTION
a^ OPTION OSD (s«s*as) iss osd (j^*a
Miil. i£» OSD (J#*a^)
a B SIZE
a^ SIZE OSD (Ri-p*a/T^)
a 5] SOUND
a^ SOUND OSD (^#p*a*)
Q fi
SIZE ¡OPTION
SaS5¥*
;
a O GEOM
a^ GEOMETRY OSD (jlfeiJgttS^a^)
[9] EXIT
MENU OSD () o
MENU OSD (
WStS) To
8
Page 63

ffiffl CENTER ( ^ib) SIZE ( Rt|- )
CENTER
1 S MENU So
MENU OSD ( ) ttiSo
2 m •ft'I'/f lii^S “ C3^ CENTER” , S
S-T MENU
CENTER OSD (tf'-DJiffaS) itiSo
i
□ 26 a
3
SIZE (R t)
1 ^ MENU Ho
MENU OSD (J?#.P*S^) itifflo
2 S p:-|’/f iP04-/-
MENU Ho
SIZE OSD (R^#*as) iiiai
3
“BSIZE” , #BS-T
:r '
□ 26 □
...
4-...
±i^30^^IS, OSD(#*S^)
^H^PflOSD (^WS^) , SS-TMENUSo
wmsimt, its OSD nmim reset
7X^fnSl;+-Di§£iiiMira£o
©ai’/f
A^^30#^is, OSD(S«S/A) S^ilAo
^^AfflOSD (P»fi^) . SS-TMENU^o
OSD (JPWfii^) ilffBiS RESET
lo /jc^iossRAi^aiisiriaSo
Page 64

GEOM ( Jimm )
1 S MENU Ho
MENU OSD iiaio
Am o<*~i~¥- HHiliaSc
SHU fé
o
ROTATION
'Q.
2 s nf/f “nGEOM” ,
MENU Ho
GEOMETRY OSD tHEo
3 fé :ó:>/f Hi^ft№SHilW®ao
iSS
o
n
■rotation
PINCUSHION
m.
n PINCUSHION
D PIN BALANCE
O KEYSTONE
O KEY BALANCE
.S'
-CD-
-o-
-D-
-a-
-►... igAffl^HSP^S
^... a^atPiS] ;&#§!)
PIN BALANCE
D
KEYSTONE
O
KEY BALANCE
Q
10
30 OSD (ff»S/A) g^iSAo
^SAfflOSD (^«S/A) , #S-TMENUHo
i#ÌE OSD (P^SS) frffBtS RESET
Èo №aW«g»ÌiiSiraSo
Page 65

ZOOM
1 SMENUSio
MENU OSD iliaio
2 i$ :6;4/f “sszoom” ,
MENU Slo
ZOOM OSD hHEo
ZOOM
3 S «◄-/-+>
COLOR im^)
1 S MENU So
MENU OSD iiil,o
2 S O'l/f in »>-/-► “S COLOR” , JfSiS-T:
MENU Ho
COLOR OSD tiiSlo
¿ji
Hi
-------
a □
1 9R
73
(GPE) m
inmAGPEAS:^-. “0 COLOR” Bt, WT
M COLOR OSD iUMo
H
V
A^^30t>^BOSD (Ji#g/^) g^ilAo
^^^raOSD (P*fi/T^) . SS-TMENUa„
OSD (S*S^) RESET
a
I®
□
0 26 0
niiuffiffl OSD (^#a*) ii,oooK «/hM
9,300K„ R 04-/-^ aiigfeSo
AiffifflGPEMWiffliai., “mnm
(GPE) A A" o
(&TW)
11
Page 66

3 «iSSfe-fio
OSD
HS:iilHIJi 9.300K in 5,000Ko
S 9.300K in 5.000K ¿iil^ftfilfilWfeia
s:0:4/faii# “0 (VARIABLE)” ,
(^èr)
9300K I
-----------------
5000K im I
I'BII—^ 0 50 0
VARIABLE
SCREEN (MB) SmMS
igfeiiiio CANCEL MOIRE 5bt6lUiB^P
1 iS MENU Ho
MENU OSD (^4P»a/T^) fuaio
2 ÌH3^-/-*-Hì^Ì¥ “QIQ SCREEN” , SSfè-
T MENU Ho
SCREEN OSD ^^0
@0
30 OSD (m&^) sm^o
^^^fflOSD (jP*fi^) . SSc-TMENU»o
its OSD trmm reset
3 Hi£»№gii^W55S,
as
®
H CONVERGENCE
V CONVERGENCE
n
CANCEL'MOIRE
® '
MOIRE ADJUST
itSATSii
12
' "-S- (MOIRE
MOIRE giiÈT "ON" ttSSo
ADJUST)" thS!Slf*±. CANCEL
(&TM)
Page 67

ei-
ПЫ31Л1 aso
й№@ aso NOiidO a/t|4# os ^?¥
°¥
°444f 02
°## s ШШШ
„ ( ssnvoaa ivnNV^'j ) a „
ssnvoaaivnNVW
:Q
:‘4>
ES
B
НШ1
ШШШ
f/ip: Ш £
°Ш№ aso NOlidO
nN3W ±
-SM4Í ‘ «NOIldOe,, Z
Я-
nNHlN
i3S3b шши aso Ш
°nnN3H^i-$tM ‘ asoK^g^
(^Wtii) aso g/44# oe ^i¥
*¥í^Síí5?¥Sr
Ш jdo„ ±4i заю1лпзэмуо ;
§:¥): „NO„ ±TÍ
ЭаЮ1М 130NV0
"-4- о
s ■ '
Сф:
■ -4
m
ЙЗ-[?1?ЙИад ■fë^Ttçl^Ml'^B
■
зШг
°i
isnrav ЭЫЮН
Ж
ЭЫЮП aaoNVO
-
эоыэонэлмоо л
“ffitp aso nN3i^
°iinN3IAI$f I
шшштшт
®Äii) aso (^^W*ií) aso ‘ЯШ
шишпн (>^'ШШШШ) aso NOlidO ШЖШ
:if (Meli) NOlidO WS
тшйтт
зНГ*
tg
■ -►
"4-
s
ЗЭЫЗОЫЗЛМОО н
®
ШШ
Page 68

i
(^Jin. ^Si^SiiTOSD (#*
M^) o
1 S MENU Ho
MENU OSD tliilo
2 ^ fo 9^1^ “ a OPTION” ,
TMENU Ho
OPTION OSD tBSlo
3 “@ (OSD H POSITION) ” =£ “Ei
(OSDVPOSITION) ” „
“@ (OSD H POSITION) " i^S*f^(4So
-hl^ 7 (1) (ttai) TF^iO MENU
1 S MENU Ho
MENU OSD tiiao
2 m ic 3«*-/-4> Hiss “ a OPTION”,
T MENU Ho
OPTION OSD 4^0
3 Si'i’I'/f H)4» “On (CONTROL LOCK) ”
“o (OSD V POSITION ) " iiSSl;ii#o
4 ^ H. ^OSD (S^a^)
±i^ 30 ft'f+Fd OPTION OSD (j^JliPSiaT:)
OSD (P#a/7) , US-7 MENU Ho
its OSD (PWS7:) fisais RESET
OSD V POSITION
4 S3^-/-^Hi£S “ON”
30 ®.'#^OPTION OSD (aJl;P»S7js)
OSD (S«S/7) SS-T MENU
-0.i4#T “ON" , Di^cfeS MENU OSD
^) “EXIT” fd “aOPTION” W^hM(ii6Ji®@o
in^s^ (1) (ifeag) s^id MENU HWi'hMSMH, On#
.s^íiials^*±o
1 S3, SS3-«-/-
“OFF" o
14
Page 69

91
&
1353Ы
°ТКШ0гЩ1353У ш
&
13S3Ü
шн-аи
aso 5«
°®пмэ1Л1Х-ай ‘ asoüá^ám
“YStgi (Y®»ií) asogí.^4ioeiv?¥
°S0 :Ndr5í ‘S№¥S^:Vil : dS3
‘SS : naa ‘S?í : Vdd ‘S3É : 0N3
13S3d
2ftX;S«lKWi^iîai (^^WÄii) aso
'ms (^^WÄii) aso) ‘i;^»
°l}SK_ÍI'¥mS?IS«lÍiWííW^Í}Y^WIi|S
°il i3S3y $f ‘ W ( ^®gii ) aso
&
Í3S3H
13S3y$f £
' Ш f/fn- a z * ..Nondo e.. -^/-► o « 4-/fo- m z
aovnoNvi
Ndr- Vil-
dS3- naa.-
Vüd- 0N3-
SSnVOBQ nvnNVW
Ш1
Э
A
°lEtP aSONOlidO
Ц,
.. (39Vn0N\n) 0„ SlíÍ5f/i0-$f £
Q>nr
°HnN3l^±
(^Stií) asow
S Öi \I\D: ‘nN3i^j $f i.
ШШШШШ
“ÍSFR aSOnNBlM
“ünN31AI$f l,
WSïSH’iSSfii¥Â 'S£SM 'SS 'S^ 'SìÉ^^
Page 70

2 GPE liiS$:^]S;c
«S-TGPEH,
(GPE):^it SiSfRfflppijS;
(GPE) as^eii$jsw±ffl«
RiiSGPE®, bp^^h
«#W7k¥ifisi;swtt^
1.0 pseco
CPD-220GS ^-i#gE0ti0l Ji 3.0 pseCo
CPD-220GS 500
pseCo
Windows
jiiT Windows fflS,
STANDARD MODE
i
PRESENTATION MODE
i
GRAPHICSA/IDEO MODE
STANDARD MODE
PRESENTATION MODE
GRAPHICSA/IDEO MODE mW!
in:SJi#s#±e. mmmn n m± color
a
GRAPHICS/VIDEO MODE
STANDARD MODE»
3 ##o
PRESENTATION MODE iD
gpe as*
CPD-220GS
^59
1
2
3
4
5
6
7
8
9
10
(^xS)
640 X 480
640 X 480
720 X 400
800 x 600
800 x 600
832 X 624
1024x768
1024x768
1024x768
1280X1024
*¥«5$ mmmm
31.5 kHz
43.3 kHz
31.5 kHz
46.9 kHz
53.7 kHz
49.7 kHz 75 Hz Macintosh
60.0 kHz
60.2 kHz 75 Hz Macintosh
68.7 kHz 85 Hz VESA
80.0 kHz
60 Hz
85 Hz
70 Hz
75 Hz
85 Hz
75 Hz VESA
75 Hz
VGAffl®
VESA
VGAi2ji
VESA
VESA
16"3gfe
19"
VESA
16
Page 71

mm
M 7F ^ in M
INFORMATION OSD (fS.tSWS
MENU a 5 ##o
INFORMATION OSD (iH-ftPWMS) itiSlo
:
INFORMATION OSD (^,tS*a7F)
:^^30#^M OSD (ji*a^)
*S)lb
■p
INFORMATION
MODEL : CPD-220GS
SER NO : 1234567
MANUFACTURED : 1998-32
mmm
r / 1
L
_________________
inTffl№/K.
CRT (S/T^P) s
i3 6 cm
/
t!l 6 cm
j
liiSMfBi. cl) is^itr
1 IE-»S№
2 i#ta <15W
3 <15W
(m2«>:irS)
4 ^BE < 8 W
5i
isE (^ 18 5D „ 30
ii, ?ra. c!) i§7K*T.^ss®feo -s^i'iijiKTinsii^^ig^.
iew^g^«agiJIE-»SfT:irSo
<120W —
3 # iffeingfeJC#
^310# gfe
H'ltiiSE “NO INPUT SIGNAL"
17
Page 72

?c®Ht
“OUT OF SCAN RANGE” AiS^T^§ll£fietliil
“NO INPUT SIGNAL” *^^ft^?|iAo
INFORMATION
«#asDT o
OUT OF SCAN RANGE
'«¿1
in* c!)
in^ “NO INPUT SIGNAL”
iD:^ “OUT OF SCAN
RANGE” fiEhiia’SPS
±
ffifg
• ^*Ei,ai^w^g*sjEiio
xw- ■ 30 - 85 kHz
sa : 48- 120 Hz
• #j)t (maoa) c
• (m 13a) o
iaikp^,
№j^im 20 6^mAmn&im^o
• ffl OPTION TDSD (^ 14
a) o
18
• (moa) o
Page 73

lèsua
• тшя^тш {щ^oж),
âfe^â^â^ia^Maafeât
шшш
ШШЙ«
Щ#ШЖад£М1Ш^Й^
• {Щ 12~13Я) о
• тшмшшж (^8Я ) 0
• ^^1ёШ^?ЙЙ (^ 13 Ж)
Пйшгшшшш, шрш, ш'шшшл, ттш
?Й€ЙШ)!^СВТ (S/T^S) ^ШШШÌIШШЩ^¥Ш, ШШЩ-Ш'>1о
Ш{РШ^ го^^тШ'ШШШо
• штшшш&пштш. тшшш (ш 12-13 ж) „
• тшжшшшо cm 12-13ж) о
• inÂft«mSS№fifia^ÂfÈ]ÊW, №JÖffM#W№^lMi^il^'^ifco
i
J$li№tìo
• шшш^. шттшттшшшт (ä c)
• (^ 12-13 Ж) о
штшшшо
Йо &Н,
fêiiffiaigôijfeagaiL^jiff
а “т” ^
• {Ш 17 Ж) о
тнж CRT (М ж№) ЖШШШШ.О
• ёШШШ^}В^о ШШ “Ш” Po ÆaiÊ
- шшшшй, -fepiBfîfijiiffô^ ж Po
Sony
19
Page 74

TCO Development Unit
S-114 94 Stockholm
Sweden
Fax: +46 8 782 92 07
Email (Internet): development@tco.se
Current information regarding TCO'95 approved and labelled products may also be obtained via the Internet using the address:
http: / / www.tco-info.com /
TCO'95 is a co-operative project between TCO (The Swedish Confederation of Professional Employees), Naturskyddsforeningen (The
Swedish Society for Nature Conservation) and NUTEK (The National Board for Industrial and Technical Development in Sweden).
Environmental Requirements
Brominated flame retardants
Brominated flame retardants are present in printed circuit boards, cables, wires, casings and housings. In turn, they delay the spread of fire.
Up to thirty percent of the plastic in a computer casing can consist of flame retardant substances. These are related to another group of
environmental toxins, PCBs, which are suspected to give rise to similar harm, including reproductive damage in fisheating birds and
mammals, due to the bio-accumulative* processes. Flame retardants have been found in human blood and researchers fear that
disturbances in foetus development may occur.
TCO'95 demand requires that plastic components weighing more that 25 grams must not contain organically bound chlorine and
bromine.
Lead**
Lead can be found in picture tubes, display screens, solders and capacitors. Lead damages the nervous system and in higher doses, causes
lead ]X)isorting.
TCO'95 requirement permits the inclusion of lead since no replacement has yet been developed.
Cadmium**
Cadmium is present in rechargeable batteries and in the colourgenerating layers of certain computer displays. Cadmium damages the
nervous system and is toxic in high doses.
TCO'95 requirement states that batteries may not contain more than 25 ppm (parts per million) of cadmium. The colourgenerating
layers of display screens must not contain any cadmium.
Mercury**
Mercury is sometimes found in batteries, relays and switches. Mercury damages the nervous system and is toxic in high doses.
TCO'95 requirement states that batteries may not contain more than 25 ppm (parts per million) of mercury. It also demands that no
mercury is present in any of the electrical or electronics components concerned with the display unit.
CFCs (freons)
CFCs (freons) are sometimes used for washing printed circuit boards and in the manufacturing of expanded foam for packaging. CFCs
break down ozone and thereby damage the ozone layer in the stratosphere, causing increased reception on Earth of ultraviolet light with
consequent increased risks of skin cancer (malignant melanoma).
The relevant TCO'95 requirement: Neither CFCs nor HCFCs may be used during the manufacturing of the product or its packaging.
* Bio-accumulative is defined as substances which accumulate within organisms
** Lead, Cadmium and Mercury are heavy metals which are Bio-accumulative
Page 75

Congratulations! You have just purchased a TCO'95 approved and labelled product! Your choice has provided you with a product
developed for professional use. Your purchase has also contributed to reducing the burden on the environment and also, to the further
development of enviroiunentally adapted electronics products.
Why do we have environmentally labelled computers?
In many countries, envirorunental labelling has become an established method for encouraging the adaptation of goods and services to the
environment. The main problem, as far as computers and other electronics equipment are concerned, is that environmentally harmful
substances are used both in the products and during the manufacturing. Since it has not been possible for the majority of electronics
equipment to be recycled in a satisfactory way, most of these potentially damaging substances sooner or later enter Nature.
There are also other characteristics of a computer, such as energy cortsumption levels, that are impx)rtant from the viewpoints of both
the work (internal) and natural (external) envirorunents. Since all methods of convenHonal electricity generation have a negative effect on
the envirorunent (acidic and climate-influencing emissions, radioactive waste, etc.), it is vital to conserve energy. Electronics equipment in
offices consume an enormous amount of energy since they are often left running continuously.
What does labelling involve?
This product meets the requirements for the TCO'95 scheme which provides for international and environmental labelling of personal
computers. The labelling scheme was developed as a joint effort by the TCO (The Swedish Confederation of Professional Employees),
Naturskyddsforeiüngen (The Swedish Society for Nature Conservation) and NUTEK (The National Board for Industrial and Technical
Development in Sweden).
The requirements cover a wide range of issues: environment, ergonomics, usability, emission of electrical and magnetic fields, energy
consumption and electrical and fire safety.
The envirorunental demands concern restrictions on the presence and use of heavy metals, brominated and chlorinated flame
retardants, CFCs (fréons) and chlorinated solvents, among other things. The product must be prepared for recycling and the manufacturer
is obliged to have an envirorunental plan which must be adhered to in each country where the company implements its operational policy.
The energy requirements include a demand that the computer and/or display, after a certain period of inactivity, shall reduce its power
consumption to a lower level in one or more stages. The length of time to reactivate the computer shall be reasonable for the user.
Labelled products must meet strict envirorunental demands, for example, in respect of the reduction of electric and magnetic fields, physical
and visual ergonomics and good usability.
On the next page, you will find a brief summary of the environmental requirements met by this product. The complete environmental
criteria document may be ordered from:
Page 76

тшш
ШШШ
®. if^ffllltïütgo
1 iëTffl«5iS}AÈ9ïi£?èfflàfêMit»taô<]fei®.
ü«iisaAi?^ÄÄo
2 ^fflMSIÈìg. ШШо
3 Й«э-Ф>Ш2«>#И±о
(ÔÊ. afe, sfe, ш
fe) i^mrn, жших№)Е#. тшшщшшш.
тчх\%щ.Ё.ггш.ш.о
CPD-220GS
шшл
íiAS^S
ЛШИ
?Lgfô*1ÏÎÊ0.25mm
17
ÍS$^90$
327 X 243 mm ( ^ X )
(12 7вх9 5/8^Й)
Ш®^ 16.0 íSi-
ЖЖ ■ lA 1280 й
SI : ЙА 1024 a
a 312x234 mm (^x 1^)
(12 3/8x9V4^i-)
7K¥ : 30 s 85 kHz
ШЖ : 48 S 120 Hz
DDC1/2B/2BÍ, GIF
0.25 W (Îp-^jl)
à:№^ms»îL
SS 8 n W±BS
^'ЖРШШШИ
шшпт^яхш, ш
Sony ^Шо
100-120-1.9 А 50/60 Hz
220-240-1.1 А 50-60 Hz
Йй
ЖШ
Itft Ш%&Ж
ЙА 120 W
406 x 432 x 420mm (Йх^хДЕ)
(16x 17 Vax 16 Va^^)
a 18 kg (39g|11 #Â])
20
 Loading...