

Page 1
Adding a Signature to Mail
When saved beforehand, your signature can
be attached at the end of the main body of
mail.
Saving a Signature
The signature attached to mail can be created
and saved.
1
From the Mail menu, select [Mail setting]
[Edit signature] and press
→
The Edit signature display appears.
If you have saved a signature before, it is
ˎ
displayed.
2
Press (Edit) and enter a signature.
Enter a signature within 5,000 full-width or 10,000
half-width characters.
You can enter a Deco mail pict. to compose Decomail.
3
Press (Complete).
The signature is saved.
You can also decorate a signature (P.208).
●
Adding a Signature Automatically
The saved signature can be automatically
attached to the main body when you compose
mail.
1
From the Mail menu, select [Mail setting]
[Signature] and press
→
2
Select [Auto]/[No] and press .
The Signature is set.
Even if the Signature is set to [No], you can
●
attach the signature manually. From the Function
menu in the Input text display, select [Add
signature].
Even if the Signature is set to [Auto], you cannot
●
attach a signature to a reply mail using the Quote
function or a forwarded mail.
.
.
Setting the Type of Mail/Message
to be Checked
You can set whether to receive mail, Message
R, and Message F when making inquiries to
the i-mode center.
Example: Setting the i-mode inquiry set for mail
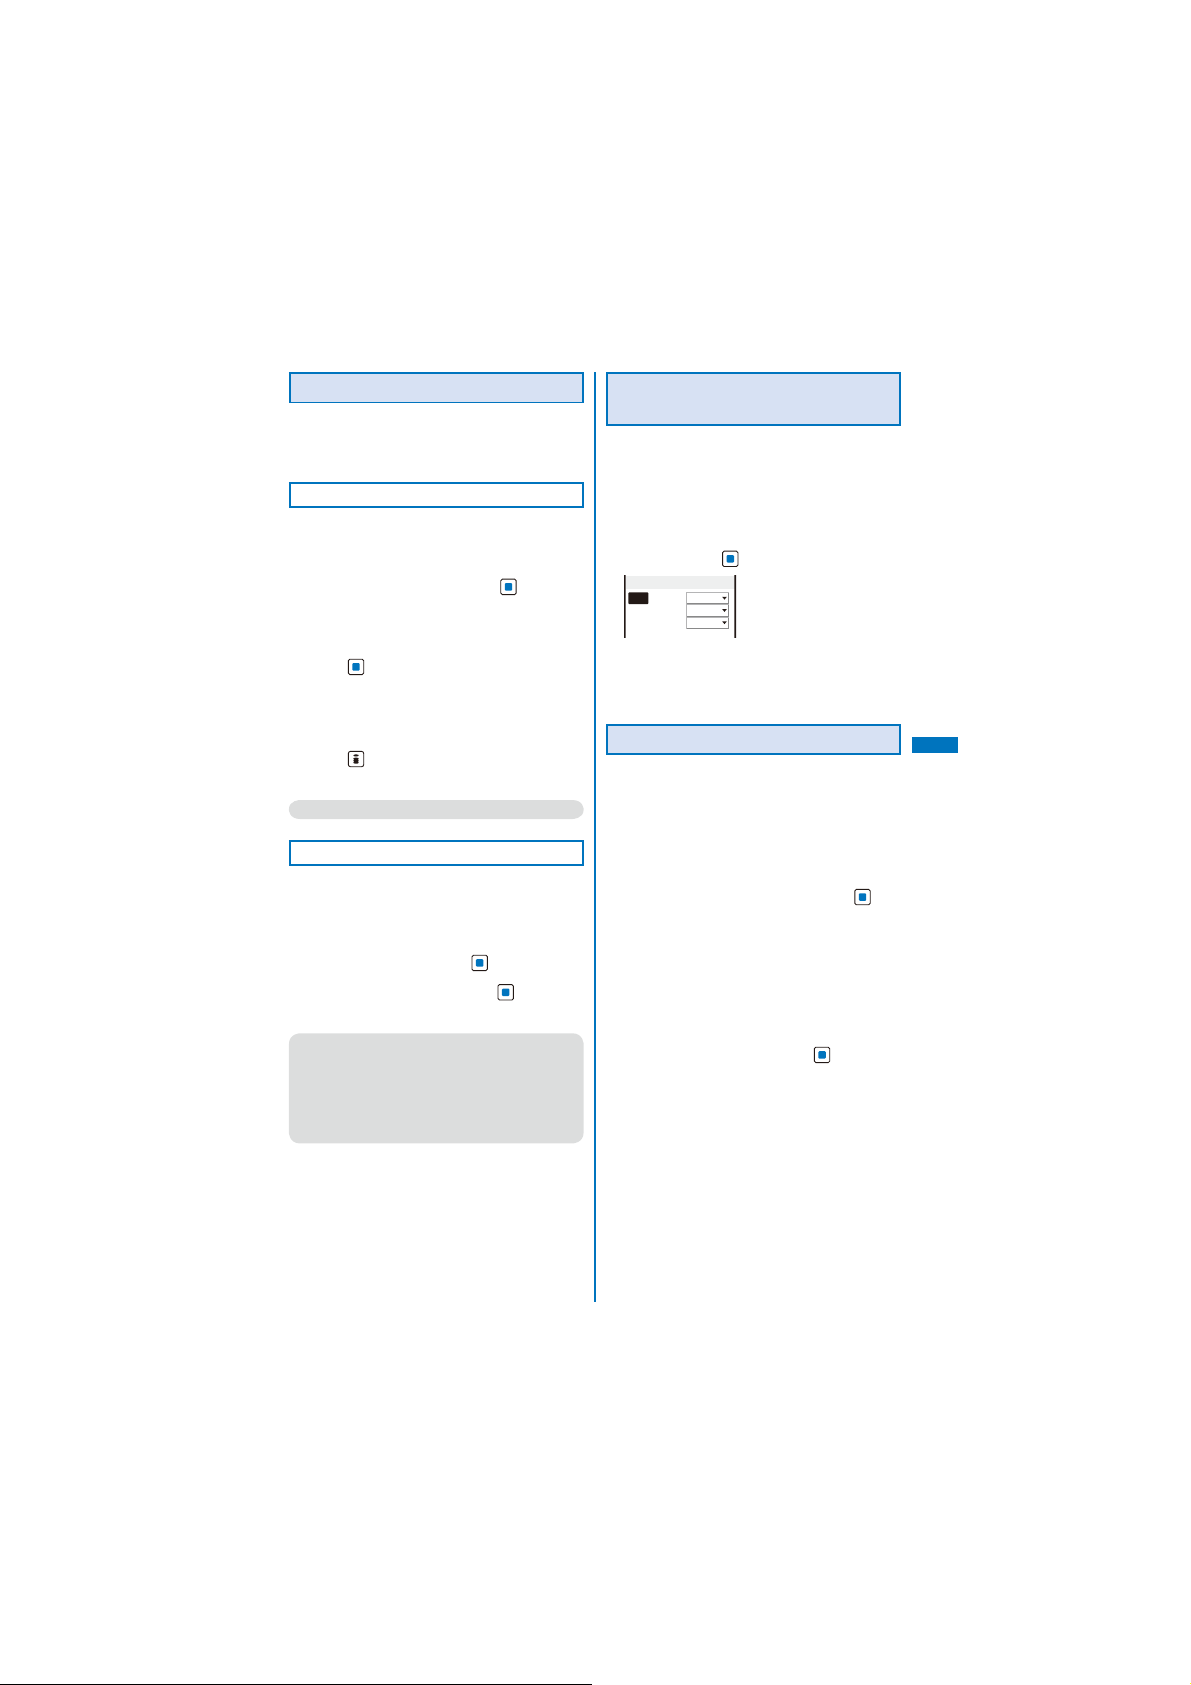
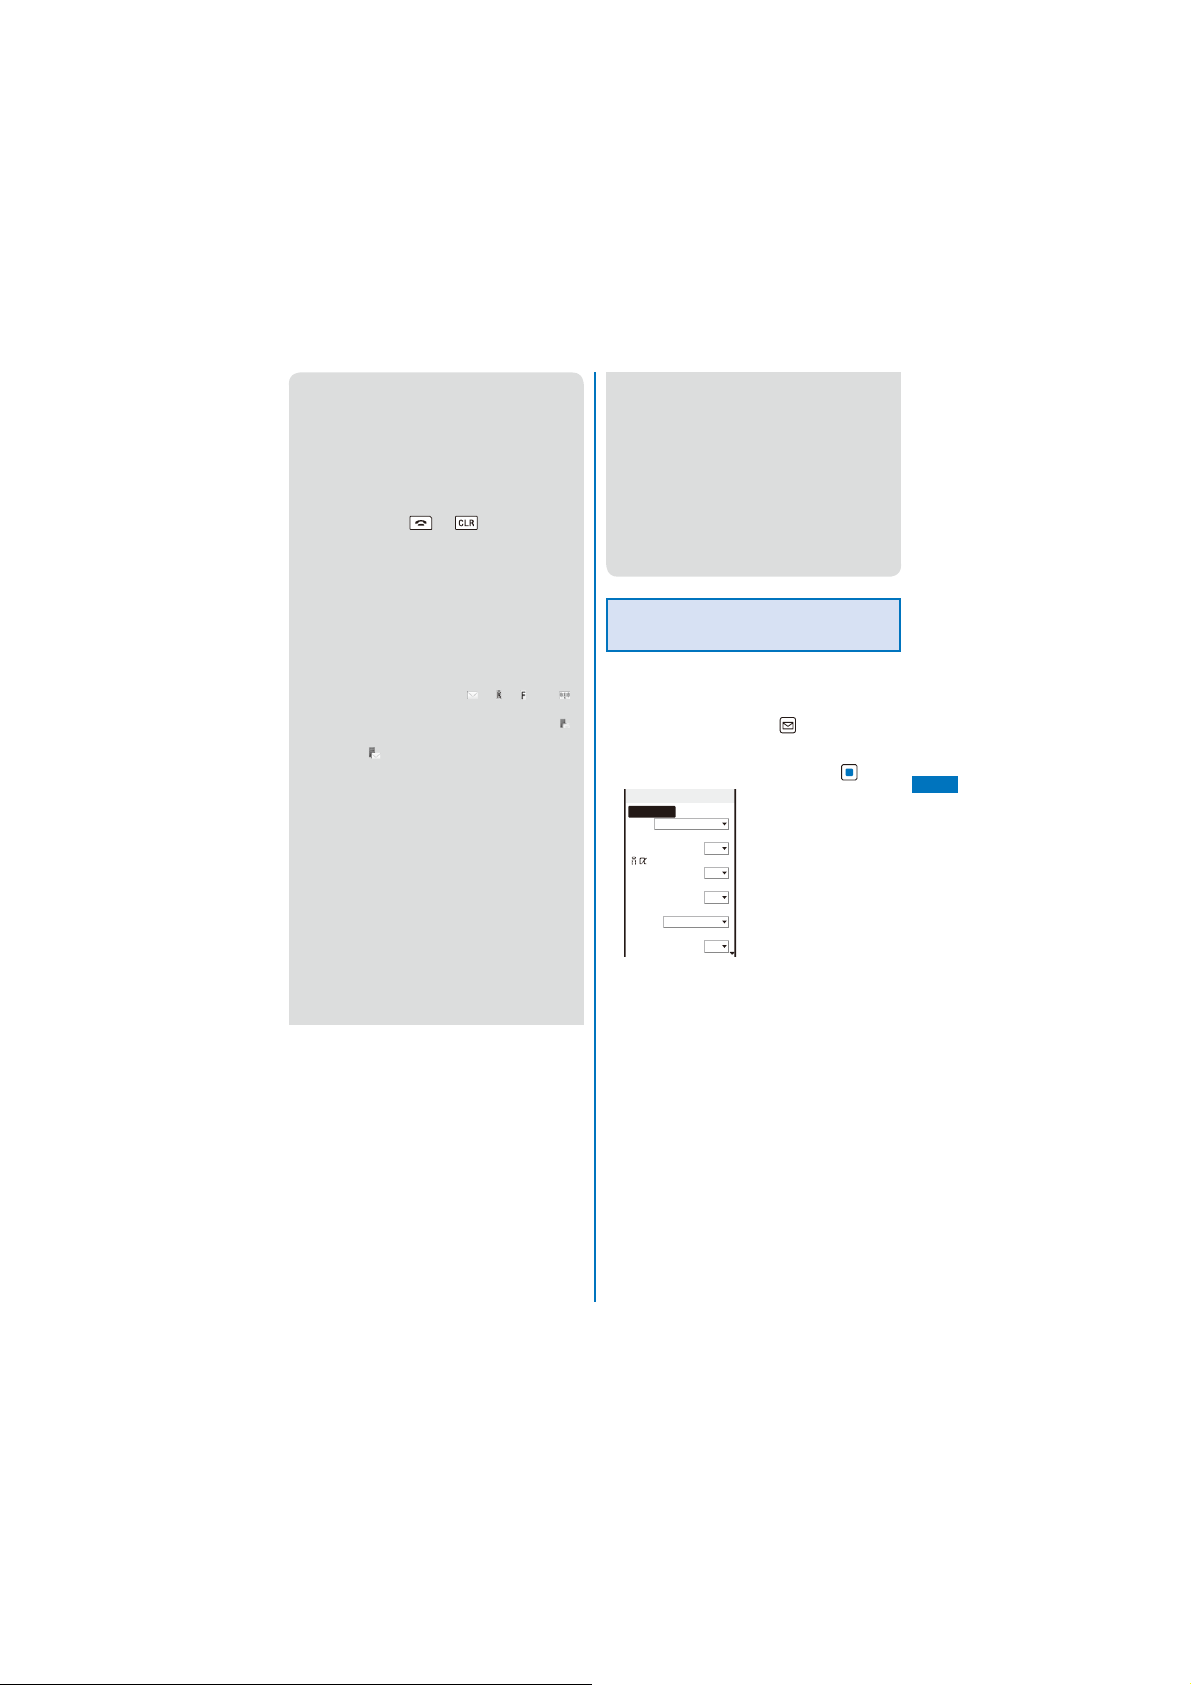
1
From the Mail menu, select [Mail setting]
[Common setting] → [i-mode inquiry
→
set] and press
i−mode inquiry set
Mail
MessageR
MessageF
2
Select [Mail] → [Valid]/[Invalid] of the
Valid
Valid
Valid
.
i-mode inquiry set.
The i-mode inquiry set is set.
Setting to Select and Receive Mail
You can set whether to selectively receive
i-mode mail.
Even if the Recv option setting is [ON], all mail is
ˎ
received if you use the Check new message. If you
do not want to receive mail, set [Mail] to [Invalid] in
the i-mode inquiry set (P.227).
1
From the Mail menu, select [Mail setting]
[Recv option setting] and press
→
The Recv option setting display appears.
[ON]:
Sent mail is held at the i-mode center and not
received by the FOMA terminal. To receive, use
the Receive option (P.215).
[OFF]:
Sent mail is received automatically by the FOMA
terminal.
2
Select [ON]/[OFF] and press .
The Recv option setting is set.
.
Mail
Continued
199
Page 2
Setting a Mail List
By saving mail addresses in a mail list, you can
send mail to all members in the list at the same
time.
Up to 10 mail lists can be saved. Up to five
mail addresses can be saved in each mail list.
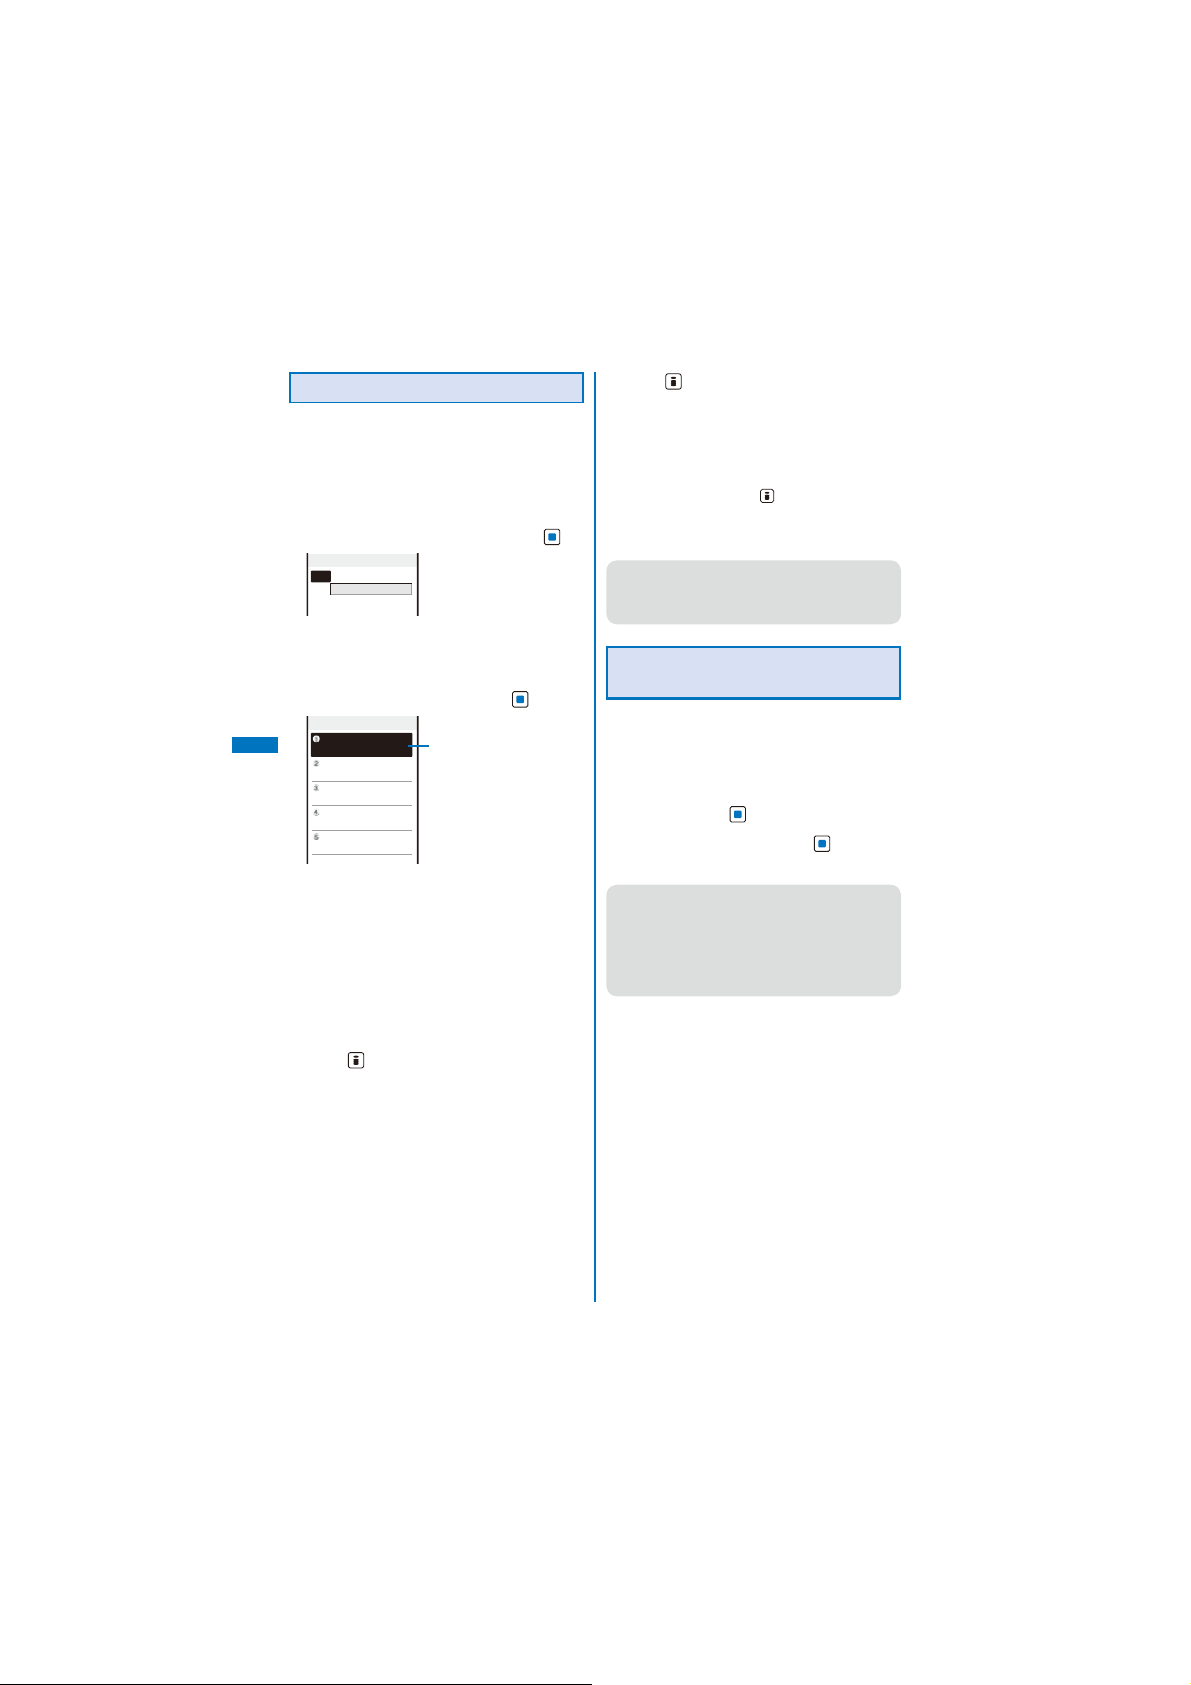
1
From the Mail menu, select [Mail setting]
[Mail list] → a mail list and press
→
List setting
List
リスト
5
Member list
2
Enter a list name at [List].
Enter a list name within eight full-width or 16 halfwidth characters.
3
Select [Member list] and press .
Friend
Mail
To delete a member
Move the cursor to the member field and from
the Function menu, select [Delete] → [Delete
one]→ [Yes]. To delete all members, from the
Function menu, select [Delete] → [Delete all],
enter the Security code, and select [Yes].
4
Enter the mail address or the phone
number in the member field.
Enter a mail address or phone number within 50
half-width alphanumeric characters and symbols.
5
Press (Complete).
The member list is set.
0/5
Member field
6
Press (Complete).
The mail list is set.
To delete a mail list
Move the cursor to a mail list in the Mail list
display and from the Function menu, select
[Delete one] → [Yes]. To delete several mail lists,
from the Function menu, select [Select&delete],
select mail lists, press (Complete), and select
[Yes]. To delete all mail lists, from the Function
.
menu, select [Delete all], enter the Security code,
and select [Yes].
Even if you change the contents of the
●
Phonebook after saving a member to the mail
list, the saved contents on the mail list do not
change.
Playing a Melody Automatically
from Mail
The melody can be set to be played back
automatically when displaying mail or
message.
1
From the Mail menu, select [Mail setting]
[Common setting] → [Melody auto
→
play] and press
2
Select [ON]/[OFF] and press .
The Melody auto play is set.
When mail has several melody attachments, the
●
melodies are played back in the order they were
attached to the mail. Melodies in the MFi format
has lower priority than those in the SMF format.
When the Manner mode is set or when the
●
message is displayed automatically, the Melody
auto play is disabled.
.
200
Page 3
Setting the Receiving Operation
during Multitasking
You can set whether the incoming mail or
received mail display should appear when you
receive mail, SMS, or Message R/F while you
are using the FOMA terminal for other tasks.
1
From the Mail menu, select [Mail setting]
[Common setting] → [Dur multi task
→
disp] and press
[Prefer alarm]:
Display the incoming mail or received mail
display.
[Prefer operat.]:
Do not display the incoming mail or received mail
display. “
receiving mail/message and “ ”, “ ”, “ ”, or “ ”
appears after reception.
2
Select [Prefer alarm]/[Prefer operat.] and
press .
The receiving operation during multitasking is set.
Regardless of the setting, SMS is received
●
with [Prefer operat.] while placing (originating)/
receiving a voice, videophone, or PushTalk call,
during a voice call, videophone call, or PushTalk
communication, while recording a still image/
movie, running i-αppli, or receiving mail.
.
”, “ ”, or “ ” flashes while you are
Enabling the Receiving of a File
Attachment
You can set whether to automatically receive
the file attached to i-mode mail.
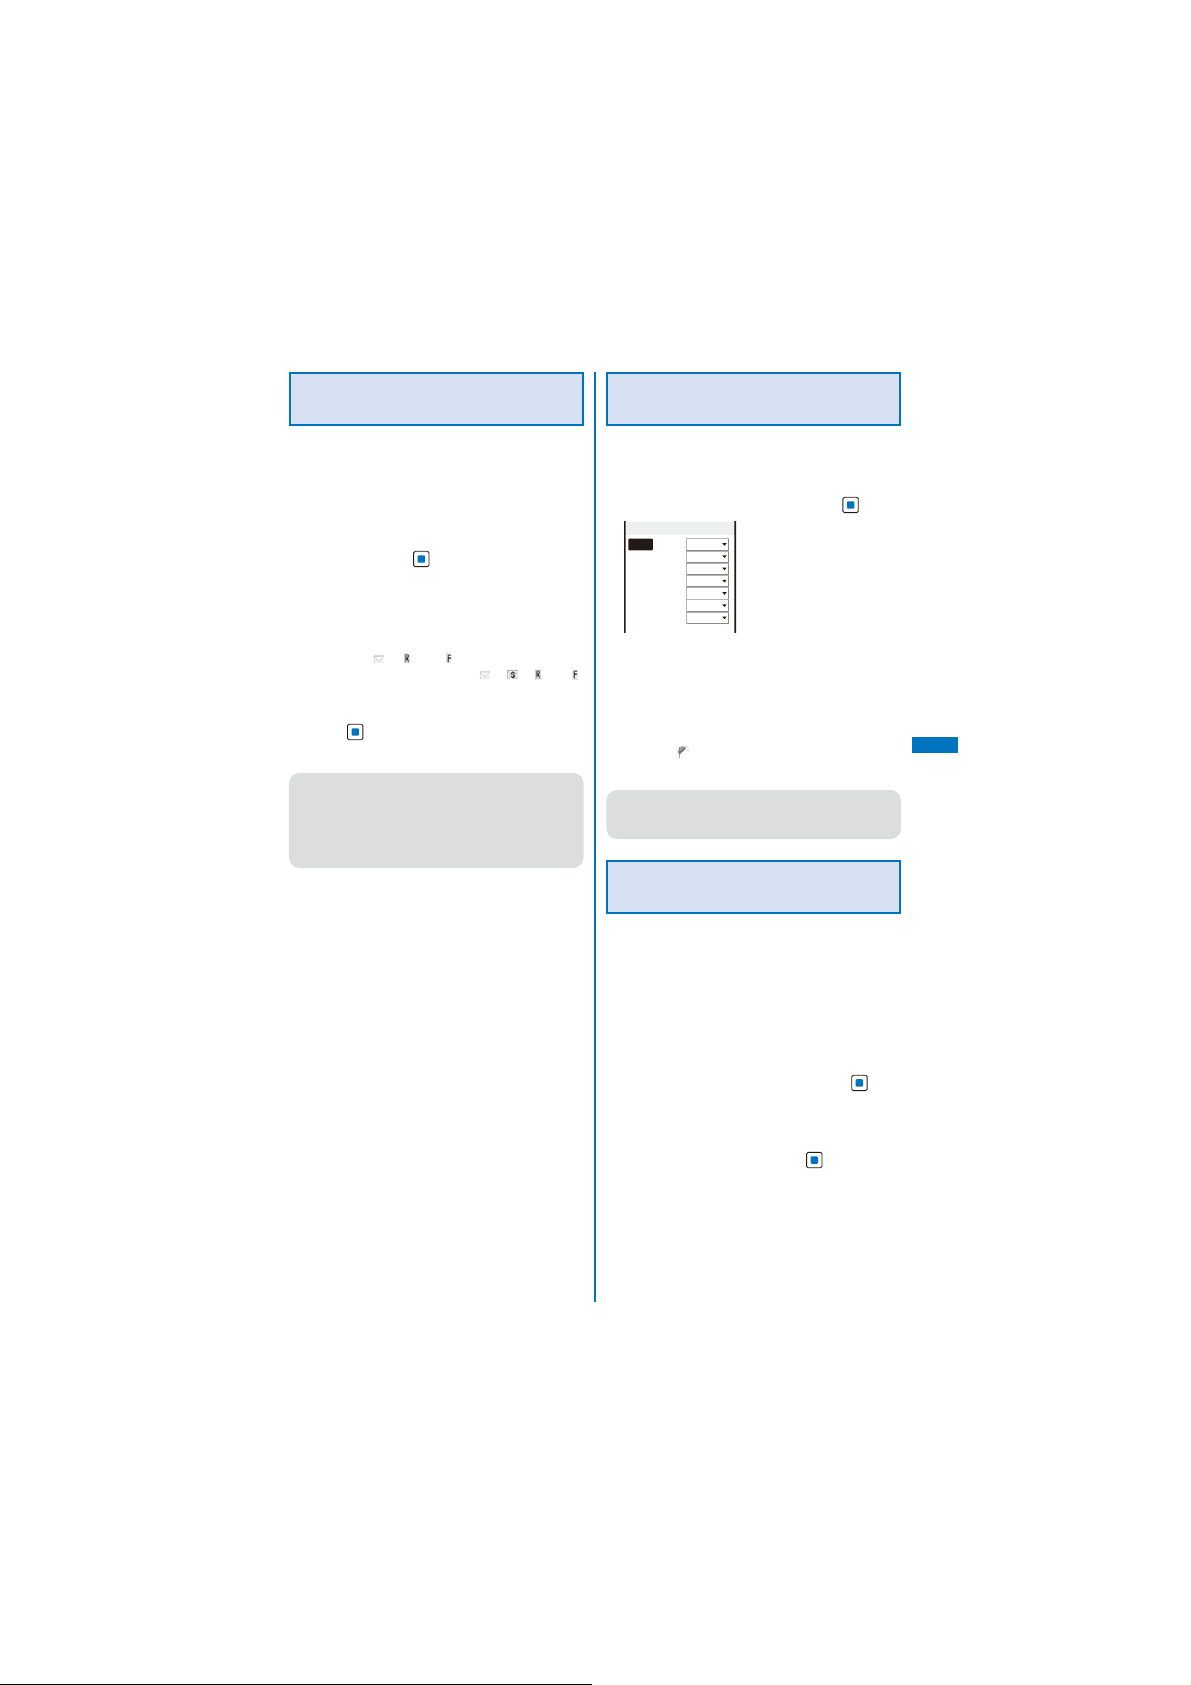
1
From the Mail menu, select [Mail setting]
[Attached file pref.] and press
→
Attached file pref.
Image
Valid
Melody
Valid
i−motion
Valid
Valid
ToruCa
Valid
PDF
Valid
Tool data
Valid
Others
2
Select [Valid]/[Invalid] for each item.
[Valid]:
Automatically receive a file attachment.
[Invalid]:
Do not automatically receive a file attachment. To
obtain a file attachment, from the Inbox display,
” (P.219).
select “
The Attached file pref. is set.
Even if you set the Attached file pref. to [Valid],
●
a file attachment exceeding 100K bytes is not
received automatically.
.
Deleting the Send/Receive
Ranking List
Up to 20 each of most frequent senders and
recipients are automatically saved in the Send
and Receive ranking lists. You can select a
recipient from this list when you compose mail.
The Send and Receive ranking lists can be
cleared at once.
Example: Deleting the Receive ranking list
1
From the Mail menu, select [Mail setting]
[Clear Recv ranking] and press
→
To delete the Send ranking list
From the Mail menu, select [Mail setting] → [Clear
Send ranking].
2
Select [Clear all] and press .
All Receive ranking list data is deleted.
.
Mail
201
Page 4
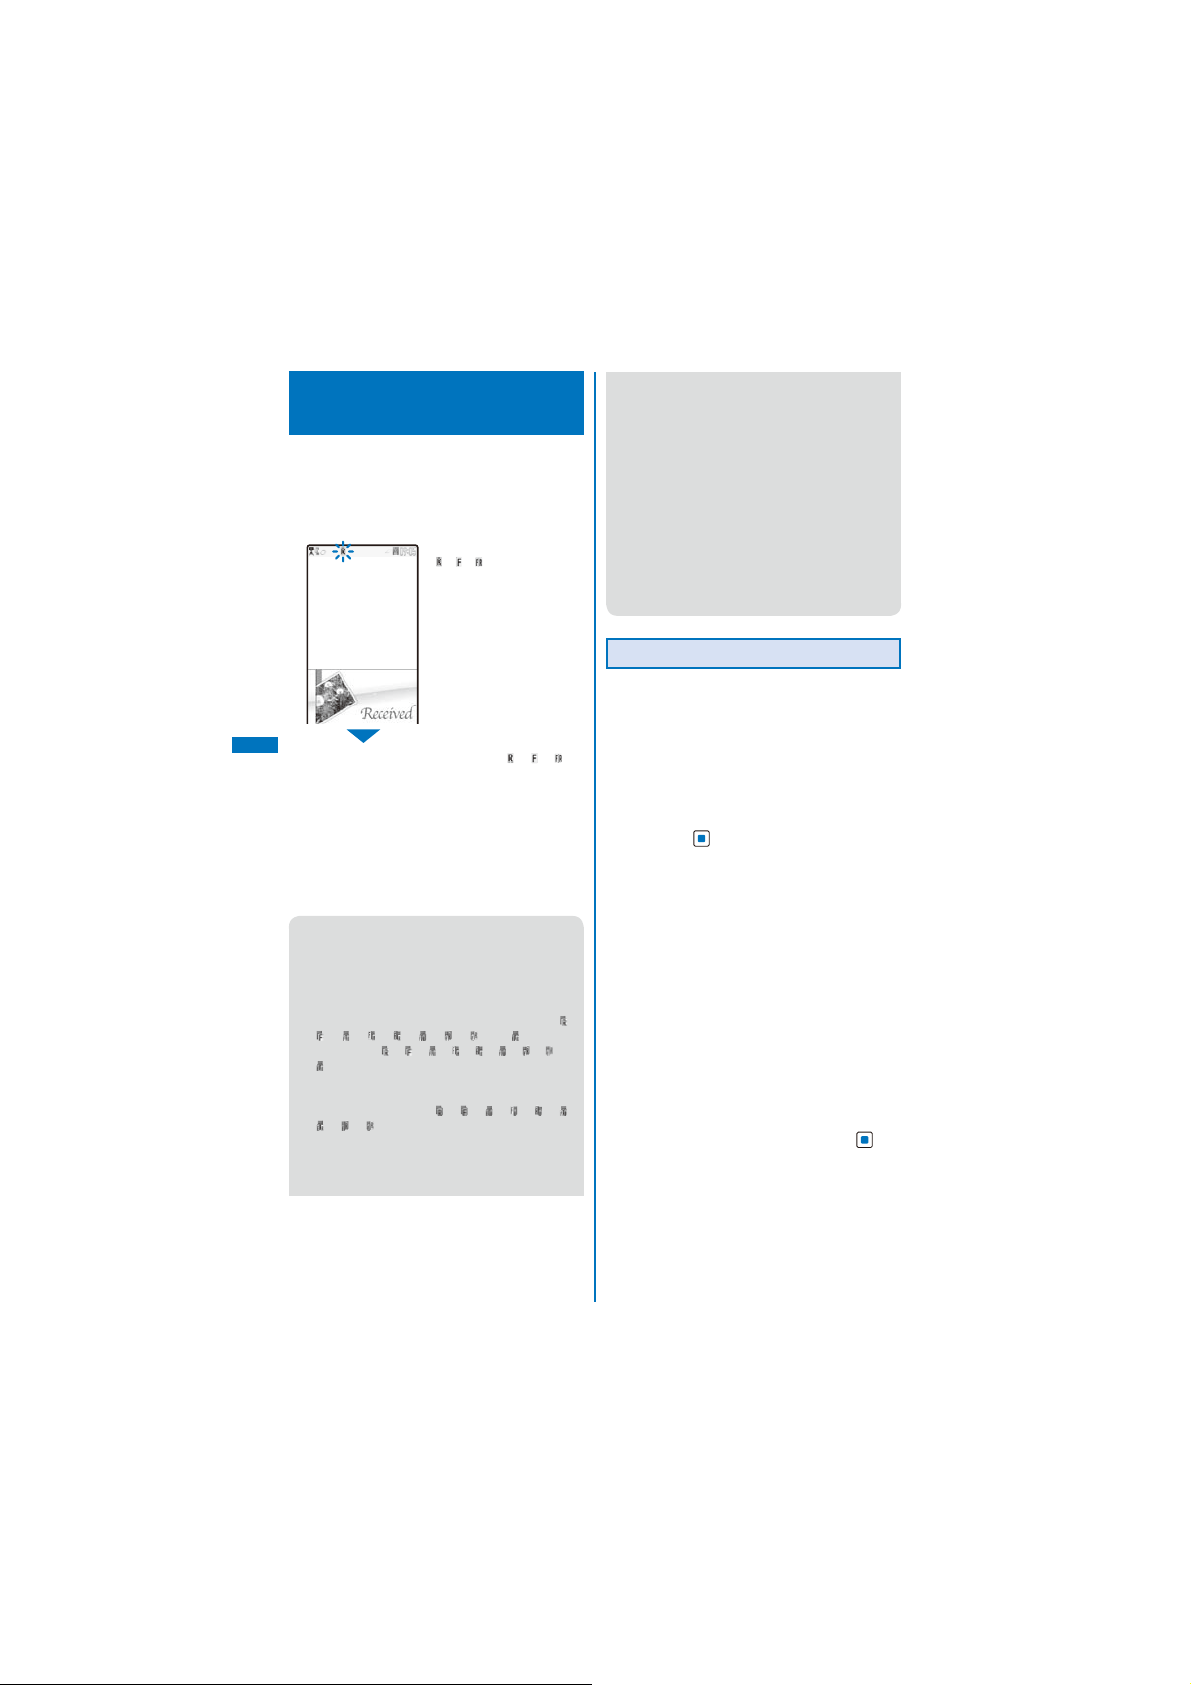
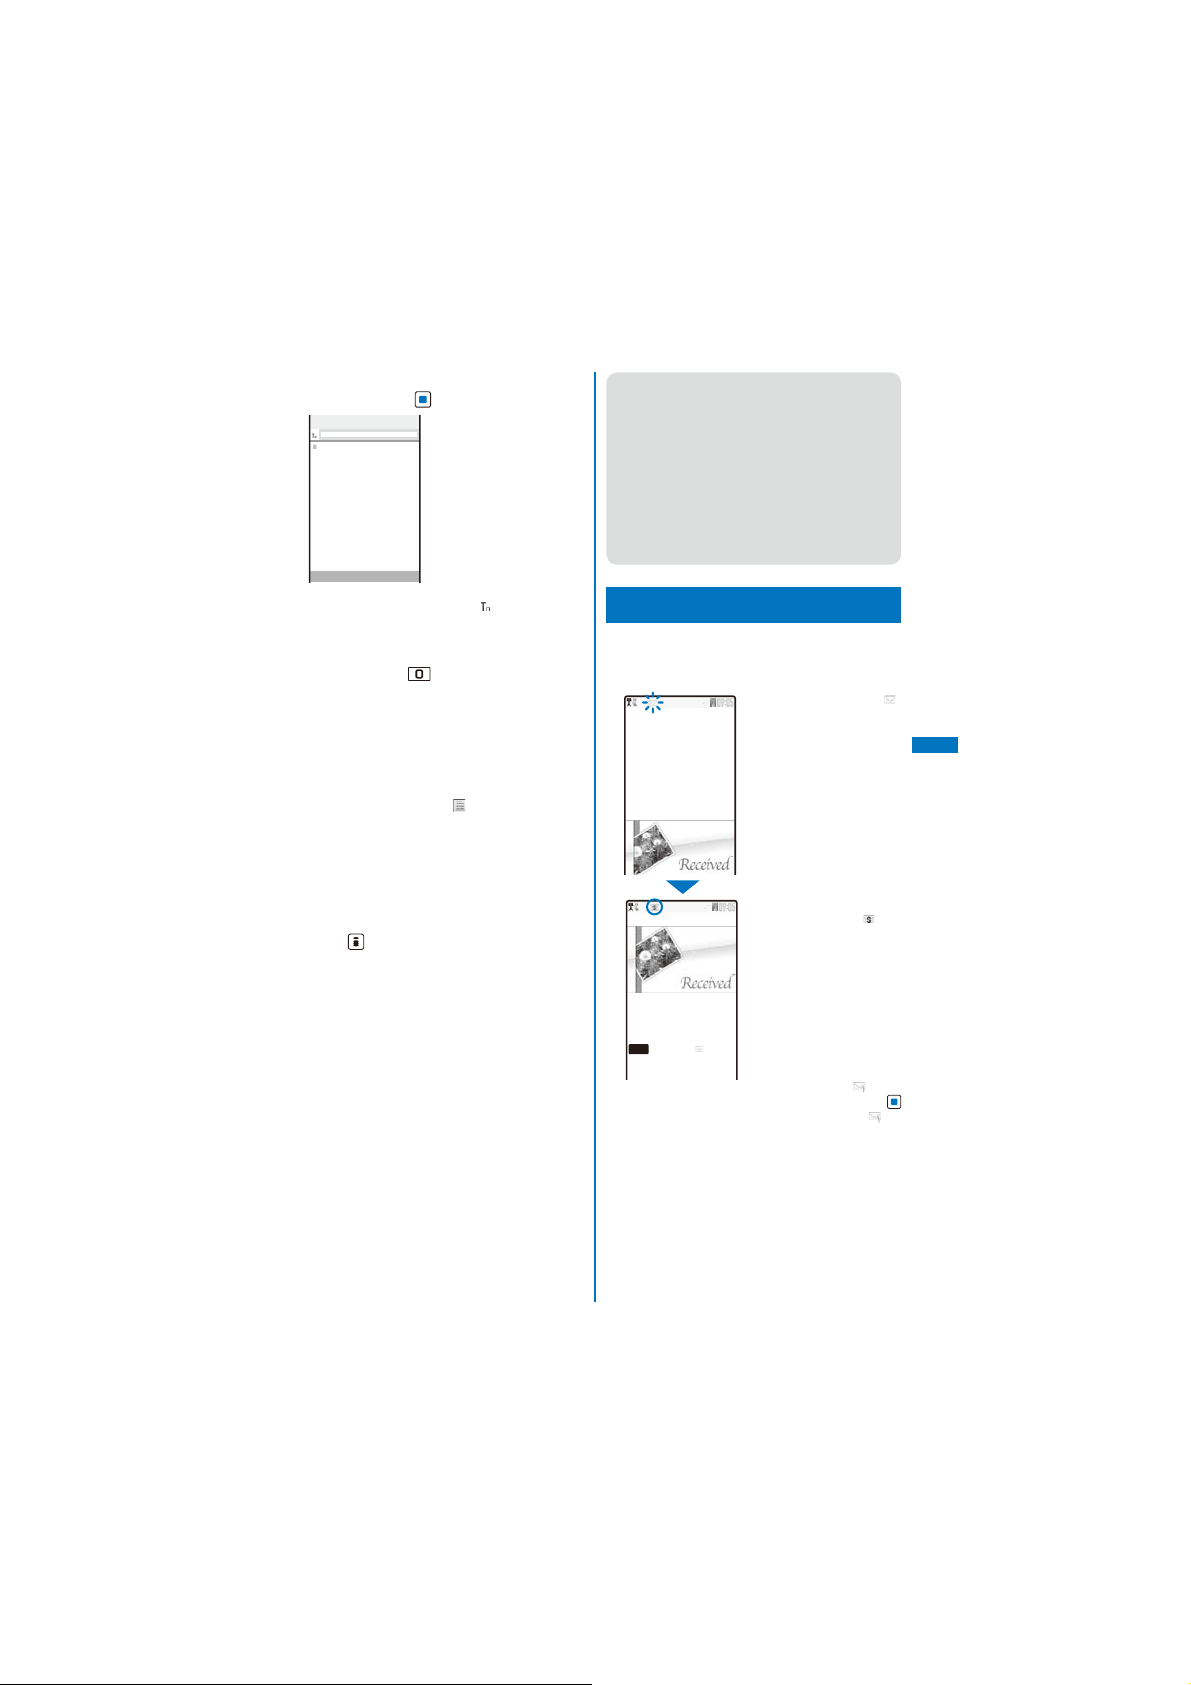
Receiving a Message
<Receive message>
When a message is received while in the
stand-by display, the contents of the message
are automatically displayed. Up to 20 Message
R and Message F each can be saved in the
FOMA terminal.
When receiving a message,
“ ”/“ ”/“ ” flashes.
Receiving
MessageR
Mail
When receiving is completed, “
displayed, the indicator flashes, the ring tone
sounds, and the number of received messages is
displayed.
The contents of the message appear automatically
after about 15 seconds. The display before
receiving reappears after about 15 seconds when
no operations are made.
Messages that are automatically displayed are
ˎ
saved as unread.
When the number of saved received messages
●
has reached 20 and a new message is received,
the unprotected message is overwritten from the
oldest.
You can also disable Auto-display of messages
●
(P.230).
Messages are held at the i-mode center when “ ”,
●
“ ”, “ ”, “ ”, “ ”, “ ”, “ ”, “ ”, or “ ” appears
(sometimes “ ”, “ ”, “ ”, “ ”, “ ”, “ ”, “ ”, “ ”, or
“ ” do not appear even if messages are held at
the i-mode center).
If the maximum number of messages is held
at the i-mode center, “ ”, “ ”, “ ”, “ ”, “ ”, “ ”,
“ ”, “ ”, “ ” appears. In this case, per form the
Check new message after checking contents
of the unread messages, delete unnecessary
messages, and cancel protection of the
messages.
”/“ ”/“ ” is
Message R/F that has been sent to you in the
●
following situations is held at the i-mode center.
- During a videophone call
- When the FOMA terminal is powered off
- When the FOMA terminal is outside of the
i-mode service area
- During PushTalk communication
- While receiving SMS
- While the Self mode is set
- While the Omakase Lock is set
- During the infrared communication
- During the iC communication
- While updating the software
- While connected to the FirstPass Center
- While connected to the Data Security Service
Center
Setting Auto-display
You can set to display the contents of the
message automatically when it is received
while in the stand-by display. You can also
select which message should be displayed
first when receiving both Message R and
Message F at the same time.
1
From the Mail menu, select [Mail setting]
[Common setting] → [Auto-display]
→
and press
[Prefer msgR]:
Display automatically Message R first when
receiving Message R and Message F at the
same time.
[MessageR only]:
Display automatically Message R only.
[Prefer msgF]:
Display automatically Message F first when
receiving Message R and Message F at the
same time.
[MessageF only]:
Display automatically Message F only.
[Display off]:
Do not display automatically.
To set from the i-mode menu
From the i-mode menu, select [i-mode setting]
[Common setting] → [Auto-display].
2
Select a display method and press .
The Auto-display is set.
.
→
202
Page 5
Checking a New Message
<Check new message>
New messages held at the i-mode center while
the FOMA terminal is powered off or outside of
the i-mode service area can be checked.
Depending on the radio wave condition, you may
ˎ
not be able to check new messages.
1
Press (Mail) for over a second in the
stand-by display.
The FOMA terminal is connected to the i-mode
center, and an inquiry result is displayed.
To check messages
Select [MessageR] or [MessageF].
You can select an inquiry item (P.227).
●
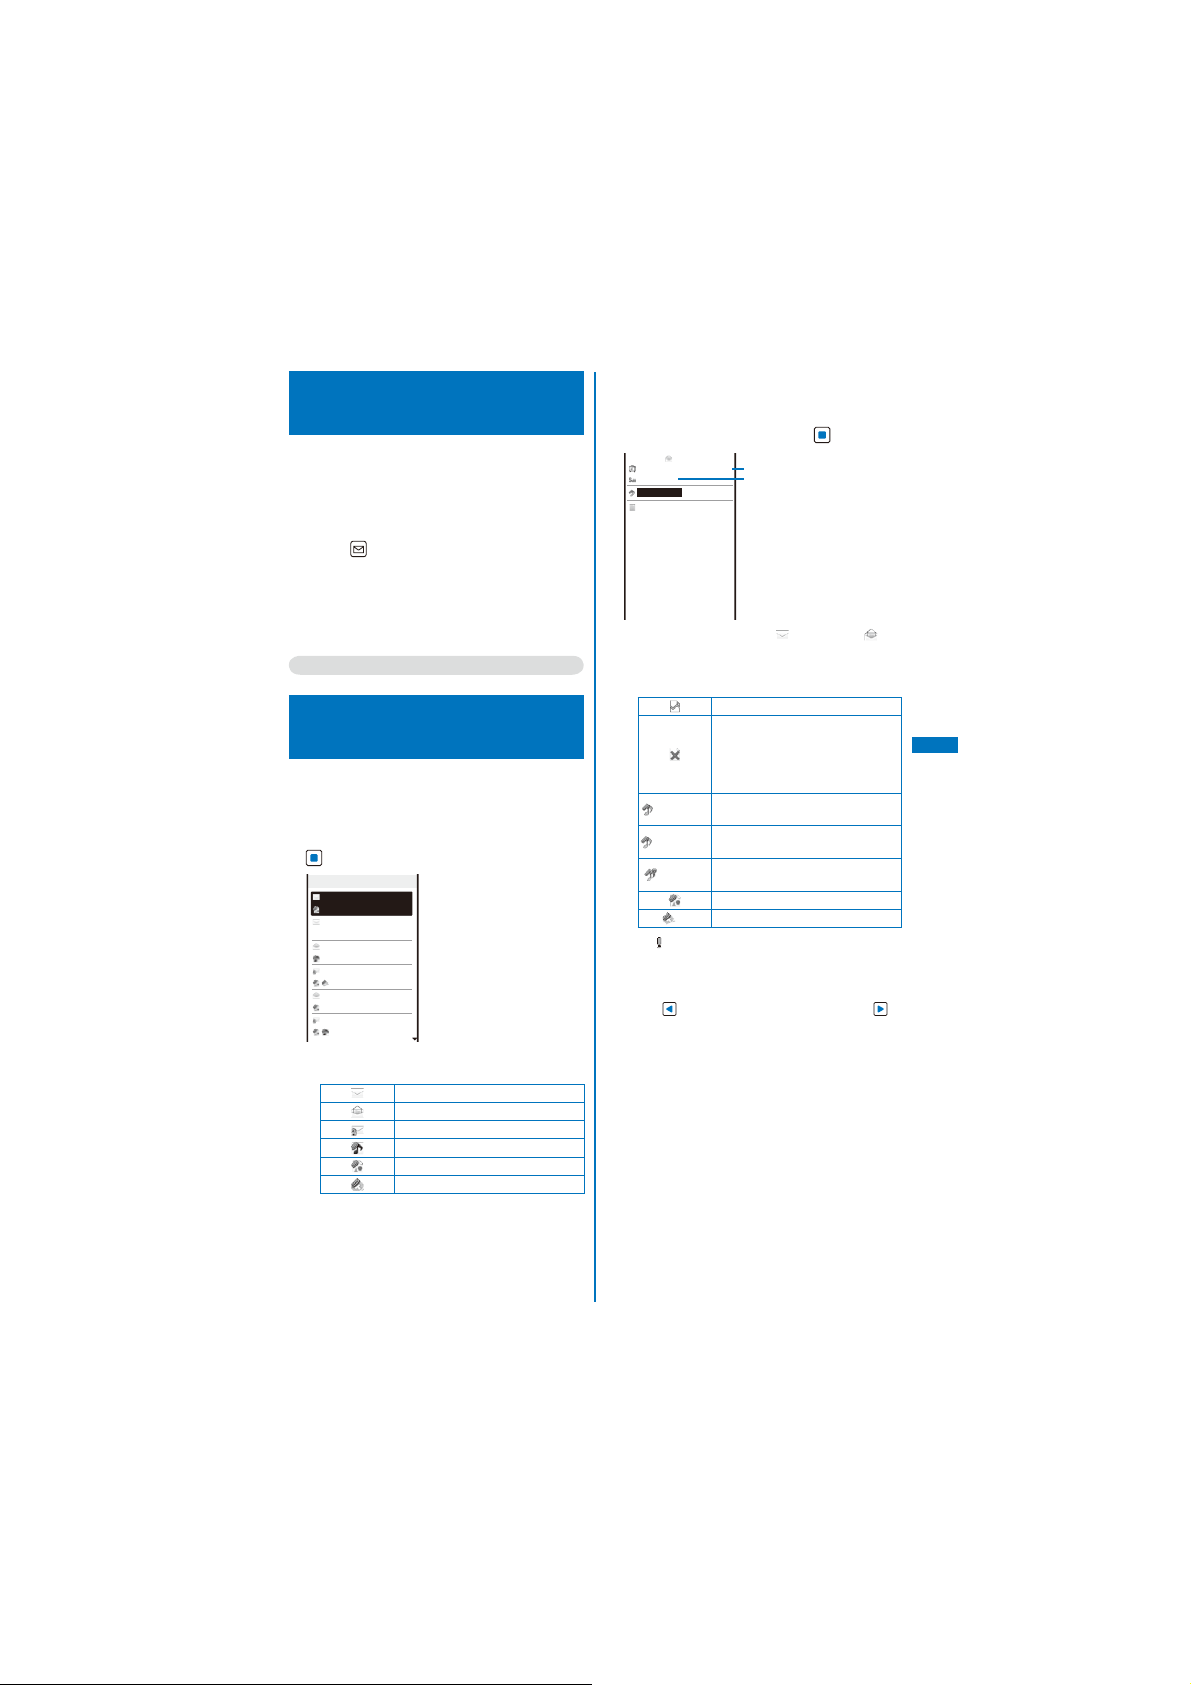
Displaying a Message
<Message R/Message F>
The list of received messages can be
displayed.
1
From the Mail menu, select [Inbox] → the
[MessageR]/[MessageF] folder and press
.
MessageR
2008/02/28 10:50
News
2008/02/28 10:00
Weather Forecast
2008/02/27 09:52
Horoscope
2008/02/26 10:00
Best choice for
2008/02/25 11:45
Salt and Pepper
2008/02/25 09:48
Recommended sto
The following icons show the status and type of
ˎ
the message.
1/8
Unread message
Read message
Protected read message
With melody attachment
With still image attachment
With ToruCa card attachment
To display from the i-mode menu
From the i-mode menu, select [Message] → the
[MessageR]/[MessageF] folder.
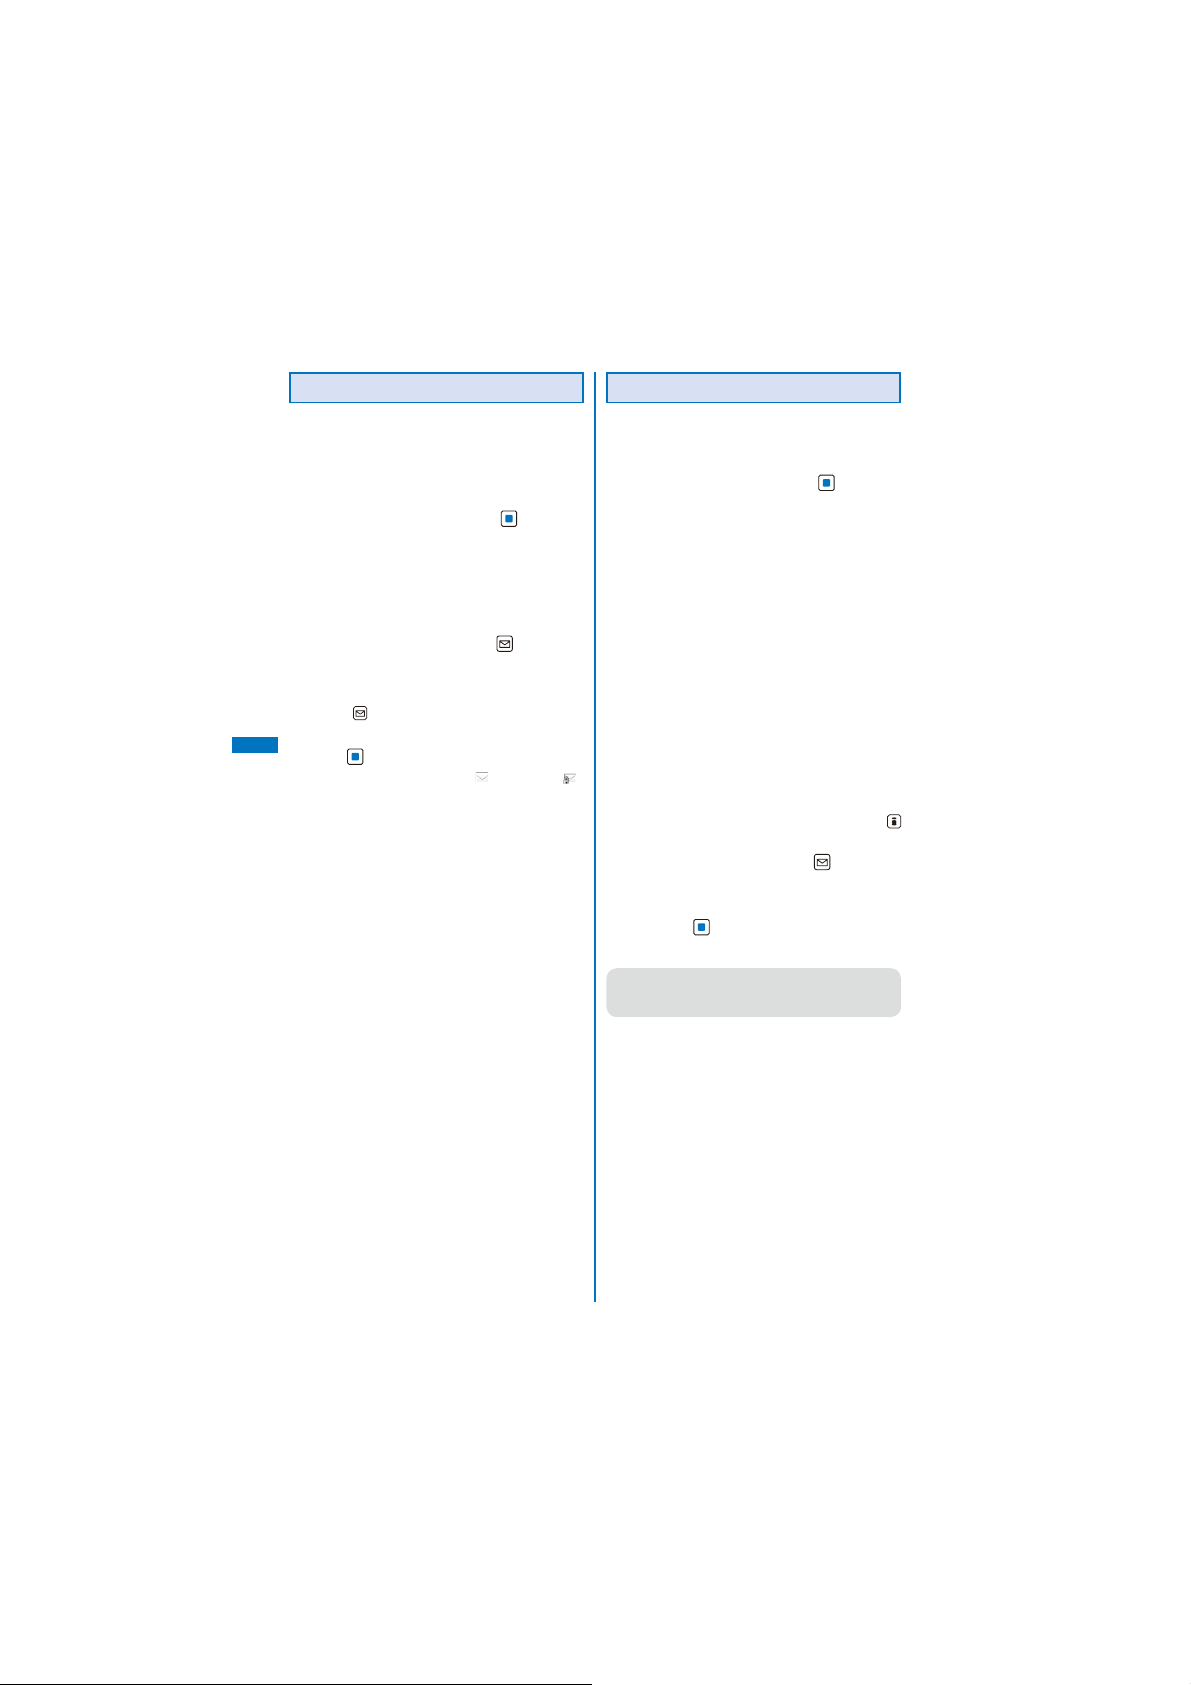
2
Select a message and press .
MessageR
2008/02/27
Horoscope
080227.mid 0.9KB
Sagittarius
☆☆
Money
Love
☆☆☆☆
Job
☆☆
Health
☆☆☆
Some overtime is unavoid
able because of overlapp
ing jobs. However, if it
triggers a chance to me
et a dream partner, it w
ill be lucky.
The message appears and “
The following icons show the details of a
ˎ
message. Other icons are the same as in step 1.
3
Received date/time
09:52
Subject
” changes to “ ”.
File attachment type
Failed to obtain the image
With invalid image attachment
With image attachment (When the
UIM is not inserted or other than
that used when the message was
received)
(Green)
(Orange)
With SMF-format melody
※
attachment
With MFi-format melody
※
attachment
With invalid MFi-format melody
(Orange)
attachment
With image attachment
With ToruCa card attachment
※
“
” appears when the UIM is not inserted.
※
For details about the operation of the file
ˎ
attachment, see P.218.
To display the previous or next message
Use to display the previous message or to
display the next message.
Mail
Continued
203
Page 6
Protecting a Message
Message R or Message F can be protected
from being overwritten.
An unread message cannot be protected.
ˎ
Example: Protecting Message R
1
From the Mail menu, select [Inbox] → the
[MessageR] folder and press .
To protect Message F
From the Mail menu, select [Inbox] → the
[MessageF] folder.
To set from the i-mode menu
From the i-mode menu, select [Message] → the
[MessageR]/[MessageF] folder.
2
Select a message and press (Func).
The Function menu appears.
To cancel the protection
Move the cursor to the protected message and
press (Func).
3
Select [Protect ON/OFF] → [Yes] and
Mail
press .
The message is protected and “
” changes to “ ”.
Deleting a Message
You can delete messages using four methods.
Example: Deleting Message R
1
From the Mail menu, select [Inbox] → the
[MessageR] folder and press .
To delete Message F
From the Mail menu, select [Inbox] → the
[MessageF] folder.
To delete from the i-mode menu
From the i-mode menu, select [Message] → the
[MessageR]/[MessageF] folder.
To delete all messages
From the Function menu, select [Delete]
[Delete all], enter the Security code, and select
[Yes].
In the received mail list, from the Function
ˎ
menu, select [Delete] to delete a message.
To delete all read messages
From the Function menu, select [Delete]
[Delete read msg], enter the Security code, and
select [Yes].
In the received mail list, from the Function
ˎ
menu, select [Delete] to delete a message.
To delete several messages
From the Function menu, select [Delete]
[Select&delete], select messages, press
(Complete), and select [Yes].
2
Select a message and press (Func).
The Function menu appears.
3
Select [Delete] → [Delete one] → [Yes]
and press .
The selected message is deleted.
You can delete all messages or read messages
●
by selecting [Delete] from the Function menu at
the folder list display of received mail.
→
→
→
204
Page 7
What is Early Warning
“Area Mail”?
Area Mail is a service that allows you to receive
mail such as the urgent earthquake news flash
delivered by the Japan Meteorological Agency.
You can receive Area Mail without subscribing to the
ˎ
i-mode service.
<Usage precautions>
To receive Area Mail, you need to set the Receive
ˎ
setting.
To set the Receive setting of Area Mail, see
※
P.233.
You may not be able to receive Area Mail in the
ˎ
following cases.
- During a call (voice/videophone call)
- During the packet communication (i-mode,
data, or PushTalk communication)
- While updating the software
In the following cases, you cannot receive Area
Mail at all.
- While the Omakase Lock is set
- While the international roaming service is used
- While the Self mode is set
The message which cannot be received
※
because of the reasons such as above ones,
you cannot receive it again.
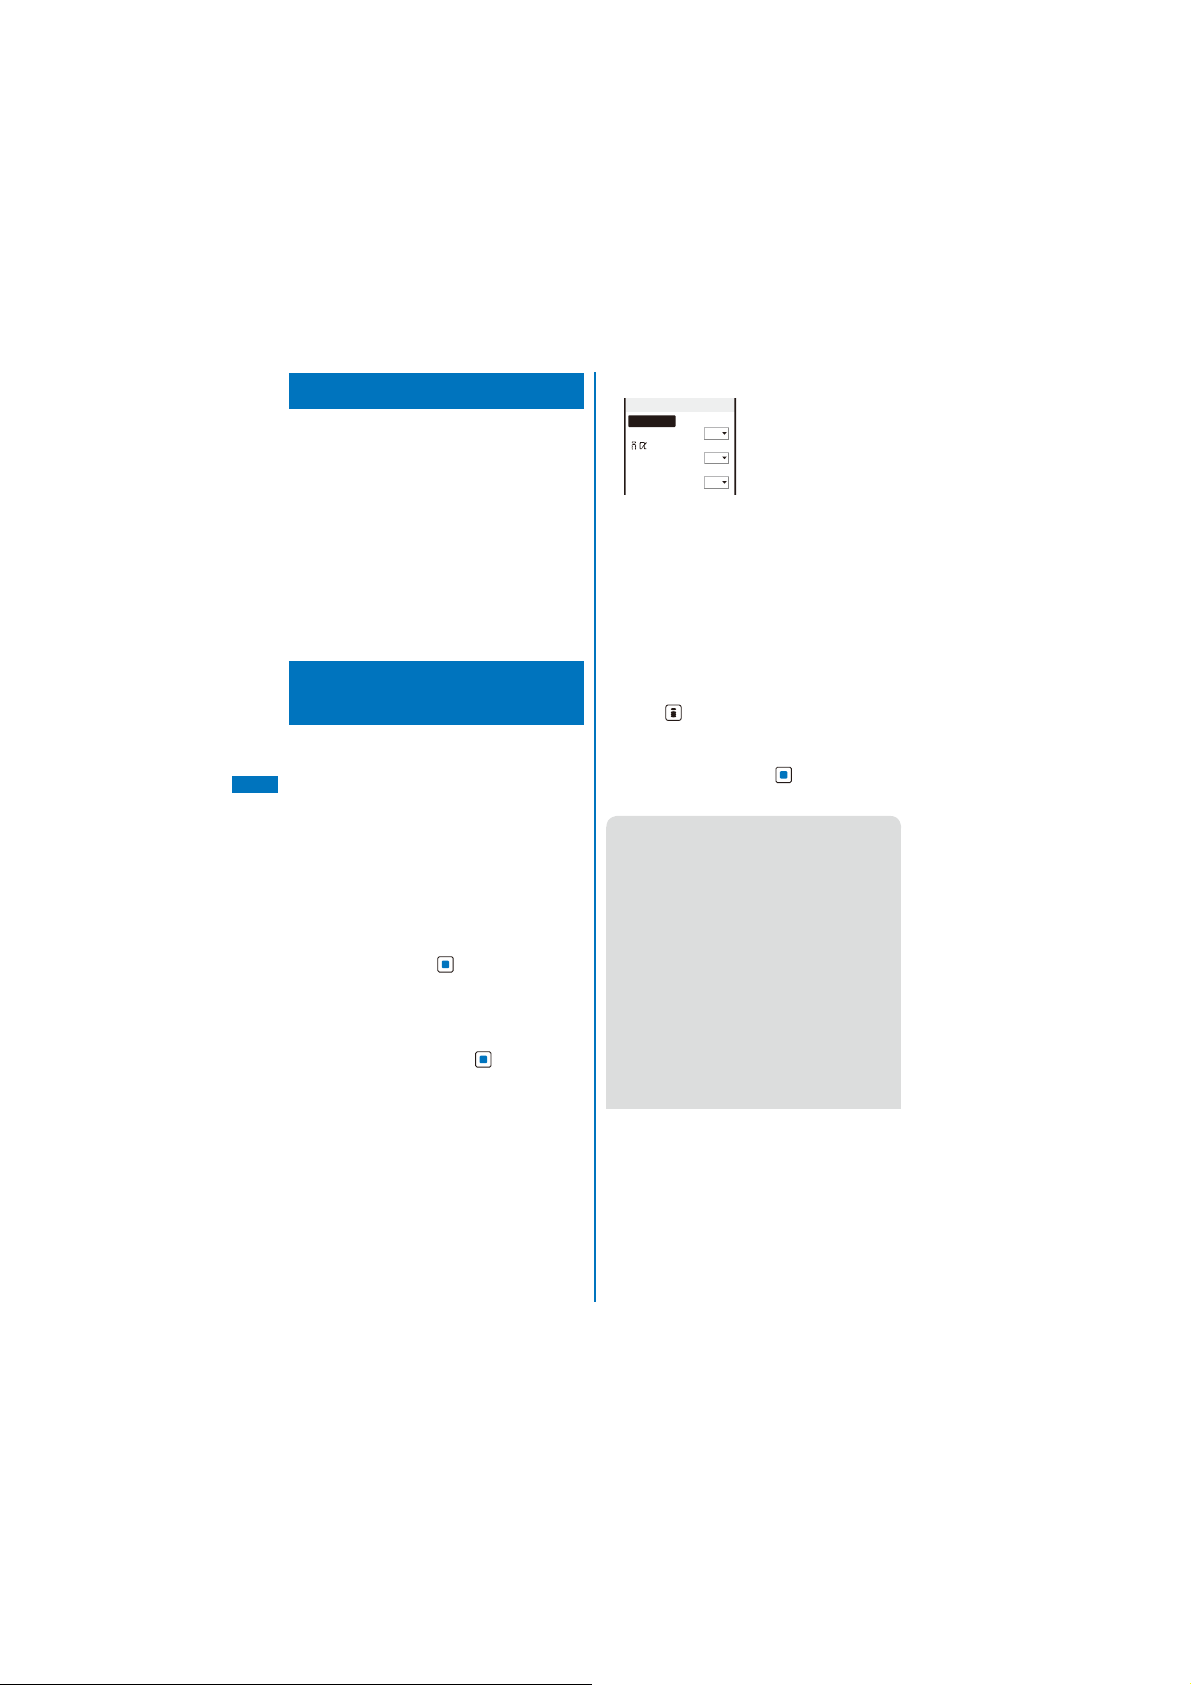
Receiving Early Warning
“Area Mail”
The FOMA terminal automatically receives
Area Mail when it is sent. You can save up to
30 received Area Mail in [Inbox] separated
from up to 1,000 mails of the normal received
mail. When there are already 30 received Area
Mail, the unprotected read mail from the oldest
one is deleted.
Received
Area Mail
When Area Mail is received, “ ” appears, the
incoming indicator flashes, the beep or ring tone of
Area Mail sounds, and then the screen informing
the Area Mail reception appears.
After about 15 seconds, the display prior to the
Area Mail reception reappears.
Some Area Mail may activate the vibrator after
ˎ
the reception is completed.
<Receive Area Mail>
Some Area Mail may show the Area Mail main
ˎ
body after the reception is completed. Confirm
the contents and press
You cannot adjust the volume of the beep of
●
Area Mail of the urgent earthquake news flash.
[Pattern1] is used for the vibrator (P.110). The
vibration pattern cannot be changed. But the
Beep and Beep time can be set (P.234). While
the Manner mode is set, the setting follows that
set in the Manner mode (P.115).
When you receive Area Mail except Area Mail of
●
the urgent earthquake news flash, the ring tone
volume of the incoming Area Mail follows the
setting of the Mail volume.
(OK), , or .
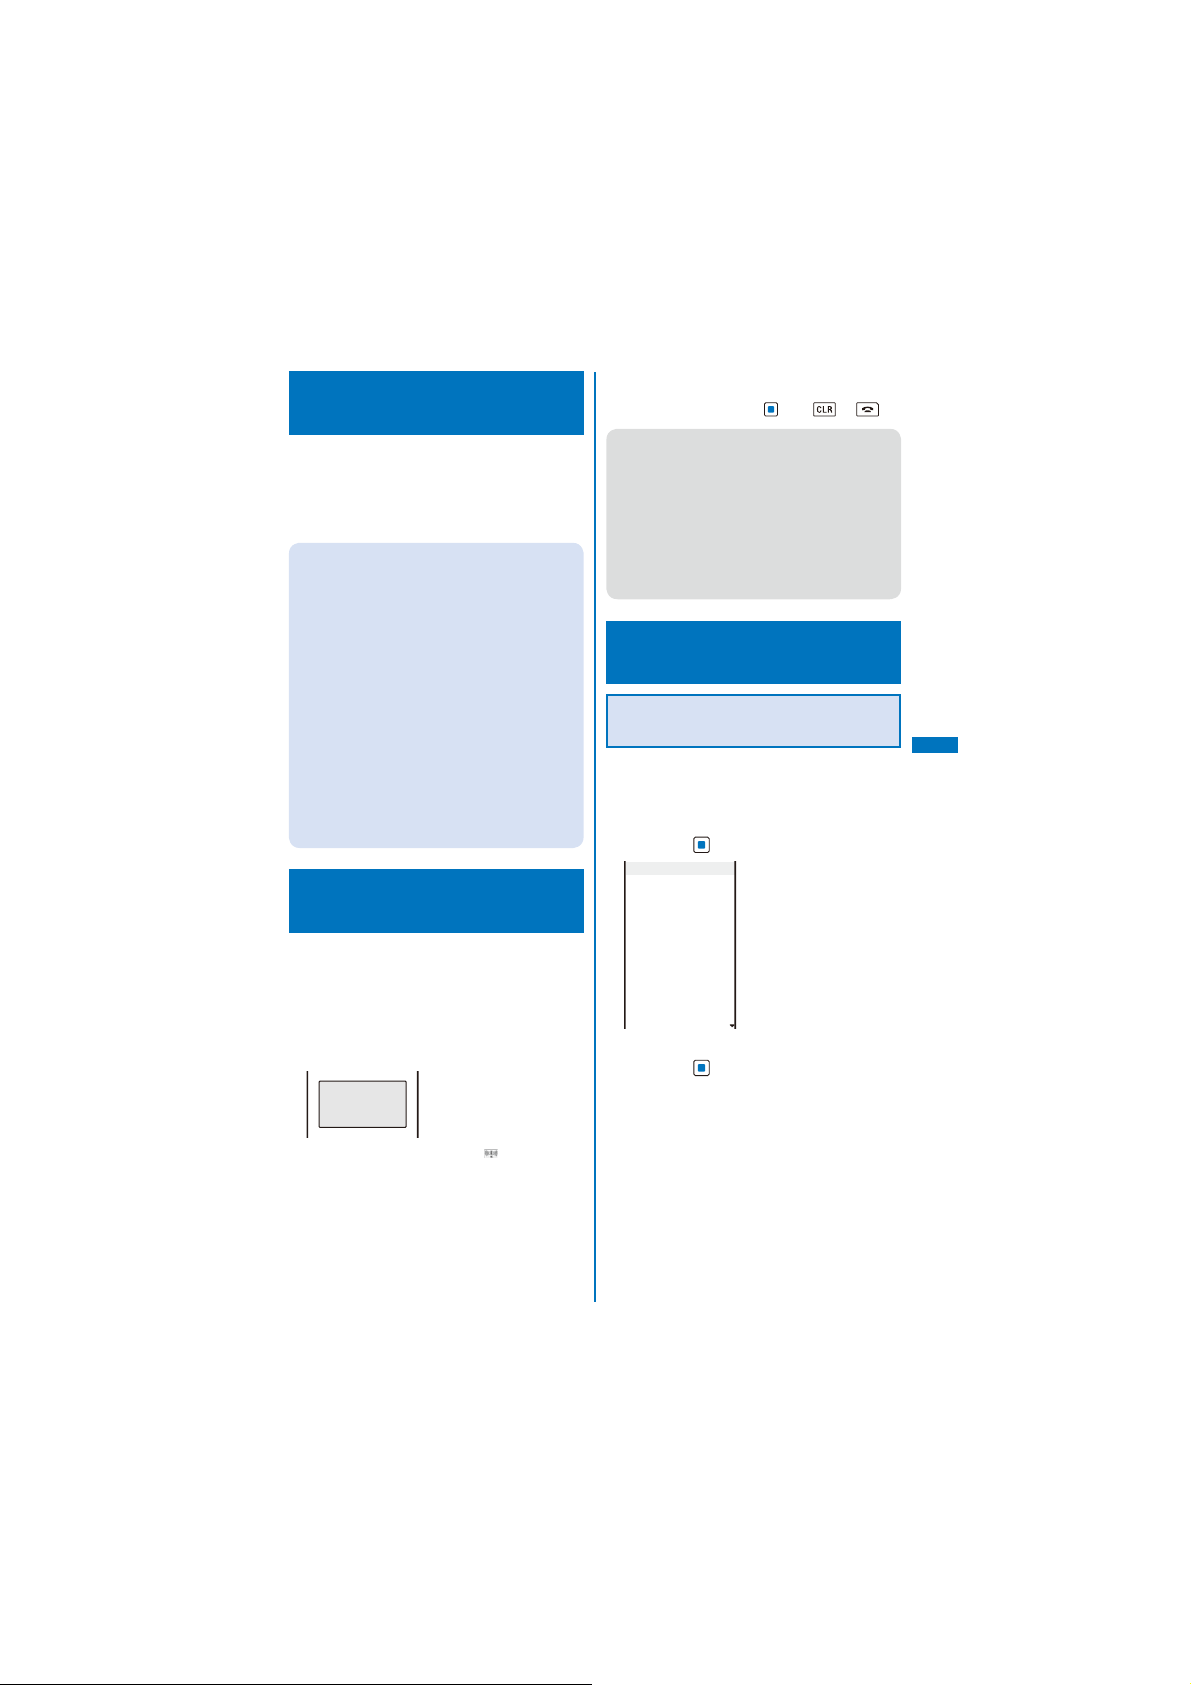
Setting Early Warning “Area
Mail”
Setting Whether to Receive Area
Mail
The default setting of the Receive setting is
[OFF].
1
From the Mail menu, select [Mail setting]
[Area Mail setting] → [Receive setting]
→
and press
Receive setting
Area Mail enables you
to receive area
information, such as
Earthquake Early
Warning, based on your
location
Notice
(Read these
directions)
DoCoMo will provide
2
Confirm the contents, select [Yes]/[No],
and press .
The Receive setting is set.
You may receive messages from different areas
ˎ
other than your current area.
.
<Area Mail setting>
Mail
Continued
205
Page 8
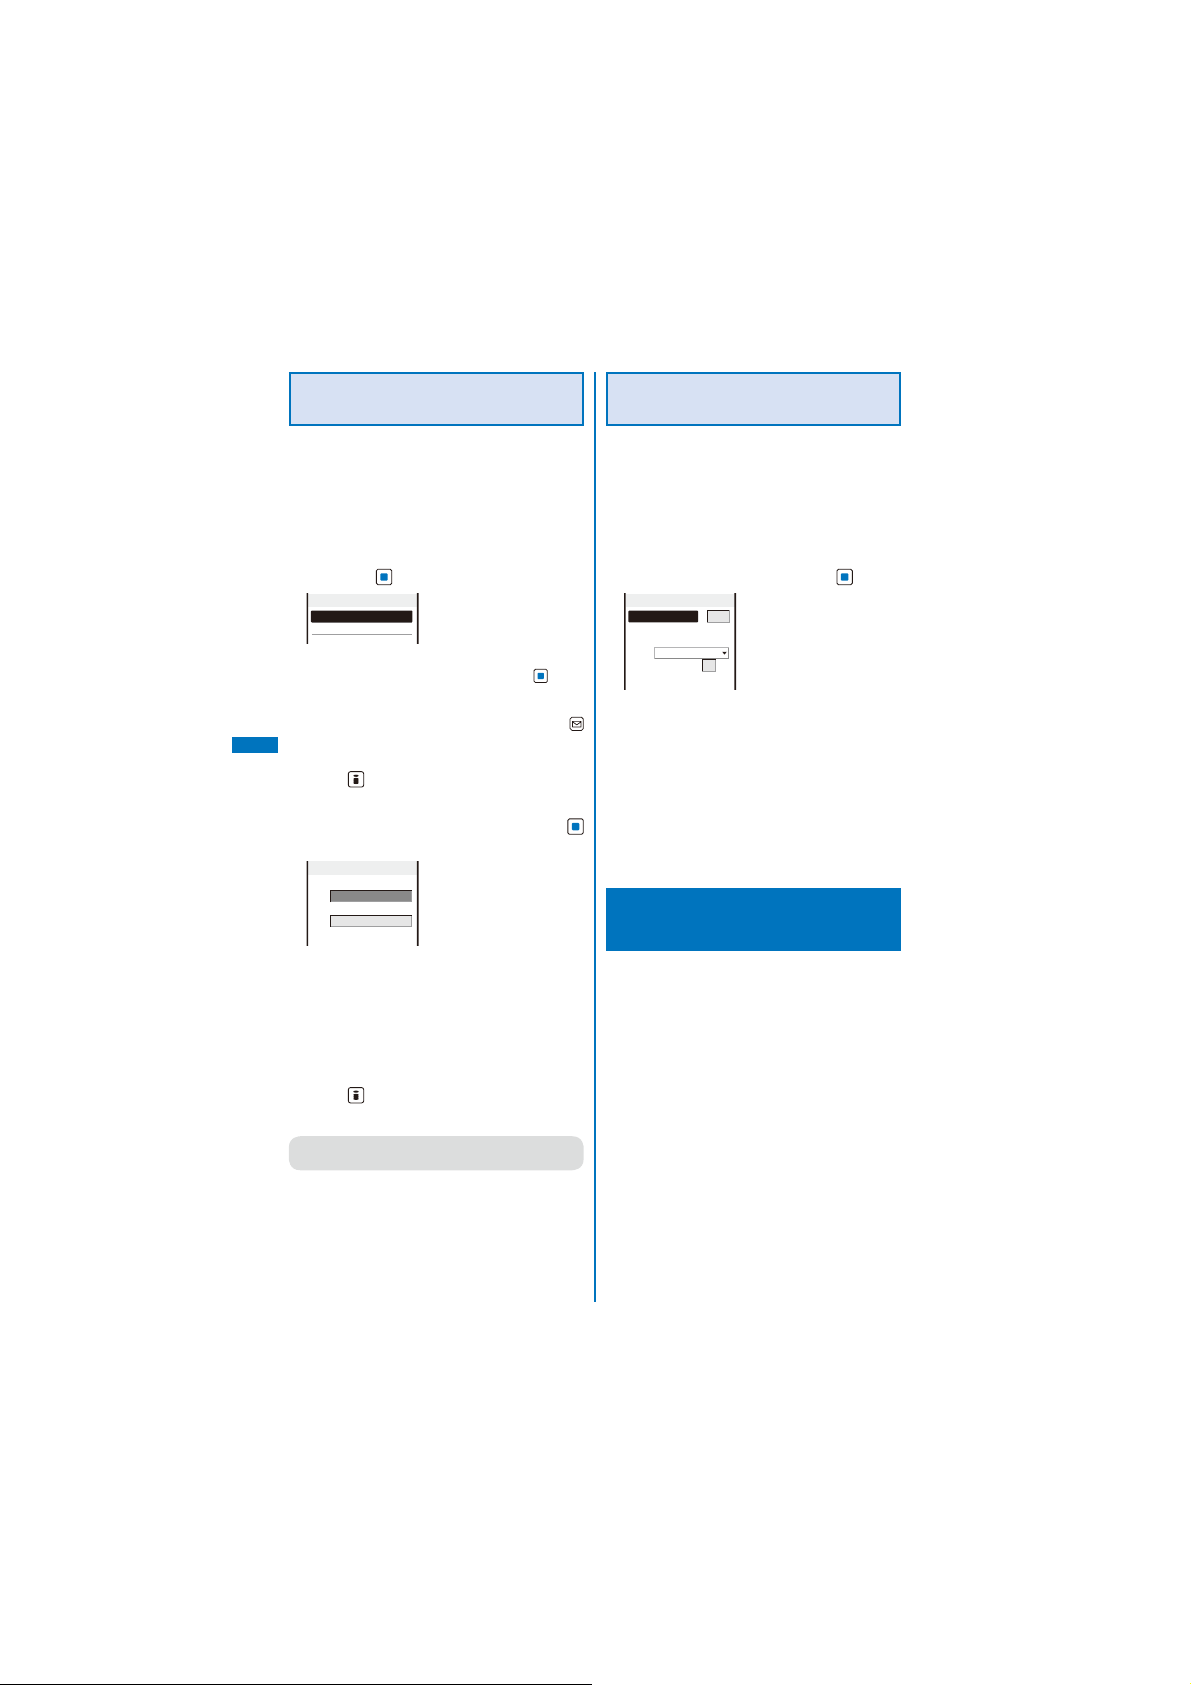
Setting to Save Receiving Entry
of Area Mail
You need to save a name and Message ID of
Area Mail including information you want to
receive rather than Area Mail of the emergency
information. To receive emergency information,
you do not need to save receiving entry.
1
From the Mail menu, select [Mail setting]
[Area Mail setting] → [Receive entry]
→
and press
Receive entry
Emergency information
To edit the settings of the set entry
Move the cursor to the set entry, press (Edit),
and enter the Security code. Edit each item.
To delete the set entry
Move the cursor to the set entry, press
(Delete), enter the Security code, and select
Mail
[Yes].
2
Press (Create).
The Security code screen appears.
3
Enter the Security code and press
(OK).
Edit Area Mail name
Area Mail name
Message ID
[Area Mail name]:
Enter the Area Mail name within 15 full-width or
30 half-width characters.
[Message ID]:
Enter the Message ID from A400 to A7FF (in
hexadecimal).
4
Enter each item.
5
Press (Complete).
The entered entry is saved.
You cannot edit/delete the pre-saved [Emergency
●
information].
.
(A400−A7FF)
Setting the Operation While
Receiving Area Mail
You can set whether to sound the beep and
activate the vibrator when you receive Area
Mail of the urgent earthquake news flash, and
the ring time of the beep. The Beep setting is
set to [Permission] and the Beep time is set to
[10sec] at the time of purchase.
1
From the Mail menu, select [Mail setting]
[Area Mail setting] and press
→
Area Mail setting
Receive setting
Receive entry
Beep setting
Beep time
2
Select [Permission]/[Non-permission] at
ON
Permission
10 sec
(01−30)
.
[Beep setting].
[Permission]:
The beep sounds and the vibrator is active.
[Non-permission]:
Neither the beep nor the vibrator activates.
3
Enter the ring time of the beep at [Beep
time].
Enter the ring time within 01 to 30 seconds.
Composing and Sending
SMS
<Compose and send SMS>
Regardless of whether you subscribe to
i-mode, you can send/receive text messages
between FOMA terminals.
You can exchange SMS with recipients/senders
ˎ
who subscribe to an overseas telecommunication
company other than DoCoMo. See the NTT DoCoMo
website for information about countries and
overseas telecommunication companies you can
use for sending/receiving SMS.
Even if the Notify caller ID is set to [Not notify], an
ˎ
SMS recipient is notified of the sender’s phone
number.
The text of sent message may not be displayed
ˎ
correctly on the recipient’s terminal depending on
the radio wave condition or the type of characters to
be sent.
206
Page 9
1
From the Mail menu, select [Compose
SMS] and press .
Edit SMS
R.70char
2
Enter a phone number at [ ].
Enter a phone number within 21 digits.
When a recipient subscribes to an overseas
telecommunication company other than DoCoMo
Enter “+” (press for over a second), “Country
code”, and “recipient’s mobile phone number”,
in this order. When the mobile phone number
starts with “0”, enter the number without “0”. You
can also send SMS by entering “010”, “Country
code”, and “recipient’s mobile phone number”,
in this order. (To reply to SMS received from
overseas, use the latter method using “010”.)
3
Enter a main body at [ ].
When you set [Language] to [JPN] for the SMS
setting, enter the SMS main body within 70
characters regardless of full-width or half-width.
When you set it to [ENG], enter the main body
within 160 half-width characters (excluding `, 。,
, ”, and ゜). Use of the symbols (|^{}[]~¥)
「,」,、,・
reduces the number of characters that can be sent.
4
Press (Send).
The SMS is sent.
To save SMS without sending it
From the Function menu, select [Save]. The SMS
is saved in [Draft].
When you change the font size, from the Function
●
menu, from [Input method] → [Font size], in the
Edit SMS display, the setting is only applied for
the font size in the matching word list. The setting
for the font size of an address and main body
text is changed from the next time when you edit
mail/SMS (P.127).
When you subscribe to the Multi Number Service,
●
set [Basic Number] for the Set Multi Number.
When 2in1 is set to the B mode, you cannot
●
compose SMS.
You cannot send SMS from Number B.
●
Receiving SMS
<Receive SMS>
The FOMA terminal automatically receives
SMS. You can save up to 1,000 received SMS
including i-mode mail in [Inbox].
While receiving SMS, “ ”
flashes.
Receiving SMS
Unread mail/message
Mail
MessageR
MessageF
When SMS reception
is completed, “
displayed, the incoming
indicator flashes, the ring
tone sounds, and the
number of received SMS
appears.
After about 15 seconds,
the display prior to the SMS
reception reappears.
1
When returning to the
ˎ
0
0
stand-by display, the
notification icon “
mail) appears. Press
(Link) and select “ ” to
display the Inbox display.
” is
” (New
Mail
Continued
207
Page 10

You can compose and send a reply to the
●
received SMS and forward it (P.216).
Some characters in a received SMS message
●
are replaced with as many spaces (blanks).
You cannot reply to SMS sent to Number B of
●
2in1.
Checking New SMS
<Check new SMS>
New SMS held at the SMS center while the
FOMA terminal is powered off or outside of the
service area can be checked.
Depending on the radio wave condition, you may
ˎ
not be able to check new SMS.
1
From the Mail menu, select [Check new
SMS] and press .
The FOMA terminal is connected to the SMS center
and receives SMS if some are held at the center.
Even if you check new SMS, it may take time to
●
Mail
receive SMS.
Setting SMS
Normally, you do not need to change the
※
<SMS setting>
SMSC, Type of Number, and address
settings.
1
From the Mail menu, select [Mail setting]
[SMS setting] and press
→
SMS setting
Language
SMS report
Validity
SMSC
Type of Number
Address
81903101652
[Language]:
Select whether a message to be sent is going
to be displayed in Japanese or English. The
number of characters that can be sent varies
depending on the type of characters.
[SMS report]:
Set whether you require a delivery report when
SMS is sent.
[Validity]:
Select the period for holding your SMS at the
SMS center when a recipient is unable to receive
the SMS you sent.
[SMSC]:
Set when you receive SMS services provided by
companies other than DoCoMo.
[Type of Number]:
When you select [Others] at [SMSC], select
[International]/[Unknown].
ˎ
[Address]:
When you select [Others] at [SMSC], enter an
address. You can enter up to 20 half-width digits.
2
Set each item.
3
Press (Complete).
The SMS setting is set.
JPN
Invalid
3days
DoCoMo
International
When “
” or “#” is included in the address
entered at [Address], select [Unknown].
.
208
Page 11

i-
α
ppli
What is i-αppli? ...................................................................................................... 238
Downloading i-αppli from a Site ............................................................................. 238
Running i-αppli ...................................................................................
Running i-αppli Automatically ................................................................
Setting i-αppli for the Stand-by Display ........................................
Managing i-αppli ..................................................................................................... 247
Displaying i-αppli Data in microSD memory card ........................
Using Various i-αppli Functions .............................................................................. 251
<Run i-αppli>
<Auto-start>
<i-αppli stand-by>
<i-αppli(microSD)>
239
246
247
250
209
Page 12
What is i-αppli?
By downloading i-αppli from its site, the
i-mode terminal can be made much more
useful in many ways. For example, you can
enjoy many kinds of games by downloading
them to it. There are also i-αppli from which
you can directly save data to the Phonebook
and Schedule, as well as i-αppli that can
be linked with Data Box for saving/loading
images.
For details on i-αppli, see the “Mobile Phone User’s
ˎ
Guide【i-mode】 FOMA version”.
Some i-αppli cannot be used when 2in1 is set to
ˎ
either the B or Dual mode.
Downloading i-αppli from
a Site
You can download i-αppli software from sites
and save it.
You can save up to 100 i-αppli software, each
ˎ
i-
software maximum 1M bytes. The number of
α
i-αppli software that can be saved may decrease
ppli
depending on the data to be saved.
When downloading ends in failure due to the radio
ˎ
wave condition, the software is not saved.
When downloading i-αppli with mail, software
ˎ
cannot be downloaded if there are already five mail
folders for i-αppli with mail or if software using the
same mail folder already exists.
1
While displaying the site, select the
software and press .
The software is downloaded.
When the screen for confirming whether to
download the software appears
Select [Yes] or [Download].
2
Select a folder and press .
The downloaded software is saved in the selected
folder.
3
Perform the Software setting.
SW init. Setting
NW setting
Use location info
There are items that cannot be changed
ˎ
depending on the software.
To connect to the network automatically when the
software is started
Select [NW setting] → [Yes].
ˎ
To set the software for the i-αppli stand-by display
Select [i αppli stand-by] → [Yes].
To use the location information
Select [Use location info] → [Yes].
4
Press (Complete).
The screen for confirming whether to run the
software appears.
5
Select [Yes] and press .
The downloaded software is started.
If you have deleted preinstalled software, you
●
can download it from “PlayNow by SO”.
[i Menu] → [
→ [ケータイ電話メーカー
Manufacturers) → [PlayNow by SO] (Japanese
only)
The message “Terminal and UIM ID will be
●
sent” may appear when downloading. Select
[Download] to download. Since the “serial
number of your mobile phone/UIM (FOMA card)”
is sent to IP (information service providers) via
the Internet, it might be accessed by a third
party.
The message “This software uses saved data”
●
may appear when downloading. Information on
the saved data to be used can be confirmed
by pressing [Description]. Select [Download]
to download the software. The i-αppli uses the
saved data in this case.
Yes
ppli stand−by
No
Yes
Settings you made are applied to the NW
setting and Stand-by NW setting of the
Individual set (P.241).
メニュー/検索
] (Menu/Search)
] (Mobile Phone
210
Page 13
If you lock the IC card function while
●
downloading an Osaifu-Keitai-compatible
i-αppli, the downloading is stopped.
After downloading i-αppli with mail, i-αppli with
●
mail folder is automatically created in Inbox,
Outbox, and Draft. The folder is named based on
the downloaded i-αppli with mail and cannot be
changed.
If only the mail folder to be used remains when
●
downloading i-αppli with mail, that folder can
be used. If a folder name is different from the
name of a downloaded i-αppli, this folder name
is changed to the downloaded i-αppli name.
If the i-αppli with mail does not use that folder,
it can be deleted and a new folder can be
created. Note that the i-αppli with mail cannot
be downloaded without creating a new folder.
Even if there is enough memory, you may not be
●
able to download an Osaifu-Keitai-compatible
i-αppli depending on the volume of data
saved on your IC card. If you cannot perform a
download, delete unnecessary software data in
accordance with the confirmation screen and
download the i-αppli again. (You may not be
able to delete some software data.) In some
cases, you may need to start up the software
before deleting related data on the IC card.
Checking i-αppli Information
When Downloading
The software information can be displayed
when i-αppli software is downloaded from a
site.
1
From the Menu, select [i appli] → [i αppli
setting]→ [SW description] and press .
2
Select [Yes]/[No] and press .
The SW description is set.
Running i-αppli
i-αppli software can be set to run manually.
1
Press (i-mode) for over a second in the
stand-by display.
The i-αppli folder list appears.
The following icons show the type of folder.
ˎ
(Yellow)
Preset folder
(Blue)
User-created folder
<Run i-αppli>
i-
α
ppli
Continued
211
Page 14
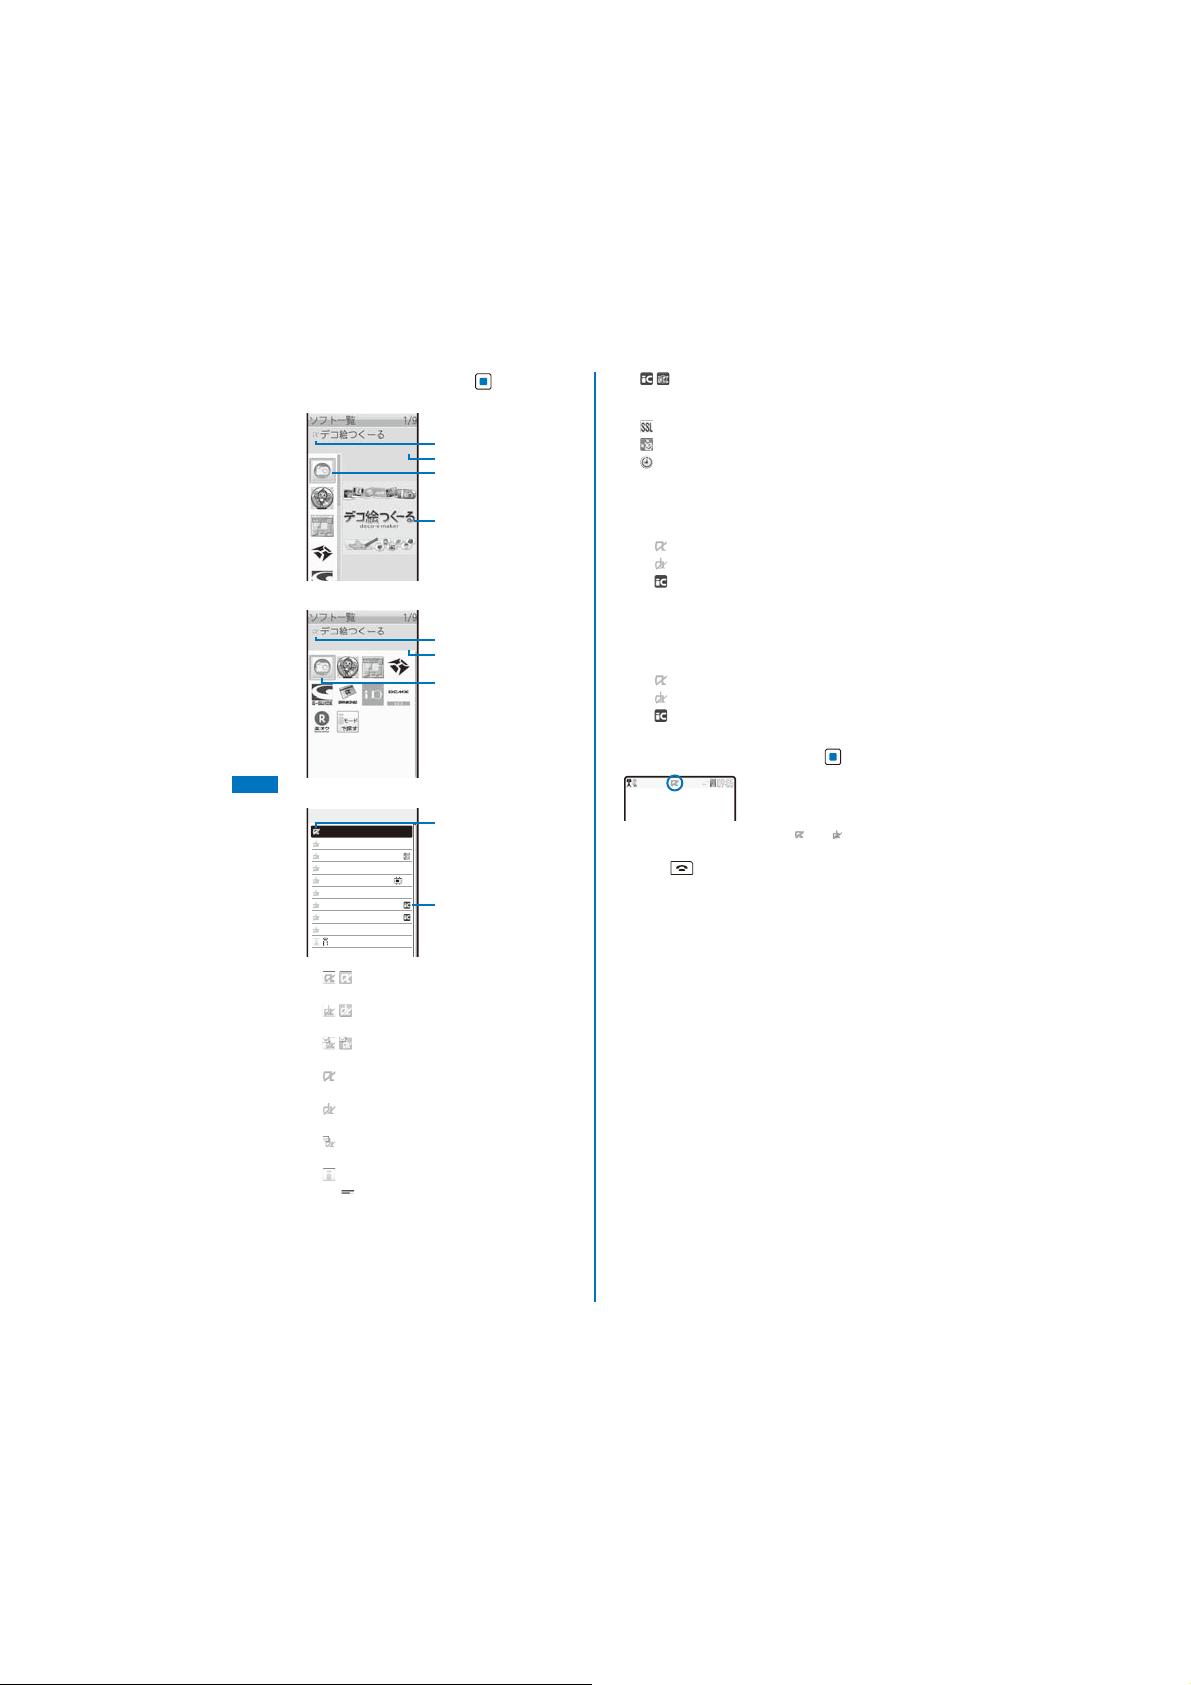
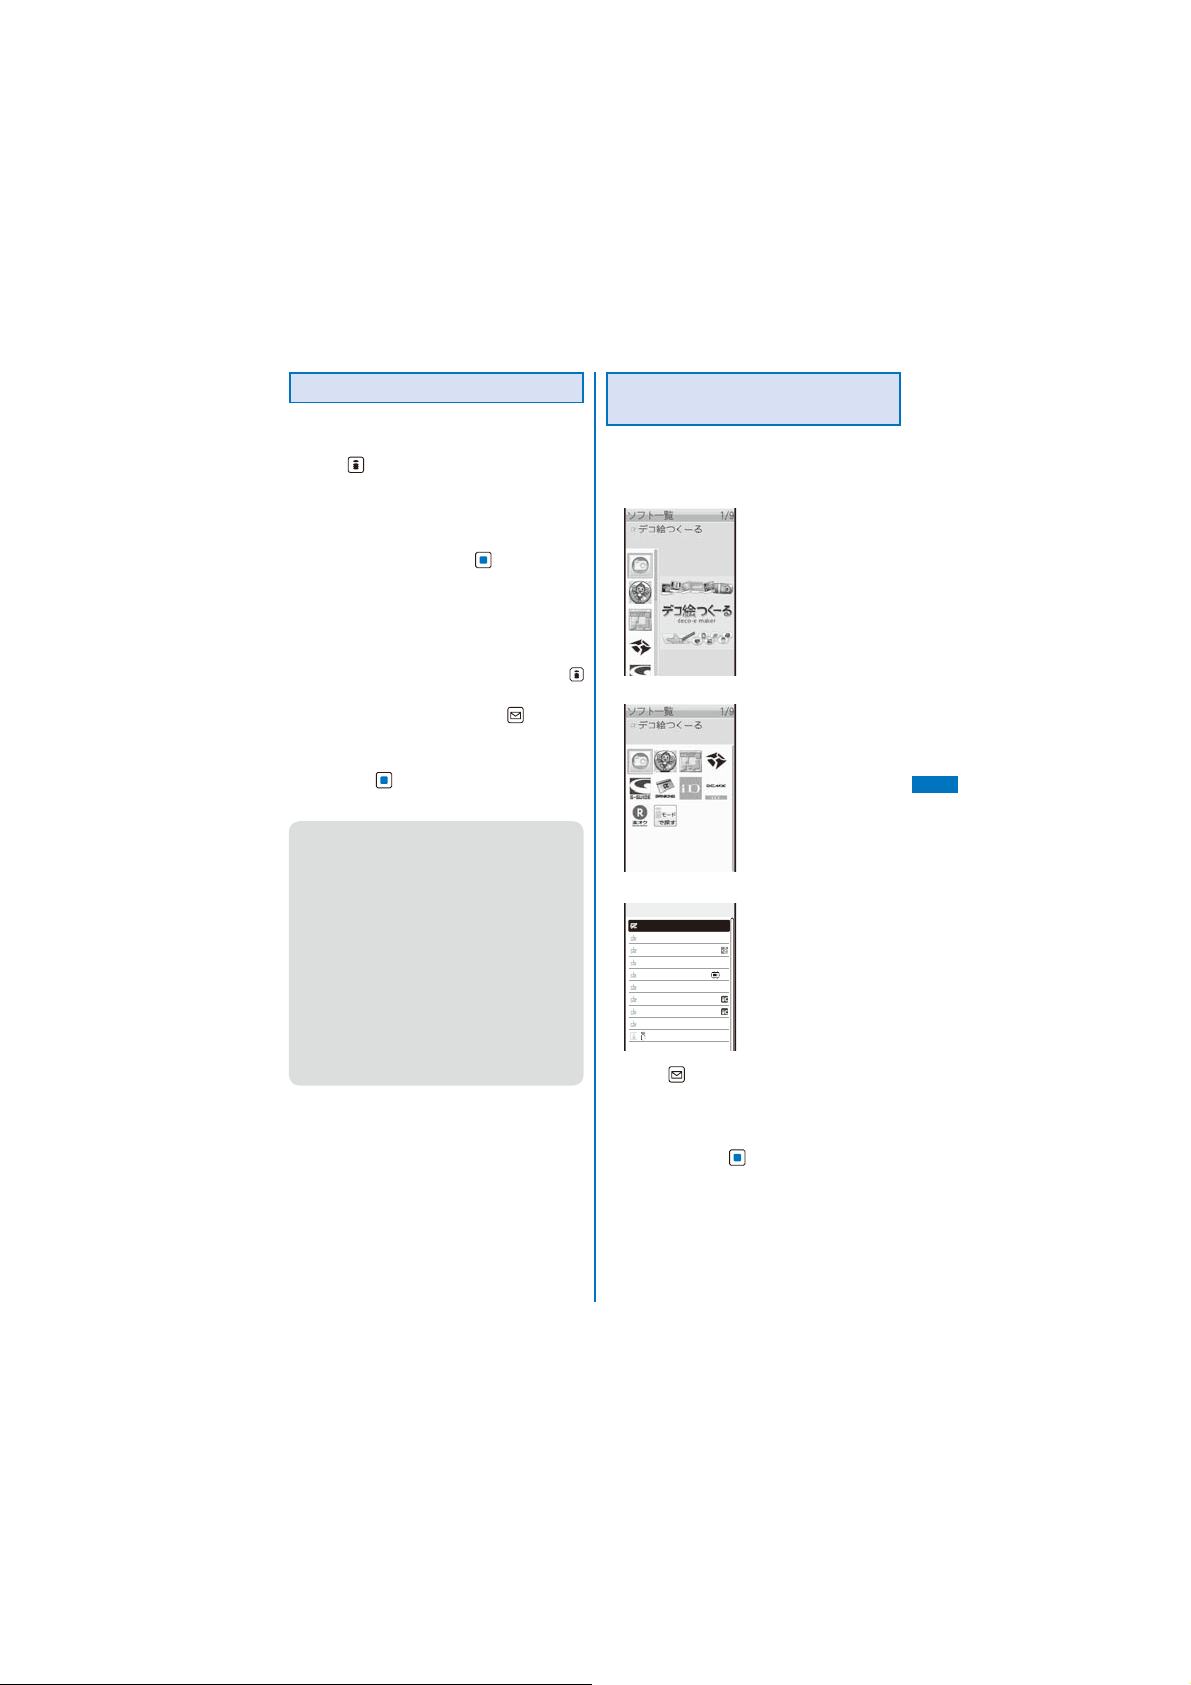
2
Select a folder and press .
Icon(L)
Icon(S)
i-
List
α
ppli
ソフト一覧
デコ絵つくーる
スーハ゜ーモンキーホ゛ール for SO
地図アプリ
FOMA
通信環境確認
Gカ゛イト゛
番組表
iアフ゜リハ゛ンキンク゛
iD
設定アプリ
DCMXクレシ゛ットアフ゜リ
楽オク出品アプリ
Search by i−mode
( )※ : Software supporting i-αppli stand-by
( )※ : Software supporting i-αppli DX
( )※ : Software supporting i-αppli with
: Software not supporting i-αppli
※
: Software not supporting i-αppli DX
※
: Software not supporting i-αppli with
※
: Search by i-mode
” appears to the lower right of the icon for
“
※
the software while downloading in progress.
1/9
アフ゜リ
リモコン
2
display (While setting)
stand-by display (While setting)
mail stand-by display (While setting)
stand-by display
stand-by display
mail stand-by display
( ) : Osaifu-Keitai-compatible i-αppli
software (While the service is
unavailable)
: Software downloaded from an SSL site
: GPS-compatible i-αppli software
: Software set for automatic startup
Software icon
An icon assigned to each software appears.
ˎ
If there is no icon assigned to software, the
following icons appear.
: i-αppli software
: i-αppli DX software
: Osaifu-Keitai-compatible i-αppli
software
Title image of selected software
A title image assigned to each software
ˎ
appears. If there is no title image assigned to
software, the following icons appear.
: i-αppli software
: i-αppli DX software
: Osaifu-Keitai-compatible i-αppli
software
3
Select the software and press .
The software is started up and “ ” or “ ” appears.
To quit i-αppli software
Press and select [Yes].
To check the detailed information
Move the cursor to the software and from the
Function menu, select [Soft description].
Displayed items may vary depending on the
ˎ
software.
The name of the software listed in the Soft
ˎ
description display cannot be changed.
To display the certificate
Move the cursor to the software and from the
Function menu, select [Certificates].
212
Page 15
Some software applications start up immediately
●
from the site. This means that the software has
been downloaded, but not saved. Also note that
you cannot save some downloaded software.
Some software applications that start up
●
immediately from the site may require NW setting
while it is running.
The software is interrupted when the Alarm or
●
Schedule alarm time comes while running the
software. Press or to return to the
previous display.
The software can be interrupted and the phone
●
can be answered when you receive a voice,
videophone, or PushTalk call while running the
software. The previous display returns when a
call is finished. When receiving a videophone or
PushTalk call while i-αppli communication is in
progress, the setting for the V.ph while packet or
the i-mode arrival act is applied, respectively.
When you receive mail/message/Area Mail
●
while running the software, “ ”, “ ”, “ ”, or “ ”
appears.
When the Receive option setting is [ON], “ ”
appears if you receive mail while running the
software. “ ” (Mail at center) appears when you
display the stand-by display. To check mail, use
the Receive option (P.215).
Images used by i-αppli software※ and some of
●
the data you entered may be automatically sent
to a server via the Internet.
Images used by i-αppli software include
※
those recorded by the camera activated from
within i-αppli software with camera interface,
obtained using the infrared communication
function of i-αppli software, obtained from
sites or Internet home pages using i-αppli
software, and obtained from the Data Box by
i-αppli software.
You can save data of some software applications
●
in a microSD memory card. The data saved in a
microSD memory card may not be used by other
terminal models.
There is i-αppli software that starts the specified
●
software so that you can enjoy the software
without returning to the software list. If software
to start is not specified, you need to select it.
Even if software to start is specified, however,
you need to download it if it is not included in the
software list.
Some software cannot start with the MUSIC
●
Player or Music&Video Channel simultaneously.
Some software may be displayed in the full-
●
screen display. While displaying in the fullscreen, the icons other than the communication
icon are not displayed.
Setting i-αppli Operating
Conditions
It may not be possible to change some items of the
ˎ
saved software.
1
From the list of i-αppli software, select
the software and press (Func).
The Function menu appears.
2
Select [Individual set] and press .
Individual setting
NW setting
Yes
Stand−by NW setting
Use icons
Cng. ring tone/img.
Phonebook/Records
[NW setting]:
Set whether to permit the software that uses
network communication to connect to the
network or alternatively set it to ask confirmation
every time you start it.
[Stand-by NW setting]:
Set whether the FOMA terminal should connect
to the network when you set an i-αppli software
that uses network communication as the stand-by
display.
[iαppli To]:
Set whether to start the software from the
currently displayed i-αppli link.
[Use icons]:
Set whether to use icon information (mail,
message, radio wave condition, battery level,
and Manner mode).
ppli To
Yes
Yes
Yes
Yes
Yes
i-
α
ppli
Continued
213
Page 16
[Cng. ring tone/img.]:
Set whether to permit the software to change the
ring tone or image. Otherwise, set the software
to ask for your permission every time before
changing it.
[Phonebook/Records]:
Set whether to permit the software to look up
the Phonebook, Redial/Received record, unread
mail, or ToruCa cards.
[Use location info]:
Set whether to use location information.
3
Set each item.
If you set the NW setting or Stand-by NW setting
●
to [No], the software may not be started and
information may not be provided in a timely
manner.
If you set the NW setting or Stand-by NW setting
●
to [Yes], i-αppli automatically connects to the
network. When the FOMA terminal is connected
to the network, the packet communication charge
is required.
When you set [Yes] for the Use icons, icon
●
information might be accessed by a third
party since it is sent to IP (information service
providers) via the Internet just as it is the case
i-
α
ppli
with the “serial number of your mobile phone/UIM
(FOMA card)”.
Depending on the settings of the Individual
●
set, the network connection and use of icon
information (such as unread mail and battery
level) from i-αppli software may not be available.
Creating from the camera shoot
You can create a Deco mail image or Deco mail
pictograph by converting/editing a part of a still image
recorded by the camera. To edit an image nicely, it is
recommended to record an image in a mono-(even)
color background where pictures or characters are
separated clearly in brightness from the background.
Creating by drawing a picture by yourself
Using various lines, colors, and functions such as
daubing and background transmission functions,
you can create a Deco mail pictograph. You can also
create an animation pictograph.
Creating from saved data
You can create a Deco mail image or Deco mail
pictograph by converting/editing data saved in the
Data Box.
For information on the operations, see “
ˎ
(Help).
To display it, select [
] (Help) and press
ヘルプ
●スーパーモンキーボールモバイル
ヘルプ
.
for SO
(Super Monkey Ball Mobile for SO)
”
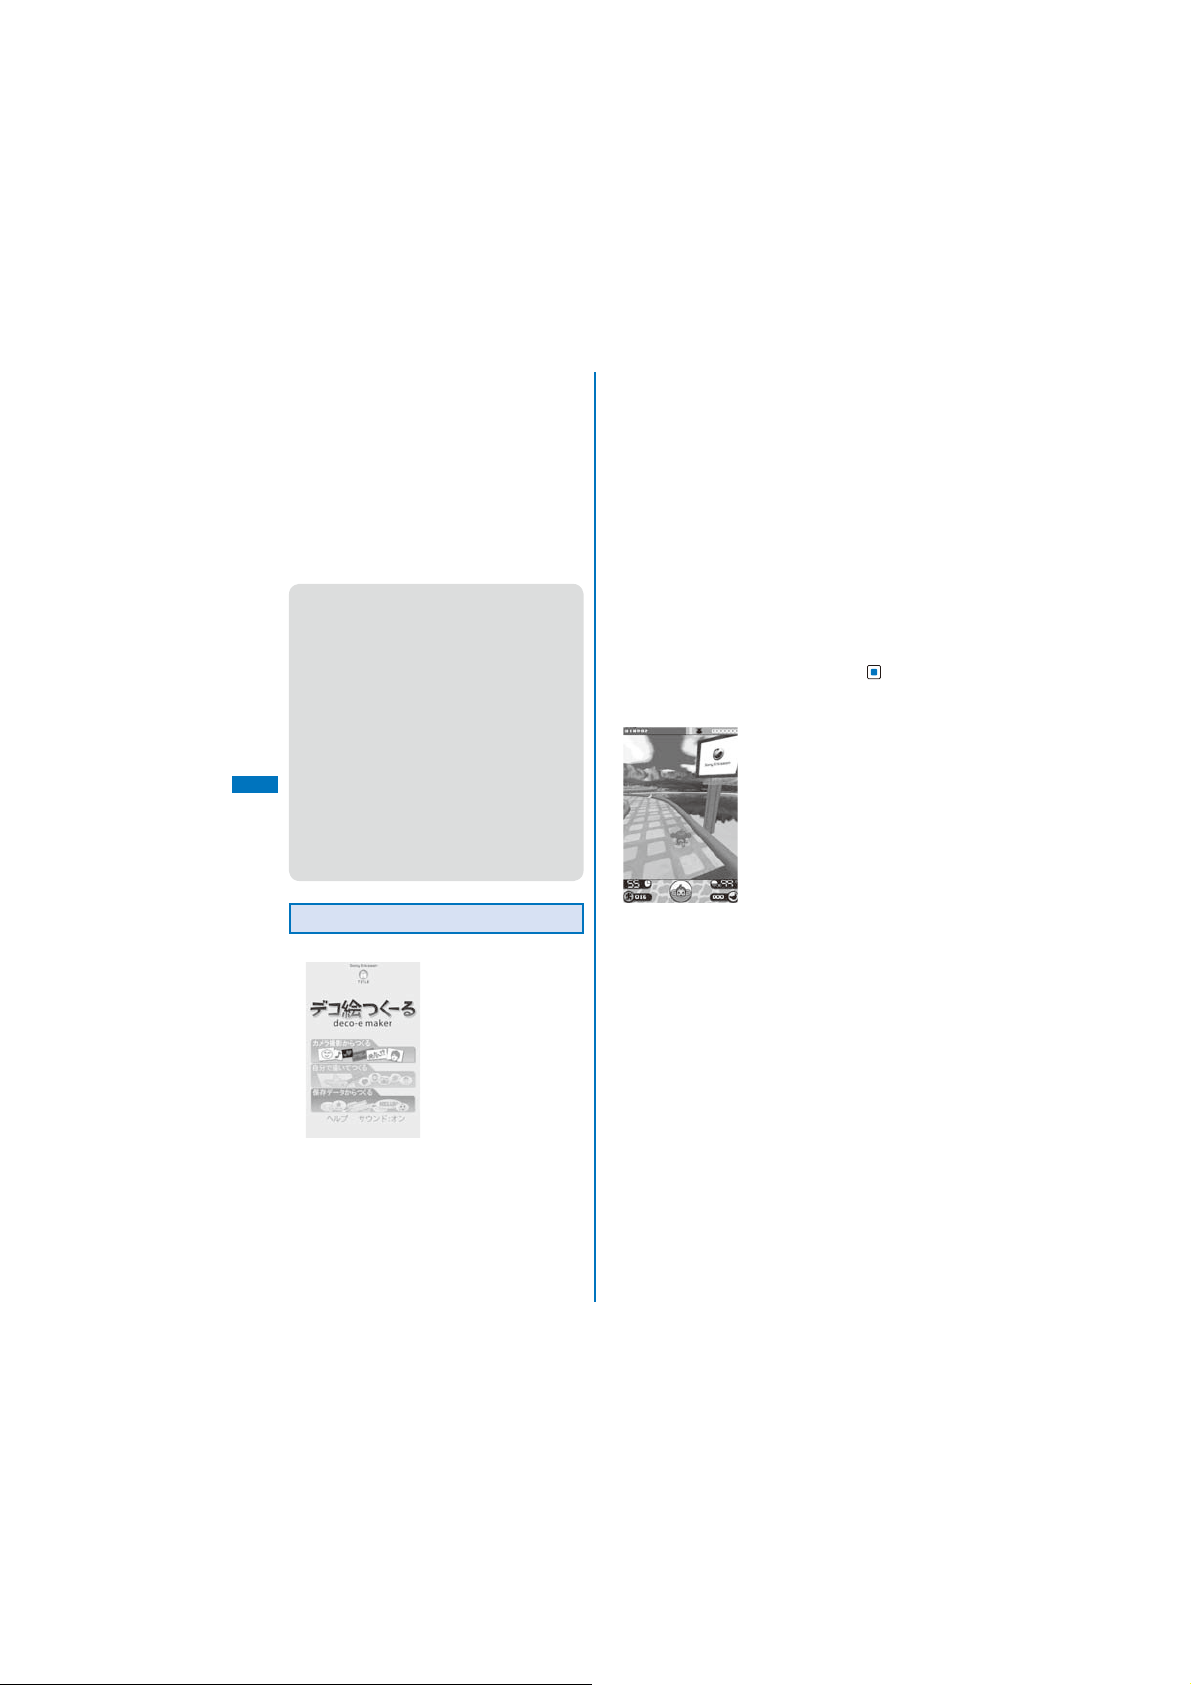
Preinstalled Software
●デコ絵つくーる
You can create materials for decorating mail by
converting/editing a part of a still image recorded by
the camera, drawing a picture by yourself, or other
means. The created image is saved in the Data Box
and you can use it when you compose mail.
214
™ (deco-e maker)
©SEGA
This is the mobile phone appli that is the very famous
home action game called “
(Super Monkey Ball).
This is the action game to roll a ball where a monkey
character stays for the goal.
Clear various worlds (scenes) and daedal stages for
the goal.
To operate by moving SO906i
Moving the FOMA terminal up, down, and to the left
and right allows you to operate it as using the 4-way
keys of the FOMA terminal.
The ball where the monkey stays is rolled to the
direction where the FOMA terminal is moved.
スーパーモンキーボール
”
Page 17
To operate by a player’s movement
Check the player location by the In-camera and the
ball is rolled to the direction where the player moves.
For more details about operations, see the “
ˎ
パーモンキーボールの遊び方
Monkey Ball).
From the Menu, select [Data Box] → [My document]
[Preinstall] → [
→
and press
Warning
■
This appli is the game played by titling or shaking
the FOMA terminal. It may injure or damage by
hitting a person or object due to some reasons
such as shaking too hard.
When you play it, hold the FOMA terminal tightly
and do not shake or move the FOMA terminal
too much or too hard. Make sure to secure the
surroundings to be safe as to play.
●地図アプリ
You can check your current location, search a map
by addresses or phone numbers, or use the FOMA
terminal to navigate you to the destination. The i-αppli
allows you to use GPS functions (P.264).
When you use a GPS-compatible i-αppli, the
ˎ
location information is sent to IP (information service
providers) of the i-αppli being used.
When you use the GPS function with a GPS-
ˎ
compatible i-αppli, set the Use location info of the
i-αppli being used to [Yes].
FOMA
●
. The appli appears.
(Map appli)
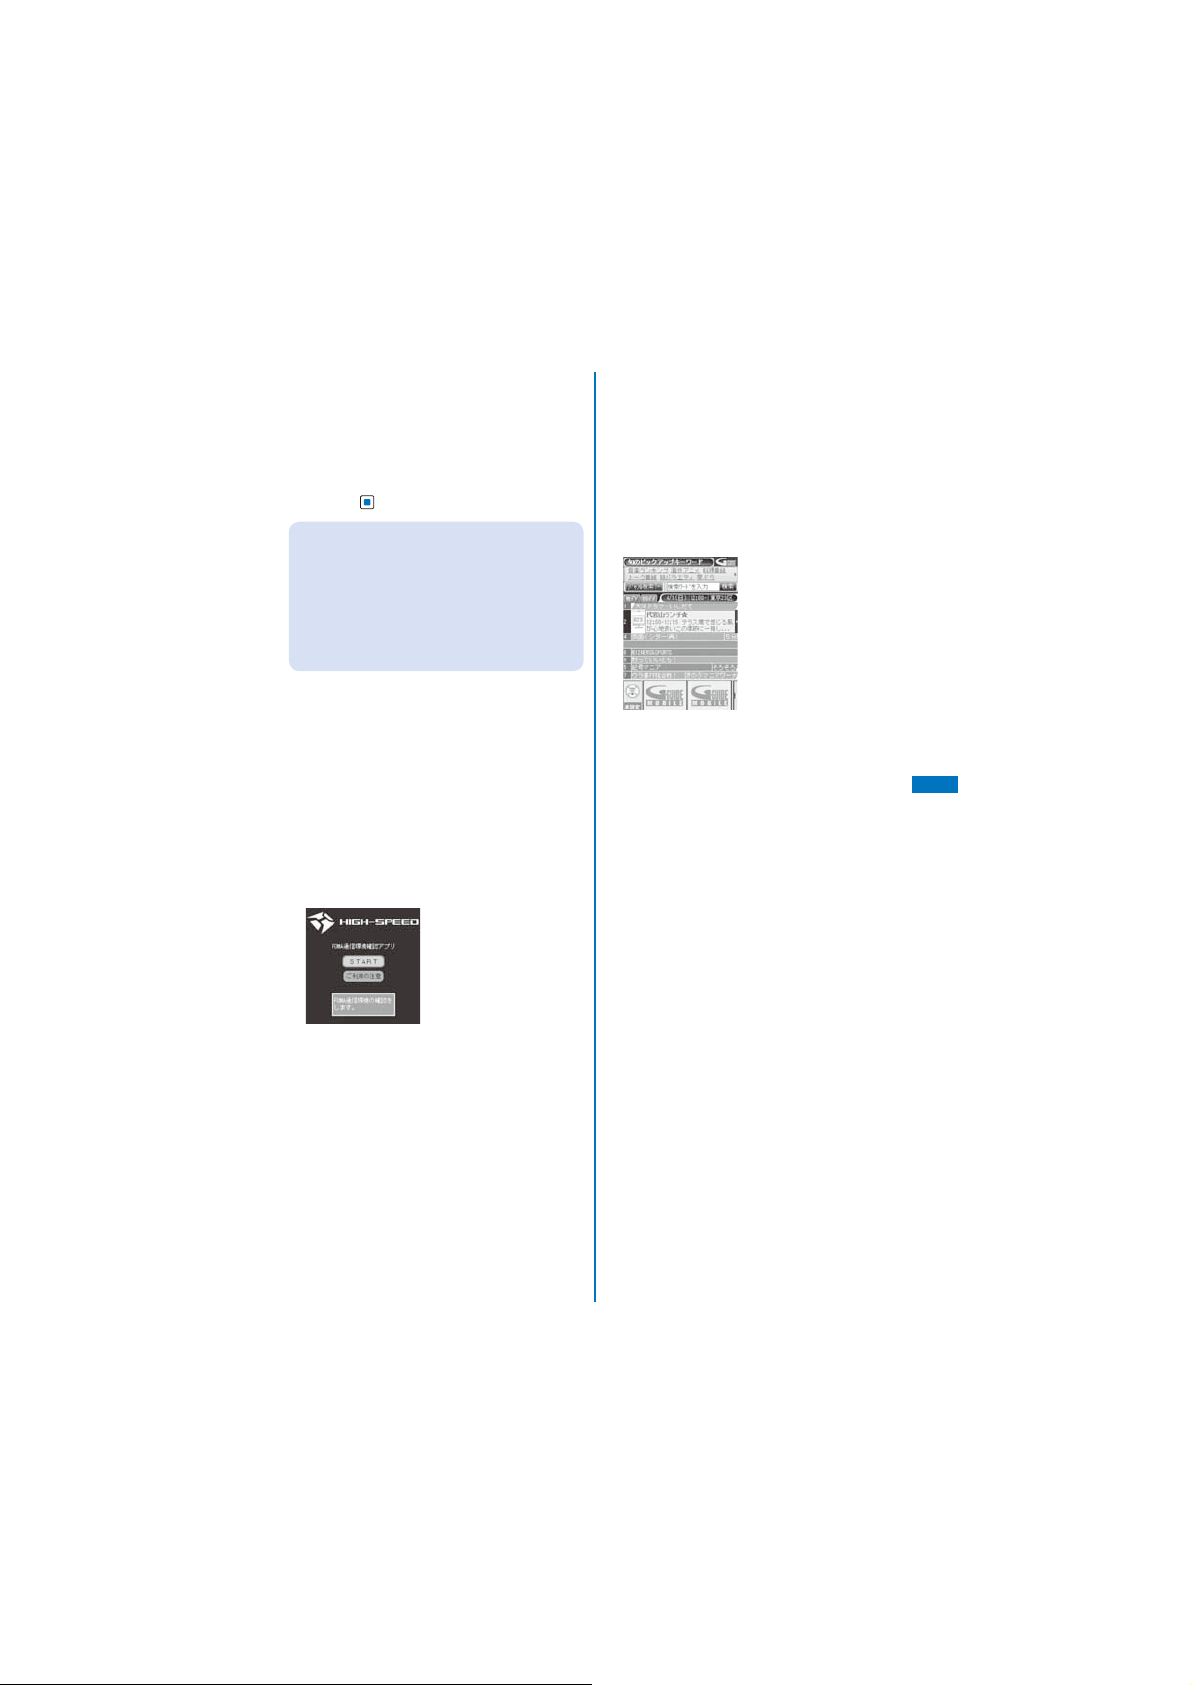
通信環境確認アプリ
” (How to play Super
スーパーモンキーボールの遊び方
(FOMA
スー
communication environment check i-appli)
The display shown is an
※
image for explanatory
purpose and may be
different from the actual
display.
FOMA
通信環境確認アプリ
environment check i-appli) is an appli to check whether
the FOMA terminal can be used the FOMA HIGHSPEED Area.
To use FOMA
ˎ
communication environment check i-appli),
you need to accept “
Precautions).
(FOMA communication
通信環境確認アプリ
ご利用上の注意
(FOMA
” (Usage
When the communication environment is checked,
ˎ
different confirmation results or the result informing
that it is outside of the service area may appear
depending on the communication environment
(such as weather, radio wave condition, or network
congested) even if you use it in the same place and
same time.
]
When you use another function while using this
ˎ
appli, it may not be checked correctly.
● Gガイド番組表リモコン
(G-GUIDE TV
Program List Remote Control)
The display shown is an
※
image for explanatory
purpose and may be
different from the actual
display. The TV program
list is displayed according
to your location.
This convenient i-αppli is a TV program list integrated
with an audiovisual remote control function and it is
free.
It enables you to get terrestrial digital/analog or BS
digital TV program information for your preferred hour
from anywhere, any time. The information includes a
TV program title, details of the program, start/end time,
etc.
If you find any program interesting, you can let the
DVD hard disk recorder to schedule recording of it
remotely via the Internet. (A DVD hard disk recorder
that features a remote scheduling function is required.
Before using this function, the initial setting for this
appli is also required.)
You can also search for program information by
entering a keyword such as a TV program category or
your favorite TV personality. Furthermore, you can also
perform remote control operation of a TV/video player/
DVD player. (Some models are not compatible with this
function.)
When you use the “G-GUIDE TV Program List
ˎ
Remote Control” for the first time, you need to
perform initial registration and accept the Terms of
Use.
An additional packet communication charge is
ˎ
required for using this function.
When you use this appli overseas, you need to set
ˎ
the time of the FOMA terminal to Japan time.
For details on G
ˎ
TV Program List Remote Control), see the “Mobile
Phone User’s Guide 【i-mode】 FOMA version”.
You cannot use this appli when 2in1 is set to the B
ˎ
mode because it uses mail.
ガイド番組表リモコン
(G-GUIDE
i-
α
ppli
Continued
215
Page 18

About the remote timer recording function
If you have a DVD hard disk recorder that supports
a remote timer recording function, you can book
recording of a program from the program list provided
by this appli.
To use this function, the initial setting for this appli is
required.
Making initial setting
ˎ
1. Set the DVD hard disk recorder to connect to the
Internet.
(For more information, see the user’s manual
supplied with your DVD hard disk recorder.)
2. Start this appli, select “
(Remote timer recording) from the menu, and
continue the initial setting as instructed by the
displayed guidance.
Booking recording of a program
ˎ
Once you complete the initial setting, by selecting
a desired program and selecting “
” from the menu, you can connect to the DVD
予約
hard disk recorder that has an entry in this appli via
the Internet and let it to schedule recording of the
program.
An additional packet communication charge is
ˎ
required for using this function.
●iアプリバンキング
i-
α
ppli
This i-αppli is for using the mobile banking service
conveniently. Mobile banking is a service that allows
you to check the balance and usage details of deposit
or withdrawal, transfer between accounts, and make a
transfer, from anywhere and at anytime. By entering the
password which you set when you start this i-αppli,
you can use up to two mobile banking services
provided by financial institutions.
To use a mobile banking service by
ˎ
(i-appli Banking), you need to open an account
ング
at a financial institution which provides the mobile
banking service and subscribe to a mobile banking
service of each financial institution.
An additional packet communication charge is
ˎ
required for using this function.
リモート録画予約
(i-appli Banking)
The display shown is an
※
image for explanatory
purpose and may be
different from the actual
display.
リモート録画
iアプリバンキ
For details, see the “Mobile Phone User’s Guide
ˎ
i-mode】 FOMA version”.
【
For information on
ˎ
(i-appli Banking), see the i-mode
グ
site.
i-mode site :
[iMenu]→ [
(Menu/Search)→[
ンキング
[
iアプリバンキング
Banking)
●iD設定アプリ
”
The chargeless e-cash “iD” is a service that enables
you to make payments for shopping by simply holding
up the Osaifu-Keitai or a credit card that is employed
“iD” to a reader. It provides you with a convenient way
of shopping because you do not need to give your
signature as you did before. Some credit card issuing
companies support cash withdrawals as well.
To use “iD”, a subscription to each credit card
ˎ
issuing company that adopts the iD brand and the
Osaifu-Keitai whose settings are completed by the
iD appli and Card appli of a credit card issuing
company or a credit card that is employed “iD” are
needed.
For using “iD” by the Osaifu-Keitai, you start the
ˎ
iD appli, agree with “
precautions), complete the settings for the iD appli,
download or start a Card appli, and then perform
the settings for the Card appli.
A fee for using a service that adopts the iD brand
ˎ
(annual membership fee, etc.) varies depending on
each credit card issuing company.
The packet communication charge is required for
ˎ
downloading the iD appli and a Card appli.
For information on “iD”, see the
ˎ
i-mode site for “iD”.
i-mode site :
[i Menu] → [
(Menu/Search) → [iD]
iアプリバンキン
メニュー/検索
] (Mobile banking)
モバイルバ
](i-appli
(iD Setting appli)
The display shown is an
※
image for explanatory
purpose and may be
different from the actual
display.
ご利用上の注意
メニュー/検索
]
→
]
” (Usage
216
Page 19
DCMX
●
クレジットアプリ
“DCMX” is an “iD” compatible credit service provided
by NTT DoCoMo group. Two types of services are
available in DCMX: DCMX mini in which the total
amount of credit is limited to ¥10,000 per month and
DCMX which allows you to use more amount than
DCMX mini as well as get DoCoMo points.
DCMX mini provides immediate use of a mobile credit
service with an easy subscription that can be made
from within this software.
What you can do on this software
Subscription and Examination ※1
Setting card information
Using
No need for troublesome charging!
You can enjoy shopping simply by holding the mobile
phone that has been configured for the service close
to a reading device without signature ※3.
Checking ※2
You can check the available balance of the credit
and the usage details for this month from within the
software!
Changing
You can also make necessary settings from within
the software when you get the card updated or the
FOMA terminal changed!
1 We make an online examination for your
※
qualification when we receive your subscription
to DCMX mini. If your subscription is to other than
DCMX mini, the connection is redirected to the
i-mode site for subscription information.
2 A function, such as for checking the usage status
※
is available only when you are a member of DCMX
mini.
3 You may be asked to enter a security code at a
※
given condition.
For information on the contents of
ˎ
the service and on how to subscribe
to the service, see the i-mode site
for DCMX.
i-mode site : [i Menu] → [DCMX iD]
(DCMX credit appli)
The display shown is an
※
image for explanatory
purpose and may be
different from the actual
display.
When you start this software for the first time, you
●
are asked to agree with “
on using the program). Agree with it to continue.
Packet communication charge is required for
●
settings and operations on this software.
ご利用上の注意
” (Note
Precaution on the Osaifu-Keitai-compatible
i-αppli software
Under no condition will DoCoMo be held liable
●
for any information set in the IC card.
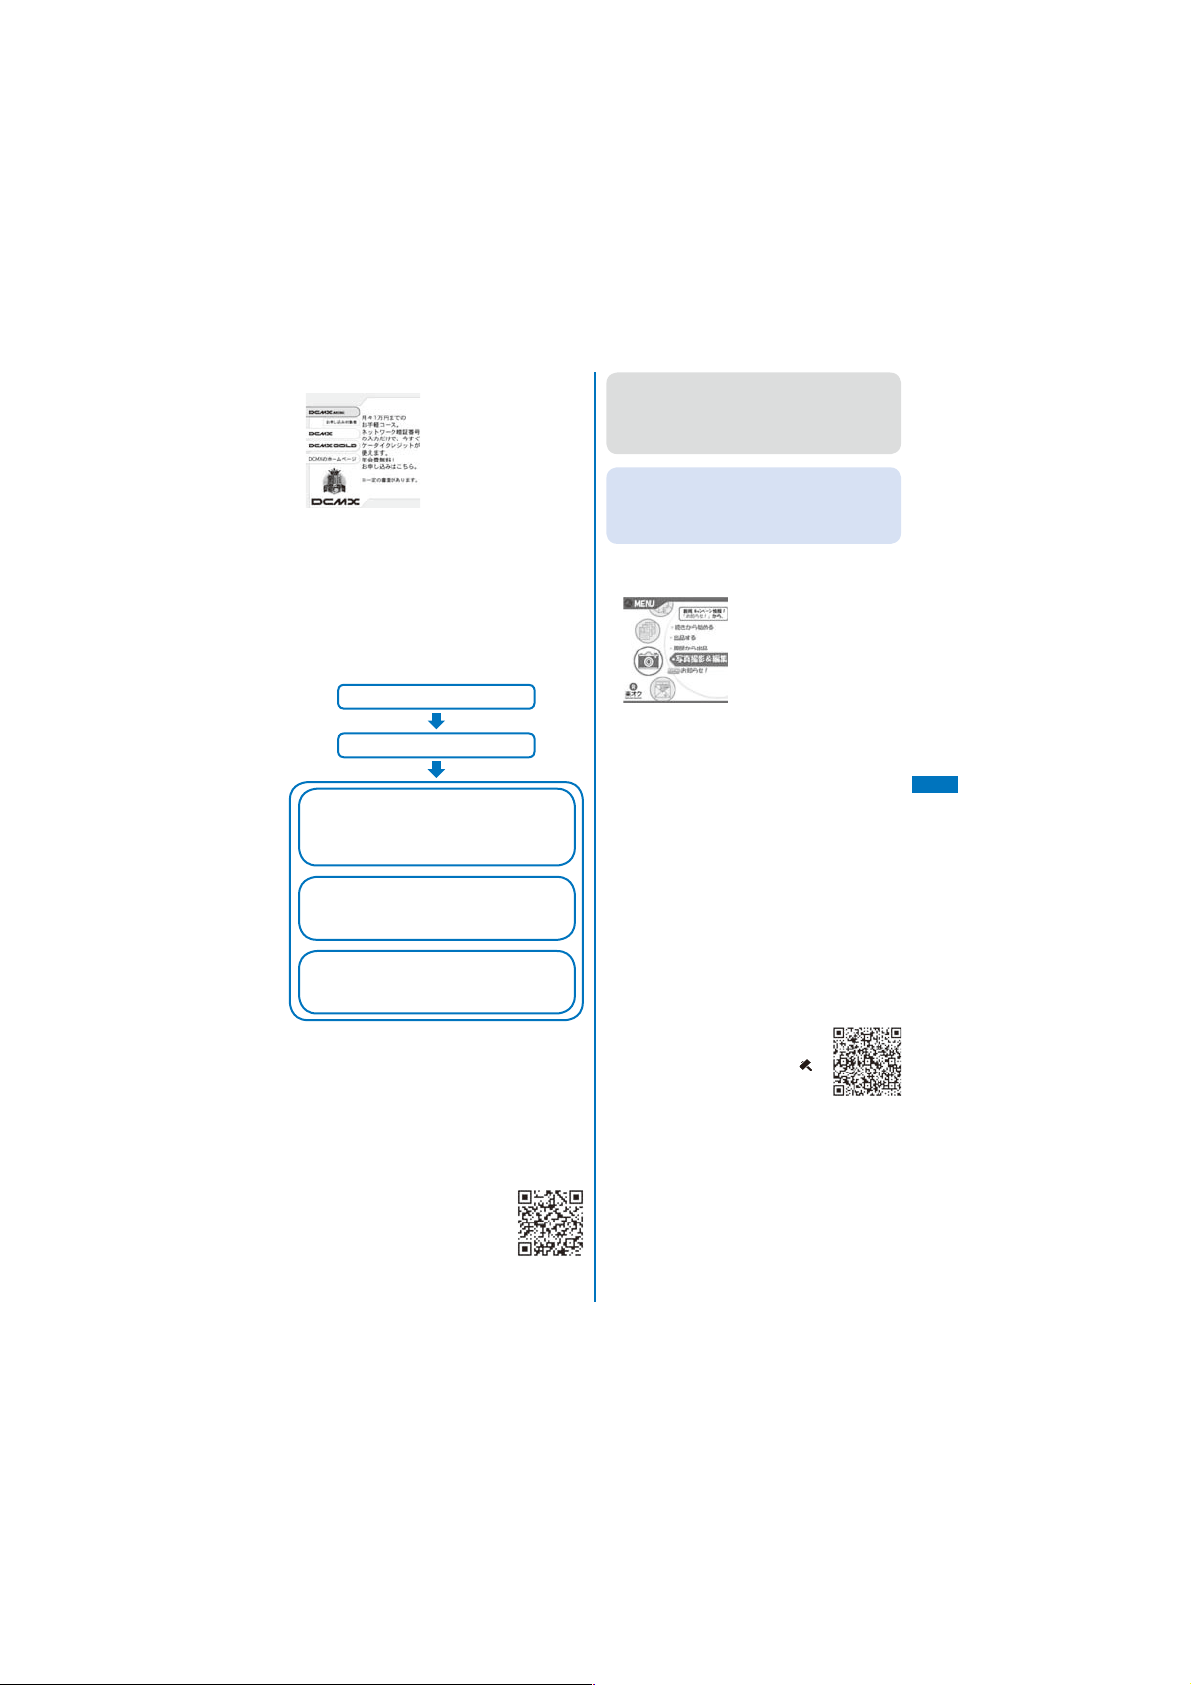
●楽オク出品アプリ
(Appli for selling items at
2
Rakuten)
The display shown is an
※
image for explanatory
purpose and may be
different from the actual
display.
“
楽オク出品アプリ
Rakuten) is a convenient appli for selling items at
(Rakuten Auction) from anywhere and at anytime
オク
easily.
The appli helps you sell an item with the guide display,
making it easy even for first-time users. Also, there are
functions such as shooting a photo, editing a photo,
and saving a history to sell an item faster than doing it
from the site.
When you use the “Appli for selling items at
ˎ
Rakuten” for the first time, you need to accept “
” (Terms of use).
規約
An additional packet communication charge is
ˎ
required for using this function.
For details on
ˎ
“Mobile Phone User’s Guide 【i-mode】 FOMA
version”.
To sell items at
ˎ
to sign up for the Rakuten Membership and register
as an auctioneer.
For information on
ˎ
Auction), see the i-mode site.
i-mode site : [i Menu] → [
” (Appli for selling items at
2
(Rakuten Auction), see the
楽オク
(Rakuten Auction), you need
楽オク
(Rakuten
楽オク
-
楽オク
オークション
-]
楽
利用
i-
α
ppli
217
Page 20
Running i-αppli
Automatically
Enabling/Disabling Auto-Start
You can set whether to start i-αppli software
automatically on the FOMA terminal.
1
From the Menu, select [i appli] → [i αppli
setting]→ [Auto-start] and press .
2
Select [Yes]/[No] and press .
Whether to enable the Auto-start is set.
Setting the Start Date and Time
The i-αppli software can be started
automatically. You can set the starting date/
time and day of the week and whether to use
the software’s automatic start for each i-αppli
software.
1
From the list of i-αppli software, select
i-
the software and press (Func).
α
ppli
The Function menu appears.
2
Select [Auto-start] and press .
Auto−start
User set
OFF
SW set
Inva
[User set]:
Set the staring date/time and day of the week for
each software.
[SW set]:
Set whether to start the software using the
software’s auto-start function.
3
Select [User set] and press .
User setting
Style
Date
Time
Day
OFF
2008/02/01 Fri
09:05
<Auto-start>
Mon
4
Select a style of the Auto-start time at
[Style].
[OFF]:
Do not set the start time.
[D/T]:
Start the software automatically at the specified
date and time.
[Eyd]:
Start the software automatically at the specified
time everyday.
[Week]:
Start the software automatically at the specified
time on every specified day of the week.
5
Enter the date/time/day of the week.
Enter the date/time/day of the week according to
ˎ
the style of the auto-start time selected in step 4.
6
Press (Complete).
7
Select [SW set] and press .
The SW set display appears.
8
Select [Valid]/[Invalid] of the Auto-start
function of the software at [Set].
The Auto-start is set.
The Auto-star t does not operate in the following
●
cases.
- When the FOMA terminal is powered off
- During a call/communication
- When the date/time is not set
- When another function is executed
- When the Alarm/Schedule alarm is set to start
at the same time as the Auto-start
- When the Lock all/Personal data lock is set
- When the Lock key is set
- When the Omakase Lock is set
- When 2in1 is set to the B mode (when i-αppli
with mail software is used or i-αppli uses
mail)
218
Page 21
Setting i-αppli for the
Stand-by Display
Only one supporting software can be set for
the i-αppli stand-by display. The software
that supports the i-αppli stand-by display is
identified by “ / / ”.
When the software using network transmission is set
ˎ
for the i-αppli stand-by display, it may not operate
properly depending on the radio wave condition.
When you set the i-αppli stand-by display from
ˎ
the i-αppli software list display, the image set for
the stand-by display in the Stand-by display is also
changed.
1
From the list of i-αppli software, select
the software and press (Func).
The Function menu appears.
2
Select [Stand-by display] → [Yes] and
press .
The i-αppli stand-by display is set and the icon
(P.240) changes to indicate that the software is set
for the stand-by display.
To operate the software set for the i-αppli stand-by
display
Press ( ) in the i-αppli stand-by display.
The message confirming whether to start the
●
i-αppli stand-by display appears when the
FOMA terminal is powered on if the i-αppli
stand-by display is set. Select [No] not to start
it. Select [Yes] or leave it for a while to start the
i-αppli stand-by display.
If the Lock all or Personal data lock is set or 2in1
●
is set to the Dual or B mode while you set the
i-αppli stand-by display, the i-αppli stand-by
display is temporarily terminated. When you
cancel the Lock all or Personal data lock, the
i-αppli stand-by display reappears.
The Web To cannot be used from the i-αppli
●
stand-by display.
If an error which could terminate the i-αppli
●
stand-by display occurs, the time of error
occurrence can be checked in the stand-by error
history.
If a security error occurs in the i-αppli stand-by
●
display, “ ” (Stand-by SW error) appears in the
stand-by display.
<i-αppli stand-by>
Terminating the i-αppli Stand-by
Display
The i-αppli stand-by display is terminated and
the normal stand-by display is set.
1
From the list of i-αppli software, select
the software and press (Func).
The Function menu appears.
2
Select [Stand-by display] → [Cancel] and
press .
[End]:
End the i-αppli stand-by display once and
redisplay without terminating it.
[Cancel]:
Terminate the i-αppli stand-by display.
The i-αppli stand-by display is terminated.
Managing i-αppli
For some software, IP (information service providers)
ˎ
may access the software saved in the mobile phone
and directly stop the use of it. In this case, most
operations including starting the software, setting
the software for the stand-by display, and upgrading
the software are disabled and only deleting the
software and displaying the software information
are available. To use the software again, you need
to request IP to resume the use of the software. For
more details, contact IP.
For some software, IP (information service providers)
ˎ
may send data to the software saved in the mobile
phone.
When IP (information service providers) sends a
ˎ
stop/resume request or data to the software, the
mobile phone starts to communicate with IP and
“
” flashes. No packet communication charge is
required.
i-
α
ppli
Continued
219
Page 22

Upgrading i-αppli
The software saved in the FOMA terminal
can be upgraded if a newer version of the
downloaded software is available on a site.
1
From the list of i-αppli software, select
the software and press (Func).
The Function menu appears.
2
Select [Upgrade] → [Yes] and press .
Download of the new version of the software starts.
Some software can be upgraded automatically
●
when it is started.
When the FOMA terminal is connected to the
●
network for software upgrade, the packet
communication charge is required.
Adding/Deleting Folders
Folders in which software are saved can be
added or deleted. Up to 10 folders can be
used to manage software and folder names
can also be changed.
i-
α
You cannot delete the preset folders.
ppli
ˎ
Example: Adding a folder
1
Press (i-mode) for over a second in the
stand-by display and press (Func).
The Function menu appears.
2
Select [Edit folder] → [Create folder],
press , and enter a folder name.
Enter a name within 10 full-width or 20 half-width
characters.
The folder is added.
To change a folder name
Move the cursor to a folder and from the Function
menu, select [Edit folder] → [Edit folder name].
Enter a name within 10 full-width or 20 half-width
characters.
To delete a folder
Move the cursor to a folder and from the Function
menu, select [Edit folder] → [Delete folder]. Enter
the Security code and select [Yes].
Moving i-αppli to a Different
Folder
You can move software to a different folder
using three methods.
Example: Moving a software
1
Press (i-mode) for over a second in
the stand-by display, select a folder, and
press .
To move all software in the folder
From the Function menu, select [Move] → [Move
all]→ [Yes] → a folder.
To move several software
From the Function menu, select [Move]
[Select&move]. Select software and press
(Complete). Select [Yes] → a folder.
2
Select the software and press (Func).
The Function menu appears.
3
Select [Move] → [Move one] → [Yes] and
press .
The Select move to display appears.
4
Select a folder and press .
The selected software is moved to the different
folder.
→
220
Page 23
Deleting i-αppli
You can delete software using four methods.
Example: Deleting a software
1
Press (i-mode) for over a second in the
stand-by display.
To delete all software
From the Function menu, select [Delete all], enter
the Security code, and select [Yes].
2
Select a folder and press .
To delete all software in the folder
From the Function menu, select [Delete]
[Delete all], enter the Security code, and select
[Yes].
To delete several software
From the Function menu, select [Delete]
[Select&delete] and select software. Press
(Complete) and select [Yes].
3
Select the software and press (Func).
The Function menu appears.
4
Select [Delete] → [Delete one] → [Yes]
and press .
The selected software is deleted.
When deleting i-αppli with mail or deleting
●
all software including i-αppli with mail, you
can select whether to delete the automatically
created mail folder at the same time. However,
if the i-αppli with mail folder contains protected
mail at the time you select to delete both of
them, neither the software nor the folder can
be deleted. When you select to delete only
the software and keep the folder intact, you
can display only the mail main body from the
Function menu (P.224).
Some Osaifu-Keitai-compatible i-αppli software
●
may not be deleted. Some software requires to
run i-αppli software and delete data stored in
the IC card before you can delete the software.
When the IC card lock is set, you cannot delete
●
an Osaifu-Keitai-compatible i-αppli.
Setting How to Display a List of
Software
You can select the display style of a software
list using the following three methods. The set
display style is applied to all folders.
Icon(L)
→
→
Icon(S)
List
ソフト一覧
デコ絵つくーる
スーハ゜ーモンキーホ゛ール for SO
地図アプリ
FOMA
通信環境確認
Gカ゛イト゛
iアフ゜リハ゛ンキンク゛
iD
設定アプリ
DCMXクレシ゛ットアフ゜リ
楽オク出品アプリ
Search by i−mode
1
Press (Func) in the i-αppli software
list display.
The Function menu appears.
2
Select [Change display] → the display
style and press .
The display style of an i-αppli software list is set.
番組表
アフ゜リ
リモコン
2
1/9
i-
α
ppli
Continued
221
Page 24

Checking Error History and
Trace Result
The error histories for the i-αppli stand-by
display and the results output by the i-αppli
trace feature can be displayed.
Stand-by err hist When an i-αppli stand-by
Security err. hist. When i-αppli software is
Trace result When i-αppli software supporting
Auto-start err hist When i-αppli software fails to
i-
α
Example: Displaying the stand-by error history
ppli
1
From the Menu, select [i appli] → [i αppli
history] and press .
ppli history
Stand−by err hist
Security err. hist.
Trace result
Auto−start err hist
2
Select [Stand-by err hist] and press .
Stby err hist
2008/02/14 15:11
XXXgame
2008/02/13 12:34
XXXhoroscope
To display the security error history
Select [Security err. hist.].
To display the trace result
Select [Trace result].
To display the auto-start error history
Select [Auto-start err hist].
To delete the error history or trace result
Press (Delete) and select [Yes].
To i-αppli authors
●
If the software does not operate properly during
its programming, the trace result may be useful
as a reference.
display is terminated by an
error, such as being unable to
continue operation, up to 10
records including the time of error
occurrence, etc. are displayed.
terminated by an error, such as
being unable to use the saved
data, up to 10 records including
the time of error occurrence, etc.
are displayed.
the trace feature is terminated, up
to 16 trace results are displayed.
operate the Auto-start, up to 10
records including the time of error
occurrence, etc. are displayed.
Displaying i-αppli Data in microSD
memory card
You can display i-αppli data saved in the
microSD memory card, using a folder name.
1
From the Menu, select [i appli]
[iαppli(microSD)] and press
ppli data
Folder1
Folder2
Folder3
Folder4
The i-αppli(microSD) folder list display appears.
To delete a folder
Move the cursor to a folder and from the Function
menu, select [Delete folder]. Enter the Security
code and select [Yes].
2
Select a folder and press .
The SW description display appears.
<i-αppli(microSD)>
→
.
222
Page 25
Using Various i-αppli
Functions
Using the Camera Function from
i-αppli
You can use the camera function (P.155) from
the software running on the FOMA terminal.
When you use the camera, open the lens cover.
ˎ
Images are used and saved in the software.
ˎ
Items that can be set and the startup procedure of
ˎ
the camera vary depending on the software.
When you activate the camera from the software
ˎ
that is specified the setting of the Closeup mode,
the Auto focus becomes [Macro].
1
While running the software, start the
camera function.
The Camera mode display appears.
2
Point the camera at the object and press
.
The image is recorded.
Using the Bar Code Reader from
i-αppli
You can use the bar code reader (P.183) from
the software running on the FOMA terminal.
The startup procedure of the bar code reader varies
ˎ
depending on the software.
The scanned data may be used in the software.
ˎ
1
While running the software, start the bar
code reader.
The Bar code reader display appears.
2
Locate at the JAN/QR code at the center
of the display and press .
The JAN/QR code is scanned.
Using Infrared Communication
from i-αppli
You can use the infrared communication
(P.327) from the software running on the FOMA
terminal.
There are some data that cannot be exchanged
ˎ
even if the other device is equipped with the infrared
communication function.
The startup procedure of the infrared communication
ˎ
varies depending on the software.
1
While running the software, start the
infrared communication.
2
Select [Yes] and press .
The infrared communication is started.
Obtaining a ToruCa Card from
i-αppli
You can obtain ToruCa cards from the software
running on the FOMA terminal (P.256) and
save them.
You can obtain up to 100 ToruCa or ToruCa(detail)
ˎ
cards each up to 1K bytes for a ToruCa card or
100K bytes for a ToruCa(detail) card. The number
of cards that can be obtained may decrease
depending on the data to be obtained.
The obtaining method of ToruCa cards varies
ˎ
depending on the software.
1
While running the software, select a
ToruCa card and press .
The screen for confirming whether to save data
appears.
2
Select [Yes] and press .
The ToruCa card is obtained.
Saving the Alarm from i-αppli
You can save the Alarm from the software
running on the FOMA terminal (P.360).
1
While running the software, perform the
settings of the Alarm.
2
Select [OK] and press .
The Alarm is saved.
i-
α
ppli
223
Page 26

Page 27

Osaifu-Keitai/ToruCa
What is Osaifu-Keitai? ............................................................................................. 254
What is the iC transfer service? ................................................................................ 254
Starting an Osaifu-Keitai-compatible i-αppli ........................................................... 255
What is ToruCa? ...................................................................................................... 256
Obtaining a ToruCa Card ........................................................
Displaying a ToruCa Card ...............................................................
Managing ToruCa Cards .......................................................................................... 258
Setting the ToruCa Details ...............................................................
Setting Whether to Notify That within the Communication Range .....
Locking the IC Card Function ..............................................................
<Obtain a ToruCa card>
<Display ToruCa>
<ToruCa setting>
<IC act. notice>
<IC card lock>
256
257
259
261
262
225
Page 28

What is Osaifu-Keitai?
“Osaifu-Keitai” provides convenient i-mode
functions (i-mode FeliCa) that can be
performed using the IC card inserted in an
i-mode terminal.
FeliCa adopts a contactless IC card technology
that enables data to be read/written just by
scanning.
You can simply hold up your Osaifu-Keitai to a
reading device in stores that provide the FeliCa
service to pay using e-money, or use it as an
airplane ticket or point card. With features like
Osaifu-Keitai, your mobile phone becomes an
increasingly handy tool.
This latest FeliCa is even more convenient to
use compared with previous versions of the
FeliCa-compatible contactless IC card. For
example, you can deposit e-money in OsaifuKeitai on the IC card, and check the balance
and purchase history using communications.
To use Osaifu-Keitai-compatible services, you
※
need to make the necessary settings using i-αppli
software (IC appli) supporting IC card function
(check with IP (information service providers) for
more details).
Osaifu-Keitai/ToruCa
For precautions on the use of each Osaifu-Keitai-
※
compatible service, see the “Mobile Phone User’s
Guide【i-mode】 FOMA version”.
The data on the IC card could be lost/changed
●
due to an Osaifu-Keitai trouble (Note that, as
a rule, when your Osaifu-Keitai is left with us
such as for repairs, we can take it only when all
data is deleted. Therefore, you are requested
to delete the data yourself). You are requested
to use the backup services provided by IP
(information service providers) to support for
reissuing, restoring, holding temporarily, or
transferring data except transferring data by the
iC transfer service. Check with IP (information
service providers) whether the backup service
is provided, for the usage conditions (such as
necessary prior procedures or fees), or whether
the iC transfer service is supported beforehand
because those vary from one service to another.
Please make sure to use the services supporting
the backup services for important data.
DoCoMo shall not be liable for any data loss/
●
change of the information saved on the IC card
or any damage occurred relating to using OsaifuKeitai-compatible services regardless of any
reasons such as trouble or changing to another
FOMA terminal.
If you should lose the Osaifu-Keitai or have
●
it stolen, immediately contact the OsaifuKeitai-compatible service provider you use
for operations which have to be done in this
situation. For this FOMA terminal, both the
Omakase Lock (P.136) and IC card lock (P.262)
can be used.
What is the iC transfer
service?
The iC transfer service※1 is a service
provided for transferring all data stored on
the IC card at once※2 to a new Osaifu-Keitai
3 when the Osaifu-Keitai is replaced such
※
as for changing to another FOMA terminal or
trouble repair. Once the data stored in the IC
card is transferred to the new Osaifu-Keitai,
you can use Osaifu-Keitai-compatible services
by simply downloading the Osaifu-Keitaicompatible i-αppli.
You can use the iC transfer service at our
service counter of your local DoCoMo shop,
etc.
For details, see the “Mobile Phone User’s
Guide【i-mode】 FOMA version”.
1 There is a processing charge for the use of the iC
※
transfer service. (There are some cases where no
charges apply.) Packet communication charges
apply for IC appli downloads and various settings.
2 There are some Osaifu-Keitai-compatible services
※
that do not support the all data transfer function.
Unsupported services are deleted when you
use the iC transfer service. Therefore, utilize the
backup service of each Osaifu-Keitai-compatible
service or delete them before you use the iC
transfer service.
3 The iC transfer service can be used only the
※
Osaifu-Keitai where the data is transferred to has
to be the compatible model with the iC transfer
service.
226
Page 29
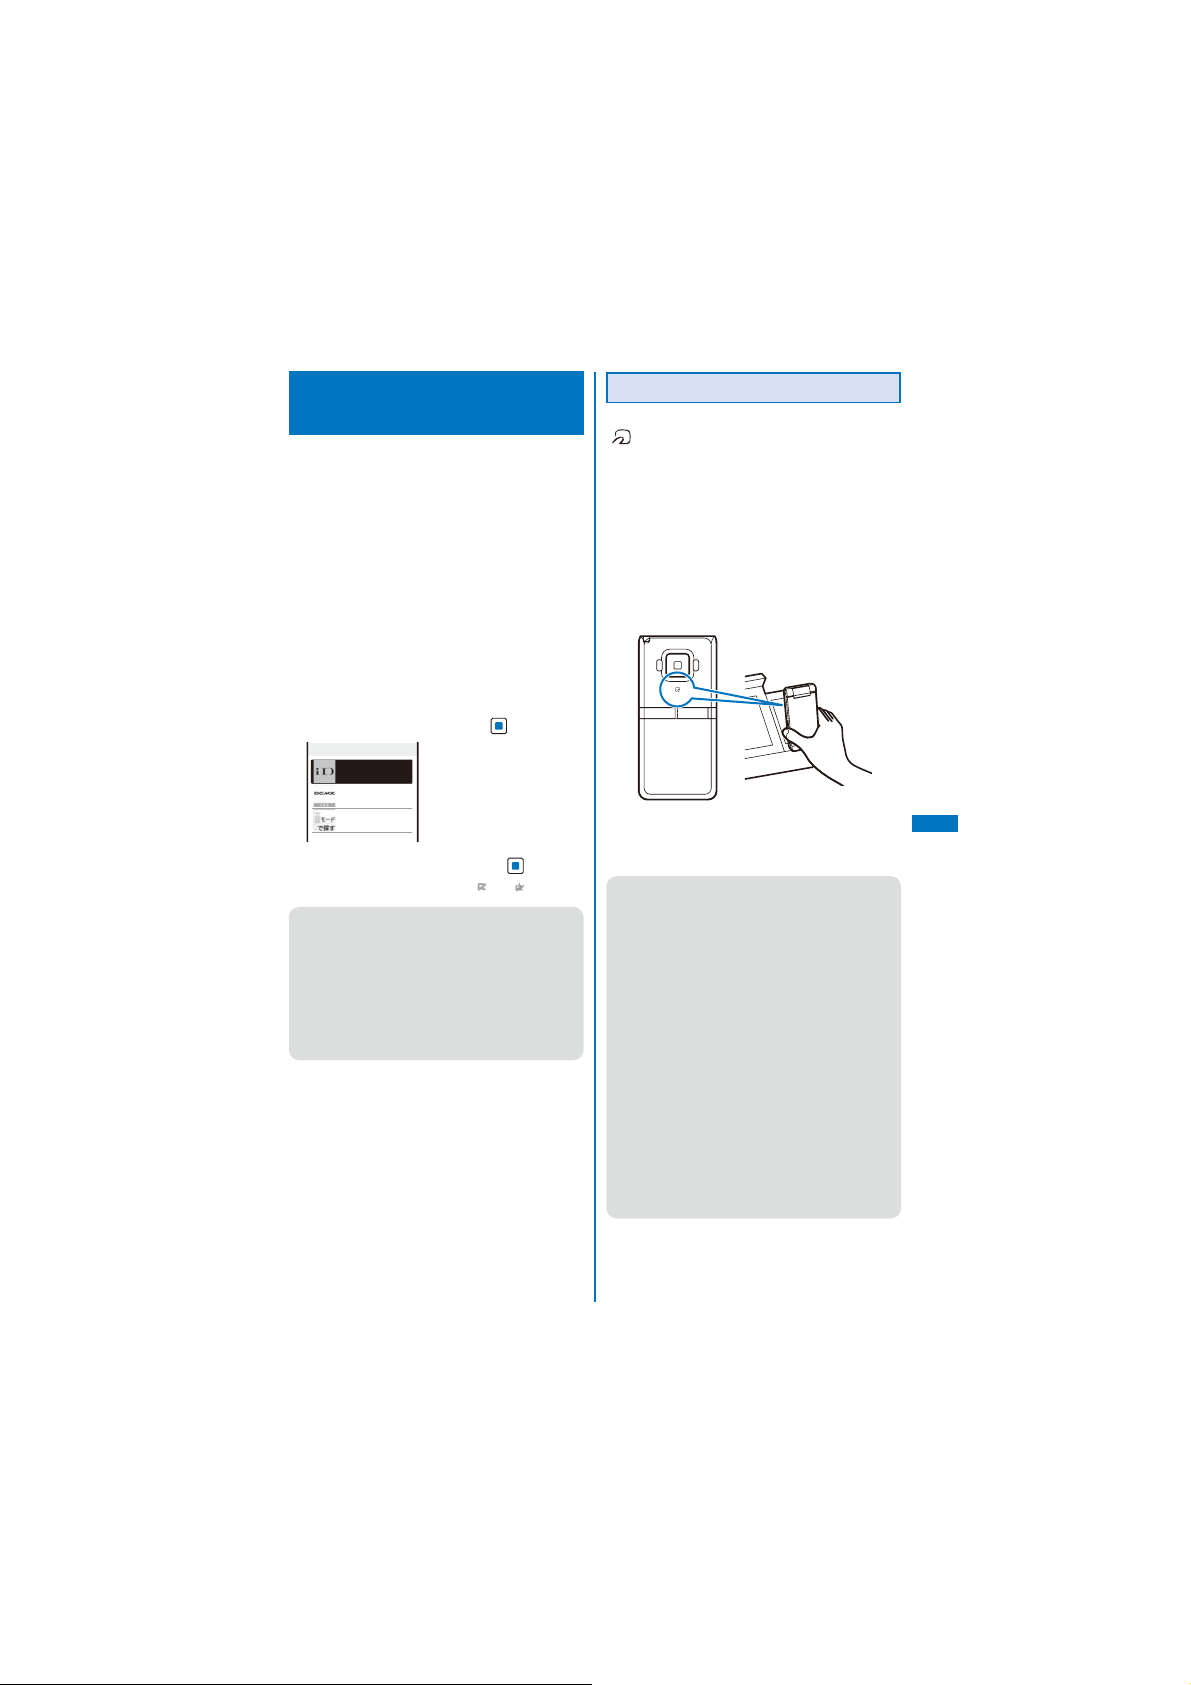
Starting an Osaifu-Keitaicompatible i-αppli
You have access to useful functions, for
example, reading/writing data on the IC card
using an Osaifu-Keitai-compatible i-αppli in
order to deposit e-money (such as train ticket
deposit) or look up the balance or purchase
history from the mobile phone.
When you start an Osaifu-Keitai-compatible i-αppli
ˎ
software for the first time or download one, the
message “Current UIM necessary to use IC card?”
appears. If you select [Yes], you cannot use the IC
card function without inserting the associated UIM.
When you use the FOMA terminal with another UIM,
you once need to delete all Osaifu-Keitai-compatible
i-αppli software with the associated UIM inserted in
the FOMA terminal to use the IC card function.
1
From the Menu, select [Osaifu-Keitai]
[IC card content] and press
IC card content
2
Select the software and press .
The software is started up and “
Reading/writing of data on the IC card from the
●
software is interrupted in the following cases.
Partially read/written data may be discarded.
- When the time preset for the Schedule alarm
- When receiving a voice, videophone, or
- When the battery runs out
1/2
iD 設定アフ゜リ
DCMXクレシ゛ットアフ゜リ
Search by i−mode
or Alarm occurs
PushTalk call (The operation that takes place
after you hang up the call may be different
depending on the service you use.)
.
” or “ ” appears.
→
Using the Osaifu-Keitai
When you hold up and show the FeliCa mark
“ ” side of the FOMA terminal to a reading
device, you can use the FOMA terminal for
payment as e-money or use it in place of a
train ticket. You can use this function without
starting up the associated software.
You can use Osaifu-Keitai by holding up and
ˎ
showing the FeliCa mark to a reading device during
a call or i-mode connection. You cannot start the
software.
Holding up and showing the FeliCa mark to a
ˎ
reading device may cause the associated software
to be executed.
When the FOMA terminal comes within the
communication range with the reading device, the
FeliCa Sign lights in green. The vibrator vibrates
when the communication starts.
If the FeliCa mark on the FOMA terminal is not
●
recognized by a reading device, move the
terminal back and forth and side to side as you
hold it up to the device.
Even if the FOMA terminal is powered off, you
●
can use the Osaifu-Keitai by holding up and
showing the FeliCa mark to a reading device. You
cannot use it if the battery pack is not attached.
You may not be able to use Osaifu-Keitai if the
attached battery pack has not been used for a
long period of time or has not been charged after
the battery alarm was sounded. In this case,
charge the battery pack and power on the FOMA
terminal. When the FOMA terminal is powered
off, you cannot start an Osaifu-Keitai-compatible
i-αppli to read/write data on the IC card.
Note that if you leave the FeliCa Sign lighting, the
●
battery drains faster.
When the FOMA terminal comes within the
●
communication range with the reading device
while charging the battery, the Charge indicator
and FeliCa Sign light at the same time.
Osaifu-Keitai/ToruCa
227
Page 30
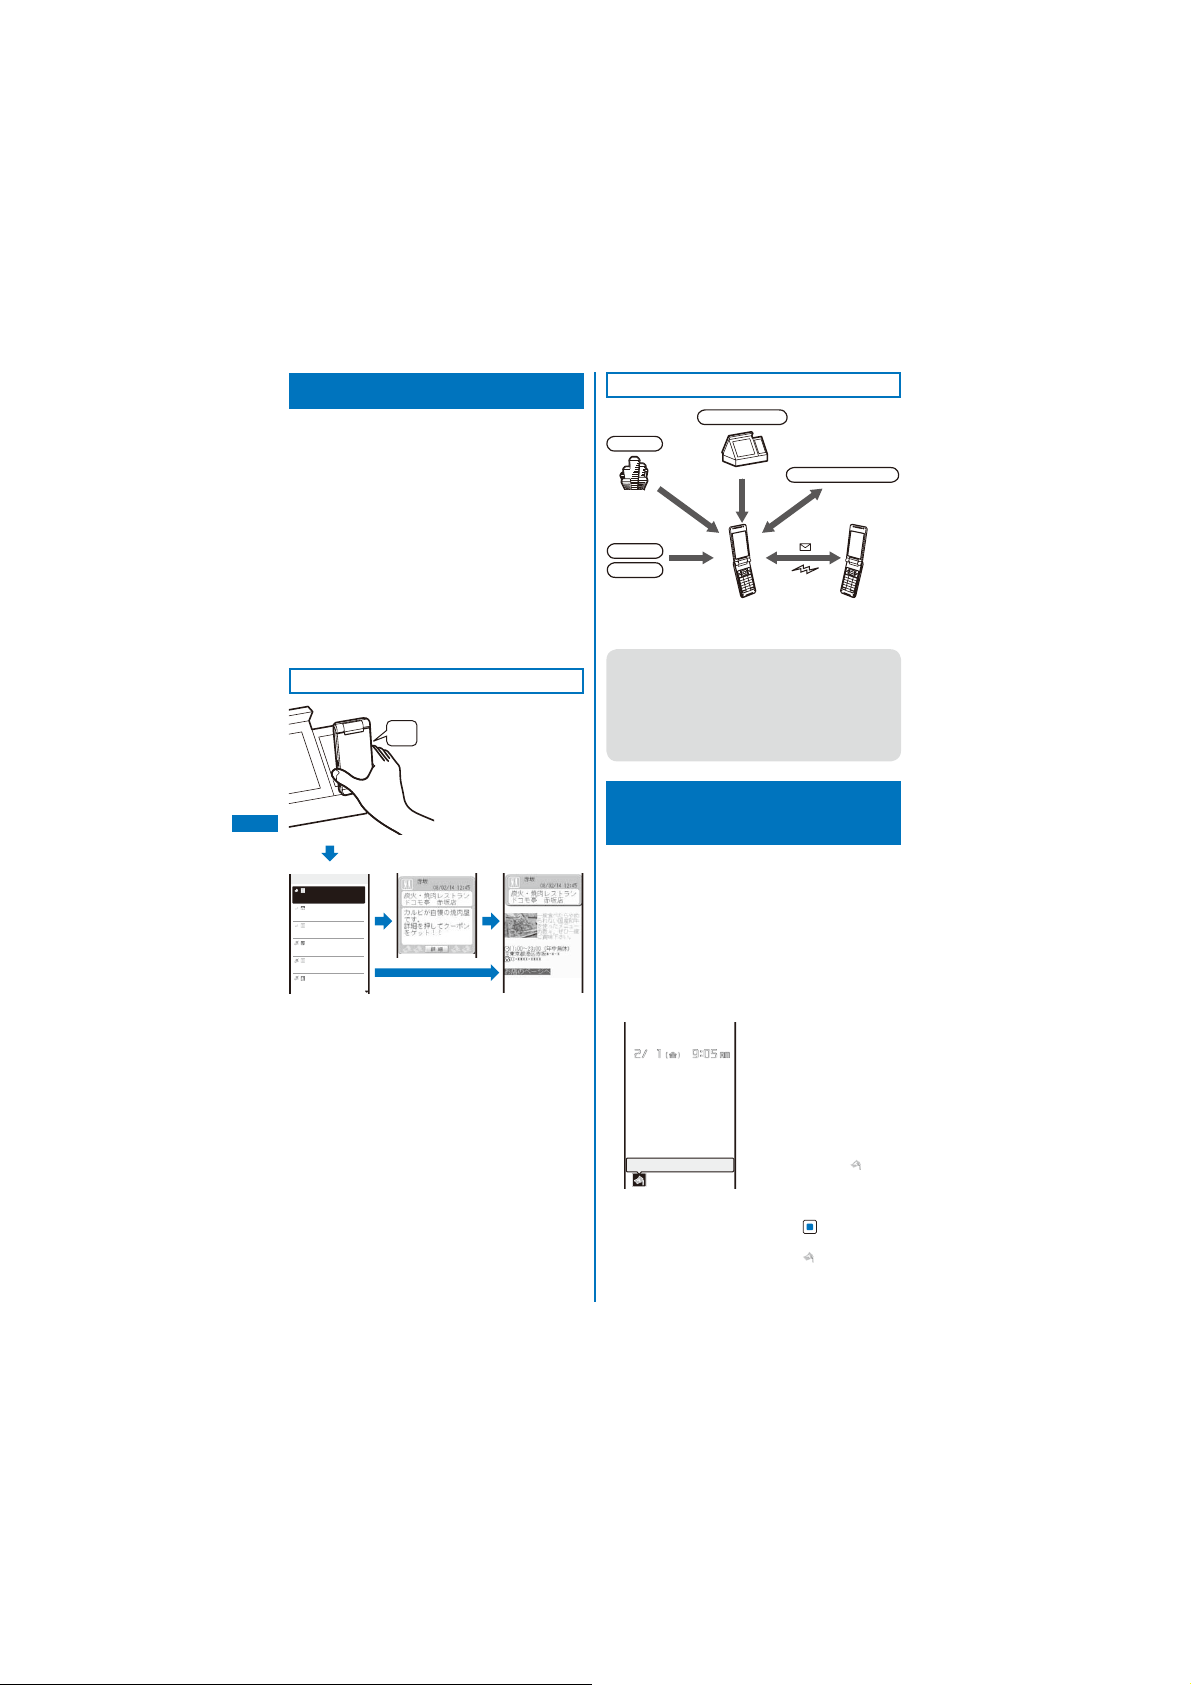
What is ToruCa?
ToruCa is an e-card that can be obtained using
Osaifu-Keitai. This convenient e-card can be
used for applications such as flier, restaurant
card, or coupon.
You can obtain ToruCa cards from a reading
device or site. These e-cards can be easily
exchanged by way of e-mail, infrared
communication, or the microSD memory card.
The ToruCa card you obtained is saved in
[ToruCa] of the [Osaifu-Keitai] menu.
You need a ToruCa-compatible terminal to use
ToruCa. For details, see the “Mobile Phone
User’s Guide 【i-mode】 FOMA version”.
Flow of ToruCa Operation
Hold up and show the OsaifuKeitai to a reading device in
Beep!
order to obtain a ToruCa card.
When the FOMA terminal
comes within the
communication range with
the reading device, the
FeliCa Sign lights in green.
Osaifu-Keitai/ToruCa
ToruCa
12:45
赤坂
02/13
築地
02/08
銀座
02/08
六本木
02/07
赤坂
02/05
品川
1/8
炭火・焼肉レストラン
江戸前 ○○○
とんかつ △△△
サロン △□△
フレンチ ○□○
割烹 ○△○
Select an obtained ToruCa card from the ToruCa list.
The vibrator vibrates and the
FeliCa Sign flashes when the
communication starts.
Methods for Obtaining a ToruCa Card
Reading device
Site
microSD memory card
Mail
QR code
i-αppli
Infrared/
iC communication
Exchange a ToruCa card between
i-mode terminals
When you exchange a ToruCa card using
●
i-mode communication, the regular packet
communication charge is required.
Some ToruCa cards may not allow you to
●
update or redistribute using mail or infrared
communication, etc. depending on the settings
by IP (information service providers).
Obtaining a ToruCa Card
<Obtain a ToruCa card>
You can hold up and show the FOMA terminal
to a reading device to obtain a ToruCa or
ToruCa(detail) card.
You can obtain up to 100 ToruCa cards, each up to
ˎ
1K bytes for a ToruCa card and up to 100K bytes for
a ToruCa(detail) card. The number of ToruCa cards
that can be obtained may decrease depending on
the data to be obtained.
While the IC card lock is set, you cannot obtain a
ˎ
ToruCa card from a reading device.
New ToruCa
When you obtain a ToruCa
card from a reading device,
the FeliCa Sign flashes in
green, a beep sounds to
notify you that the card has
been obtained, the ToruCa
card is displayed, and the
previous display reappears
after about 15 seconds. The
notification icon “ ” (New
1
ToruCa) appears in the
stand-by display.
To display the ToruCa card
Press (Link) in the
stand-by display and
select “ ”.
228
Page 31

Some ToruCa cards may not allow you to send
●
mail with ToruCa cards attached, send data
using iC or infrared communication, or copy
them to the microSD memory card.
When the Lock key is set, a beep for notifying
●
you that the card has been obtained does not
sound.
3
Select a ToruCa card and press .
Index
Category icon
Displaying a ToruCa Card
<Display ToruCa>
You can display a saved ToruCa or
ToruCa(detail) card any time. You can also
obtain a ToruCa(detail) card from the ToruCa
card.
1
From the Menu, select [Osaifu-Keitai]
[ToruCa] and press
ToruCa
ToruCa
Folder1
Used
The ToruCa folder list appears.
The following icons show the status of the folder.
ˎ
If there is an unread ToruCa card, “
ˎ
2
Select a folder and press .
ToruCa
12:45
炭火・焼肉レストラン
02/13
江戸前 ○○○
02/08
とんかつ △△△
02/08
サロン △□△
02/07
フレンチ ○□○
02/05
割烹 ○△○
The ToruCa list appears.
The following icons show the status of the ToruCa
ˎ
card.
8/12
(Yellow) Preset folder
(Blue) User-created folder
appears at the lower right of the icon.
赤坂
築地
銀座
六本木
赤坂
品川
Unread ToruCa card/Expired unread
/
ToruCa card
Read ToruCa card/Expired read
/
ToruCa card
Obtained date/time
1/8
Index
Category icon
.
→
4
Select [詳細] (Detail) → [Yes] and press
.
You obtain a ToruCa(detail) card.
To update a ToruCa(detail) card to the latest status
From the Function menu, select [Updated
ToruCa] → [Yes].
To save data such as a phone number in the
Phonebook
Move the cursor to the phone number, etc.
and from the Function menu, select [Add to
phonebook].
”
Follow the same steps as in “Saving the
ˎ
Redial/Received Record in the Phonebook”
(P.99, step 4 to 7).
When you obtain a ToruCa card from a reading
●
device while displaying a list such as the ToruCa
list, the ToruCa folder list appears. Select [ToruCa]
once again to display the obtained ToruCa card.
Osaifu-Keitai/ToruCa
229
Page 32

Managing ToruCa Cards
You cannot move, sort, or search a ToruCa card in
ˎ
the [Used] folder.
Adding/Deleting Folders
You can create and delete a folder for saving a
ToruCa card. You can manage up to 22 folders.
You can also change the name of a folder or
sort folders in the list.
You cannot delete or change the names of the
ˎ
preset folders.
Example: Adding a folder
1
Press (Func) in the ToruCa folder list.
The Function menu appears.
2
Select [Edit folder] → [Create folder],
press , and enter a folder name.
Enter a folder name within 10 full-width or 20 halfwidth characters.
The folder is added.
To change a folder name
Move the cursor to the folder and from the
Function menu, select [Edit folder] → [Edit folder
Osaifu-Keitai/ToruCa
name]. Enter a folder name within 10 full-width or
20 half-width characters.
To reorder the folders
From the Function menu, select [Edit folder]
[Reorder folders] → a folder. Move the cursor
to a position to move to, press
press (Complete).
To delete a folder
Move the cursor to the folder and from the
Function menu, select [Edit folder] → [Delete
folder], enter the Security code, and select [Yes].
→
(Move), and
Moving a ToruCa Card to
Another Folder
You can move ToruCa cards to another folder
using three methods.
You cannot move a ToruCa card to [Used].
ˎ
Example: Moving a ToruCa card
1
From the ToruCa folder list, select a folder
and press .
To move all ToruCa cards in the folder
From the Function menu, select [Move] → [Move
all]→ [Yes] → a folder.
To move several ToruCa cards
From the Function menu, select [Move]
[Select&move], select ToruCa cards, and press
(Complete). Select [Yes] → a folder.
2
Select a ToruCa card and press (Func).
The Function menu appears.
3
Select [Move] → [Move one] → [Yes] and
→
press .
The Select move to display appears.
4
Select a folder and press .
The selected ToruCa card is moved to another
folder.
Deleting a ToruCa Card
You can delete ToruCa cards using four
methods.
Example: Deleting a ToruCa card
1
From the Menu, select [Osaifu-Keitai]
[ToruCa] and press
To delete all ToruCa cards
From the Function menu, select [Delete all], enter
the Security code, and select [Yes].
2
Select a folder and press .
To delete all ToruCa cards in the folder
From the Function menu, select [Delete]
[Delete all], enter the Security code, and select
[Yes].
To delete several ToruCa cards
From the Function menu, select [Delete]
[Select&delete], select ToruCa cards, press
(Complete), and select [Yes].
.
→
→
→
230
Page 33

3
Select a ToruCa card and press (Func).
The Function menu appears.
4
Select [Delete] → [Delete one] → [Yes]
and press .
The selected ToruCa card is deleted.
Sorting the List
You can temporarily sort the ToruCa cards in a
folder and display them.
1
Press (Func) in the ToruCa list.
The Function menu appears.
2
Select [Sort] → a sorting order and press
.
[Date]:
Sort by obtained date/time from newest to oldest.
[Genre]:
Sort by genre that identifies the type of ToruCa.
[Index]:
Sort by index in Japanese alphabetical order.
[By kana]:
Sort by “kana” in the data saved on a ToruCa
card.
The ToruCa cards are displayed in accordance with
the selected sort method.
When you sort ToruCa cards using [Index], the
●
order of sorting may not follow the Japanese
alphabetical order if both full-width and halfwidth characters are used.
Searching a ToruCa Card
You can search for ToruCa cards by genre.
1
Press (Func) in the ToruCa folder list.
The Function menu appears.
To search for ToruCa cards in the folder
Press (Func) in the ToruCa list.
2
Select [Search] and press .
Select category
Restaurant
Town info
Supermarket
travel/recreation
fashion/accessory
beauty/relaxation
game/horoscope
hobby/entertainment
Education
Others
Category icons
3
Select a genre and press .
The search result appears.
To delete all searched ToruCa cards
From the Function menu, select [Delete]
[Delete all item], enter the Security code, and
select [Yes].
To move all searched ToruCa cards
From the Function menu, select [Move] → [Move
all item] → [Yes] → a folder.
→
Setting the ToruCa Details
<ToruCa setting>
Setting Whether to Obtain a
ToruCa Card
You can set whether to obtain ToruCa
cards from a reading device or using the iC
communication.
1
From the Menu, select [Osaifu-Keitai]
[Settings]→ [ToruCa setting] → [ToruCa
receive] and press
[Yes]:
Obtain a ToruCa card from a reading device or
using the iC communication.
[No]:
Do not obtain a ToruCa card from a reading
device or using the iC communication.
2
Select [Yes]/[No] and press .
The ToruCa receive is set.
.
→
Osaifu-Keitai/ToruCa
Continued
231
Page 34

Assigning Separate Folders for
ToruCa Cards
You can save requirements to sort ToruCa
cards obtained from a reading device so that
they can be automatically assigned to folders.
Up to 20 sorting requirements can be saved.
1
From the Menu, select [Osaifu-Keitai]
[Settings]→ [ToruCa setting] → [Sort
folder] and press
Sort folder
To delete a sorting requirement
Move the cursor to the sorting requirement
and from the Function menu, select [Delete]
[Delete one] → [Yes]. To delete several sorting
Osaifu-Keitai/ToruCa
requirements, from the Function menu, select
[Delete]→ [Select&delete], select sorting
requirements, press
[Yes]. To delete all sorting requirements, from the
Function menu, select [Delete] → [Delete all],
enter the Security code, and select [Yes].
To reorder the sorting requirements
From the Function menu, select [Reorder] → a
sorting requirement, move the cursor to a folder
to move to, press (Move), and press
(Complete).
2
Select a place to save the sorting
requirement to and press .
Sort rule1
Sorting criteria
Folder to sort into
.
(Complete), and select
3
Select the sorting method at [Sorting
criteria].
[Genre]:
Specify a genre of ToruCa cards.
[Title]:
Specify a part of a title within 10 full-width or 20
half-width characters.
[Index]:
→
Specify a part of an index within 10 full-width or
20 half-width characters.
[None]:
Do not specify any sorting method.
4
Select a folder to be used for sorted
ToruCa cards at [Folder to sort into] and
press .
When no folder is specified
ToruCa cards are sorted to [ToruCa].
5
Press (Complete).
The sorting requirement is saved.
If a ToruCa card satisfies several sorting
●
requirements, the sorting requirement with a
lower number in the list has higher priority.
If you delete a folder for which the sorting
●
→
requirement is set, [ToruCa] is used as a sort
destination folder.
ToruCa cards received before the sorting
●
requirement is set are not sorted automatically.
You cannot set [Used] as a sort destination
●
folder.
Only ToruCa cards obtained from the reading
●
device are sorted automatically.
Setting Whether to Automatically
Recognize a ToruCa(Detail) Card
You can set whether to let a reading device
recognize available ToruCa cards automatically
when you hold up and show the FOMA terminal
to it in order to use ToruCa.
Up to 20 ToruCa cards are saved in [Used]. When
ˎ
the number of saved cards exceeds 20, the cards
with the oldest date/time are deleted, in that order.
232
Page 35

1
From the Menu, select [Osaifu-Keitai]
[Settings] → [ToruCa] → [Auto
→
recognition] and press
[ON]:
Available ToruCa cards are automatically
recognized by the reading device and saved in
[Used].
[OFF]:
Available ToruCa cards are not recognized by
the reading device.
To display the explanation about the Auto recognition
Move the cursor to [Auto recognition] and press
(Help).
2
Select [ON]/[OFF] and press .
The Auto recognition is set.
When you select [ON]
Select [Yes].
When the Lock all or Personal data lock is set, a
●
ToruCa card does not move to [Used] even if it is
to be deleted regardless of the Auto recognition
being set to [ON].
If you hold up and show the FOMA terminal to
●
a reading device with the Auto recognition set
to [OFF], a message confirming whether to use
the Automatic reading function or stating that the
Automatic reading function is OFF may appear.
To use the Automatic reading function, select
[Yes] to set the Auto recognition to [ON].
.
Setting Whether to Check the
Duplication of a ToruCa(Detail) Card
You can set the FOMA terminal to check if the
ToruCa(detail) card you are trying to obtain has
been obtained already when you obtain the
card from a reading device.
1
From the Menu, select [Osaifu-Keitai]
[Settings]→ [ToruCa] → [Duplication
check] and press
[ON]:
Check if a target ToruCa(detail) card is already
obtained. Do not obtain a ToruCa card that you
have obtained already. Obtain a ToruCa card
only when you have not obtained it yet.
[OFF]:
Do not check if a target ToruCa(detail) card is
already obtained.
.
→
2
Select [ON]/[OFF] and press .
The Duplication check is set.
Setting Whether to Notify That within
the Communication Range
You can set the FOMA terminal whether to notify
you of being within the FeliCa communication
range or the FeliCa communication being
started by vibration or the FeliCa Sign when
you are close to a reading device with the
FOMA terminal powered on.
1
From the Menu, select [Osaifu-Keitai]
[Settings]→ [IC act. notice] and press
IC act. notice
By vibrator
By LED
[By vibrator]:
Set whether to activate the vibrator when the
communication starts.
[By LED]:
Set whether to turn on the FeliCa Sign when
you enter the range in which communication is
enabled or when the communication starts.
2
Select [ON]/[OFF] of the vibrator at [By
vibrator].
3
Select [ON]/[OFF] of the FeliCa Sign at [By
LED].
When the Public mode (Drive mode) is set, the
●
FeliCa Sign does not light and the vibrator does
not operate even if the By vibrator and By LED
are set to [ON].
ON
ON
<IC act. notice>
→
.
Osaifu-Keitai/ToruCa
233
Page 36

Locking the IC Card
Function
You can lock the IC card function to prevent
others from using it.
1
Press ( ) for over a second in the
stand-by display.
The IC card function is locked and “ ” appears.
To cancel the IC card lock
Press ( ) for over a second in the stand-by
display, enter the Security code, and press
(OK).
Locking the IC Card Function When
the FOMA Terminal Is Powered Off
You can set to automatically lock the IC card
function when the FOMA terminal is powered
off.
1
From the Menu, select [Osaifu-Keitai]
Osaifu-Keitai/ToruCa
[Settings]→ [IC card lock] and press
The Security code screen appears.
2
Enter the Security code and press
(OK).
IC card lock
IC card lock
IC lock(power−off)
[IC card lock]:
Set whether to lock the IC card function.
[IC lock(power-off)]:
Set whether to automatically lock the IC card
function when the FOMA terminal is powered off.
OFF
Last status
<IC card lock>
3
Select [Last status]/[Locked] at [IC
lock(power-off)].
[Last status]:
Keep the current status even after the FOMA
terminal is powered off.
[Locked]:
Lock the IC card function when the FOMA
terminal is powered off.
→
.
234
Page 37

GPS Function
Precautions on the Use of GPS Functions .............................................................. 264
Checking Your Location .................................................................
Using the GPS-compatible i-αppli ..............................................................
Providing Your Current Location Information upon Request .......
Notifying Your Current Location Information ...................................
Displaying the History of Location Positioning ...............................
Using the Location Information from Each Function ................................................ 277
Setting the GPS Functions .................................................................
<Position location>
<i appli>
<Location provision>
<Location notice>
<Location history>
<GPS settings>
264
265
270
274
276
278
235
Page 38

Precautions on the Use of
GPS Functions
You may need i-mode subscription for the use of the
ˎ
GPS function.
GPS is operated by the U.S. Department of
ˎ
Defense. Therefore, GPS radio wave condition may
be controlled (degradation of accuracy, suspension
of radio wave transmission, etc.) at the discretion of
the U.S. Department of Defense.
Note that radio waves may not be received or it may
ˎ
be difficult to receive radio waves in the following
conditions, since GPS uses radio waves from a
satellite.
Inside or immediately under a building
-
Inside a basement or tunnel, and below the
-
ground or water
Inside a bag or box
-
High-rise building district or densely populated
-
residential area
Inside or under a thick covering of trees
-
Near a high-voltage cable
-
In a car, inside a train compartment
-
Bad weather such as heavy rain or snow
-
When there are obstructions (people or objects)
-
near a mobile phone
When you are covering the display or earpiece of
-
your mobile phone with your hand.
The obtained location information may deviate by
300 m or more under the above conditions.
When the FOMA terminal is outside of the service
ˎ
GPS Function
area (or it is overseas), the GPS function is not
available.
There are about 24 GPS satellites in orbit at an
ˎ
altitude of about 20,000 km, and each satellite takes
about 12 hours to travel around the earth. Therefore,
radio wave reception condition may vary depending
on the date/time even if the operating environment is
the same. For example, a significant deviation could
occur to the location information or it may not be
possible to identify a location.
Please note that DoCoMo shall have no liabilities
ˎ
for any purely economic loss including those due
to missing a chance to check the measurement
(communication) results because of external factors
(including the running out of the battery), such as
a failure, malfunction, or any other problems of the
FOMA terminal or the power failure.
You cannot use the FOMA terminal as a navigation
ˎ
device for an aircraft, vehicle, and person.
Please note that DoCoMo shall have no liabilities
whatsoever even if you suffer damage or loss
while performing a navigation using the location
information.
You cannot use the FOMA terminal as a high-
ˎ
accuracy measurement GPS. Please note that
DoCoMo shall have no liabilities whatsoever even if
you suffer damage or loss due to a deviation of the
location information.
236
The Position location, Location notice, and Location
ˎ
provision cannot be used in the following cases.
While the Lock all is set※1
-
While the Omakase Lock is set※1
-
While the Personal data lock is set※1
-
While the Lock key is set※1
-
While the Self mode is set
-
When the UIM is not inserted
-
While updating the software
-
While the Key dial lock is set※2
-
1 The Location provision is available.
※
2 The Position location, Location provision, and
※
Location notice from the Loc. service client list
are available.
Checking Your Location
<Position location>
You can measure your current location to
determine where you are. You can display a
map based on the location information you
obtain, mail the location information, or save
the location information in the Phonebook.
No communication charge is required for confirming
ˎ
your current location. Note, however, that there is an
extra packet communication charge for displaying a
map based on your current location information.
Page 39

Example: Displaying a map of your current location
1
From the Menu, select [LifeKit] → [GPS]
[Position location] and press
→
You can also check your current location by
ˎ
pressing
display. After positioning, the operations follow
the settings of the GPS button setting (P.278).
Positioning loc.
Accuracy:
Position location
Positioning
completed.
Accuracy ★ ★
Read a Map
Run i appli
Paste to mail
Add to phonebook
Attach to image
Use the positioning accuracy as a guide. The
ˎ
accuracy may vary depending on the radio wave
condition of the vicinity.
2
Select [Read a Map] and press .
The map of determined current location is
displayed.
After displaying the map, you can search for the
ˎ
neighborhood information using “
辺情報−
details about “
DoCoMo’s website.
To use the location information with GPS-compatible
i-αppli software
Select [Run i appli] → software to be used.
To paste the location information to mail
Select [Paste to mail] →[Yes].
“
ˎ
The location information URL being sent is
ˎ
for over a second in the stand-by
“ ” flashes and the incoming
indicator flashes.
The progress of accuracy is
indicated by the bar.
To quit the Position location
★ ☆ ☆
” (i-mode area –Neighbor info–). For
location URL” that has a link to the location
information is entered in the mail main body.
only displayed on the i-mode compatible
terminals.
Press (Cancel).
To display the result for
identifying a location right
away
Press (Use).
To retry the operation
Press (Retry).
Accuracy
★★★
★
★★☆
★☆☆
iエリア−周辺情報−
.
: Nearly accurate
location information
(with an error less
than approximately
50 m)
: Relatively accurate
location information
(with an error less
than approximately
300 m)
: Approximate
location information
(with an error more
than approximately
300 m)
iエリア−周
”, see the
To save the location information in the Phonebook
Select [Add to phonebook] → [New]/[Add].
Follow the same steps as in the Add to FOMA
ˎ
terminal phonebook (P.95, step 3 to 6).
To add location information on an image
Select [Attach to image] →an image from My
picture of the Data Box.
You can add location information using the GPS
●
function on an image recorded by the camera
automatically (P.171).
Using the GPS-compatible
i-αppli
You can use the location information with GPScompatible i-αppli software.
When you use a GPS-compatible i-αppli, the
ˎ
location information is sent to the information
provider of the software being used.
When you use the GPS function with a GPS-
ˎ
compatible i-αppli, set the Use location info of the
software being used to [Yes].
The method of using the location information varies
ˎ
depending on the software.
1
From the Menu, select [LifeKit] → [GPS]
[i appli] and press
→
The GPS software list display appears.
2
Select a software and press .
The software is started up and “
Using
地図アプリ
The preinstalled “
uses the GPS function and a map to display
your current location or specified location, to
search the information on neighborhood, and
to navigate you to the destination by public
transportation, walk, or car.
An additional packet communication charge is
ˎ
required for using this function. It is recommended
to use the Pake-Houdai/Pake-Houdai Full for this
software.
When you have deleted the software but you want to
ˎ
restore it, download it from “
(i-mode area-Neighbor info-).
You cannot use this software when 2in1 is set to the
ˎ
B mode because it uses mail.
Please note that DoCoMo will not guarantee any
ˎ
result such as of the accuracy and immediacy of
information such as map or route.
While driving a car, please let a person other than
ˎ
the driver operate it.
.
(Map appli)
地図アプリ
iエリア−周辺情報−
<i appli>
” or “ ” appears.
(Map appli)”
Continued
GPS Function
”
237
Page 40

Basic Service and Additional Service
There are the basic services and additional
services for this software.
Basic service : Services provided by
DoCoMo for free of
charge.
Additional service : Services provided by
ZENRIN DataCom that
require an additional
charge.
You can use the additional services except
the traffic information up to 90 days after you
activate the software for the first time.
After 90 days, if you wish to keep using the
additional services, you need to apply for a
membership (paid) to “
” (ZENRIN Maps+Navi) provided by ZENRIN
ビ
ゼンリン
DataCom.
If you apply for a membership while still using
it, you do not need to download the software
again. You can keep using the software.
Menu Contents
今いる場所
(Current
location)
GPS Function
周辺を調べる
(Search
neighborhood)
地図を見る
(View a map)
Use the GPS function to
ˎ
show the map of your
current location or send
a map attached to mail.
Leave your footmark of
ˎ
your current location,
follow the track, and
check others’ footmarks.
Search information such
ˎ
as shops, facilities, iDavailable stores around
your current location or
specified location and
obtain a coupon from
gourmet information.
Check weather or
ˎ
availabilities of parking
lot near the location.
Search a map by
ˎ
entering information
such as keywords, a
genre, address, and
phone number.
Check a map of the
ˎ
location saved in the
software, server, or
Phonebook or searched
before.
Save a map of a location
ˎ
in a server to use the
information on a PC as
well.
238
地図+ナ
Up to
After 90
90 days
days
Free Free
Free Free
Free Free
Free Paid
Up to
Menu Contents
ナビをする
(Navigation)
乗換案内
(Transfer
information)
設定/直感★
(Settings/
Intuition)
Navigate the route to the
ˎ
destination by public
transportation, walk, or
car.
Navigate the route
ˎ
to your house whose
information is saved
before.
Check transfer
ˎ
information and time
table of trains.
Check the train route on
ˎ
a map and set an alarm
before departure.
Tilt the FOMA terminal to
ˎ
move a 3D map or map.
Check how to set or
ˎ
operate the software
regarding display of a
map, navigation, etc.
After 90
90 days
days
Free Paid
Free Paid
Free Free
Free Free
Menus and Operations of the Top Display
of “
地図アプリ
When you use “
ˎ
first time, the Terms of Use and precautions are
displayed.
The display shown is an image for explanatory
ˎ
purpose and may be different from the actual
display.
Top display
Each menu is displayed in the Top display. When you
close the menu, the last searched map appears.
” (Map appli)
地図アプリ
” (Map appli) for the
Page 41

After 90 days without a subscription for a
■
membership
When you use the software for the first time after
90 days, the message informing that available
functions are limited and the message inquiring for a
subscription for a membership appear.
When you select an additional service, those
messages appear as well.
You can subscribe for a membership from the software
accessed to the “
Maps+Navi) site.
ゼンリン
地図+ナビ
” (ZENRIN
Display and Operations of a Map
The display shown is an image for explanatory
ˎ
purpose and may be different from the actual
display.
Map display
©ZENRIN DataCom CO.,LTD. 2007
Key operations while displaying a map
Key operation Action
メニュー
拡縮
Key operations while displaying the quick access menu
Key operation Action
周辺を調べる
(Search neighbor)
ココへナビ
(Navi here)
ココを送信
(Send here)
ココを登録
(Save here)
地図へ
(To Map)
3D
・パノラマ
(3D/Panorama)
ビル テナ
(Building
ント
Tenant)
Display the menu.
(Menu)
Display the quick access menu.
(Zoom) D isplay the zoom bar. Press
to display a wider range, or to
display the detailed area. Press
(
) (Exit) to determine the
閉じる
zoom and the bar disappears.
Move the map horizontally or
vertically.
Close the menu or send you back
to the first searched result position.
Rotate the map counterclockwise.
Rotate the map faced to north.
Rotate the map clockwise.
Search the neighboring information
based on the center of the
displayed map.
Search the route from the set
departure point to the center of the
displayed map.
Send mail with the URL of the
displayed map.
Save the location information
on the center of the map in the
software, server, or Phonebook.
When you save it in the server, you
can access it from a PC as well.
Close the quick access menu.
Display the points where you
can display a 3D intersection or
panorama image. Select the point
to view them.
Display a building existed around
and if there is a tenant, you can
click to check it.
GPS Function
Continued
239
Page 42

Display and Operations of the Search
Result of Neighboring Information
It explains only for the display and operations of the
ˎ
search result displayed on the map, and it does not
apply for the display and operations selected from
the list.
The display shown is an image for explanatory
ˎ
purpose and may be different from the actual
display.
Search result display of neighboring information
©ZENRIN DataCom CO.,LTD. 2007
Key operations while displaying the search result
display of neighboring information
When the cursor does not point at searched
ˎ
information such as a store, the quick menu is
displayed.
Key operation Action
GPS Function
メニュー
(Zoom) Display the zoom bar. Press
拡縮
Check the detailed information on
the search result.
Move the map horizontally or
vertically.
Search again based on the
displayed map to be center.
Show the previous search result.
Show the next search result.
Display the menu.
(Menu)
to display a wider range, or to
display the detailed area. Press
(
) (Exit) to determine the
閉じる
zoom and the bar disappears.
Navigating the Searched Route with
Sound and Display to the Destination
You can set the departure point and the
destination to search the route. The route
is displayed traveling by walk, public
transportation, or car. After the route is
searched, you can be navigated to the
destination with sound and display.
1
While activating the software, press
(
(Navigation) → [
) (Menu), select [
メニュー
ナビをする
ナビをする
] (Navigation),
and press .
2
Select [
] (Departure point), press
出発地
, and set the departure point by the
items below.
(GPS)
現在地
(Current location
(GPS))
フリーワード検索
(By keyword)
地図上で指定
(Specif
y on map)
TEL/
〒検索
(By phone
number/code)
住所一覧から
(From address list)
ジャンルから
(From genre)
履歴から
(From history)
登録地点から
(From saved
location)
(Home) Set the location information on
自宅
出発地の確認
(Check departure
point)
3
Select [
Position the current location
and set it.
Search by keyword.
Set the departure point on the
map.
Search by phone number/
postal code.
Select an address to set.
Select a genre to set.
Set from the previously
displayed map.
Set from the location information
saved in the software, server, or
Phonebook.
your home.
Check information on the
departure point.
] (Destination), press
目的地
, and set the destination following the
similar steps at Step 2.
4
Select [
] (Specify time), press ,
時間指定
and select an item below.
現時刻で指定
(Current time)
出発時刻指定
(Start time)
到着時刻指定
(Arrival time)
終電を利用
(Last train)
Check the route using the
current time.
Set the start time and check the
route.
Set the arrival time and check
the route.
Check the route with the last
train of the day.
]
240
Page 43

5
Select [
select an item below, select [
] (Condition), press ,
条件設定
上記で設定
(Set as above), and press .
乗換条件
(Transfer)
徒歩ルート
(Walking route)
特急利用
(Express)
通常利用車種
(Type of car in
regular use)
6
Select [
press
You can search a route by using the total navigation:
[
]. Routes (up to six routes) are displayed as a
検索
search result. If there is another transfer route, an
icon shows the characteristics of the route.
Icon Meaning
(Fast) Fastest route to reach the
早
(Budget) Most budget route to reach the
安
(Easy)
楽
オススメ
(Recommended)
(Toll) Car route taking toll roads.
有料
(Local) Car route taking local roads.
一般
To save the route
Select [
7
Select a route, select [
(Check Navi/route) → [ナビ]/[ナビ(
Select from [早い] (Fast), [安い]
(Budget), or [楽々] (Easy) for
transfer selection criteria.
Select from [
(Recommended), [
(Many roofs), or [
(Less up-and-down) for route
selection criteria.
Select whether to use express
even if the total route distance
is within 100 km.
Select a type of car in regular
use.
]/[
で検索
.
] and the car navigation: [
で検索
destination.
destination.
Route with less numbers of
transfers to reach the destination.
Meet the above three conditions.
ルートを登録
] (Save route).
おまかせ
屋根多い
階段少ない
のみで検索
ナビ・ルート確認
省電力
(Navi/Navi(power saver)), and press .
The “
ご利用上の注意
appears.
To check a route
Select a route and select [
route).
To check the time table
Select a route and select [
8
Select [はい] and press .
The navigation to the destination starts.
” (Usage precautions)
] (Check
ルート確認
] (Time table).
時刻表
] and
のみで
Display and operations of route (car)/
]
navigation (car)
The display shown is an image for explanatory
ˎ
purpose and may be different from the actual
display.
Route (car) display
]
]
]
Route to the destination
©ZENRIN DataCom CO.,LTD. 2007
Navigation (car) display
Current location/traveling direction
Route to the destination
©ZENRIN DataCom CO.,LTD. 2007
Key operations while using the navigation
Key operation Action
(Menu) End the navigation and display
メニュー
(Zoom) Display the zoom bar. Press
拡縮
]
)]
the Top menu.
Display the quick access menu.
to display a wider range,
or to display the detailed
area. Press (
determine the zoom and the bar
disappears.
Move the map horizontally or
vertically.
Go back to the current location.
Switch to the intersection mode.
End/start the navigation.
Rotate the map counterclockwise.
Rotate the map faced to north.
Rotate the map clockwise.
閉じる
GPS Function
) (Exit) to
Continued
241
Page 44

Key operations while displaying the quick access menu
Key operation Action
結果&設定
(Result&Settings)
経由地の決定
(Decide the passing
point)
リルート
(Search the route
again)
ルート消去
(Delete route)
モード切替
(Switch mode)
渋滞情報
(Traffic information)
Only for the car
※
route
Display the search result
of a route (time, fee, etc.)
and perform settings for the
navigation.
Search the route adding up to
three passing points toward the
destination.
Search the route from the
departure to the destination
again.
Delete the displayed route.
Switch to the intersection mode.
Display the traffic information
linked to the displayed map.
Using the Setting/Help
1
From the menu of the Top display, select
[設定/
直感★]→[設定・ヘルプ
and select items from the followings.
Check whether you sign up
for
[
ゼンリン地図+ナ
] (ZENRIN Maps+Navi).
ビ
Set the settings related
to the software itself such
as the display color of the
map and font size.
Set the setting related to
the navigation function
such as
route) and volume of audio
guidance.
Save your home location.
Delete the usage history of
maps and navigations.
Check the explanation
of usage, FAQ, and
agreement for use.
GPS Function
会員情報確認
(Check membership)
基本設定
(Basic settings of appli)
ナビ設定
(Navi setting)
自宅設定
(Set your home)
履歴系クリア
(Delete history)
使い方の説明/よく
ある質問/利用規約
(Explanation of usage/
FAQ/Agreement for use)
], press ,
(Re-
リルート
Providing Your Current Location
Information upon Request
You can provide your current location
information when there is a request from
another party.
Before using the Location provision, set the Location
ˎ
request to [ON] or [Permission sched]. The default
setting is set to [OFF]. You may also need to perform
the usage settings for each service (P.271). (When
you use “imadoco-search”, you need to set “
報利用設定
(settings for imadoco-search) in i Menu (“
ン設定
Subscription/Settings)).)
To use the Location provision, you may need to
ˎ
subscribe to a service provider that supports this
function. There may be a charge for the use of the
service.
To use the Location provision, follow the information
ˎ
provided by the service provider and DoCoMo’s
website.
When the Location request is set to [ON] or
ˎ
[Permission sched], the location information may
be sent to a searcher without operating the FOMA
terminal.
When Your Location Information
Is Requested
When the provision of the location information
is requested by the preset GPS host, the
Location provision is started.
During a voice call or PushTalk communication, the
ˎ
vibrator does not operate.
When the settings for using each service is set to “許可”
(accept)
” (Settings to use location information)
” (Options) of “
Providing location
イマドコサーチ
090XXXXXXXX
ドコモ一郎
Accuracy:
料金&お申込・設定
★ ☆ ☆
<Location provision>
位置情
オプショ
” (Charge &
“ ” flashes, the Loc.
provide/accept tone sounds,
and the incoming indicator
flashes.
To quit the Location provision
Press (Cancel), ,
or .
When the Lock key is set,
(Cancel) becomes
invalid.
242
Page 45

When the settings for using each service is set to “
” (Check every time)
確認
Loc.Req.from
:
イマドコサーチ
ドコモ一郎
Send Loc.
Not Send Loc.
Select [Send Loc.].
Providing location
イマドコサーチ
090XXXXXXXX
ドコモ一郎
Accuracy:
★ ☆ ☆
If there is a request for your location information
●
when the Public mode (Drive mode) is set, the
FOMA terminal operates as follows.
- When the settings for using each service
is set to “許可” (accept), it is indicated only
in the display and the location information
is provided. The Loc. provide/accept tone,
vibrator, and incoming indicator do not
operate.
- When the settings for using each service is set
to “
毎回確認
information is not provided.
When the location information is requested from
●
a person who uses “imadocokantan search”, the
FOMA terminal operates as follows.
- The confirmation screen appears every time
you are requested. If you select [Send Loc.],
the rough positioning result is immediately
notified to the person who requests it. After
you select [Send Loc.], the GPS positioning
display appears. The high-detailed positioning
result is notified after the GPS positioning.
- After you select [Send Loc.] and you cancel
providing the location, the rough positioning
result is notified to the person who requests it.
In this case, the Location history is saved but
location information is not displayed.
The location information may be sent depending
●
on the timing of cancellation.
Even if the location information may have
●
been sent, the service provider that supports
the Location provision function may not have
received it depending on the radio wave
condition.
“ ” flashes, the Loc.
provide/check tone sounds,
and the incoming indicator
flashes.
To quit the Location provision
Press (Cancel), ,
or .
When the Lock key is set,
(Cancel) becomes
invalid.
” (Check every time), the location
毎回
When 2in1 is used, the location information is
●
provided, regardless of the 2in1 mode.
Some Service client IDs may not be displayed.
●
Setting Whether to Provide Your
Location Information
You can set whether to accept or reject the
request to provide your current location
information.
1
From the Menu, select [LifeKit] → [GPS]
[GPS settings] → [Loc. request menu]
→
[Location request] and press
→
The Security code screen appears.
2
Enter the Security code and press .
The Location request display appears.
[ON]:
Provide the location information to requesting
party. The location information may be sent to a
searcher without operating the FOMA terminal.
[OFF]:
Do not provide location information to requesting
party.
[Permission schedule]:
Provide the location information to requesting
party during the permitted period.
3
Select a way to provide the location
information and press .
The Location request is set. If you set [ON] or
[Permission sche], “ ” appears.
When you select [Permission schedule]
Set a period to permit for providing location
information. Enter the time both at [Start time]
and [End time] in 24-hour format and select the
repeat type at [Repeat]. If you set [Eyd] or [Day],
enter dates both at [Start day] and [End day].
To perform the setting via the Initial setting
From the Menu, select [Settings]
[Management]→ [Initial setting] → [Location
request], enter the Security code, and select
[Yes]/[No].
.
GPS Function
→
Continued
243
Page 46

Operations When the Period to Permit for
Providing Location Information is Set
Example: When the current date and time is “2008/2/23
14:00”
Starting time: 15:00 Ending time: 22:00
Repeat
type
None
specified
Everyday Start date
Specified
day
GPS Function
Settings
Valid period
2008/2/28
End date
2008/3/28
Start date
2008/2/23
End date
2008/3/28
Start date
2008/2/23
End date None
specified
Start date
2008/2/28
End date
2008/3/28
Start date
2008/2/23
End date
2008/3/28
Start date
2008/2/23
End date None
specified
Period for providing location
From 2008/2/23 15:00 to
−
2008/2/23 22:00
From 2008/2/28 15:00 to
2008/3/28 22:00
Everyday (from 15:00 to
22:00)
From 2008/2/23 15:00 to
2008/3/28 22:00
Everyday (from 15:00 to
22:00)
After 2008/2/23 15:00
Everyday (from 15:00 to
22:00)
Specified day from
2008/2/28 15:00 to
2008/3/28 22:00 (from
15:00 to 22:00)
Specified day from
2008/2/23 15:00 to
2008/3/28 22:00 (from
15:00 to 22:00)
Specified day after
2008/2/23 15:00 (from
15:00 to 22:00)
information
Starting time: 09:00 Ending time: 22:00
Settings
Repeat
None
specified
Everyday Start date
Specified
day
type
Valid period
2008/2/28
End date
2008/3/28
Start date
2008/2/23
End date
2008/3/28
Start date
2008/2/23
End date None
specified
Start date
2008/2/28
End date
2008/3/28
Start date
2008/2/23
End date
2008/3/28
Start date
2008/2/23
End date None
specified
Period for providing location
From 2008/2/23 14:00 to
−
2008/2/23 22:00
From 2008/2/28 09:00 to
2008/3/28 22:00
Everyday (from 09:00 to
22:00)
From 2008/2/23 14:00 to
2008/3/28 22:00
Everyday (from 09:00 to
22:00)
After 2008/2/23 14:00
Everyday (from 09:00 to
22:00)
Specified day from
2008/2/28 09:00 to
2008/3/28 22:00 (from
09:00 to 22:00)
Specified day from
2008/2/23 14:00 to
2008/3/28 22:00 (from
09:00 to 22:00)
Specified day after
2008/2/23 14:00 (from
09:00 to 22:00)
information
244
Page 47

Starting time: 15:00 Ending time: 10:00
Settings
Repeat
Valid period
type
None
specified
Everyday Start date
2008/2/28
End date
2008/3/28
Start date
2008/2/23
End date
2008/3/28
Start date
2008/2/23
End date None
specified
Specified
Start date
day
2008/2/28
End date
2008/3/28
Start date
2008/2/23
End date
2008/3/28
Start date
2008/2/23
End date None
specified
Period for providing location
From 2008/2/23 15:00 to
−
2008/2/24 10:00
From 2008/2/28 15:00 to
2008/3/29 10:00
Everyday (from 15:00 to
10:00 at the next day)
From 2008/2/23 15:00 to
2008/3/29 10:00
Everyday (from 15:00 to
10:00 at the next day)
After 2008/2/23 15:00
Everyday (from 15:00 to
10:00 at the next day)
Specified day from
2008/2/28 15:00 to
2008/3/29 10:00 (from
15:00 to 10:00 at the next
day)
Specified day from
2008/2/23 15:00 to
2008/3/29 10:00 (from
15:00 to 10:00 at the next
day)
Specified day after
2008/2/23 15:00 (from
15:00 to 10:00 at the next
day)
information
Starting time: 09:00 Ending time: 09:00
Settings
Repeat
None
specified
Everyday Start date
Specified
day
type
Valid period
2008/2/28
End date
2008/3/28
Start date
2008/2/23
End date
2008/3/28
Start date
2008/2/23
End date None
specified
Start date
2008/2/28
End date
2008/3/28
Start date
2008/2/23
End date
2008/3/28
Start date
2008/2/23
End date None
specified
Period for providing location
From 2008/2/23 14:00 to
−
2008/2/24 09:00
From 2008/2/28 09:00 to
2008/3/29 09:00
Everyday (from 09:00 to
09:00 at the next day)
From 2008/2/23 14:00 to
2008/3/29 09:00
Everyday (from 09:00 to
09:00 at the next day)
After 2008/2/23 14:00
Everyday (from 09:00 to
09:00 at the next day)
Specified day from
2008/2/28 09:00 to
2008/3/29 09:00 (from
09:00 to 09:00 at the next
day)
Specified day from
2008/2/23 14:00 to
2008/3/29 09:00 (from
09:00 to 09:00 at the next
day)
Specified day after
2008/2/23 14:00 (from
09:00 to 09:00 at the next
day)
information
GPS Function
Continued
245
Page 48

Setting the User-defined Host
Normally, you do not need to change this
※
setting.
You can set one host for using the GPS service
besides the Initial host set at the time of
subscription.
1
From the Menu, select [LifeKit] → [GPS]
[GPS settings] → [Loc. request menu]
→
[Host setting] and press
→
Host setting
Initial host
Unregistered
To edit the set host
Move the cursor to the set host, press (Edit),
and enter the Security code. Edit each item.
To delete the set host
Move the cursor to the set host, press (Delete),
enter the Security code, and select [Yes].
To reset the host to the default setting
Select [Initial host].
2
Select [Unregistered] and press (Edit).
The Security code screen appears.
3
Enter the Security code and press
(OK).
Register host
GPS Function
Host name
Host address
[Host name]:
Enter a host name within 99 half-width
alphanumeric characters and symbols.
[Host address]:
Enter a host address within 100 half-width
alphanumeric characters and symbols.
4
Enter each item.
5
Press (Complete).
The entered host is saved.
6
Select a host and press .
The user-defined host is changed.
Performing Settings for Using
the GPS Service
You can connect to the GPS service settings
site and perform setting necessary for
providing the location information.
1
From the Menu, select [LifeKit] → [GPS]
[GPS settings] → [Loc. request menu]
→
[Service settings] and press
→
.
The FOMA terminal is connected to the GPS service
settings site.
2
Set each item.
For details about how to set the services, contact
ˎ
your service provider.
While you are connecting to the GPS service
●
settings site, available Function menus are
different from the ones displayed during i-mode.
The URL history is also not recorded.
If you connect to the GPS service settings site
●
during international roaming, an error message
appears on the display and a communication
charge is required.
.
Notifying Your Current Location
Information
You can notify a specific party (a service
provider that supports the Location notice
function) of the location information of your
current location.
To use the Location notice, you may need to
ˎ
subscribe to a service provider that supports this
function. There may be a charge for the use of the
service.
To use the Location notice, follow the instructions
ˎ
provided by the service provider or on the DoCoMo’s
website. There is a charge for the use of the Location
notice function.
1
From the Menu, select [LifeKit] → [GPS]
[Location notice] and press
→
The screen for selecting the method for activating
the Location notice appears.
<Location notice>
.
246
Page 49

2
Select [Loc. service client] → a party to
be notified and press .
Notifying location
○○サービス
Accuracy:
★ ☆ ☆
To enter a party to be notified and notify location
information
Select [Direct input], enter the service client ID,
and press (OK).
To quit the Location notice
Press (Cancel), , or .
When 2in1 is used, the location information is
●
notified by Number A, regardless of the 2in1
mode.
The location information may be sent depending
●
on the timing of cancellation.
Even if the location information may have been
●
sent, the service provider that supports the
Location notice function may not have received it
depending on the radio wave condition.
“ ” flashes and the incoming
indicator flashes.
When the current location
is notified, the location
notice tone sounds and
the location information is
notified to a recipient.
Saving a Party to Be Notified
You can save a party to be notified of your
current location information as a location
service client. Up to five parties can be saved.
Make sure to enter [Loc. serv. client] and [Service
ˎ
client ID].
1
From the Menu, select [LifeKit] → [GPS]
[GPS settings] → [Reg. service client]
→
and press
Loc. service client
.
To delete a party
Move the cursor to the party and from the
Function menu, select [Delete] → [Delete one]
[Yes]. To delete all parties, from the Function
→
menu, select [Delete] → [Delete all], enter the
Security code, and select [Yes].
To save a party in the Phonebook
Move the cursor to the party and from the
Function menu, select [Add to phonebook]
[Main memory]/ [UIM].
Follow the same steps as in the Add to FOMA
ˎ
terminal phonebook (P.95, step 3 to 6) or in
the Add to UIM phonebook (P.98, step 3 to 4).
2
Press (Create).
Reg. service client
Loc. serv. client
Service client ID
Phone number
Auto Notice setting
Confirm
[Loc. serv. client]:
Enter a name of the party to be notified.
[Service client ID]:
Enter a notified party ID specified by the service
provider.
[Phone number]:
Enter a phone number.
[Auto Notice setting]:
Set whether to notify your current location
automatically when you place a voice/
videophone call to the number set at [Phone
number].
3
Enter a name of a party to be notified at
[Loc. serv. client].
Enter the name within 16 full-width or 32 half-width
characters.
4
Enter a notified party ID specified by the
service provider at [Service client ID].
Enter the ID within 12 half-width numeric characters
including “
” or “#”.
*
→
GPS Function
To display the details of a party
Move the cursor to the party and press
(Detail).
To edit the information of a party
Move the cursor to the party and from the
Function menu, select [Edit]. Edit each item.
Continued
247
Page 50

5
Select [Phone number] → [Direct input],
press , and enter a phone number.
Enter the phone number within 26 half-width
numeric characters including “
The phone number which is already saved as a
ˎ
location service client cannot be saved again.
To quote from the Phonebook
Select [Phonebook].
6
Select the notification method at [Auto
”, “#”, “+”, or “P”.
Notice setting].
[Yes]:
Notify your current location automatically.
[No]:
Do not notify your current location automatically.
[Confirm]:
When you place a voice/videophone call, confirm
whether to notify your current location.
7
Press (Complete).
The party is set as a location service client.
Displaying the History of
Location Positioning
Up to 50 results of location information
positioned by the Position location, Location
provision, and Location notice are recorded
as history. You can perform various operations
GPS Function
from the location information recorded in the
history.
When the number of location information records
ˎ
exceeds 50, the records are deleted starting from
the location information with the oldest date/time.
1
From the Menu, select [LifeKit] → [GPS]
[Location history] and press
→
Loc. history
02/14 10:20:10
02/12 10:00:08
02/12 9:32:00
02/11 21:28:37
02/11 21:22:15
02/11 15:43:10
02/11 15:09:51
02/11 14:49:33
02/11 14:40:39
02/10 22:54:22
02/10 22:34:08
02/10 10:55:17
The following icons show the type of positioning
ˎ
used.
1/25
Position location
Location notice
Location provision
<Location history>
When the location information
is available, “ ” appears.
Type of positioning
To use the location information
Press (Use).
For details about how to use the location
ˎ
information, see P.277.
To delete a location history record
Move the cursor to the location history record
and press (Use), select [Delete] → [Delete
one]→ [Yes]. To delete several location history
records, from the Function menu, select [Delete]
[Select&delete], select records, press
→
(Complete), and select [Yes]. To delete all
location history records, from the Function menu,
select [Delete] → [Delete all], enter the Security
code, and select [Yes].
2
Select a location history and press
(Detail).
Loc. history
2008/02/14 10:20:10
Position location
°
XX XX.XXX
NXX
°
XX XX.XXX
EXXX
Datum:WGS84
★ ★ ☆
Accuracy:
Accuracy
When the Location notice or Location provision is
●
performed, it is recorded in the Location history
even if the Position location fails or is canceled.
However, note that some items are not displayed.
A location history record for which location
.
●
information is not obtained cannot be used by
any function.
Even if the result of the Location provision or
●
Location notice is left in the history, the service
provider may not have received the location
information.
When you provide your location information while
●
2in1 is used, the name of the party who requests
the location information is displayed by each
2in1 mode following the Phonebook 2in1 setting.
The location information and accuracy saved in
●
the Location history may differ from those sent
to the Location provision destination/Location
service client depending on some reasons such
as radio wave condition.
Positioning date/time
Typ e:
Either Position location,
Location notice, or Location
provision is displayed.
Location information:
Latitude (degree, minute,
second), Longitude
(degree, minute, second)
“N” and “E” indicate
northern latitude and eastern
longitude, respectively.
Datum:
WGS84 (World Geodetic
System)
The geodetic system is the
standard used for indicating
a location on earth by its
longitude/latitude.
248
Page 51

Using the Location Information
from Each Function
You can display a map based on the location
information added to the Phonebook, sites,
screen memos, ToruCa cards, Message R/F,
or images. You can also paste the location
information URL to mail.
Adding the Location Information
You can add the location information to an
image or the FOMA terminal phonebook or
paste the location information URL in the main
body of mail.
Example: Adding the location information to the mail
main body by obtaining it by the Position
location
1
Press (Func) in the mail main body
input display, select [Rcv loc. info], and
press .
Rcv location info
From position loc.
From loc. history
From phonebook
Attach from image
To add the location information to the FOMA
terminal phonebook
Select “ ” in the Edit FOMA terminal phonebook
display.
2
Select [From position loc.], press , and
press (OK).
The screen for confirming whether to paste the
location URL appears.
To add the location information by selecting from the
Location history
Select [From loc. history] → a location history
and press (OK).
To add the location information by selecting from the
Phonebook
Select [From phonebook] → a phonebook.
To add the location information from an image
Select [Attach from image] → an image from My
picture of the Data Box.
You cannot select it when you add the location
ˎ
information on an image.
3
Select [Yes] and press .
location URL” that has a link to the location
“
information is entered in the mail main body.
Using the Added Location
Information
You can use the location information added to
the image, FOMA terminal phonebook, sites,
screen memos, ToruCa cards, or Message R/F.
Items you can use vary depending on the type of
ˎ
data which is attached location information. The
available items depending on the type of data are
followings.
Type of data Available item
Image Read a Map, Paste to mail,
Phonebook Read a Map, Paste to mail,
Site, Screen memo,
ToruCa, or MessageR/F
Example: Displaying a map of the location information
added to the Phonebook
1
From the Phonebook, select data → [
Has loc. info] and press .
Use location info
Read a Map
Run i appli
Paste to mail
Attach to image
2
Select [Read a Map] and press .
The map of the location information appears.
After displaying the map, you can search for the
ˎ
neighborhood information using “
辺情報−
details about “
DoCoMo’s website.
To add the location information on an image
Select [Attach to image] →an image from My
picture of the Data Box.
To delete the location information added on the
image
Select [Delete loc. info] →[Yes].
To use the location information with GPS-compatible
i-αppli software
Select [Run i appli] → software to be used.
To paste the location information to mail
Select [Paste to mail] →[Yes].
“
location URL” that has a link to the location
ˎ
information is entered in the mail main body.
Run i appli, and Add to
phonebook
Run i appli, and Attach to
image
Read a Map, Paste to mail,
and Run i appli
” (i-mode area –Neighbor info–). For
iエリア−周辺情報−
iエリア−周
”, see the
GPS Function
Continued
249
Page 52

To save the location information in the Phonebook
Select [Add to phonebook] → [New]/[Add].
Follow the same steps as in the Add to FOMA
ˎ
terminal phonebook (P.95, step 3 to 6).
Setting the GPS Functions
<GPS settings>
Setting the GPS Keys
You can set the actions when performing the
Position location by pressing for over a
second in the stand-by display.
1
From the Menu, select [LifeKit] → [GPS]
[GPS settings] → [GPS button setting]
→
and press
GPS button setting
Read a Map
Run i appli
Paste to mail
Add to phonebook
Attach to image
Confirm
[Read a Map]:
Display the map showing your current location
that is positioned.
[Run i appli]:
GPS Function
Use the GPS-compatible i-αppli.
[Paste to mail]:
Attach the location information into mail.
[Add to phonebook]:
Save the location information in the Phonebook.
[Attach to image]:
Attach the location information to an image.
[Confirm]:
Select a function every time you use.
2
Select a function to be performed
automatically and press .
The GPS button setting is set.
.
Setting the Positioning
Accuracy
You can set to prioritize either the speed or
accuracy of positioning.
1
From the Menu, select [LifeKit] → [GPS]
[GPS settings] → [Positioning mode]
→
and press
Positioning mode
Position location
Location notice
Location provision
2
Select a positioning mode at each item.
[Standard mode]:
Perform positioning in preference to the speed.
[Quality mode]:
Perform positioning in preference to the
accuracy. It may take time longer than [Standard
mode] to perform positioning.
3
Press (Complete).
The Positioning mode is set.
.
Standard mode
Standard mode
Standard mode
250
Page 53

1Seg
About One Seg ........................................................................................................ 240
Before Using One Seg ............................................................................................. 241
Setting Channels ............................................................................
Watching One Seg ...........................................................................
Using the Program Guide i-αppli ....................................................
Setting a Timer for Watching/Recording a One Seg Program .............
Using Data Broadcasting ......................................................................................... 251
Using TVlink .................................................................................................
Recording One Seg While Watching ............................................
Starting Time Shift Play While Watching .................................................
Receiving Mail While Watching One Seg ................................................................. 254
Various Settings for One Seg .............................................................
<Set channel list>
<Activate 1Seg>
<Program guide>
<Booking list>
<TVlink>
<Record One Seg>
<Time shift>
<1Seg setting>
242
243
247
247
252
252
253
255
251
Page 54

About One Seg
What is One Seg?
One Seg is a digital terrestrial broadcasting
for mobile devices and provides data
broadcasting as well as video and sound
broadcasting. You can also receive more
detailed program information, join panel shows,
enjoy TV shopping, and more using i-mode.
For details on the “One Seg” service, see the
ˎ
website below.
The Association for Promotion of Digital
Broadcasting
PC : http://www.dpa.or.jp/
i-mode : http://www.dpa.or.jp/1seg/k/
About Using One Seg
One Seg is a service provided by TV broadcasters
ˎ
(broadcast stations).
You can receive video, sound, and data
ˎ
broadcasting of One Seg that is broadcasted
without any subscription and free of charge.
The two types of information are available in the
ˎ
area of the data broadcasting: “data broadcasting”
and “data broadcasting site”. “Data broadcasting”
is carried in airwave with video and sound, and “data
broadcasting site” is available by accessing sites
provided by TV broadcasters (broadcast stations).
Also, “i-mode site” can be accessed with this
service. To access sites, you need to subscribe to
1Seg
services such as i-mode.
The packet communication charge is required to
ˎ
access a site such as “data broadcasting site” or
“i-mode site”.
Depending on a site, an additional information
charge may be required for using sites (i-mode paid
sites).
About Radio Wave
One Seg is one of the broadcasting services
and uses the different radio wave (airwave)
from the FOMA service. Therefore, regardless
of whether you are outside/inside of the FOMA
service area, you cannot receive One Seg
broadcasting in a place where the airwave
does not reach or in a time zone when it is out
of service.
Even if you are in the digital terrestrial
broadcasting service area, the receiving
condition may become worse or you cannot
receive anything in the following places.
Places where are far away from the radio wave
-
tower which send airwaves
Places such as interfered by mountains, covered
-
with a building where the radio wave is interrupted
by features or buildings
Places such as in the tunnel, basement, or building
-
where the radio wave is weak or does not reach at all
To make the radio wave condition better,
extend the One Seg Antenna fully. Changing
the orientation of the antenna, placing the
FOMA terminal closer or further to the body, or
moving to another location may make the radio
wave condition better.
Display When Using One Seg for the First
Time
After the purchase, when you use One Seg
for the first time, the display for confirming the
notabilia of the service appears. Check the
contents and press (OK).
When you insert another UIM or perform the
●
Reset all data&set, the display for confirming the
notabilia of the service appears again.
252
What is Broadcast Storage Area?
The broadcast storage area is a storage area
inside the terminal that is exclusive for One
Seg. The information you input according
to the instructions provided by the data
broadcast program you are watching is saved
in the broadcast storage area as specified by
the settings of TV broadcasters (broadcast
stations). The information to be saved may
contain answers for quiz, as well as personal
information such as membership number,
gender, age, or occupation.
Page 55

The saved information may be displayed, or be
sent to TV broadcasters (broadcast stations)
without another input of information when you
browse to the data broadcasting site.
To delete information in the broadcast storage
area, see P.255.
When you replace the UIM with another one,
the screen for confirming whether to reset the
broadcast storage area appears. Select [Yes]
to reset it.
Using information in the broadcast storage
■
area
When information in the broadcast storage area
is used while you are watching a program, the
message “Use saved info? It may include info
used by the same broadcasting gr.” appears.
When you select [Yes], the confirmation screen
does not appear as long as you watch the
same program. If you select [Yes,from then
on], the confirmation screen no longer appears
even if the program is changed.
Other Features
One-touch channel selection by the remote-
●
control numbers (P.244)
Switching between the main sound and sub
●
sound (P.246)
Using the program guide i-αppli (P.247)
●
Setting a timer for watching (P.247)
●
Setting a timer for recording (P.247)
●
Displaying and using the data broadcasting
●
(P.251)
Using TVlink (P.252)
●
Recording a video and still image (P.252)
●
Time shift play while watching (P.253)
●
Rapid play with sound at about 1.3x speed
●
(P.277)
Before Using One Seg
Step to Watch One Seg
Example: When you watch One Seg for the first time
Step 1
Set channel list (P.242)
Save a channel list suitable for the
area you use.
Step 2
Activate One Seg (P.243)
Extend the One Seg Antenna and
activate One Seg.
One Seg Antenna
■
When you use the One Seg function, extend
the One Seg Antenna as illustrated below.
When the One Seg reception is poor, change
the direction of the One Seg Antenna or the
location of the FOMA terminal.
Do not use force to change the direction of the One
ˎ
Seg Antenna.
Using the One Seg Antenna
1
Pull out the One Seg Antenna.
2
Raise the One Seg Antenna.
3
Change the direction.
3
2
1
3
1Seg
Continued
253
Page 56

Putting the One Seg Antenna back
1
Change the direction back.
2
Push the One Seg Antenna back while
aligning the top of the One Seg Antenna
with the counter part until it stops.
If you use force to put the antenna back without
ˎ
confirming the correct orientation, it may cause
malfunction.
1
2
The display that appears when One Seg is
■
used for the first time
When One Seg is activated for the first time,
the display for confirming the notabilia of the
service appears. When the FOMA terminal is
in the TV style, switch to the Normal style, and
then check the contents and press
(P.240).
Battery level
■
If you try to activate One Seg with the battery level
ˎ
low, the screen for confirming whether to activate
One Seg appears. If you select [Yes], One Seg
is activated. When the battery level becomes low
while watching One Seg, the screen for confirming
whether to quit One Seg appears. When you select
[Yes], One Seg is terminated.
When the battery level becomes low, the screen
1Seg
ˎ
informing that the battery level becomes low
appears, “
Seg, and “ ”/“ ”/“ ” flashes while recording a
One Seg program.
When the battery level becomes extremely low while
ˎ
watching or recording a One Seg program, One
Seg is terminated. When you are recording a One
Seg program, the video recorded up to this point is
saved automatically.
”/“ ”/“ ” flashes while watching One
(OK)
When there is an incoming call, etc. while
■
watching One Seg
When receiving a voice, videophone, or PushTalk
ˎ
call while watching One Seg, you can answer the
call by pausing video and sound. After the call is
terminated, the screen for confirming whether to
use Time shift play appears. When you select [Yes],
Time shift play is started.
When receiving i-mode mail, SMS, Message R/F
ˎ
while watching One Seg, the incoming mail display
appears. The display restores when mail reception
is completed. (When the Mail telop disp set is set
to [OFF] and Dur multi task disp is set to [Prefer
operat.])
When the Alarm, Schedule alarm, or Booking alarm
ˎ
time comes while watching One Seg, the alarm is
displayed. The display restores when you stop the
Alarm or Schedule alarm and press
in the display informing the release of the alarm.
When you stop the Booking alarm, the screen for
confirming whether to activate One Seg appears
depending on the setting of the Cfm. activation
(P.248) and you can activate it.
When the UIM is not inserted, you cancel the
●
subscription to DoCoMo, or you temporarily
suspend using the FOMA service, you cannot
watch One Seg.
Even when you insert the UIM for which you
●
subscribe to DoCoMo, you may not be able to
activate One Seg if you repeatedly watch One
Seg in the condition the FOMA terminal cannot
communicate such as when the FOMA terminal
is outside of the service area or in the Self mode.
In that case, try to activate One Seg in the
condition the FOMA terminal can communicate
by moving into the FOMA service area.
When you activate One Seg for the first time,
●
activate it within the FOMA service area.
Even if the data may be lost or changed as a
●
result of malfunction, repair, or other handling
of the FOMA terminal, under no condition will
DoCoMo be held liable for any damaged or lost
data saved in the FOMA terminal. Furthermore,
note that the saved information (such as One
Seg recorded videos or still images, TV links, or
information saved in the broadcast storage area)
cannot be moved when you change your FOMA
terminal or have it repaired.
If you continue watching One Seg for a long
●
period of time with the battery being charged,
the life of the battery pack may become shorter.
or
254
Page 57

Setting Channels
<Set channel list>
3
To use One Seg, you need to perform the
channel setting and save the channel list
beforehand. When you watch One Seg, select
a channel list suitable for the current location.
You can save up to 10 channel lists, 62
broadcast stations for each list.
Saving a Broadcast Station to the Channel
List Automatically
Broadcast stations that can be received are
automatically searched and saved to a channel
list.
You need to set it within the Terrestrial digital TV
ˎ
broadcasting service area.
When you perform the Auto channel set, extend the
ˎ
One Seg Antenna fully.
1
From the Menu, select [1 Seg] → [Set
channel list] and press .
Set channel list
チャンネルリスト1
東京
大阪
神奈川
When no channel list is saved
Follow step 3 to 4.
2
Select a place to save to and press
(Create).
The screen for creating a channel list appears.
<Auto channel set>
4
Select [Auto channel set] → [Yes] and
press .
Channel scanning
Receive ch.
Physical ch. 27ch
○○テレビ
Searching broadcast stations starts. The Channel
scan result display appears when the search is
completed.
To cancel searching broadcast stations
Press (Cancel) and select [Yes].
Press (OK), select [Yes], press , and
enter a name of a channel list.
Enter a name within 10 full-width or 20 half-width
characters.
The channel list is saved.
When the multiple broadcast stations which have
●
the same remote-control number are retrieved,
the message to the effect that the remote-control
number is doubled appears. Press and select
the current location you are in from the Select
service area display. The channels in the area
you select are preferentially assigned to remotecontrol numbers 1 to 12, and channels in the
area you do not select are assigned to remotecontrol numbers 13 to 62 onward.
It takes about 40 to 60 seconds to complete
●
searching broadcast stations. However, the
searching time varies and it may exceed 60
seconds depending on the number of broadcast
stations or the condition of airwave.
1Seg
Continued
255
Page 58

Saving a Broadcast Station into
the Channel List Manually
You can save broadcast stations to a channel
list by selecting a service area, prefecture, and
area.
1
From the Menu, select [1 Seg] → [Set
channel list] and press .
The Set channel list display appears.
When no channel list is saved
Follow step 3 to 5.
2
Select a place to save to and press
(Create).
The screen for creating a channel list appears.
3
Select [Select Serv Area] and press .
Select service area
Hokkaido
Tohoku
Kanto
Koshinetsu/Hokuriku
Tokai
Kinki
Chugoku
Shikoku
Kyusyu/Okinawa
4
Select a service area → a prefecture → an
area and press .
The screen for confirming the channel information
of the selected service area appears.
1Seg
5
Press (OK), select [Yes], and press .
The channel list is saved.
Depending on the area you use, you may not be
●
able to save a broadcast station correctly even
if you set the Select Serv Area. In this case, use
the Auto channel set.
Selecting a Channel List to be
Used
You can select a channel list suitable for your
current location. Also, you can edit the saved
channel lists.
1
From the Menu, select [1 Seg] → [Set
channel list] and press .
The Set channel list display appears.
To activate One Seg from the channel list
Move the cursor to a channel list, press
(Ch. list), move the cursor to a broadcast station
in the channel list, and press (Watch).
To change the name of a channel list
Move the cursor to a channel list and from the
Function menu, select [Edit title]. Enter a name
within 10 full-width or 20 half-width characters.
To delete a channel list
Move the cursor to a channel list and from the
Function menu, select [Delete one] → [Yes].
The currently used channel list cannot be
ˎ
deleted.
To reset the channel list
From the Function menu, select [Reset], enter
the Security code, and select [Yes].
To display detailed information of a broadcast station
Move the cursor to a channel list, press
(Ch. list), move to the cursor to a broadcast
station in the channel list, and press (Detail).
2
Select a channel list and press .
The channel list to be used is set.
Editing Remote-control Numbers
A remote-control number which can be used
for selecting a station is already assigned
to each broadcast station. Remote-control
numbers can be changed.
1
Select a channel list in the Set channel
list display and press (Func).
The Function menu appears.
256
Page 59

2
Select [Edit RC number] and press .
Edit RC number
○○テレビ
テレビ
△△
○
テレビ
△
□□テレビ
To delete a broadcast station
Move the cursor to a broadcast station and from
the Function menu, select [Delete one] → [Yes].
3
Select a broadcast station and press .
The remote-control number input screen appears.
4
Enter a remote-control number.
Enter a number within 01 to 62.
The remote-control number is changed.
When the remote-control number is already
assigned to another broadcast station
Select [Yes]. The saved broadcast station is
replaced with the new one.
Watching One Seg
<Activate 1Seg>
Using the Display for Watching
One Seg
Normal style (Watching) Normal style (Recording)
群れのペンギンたちが、み
んないっせいに同じ方向を
見た。なにかを見つけたの
だろうか。
○△の不思議
毎週木曜よる
第
225
○
ch
×
Rec
Display status
Watching One Seg Recording One Seg
Video
10
時〜
回
一
○○テレビ ○△の不思議
ͰͱͲ
TV style
○○テレビ ○△の不思議
○×ch
群れのペンギンたちが、みんないっ
群れのペンギンたちが、みんないっ
せいに同じ方向を見た。なにかを見
せいに同じ方向を見た。なにかを見
つけたのだろうか。
つけたのだろうか。
Volume
Channel Rec Func Quit
群れのペンギンたちが、み
んないっせいに同じ方向を
見た。なにかを見つけたの
だろうか。
○△の不思議
毎週木曜よる
225
回
第
一
○×ch
○○テレビ ○
10
時〜
の不思議
△
Ͱͱ
ͱ
Ͳ
Subtitle
Data broadcasting/displaying mail
The display varies depending on the Mail disp
ˎ
set (P.256).
It is not displayed in the TV style.
※
Remote-control number
Name of the channel/program
Recording status
Recording progress bar
Estimated recordable time
The recordable time changes according to
※
the progress of recording. It may increase or
suddenly decrease while recording, depending
on the contents of the program to be recorded.
Volume
Operating mode
Ͱ
Video mode Data broadcasting mode
Video mode while displaying mail
Mail mode
Airwave reception level
ͱ
strong weak)
(
Guide display
Ͳ
Outside of the broadcast
service area
Watching One Seg in the Normal
Style
You can watch One Seg in the Normal style.
1
From the Menu, select [1 Seg] → [Activate
1Seg] and press .
○△の不思議
10
時〜
毎週木曜よる
第
225
回
ペンギンの一生
■豆知識
■クイズ
■撮影裏話
■次回予告
○×ch
○△の不思議
Rec
The channel which you watched previously is
displayed.
You can also activate One Seg by pressing
ˎ
for over a second in the stand-by display.
1Seg
Continued
257
Page 60

Operating method
Video mode
Operation Key operation
UP/DOWN channel
select
One-touch channel
select
Channel search Use ( ) / ( ) for
Volume adjustment Use
Switch between
video and data
broadcasting
modes
Start the program
guide i-αppli
Time shift Press
Use
Select a station in order/
reverse order of the remotecontrol numbers.
Remote-control number
1 to 9 :
10 :
11 :
12 :
over a second.
Search broadcast stations
which can be received.
The volume can be adjusted
in 32 levels: 0 to 31.
Press
Press
Pause watching a program
and play it back in time-shift
mode (P.253).
Record a still image Press
Record a video Press
Quit 1Seg Press
Data broadcasting mode
1Seg
Operation Key operation
Display the previous/
next page
Switch the data
broadcasting
screen between half
and full screens
Use / while using the
data broadcasting site.
Press
second.
( ) / ( ).
to
( ) / ( ).
(TV/DATA) (P.251).
(EPG).
(T.shft).
.
for over a second.
and select [Yes].
(TV/DATA) for over a
When no channel list is saved
The screen informing that no channel list is saved
appears. Select how to save a channel and save
one (P.242).
To display the program information
From the Function menu, select [Program info.].
When you press , the details of the program
is displayed. To display the information of the
previous/next program, press (Previous) /
(Next).
To set the 1Seg setting
From the Function menu, select [1Seg setting].
To compose mail containing program information
From the Function menu, select [Prog info mail].
When you send the program information to the
ˎ
FOMA terminal which is compatible with the
Media To function, the recipient can select it to
activate One Seg.
To select a program when multiple services
(programs) are broadcasted on the same channel
From the Function menu, select [Select service]
a program.
→
To save the broadcast station into a channel list
while watching it
From the Function menu, select [Add channel].
Watching One Seg in the TV Style
When you switch the FOMA terminal to the TV
style, you can watch One Seg in the horizontal
orientation.
See “About the Style” (P.27) to switch the FOMA
ˎ
terminal to the TV style.
The data broadcasting cannot be displayed in the
ˎ
TV style.
1
Switch to the TV style in stand-by status.
The Viewing Touch Key lights and it can be
operated.
You can set functions to be activated when
ˎ
switching to the TV style (P.328).
When you set other functions to be activated,
activate One Seg in the stand-by status and then
switch to the TV style.
○△の不思議
○×ch
258
Volume
Channel Rec Func Quit
The channel which you watched previously is
displayed.
Page 61

Operating method
Operation Key operation
UP/DOWN channel
select
Channel search Use
Volume adjustment Use
Record a still image Press
Record a video Press
Display the Function
menu
Quit 1Seg Press
To display the program information
From the Function menu, select [Program info.].
When you use (Chg.Info), the details of the
program is displayed. To display the information
of the previous/next program, use / (Back/
Next).
Depending on the receiving condition of
●
airwave, sound interruption or video pause may
occur, black-shaped noise may appear on the
picture, or a dark display without video or data
broadcasting may appear.
Depending on the radio wave condition, videos
●
and data broadcasting may not be displayed
even if the status of the airwave reception level
is other than the outside of the broadcast service
area.
When you activate One Seg while the Manner
●
mode is set, the screen for confirming whether
to output sound appears. When you select [Yes],
you hear the sound.
Colors of the guide display, etc. may change
●
slightly while watching One Seg.
The Viewing Touch Key is turned off about 15
●
seconds after it lights. Pat the Viewing Touch Key
or press , , or to light it again.
.
Use
Select a station in order/
reverse order of the remote-
control numbers.
for over a second.
Search broadcast stations
which can be received.
.
The volume can be adjusted
in 32 levels: 0 to 31.
.
for over a second.
.
Press
for over a second
and select [Yes].
Setting While Watching One Seg
Watching One Seg with Subtitles
You can display subtitles while watching a
program.
You can set it either in the Normal style or in the TV
ˎ
style.
Example: For the TV style
1
Press (Func) while watching One
Seg.
The Function menu appears.
For the Normal style
From the Function menu, select [Caption disp
set]→ a type of subtitles.
2
Use to select [Caption disp set] and
press .
The Caption disp set menu appears.
[Language1]:
The subtitle of Language 1 is displayed.
[Language2]:
The subtitle of Language 2 is displayed.
[OFF]:
The subtitle is not displayed.
3
Use to select a type of subtitles and
press .
The subtitle is set.
Whether subtitles are provided or not depends
●
on the program.
When no subtitle is provided on a program,
●
the subtitle is not displayed regardless of the
Caption disp set.
Displaying the Guide Display All the Time
You can set whether to display the guide
display, icon, etc. all the time in the TV style.
You can set it only in the TV style.
ˎ
1
Press (Func) while watching One
Seg.
The Function menu appears.
2
Use to select [Guide always on] and
press .
The Guide always on setting menu appears.
1Seg
Continued
259
Page 62

3
Use to select [ON]/[OFF] and press
.
The Guide always on is set.
When the guide display, icon, etc. are displayed,
●
part of video may not be seen.
Adjusting the Image Quality
You can set the image quality of the video
portion.
You can set it either in the Normal style or in the TV
ˎ
style.
Example: For the TV style
1
Press (Func) while watching One
Seg.
The Function menu appears.
For the Normal style
From the Function menu, select [Image quality]
an image quality.
→
2
Use to select [Image quality] and
press .
The Image quality menu appears.
[Normal]:
The standard image quality emphasized
naturalness.
[Sharp]:
Sharply edged image quality.
[Dynam.]:
1Seg
The clear image quality in which an edge and
contrast of an image is emphasized.
3
Use to select an image quality and
press .
The image quality is set.
Setting to Adjust the Light Automatically
You can set whether to adjust automatically
the display light brightness by the Brightness
Sensor to adapt for the surrounding brightness
while watching One Seg.
You can set it either in the Normal style or in the TV
ˎ
style.
Example: For the TV style
1
Press (Func) while watching One
Seg.
The Function menu appears.
For the Normal style
From the Function menu, select [Auto Disp light]
[ON]/[OFF].
→
2
Use to select [Auto Disp light] and
press .
The Auto Disp light display appears.
[ON]:
Adjust the light automatically.
[OFF]:
Do not adjust the light automatically.
3
Use to select [ON]/[OFF] and press
.
The Auto Disp light is set.
Adjusting the Brightness of the Display
You can set the display light brightness when
you watch One Seg.
You can set it either in the Normal style or in the TV
ˎ
style.
Example: For the TV style
1
Press (Func) while watching One
Seg.
The Function menu appears.
For the Normal style
From the Function menu, select [Display light]
brightness.
2
Use to select [Display light] and
→
press .
The Display light menu appears.
3
Use to select brightness and press
.
Select brightness from [1 to 5].
260
Page 63

Switching between the Primary/Secondary
Sounds
You can switch the sound between the primary
and secondary sounds.
You can switch the sound only in the Normal style.
ˎ
1
Press (Func) while watching One Seg.
The Function menu appears.
2
Select [Switch sound] and press .
The screen for selecting the Switch sound appears.
[Primary sound]:
The primary sound is played back.
[Secondary sound]:
The secondary sound is played back.
3
Select a sound and press .
The Switch sound is set.
Even if the Switch sound is set to [Secondary
●
sound], the primary sound is played back when
there is no secondary sound for the program
which you are watching.
Switching between the Main/Sub Sounds
You can switch the sound between the main
and sub sounds.
You can switch the sound only in the Normal style.
ˎ
1
Press (Func) while watching One Seg.
The Function menu appears.
2
Select [Main/Sub] and press .
The screen for selecting the Main/Sub appears.
[Main sound]:
The main sound is played back.
[Sub sound]:
The sub sound is played back.
[Main+Sub sound]:
The main sound is played back from the left
speaker and the sub sound is played back from
the right speaker.
3
Select a sound and press .
The Main/Sub is set.
Even if the Main/Sub is set to [Sub sound]/
●
[Main+Sub sound], the main sound is played
back when there is no sub sound for the program
which you are watching.
Using the Sleep Timer
You can set to terminate One Seg automatically
after the certain period of time.
You can set it either in the Normal style or in the TV
ˎ
style.
Example: For the TV style
1
Press (Func) while watching One
Seg.
The Function menu appears.
For the Normal style
From the Function menu, select [Sleep] → a time
before terminating One Seg automatically.
2
Use to select [Sleep] and press .
The Sleep setting menu appears.
3
Use to select a time before
terminating One Seg automatically and
press .
Select from [OFF], [30min], [60min], [90min], and
[120min].
Using the Program Guide
i-αppli
Using the program guide i-αppli, you can
activate One Seg by selecting a program from
within the program guide and set a timer for
watching or recording a program.
“G
ガイド番組表リモコン
ˎ
List Remote Control) is preinstalled as the program
guide i-αppli (P.211). For details, see the “Mobile
Phone User’s Guide 【i-mode】 FOMA version”.
<Program guide>
” (G-GUIDE TV Program
1Seg
Continued
261
Page 64

1
From the Menu, select [1 Seg] → [Program
guide] and press .
The display shown is an
※
image for explanatory
purpose and may be
different from the actual
display. The TV program
list is displayed according
The program guide i-αppli is started and “
“ ” appears.
To start the program guide i-αppli while watching in
the Normal style
Press (EPG). You can also start the program
guide i-αppli when, from the Function menu,
select [Program guide].
To change the software to be activated by the
Program guide key
Move the cursor to the software in the list of
i-αppli software and from the Function menu,
select [Individual set] → [Program guide key]
[Yes]/[No] (P.209).
When you select a program in the “G
●
表リモコン
Control) display, you can watch the selected
program by pressing (TV起動).
Setting a Timer for Watching/Recording
1Seg
” (G-GUIDE TV Program List Remote
to your location.
a One Seg Program
You can set a timer for watching or recording
a One Seg program. When you set a timer for
watching a program, the alarm sounds to notify
you of the start of the program at the specified
date/time. You can save up to 50 timer settings
for watching and recording programs.
When the channel list is not set, you cannot set a
ˎ
timer for watching or recording a program.
The copy control signal (indicating that “the program
ˎ
cannot be recorded (Copy Never)”, “the program
can be recorded only once (Copy Once)”, or “the
program can be recorded without restrictions (Copy
Free)”) is placed in One Seg. They are set by each
broadcast station.
If the copy control signal of a program is one of
ˎ
“the program can be recorded only once (Copy
Once)” and “the program can be recorded without
restrictions (Copy Free)”, the program can be
recorded.
ガイド番組
<Booking list>
When the copy control signal changes to “the
ˎ
program cannot be recorded (Copy Never)” while
recording a program, the recording stops. Video
data recorded up to that point is saved.
When you set a microSD memory card as a place
ˎ
to save a recorded video, insert a microSD memory
card beforehand.
1
From the Menu, select [1 Seg] → [Booking
list] and press .
” or
Rsrv data list
2007/11/28 Wed18:00
○○テレビ
明日の天気
The Res. data list display appears.
To delete a timer for watching/recording a program
To edit a timer for watching/recording a program
→
To display the detailed information of a timer for
watching/recording a program
2
Press (Func).
The Function menu appears.
3
Select [Create] and press .
Edit Reservation
10
1/1
Move the cursor to a timer and from the Function
menu, select [Delete] → [Delete one] → [Yes]. To
delete all timers, from the Function menu, select
[Delete]→ [Delete all], enter the Security code,
and select [Yes].
Move the cursor to a timer and press (Edit).
Move the cursor to a timer and press .
Booking program
2007/11/28 Wed
18:00
2007/11/28 Wed
20:00
○○テレビ
明日の天気
ON
30sec.before
Eyd
Count
To 2007/12/07
262
Page 65

4
Save each item.
Allowed to be saved
:
○
Icon Setting data
Select [Booking program]
(Blue)/ [Timer recording] (Pink).
Enter a starting date within
the range from 2000/01/01 to
2050/12/31.
Enter a starting time in 24-hour
format.
Enter an ending date from the
starting date to 2050/12/31.
Enter an ending time in 24-hour
format.
Select a channel.
Enter a program name within
48 full-width or 96 half-width
characters.
Select [ON]/[OFF] of the alarm.
When you set to [ON],
ˎ
you can select how many
minutes before the starting
time of timer the alarm
should sound. If you want to
sound the alarm at the same
time as the starting time,
select [00sec.before].
Select the repeat type.
[OFF]:
Do not repeat the timer.
[Eyd]:
Repeat the timer every day.
[Day]:
Repeat the timer on the
same day of the week.
[Month]:
Repeat the timer every
month on the same day.
When the repeat type is set
ˎ
to other than [OFF], enter the
repeat count within 01 to 99
times.
Cfm. activation
Select whether to display the
Cfm. activation display when
the Booking alarm is activated.
[ON]:
Display the Cfm. activation
display.
[OFF]:
Do not display the Cfm.
activation display.
When the alarm is set to
ˎ
[OFF], it cannot be set.
Not allowed to be saved
:
−
Booking
program
○○
○○
○○
−○
−○
○○
○○
○−
○○
○−
Timer
recording
Icon Setting data
Dur multitask Rec
Select whether to display the
screen for confirming to start
recording when the time to
start recording comes while
another function which cannot
be activated at the same time
is running.
[Pref. recording]:
Terminate the executed
function automatically and
start recording.
[Prefer operat.]:
Display the screen for
confirming whether to
terminate the executed
function. When you select
[Yes], terminate the
executed function and start
recording. When you select
[No], a timer for recording a
program is canceled.
Output of Rec
Select [Data Box]/[microSD]
as a place to save a recorded
video.
Booking
Timer
program
recording
−○
−○
1Seg
Continued
263
Page 66

5
Press (Complete).
A timer for watching/recording a program is saved.
To play back a recorded video, see “Displaying/
ˎ
Playing Back One Seg” (P.277).
To set a timer for recording a program
The display for confirming the notabilia of the
service appears. To save a timer for recording a
program, confirm the contents and select [Yes].
If you do not want to display the confirmation
display next time, select [Yes,from then on]. The
confirmation display no longer appears.
To restore the display for confirming the
ˎ
notabilia of the service, perform the Rset
permission set (P.256).
You can also set a timer for watching/recording
●
a program using a program information provided
by the program guide i-αppli, site, mail, etc.
If the Alarm, Schedule alarm, and Booking alarm
●
are set to start at the same time, the following
priority is applied.
1. Schedule alarm
2. Booking alarm
3. Alarm
If there is a timer that is set to start at the same
●
time as the new timer for recording a program,
the confirmation screen appears. If you select
[Yes], the previously saved timer for recording a
program is overwritten by the new one.
When the ending or starting date and time set
●
for the previously saved timer for recording a
program is the same as the starting or ending
date and time set for the newly saved one
1Seg
respectively, the confirmation screen appears. If
you select [Yes], the preceding timer terminates
slightly earlier than the specified time.
If the Booking list is updated because of the
●
saved reservation being started while editing a
reservation or other reason, the reservation may
not be saved successfully.
If the repeat type of the schedule set for the 31st
●
is set to [Month], the schedule is set for the last
day of the month for months with less than 31
days.
At the Booking Alarm Time
The alarm tone sounds for about 30 seconds
with the indicator flashing.
Booking alarm
18:00
○○テレビ
明日の天気
ON
30sec.before
Eyd
10 Count
To stop the alarm tone
Press any key. When you stop the alarm tone,
the display informing the release of the alarm
appears. To turn off the display, press (OK) or
.
When you do not stop the alarm tone
The display informing the release of the alarm
appears. To turn off the display, press (OK) or
.
When the Cfm. activation is set to [ON]
After you turn off the display informing the
release of the alarm, the Cfm. activation display
appears. Select [Yes] to activate One Seg.
When the Cfm. activation is set to [OFF]
Press for over a second to activate One
Seg.
If you set an i-motion with video and sound
●
tracks to the alarm tone, a movie in the i-motion
is displayed.
If the alarm time comes during a voice/
●
videophone call or PushTalk communication,
the default alarm tone sounds and default
alarm image is displayed. The vibrator does not
operate.
The Booking alarm does not operate in the
●
following cases.
- When the FOMA terminal is powered off
- While the Lock all is set
- While the Personal data lock is set
- While the Omakase Lock is set
- While updating the software
264
Page 67

If the alarm time comes in the following cases,
●
the alarm may operate when the status changes
to during a call or stand-by.
- While placing/receiving a voice/videophone
call or originating/receiving a PushTalk call
- During packet communication
- During the infrared communication/while the
infrared remote control is being used
- During the iC communication
- During data communication or while reading/
writing data from/into a microSD memory card
on a PC with the FOMA terminal connected
using the USB cable
- While recording a still image/movie
- While the Schedule alarm is sounding
- Beep while receiving Area Mail, while
sounding Area Mail ring tone, or displaying
Area Mail
If you leave the FOMA terminal with the battery
●
pack removed or fully expended for a long
period of time, the date and time is reset, and the
Booking alarm may not operate correctly.
At the Timer Recording Starting Time
A recording is automatically started. When the
timer for recording a program starts while One
Seg is not activated, “ ” appears. After the
recording is completed, the notification icon
“ ” (Timer Rec result) appears in the stand-by
display.
Extend the One Seg Antenna fully while recording a
ˎ
program.
Timer Rec result
1
To check the reservation result
Press (Link) in the stand-by display and select
“ ”.
○△の不思議
10
時〜
毎週木曜よる
第
225
回
ペンギンの一生
■豆知識
■クイズ
■撮影裏話
■次回予告
○×ch
○△の不思議
Preparing to Rec
When the timer recording starting time comes while
watching One Seg
The Preparing to Rec display appears. To cancel
recording, press and select [Yes].
To cancel the recording during timer recording
Press while recording and select [Yes].
Even if the Dur multitask Rec is set to [Prefer
●
recording], the timer for recording a program
may be canceled in a case such as when there
are too many active functions or there is not
enough memory. Also, while transferring data to
the microSD memory card, the recording does
not start.
If the Dur multitask Rec is set to [Prefer
●
operat.] and when functions that cannot be
run simultaneously are active, the screen for
confirming whether to start the timer recording
appears. When you select [Yes], the timer
recording starts.
However, regardless of selecting [Yes] on the
confirmation screen, the timer for recording a
program may not start in a case such as when
there are too many active functions or there is not
enough memory.
Even if the FOMA terminal is outside of the
●
broadcast service area when the timer recording
starting time comes, the timer recording works
effectively.
However, the timer recording fails if the FOMA
terminal is outside of the broadcast service area
all the time from the beginning to the end of the
scheduled recording time. The message “Could
not receive broadcast wave” appears in the
Result detail display (P.251).
1Seg
Continued
265
Page 68

Timer recording does not start in the following
●
cases.
- When the FOMA terminal is powered off
- When the UIM is not inserted
- While the Lock all is set
- While the Personal data lock is set
- While the Omakase Lock is set
- During packet communication
- During 64K data communication
- During the infrared communication
- During the iC communication
- While using the Data Security Service
- While updating the software
Setting the Operation for the
Booking Alarm
You can set the detailed operation for the
Booking alarm.
1
Press (Func) in the Res. data list
display.
The Function menu appears.
2
Select [Booking ALM set] and press .
Alarm setting
Alarm tone
Alarm(std)
Alarm image
視聴予約
Alarm volume
Vibrator
Color
1Seg
3
Select an alarm tone from MUSIC/
i-motion/Melody of the Data Box at [Alarm
tone].
You can set the following files. You can select a
ˎ
アラーム
鳴動
4
OFF
C5
Chaku-Uta® from [i-motion].
Category
MUSIC
i-motion
Melody SMF/
※
File
File size Image size
format
AAC-LC/
※
※
Some files may not be set.
Max. 5M
HE-AAC
bytes
MP4 Max. 10M
bytes
Max. 350K
MFi
bytes
Max. [VGA(640
480)]
When you select a Chaku-Uta Full® that has a
choice of specified playback ranges from [MUSIC]
The screen for selecting a type of setting
appears. If you select [Full song], the whole track
of Chaku-Uta Full® is set for the alarm tone. If you
select [Point], the specified playback range of
Chaku-Uta Full® is set for the alarm tone.
To mute the alarm tone
Select [Silent].
To check the alarm tone
Move the cursor to the alarm tone and press
(Play).
4
Select an image from My picture/i-motion
of the Data Box at [Alarm image].
You can set the following files.
ˎ
Category
My picture
i-motion
Some i-motion may not be set.
※
To check the alarm image
Move the cursor to the alarm image and press
5
Set the volume at [Alarm volume].
Select from [OFF] and [1 to 6].
To set the volume to [OFF]
Press at level 1.
6
Select a vibration type at [Vibrator].
[Pattern1]:
Set short intermittent vibration.
[Pattern2]:
−
×
−
Set long intermittent vibration.
※
(Play).
File
File size Image size
format
GIF/
Max. 250K
JPEG
bytes
SWF Max. 100K
bytes
MP4 Max. 10M
bytes
Max. [Stand-by
(480×864)],
Max. W480
×
H288 for GIF
animation
−
Max. [VGA(640
480)]
×
266
Page 69

[Link melody]:
Vibrates in accordance with the alarm tone. If you
have set the alarm tone to [Silent] or to a melody
that cannot be synchronized with the vibrator
operation, the vibrator vibrates using [Pattern1].
[OFF]:
Do not set the vibrator.
To check the vibration
Move the cursor to the pattern and press
(Confirm).
7
Select an indicator color at [Color].
Select from 12 indicator colors or [C13:ALL]
(indicator flashes in 12 colors in sequence).
When you move the cursor, the indicator flashes
accordingly.
8
Press (Complete).
The operation for the Booking alarm is set.
When you set an i-motion or Chaku-Uta Full® for
●
the alarm tone or set an i-motion for the alarm
image, the settings may be changed in some
cases.
Checking the Reservation Result
Up to 30 results of Timer recording can be
saved.
1
Press (Res.Rslt) in the Res. data list
display.
Rsrv rslt list
2007/11/28 Wed18:00
○○テレビ
明日の天気
2007/11/29 Thu21:00
△△
今日のニュース
To delete a reservation result
1/2
テレビ
Move the cursor to a reservation result and from
the Function menu, select [Delete one] → [Yes].
To delete all reservation results, from the Function
menu, select [Delete all], enter the Security code,
and select [Yes].
2
Select a reservation result and press .
Result detail
[Result]
Timer recording
finished completely
2007/11/28 Wed
18:00
2007/11/28 Wed
20:00
○○テレビ
明日の天気
Eyd
10 Count
To 2007/12/07
Using Data Broadcasting
One Seg allows you to use the data
broadcasting in addition to the video and
sound broadcasting. Various kinds of
information including still images and movies,
such as sites linked with programs are
available.
You cannot display the data broadcasting in the TV
ˎ
style.
During the data broadcasting mode, you cannot
ˎ
select a broadcast station.
1
Press (TV/DATA) while watching One
Seg.
” appears and the mode is switched to the data
“
broadcasting mode.
Half-screen display Full-screen display
○△の不思議
10
時〜
毎週木曜よる
第
225
回
ペンギンの一生
■豆知識
■クイズ
■撮影裏話
■次回予告
○×ch
○△の不思議
Rec
To go back to the video mode
Press (TV/DATA). Every time you press , the
mode is switched between the video and data
broadcasting modes.
To switch the data broadcasting screen between half
and full screens
Press (TV/DATA) for over a second during the
data broadcasting mode. Every time you press
for over a second, the screen is switched
between half and full screens.
To display the certificate
From the Function menu, select [Certificates].
○△の不思議
毎週木曜よる
10
時〜
第
225
回
ペンギンの一生
■豆知識
■クイズ
■撮影裏話
■次回予告
最新情報
●ドラマ
●ニュース・ドキュメンタリー
●バラエティ
●スポーツ
○×ch
○△の不思議
Rec
1Seg
Continued
267
Page 70

To reload the data broadcasting site
From the Function menu, select [Reload].
To go back to the data broadcasting from the data
broadcasting site
From the Function menu, select [Back to data
BC.].
2
Select an item and press .
When you access an i-mode site from the data
●
broadcasting, the site is displayed in full-screen
and the video and sound of One Seg are not
output.
If you select [Yes] on the screen for confirming
●
whether to connect to i-mode that appears while
using data broadcasting or data broadcasting
site, the FOMA terminal connects to i-mode. If
you select [Yes,from then on], the confirmation
screen no longer appears. The packet
communication charge may be required because
of contents of data broadcasting or data
broadcasting site being updated automatically.
To display the confirmation screen again,
perform the Rset permission set (P.256).
The packet communication performed when
●
connecting to a data broadcasting site is
covered by the Pake-Houdai/Pake-Houdai Full
service.
For the operation while the site is displayed,
●
follow the same steps as in “Using Sites”
(P.162). You cannot enter pictographs in the
text box while in a data broadcasting or data
broadcasting site.
1Seg
Using Displayed Information
Some data broadcasting or data broadcasting
sites allow you to use displayed information
to activate Phone To, Mail To, or i-αppli To
function, download ToruCa cards, and save
entries in the Phonebook or Schedule.
Saving as a TV link
You can save up to 50 TV links.
ˎ
1
Select an item that can be saved as a TV
link and press .
2
Select [Yes] and press .
The TV link is saved.
Displaying the Saved TV link
1
From the Menu, select [1 Seg] → [TVlink]
and press .
TVlink list
○○番組
□△ズーム
○
△
△△
The following icons show the type of TV link
ˎ
To display the detailed information of a TV link
Move the cursor to a TV link and press (Detail).
To delete a TV link
Move the cursor to a TV link and from the
Function menu, select [Delete one] → [Yes].
To delete all TV links, from the Function menu,
select [Delete all], enter the Security code, and
select [Yes].
2
Select a TV link and press .
The selected TV link is displayed.
When the screen for confirming whether to connect
to the i-mode appears
Select [Yes].
1/4
入門
発見
Data broadcasting site
i-mode site
Memo information
TV link with expiration date set
Using TVlink
Depending on the data broadcasting or data
broadcasting sites, you can save a URL or
memo information as a TV link. Once the
frequently used site or memo information is
saved as a TV link, you can display a desired
site or memo information directly.
268
<TVlink>
Page 71

Recording One Seg While
Watching
You can save a program as a video and a
scene of a program as a still image while
watching One Seg.
The copy control signal (indicating that “the program
ˎ
cannot be recorded (Copy Never)”, “the program
can be recorded only once (Copy Once)”, or “the
program can be recorded without restrictions (Copy
Free)”) is placed in One Seg. They are set by each
broadcast station.
If the copy control signal of a program is one of
ˎ
“the program can be recorded only once (Copy
Once)” and “the program can be recorded without
restrictions (Copy Free)”, the program can be
recorded.
When the copy control signal changes to “the
ˎ
program cannot be recorded (Copy Never)” while
recording a program, the recording stops. Video
data recorded up to that point is saved.
Recording a Video
A recorded video is saved in either the [Video]
folder in 1Seg of the Data Box or in 1Seg of a
microSD memory card.
Estimated number and recording time of
■
videos you can record
Place to save to
Data Box 99 items About 30 minutes
microSD memory
card (2GB)
1 Depending on the data size, the number of
*
videos you can save may decrease.
2 The recording times are estimated values. They
*
vary depending on the contents of a program
to be recorded.
To set a place to save a recording video, see
ˎ
“Setting a Place to Save a Recorded Video to”
(P.255).
1
Press for over a second while
watching One Seg.
The display is switched to the Preparing to Rec
display. After time for preparation, recording starts
and “
Estimated max.
99 items About 10 hours
” appears.
number
<Record One Seg>
Estimated max.
1
*
recording time
43 minutes
2
*
2
To stop recording, press , select [Yes],
and press .
The recording is stopped and a video is saved.
To play back a saved video, see “Displaying/
ˎ
Playing Back One Seg” (P.277).
For the TV style
Press , select [Yes], and press .
A file name of a recorded video appears in
●
the format of the recorded year, month, date,
hour, and minute. For example, when a video is
recorded at November 1, 2007, 9:05, it appears
as “200711010905NNN”. A number “000 to 999”
is assigned to “NNN”.
You cannot set a recorded video for the stand-by
●
display, ring tone, incoming image, etc.
When the Rec T.shift now/Play T.shift now is
●
activated, you cannot start recording a program.
You cannot start recording a video while the
●
FOMA terminal is outside of the broadcast
service area.
Recorded video can only be moved from the
●
Data Box to the microSD memory card. A video
cannot be moved/copied from the microSD
memory card to the Data Box.
If the free space of the storage area is being
●
decreased during recording, the message
informing that there is not enough space appears
and the recording ends. The video recorded up
to this point is saved.
Recording a Still Image
You can save up to 50 recorded still images.
1
Press while watching One Seg.
A still image is recorded and saved automatically.
A One Seg recorded still image cannot be saved
ˎ
in the microSD memory card.
To play back a saved still image, see “Displaying/
ˎ
Playing Back One Seg” (P.277).
1Seg
Continued
269
Page 72

Subtitles and data broadcasting cannot be
●
recorded as a still image.
A file name of a recorded still image appears
●
in the format of the recorded year, month, date,
hour, and minute. For example, when a still
image is recorded at November 1, 2007, 9:05, it
appears as “200711010905NNN”. A number “000
to 999” is assigned to “NNN”.
You cannot set a recorded still image for the
●
stand-by display, incoming image, etc.
You cannot record a still image while the Rec
●
T.shift is in progress, the FOMA terminal is
outside of the broadcast service area, or video
playback is in progress.
The number of images that can be saved may
●
decrease depending on the size of still images.
Starting Time Shift Play
While Watching
You can play back a time-delayed copy of a
program after pausing watching One Seg.
While playing back, a video and sound are played
ˎ
back at about 1.3× speed. When the time shift
play is ended, the original broadcasting program is
returned.
When you start the Time shift recording while you
ˎ
are talking on the phone, extend the One Seg
Antenna fully.
You can set it either in the Normal style or in the TV
ˎ
style.
1Seg
Example: For the TV style
1
Press (Func) while watching One
Seg.
The Function menu appears.
For the Normal style
Press (T.shft) and select [Yes]. To play back,
press (Play).
2
Use to select [Time shift] and press
.
3
Use to select [Start] and press .
<Time shift>
4
Use to select [Yes] and press .
The Time shift recording is started and the Rec
T.shift now display appears.
To cancel the Time shift recording
From the Function menu, select [Time shift]
[Quit]→ [Yes].
To cancel the Time shift recording in the Normal
style
Press and select [Yes].
5
Press (Func) to play back.
The Function menu appears.
6
Use to select [Time shift] and press
.
7
Use to select [Play] and press .
The Time shift play is started.
To quit the Time shift play
From the Function menu, select [Time shift]
[Quit]→ [Yes].
To quit the Time shift play in the Normal style
Press (Quit) and select [Yes].
When there is an incoming voice/videophone or
●
PushTalk call while watching One Seg, the Time
shift recording is automatically started. After the
call is disconnected, the screen for confirming
whether to play back a program appears. Select
[Yes] to start the Time shift play.
The recording time of video you can record
●
using the Time shift recording is up to about 90
seconds. When 90 seconds are past, the older
part of the video is overwritten by the newer one.
Every latest 90 seconds of video is maintained.
When the Time shift recording is too short, the
●
Time shift play may not start, or it may stop
immediately to return to the original broadcasting
program.
You cannot start the Time shift recording when
●
the FOMA terminal is outside of the broadcast
service area. However, if the FOMA terminal
becomes outside of the broadcast service area
while the Time shift recording is in progress, the
recording continues.
Regardless of whether the data broadcasting
●
is displayed in half-/full-screen, you cannot
start the Time shift recording during the data
broadcasting mode.
→
→
270
Page 73

Receiving Mail While
Watching One Seg
While watching One Seg, you can read
received mail or reply to the mail. The display
style of the received mail varies depending on
the Mail disp set. The default setting is set to
[OFF] (P.256).
When the Mail disp set is set to [Display
■
mail]
In
携帯なつ子
Happy Birthday
Happy birthday! Its alr
eady one year since you
left. You surely familia
rize yourself with the l
ocal culture. I hope you
Multi-window
When you receive mail in the Normal style, the screen
for confirming whether to display received mail
appears. Select [Yes] to display the contents of the
mail and “
To reply mail/SMS using the Quote function
Press (Quote). The Edit mail display or Edit SMS
display appears.
Follow the same steps as in “Compose and send
ˎ
mail” (P.179, step 3 to 5) or “Compose and send
SMS” (P.202, step 3 to 4).
To switch to the Video mode
Press (TV/Mail). Every time you press (TV/
Mail), the mode is changed between Video and Mail
modes.
To end the mail display
Press (QuitMail).
“ ” appears in the Video
mode and “ ” appears in the
Mail mode.
” appears.
Mail cannot be displayed in the TV style but the
●
Telop text is displayed.
Mail cannot be displayed when you receive
●
it from the sender who is saved as Secret. To
display mail, set the Secret display to [ON].
Mail cannot be displayed when it is sent from a
●
sender who is not saved in the Phonebook.
If you receive several mails continuously, the last
●
received mail is displayed.
When a message appears in the Mail mode, the
●
message is not displayed completely and you
may not be able to perform an operation. Press
(TV/Mail) to switch to the Video mode, the
message appears correctly, and then you can
perform the operation.
When the Mail disp set is set to [Display
■
telop]
When you receive mail, the Telop text is displayed.
When you receive i-mode mail from the sender who is
saved in the Phonebook, the name of the sender and
subject are added to the Telop text. When SMS is sent
from the sender who is saved in the Phonebook, the
name of the sender and “SMS” are added.
For the Normal style
○△の不思議
10
時〜
毎週木曜よる
第
225
回
ペンギンの一生
■豆知識
■クイズ
■撮影裏話
■次回予告
○×ch
の不思議
○
△
Received mail
携帯なつ子
Telop
For the TV style
○△の不思議
○×ch
Tel o p
Received mail
携帯なつ子
1Seg
Volume
Channel Rec Func Quit
Continued
271
Page 74

When you receive mail from a sender who is
●
saved as Secret, the name of the sender is not
displayed. To display a name, set the Secret
display to [ON].
When the mail is being saved in the folder for
●
which the Mail security is set, the name and
subject are not displayed.
When the Public mode (Drive mode) is set, the
●
Telop text is not displayed.
Mail ring tone, vibrator, and incoming indicator
●
are not operated.
If you receive several mails or messages
●
continuously, the information of the last received
mail or message is displayed in the Telop text.
Various Settings for One
Seg
You can set functions regarding One Seg, reset
the settings, etc.
Deleting the Broadcast Storage
Area
You can delete information stored in the
broadcast storage area.
1
From the Menu, select [1 Seg] → [1Seg
setting]→ [Delete storage area] and
press .
1Seg
The BC group list display appears.
To delete data by each affiliated channel group
Move the cursor to an affiliated channel group
and from the Function menu, select [Delete aff.
Data]→ [Yes]. To delete data of all affiliated
channel groups, from the Function menu, select
[Del all aff.data], enter the Security code, and
select [Yes].
2
Select an affiliated channel group and
press .
The list of the broadcast stations in the affiliated
channel group is displayed.
3
Select a broadcast station and press
(Delete).
4
Select [Yes] and press .
Data of the selected broadcast station is deleted.
<1Seg setting>
<Delete storage area>
Setting Not to Display Images of
Data Broadcasting Site
You can set whether to display images
provided by data broadcasting sites.
This setting is synchronized with that of the Display
ˎ
img of i-mode (P.170).
1
From the Menu, select [1 Seg] → [1Seg
setting]→ [Display img] and press .
2
Select [ON]/[OFF].
The Display img is set.
When set to [OFF], “
images.
Even if the Display img is set to [ON], some
●
images may not be displayed correctly.
<Display img>
” is displayed instead of
Setting Not to Hear Sound Effect of
Data Broadcasting Site
You can set whether to hear sound effect
provided by data broadcasting/data
broadcasting sites.
1
From the Menu, select [1 Seg] → [1Seg
setting]→ [Sound effect] and press .
2
Select [ON]/[OFF].
The Sound effect is set.
The volume of the Sound effect follows that set
●
for watching One Seg.
<Sound effect>
272
Page 75

Setting a Place to Save a
Recorded Video to
You can set a place to save a recorded video.
1
From the Menu, select [1 Seg] → [1Seg
setting]→ [Output of Rec] and press .
The Save to display appears.
[Data Box]:
A video is saved in the [Video] folder of 1Seg of
the Data Box.
[microSD]:
A video is saved in 1Seg of the microSD memory
card.
2
Select a place to save to and press .
The Output of Rec is set.
When you set the Output of Rec while recording
●
a video, the setting is effective from the next
recording.
<Output of Rec>
Setting the Operation for Incoming Mail
While Watching One Seg
You can set whether to display contents of the
received mail or telop when you receive mail
while watching One Seg.
1
From the Menu, select [1 Seg] → [1Seg
setting]→ [Mail disp set] and press .
[Display mail]:
Display the screen for confirming whether to
display the contents of mail when you receive
mail.
[Display telop]:
Display the Telop text.
[OFF]:
Do not display anything.
When you watch in the TV style
In the watching display, from the Function menu,
select [Mail disp set] →[Mail]/[Telop]/[OFF].
<Mail disp set>
2
Select an operation which is performed
when you receive mail while watching.
The Mail disp set is set.
Even if the Mail disp set is set to [Display mail],
●
while watching One Seg in the TV style or when
receiving mail from the sender who is not saved
in the Phonebook, the mail is not displayed but
the Telop text is displayed.
Displaying a User’s Confirmation Screen for
Data Broadcasting Site
If you select [Yes,from then on] on the screen
for confirming whether to connect to i-mode,
which appears when using data broadcasting
or data broadcasting sites, the confirmation
screen no longer appears. To display the
confirmation screen again, perform the Rset
permission set.
1
From the Menu, select [1 Seg] → [1Seg
setting]→ [Rset permission set] and
press .
The Security code screen appears.
2
Enter the Security code and press
(OK).
The screen for confirming whether to perform the
Rset permission set appears.
3
Select [Yes] and press .
The Rset permission set is reset.
<Rset permission set>
1Seg
Continued
273
Page 76

Resetting the One Seg Settings to
the Default Settings
You can reset the settings of the functions
regarding the One Seg video and sound to the
default settings. The items that can be reset
are as follows.
Items set from
the Function
menu while
watching/
playing back a
program
Items set from
the 1Seg menu
The broadcast storage area and channel list are not
ˎ
reset.
By performing the Reset 1Seg set, the Rset
ˎ
permission set is also performed simultaneously.
1Seg
1
From the Menu, select [1 Seg] → [1Seg
setting]→ [Reset 1Seg set] and press .
The Security code screen appears.
2
Enter the Security code and press
(OK).
The screen for confirming whether to reset the One
Seg settings appears.
3
Select [Yes] and press .
The One Seg settings are reset.
Item Default setting
Caption disp set OFF
Guide always on ON
Image quality Normal
Display light 3
Auto Disp light ON
Switch sound Primary sound
Main/Sub Main sound
Auto off setting OFF
Display img ON
Sound effect ON
Output of Rec Data Box
Mail disp set OFF
Booking ALM set A l a r m tone:
<Reset 1Seg set>
Alarm(std), Alarm
image:
アラーム鳴動中
Alarm volume:
4, Vibrator: OFF,
Color: C5:Color5
視聴予約
,
274
Page 77

Full Browser
Displaying a Website Designed for PC ..................................................................... 280
Key Operations While Viewing a Website ................................................................. 280
Managing a Bookmark.............................................................................................. 285
Setting the Full Browser Functions ........................................................................... 286
275
Page 78

Displaying a Website
Designed for PC
You can view websites designed for PC on the
FOMA terminal using Full Browser.
Some websites may not be displayed at all or
ˎ
displayed incorrectly.
Note that the communication charge could be
ˎ
expensive if you exchange large volumes of data
such as viewing websites that contain a lot of
images or downloading files. For details on the
packet communication charge, see the “Mobile
Phone User’s Guide 【i-mode】 FOMA version”.
1
Press (i-mode) in the stand-by display,
select [Full Browser], and press .
Full Browser
Home
Bookmark
Go to location
Last accessed URL
Full Browser setting
The Full Browser menu appears.
2
Select [Go to location] → [Enter URL] and
press .
The Enter URL display appears.
To view the website saved as the Home page
Select [Home].
To view a website from a bookmark
Select [Bookmark] → a folder → a bookmark.
To view the website accessed last
Select [Last accessed URL] and press (Cnct).
3
Press (Edit) and enter the URL.
Full Browser
Enter the URL including “http://” within 512 halfwidth alphanumeric characters and symbols.
4
Press (Cnct).
○○○
△△△
ЧЧЧЧЧЧЧЧЧЧ
ЧЧЧЧЧ
□□□□□□
The website is displayed.
When the Access setting is set to [No], the
ˎ
screen for confirming whether to use Full
Browser appears. If you select [Yes] and [OK],
the Access setting is changed and the website is
displayed (P.288).
It may take time to display a website depending
●
on a website.
Full Browser does not support the following
●
functions.
- Displaying a Flash movie
- Plug-in
- Playing back a melody or music data
- Phone To
- Displaying PDF data
Some websites may communicate automatically.
●
Key Operations While
Viewing a Website
You can operate Full Browser both in vertical
and horizontal views.
The following key operations can be performed
while viewing a website.
276
Operating in Vertical View
○○○
△△△
ЧЧЧЧЧЧЧЧЧЧ
ЧЧЧЧЧ
□□□□□□
Page 79

Operating method
Operation Key operation
Move the pointer
Zoom out Press
Scroll to the upper page Press
Zoom in Press
Scroll to the left page Press
Display the PagePilot
display (Full page display)
Scroll to the right page Press
Display the previous page Press
Scroll to the lower page Press
Display the next page Press
Display the list of
bookmarks
Switch to the left window While displaying multiple
Switch to the right window While displaying multiple
The movement speed of the pointer can be changed
※
(P.287).
To change the function assigned to a key
From the Function menu, select [Short cut], select a
key, press (Edit), select a function to be assigned
to the key, and press (Complete).
To restore the default settings, press (Reset) in
the Short cut list display and select [Yes].
You can scroll pages using the JOG but you
●
cannot use the JOG to operate the pointer in a
page such as selecting items. To operate the
pointer, use the 4-way keys.
Press
※
It can be operated only in
the PC mode.
Press
It can be operated only in
the PC mode.
Press
windows, press
windows, press
.
.
.
.
.
.
.
or (History).
.
.
.
.
.
Operating in Horizontal View
You can operate the FOMA terminal held
horizontally, tilted 90 degrees from vertical.
1
Press (Func) in the Full Browser
display, select [Horizontal mode], and
press .
○○○
△△△
Vertical Select History
A website is displayed in horizontal view.
Operating method
Operation Key operation
Move the pointer Press
Switch the display to the
vertical view
View the previous page Press
OK Press
If you press (Vertical) while viewing a
●
website in horizontal view, the display may not
be switched to the vertical view immediately in
a case such as when the PagePilot display is
active. To switch to the vertical view, return to the
normal page viewing display.
Setting/canceling the full-screen display can be
●
performed only in vertical view (P.284).
Press
.
(Vertical).
(History).
.
Function Menus While Viewing a
Website
While viewing a website, press (Func)
to display the Function menu, and from the
Function menu, the following operations can
be performed.
Operations from the Function menu are not available
ˎ
in horizontal view. Switch to the vertical view before
using the Function menu.
Some functions cannot be activated while loading a
ˎ
page.
Full Browser
Continued
277
Page 80

Item Operation
Display the
previous page
Display the next
page
Reload a website Select [Reload].
Save a website in
the Bookmark
Connect to
another site
Use a history※Select [History].
Display a website
Save a website as
the Home page
Display the website
saved as Home
Display in
horizontal view
Display in full-
screen view
Save an image Select [Acquire image] → [Save]/
Display multiple
windows
Display the Flame
selection display
Search a
character string
in a page
Send a URL by mail
Display a website
correctly
Full Browser
Retry to play back
an animation
Display a title of a
website
Display a website
URL
Display a certificate
Set Full Browser Select [Full browser set] (P.286).
Display a function
assigned to a key
If there is not enough memory, the image which is
※
different from the one displayed in the shrinking
display may appear.
Select [Previous page].
Select [Next page].
Select [Add bookmark]
[Complete]→ a folder.
Select [Bookmark] → a folder → a
bookmark.
Select [Go to location] (P.280, 283).
Select [Set as Home URL] → [Yes].
Select [Home].
Select [Horizontal mode].
Select [Full scrn/normal].
[Save&Setting]→ an image.
Select [Window] (P.283).
Select [All frames] (P.283).
Select [Search] (P.285).
Select [Compose message]
(P.207).
Select [Word translate].
Sequentially convert the
ˎ
character codes and display
the site again.
Select [Retry].
Select [Title].
Select [URL].
To copy the URL, press
ˎ
(Copy).
Select [Certificates] (P.284).
Select [Short cut] (P.281).
Action Menu While Viewing a
Website
While viewing a website, press (Action)
to display the Action menu, and from the
Action menu, the following operations can be
→
performed.
Operations from the Action menu are not available
ˎ
in horizontal view. Switch to the vertical view before
using the Action menu.
The Action menu which can be actually performed
ˎ
varies depending on a displayed website or position
of the pointer.
Item Operating method
Display a link in a new
window
Display a linked URL Select [Display Link URL]
Download and save an
image
Save an image and set it
as the stand-by display
Zoom in Select [Zoom in].
Zoom out Select [Zoom out].
Select a portion of an
entire page to display
Select an area or grab a
display to move
Copy a text Select [Text copy] (P.284).
Paste a text Select [Text paste] (P.284).
Select [Open New
Window] (P.283).
(P.283).
Select [Save image]
(P.285).
Select [Save image&set].
Select [PagePilot] (P.284).
Select [Drag] (P.284).
278
Page 81

Displaying Using the URL
History
Up to 50 websites that have been displayed
by entering their URLs are saved in the URL
history. The sites can be directly accessed
from the URL history.
If a total of 50 URLs is saved in the URL history, the
ˎ
URL is overwritten from the oldest.
1
From the Full Browser menu, select [Go
to location] → [URL history] and press
.
The URL history display appears.
To display a URL
Move the cursor to a URL history and from the
Function menu, select [URL]. When you press
(Cnct), it is connected to its website.
To send a URL history by mail
Move the cursor to a URL history and from the
Function menu, select [Compose message].
Follow the same steps as in “Compose and
ˎ
send mail” (P.207, step 2 to 5).
To delete a URL history
Move the cursor to a URL history and from the
Function menu, select [Delete] → [Delete one]
[Yes]. To delete several URLs, from the Function
menu, select [Delete] → [Select&delete], select
URLs, press
delete all URLs, from the Function menu, select
[Delete]→ [Delete all], enter the Security code,
and select [Yes].
2
Select a URL history and press (Cnct).
The website of the selected URL history is
connected.
(Complete), and select [Yes]. To
→
Displaying Websites in the
Multiple Windows
You can view several websites by switching
windows.
Up to five windows can be displayed. However, you
ˎ
may not be able to display the maximum number of
windows depending on displaying websites.
Example: Di spl aying the Home page in the new
window
1
Press (Func) in the Full Browser
display, select [Window], and press .
To display a link in the new window
Move the cursor to a link in the Full Browser
display, press (Action), and select [Open New
Window].
To display a URL of a link
Move the cursor to a link in the Full Browser
display, press (Action), and select [Display
Link URL].
2
Select [Open New Window] and press .
To display a website in the back window
Select [Open Back Window].
To close the window
Select [Close Window] → [OK].
To change the window
Select [Change Window] → a window being
switched.
3
Select [Home].
The Home is displayed in the new window.
To display a website from a bookmark
Select [Bookmark] → a folder → a bookmark.
To display a website by entering a URL
Select [Go to location] → [Enter URL], press
(Edit), enter a URL, and press (Cnct).
To display a website from a URL history
Select [Go to location] → [URL history] → a URL.
Displaying a Frame Page
You can display a website consisted of multiple
frames. Select a frame from the frame selection
display to display a page.
1
Use to select a frame in the frame
selection display and press .
The selected frame is displayed.
To go back to the frame selection display
From the Function menu, select [All frames].
Full Browser
Continued
279
Page 82

Changing the Display
You can set whether to display the guide
display in the display.
1
Press (Func) in the Full Browser
display.
The Function menu appears.
2
Select [Full scrn/normal] and press .
The Full scrn/normal is set.
Displaying a SSL-/TLSCompatible Page
You can display a SSL-/TLS-compatible page
whose URL begins with “https://” using Full
Browser.
SSL/TLS is a method to perform data communication
ˎ
safely using the authentication/cryptograph
technology.
Establishing
SSL/TLS session
(Authenti−
cating)
When you display a SSL-/TLS-compatible page,
the screen above appears. Once the SSL-/TLScompatible page is displayed, “ ” appears.
To display a certificate
From the Function menu, select [Certificates]
a certificate.
Full Browser
Selecting a Portion to be
Displayed from the Entire Page
1
Press (Action) in the Full Browser
display, select [PagePilot], and press .
The entire page is displayed.
2
Use / to select a portion to be
displayed and press .
The selected portion is displayed.
If there is not enough memory, the image which is
●
different from the one displayed in the shrinking
display may appear.
Dragging
You can select an area or move a display using
the dragging operation in the Full Browser
display.
Some sites may not allow you to drag.
ˎ
Example: Selecting an area
1
Press (Action) in the Full Browser
display, select [Drag], and press .
The pointer changes from “
2
Select the Start point and press .
The pointer changes to “
To move a display by dragging
Press at the point to grab and use /
to move the display.
3
Use / to select an area and
” to “ ”.
”.
press .
The area is selected and the pointer changes
”.
to “
To quit the Drag
Press .
Copying Text
1
Press (Action) in the Full Browser
display, select [Text copy], and press .
The pointer changes from “
→
2
Select the Start point and press .
3
Use / to select the End point
and press .
The text is copied.
To paste text
Press (Action) in the textbox of the Full
Browser display and select [Text paste].
” to “ ”.
280
Page 83

Searching a Character String in
a Page
1
Press (Func) in the Full Browser
display, select [Search], and press .
2
Enter a keyword to be searched at [Search
text].
Enter a keyword within 25 full-width or 50 half-width
characters.
3
Select [ON]/[OFF] at [Match full].
4
Select [ON]/[OFF] at [Case sensitivity].
5
Press (OK).
The searched word is displayed in reverse video.
To display the previous/next search result
Press (Back)/ (Next).
Uploading an Image
You can upload an image saved in the Data
Box or microSD memory card to a website
which allows you to upload an image.
The way of uploading an image varies depending
ˎ
on a website.
1
Select the “select” key in the Full Browser
display and press .
2
Select an image in My picture of the Data
Box or microSD memory card.
The following image can be uploaded.
ˎ
Category File format File size
My picture GIF/JPEG
It is the size for one file. When containing
※
several images or character strings, the
maximum size of the total amount is 100K
bytes.
Max. 80K bytes
Image
size
−
※
Saving an Image
You can save images downloaded from a
website in the Data Box or microSD memory
card.
A GIF image, JPEG image, PNG image, or BMP
ˎ
image can be saved and the image size must be
less than 1M bytes. PNG and BMP images can be
saved in the microSD memory card only.
You cannot save a GIF image exceeding
ˎ
[UXGA(1600×1200)] and a GIF animation
exceeding [Stby(480×864)] in the Data Box. You
may not be able to save some JPEG images in the
Data Box as well.
1
In the Full Browser display, move the
pointer to an image which you want to
save.
2
Press (Action), select [Save image],
and press .
The screen for selecting where to save appears.
[Data Box]:
Save an image in the Data Box. Select a folder to
save to.
[microSD]:
Save an image in the microSD memory card.
3
Select a place to save to and press .
The image is saved in the selected place to save
to.
Managing a Bookmark
Up to 200 URLs can be saved as bookmarks
of Full Browser.
For information on functions operated at the folder
ˎ
list display or bookmark list display of Bookmark,
see P.191 (a URL can be changed in Full Browser).
A URL including “http://” of up to 512 half-width
ˎ
alphanumeric characters and symbols can be
saved as a bookmark.
Bookmarks can be managed by up to 16 folders.
ˎ
A folder neme of a bookmark can be entered within
ˎ
16 full-width or 32 half-width characters.
If there is not enough memory, the image which is
ˎ
different from the one displayed in the shrinking
display may appear.
Full Browser
Continued
281
Page 84

Editing a Bookmark
You can change the title of a bookmark or URL.
1
From the Full Browser menu, select
[Bookmark]→ a folder, press , select a
bookmark, and press (Func).
The Function menu appears.
2
Select [Edit] and press .
The display for editing a bookmark appears.
3
Select [Title], press , and enter a title.
Enter a title within 12 full-width or 24 half-width
characters.
4
Select [URL], press , and enter a URL.
Enter the URL including “http://” within 512 halfwidth alphanumeric characters and symbols.
5
Press (Complete).
The edited contents are saved.
Setting the Full Browser
Functions
You can set the functions used for Full Browser.
You can operate Full Browser from the Function
ˎ
menu while viewing a website, but some functions
cannot be performed.
Saving a Website as the Home
Page
Full Browser
You can save a website as the Home page.
“http://www.google.co.jp” is set as the Home
URL at the time of purchase.
1
From the Full Browser menu, select [Full
Browser setting] → [Home URL] and
press .
2
Press (Edit), enter a URL, and press
(OK).
Enter the URL including “http://” within 512 halfwidth alphanumeric characters and symbols.
Setting Cookie
Cookie is the mechanism for temporarily saving
information such as the user name, date and
time you accessed the website, and number
of accesses in the FOMA terminal when you
accessed a website. When you access the
same website next time, the information is
used.
You can set whether to send/receive Cookie
when connecting to a website.
Under no condition will DoCoMo be held liable
ˎ
for any reveal of your information to third parties
because of sending Cookie.
Some websites may not be displayed correctly or
ˎ
may be unable to use when Cookie is not set.
1
From the Full Browser menu, select [Full
Browser setting] → [Cookie setting] and
press .
[Valid]:
Cookie is always valid.
[Notify-sending]:
Select whether to send Cookie.
[Notify-receiving]:
Select whether to receive Cookie.
[Notify-send/recv]:
Select whether to send/receive Cookie.
[Invalid]:
Cookie is always invalid.
To delete all Cookie
Select [Delete Cookie], enter the Security code,
and select [Yes].
2
Select whether to set Cookie valid and
press .
The Cookie setting is set.
When you insert another UIM, the Cookie setting
●
becomes [Invalid].
282
Page 85

Setting JavaScript to Be Valid/
Invalid
JavaScript is a programming language
used on a website to create a website with
movement.
When JavaScript is used at the website, you
can set whether to execute the program.
Some websites may not be displayed correctly
ˎ
when you set JavaScript to be invalid.
1
From the Full Browser menu, select [Full
Browser setting] → [Script setting] and
press .
[Valid(Auto)]:
Activate a program automatically during
communication.
[Valid(Confirm)]:
Confirm whether to activate a program during
communication. If you select [Yes,from then on]
at the confirmation screen during communication,
the setting is changed to [Valid(Auto)]
automatically.
[Invalid]:
Do not activate a program.
2
Select a method to activate a program
and press .
The Script setting is set.
When [Valid(Auto)] is selected
Select [Yes].
Setting the Display Mode
You can set the display mode when activating
Full Browser.
1
From the Full Browser menu, select
[Full Browser setting] → [Display mode
setting] and press .
[PC mode]:
Display the website with the screen size for PC.
[Mobile mode]:
Reduce the display size of a website to fit in the
width of the FOMA terminal.
2
Select a display mode and press .
The Display mode setting is set.
Disabling the Display of
Graphics
You can set whether to display graphics when
displaying a website.
1
From the Full Browser menu, select [Full
Browser setting] → [Display img] and
press .
2
Select [ON]/[OFF] and press .
The Display img is set.
Setting the Display Magnification
You can set the display magnification for the
Full Browser display.
1
From the Full Browser menu, select
[Full Browser setting] → [Display
magnification] and press .
2
Select a display magnification and press
.
Select from [75%], [100%], [125%], [150%], [175%],
and [200%].
Displaying the Entire Page While
Scrolling
You can set whether to display the entire page
automatically while scrolling.
1
From the Full Browser menu, select [Full
Browser setting] → [PagePilot setting]
and press .
2
Select [Valid in scrl]/[Invalid] and press
.
The PagePilot setting is set.
Setting the Movement Speed of
the Pointer
You can set a speed to move the pointer.
1
From the Full Browser menu, select
[Full Browser setting] → [Pointer speed
setting] and press .
2
Select a movement speed of the pointer
and press .
Select from [1(Slow)], [2 to 4], or [5(Fast)].
Full Browser
Continued
283
Page 86

Setting Whether to Open a New
Window Automatically
You can set whether to open a website in a
new window automatically when JavaScript of
a website requests to open a new window.
1
From the Full Browser menu, select [Full
Browser setting] → [Window Open Guard]
and press .
[Valid]:
Do not open a website in a new window.
[Invalid]:
Open a website in a new window.
2
Select [Valid]/[Invalid] and press .
The Window Open Guard is set.
Setting Whether to Send Referer
Referer is the information of a link origin. If you
send Referer, the access information of which
page is used to connect is sent to a site.
You can set whether to send Referer when you
select the link while viewing a website.
Under no condition will DoCoMo be held liable
ˎ
for any reveal of your information to third parties
because of using Referer.
Some websites may not be displayed correctly
ˎ
when Referer is not sent.
1
From the Full Browser menu, select [Full
Browser setting] → [Referer setting] and
press .
Full Browser
2
Select [Send]/[Unsend]/[Notify] and press
.
The Referer setting is set.
Setting Whether to Use the Full
Browser Function
You can set whether to use the Full Browser
function.
1
From the Full Browser menu, select [Full
Browser setting] → [Access setting] and
press .
[Yes]:
Full Browser can be used.
[No]:
The Access setting display appears when you
activate Full Browser.
2
Select whether to use the Full Browser
function and press .
3
Select [OK] and press .
The Access setting is set.
When you change the UIM to another UIM, the
●
Access setting changes to [No].
Checking the Settings of Full
Browser
1
From the Full Browser menu, select [Full
Browser setting] → [Check settings] and
press .
The contents of the settings appear.
Restoring the Default Settings
of Full Browser
You can restore the default settings of Full
Browser.
1
From the Full Browser menu, select [Full
Browser setting] → [Reset settings] and
press .
The Security code screen appears.
2
Enter the Security code and press .
3
Select [Yes] and press .
The default settings of Full Browser are restored.
284
Page 87

Data Display/Edit/
Management
Using Still Image
■
Displaying the Saved Image ..................................................................
Display Images Using the Music Slide Show............................................................. 291
Editing Still Images ................................................................................
Using Movie
■
Playing Back Movie/i-motion .....................................................................
Editing Movies .......................................................................................
Using Chara-den
■
What is Chara-den? ...............................................................................
Using Music
■
Playing Back Music Data .............................................................................
Using the Melody
■
Playing Back a Melody ..............................................................................
Using Kisekae Tool
■
Displaying/Playing Back Kisekae Tool .................................................
Using the microSD memory card
■
microSD memory card ............................................................................................. 306
Displaying Data on the microSD memory card ........................................................ 308
Folder Setup of the microSD memory card ............................................................. 309
Data That Can Be Written/Read to and from the microSD memory card ................ 311
Saving Data from the FOMA Terminal to the microSD memory card ...................... 312
Saving Data from the microSD memory card to the FOMA Terminal ...................... 312
Managing the microSD memory card ...................................................................... 313
Using the FOMA Terminal with a PC ..........................................
Using the UIM
■
Copying Data from the FOMA Terminal to the UIM ................................................. 316
Copying Data from the UIM to the FOMA Terminal ................................................. 317
Using Data Box
■
Managing Data Box .................................................................................
Checking the Memory of the FOMA Terminal ...........................
Using Infrared Communication
■
What is the Infrared Communication? .................................
Data That Can Be Sent/Received via Infrared Communication ............................... 328
Receiving Data Using the Infrared Communication ........................
Sending Data Using the Infrared Communication ..............................
Using the Infrared Remote Control .......................................................................... 331
Using iC Communication Function
■
What is iC Communication Function? ..................................................................... 331
Receiving Data Using iC Communication ................................................................ 332
Sending Data Using iC Communication .................................................................. 332
Using PDF-compatible Viewer
■
Displaying PDF Data .........................................................................
<Infrared communication>
<My picture>
<Edit photo>
<i-motion>
<Edit movie>
<Chara-den>
<Music>
<Melody>
<Kisekae Tool>
<USB mode setting>
<Data Box>
<Storage information>
<Receive Ir data>
<Send Ir data>
<My document>
290
292
295
298
302
303
304
305
314
317
326
327
329
329
333
285
Page 88

Displaying the Saved
Image
You can display images saved in My picture of
the Data Box or microSD memory card.
1
Press ( ) in the stand-by display,
select [My picture], and press .
My picture folder list appears.
2
Select a folder and press .
Camera
1/25
My picture file list appears.
The following icons show the type/size of an
ˎ
image.
Icon Type Size
Data Display/Edit/Management
My favorite
Your cat
Memorial shot
Sasha of the nex
A friend of Sash
A stage face
JPEG image
Management title
sQCIF(128×96)
QCIF(176×144)
QVGA(240×320)
CIF(352×288)
WQVGA(240×432)
VGA(640×480)
Stby(480×864)
1M(1280×960)
2M(1632×1224)
2M Wide(1920×1080)
3M(2048×1536)
5M(2592×1944)
Others
<My picture>
Icon Type Size
Mini-Photo
image
Frame image
Stamp image
Deco mail pict.
GIF image
Flash movie
Has loc. info
” appears on the upper right of the icon for
“
ˎ
images prohibited from being retrieved out of
the FOMA terminal.
To display the saved date/time
Press to switch the display temporarily
between the management title and saved date/
time.
3
Select an image and press .
FuncDisplay
MENU
Enlarge
The selected image appears.
To change the display quality
Press . By pressing , you can switch the
display quality between Normal/Sharp/Dynamic.
The following icons show the display quality.
ˎ
Normal
Sharp
Dynamic
To hide the icons and guide display
Press (Display). When you press (Display),
you can switch the display between standard
and simple or turn off the display.
QCIF(176×144)
QVGA(240×320)
VGA(640×480)
Stby(480×864)
Others
Display quality
−
−
−
−
−
−
286
Page 89

To display the previous/next image
Use to display the previous image and to
display the next image.
To change the display size of a JPEG or GIF image
Press (True img/Std./Enlarge/Shrink). Press
(True img) to display the image in the true
size. However, when the image size is set
to [sQCIF(128×96)], [QCIF(176×144)], or
[QVGA(240×320)], press (Std.) to display the
image in the doubled size.
To display a Flash movie again
Press (Retry).
To attach to i-mode mail
Press (Func) for over a second (P.212).
To post on a blog
From the Function menu, select [easy BlogUp]
a service provided a blog (P.358).
→
To set an image for stand-by or other displays
From the Function menu, select [Display setting]
a type of display.
→
To add the location information
From the Function menu, select [Location info]
[Rcv loc. info] → [Yes] (P.277).
To use the added location information
From the Function menu, select [Location info]
[Use loc. info] (P.277).
To display the attached detailed location information
From the Function menu, select [Location info]
[Location detail].
To delete the added location information
From the Function menu, select [Location info]
[Delete loc. info] → [Yes].
When the file list of images in the microSD
●
memory card is displayed, you cannot perform
the Rcv loc. info or Delete loc. info.
It may take time to display a file list or images
●
saved in the microSD memory card.
If you edit a recorded image on a PC, etc., “ ”
●
may be displayed instead of the thumbnail.
When the image cannot be displayed, “ ”
●
appears.
You can send a still image using the high-speed
●
infrared communication (P.330).
Displaying Images Using
the Music Slide Show
JPEG images saved in My picture of the
Data Box or microSD memory card can be
displayed with a BGM and effect, while being
switched automatically.
The Music slide show is played back in the
ˎ
horizontal orientation.
Example: Playing back the Music slide show from My
picture of the Data Box
1
Press (Func) in the My picture file list.
The Function menu appears.
To play back the Music slide show from the Menu
display
From the Menu, select [Imaging] → [Music slide
show].
To play back the Music slide show while the camera
→
is activated
Press in the Camera mode, press (List),
→
→
→
and from the Function menu, select [Music slide
show].
2
Select [Music slide show] and press .
The display indicating stand-by for playing back
the Music slide show appears.
3
Press (Play).
The Music slide show is started.
Operating method
Operation Key operation
Play Press
Pause Press
Volume
adjustment
Fast-forward
an image
Fast-reverse
an image
To display the icon or guide display while playing
back
Press . Every time you press , you can
switch between turning on/off the display.
To specify the folder to be played back as the Music
slide show
While pausing, from the Function menu, select
[ ]→ a folder.
(Play).
(Pause).
.
Use
Press
while pausing. Pressing
and holding keeps fast-forwarding
images continuously.
Press
while pausing. Pressing
and holding keeps fast-reversing
images continuously.
Data Display/Edit/Management
Continued
287
Page 90

To change the Effect
While pausing, from the Function menu, select
[ ](Effect) → a type of effects.
To set the repeat on the Effect
While pausing, from the Function menu, select
[ ](Repeat)→ [ ](ON)/[ ](OFF).
To change the BGM
While pausing, from the Function menu, select
[ ](BGM)→ [ ](Data Box) → [Music]/[i-motion]
a BGM. To mute the BGM, select [
→
When you select a Chaku-Uta Full
ˎ
a choice of specified playback ranges from
[MUSIC], the screen for selecting a type of
setting appears. If you select [Full song],
the entire track of Chaku-Uta Full® is set for
the BGM. If you select [Point], the specified
playback range of Chaku-Uta Full® is set for
the BGM.
To set the display quality
While pausing, from the Function menu, select
[ ](Change image quality) → [ ](Normal)/
[ ](Sharp)/[ ](Dynamic).
To end the Music slide show
Press to end the Music slide show and go
back to the stand-by display.
Editing Still Images
You can edit a JPEG image saved in My
picture by pasting a stamp, a frame, etc.
You cannot edit preinstalled images, images
ˎ
prohibited from being retrieved out of the FOMA
terminal, or images recorded with [Panorama] set at
the Shoot mode.
Some images may not be edited.
ˎ
Once you start editing an image of a type displayed
ˎ
after being rotated, the rotation is canceled and the
image is displayed in the orientation in which the
Data Display/Edit/Management
image is saved. Also after saving the image, it is
displayed in the orientation without rotation.
Images may become inferior by editing repeatedly.
ˎ
Pasting a Frame
A frame can be pasted to an image of
[sQCIF(128×96)], [QCIF(176×144)],
[QVGA(240×320)], [CIF(352×288)],
[VGA(640×480)], and [Stby(480×864)].
](Silent).
®
that has
<Edit photo>
Example: Pasting a frame and saving by overwriting
1
From My picture file list, select an image,
press , and press (Func).
The Function menu appears.
2
Select [Edit photo] → [Frame] and press
.
3
Select a frame and press .
To check a frame
Move the cursor to a frame and press (Play).
4
Press (Save), select [Overwrite], and
press .
The image with the frame is saved by overwriting
the original image.
To save as a new image
Select [Save new] → a place to save to.
Pasting a Stamp
A stamp can be pasted to an image of
[sQCIF(128×96)], [QCIF(176×144)],
[QVGA(240×320)], [CIF(352×288)],
[VGA(640×480)], and [Stby(480×864)].
Example: Pasting a stamp and saving by overwriting
1
From My picture file list, select an image,
press , and press (Func).
The Function menu appears.
2
Select [Edit photo] → [Image stamp] and
press .
3
Select a stamp and press .
To check a stamp
Move the cursor to a stamp and press (Play).
4
Use / to adjust the position
and press (Paste).
To add the same stamp
Repeat step 4.
To paste another stamp
Press (Retry) and perform step 3 to 4 again.
5
Press (OK).
288
Page 91

6
Press (Save), select [Overwrite], and
press .
The image with the stamp is saved by overwriting
the original image.
To save as a new image
Select [Save new] → a place to save to.
Pasting Text
Text can be pasted to an image of [sQCIF(128
96)], [QCIF(176×144)], [QVGA(240
×
320)], [CIF(352×288)], [VGA(640×480)], and
[Stby(480×864)]. The style and color of the
text can also be specified.
Example: Pasting text and saving by overwriting
1
From My picture file list, select an image,
press , and press (Func).
The Function menu appears.
2
Select [Edit photo] → [Text stamp] and
press .
Text stamp
Input text
Font color
□
Font size Std
Font type
Thickness
Underline
[Input text]:
[Font color]:
[Font size]:
[Font type]:
[Thickness]:
[Underline]:
3
Set each item.
4
Press (OK).
5
Use / to adjust the position
Std
Std
No
Enter a text to be pasted within 10 full-width or
20 half-width characters.
Select the color of a font to be pasted.
Select the size of a font to be pasted.
Select the type of a font to be pasted.
Select the thickness of a font to be pasted.
Select whether to display a line under a font to
be pasted.
and press (Paste).
×
To add the same text stamp
Repeat step 5.
To paste another text stamp
Press (Retry) and perform step 2 to 5 again.
6
Press (OK).
7
Press (Save), select [Overwrite], and
press .
The image with the text is saved by overwriting the
original image.
To save as a new image
Select [Save new] → a place to save to.
Trimming Part of an Image After
Zoom In
You can specify a part of an image after
zooming in on it and trim it into a size of
[sQCIF(128×96)], [QCIF(176×144)],
[QVGA(240×320)], [CIF(352×288)],
[VGA(640×480)], and [Stand-by(480×864)].
When the image size is [sQCIF(128×96)], you
ˎ
cannot trim this image.
Example: Trimming an image and saving by overwriting
1
From My picture file list, select an image,
press , and press (Func).
The Function menu appears.
2
Select [Edit photo] → [Zoom&trim] → a
size of an image to be trimmed and press
.
The image size displayed in gray is not available
ˎ
for trimming.
3
Press (Zoom(T))/ (Zoom(W)).
QCIF(176×144)
Press
ˎ
The zoom is adjusted and the bar is displayed for
the zoom magnification you have set.
4
Use / to select the area to be
trimmed and press (OK).
The image is trimmed to the selected size.
(Zoom(T)) to enlarge and (Zoom(W))
to reduce an image.
Data Display/Edit/Management
Continued
289
Page 92

5
Press (Save), select [Overwrite], and
press .
The trimmed image is saved by overwriting the
original image.
To save as a new image
Select [Save new] → a place to save to.
Rotating an Image
An image of [sQCIF(128×96)], [QCIF(176
144)], [QVGA(240×320)], [CIF(352×288)],
[VGA(640×480)], and [Stby(480×864)] can
be rotated.
Example: Rotating an image and saving by overwriting
1
From My picture file list, select an image,
press , and press (Func).
The Function menu appears.
2
Select [Edit photo] → [Rotate] and press
.
3
Press (Rotate) and press (OK).
Every time you press
clockwise by 90 degrees.
4
Press (Save), select [Overwrite], and
(Rotate), the image rotates
press .
The rotated image is saved by overwriting the
original image.
To save as a new image
Select [Save new] → a place to save to.
Converting the Image Size
You can convert an image size into [sQCIF(128
Data Display/Edit/Management
96)], [QCIF(176×144)], [QVGA(240
×
320)], [CIF(352×288)], [VGA(640×480)], and
[Stand-by(480×864)].
Example: Converting an image size and saving
1
From My picture file list, select an image,
press , and press (Func).
The Function menu appears.
2
Select [Edit photo] → [Select size] → a
size of an image to be converted and
press .
The image size displayed in gray is not available
ˎ
for size conversion.
3
Press (Save), select [Yes] → a place to
save to, and press .
The size-converted image is saved.
Some of the image size cannot be converted into
●
the selected size.
Adding the Effect on an Image
You can add special effects on an image.
1
From My picture file list, select an image,
press , and press (Func).
×
The Function menu appears.
2
Select [Edit photo] → [Image effect] and
press .
[Photo fix]:
Adjust the color and brightness of an image
automatically.
[Comical]:
Make an image cartoonish.
[Gray scale]:
Set an image in black and white.
[Antique]:
Set an image antique-toned like an old
photograph. It is brighter than Sepia.
[Sketch]:
Make an image like in colored line drawing.
3
Select an image effect and press .
To display an image without an image effect
Press (Eff. OFF). To undo it, press (Eff.
ON).
4
Press (Save), select [Overwrite], and
press .
The image added the effect is overwritten.
To save as a new image
Select [Save new] → a place to save to.
×
290
Page 93

Storing an Image at the Data
Security Service Center
You can use the Data Security Service to store
up to 10 GIF/JPEG images at one time at the
Data Security Service Center.
Data Security Service is a paid service that requires
ˎ
a subscription. For details on this service, see
the “Mobile Phone User’s Guide 【i-mode】 FOMA
version”.
You cannot store a file that contains an image larger
ˎ
than 100K bytes and an image that is prohibited
from being retrieved out of the FOMA terminal.
1
Press (Func) in the file list of My
picture.
The Function menu appears.
2
Select [Store in Center] and press .
The Security code screen appears.
3
Enter the Security code and press .
The Select&save display appears.
4
Select an image and press .
To store several images, repeat step 4.
ˎ
5
Press (Complete).
The screen for confirming whether to store the
image appears.
6
Select [Yes] and press .
The call is connected to the Data Security Service
Center and the image is stored. When the storing is
completed, the storing result display appears.
Playing Back Movie/
i-motion
You can play back movie/i-motion that is saved
in i-motion of the Data Box or microSD memory
card.
1
Press ( ) in the stand-by display,
select [i-motion], and press .
The i-motion folder list appears.
To play back data from the last stopped position
Select [Resume play].
To play back a playlist
Select the [Playlist] folder, move the cursor to
a playlist, and press (Play). When you play
back a movie/i-motion in the playlist, select the
[Playlist] folder → a playlist, move the cursor to a
movie/i-motion, and press (Play).
<i-motion>
2
Select a folder and press .
Camera
Flowers and cats
One early aftern
Chummy two
It looks big
Farewell, My fri
Roaming at night
The i-motion file list appears.
The following icons show the type/size of a
ˎ
movie/i-motion and playback restrictions.
Type and size
Icon Type Size
“
ˎ
movie/i-motion prohibited from being retrieved
out of the FOMA terminal.
Playback restrictions
Icon Playback restrictions
1/8
Management title
Movie/i-motion with
video and sound
tracks
Movie/i-motion with
video track only
Movie/i-motion with
sound track only
(i-motion without
video track, such as
singer’s voice)
Movie/i-motion
downloaded
partway
” appears on the upper right of the icon for
Movie/i-motion with playback
restrictions
Movie/i-motion whose time limit on
playback has expired
sQCIF(128×96)
QCIF(176×144)
QVGA(320×240)
VGA(640×480)
Others
sQCIF(128×96)
QCIF(176×144)
QVGA(320×240)
VGA(640×480)
Others
−
−
Data Display/Edit/Management
Continued
291
Page 94

To play back movie in a folder repeatedly
From the Function menu, select [Continuous
play]. The files displayed in the list are played
back sequentially. To stop the playback, press
(Stop).
To display the saved date/time
Press to switch the display temporarily
between the management title and saved date/
time.
3
Select a movie/i-motion and press .
The selected movie/i-motion appears.
When the screen informing to make enough space
appears
Select [Yes].
To change the display quality
Press . By pressing , you can switch the
display quality between Normal/Sharp/Dynamic.
The following icons show the display quality.
ˎ
Normal
Sharp
Dynamic
To hide the icons and guide display
Press (Display). When you press (Display),
you can switch the display between standard/
simple or turn it off.
To display the previous/next movie/i-motion
Use to display the previous movie/i-motion
and to display the next movie/i-motion.
To change the display size
Press (True img/Std./Enlarge). When the
image size is set to [QVGA(320×240)], press
(True img) to display the image in the true size.
When the image size is set to [sQCIF(128×96)]
or [QCIF(176×144)], press (Std.) to display
the image in the doubled size.
When the image size is set to [VGA(640
ˎ
Data Display/Edit/Management
480)], the image is always displayed in the
true size and cannot change the display size.
To attach to i-mode mail
Press (Func) for over a second (P.212).
To post on a blog
From the Function menu, select [easy BlogUp]
a service provided a blog (P.358).
→
To set a movie/i-motion for the stand-by display or
other settings
From the Function menu, select [Display setting]
a type of a display.
→
To set a movie/i-motion for the ring tone or other
tones
From the Function menu, select [Sound setting]
a type of a ring tone.
→
To change the display style of an image temporarily
From the Function menu, select [Change scr. set]
a display style of an image.
→
When the image size is [QVGA(320×240)],
ˎ
you can select [Hor. wide(zoom)]/[Hor.
wide(full)].
To set the display style of an image
From the Function menu, select [Screen setting]
a display style of an image.
→
4
Press (Play).
Display quality
The selected movie/i-motion is played back.
Operating method
Operation Key operation
×
Play Press
Pause Press
Stop Press
Volume
adjustment
Fast-forward Press
Fast-reverse Press
Frame
advance
(Play).
(Pause).
(Stop).
Use
.
during playback. Pressing
and holding also provides Fastforward.
during playback. Pressing
and holding also provides Fastreverse.
during pause.
Press
292
Page 95

When you play back a movie/i-motion for the first
●
time, the screen for confirming whether to play it
back in the horizontal orientation appears. If you
select [Yes], the movie/i-motion is played back in
the horizontal orientation.
It may take time to display a file list or movie/
●
i-motion saved in the microSD memory card.
If you edit a recorded movie on a PC, etc., “ ”
●
may be displayed instead of the thumbnail.
If you leave the FOMA terminal without a battery
●
pack or with a fully expended battery pack for a
long period of time, the date and time is reset,
and a movie/i-motion that has a time limit on
playback may not be played back.
A movie/i-motion can be set for the ring tone
●
and/or incoming image when [Ring tone] and/or
[Receive display] is set to “Not restricted” as can
be checked in the Detail info display. However,
the following are the exceptions.
- A movie/i-motion restored from a PC or another
FOMA terminal, which was once transferred
to it using the infrared or iC communication or
DoCoMo keitai datalink
- A movie/i-motion saved from the microSD
memory card to the FOMA terminal (including
the one that is restored to the FOMA terminal
after once copied/moved from there, except
for the movable contents-compatible one)
Playing Back i-motion by Each
Chapter
You can play back i-motion by each chapter.
1
From the i-motion file list, select a movie/
i-motion, press , and press (Func).
The Function menu appears.
2
Select [Chapter list] and press .
Chapter list
Chapter1
00:00:00
Chapter2
00:01:20
Chapter3
00:06:30
Chapter4
00:09:00
1/4
3
Select a chapter and press .
The movie/i-motion is played back from the selected
position.
To play back from the previous/next chapter
Press to play back from the previous
chapter and press to play back from the
next chapter.
Creating a Playlist
You can save your favorite movies/i-motion in a
playlist. Up to five playlists can be saved and
up to 25 movies/i-motion can be saved in each
playlist.
Example: Adding and saving one movie/i-motion
1
From the i-motion file list, select a movie/
i-motion and press (Func).
The Function menu appears.
2
Select [Add to playlist] → [Save one] and
press .
Select add to
Playlist1
Playlist2
Playlist3
Playlist4
To create a new playlist
From the i-motion folder list, select [Playlist] and
from the Function menu, select [Create playlist].
Enter a playlist name within 10 full-width or 20
half-width characters.
To save several movies/i-motion
From the Function menu, select [Add to playlist]
[Select&save], select movies/i-motion, and
→
press
1/4
(Complete).
Data Display/Edit/Management
Continued
293
Page 96

3
Select a playlist to be saved and press
.
The screen for selecting the saving method
appears.
[Add]:
The selected movie/i-motion is newly added in a
playlist.
[Overwrite]:
The screen for confirming whether to overwrite all
movies/i-motion saved in a playlist with selected
movies/i-motion appears. Note that all data
existing in the playlist is deleted when you select
[Yes].
4
Select [Add] and press .
The selected movie/i-motion is saved in the playlist.
Deleting/Reordering Movies/
i-motion of the Playlist
You can delete movies/i-motion from a playlist
or reorder them within a playlist. Even if you
delete movies/i-motion from a playlist, the files
of the movies/i-motion are not deleted.
Example: Deleting one movie/i-motion
1
From the i-motion folder list, select
[Playlist] → a playlist and press .
The movie/i-motion list of the playlist appears.
To delete all movies/i-motion
From the Function menu, select [Delete from list]
[Delete all] → [Yes].
→
2
Select a movie/i-motion and press
(Func).
The Function menu appears.
To reorder movies/i-motion
Data Display/Edit/Management
From the Function menu, select [Reorder]
a movie/i-motion. Move the cursor to the place
to move to, press
(Complete).
(Move), and press
3
Select [Delete from list] → [Delete one]
[Yes] and press
The selected movie/i-motion is deleted from the
playlist.
.
Deleting/Editing the Name of the
Playlist
You can delete a playlist or edit its name.
Example: Deleting one playlist
1
From the i-motion folder list, select
[Playlist] and press .
A list of all playlists appears.
2
Select a playlist and press (Func).
The Function menu appears.
To edit the name of a playlist
Move the cursor to the playlist and from the
Function menu, select [Edit name]. Enter a
new name within 10 full-width or 20 half-width
characters.
3
Select [Delete playlist] → [Yes] and press
.
The selected playlist is deleted.
Editing Movies
<Edit movie>
You can edit a movie recorded with the FOMA
terminal.
Some movies may not be edited.
ˎ
Clipping a Movie
You can clip a portion of a movie of [sQCIF(128
→
96)], [QCIF(176×144)], [QVGA(320×240)],
×
and [VGA(640×480)] image size by specifying
the range or size to be clipped.
Example: Trimming a movie image by specifying size
and saving by overwriting
1
From the i-motion file list, select a movie,
press , and press (Func).
The Function menu appears.
→
294
Page 97

2
Select [Edit movie] → [Clip movie] and
press .
Clip movie
Any size
Attach to mail(S)
Attach to mail(L)
[Any size]:
Clip a movie by specifying the start and end
positions.
[Attach to mail(S)]:
Automatically clip a movie to up to 500K-byte
length from the specified start position.
[Attach to mail(L)]:
Automatically clip a movie to up to 2M-byte
length from the specified start position.
3
Select [Attach to mail(S)]/[Attach to
mail(L)] and press .
4
Use to select the clipping start
position and press (Start).
When you select [Any size]
Use to select the clipping end position and
press (End).
5
Select [Yes] and press .
6
Press (Save), select [Overwrite], and
press .
The movie clip is saved by overwriting the original
movie.
To save as a new movie
Select [Save new] → a place to save to.
Clipping a Still Image from a
Movie
You can specify any portion of a movie and
clip it as a still image of [sQCIF(128×96)],
[QCIF(176×144)], [QVGA(320×240)], and
[VGA(640×480)] image size.
1
From the i-motion file list, select a movie,
press , and press (Func).
The Function menu appears.
2
Select [Edit movie] → [Clip picture] and
press .
To move forward frame-by-frame
Press .
To move backward frame-by-frame
Press .
3
Press (Play), press (Pause) at the
clipping position, and press (Clip).
4
Select [Yes] and press .
5
Press (Save), select [Yes] → a place to
save to, and press .
The still image clip is saved in My picture.
Converting the Image Size
You can convert a [QVGA(320×240)] image
size movie into the [QCIF(176×144)] image
size.
Example: Converting the image size and saving by
overwriting
1
From the i-motion file list, select a movie,
press , and press (Func).
The Function menu appears.
Data Display/Edit/Management
Continued
295
Page 98

2
Select [Edit movie] → [Select size] and
press .
3
Select [Yes] and press .
4
Press (Save), select [Overwrite], and
press
.
The converted movie is saved by overwriting the
original movie.
To save as a new movie
Select [Save new] → a place to save to.
It may take time to convert a large movie/i-motion
●
file.
When the size of a file after conversion is too
●
large, movie images may be partially clipped into
a file of 500K bytes or less.
What is Chara-den?
<Chara-den>
You can send an avatar of your choice
instead of your own image when you use the
videophone function. You can make this avatar
move by pressing the keys on the keypad. The
mouth part of some avatars can be moved
in response to the sound heard from the
microphone.
Preinstalled Chara-den characters
■
アイアイ
If you have deleted a preinstalled Chara-den fille,
●
you can download it from “PlayNow by SO”.
[i Menu] → [
→ [ケータイ電話メーカー
Manufacturers) → [PlayNow by SO] (Japanese
only)
メニュー/検索
] (Menu/Search)
] (Mobile Phone
Displaying and Operating Charaden
You can display Chara-den characters saved
in the Chara-den folder of the Data Box.
1
Press ( ) in the stand-by display,
select [Chara-den], and press .
Chara−den
1/1
アイアイ
The Chara-den file list appears.
File restriction is set for Chara-den files and “
ˎ
appears on the upper right of the Chara-den
icon.
To place a videophone call
Move the cursor to the Chara-den file and from
the Function menu, select [Call Chara-den], enter
a phone number, and press (V.phone).
To set a substitute image of videophone
Move the cursor to the Chara-den file and from
the Function menu, select [Set sub image].
2
Select a Chara-den file and press .
Management title
”
©SEGA
Data Display/Edit/Management
Action lists of the preinstalled Chara-den
■
characters
アイアイ
Full-body action
1:
3:
5:
7:
9:
2:
アレレ?
エーンエーン
6:
もうっ!
がっかり・・・
なんだってー!
8:
イェーイ!
4:
アハハッ
ねむいよ〜
ごめんなさーい
296
Action mode icon
©SEGA
To display the previous/next Chara-den
Use to display the previous Chara-den and
to display the next Chara-den.
Page 99

Operating method
Operation Key operation
Stop action Press
Switch the
action mode
Display the
action list
Display other
Chara-den file
The action that you can perform varies
●
depending on a Chara-den file. Some Chara-den
files have no action to be performed.
while in action.
Press
(Change). Every time
you press this key, the operation is
switched between full-body action
and parts action.
(Full-body action) :
The entire body is moved.
(Parts action) :
A part of the body is moved.
(List). Select an action to
Press
check the movement of it. Move
the cursor to an action and press
(Detail) to display the action
name.
From the Function menu, select
[Set Chara-den] → [Change
Chara-den]→ a Chara-den file.
Playing Back Music Data
<Music>
You can play back music data saved in MUSIC
of the Data Box and microSD memory card.
1
Press ( ) in the stand-by display,
select [MUSIC], and press .
Music
Orig. playlis
folder 1
Active−OKINO, SH
Cat−Masato Kouya
The list of music folders and files appears.
The following icons show the type of music data
ˎ
and playback restrictions.
Ty pe
Icon Type
Original playlist, WMA playlist, and
/
imported playlist
Chaku-Uta Full
®
Chaku-Uta Full® downloaded partway
3GPP
WMA
File restriction is set for Chaku-Uta Full® and
ˎ
“
” appears on the upper right of the icon.
Playback restrictions
Icon Playback restrictions
Music data with playback restrictions
Music data whose time limit on
playback has expired
Uta-hodai
Uta-hodai whose time limit on playback
has expired
To play back music data in a folder
Select a folder and press .
To switch between the jacket display and list display
From the Function menu, select [Change
jackets].
To switch to the MUSIC Player
From the Function menu, select [Player mode].
To set a Chaku-Uta Full® for the ring tone
Move the cursor to a Chaku-Uta Full® from the
Function menu, select [Sound setting] → a type
of incoming.
When you select a Chaku-Uta Full
ˎ
a choice of specified playback ranges from
[MUSIC], the screen for selecting a type of
setting appears. If you select [Full song], the
entire track of Chaku-Uta Full® is set for the
ring tone. If you select [Point], the specified
playback range of Chaku-Uta Full® is set for
the ring tone.
When you select a Chaku-Uta Full
ˎ
the microSD memory card, select [Yes] at the
screen for confirming whether to save to the
FOMA terminal, select a folder to move to, and
press
(Save).
®
that has
®
saved in
Data Display/Edit/Management
Continued
297
Page 100

2
Select music data and press .
The selected music data is played back.
Operating method
Operation Key operation
Play Press
Stop Press
Volume
adjustment
Rewinding Press
Fast-forward Press
Fast-reverse Press
When you select a playlist
It is switched to the MUSIC Player.
(Play).
(Stop).
Use
.
.
for over a second during
playback.
for over a second during
playback.
The following icons show the type of the melody.
ˎ
Icon Type
Melody
3D sound-compatible melody
“
” appears on the upper right of the icon for
ˎ
melodies prohibited from being retrieved out
of the FOMA terminal.
To play a melody that has specified playback range
Move the cursor to the melody and from the
Function menu, select [Play portion].
To attach to i-mode mail
Move the cursor to the melody and from the
Function menu, select [Attach to mail] (P.212).
To set a melody for the phone tone or other settings
Move the cursor to a melody and from the
Function menu, select [Sound setting] → a ring
tone.
3
Select a melody and press .
Tsuki
Playing Back a Melody
You can play back an SMF/MFi-format melody
that is saved in Melody of the Data Box or
microSD memory card.
1
Press ( ) in the stand-by display,
Data Display/Edit/Management
select [Melody], and press .
The melody folder list appears.
2
Select a folder and press .
Preinstall
着信音
着信音
着信音
着信音
着信音
Symphony
Tsuki
Pavane
Raindrop
Forest
Cuckoo Clock
School Chime
The melody file list appears.
298
1/21
1
2
3
4
5
Management title
<Melody>
The selected melody is played and the indicator
flashes.
To stop playback
Press (Stop).
To play back the previous/next melody
Use to play back the previous melody and
to play back the next melody.
To adjust the volume
Use .
When you play back a melody, the FOMA
●
terminal may start vibrating in concert with the
melody, regardless of the Vibrator setting (P.110).
 Loading...