

Sony A3352031 User Manual
To turn on or off Smart-Fit
Rendering™
1
When you browse the Internet, select
Options > Advanced > Smart-Fit.
2
Select an option.
To make a call when you browse
•
Press
.
To save a picture from a Web page
1
When you browse the Internet, select
Options > Tools > Save picture.
2
Select a picture.
To find text on a Web page
1
When you browse the Internet, select
Options > Tools > Find on page.
2
Enter text and press Find.
To copy and paste text while
browsing
1
When browsing the Internet, select
Options > Tools > Mark & Copy.
2
Scroll to where you want to start
copying and select Mark.
3
Scroll to mark text and select Copy.
4
Navigate to where you want to insert
the text and select Options > Copy &
paste > Paste.
To save a Web page
•
When browsing the Internet, select
Options > Tools > Save page.
To view saved Web pages
1
From Homescreen select Menu >
Organiser > Media Album > Web pages
> Saved pages.
2
Scroll to an item and select View.
To send a link
1
When you browse the Internet, select
Options > Tools > Send link.
2
Select a transfer method.
Make sure the receiving device supports
the transfer method you select.
Internet keypad shortcuts
You can use the keypad to go directly
to an Internet browser function.
Key Shortcut
Enter address, Search Internet or
search in Bookmarks
Bookmarks
Homepage
Pan & zoom (when Smart-Fit is off)
To select Internet keypad shortcuts
1
From Homescreen select Menu >
Orange World.
Internet 21
2
Select Options > Advanced > Keypad
mode > Shortcuts.
Internet security and
certificates
Your phone supports secure browsing.
Certain Internet services, such as
banking, require certificates in your
phone. Your phone may already
contain certificates when you buy it or
you can download new certificates.
To view certificates in the phone
•
From Homescreen select Menu >
Settings > the General tab > Security >
Certificates.
Web feeds
You can subscribe to and download
frequently updated content, such as
news, podcasts or photos, using Web
feeds.
To add new feeds for a Web page
1
When you browse a page on the
Internet that has Web feeds, indicated
by
, select Options > Web feeds.
2
For each feed you want to add, scroll
to the feed and select Mark.
3
Select Options > Continue.
To search for Web feeds
1
From Homescreen select Menu >
Media > Web feeds.
2
Select New feed and enter a Web
address.
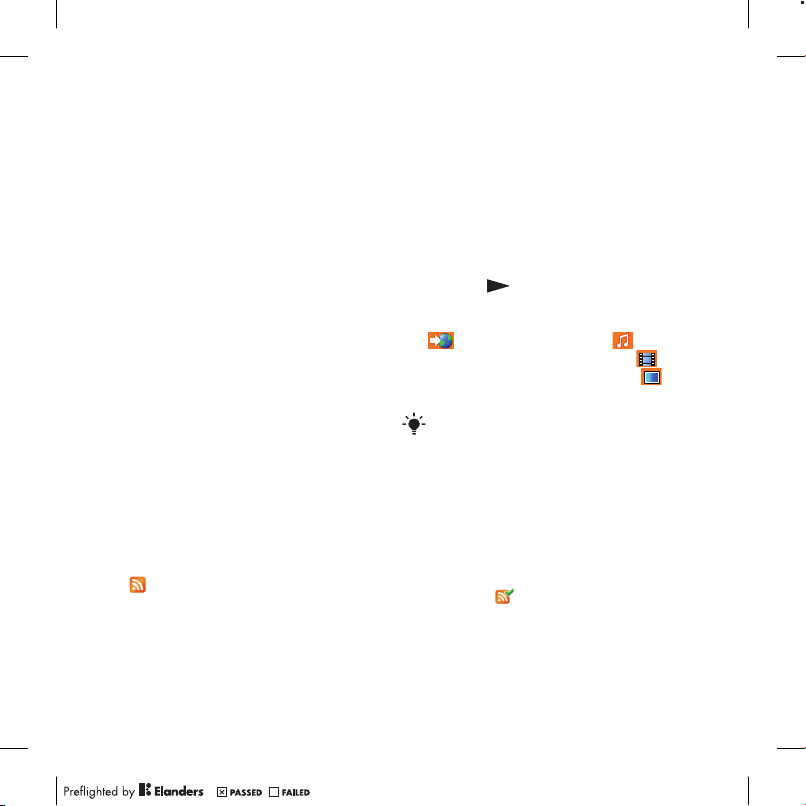
To download content via feeds
1
From Homescreen select Menu >
Media > Web feeds.
2
Scroll to an updated feed and select
View or
3
Select a heading to expand.
4
Select an icon depending on content,
download an audio podcast, to
download a video podcast or to
download a photo.
You can also subscribe to and download
content to a computer via feeds using
Sony Ericsson Media Manager. You can
then transfer the content to your phone.
See Transferring content to and from a
computer on page 47.
Updating Web feeds
You can manually update your feeds,
or schedule updates. When there are
updates, appears on the screen.
.
to open a Web page, to
To schedule Web feed updates
1
From Homescreen select Menu >
Media > Web feeds.
22 Internet

2
Scroll to a feed and select Options >
Schedule update.
3
Select an option.
Frequent updates may be costly.
Web feeds in Homescreen
You can show news updates on the
Homescreen.
To show Web feeds in Homescreen
1
From Homescreen select Menu >
Media > Web feeds.
2
Scroll to a feed and select Options >
Settings > Standby ticker > Show in
standby.
To access Web feeds from
Homescreen
1
From Homescreen select Ticker.
2
To read more about a feed, press or
to scroll to a headline and select Go
to.
Podcasts
Podcasts are files, for example, radio
programmes or video content, that you
can download and play. You subscribe
to and download podcasts using Web
feeds.
To access audio podcasts
•
From Homescreen select Menu >
Media > My music > Podcasts.
To access video podcasts
•
From Homescreen select Menu >
Media > Video > Podcasts.
Photo feeds
You can subscribe to Photo feeds and
download photos. To start using Photo
feeds, see Web feeds on page 22.
To access photo feeds
•
From Homescreen select Menu >
Media > Photo > Photo feeds.
Wi-Fi™
Using Wi-Fi™ you can access the
Internet wirelessly with your phone.
You can browse the Internet at home
(personal networks) or in public access
zones (hot spots):
•
Personal networks – usually
protected. A pass phrase or a key is
required from the owner.
•
Hot spots – usually non-protected
but often requires you to log on to the
operator’s service before you get
Internet access.
Internet 23
Using Wi-Fi
To be able to browse the Internet using
Wi-Fi you need to search for and
connect to an available network and
then open the Internet browser.
To turn on or off Wi-Fi
1
From Homescreen select Menu >
Settings > the Connectivity tab > Wi-Fi.
2
Select an option.
For quick access press and select
Wi-Fi.
To connect to a network
1
From Homescreen select Menu >
Settings > the Connectivity tab > Wi-Fi.
2
Scroll to a network and select
Connect.
To start browsing using Wi-Fi
1
Make sure is showing in the status
bar.
2
From Homescreen select Menu >
Orange World.
Often used networks can be saved as
favourites. These will connect
automatically when you are within range
if you turn on Auto connect.
Unique
With a Unique phone your calls
automatically and seamlessly switch
between the mobile network or your
home Wi-Fi network depending on
your location. Unique is available when
appears in the status bar.
To set up your Unique phone
•
From Homescreen select Unique and
follow the Unique wizard.
To view the Unique wizard
•
From Homescreen select Menu >
Settings > the General tab > Setup
wizard.
24 Internet
Calling
Making and receiving calls
You need to turn on your phone and be
within range of a network.
To make a call
1
From Homescreen enter a phone
number (with international country
code and area code, if applicable).
2
Press
You can call numbers from your Address
Book and Call History. See Address Book
on page 27, and Call History on
page 26. You can also use your voice to
make calls. See Voice control on
page 30.
To end a call
•
Press .
To make international calls
1
From Homescreen press and hold
down until a “+” sign appears.
2
Enter the country code, area code
(without the first zero) and phone
number.
3
Press .
To re-dial a number
•
When Retry? appears select Yes.
.
Do not hold your phone to your ear when
waiting. When the call connects, your
phone gives a loud signal.
To answer a call
•
Press .
To reject a call
•
Press .
To change the ear speaker volume
during a call
•
Press the volume key up or down.
To mute the microphone during a call
1
Press and hold down .
2
Press and hold down again to
resume.
To turn on the loudspeaker during a
call
•
Press SpkrOn.
Do not hold your phone to your ear when
using the loudspeaker. This could
damage your hearing.
Networks
Your phone switches automatically
between GSM and 3G (UMTS)
networks depending on availability.
Some network operators allow you to
switch networks manually.
Calling 25

To switch networks manually
1
From Homescreen select Menu >
Settings > the Connectivity tab > Mobile
networks > GSM/3G networks.
2
Select an option.
Emergency calls
Your phone supports international
emergency numbers, for example, 112
or 911. You can normally use these
numbers to make emergency calls in
any country, with or without the SIM
card inserted, if you are within range of
a network.
In some countries, other emergency
numbers may also be promoted. Orange
may therefore have saved additional local
emergency numbers on the SIM card.
To make an emergency call
•
From Homescreen enter 112 (the
international emergency number) and
press .
To view your local emergency
numbers
1
From Homescreen select Menu >
Address Book.
2
Scroll to New contact and select
Options > Special numbers >
Emergency nos..
Video call
You can share experiences with friends
and family as they happen or save them
to share later. You see the person you
are talking to on your screen. The other
person sees you or what is on your
camera.
Before making video calls
3G (UMTS) service is available when
appears. To make a video call, both
parties on the call must have a 3G
(UMTS) phone subscription that
supports 3G (UMTS) service and 3G
(UMTS) coverage.
To make a video call
1
From Homescreen enter a phone
number (with international country
code and area code, if applicable).
2
Select Options > Make video call.
To use the zoom with an outgoing
video call
•
Press or .
To view video call options
•
During the call, select Options.
Call History
You can view information about recent
calls.
26 Calling
To call a number from the Call History
1
From Homescreen press
scroll to a tab.
2
Scroll to a name or a number and press
.
and
Address Book
You can save names, phone numbers
and personal information in Address
Book. Information can be saved in the
phone memory or on the SIM card.
You can synchronise your contacts using
the Sony Ericsson PC Suite.
Default contacts
You can choose which contact
information is shown as default. If
Phone contacts is selected as default,
your contacts show all the information
saved in Address Book. If you select
SIM contacts as default, your contacts
show names and numbers saved on
the SIM card.
To select default contacts
1
From Homescreen select Menu >
Address Book.
2
Scroll to New contact and select
Options > Advanced > Default contacts.
3
Select an option.
Phone contacts
Phone contacts can contain names,
phone numbers and personal
information. They are saved in the
phone memory.
To add a phone contact
1
From Homescreen select Menu >
Address Book.
2
Scroll to New contact and select Add.
3
Enter the name and select OK.
4
Scroll to New number: and select Add.
5
Enter the number and select OK.
6
Select a number option.
7
Scroll between the tabs and add
information to the fields.
8
Select Save.
Calling contacts
To call a contact
1
From Homescreen select Menu >
Address Book.
2
Scroll to a contact and press .
To go directly to the contacts list
•
From Homescreen press and hold
down – .
To call with Smart search
1
From Homescreen press – to
enter a sequence of (at least two) digits.
All entries which match the sequence
Calling 27

of digits or corresponding letters are
shown in a list.
2
Scroll to a contact or a phone number
and press
.
To turn on or off Smart search
1
From Homescreen select Menu >
Settings > the Calls tab > Smart search.
2
Select an option.
Editing contacts
To add information to a phone contact
1
From Homescreen select Menu >
Address Book.
2
Scroll to a contact and select Options >
Edit contact.
3
Scroll between the tabs and select
Add or Edit.
4
Select an option and an item to add or
edit.
5
Select Save.
If your subscription supports Calling Line
Identification (CLI) service, you can assign
personal ringtones and pictures to
contacts.
To copy names and numbers to
phone contacts
1
From Homescreen select Menu >
Address Book.
2
Scroll to New contact and select
Options > Advanced > Copy from SIM.
3
Select an option.
To copy names and numbers to the
SIM card
1
From Homescreen select Menu >
Address Book.
2
Scroll to New contact and select
Options > Advanced > Copy to SIM.
3
Select an option.
When you copy all contacts from your
phone to the SIM card, all existing SIM
card information is replaced.
To automatically save names and
phone numbers on the SIM card
1
From Homescreen select Menu >
Address Book.
2
Scroll to New contact and select
Options > Advanced > Auto save on
SIM.
3
Select an option.
To save contacts on a memory card
1
From Homescreen select Menu >
Address Book.
2
Scroll to New contact and select
Options > Advanced > Back up to m.
card.
SIM contacts
SIM contacts can contain names and
numbers only. They are saved on the
SIM card.
28 Calling

To add a SIM contact
1
From Homescreen select Menu >
Address Book.
2
Scroll to New contact and select Add.
3
Enter the name and select OK.
4
Enter the number and select OK.
5
Select a number option and add more
information, if available.
6
Select Save.
Deleting contacts
To delete all contacts
1
From Homescreen select Menu >
Address Book.
2
Scroll to New contact and select
Options > Advanced > Delete all
contacts.
3
Select an option.
Contact memory status
The number of contacts you can save
in your phone or on the SIM card
depends on available memory.
To view contact memory status
1
From Homescreen select Menu >
Address Book.
2
Scroll to New contact and select
Options > Advanced > Memory status.
Myself
You can enter information about
yourself and, for example, send your
business card.
To enter Myself information
1
From Homescreen select Menu >
Address Book.
2
Scroll to Myself and select Open.
3
Scroll to an option and edit the
information.
4
Select Save.
To add your own business card
1
From Homescreen select Menu >
Address Book.
2
Scroll to Myself and select Open.
3
Scroll to My contact info and select
Add > Create new.
4
Scroll between the tabs and add
information to the fields.
5
Enter the information and select Save.
Groups
You can create a group of phone
numbers and email addresses from
Phone contacts to send messages to.
See Messaging on page 34. You can
also use groups (with phone numbers)
when you create accepted callers lists.
Accept calls
See
on page 33.
Calling 29
To create a group of numbers and
email addresses
1
From Homescreen select Menu >
Address Book.
2
Scroll to New contact and select
Options > Groups.
3
Scroll to New group and select Add.
4
Enter a name for the group and select
Continue.
5
Scroll to New and select Add.
6
For each contact phone number or
email address you want to mark, scroll
to it and select Mark.
7
Select Continue > Done.
Speed dial
Speed dialling lets you select nine
contacts that you can dial quickly. The
contacts can be saved in positions 1-9.
To add contacts to speed dial
numbers
1
From Homescreen select Menu >
Address Book.
2
Scroll to New contact and select
Options > Speed dial.
3
Scroll to a position number and select
Add.
4
Select a contact.
To speed dial
•
From Homescreen enter the position
number and press
.
More calling features
Answer phone service
If your subscription includes an
answering service, callers can leave a
message when you cannot answer a
call.
To enter your answer phone number
1
From Homescreen select Menu >
Messaging > Messages > Settings >
Answer Phone no..
2
Enter the number and select OK.
To call your answer phone service
•
From Homescreen press and hold
down .
Voice control
By creating voice commands you can:
•
Voice dial – call someone by saying
their name
•
Answer and reject calls when you
use a handsfree
30 Calling

To record a voice command using
voice dialling
1
From Homescreen select Menu >
Settings > the General tab > Voice
control > Voice dialling > Activate.
2
Select Yes > New voice command and
select a contact. If the contact has
more than one number, select the
number to add the voice command to.
3
Record a voice command such as
“John mobile.”
4
Follow the instructions that appear.
Wait for the tone and say the command
to record. The voice command is
played back to you.
5
If the recording sounds OK, select Yes.
If not, select No and repeat steps 3 and
4.
Voice commands are saved in the phone
memory only. They cannot be used in
another phone.
To voice dial
1
From Homescreen press and hold
down a volume key.
2
Wait for the tone and say a recorded
name, for example “John mobile.” The
phone plays the name back to you and
connects the call.
Diverting calls
You can divert calls, for example, to an
answering service.
When Restrict calls is used, some divert
call options are not available. See
Restricted dialling on page 33.
To divert calls
1
From Homescreen select Menu >
Settings > the Calls tab > Divert calls.
2
Select a call type and a divert option.
3
Select Activate.
4
Enter the number to divert calls to and
select OK.
More than one call
You can handle more than one call at a
time. For example, you can put an
ongoing call on hold, while you make or
answer a second call. You can also
switch between the two calls. You
cannot answer a third call without
ending one of the first two calls.
Call waiting
You will hear a beep if you receive a
second call while call waiting is active.
To activate call waiting
•
From Homescreen select Menu >
Settings > the Calls tab > Manage calls
> Call waiting > Activate.
Calling 31
To make a second call
1
During the call, press
the ongoing call on hold.
2
Select Options > Add call.
3
Enter the number to call and press
.
. This puts
To answer a second call
•
During the call, press
the ongoing call on hold.
. This puts
To reject a second call
•
During the call, press
continue with the ongoing call.
and
To end an ongoing call and answer a
second call
•
During the call, select Replace active
call.
Handling two voice calls
You can have calls ongoing and on
hold at the same time.
To switch between two calls
•
During the call, press .
To join two calls
•
During the call, select Options > Join
calls.
To connect two calls
•
During the call, select Options >
Transfer call. You are disconnected
from both calls.
To end an ongoing call and return to
the call on hold
•
First press
Conference calls
With a conference call, you can have a
joint conversation with up to five
people.
and then .
To add a new participant
1
During the call, press . This puts
the joined calls on hold.
2
Select Options > Add call.
3
Enter the number to call and press
.
4
Select Options > Join calls to add the
new participant.
5
Repeat this task to add more
participants.
To release a participant
1
Select Options > Release party.
2
Select the participant to release.
To have a private conversation
1
During the call, select Options > Talk
to and select the participant to talk to.
32 Calling

2
To resume the conference call, select
Options > Join calls.
My numbers
You can view, add and edit your own
phone numbers.
To check your phone numbers
1
From Homescreen select Menu >
Address Book.
2
Scroll to New contact and select
Options > Special numbers > My
numbers.
3
Select an option.
Accept calls
You can choose to receive calls from
certain phone numbers only.
To add numbers to the accepted
callers list
1
From Homescreen select Menu >
Settings > the Calls tab > Manage calls
> Accept calls > Only from list.
2
Scroll to New and select Add.
3
Select a contact or Groups.
See Groups on page 29.
To accept all calls
•
From Homescreen select Menu >
Settings > the Calls tab > Manage calls
> Accept calls > All callers.
Restricted dialling
You can restrict outgoing and incoming
calls. A password from your service
provider is required.
If you divert incoming calls, you cannot
use some restrict calls options.
Restrict calls options
Standard options are:
•
All outgoing – all outgoing calls
•
Outgoing intl – all outgoing
international calls
•
Outgoing intl roam. – all outgoing
international calls except to your
home country
•
All incoming – all incoming calls
•
Inc. when roaming – all incoming calls
when you are abroad
To restrict calls
1
From Homescreen select Menu >
Settings > the Calls tab > Manage calls
> Restrict calls.
2
Select an option.
3
Select Activate.
4
Enter your password and select OK.
Call time and cost
During a call, the phone shows how
long you have been talking. You can
also check on the duration of your last
Calling 33

call, your outgoing calls and the total
time of all your calls.
To check the call time
•
From Homescreen select Menu >
Settings > the Calls tab > Time & cost >
Call timers.
Showing or hiding your phone number
You can decide to show or hide your
phone number when you make a call.
To hide your phone number
1
From Homescreen select Menu >
Settings > the Call History tab > Show/
hide my no..
2
Select Hide number.
Messaging
Text and multimedia
messages
Messages can contain text, pictures,
sound effects, animations, and
melodies. You can also create and use
templates for your messages.
When sending messages, the phone
automatically selects the most suitable
method (as a text or multimedia
message) for sending the message.
If you cannot use multimedia
messages, see I cannot use Internet-
based services on page 66.
Sending messages
You can send messages from your
phone.
To create and send a message
1
From Homescreen select Menu >
Messaging > Write message >
Message.
2
Enter text. To add items to the
message, press , scroll and select
an item.
3
Select Continue > Addr. Book look-up.
34 Messaging

4
Select a recipient and select Send.
If you send a message to a group, you will
be charged for each member. See
Groups on page 29.
To copy and paste text in a message
1
When you write the message, select
Options > Copy & paste.
2
Select Copy all or Mark & copy. Scroll to
and mark text in the message.
3
Select Options > Copy & paste > Paste.
Receiving and saving messages
You are notified when you receive a
message. Messages are automatically
saved in the phone memory. When the
phone memory is full, you can delete
messages or save them on a memory
card or on the SIM card.
To save an incoming message on a
memory card
•
From Homescreen select Menu >
Messaging > Messages > Settings >
Save to > Memory card.
To save a message on the SIM card
1
From Homescreen select Menu >
Messaging > Messages and select a
folder.
2
Scroll to a message and select
Options > Save message.
To view a message from the inbox
1
From Homescreen select Menu >
Messaging > Inbox.
2
Select the Inbox tab.
3
Scroll to the message and select View.
To call a number in a message
•
When you view the message, scroll to
the phone number and press
Templates
If you often use the same phrases and
pictures in a message, you can save
the message as a template.
To add a message template
1
From Homescreen select Menu >
Messaging > Messages > Templates >
New template > Add.
2
Enter text. To add items to the
message, press , scroll and select
an item.
3
Select Save.
4
Enter a title and select OK.
To save a message as a template
1
From Homescreen select Menu >
Messaging > Inbox.
2
Scroll to the message and select View
> Options > Save as template.
.
Messaging 35

Message options
You can set some options, such as the
Message alert and default storage
location, to apply to all messages. You
can set other options, such as the
Delivery priority and Delivery time, for
each message you send.
To set options for all messages
1
From Homescreen select Menu >
Messaging > Messages > Settings.
2
Scroll to an option and choose Select.
To set options for a specific message
1
When the message is ready and a
recipient is selected, select Options >
Advanced.
2
Scroll to an option and select Edit.
Voice messages
You can send and receive a sound
recording as a voice message.
The sender and recipient must have a
subscription supporting picture
messaging.
To record and send a voice message
1
From Homescreen select Menu >
Messaging > Write message > Voice
message.
2
Record the message and select Stop >
Send > Addr. Book look-up.
3
Select a recipient and select Send.
Email
You can use standard email functions
and your computer email address in
your phone.
You can synchronise your email using
Microsoft® Exchange ActiveSync®.
Before using email
You can use the setup wizard to check
if settings are available for your email
account or you can enter them
manually. You can also receive settings
at www.sonyericsson.com/support.
To create an email account
1
From Homescreen select Menu >
Messaging > Email to start the setup
wizard.
2
Follow the prompts to create the
account.
If you enter settings manually, you can
contact your email provider for more
information. An email provider could be
the company that supplied your email
address.
To create additional email accounts
1
From Homescreen select Menu >
Messaging > Email > Accounts.
2
Scroll to New account and select Add.
36 Messaging

To write and send an email message
1
From Homescreen select Menu >
Messaging > Email > Write message.
2
Select Add > Enter email address. Enter
the email address and select OK.
3
To add more recipients, scroll to To:
and select Edit.
4
Scroll to an option and select Add >
Enter email address. Enter the email
address and select OK. When you are
ready, select Done.
5
Select Edit and enter a subject. Select
OK.
6
Select Edit and enter the text. Select
OK.
7
Select Add and choose a file to attach.
8
Select Continue > Send.
To receive and read an email message
1
From Homescreen select Menu >
Messaging > Email > Inbox > Options >
Check new email.
2
Scroll to the message and select View.
To reply to an email message
1
From Homescreen select Menu >
Messaging > Email > Inbox.
2
Scroll to the message and select
Options > Reply.
3
Write the reply and select OK.
4
Select Continue > Send.
To view an attachment in an email
message
•
When you view the message, select
Options > Attachments > Use > View.
Active email account
If you have several email accounts, you
can change which one is active.
To change the active email account
1
From Homescreen select Menu >
Messaging > Email > Accounts.
2
Select an account.
Push email
You can receive notification in your
phone from your email server that you
have new email messages.
To turn on push email notification
•
From Homescreen select Menu >
Messaging > Email > Settings > Push
email.
When using push email, the phone stays
connected to the email server and normal
traffic rates apply. Contact Orange for
details.
Orange Messenger
You can connect and log in to the
Orange Messenger server to
communicate online with chat
Messaging 37

messages. If you cannot use Orange
Messenger, see I cannot use Internet-
based services on page 66.
Before using Orange Messenger
If you do not have an existing Orange
Messenger account, you need to
register one.
To register an Orange Messenger
account
•
From Homescreen select Menu >
Messaging > Messenger > Reg. new
account.
To enter Orange Messenger server
settings
1
From Homescreen select Menu >
Messaging > Messenger > Configure.
2
Scroll to a setting and select Add.
To log in to the Orange Messenger
server
•
From Homescreen select Menu >
Messaging > Messenger > Sign In.
To log out of the Orange Messenger
server
•
Select Options > Log out.
To add a chat contact
1
From Homescreen select Menu >
Messaging > Messenger > the
Contacts tab.
2
Select Options > Add contact.
To send a chat message
1
From Homescreen select Menu >
Messaging > Messenger > the
Contacts tab.
2
Scroll to a contact and select Send IM.
3
Write the message and select Send.
My Status
You can show your status, for example,
Online, Busy or Appear Offline.
To set your status
1
From Homescreen select Menu >
Messaging > Messenger > the My
status tab.
2
Scroll to Availability and select Edit.
To update your status
1
From Homescreen select Menu >
Messaging > Messenger > the My
status tab.
2
Edit the information.
3
Select Options > Save.
38 Messaging
Imaging
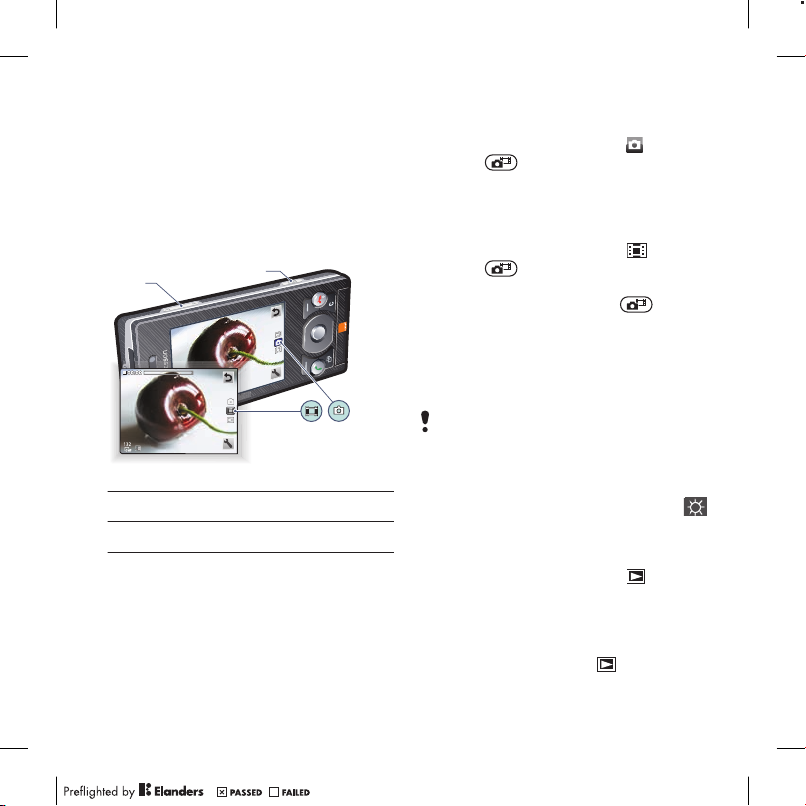
1
2
You can take photos and record video
clips to view, save or send. You find
saved photos and video clips in Media
and in Media Album.
To take a photo
1
Activate the camera and press the
navigation key to scroll to .
2
Press to take a photo. The photo
is automatically saved.
To record a video clip
Using the camera
1
Activate the camera and press the
navigation key to scroll to
2
Press fully down to start
recording.
3
To stop recording, press fully
down. The video clip is automatically
saved.
.
To use zoom
•
Press the volume key up or down.
When taking a photo, zoom is available
only in VGA mode.
To adjust brightness
•
Press the navigation key. The amount
1 Take photos/Record video
2 Zoom in or out
To activate the camera
•
From Homescreen select Menu >
Camera.
of brightness is shown beside the .
To view photos
1
Activate the camera and press the
navigation key to scroll to .
2
Scroll through the photos.
To view video clips
1
Activate the camera and press the
navigation to scroll to
.
Imaging 39
2
Scroll to a video clip and press the
centre selection key.
More camera features
You can improve an underexposed
photo with Photo fix.
To improve a photo with Photo fix
1
Activate the camera and press the
navigation key to scroll to
2
Make sure Review is set to On. Select
Options >Review > On.
3
Take a photo.
4
During review, select Options > Photo
fix.
Camera icons and settings
Icons on the screen inform what the
current setting is. More camera
settings are available in Options.
To change settings
•
Activate the camera and select .
To view information about settings
•
Scroll to a setting and select .
Camera shortcuts
Key Shortcut
Volume key Zoom
.
Navigation key Brightness
Camera key guide
Viewing and tagging photos
You can view and tag your photos in
Media.
To view photos in a slide show
1
From Homescreen select Menu >
Media > Photo > Camera album.
2
Select a month.
3
Scroll to a photo and select View.
4
Select Options > Slide show.
5
Select a mood.
Geo tagging
When appears on the screen, your
geographical position is saved with the
photos you take. This is called geo
tagging, and it shows the approximate
location of where a photo was taken.
To change the geo tagging setting
1
From Homescreen select Menu >
Camera > > Settings > Add position.
2
Select an option.
Photo tags
You can tag photos to categorise them
in Photo tags. For example, you can
40 Imaging

create a tag called vacation and add it
to all your vacation photos.
To create a new photo tag
1
From Homescreen select Menu >
Media > Photo > Camera album.
2
Select a month.
3
Scroll to a photo and select View.
4
Press
5
6
7
and select Options > New tag.
Enter a name and select OK.
Select an icon.
To tag the photo, select Options > Tag
this photo.
To tag photos
1
From Homescreen select Menu >
Media > Photo > Camera album.
2
Select a month.
3
Scroll to a photo and select View.
4
Press and scroll to a tag.
5
Select Options > Tag this photo.
6
For each photo you want to tag, scroll
to the photo and select Options > Tag
this photo.
Using photos
You can add a photo to a contact, use
it as a wallpaper or as a screen saver.
To use photos
1
From Homescreen select Menu >
Media > Photo > Camera album.
2
Select a month.
3
Scroll to a photo and select View.
4
Select Options > Use as.
5
Select an option.
To set a Java™ application as a
wallpaper
1
From Homescreen select Menu >
Settings > the Display tab.
2
Select Wallpaper > Application.
3
Select a Java application.
You can only see the Java applications
that have support for wallpaper.
Working with photos
You can view, enhance and organise
your photos and video clips on your
computer by installing the Adobe™
Photoshop™ Album Starter Edition. It
is included on the CD that comes with
your phone and available for download
at www.sonyericsson.com/support.
Use Sony Ericsson Media Manager to
transfer content to and from your
phone. For more information, see
Transferring content to and from a
computer on page 47.
PhotoDJ™ and VideoDJ™
You can edit photos and video clips.
Imaging 41
 Loading...