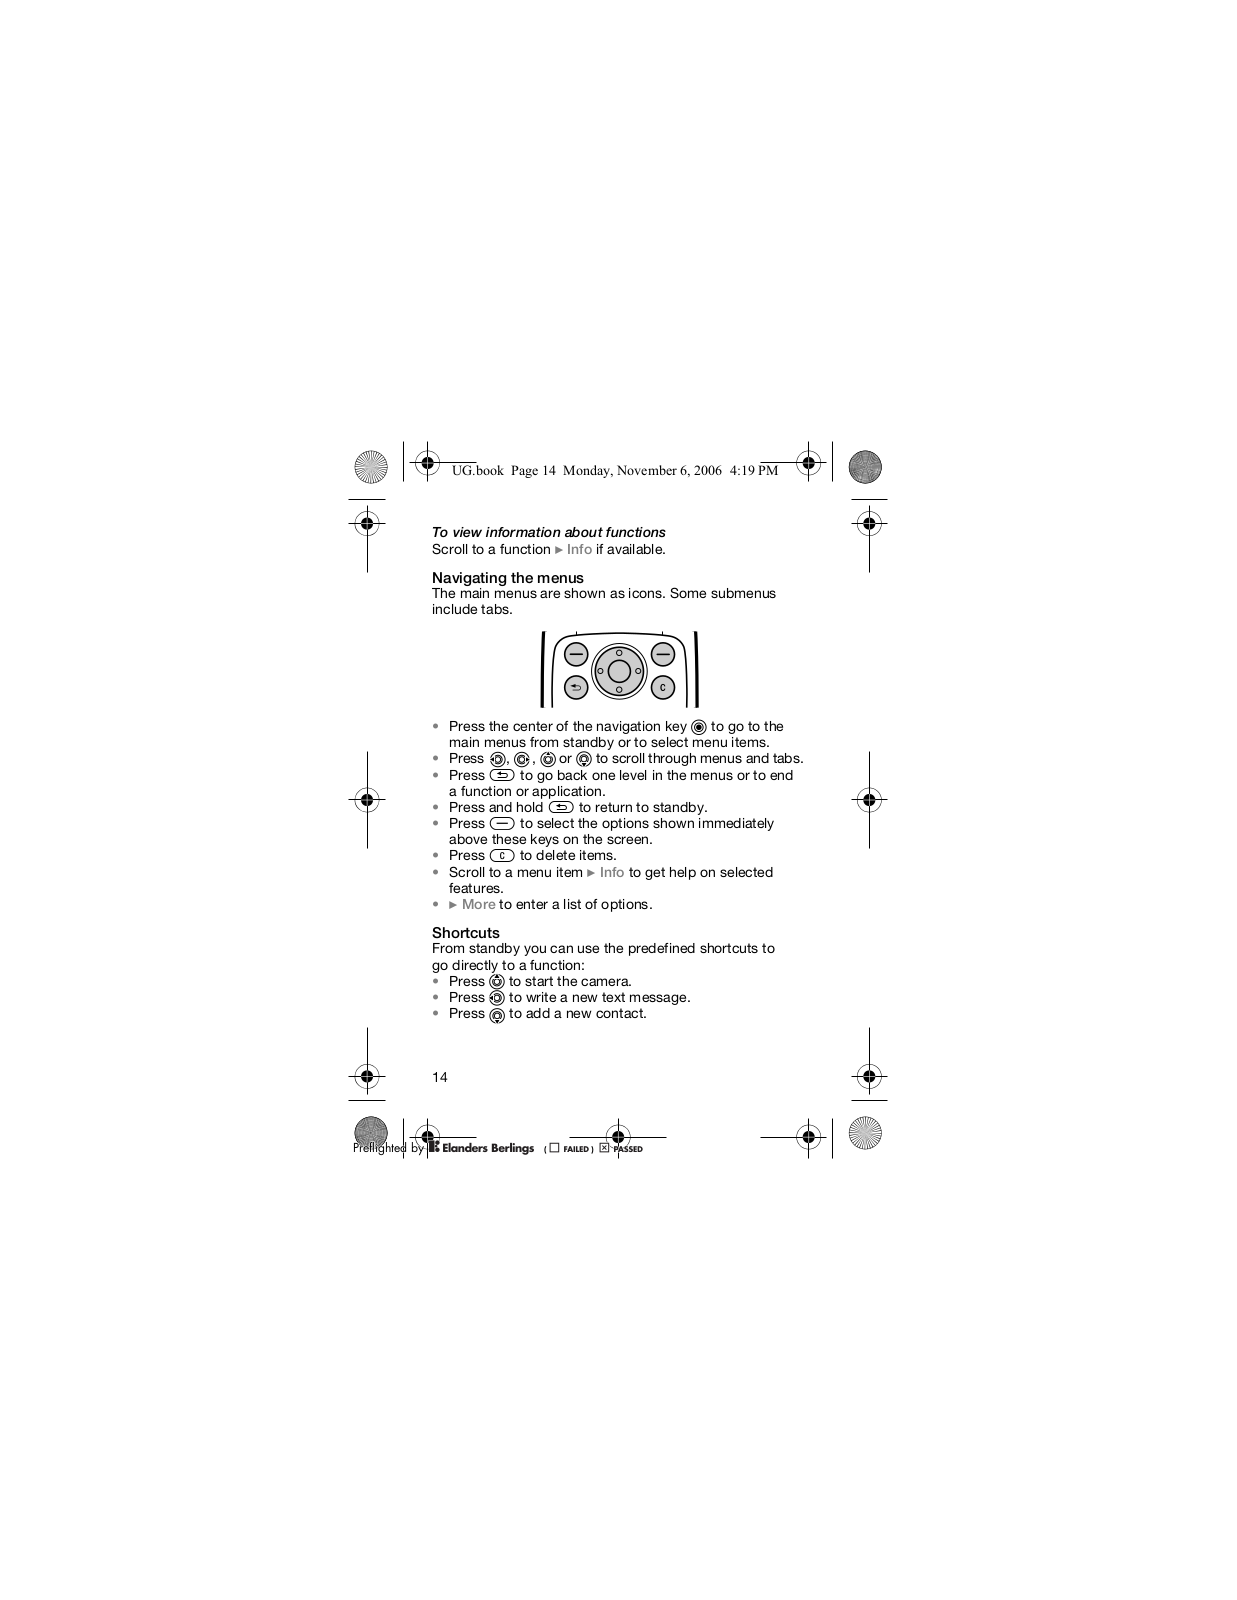
How it Works
Log In / Sign Up
Buy Points
How it Works
FAQ
Contact Us
Questions and Suggestions
Users
Sony
Loading...
A
A0402
A100
2
A1021012
A102101B
A1021021
A1021031
A1021041
2
A1021042
A1021043
A1021044
A1021051
A1021061
A1021062
A1021071
A1022011
A1022012
A1022013
A1022014
A1022015
A1022016
A1022021
2
A1022031
A1022041
A1022042
A1022043
A1022044
A1022051
A1022061
A1022071
A1022081
A1022091
A1022092
A1022101
2
A1022111
A1022112
2
A1022121
A1022131
A1022141
2
A1022151
2
A1022161
A1022171
A1031011
A1031012
A1031021
A1032011
A1032012
A1032013
A1032021
3
A1032041
A1032042
A1032051
A1032052
2
A1032061
A1032071
2
A1032081
A1032091
A1041011
A1041012
A1041021
A1041031
A1042011
A1042012
A1042021
A1042041
A1042051
A1042052
A1042061
A1042062
2
A1042081
A1042092
A1052021
A1052022
A1052023
A1052031
A1052041
2
A1052042
4
A1052051
2
A1052061
2
A1052091
A1052101
2
A1052121
2
A1052141
3
A1052151
A1052161
2
A1052171
A1052191
2
A1061011
A1368100A
A1368101A
A1663610A
A1833832
A1880011
3
A1880014
A1880026
3
A1880028
A1880032
A1880033
A-92-GX-18-C-820
A-AY7-100-11-1
A-BY5-100-01
Loading...
Loading...
Nothing found
A1032021
User Manual
88 pgs
2.97 Mb
0
Users Manual
86 pgs
1.64 Mb
0
Users Manual
2 pgs
106.28 Kb
0
Table of contents
Loading...
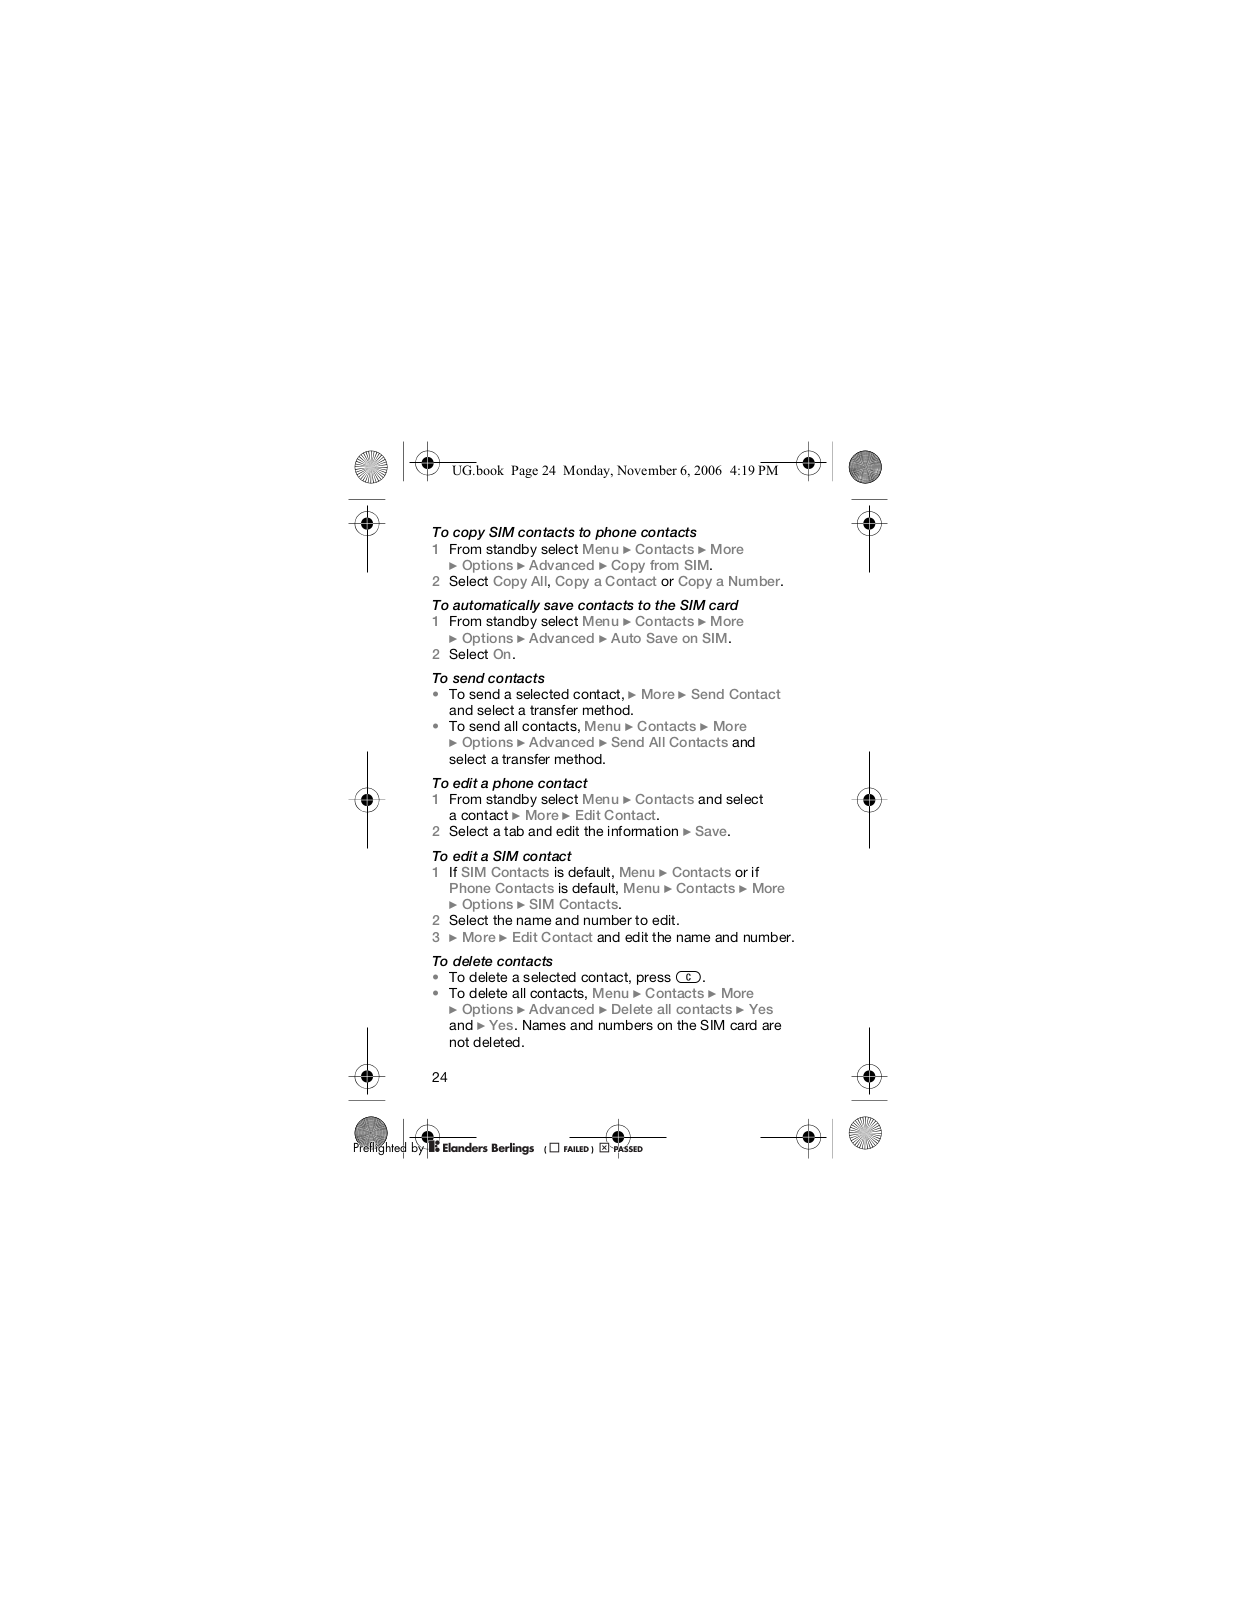
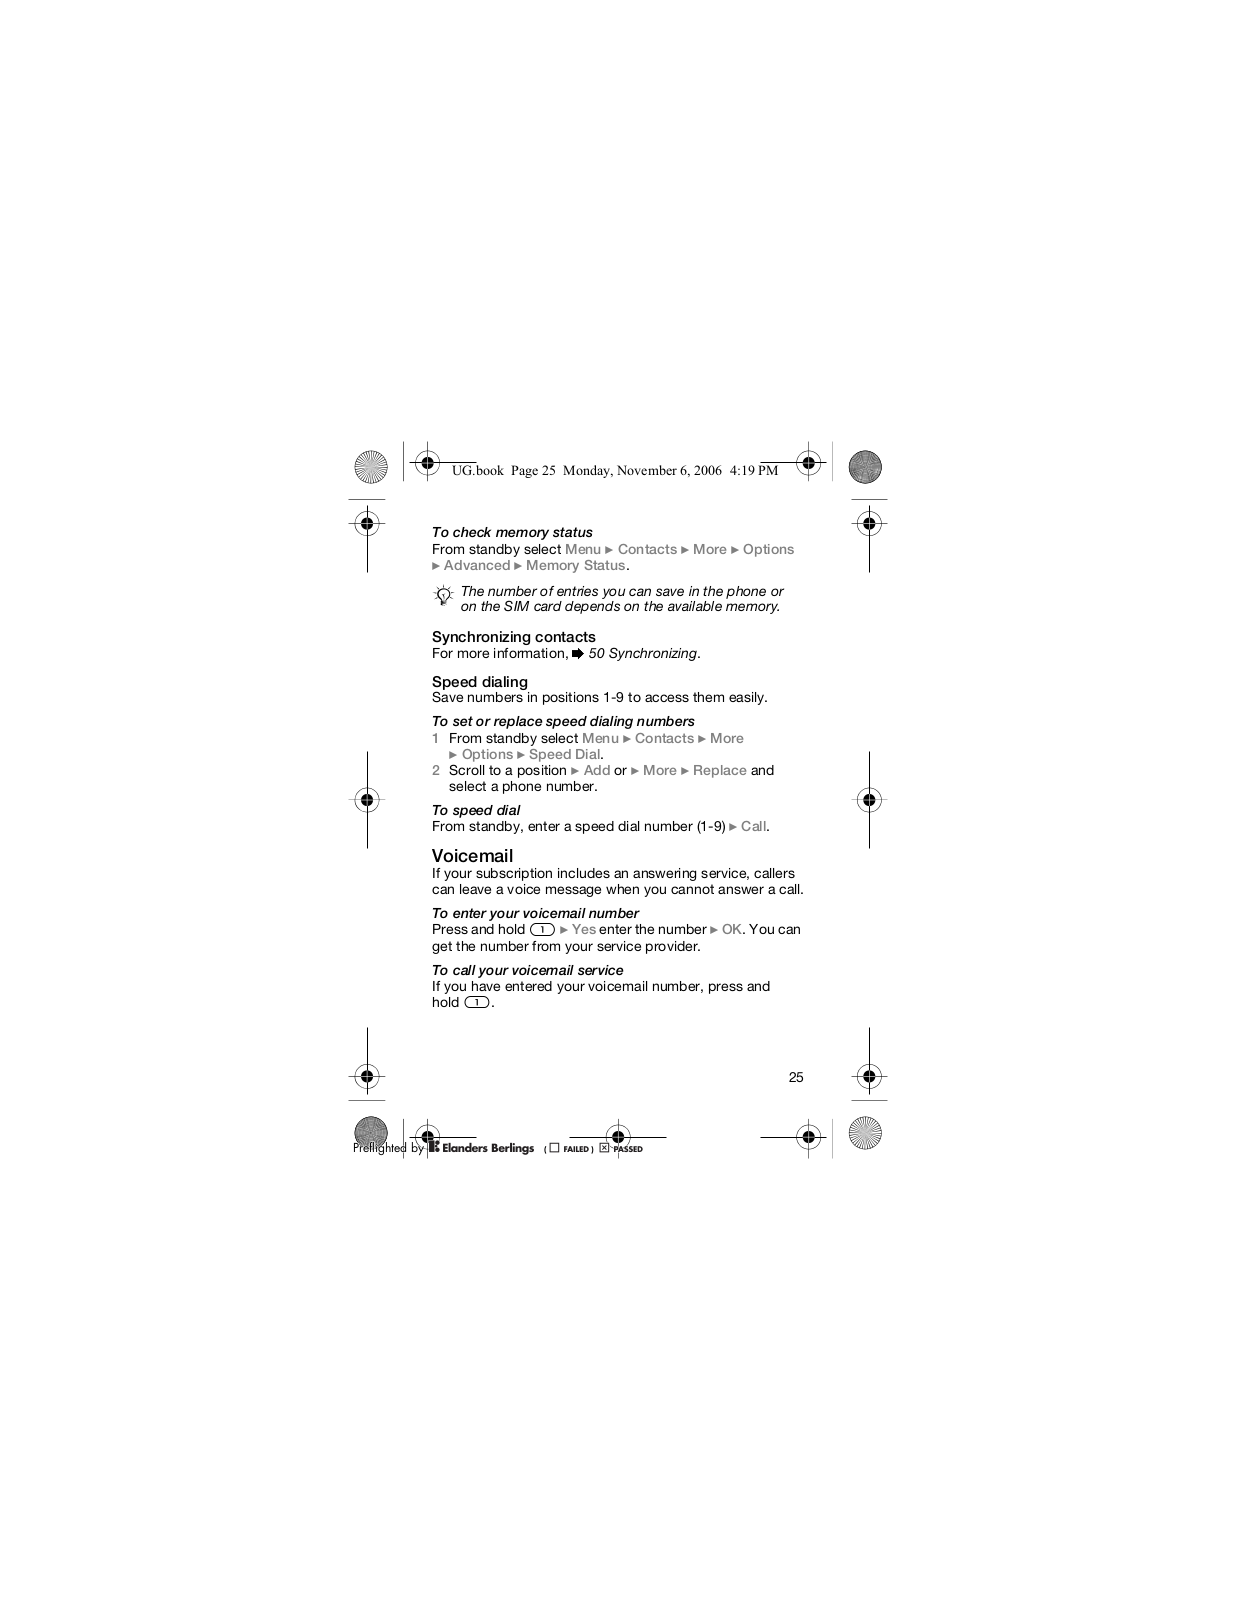
Sony A1032021 User Manual
...
Sony User Manual
Download
Specifications and Main Features
Frequently Asked Questions
User Manual
Download
Loading...
+
61
hidden pages
Unhide
You need points to download manuals.
1 point = 1 manual.
You can buy points or you can get point for every manual you upload.
Buy points
Upload your manuals
 Loading...