

Sony 80422D User Manual
Introduction
Most operation descriptions are based on default settings.
Unless noted otherwise, descriptions are for Home Screen. Some operation
descriptions may be omitted.
Before You Begin
Data Communication
Screenshots & Key Labels
Other Notations
Before You Begin
Read "Safety Precautions" and this guide thoroughly beforehand for proper usage.
Accessible services may be limited by contract conditions.
Unauthorized copying of any part of this guide is prohibited.
Guide content subject to change without prior notice.
Data Communication
Handset is designed to be always connected to the Internet. Some functionality, such as data
syncing, initiate transmission automatically.
Large-volume data communication (application downloads, video viewing, etc.) incur expensive
transmission fees. Subscription to a flat-rate data plan is strongly recommended.
Depending on applications and services used, transmission fees may be incurred even while
connected by Wi-Fi.
Screenshots & Key Labels
Screenshots and Key labels are provided for reference only. Actual handset windows, menus, etc.
may differ in appearance.
xperia_00_Introduction.docx
1

Other Notations
Xperia is referred to as "handset" in this guide.
In this guide, microSD
In this guide and on handset, "abroad" means "outside Japan" with regard to handset/service
usage.
TM
/microSDHCTM/microSDXCTM Card is referred to as "SD Card."
xperia_00_Introduction.docx
2
Parts & Functions
Part
Description
while charging.
call.
yourself, etc.
etc.) from here.
your fingers on
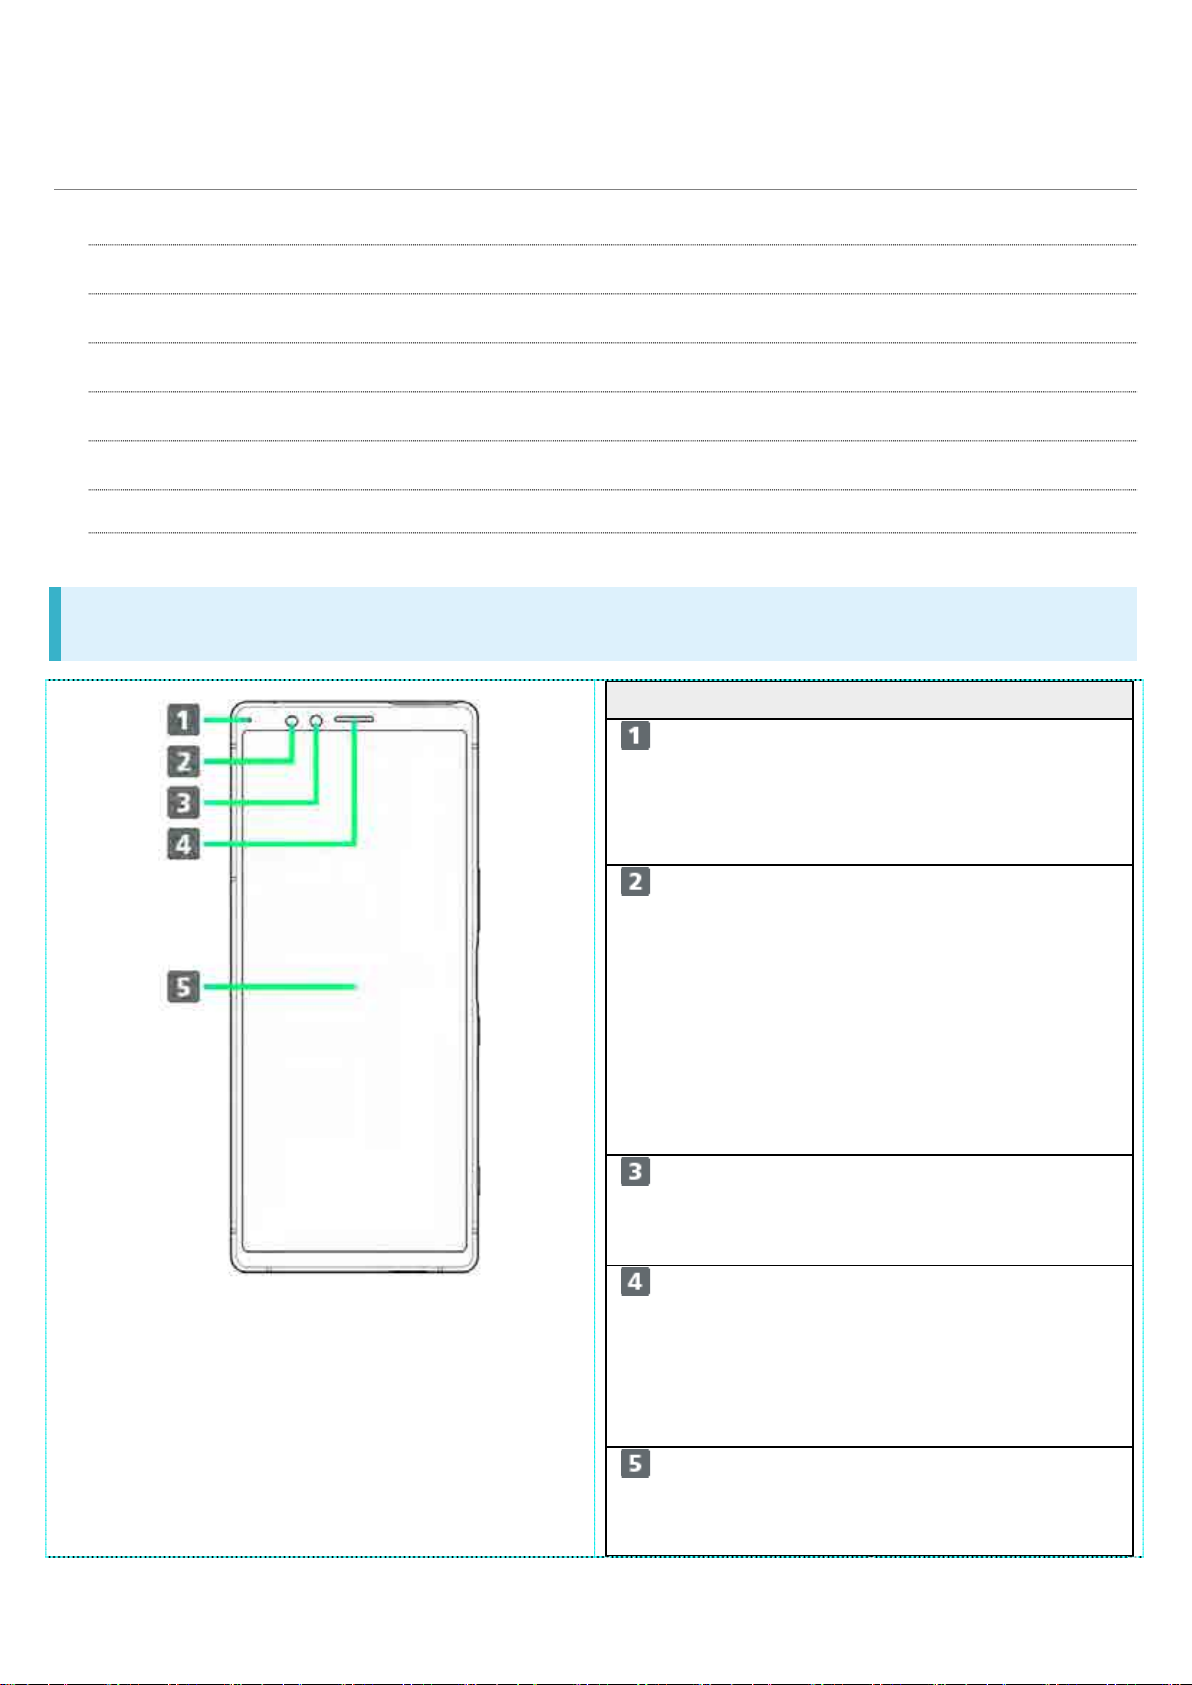
Handset (Front)
Handset (Back/Side)
Handset Keys
CE mark and FCC ID
Available radio frequencies
Notification Lamp
Handset (Front)
Notification Lamp Flashes for
notifications while
Display is off. Lights
Proximity/Light
Sensor
Front Camera Use to shoot still
Earpiece/Speaker Hear the other party's
Detects surrounding
brightness to
automatically adjust
Display or backlight
and prevent
Touchscreen
misoperation during a
images, videos of
xperia_01_Getting Started.docx
1
voice here.
Also, hear sound
(music, videos, TV,
Display Touchscreen-type
display, operate with
Display.
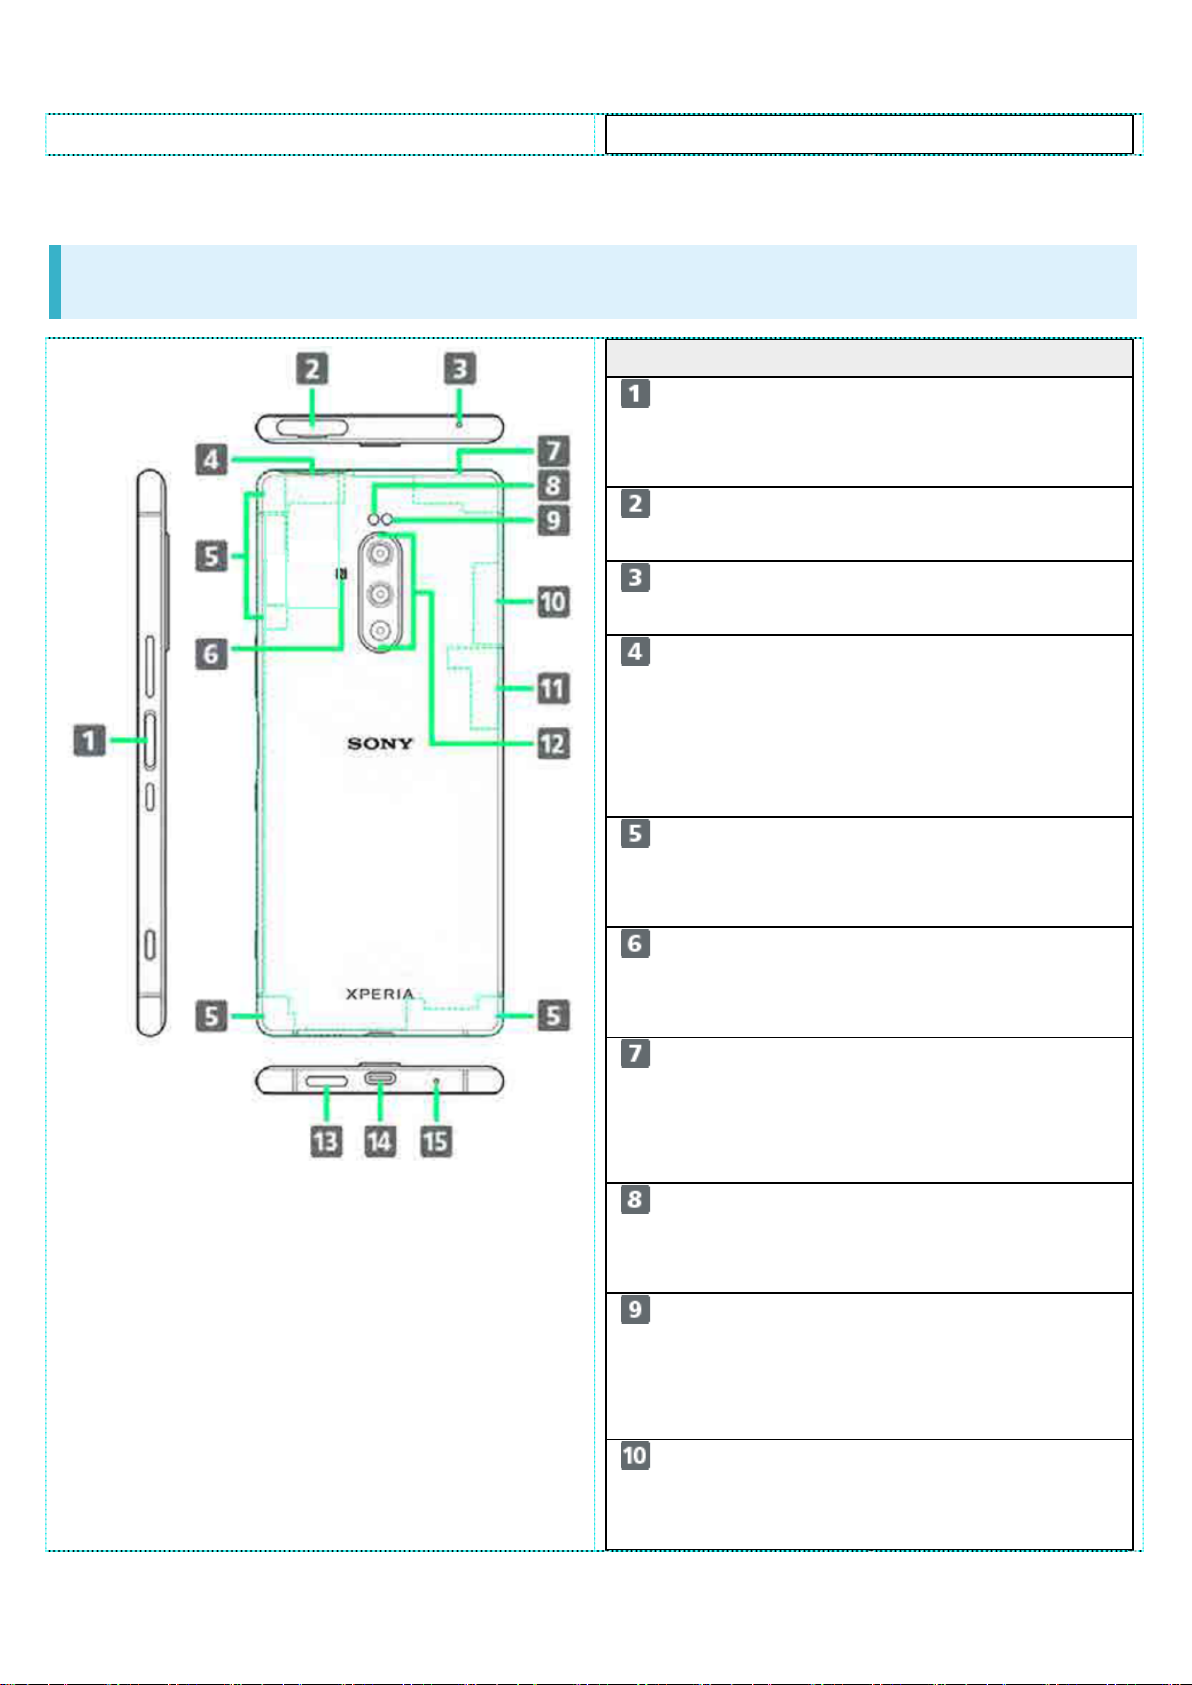
Handset (Back/Side)
Part
Description
authentication.
Slot
Card.
calling.
remove nameplate.
communication.
Detection Area
NFC / Osaifu-Keitai®.
Wi-Fi.
etc.
the light source.
ooth®Antenna Area
Bluetooth®feature.
Fingerprint
Sensor
SIM Card/SD Card
Unlock screen with
fingerprint
Insert SIM Card/SD
Second Mic Reduces noise for
Nameplate CE mark, FCC ID,
IMEI information
printed sticker is
attached. Do not
Internal Antenna
Area
NFC /
Osaifu-Keitai
®
Internal Antenna for
calls and data
Hold up to a
reader/writer to use
xperia_01_Getting Started.docx
2
Internal
Antenna/Wi-Fi
Antenna Area
®
Internal Antenna for
calls, data
communication and
Flash/Photo Light Use as camera flash
when taking photos,
RGBC-IR Sensor Automatically adjusts
white balance based
for shooting based on
GPS
Antenna/Wi-Fi/Bluet
Internal Antenna for
GPS and Wi-Fi and

Wi-Fi®Antenna
Area
Wi-Fi.
and videos.
audio.
TM
available), etc.
Mic
Speak here.
Part
Description
using Camera.
Key
Turn Display on/off.
Camera.
Camera Capture still images
Speaker Listen to music as well
Internal Antenna for
as video, TV, etc.
Handset Keys
USB Type-C
Port
Volume/Zoom
Up/Down Key
Power
Key/Screen Lock
Connect USB Type-C
cable (commercially
Adjust Volume.
Adjust Zoom while
Long Press for power
on/off.
Camera Key Use as Camera
shutter.
Long Press to launch
CE mark and FCC ID
Open the slot cover, and insert a fingernail into the hook at the edge of the label tray, then pull it out
xperia_01_Getting Started.docx
3
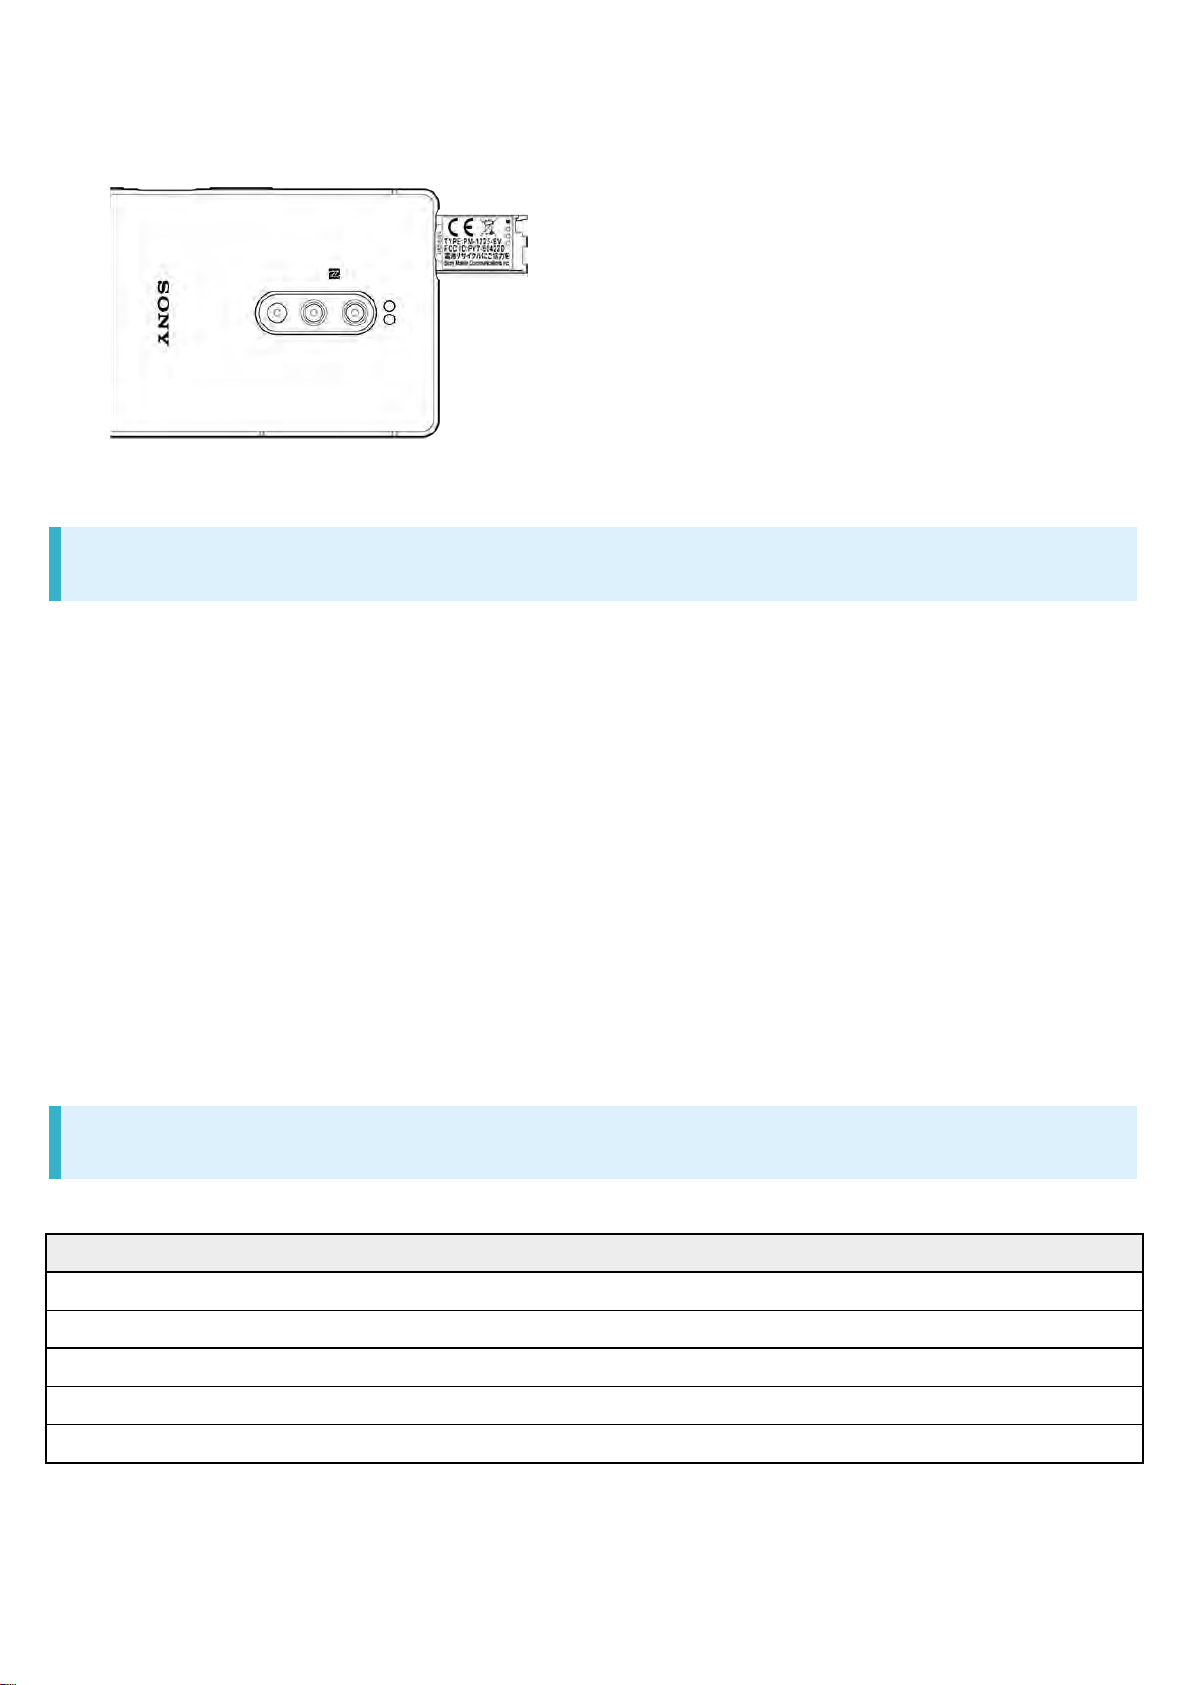
straight.
Color and How Illuminated
Indicates
Lit red
Charging (charge:14% or less)
Lit orange
Charging (charge:15% to 89%)
Lit green
Charging (charge:90% or more)
Flashing red
Charge:14% or less
Flashing white
Missed call / new Gmail / new +Message
Available radio frequencies
GSM/GPRS/EDGE : 850, 900, 1800, 1900MHz
UMTS : 2100 (Band I), 1900 (Band II), 1700 (Band IV), 900 (Band VIII)MHz
LTE : Bands 1, 2, 3, 4, 8, 11, 12, 17, 28, 38, 39, 40, 41, 42
WLAN 2.4G/5G
NFC
GSM 850/900 : 33dBm
DCS (1800)/PCS (1900) : 30dBm
UMTS : 24dBm
LTE : 23dBm(Bands 1, 2, 3, 4, 8, 11, 12, 17, 28, 38, 39, 40, 42), 26dBm(Band 41)
WLAN : 2.4GHz<100mW, 5.15-5.35GHz<200mW, 5.47-5.725GHz<200mW,
5.735-5.835GHz<25mW
NFC 13.56MHz
Notification Lamp
Lights/flashes while charging or for arriving calls/mail.
1
1 Flashes while Display is off.
xperia_01_Getting Started.docx
4

Flashing Red
Battery level is not sufficient if Notification Lamp flashes several times in red when Power
Key is Pressed with handset powered off.
Notification Lamp first flashes several times in red if charging is started with handset
powered off.
xperia_01_Getting Started.docx
5
SIM Card
SIM Card is an IC card containing phone number and other customer information.
Inserting SIM Card
Removing SIM Card
SIM-Unlocking Handset
Inserting SIM Card
Always unmount SD Card beforehand.
Pull Tray out from handset
Pull SIM Card/SD Card Slot Cover out straight using groove.
Set SIM Card into Tray with IC chip facing up
xperia_01_Getting Started.docx
6
Check SIM Card orientation by notch.
Make sure SIM Card is in Tray securely.
Holding handset held level, press Tray in straight
SIM Card is inserted.
Check Tray orientation.
Press firmly where circled ○, and make sure there is no gap between handset and SIM Card/SD
Card Slot Cover.
Removing SIM Card
Always unmount SD Card beforehand.
xperia_01_Getting Started.docx
7
Pull Tray out from handset
Pull SIM Card/SD Card Slot Cover out straight using groove.
Remove SIM Card from Tray
Holding handset held level, press Tray in straight
xperia_01_Getting Started.docx
8
SIM Card is removed.
Check Tray orientation.
Press firmly where circled ○, and make sure there is no gap between handset and SIM Card/SD
Card Slot Cover.
SIM-Unlocking Handset
Handset can be SIM-unlocked. SIM-unlocking handset allows other-carrier SIM cards to be used
with it.
Some services, functions, etc. may have restrictions when an other-carrier SIM card is used.
SoftBank Corp. does not guarantee operation whatsoever.
For details, see SoftBank Website.
xperia_01_Getting Started.docx
9
SD Card
Handset supports SD Cards up to 512 GB. Some SD Cards may not operate properly.
When using a new SD Card for the first time, always format it on handset.
Inserting SD Card
Formatting SD Card
Removing SD Card
SD Card Cautions
Data
Information stored on SD Card can become lost or changed accidentally or as a result of damage. It is
recommended that you keep a separate copy of important data. SoftBank Corp. is not responsible for
damages from data that is lost or changed.
Reading/Writing Data
Never power off while reading or writing data.
Battery Level
A low battery charge may prevent reading/writing to SD Card.
Handling SD Card
Use/keep SD Cards away from the reach of infants. May cause choking if swallowed.
Inserting SD Card
Pull Tray out from handset
xperia_01_Getting Started.docx
10
Pull SIM Card/SD Card Slot Cover out straight using groove.
Set SD Card into Tray with the metal terminals facing up
Make sure SD Card is in Tray securely.
Holding handset held level, press Tray in straight
xperia_01_Getting Started.docx
11
SD Card is inserted.
Check Tray orientation.
Press firmly where circled ○, and make sure there is no gap between handset and SIM Card/SD
Card Slot Cover.
Formatting SD Card
In Home Screen, (Apps)
xperia_01_Getting Started.docx
12
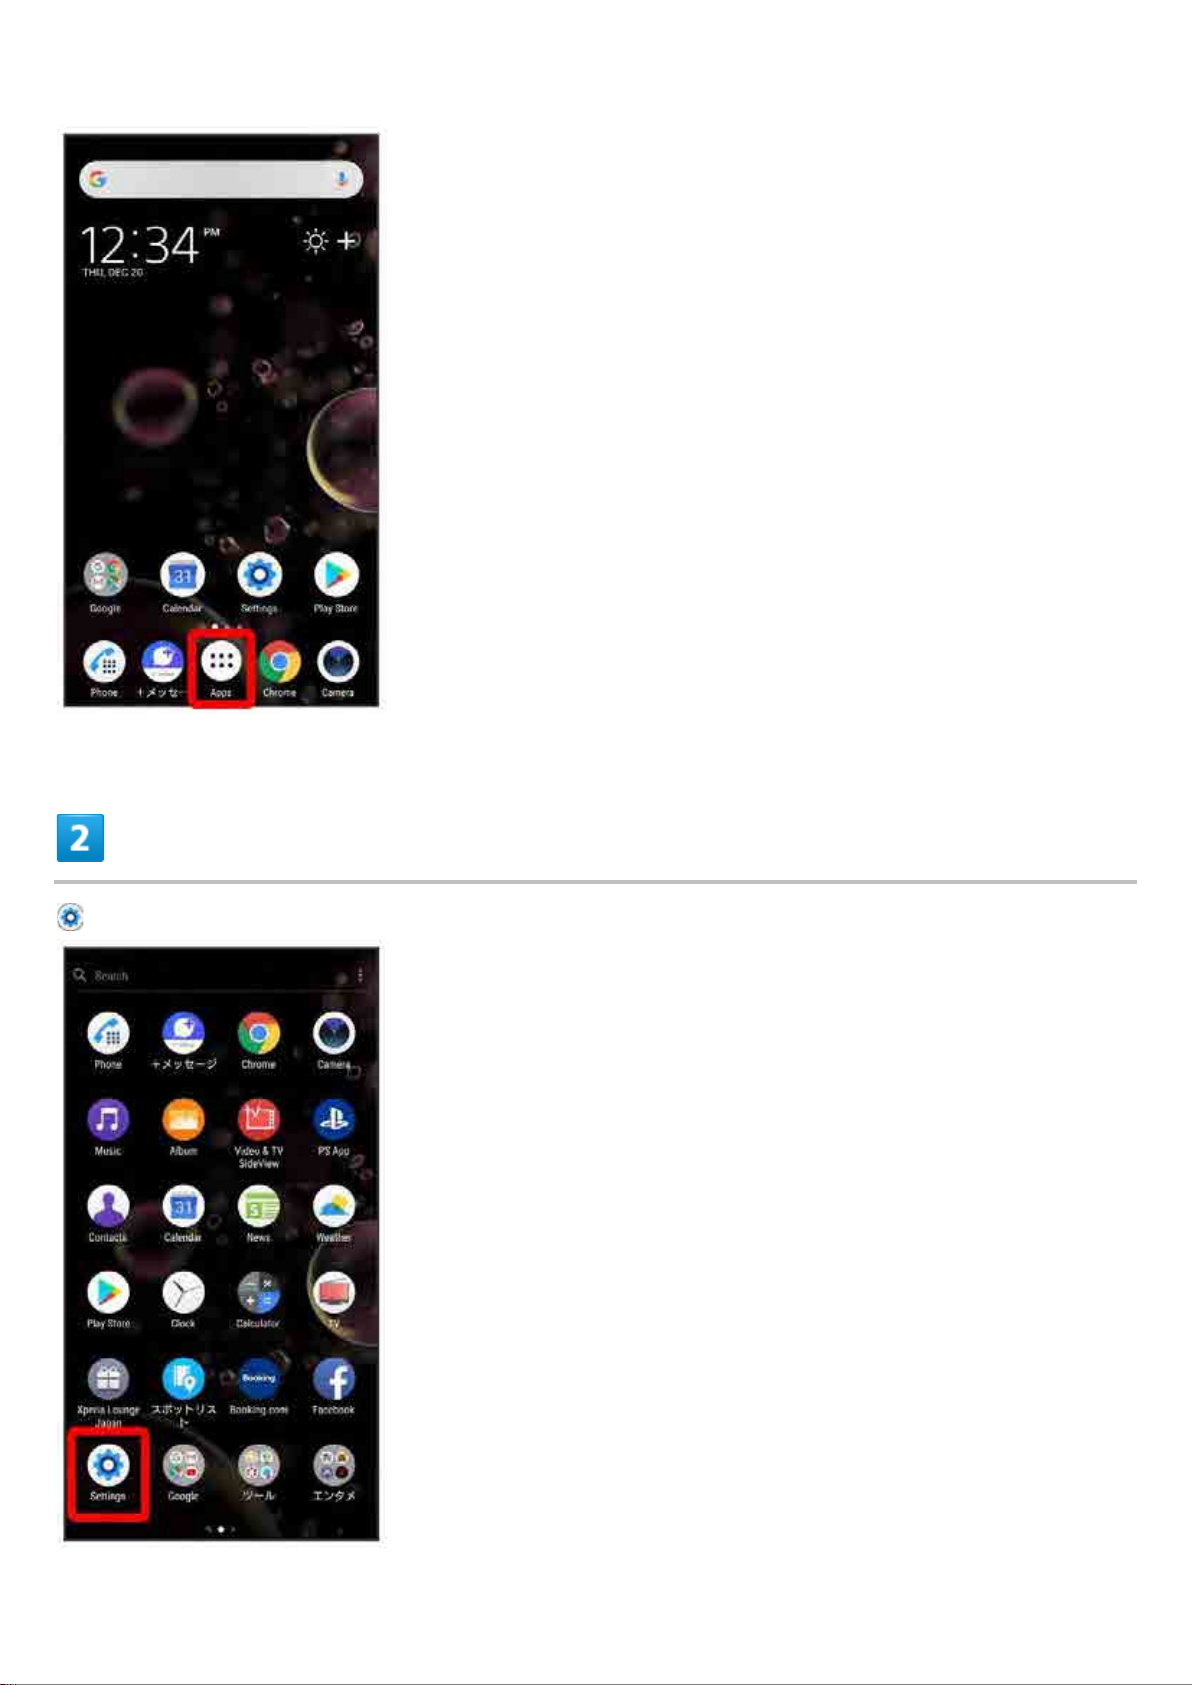
(Settings)
xperia_01_Getting Started.docx
13
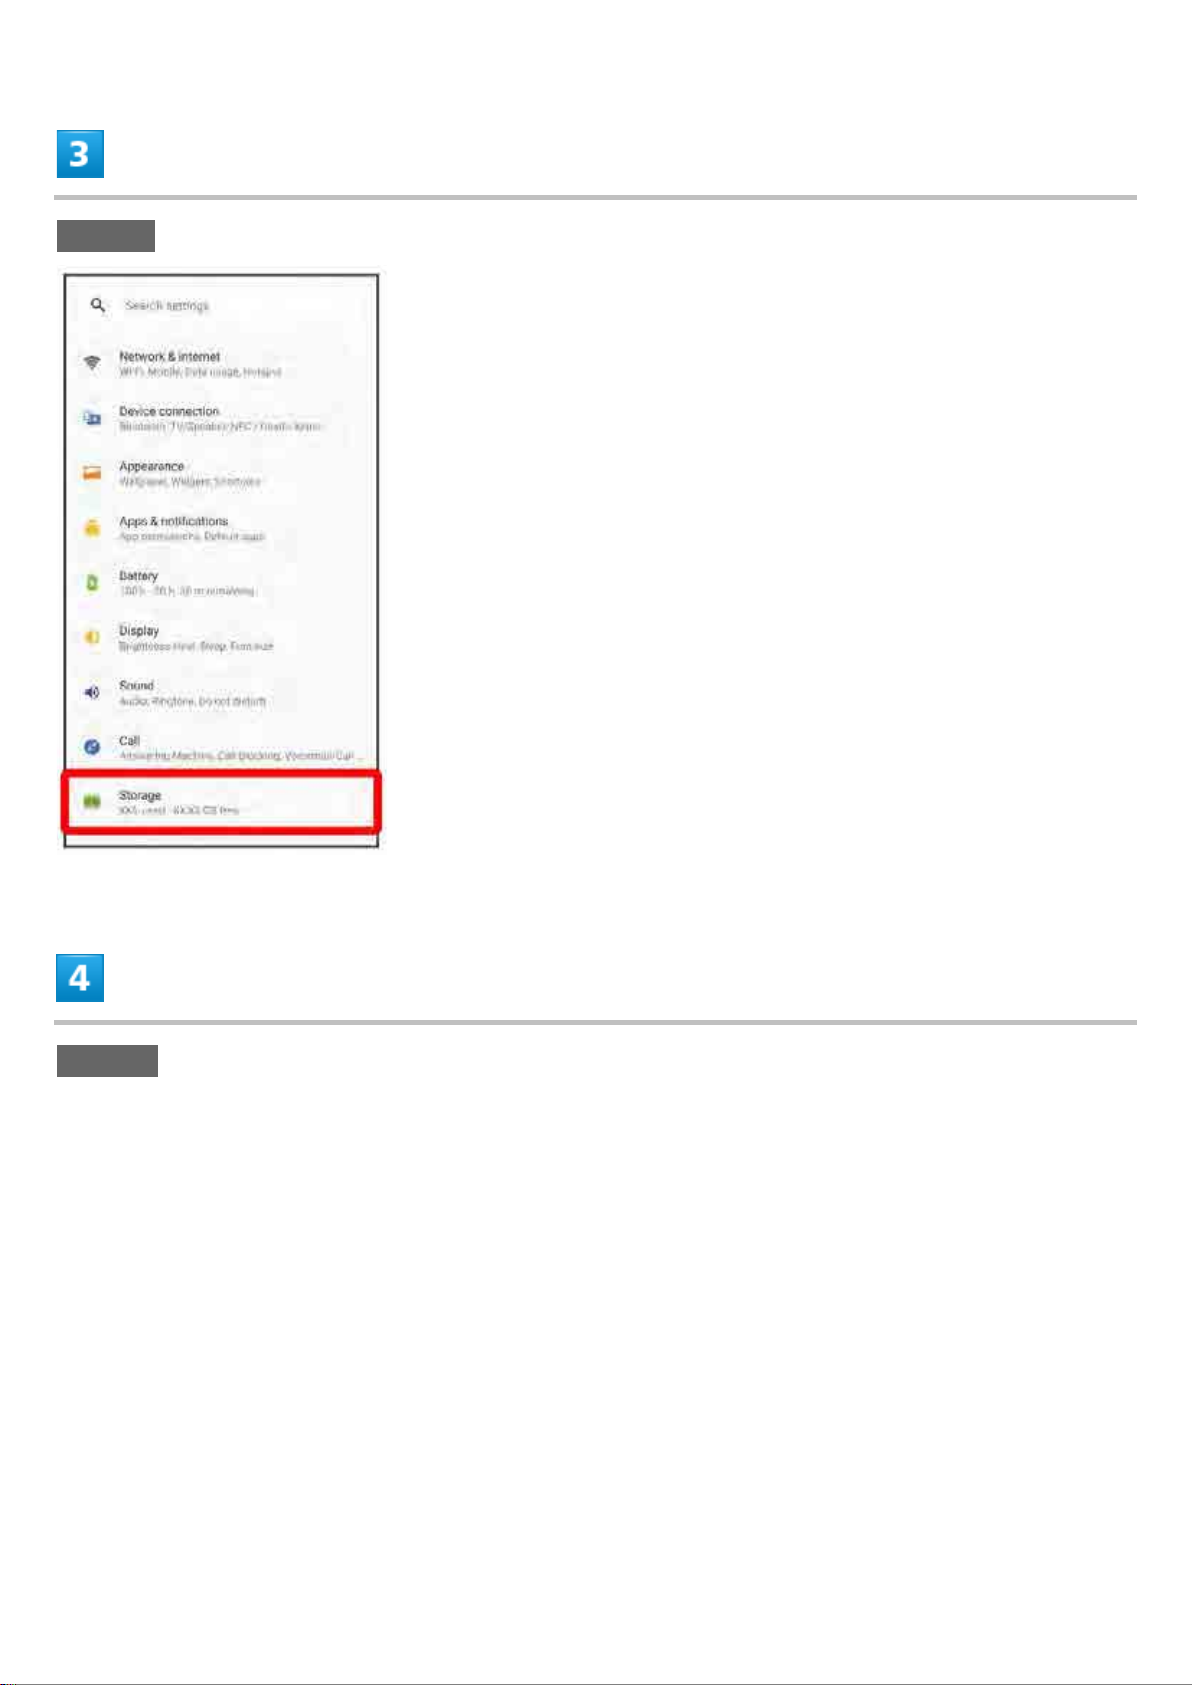
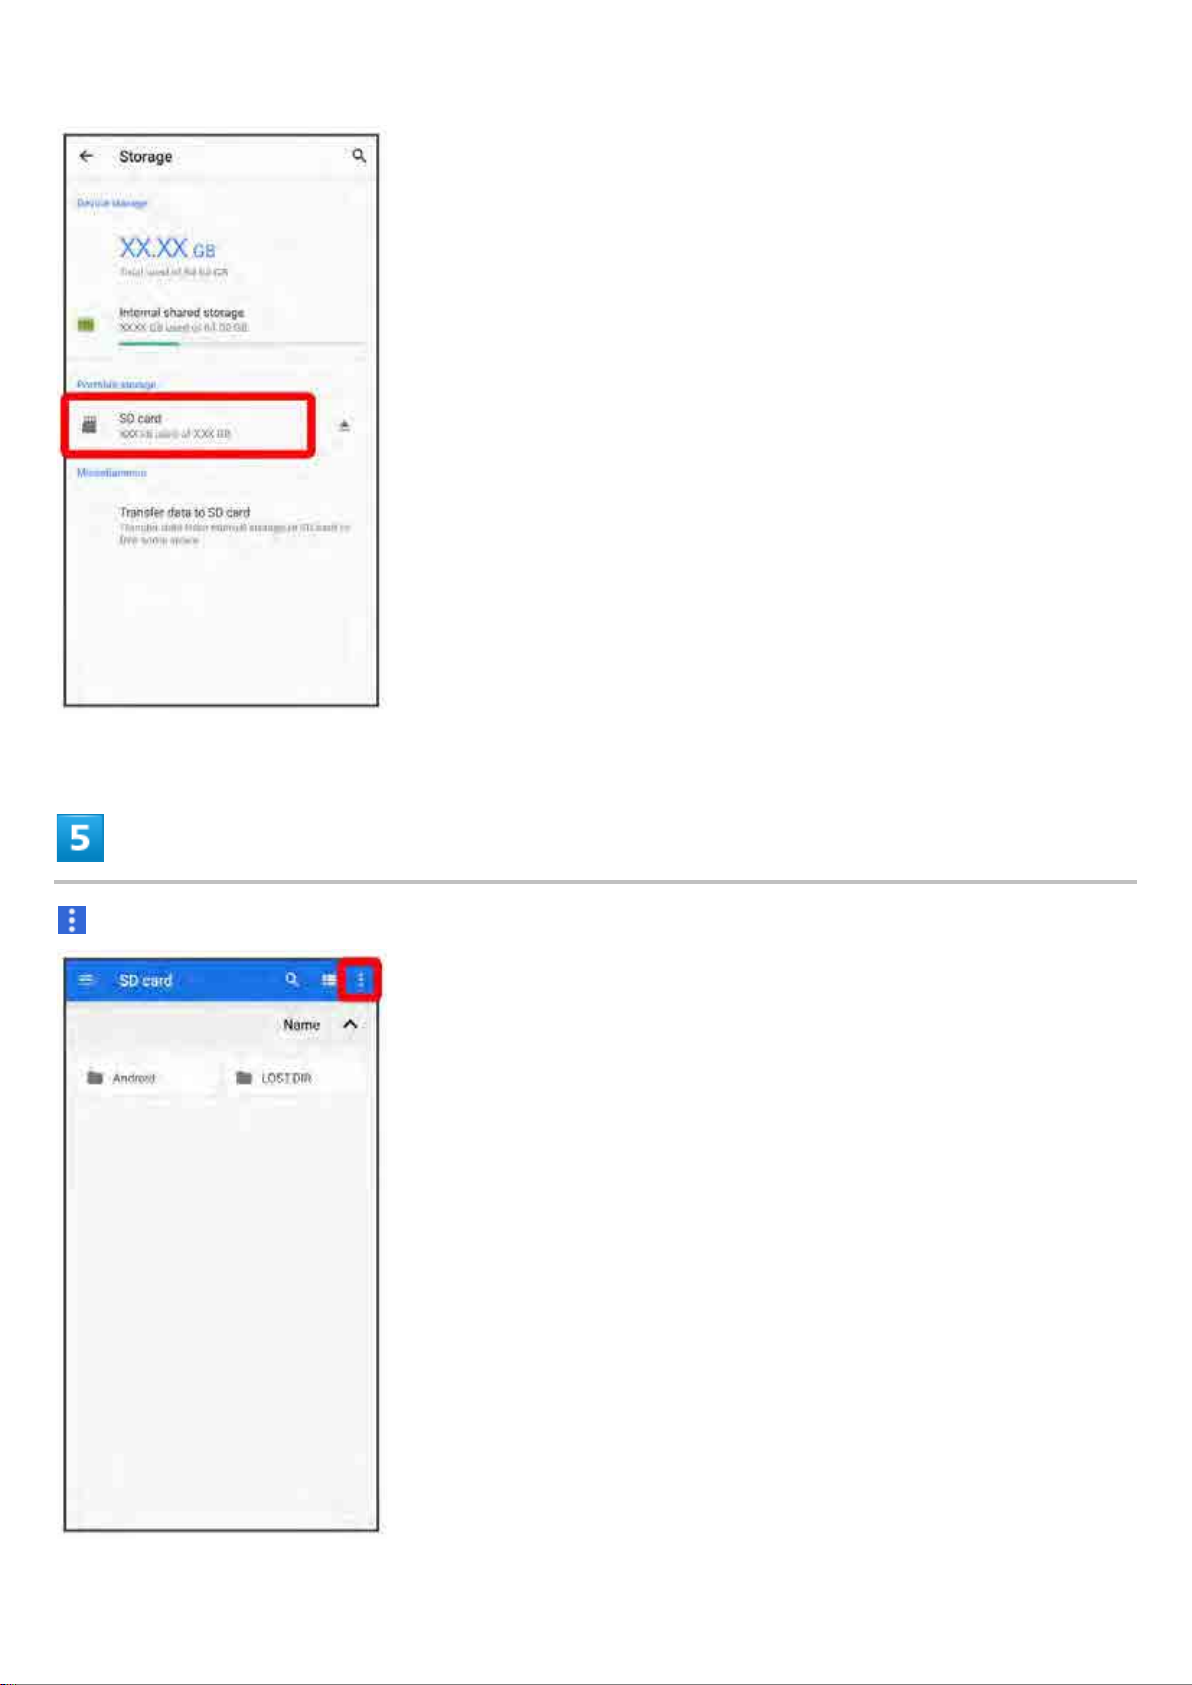
Storage
SD card
xperia_01_Getting Started.docx
14
xperia_01_Getting Started.docx
15
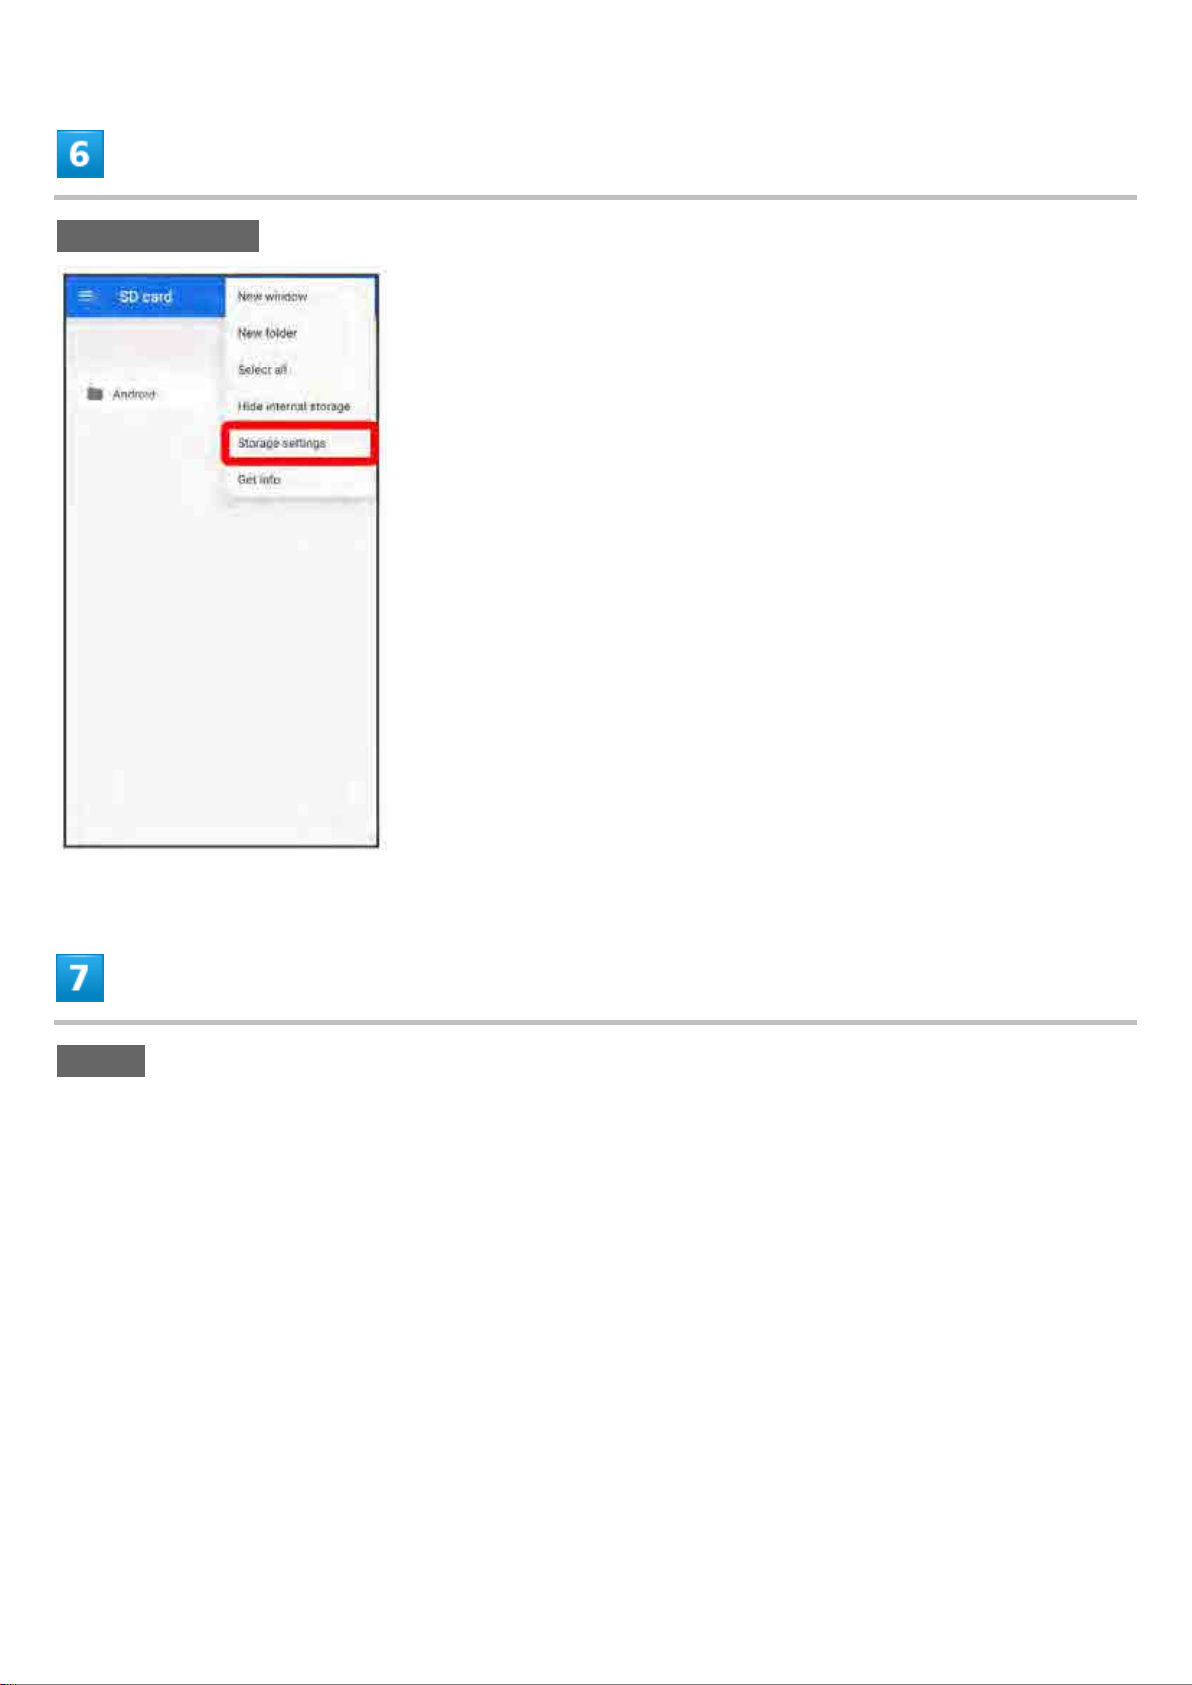
Storage settings
Format
xperia_01_Getting Started.docx
16
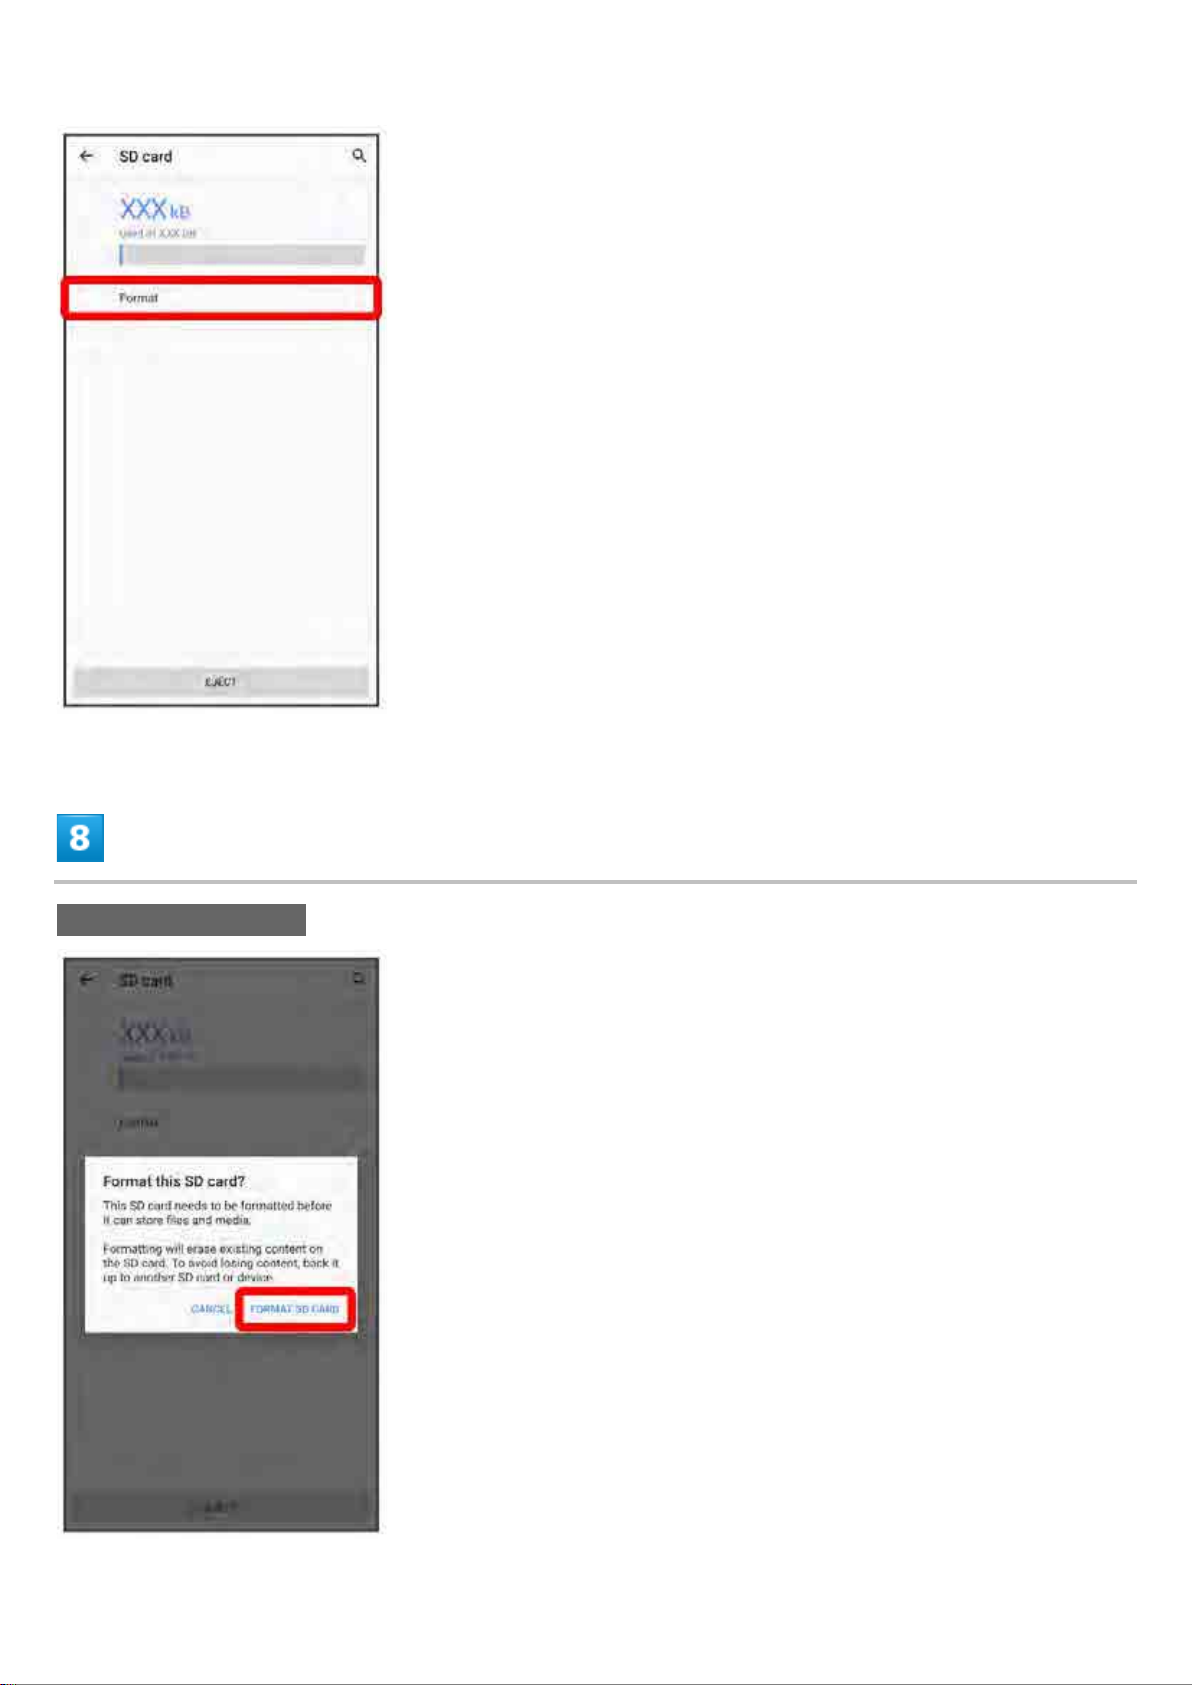
FORMAT SD CARD
xperia_01_Getting Started.docx
17
Done
All data on SD Card is erased.
Cautions when Formatting SD Card
Observe the following when formatting SD Card.
Formatting erases all data on SD Card. Carefully check any SD Card that was used on
another device before formatting.
Charge Internal Battery while formatting, or format with adequate battery charge.
Removing SD Card
Always unmount SD Card beforehand.
Pull Tray out from handset
Pull SIM Card/SD Card Slot Cover out straight using groove.
Remove SD Card from Tray
xperia_01_Getting Started.docx
18
Holding handset held level, press Tray in straight
SD Card is removed.
Check Tray orientation.
Press firmly where circled ○, and make sure there is no gap between handset and SIM Card/SD
Card Slot Cover.
xperia_01_Getting Started.docx
19
Charging Internal Battery
Charging with AC Charger
Charging with Wireless Charger
Charging with AC Charger
AC Charger is an optional accessory. Be sure to use an AC Charger specified by SoftBank. For
information on AC Charger and other peripheral devices, see SoftBank Website.
Operation using AC Charger (USB Type-CTM rapid charging AC Charger with USB PD capability
[ZSDBAS] (SB-AC20-TCPD) (scheduled release starting early November 2018)) is explained here.
Insert USB Type-C connector of AC Charger straight into USB Type-C Port
Unfold power plug of AC Charger and plug into household AC
xperia_01_Getting Started.docx
20
Charging start sound sounds and Notification Lamp on handset lights up when charging starts.
When charging is complete, unplug AC Charger and remove USB Type-C connector of
AC Charger straight from handset
Charging ends.
Charging with Wireless Charger
Handset can be charged using a wireless charger.
For details on charging, see the instructions included with the wireless charger.
Products with a comply with WPC (Wireless Power Consortium) wireless charging standards.
Wireless Charging Cautions
Observe the following when charging with a wireless charger.
xperia_01_Getting Started.docx
21

When charging, be sure to align the wireless charging position on the handset with the
wireless charger position properly.
Remove any covers (commercially available) attached to handset before charging.
Do not subject handset to vibration while charging. Vibration causing handset to move
may prevent charging from completing or cause handset to fall.
If a TV or radio produce noise while charging, distance handset and charge.
If another wireless charging device is nearby, distance the wireless charger at least 30
cm away. Handset may not be detected properly and may not charge.
While charging, calling, data transmission, and TV reception may be affected.
Do not allow metal objects between handset and the wireless charger. Metal object
may become hot.
Do not allow an IC card or similar item to be lodged between handset and the wireless
charger. IC card may be damaged.
Do not place handset on the wireless charger while AC Charger, USB Type-C cable,
USB host cable, etc. is connected.
Using Camera while charging may cause images to be grainy with noise.
Using handset while charging may cause handset to slow down or stop charging as it
is designed to avoid reaching a high temperature.
xperia_01_Getting Started.docx
22

Power On/Off
Powering On
Powering Off
Powering On
Long Press Power Key until handset vibrates once
Lock Screen appears.
For details on unlocking screen, see "Unlocking Screen."
Startup wizard appears for the first time handset is powered on. Follow onscreen instructions.
Battery level is not sufficient if low battery indicator appears when Power Key is Pressed with
handset powered off. Charge Internal Battery.
Powering Off
xperia_01_Getting Started.docx
23
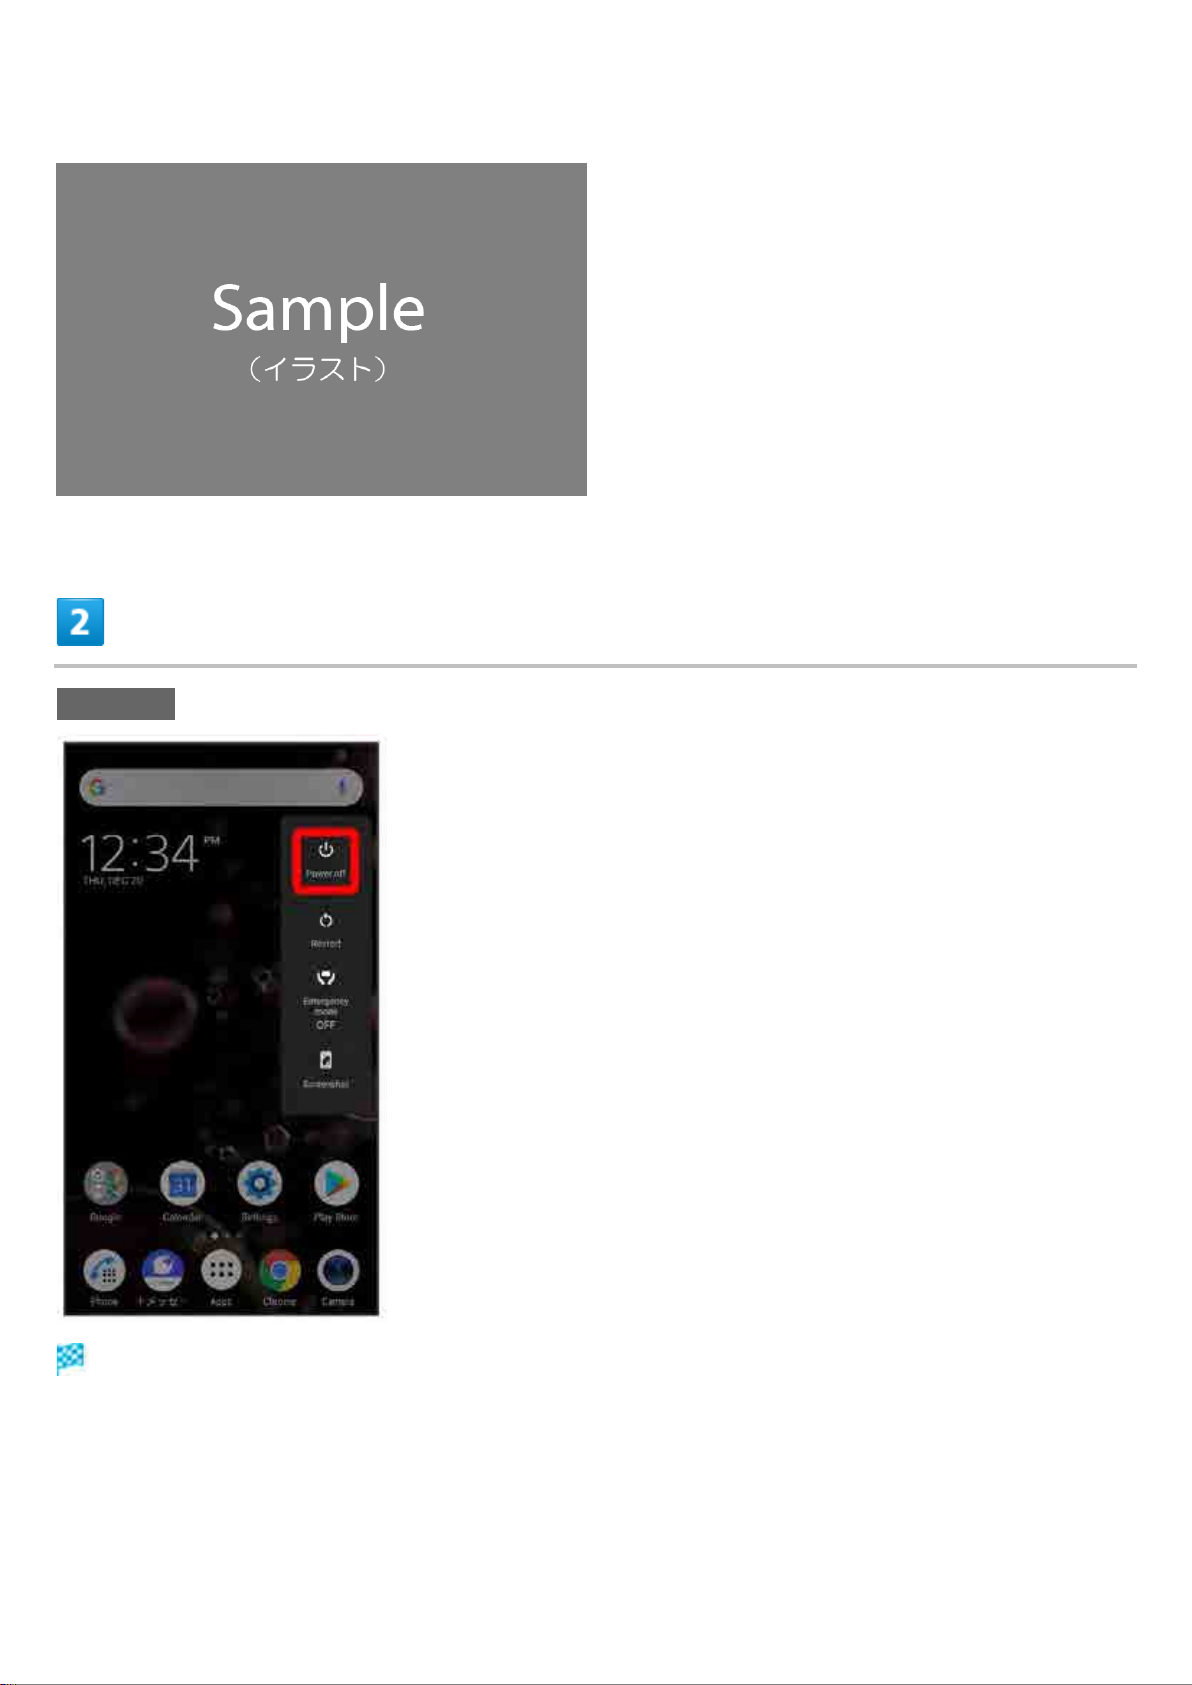
Long Press Power Key
Power off
Handset powers off.
xperia_01_Getting Started.docx
24

Setting a Google Account
Use a Google account and get more convenience with Google services. A Google
account is required to use some services or fully use some applications.
Creating a Google Account
Logging In with a Google Account
Google Account Cautions
Be careful not to forget your Google account mail address or password.
Creating a Google Account
In Home Screen, (Apps)
xperia_01_Getting Started.docx
25
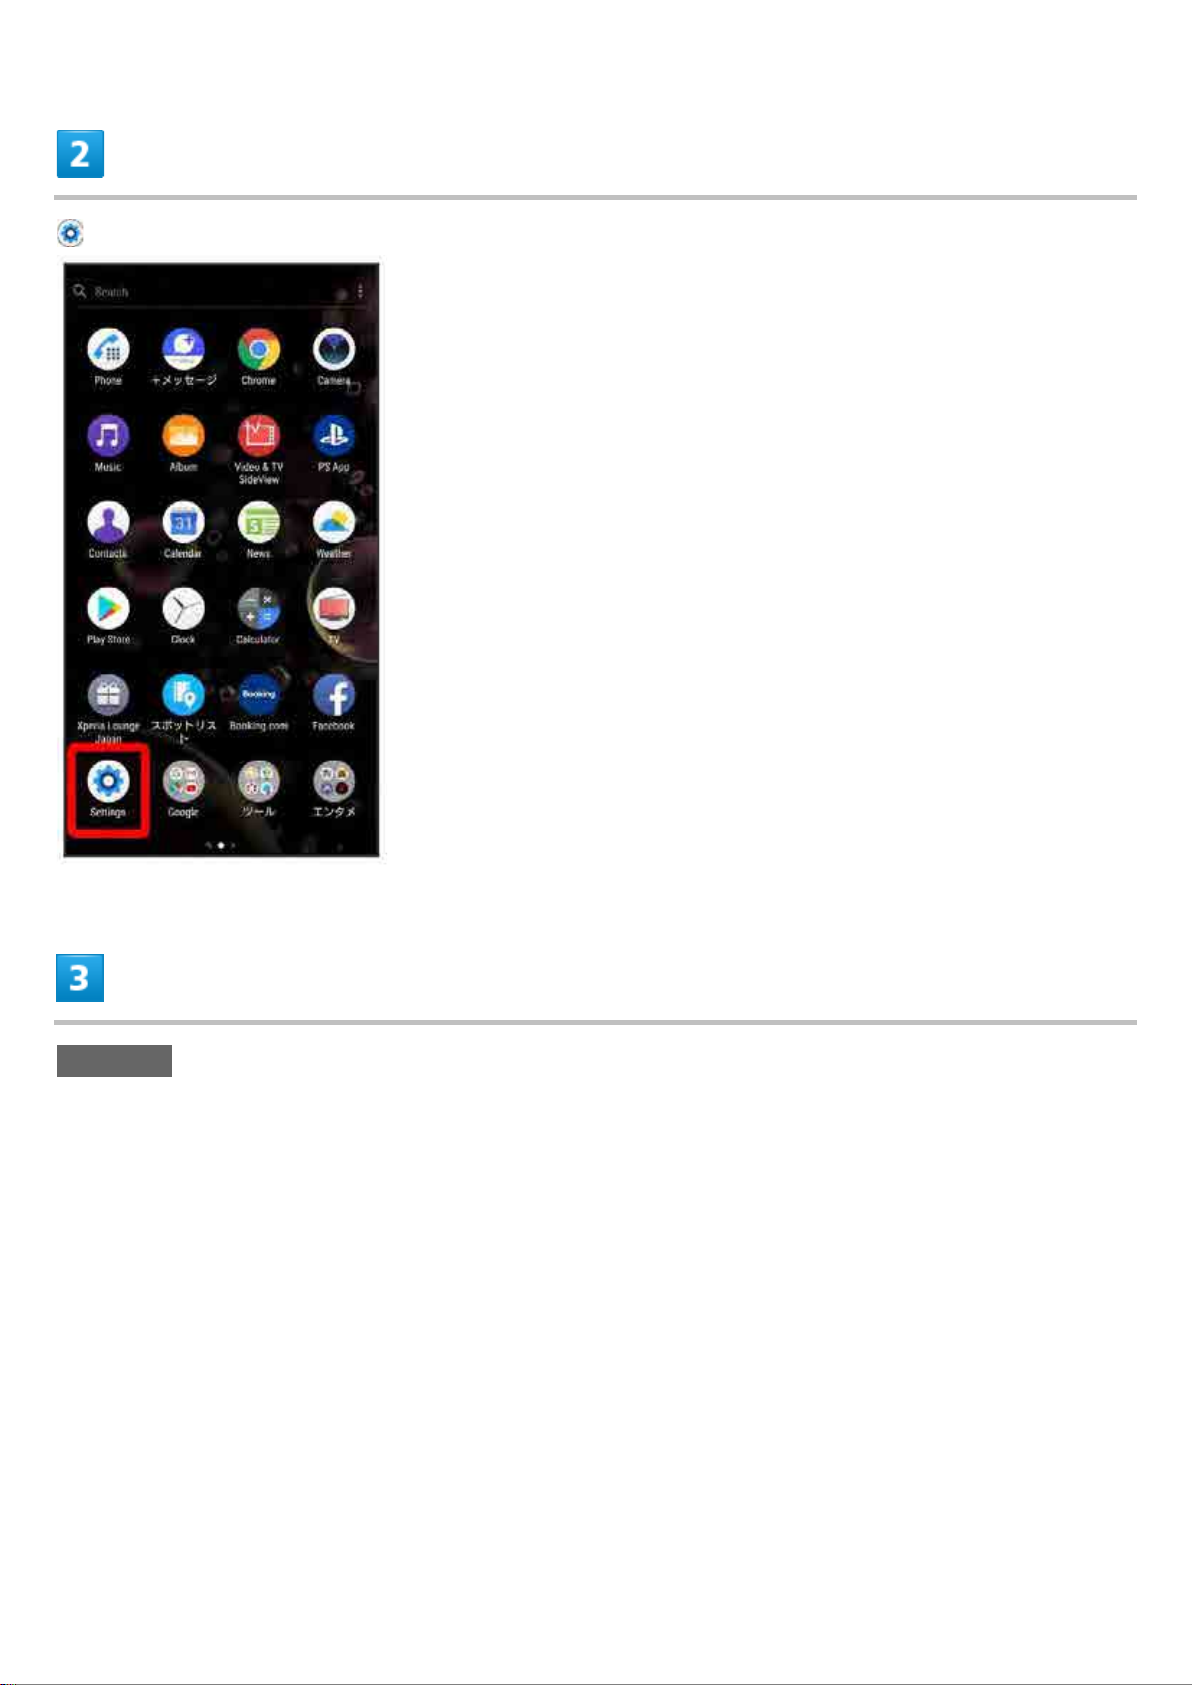
(Settings)
Accounts
xperia_01_Getting Started.docx
26

Add account
xperia_01_Getting Started.docx
27

Google
Window for logging in to a Google account opens.
Create account
xperia_01_Getting Started.docx
28
 Loading...