

Page 1

F1000-NZ
10
Page 2
- 28 -
Thank you for having chosen the digital photo frame of our company!
1. We promise that the digital photo frame of our company provides
excellent function and entertainment. Hope you can enjoy our frames.
2. The following cases are excluded in our warranty, repair will be charged:
z Warranty term expires.
z An unauthorized change, modification to the purchased product or
dismount.
z Failure to provide warranty, purchase bill or warranty card,
discrepancy between the purchase bill and the product to be repaired.
z Faults or damage resulted accidentally or human factors.
z Other product faults or damage due to Force Majeure (for instance:
earthquake, fire and etc.)
Thank you again for your using of our frame.
Warranty
- 1 -
Int
Welcome to choose the digital photo frame that produced by our
company, this guide shows you how to use and setup your digital photo
frame. Please read it carefully before operating the unit then you can
exactly understand the using skill.
In order to improve the function and capability of our products, we
reserve the rights to improve it without notice.
Introduction
Page 3
- 2 -
Introduction……………………………………………………………….1
Hardware…………………………………………………………………..3
1.Description…………………………………………………………….3
2.Structure……………………………………………………………….3
6.Remote control……………………………………………………….
.6
8.Auto-Power……………………………………………………………14
2.Auo-Play……………………………………………………………….20
4.Custom Setup…………………………………………………………23
General question…………………………………………………………26
Table of Contents
4.Features……………………………………………………………….4
3.Accessories……………………………………………………………3
5.Table of model………………………………………………………...5
7.Keyboard………………………………………………………………6
Main function……………………………………………………………..7
1.Photo…………………………………………………………………..7
2.Music…………………………………………………………………..8
3.Photo+Music…………………………………………………………..9
4.Movie…………………………………………………………………..9
5.Calendar……………………………………………………………….10
6.Clock…………………………………………………………………...11
7.Alarm…………………………………………………………………..13
9.Edit……………………………………………………………………..15
10.Favorite……………………………………………………………....17
Set parameter…………………………………………………………….18
1.Photo Setting………………………………………………………….18
3.Display Setup…………………………………………………………23
5.Exit……………………………………………………………………..24
6.Screen saver………………………………………………………….25
Supported Interfaces……………………………………………………27
28 Warranty …………………………………………………………………
- 27 -
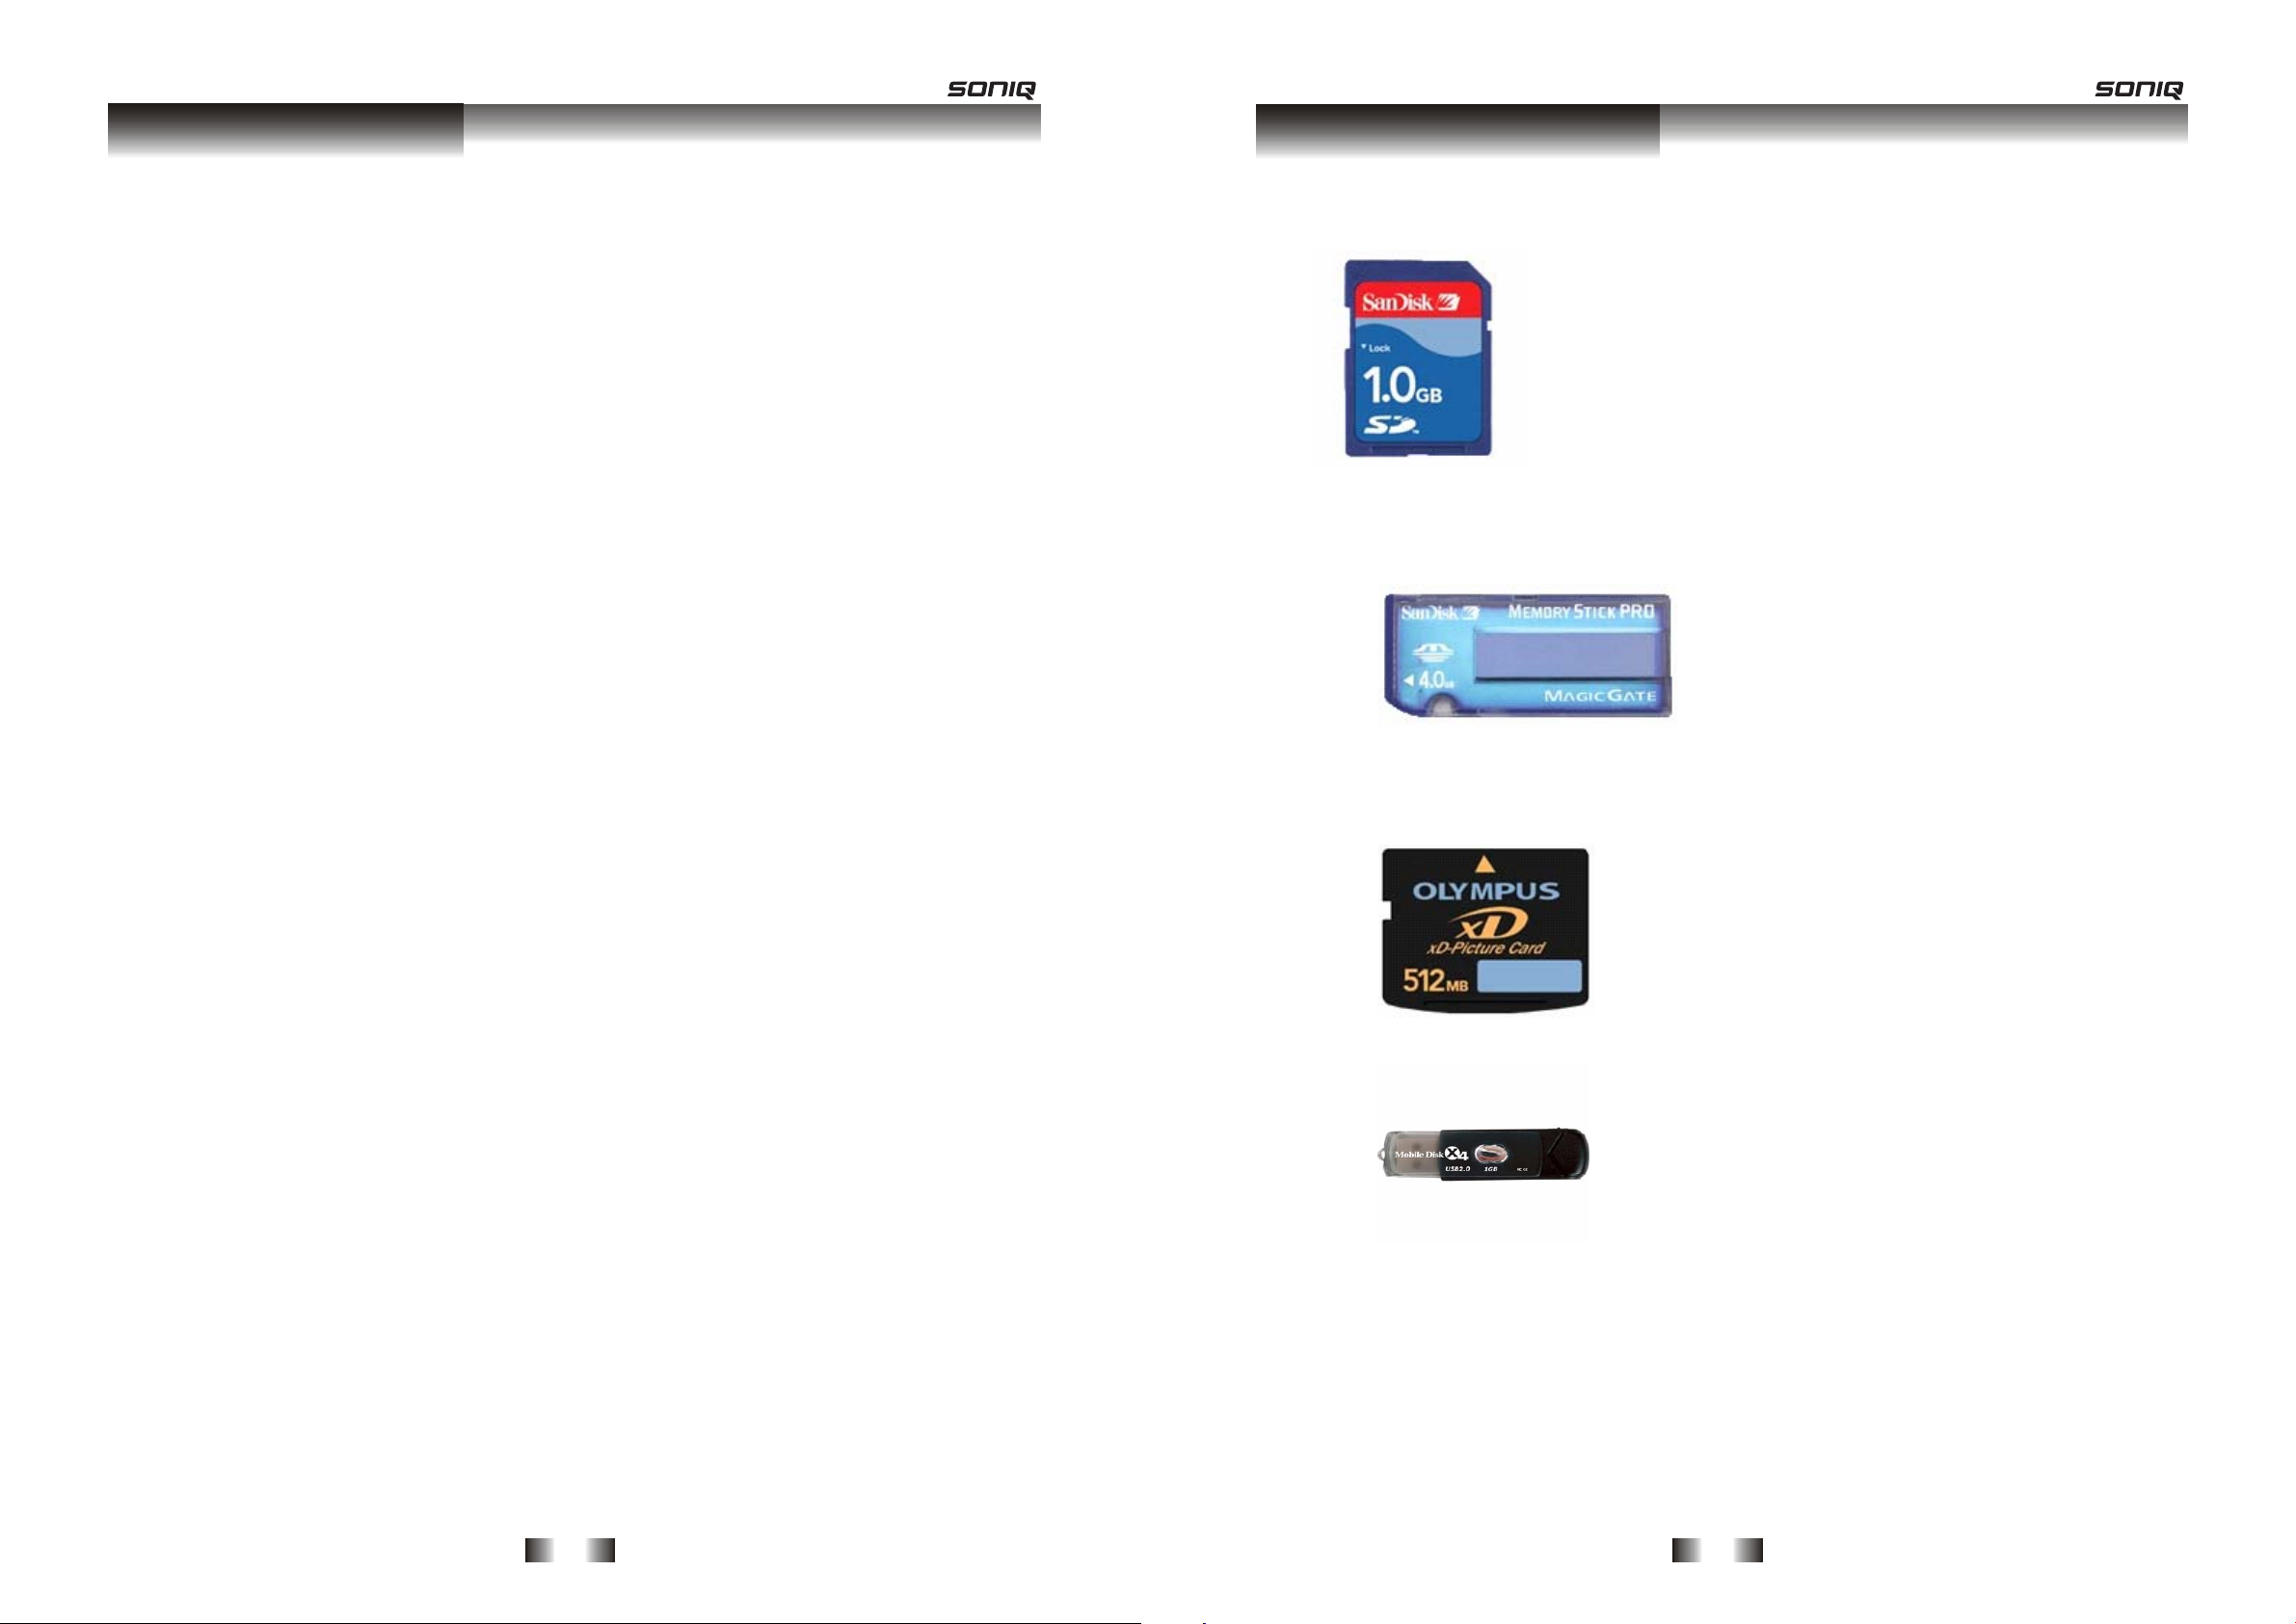
y SD: with dimensions of 24mm x 32mm x 2.1mm (about the size of a
postage stamp) as shown in the illustration:
y
MS: dimensions for the MS Card are 50mm x 21.5mm x 2.8mm,
which is the exclusive memory card format for Sony's digital products,
as shown in the illustration:
y
xD: with dimensions of 20mm x 25mm x 1.7mm, which is the
exclusive memory card for Fujifilm and Olympus digital products, as
shown in the illustration:
y
USB: supports 1.1 and 2.0
Supported Interfaces
Page 4
- 26 -
Question
Familiar reason and solution
● The power adapter isn’t plugged in correctly, please plu g in the
power adapter and make sure the connection of the power
adapter is all right.
z The product goes into STANDBY status.
the digital
frame can
not be
switched on
If the above two are all correct, please get in touch with the
appointed maintenance site or the appointed customer service
department.
z The card isn’t plugged in correctly.
z There are no files of photo, music or video.
z The format of files is different.
z Examine the method of your plug-in is right or wrong.
the digital
frame can
not read card
If the above four are all correct, please get in touch with the
appointed maintenance site or the appointed customer service
department.
The screen
can not show
picture when
you choose
“PHOTO”
function
z Not-support file format.
z There isn’t any picture in storage card.
Notice: the digital frame only compatible with JPEG format, not
support other format like TIFF、BMP、GIF.
Dark block
around the
picture
z It’s normal, because different digital camera use different
scenario or pixel to take pictures.
General question
- 3 -
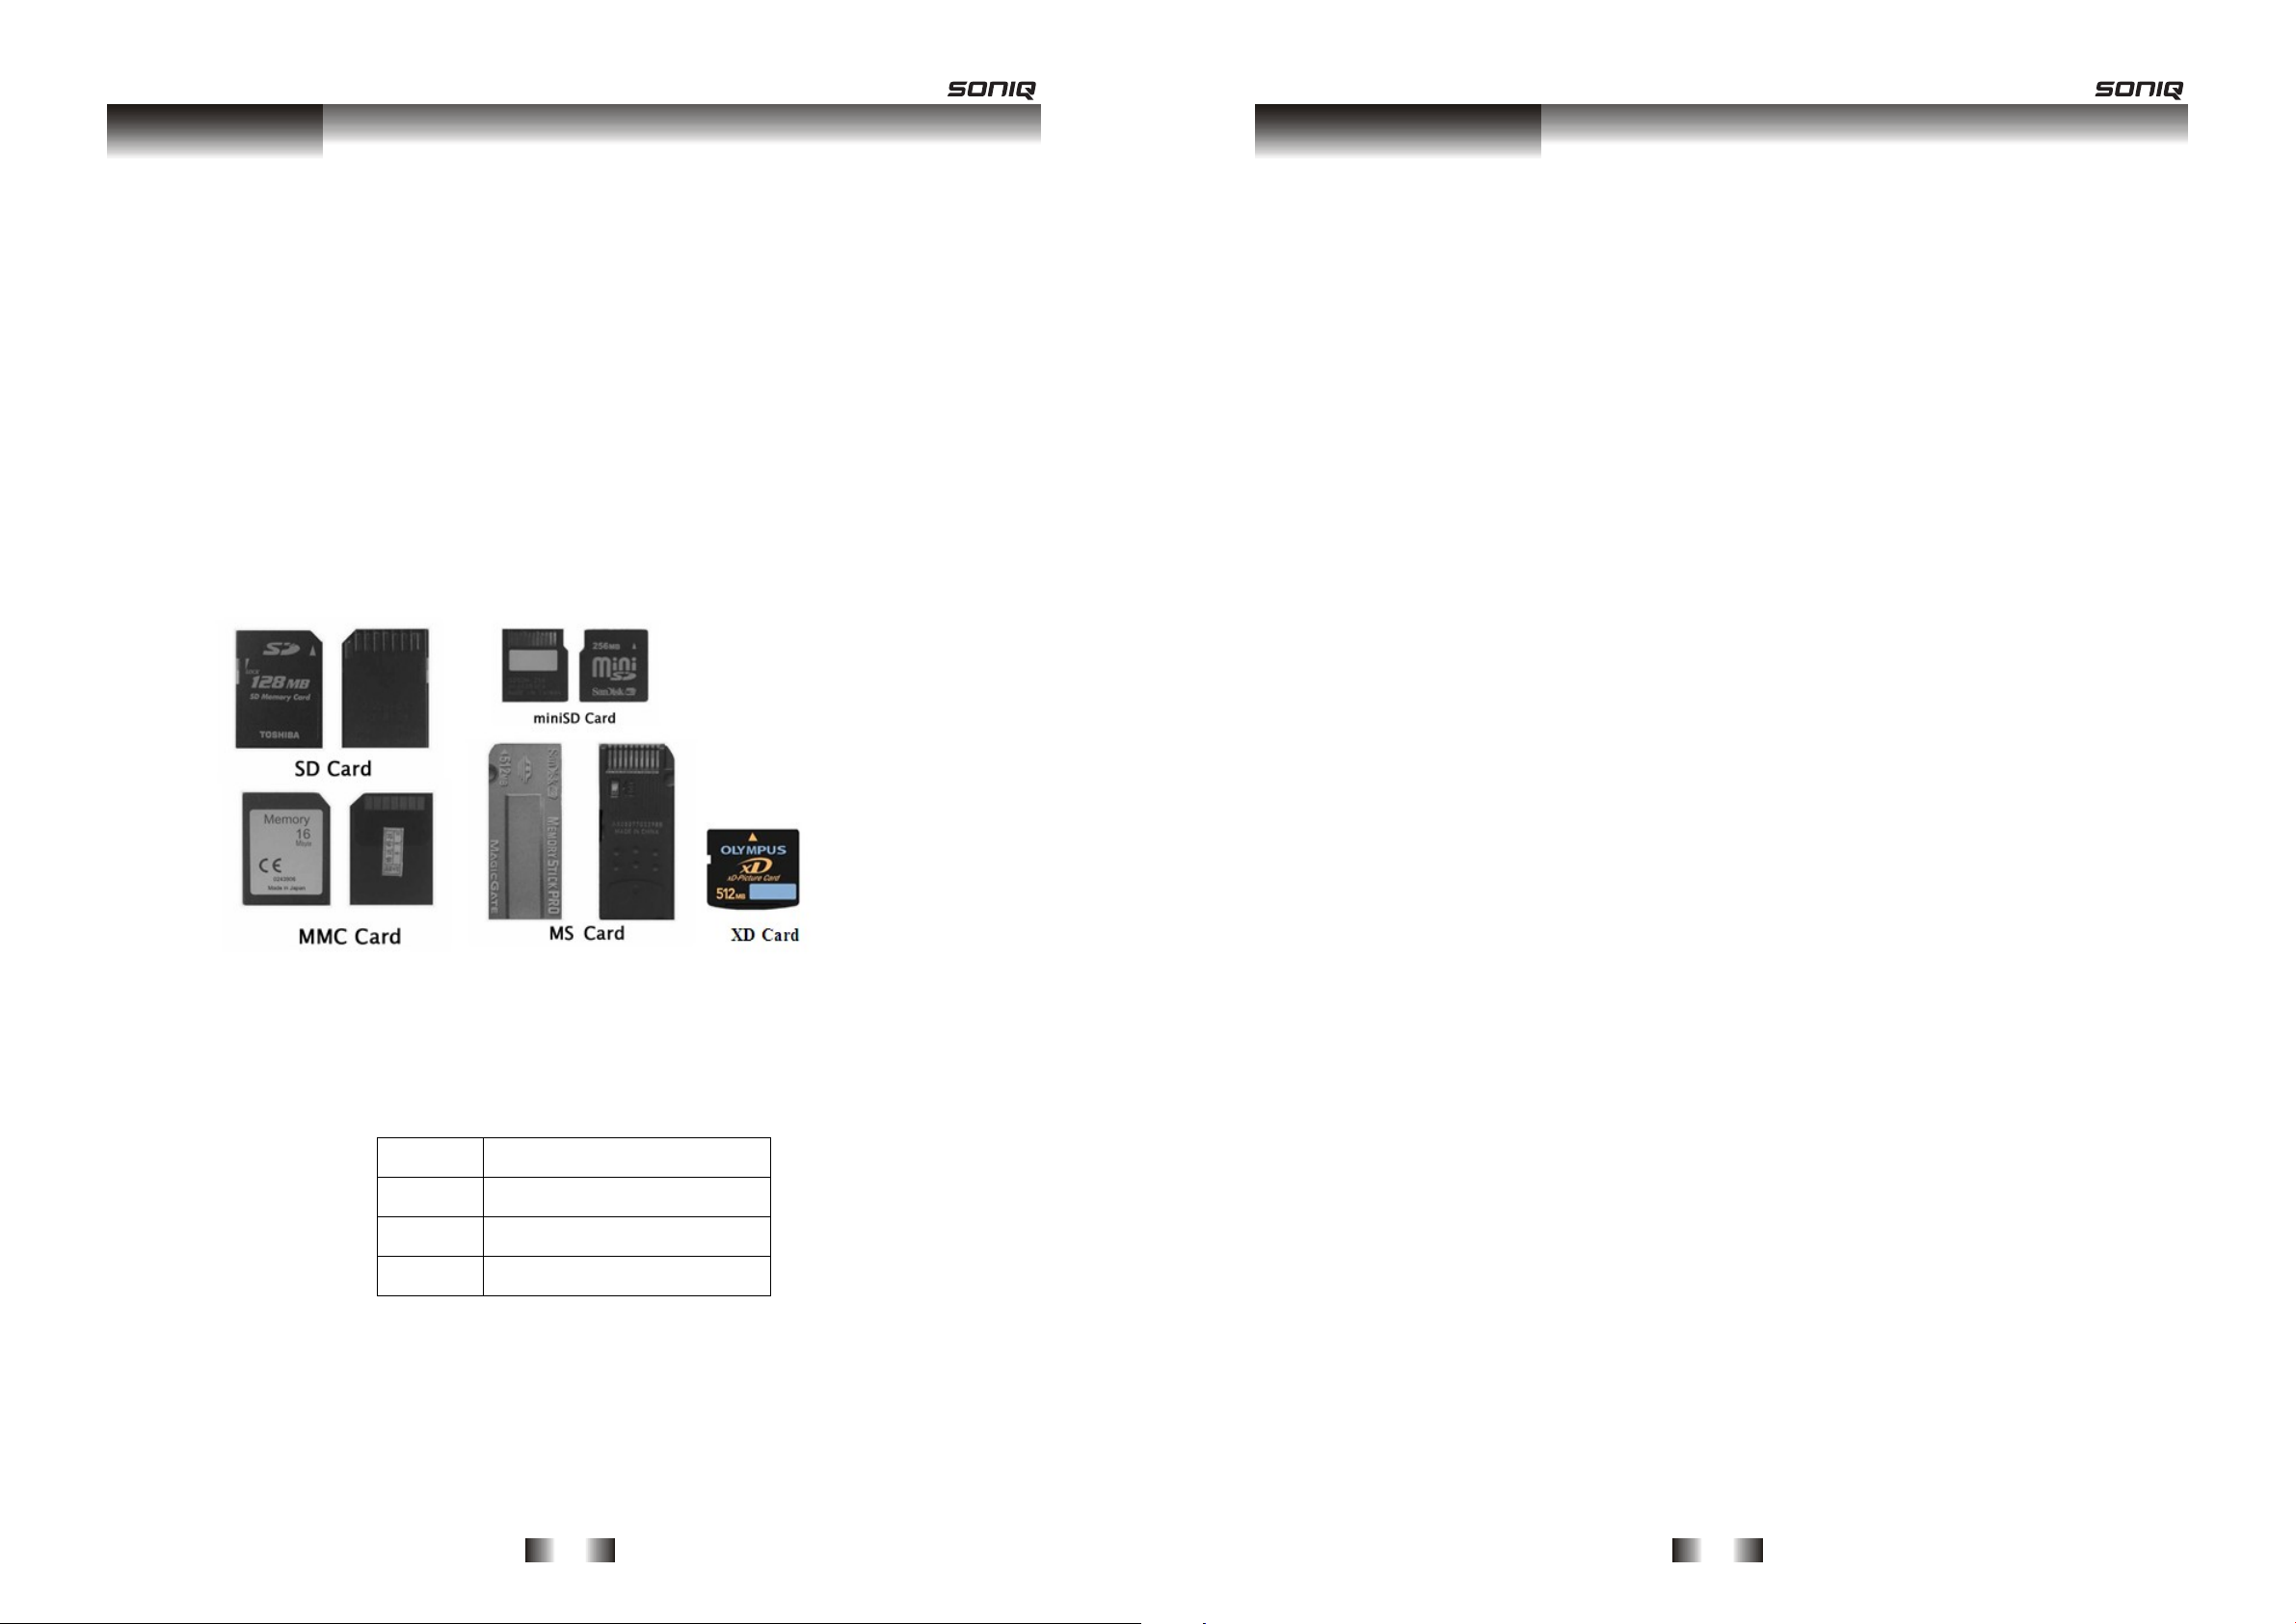
1.Description
Digital photo frame is a new digital device which substitutes the
traditional frame, supporting 10-inch TFT LCD, built-in amplifier and
speaker. These audio & video files can be played directly which are
stored in USB disk、SD card、Mini-SD card、MS card、MMC card and
XD card.
Use Digital photo frame, no need to use computer or printer, reappear fascinating appearance at any time!
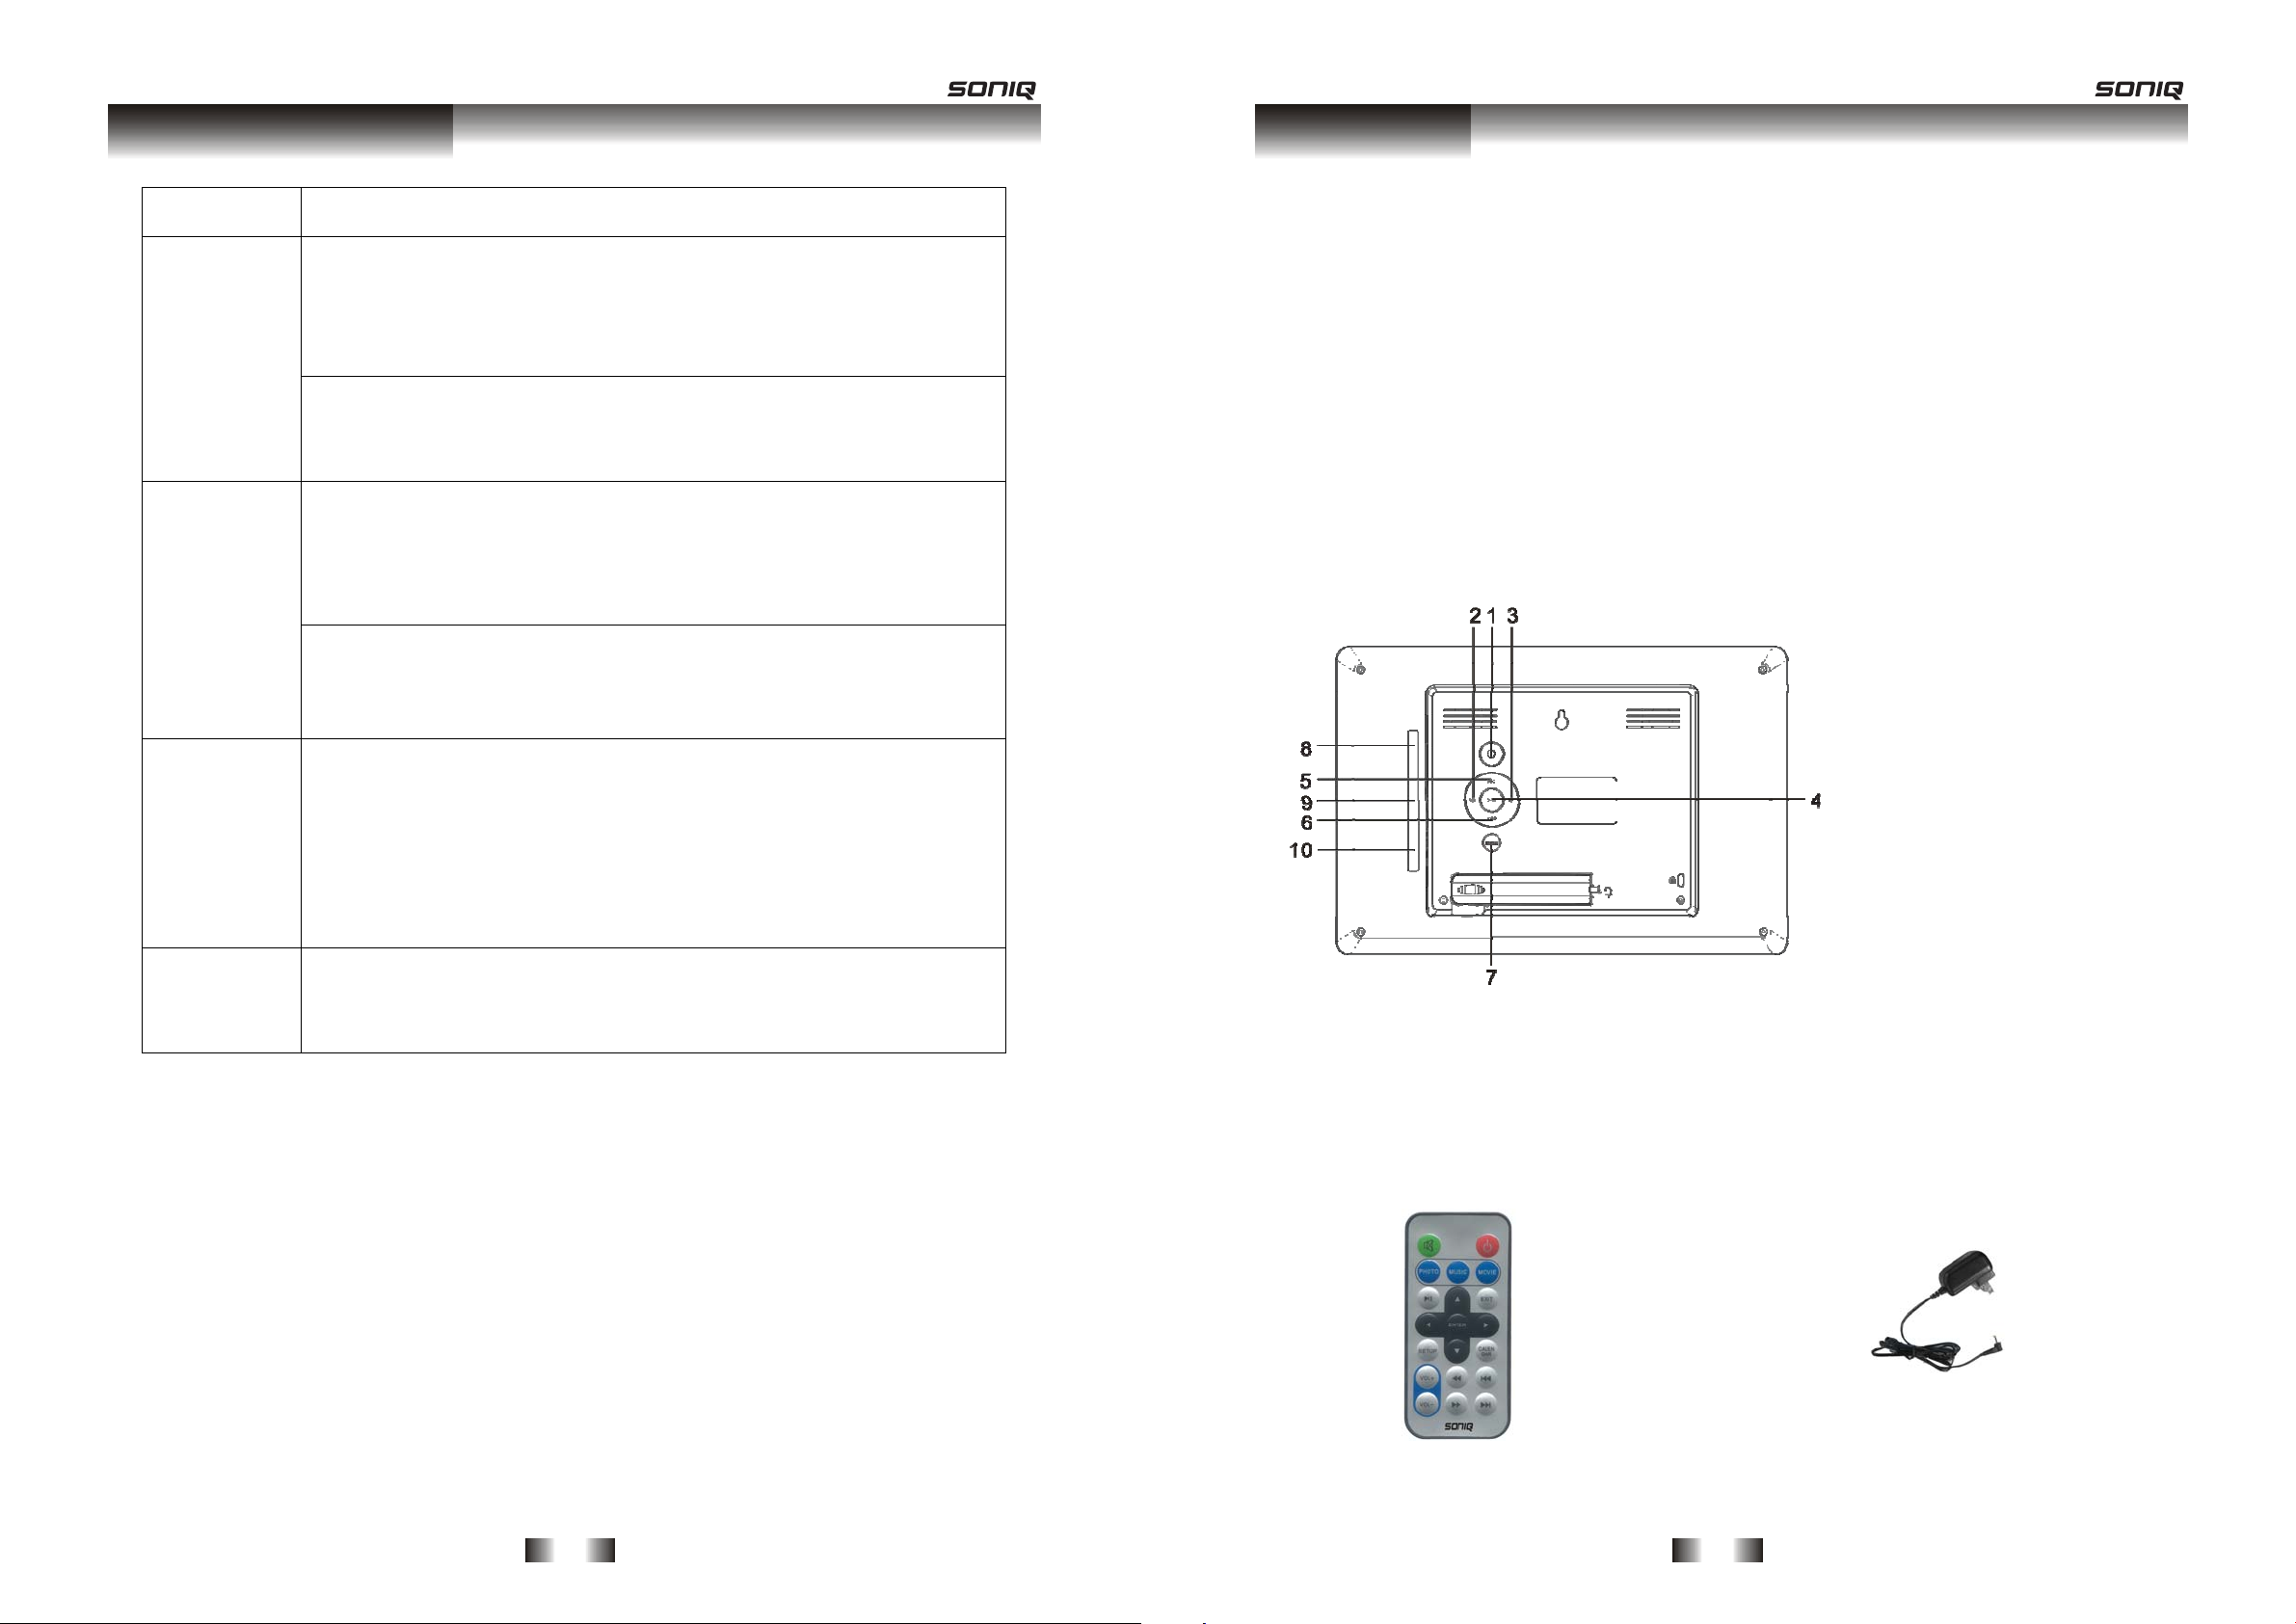
2.Structure
(1)Power on/off
(2)VOL +/Right
(3)VOL -/Left
(4)PLAY/PAUSE
(5)
UP
(6)DOWN
(7)MENU
(8)
SD/ MS/MMC
/XD
(9)USB
(10)DC IN
3.Accessories
You will hold these accessories while buying this product.
Remoter AC/DC Adapter
Hardware
Page 5
- 4 -
These pictures of accessories are only for reference, maybe there is
slightly different in shapes.
4.Features
z Remote control and keyboard control.
z Playback of photo, music or video files stored in data storage
devices through High-Speed USB 2.0 port, card-reader port or the
built-in memory.
z Supporting data storage devices: USB disk, SD, MS, MMC, XD
card.
z Supporting multi-language OSD, including English、French、
German、Italian、Spanish、Portuguese、Dutch and Polish.
z Supporting files format:
Type
Format
Photo JPG,BMP
Music MP2/MP3/WMA
Movie AVI/MPG/VOB
z Playing mode of JEPG files: sequence、rando
z m、pause、rotate、mirror.
z Automatic slideshow with multiple transition effects and adjustable
display time.
z Built-in stereo speaker, supporting photo and music playing
Hardware
- 25 -
6.Screen saver
Under the general condition, it will enter screen saver program
automatically to protect your screen if there isn’t any data of the system
to play continuously or there isn’t any action of the user last more than 20
seconds. It will not quit “screen saver” mode until any key is pressed, and
go back to the main menu.
The following are some special conditions, they will not enter screen
saver mode:
※ Under 【Photo】、【Music】、【Photo+Music】、【Movie】.
※ Displaying clock or clock & calendar.
Set parameter
Page 6
- 24 -
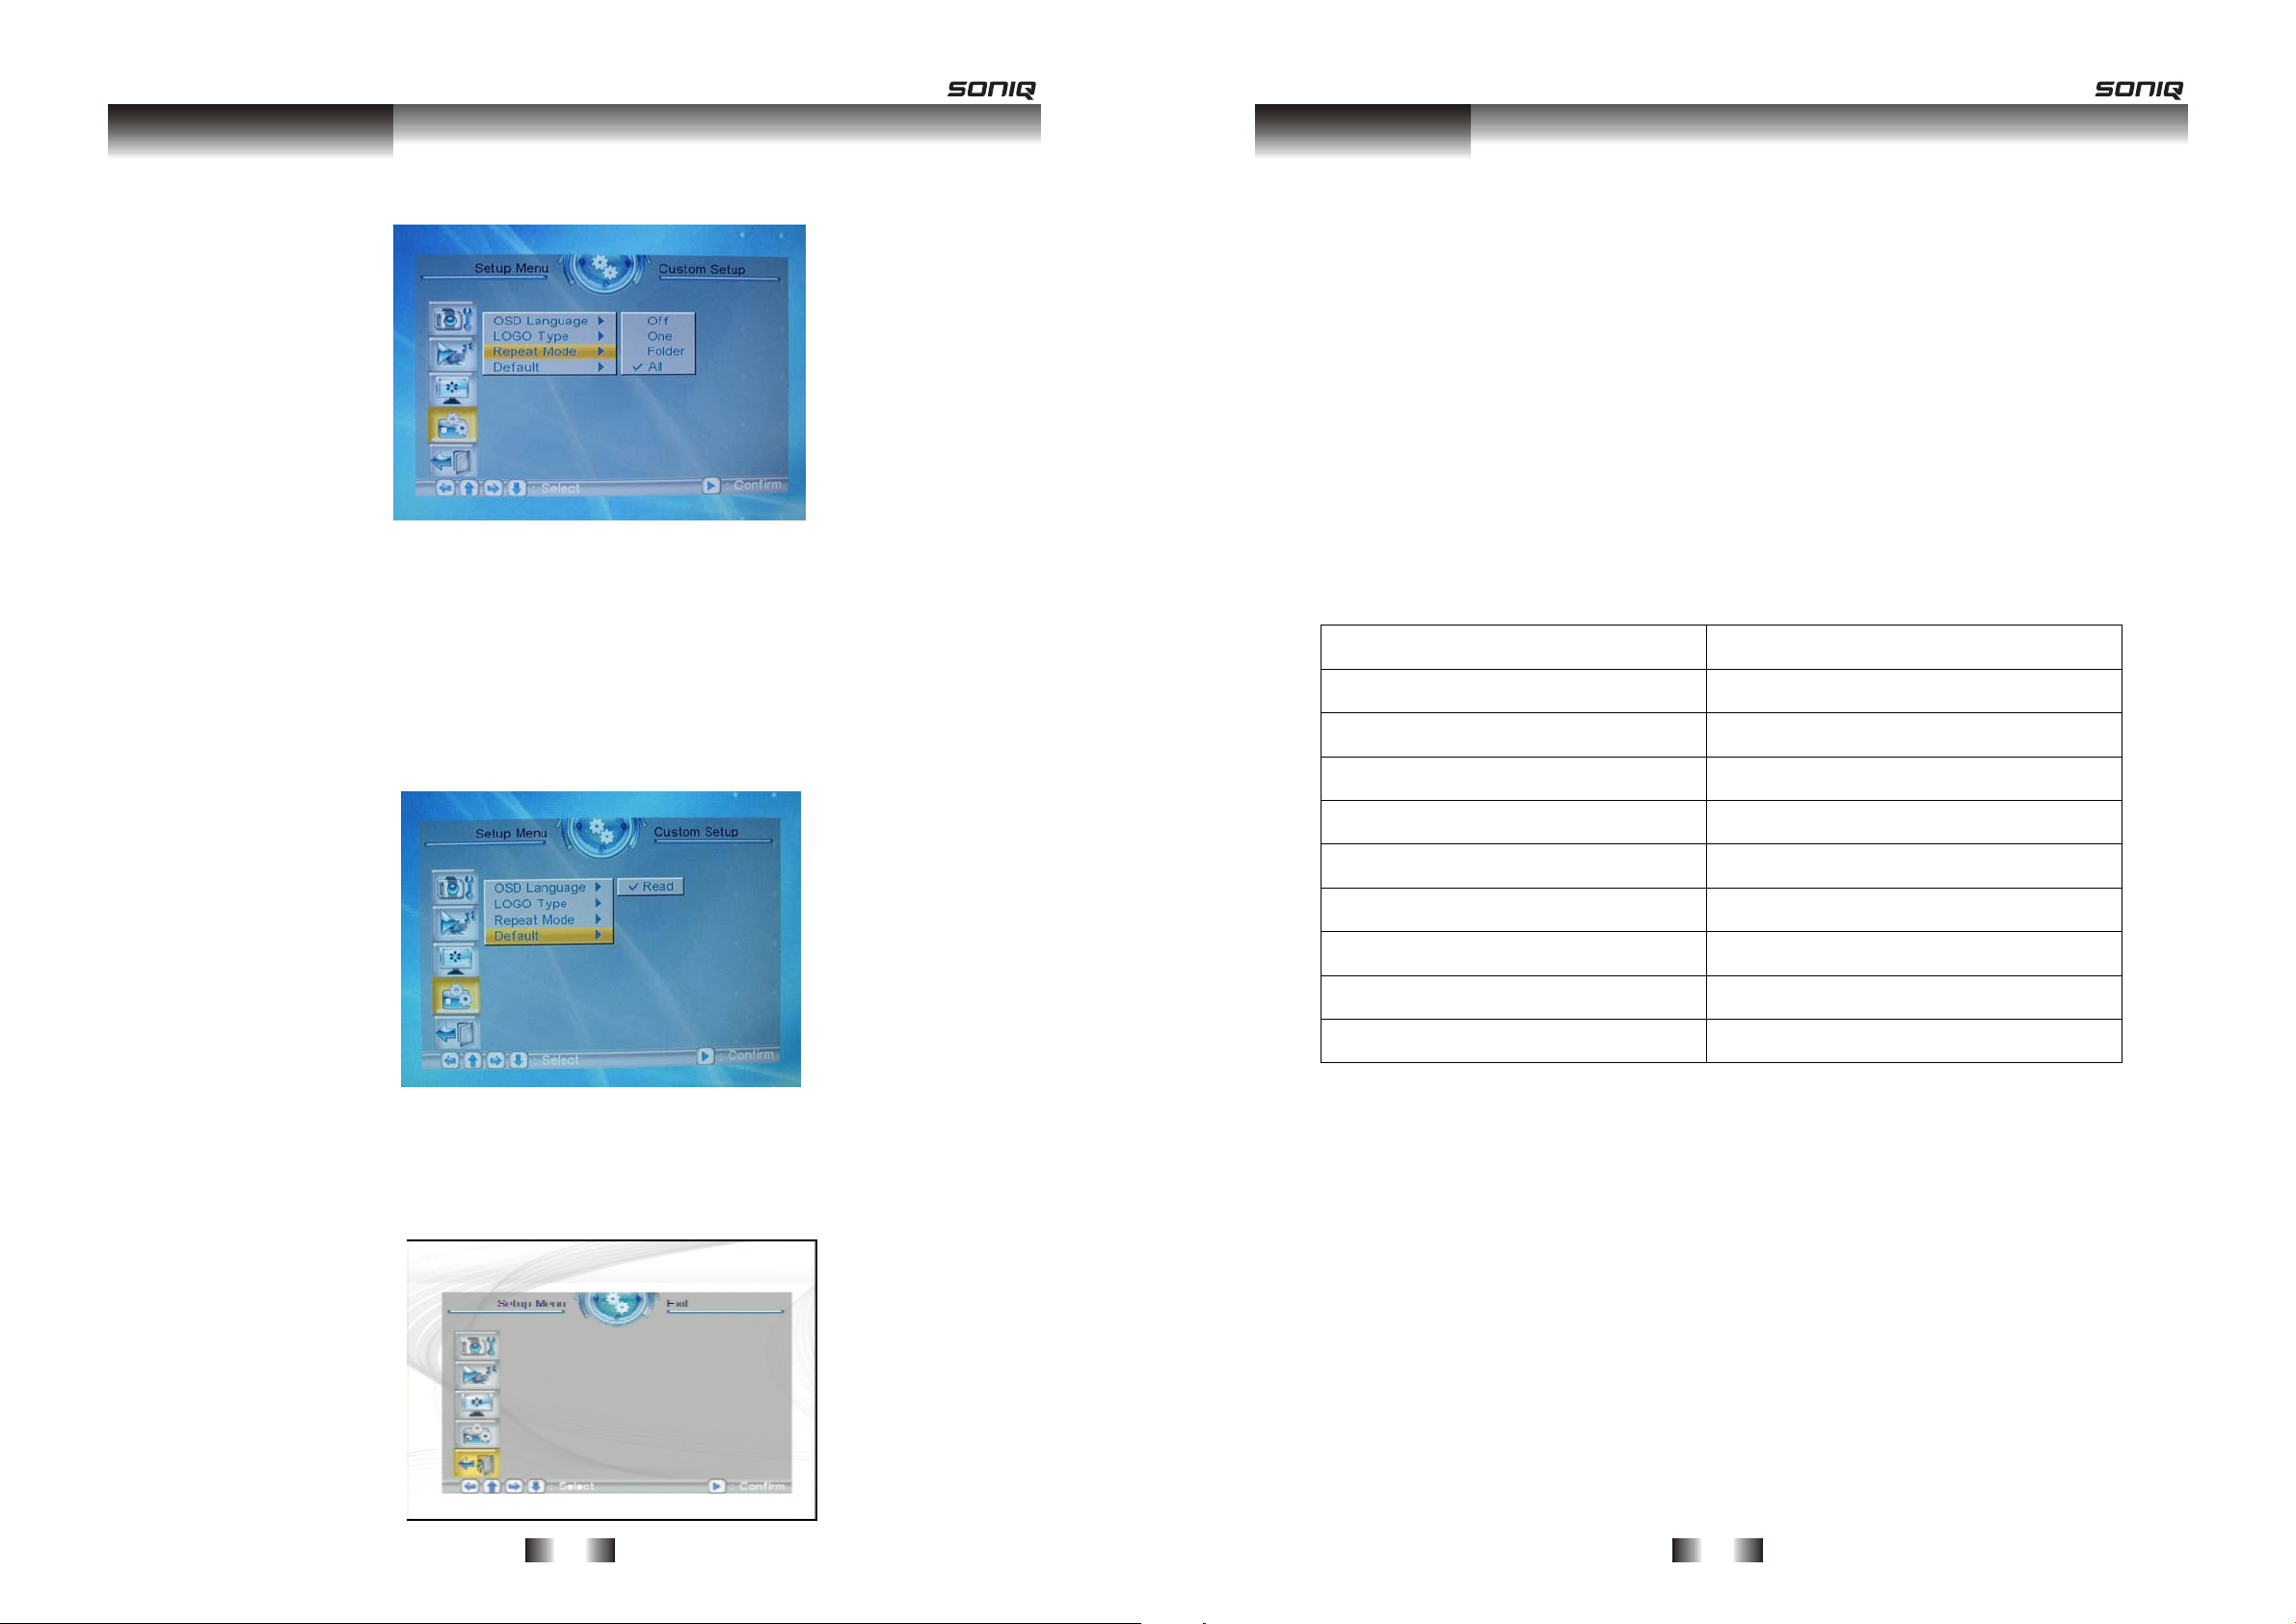
Off: turns off the repeat mode.
One: repeats the file that is currently playing.
Folder: repeats the folder that is currently playing.
All: repeatedly plays all of the files inside the storage medium.
● Default
By setting this option, all settings will be reset to the original
system settings.
5.Exit
Setting finished, quit.
Set parameter
- 5 -
simultaneously.
z Supporting calendar, clock and alarm function.
z Supporting auto power on/off function.
z Supporting screen savers function.
z 10 inch TFT LCD display, brightness、contrast and saturation
adjustable.
z active plank can rotate or retract.
z Add or delete image of built-in memory.
5.Table of model
F1000-
NZ
Remoter and keyboard control √
SD/MS/MMC/XD √
USB √
AV out √
Built-in speaker √
Photo/music/P+M/movie √
10’ TFT-LCD display √
active plank √
Built-in memory √
Note1: P+M = Photo+Music.
Hardware
Page 7

- 6 -
6.Remote control
7.Keyboard
Power on/off
Up
Down
Play/Pause
Vol up/Right
Vol down/Left
MENU Menu
(1) Power on/off
(2
) sound on/off
(3
) play or pause
(4
) Leftwards/ Rightwards key
(5
) setup menu
(6
) volume down/up
(7
) Photo/music/movie play
(8
) quit to previous menu
(9
) Downwards/ Upwards key
(10
)enter
(11
)Calendar
(12
)reverse/ forward
(13
)previous/ next file
Hardware
- 23 -
4.Custom Setup
● OSD Language
This option can be used to set the language for the OSD (on
screen display). The user can choose from: English, French, Itali
an,
Spanish, German, Portuguese, Dutch, and Polish.
● Logo type
This option allows the user to set the Logo. There are two
available options: Default and Favorite.
● Repeat mode
This option allows the user to set the play repeat mode. There
are four available options: Off, One, Folder, and All.
Set parameter
2
1
3
4
5
6
7
8
9
10
11
12
13
Page 8

Set parameter
Main function
3.Display Setup
After power on, system enter standby status. Press “ ”, there will
be a main menu displayed.
This frame provides 11 functions including 【 Photo】【 Music 】
【 Photo +Music】【 Movie】【 Edit 】【 Setup 】【 Calendar】
【Clock】【Alarm】【Auto-Power】【 Favorite】.Following pictures for
your reference:
It will search storage device when entering 【 Photo】【 Music 】
【 Photo+Music】【 Movie】. Frame will quit to main menu if no
Select [Brightness],set brightness of video
Select [contrast],set contrast of video
Select [TFT Brightness],set brightness of LCD Select [TFT Contrast],set contrast of LCD
Select [TFT Saturation],set saturation of LCD
storage device was searched within 10 seconds. It will read and play files
while finding any storage device.
1.Photo
After choosing 【Photo】 from the main menu, press the "ENTER"
key, and the system will automatically detect whether or not a storage
device has been connected (USB drive or memory card). If no storage
device has been connected, the system will go back to the main menu.
After the storage device has been connected and correct read/write
access has been confirmed, the system will enter the mode chosen by
the user . section for settings details). If the user has selected 【File
Mode】for playlist management, the screen on the lower left will appear;
if the user chooses 【 Browse Mode】 for playlist management, the
screen on the lower right will appear.
Under 【Photo】 mode, the system only supports the display of
- 22 -
- 7 -
Page 9

- 8 -
images in JPG format.
2.Music
After choosing 【Music】 from the main menu, press the "ENTER"
key, and the system will automatically detect whether or not a storage
device has been connected (USB drive or memory card). If no storage
device has been connected, the system will go back to the main menu.
After the storage device has been connected and correct read/write
access has been confirmed, the system will enter【Media Manager】for
playlist management, as shown in the illustration.
In the 【Music】 mode, the system only supports the playing of
music files in MP2/MP3/WMA format. If the user has turned on the
【Music】 automatic playing function, then music will automatically be
played when the system enters 【Music】 mode.
Main function
- 21 -
● Music
The option can switch on or off auto-play function of Music.
Switch on, it will auto play music while entering【Music】; Switch
off, you must select music files you want to play then
press“ENTER”.
● Movie
The option can switch on or off auto-play function of Movie.
Switch on, it will auto play movie while entering【Movie】; Switch
off, you must select movie files you want to play then
press“ENTER”.
Set parameter
Page 10

- 20 -
● Browse
There are two kinds of “Photo” modes, one is the “File Manager”
mode, and the other is the “Thumbnail” mode.
File Manager mode:
Thumbnail mode:
2.Auto-Play
● Photo
The option can switch on or off auto-play function of Photo.
Switch on, it will auto play photo while entering【Photo】; Switch
off, you must select photo files you want to play then press“ENTER”.
Set parameter
- 9 -
3.Photo+Music
After choosing 【Photo+Music】 from the main menu, press the
"ENTER" key, and the system will automatically detect whether or not a
storage device has been connected (USB drive or memory card).
If no storage device has been connected, the system will go back to
the main menu. After the storage device has been connected and correct
read/write access has been confirmed, the system will enter【 File
Manager】for playlist management, as shown in the illustration. Under
【Photo+Music】 mode, the system supports the displaying of pictures
and the playing of music, and the supported file types are: JPG, MP2,
MP3, and WMA. If the user turns on the 【Photo+Music】 automatic
playing function, then the system will initiate automatic display and
playback after entering 【Photo+Music】 mode.
4.Movie
After choosing 【Movie】 from the main menu, press the "ENTER"
key, and the system will automatically detect whether or not a storage
device has been connected (USB drive or memory card).
If no storage device has been connected, the system will go back to
the main menu. After the storage device has been connected and correct
read/write access has been confirmed, the system will enter【 File
Manager】for playlist management, as shown in the illustration. Under
【Movie】 mode, the system supports movie playback in the following
formats: DAT, MPG, VOB, and AVI.
Main function
Page 11

- 10 -
5.Calendar
After selecting 【Calendar】 from the main menu, press the PLAY
button, and you will enter the date setting mode.
● Display
This option provides the 【Calendar】display function. The date
displayed in the calendar is the current date set in the system.
In addition to displaying the current date, the user can use the
keys to browse different months, or use the keys to browse
different years.
Main function
- 19 -
This option is used to set the transition effect as images change.
● Show Type
This option lets you decide whether the photo is displayed on
screen using Fit Screen (photo is always fully on the screen) or Full
Screen (photo always fills the screen – some clipping may occur).
● Show Mode
This option allows you to set the Slide mode. There are two
available options: Normal and Date&Time.
Set parameter
Page 12

- 18 -
Select【Setup】 from the main menu, press the "ENTER" button,
and you will enter the settings mode. In addition, under other function
modes, you can also enter the settings mode by pressing the
【SETUP】 button. The following illustration shows the initial screen in
the settings mode, and in the following section we will introduce the
various functions of the settings mode.
The adjustment screen for the SETUP menu is as follows:
1.Photo Setting
● Display Interval
This option can be used to set the length of time for display of
each image. There are six options: 5 seconds, 10 seconds, 15
seconds, 30 seconds, one minute, or three minutes.
● Transition Effect
Set parameter
- 11 -
● Set Date
Use direction key, you can set date.
● Exit
Quit, return to main menu.
6.Clock
Press direction key of remote control, move cursor to
【Clock】,press“ENTER” Following pictures for your reference:
● Display
This option allows the user to choose if they want to display
【Time】or 【Time & Calendar】. Select【Clock】, and press the
"ENTER" key.
Main function
Page 13

- 12 -
Select 【Clock】
Select 【Clock & Calendar】
● Set Time
Use direction key, time can be set
● Exit
Quit, return to main menu.
Main function
- 17 -
● Delete
After select “Delete”, this feature provi
des you remove the screen
saver tablets stored.
Move cursor to “Delete”, enter delete mode.
Move cursor to one photo, press "ENTER" button to delete it.
Move cursor to “Delete ALL”, press "ENTER" then delete all photo.
Move cursor to “Exit”, press "ENTER" button then quit to main
menu.
10.Favorite
After selecting【Favorite】, press the "ENTER" button, and you will
enter 【Slide Show】 mode, and be able to preview the screen saver
images.
Main function
Page 14

- 16 -
Here,you have three options;
“Copy”: Save photo files to built-in memory;
“Delete”: Delete photo in built-in memory;
“Exit”: Quit to main menu.
After select “Copy”, this product will read photo files and display
files list if any storage devices(USB device or fl
ash card) connect
with this produce, quit to main menu if no any storage devices.
Move cursor to file you want to save, press "ENTER" button, you
can see yellow frame around file.
Move cursor to “Save”, press "ENTER" button then save these
files to built-in memory.
Move cursor to “Exit”, press "ENTER" button then quit to main
menu.
Main function
- 13 -
7.Alarm
Press direction key of remote control, move cursor to【Alarm】, and
press“ENTER”,it will enter alarm mode.
● Enable
Set alarm on or off.
● Set Time
Use direction key, you can set alarm time.
If alarm bell is on, it will display the following screen. Press any key
to stop it.
Main function
● Copy
Page 15

- 14 -
● Exit
Quit, return to main menu.
8.Auto-Power
Press direction key of remote control, move cursor to【 Auto-
Power】, and press“ENTER”,it will enter into auto-power mode.
● Power on Enable
Set power-on-enable on or off.
● Power off Enable
Set power-off-enable on or off.
Main function
- 15 -
● Set Time
Use direction key, you can set time of power on and power off.
● Exit
Quit, return to main menu.
9.Edit
After selecting 【Edit】
from the main menu, press the "ENTER"
button, and the system will enter “Edit mode”. It can add and delete
photo in built-in memory.
Main function
 Loading...