

Page 1
User'sManual
Rev.2
LVN-040-UM-02-EN
Page 2

FCC regulation warning (for USA)
Note: This equipment has been tested and found to comply with the limits for a Class B digital device, pursuant to
part 15 of the FCC Rules. These limits are designed to provide reasonable protection against harmful interference in a
residential installation. This equipment generates, uses and can radiate radio frequency energy and, if not installed and
used in accordance with the instructions, may cause harmful interference to radio communications. However, there is
no guarantee that interference will not occur in a particular installation. If this equipment does cause harmful interfer
ence to radio or television reception, which can be determined by turning the equipment o and on, the user is encouraged to try to correct the interference by one or more of the following measures:
– Reorient or relocate the receiving antenna.
– Increase the separation between the equipment and receiver.
– Connect the equipment into an outlet on a circuit dierent from that to which the receiver is connected.
– Consult the dealer or an experienced radio/TV technician for help.
-
Legal disclaimers
Sonicware Inc. (hereafter, "SONICWARE" ) strives to assure that this document is as accurate and current as possible,
but will bear no responsibility for any compensation claims or losses due to content included in this document. More
over, information in this document could be changed without notice. SONICWARE retains the right to change product
specications and programs at any time. SONICWARE will bear no responsibility for any errors depicted in this docu
ment. SONICWARE will bear no responsibility for any losses resulting from the use of this information, functions or performance, regardless of contracts, lack of caution or other conduct.
-
-
Copyrights and registered trademarks
• SONICWARE is a registered trademark of Sonicware Inc.
• MIDI is a registered trademark of the Association of Musical Electronics Industry (AMEI).
• Other company names, product names, standard names and registered trademarks in this document are the
property of their respective owners.
• All the trademarks and registered trademarks in this document are not intended to violate the copyrights of their
owners, but rather are included for the purpose of identication only.
• Recording from copyrighted sources, including audio les, CDs, records, videos, tapes, broadcasts, streamed
content and works of art, without permission of the copyright holder for any purpose other than personal use is
prohibited by law.
• Sonicware Inc. will not assume any responsibility related to infringements of copyrights.
Important safety precautions
You must read the following precautions in order to use the product safely and prevent accidents.
WARNING: Failure to follow these precautions could result in serious harm to the user or even
death.
• Operation using an AC adapter
Do not do anything that could exceed the ratings of outlets and other electrical wiring equipment.
Disconnect the AC adapter from the outlet when lightning occurs and when not using it for a long time.
• Operation using batteries
Use-commercially available 1.5V AA batteries.
Carefully read the precautions of the batteries being used.
Be sure to insert the batteries with +/ − ends oriented correctly.
Do not use new and old batteries together. Do not use batteries of dierent types together.
2
Page 3

Remove the batteries when they will not be used for a long time.
If a leak occurs, thoroughly wipe the battery compartment and battery terminals to remove the leaked uid.
• Do not open the case and disassemble or modify the product.
• Do not drop, strike or apply excessive force to the unit.
• Do not put liquid on or in the unit.
• Do not put foreign objects into the case.
• Do not use at a loud volume. Doing so could generate loud volumes that might lead to hearing loss.
• When transferring this unit, use the individual packing box and cushioning material that it came with when pur
chased new.
• When the unit is powered on, do not wrap it in cloth, plastic or other materials.
• Do not step on or apply pressure to the power cord.
• Do not use in the following environmental conditions. Doing so could cause malfunction.
Locations in direct sunlight, environments that exceed 40°C, or near stoves and other heat sources
Locations with extremely low or high temperatures
Locations with extremely high humidity or where the product could become wet
Locations with frequent vibrations or much dust or sand
• If the unit becomes broken or malfunctions, immediately turn the power o and stop using it.
Usage Precautions
-
Failure to follow these precautions could cause injury to the user and physical damage.
• When connecting cables or working with the power of the unit, minimize the input levels of connected devices or
turn them o.
• Cleaning
If the screen or the case become dirty, wipe them gently with a soft cloth.
Do not use chemicals, including alcohol, benzene, thinner or cleansers.
If this does not clean them, wipe them with a slightly damp cloth that has been wrung out well.
Do not turn the power on until the product is completely dry.
3
Page 4

Introduction
Thank you very much for purchasing a SONICWARE LIVEN Lo-12.
The LIVEN Lofi-12 is a compact groovebox that features a retro
sampling, including a 12-bit sampler mode that gives any sound a
pleasing low-delity feel, and a 4-track step sequencer with independent eects for each track as well as a master reverb. The 16 physical knobs enable intuitive operation, while battery power and a builtin speaker make it ready for live performance in any situation.
We hope you enjoy using it for many years.
Key features of the LIVEN Lo-12
• Retro sampling gives any sound a lo- vibe
• Sampled sounds are automatically assigned to the keyboard and can
be played with dierent pitches
• Powerful 4-track step sequencer developed with the LIVEN series
• The Laid-back knob can delay sound timing for a the drunk beats
• 11 types of eects independent for each track along with 8 types of
master eects
Jam in any situation
Battery power and a built-in speaker enable producing and performing
anywhere
Synchronize with all kinds of devices
Clock synchronization is possible with devices that have MIDI or
SYNC connectors.
The audio SYNC function enables synchronization with Teenage En-
4
Page 5
Key features of the LIVEN Lo-12
gineering Pocket Operator devices using the LINE jack.
In addition, clock synchronization signals can be bridged between dif-
ferent connectors. For example, MIDI clock can be generated from an
input SYNC clock signal.
5
Page 6

Contents
Names of parts ……………………………… 10
Connection example ……………………… 10
Starting up and shutting down ……… 11
Preparing a power supply ……………… 11
Starting up …………………………………… 11
Turning the unit o ………………………… 11
Basic operations …………………………… 12
Adjusting the overall volume …………… 12
Turning on/o the speaker ……………… 12
Using the func button …………………… 13
Using the shift button …………………… 13
Using the shift button hold function … 13
Tracks and patterns ……………………… 14
Track overview ……………………………… 14
Pattern overview …………………………… 14
Patterns and banks ……………………… 14
Basic pattern operation ………………… 15
Changing the arpeggiator type (in ARP
mode) ………………………………………… 22
Sample selection …………………………… 23
Overview ……………………………………… 23
Selecting samples ………………………… 23
12-bit sampler mode ……………………… 23
Changing the pitches of samples …… 24
Changing track pitch ……………………… 24
Changing track pitch by semitone (trans
posing) ………………………………………… 24
Adjusting how samples sound ……… 25
Adjusting sample start positions ……… 25
Adjusting sample attack and release … 25
Filters …………………………………………… 26
Changing the lter type ………………… 26
Changing the lter cuto frequency … 27
Adjusting the lter resonance ………… 27
-
Selecting patterns ………………………… 15
Selecting pattern 17 and higher ……… 15
Playing patterns …………………………… 15
Changing the tempo ……………………… 16
Reloading patterns ………………………… 16
Pattern chain playback ………………… 17
Selecting multiple patterns and playing
them in order (chain playback) ………… 17
Adjusting the volume of
individual patterns ………………………… 17
Track selection and
basic adjustments ……………………… 18
Selecting tracks …………………………… 18
Muting tracks ……………………………… 18
Adjusting track levels …………………… 18
Adjusting track panning ………………… 18
Performing with ………………………… 19
Adjusting the lter envelope …………… 28
LFO ……………………………………………… 29
Overview ……………………………………… 29
Adjusting the LFO speed ………………… 29
Adjusting the amount of LFO effect on
pitch …………………………………………… 29
Adjusting the amount of LFO eect on l
ter cuto ……………………………………… 29
Selecting the LFO wave ………………… 30
Setting the LFO starting delay ………… 30
Sweep …………………………………………… 31
Overview ……………………………………… 31
Sweeping notes while playing ………… 31
Eects ………………………………………… 32
Adjusting eects …………………………… 32
Reverb ………………………………………… 33
Adjusting the reverb ……………………… 33
-
the keyboard and voice modes …… 19
Performing …………………………………… 19
Holding keyboard notes ………………… 19
Changing the velocity …………………… 19
Changing the octave range …………… 20
Changing the voice mode ……………… 20
Changing the glide
(in MONO/LEGATO mode) ……………… 21
Quick sampling – Recording …………… 34
Connecting equipment to
the LINE IN …………………………………… 34
Select the recording slot ………………… 34
Enable recording …………………………… 34
Start recording ……………………………… 34
Sampling settings ………………………… 35
Setting auto recording …………………… 35
6
Page 7

Contents
Setting the sampling frequency ……… 35
LINE IN settings …………………………… 36
Changing the gain ………………………… 36
Setting mono/stereo ……………………… 36
Activating and deactivating
SAMPLE & EDIT mode …………………… 37
Activating SAMPLE & EDIT mode (slot se
lection) ………………………………………… 37
Selecting slots ……………………………… 37
Deactivating SAMPLE & EDIT mode
(returning to Regular mode) …………… 38
SAMPLE & EDIT mode (editing)
— Preparing to record …………………… 39
Connecting equipment to
the LINE IN …………………………………… 39
Select the recording slot ………………… 39
SAMPLE & EDIT mode (editing)
Exporting a single sample ……………… 46
Importing a single sample ……………… 46
Exporting sample banks ………………… 47
Importing sample banks ………………… 47
Step sequencer overview ……………… 48
Overview ……………………………………… 48
Lo-12 step sequencer features ……… 48
-
Creating sequences – Preparation … 49
Selecting tracks and setting sounds … 49
Creating sequences – Settings ……… 50
Setting the note length of one step … 50
Changing the sequence length ………… 50
Creating sequences
– Step recording …………………………… 51
Basic operations …………………………… 51
Selecting steps 17 and higher ………… 52
Clearing steps ……………………………… 53
— Recording ………………………………… 40
Enable recording …………………………… 40
Set the sample ……………………………… 40
quality ………………………………………… 40
Start recording ……………………………… 40
SAMPLE & EDIT mode (editing)
— Basic operation ………………………… 41
Adjust parameters ………………………… 41
Save settings ……………………………… 41
Discard settings …………………………… 41
Adjust parameters precisely …………… 41
Setting Sustain loops …………………… 42
Reversing sample playback …………… 43
Setting sample fade out ………………… 43
Chacking the attack, release, and velocity
of the sound ………………………………… 43
SAMPLE & EDIT mode (editing)
Copying steps ……………………………… 53
Automatically advancing steps during step
recording (Auto Step mode) …………… 53
Enabling tied-note (long sound) input 54
Inputting tied-notes (long sounds) …… 54
Creating sequences
– Real-time recording …………………… 55
Basic operations …………………………… 55
Clearing notes ……………………………… 55
Setting the metronome ………………… 56
Setting a pre-count ……………………… 56
Creating sequences
– Direct recording ………………………… 57
Basic operations …………………………… 57
Creating sequences
– Groove settings ………………………… 59
Setting the swing ………………………… 59
— Renaming and copying ……………… 44
Renaming samples ………………………… 44
Copying samples …………………………… 44
SAMPLE & EDIT mode (editing)
— Clearing …………………………………… 45
Clearing samples …………………………… 45
SAMPLE & EDIT mode (editing)
— Exporting/importing samples……… 46
Setting the laid-back function ………… 59
Parameter locking ………………………… 60
Turning parameter locking on ………… 60
Clearing parameter lock data …………… 60
Basic parameter locking
operations …………………………………… 60
Parameter locking – Direct input …… 61
Turning parameter ………………………… 61
7
Page 8

Contents
locking on …………………………………… 61
Recording knob operations ……………… 61
Parameter locking
– Real-time input …………………………… 62
Inputting in real time (parameter recording)
…………………………………………………… 62
Parameter locking
– Sound locking input …………………… 63
Turning sound ……………………………… 63
locking on …………………………………… 63
Recording note input and parameter lock
data at the same time …………………… 63
Sequence eects ………………………… 64
Random ……………………………………… 64
Random settings …………………………… 64
Dice …………………………………………… 64
Stutter ………………………………………… 65
Lo-12 as clock master ………………… 75
External device as clock master ……… 76
Bridging clock signals to a different con
nector from an external device acting as
the clock master …………………………… 77
MIDI ……………………………………………… 78
Setting channels for transmitting and re
ceiving MIDI ………………………………… 78
Setting the MIDI channel for pattern pa
rameters ……………………………………… 78
Setting the MIDI channel for accessing the
selected track (automatic channel) … 78
Setting the MIDI channel used to output
keyboard playing …………………………… 79
Turning control change transmission
on/o ………………………………………… 79
Turning MIDI clock output on/o ……… 79
-
-
-
Deleting sequences ……………………… 66
Clearing steps ……………………………… 66
Clearing all note data in a sequence … 66
Restoring only track sounds to the last
saved state ………………………………… 66
Copying tracks ……………………………… 67
Copying tracks ……………………………… 67
Pattern saving ……………………………… 68
Saving patterns …………………………… 68
Initializing patterns ………………………… 68
Pattern renaming ………………………… 69
Renaming patterns ………………………… 69
Tempo overview …………………………… 70
Setting the BPM mode …………………… 70
Setting the pattern BPM ………………… 70
Setting the global BPM ………………… 71
Clock synchronization with
Setting MIDI OUT ………………………… 80
Setting MIDI command transmitting and
receiving ……………………………………… 80
Turning active sensing transmission
on/o ………………………………………… 80
Turning on/o active sensing
reception ……………………………………… 81
Setting the channel for transmitting and
receiving program changes …………… 81
Turning on/off program change transmis
sion …………………………………………… 81
Turning on/o program change reception
…………………………………………………… 82
Exporting/importing user data ……… 83
Connecting – Exporting/importing to/from
a PC/Mac …………………………………… 83
Connecting – Exporting/importing to/from
-
external devices — Clock settings … 72
Overview ……………………………………… 72
Setting the clock source ………………… 73
Setting Audio Sync output ……………… 73
Setting SYNC IN polarity ………………… 74
Setting SYNC OUT polarity …………… 74
Clock synchronization with external de
vices — Connection examples ………… 75
another Lo-12 ……………………………… 83
Exporting a single pattern ……………… 84
Importing a single pattern ……………… 84
Backing up all user data at once ……… 85
Restoring (importing) user data ……… 86
System settings …………………………… 87
-
Setting the battery type ………………… 87
Setting the automatic power down func
8
-
Page 9

Contents
tion ……………………………………………… 87
Setting the headphone gain …………… 88
Setting the master tuning ……………… 88
Setting knob movement behavior …… 89
Restoring to factory default settings (fac
tory reset) …………………………………… 90
Checking the system versions ………… 90
Updating the rmware …………………… 91
Error codes …………………………………… 92
Appendix ……………………………………… 93
Figure1. Sound architecture …………… 93
-
9
Page 10
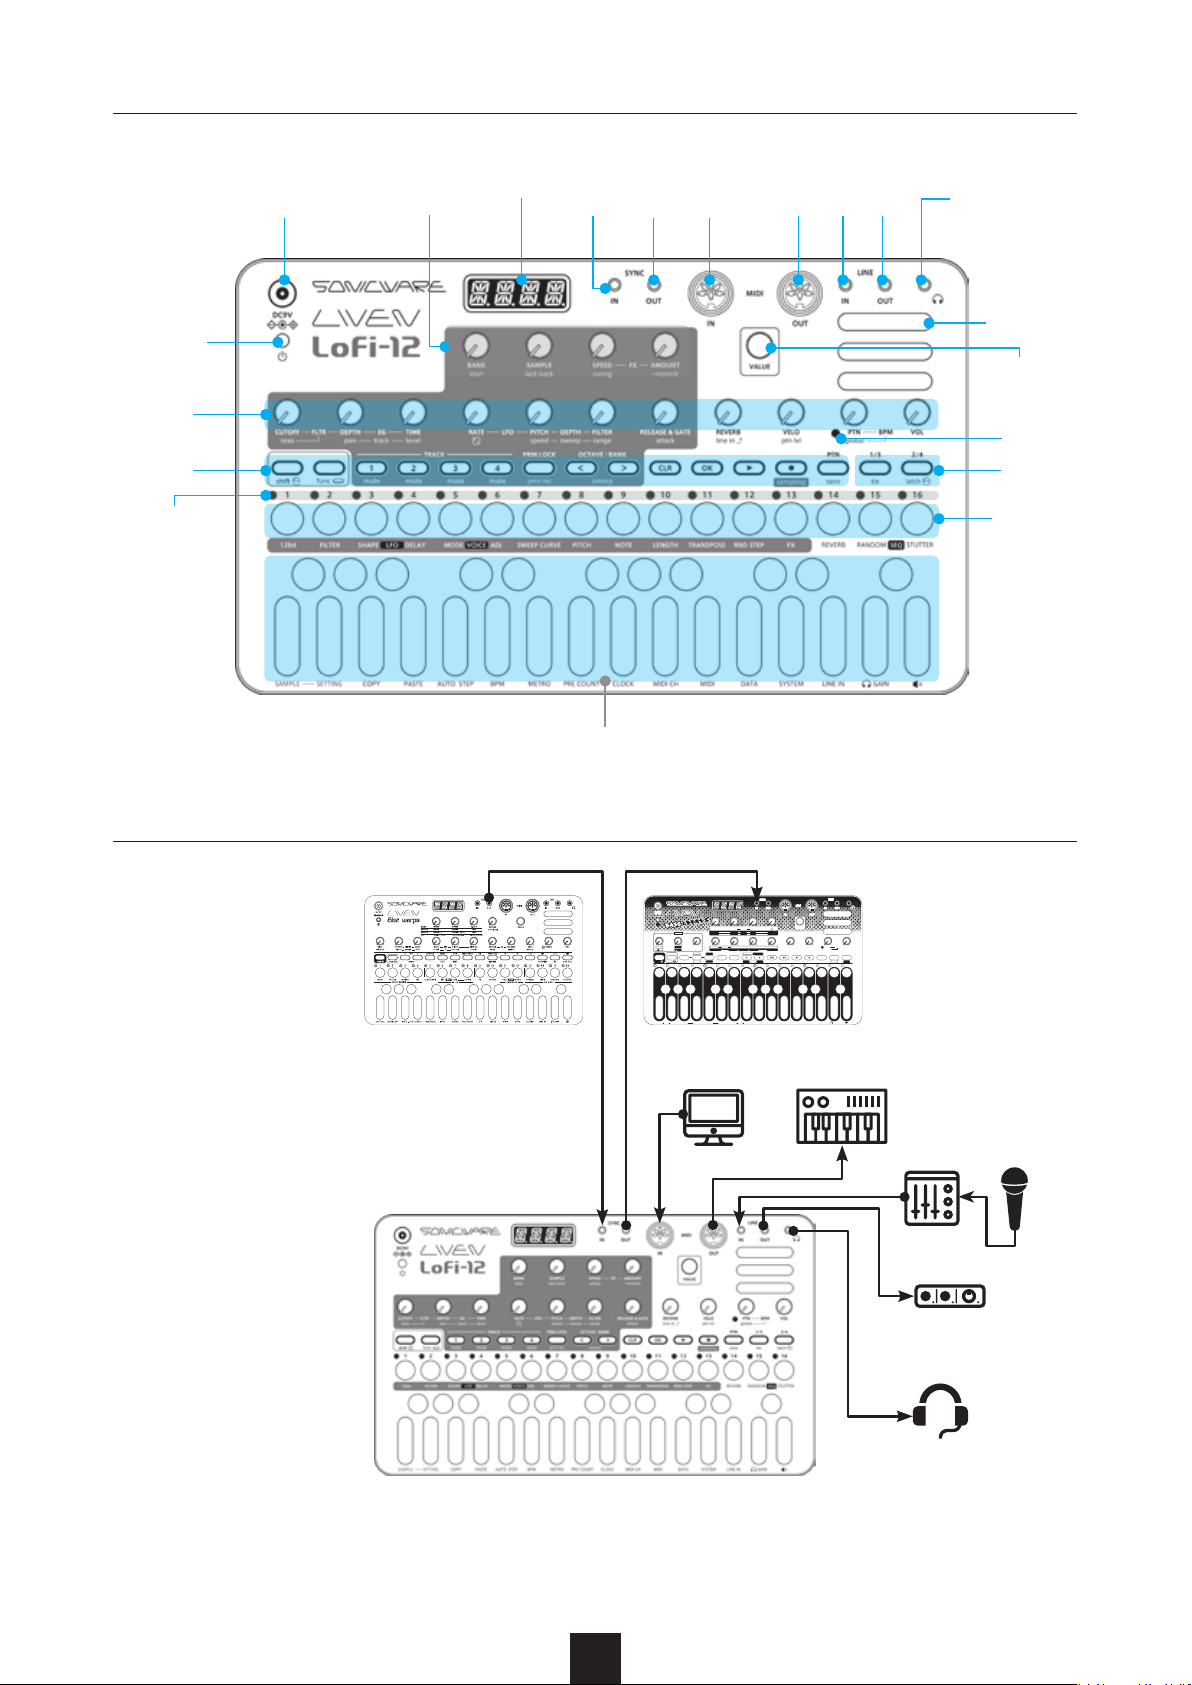
Names of parts
POWER
switch
Knobs
Buttons
Step
LEDs
DC9V
jack
Main knobs
1 – 4
Display SYNC
IN
Keyboard
SYNC
OUT
MIDI
IN
MIDI
OUT
LINEINLINE
OUT
Headphone
jack
Speaker
VALUE
knob
Tempo
LED
Page
but
tons
Step
buttons
-
Connection example
SYNC
SYNC
MIDI
MIDI
OUTIN
OUT
MEMORY
bank
KICK
kick1
PITCHRATE DEPTH
fx
DRUM STEP
kit
CYMBAL2 CLAP STICK KICK2 SNARE2SNARE1 HAT1 HAT2
IN
ASSIGN1
ASSIGN2 DIMENSION
speed sweep
range
SNARE LEVEL
HAT OTHERS
snare1 tune
hat1
RELEASE&GATE
SN1/ /KICK1/ HT1/ ex4ex3tuneex1 ex2 EX1/
TIME
OCTAVEBASS
fxtype
sweep
pad muteselect
hat2
M.GUN
IN
IN
VALUE
velo ptnlevel global
EX3 EX4
OUT
OUT
RANDOMFXPRMLOCK 1/3 2/4
stutter
DC9V
MIXER
LINEIN DUCKING FXAMOUNT PTN BPM VOL
BASS
DRUM
fx
fx
PTN
glide
save prmrec
func
shift
21 3 4 65 7 8 109 11 12 1413 15 16
KICK1 CYMBAL1 EX2EX1
MEMORY KITEDIT COPY PASTE UNDO REDO BASS PTN DRUM CLOCKMETRO MIDICH MIDI DATA SYSTEM GAIN
LINE
LINE
OUT
IN
OUT
IN
tie
EX6EX5
Note: Use connection cables that are
3 m or shorter.
10
Page 11
Starting up and shutting down
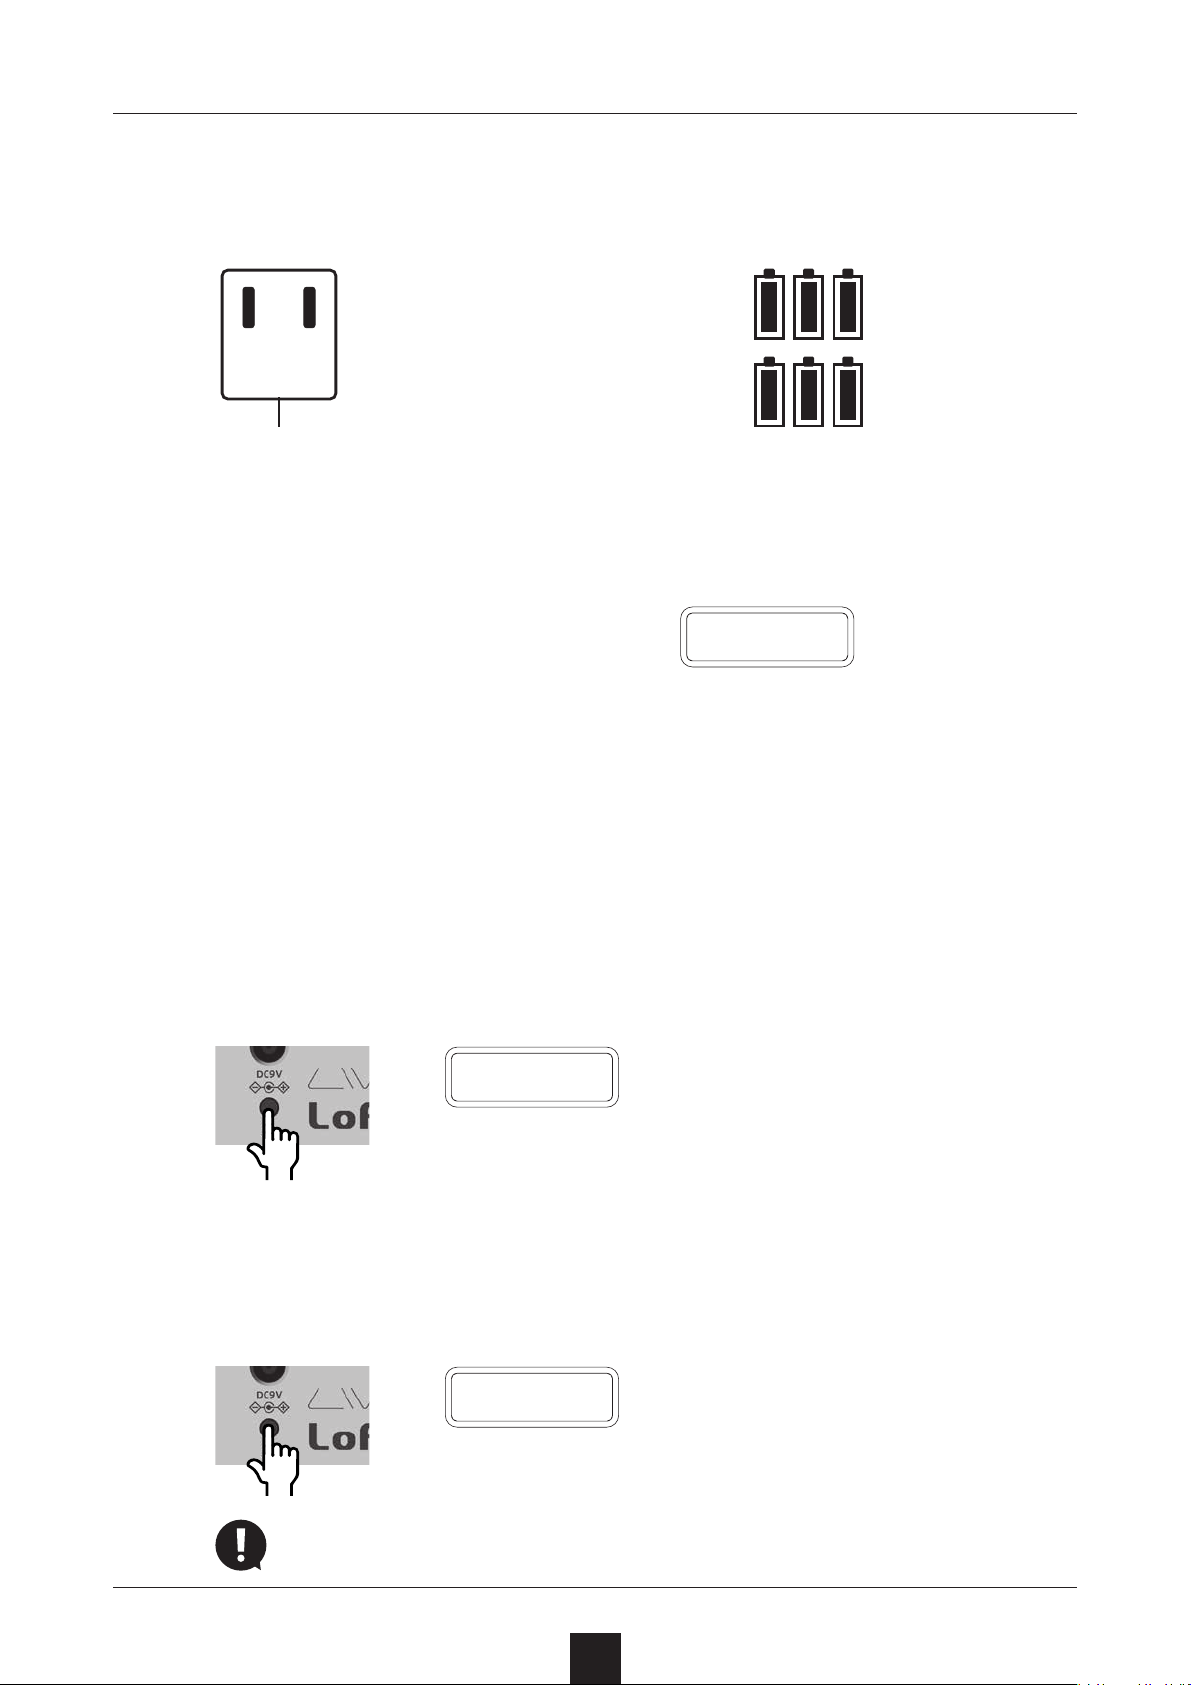
Preparing a power supply
AC adapter (sold separately)
DC9V
Only use AC adapters that
conform to the specications. Using an AC adapter
with dierent specications could cause damage.
AC adapter specications*
Voltage: 9V output
Current: 1A or higher
Connector: EIAJ-03 compliant
(1.7mm inner diameter,
4.75mm outer diameter)
Polarity: center+
*Equivalent to Korg Volca KA350 adapter
6 AA batteries
or
BT.LO will appear on the display if the remaining battery
charge is low. Replace the
batteries immediately.
B T.L O
When using nickel-metal hydride batteries or lithium batteries, change the
battery setting.
( → P.87)
Starting up
Press and hold the POWER switch until LOFI (LIVEN Lo-12) ap-
1
pears on the display.
L O F I
Turning the unit o
Press and hold the POWER switch until the display turns o.
1
P.O F F
Recently made changes will be lost when the unit is turned o.
Save the changes if necessary.
11
Page 12
Basic operations
This section explains basic operations.
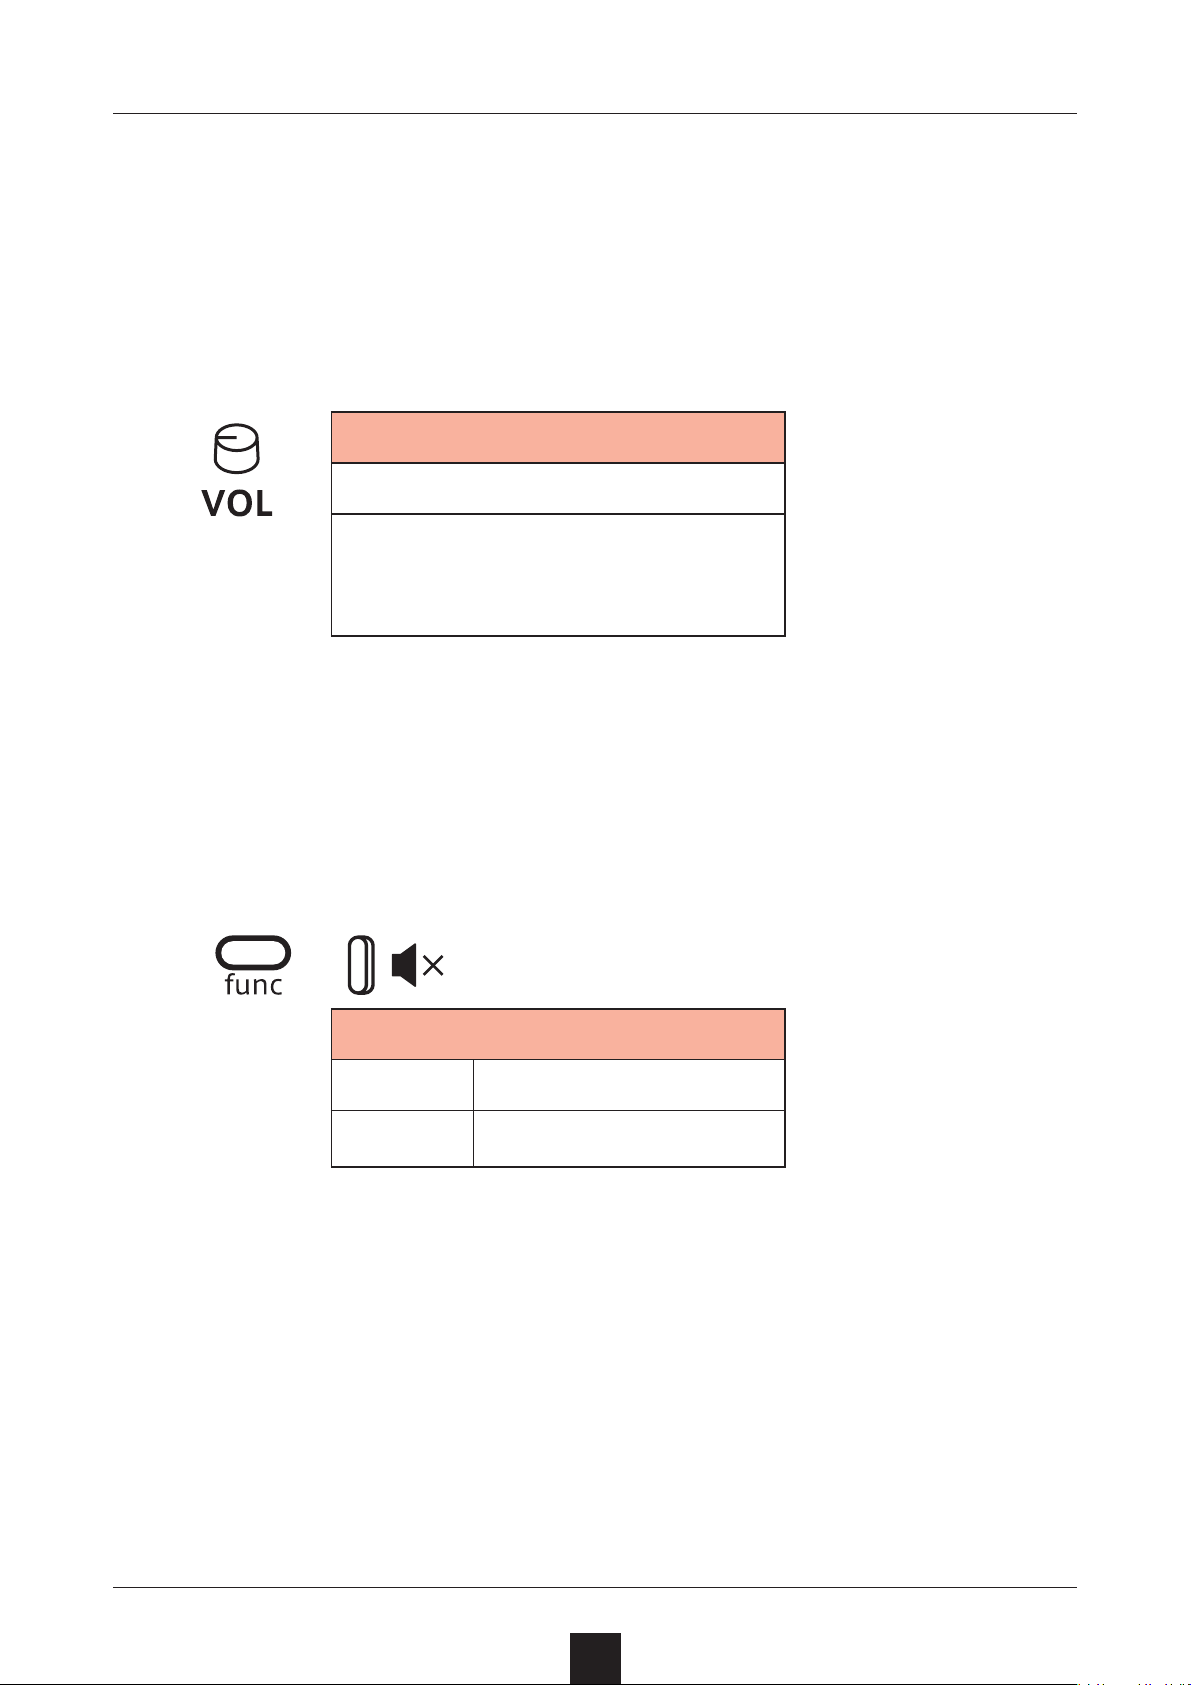
Adjusting the overall volume
The volume from the speaker, headphones and the LINE OUT can be
adjusted.
Volume
0 – 127
This can be adjusted from −∞
to +6 dB with 0 dB as the middle value (63–64).
Turning on/o the speaker
The built-in speaker can be turned o manually if you want to mute it
without connecting headphones (when only using the LINE OUT, for
example).
+
Speaker
MUTE Speaker o
SPK Speaker on
12
Page 13
Basic operations
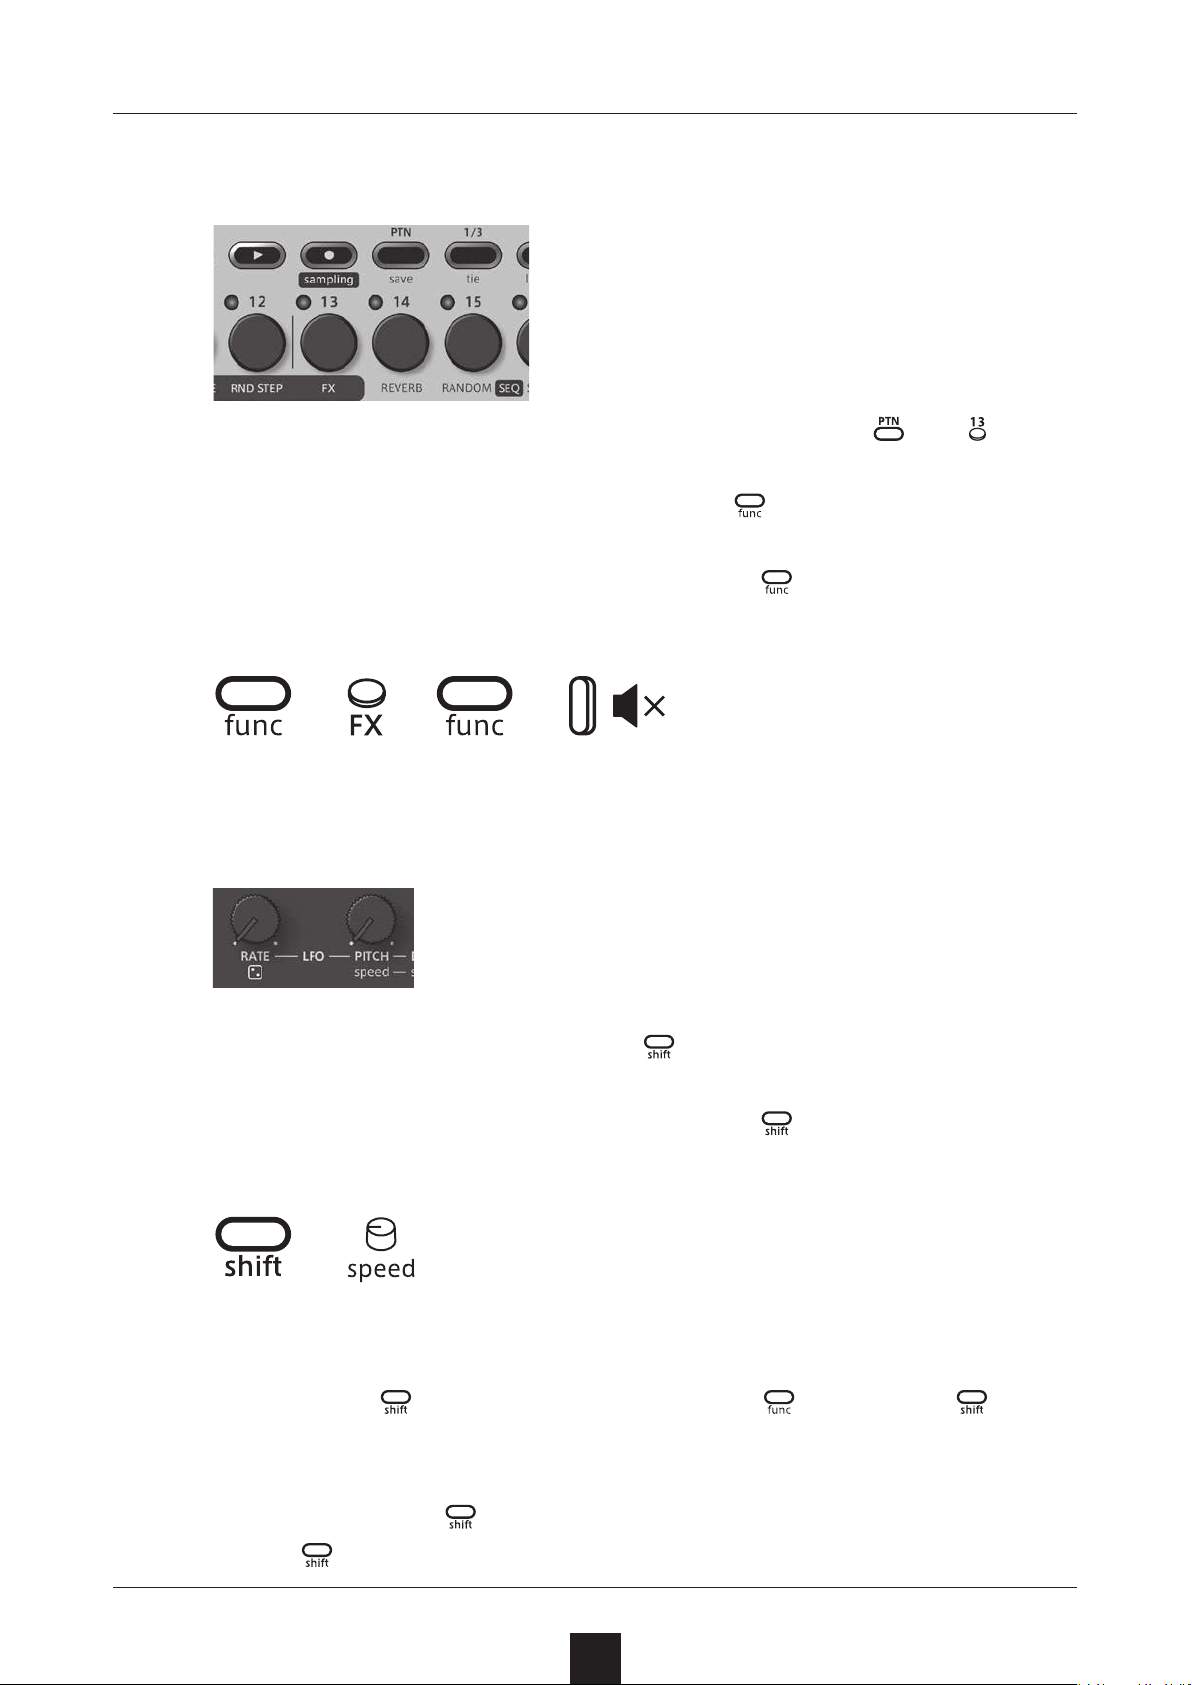
Using the func button
Some Lo-12 buttons have two functions.
In the example above, the secondary functions of the and buttons are “save” and “FX”.
Pressing these buttons while pressing the
their secondary functions.
In this manual, operations while pressing the button will be shown
as follows.
+
+
button will activate
Using the shift button
Many Lo-12 knobs have both uppercase and lowercase names.
Turning a knob alone will adjust the uppercase parameter.
Turning the knob while pressing the
case parameter.
button will adjust the lower-
In this manual, operations while pressing the button will be shown
as follows.
+
Using the shift button hold function
By pressing the button while pressing the button, the button hold function can be activated. (The button lights orange.) When
the hold function is activated, lowercase parameters can be adjusted
without pressing the
Press the
button again to deactivate the hold function.
button.
13
Page 14
Tracks and patterns
Track overview
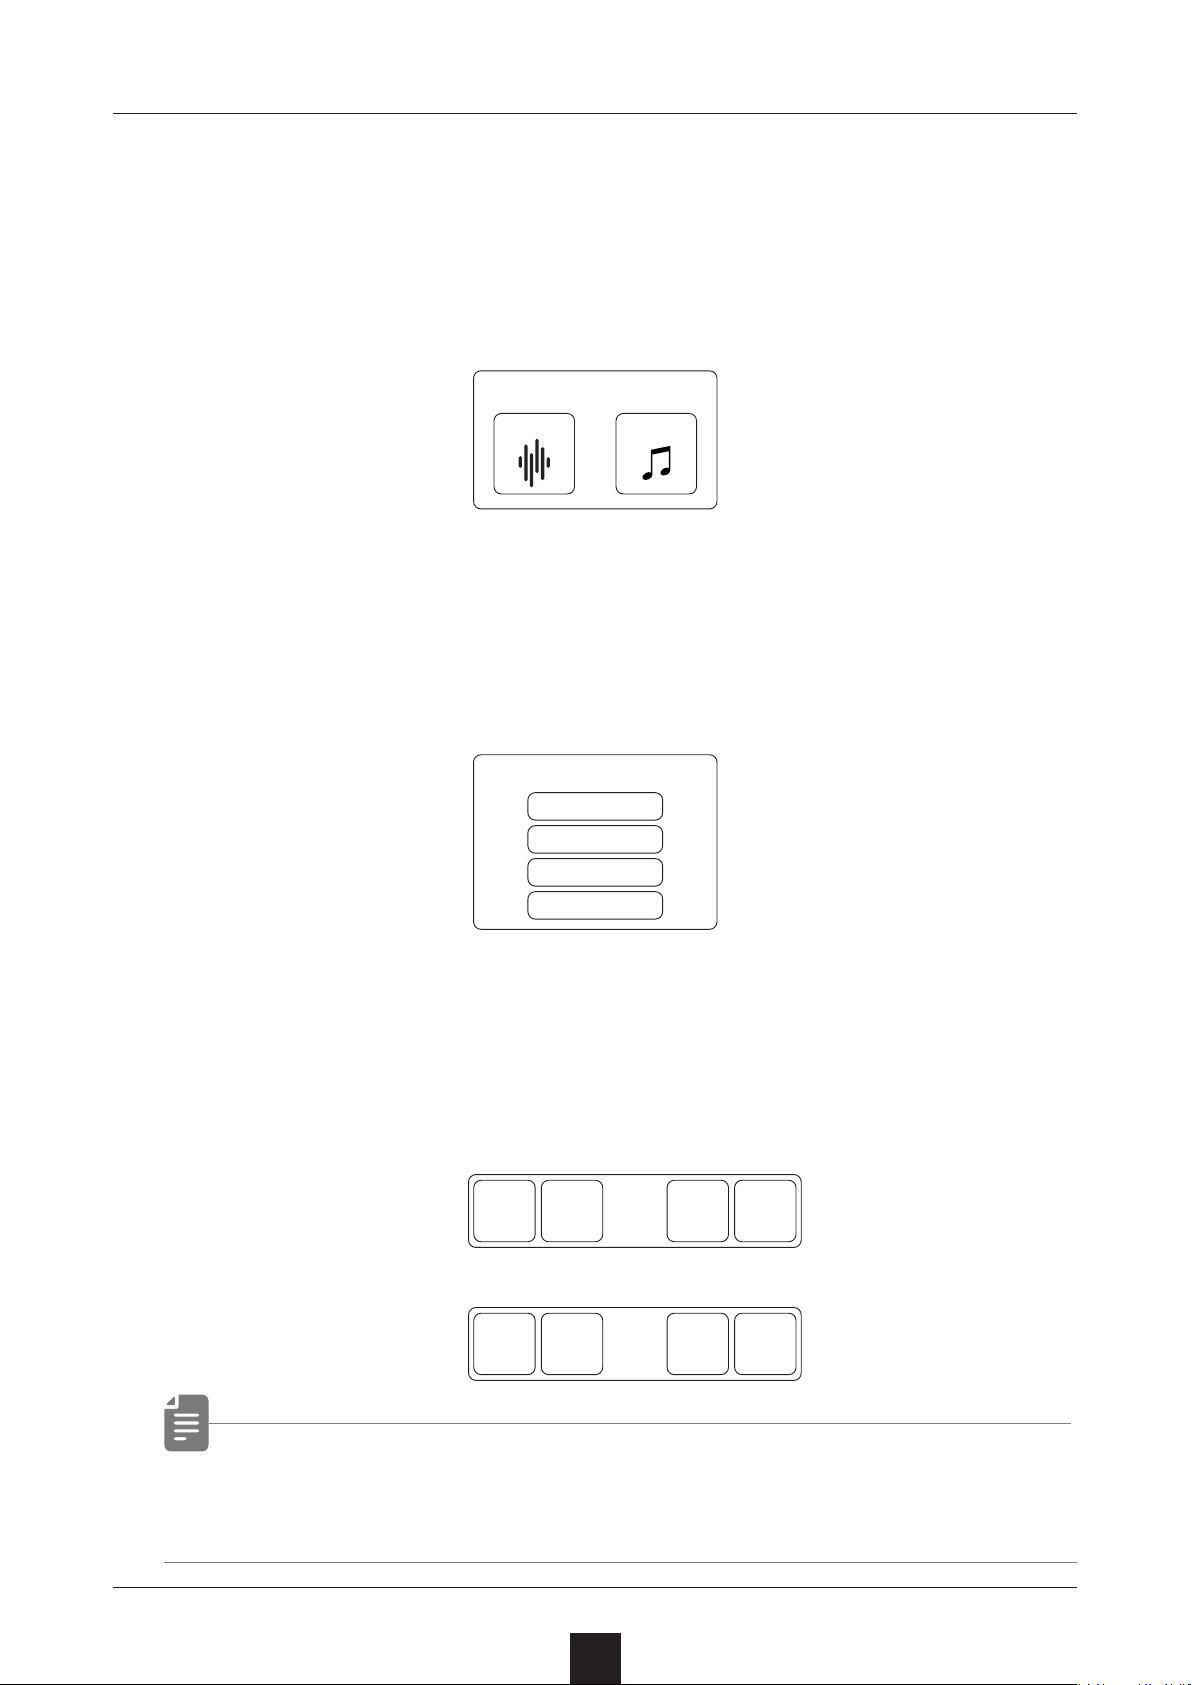
The LIVEN Lo-12 groovebox has a 4-track sequencer. Tracks contain both sound settings and sequences (performance data). The
four tracks of the LIVEN Lo-12 can each have dierent sounds and
individual sequences created for them.
Track
Sound
Sequence
+
Pattern overview
A pattern is a combination of the four tracks described above. With
lengths of 1–4 bars, patterns can be used as the smallest units in
making songs.
Pattern
Track 1
Track 2
Track 3
Track 4
Patterns and banks
16 patterns can be stored together in a single bank.
The LIVEN Lo-12 has 4 banks enabling 64 patterns to be saved in
total.
BANK 1
BANK 4
Pattern1Pattern
2
Pattern1Pattern
2
……
……
……
Pattern
Pattern
• BANK 1 contains present patterns. Following the instructions
on the next page, try playing them.
15
15
Pattern
16
Pattern
16
14
Page 15
Basic pattern operation
Selecting patterns
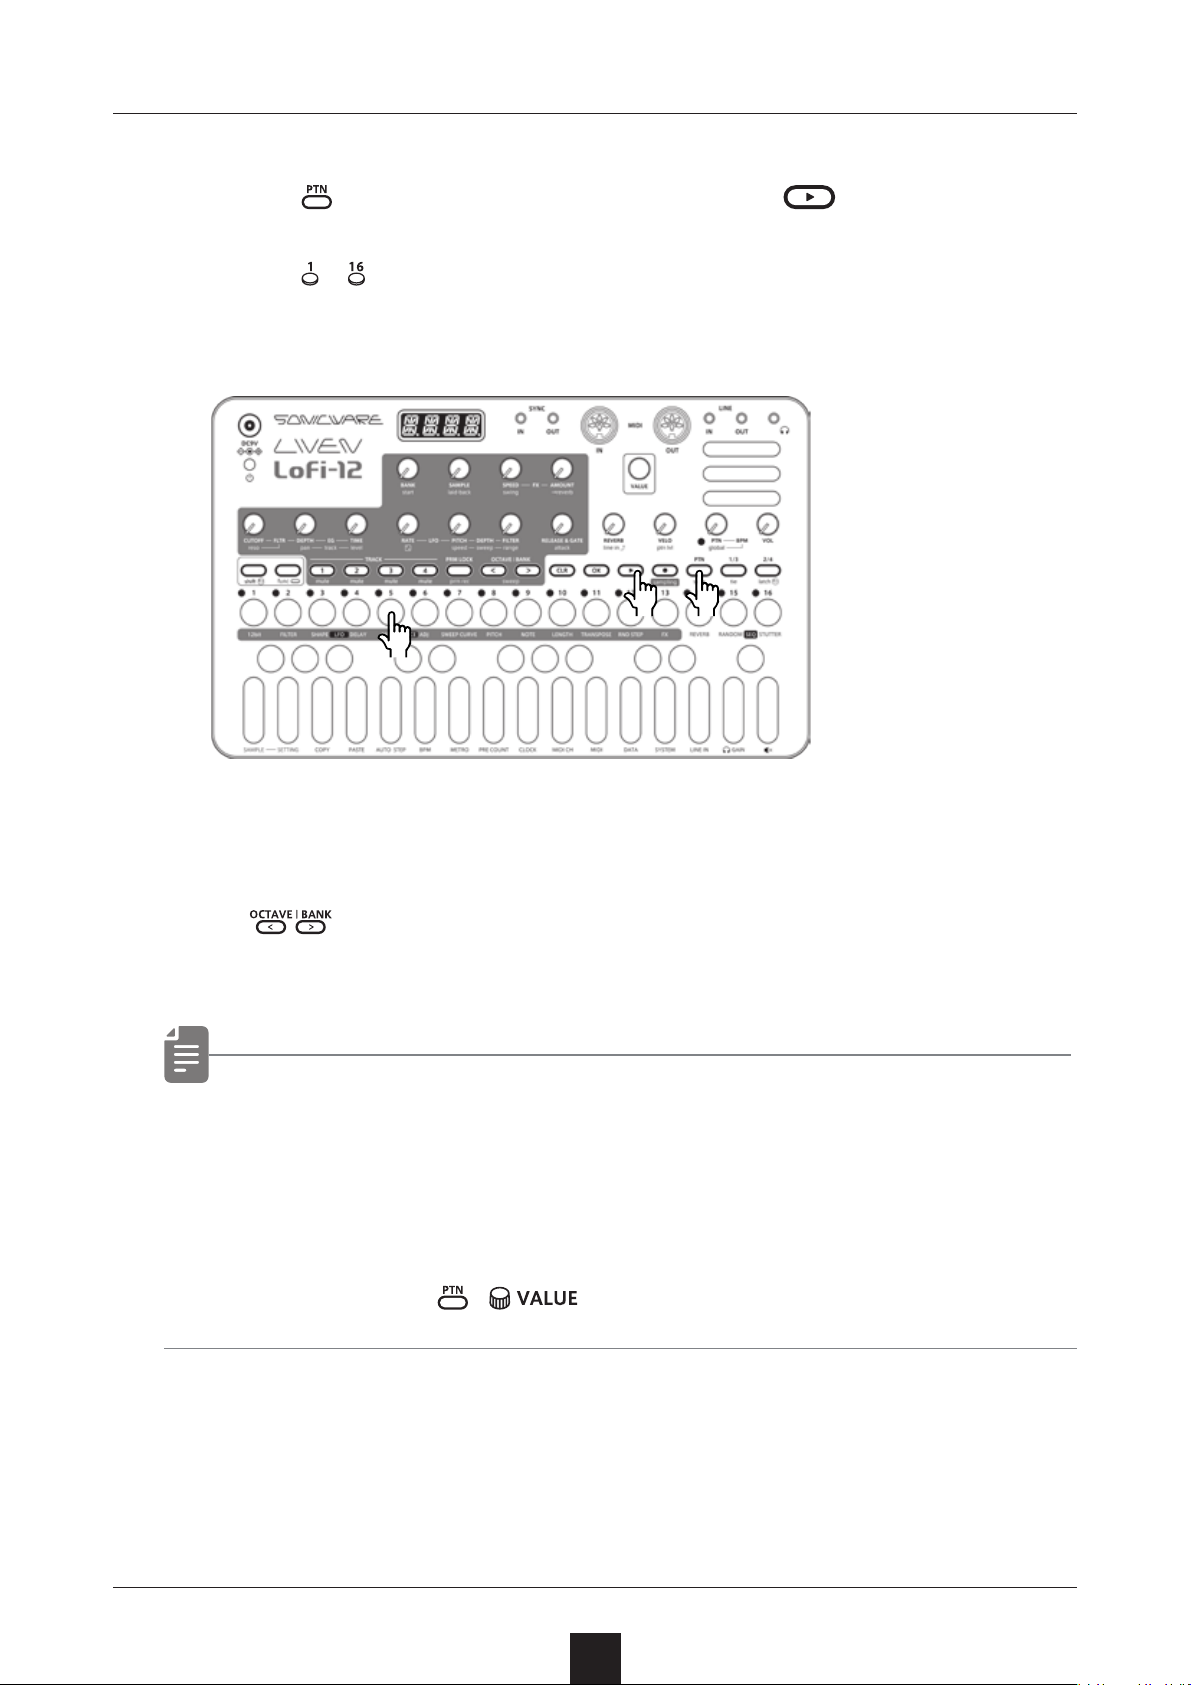
Press .
1
Press – .
2
→ This selects a pattern.
(STEP 1 for pattern 1… STEP 16 for pattern 16)
Playing patterns
Press .
3
Press it again to stop.
●❶●❸
●❷
Selecting pattern 17 and higher
Press after procedure 1 to change the bank, enabling selection of pattern 17 and higher.
• If a dierent pattern is selected during pattern playback, it will
be readied but will not start playing immediately.
Playback will switch to the selected pattern after the playing
pattern completes.
• After pressing
, can also be used to select patterns.
15
Page 16
Basic pattern operation
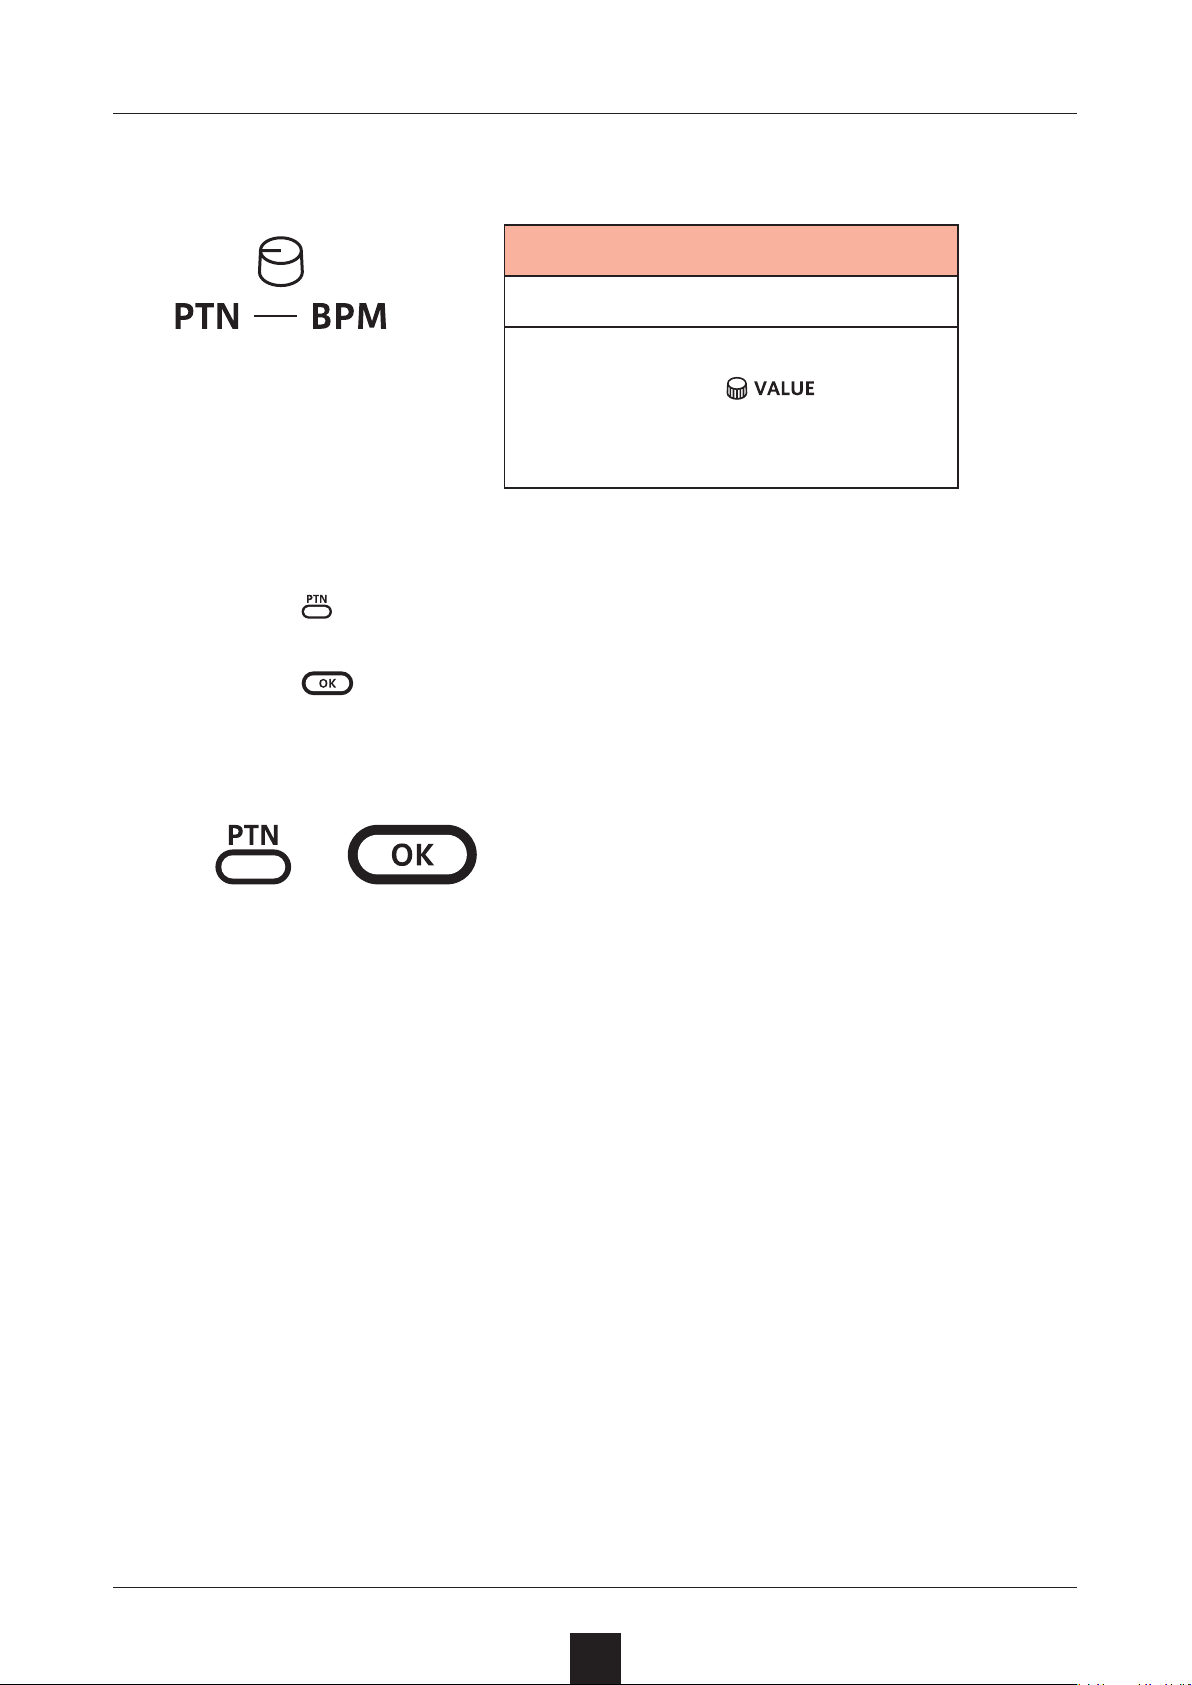
Changing the tempo
PTN – BPM
40 – 250
When the tempo is shown on
the display, the
be turned to change it in 0.1beat increments.
knob can
Reloading patterns
Press .
1
Press .
2
This is useful for restoring sounds to their original states during
live performances, for example.
16
Page 17
Pattern chain playback
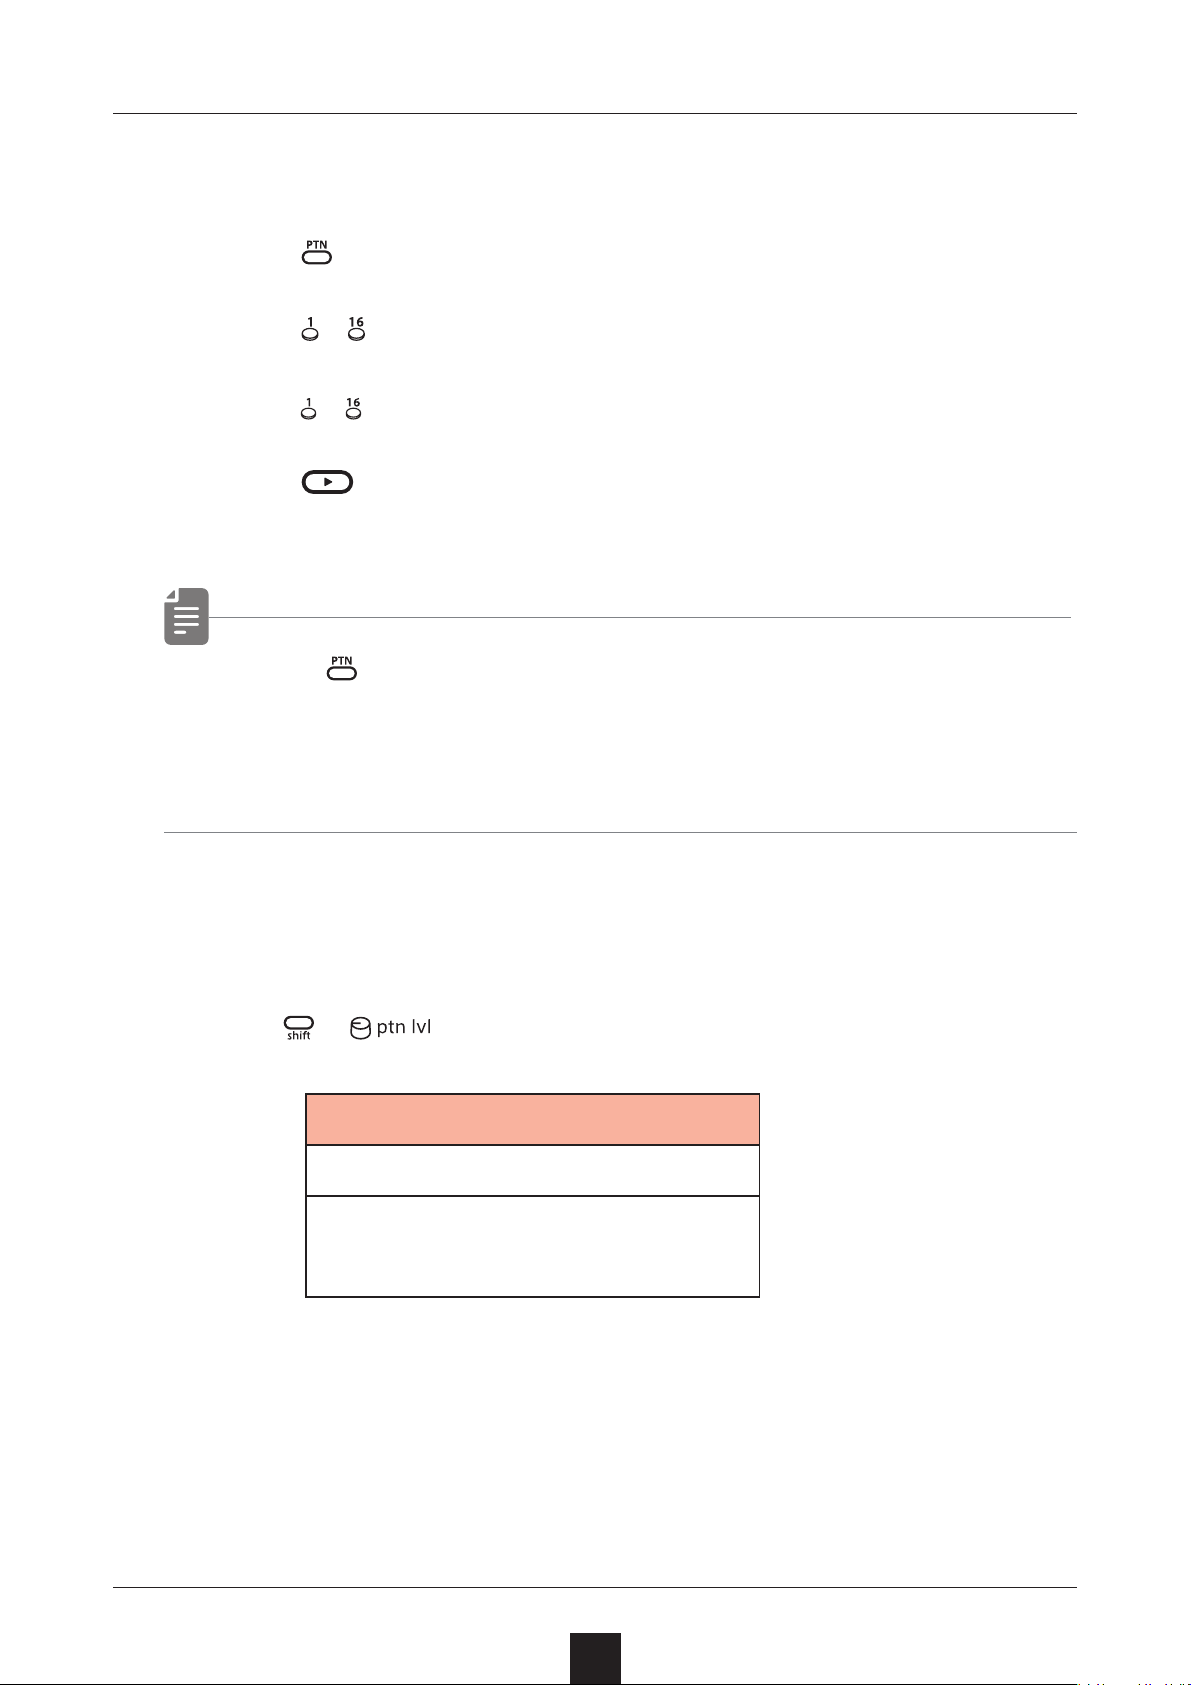
Selecting multiple patterns and playing them in order (chain playback)
Press twice (lights orange).
1
Press – .
2
Select patterns in the order that you want them to play.
Press – again to deselect.
Press .
3
The patterns will play in the selected order.
• Press again to end chain playback.
• Stutter mode ( → P.65) cannot be used during chain playback.
Adjusting the volume of individual patterns
Turn + .
1
Pattern Level
0 – 127
Pattern levels can be set in a
range of −∞ – +6 dB.
17
Page 18
Track selection and basic adjustments
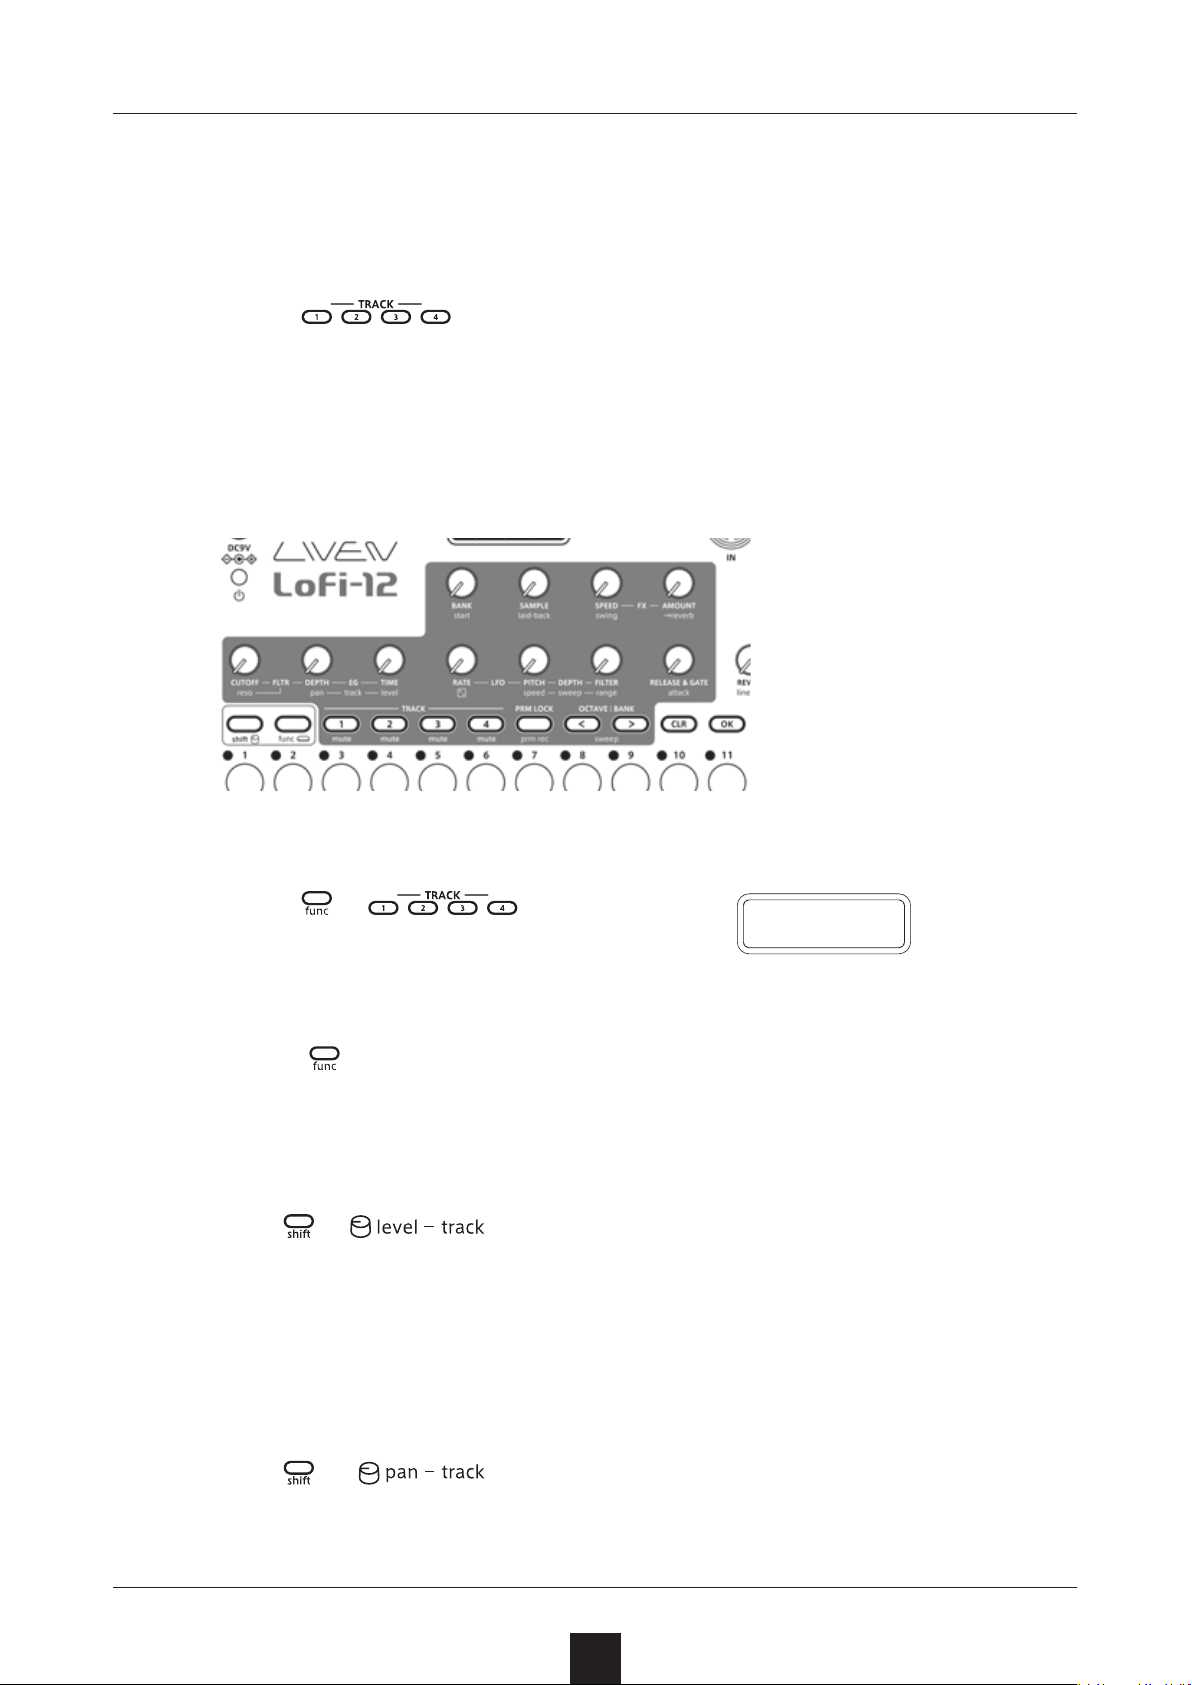
Switch between the 4 tracks of the Lo-12 to work with them.
Selecting tracks
Press for the track you want to select.
1
The selected TRACK button will light red and its track number
will be shown on the display. (The unselected TRACK buttons
will light green.)
The parameters shown in the dark gray areas on the top of the
unit can be controlled separately for each track.
Muting tracks
Press + for the track
1
you want to select.
The muted TRACK buttons will light orange.
Press + the button that is lit orange to unmute the track.
M U T E
Adjusting track levels
Turn + .
1
The level of the selected track can be set in a range of 0 – 127
( −∞ – +6 dB).
Adjusting track panning
Turn + .
1
The panning of the selected track can be set in a range of L63 –
CNTR – R63.
18
Page 19
Performing with
the keyboard and voice modes
Performing
Play the keyboard.
1
Holding keyboard notes
Press + keys to hold them.
1
• Press the same key again to stop holding it.
• Press + to stop holding all keys.
Changing the velocity
The velocity value used when playing keys can be set.
Velocity
0–127
The higher the value, the louder
the notes will be played.
19
Page 20
Performing with
the keyboard and voice modes
Changing the octave range
Press / .
1
This lowers/raises the range by an octave.
+3 octaves
+2 octaves
+1 octave
− 1 octave
− 2 octaves
− 3 octaves
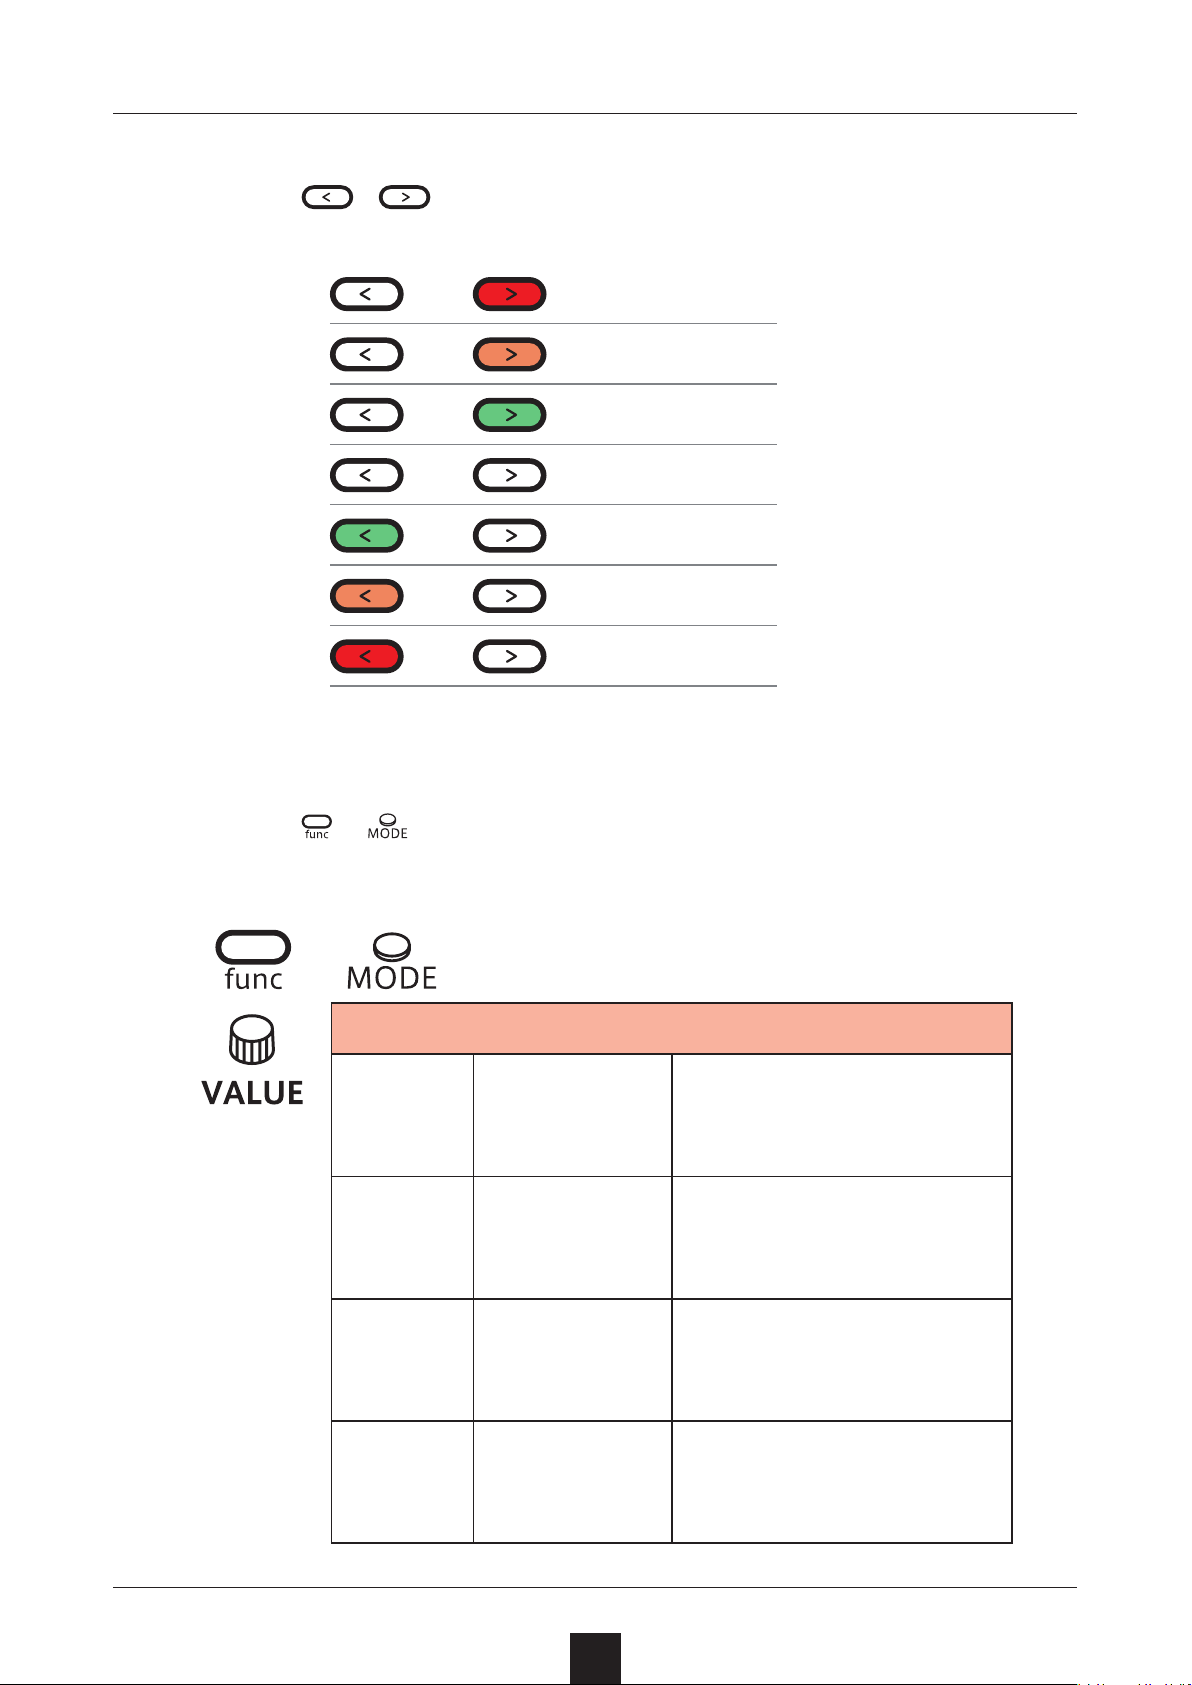
Changing the voice mode
Press + .
1
This selects the voice mode
+
Voice Mode
POLY
Polyphonic
Up to 10 voices can be
output simultaneously
in this mode
In this single voice
MONO
LGT
ARP
Monophonic
Legato
Arpeggiator
20
mode, each note retriggers the sound.
In this single voice
mode, notes do not retrigger the sound.
Pressed keyboard keys
are played one at a time
in this mode.
Page 21
Performing with
the keyboard and voice modes
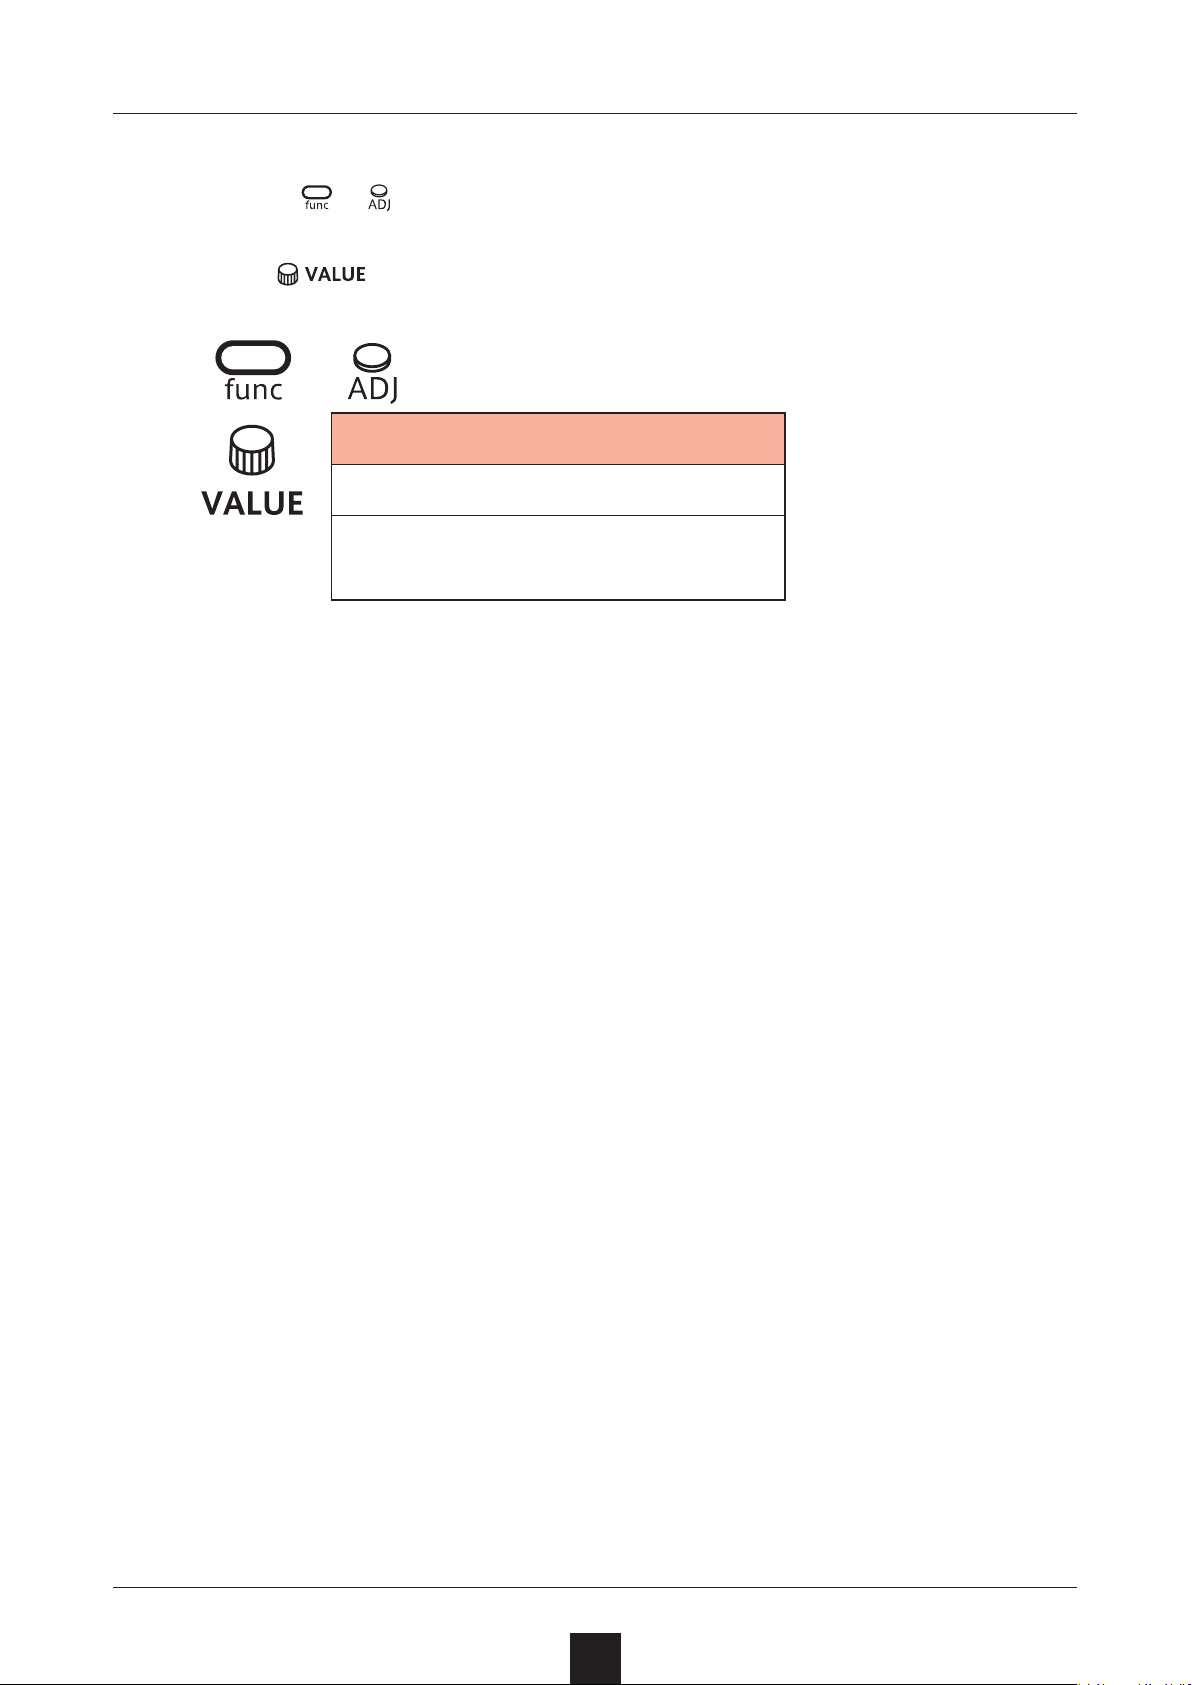
Changing the glide (in MONO/LEGATO mode)
Press + .
1
Use to set the speed.
2
+
Glide
0 – 127
The time can be changed in a
range of 0 – 10000 ms.
21
Page 22
Performing with
the keyboard and voice modes
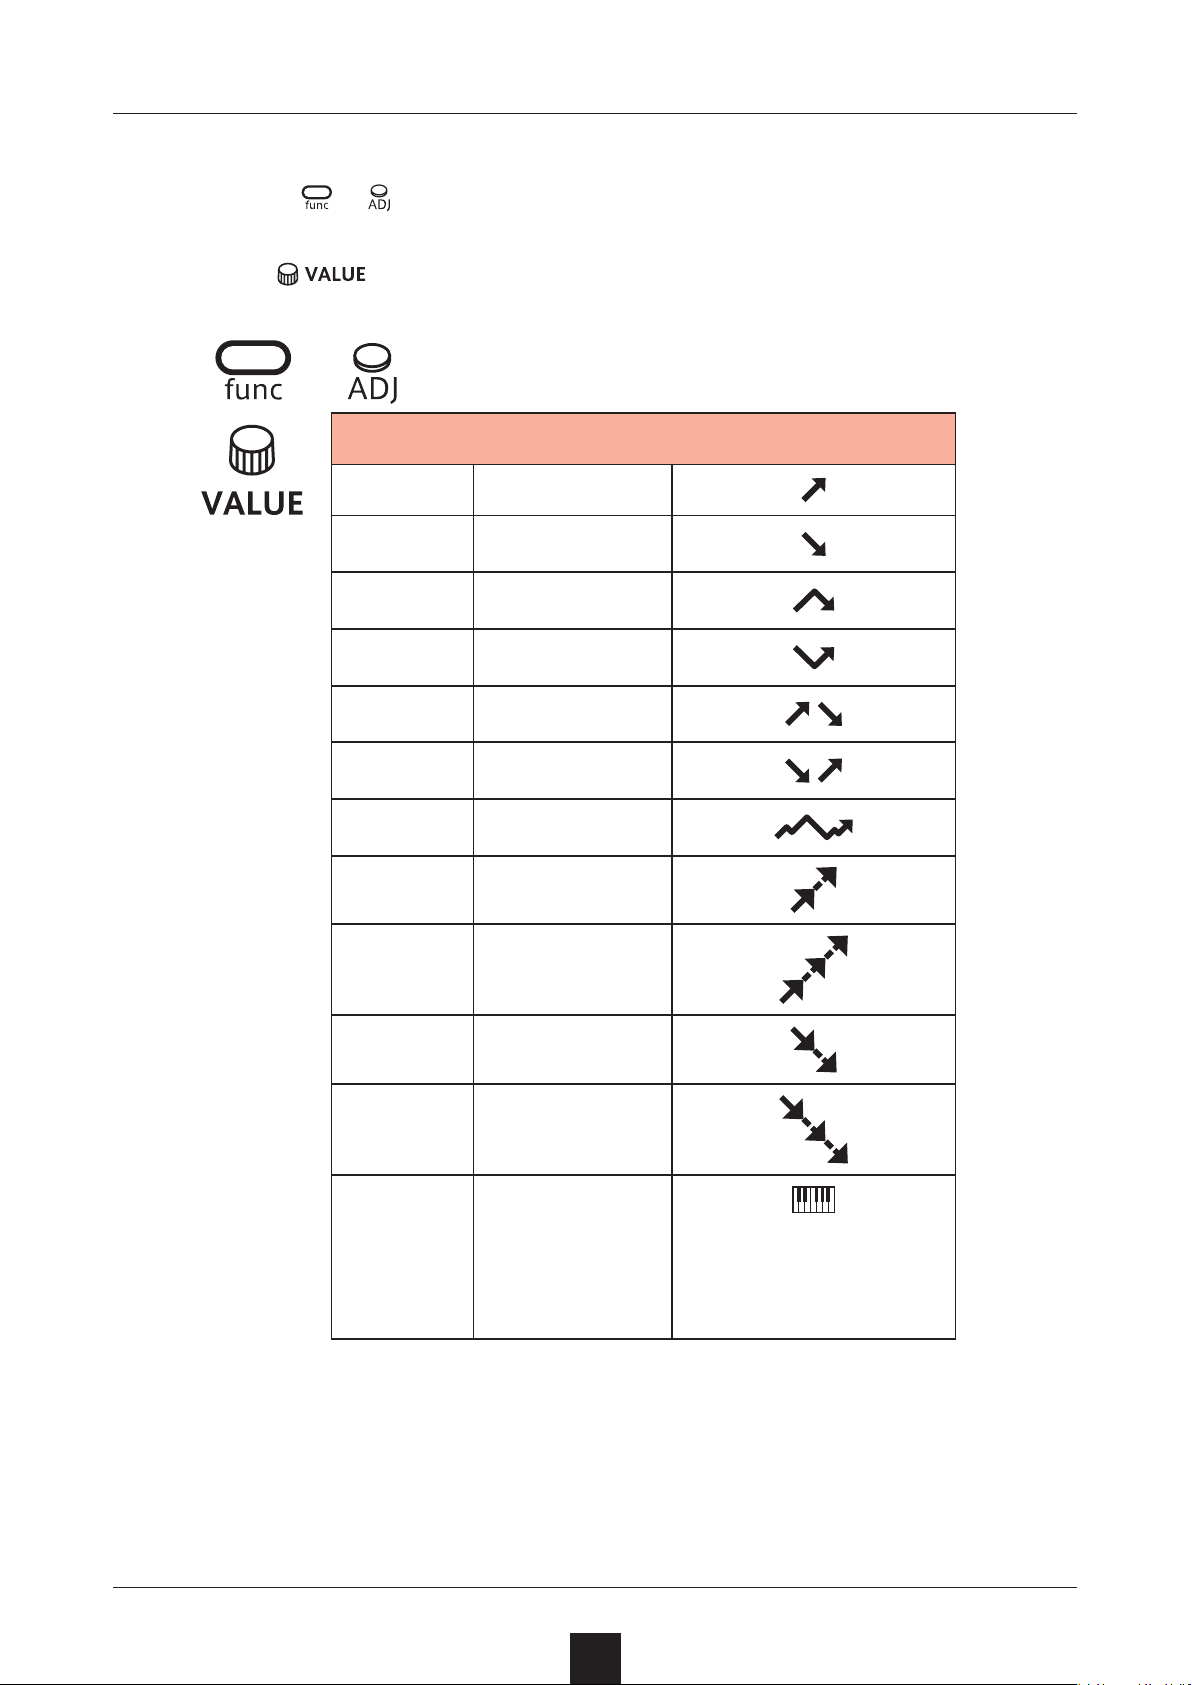
Changing the arpeggiator type (in ARP mode)
Press +
1
Use to select the arpeggiator type.
2
.
+
Arpeggiator
UP
DOWN
U.D
D.U
U.A.D
D.A.U
RNDM
UP+1
UP
DOWN
UP DOWN
DOWN UP
UP & DOWN
DOWN & UP
RANDOM
UP +1
UP+2
DN-1
DN-2
P.O
UP +2
DOWN − 1
DOWN − 2
PLAY
ORDER
Notes are sounded
in the order played
on the keyboard
22
Page 23
Sample selection
Overview
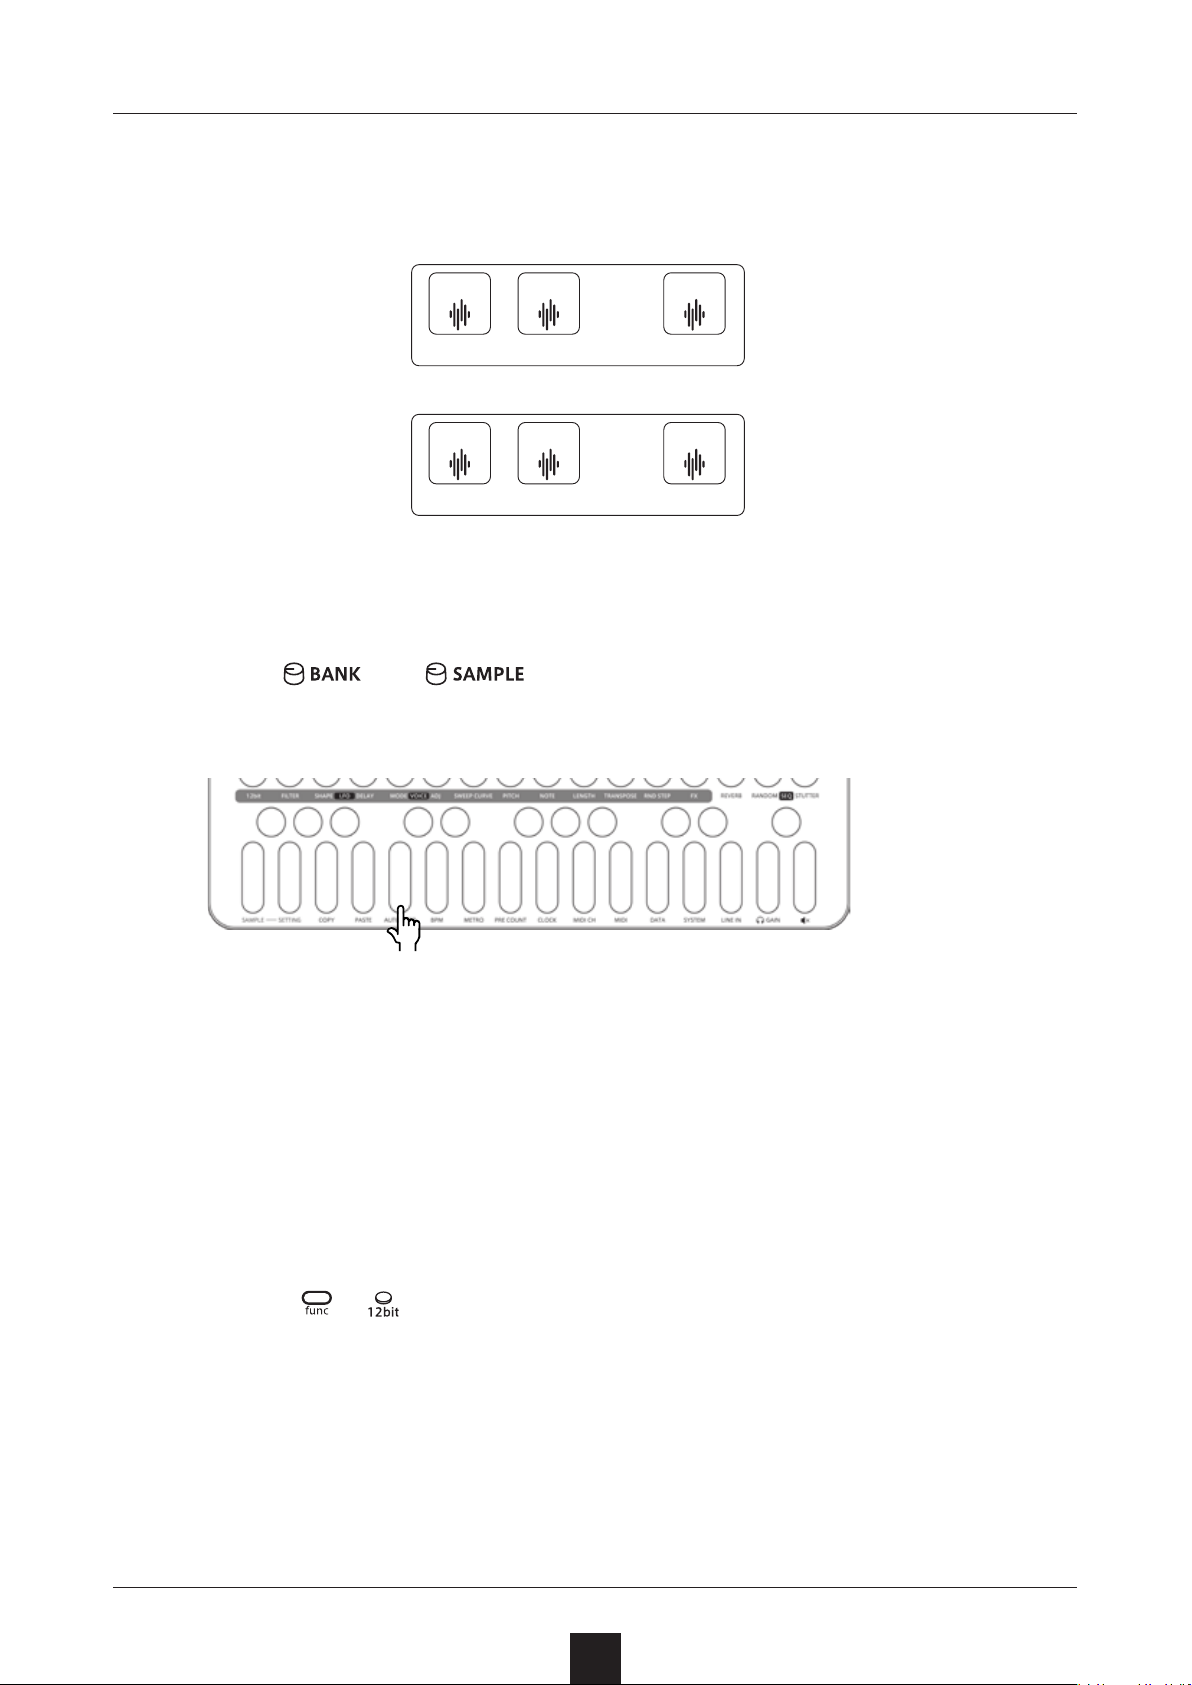
The Lo-12 can store a total of 128 recorded samples in 8 banks
with 16 slots each.
Sound
BANK 1
Slot 1
Sound
BANK 8
Slot 1
Sound
Slot 2
Sound
Slot 2
……
……
……
Sound
Slot 16
Sound
Slot 16
Selecting samples
Turn and to select samples.
1
Sounds can be checked by playing the keys on the keyboard.
Play this key to hear the sample with its original pitch and length.
12-bit sampler mode
The Lo-12 records samples at 16-bit/12kHz or 16-bit/24kHz, but
it also has a mode that drops the bit rate to 12-bit and re-create the
sound of vintage samplers.
Press + .
1
Turning this on enables 12-bit sampler mode.
23
Page 24
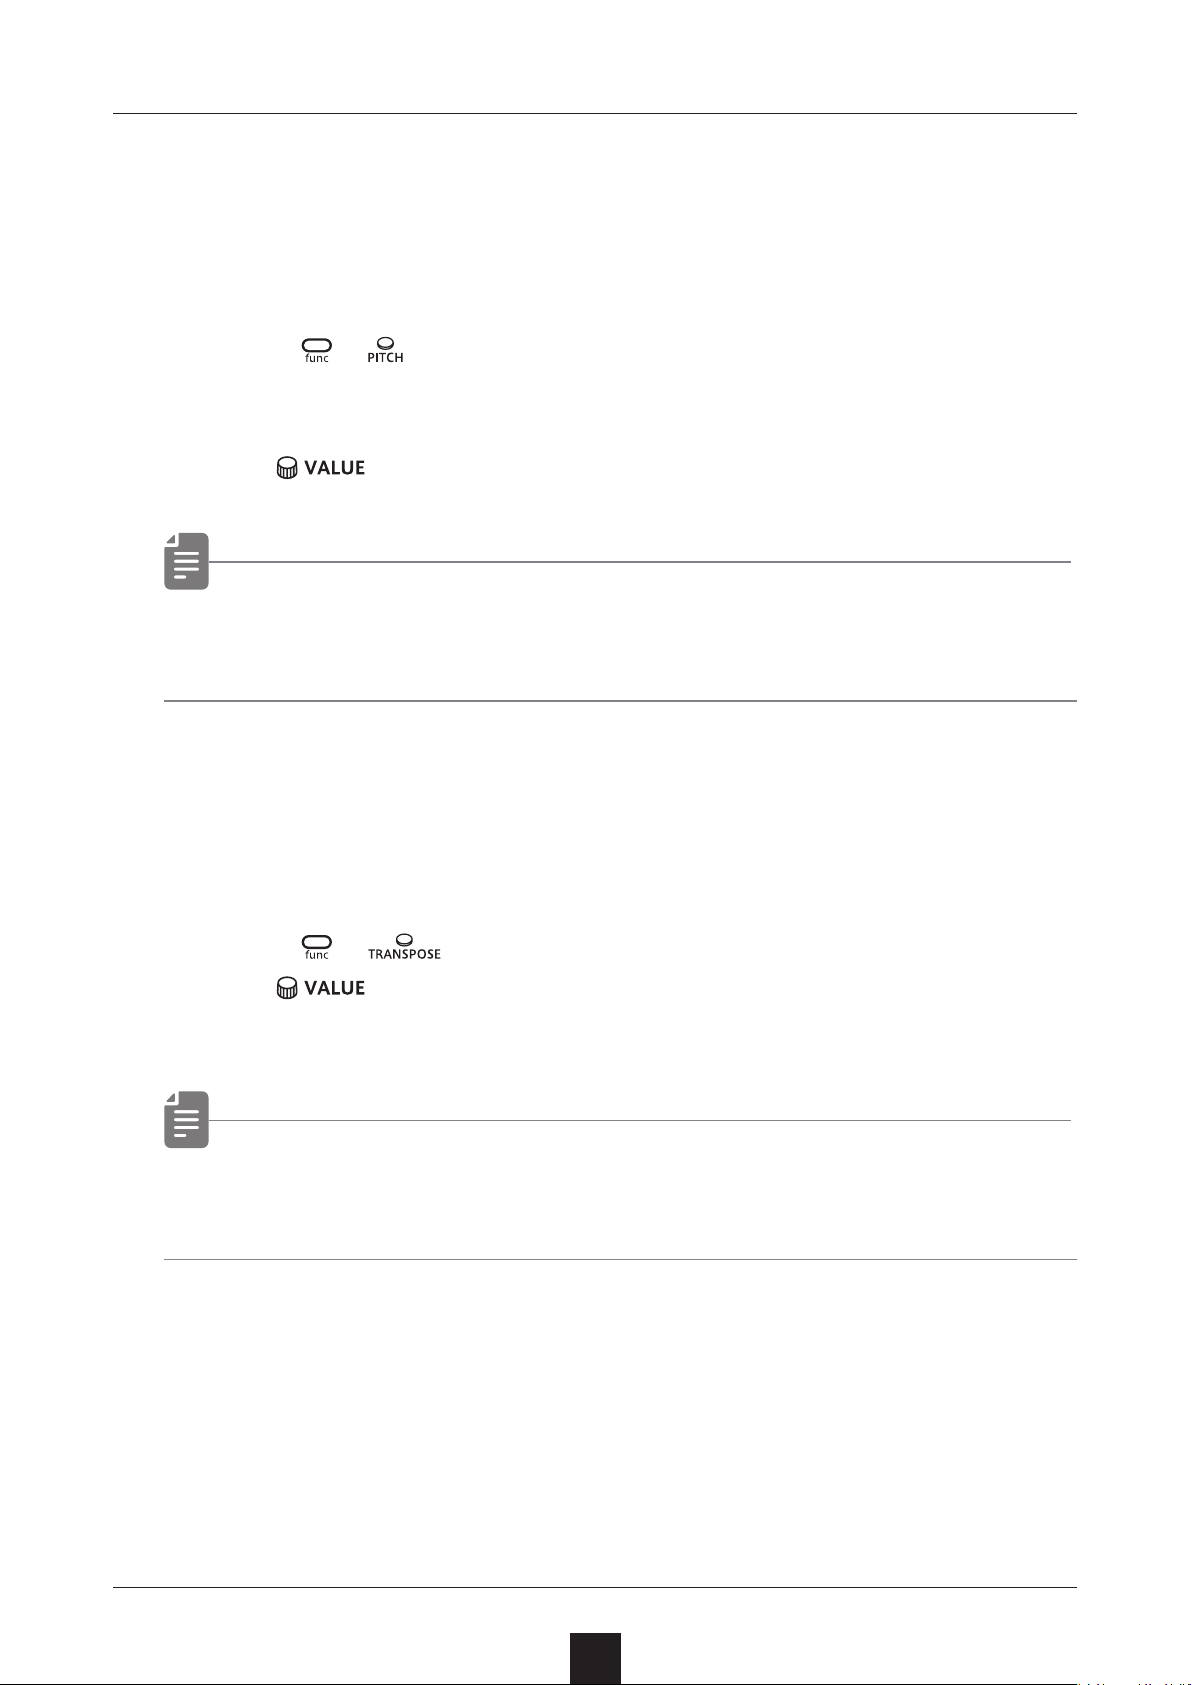
Changing the pitches of samples
In addition to changing pitches in semitones using the keyboard
keys, the Lo-12 has other ways of changing pitches.
Changing track pitch
Press +
1
Press this button to change the pitch 100 cents (1 semitone)
at a time from − 600 – +600.
.
Use
• Each sample pitch can be changed in SAMPLE & EDIT mode.
( → P.41)
to adjust it 1 cent at a time.
Changing track pitch by semitone (transposing)
Press +
1
Use to change the pitch in a range of − 12 – +12 semi-
tones.
.
• If the key is changed during pattern playback, the actual
change of key will occur the next time the pattern begins.
24
Page 25
Adjusting how samples sound
Adjusting sample start positions
Turn +
1
The sample start position can be set from 0 – 127.
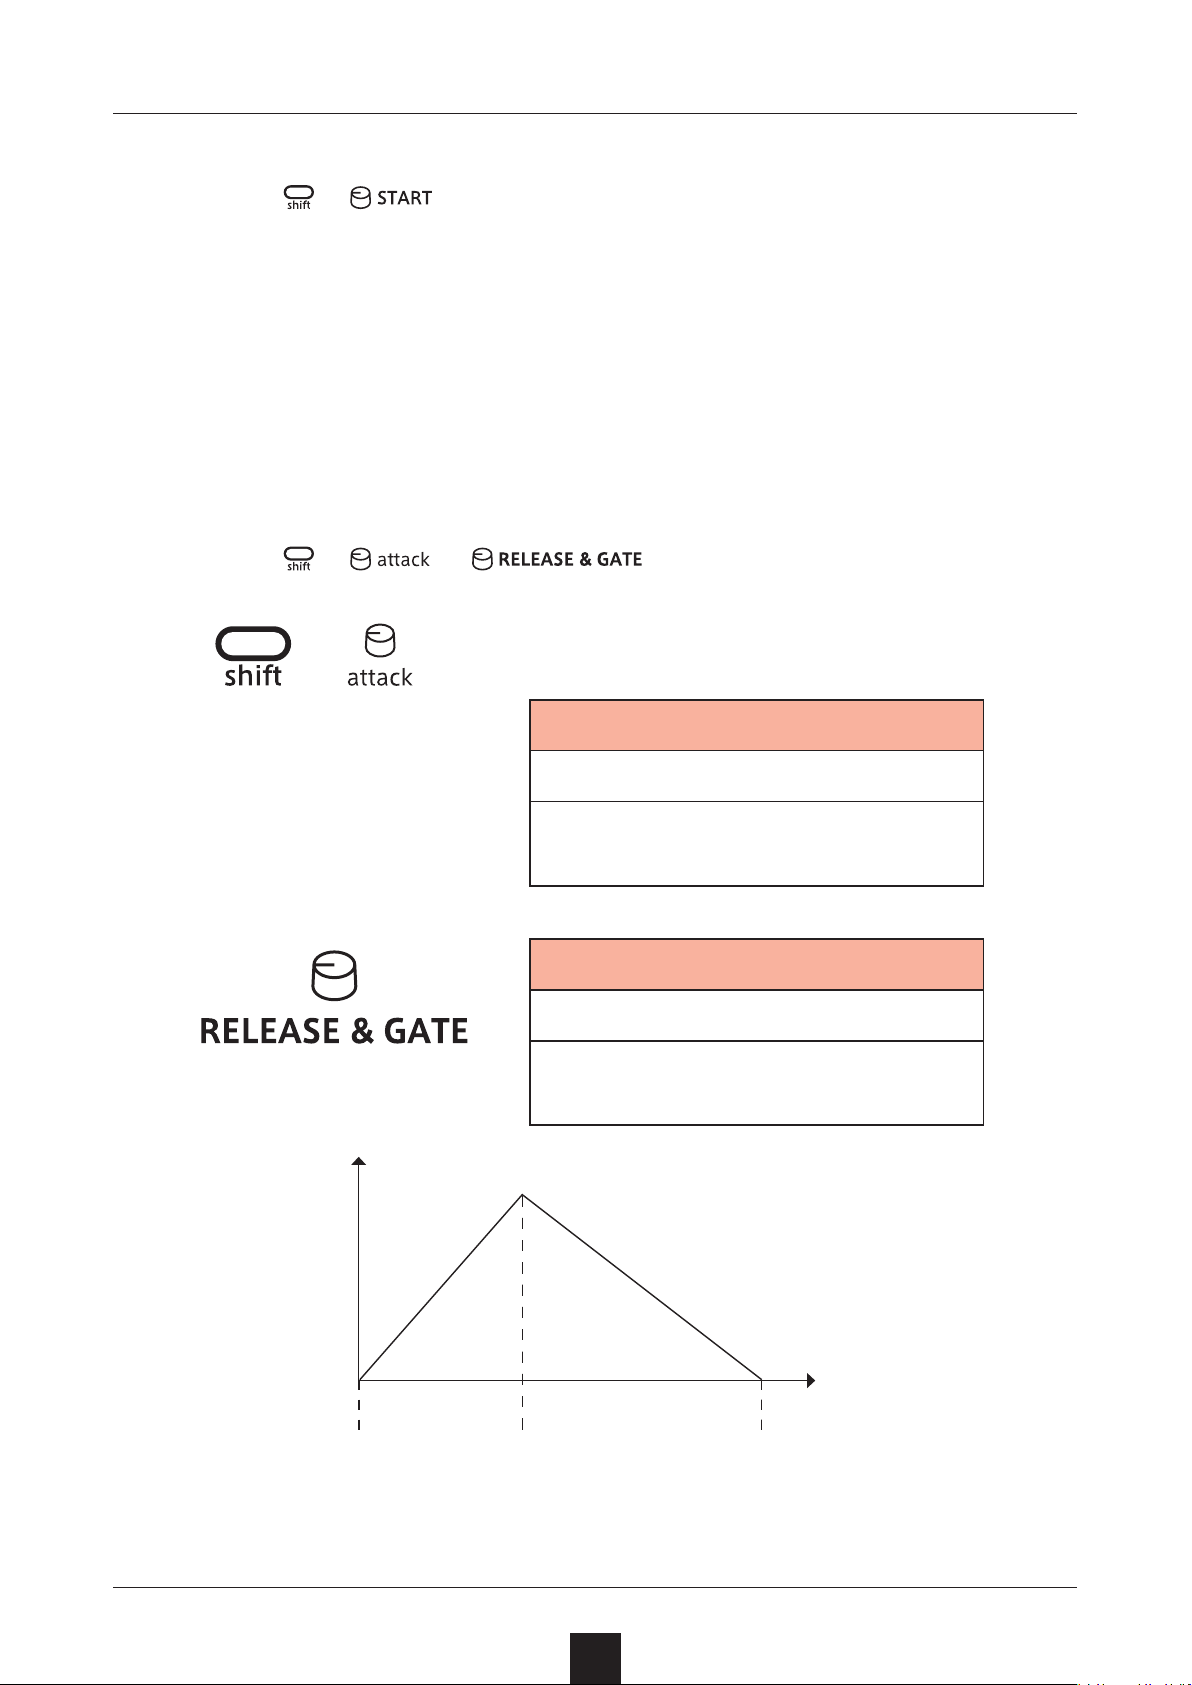
Adjusting sample attack and release
Use the envelope generator to adjust the attack that aects the
beginning of the sound and the release that aects how the sound
fades out.
Turn + or .
1
.
+
attack (EG)
0 – 127
The attack time can be changed
in a range of 0 – 4000 ms.
RELEASE & GATE (EG)
0 – 127
The release time can be changed
in a range of 0 – 4000 ms.
Volume
Attack Release
Note on Note o
Time
25
Page 26
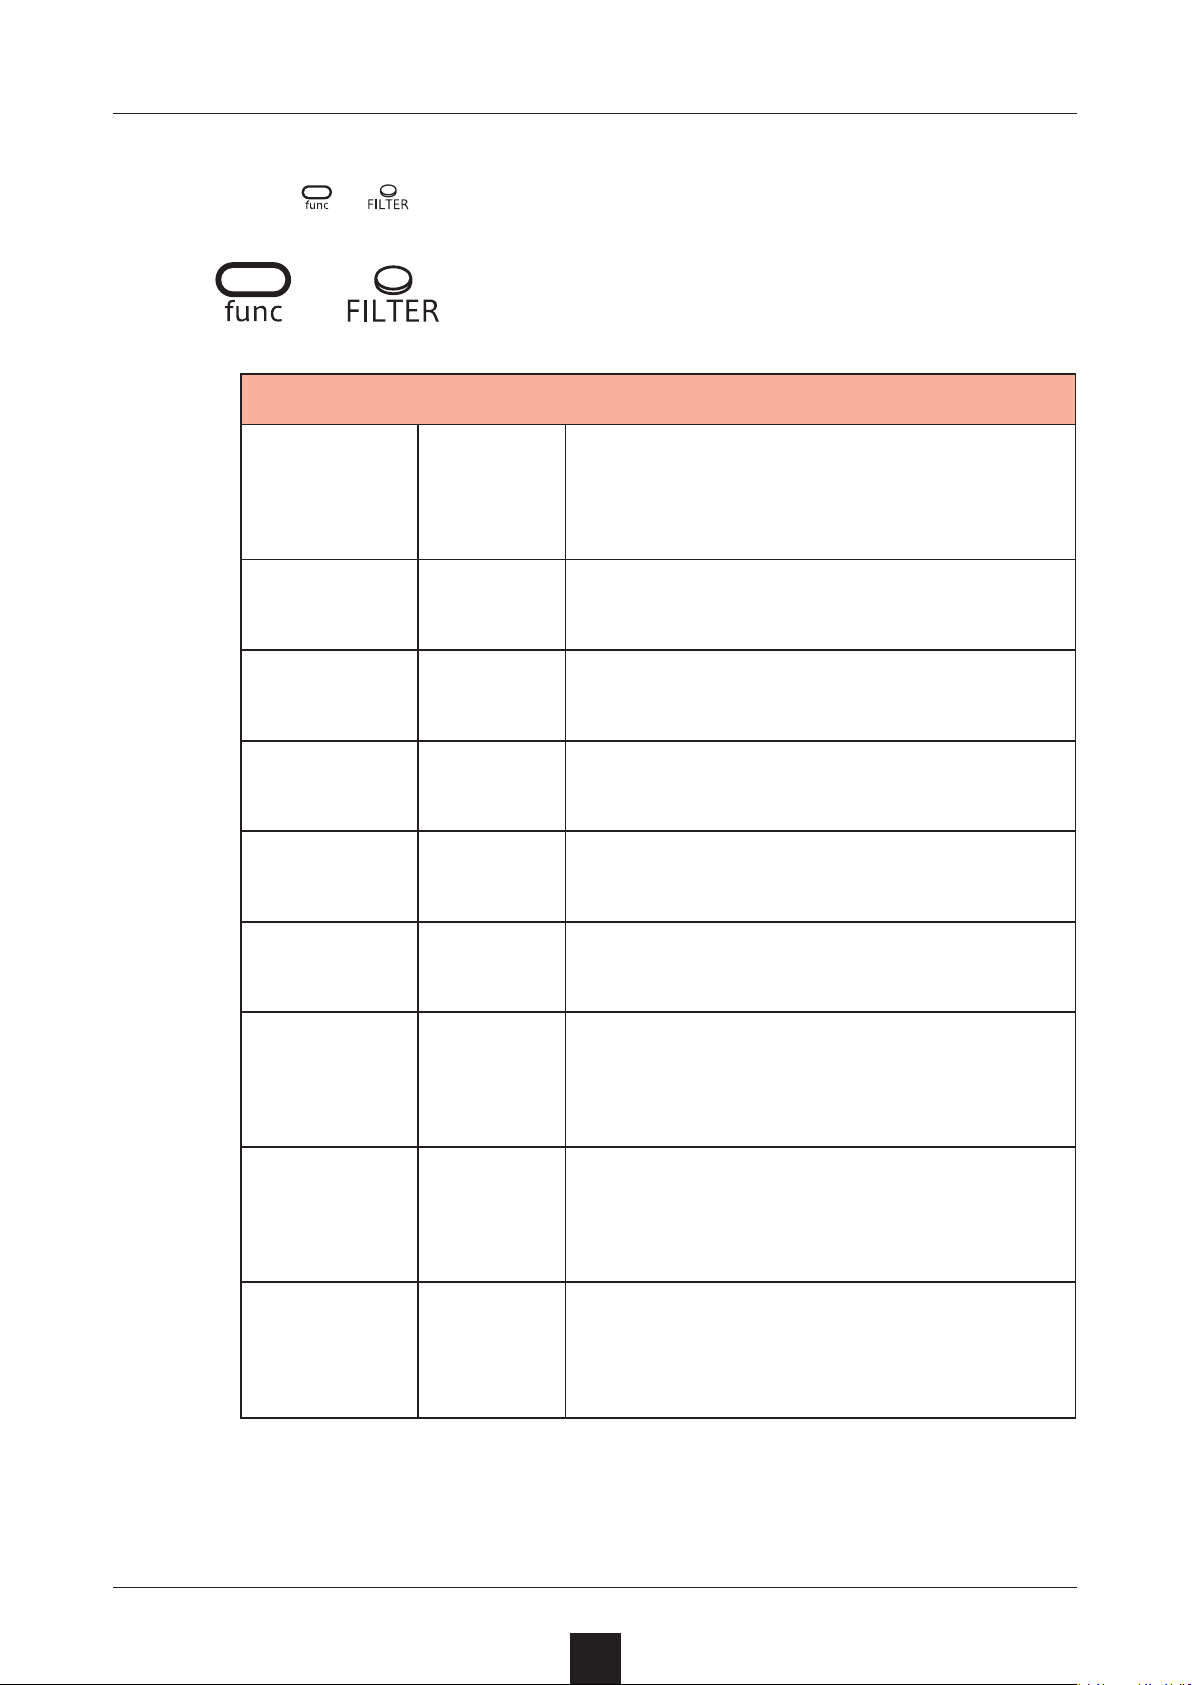
Filters
Changing the lter type
Press + to select the type.
1
+
Filter type
LPF./\
LPF.│\_
LPF./│_
HPF./\
HPF.│\_
LP/\
LP1\_
LP/1_
HP/\
HP1\_
This lter cuts high frequencies using an envelope with attack and decay.
This lter cuts high frequencies using an envelope with decay.
This lter cuts high frequencies using an envelope with attack.
This lter cuts low frequencies using
an envelope with attack and decay.
This lter cuts low frequencies using
an envelope with decay.
HPF./│_
BPF./\
BPF./│
BPF.│\
HP/1_
BP/\
BP/1_
BP1\_
This lter cuts low frequencies using
an envelope with attack.
This lter only allows frequencies in
a specific range to pass using an
envelope with attack and decay.
This lter only allows frequencies in
a specific range to pass using an
envelope with decay.
This lter only allows frequencies in
a specific range to pass using an
envelope with attack.
26
Page 27
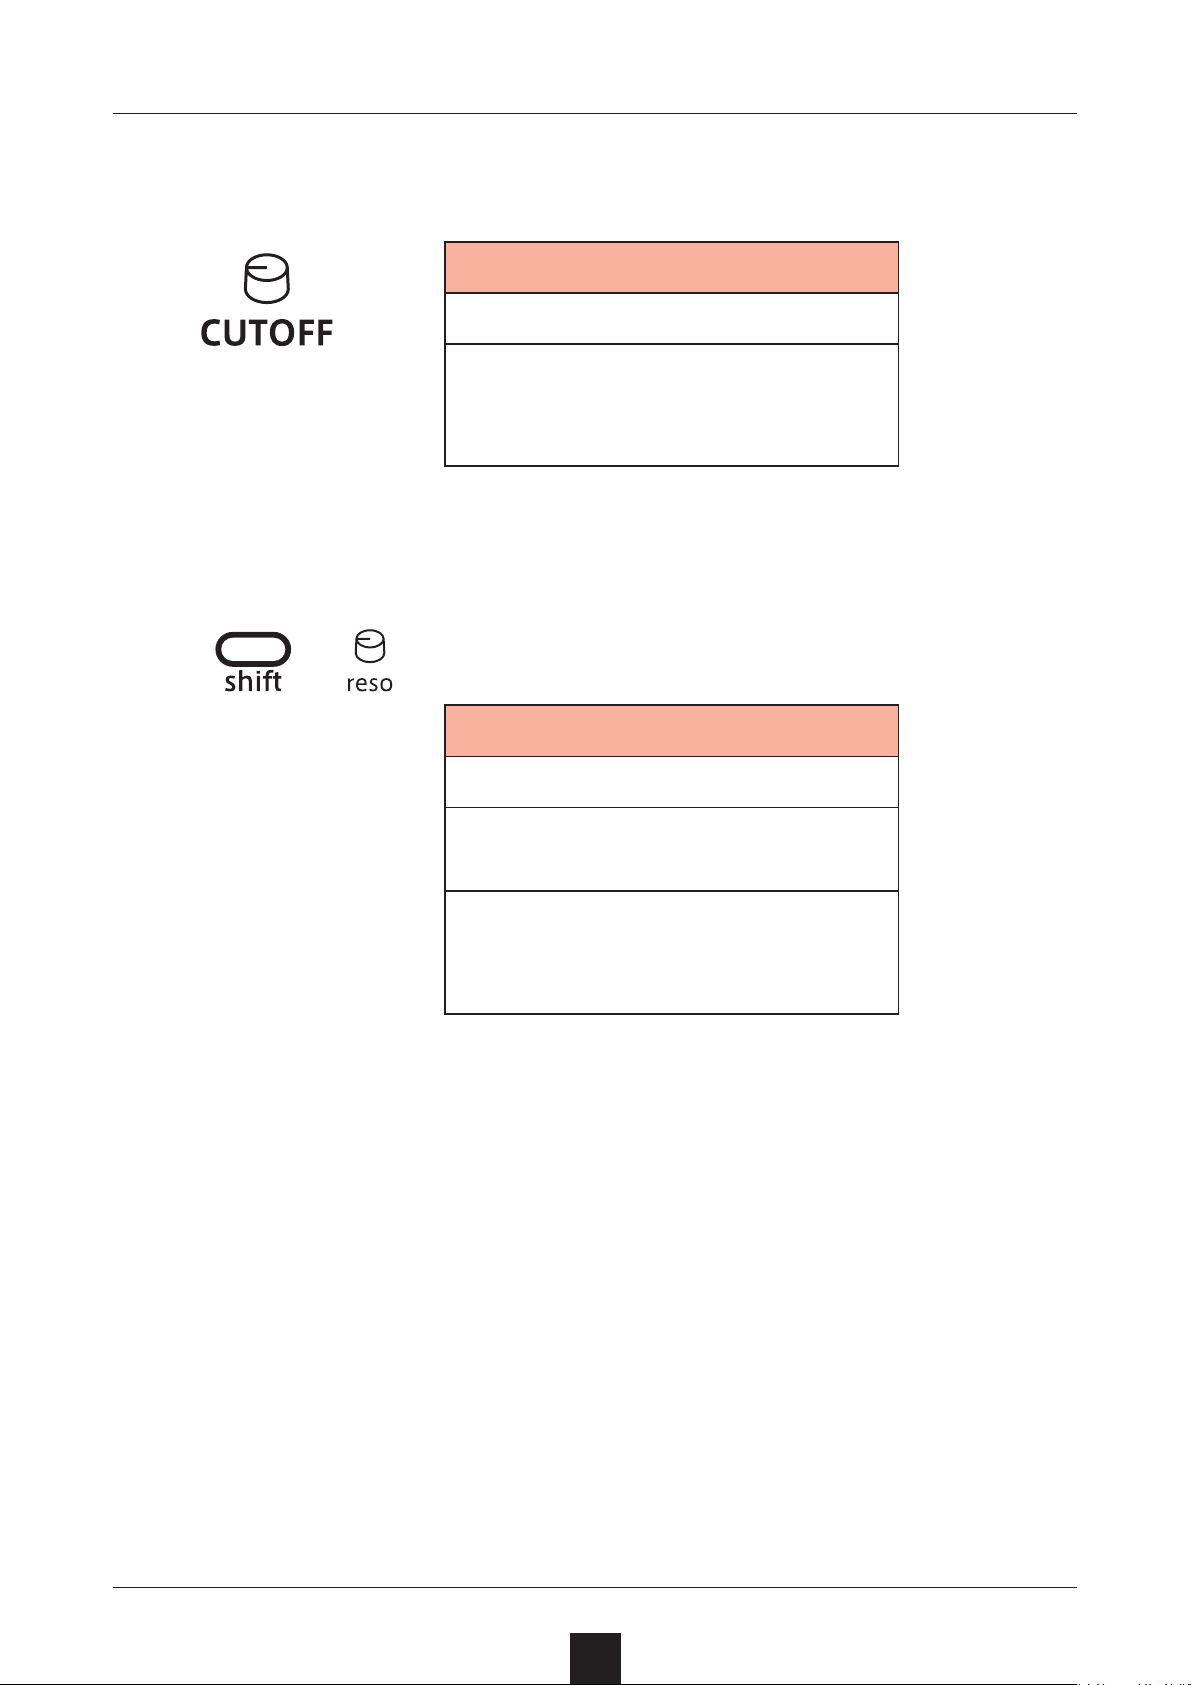
Filters
Changing the lter cuto frequency
Cuto
0 – 127
The cuto frequency can be
changed in a range of 70 –
21600 Hz.
Adjusting the lter resonance
+
Resonance
0 – 127
The resonance can be changed
in a range of 0.1 – 10.
For BPF, the bandwidth can be
changed in a 0.1 – 2.0 octave
range.
27
Page 28
Filters
Adjusting the lter envelope
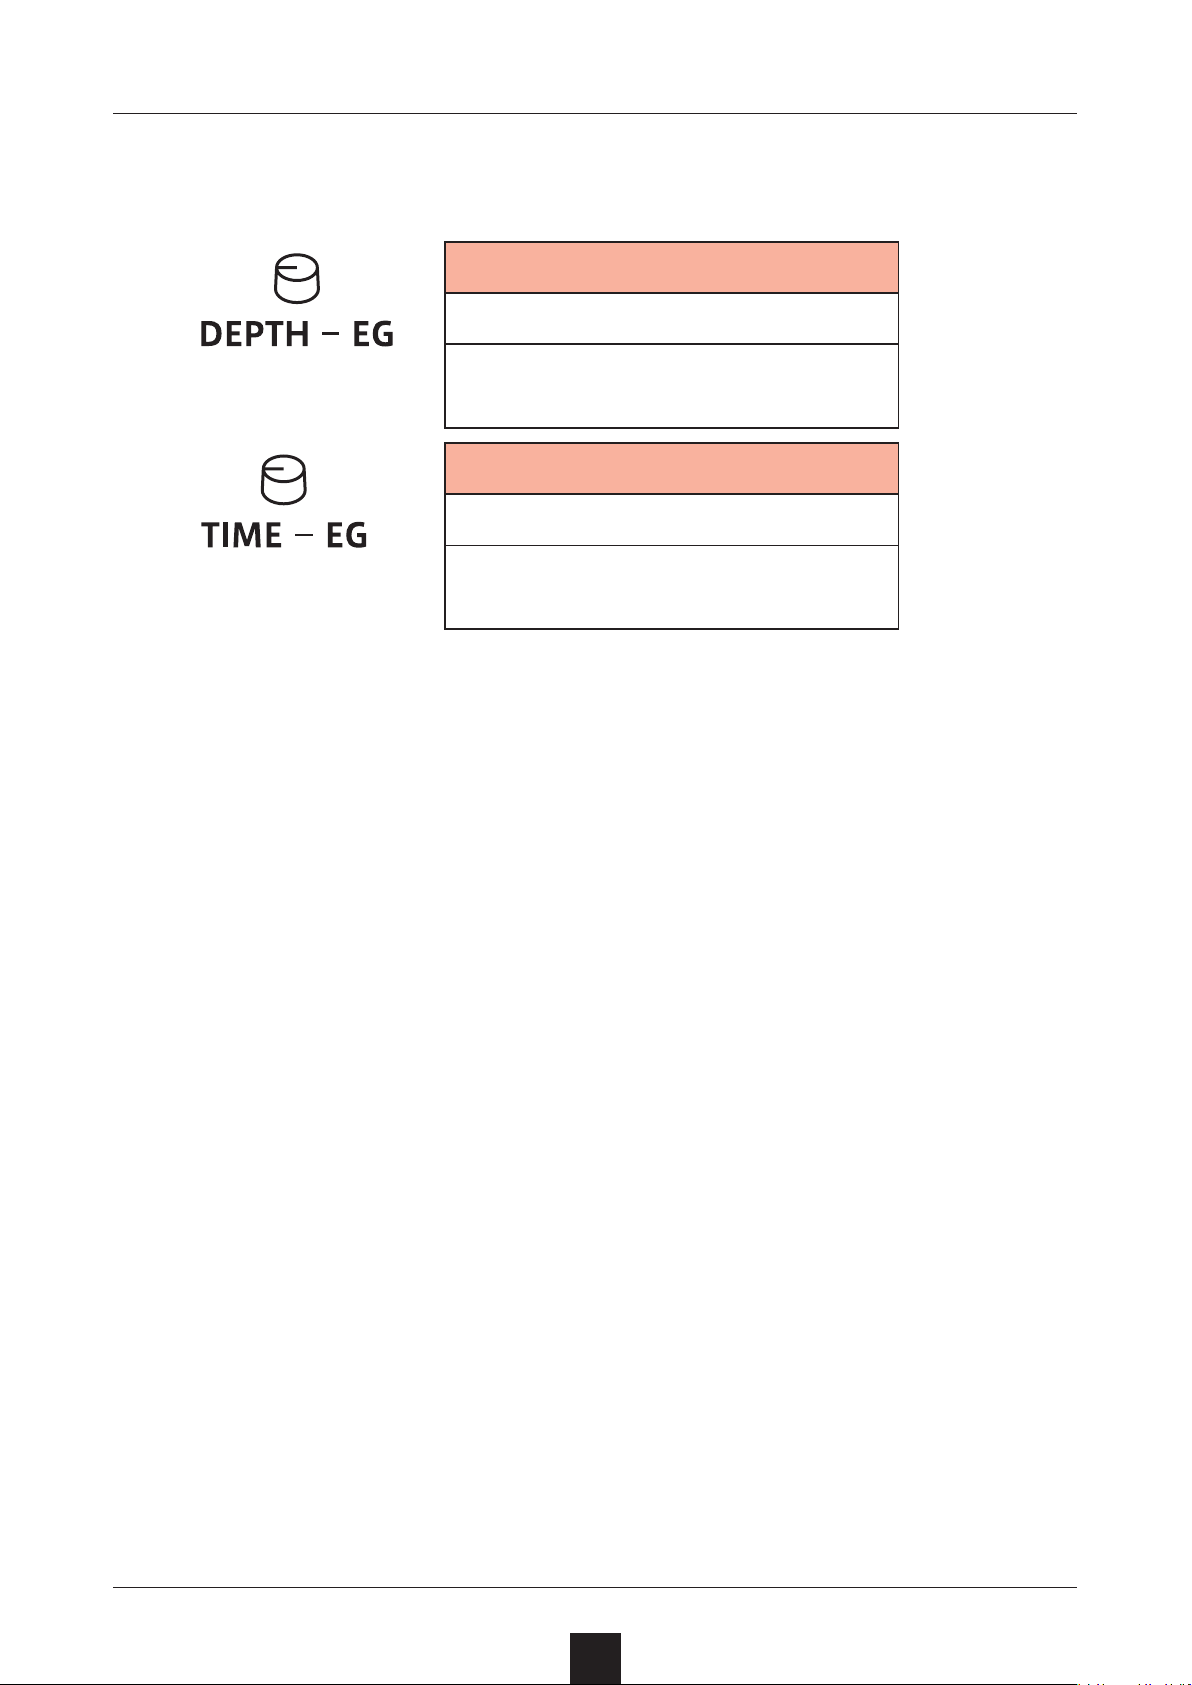
Filter EG Depth
− 63 – 63
The envelope depth can be set
from − 100 – 100%.
Filter EG Time
0 – 127
The time can be changed in a
range of 13 ms – 20 s.
For LPF./\, HPF/\ and BPF./\, TIME changes the attack and the decay.
For LPF.|\_, HPF.|\_ and BPF.|\_, TIME changes the decay.
Filters of the same type (e.g. LPF./\ and LPF.|\_) share DEPTH and
TIME settings.
28
Page 29
LFO
Overview
Each track of the Lo-12 has one LFO that can be used to modulate
the pitch and the cuto frequency.
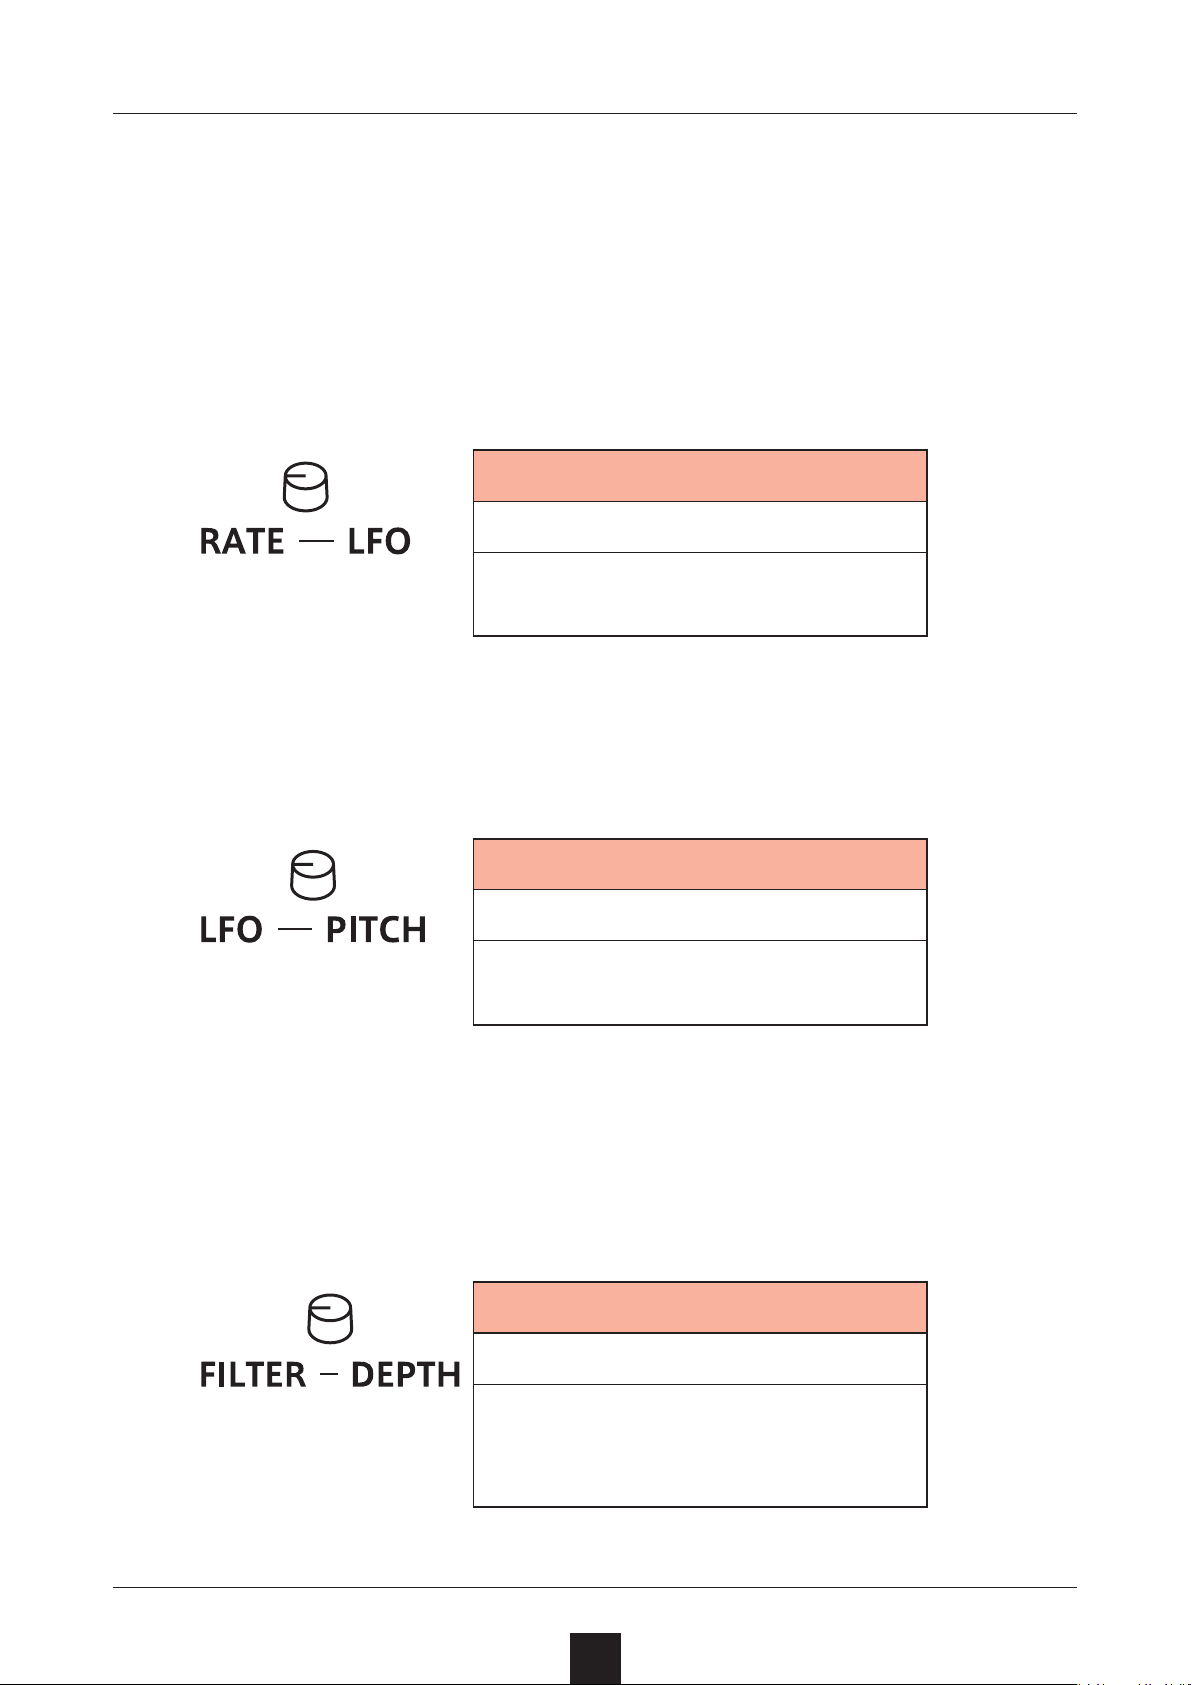
Adjusting the LFO speed
Rate – LFO
0 – 127
The frequency of the LFO can be
changed in a range of 0 – 30 Hz.
Adjusting the amount of LFO eect on pitch
Pitch Depth – LFO
0 – 127
This changes it in a range of 0 –
2 octaves.
Adjusting the amount of LFO eect on lter
cuto
Filter Cuto Depth – LFO
0 – 127
The higher the value is, the
greater the amount of change.
Set to 0 for no change.
29
Page 30
LFO
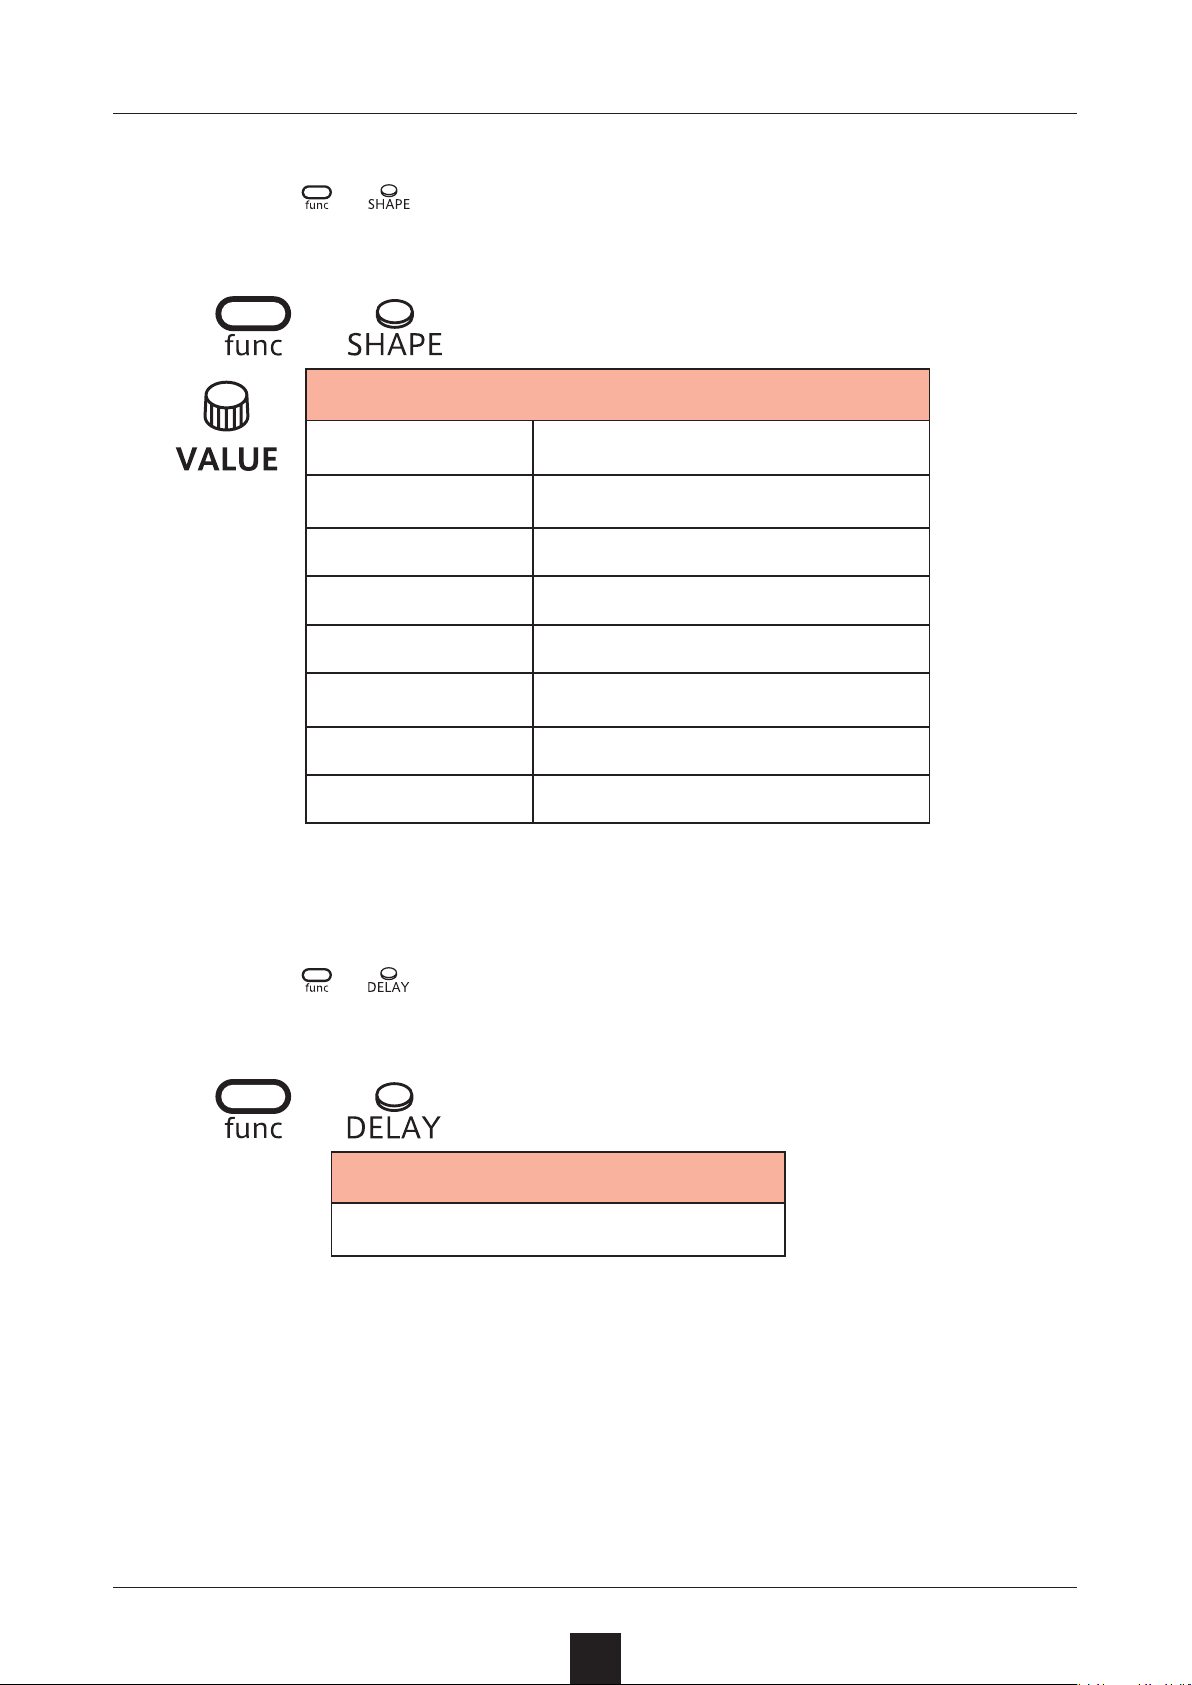
Selecting the LFO wave
Press + to select the LFO wave.
1
+
LFO Wave
SINE
SQAR
TRI
SAW
R.SAW
RAND
LOG
R.LOG
sine wave
square wave
triangle wave
sawtooth wave
reverse sawtooth wave
random wave
logarithmic wave
reverse logarithmic wave
Setting the LFO starting delay
Press + to set the LFO starting delay.
1
+
LFO Delay
0 〜 127(0 〜 8000ms)
30
Page 31
Sweep
Overview
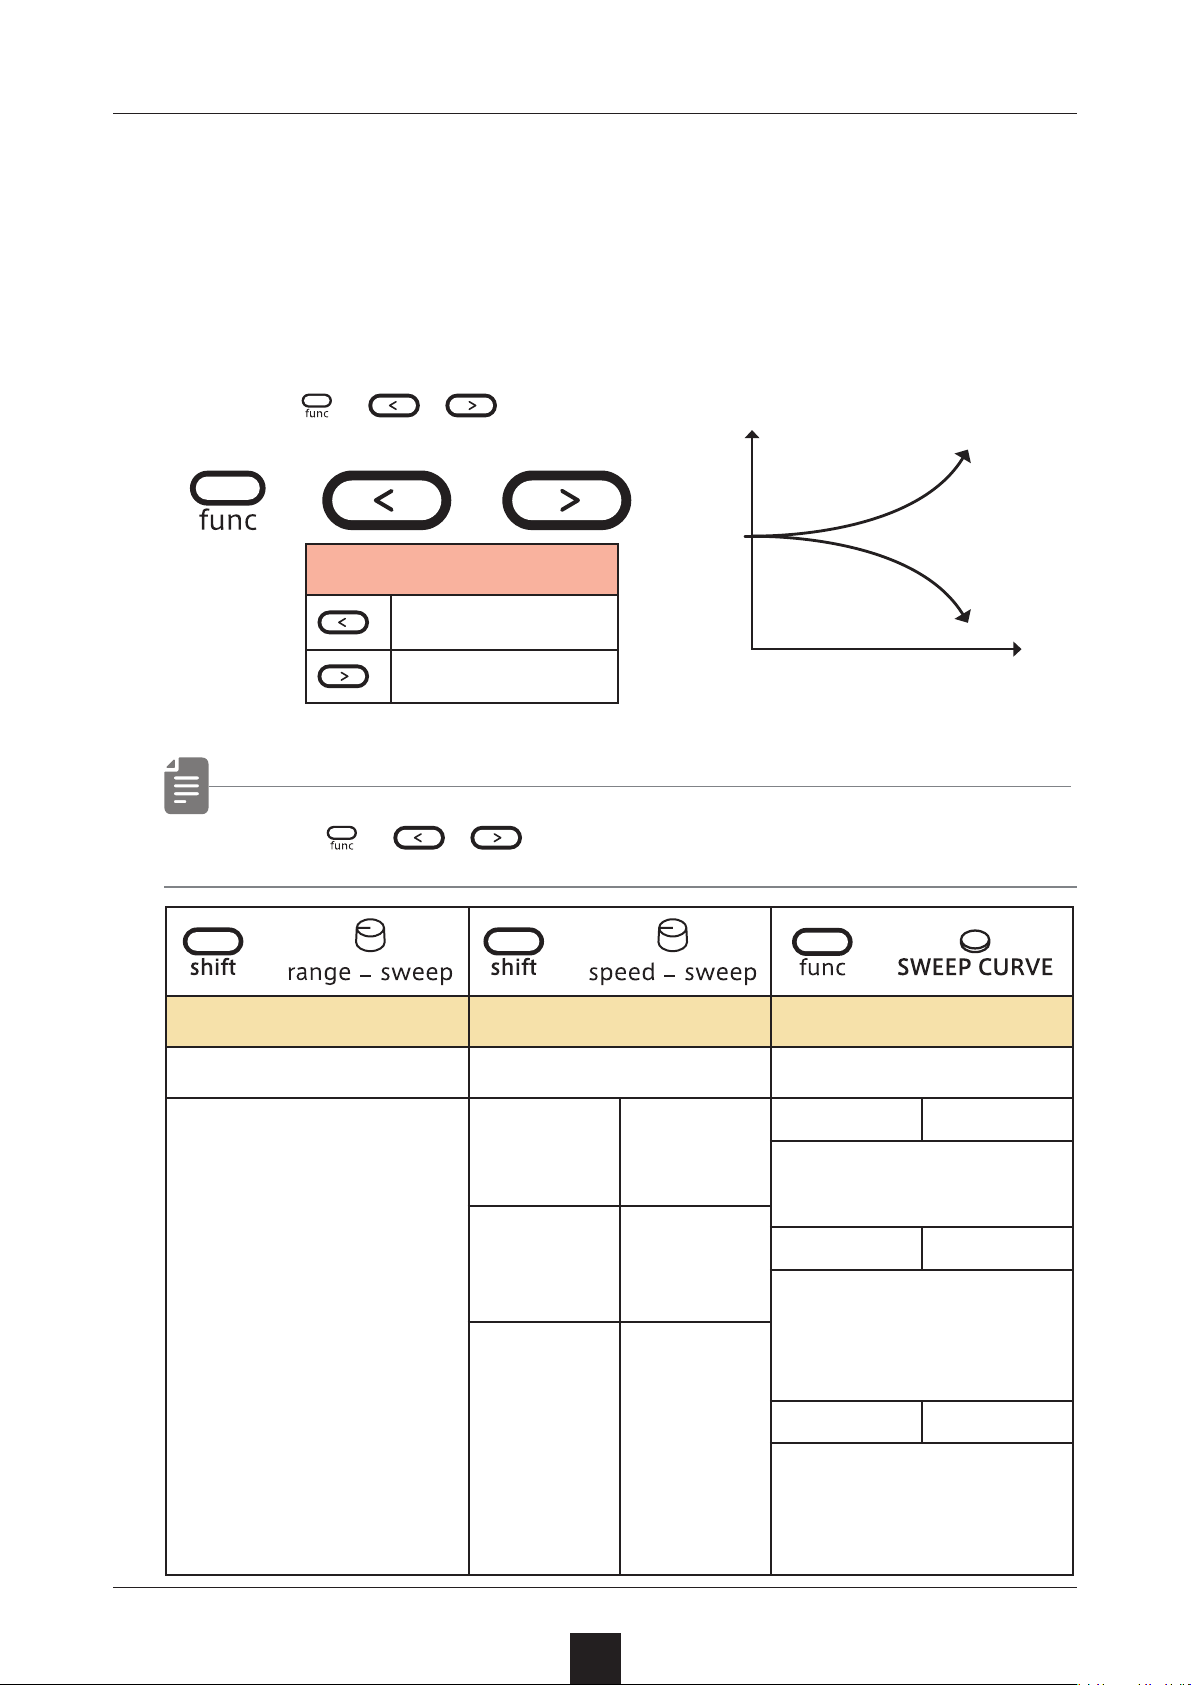
The Lo-12 has a sweep sound function that changes the pitch at a
set speed.
Sweeping notes while playing
Press + / .
1
+
or
Original
sound
Pitch
Sweep up
Sweep
Sweep down
Sweep down
Sweep up
• Press + / again to disable the sweep function.
+ +
+
Time
Speed Range Curve
Sweep speed Sweep amount Curve type
0–31
The higher the value is,
the slower the speed be
comes.
-
–
1
11
1OCT
2OCT
1 – 11 semi
tones
1 octave
2 octaves
-
LINE
After input, the note
changes linearly to the
range amount.
EXP
After input, the note
changes gradually at rst
and then rapidly in the lat
ter half until it reaches the
range amount.
LOG
After input, the note
changes rapidly at rst
and then gradually slows
until it reaches the range
amount.
Linear
Exponential
-
Logarithmic
31
Page 32
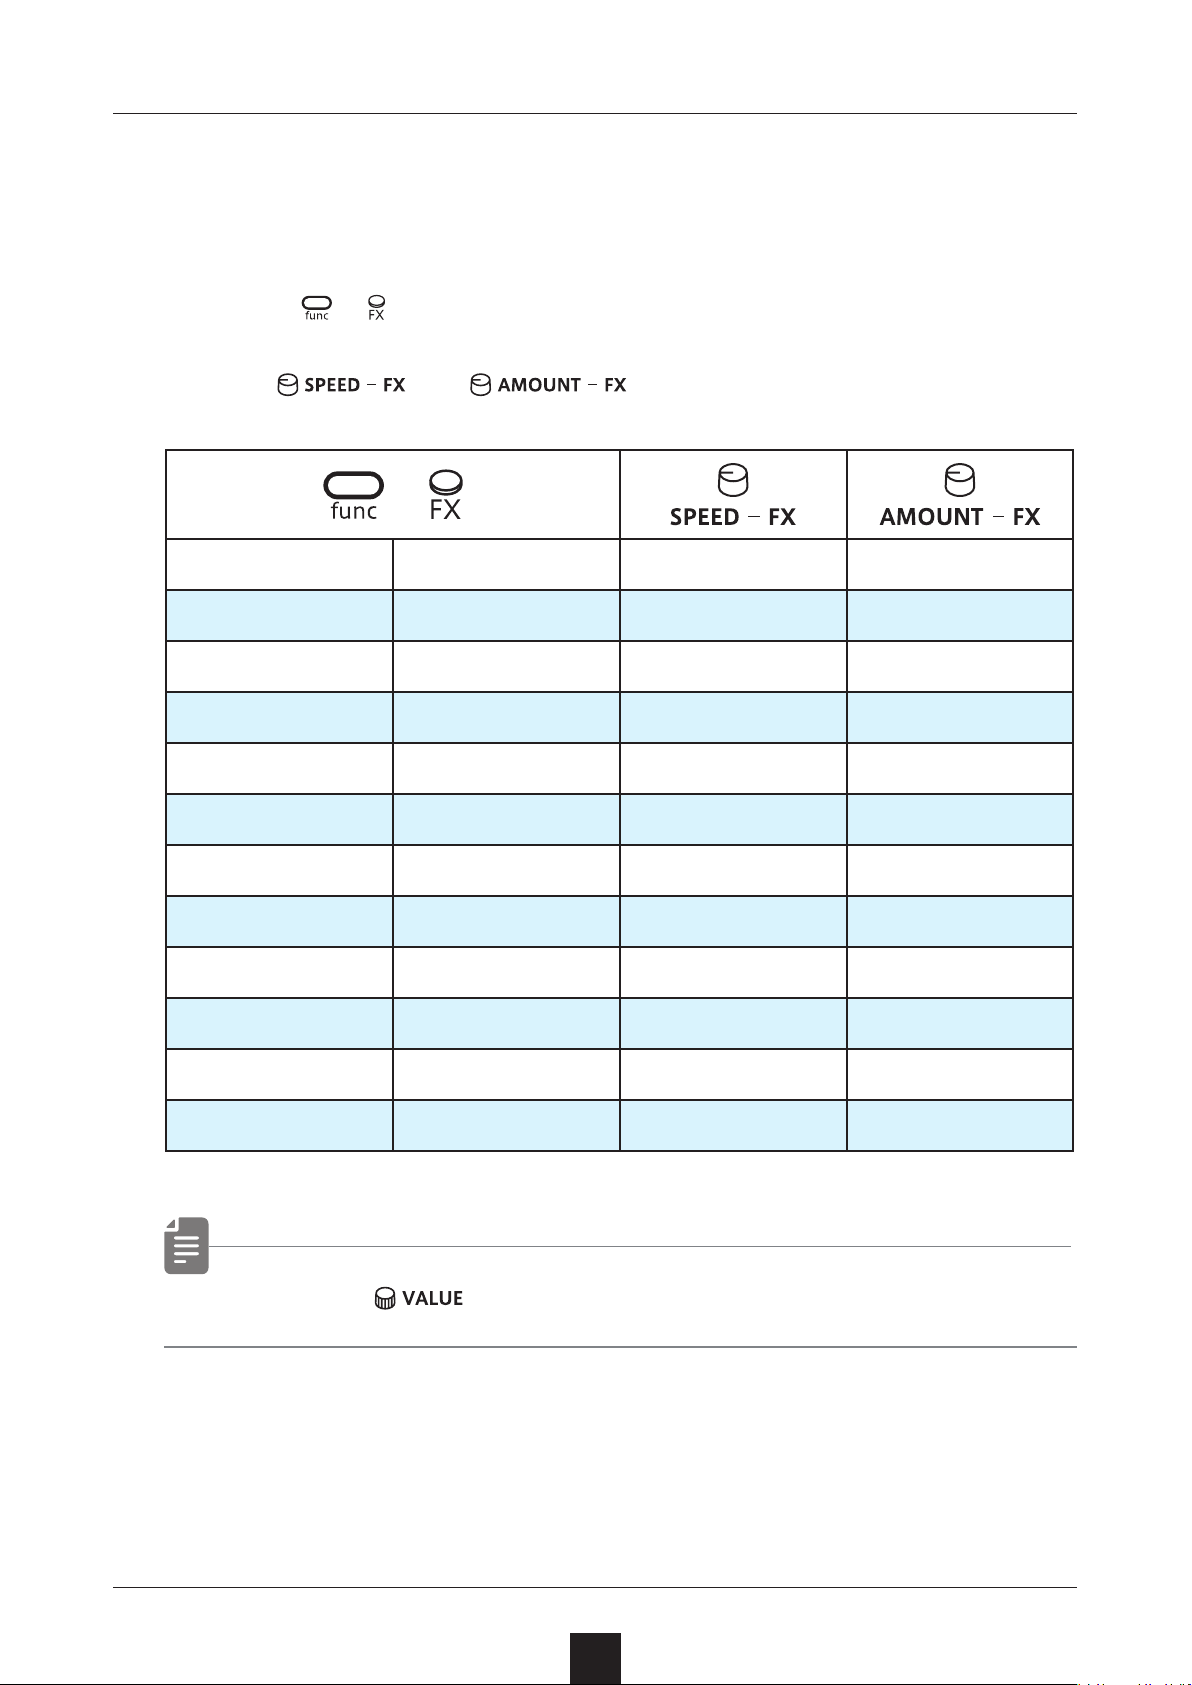
Eects
Eects can be set for each track of the Lo-12.
Adjusting eects
Press + to select an eect.
1
Use and to adjust the parameters.
2
+
OFF
CHRS
FLNG
DLY
CRSH
DIST
LPF
HPF
ISO
TILT
TRML
COMP
O ---- ----
Chorus Rate Amount
Flanger Speed Amount
Delay Time Amount
Crush Sample rate LPF cuto
Distortion Gain Tone
Low pass lter Cuto Resonance
High pass lter Cuto Resonance
Isolator Frequency Balance
Tilt EQ Frequency Balance
Tremolo Rate Amount
Compressor Ratio Threshold
• In step 1, can also be used to select the eect type.
32
Page 33
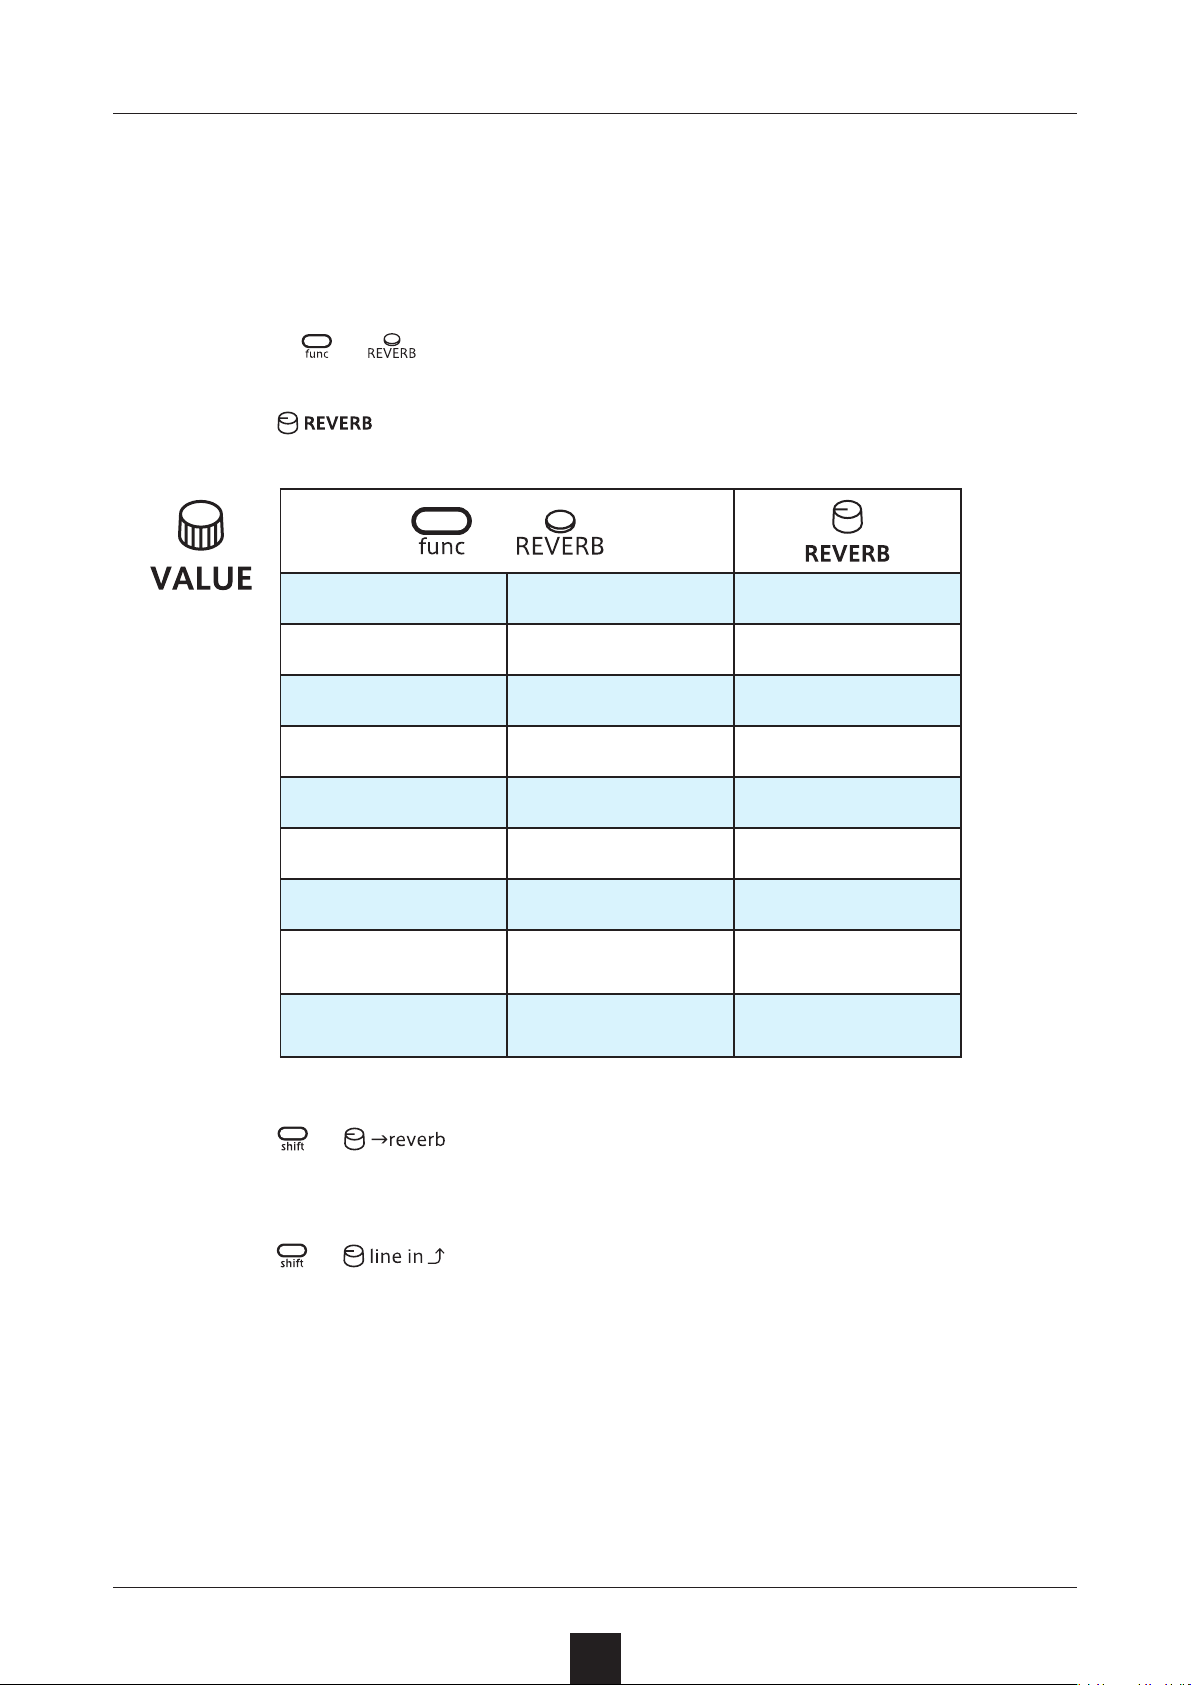
Reverb
The Lo-12 has a single high quality reverb eect.
The send levels for this reverb can be set individually for each track.
Adjusting the reverb
Press + to select the eect.
1
Use to adjust the parameter.
2
+
3
Use
tracks.
OFF
HALL
ROOM
ARNA
PLAT
TNNL
INF
TAPE
VNYL
O ----
Hall Mix
Room Mix
Arena Mix
Plate Mix
Tunnel Mix
Innity Mix
Cassette Tape Sim
ulator
Vinyl Simulator
Noise +
wow utter
Noise +
wow utter
+ to set the reverb send level for individual
Use
+ to set the reverb send level for LINE IN input.
33
Page 34
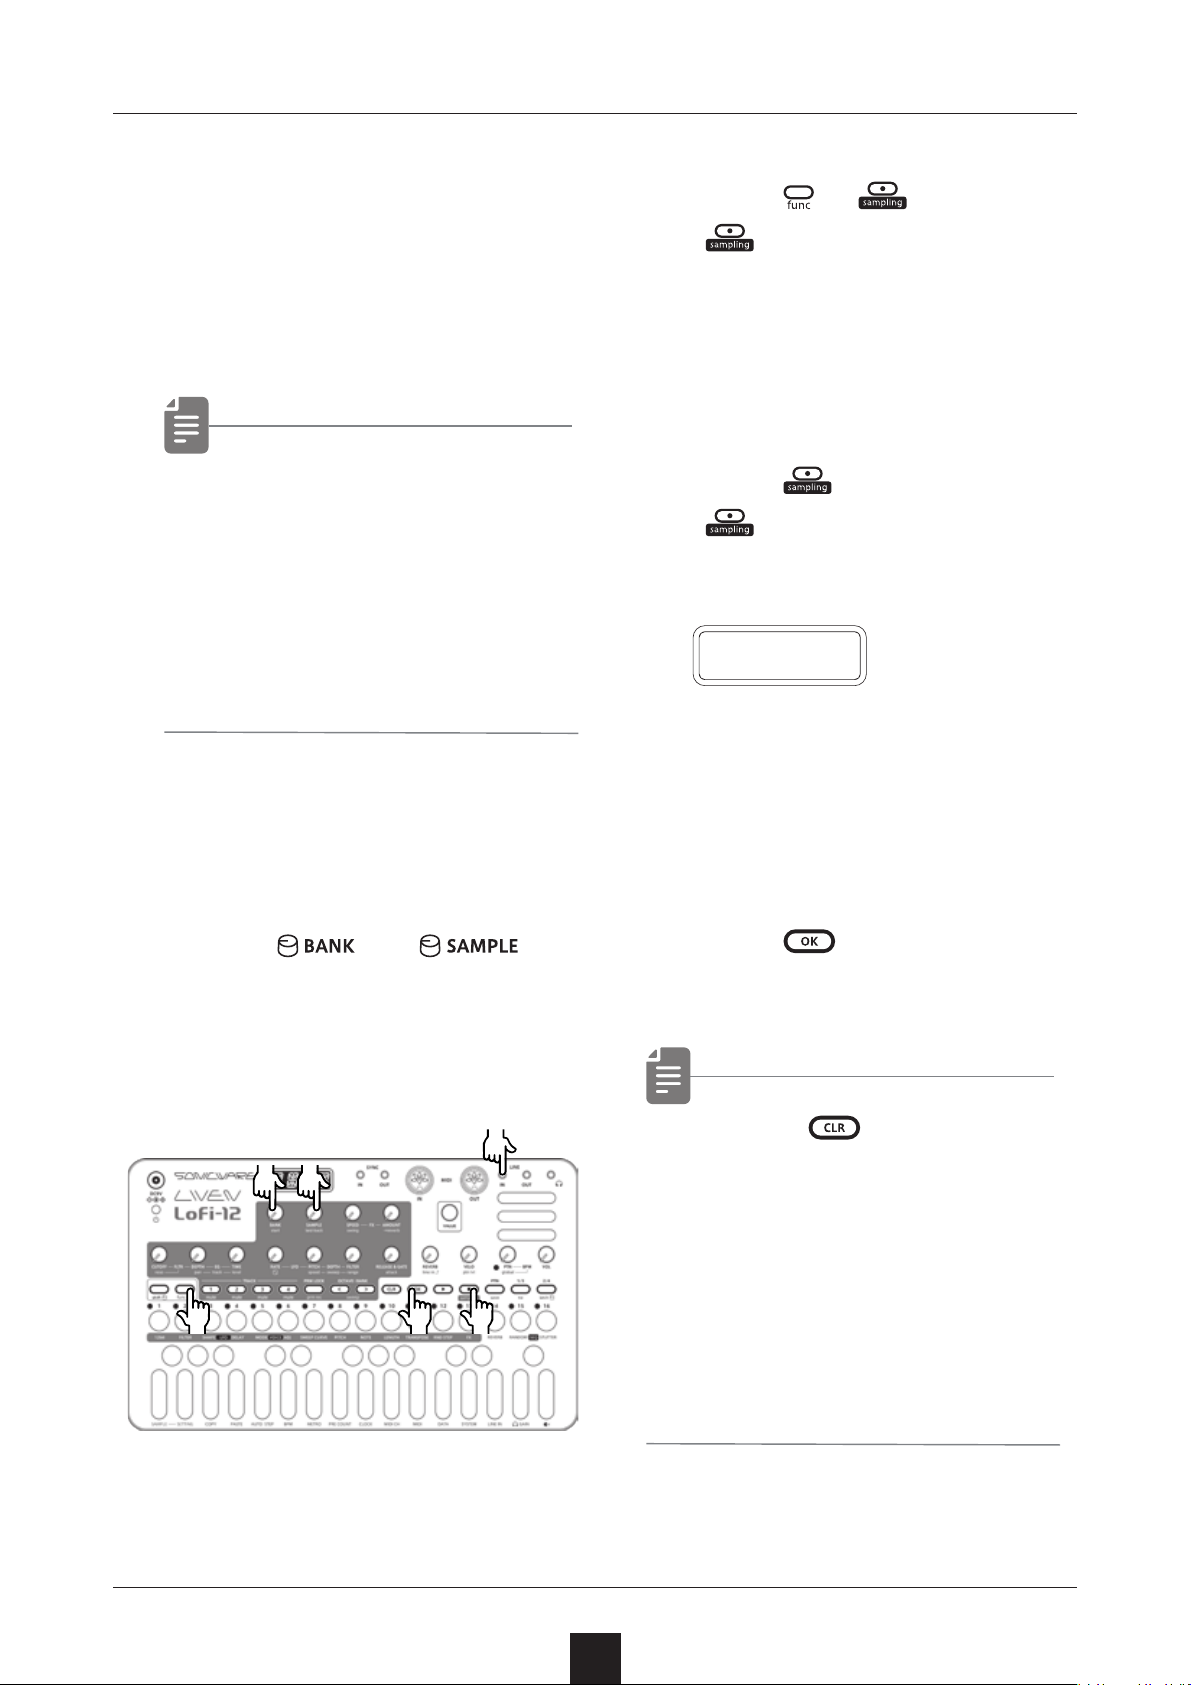
Quick sampling – Recording
Connecting equipment to the LINE IN
Connect the output of the
1
equipment you want to record to the Lo-12 LINE IN.
• Mics and guitars cannot
be connected directly. Use a mixer or other
equipment to convert
their outputs to line signals.
Enable recording
Press + .
3
Use the step keys to check
will blink red.
the recording level.
Start recording
Press again.
4
will light red and recording will automatically start
when a signal is input.
R E C
The step keys show the re-
Select the recording slot
Use
2
select the slot where the
sample will be recorded.
and to
●❶
●❷ ●❷
cording progress.
When step 16 lights, record-
ing will stop automatically.
Press twice.
5
This saves the sample.
• Press to cancel the
operation.
• Use SAMPLE & EDIT
mode to rename and edit
samples.
●❸
●❺
●❸
●❹
( → P.44)
34
Page 35
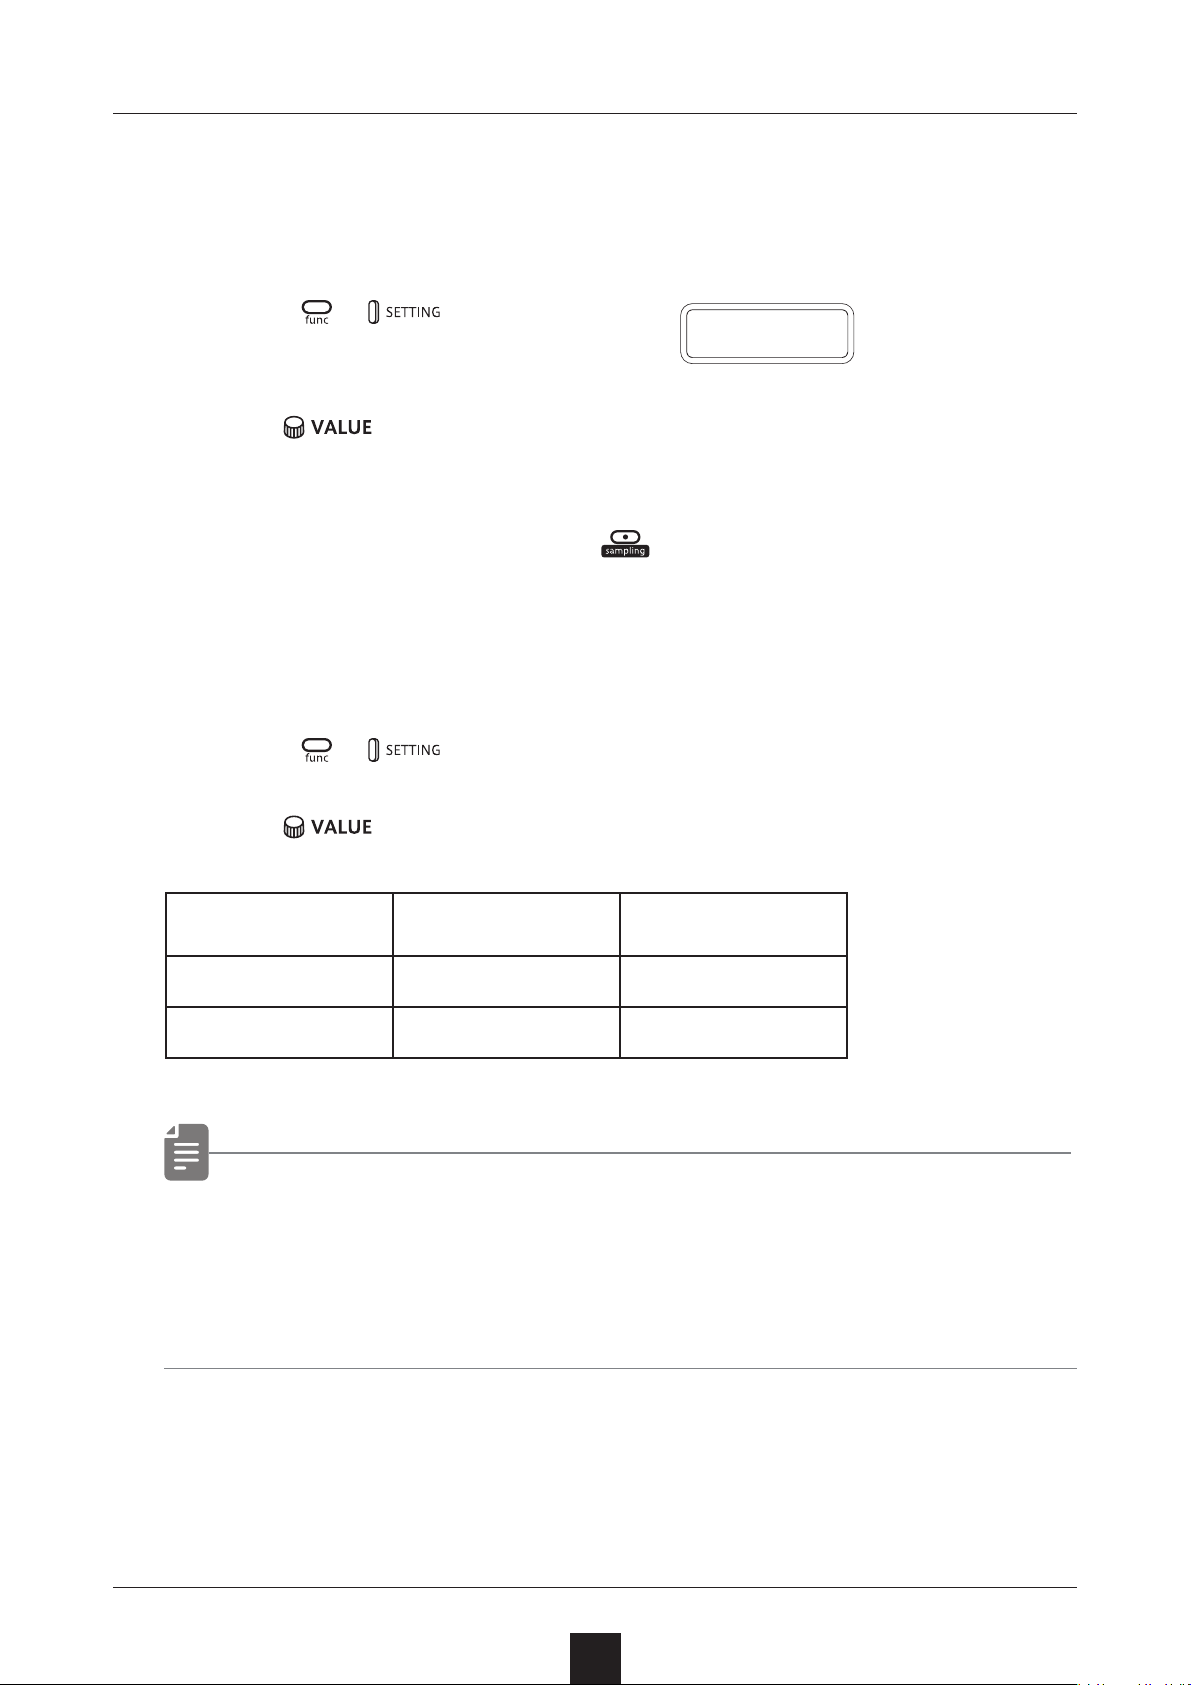
Sampling settings
The following settings are used for quick sampling.
Setting auto recording
Press + to select A.R.LV.
1
Turn .
2
This can be set to OFF or the input signal level that starts re-
cording automatically ( − 60 – − 20 dB).
A.R.L V
If auto recording is o, press
start recording.
when in recording standby to
Setting the sampling frequency
Press
1
Turn to select one.
2
Sample quality Sampling frequency
Lo 12 kHz 4 seconds
Standard 24kHz 2 seconds
+ , and select S.FRQ 12K or 24K.
Maximum recording
time
• Use func + LINE IN to adjust the LINE IN input gain.
• After recording completes, the volume of the sample will be
normalized automatically.
35
Page 36
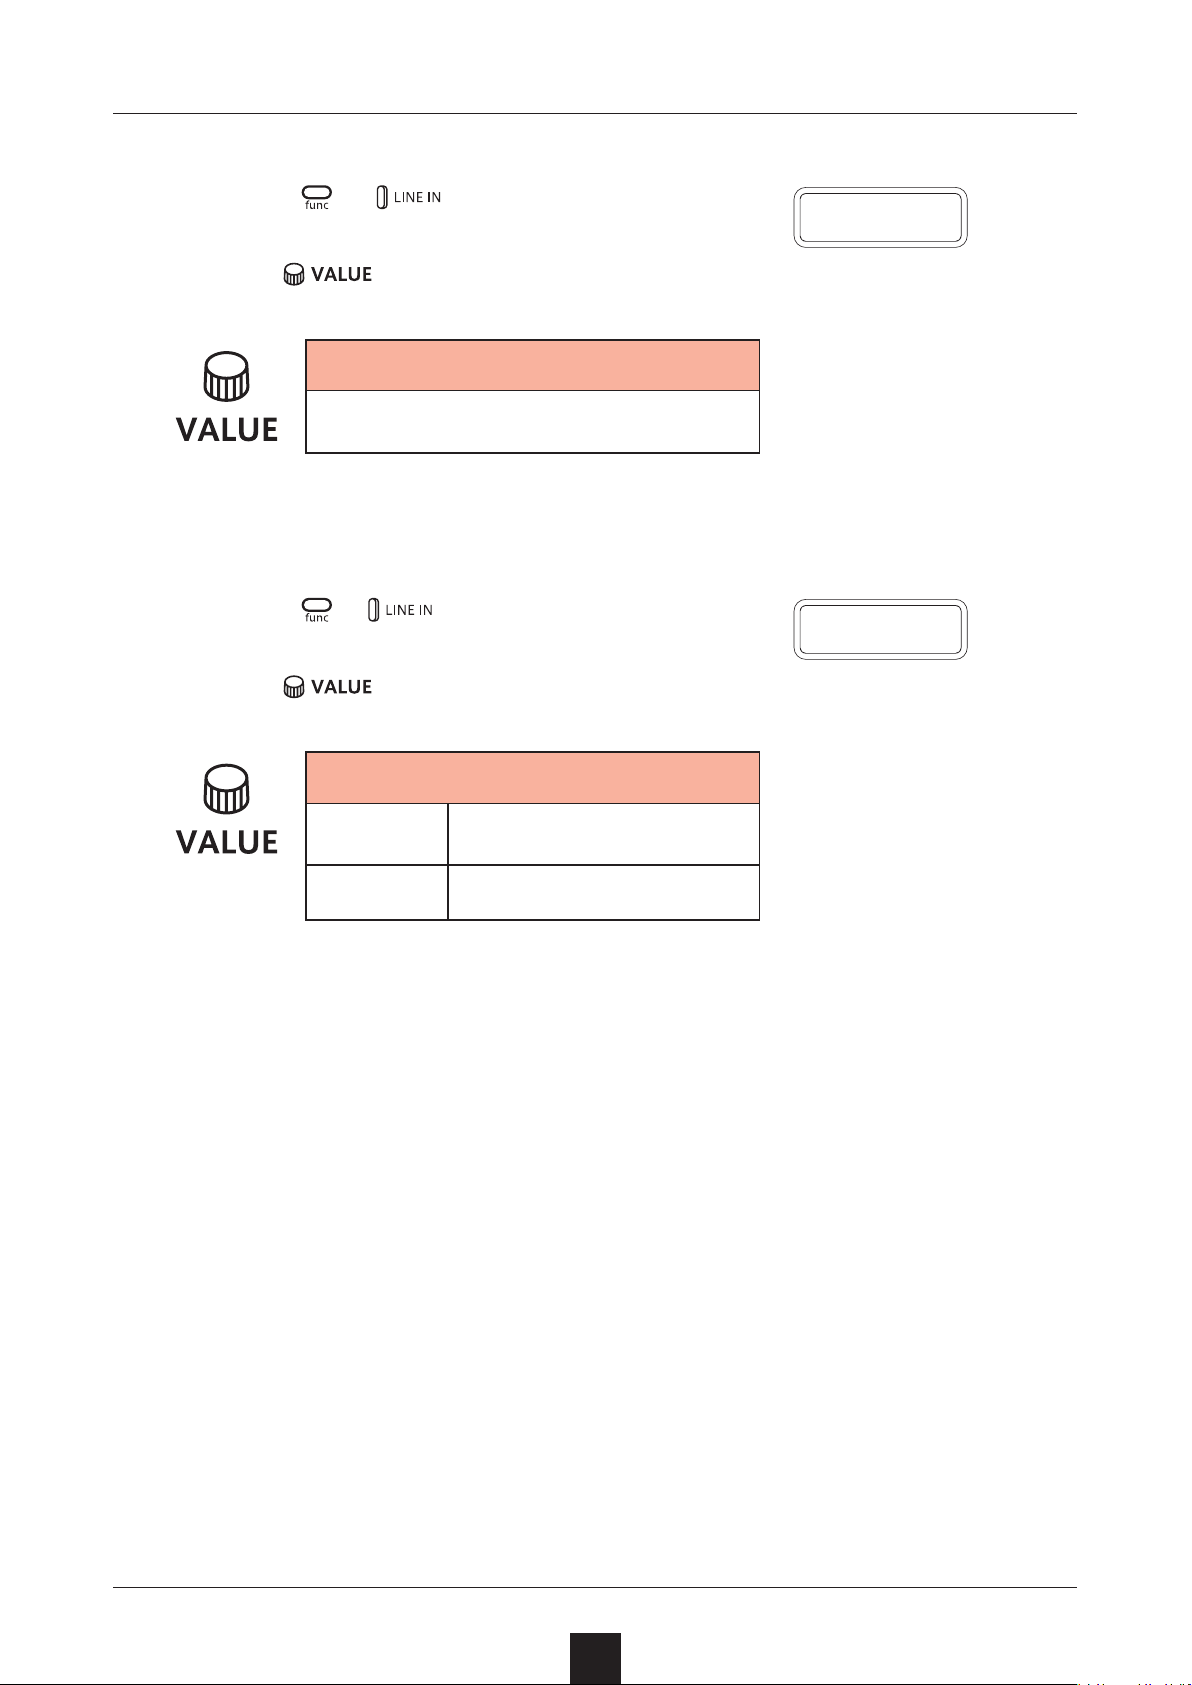
LINE IN settings
Changing the gain
Press + to select GAIN.
1
Turn to change the gain.
2
Gain
MUTE – 127
Setting mono/stereo
Press + to select MONO.
1
G A I N
M O N O
Turn to switch between ON and OFF.
2
Monophonic
ON Mono
OFF Stereo
36
Page 37
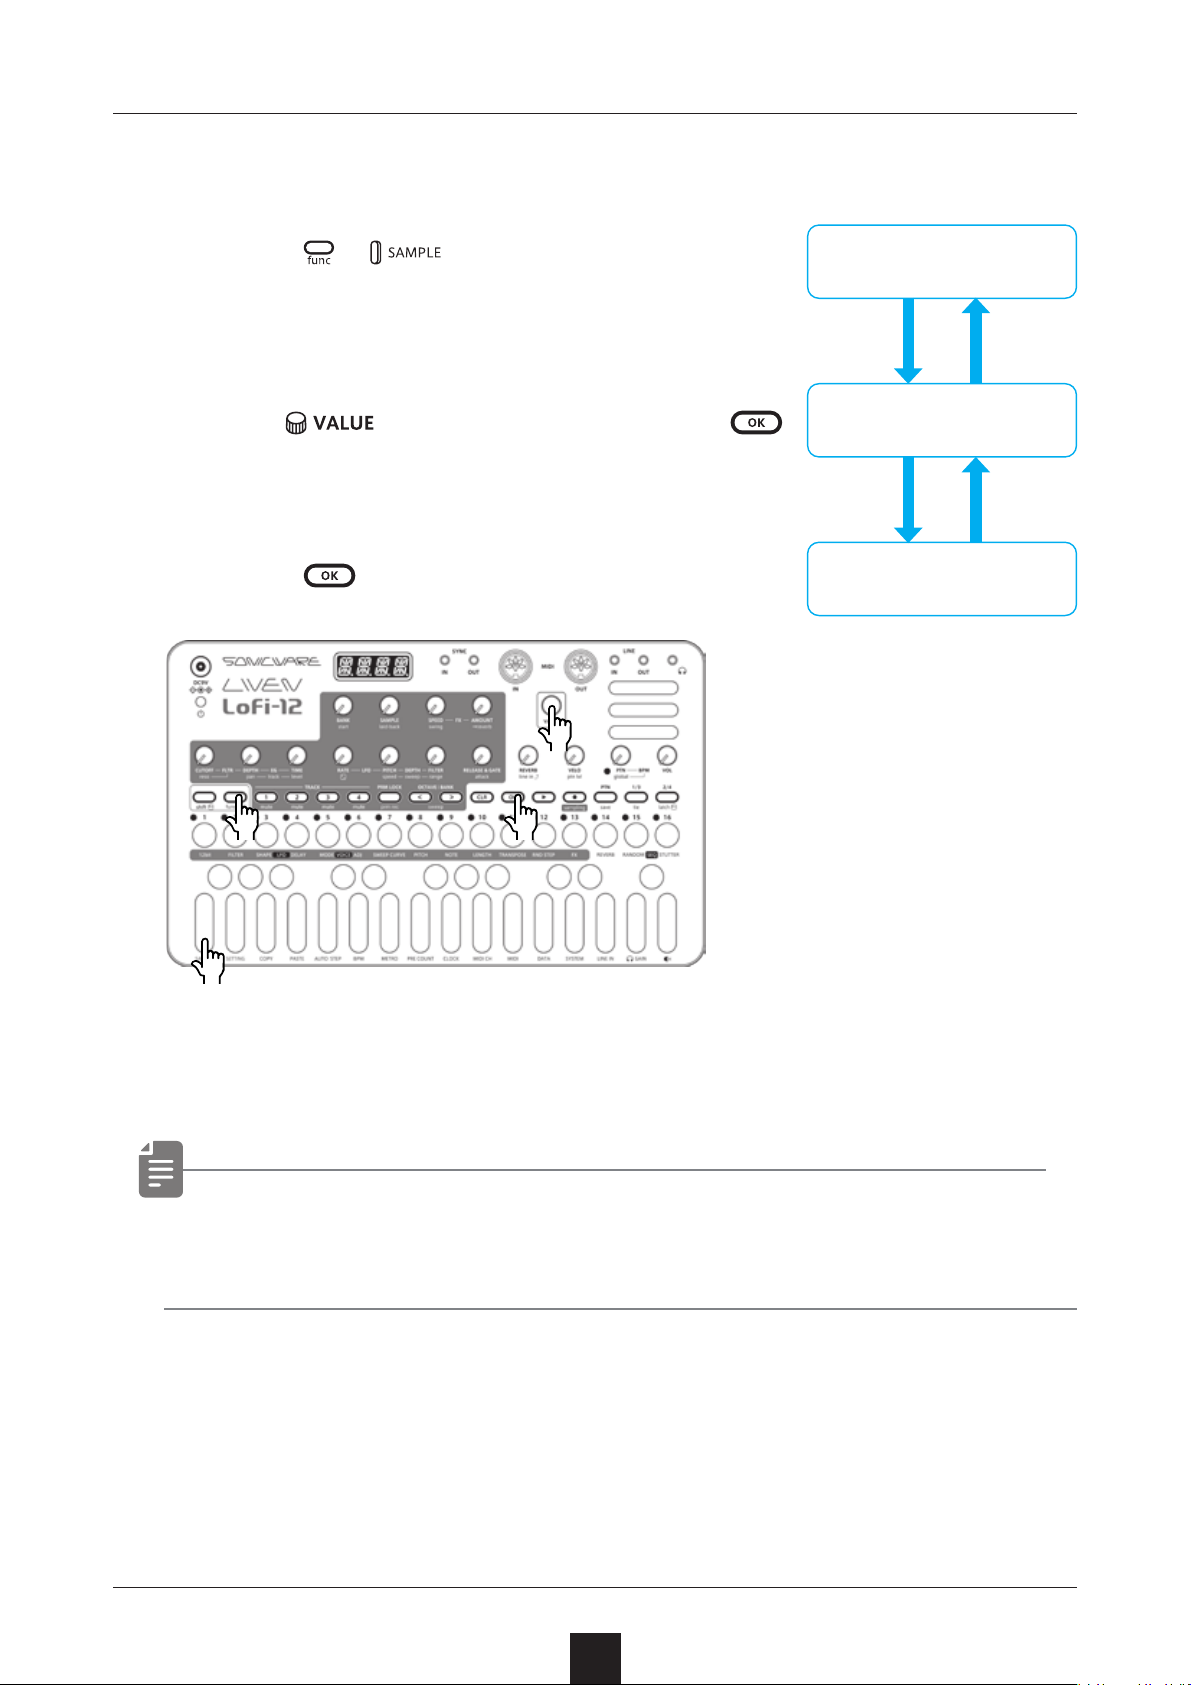
Activating and deactivating
SAMPLE & EDIT mode
Activating SAMPLE & EDIT mode (slot selection)
.
to select a slot and press
Regular mode
SAMPLE & EDIT mode
.
(slot selection)
1
Press
+
Selecting slots
Turn
2
→ This activates SAMPLE & EDIT
mode (editing).
SAMPLE & EDIT mode
(editing)
3
Press
.
●❷
●❶
●❸
●❶
Place the included SAMPLE & EDIT overlay on the unit.
• When a slot is selected, the sample can be auditioned by playing
the keyboard.
37
Page 38

Activating and deactivating
SAMPLE & EDIT mode
Deactivating SAMPLE & EDIT mode (returning to Regular mode)
Press .
1
This returns to slot selection.
Press again.
2
This returns to regular mode.
38
Page 39
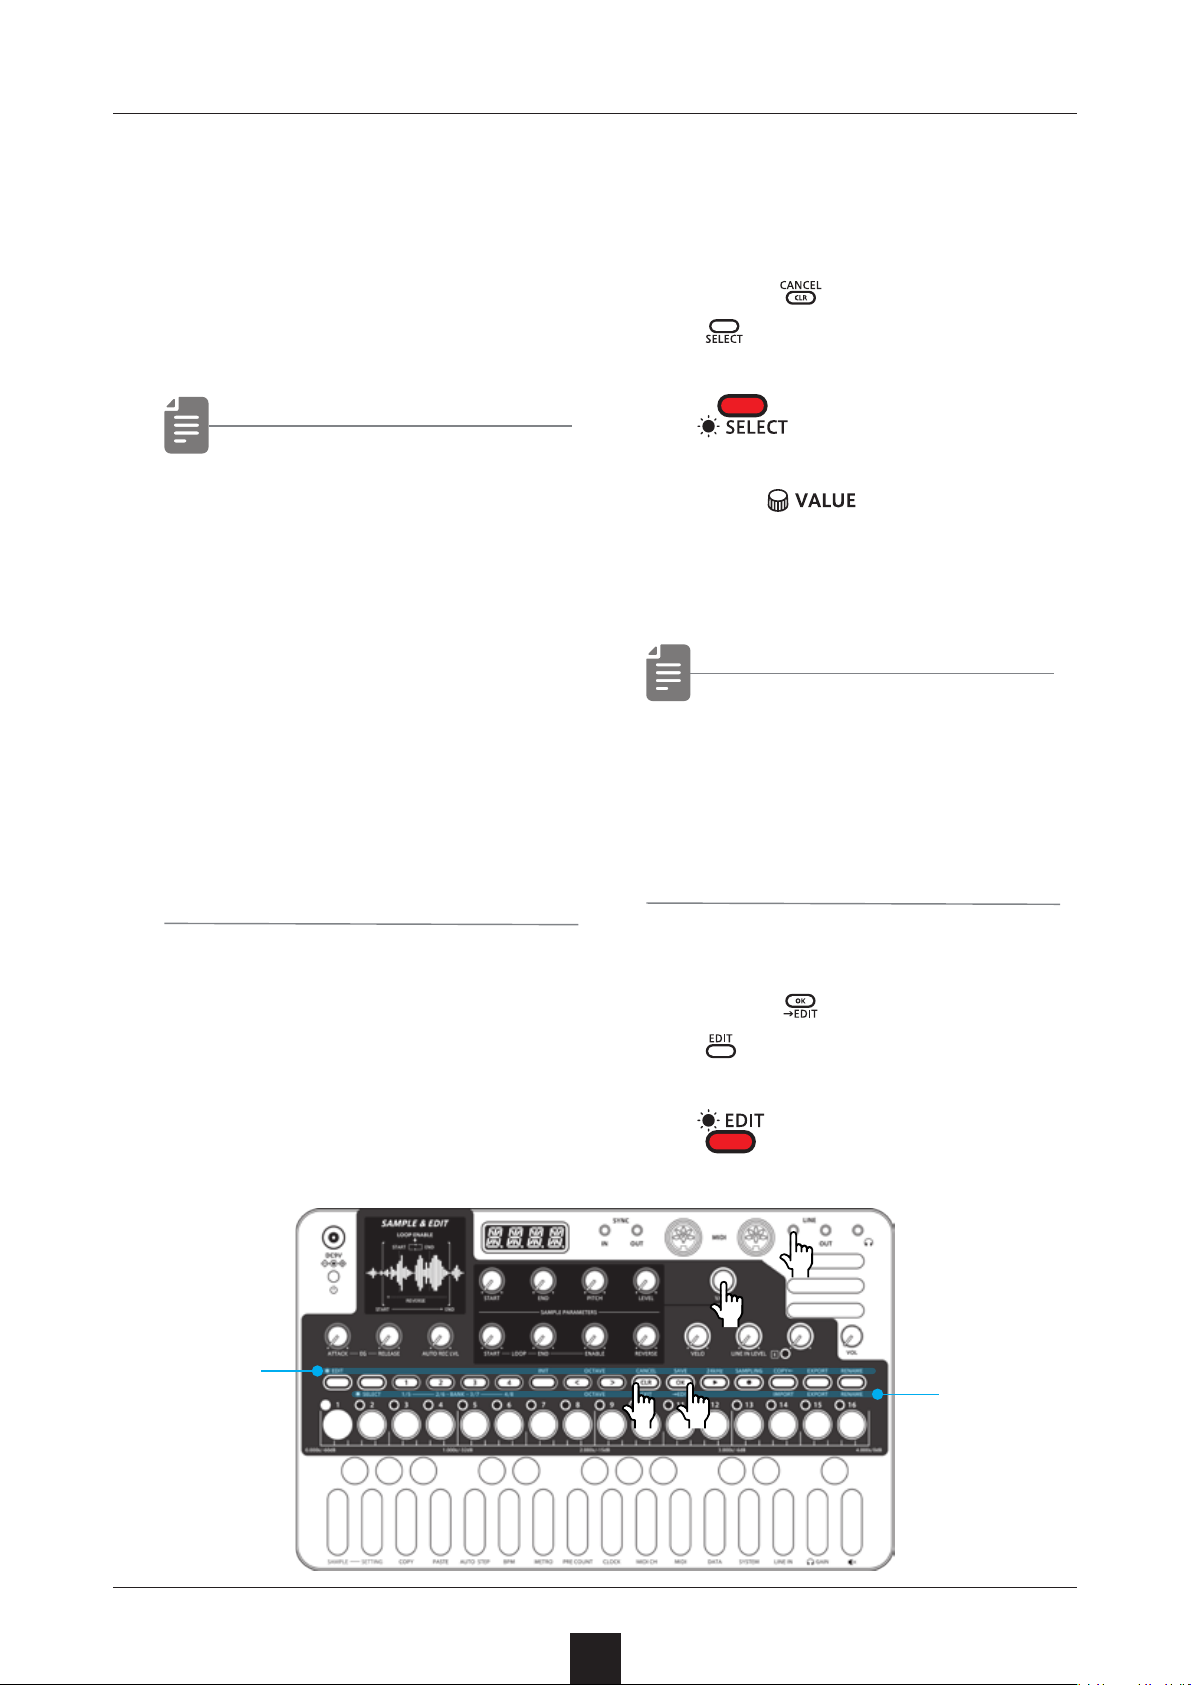
SAMPLE & EDIT mode (editing)
— Preparing to record
Connecting equipment to the LINE IN
Connect the output of the
1
equipment you want to record to the Lo-12 LINE IN.
• Mics and guitars cannot
be connected directly. Use a mixer or other
equipment to convert
their outputs to line signals.
• The Lo-12 records in
mono. Stereo signals
input to the LINE IN are
mixed in mono by default.
Select the recording slot
In SAMPLE & EDIT mode,
2
press
3
will light red.
Turn
slot where you want to record the sample.
• When a slot is selected,
the sample can be auditioned by playing the keyboard.
.
to select the
Editing menu
Press to enable editing.
4
●❷ ●❹
will light red.
●❶
●❸
Slot selection
menu
39
Page 40
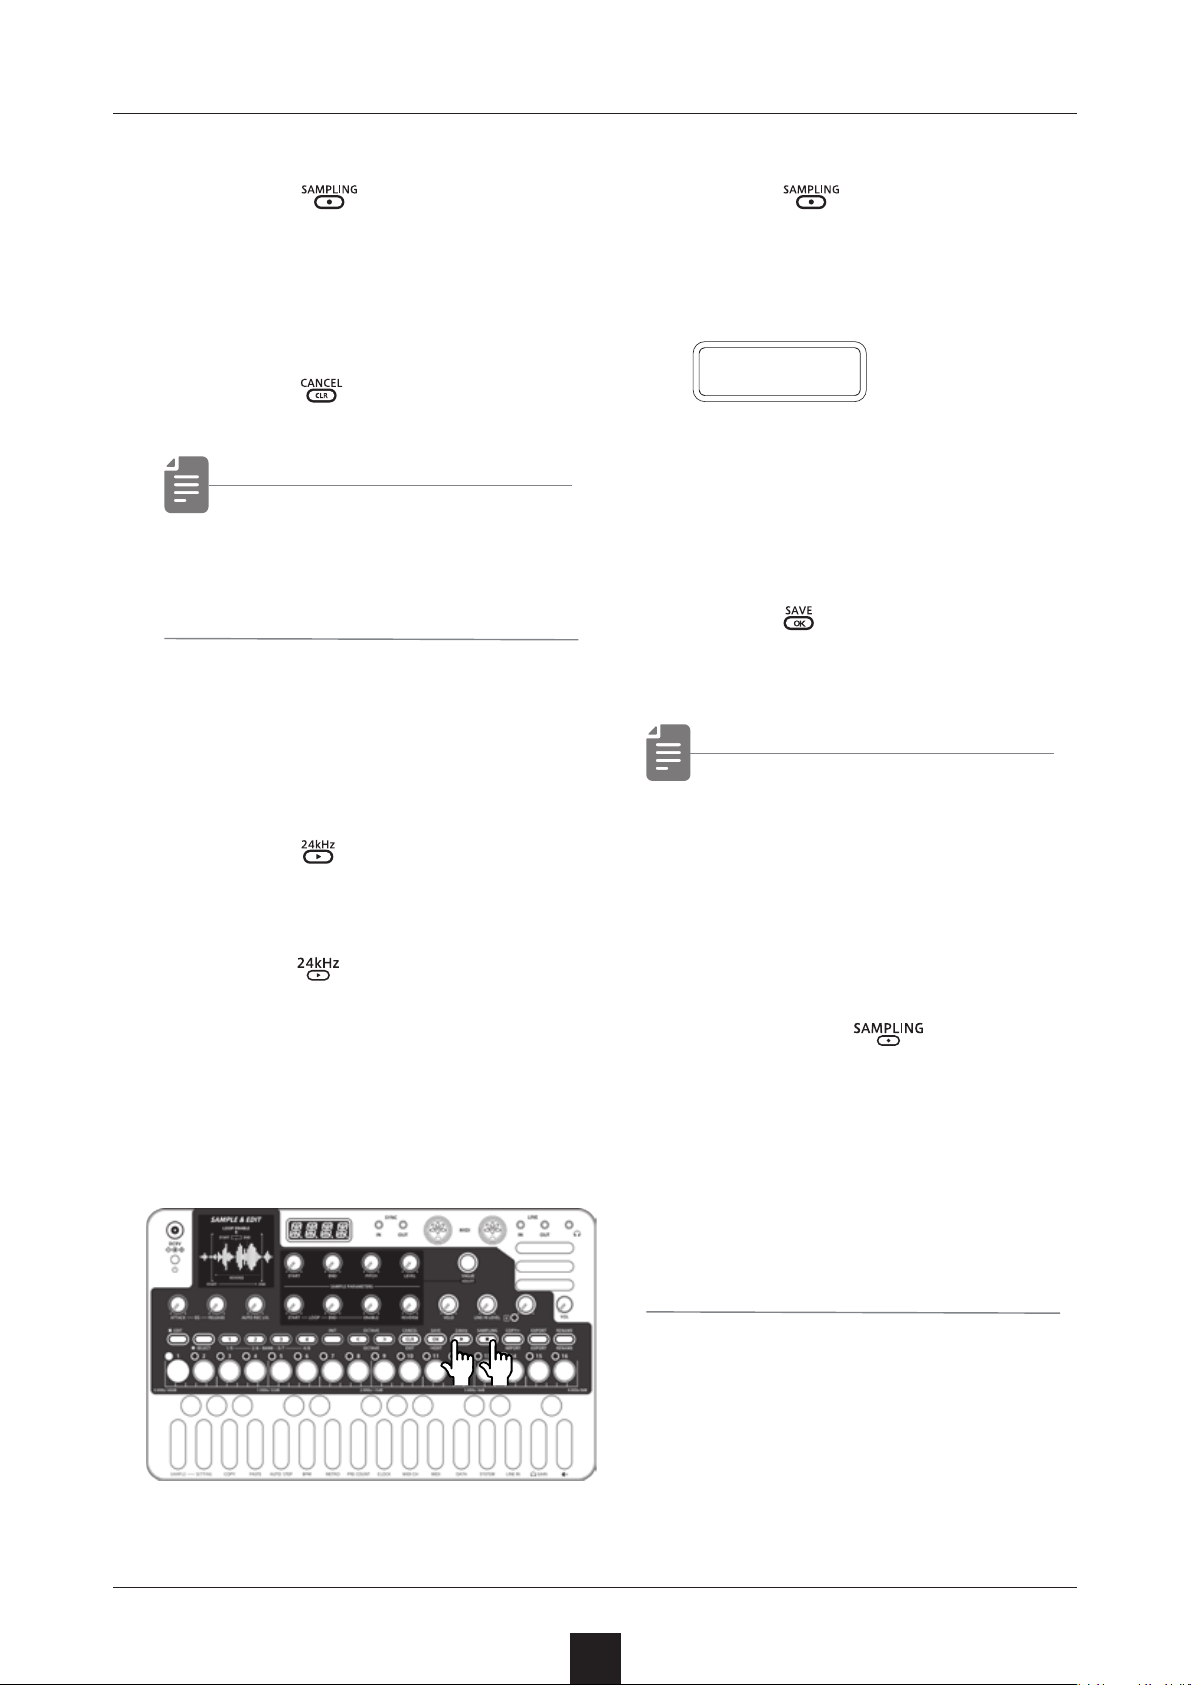
SAMPLE & EDIT mode (editing)
— Recording
Enable recording
Press .
1
It will blink red.
Use the step keys to check
the recording level.
Press
• Use LINE IN LEVEL to adjust the input level.
to cancel.
Start recording
Press again.
3
It will light and automatically
start recording when a signal is input.
R E C
The step keys show the re-
cording progress.
When step 16 lights, record-
ing will stop automatically.
Press twice.
4
This saves the sample.
Set the sample
quality
Press to select the
2
sampling frequency.
When
ting is 24kHz (2 seconds
of recording). When it is
unlit, the setting is 12kHz
(4 seconds of recording).
is lit red, the set-
• AUTO REC LVL can be set
to OFF or the input signal
level that starts recording
automatically ( − 60 – −
20 dB).
If AUTO REC LVL is OFF,
pressing will start
recording.
• After recording completes,
the volume of the sample
will be normalized automatically.
●❷●❶
●❸
40
40
Page 41
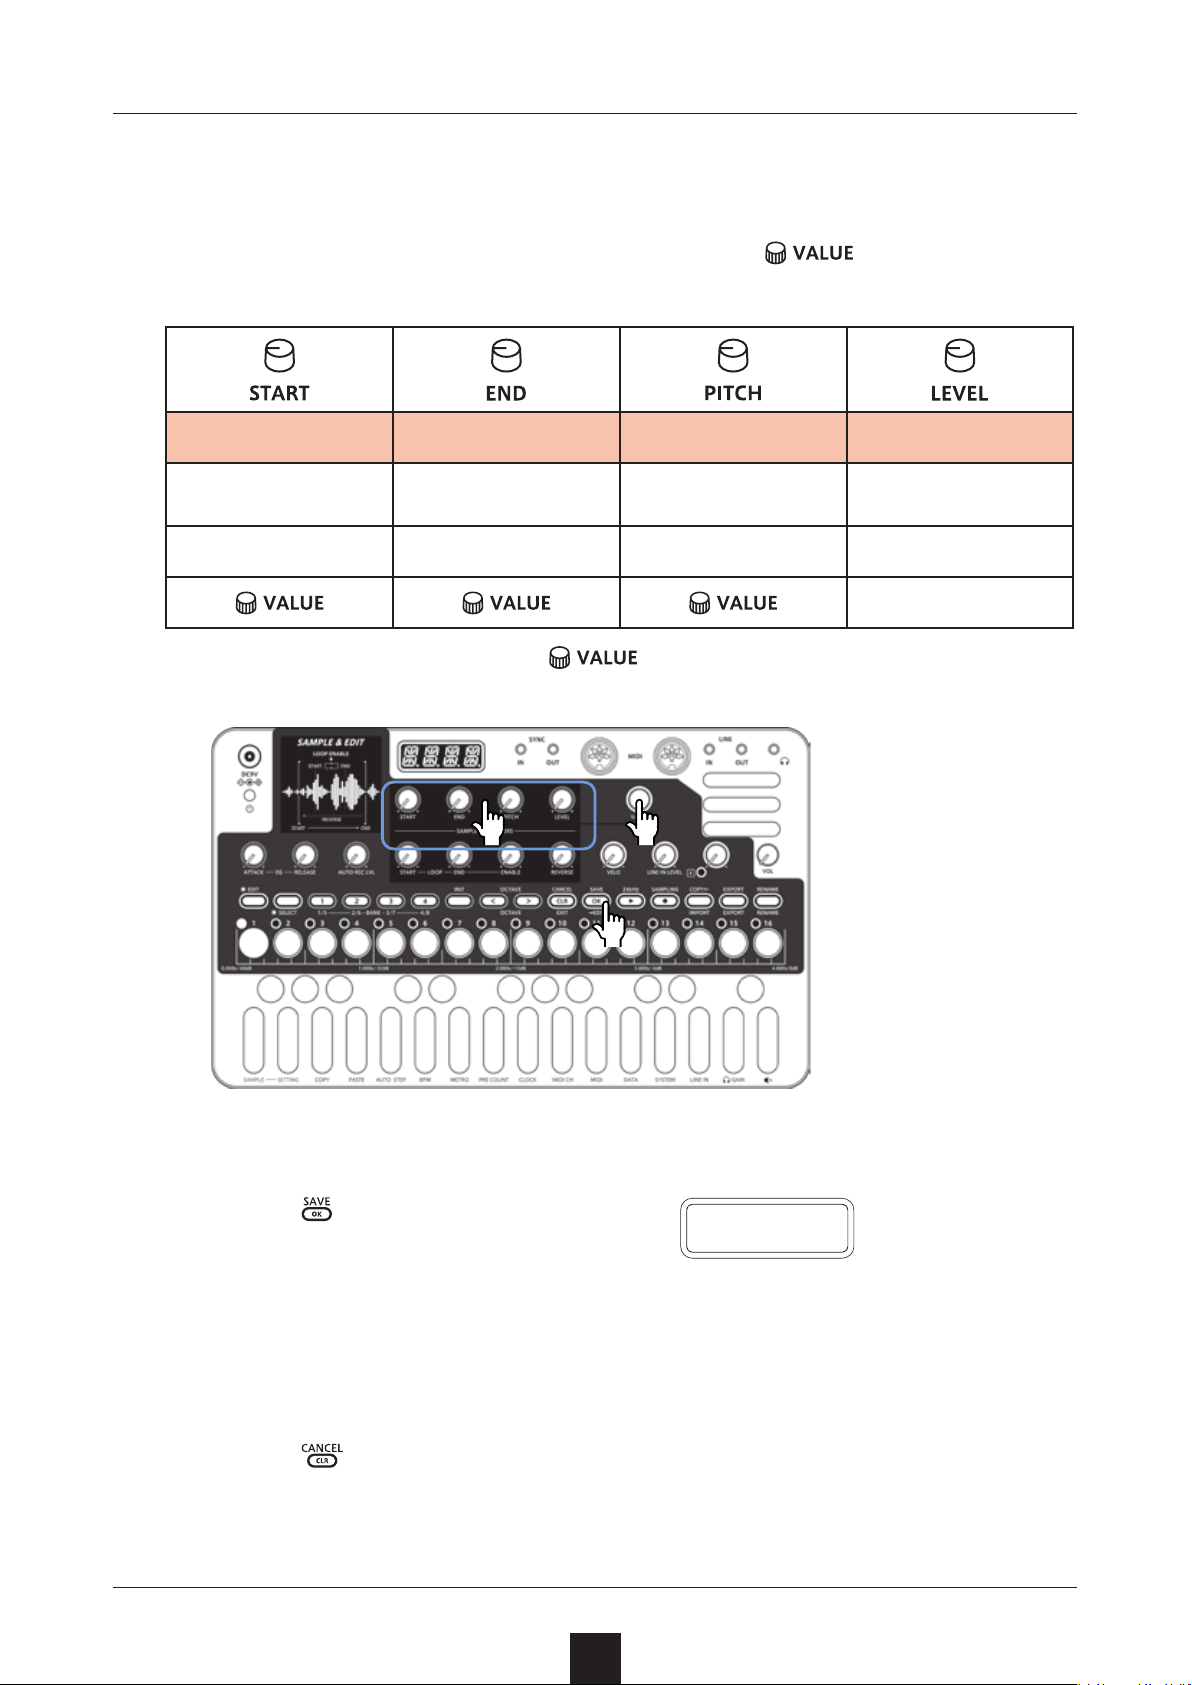
SAMPLE & EDIT mode (editing)
— Basic operation
Adjust parameters
Turn a knob.
1
Start End Pitch Level
Start position in
sample
0 – 9998 1 – 9999 − 999 – +999* 0 – 127
End position in
sample
Adjust parameters precisely
Turn
2
eter is shown.
Pitch adjustment Level
Parameters that allow precise adjustment
while the param-
*100 = 1 semitone
●❶ ●❷
Save settings
Press twice.
3
It will be saved and return to
slot selection.
Discard settings
●❸
S A V E
Press .
This will return to slot selection without saving.
41
Page 42
SAMPLE & EDIT mode (editing)
— Basic operation
Setting Sustain loops
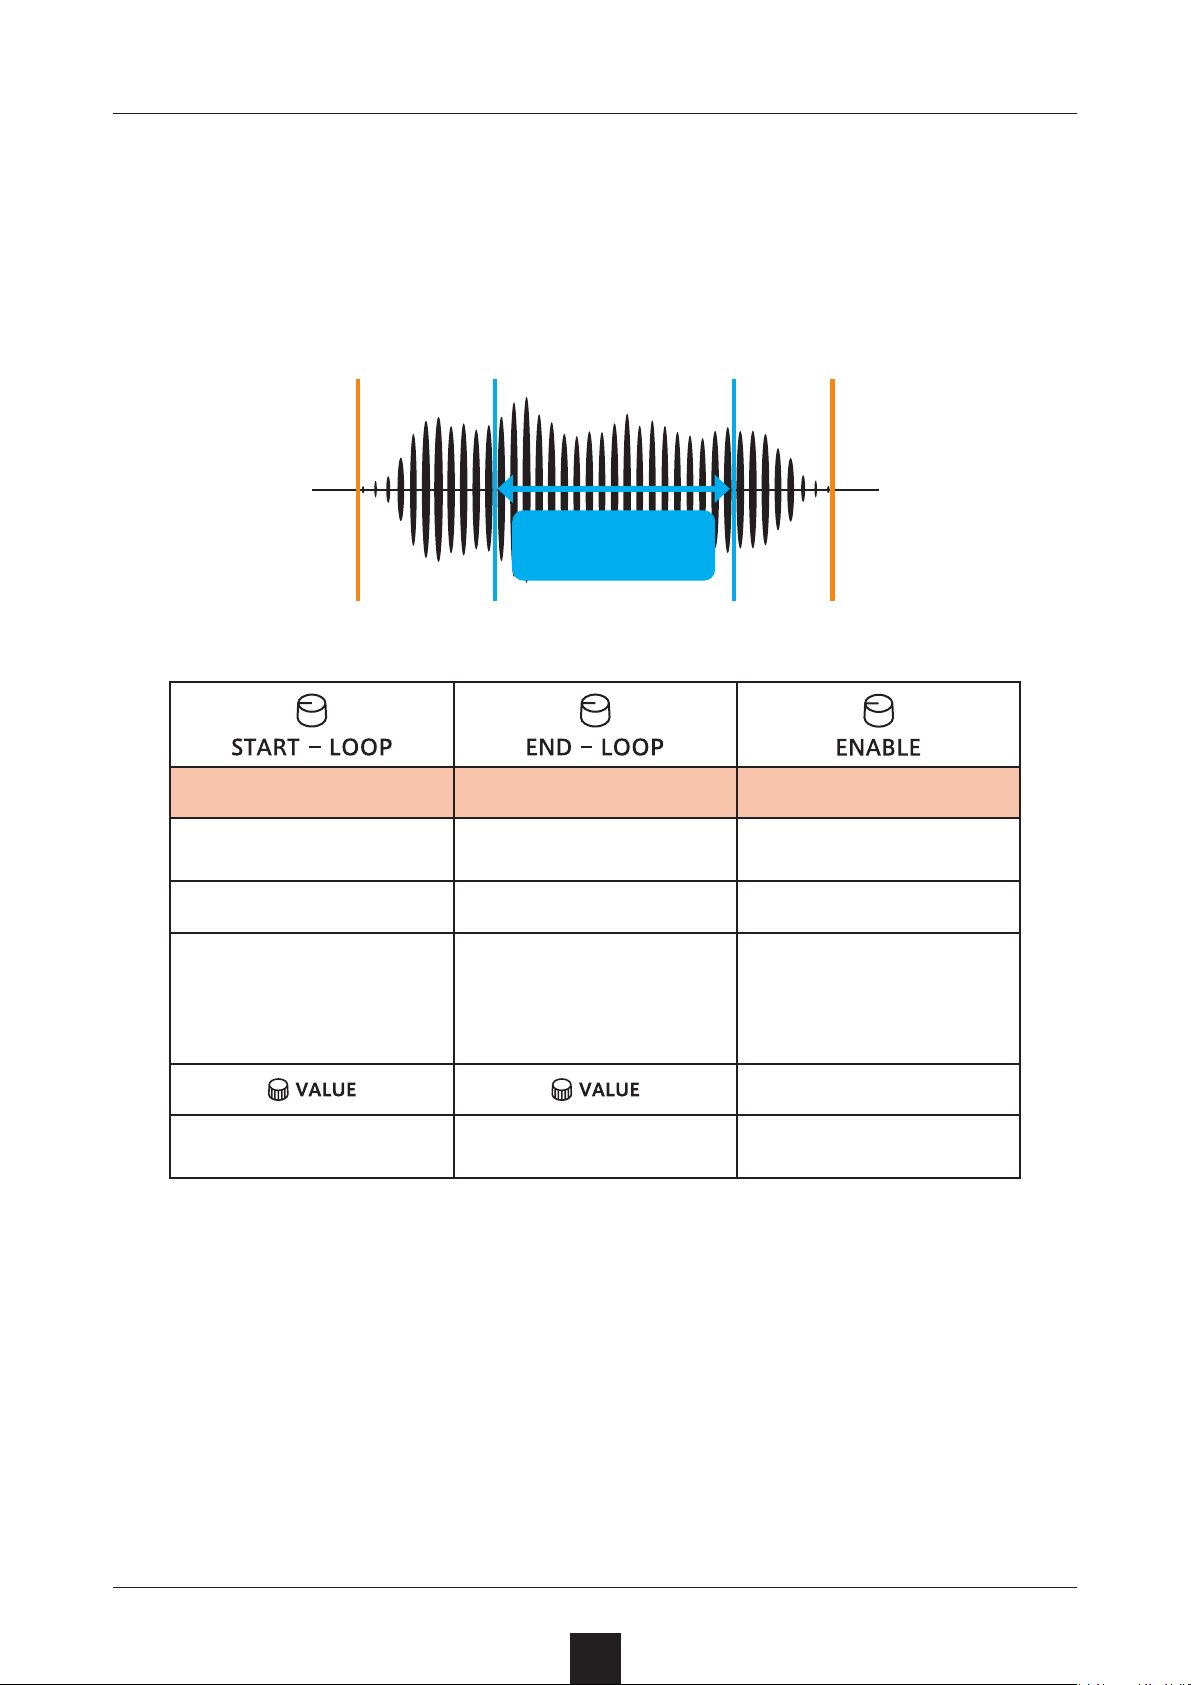
The Lo-12 has a sustain loop function that can play the desired interval in a sample as a loop.
Set a sustain loop if you want to have a sound play continuously like
an organ as long as you press a key on the keyboard.
Play loop when loop-
ing is on
Start EndLoop Start Loop End
Loop Start Loop End Loop Enable
Start position of sustain
loop
0 – 9776 420 – 9999 ON/OFF
Set the position of the
9,999 divisions of the
sample in increments of
100.
Adjust the position in
increments of 1.
End position of sustain
loop
Set the position of the
9,999 divisions of the
sample in increments of
100.
Adjust the position in
increments of 1.
Sustain loop activation
This turns the sustain
loop on/o.
The Loop Start and Loop End are connected by a crossfade.
Set an interval that does not have volume or tone changes in order
to make the loop sound natural. Setting a natural-sounding sustain
loop might not be possible for some waveforms.
42
Page 43
SAMPLE & EDIT mode (editing)
— Basic operation
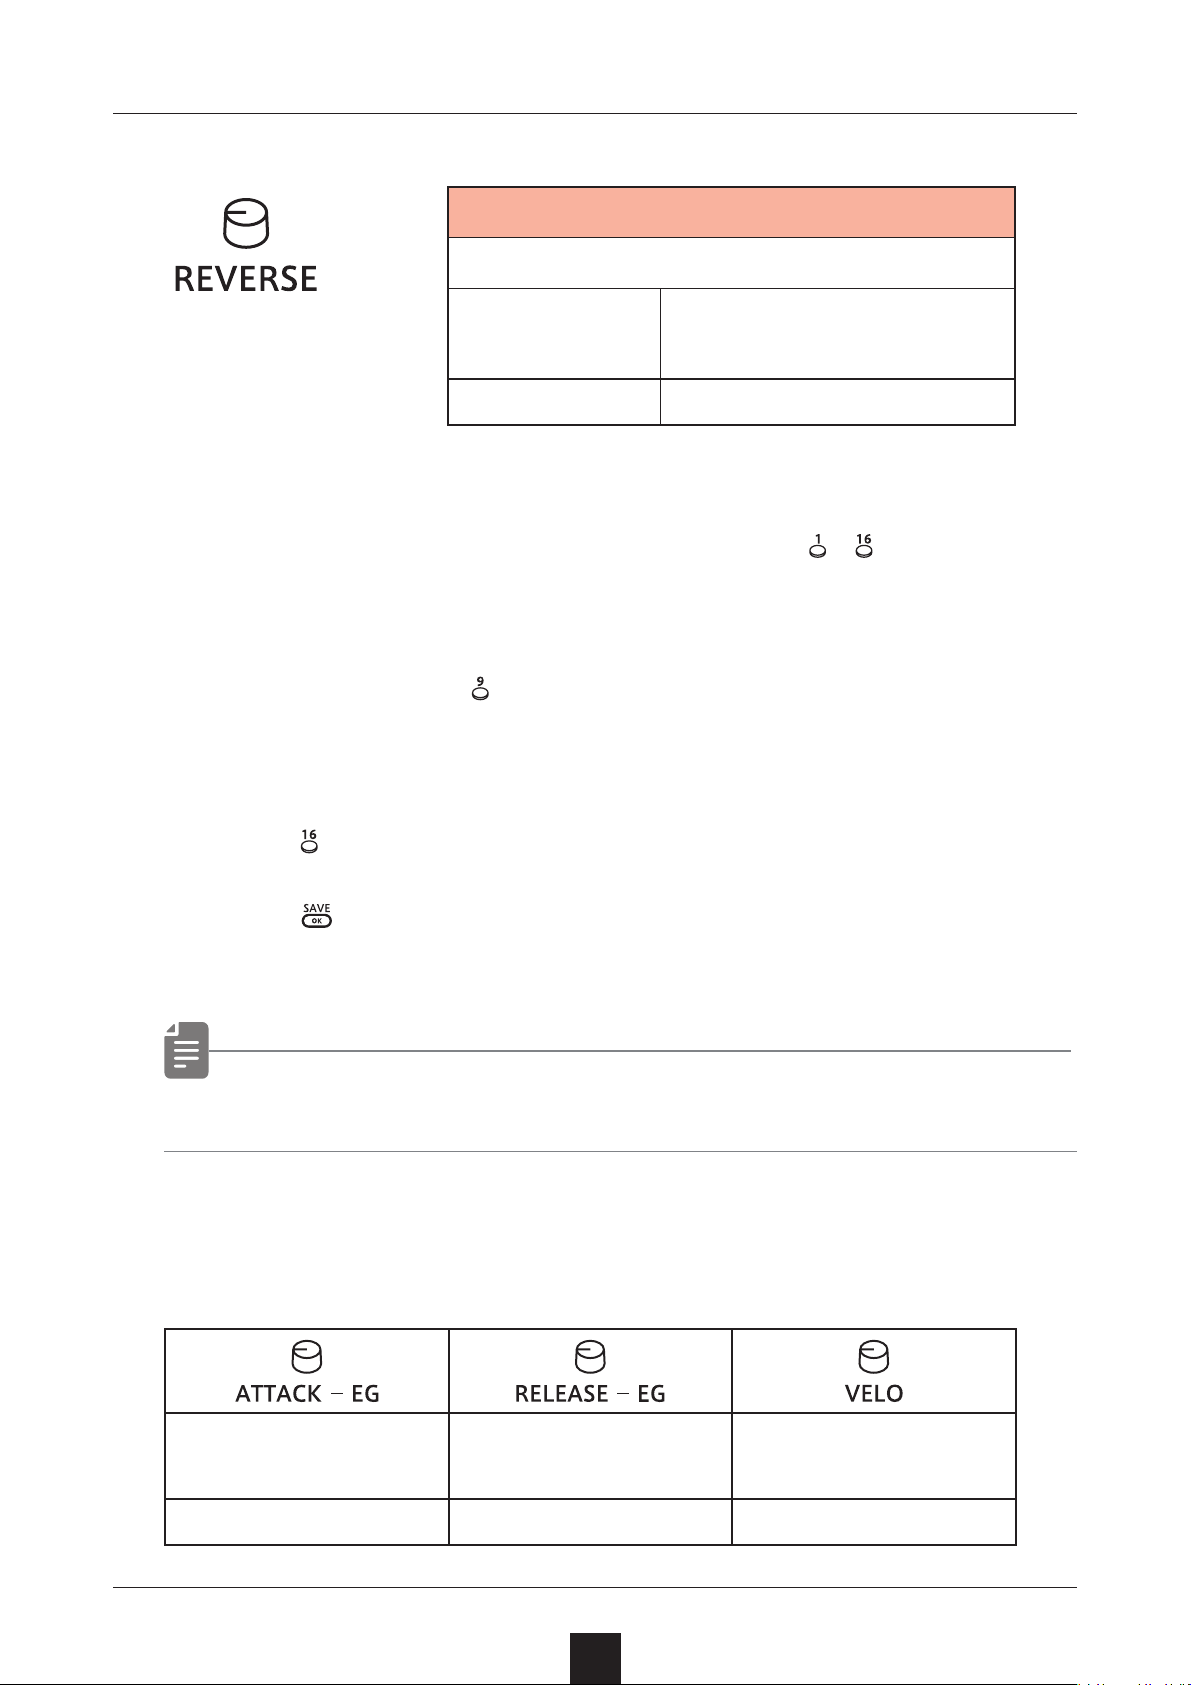
Reversing sample playback
Reverse
This turns reverse playback on/o.
Played in regular direc-
OFF
tion
ON Played in reverse
Setting sample fade out
The entire length of a sample is shown by the lit – .
Press the step at the position where you want to start the fade-
1
out.
For example, press
dle of the sample.
Steps will blink for the length that is being faded out.
Press
Press twice.
2
This applies the fadeout to the sample.
• Fade-outs can only be set when LOOP ENABLE is o.
to set no fadeout.
if you want to start to fade out in the mid-
Chacking the attack, release, and velocity of the sound
Time for sample to reach
full volume after note is
turned on
0–127 0–127 0–127
Time until sample becomes silent after note
is turned o
43
Volume triggered when
note is turned on
Page 44
SAMPLE & EDIT mode (editing)
— Renaming and copying
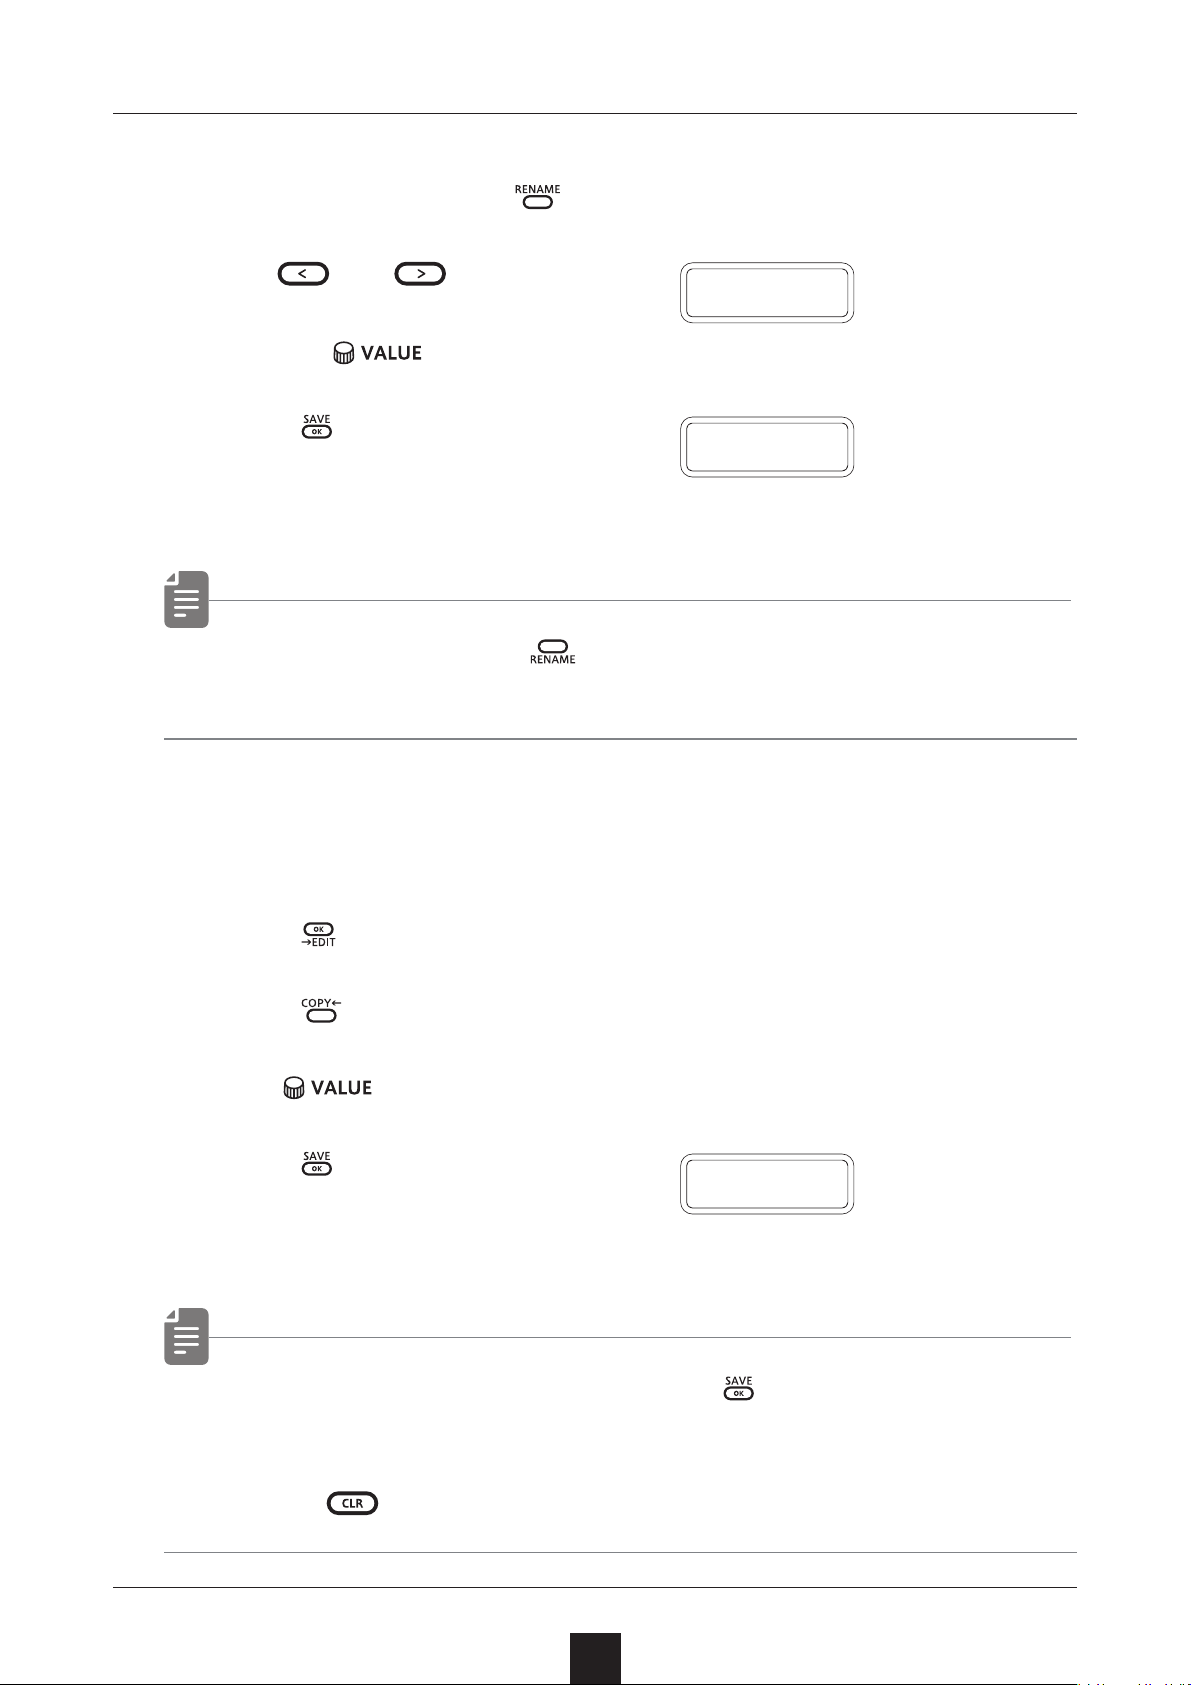
Renaming samples
In editing mode, press .
1
Use and to move
2
the cursor left and right,
and turn to select characters.
Press .
3
This completes the setting.
DONE will appear on the display.
S A X.1
D O N E
• During slot selection, can be pressed to rename a bank in
the same way.
Copying samples
Use slot selection to select an empty slot
1
Press to enable editing.
2
Press .
3
Turn to select the sample you want to copy.
4
Press .
5
The sample will be copied and
D O N E
DONE will be shown on the display.
• After completing a procedure, press twice to save the
changes.
• Press
during a procedure to cancel it.
44
Page 45
SAMPLE & EDIT mode (editing)
— Clearing
Clearing samples
In editing mode, press .
1
This clears the sample.
• After completing a procedure, press twice to save the
changes.
I N I T
• Press
during a procedure to cancel it.
45
Page 46
SAMPLE & EDIT mode (editing)
— Exporting/importing samples
Recorded samples can be exported to or imported from a PC, Mac or
similar device by MIDI. See page 81 for details about connection.
Exporting a single sample
Use slot selection to select the sample you want to export.
1
Press to enable editing.
2
Press .
3
Set your PC to receive MIDI data.
4
S S.E X
Press .
5
This starts sample data
transmission.
The step LEDs will show the progress. When nished, DONE will
appear on the display.
D O N E
Importing a single sample
Use slot selection to select the slot you want to import to.
1
Press to enable editing.
2
Start transmitting data from the transmitting device.
3
After receiving data has completed, press twice to save it.
4
46
Page 47
SAMPLE & EDIT mode (editing)
— Exporting/importing samples
Exporting sample banks
In the slot selection, press
1
want to export.
Press .
2
Set your PC to receive MIDI data.
3
Press .
4
This starts sample data transmission.
The step LEDs will show the progress. When nished, DONE will
appear on the display.
to select the bank you
B K.E X
D O N E
Importing sample banks
In the slot selection, press
1
want to export.
to select the bank you
Press .
2
Start transmitting data from
3
the transmitting device.
When BK.SV is shown, press .
4
B K.I M
R C V
B K.S V
47
Page 48
Step sequencer overview
Overview
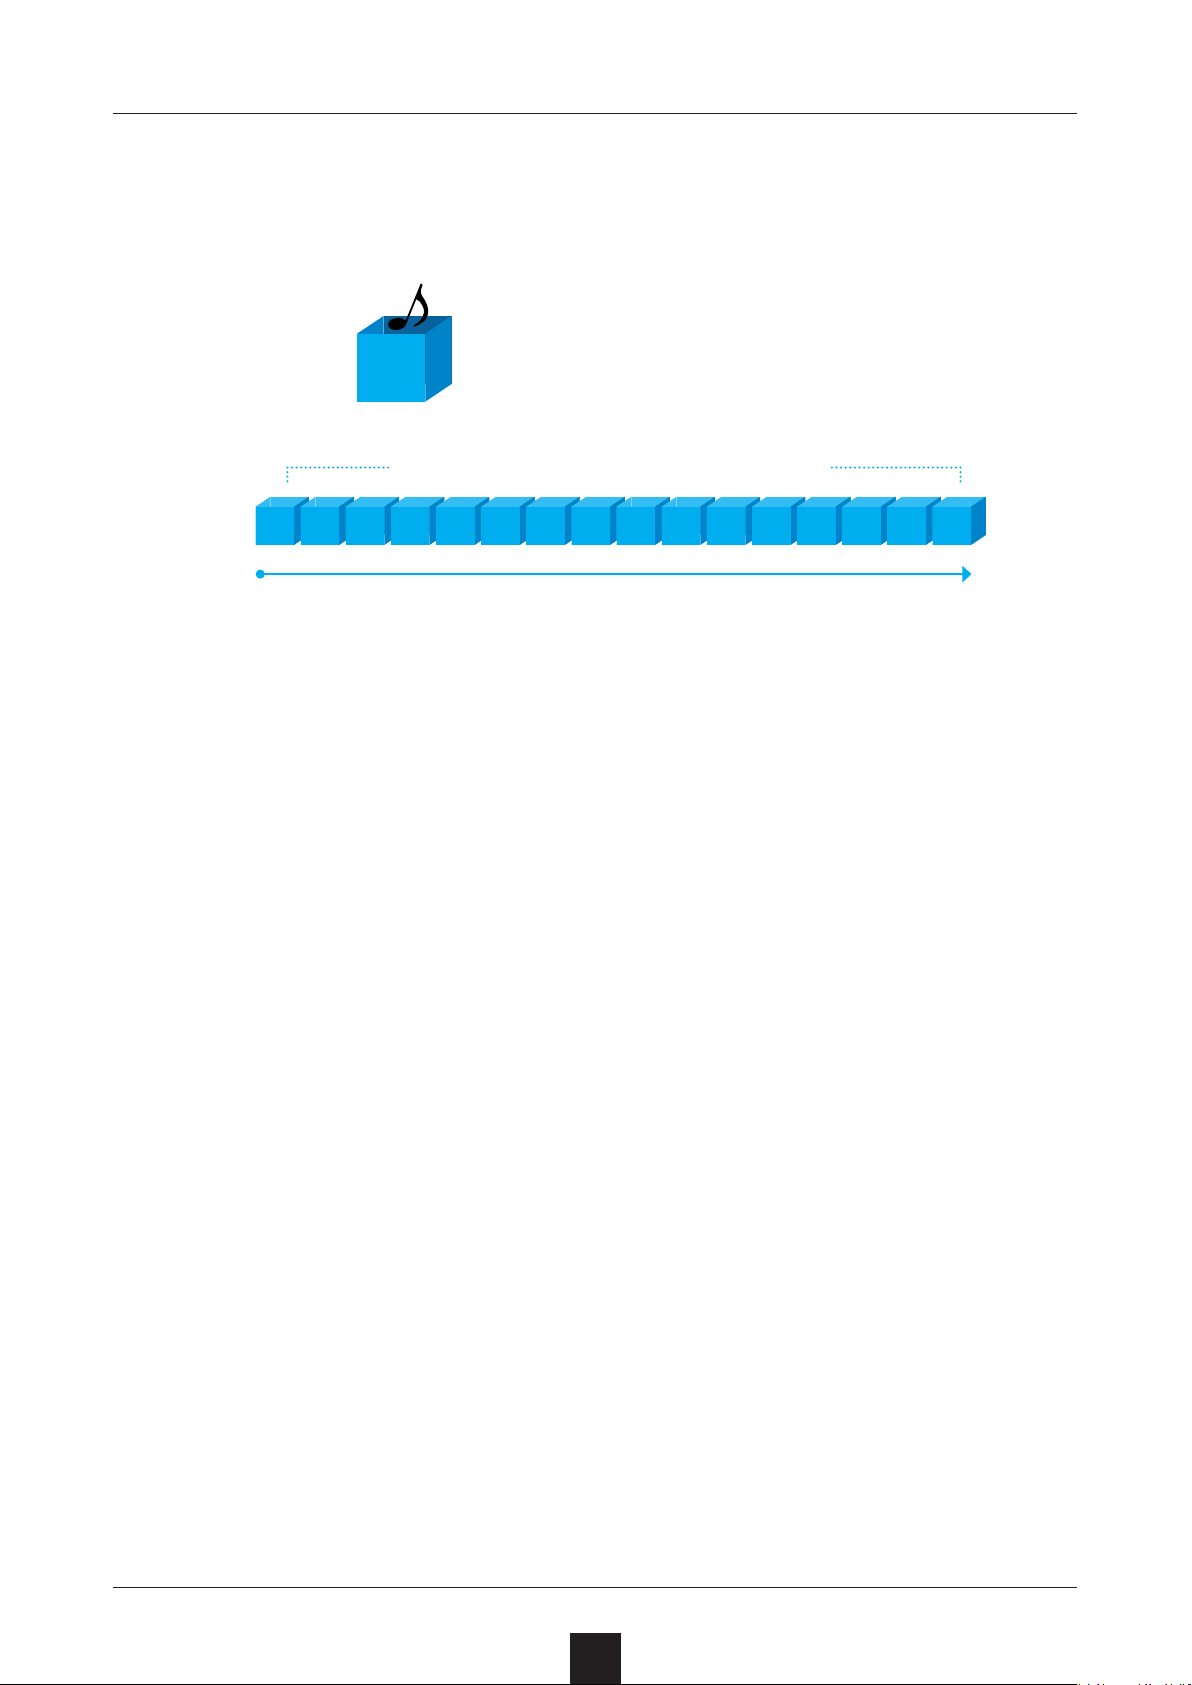
The Lo-12 step sequencer can play multiple steps in order (a sequence) with performance and parameter data.
STEP
1
1 2 3 4 5 6 7 8 9 10 11 12 13 14 15 16
Sequences play in order from the rst step.
Steps contain note data and param-
eter data.
Sequences contain multiple steps.
Lo-12 step sequencer features
The sequencer in the Lo-12 has the following features.
Three input methods
Step recording
Record notes to each step with the sequencer stopped
Real-time recording
Record notes to steps by playing the keyboard
Direct recording
Record notes to steps directly during sequencer playback
Flexible sequencing
Sequences with up to 64 steps
The number of steps can be set from 1 – 64 as desired for
each track
Support for various note lengths
The length of each step can be set from 1/32nd note to 1
bar.
48
Page 49
Creating sequences – Preparation
Selecting tracks and setting sounds
Press one
1
creation.
Turn and to select the sound to use.
2
• The LIVEN Lo-12 can generate a maximum of 10 notes simul-
taneously (10-voice polyphony).
• If the maximum polyphony is exceeded, notes will be turned o
starting with notes on the lowest priority track. (The track priority is from 4 to 1 in order. However, sounds that are being released will be turned o rst in track priority order.)
• The LIVEN Lo-12 includes 8 banks of 16 sounds, allowing se-
button to select the track for sequence
lection of up to 128 sounds.
49
Page 50
Creating sequences – Settings
Setting the note length of one step
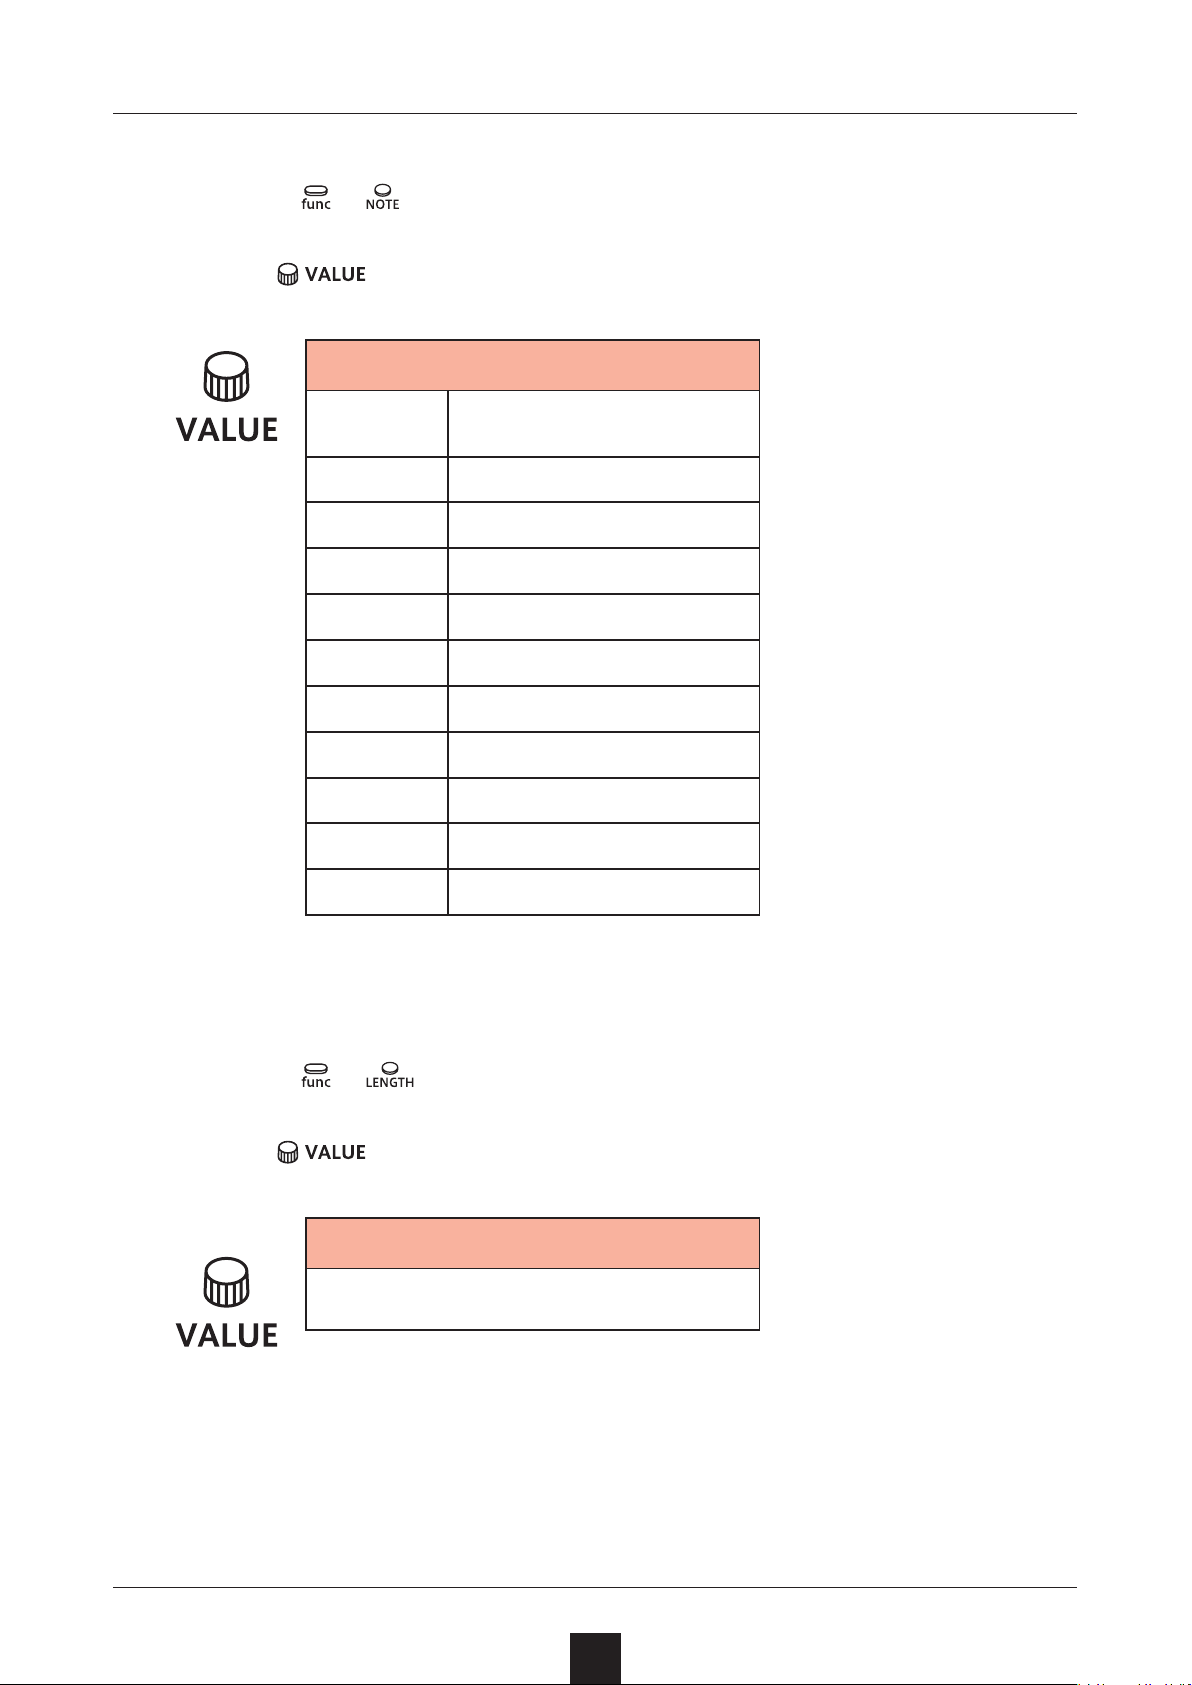
Press + .
1
Use to select the note length.
2
Note
1/1 Whole note
1/2 Half note
1/.4 Dotted quarter note
1/4 Quarter note
1/.8 Dotted 8th note
1/2T Half note triplet
1/8 8th note
1/.16 Dotted 16th note
1/4T Quarter note triplet
1/16 16th note
1/32 32nd note
Changing the sequence length
Press + .
1
Use to set the sequence length.
2
Length
1 – 64 (steps)
50
Page 51
Creating sequences – Step recording
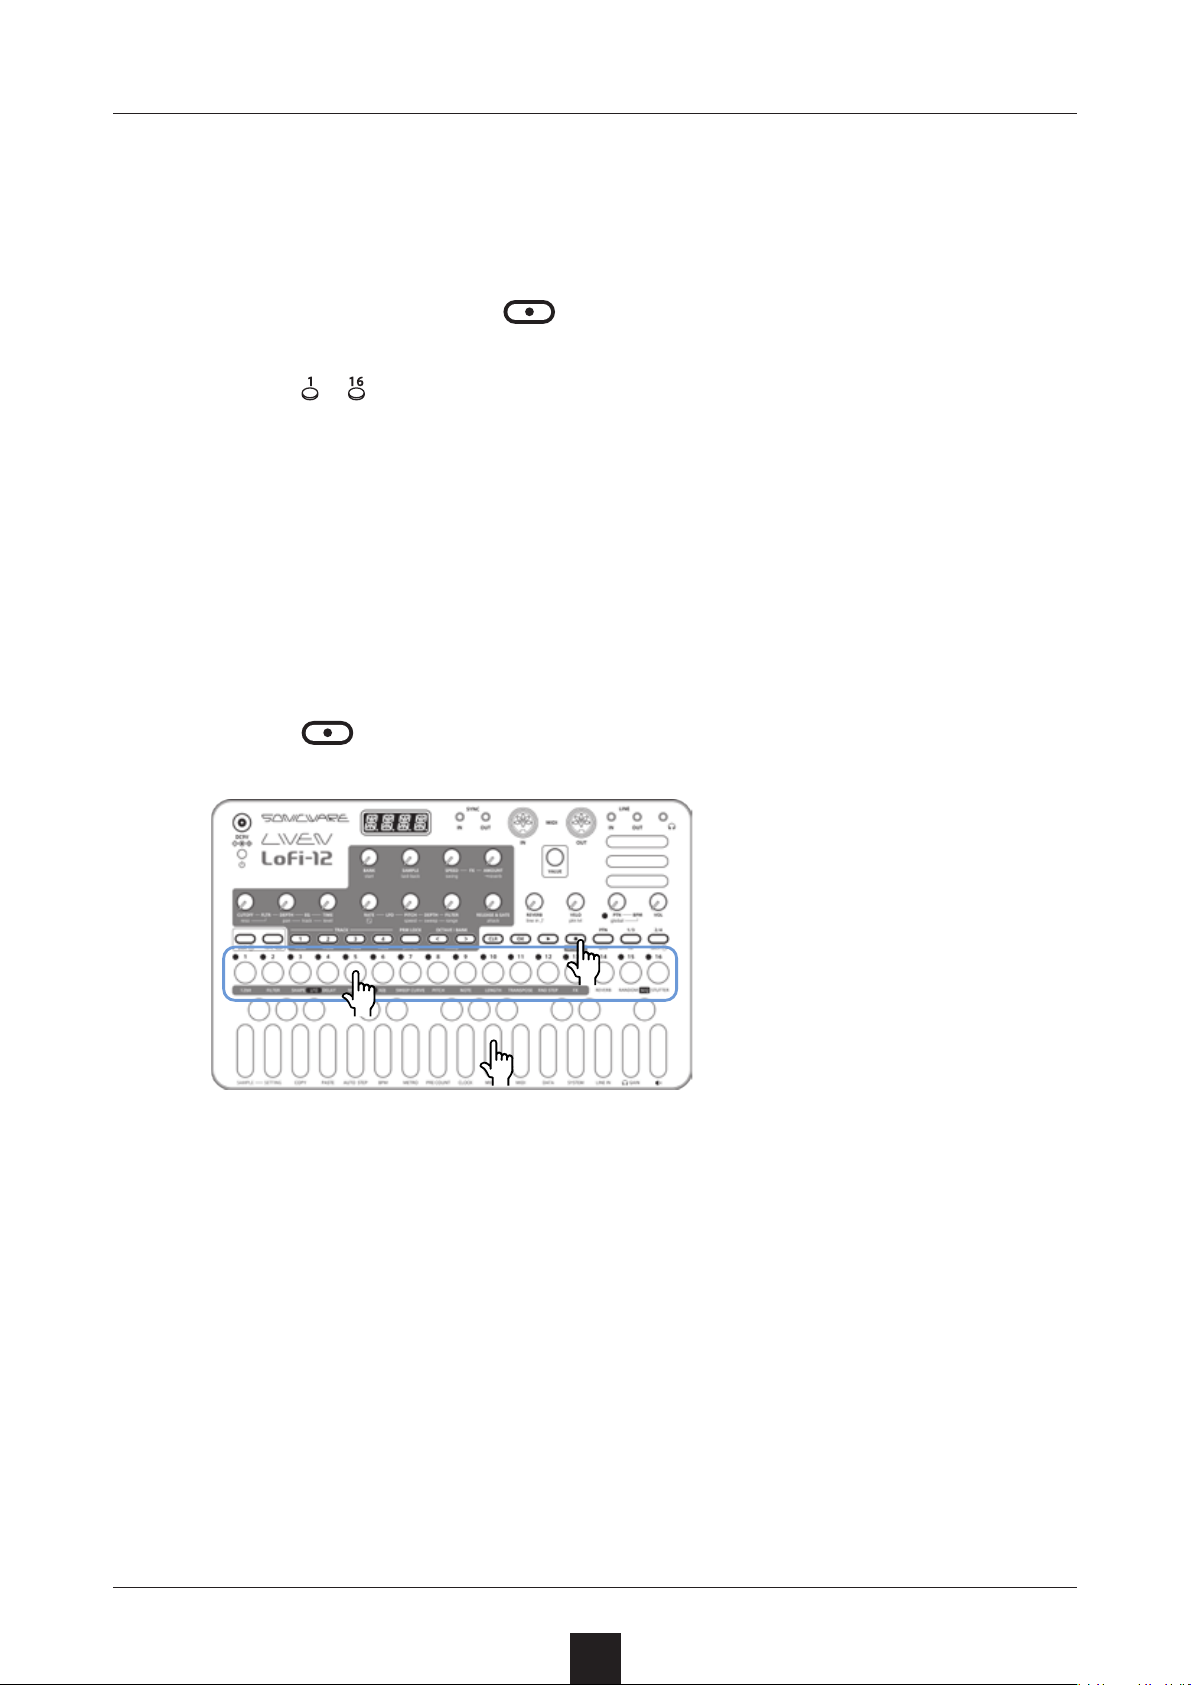
Using step recording, sequences can be created carefully while playback is stopped.
Basic operations
When stopped, press (lights red).
1
Press –
2
The LED for the current step will blink. The LEDs for steps that
already have notes will light.
Play a note on the keyboard to input it at the step.
3
Press the same note again on the keyboard to remove it from the
step.
Repeat steps 2 – 3 to create the sequence.
Press to end step recording.
4
at the step where you want to input a note.
●❷
●❶
●❹
●❸
51
Page 52
Creating sequences – Step recording
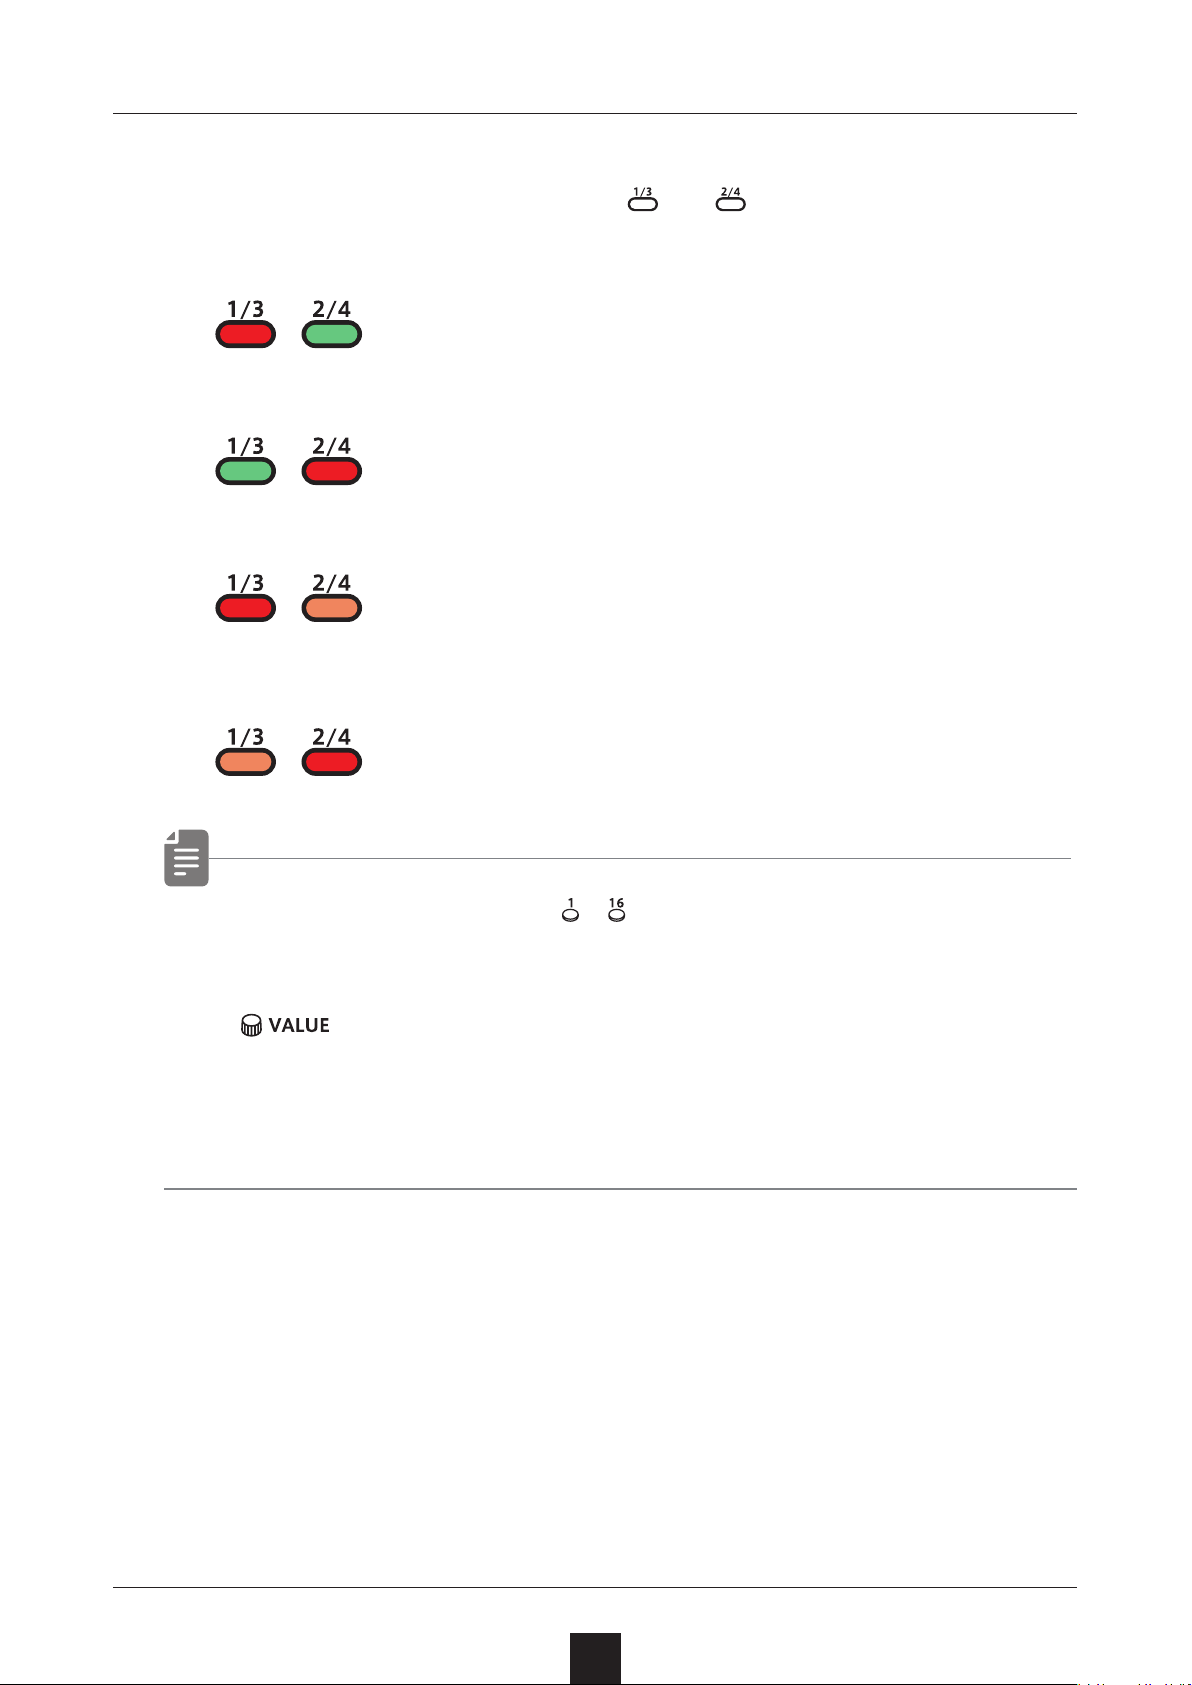
Selecting steps 17 and higher
After procedure number one, press and to select steps 17 and
higher.
To select steps 1–16, press the 1/3 button.
To select steps 17–32, press the 2/4 button.
To select steps 33–48, press the 1/3 button twice.
To select steps 49–64, press the 2/4 button twice.
• In procedure 2, pressing – will cause the stored note to
sound continuously. This is by design.
•
• Page buttons are enabled or disabled according to the length
of the sequence.
can also be used to move between steps.
52
Page 53
Creating sequences – Step recording
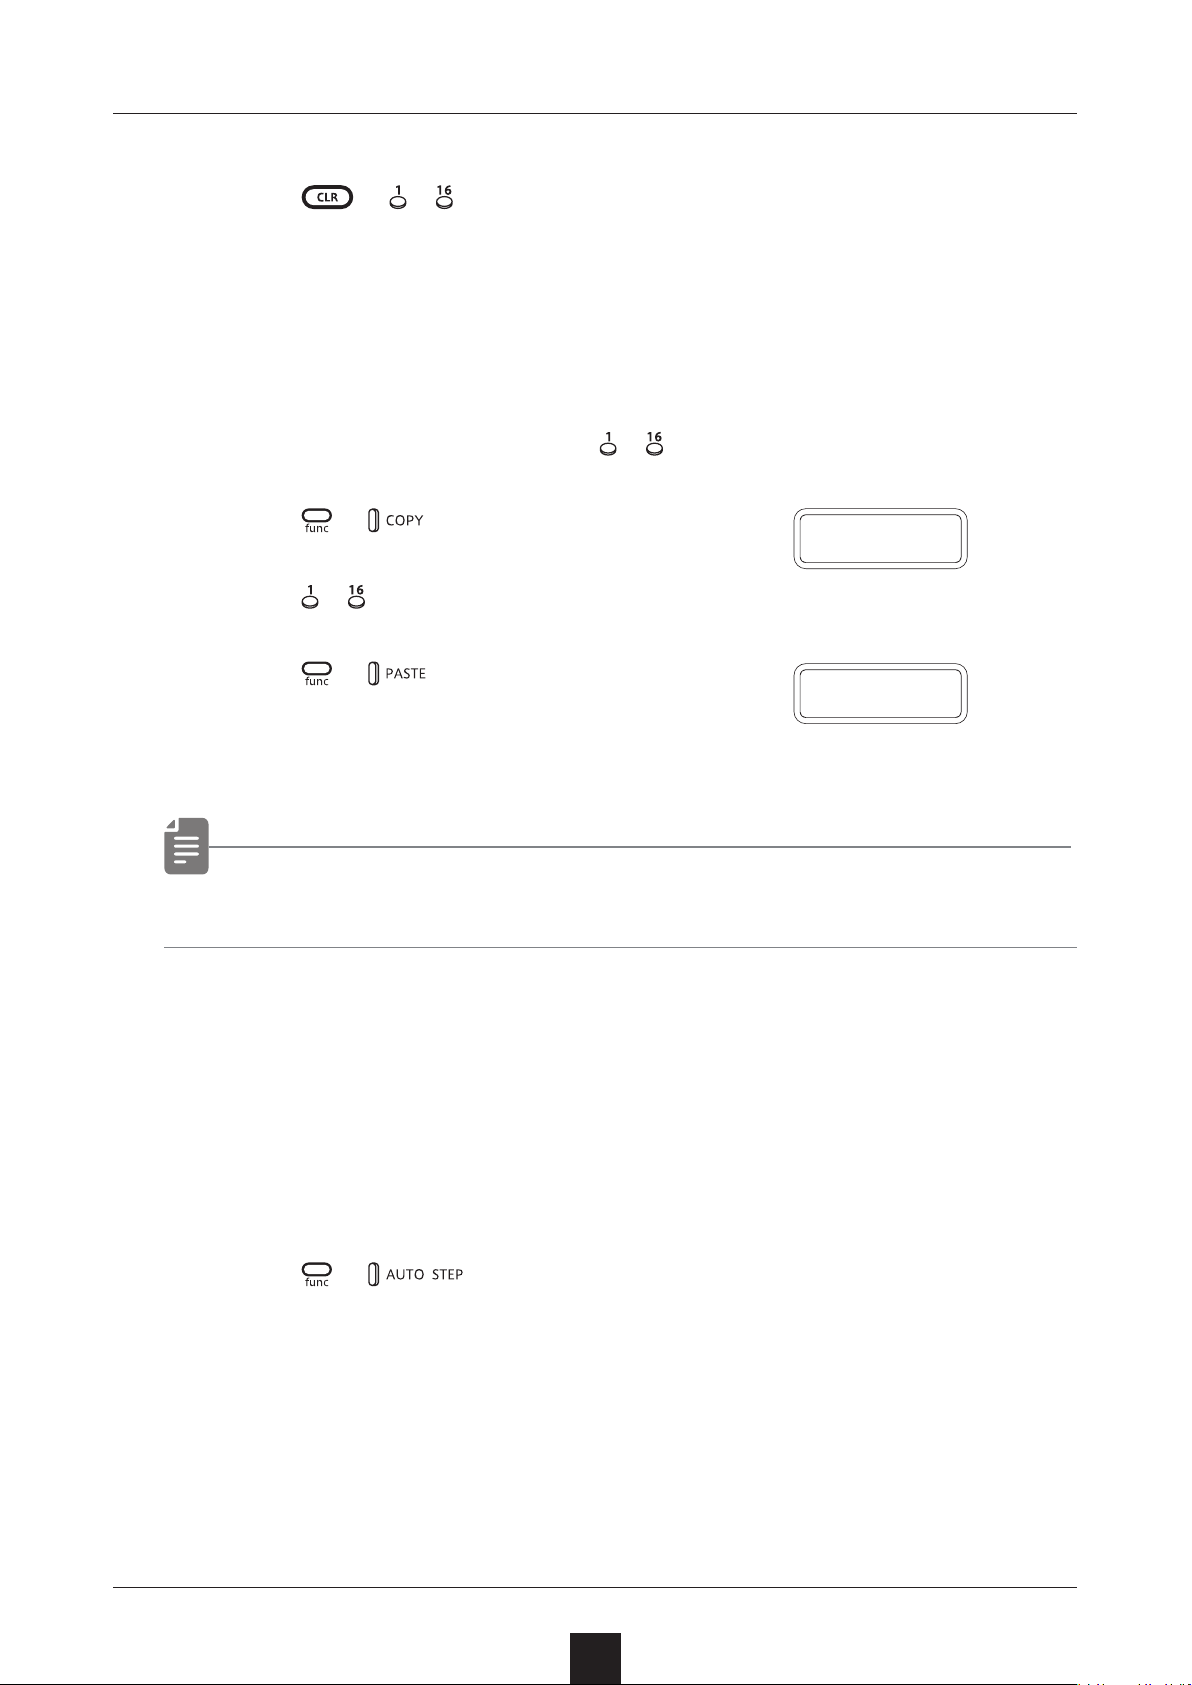
Clearing steps
Press +
1
During step recording, only the note information for that step will
be cleared.
–
.
Copying steps
During step recording, press – to select the step to copy.
1
Press +
2
Press –
3
Press +
4
The note and parameter lock data
from the copy source step will be pasted to the destination step.
.
C O P Y
to select the paste destination step.
.
D O N E
• Data for ties cannot be copied.
Automatically advancing steps during step recording (Auto Step mode)
In step recording mode, the step can be advanced automatically
each time a key of the keyboard is pressed.
1
Press
+ to turn this mode on/o.
53
Page 54
Creating sequences – Step recording
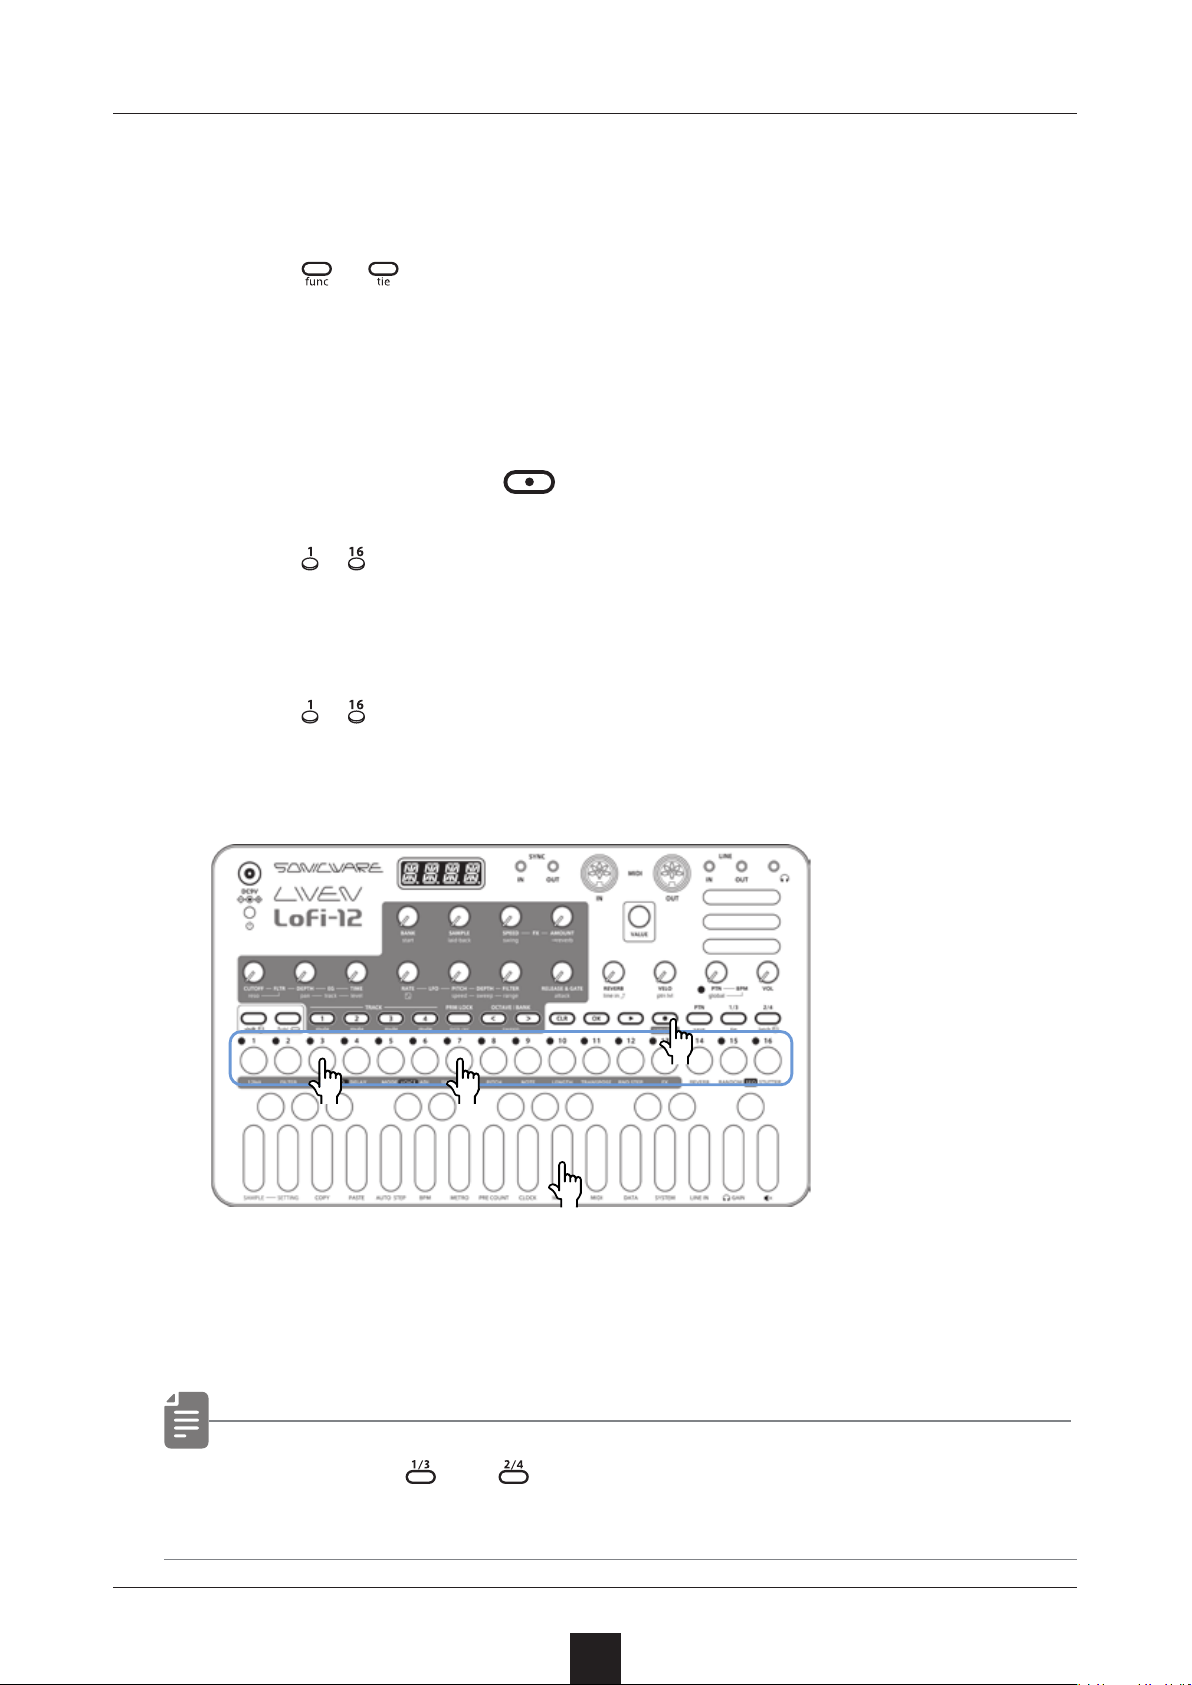
Tied-notes (long sounds) can be input with the Lo-12.
Enabling tied-note (long sound) input
Press + .
1
The button will light red, and tied-note input will be enabled.
Inputting tied-notes (long sounds)
When stopped, press
1
Press –
2
Press and hold a key on the keyboard.
3
Press –
4
This inputs a tied-note from the starting step to the stopping
step.
at the step where you want to start note input.
at the step where you want to stop the note.
(lights red) to start step recording.
●❶
●❷ ●❹
●❸
In the example above, a note (A) is input that starts on step 3 and
ends on step 7.
• By pressing and during procedure 4, tied-notes that span
pages can be input.
54
Page 55
Creating sequences
– Real-time recording
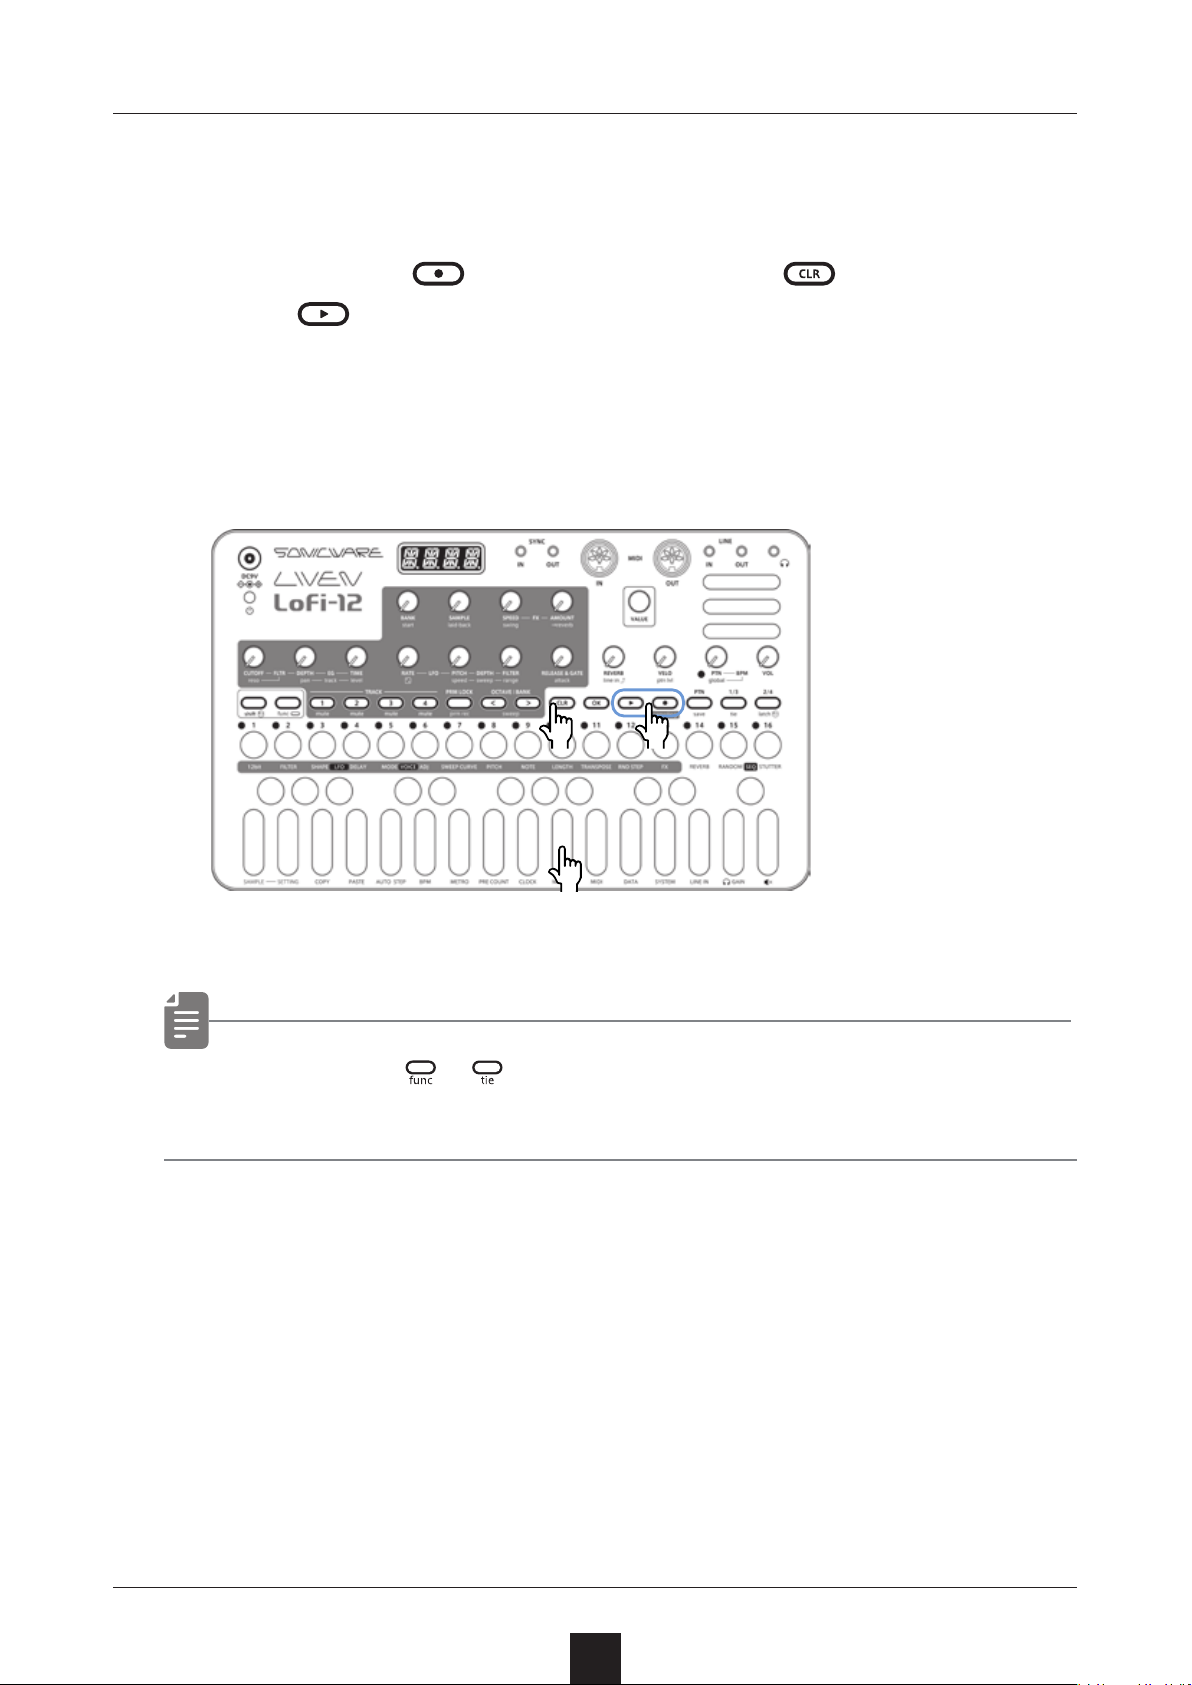
Sequences can be created in real time while playing the keyboard.
Basic operations
After pressing ,
1
press
The pattern will start playing,
2
so play the keyboard
when you want to input notes.
.
Clearing notes
Press
3
you want to clear notes.
Notes will be cleared while
this is being pressed.
at the time when
●❶●❸
●❷
• By pressing + to enable the input of tied-notes, long
notes that span steps can be input.
55
Page 56
Creating sequences
– Real-time recording
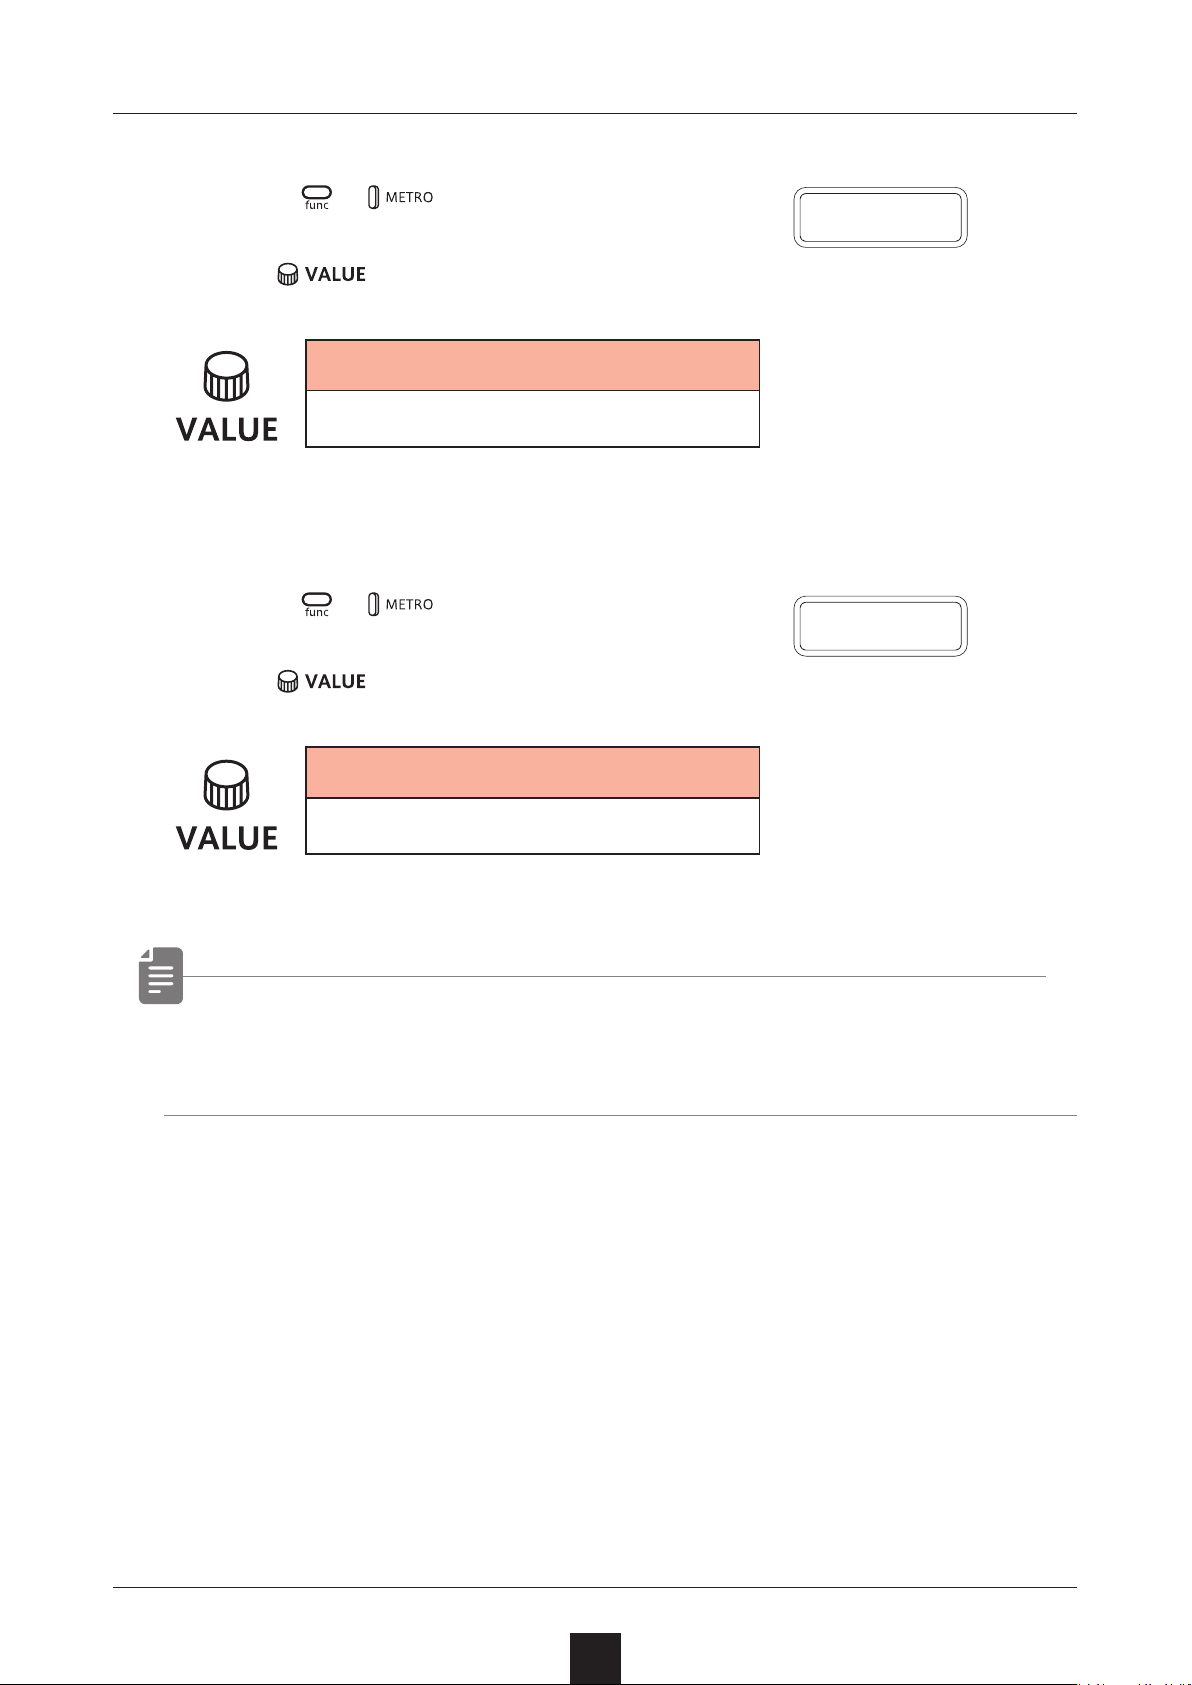
Setting the metronome
Press + to select MTRO.
1
Use to adjust the metronome volume.
2
Metronome
0 – 15
Setting a pre-count
Press + to select PR.CT.
1
M T R O
P R.C T
Use to change the pre-count.
2
Metronome
OFF, 1 – 8
• When a pre-count is set, recording and playback will start after
the pre-count.
56
Page 57
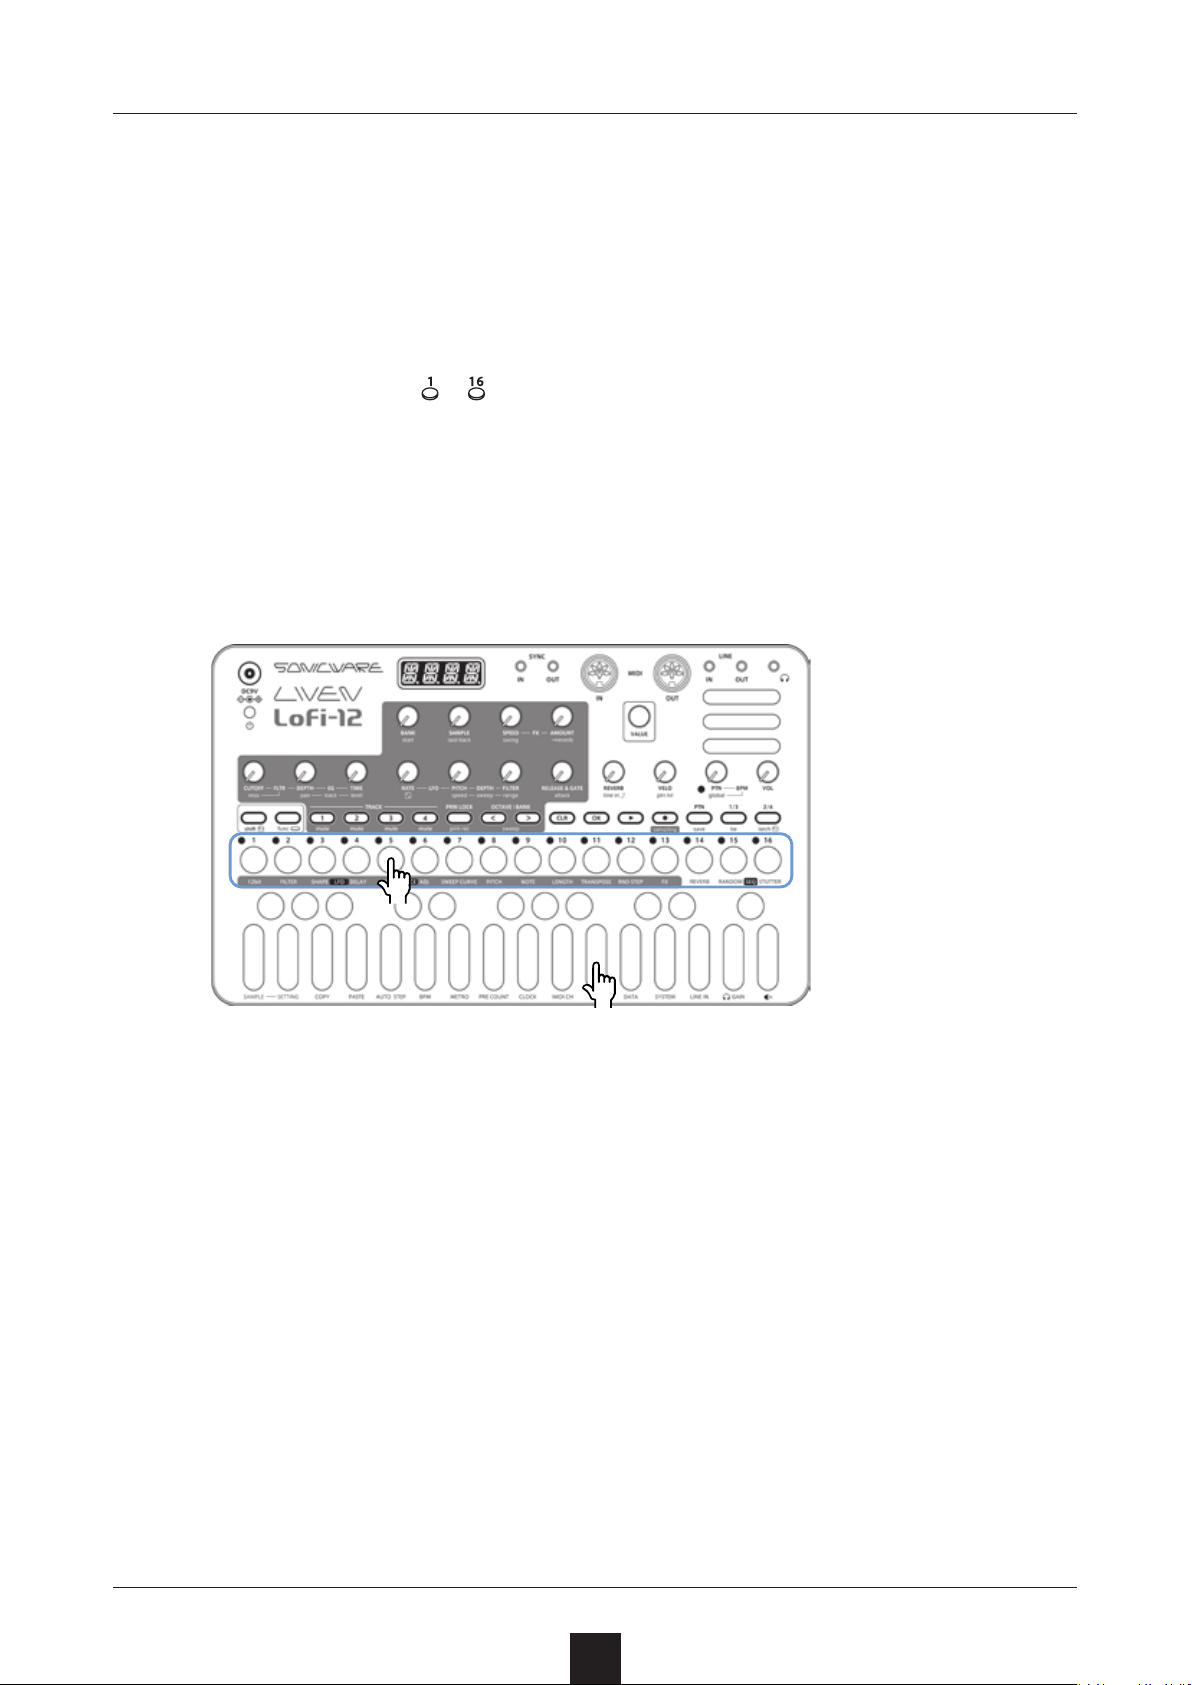
Creating sequences – Direct recording
With direct recording, notes can be input on steps directly when both
stopped and playing back.
This is particularly suitable for building up sequences while performing by directly inputting notes during playback.
Basic operations
for the position where you want to input a
Press and hold
1
note
Play a note on the keyboard to input it at the step.
2
Notes can also be input if procedures 1 and 2 are done in re-
verse order.
–
●❶
●❷
57
Page 58
Creating sequences – Direct recording
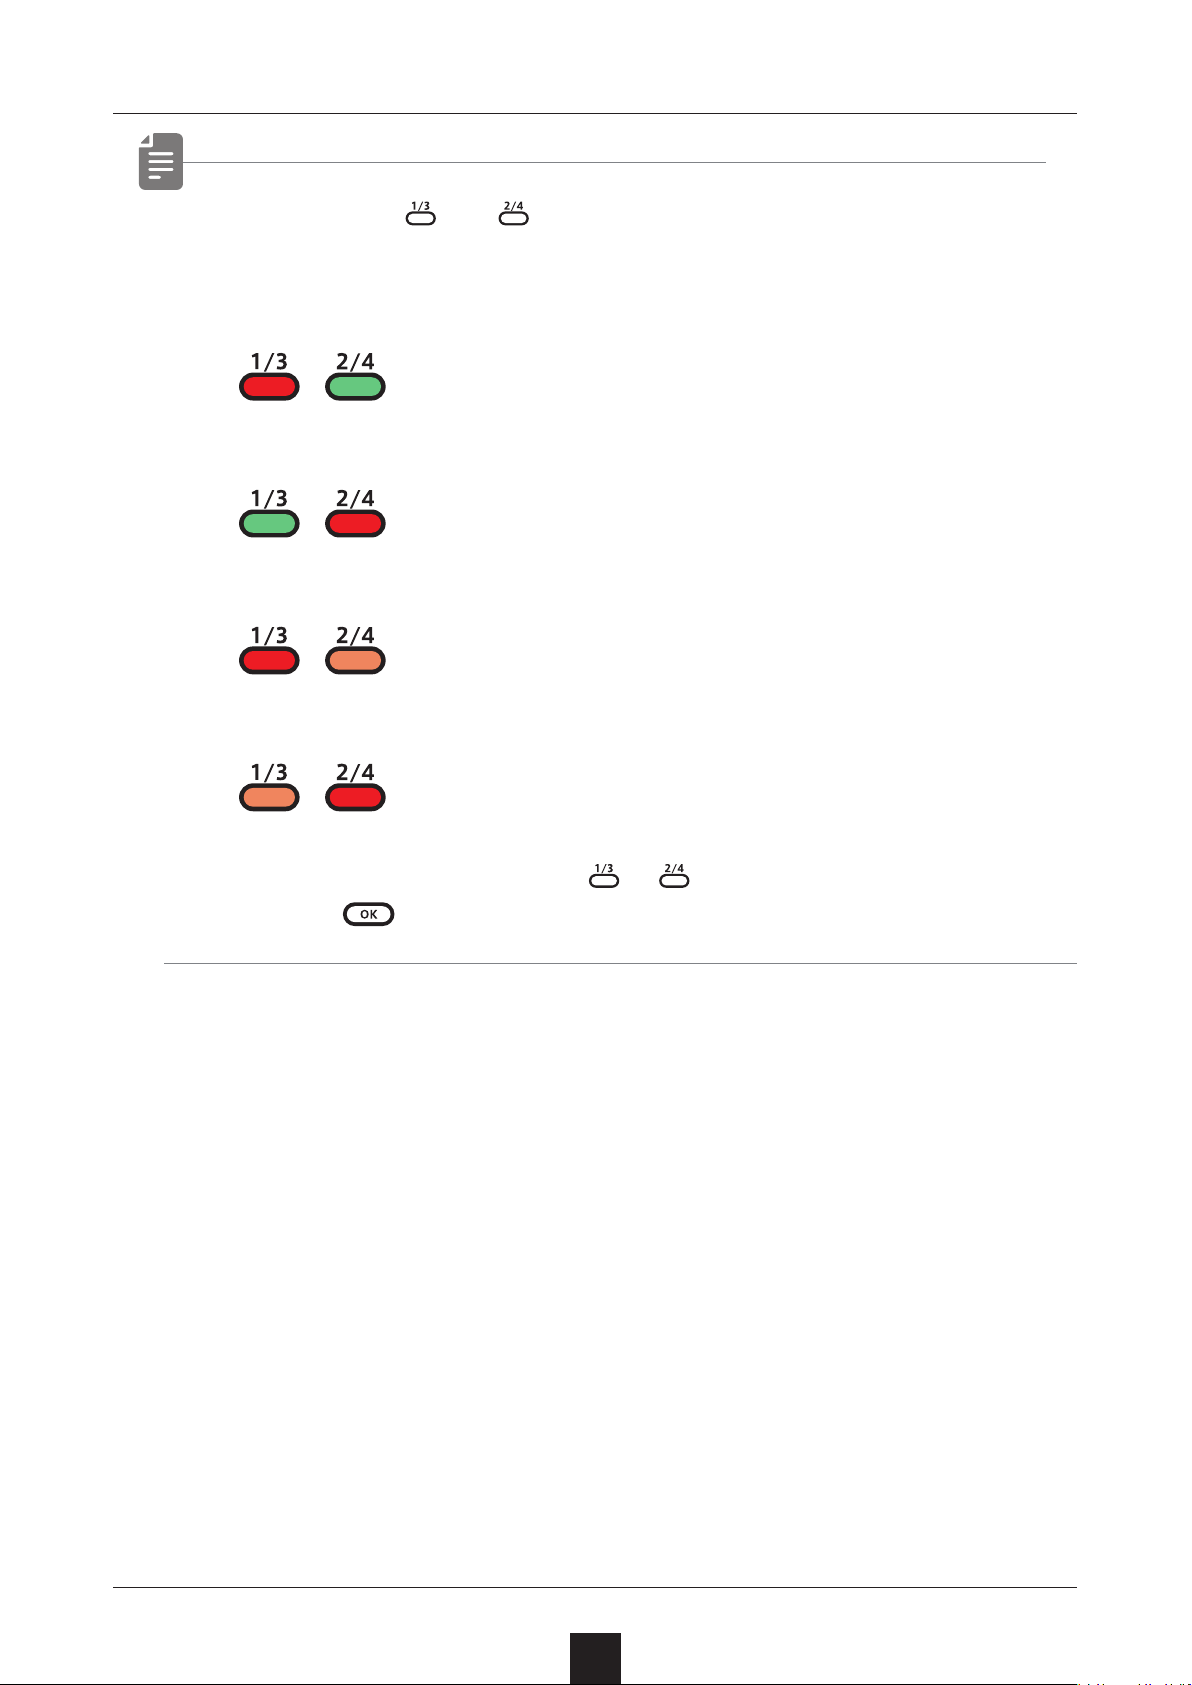
• By pressing and before procedure 1, pages with steps 17
and higher can be selected.
To select steps 1–16, press the 1/3 button.
To select steps 17–32, press the 2/4 button.
To select steps 33–48, press the 1/3 button twice.
To select steps 49–64, press the 2/4 button twice.
• During playback, pressing or will lock the page shown.
Press
to unlock the page.
58
Page 59
Creating sequences – Groove settings
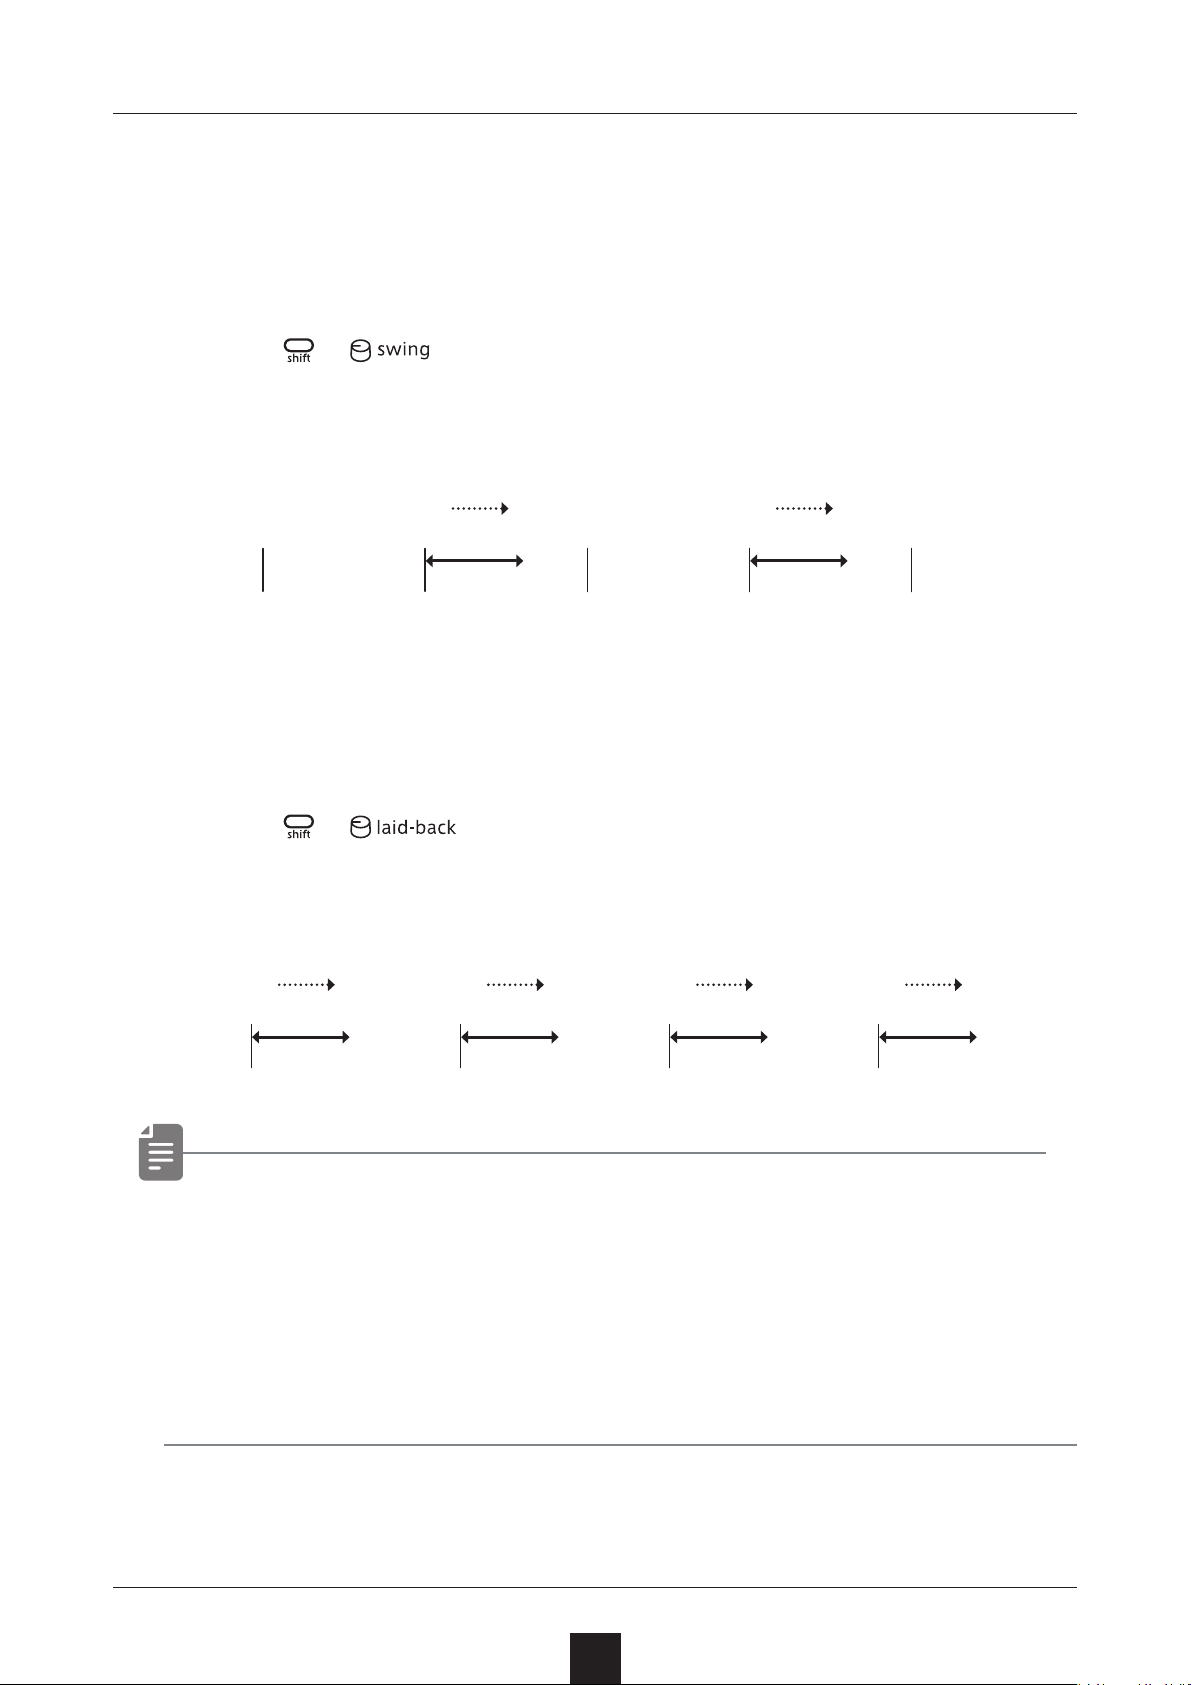
The Lo-12 includes a swing function for creating oset rhythms
and a laid-back function for delaying the timing of sample sounds.
Setting the swing
Turn +
1
Every even step (2nd, 4th, 6th, etc.) will be delayed.
Step 1 2
♪
This setting can be made separately for each track.
to adjust it.
♪ ♪
0 – 75%
3 4
♪
♪ ♪
0 – 75%
5
♪
Setting the laid-back function
Turn +
1
This delays the timings of entire samples for the selected track.
to adjust it.
Step 1
♪ ♪
0 – 127 (about 94 msec)
• The timings of sounds can be changed independently for each
step using the parameter locking function.
The sound locking function can be used to create a drum track
that has multiple samples on a single track, and these functions can be used to freely set the timing of bass drum and
snare sounds, for example.
2
♪ ♪
0 – 127 (about 94 msec)
3
♪ ♪
0 – 127 (about 94 msec)
4
♪ ♪
0 – 127 (about 94 msec)
59
Page 60
Parameter locking
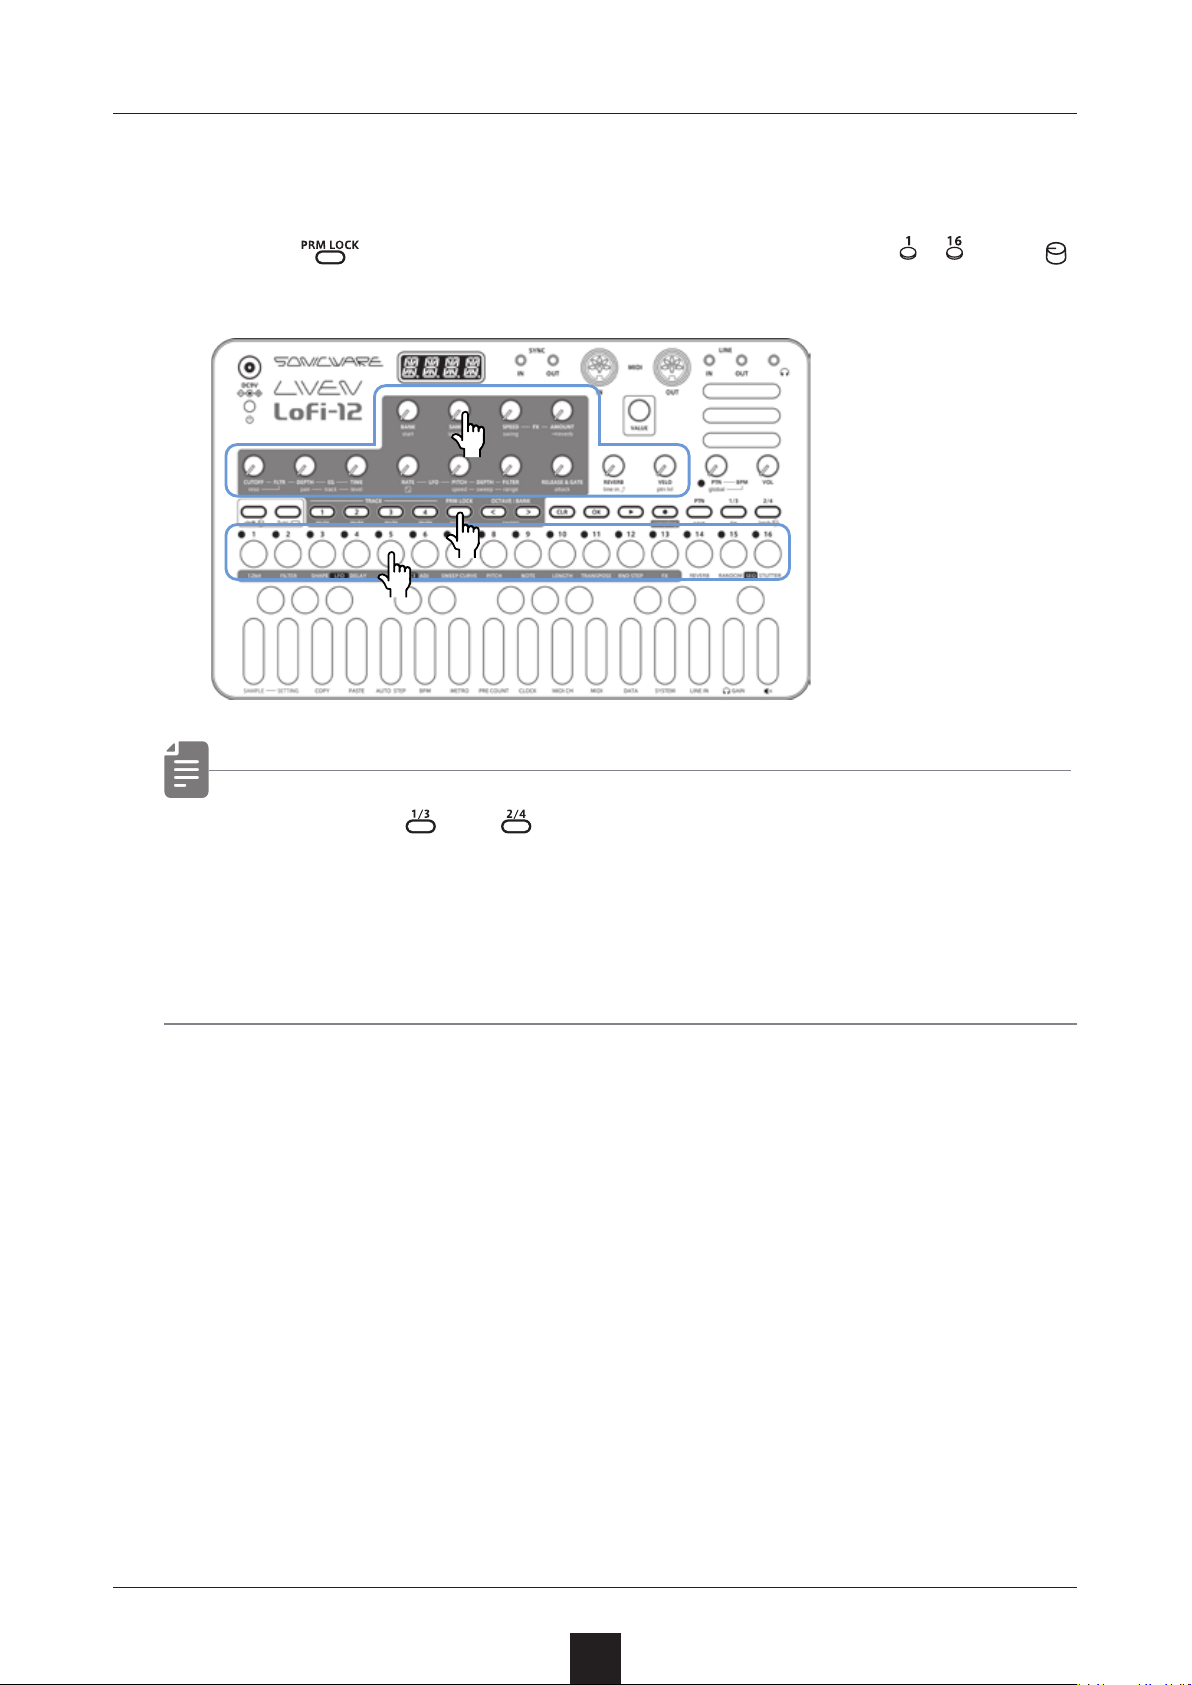
The Lo-12 has a parameter locking function that can record knob
operations to steps.
This allows sounds to be changed over time and is useful for creating patterns with great expressiveness.
Parameter locking data can be input in the following three ways.
Direct input
Turn knobs while pressing – in this fundamental method of
direct input.
Real-time input
Record the operation of knobs during playback in real-time in this
method.
Sound locking input
When recording notes to steps by pressing keys on the keyboard, the state of the sound currently playing is simultaneously
recorded to the step as parameter lock data in this input method.
Basic parameter locking operations
Turning parameter locking on
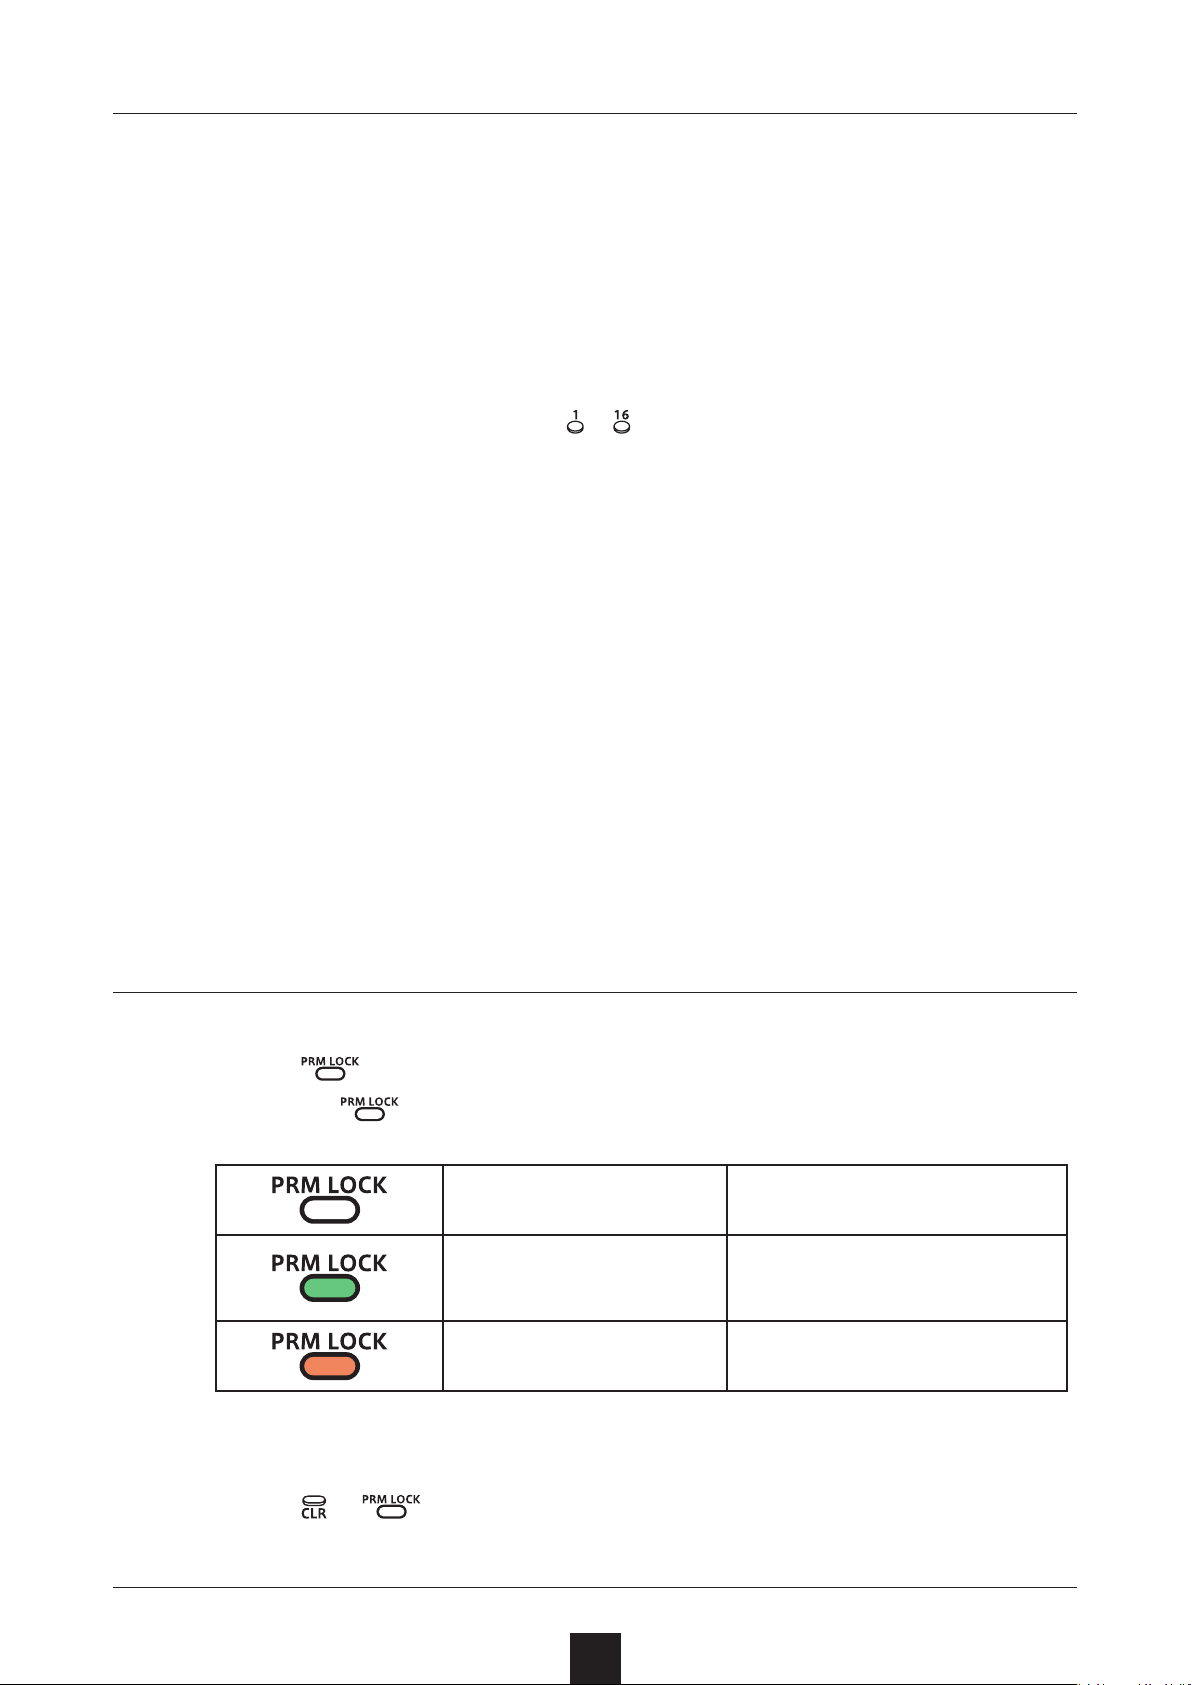
Press .
1
Pressing
cycles through the following states.
Parameter locking o
Parameter locking on
Parameters do not change
automatically
Parameters change automati
cally based on parameter lock
data
-
Sound locking on
Clearing parameter lock data
Press
1
This clears parameter lock data.
+ .
60
Sound lock recording enabled
( → P.63)
Page 61
Parameter locking – Direct input
Turning parameter
locking on
1
Press
(lights green).
●❷
●❶
●❷
Recording knob operations
While pressing
2
knobs.
–
, turn
• By pressing and before procedure 2, pages with steps
17 and higher can be selected.
• Parameter locking cannot be used on REVERB, line in ↑ , ptn
level, PTN BPM, global BPM and VOL.
61
Page 62
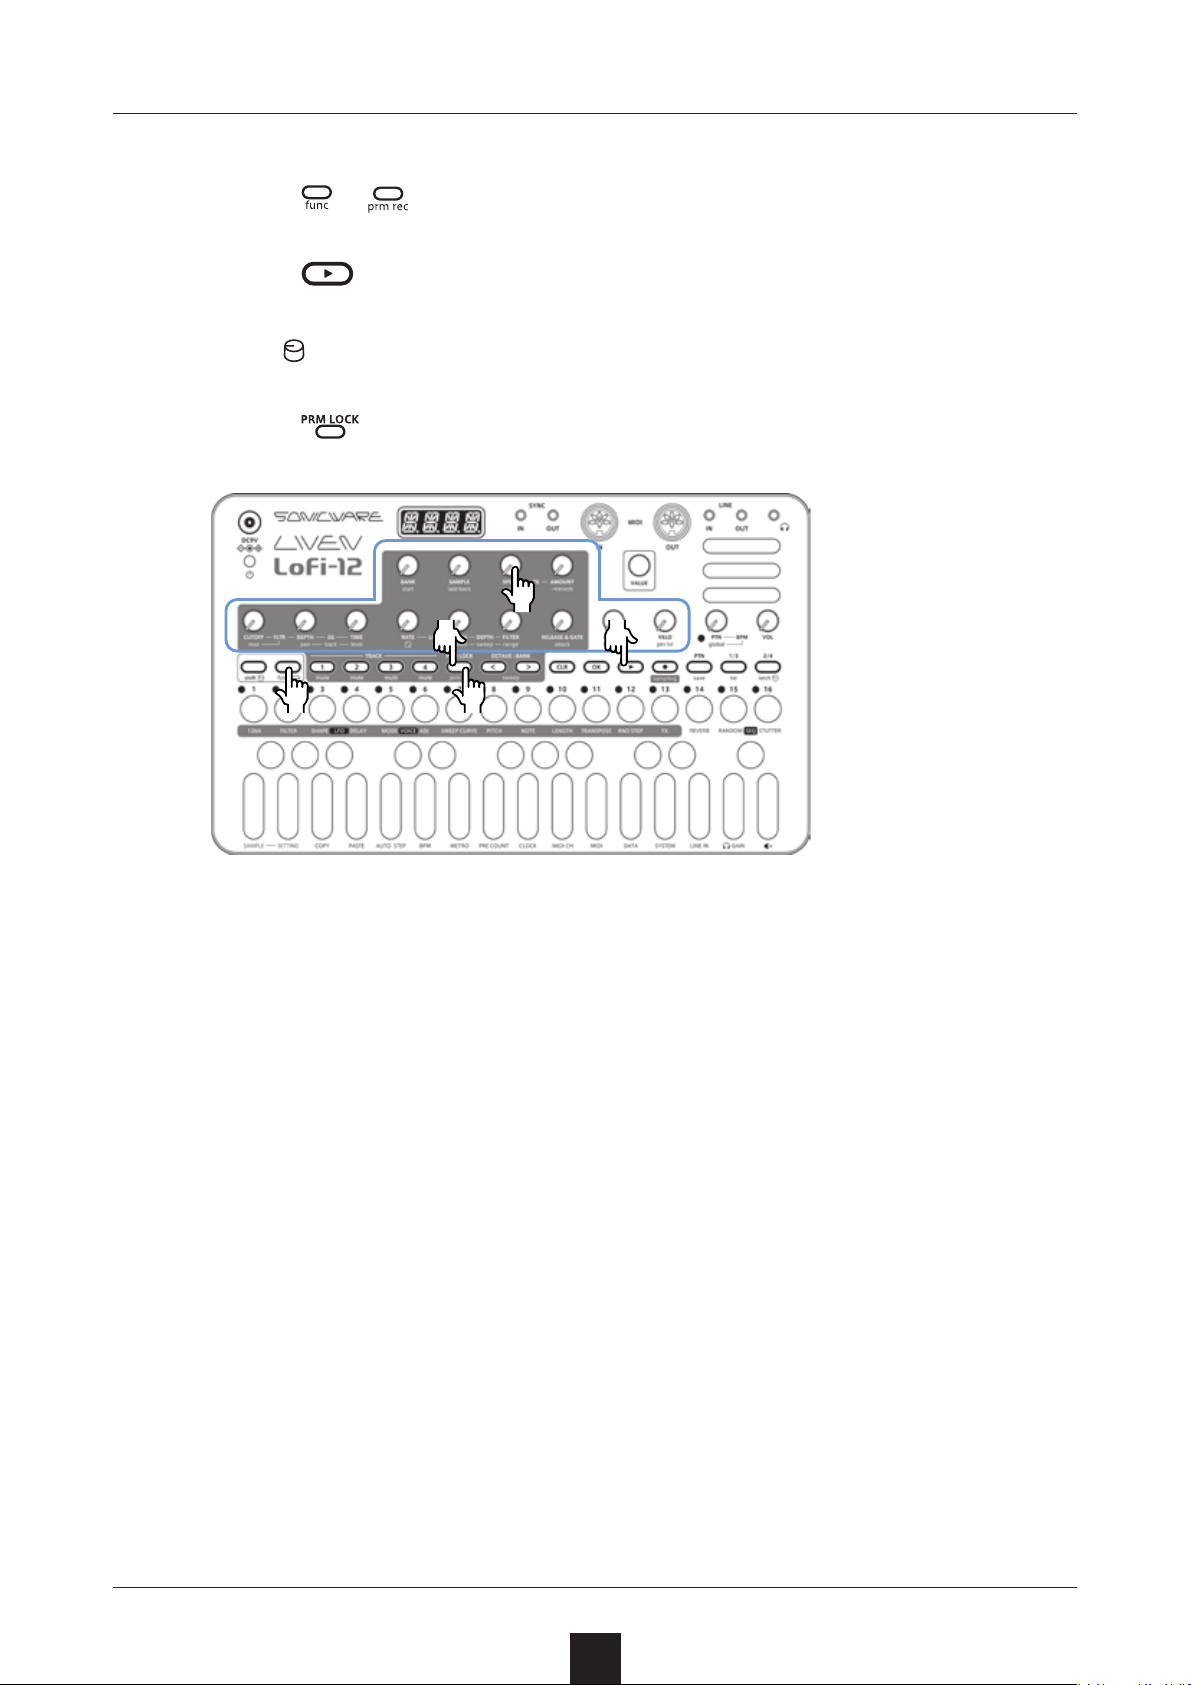
Parameter locking – Real-time input
Inputting in real time (parameter recording)
Press +
1
Press to play the pattern.
2
Turn
3
Press , making it light green, to end real-time input.
4
knobs and record the changes.
(lights red).
●❷●❹
●❸
●❶●❶
62
Page 63
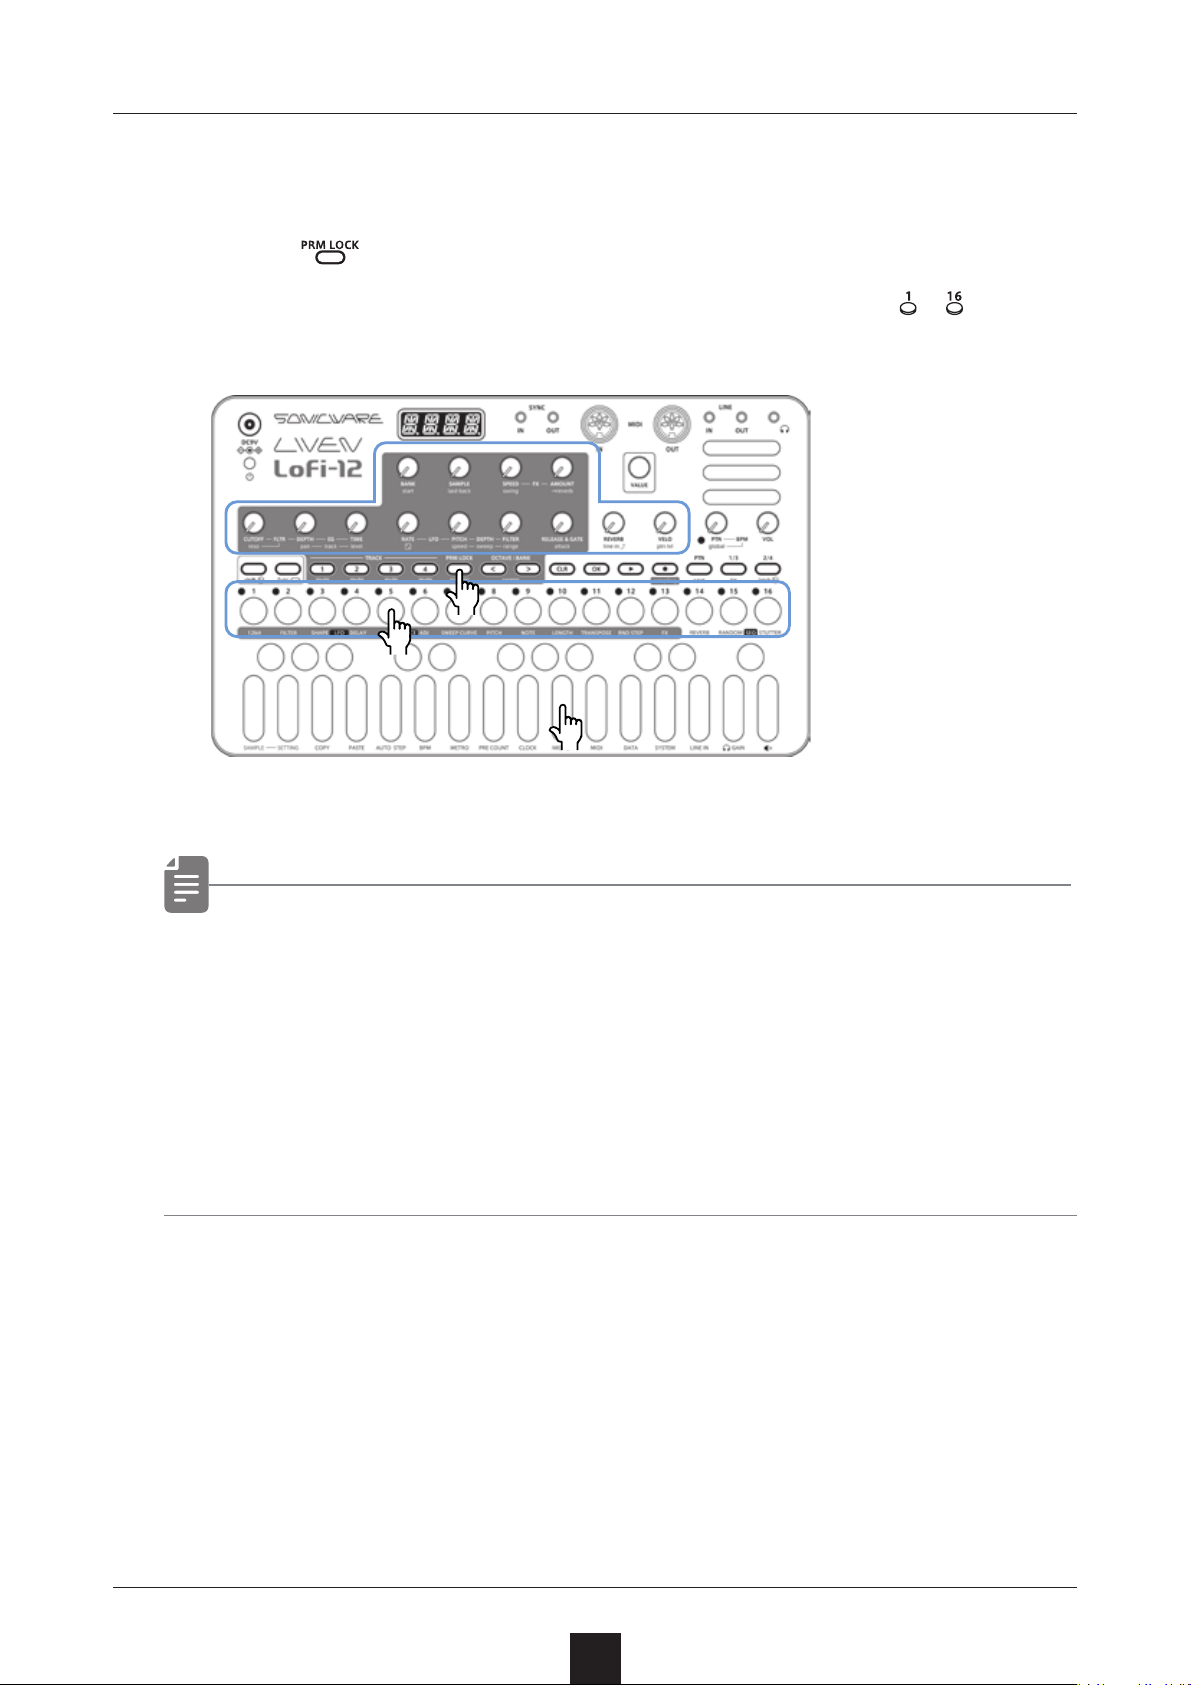
Parameter locking – Sound locking input
Turning sound
locking on
Press twice
1
(lights orange).
●❷
●❶
Recording note input and parameter lock data at the same time
While pressing
2
the keyboard.
–
, play
●❷
• In procedure 2, direct recording is used for note input. The
sound locking function can also be used with step recording
and real-time recording in the same manner.
• The parameter lock data that is recorded using the sound locking function includes BANK, SAMPLE, start, RELEASE & GATE
and attack.
63
Page 64
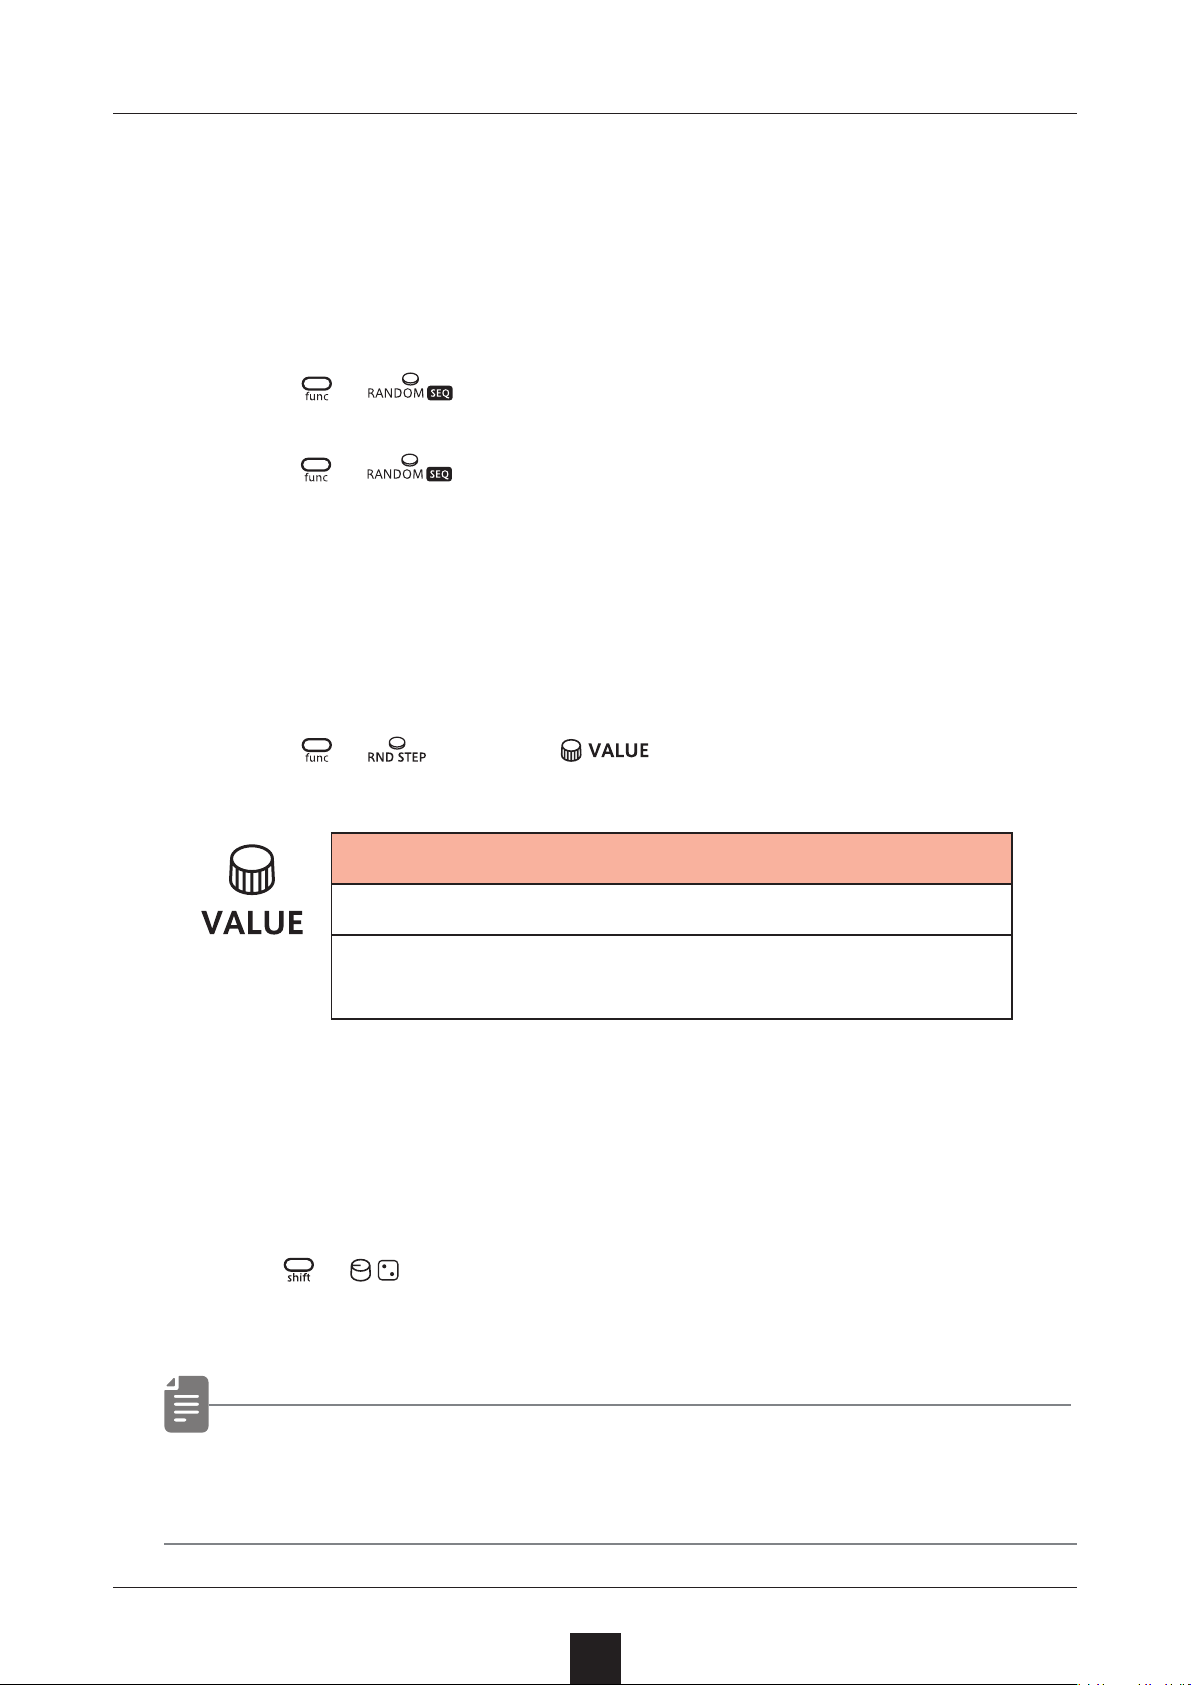
Sequence eects
The Lo-12 has sequence eect functions, including Dice that sets
the probability of notes sounding, Random that can randomize phrases, and Stutter that repeats playback of pressed steps.
Random
Press + .
1
When this is on, a randomized sequence will be played back
Press
+ again to turn the random function o.
Random settings
The smallest unit used for randomization during random playback can
be set (for example, 1 step or 4 steps).
Press
1
The random on/o setting is saved with the pattern, but random unit
+ , and use to adjust.
Random step unit
OFF, 1, 2, 4, 8, 16 (steps)
If set to OFF, randomization will not occur even if
the random playback function is on.
settings can be saved per track.
Dice
Turn + .
1
The probability of a note sounding can be set from 25 – 100% .
• The probability of notes sounding can be set independently for
each step using the parameter locking function.
64
Page 65
Sequence eects
Stutter
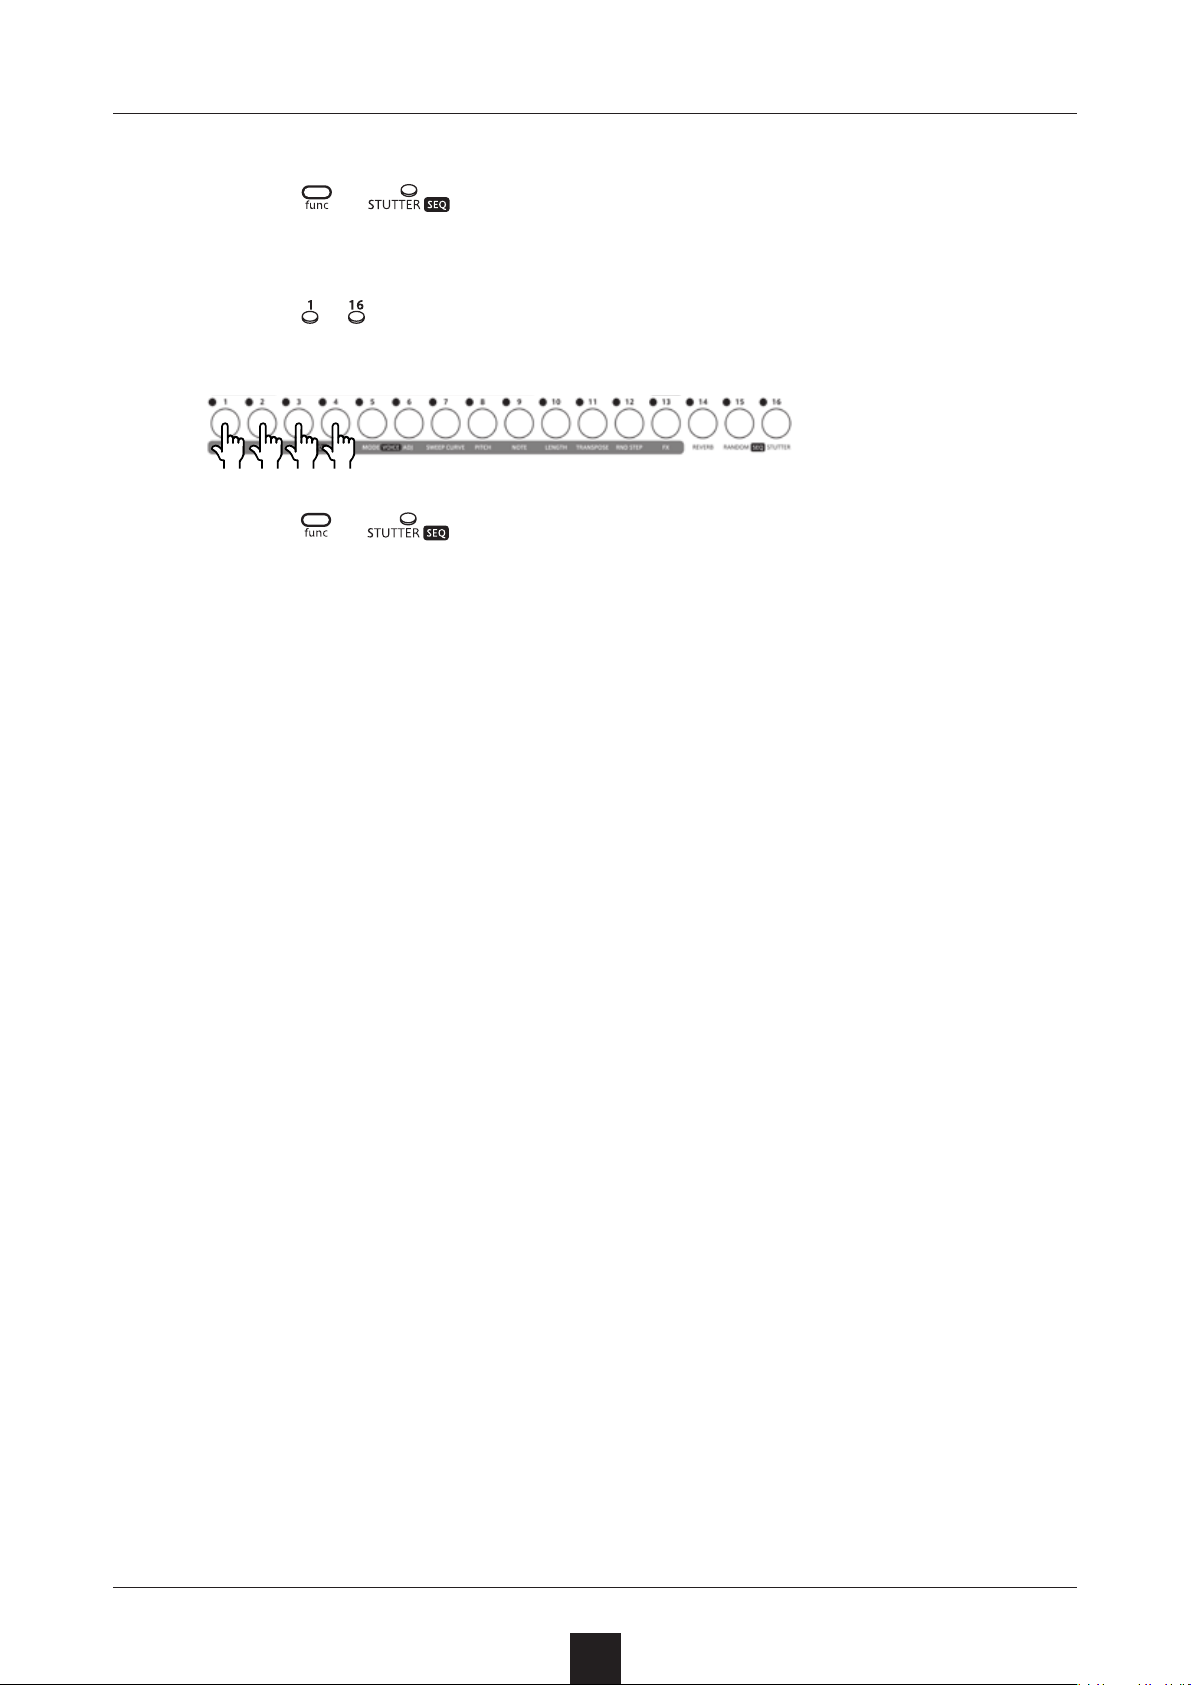
Press + .
1
Turning this on enables stutter mode.
Press
2
Only the pressed steps will be played.
Press
– .
+ again to turn stutter mode o.
65
Page 66
Deleting sequences
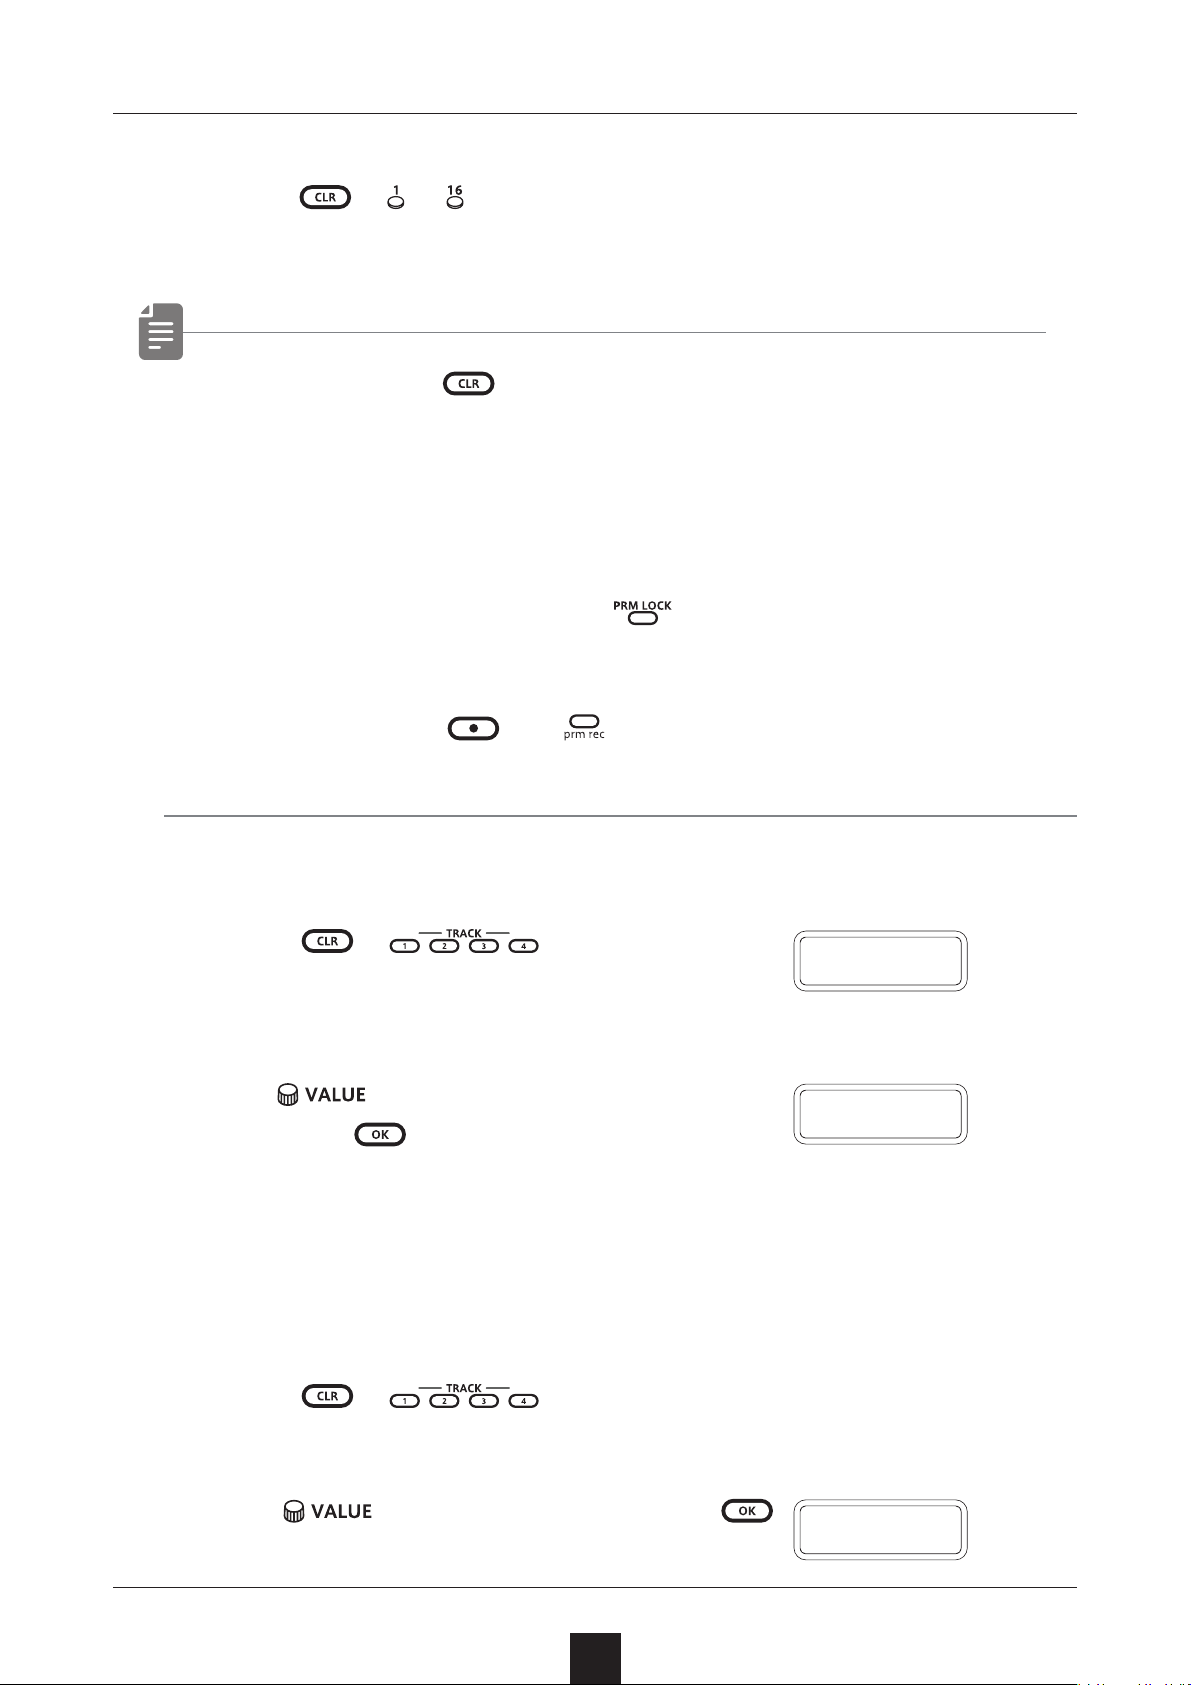
Clearing steps
Press + 〜
1
The note and parameter lock data from that step will be cleared.
• While pressing , steps that have parameter lock data blink
red.
• When recording notes (REC button lit red), only note data will
be cleared.
• When parameter recording (
data will be cleared.
• Normally, when
parameter data will be cleared.
.
lit red), only parameter lock
and buttons are lit red, both note and
Clearing all note data in a sequence
Press
1
the sequence to be cleared.
Use to select NOTE,
2
and press
This clears all notes on all steps of the sequence.
+ for the track with
.
N O T E
C L R
Restoring only track sounds to the last saved state
1
Press
stored.
+ for the track with the sound to be re-
Turn to select SND, and press
2
66
.
S N D
Page 67
Copying tracks
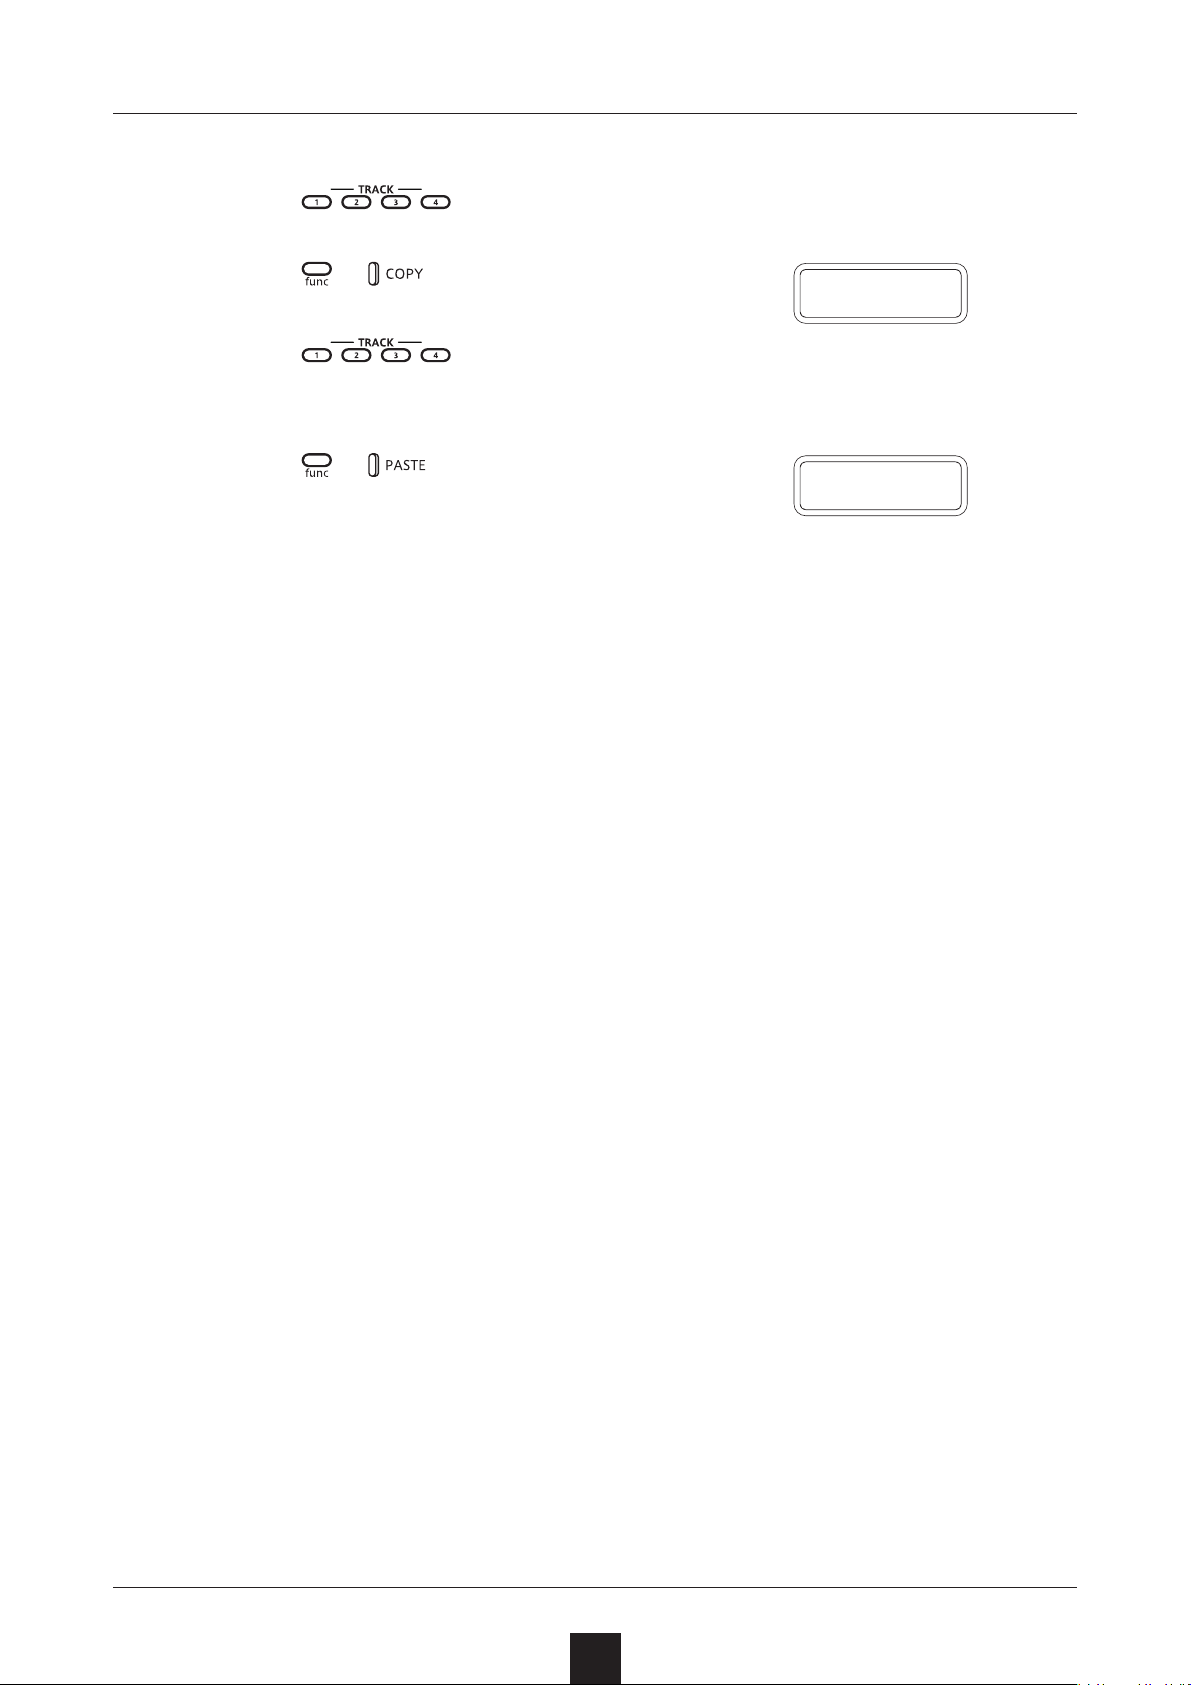
Copying tracks
Press to select the track of the pattern to be copied.
1
Press + .
2
C O P Y
Press
3
ed.
Press + .
4
to select the track for the pattern to be past-
D O N E
67
Page 68
Pattern saving
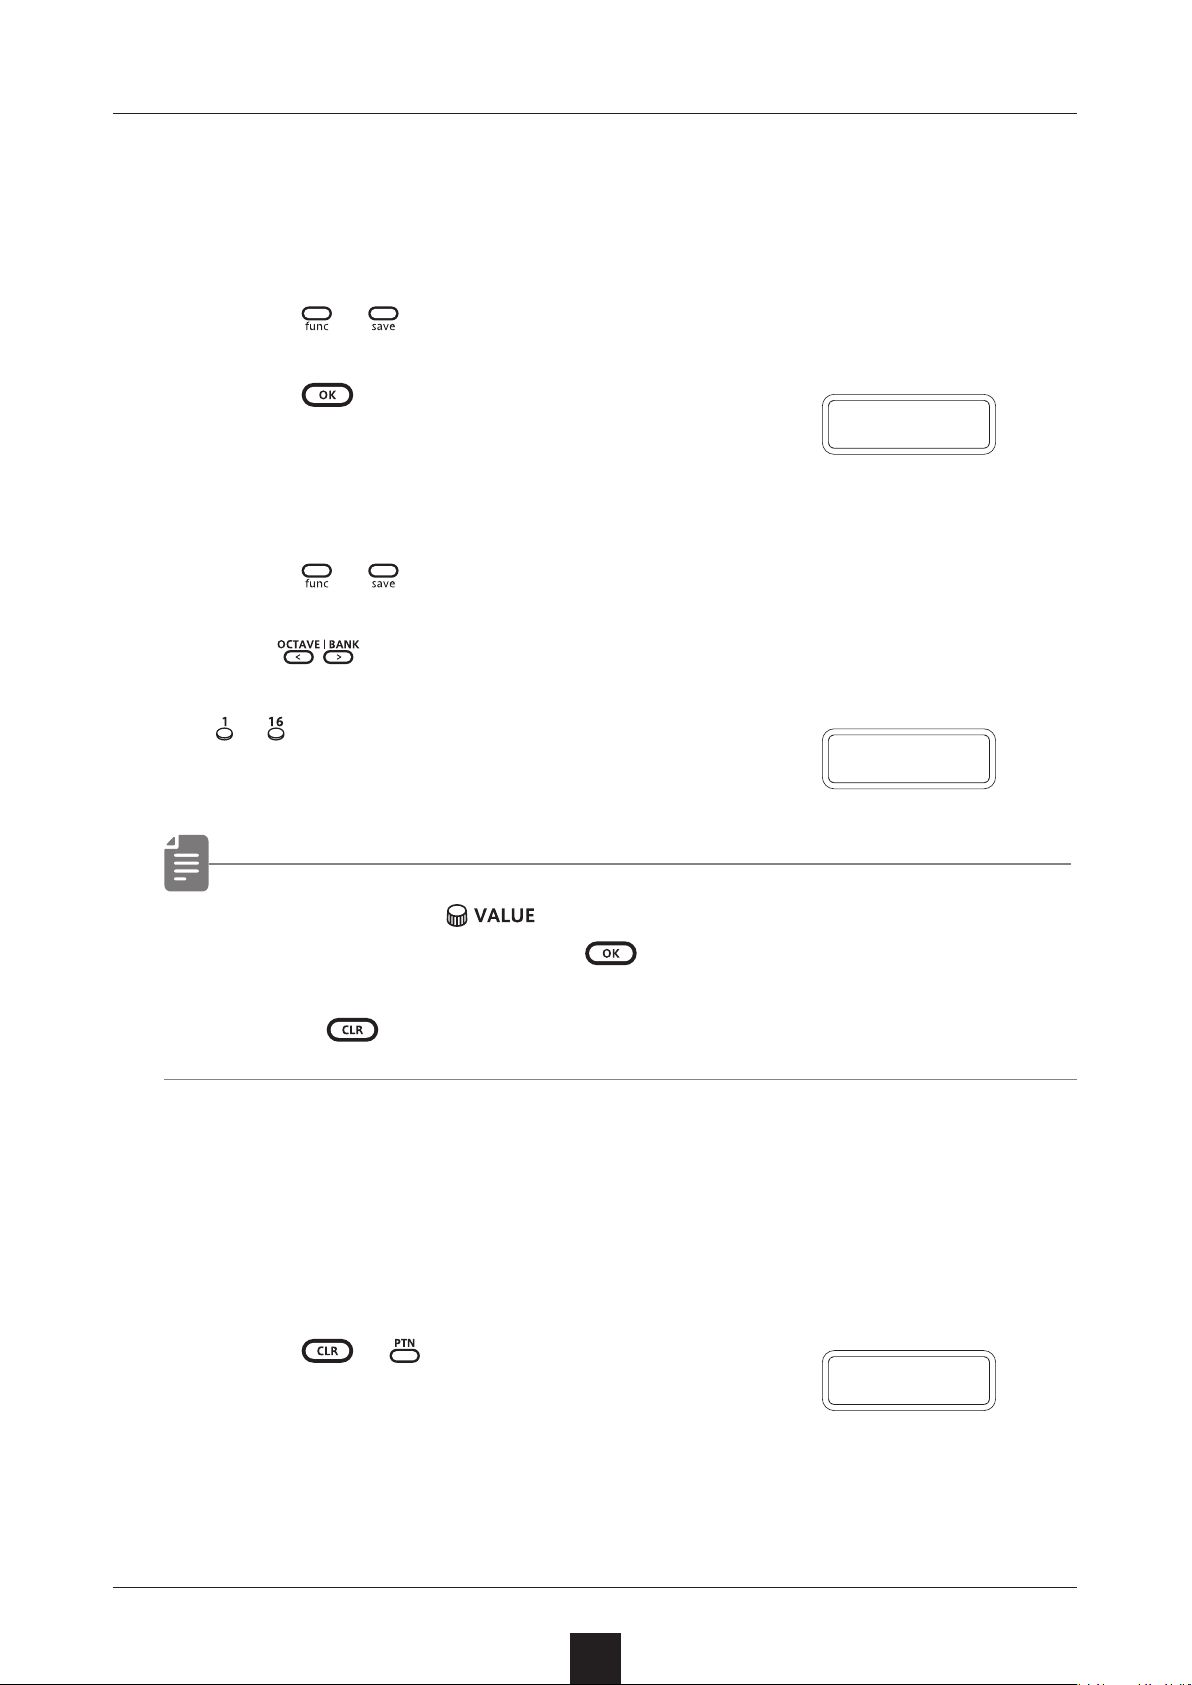
Sequences created on every track can be saved as patterns.
Saving patterns
Press + .
1
Press .
2
DONE will appear, and it will be saved.
Changing the save destination or copying the pattern
Press + .
1
Use to select the save destination bank.
2
D O N E
3
DONE will appear, and it will be saved.
• In procedure 2, can also be used to select the save
• Press during a procedure to cancel it.
to select the save destination pattern.
–
destination (execute with
Initializing patterns
Select the pattern to be initialized.
1
( → P.15)
D O N E
).
Press + .
2
CLR will be shown, and pattern settings
along with note and parameter lock data will all be cleared.
Save the pattern.
3
68
C L R
Page 69
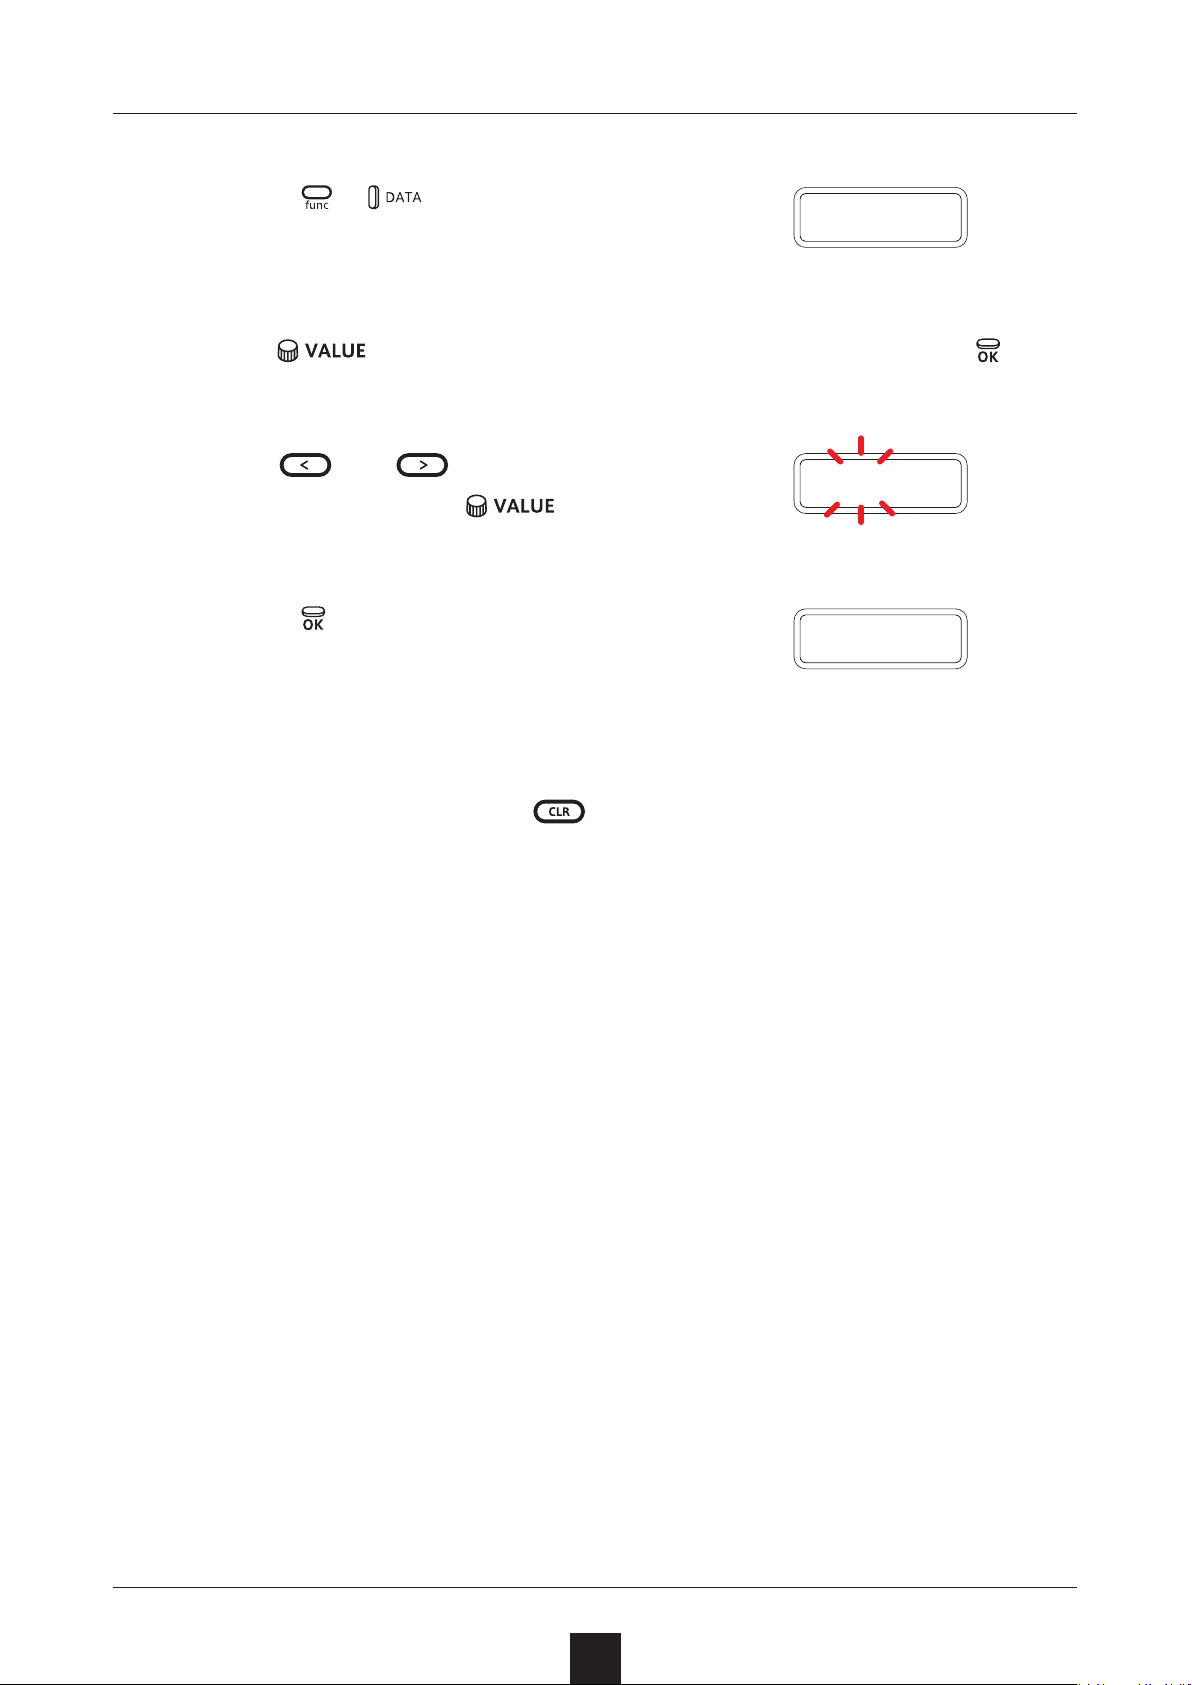
Pattern renaming
Renaming patterns
Press + multiple times to
1
select P.N.ED (pattern name editing).
Use to select the pattern for renaming, and press .
2
P.N.E D
Use
3
and right, and turn
characters.
Press .
4
This saves the name and returns to
pattern selection.
To rename other patterns,
repeat from procedure 2.
To end renaming, press
and to move the cursor left
to select
.
N A M E
Cursor position blinks
D O N E
69
Page 70
Tempo overview
The Lo-12 has two BPM modes.
Pattern BPM mode
Whenever a dierent pattern is selected, the BPM is reset using
the tempo saved in that pattern.
Global BPM mode
The current global BPM value will continue to be used even when
a dierent pattern is selected.
Select global BPM mode to maintain a consistent tempo during the
jam session. Use pattern BPM mode when you want the tempo to
change with each pattern.
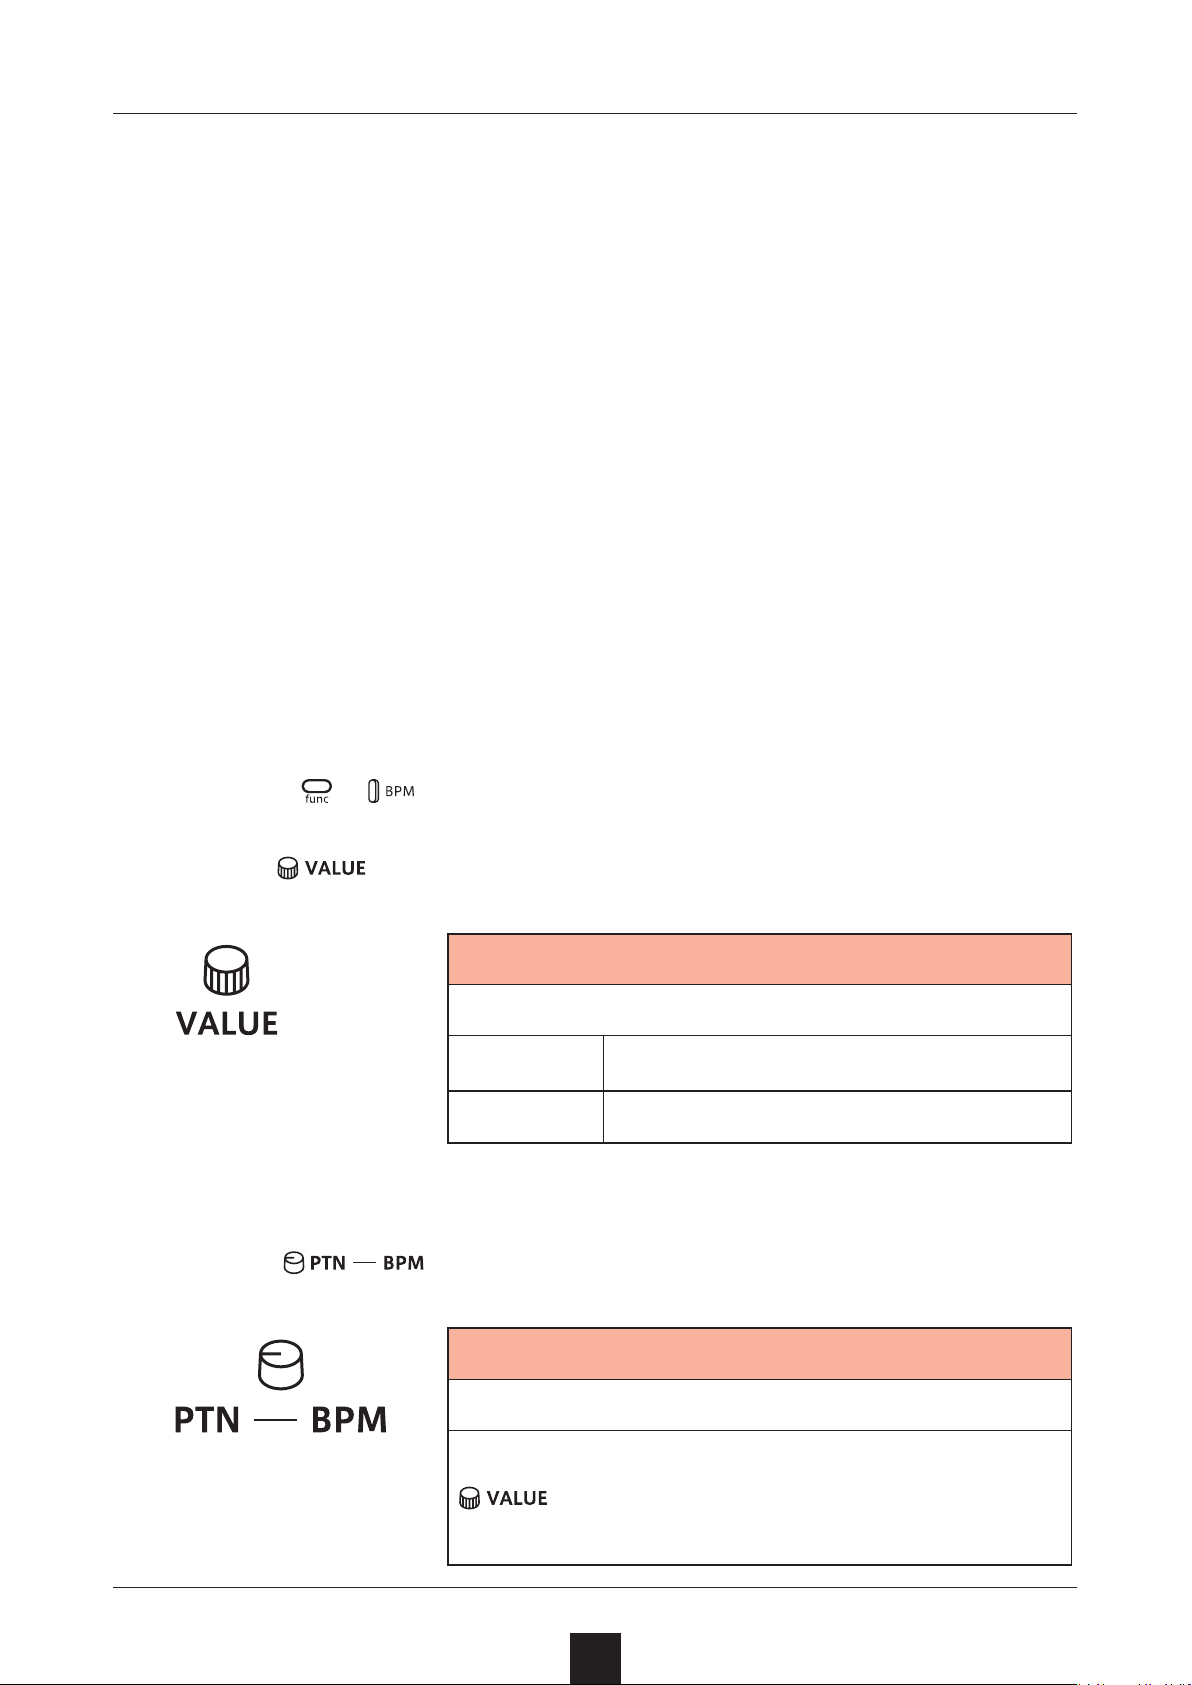
Setting the BPM mode
Press + .
1
Use to select the BPM mode.
2
BPM
BPM mode
PTN
GLBL
Setting the pattern BPM
1
Turn
.
Pattern BPM mode
Global BPM mode
Pattern BPM
40 – 250
When the tempo is shown on the display,
can be turned to change it in 0.1-beat
increments.
70
Page 71
Tempo overview
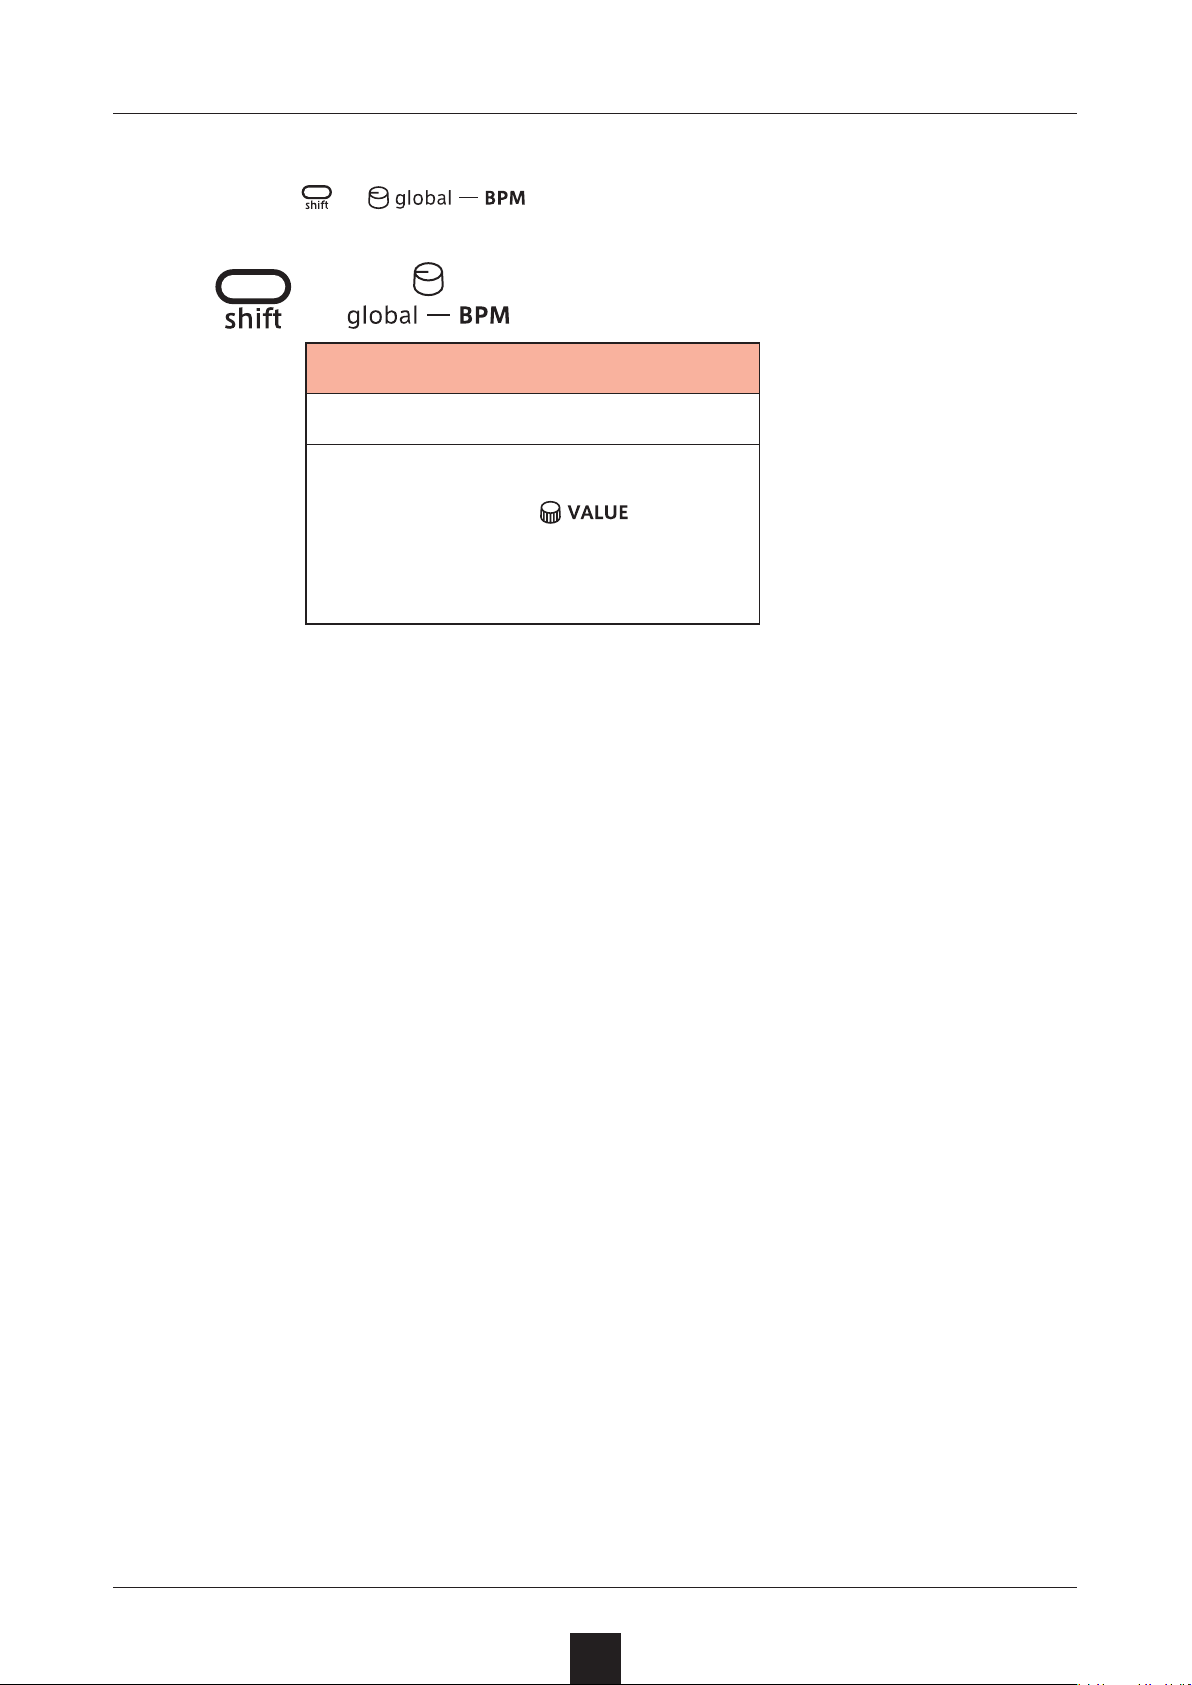
Setting the global BPM
Press + .
1
+
Global BPM
40 – 250
When the tempo is shown on
the display,
turned to change it in 0.1-beat
increments.
can be
71
Page 72

Clock synchronization with
external devices — Clock settings
Overview
The Lo-12 has the following synchronization capabilities.
SYNC
Use the SYNC IN/OUT jacks to connect and synchronize with devices that support SYNC (including the Korg Volca series).
MIDI
Use the MIDI IN/OUT jacks to connect and synchronize with devices that support MIDI.
Audio Sync
Use the LINE IN and headphone jacks to connect and synchronize with devices that support Audio Sync (including the Teenage Engineering Pocket Operator series).
When using Audio Sync, the audio exchanged will be mono.
The Lo-12 can act as a clock master or receive clock from an external device.
72
Page 73
Clock synchronization with
external devices — Clock settings
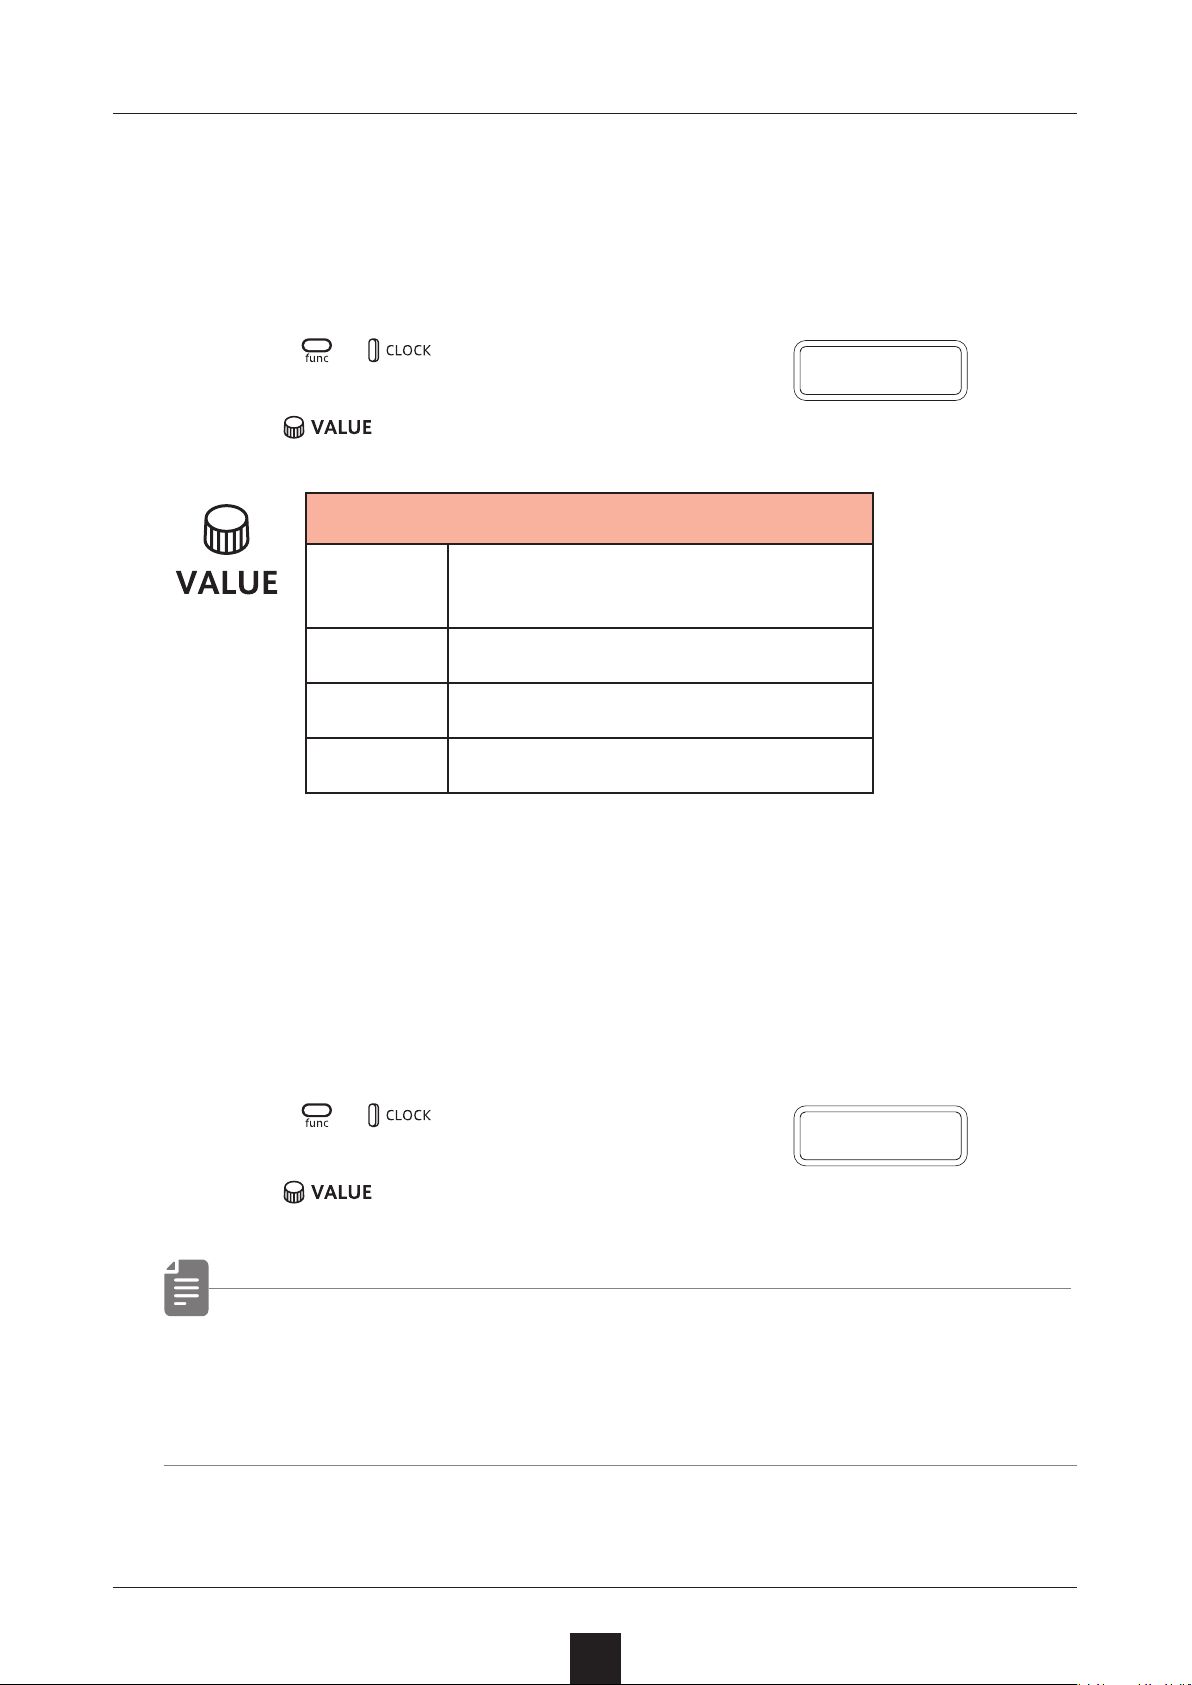
Setting the clock source
When set to INT (internal), the Lo-12 acts as a clock master.
When not set to INT, the external device will be treated as the clock
master.
Press + to select SRC.
1
Turn to set the clock source.
2
Clock Source
Use internal clock of LIVEN
INT
Lo-12
S R C
MIDI
SYNC
LN.IN
Use clock from MIDI IN
Use clock from SYNC IN
Use clock from LINE IN
Setting Audio Sync output
Audio Sync output uses the headphone jack.
For this purpose, make the following setting to use Audio Sync output.
1
2
Press
Turn
+ and select A.OUT.
A.O U T
to select ON.
• The sync signal will be output from the left channel and a mono
mix of the audio will be output from the right channel of the
headphone jack.
73
Page 74
Clock synchronization with
external devices — Clock settings
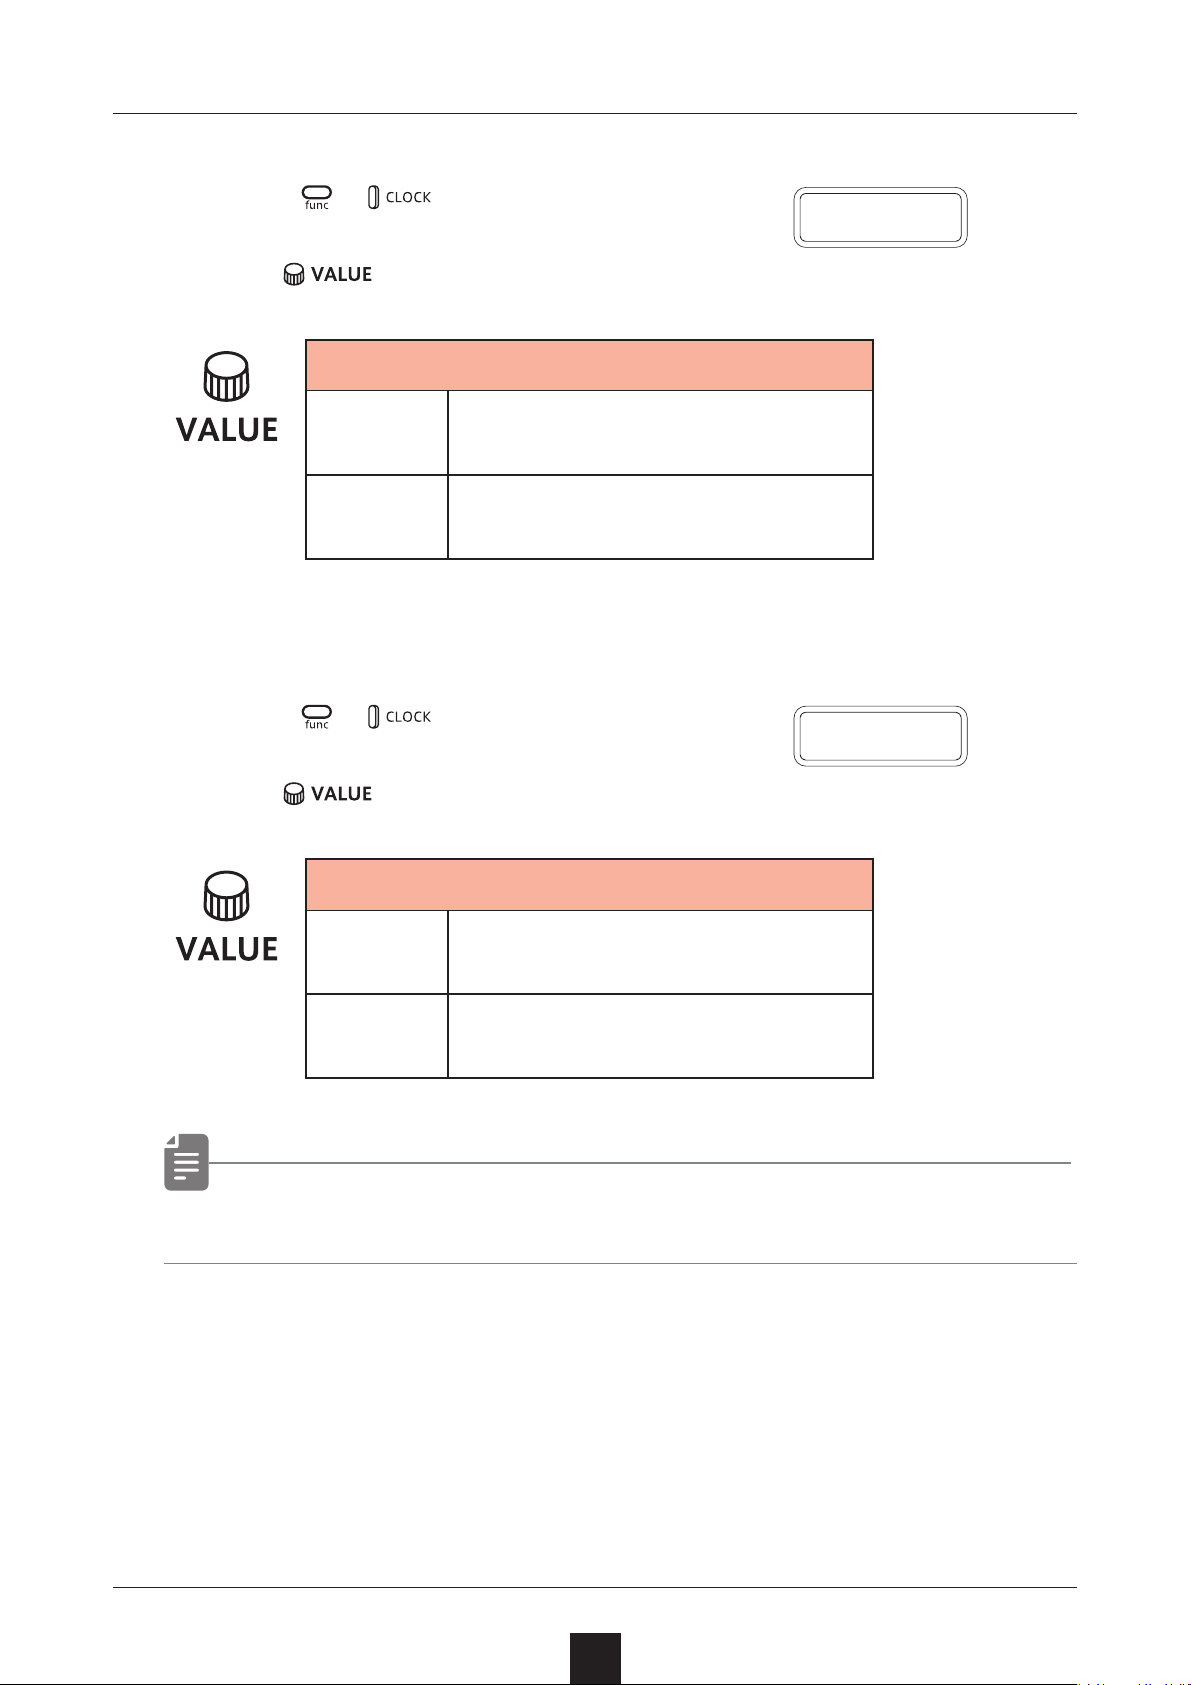
Setting SYNC IN polarity
Press + and select S.I.PO.
1
Turn to set the polarity.
2
Polarity – Sync In
Synchronize with falling of
FALL
RISE
sync signal
Synchronize with rising of
sync signal
S.I.P O
Setting SYNC OUT polarity
Press + and select S.O.PO.
1
Turn to set the polarity.
2
Polarity – Sync In
Synchronize with falling of
FALL
RISE
• See P. 78 for details about setting MIDI clock.
sync signal
Synchronize with rising of
sync signal
S.O.P O
74
Page 75
Clock synchronization with
external devices — Connection examples
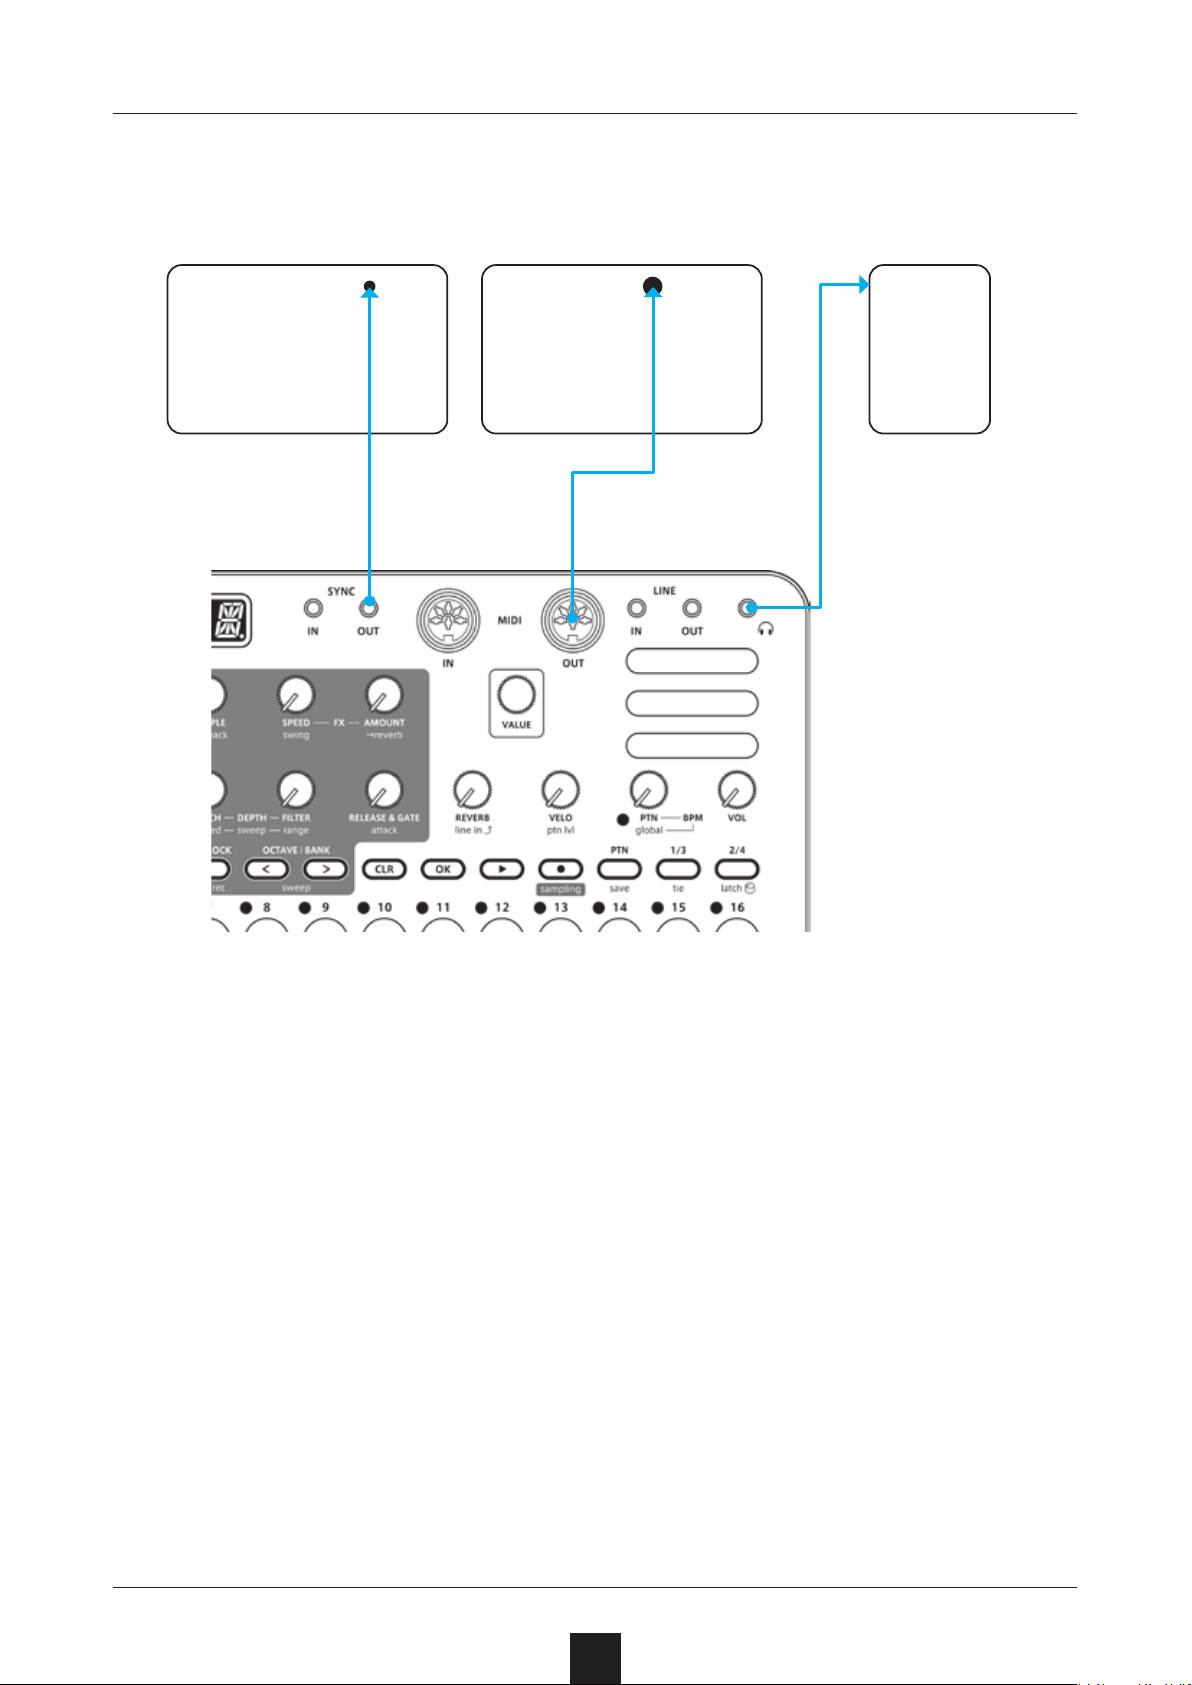
Lo-12 as clock master
SYNC IN
Volca series PO series
MIDI device
MIDI IN INPUT
TX.CK set to ON
( → P.79)
A.OUT set to ON
( → P.73)
SRC set to
INT
75
Page 76
Clock synchronization with
external devices — Connection examples
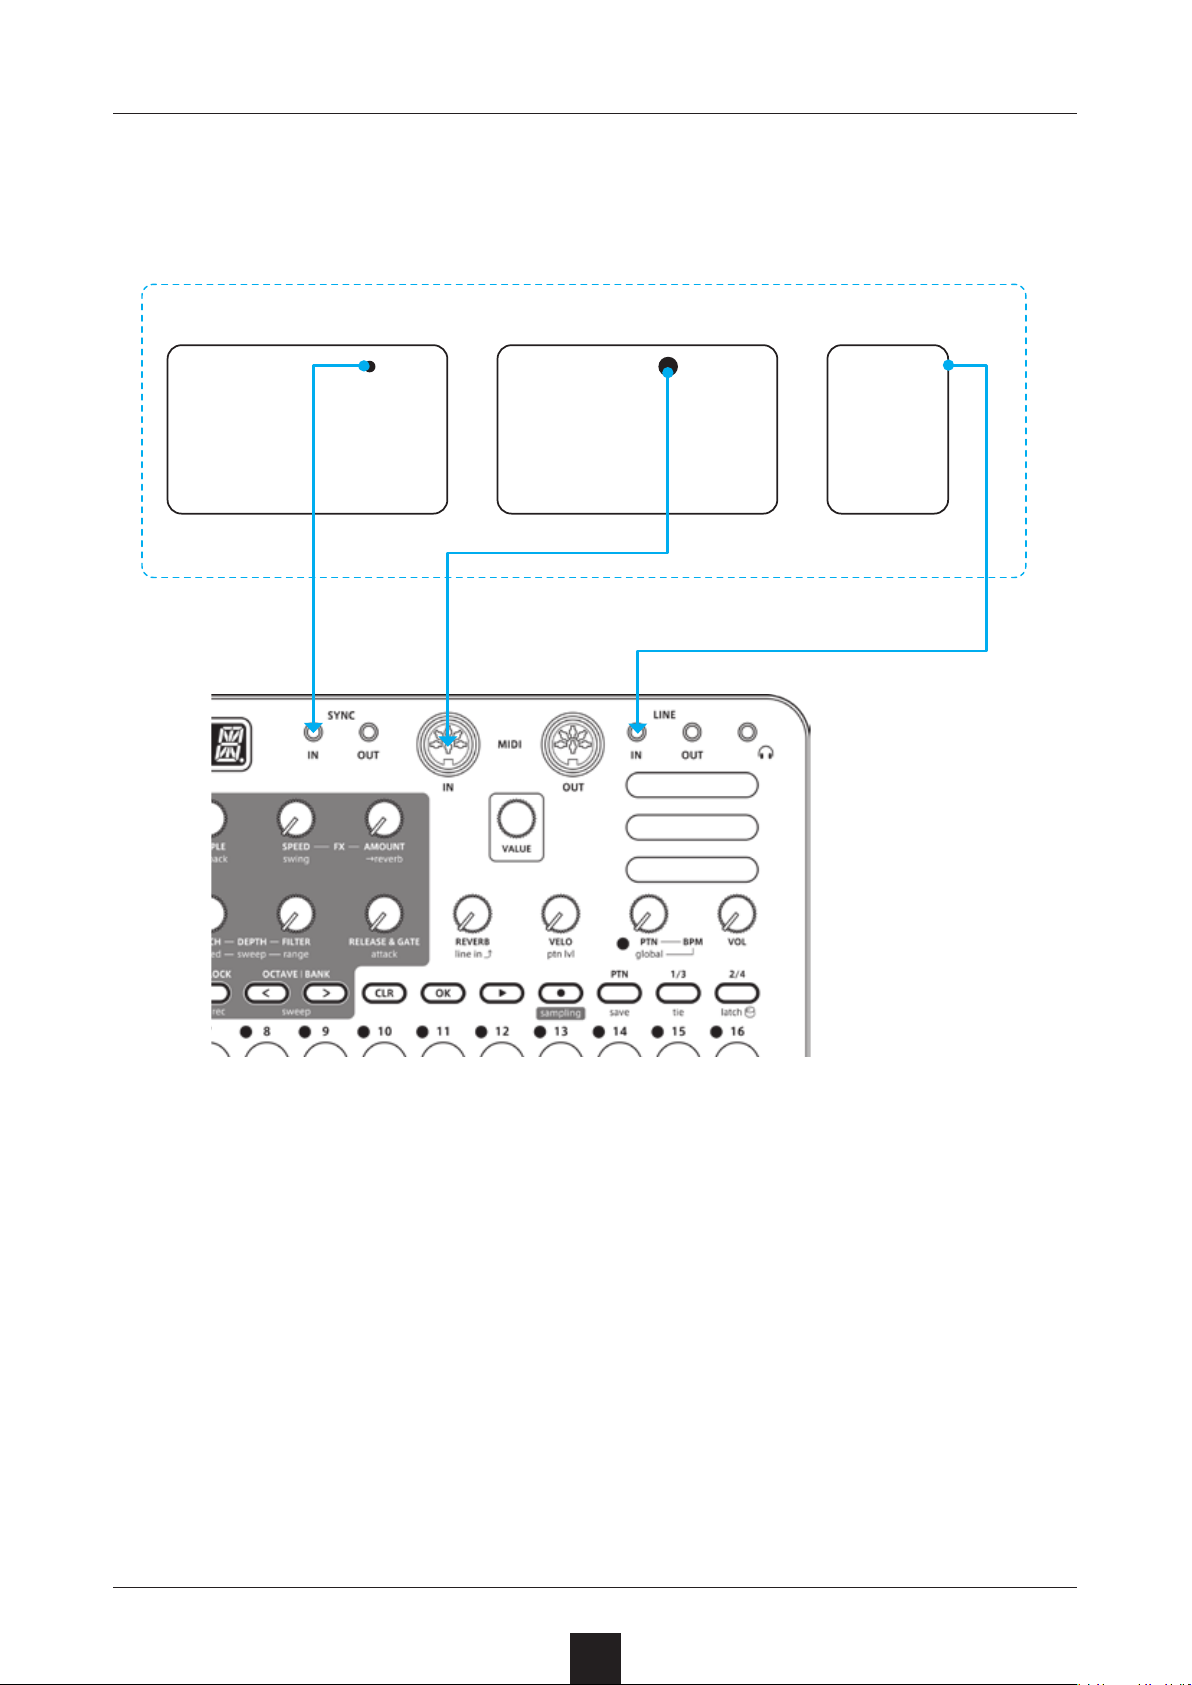
External device as clock master
Make only one device the clock master
Volca series
SYNC OUT
SRC set to
SYNC
SRC set to
MIDI
MIDI OUT
OUTPUT
oror
PO seriesMIDI device
SRC set to
LN.IN
76
Page 77
Clock synchronization with
external devices — Connection examples
Bridging clock signals to a dierent
connector from an external device acting as
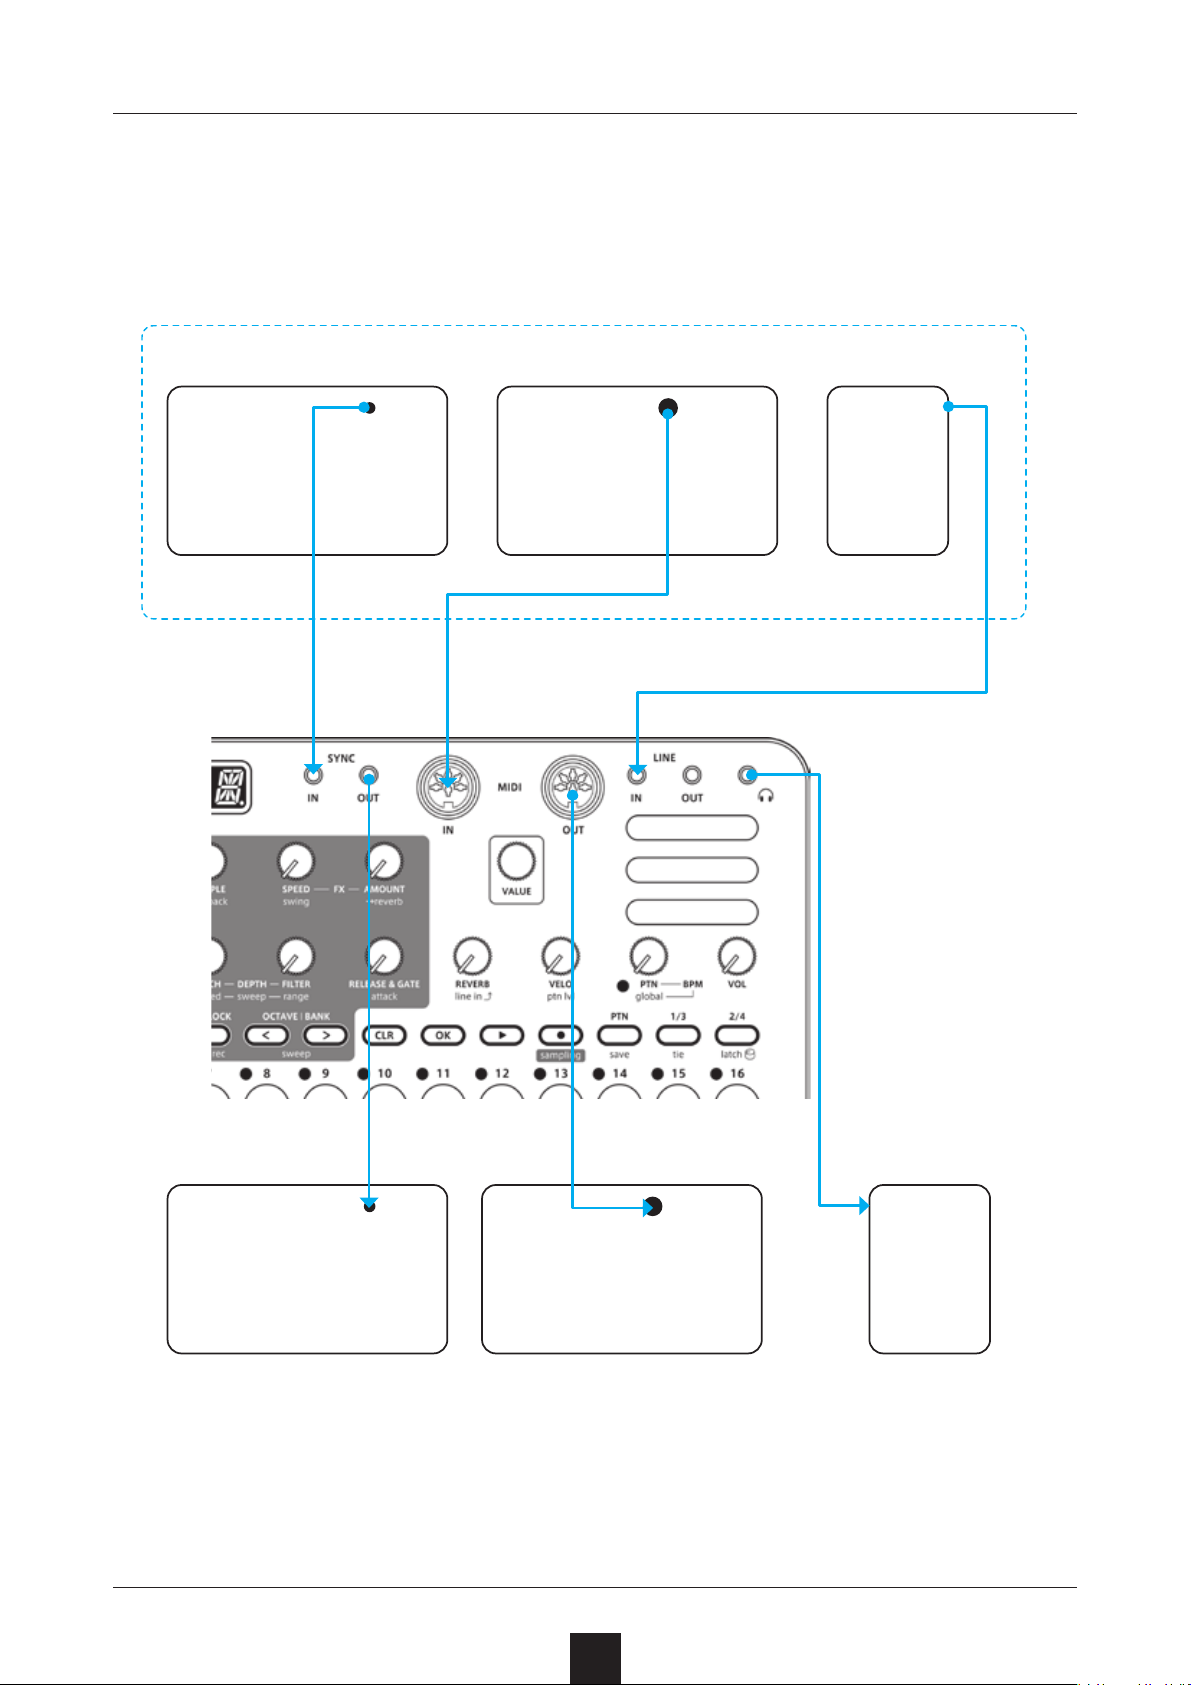
the clock master
Make only one device the clock master
Volca series
SYNC OUT
SRC set to
SYNC
MIDI device
SRC set to
MIDI
MIDI OUT
OUTPUT
oror
PO series
SRC set to
LN.IN
A.OUT set to ON
( → P.73)
SYNC IN
Volca series
TX.CK set to ON
( → P.79)
MIDI device
MIDI IN
INPUT
PO series
Using the bridging function, it is possible to synchronize devices with
dierent connectors. For example, a Pocket Operator acting as a clock
master can be used to synchronize a Volca or MIDI device connected to
the Lo-12.
77
Page 78
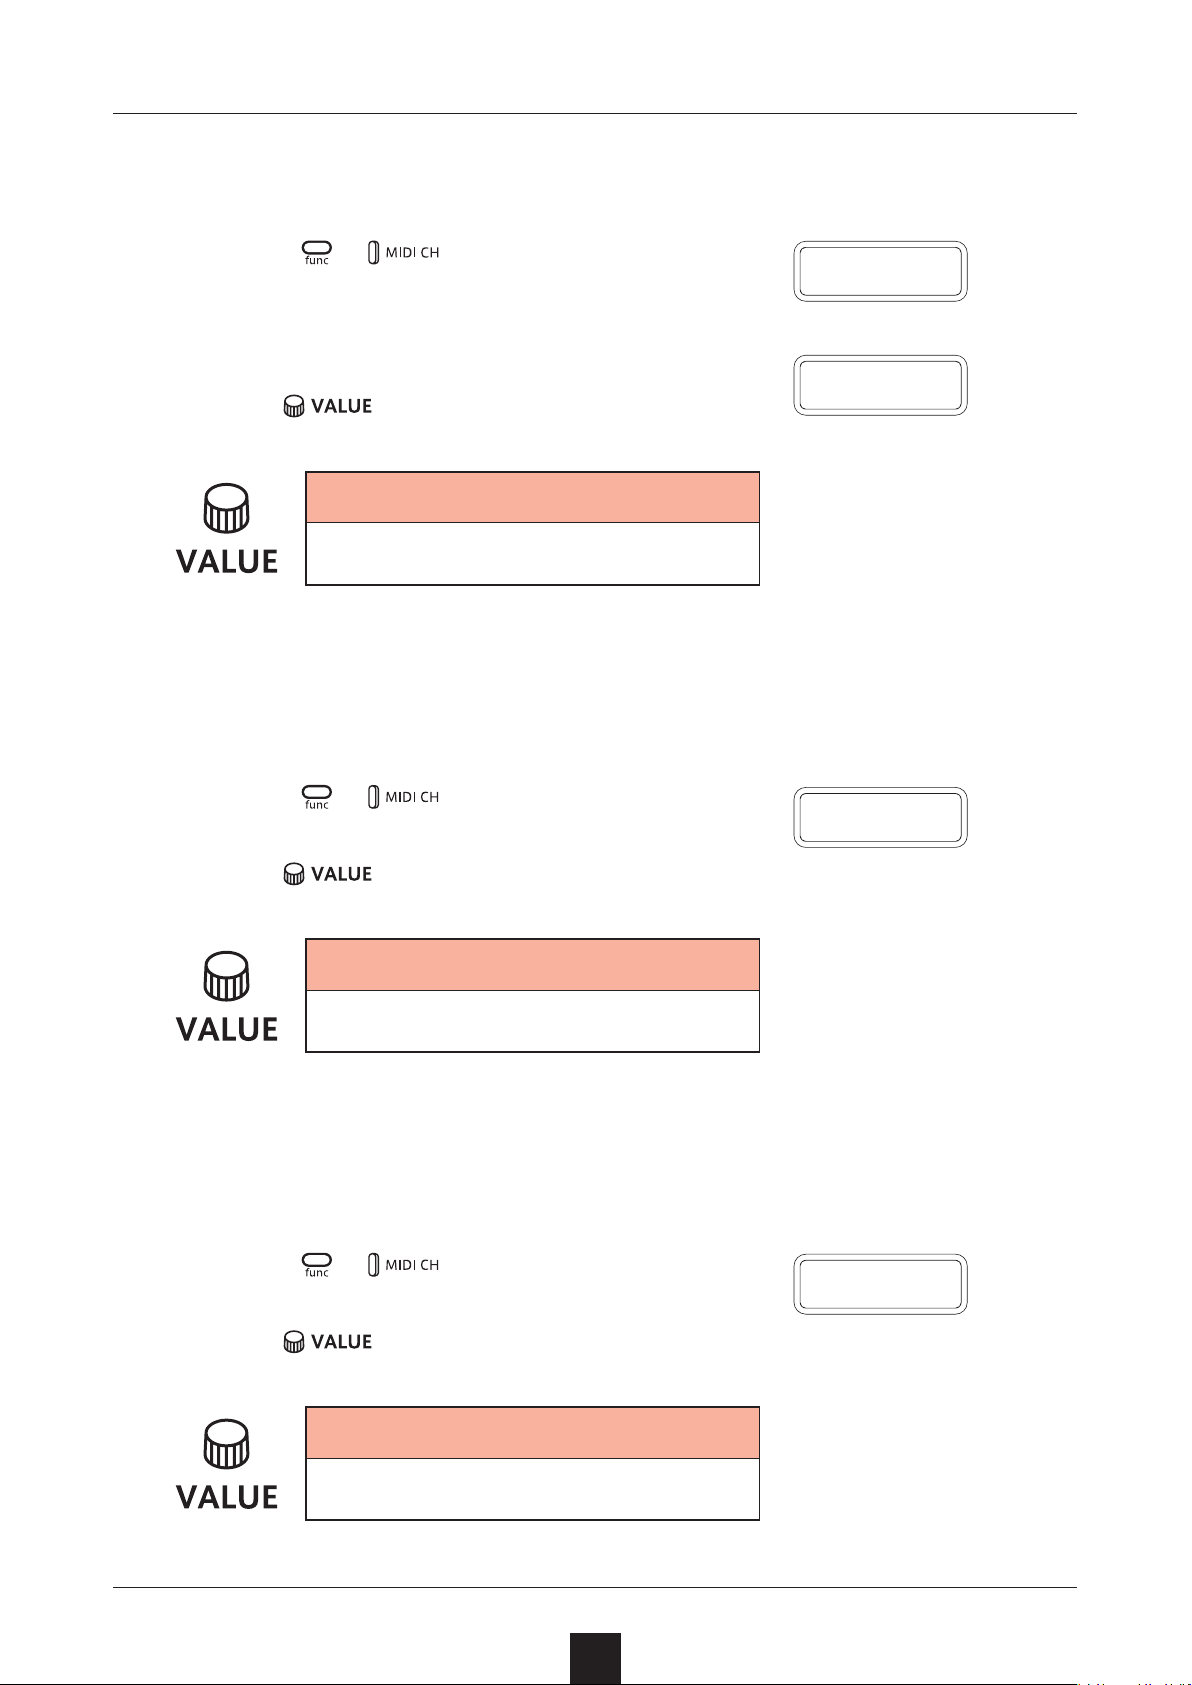
MIDI
Setting channels for transmitting and receiving MIDI
Press
1
which you want to set the MIDI channel.
Turn to set the channel.
2
+ , and select the track for
T 1.c h
〜
T 4.c h
MIDI Channel
OFF, CH.01 – CH.16
Setting the MIDI channel for pattern parameters
Press + and select PT.CH.
1
P T.C H
2
Turn
to set the channel.
MIDI Channel
OFF, CH.01 – CH.16
Setting the MIDI channel for accessing the selected track (automatic channel)
Press + and select AT.CH.
1
Turn to set the channel.
2
MIDI Channel
A T.C H
OFF, CH.01 – CH.16
78
Page 79
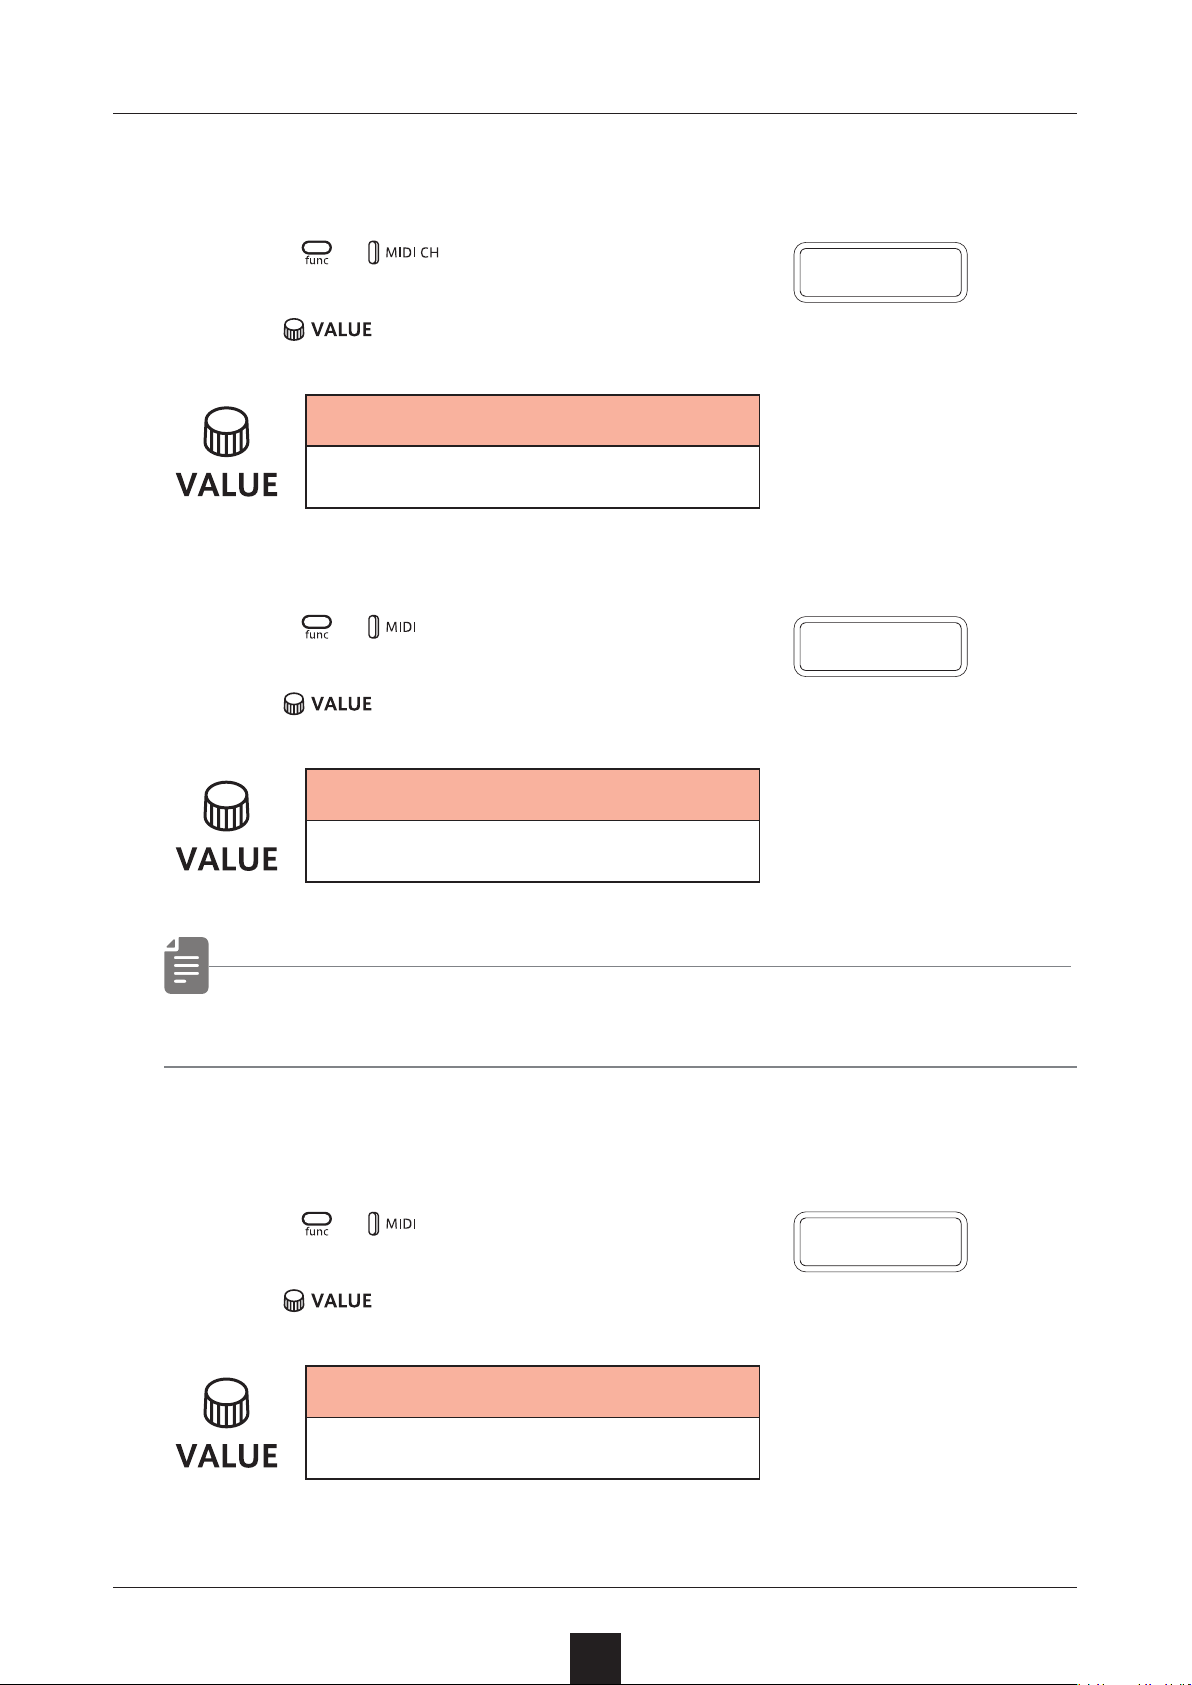
MIDI
Setting the MIDI channel used to output keyboard playing
Press + and select O.CH.
1
Turn to set it.
2
MIDI Channel
TRCK (track), AUTO
Turning control change transmission on/o
Press + and select TX.CC.
1
O.C H
T X.C C
Turn to set it to on/o.
2
Control Change
ON, OFF
• Control change reception is always enabled.
Turning MIDI clock output on/o
Press + and select TX.CK.
1
T X.C K
Turn to set it to on/o.
2
MIDI Clock
ON, OFF
79
Page 80
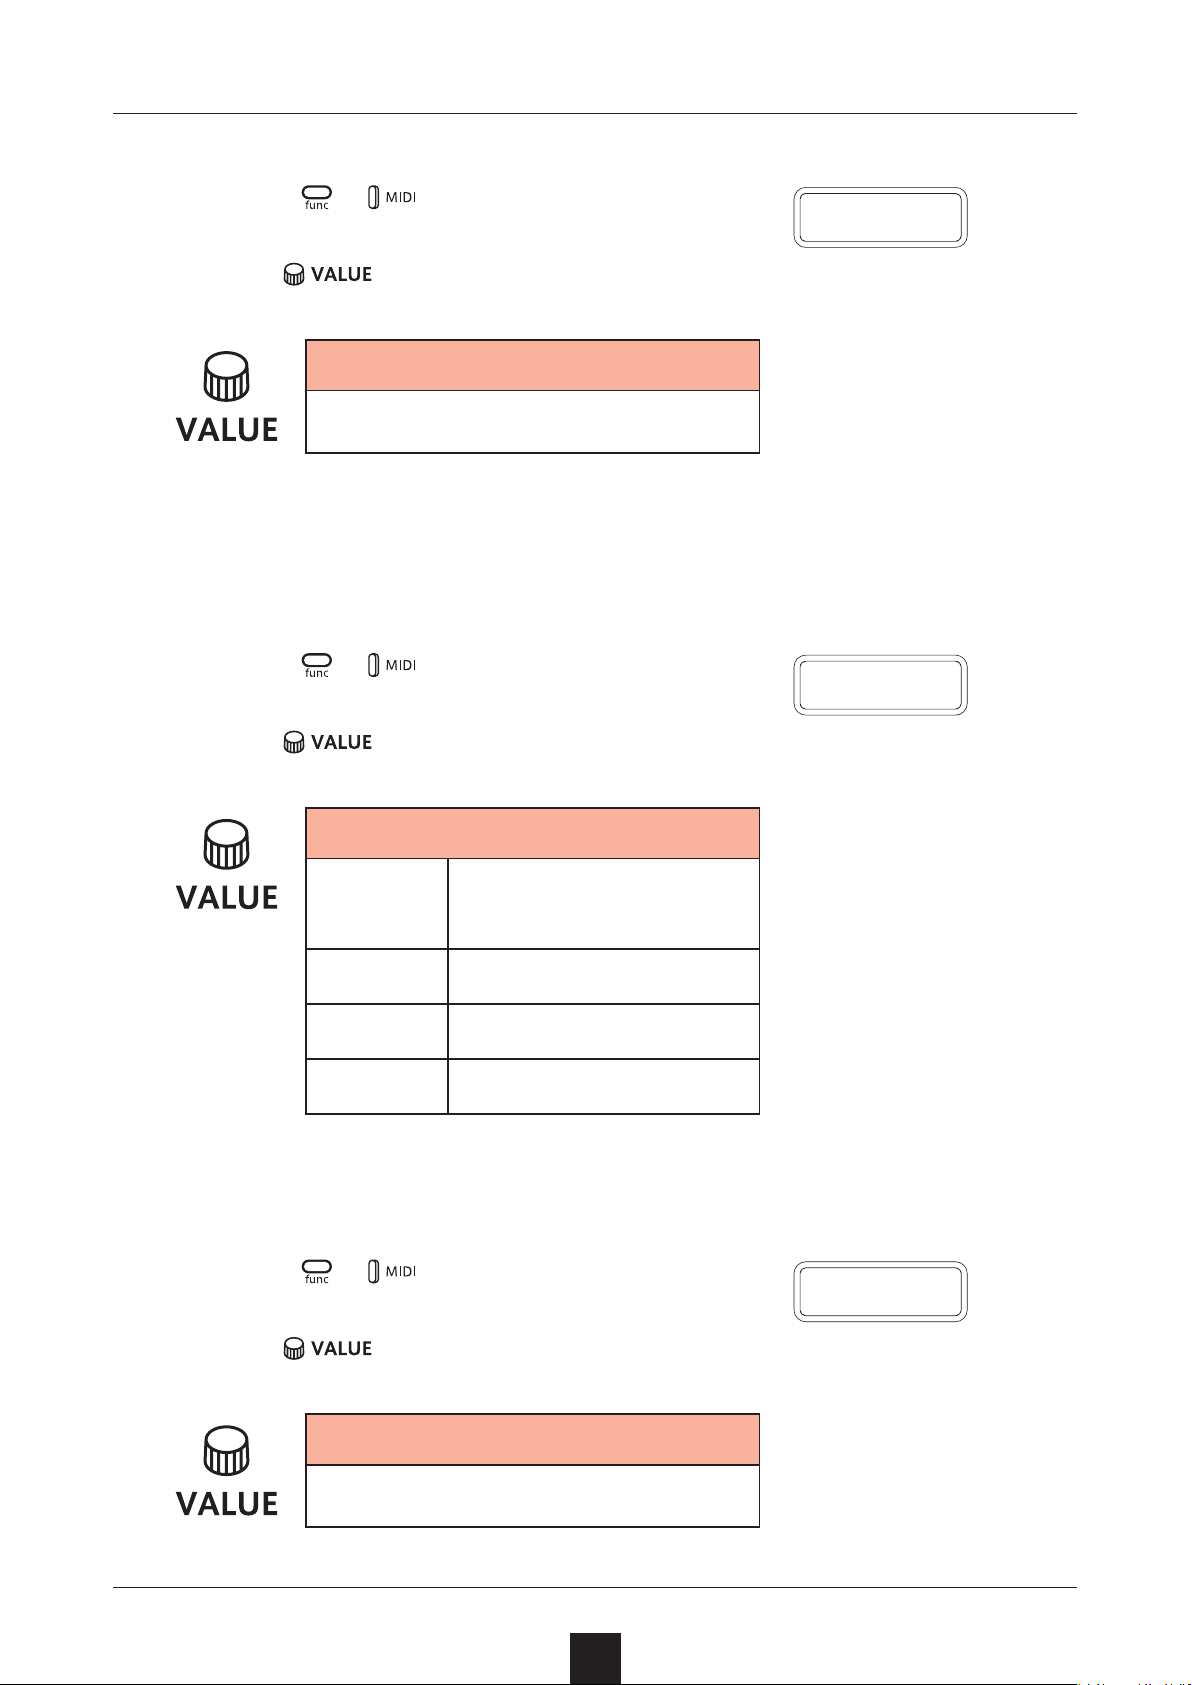
MIDI
Setting MIDI OUT
Press + and select M.OUT.
1
Turn to set MIDI OUT.
2
MIDI OUT
OUT, THRU
Setting MIDI command transmitting and receiving
M.O U T
Press + and select M.CMD.
1
Turn to set MIDI command transmitting and receiving.
2
MIDI Commands
Neither transmit nor
OFF
RX
TX
RX.TX
receive
Only receive
Only transmit
Transmit and receive
M.C M D
Turning active sensing transmission on/o
Press + and select TX.AS.
1
2
Turn
to set it to on/o.
Active Sensing – Transmit
ON, OFF
T X.A S
80
Page 81
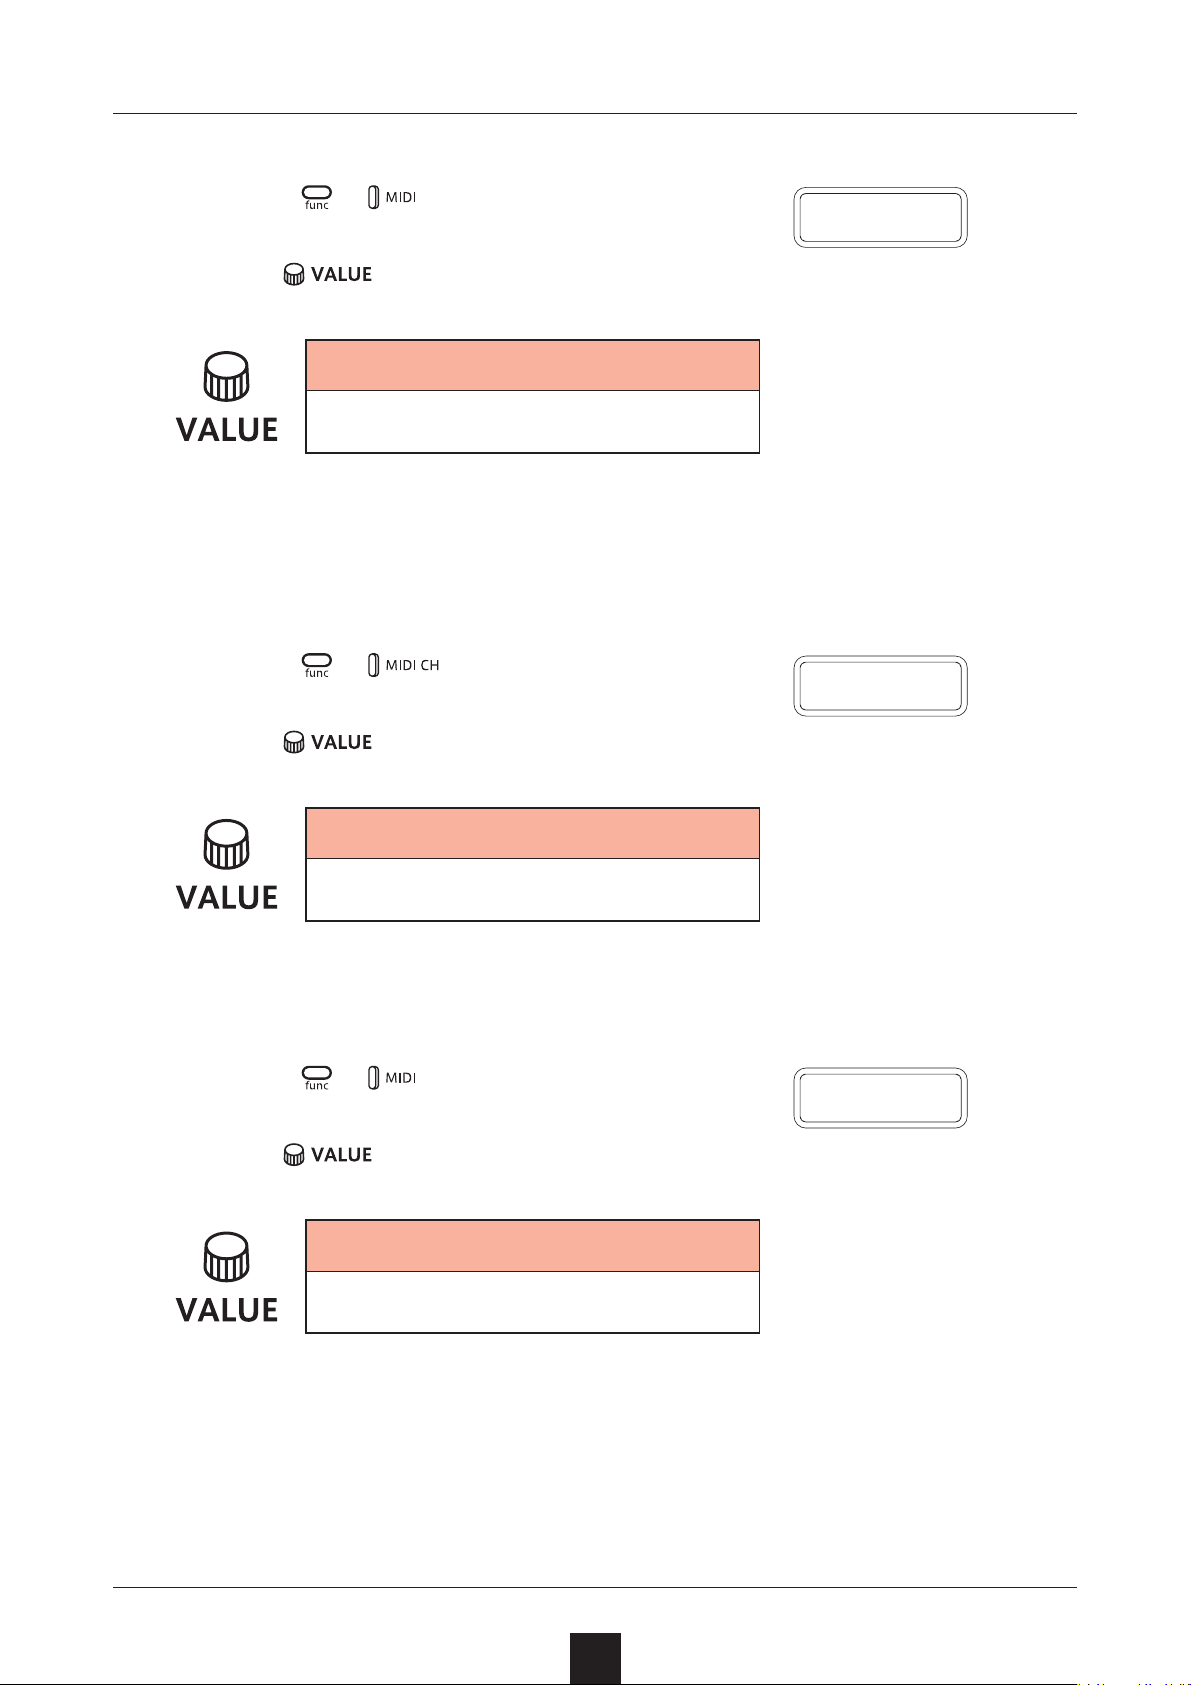
MIDI
Turning on/o active sensing reception
Press + and select RX.AS.
1
Turn to set it to on/o.
2
Active Sensing – Receive
ON, OFF
Setting the channel for transmitting and receiving program changes
R X.A S
Press + and select PC.CH.
1
Turn to set the program change channel.
2
Program Change – Channel
AUTO, CH.01 – CH.16
P C.C H
Turning on/o program change transmission
Press + and select TX.PC.
1
Turn to set it to on/o.
2
Program Change – Transmit
T X.P C
ON, OFF
81
Page 82
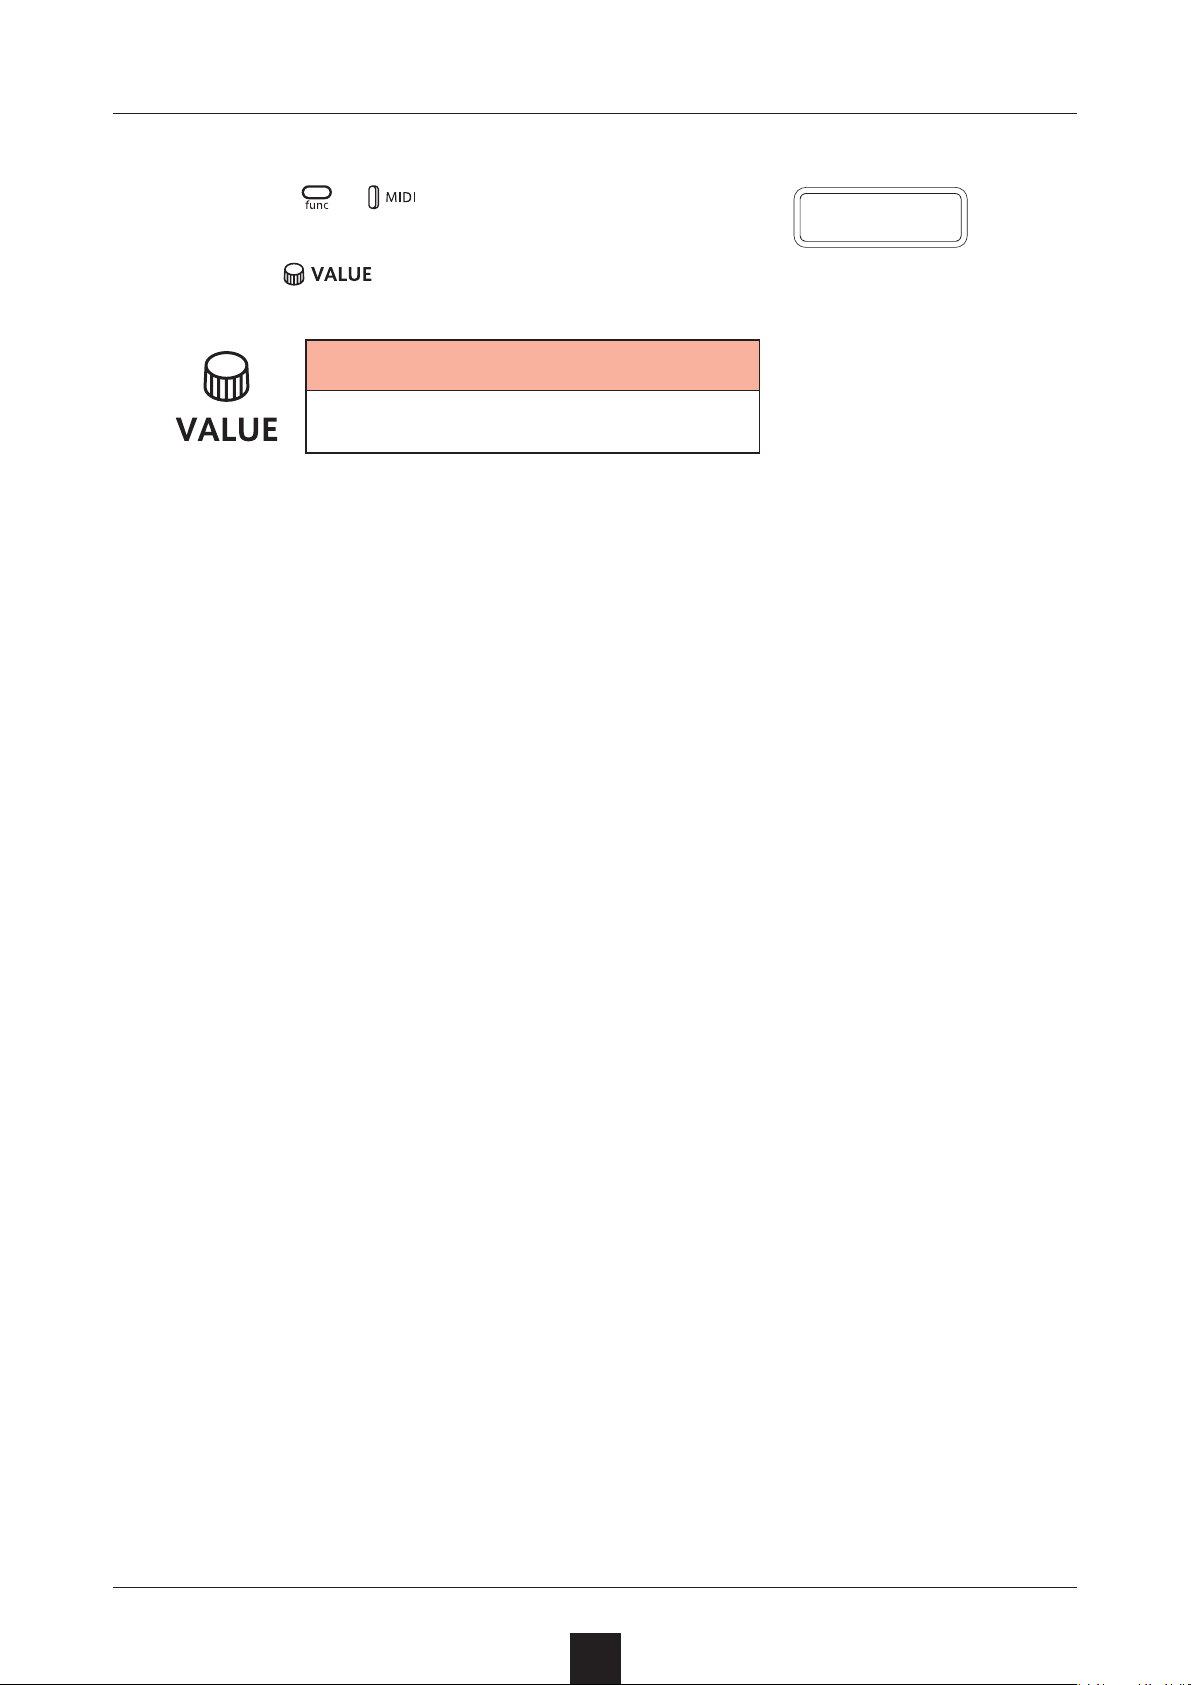
MIDI
Turning on/o program change reception
Press + and select RX.PC.
1
Turn to set it to on/o.
2
Program Change – Receive
ON, OFF
R X.P C
82
Page 83
Exporting/importing user data
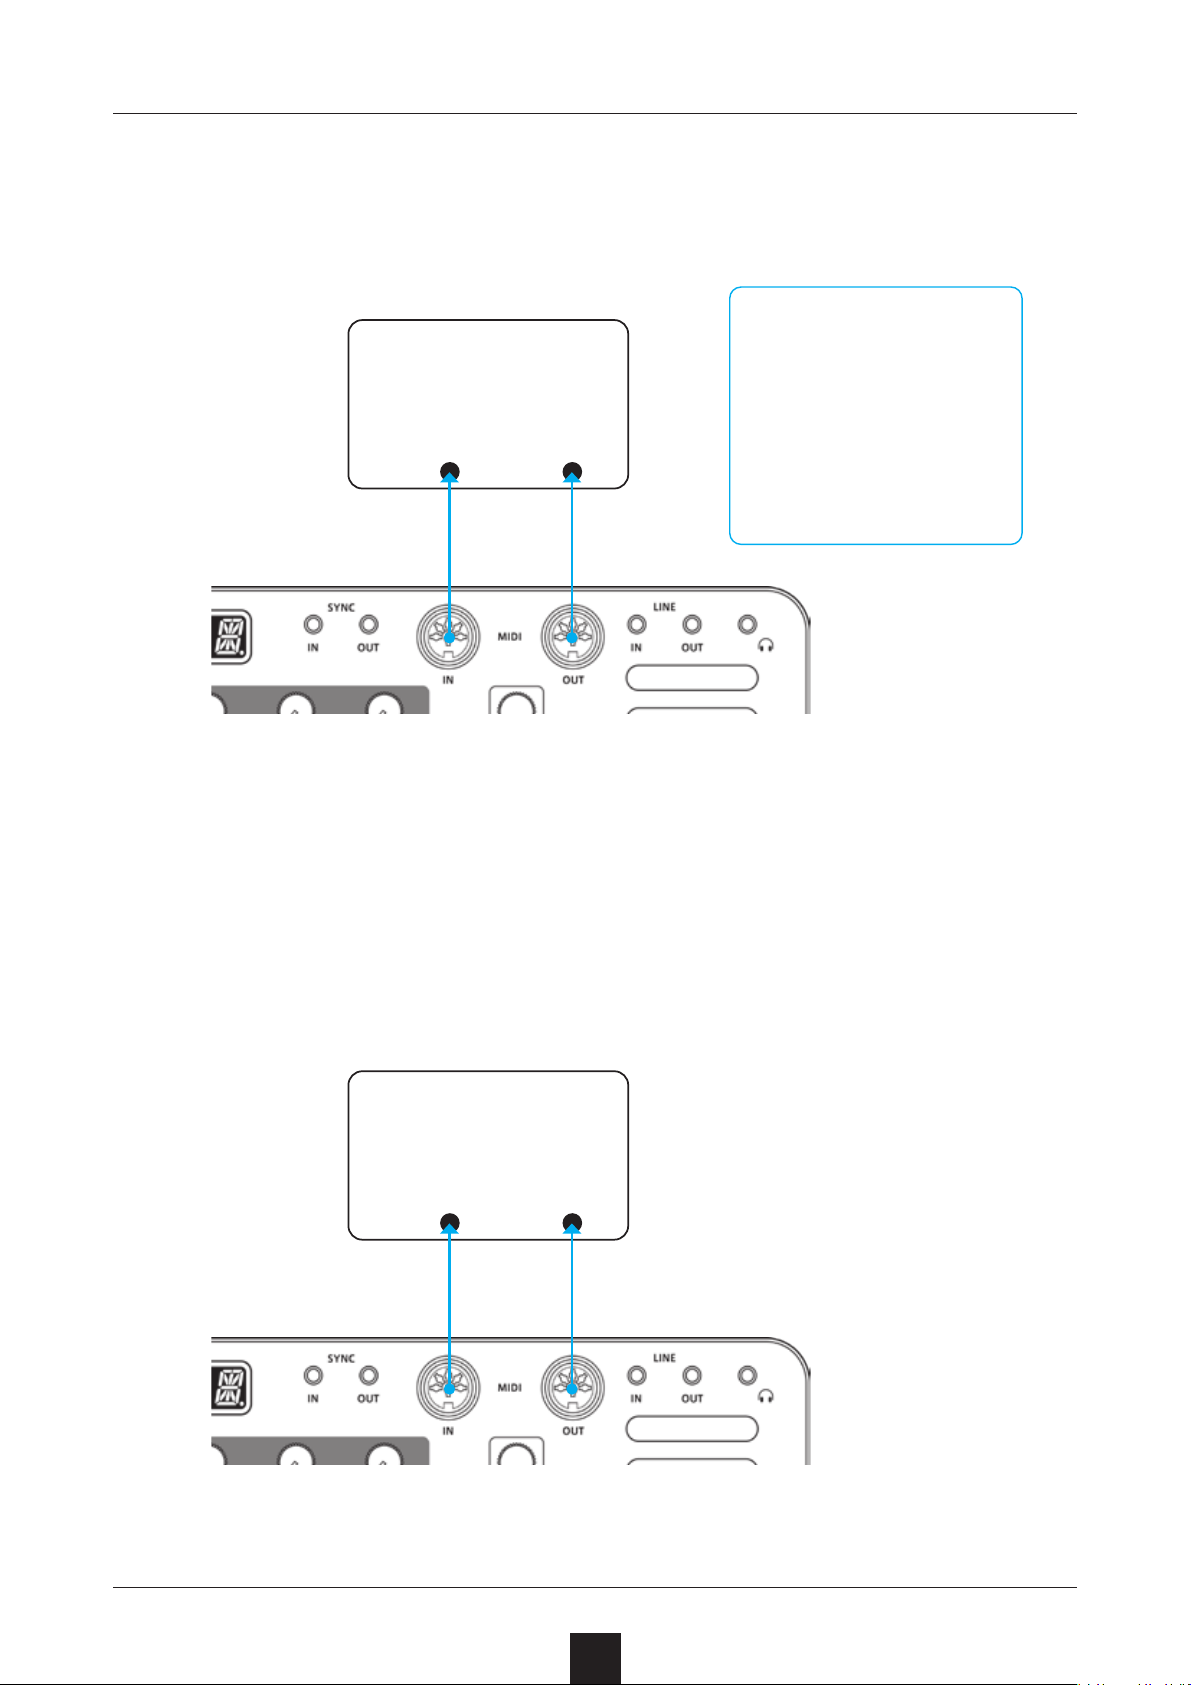
Connecting
– Exporting/importing to/from a PC/Mac
PC/Mac
Recommended
MIDI
interface
MIDI OUT
MIDI IN
applications
PC
MIDI-OX
Mac
SysEx Librarian
Connecting
– Exporting/importing to/from another Lo-12
Lo-12
MIDI OUT
MIDI IN
83
Page 84
Exporting/importing user data
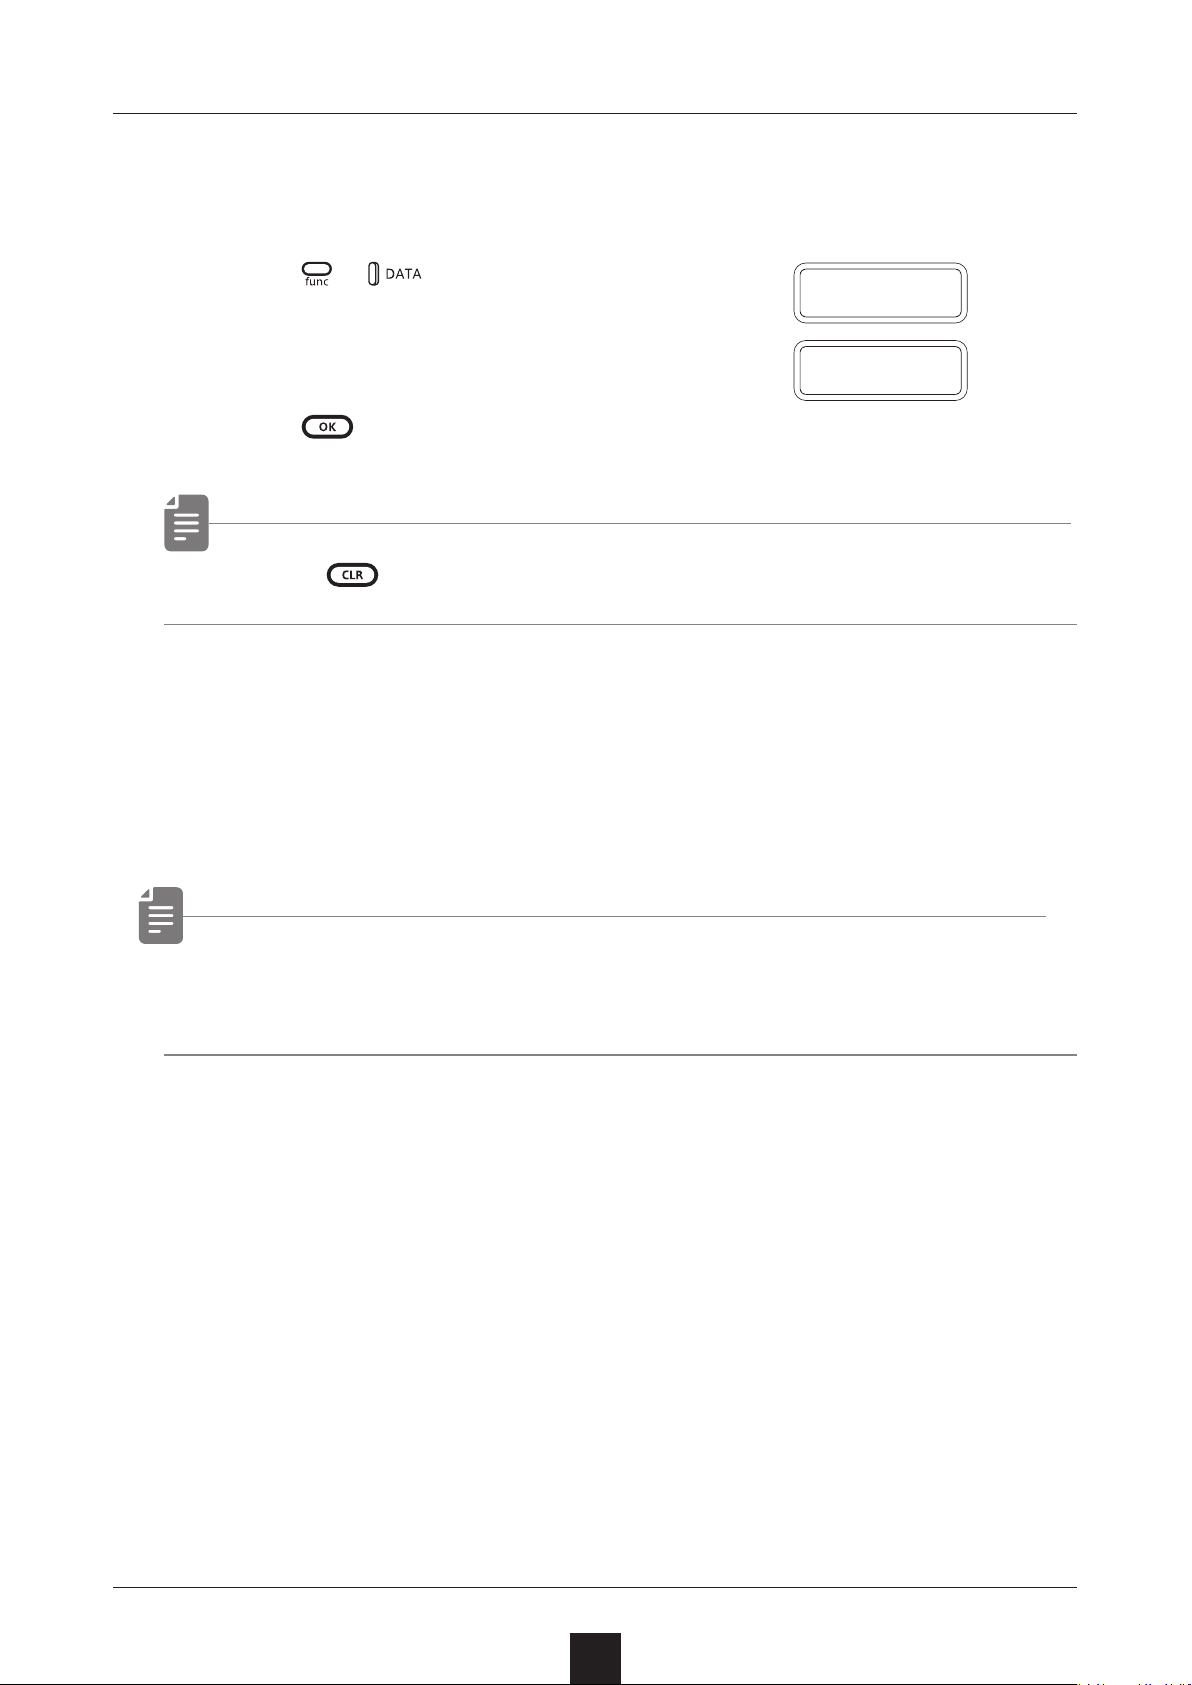
Exporting a single pattern
Select the pattern you want to export. ( → P.15)
1
Press + and select P.EXP.
2
Set your PC to receive MIDI data.
3
Press .
4
• Press to cancel.
P.E X P
D O N E
Importing a single pattern
Put the unit into regular mode, and start transmitting data from
1
the transmitting device.
• The received pattern will not be saved automatically. Save the
pattern as necessary. ( → P.68)
84
Page 85
Exporting/importing user data
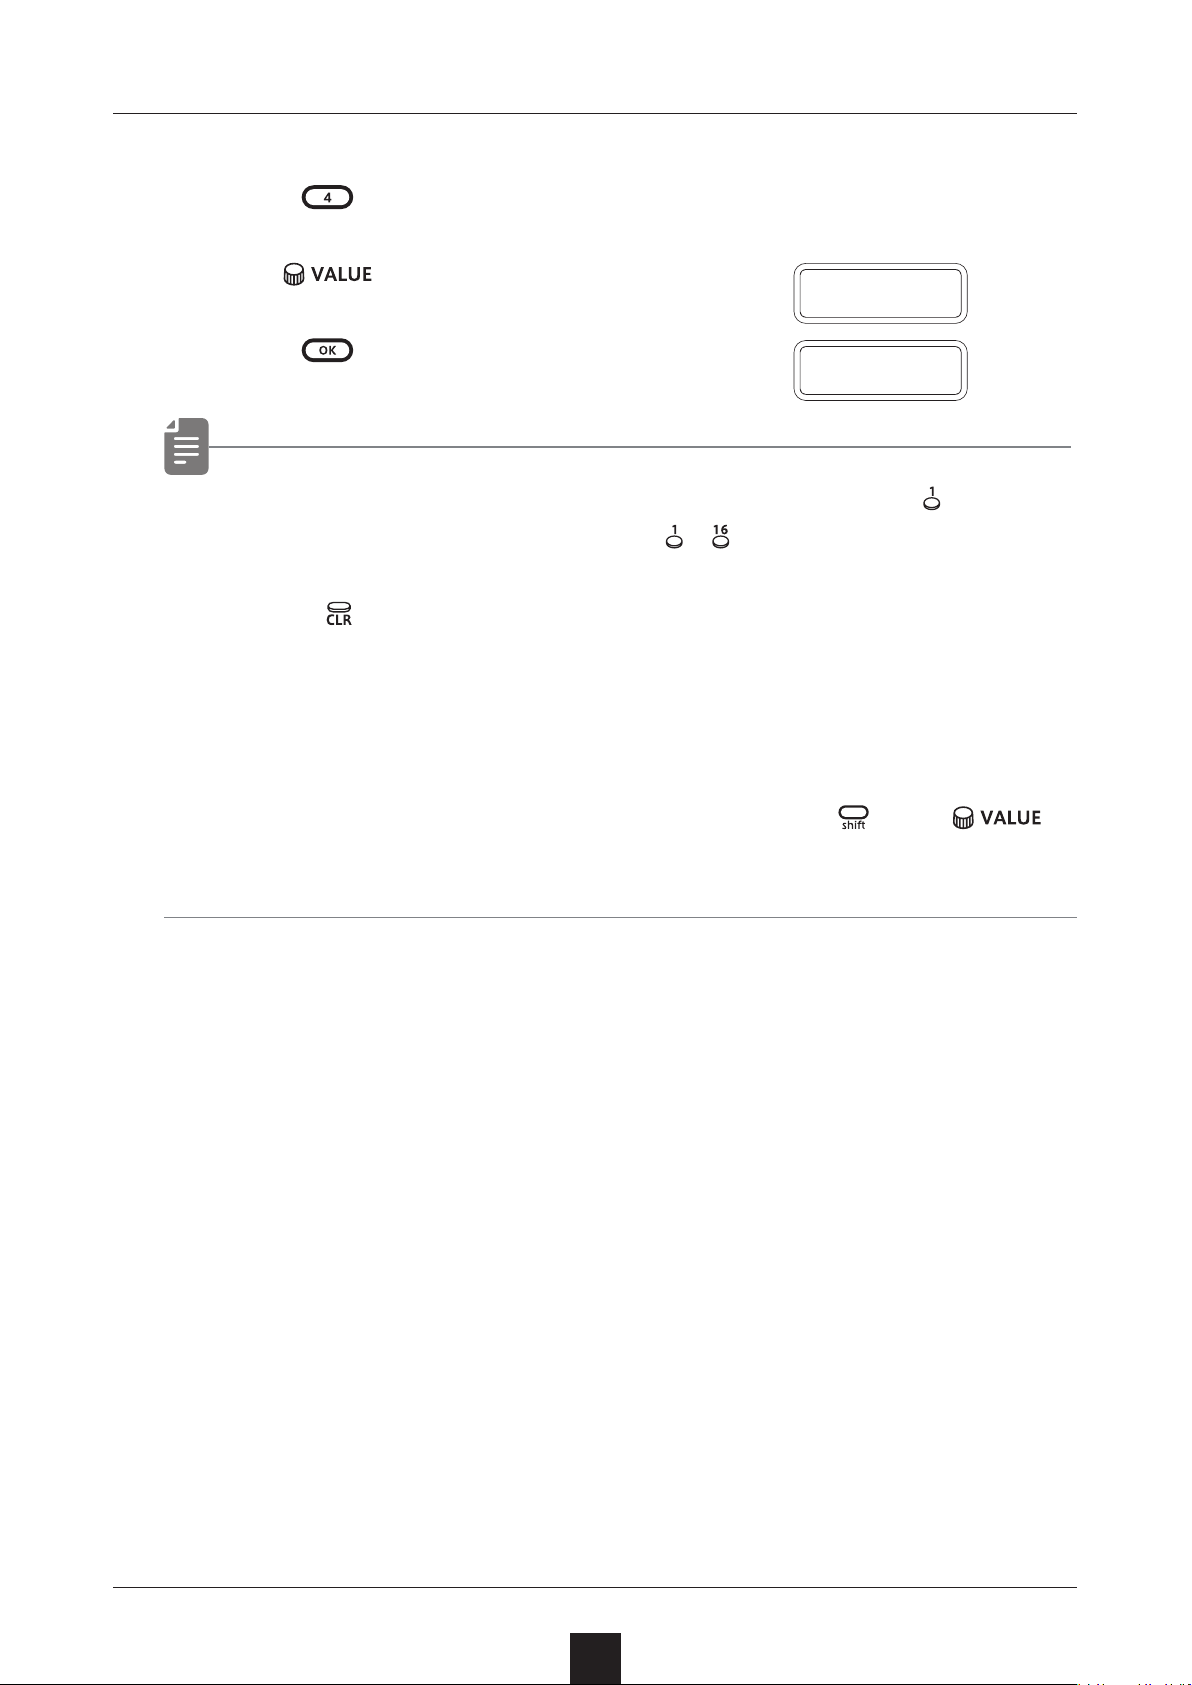
Backing up all user data at once
Press + the POWER switch to turn on the Lo-12.
1
Turn to select EXPT.
2
Press .
3
• The step LEDs show the progress. (They light from in order.
E X P T
D O N E
Transmission is complete when
• Press to cancel.
• The size of the backup data is 69,908 messages - 16.7MB.
• If the size of the data is dierent, the backup might have failed.
If this occurs, before step ③ , while pressing
increase the transmission interval. (The default value is 0.)
– have all lit.)
, turn to
85
Page 86
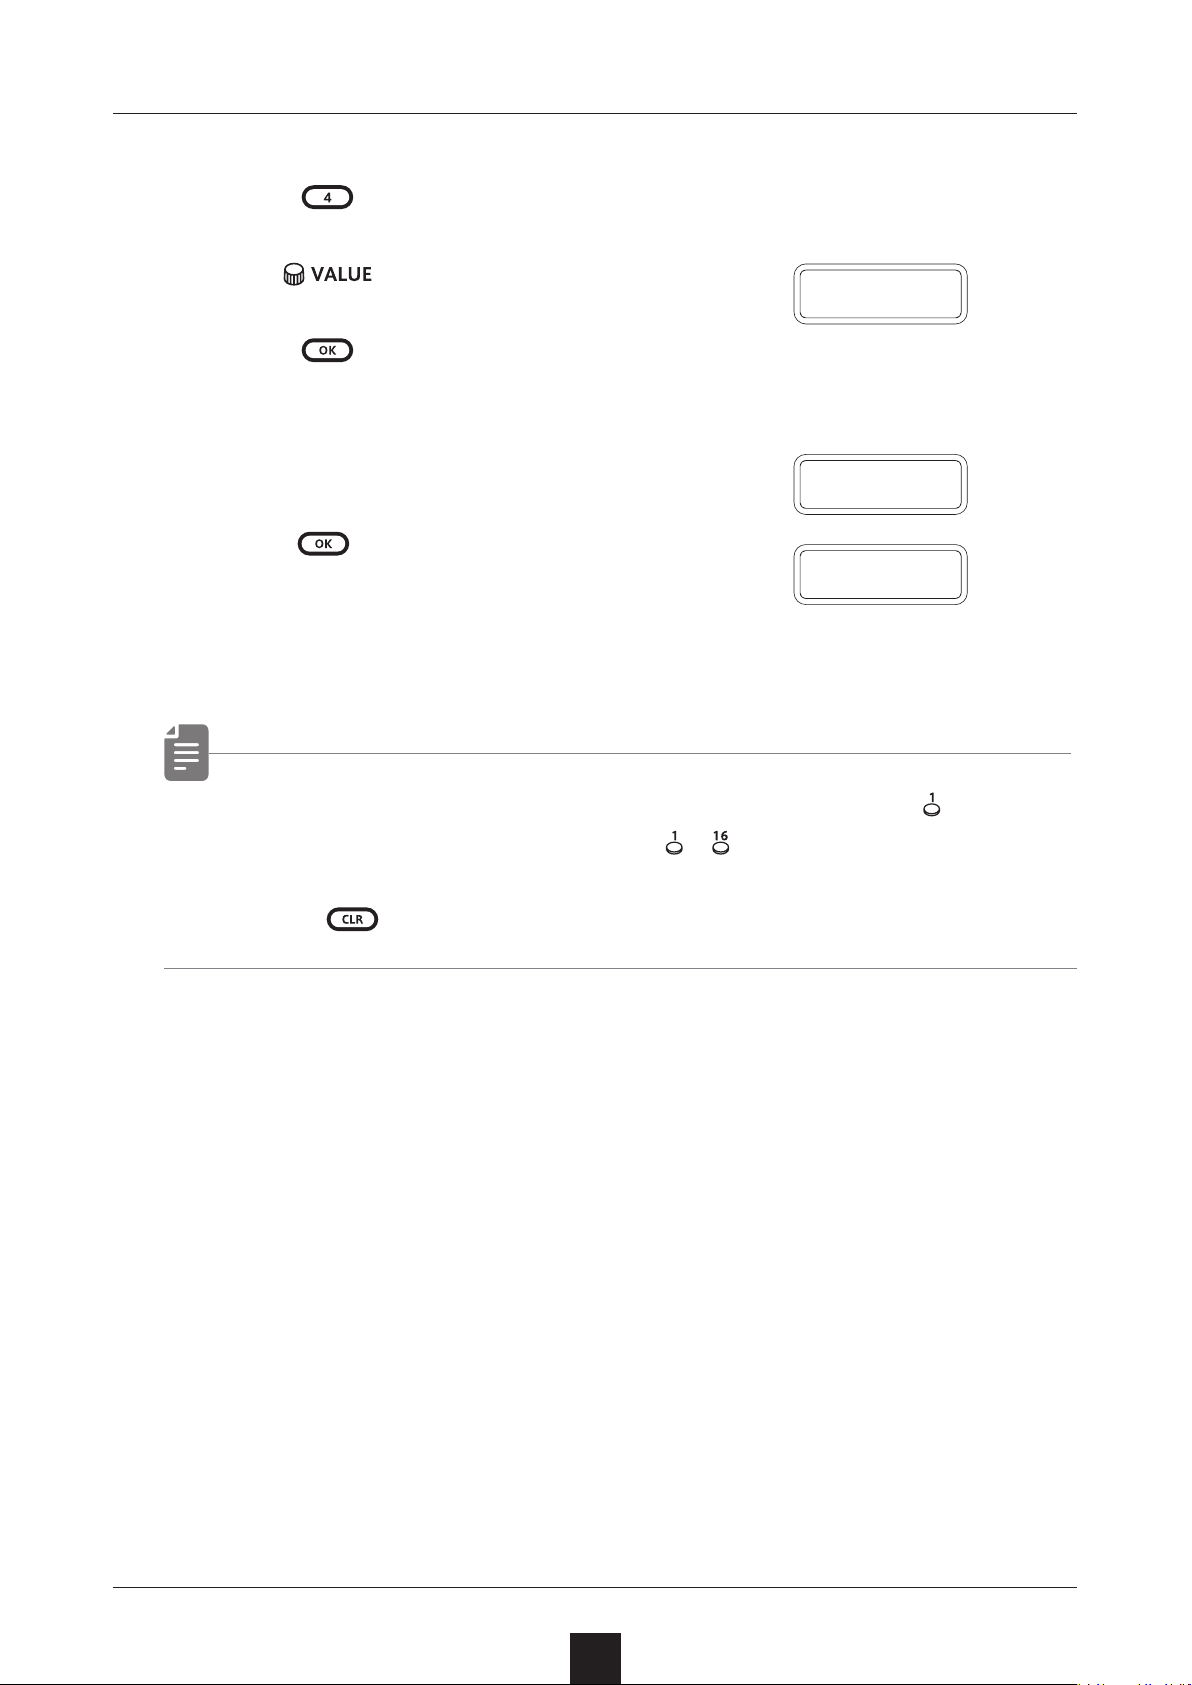
Exporting/importing user data
Restoring (importing) user data
Press + the POWER switch to turn on the Lo-12.
1
Turn to select IMPT.
2
Press . This makes the unit ready to receive data.
3
Start exporting from the sending device.
When SAVE appears on the display
4
after receiving completes,
press to restore (load)
I M P T
S A V E
the received data.
• The step LEDs show the progress. (They light from in order.
Transmission is complete when
• Press to cancel.
– have all lit.)
D O N E
86
Page 87
System settings
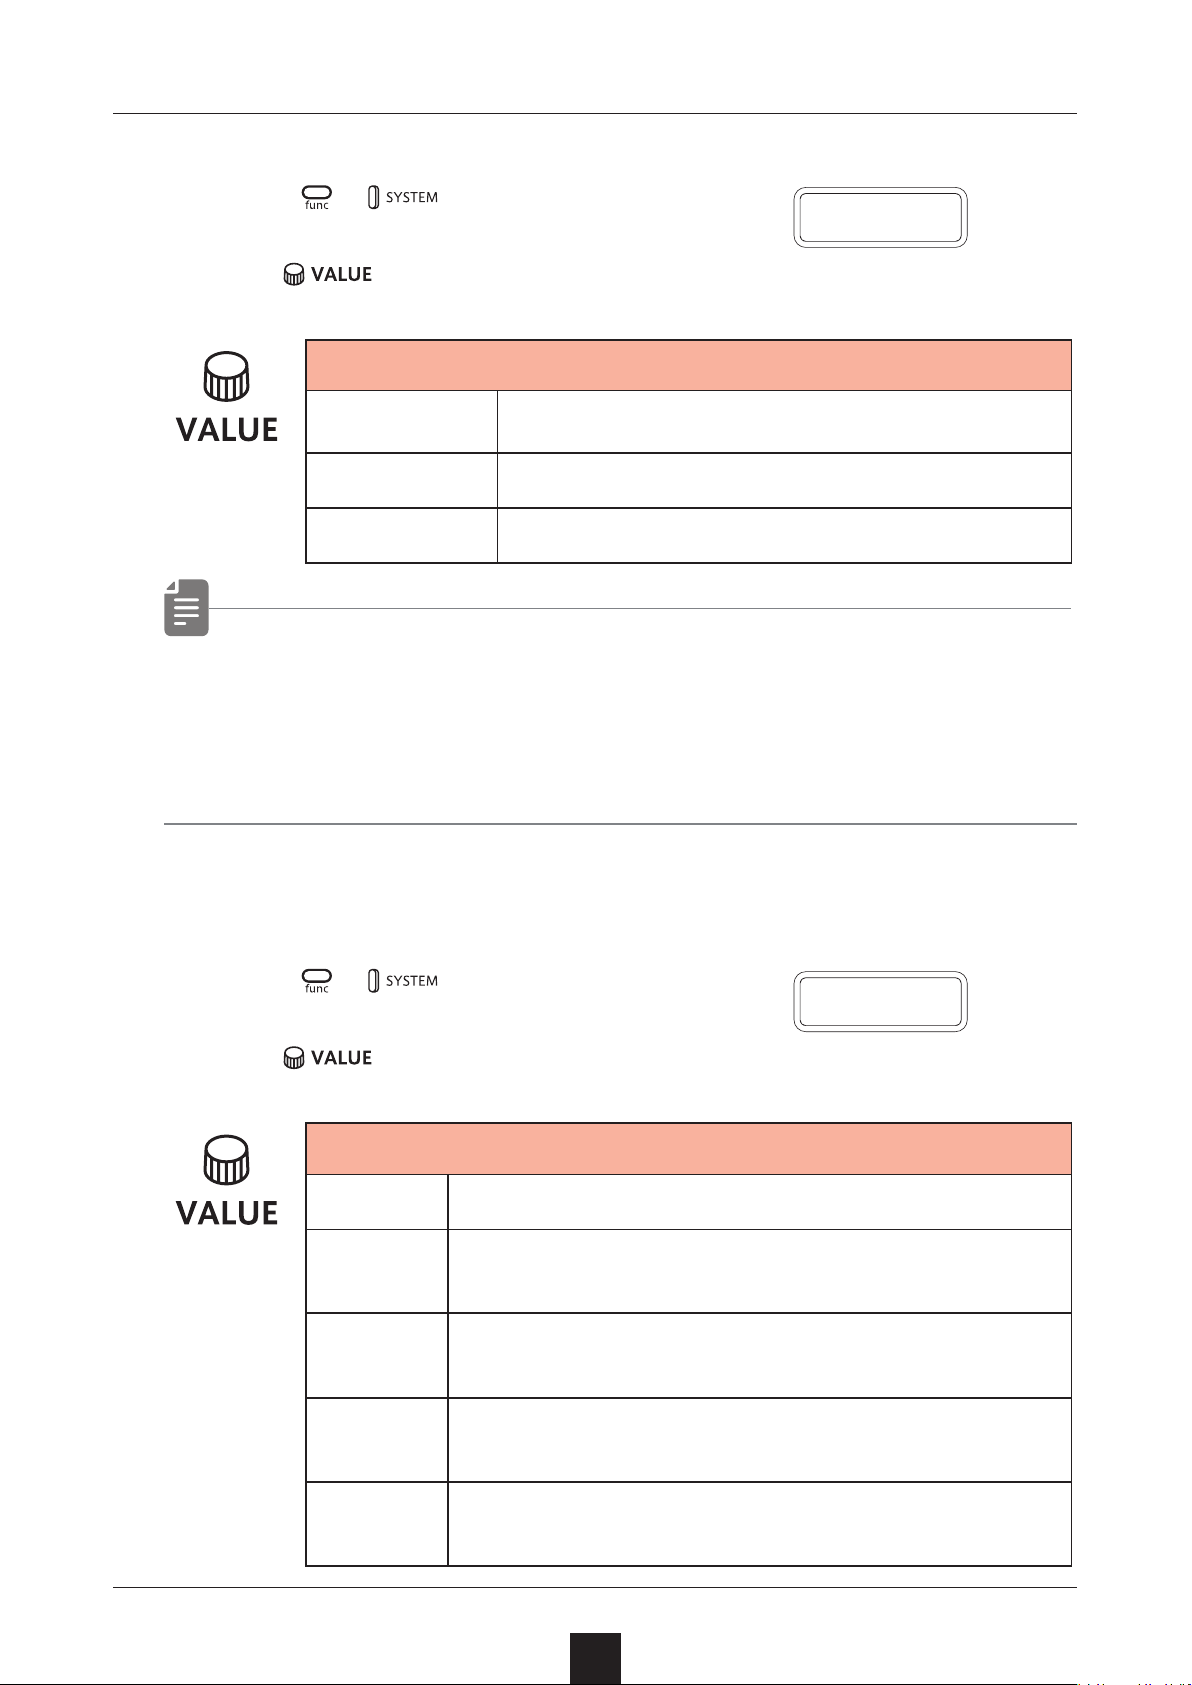
Setting the battery type
Press + to select BATT.
1
Turn to select the battery type.
2
Battery
B A T T
ALKL
NIMH
LTHM
• Please set this correctly because it eects operation time.
• The remaining charge shown could be higher than the actual
amount depending on the type of rechargeable battery.
Alkaline dry cell
Nickel-metal hydride rechargeable
Lithium dry cell
Setting the automatic power down function
Press + and select A.PWR.
1
A.P W R
Turn to select the automatic power down time.
2
Automatic power down time
OFF
0.5H
1H
3H
6H
Automatic power down is disabled.
Power will turn o automatically after 30 minutes without operation.
Power will turn o automatically after 1 hour
without operation.
Power will turn o automatically after 3 hours
without operation.
Power will turn o automatically after 6 hours
without operation.
87
Page 88
System settings
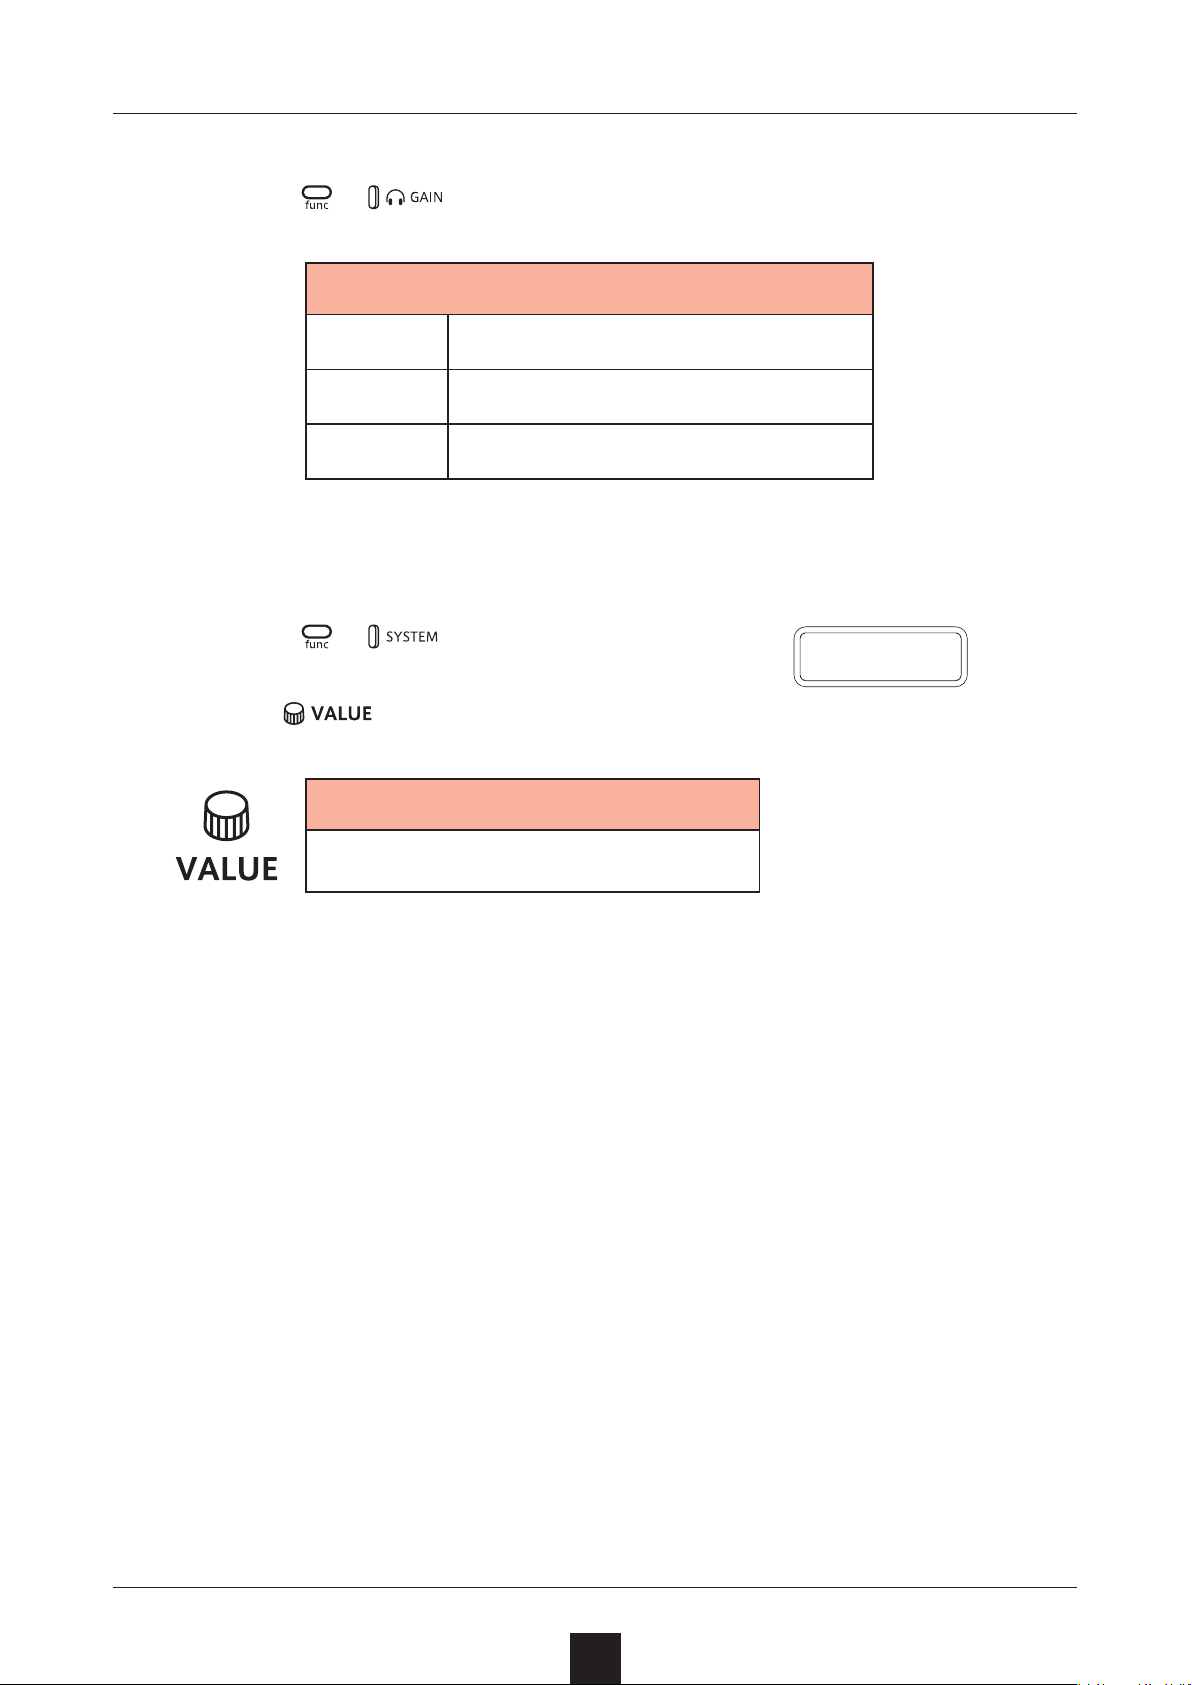
Setting the headphone gain
Press + .
1
Headphone Gain
LOUD
NORM
SOFT
Louder output
Factory default
Quieter output
Setting the master tuning
Press + to select TUNE.
1
Turn to set the master tuning.
2
Master Tuning
− 75 – 0 – +75 (cents)
T U N E
88
Page 89
System settings
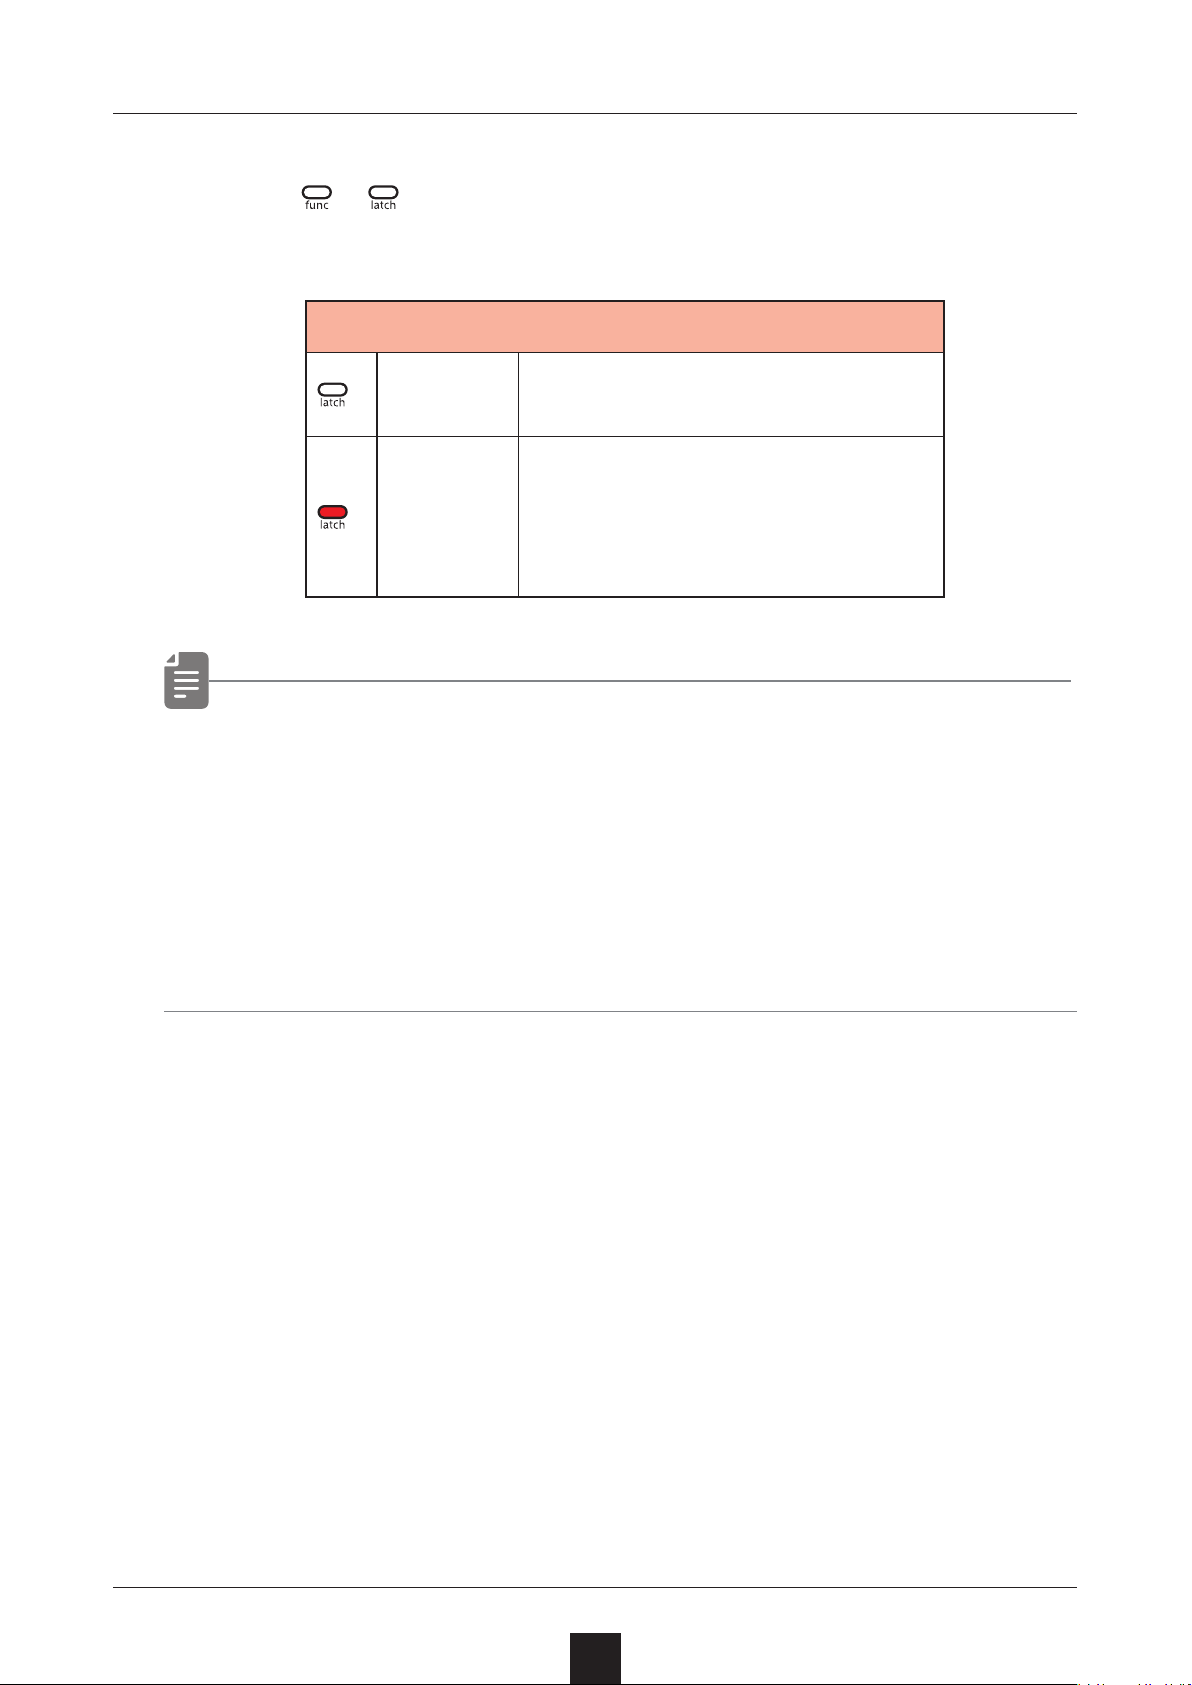
Setting knob movement behavior
Press
1
eration.
• When set to Latch, the dots on the display will be animated to
show how much the knob position and parameter value diers
+ to set whether or not latching is used for knob op-
Latching
When a knob is moved, the pa-
Jump
rameter changes immediately.
The knob does not aect the
parameter value until its posi-
Latch
tion reaches that value. Then,
the value follows the knob.
to the left or right.
The dots will appear to ow to the left when the parameter
value is lower than the knob position and to the right when
the value is higher than the position. The ow will be faster for
higher values.
89
Page 90
System settings
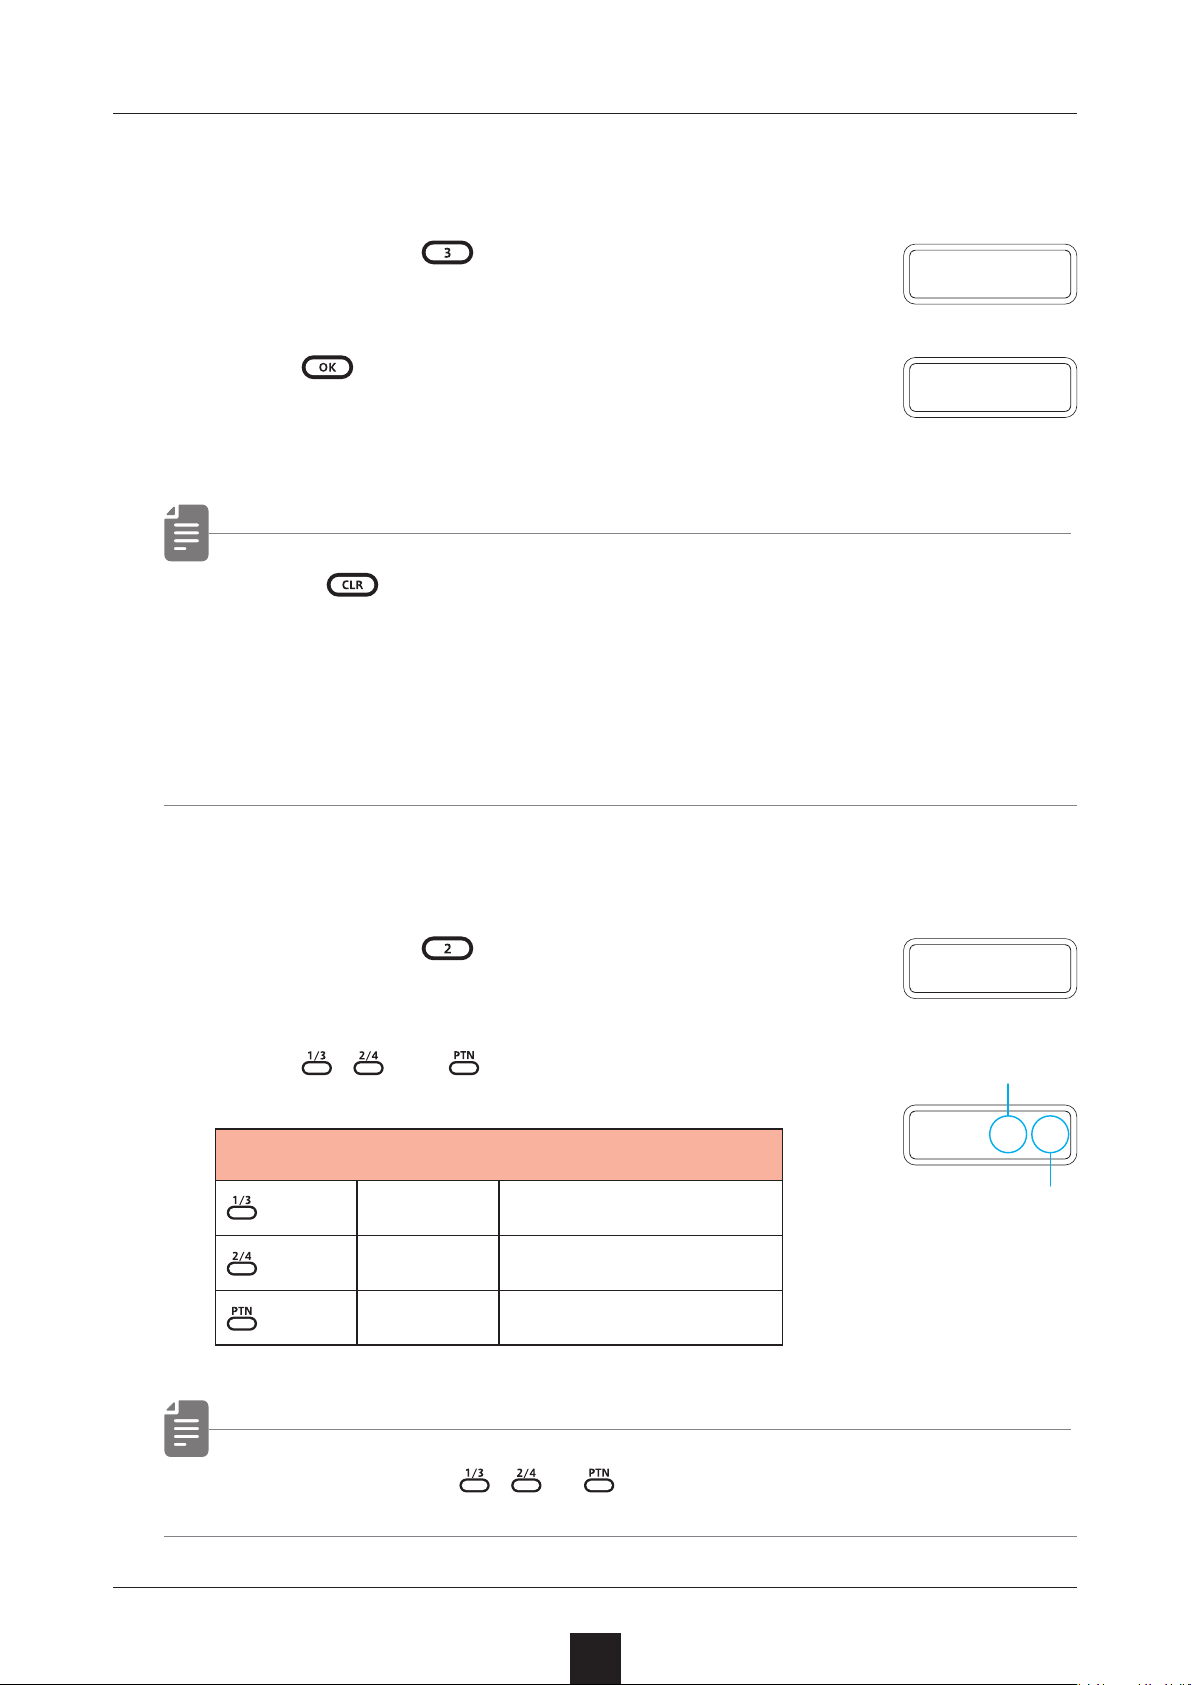
Restoring to factory default settings (factory reset)
Press and hold + the POWER switch to
1
turn on the Lo-12.
Press .
2
The step LEDs will show the progress.
When nished, OK will appear on the display.
• Press to cancel.
• This will not restore sample waveform data to the factory de-
F.R S T
O K
fault. To restore the sample waveform data, download it from
the SONICWARE website and import it.
Checking the system versions
Press and hold + the POWER switch to
1
turn on the Lo-12.
Press , and to check the versions.
2
Firmware Versions
S X.Y
B X.Y
System version
Boot version
V E R
Major version
S X.Y
Minor version
P X.Y
• Press the same , or again to show the build number.
Preset version
90
Page 91
System settings
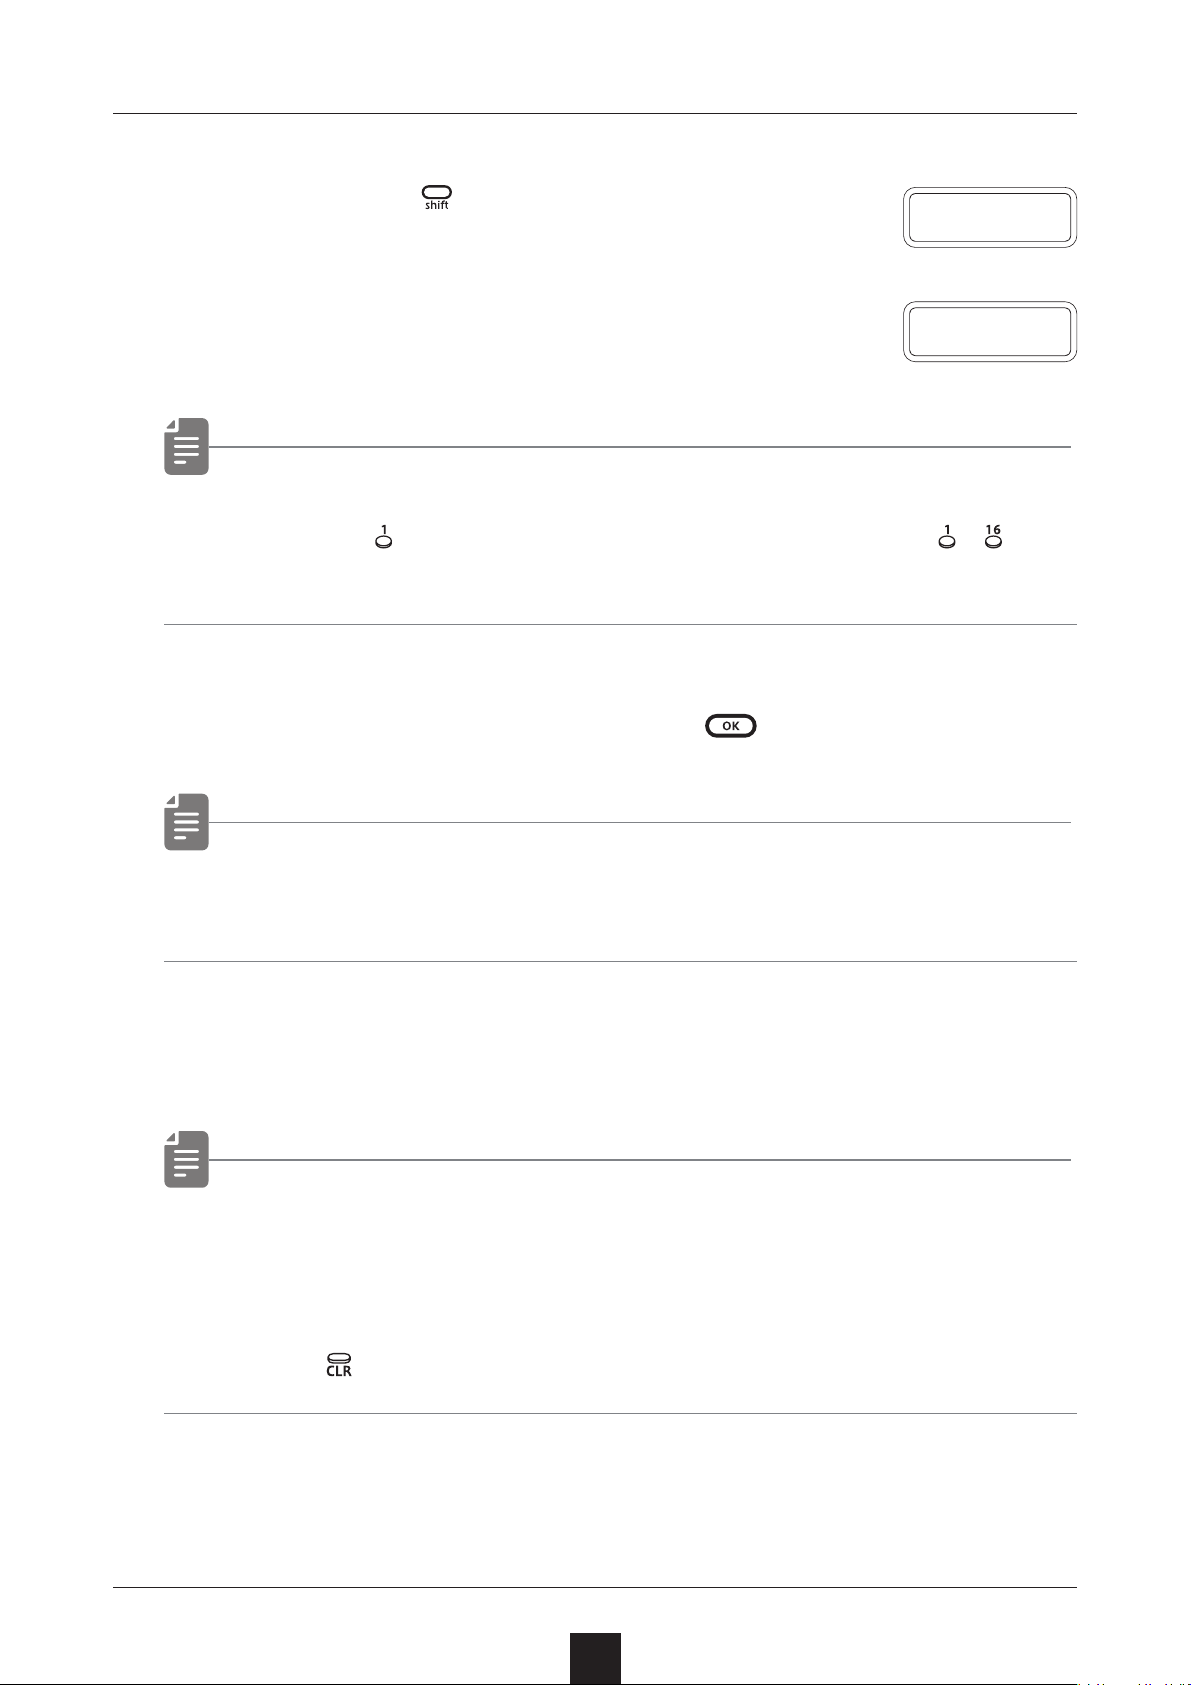
Updating the rmware
Press and hold + the POWER switch to
1
turn on the Lo-12.
Transmit the rmware (Sys Ex data) from
2
a PC/Mac.
• The step LEDs show the progress of data transmission. (They
U P D T
R C V
light from
all lit.)
After transmission completes, press to execute the update.
3
• If the update occurred properly, OK will be shown. ( If a problem
occurred, an error code will be shown.)
Restart the unit.
4
in order. Transmission is complete when – have
• Use new batteries or an AC adapter.
• Never interrupt the power during a rmware update.
• Press
to cancel the update and start up normally.
91
Page 92
System settings
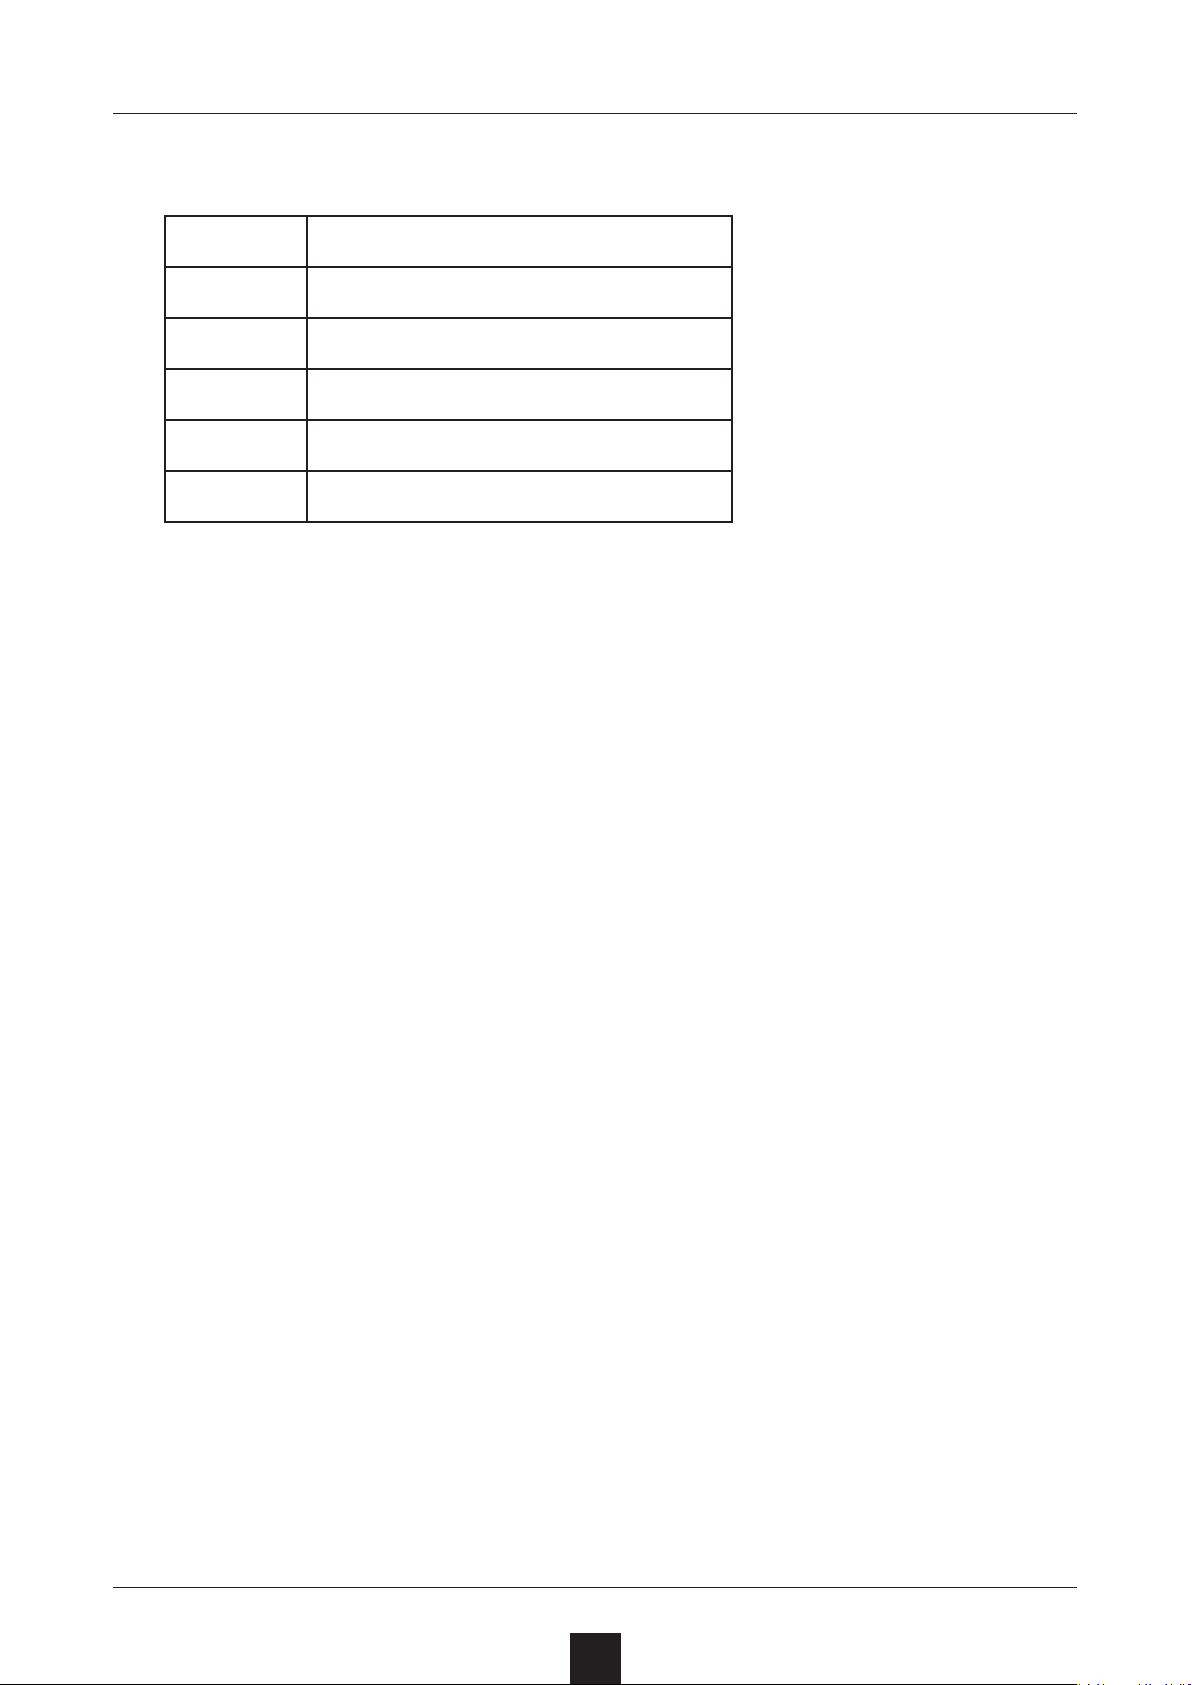
Error codes
ER.10
ER.11
ER.20
ER.21
ER.22
ER.30
System error
Low battery
Data receiving error
Invalid data
No need to update (Boot)
Update Failed
92
Page 93
Appendix
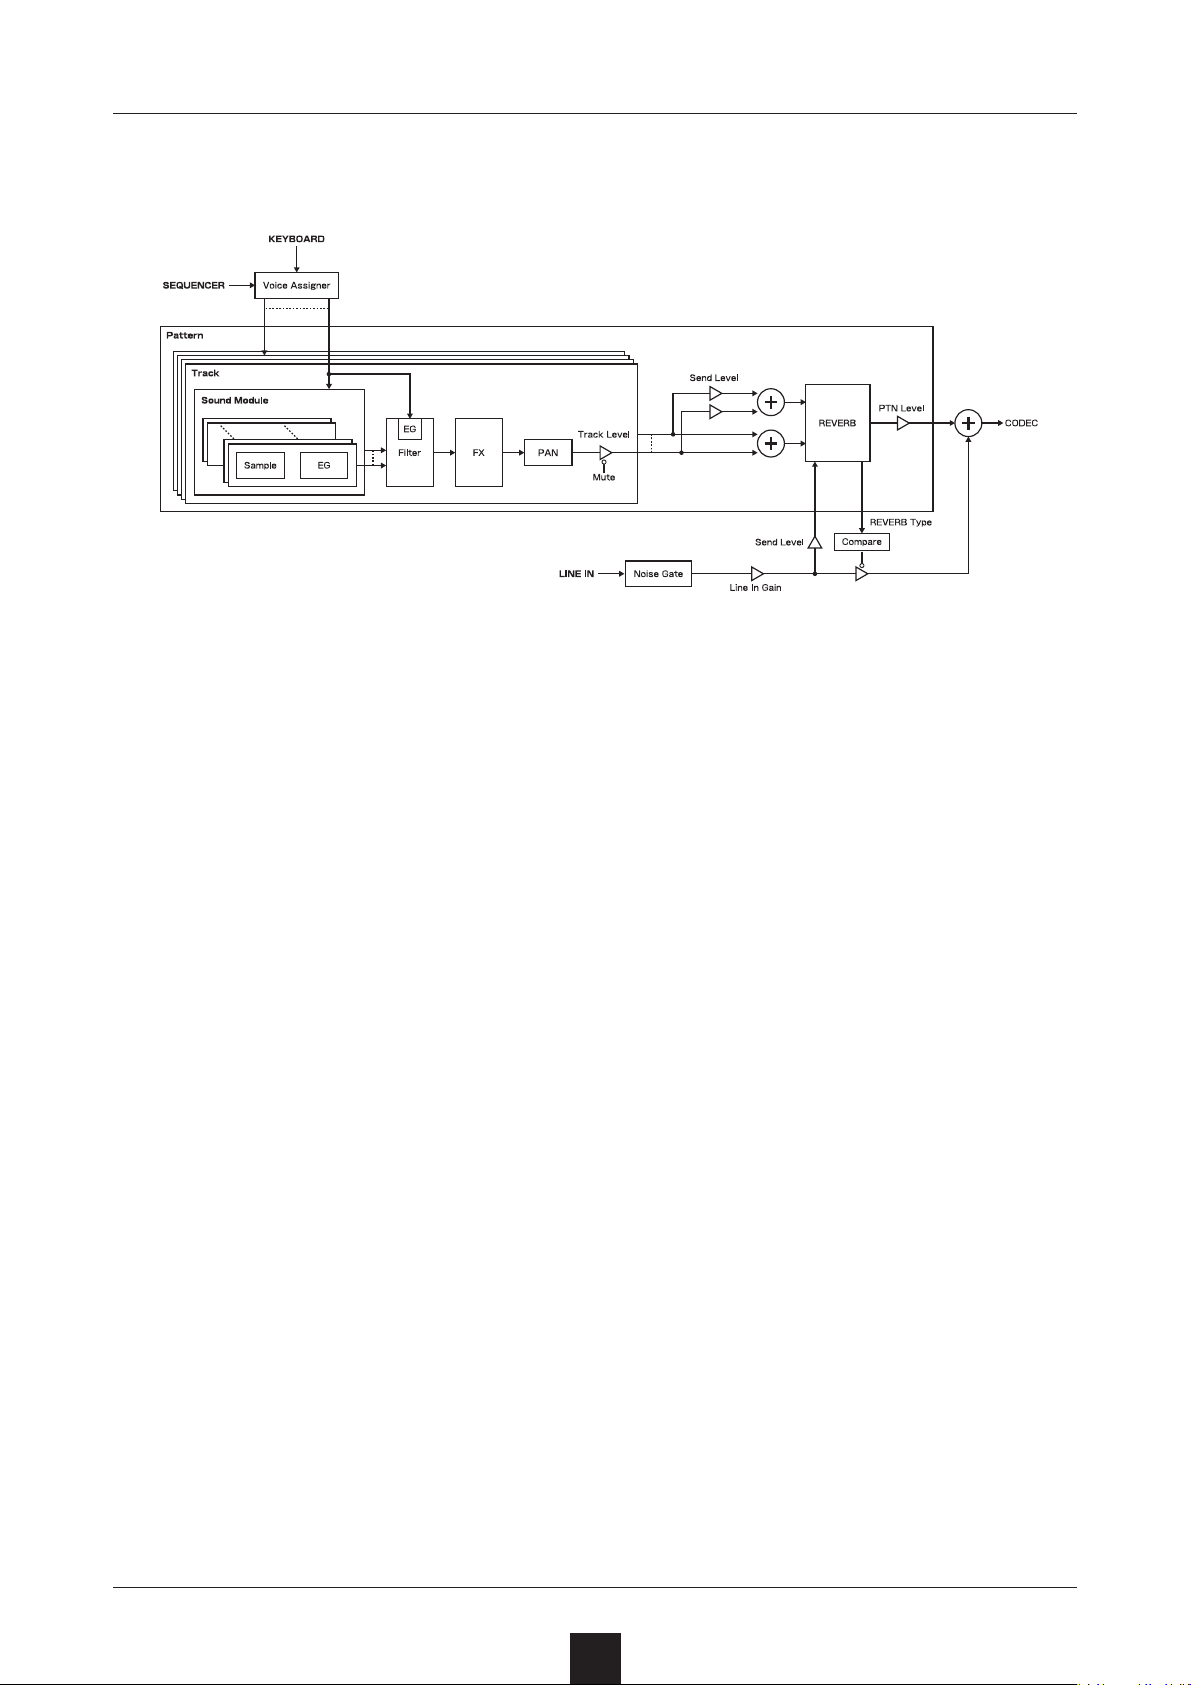
Figure1. Sound architecture
93
 Loading...