

Page 1

www.somfy.com
QuickCopy &
QuickCopy PC Soware
Interactive operating instructions
Ref. 5129290A
Page 2

WELCOME PAGE
The QuickCopy device enables the quick copying of settings of a Chronis / Soliris Smoove or Smoove
UNO io device to other Chronis / Soliris Smoove & Smoove UNO io controllers. QuickCopy is operated
over the plugged in Chronis / Soliris Smoove & Smoove UNO io device (see chapter "So Key functions
of the Smoove device").
The QuickCopy device runs on batteries and can also be supplied over the USB interface of the
computer.
This manual is interactive:
• Click on each title or page number in the table of Contents to access it directly.
• Click on [ Back to Contents ] at the bottom of each page to return to table of Contents.
Copyright © 2016 Somfy SAS. All rights reserved. Non contractual images
QuickCopy & QuickCopy PC Soware
Interactive operating instructions
[ Back to Contents ]
2/18
Page 3
CONTENTS
[ Interactive instructions ]
You can click on each title to access it directly.
1. DESCRIPTION 4
2. STARTING UP THE QUICKCOPY DEVICE 5
3. SOFT KEY FUNCTIONS OF THE SMOOVE DEVICE 6
4. COPY FUNCTION OF THE QUICKCOPY DEVICE 7
4.1. Copy Smoove device to QuickCopy 8
4.2. Copy QuickCopy to device 9
4.3. Configure 10
4.4. Reset / Delete storage location 10
5. QUICKCOPY PC SOFTWARE 11
5.1. Starting-up the QuickCopy PC Soware 11
5.2. Copy function of the soware 14
5.3. Parameter settings 15
6. TECHNICAL DATA 17
Copyright © 2016 Somfy SAS. All rights reserved. Non contractual images
QuickCopy & QuickCopy PC Soware
Interactive operating instructions
3/18
Page 4
1. DESCRIPTION
USB CABLE TO PC
CONNECTION
LEDS
Show move direction with
manual operation
RESET BUTTON
ON BUTTON WITH BATTERY
OPERATION
SYNC LEDS
Display of communication
from device to QuickCopy
or from QuickCopy to
device
There is a QuickCopy PC Soware written for the QuickCopy. It is a user-friendly soware which
enables copying of device settings to additional devices (as with the QuickCopy device), as well as
parameter settings of the Chronis / Soliris Smoove & Smoove UNO io device.
Copyright © 2016 Somfy SAS. All rights reserved. Non contractual images
QuickCopy & QuickCopy PC Soware
Interactive operating instructions
[ Back to Contents ]
4/18
Page 5
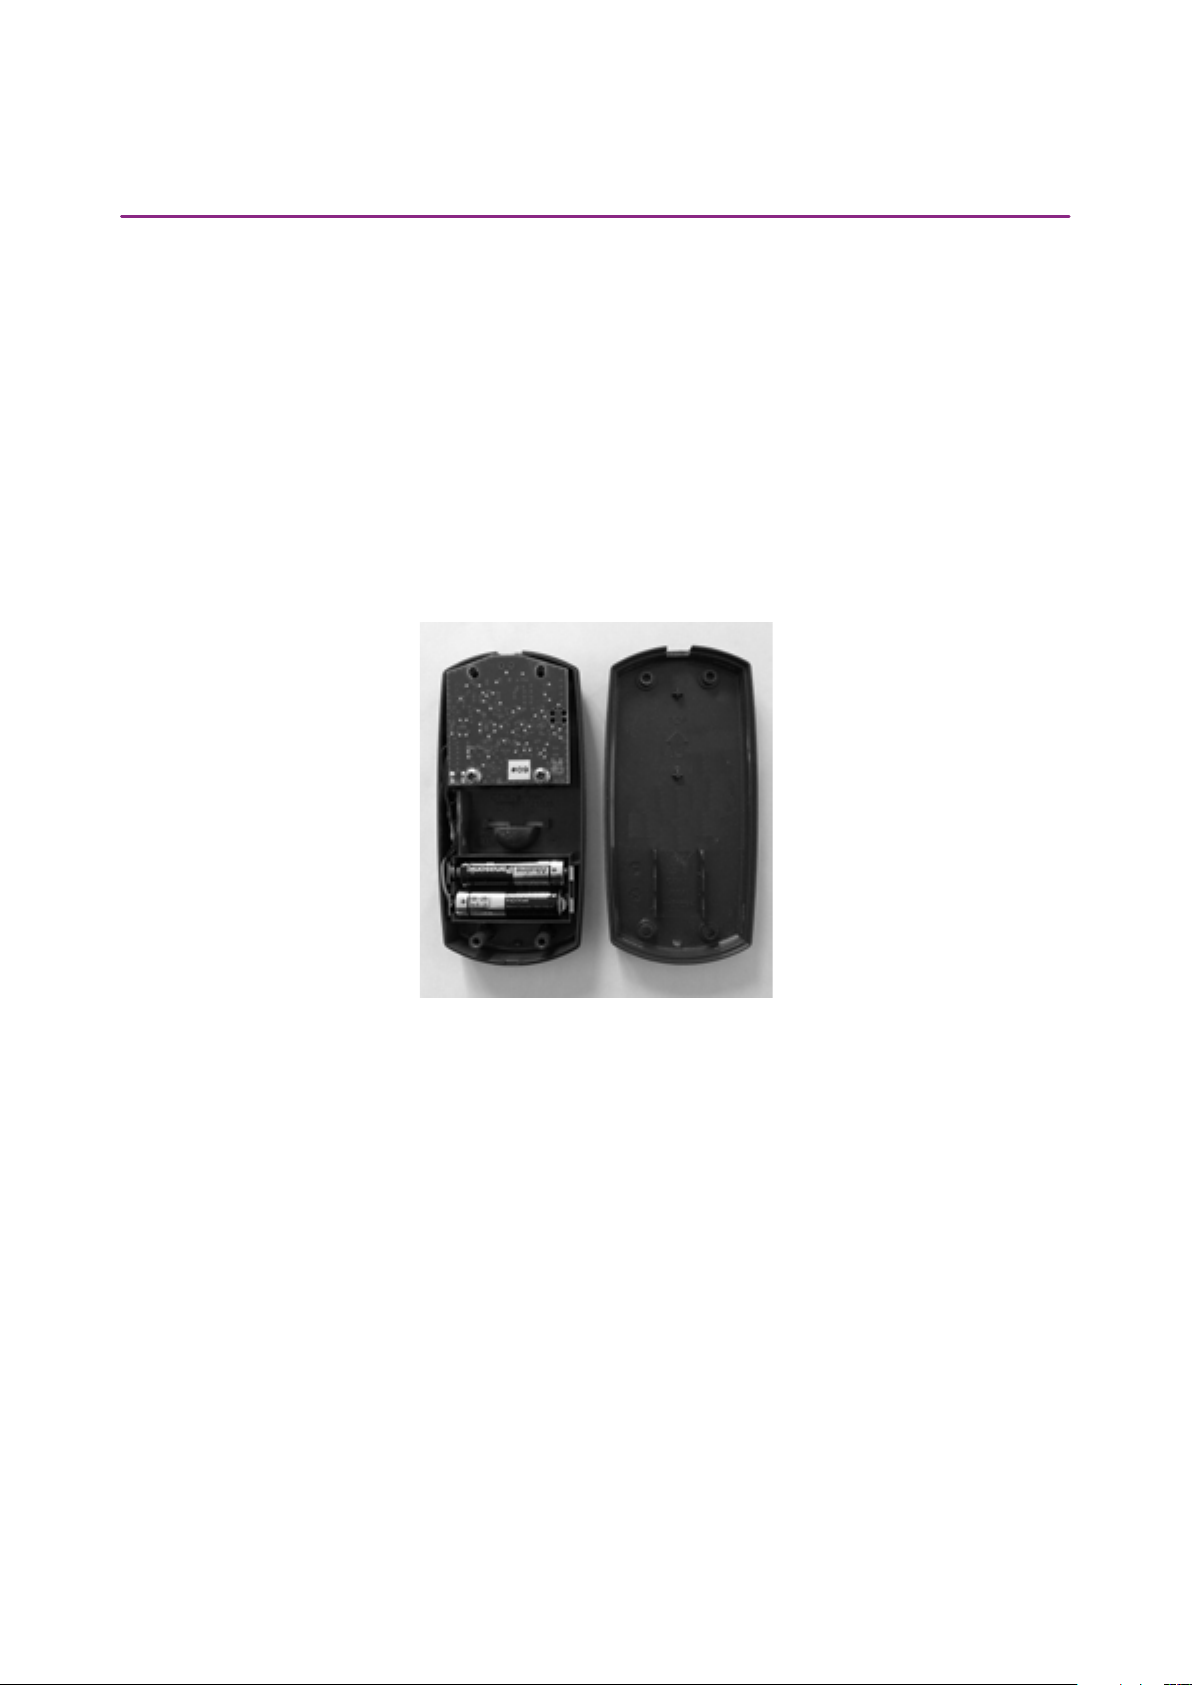
2. STARTING UP THE QUICKCOPY DEVICE
1. Unscrew the 4 screws and open the device.
2. Place the batteries in the QuickCopy device and screw the device closed.
3. Plug the Chronis / Soliris Smoove or Smoove UNO io device to the QuickCopy device.
4. Press the ON button of the QuickCopy device to supply the Chronis / Soliris Smoove or Smoove
UNO io device with power.
> "Somfy", followed by "Operating menu", are briefly displayed.
Note: Aer approx. 3 minutes with no operation of the device, the power supply is switched off
automatically.
Unplug the Smoove device as soon as the Copy procedure is completed.
Copyright © 2016 Somfy SAS. All rights reserved. Non contractual images
QuickCopy & QuickCopy PC Soware
Interactive operating instructions
[ Back to Contents ]
5/18
Page 6
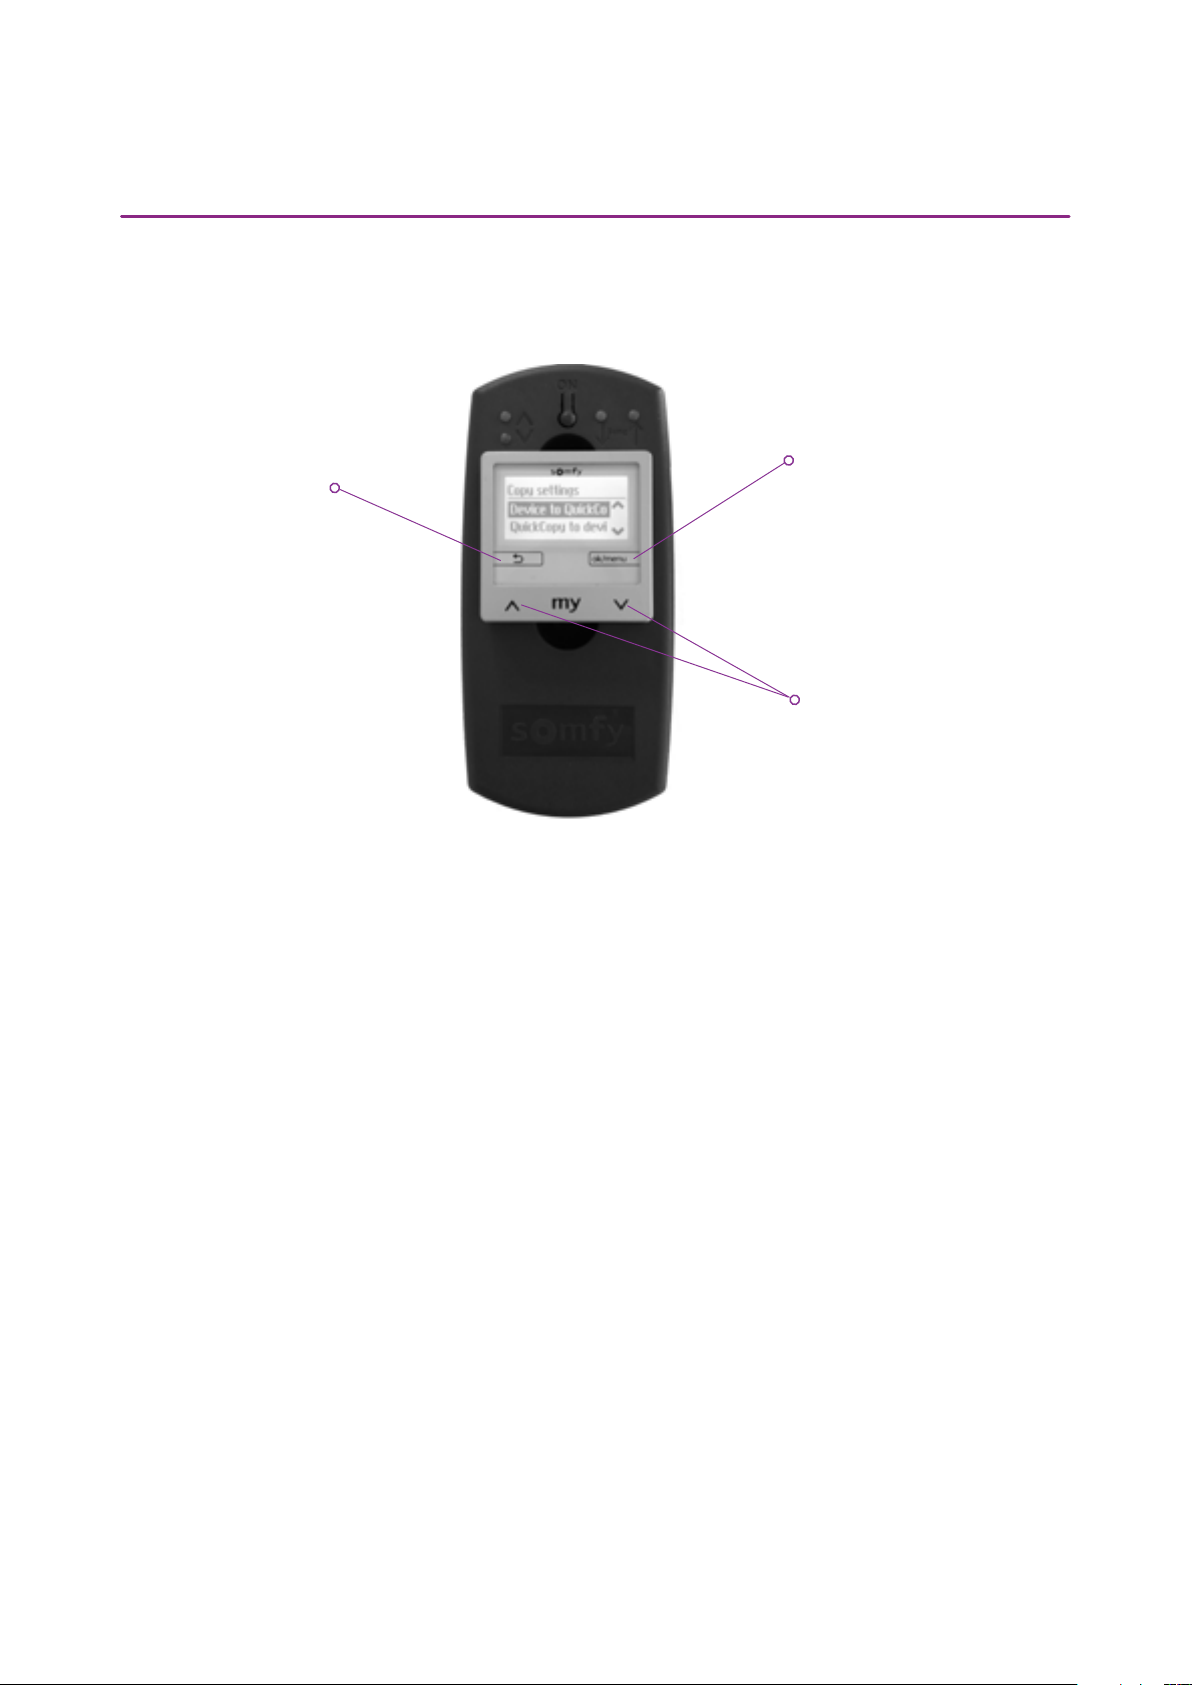
3. SOFT KEY FUNCTIONS OF THE SMOOVE DEVICE
The so key functions of the plugged in Chronis / Soliris Smoove device are similar to that of normal
operation:
Go back to the previous
menu or to menu
Confirm selection or setting
Navigate through the menu
Copyright © 2016 Somfy SAS. All rights reserved. Non contractual images
QuickCopy & QuickCopy PC Soware
Interactive operating instructions
[ Back to Contents ]
6/18
Page 7
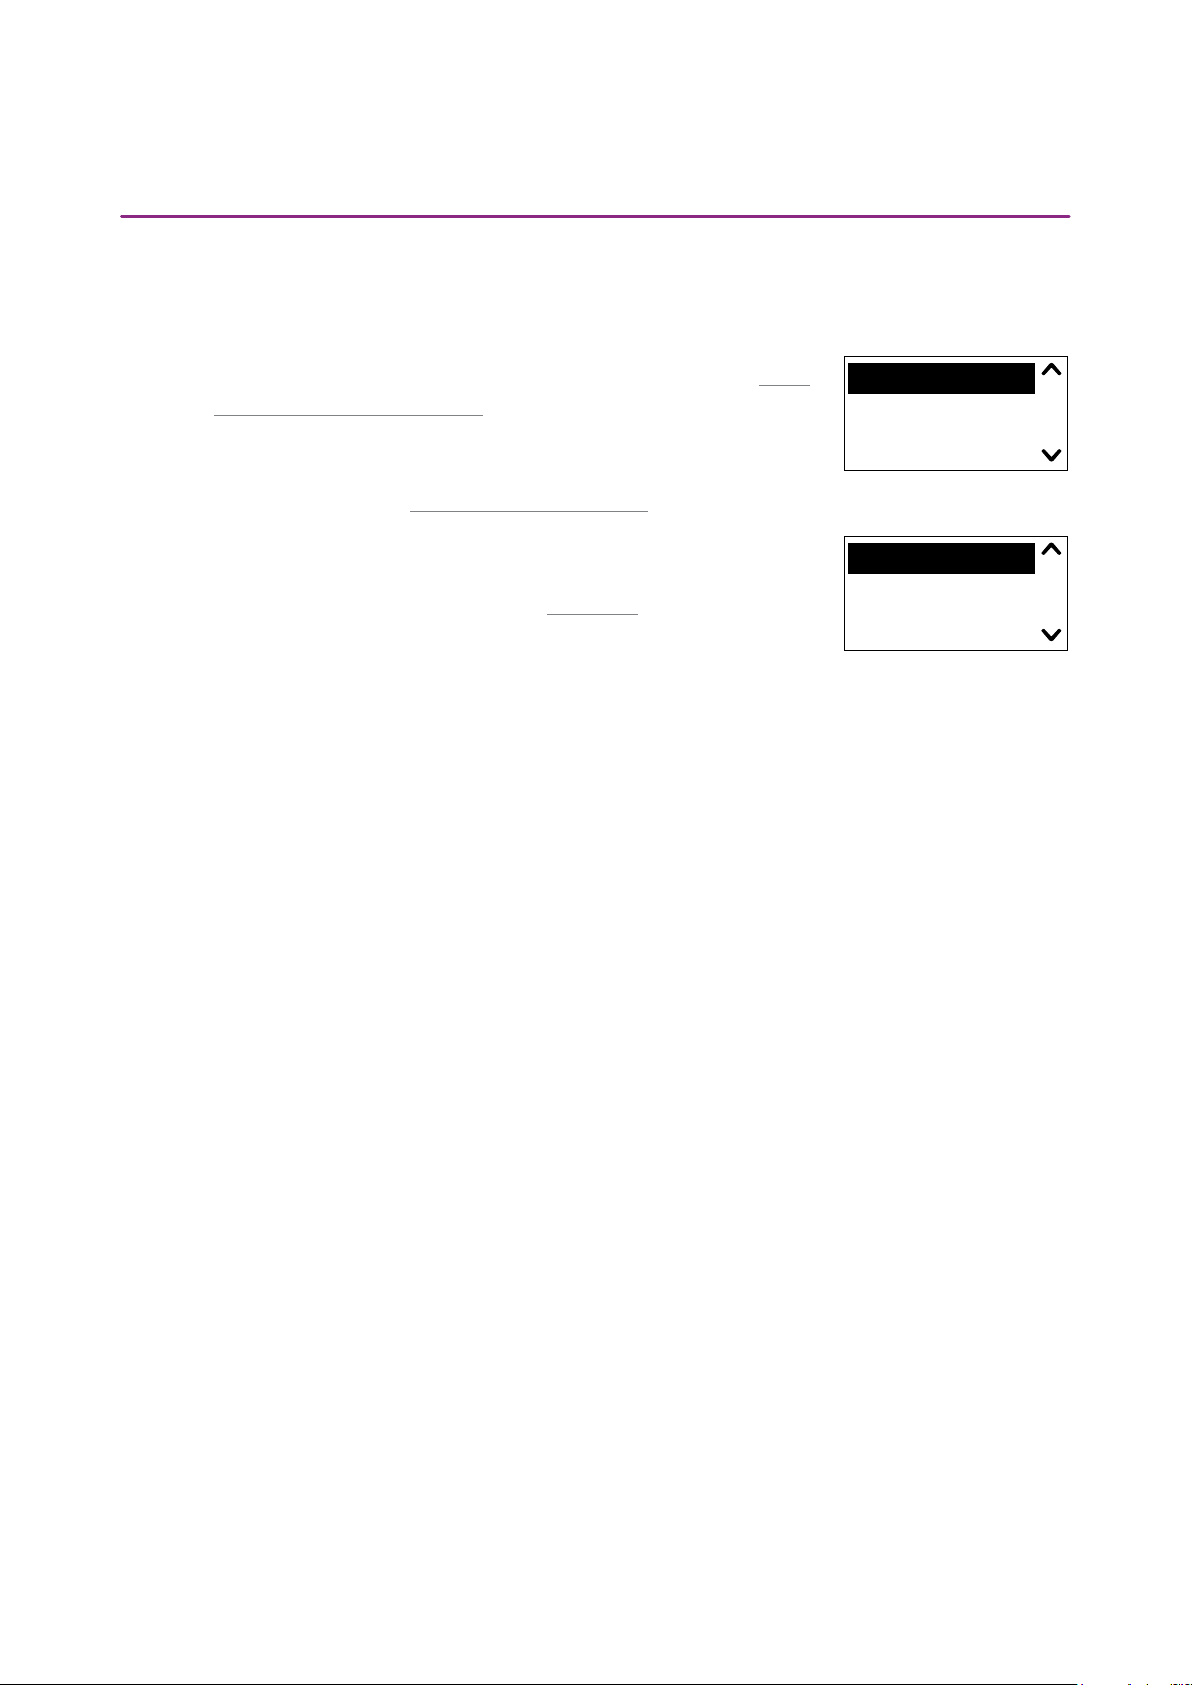
4. COPY FUNCTION OF THE QUICKCOPY DEVICE
On the main display of the Smoove device, "Copy settings" appears with the following options:
- Device to QuickCopy: the settings from plugged-in Smoove
device are copied to the QuickCopy storage (see chapter "Copy
Smoove device to QuickCopy").
- QuickCopy to device: the other way around, the settings from
a QuickCopy storage are copied to the plugged-in Smoove
device (see chapter "Copy QuickCopy to device").
Copy settings
Device to QuickCop
QuickCopy to Devi
- Configure: exit the copy function. QuickCopy is used as a power
supply for the device (see chapter "Configure").
Copy settings
QuickCopy to Devi
Configure
Copyright © 2016 Somfy SAS. All rights reserved. Non contractual images
QuickCopy & QuickCopy PC Soware
Interactive operating instructions
[ Back to Contents ]
7/18
Page 8

4. COPY FUNCTION OF THE QUICKCOPY DEVICE
QuickCopy target
10 - V - Name 10
Only time+date
4.1. Copy Smoove device to QuickCopy
Copy settings
1. Confirm "Device to QuickCopy".
> In the menu point "QuickCopy Target", there are 10 different
storage destinations available (Name 1 to Name 10).
Note: The naming of storage destinations 1 to 10 is fixed and cannot be modified with the QuickCopy
device. For this reason, the storage destinations are to be documented separately.
The status of the storage destinations is shown with a symbol:
- X = the space is empty
- V = the space is occupied
QuickCopy target
1 - V - Name 1
2 - V - Name 2
2. Scroll for storage destination and save your selection.
> The synch LED on the QuickCopy device lights up briefly in green and the following message
appears: "Sending configuration to the QuickCopy tool".
Note: If the storage destination is already occupied, the following message appears: "Already stored
data will be overwritten". Either confirm this option or exit.
Copy only Time and Date
In the factory state, the storage in the QuickCopy device is empty and with no time and date settings.
Here, you have the option of copying only from the plugged-in Smoove device to the QuickCopy
device. When the QuickCopy device is run on batteries, the time and date remain during the period
with battery operation. However, aer changing the batteries, the time and date must be copied / set
again.
1. Following storage destination number 10, confirm the option "Only
time+date".
> The following message appears: "Sending time/date to the
QuickCopy tool".
2. Remove the Smoove device aer completion of the copy procedure.
Copyright © 2016 Somfy SAS. All rights reserved. Non contractual images
QuickCopy & QuickCopy PC Soware
Interactive operating instructions
[ Back to Contents ]
8/18
Page 9

4. COPY FUNCTION OF THE QUICKCOPY DEVICE
QuickCopy source
QuickCopy source
4.2. Copy QuickCopy to device
Copy settings
1. Confirm "QuickCopy to device".
> In the menu point "QuickCopy source", there are 10 different
storage destinations available (Name 1 to Name 10).
The status of the storage is displayed with a symbol:
- X = the space is empty
- V = the space is occupied
2. Scroll for storage destination and save your selection.
> The Sync LED lights up briefly in green and the following message appears: "Getting
configuration from the QuickCopy tool".
1 - V - Name 1
2 - V - Name 2
Note: Should the end products be different, the correct move time must be entered again. If the length
of the end products is identical with the stored configuration, you can take on the value listed and
simply confirm.
Copy only Time and Date
When the Smoove device has not been supplied with electrical power for several hours, it loses the
time and date. For this reason, it is possible to copy only time and date from the QuickCopy device.
1. Following storage destination number 10, choose the option "Only
time+date".
2. Confirm this option.
> The following message appears: "Getting time/date from
QuickCopy tool".
10 - V - Name 10
Only time+date
Copyright © 2016 Somfy SAS. All rights reserved. Non contractual images
QuickCopy & QuickCopy PC Soware
Interactive operating instructions
[ Back to Contents ]
9/18
Page 10

4. COPY FUNCTION OF THE QUICKCOPY DEVICE
4.3. Configure
You exit the copy function and the plugged in device functions as in the built-in condition. The
QuickCopy device now only supplies power.
Carry out the settings comfortably.
Note: To return to the copy function, the Smoove device must be unplugged and subsequently
plugged in again to the QuickCopy device.
4.4. Reset / Delete storage location
In case the complete QuickCopy storage were deleted, press the Reset button for at least 10 seconds.
To show confirmation, both synch LEDs light up briefly.
Copyright © 2016 Somfy SAS. All rights reserved. Non contractual images
QuickCopy & QuickCopy PC Soware
Interactive operating instructions
[ Back to Contents ]
10/18
Page 11

5. QUICKCOPY PC SOFTWARE
The soware serves as a user-friendly support for setting and copying the device parameters.
Configurations can be prepared on the PC and then transferred later to to the QuickCopy device, to
Chronis / Soliris Smoove or Smoove UNO io.
In addition, you have the possibility of reading out already programmed devices on the PC and, if
necessary, to save the settings.
5.1. Starting-up the QuickCopy PC Soware
Installing the soware
System requirements: Windows 7, 8 or 10.
1. Copy the "QuickCopy PC Soware" file on your computer aer downloading it
(www.wiredcontrols.somfy.com).
2. Extract the .zip data.
3. Start the .exe application.
> You will be requested by the system to confirm the
trustworthiness of the soware.
> At start-up, the following messages appear on your PC.
4. Select the language and press "OK".
> The following window appears.
Copyright © 2016 Somfy SAS. All rights reserved. Non contractual images
QuickCopy & QuickCopy PC Soware
Interactive operating instructions
[ Back to Contents ]
11/18
Page 12

5. QUICKCOPY PC SOFTWARE
Connecting the QuickCopy device
1. Connect the QuickCopy device to the PC via the supplied USB cable.
2. Plug the Chronis / Soliris Smoove or Smoove UNO io device to the QuickCopy device.
> The "Controlled by PC application" notification appears on the display of Chronis / Soliris
Smoove.
> With Smoove UNO io, a red LED lights up.
Description of the main overview
TYPE OF PLUGGED IN MOTOR
CONTROLLER DEVICE
TRASH
STORAGE DESTINATIONS IN
QUICKCOPY
LOCAL FILES DATA /
SAVE ON PC
Type of Device
When the Chronis / Soliris Smoove or Smoove UNO io device is plugged-in, the controlled device type
is shown in the upper le area of the display (example: Chronis Smoove UNO S).
Storage locations
The available storage locations of the QuickCopy device are displayed. There are 10 locations for
Chronis / Soliris Smoove versions. For Smoove UNO io, there is a separate storage location.
Checking availability of the storage location
In the factory state, the storage locations are not assigned with names and "---" is displayed. However,
this does not mean that there are no storage locations with data already stored. For this reason, name
the occupied storage locations (right mouse click). The name is then simultaneously transferred to
the QuickCopy device.
Copyright © 2016 Somfy SAS. All rights reserved. Non contractual images
QuickCopy & QuickCopy PC Soware
Interactive operating instructions
[ Back to Contents ]
12/18
Page 13

5. QUICKCOPY PC SOFTWARE
1. With the le mouse button, click on the storage location to enquire
whether the space is occupied.
> If the following window appears, the storage location is free.
2. In the first field, you can give the storage location a name (e.g. living
room).
3. In the second field, you select the corresponding product (e.g. Chronis
Smoove IB+).
4. If the location is occupied, the following window
appears, showing all configuration parameters for
the intended storage location.
Naming the storage location
1. Right click on the storage location to name or rename it.
2. Enter the name.
We recommend always naming the occupied storage location.
> When working with QuickCopy device without soware, the name of the storage location will
now appear.
Deleting the storage location
• Drag and drop (press continuously the le mouse button) to
move to the trash the storage location that you wish to delete.
> A warning appears to confirm deletion.
Copyright © 2016 Somfy SAS. All rights reserved. Non contractual images
QuickCopy & QuickCopy PC Soware
Interactive operating instructions
[ Back to Contents ]
13/18
Page 14

5. QUICKCOPY PC SOFTWARE
Assigning additional storage locations in the PC
When the 10 storage locations are occupied and are insufficient, it is possible to assign additional
storage locations in the PC. However, these are only saved locally in the PC as .xml files.
1. In "Local files", le click on the sheet symbol to assign a
new file.
2. Click on the disk symbol to save the file.
> A confirmation of the saving process appears.
The data is saved in the "Database" sub-directory. This folder can be found at the same place where
the .exe data is located. Up to 100 files can be stored directly in this directory. If you have more files,
we recommend moving these to an additional directory, e.g. "Construction project". Doing this means
that the data will not be displayed when the QuickCopy Soware is started.
5.2. Copy function of the soware
The settings of a device can be copied quickly and easily to another device. In the QuickCopy device,
there are 10 storage locations available for Chronis / Soliris Smoove. For the Smoove UNO io, there
is one location available.
Copy procedure
The settings at a storage location, on the plugged-in device or data stored in a PC, can be copied
easily to another position (device, QuickCopy storage location or PC file).
1. Move the mouse cursor on the copy field.
2. Click the le mouse button.
3. Keep the le mouse button pressed and move the mouse cursor to a new position.
> If this position already contains configuration data, you are asked whether you really wish to
overwrite the current data.
Note: Pay special attention when you are trying to copy between different device types. Aer the copy
procedure, we recommend checking the individual parameter settings. Some copy procedures are
blocked automatically. You can only transfer a plugged-in device to a device with the corresponding
configurations.
Copyright © 2016 Somfy SAS. All rights reserved. Non contractual images
QuickCopy & QuickCopy PC Soware
Interactive operating instructions
[ Back to Contents ]
14/18
Page 15

5. QUICKCOPY PC SOFTWARE
5.3. Parameter settings
In the PC soware, you can match the settings from a plugged-in device to a storage location or to
PC-assigned data.
Opening Settings menu
• Le click the mouse on the field of the device which is plugged in
(e.g. Chronis Smoove Uno S).
> A settings window appears.
• With the settings of the plugged-in Smoove device, the name of the Chronis / Soliris Smoove or
Smoove UNO io device appears in upper le area. You cannot change the type of product as it is
specific to the device.
• With storage spaces and PC data you can change the product type.
Example: Non changeable type of device.
Example: Changeable type of device.
Parameter settings
Depending on the Smoove device, different parameter settings appear. These are the same parameters
that are set directly on the Smoove device (except with Chronis Smoove IB+ and Soliris Smoove IB+:
here there are additional possibilities, as opposed to the device settings (see chapter "Defining zones
with IB+ versions")).
Note: For a detailed explanation of the function and parameter of the Smoove device, refer to the
operating instructions of the corresponding device.
• Le click the mouse on a parameter to set it.
> A support window appears automatically with the parameters and functions explanations
("Tooltip").
Note: As soon as a parameter is set, it is immediately saved and can no longer be set back. For this
reason, save the original setting in a free storage location, or copy it in a PC file and then proceed with
changing.
Copyright © 2016 Somfy SAS. All rights reserved. Non contractual images
QuickCopy & QuickCopy PC Soware
Interactive operating instructions
[ Back to Contents ]
15/18
Page 16

5. QUICKCOPY PC SOFTWARE
Defining zones with IB+ versions
This setting can be done only with the QuickCopy PC Soware.
With Chronis Smoove IB+ and Soliris Smoove IB+, it is possible to define up to 3 different zones. Each
zone for the timer function is settable individually. You can also decide for each zone whether to
activate the Sun, Wind, or Rain Function. For example: the living room and the bedroom should both
have different cycle times. For this, the IB+ device requires 2 zones.
Note:
• In the QuickCopy PC Soware, the number of zones is defined and the corresponding parameters are set. Following this procedure, the Smoove devices are not yet assigned to the corresponding zones. There is a further procedure to assign zones. As soon as the Soliris Smoove
IB+ or Chronis Smoove IB+ is plugged into the wall adaptor again and the Smoove devices
are connected, this procedure can be carried out. Refer to the operating instructions of Soliris
Smoove IB+ and Chronis Smoove IB+.
• The different zones are not designed to control different types of end products (Venetian blinds,
roller shutters, awnings). If you want to do this, you must use different Chronis Smoove IB+ or
Soliris Smoove IB+ devices. You can also apply another product, e.g. Somfy animeo IB+ TouchBuco. With this option, you can even build 4 to 8 zones per central controlling.
Defining the number of zones
1. Open the settings window of a Smoove IB+ device.
2. Under "Zones", select the number of zones (example:
Soliris Smoove IB+ with 2 zones).
Setting a zone individually
Under "Prog. timer", you can set each zone individually.
Instead of 4 cycle times, you now have 8 (2-zone
operation) or 12 (3-zone operation).
Under "Sun, Wind, Rain", you can decide which zone
should carry out which function.
Example: Zone 1 and 2 are both assigned with the
Sun Function. The Wind and Rain Functions are only
assigned to zone 1.
Copyright © 2016 Somfy SAS. All rights reserved. Non contractual images
QuickCopy & QuickCopy PC Soware
Interactive operating instructions
[ Back to Contents ]
16/18
Page 17

6. TECHNICAL DATA
Dimensions (HxWxD) 140x70x25
Batteries 2xAA
Expectancy of battery with a battery
size of 1250 mAh
270 days in stand-by mode
max. 18 hours in uninterrupted operation
Somfy hereby declares that the radio equipment covered by these instructions is in compliance
with the requirements of Radio Directive 2014/53/EU and the other essential requirements of
the applicable European Directives.
The full text of the EU declaration of conformity is available at www.somfy.com/ce.
Copyright © 2016 Somfy SAS. All rights reserved. Non contractual images
QuickCopy & QuickCopy PC Soware
Interactive operating instructions
[ Back to Contents ]
17/18
Page 18

Somfy SAS
50 avenue du Nouveau Monde
F-74300 CLUSES
FRANCE
www.somfy.com
Somfy SAS, capital 20.000.000 Euros, RCS Annecy 303.970.230 - 11/2016
 Loading...