

SOMFY Pergola sc io Installation Manual
www.somfy.com
Markizy.by
Pergola sc io
FR
Notice installateur
DE
Insallationsanleitung
IT
Guida all’installazione
Montagehandleiding
NL
Installation guide
EN
Guía de instalación
ES
Guia de instalação
PT
EL
Tesisatçı Kılavuzu
TR
Ref. 5069578A
ReYAQ
CONTENTS
Markizy.by
Pergola sc io
1. Introduction 37
2. Safety 38
2.1. Safety and responsibility 38
2.2. Specific safety advice 38
3. Installation 38
3.1. Motor preparation 38
3.2. Tube preparation 38
3.3. Motor/tube assembly 39
3.4. Installing the tube/motor assembly 39
4. Wiring 39
5. Commissioning 40
5.1. Identifying setting steps already
completed 40
5.2. Pre-programming the Somfy io local
control point 40
5.3. Checking the motor's direction of rotation 40
5.4. Setting the end limits 41
5.5. Programming the first Somfy io local
control point 42
5.6. Checking the settings 42
6. Operation 42
6.1. Standard operation 42
6.2. Operating with a Somfy io sensor 42
6.3. Feedback 42
7. Additional settings 43
7.1. Favourite position (my) 43
7.2. Adding/Deleting Somfy io control points
and io sensors 43
7.3. Modifying end limits 43
7.4. Advanced functions 43
8. Tips and recommendations 44
8.1. Questions about the Pergola sc io? 44
8.2. Replacing a lost or broken Somfy io
control point 45
8.3. Restoring the original configuration 45
9. Technical data 45
1. INTRODUCTION
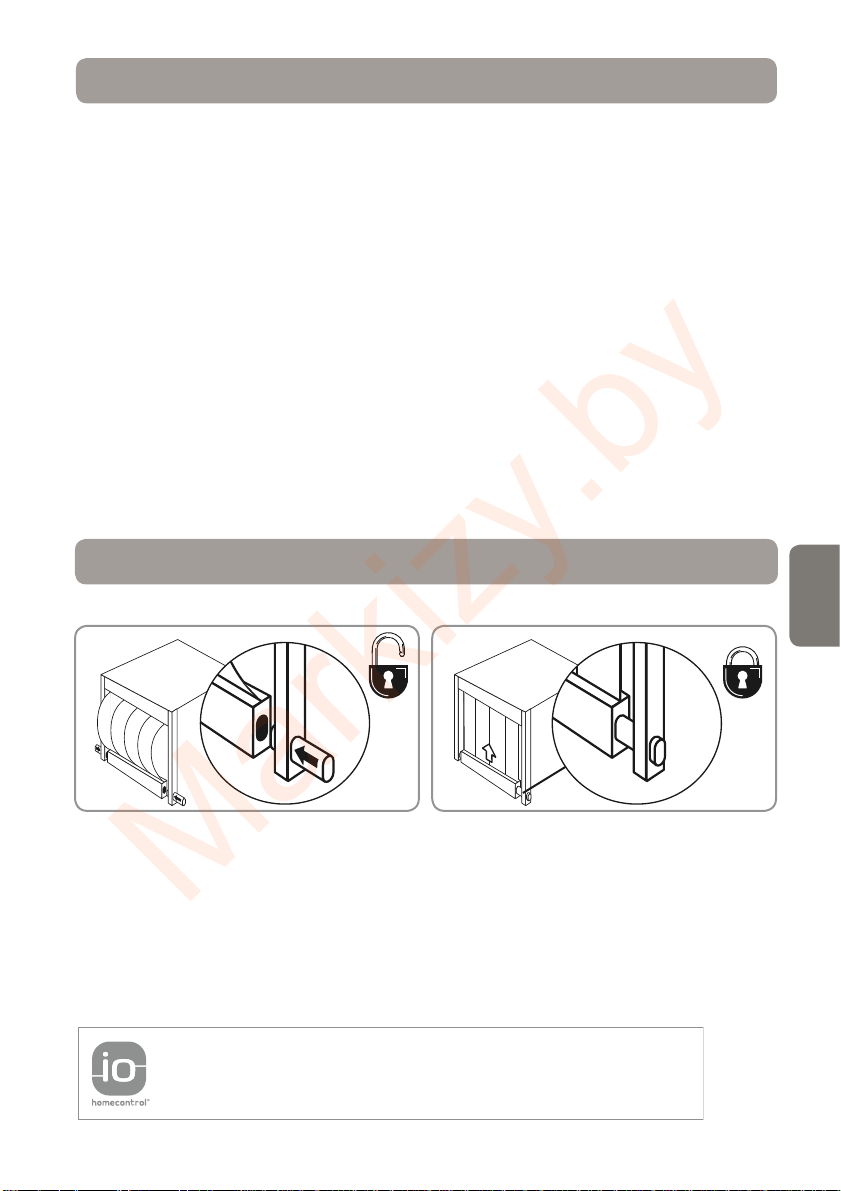
The Pergola sc io motor is designed to drive all vertical blinds used on terraces with or without a
manual latch (with or without fabric tension).
EN
What is io-homecontrol®?
The Pergola sc io uses io-homecontrol®, the new universal and secure wireless communication
protocol, shared by the major manufacturers in the world of home automation. io-homecontrol®
enables all comfort and security equipment to intercommunicate and be actuated via a single control
point.
The flexibility and perfect compatibility of the io-homecontrol® system provides support for you as
your needs evolve. You can start by automating roller shutters and the front door, then equip
the outside blinds, the gate and garage door or garden lighting with the io-homecontrol® system.
These scalable items of equipment are still compatible with the existing system, thanks to
io-homecontrol® technology, which ensures their inter-operability.
For further information please visit the website www.io-homecontrol.com..
io-homecontrol® provides advanced and secure radio technology that is easy to install.
io-homecontrol
security and energy savings.
Copyright © 2010 Somfy SAS. All rights reserved.
®
labelled products communicate with each other, improving comfort,
www.io-homecontrol.com
37
Pergola sc io
Markizy.by
2. SAFETY
2.1. Safety and responsibility
Before installing and using this product, please read this guide carefully.
This Somfy product must be installed by a professional motorisation and home automation installer,
for whom this guide is intended.
Moreover, the installer must comply with current standards and legislation in the country in which the
product is being installed, and inform his customers of the operating and maintenance conditions for
the product.
Any use outside the area of application specified by Somfy is prohibited. This invalidates the warranty
and discharges Somfy of all liability, as does any failure to comply with the instructions given herein.
Never begin installing without first checking the compatibility of this product with the associated
equipment and accessories.
2.2. Specific safety advice
In addition to the safety instructions described in this guide, be sure to also observe the instructions
set out in the attached document "Safety instructions to follow and keep".
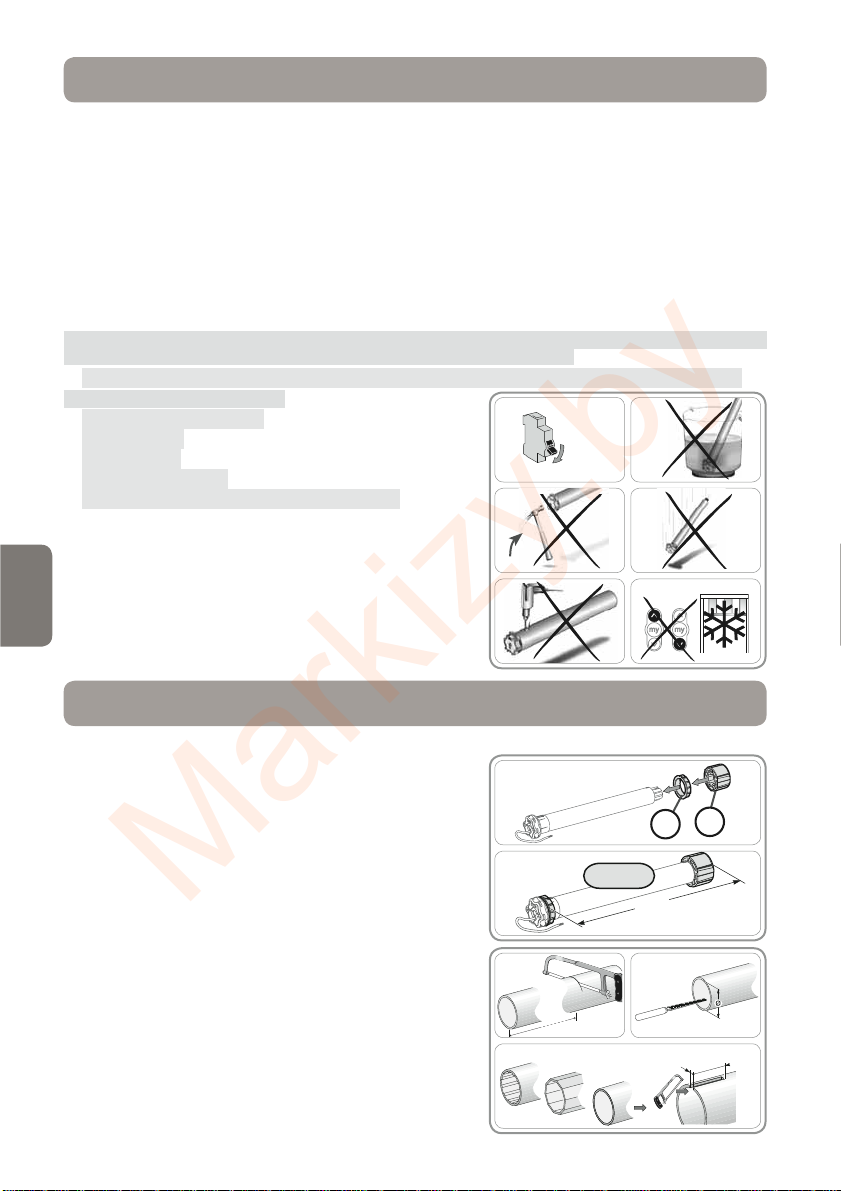
1) Switch off the mains supply for the blind before performing any service operation in the vicinity.
To avoid damaging the product:
Never immerse it in liquid!2)
Avoid impacts!3)
Do not drop it!4)
Never drill holes in it!5)
Avoid moving the blind if ice has formed on it.6)
1
OFF
3
56
2
4
EN
3. INSTALLATION
The Pergola sc io must be installed in a location sheltered from inclement weather.
3.1. Motor preparation
1) Fit the crown (A) and the drive wheel (B) to the motor.
Measure the length (L1) between the interior edge of the 2)
motor head and the outer rim of the drive wheel.
3.2. T ube preparation
Cut the roller tube to the required length.1)
Deburr the roller tube and remove the swarf. 2)
For smooth roller tubes, cut a notch with the following 3)
measurements:
e = 4 mm h = 28 mm. -
38
1
B
A
2
1
3
Copyright © 2010 Somfy SAS. All rights reserved.
L1 = …
2
L1
Ø > 47
e
h
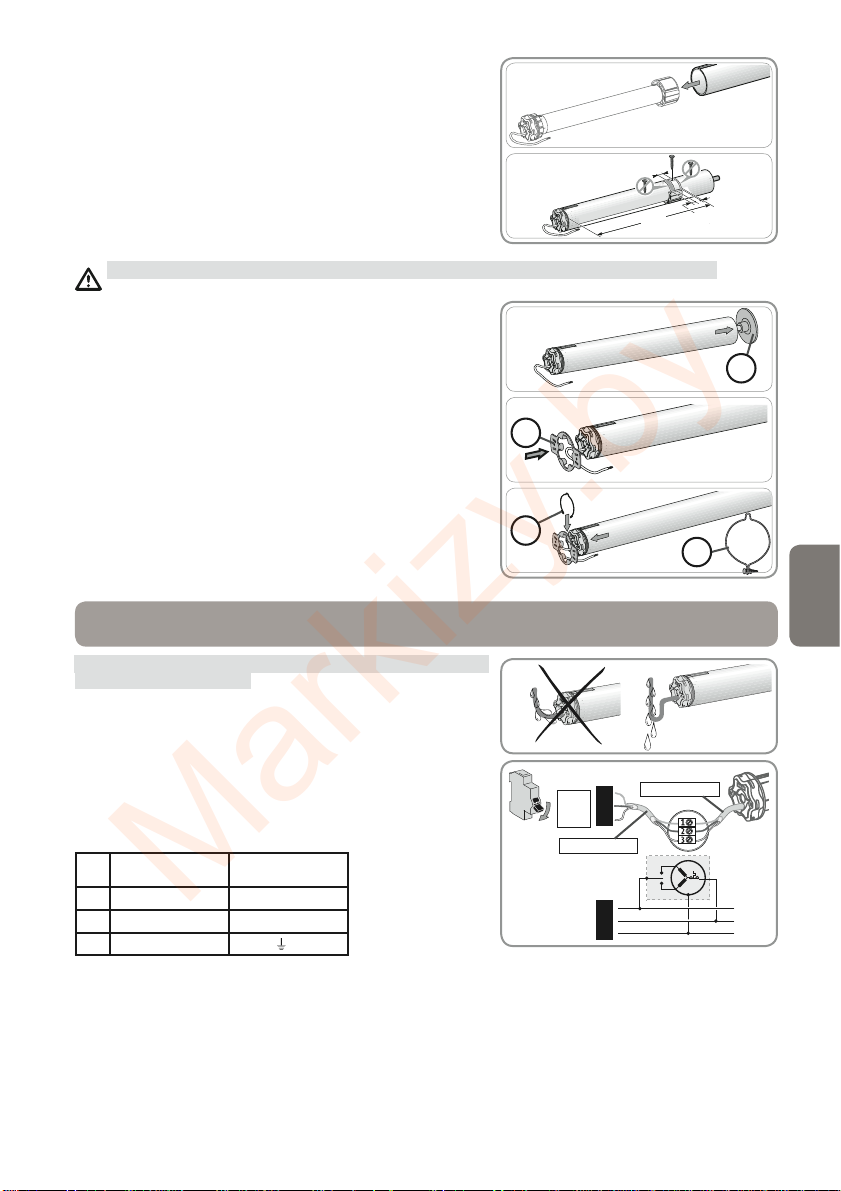
3.3. Motor/tube assembly
Markizy.by
Slide the motor into the roller tube. 1)
For smooth roller tubes, position the notch previously cut
on the crown.
For safety reasons, fix the roller tube to the drive wheel 2)
with 4 x Ø 5 mm self-tapping screws or 4 x Ø 4.8 mm
steel pop rivets located:
at least 5 mm from the outer rim of the drive wheel: -
L1 - 5, and
no more than 15 mm from the outer rim of the drive -
wheel: L1 - 15.
The screws or pop rivets must only be attached to the drive wheel and not to the motor.
1
2
15 mm
3.4. Installing the tube/motor assembly
Fit the tube/motor assembly to the end bracket (C).1)
Fit the tube/motor assembly to the motor bracket (D).2)
Depending on the type of bracket, position the retaining ring 3)
(E) (for motors 85 Nm with a retaining ring, it is essential
to use the locking retaining ring (F)).
1
2
D
3
E
L1
Pergola sc io
5 mm
20 mm
C
F
4. WIRING
Always make a loop in the power supply cable to prevent
water entering the motor!
Cut off the mains power supply. Connect the motor according to the information in the -
table below:
230 V ~ 50 Hz Motor cable
1 Brown Live (P)
2 Blue Neutral (N)
3 Y ellow/Green
Copyright © 2010 Somfy SAS. All rights reserved.
Earth (
)
OFF
230 V
50 Hz
3 x 1.5 mm
3 x 0.75 mm
1
2
~
3
2
1
2
3
2
39
EN
 Loading...