

SOMFY 2401220 User Manual
Somfy SAS dans un souci constant d’évolution et d’amélioration peut modifi er le produit sans préavis. Photos non contractuelles. / In het streven naar het voortdurend ontwikkelen en verbeteren van onze producten, behoudt Somfy SAS zich het recht voor deze te wijzigen
zonder voorafgaande kennisgeving. Aan de foto’s kunnen geen rechten worden ontleend. / As part of our policy of continuous improvement, Somfy SAS reserves the right to modify the product without notice. Photos are not contractually binding.
Capteur de température extérieur
sans fi l
5116366B
Somfy SAS, capital 20.000.000 Euros, RCS Annecy 303.970.230 01/2015
www.somfy.com
FR NL EN
Draadloze
temperatuursensor voor buiten
Deze handleiding beschrijft het installeren en het in bedrijf stellen van de temperatuursensor
voor buiten.
Productbeschrijving
De temperatuursensor voor buiten is een draadloze temperatuursensor. Deze zendt
de gemeten temperatuur naar de Somfy domotica Box voor het automatisch besturen
op basis van de temperatuur.
Inhoud van de verpakking
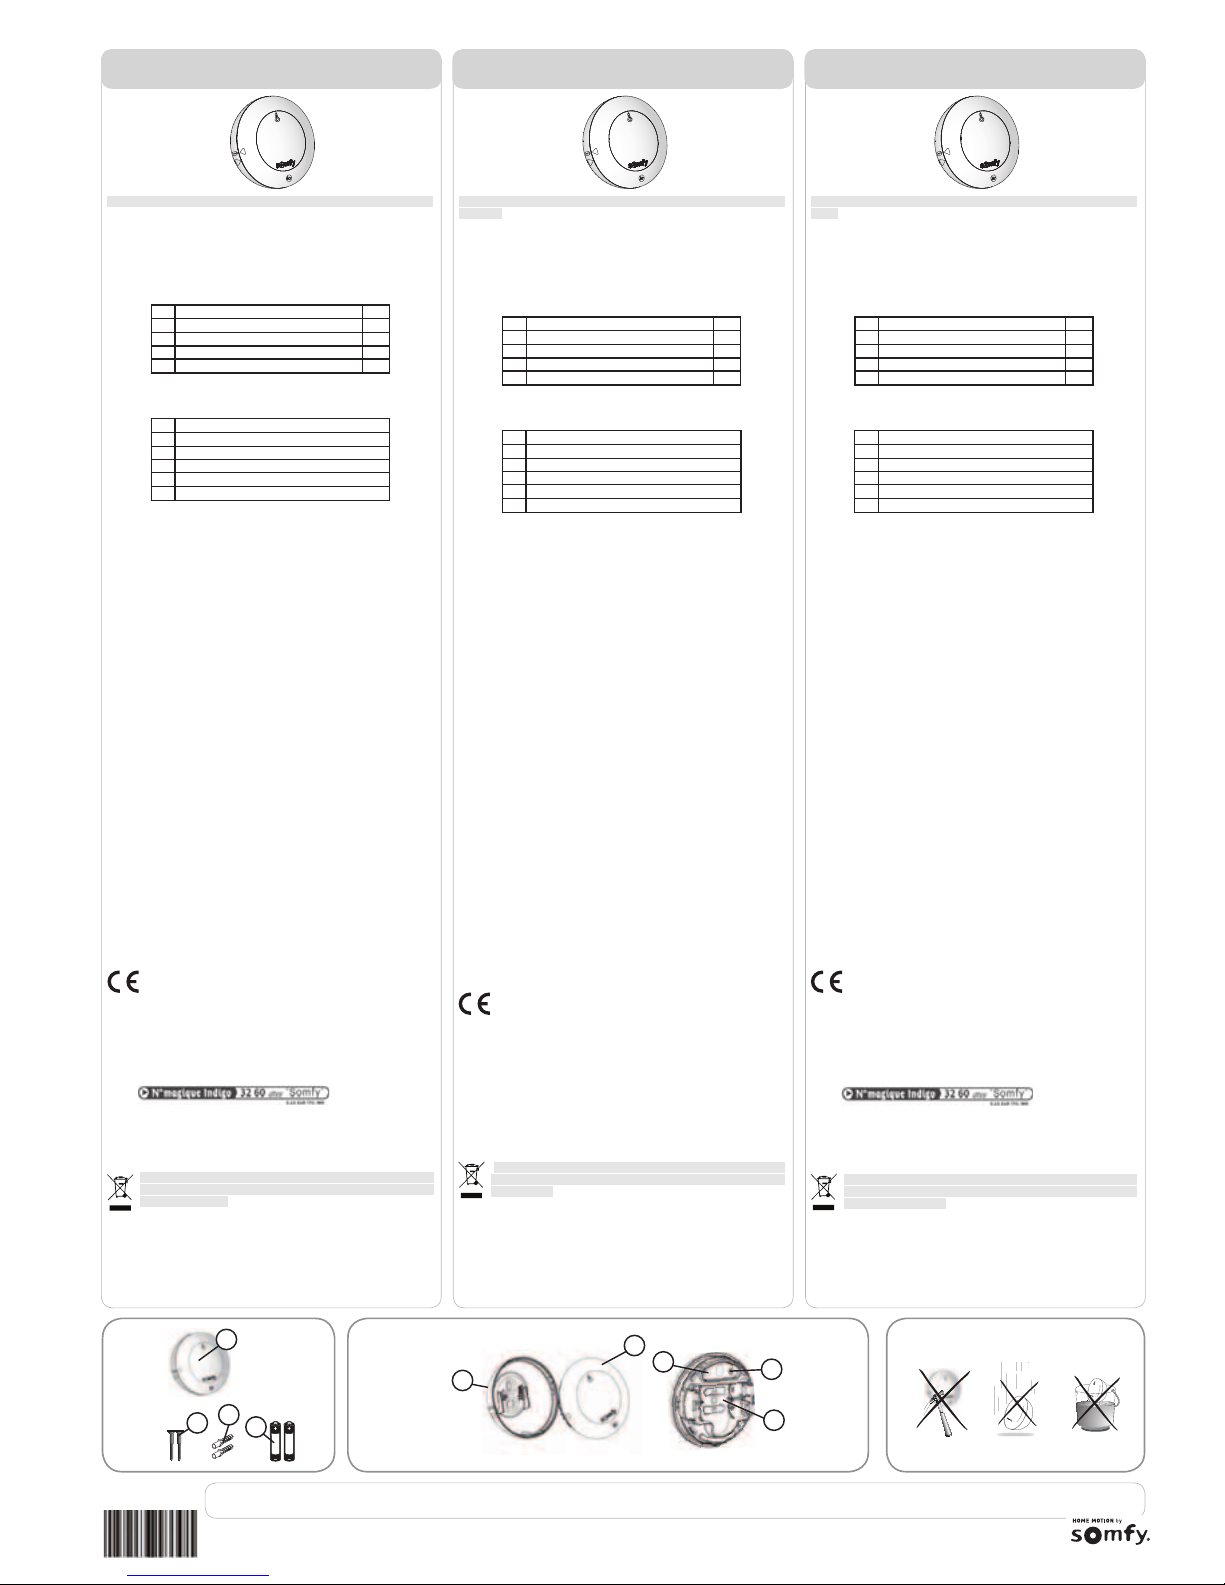
Zie fi guur A
Omschrijving Q.
a Temperatuursensor voor buiten 1
b Schroeven 2
c Pluggen 2
d Batterijen 1,5 V, type AA (LR6) 2
Temperatuursensor voor buiten in detail
Zie fi guur B
Omschrijving
e Muursteun
f Temperatuursensor
g Programmeertoets (PROG.)
h Oranje/groene LED
i Plaats van de batterijen
Veiligheid - belangrijke informatie
Algemeen
Lees deze installatiegids en de bijgevoegde veiligheidsvoorschriften aandachtig
voordat u begint met de installatie van dit Somfy product. Houd u nauwkeurig aan
de instructies die in deze handleiding worden gegeven en bewaar deze handleiding
gedurende de gehele levensduur van het product. Controleer vóór de installatie of dit
Somfy product compatibel is met de aanwezige apparatuur en accessoires.
In deze handleiding staan de installatie en het gebruik van dit product beschreven. Elke
installatie of vorm van gebruik dat buiten het door Somfy gedefi nieerde toepassingsgebied
valt, is niet toegestaan. Hierdoor en door het negeren van de instructies in deze
handleiding, vervallen iedere aansprakelijkheid en garantie van Somfy.
Somfy is niet aansprakelijk voor veranderingen van normen en standaards die van
kracht zijn geworden na publicatie van deze handleiding.
Algemene veiligheidsvoorschriften
Dit apparaat mag niet gebruikt worden door personen (inclusief kinderen) met
verminderde fysieke, zintuiglijke of verstandelijke capaciteiten of personen zonder
ervaring of kennis, behalve als zij onder toezicht staan van iemand die verantwoordelijk
is voor hun veiligheid of toezicht, of die instructies vooraf over het gebruik van het
apparaat heeft gegeven.
Laat kinderen niet met het apparaat spelen.
Specifi eke veiligheidsvoorschriften
Zie Figuur C
Somfy wijst elke aansprakelijkheid af in geval van schade aan de installatie ten gevolge
van weersomstandigheden die niet door de sensor zijn gedetecteerd.
Om het product niet te beschadigen:
• Voorkom schokken!
• Niet laten vallen!
• Dompel het nooit onder.
• Zorg ervoor dat de sensor altijd schoon is en niet bedekt wordt door bladeren,
sneeuw, enz. en controleer regelmatig of hij goed werkt.
• Maak de sensor schoon met een droge doek, maak hem niet onder een waterstraal
schoon, noch onder hoge druk en gebruik geen schurende schoonmaakmiddelen
noch oplosmiddelen.
Conformiteit
Hierbij verklaart Somfy dat dit product in overeenstemming is met de
essentiële eisen en de andere relevante bepalingen van richtlijn 1999/5/CE.
Een conformiteitsverklaring staat ter beschikking op de website www.somfy.
com/ce (Thermis Wirefree io) en is bruikbaar in de EU, Zwitserland en
Noorwegen. Aan de afbeeldingen kunnen geen rechten worden ontleend.
Garantie
Dit product wordt 3 jaar gegarandeerd gerekend vanaf de aankoopdatum.
Assistentie
België - Nederland
www.somfy.mobi
Recycling
Gooi het product noch de oude batterijen niet weg met het huishoudafval. Let
er op dat u ze bij een inzamelpunt of depot inlevert zodat ze gerecycleerd
kunnen worden.
Technische gegevens
Radiofrequentie 868-870 MHz
Beschermingsgraad IP34
Veiligheidsniveau Klasse III
Werkingstemperatuur -20 °C tot +60 °C
Afmetingen L x H x D in mm 78 x 78 x 37
Voeding 2 batterijen type AA (LR6), 1,5 V
Wireless
outdoor temperature sensor
These instructions describe how to install and commission the Outdoor temperature
sensor.
Product description
The Outdoor temperature sensor is a wireless temperature sensor. It transmits the
temperature level detected to the Somfy home automation box so that the applications
can be automatically controlled in accordance with the temperature level.
Contents of the package
See fi gure A
Description Q.
a Outdoor temperature sensor 1
b Screws 2
c Plugs 2
d AA (LR6) 1.5 V batteries 2
The Outdoor temperature sensor in detail
See Figure B
Description
e Wall support
f Temperature sensor
g Programming button (PROG.)
h Orange/green indicator light
i Battery housing
Safety - Important information
General information
Read this installation guide and the safety instructions carefully before installing this
Somfy product. All the instructions given must be followed closely and this guide must
be stored in a safe place throughout the service life of your product. Before installation,
check that this Somfy product is compatible with the associated equipment and
accessories.
These instructions give information on how to install and use this product. Any
installation or use outside the fi eld of application specifi ed by Somfy is forbidden. This
invalidates the warranty and discharges Somfy of all liability, as does any failure to
comply with the instructions given herein.
Somfy cannot be held responsible for any changes in standards which come into effect
after the publication of these instructions.
General safety instructions
This product is not designed to be used by persons (including children) whose physical,
sensory or mental capacity is impaired, or persons with little experience or knowledge,
unless they are under supervision or have received instructions on using the appliance
by a person responsible for their safety.
Do not let children play with this product.
Specifi c safety advice
See Figure C
Somfy accepts no liability in the event of damage to equipment caused by weather
conditions not detected by the sensor.
To avoid damaging the product:
• Avoid impacts!
• Do not drop it!
• Never submerge it in water.
• Ensure that the sensor is kept clean and unobstructed by leaves, snow, etc. and
check regularly that it is functioning correctly.
• Clean the sensor with a dry cloth. Do not use a water jet or high pressure device to
clean it and do not use abrasive products or solvents.
Conformity
Somfy hereby declares that this product is in compliance with the essential
requirements and other relevant provisions of Directive 1999/5/EC. A
Declaration of Conformity is available at the web address www.somfy.com/
ce (Thermis Wirefree io), usable in EU, CH and NO. Images are not
contractually binding.
Warranty
This product is guaranteed for 3 years from the date of purchase.
Assistance
France
www.ma-domotique-somfy.fr
Belgium/Netherlands
www.somfy.mobi
Recycling
Do not dispose of either the product or the used batteries with household
waste. Please take them to a collection point or an approved centre to ensure
they are recycled correctly.
Technical data
Radio frequency 868-870 MHz
Index protection rating IP34
Safety level Class III
Operating temperature -20°C to +60°C
Dimensions in mm (H x w x d) 78 x 78 x 37
Power supply 2 AA (LR6) 1.5 V batteries
a
b
c
d
f
e
h
i
g
CAB
Cette notice décrit l’installation et la mise en service du Capteur de température extérieur.
Présentation du produit
Le Capteur de température extérieur est un capteur température sans fi l. Il transmet le
niveau de température capté à la box domotique Somfy afi n de piloter automatiquement
les applications en fonction du niveau de température.
Contenu du colis
Voir fi gure A
Désignation Q.
a Capteur de température extérieur 1
b Vis 2
c Chevilles 2
d Piles 1,5 V, type AA (LR6) 2
Le Capteur de température extérieur en détails
Voir fi gure B
Désignation
e Support mural
f Capteur de température
g Bouton de programmation (PROG.)
h Voyant orange/vert
i Logement des piles
Sécurité - Informations importantes
Généralités
Lire attentivement cette notice d’installation et les consignes de sécurité avant
de commencer l’installation de ce produit Somfy. Suivre précisément chacune des
instructions données et conserver cette notice aussi longtemps que le produit. Avant
toute installation, vérifi er la compatibilité de ce produit Somfy avec les équipements et
accessoires associés.
Cette notice décrit l’installation et l’utilisation de ce produit.Toute installation ou
utilisation hors du domaine d’application défi ni par Somfy est non conforme. Elle
entraînerait, comme tout irrespect des instructions fi gurant dans cette notice,
l’exclusion de la responsabilité et de la garantie Somfy.
Somfy ne peut être tenu responsable des changements de normes et standards
intervenus après la publication de cette notice.
Consignes générales de sécurité
Ce produit n’est pas prévu pour être utilisé par des personnes (y compris les enfants)
dont les capacités physiques, sensorielles ou mentales sont réduites, ou des
personnes dénuées d’expérience ou de connaissance, sauf si elles ont pu bénéfi cier,
par l’intermédiaire d’une personne responsable de leur sécurité, d’une surveillance ou
d’instructions préalables concernant l’utilisation de l’appareil.
Ne laissez pas les enfants jouer avec ce produit.
Consignes spécifi ques de sécurité
Voir fi gure C
Somfy dégage toutes responsabilités en cas de destruction de matériel survenu lors
d’un événement climatique non détecté par le capteur.
Pour ne pas endommager le produit :
• Éviter les chocs !
• Éviter les chutes !
• Ne jamais l’immerger.
• S’assurer que le capteur est toujours propre et non caché par des feuilles, de la
neige, etc, et vérifi er son bon fonctionnement régulièrement.
• Nettoyer le capteur avec un chiffon sec, ne pas le nettoyer au jet d’eau, ni sous haute
pression, ne pas utiliser de produits abrasifs ni de solvant.
Conformité
Par la présente Somfy déclare que le produit est conforme aux exigences
essentielles et aux autres dispositions pertinentes de la directive 1999/5/CE.
Une déclaration de conformité est mise à disposition à l’adresse internet
www.somfy.com/ce (Thermis Wirefree io), utilisable en UE, CH et NO.
Images non contractuelles.
Garantie
Ce produit est garanti 3 ans à compter de sa date d’achat.
Assistance
France
www.ma-domotique-somfy.fr
Belgique
www.somfy.mobi
Recyclage
Ne pas jeter le produit ou les piles usagées avec les ordures ménagères.
Veiller à les déposer dans un point de collecte ou dans un centre agréé afin de
garantir leur recyclage.
Caractéristiques techniques
Fréquence radio 868-870 MHz
Indice de protection IP34
Niveau de sécurité Classe III
Température d’utilisation -20°C à +60°C
Dimensions L x H x P en mm 78 x 78 x 37
Alimentation 2 piles type AA (LR6), 1,5 V
FR NL EN
Stap 1: In bedrijf stellen
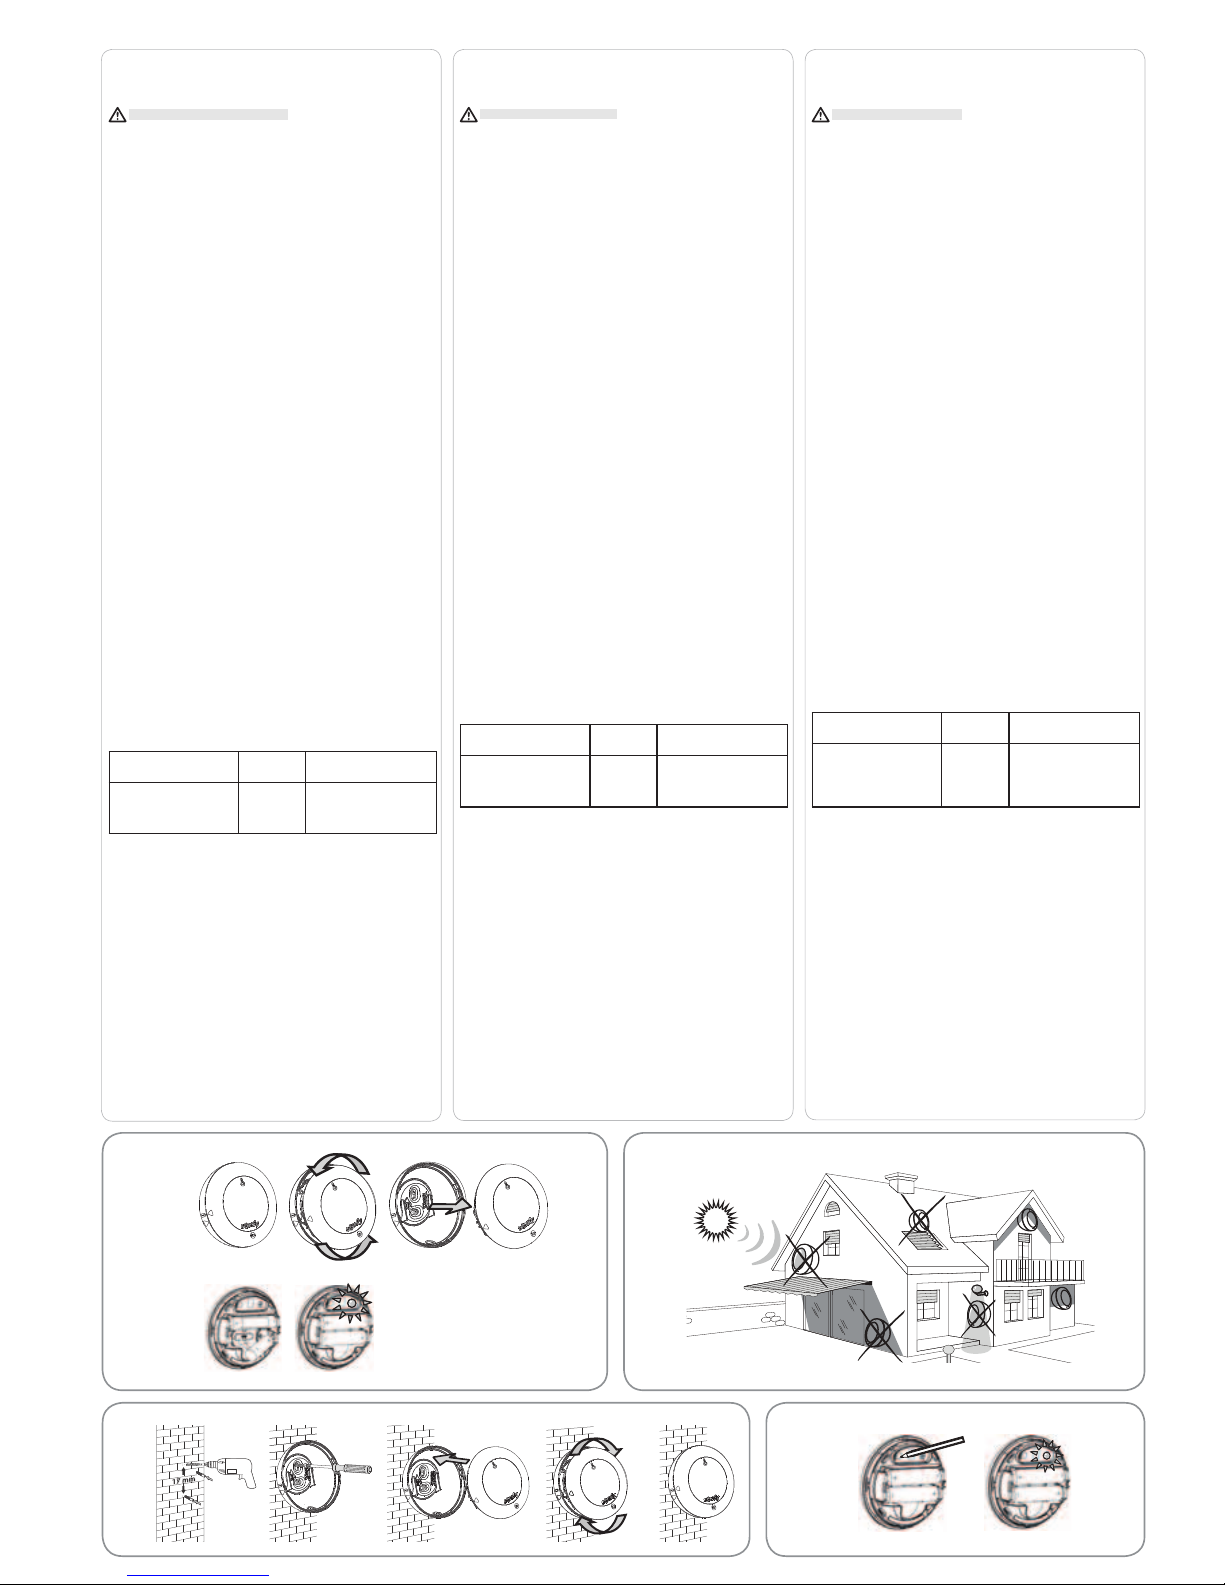
1.1. Plaatsen van de batterijen van de temperatuursensor voor buiten
Zie fi guur D
Gebruik nooit oplaadbare batterijen.
[1]. Open de temperatuursensor voor buiten: Draai de sensor op zijn muursteun
(linksom) tot de twee pijlen aan de zijkant op één lijn liggen en scheid de twee delen
van elkaar.
[2]. Plaats de twee meegeleverde 2 batterijen en houd u aan de polariteit: De LED van
de sensor brandt groen.
[3]. Laat de sensor open om verder te gaan met het in bedrijf stellen.
1.2. Koppelen van de temperatuursensor voor buiten met de Somfy
domotica Box
[1]. Log in op de TaHoma®-interface van de Somfy domotica Box.
[2]. Ga naar het menu "CONFIGURATIE".
[3]. Klik in het tabblad "IO" op "toevoegen".
[4]. Selecteer de familie van de sensoren en daarna OK.
[5]. Selecteer de temperatuursensor io en volg daarna de aanwijzingen op het scherm.
Stap 2: Installatie van de temperatuursensor voor buiten
2.1. Voorschriften
Zie fi guur E
[1]. Installeer de sensor in verticale positie in de schaduw (niet rechtstreeks beschenen
door de zon) en beschut tegen de weersomstandigheden.
[2]. Kies een goed bereikbare plaats.
2.2. Monteren en bevestigen van de temperatuursensor voor buiten
Zie fi guur F
[1]. Boor twee gaten (diameter 6 mm) boven elkaar op ongeveer 17 mm van elkaar.
[2]. Zet de muursteun vast met de bijgeleverde schroeven met het langwerpige gat
horizontaal aan de onderkant, het opschrift "OP" moet leesbaar zijn.
[3]. Plaats de temperatuursensor voor buiten terug op de muursteun, zorg dat de twee
pijlen op één lijn liggen en draai hem rechtsom om hem te vergrendelen.
Stap 3: Confi guratie/Programmeren van de sensor met de
Somfy domotica Box
3.1. Confi guratie
[1]. Log in op de TaHoma®-interface van de Somfy domotica Box.
[2]. Selecteer de sensor om deze te confi gureren en volg de aanwijzingen op het
scherm.
[3]. Met de TaHoma®-interface van de Somfy domotica Box kunt u programma's
inschakelen die passen bij de gemeten temperatuur.
3.2. Programmeren
De instellingen van de temperatuursensor voor buiten kunnen een permanent karakter
hebben of slechts actief zijn op bepaalde dagen van de week gedurende een bepaalde
periode, of inactief zijn. Volg de aanwijzingen op de interface om de werking van de
sensor te programmeren.
Tips en adviezen
Vragen over de temperatuursensor voor buiten
Vaststellingen
Mogelijke
oorzaken
Oplossingen
De led van de
temperatuursensor voor buiten
knippert oranje.
De batterijen
zijn bijna leeg.
Vervang de batterijen door
2 nieuwe alkaline batterijen AA
(LR6) 1,5 V en let daarbij op de
polariteit.
Vervangen van de batterijen van de temperatuursensor voor buiten
Zie het hoofdstuk "In bedrijf stellen".
Terugzetten van de fabrieksconfi guratie van de temperatuursensor voor
buiten
Zie fi guur G
• Druk 7 seconden op de PROG toets van de sensor: de led van de sensor licht groen
op na 2 seconden daarna knippert hij groen na 7 seconden. De temperatuursensor
voor buiten is in de fabrieksconfi guratie.
• Om de temperatuursensor voor buiten opnieuw te kunnen gebruiken, voert u de
complete inbedrijfstelling opnieuw uit en slaat u deze opnieuw op in de Somfy
domotica Box.
Step 1: Commissioning
1.1. Fitting batteries in the Outdoor temperature sensor
See Figure D
Never use rechargeable batteries.
[1]. Open the Outdoor temperature sensor: rotate the sensor on its wall bracket
(anticlockwise) to align the two arrows on the side and separate the two parts.
[2]. Install the 2 supplied batteries, observing the polarity: the sensor's indicator light
comes on green.
[3]. Leave the sensor open to continue commissioning.
1.2. Linking the Outdoor temperature sensor to the Somfy home
automation box
[1]. Connect to the TaHoma®interface on the Somfy home automation box.
[2]. Go to the "CONFIGURATION" menu.
[3]. In the "IO" tab, click "add".
[4]. Select the family of sensors then OK.
[5]. Select the Temperature sensor io then follow the instructions shown on the screen.
Step 2: Installing the Outdoor temperature sensor
2.1. Recommendations
See fi gure E
[1]. Install the sensor in a vertical position, in the shade (not in direct sunlight) and
sheltered from inclement weather.
[2]. Choose a location which is easy to access.
2.2. Fitting and mounting the Outdoor temperature sensor
See fi gure F
[1]. Drill two holes (6 mm in diameter) one above the other and approximately 17 mm
apart.
[2]. Mount the wall bracket with the screws provided, positioning the long hole
horizontally at the bottom, with the “UP” marking visible.
[3]. Fit the Outdoor temperature sensor on its wall bracket, aligning the two arrows, and
turn it clockwise to lock it.
Step 3: Confi guring/Programming the sensor with the Somfy
home automation box
3.1. Confi guration
[1]. Connect to the TaHoma® interface on the Somfy home automation box.
[2]. Select the detector to confi gure it, following the instructions displayed on the screen.
[3]. The TaHoma® interface on the Somfy home automation box gives you the option to
activate lifestyle scenarios according to the measured temperature level.
3.2. Programming
The settings programmed on the Outdoor temperature sensor may be permanently
activated, or only on certain days of the week during certain time slots, or they may
be inactive. Follow the instructions displayed on the interface to program activation of
the sensor.
Tips and recommendations
Questions on the Outdoor temperature sensor
Observations
Possible
causes
Solutions
The Outdoor temperature
sensor's indicator light fl ashes
orange.
The batteries
are low.
Remove the batteries and fi t
2 new alkaline AA (LR6) 1.5 V
batteries, making sure they are
correctly positioned according to
the polarity.
Replacing batteries in the Outdoor temperature sensor
See the section on "Commissioning".
Resetting the Outdoor temperature sensor to its factory settings
See Figure G
• Press the PROG button on the sensor for 7 seconds: the sensor's indicator light will
turn green after 2 seconds and then will fl ash green after 7 seconds. The Outdoor
temperature sensor has been reset to its factory settings.
• To start using the Outdoor temperature sensor again, carry out the complete
commissioning procedure once more, and program it to the Somfy home automation
box again.
FG
DE
7s
Etape 1 : Mise en service
1.1. Mise en place des piles du Capteur de température extérieur
Voir fi gure D
Ne jamais utiliser de piles rechargeables.
[1]. Ouvrir le Capteur de température extérieur : tourner le capteur sur son support
mural (sens inverse des aiguilles d’une montre) jusqu’à aligner les deux fl èches placées
sur le côté et séparer les deux parties.
[2]. Mettre en place les 2 piles fournies en respectant la polarité : le voyant du capteur
s’allume en vert.
[3]. Laisser le capteur ouvert pour continuer la mise en service.
1.2. Association du Capteur de température extérieur avec la box
domotique Somfy
[1]. Se connecter à l’interface TaHoma®de la box domotique Somfy.
[2]. Aller dans le menu « CONFIGURATION ».
[3]. Dans l’onglet « IO », cliquer sur « ajouter ».
[4]. Sélectionner la famille des capteurs puis OK.
[5]. Sélectionner le Capteur de température io puis suivre les instructions affi chées à
l’écran.
Etape 2 : Installation du Capteur de température extérieur
2.1. Préconisations
Voir fi gure E
[1]. Installer le capteur en position verticale, à l’abri de la lumière (pas sous un
ensoleillement direct) et des intempéries.
[2]. Choisir un emplacement facile d’accès.
2.2. Montage et fi xation du Capteur de température extérieur
Voir fi gure F
[1]. Percer deux trous (diamètre 6 mm) l’un au dessous de l’autre et séparés de 17 mm
environ.
[2]. Fixer le support mural avec les vis fournies en plaçant le trou allongé horizontalement
vers le bas, l’inscription « UP » lisible.
[3]. Placer le Capteur de température extérieur sur le support mural en alignant les deux
fl èches et le faire tourner dans le sens des aiguilles d’une montre pour le verrouiller.
Etape 3 : Confi guration/Programmation du capteur avec la box
domotique Somfy
3.1. Confi guration
[1]. Se connecter à l’interface TaHoma® de la box domotique Somfy.
[2]. Sélectionner le détecteur pour le confi gurer en suivant les instructions affi chées
à l’écran.
[3]. L’interface TaHoma® de la box domotique Somfy vous offre la possibilité de
déclencher des scénarios de vie selon le niveau de température mesuré.
3.2. Programmation
Les réglages réalisés sur le Capteur de température extérieur peuvent être actifs en
permanence ou seulement certains jours de la semaine sur un certain créneau horaire
ou inactifs. Suivre les instructions affi chées sur l’interface pour programmer l’activation
du détecteur.
Astuces et conseils
Questions sur le Capteur de température extérieur
Constats
Causes
possibles
Solutions
Le voyant du Capteur de
température extérieur clignote
en orange.
Les piles sont
faibles.
Enlever les piles et mettre en
place 2 piles alcalines neuves
de type AA (LR6) 1,5 V en
respectant la polarité.
Remplacement des piles du Capteur de température extérieur
Voir le chapitre « Mise en service ».
Retour en confi guration d’origine du Capteur de température extérieur
Voir fi gure G
• Appuyer 7 secondes sur le bouton PROG du capteur : le voyant du capteur s’allume
en vert au bout de 2 secondes puis il clignote en vert après 7 secondes. Le Capteur
de température extérieur se retrouve dans sa confi guration d’origine.
• Pour utiliser de nouveau le Capteur de température extérieur, reprendre la mise en
service complète et effectuer de nouveau l’enregistrement sur la box domotique
Somfy.
 Loading...