


2
Bedienungsanleitung
Mode d’ emploi
Istruzioni per l’uso
Operating Instructions
2–23
24–45
46–67
68–89

SOLIS MASTER TOP
Operating Instructions
68
PLEASE OBSERVE THE SAFETY INSTRUCTIONS.
Dear Customer,
Congratulations on acquiring this new SOLIS MASTER TOP
FULLY AUTOMATIC ESPRESSO MACHINE, a Swiss quality
product. Please read these instructions carefully and follow
them. By doing so, you and your guests will truly enjoy your
SOLIS MASTER TOP. Please keep these instructions in a
safe place. If you are not sure about anything or would like
more information, please ask your local dealer or us. We are
always ready to help.
SOLIS LTD
Table of contents:
Legend, control panel, control indicators, page 69 –71
indicator explanations
1.0 Safety instructions page 72 –73
2.0 General comments page 73
3.0 Starting up/Before using for first time page 74 –75
4.0 Making coffee with beans page 75
5.0 Making coffee with ground coffee page 76
6.0 Making hot water page 76
7.0 Making steam page 77
8.0 Programming page 78
8.1 Water quantity page 78
8.2 Coffee quantity page 78–79
8.3 Temperature page 79
9.0 Special programming functions page 80
9.1 Pre-brewing page 80
9.2 Rinsing function page 80
9.3 Stand-by function page 80 –81
9.4 Status indicator page 81
9.5 Standard programming by manufacturer page 81
10.0 Adjustment of grinder page 81–82
11.0 Pre-heating the cups page 82
12.0 Care and cleaning page 82 –85
13.0 Decalcifying page 86 –87
14.0 Trouble-shooting page 87– 88
15.0 Service and maintenance page 88
16.0 Useful tips for coffee page 88
17.0 Recommended accessories page 89
18.0 Technical data page 89
SOLIS MASTER TOP
Operating Instructions
69
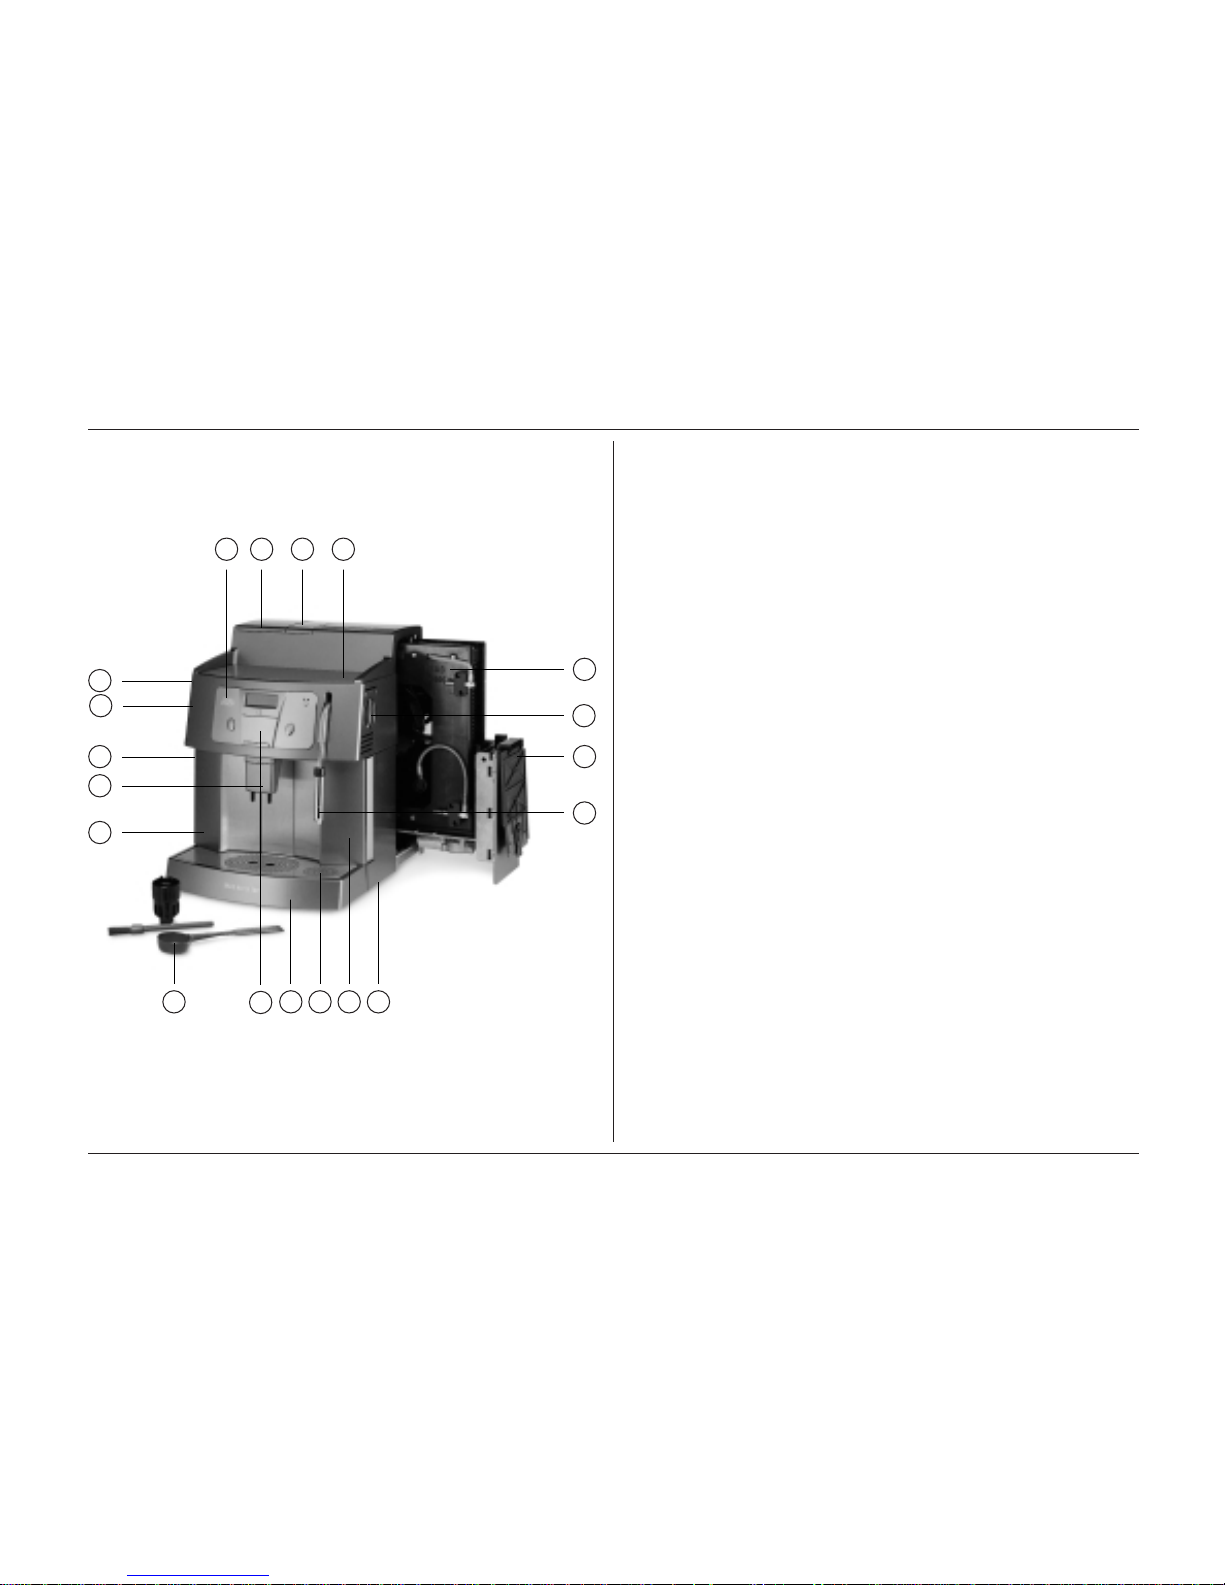
Legend:
1 Removable water container
2 Warming plate for cups
3 Swiveling steam and hot-water nozzle
with cappuccino nozzle
4 Hot-water/steam knob
5 Cup tray
6 Removable drip tray with fill-level indicator
7 Removable container for waste coffee
8 Bean-container with cover
9 Funnel for ground coffee with cover
10 Grinding adjustment
10a Indicator for grinding adjustment
11 Main switch O–I
12 Built-in rotating ring
13 Control panel
14 Service door (2 parts)
15 Brewing unit with drawer for waste coffee
16 Removable and adjustable coffee delivery system
17 Accessories: measuring spoon, multi-tool
adjustment knob and cleaning brush
18 Panel cover
1 125
6
17
9 28
13
10
10 a
11
16
7
15
4
14
3
18

SOLIS MASTER TOP
Operating Instructions
11 9
1310 12 14 1a 1b
1
2
8
15 7 6 5 4 3
70
SOLIS MASTER TOP
Operating Instructions
Open panel cover, so that all keys and LEDs are visible.
Control panel:
1 Operating switch ON/OFF
1a Indicator: ON/OFF
1b Indicator: stand-by
2 Selector key for café crème 1 or 2 cups
3 Cleaning key
4 Pre-selector for ground coffee for products 2,8 and 9
5 Quantity keys +/- for programming
6 Decalcifying key
7 Programming key
8 Selector key for espresso 1 or 2 cups
9 Selector key for pot of coffee
10 Indicator: espresso 1 or 2 cups
11 Indicator: ground coffee
12 Indicator: pot of coffee
13 Indicator: café crème 1 or 2 cups
14 Indicator: cleaning/rinsing
15 Panel cover (open)
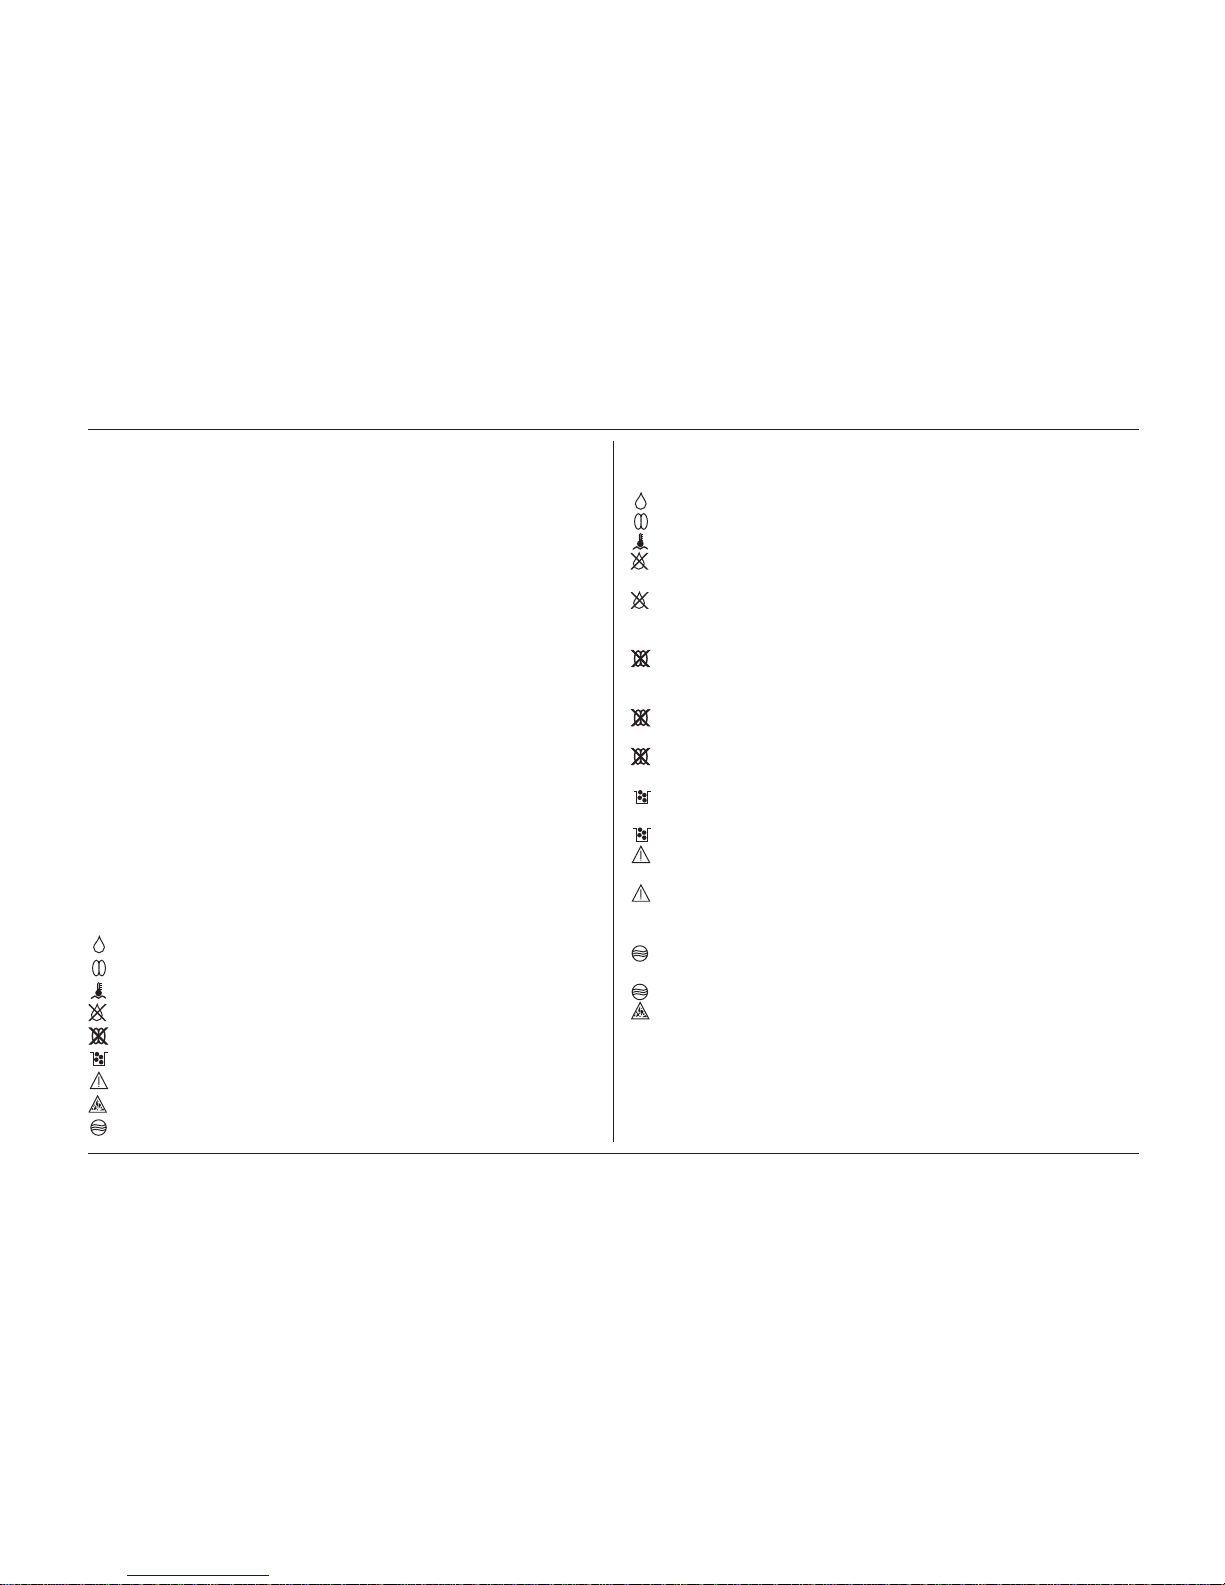
Control indicators:
1– 6 Programmed value indicators
Control indicator for water quantity programming
Control indicator for coffee quantity programming
Temperature indicator green
Control indicator insufficient water
Control indicator insufficient beans
Control indicator waste coffee container full
Control indicator malfunctioning/brewing unit
Control indicator decalcifying
Control indicator cleaning/rinsing
Indicator explanations:
1–6 The LED indicators 1– 6 display the programmed values for
coffee quantity, temperature, stand-by and status.
Lit when programming water quantity.
Lit when programming coffee quantity.
Indicates the correct operating temperature.
Flashes as soon as there is too little water in the tank or the
tank is removed.
Lit as soon as pump is unable to pump water. In this case
the appliance must first be vented (see trouble-shooting
14.0 point 4).
Lit as soon as bean container is empty. Switches off as
soon as container is re-filled and an appropriate selector
key is pressed.
Flashes if bean container cover is removed or is not
properly positioned.
+1 Lit when the grinder is blocked. (To clear, see point 12.3,
grinder cleaning.)
Lit when waste coffee container is full, switches off
automatically after emptying and refitting the container.
Flashes if waste coffee container is removed.
Flashes if brewing unit is not properly inserted or if service
door is not properly closed.
Lit together with a number on the programming
indicator. This indicates a serious malfunction of the unit.
In this case, please contact the SOLIS customer service.
Flashes as soon as cleaning is required after
250 operations.
*8* Lit when the cleaning or rinsing program is in operation.
Indicates that decalcifying is necessary. Switches off as
soon as the decalcifying program is completed.
• Stand-by indicator. Lit if appliance has been switched off
with operating switch. In the stand-by mode the appliance
uses very little electricity.
71
SOLIS MASTER TOP
Operating Instructions
SERVICE
1.0 Safety instructions
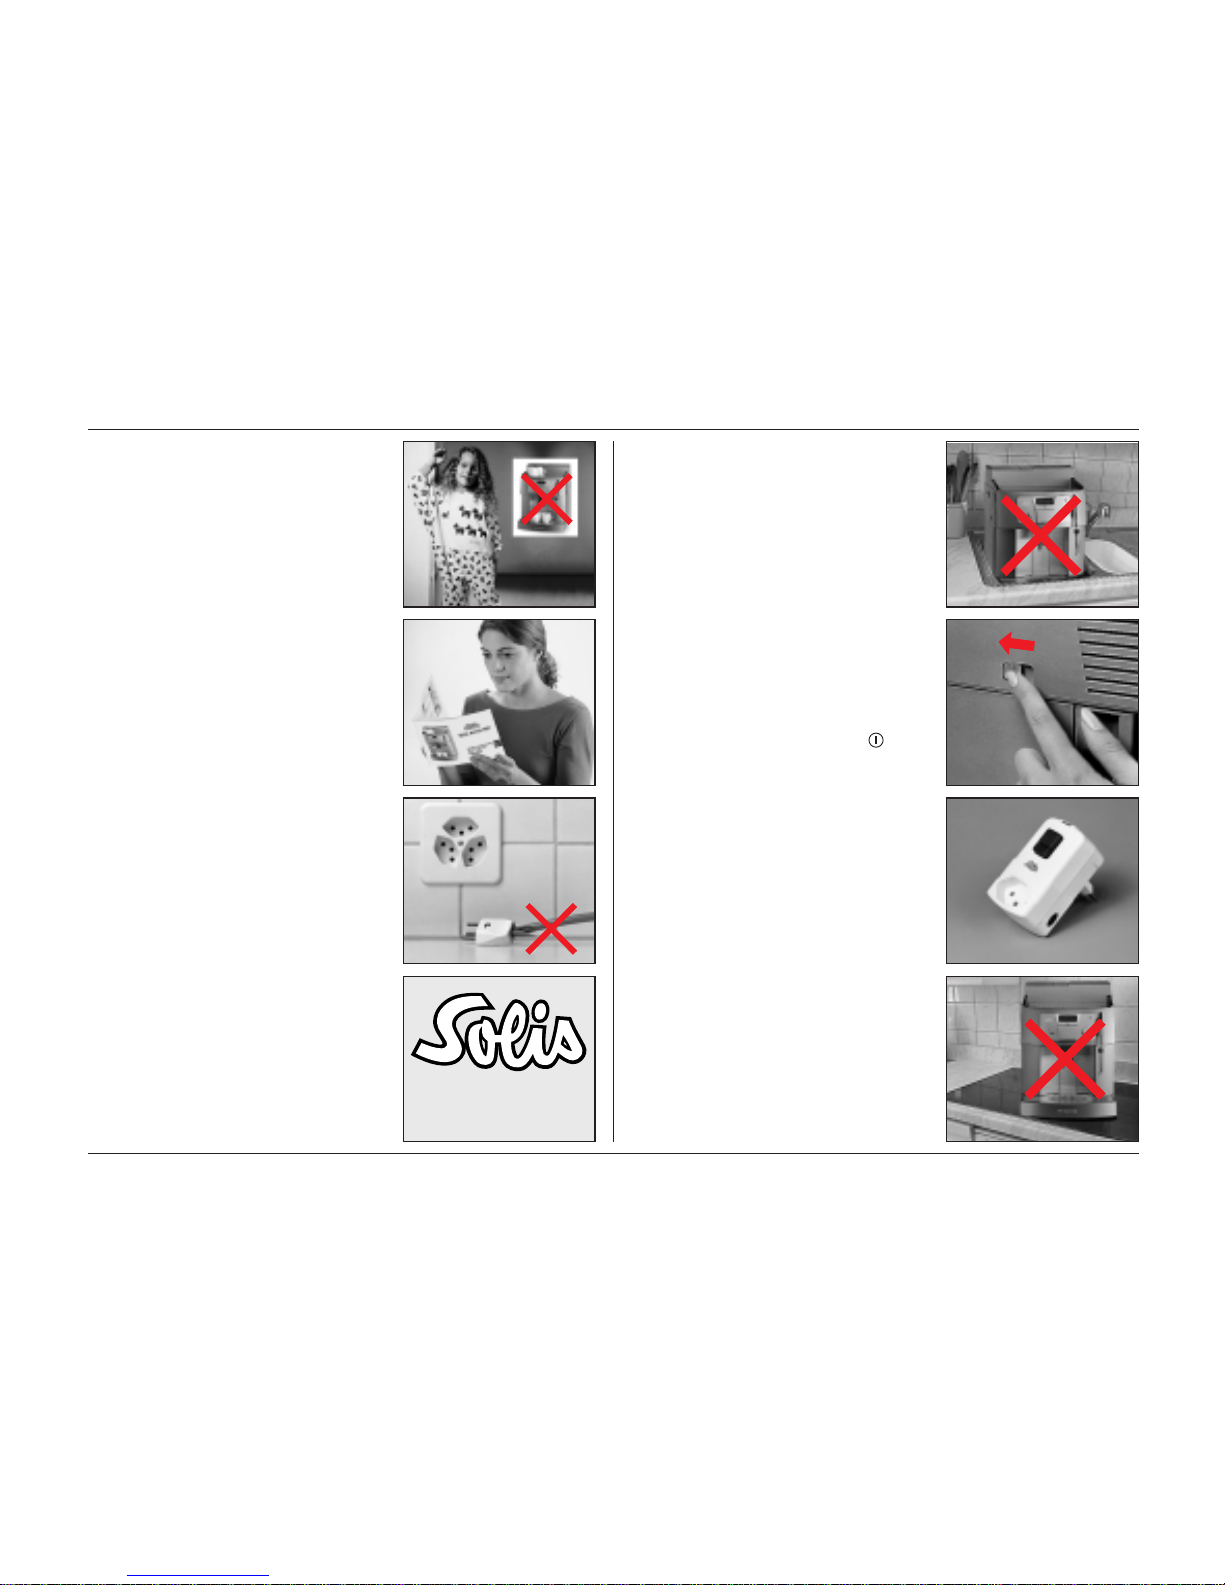
Children do not understand how dangerous electrical appliances can be. For that
reason, children should never be allowed
around electrical appliances without
supervision.
Do not use the appliance without first
studying the user manual or being shown
how to operate it.
Never use an appliance with a faulty
cord. When using an extension cord,
this must also be in perfect condition.
Place extension cords in such a way
that tripping over it is not possible.
Keep children and domestic animals
away from the appliance.
In the case of damage, the appliance
must only be opened by an authorized
service technician and repaired with
original spare parts and accessories. If
not the manufacturer declines all liability.
This also applies to damaged cords
since special tools are required.
Do not immerse the appliance in water
and do not use the appliance with wet
hands.
The appliance should not be left
switched on without supervision.
For safety and energy-saving reasons
we recommend that the appliance be
switched off over-night and during
absences (for short absences, the
appliance can be switched to stand-by
mode with the operating switch ). For
appliances connected to the water
supply, the water tap must be closed.
The socket to which the appliance is
connected must be earthed. For your
safety, we recommend the use of an
earth leakage safety adapter (available
from your electrical store).
Place the appliance on a firm, level
surface. The surface must not be warm
or hot. Choose a position, which is out
of reach of children and pets.
72

SOLIS MASTER TOP
Operating Instructions
Be careful when touching the steam
nozzle as it becomes hot when in use
(danger of scalding).
Before cleaning the appliance, always
remove the mains plug. Do not allow
the cord to come into contact with hot
parts of the appliance.
Do not expose the appliance to external
climatic conditions (rain, snow, frost
etc.).
When you unpack the appliance, please
check that the voltage indicated on the
rating plate is the same as your mains
supply.
2.0 General comments
Do not operate the appliance without
water.
The appliance is intended for the preparation of coffee, hot water and steam
and must not be used for any other
purpose. The appliance is designed for
domestic and commercial use. If it
is used for commercial purposes, the
warranty conditions will change.
Please observe the guarantee conditions.
The original packaging has been made
especially strong so that the appliance
can be sent by post. Please retain
the packaging in case it should be
necessary to return the appliance.
The appliance may be damaged by
frost. For this reason, it must be protected against frost and should not be left
overnight in a car during winter.
73
SOLIS MASTER TOP
Operating Instructions
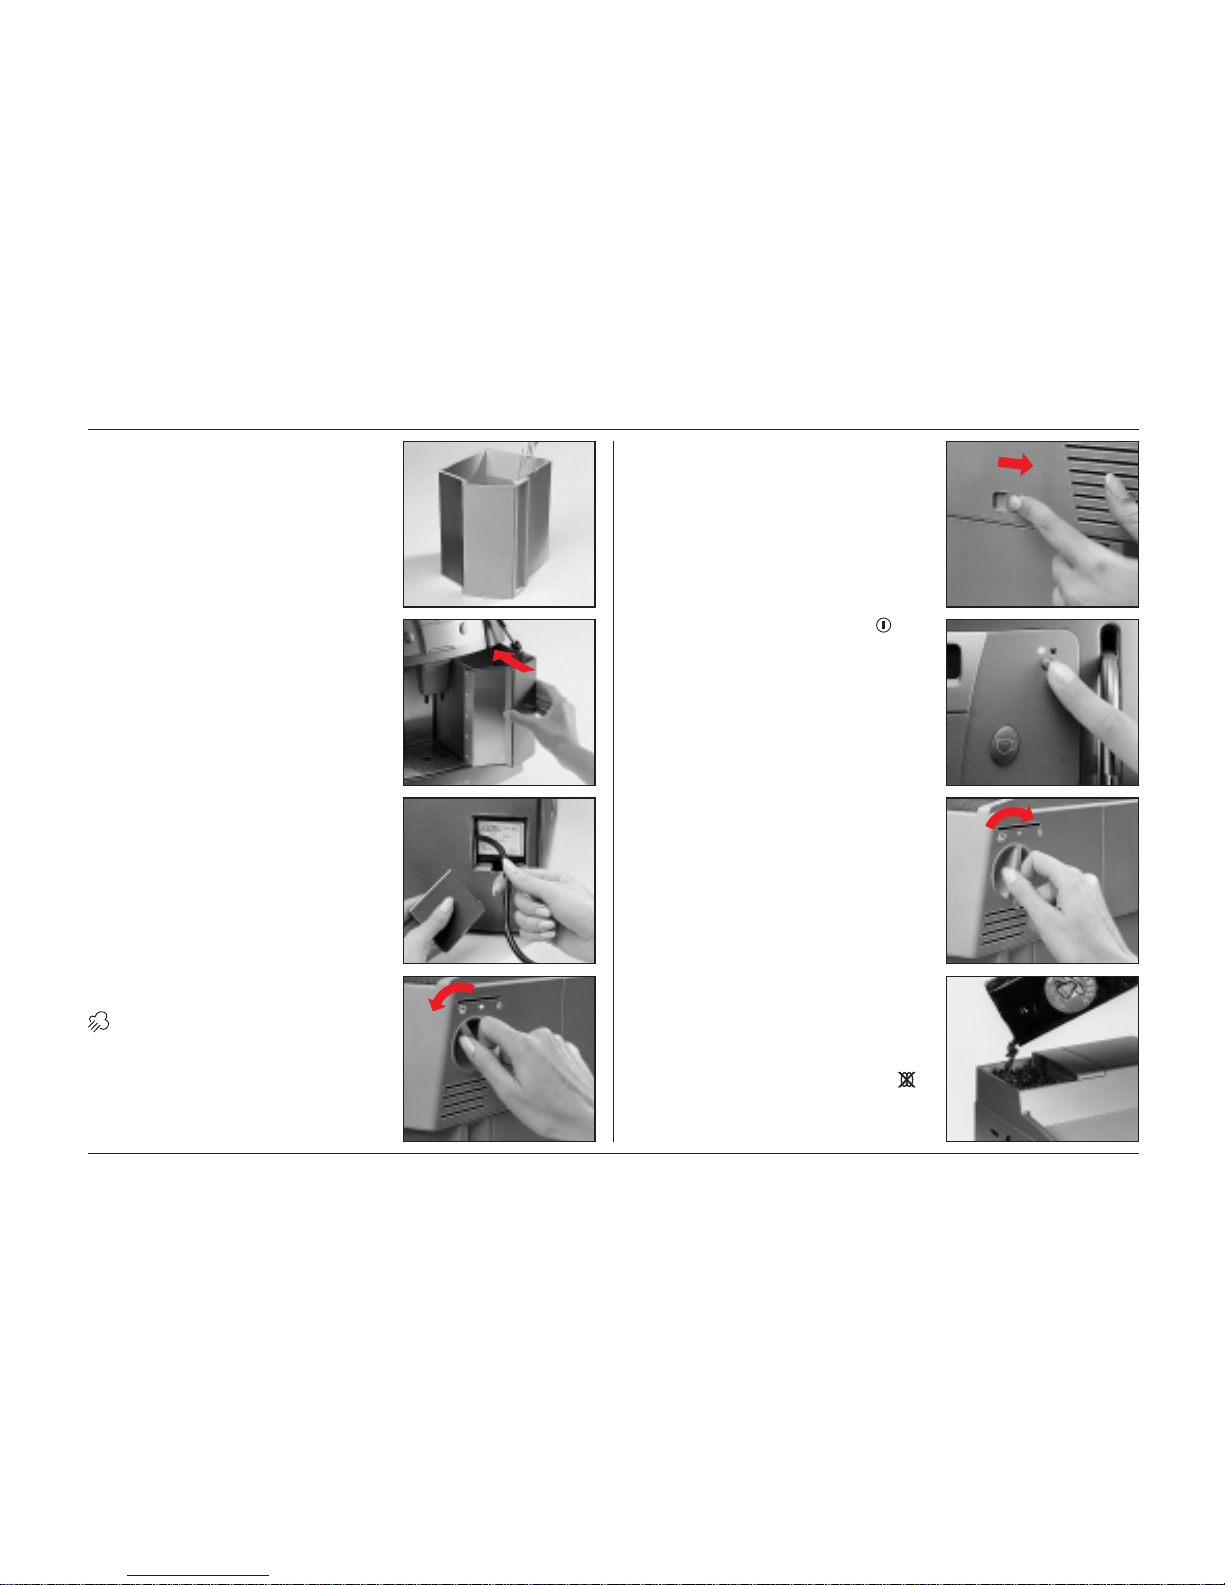
3.0 Starting up/Before using for
the first time
3.1 Fill the water container with cold
water (max. 2.4 liters). Insert it in the
appliance from the front and press home
firmly so that the valve at the back
opens.
Note: Use only fresh cold water to fill
the container. Do not use mineral water,
milk or any other liquid.
3.2 Pull the required length of cord
out from the back of the appliance.
Leave the rest in the special cable
compartment. Connect the appliance
to an earthed socket. Close the cable
compartment with the cover.
3.3 Make sure that the hot water/
steam knob is in the steam position
to ensure that automatic venting can
occur after switching on the appliance.
3.4 Turn the main switch O –I ON. The
appliance is now switched on but in
the stand-by mode.
3.5 Press the operating switch .
The appropriate indicator (1a) is lit and
the appliance heats up. At the same
time, the water pump starts to operate
and fills the system with water and
the appliance is vented automatically.
3.6 As soon as the automatic venting
is completed (water pump stops operat-
ing), close the hot water /steam knob
again. Note: the automatic venting func-
tions only provided the hot water/steam
knob is turned to the steam position. If
this is not the case, the knob must be
turned to the steam position.
3.7 Fill the bean container with beans
(max. 320 g). Close the bean container
with the cover. Note: Only pure coffee
beans may be used. Coffee with a
caramelized or aromatized content must
not be used. If the control indicator
flashes, the cover is not properly closed
and the appliance will not operate.
74
 Loading...