

Page 1
Model Number:
SG-TTW-10ESE
SG-TTW-12ESEZ
SG-TTW-12ESE
SG-TTW-14
Electronic Through the Wall Air Conditioner
Operating Instructions
Page 2
Thank you for choosing a Soleus Air powered by Gree Air Conditioner. This owner’s manual will
provide you with valuable information necessary for the proper care and maintenance of your new
product. Please take a few moments to thoroughly read the instructions and familiarize yourself with
all the operational aspects of your new air conditioner.
For your own records, please attach a copy of your sales receipt to this manual. Also, write the store name/location, date purchased, and serial number below:
Store Name: ____________________________________________________
Location: ______________________________________________________
Date Purchased: _________________________________________________
Serial Number (located on back of unit): ______________________________
IMPORTANT SAFETY INSTRUCTIONS
Before installing and using your air conditioner, please read this owner’s manual carefully. Store this
manual in a safe place for future reference. Your safety and the safety of others is very important to
us. Please pay attention to all safety messages outlined in this owner’s manual.
WARNING: To reduce the risk of fire, electrical shock or injury when using your air conditioner, follow
the following basic precautions:
• Plug into a grounded 3 prong outlet.
• Do not remove the ground prong.
• Do not use a plug adapter.
• Do not use an extension cord.
• Unplug the air conditioner before servicing
• Use two or more people to move and install the air
conditioner
This is a safety alert symbol.
This symbol alerts you to potential hazards that can harm you or others or even cause
death.
All safety messages will directly follow the safety alert symbol and/or the words
“DANGER” or “WARNING”.
All Safety messages alert you of potential hazards, how to reduce the chance of injury,
and what can happen if instructions are not followed correctly.
Failure to immediately follow these
instructions may cause serious injury
or even death.
2
Page 3
IMPORTANT SAFETY INSTRUCTIONS
Read all instructions before using this air conditioner
FOR YOUR SAFETY
Do not store or use gasoline or other flammable vapors and liquids in the vicinity of this or any other appliance. Read
product labels for flammability and other warnings.
ACCIDENT PREVENTION
To reduce the risk of fire, electrical shock, or injury to persons when using your air conditioner, follow basic precautions,
including the following:
• Be sure the electrical service is adequate for the model you have chosen. This information can be found on the
rating label located on the side of the cabinet or behind the grille.
• If the air conditioner is to be installed in a window, you will probably want to clean both sides of the glass prior to
installation. If the windows is a triple-track type with a screen panel included, remove the screen completely before
installation.
• Be sure the air conditioner has been securely and correctly installed according to the installation instructions
provided with this manual. Save this manual and the installation instructions for future use when removing and
reinstalling the unit.
• When handling the air conditioner, be careful to avoid cuts form sharp metal fins on the front and rear coils.
NOTE: The power supply cord on this air conditioner contains a current detec-
tion device designed to reduce the risk of fire. Please refer to the section “Operation of
Current Device” for details. In the event that the power supply cord is damaged, it
cannot be repaired it must be replaced with a cord from Soleus Air Powered by Gree.
ELECTRICAL INFORMATION
The complete electrical rating of your new air conditioner is
stated on the product rating label located on the unit. Refer to the
ratings on the label when checking electrical requirements.
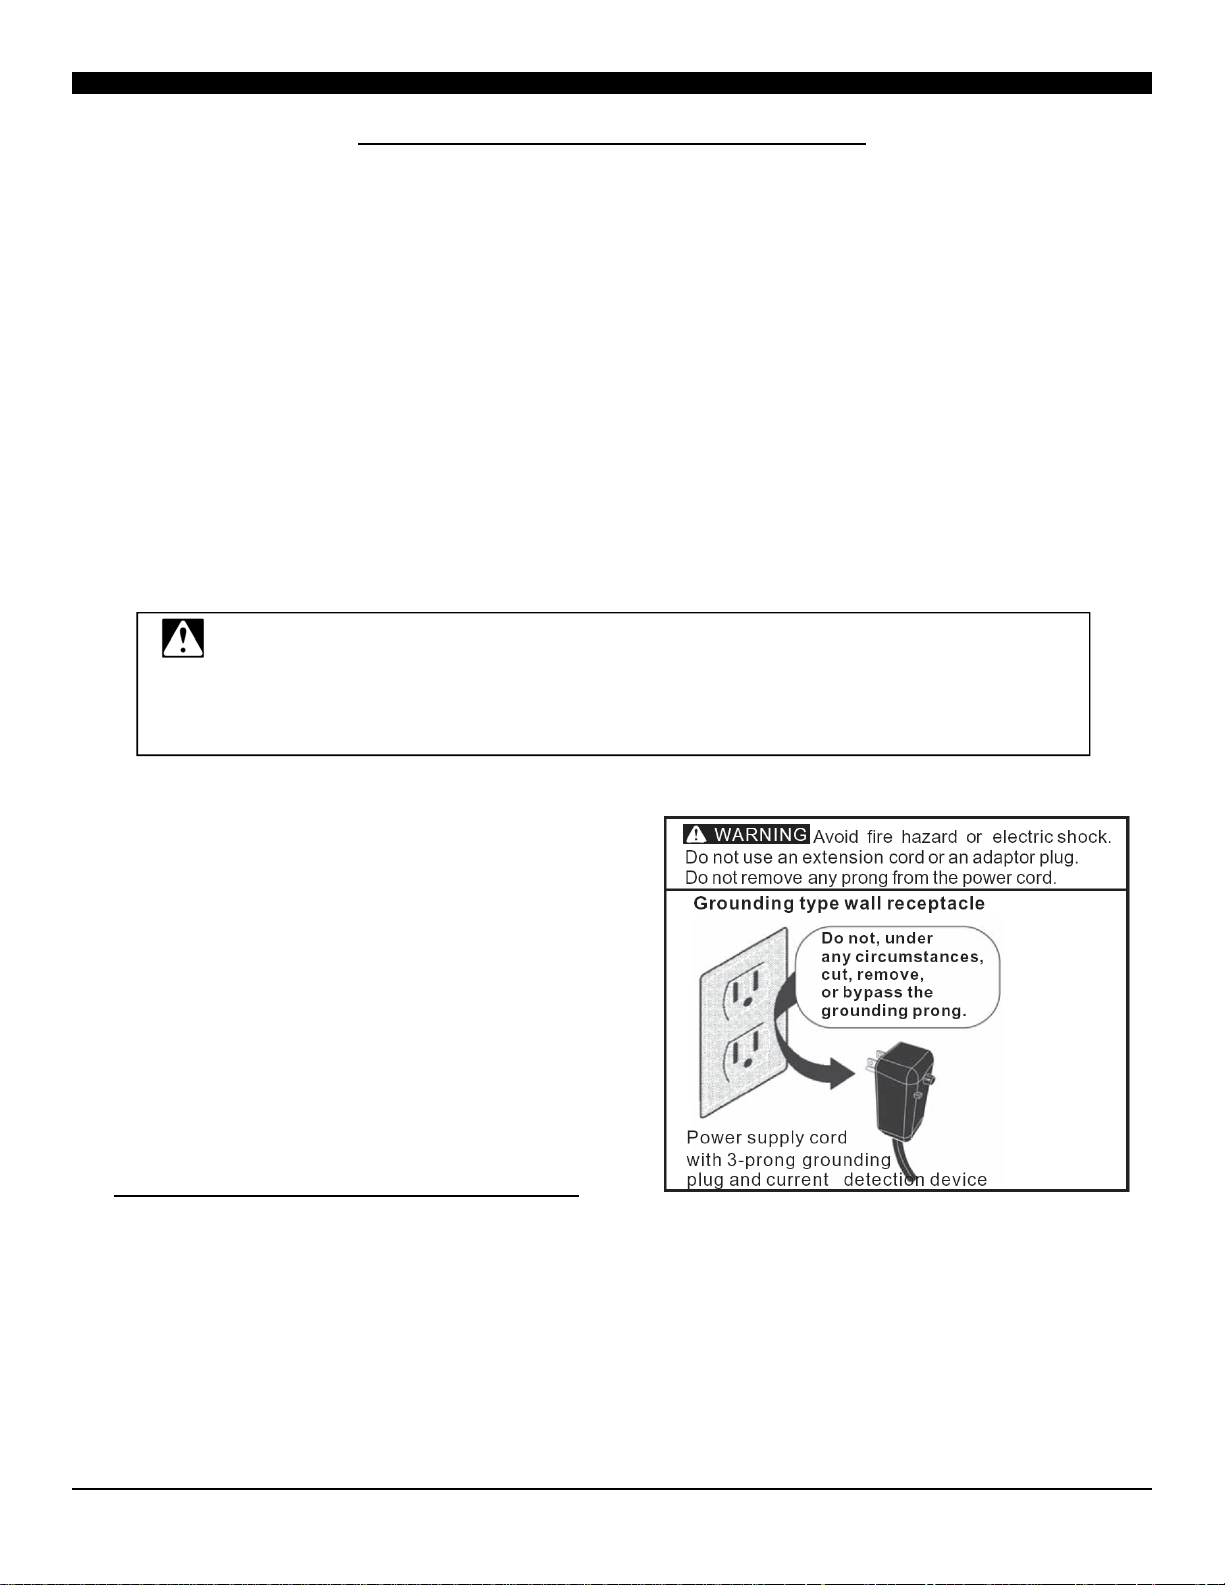
• Be sure the air conditioner is properly grounded. To minimize
shock and fire hazards, proper grounding is important. The
power cord is equipped with a three-prong grounded plug for
protection against shock hazards.
• Your air conditioner must be used in a properly grounded
wall receptacle. If the wall receptacle you intend to use is not
adequately grounded or protected by a time delay fuse or
circuit breaker, a qualified electrician will have to install the
proper receptacle.
• Do not run the air conditioner with a protective cover on the
outside of the unit. This could result in mechanical damage
within the air conditioner.
• Do not use an extension cord or an adapter plug.
3
Page 4
IMPORTANT SAFETY INSTRUCTIONS
READ THIS SECTION BEFORE ATTEMPTING TO OPERATE YOUR AIR CONDITIONER
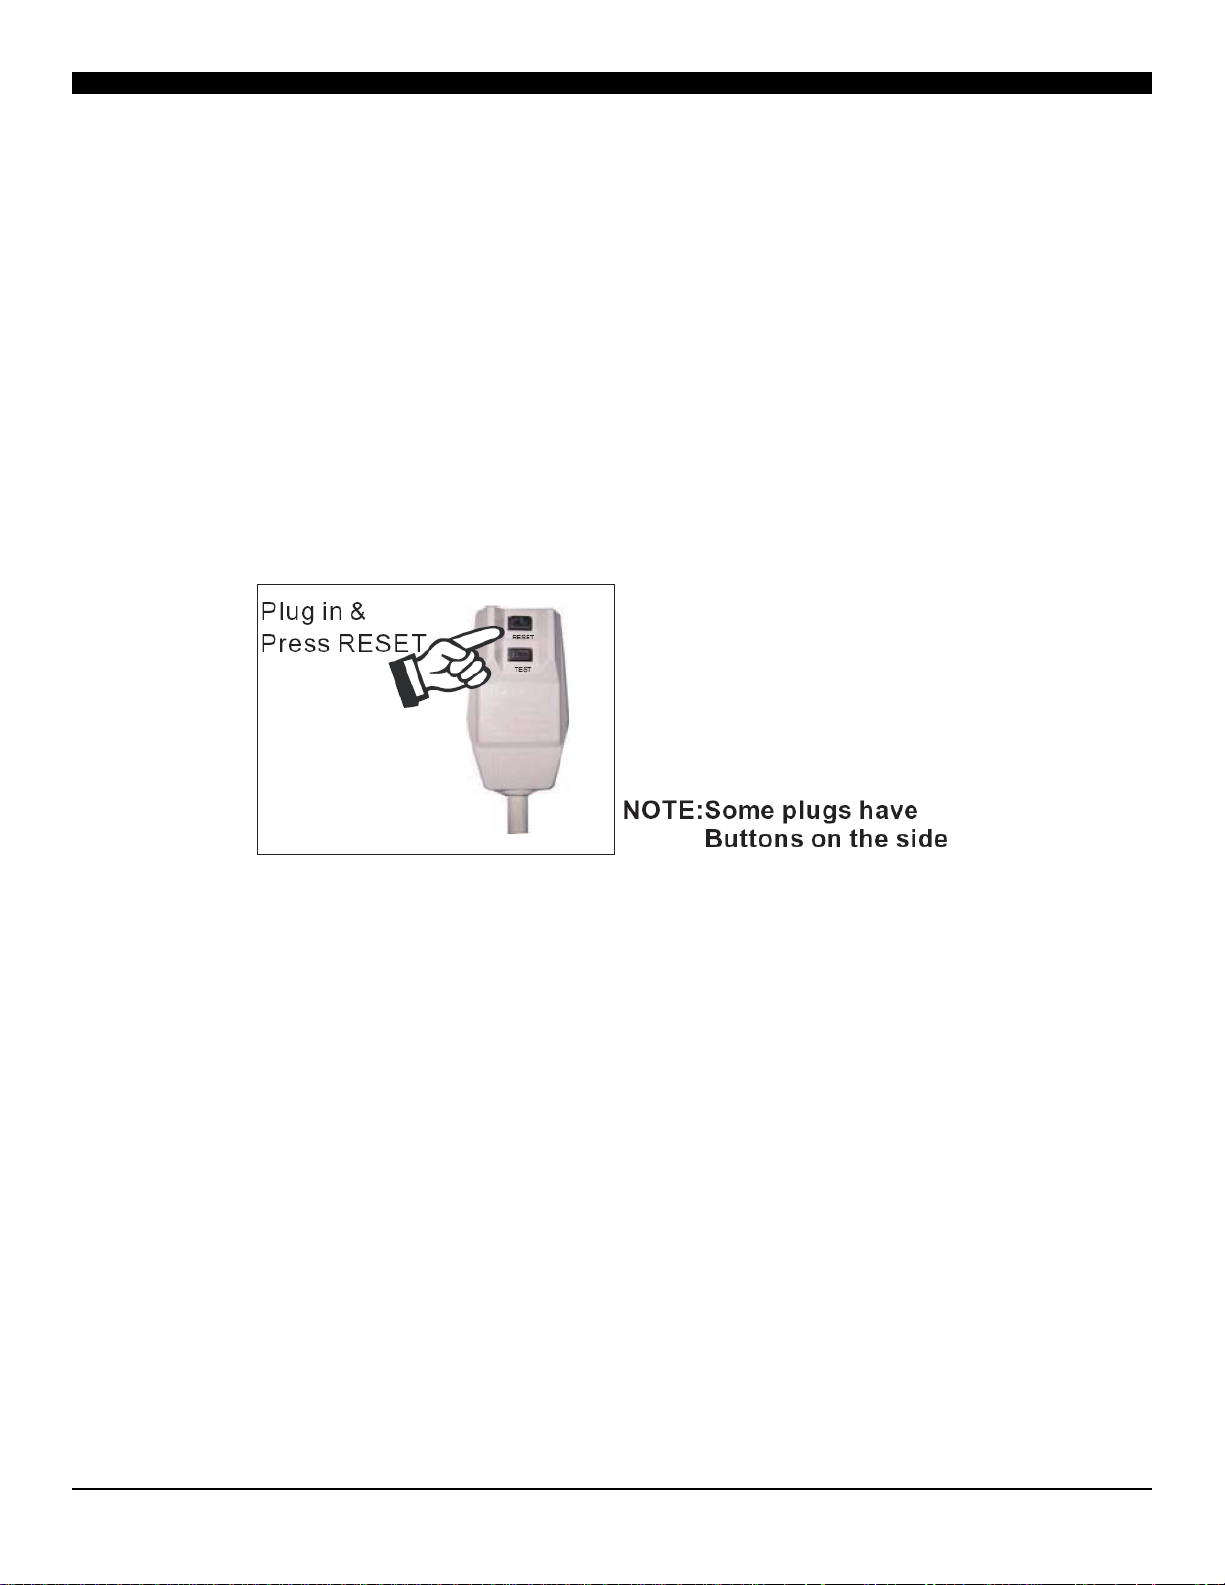
The power supply cord contains a current device that senses damage to the power cord. Follow the instructions below to
test your power cord.
1. Plug in your air conditioner
2. The power supply cord will have TWO buttons on the plug. Press the TEST button. You will notice a click as the
RESET button pops out.
3. Press the RESET button. The button will click when the RESET button engages.
4. The power supply cord is now supplying electricity to the unit.
NOTE:
• Do not use this device to turn the unit on or off.
• Always make sure the RESET button is engaged for correction operation
• The power supply cord must be replaced if it fails to reset when either the TEST button is pushed, or it cannot be
reset. A new one can be obtained from Soleus Air Powered by Gree.
• If the power supply cord is damaged, it CANNOT be repaired. It MUST be replaced with one obtained from Soleus
Air Powered by Gree.
OPERATION OF CURRENT DEVICE
DISCLAIMER
ALL INFORMATION AND THE TECHNICAL SPECIFICATIONS PRESENTED IN THIS USER’S MANUAL ARE THE
PRESENTATION OF THE MANUFACTURER. SOLEUS INTERNATIONAL HAS NOT CONDUCTED INDEPENDENT
TEST TO THE INFORMATION AND THE SPECIFICATIONS PRESENTED HEREWITHIN.
4
Page 5
SPECIFICATIONS
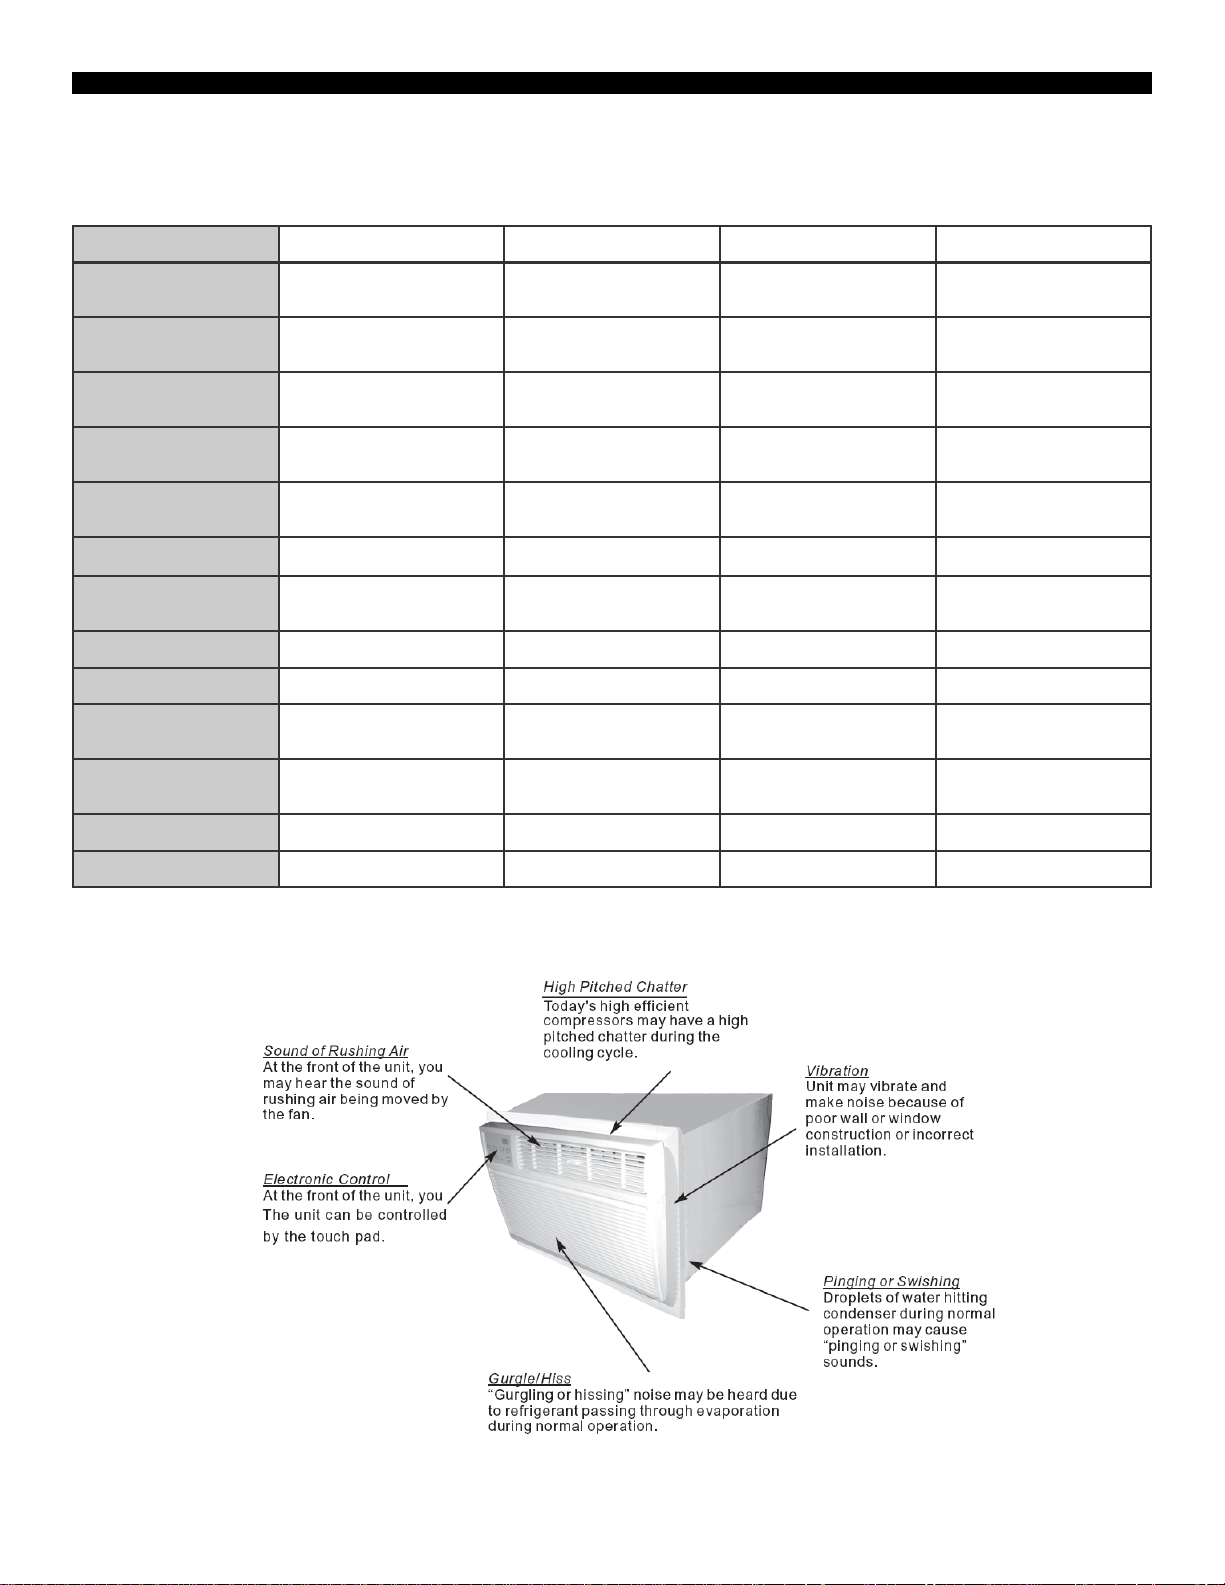
• Noise level is measured at a distance of 3.28 ft away from the front of the unit in cooling mode.
• Power consumption is measured when the fan runs at the highest speed setting.
• These specifications are for reference only. For actual data, please refer to the rating label on the back of the unit.
Model SG-TTW-12ESEZ
Power Supply
(Ph/V/Hz)
Dehumidifying Capacity
(Pints/Day)
Rated Cooling Capacity
(BTU/h)
Cooling Power Input
(Watts)
Rated Current Cooling
(Amperage)
EER 9.4
Noise Level dB(A)
(High/Med/Low)
CFM (High/Med/Low) 300/266/225
Power Plug Type NEMA 5-15P
Dimensions
(W x H x D)
Package Dimensions
(W x H x D)
SG-TTW-10ESE
1/115/60Hz
60
10000
1060
9.5
9.4
58/56/54
290/260/230
NEMA 5-15P
24 x 14.50 x 20.625
28.50” x 16.375” x 27.125”
1/115/60Hz
81.6
12000
1280
11.7
59/57/55
24” x 14.50” x 20.625”
28.5” x 16.375” x 27.125”
SG-TTW-12ESE
1/230-208/60Hz
81.6
12000/11700
1280/1240
6.0/6.5
9.4
59/57/55
300/266/225
NEMA 6-15P
24” x 14.50” x 20.625”
28.5” x 16.375” x 27.125”
SG-TTW-14
1/230-208/60Hz
100.8
14000/13600
1650/1600
7.0/7.5
8.5
59/57/55
320/290/260
NEMA 6-15P
24” x 14.50” x 20.625”
28.5” x 16.375” x 27.125”
Net/Gross Weight (lbs) 76.2/88.3
Refrigerant R-410A
74/86
R-410A
76.2/86
R-410A
78.3/90.4
R-410A
NORMAL OPERATING SOUNDS
5
Page 6

OPERATING YOUR AIR CONDITIONER
Before you start using your air conditioner, please familiarize yourself with the control panel and remote control
functions. This air conditioner can be controlled by the control panel (touch pad) or the included remote control.
CONTROL PANEL (TOUCH PAD)
REMOTE CONTROL
NOTE: Heat and Swing Mode
are not available on this unit
Battery Size: AAA
NOTE: Do not mix old and new batteries or different types of AAA batteries.
This is a general use remote control. Some of the features might not available.
6
Page 7

OPERATING YOUR AIR CONDITIONER
Using the control panel or remote
Touch or hold either the up (▲) or down (▼) buttons until the desired temperature is shown on the display. The
temperature will be automatically maintained anywhere between 61°F and 86°F for cooling mode.
The fan speed will automatically adjust between HI, MED, and LOW depending on the room temperature. The closer the
room is to the set temperature, the lower the fan speed.
7
Page 8

OPERATING YOUR AIR CONDITIONER
Use the fan only mode when cooling is not desired and air circulation is needed. Auto fan is not selectable in fan only
mode. The digital display will show the current room temperature in fan only mode.
For the Auto-off Timer the unit must be turned “ON” prior to setting the Auto-off time.
For the Auto-on Timer the unit must be turned “OFF” prior to setting the Auto-on time.
To Adjust the timer setting, touch or hold the UP arrow (▲) or down arrow (▼) to change the time for the unit to
automatically turn off or on. The time will change in .5 hour increments up to 10 hours, then by 1 hour increments up to
24 hours. The digital display will count down the amount of time left in hours until the unit starts or stops (depending on
which timer is being used).
The Auto-on mode automatically selects COOLING MODE with the maximum fan speed when the unit turns on. The
temperature will be the same as it was prior to programming the unit (your previous set temperature). To change the set
temperature, select “COOL” and press the UP arrow (▲) or down arrow (▼) until the desired termperature is shown on
the digital display. After 5 seconds, the digital display will change back to the hours remaning until the unit will start or
stop. Turning the unit “ON” or “OFF” at any time will cancel the Auto-on or Auto-off timer functions. The Auto-on & Autooff feature will work until the unit either starts or stops. Once the unit has started (in Auto-on mode) or stops (in Auto-off
mode) the timers must be programmed again.
8
Page 9
OPERATING YOUR AIR CONDITIONER
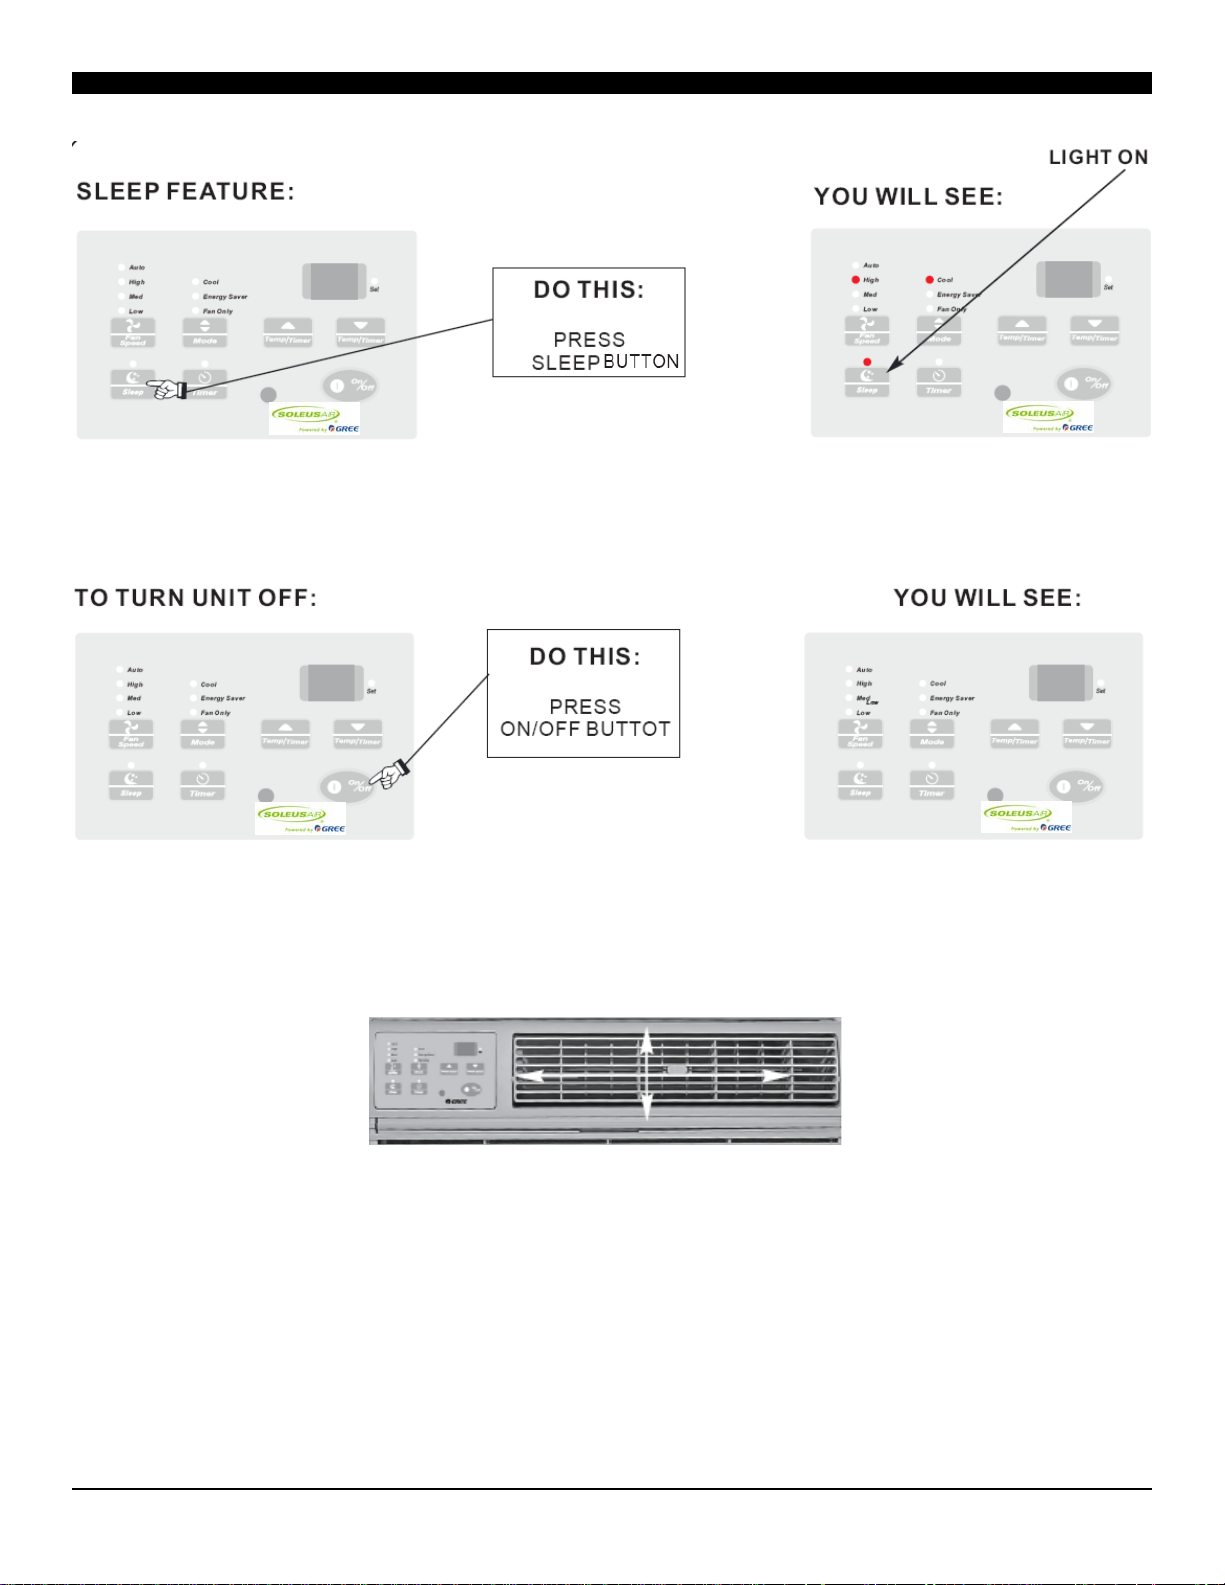
The Sleep Mode can be selected in Cooling Mode. In this mode, the selected cooling temperature will increase by 2°F,
30 minutes after the mode is selected. The set temperature will then increase by another 2°F after an additional 30
minutes. This new set temperature will for 7 hours before it returns to the original set temperature.
4-Way Directional Louvers
The 4-Way directional louvers allow you to direct the air up or down, left or right. Use the handle in the center of the
louvers to change the air direction.
9
Page 10

OPERATING THE REMOTE CONTROL
NOTE: Make sure there are no obstructions between the receiver on the A/C and the
remote control. Do not drop or throw the remote control. Do not allow water to get
inside the remote control and do not place the remote control in direct sunlight or a
place where it is very hot.
• Press the SLEEP button to turn SLEEP
mode on or off. SLEEP mode is set to
off automatically. When SLEEP mode is
selected the timer can be adjusted.
SLEEP mode is not available in Fan or
Auto mode.
• Press the ON/OFF button to turn the
A/C on or off. When the unit is turned
off, the Timer and sleep functions will be
cancelled. The set temperature will be
saved.
• Press the MODE button to change the
operating mode. You can choose AUTO,
COOL, SAVE (energy saver), or FAN
only. The temperature will not be
displayed when AUTO mode is selected.
• Press the FAN button to turn change
the FAN options. You can choose between four speeds and auto mode. The
fourth fan option is only available in
cooling and energy saver modes.
•Swing mode is not available on this
model
10
Page 11

OPERATING THE REMOTE CONTROL
• Press the “+” button to increase
the temperature when the unit is on.
Press and hold the “+” button for
more than 2 seconds to quickly
cycle through the temperature
options. Stop pressing the button
when the desired temperature is
displayed. The temperature cannot
be set in auto mode. Temperature
range: 61°F - 86°F.
• Press the TIMER button when the unit
is off to set up the Auto-on timer. The
Auto-on time can be set between .5 24 hours. The icons “T-ON” and “H”
will flash for 5 seconds. Start selecting the time using the “+” and “-” buttons before the icons stop flashing.
The time will increase/decrease in .5
hour increments with each press of
the “+” or “-” buttons. To cancel the
Auto-on time, manually press the ON/
OFF button to turn the unit on.
• Press the TIMER button when the unit
is on to set up the Auto-off timer. The
Auto-off time can be set between .5 24 hours. The icons “T-OFF” and “H”
will flash for 5 seconds. Start selecting the time using the “+” and “-” buttons before the icons stop flashing.
The time will increase/decrease in .5
hour increments with each press of
the “+” or “-” buttons. To cancel the
Auto-off time, manual press the ON/
OFF button to turn the unit off.
• Once the Auto-on or Auto-off time is
set, the “T-On” or
blink for 2 seconds. After 2 seconds
the set temperature will be displayed.
“T-Off” and “H” will
• Press the “-” button to decrease
the temperature when the unit is on.
Press and hold the “-” button for
more than 2 seconds to quickly
cycle through the temperature
options. Stop pressing the button
when the desired temperature is
displayed. The temperature cannot
be set in auto mode. Temperature
range: 61°F - 86°F.
11
Page 12

TAKING CARE OF YOUR AIR CONDITIONER
CARE AND CLEANING
Clean your air conditioner to keep it looking new
and to minimize dust build up.
Air Filter Cleaning
The air filter should be checked at least once
every month to see if it needs cleaning. Trapped
particles and dust can build up in the filter and
may decrease airflow as well as cause the
cooling coils to accumulate frost. To clean the air
filter:
1. Remove the filter by pulling down on the indents of the filter door on the front of the unit.
(See FIG. 13)
2. Wash the filter using liquid dish soap and
warm water. Rinse the filter thoroughly. Gently shake the filter to remove excess water.
3.
Let the filter dry completely before placing it
into the air conditioner.
4.
If you do not wish to wash the filter, you may
vacuum the filter to remove the dust and
other particles.
FIG. 13
Wear and Tear
To minimize wear and tear on the air conditioner, always wait at least 3 minutes before
changing modes. This will help prevent the
compressor from overheating and the circuit
breaker from tripping.
Winter Storage
To store the air conditioner when it is not in use
for an extended period of time, remove it carefully from the window according to the installation
instructions and cover it with plastic or place it in
the original box.
Cabinet Cleaning
To clean the air conditioner cabinet:
• Unplug the air conditioner to prevent shock or
a fire hazard. The cabinet and front panel of
the air conditioner may be dusted with an oilfree cloth or washed with a cloth dampened in
a solution of warm water and mild liquid soap.
Rinse thoroughly with a damp cloth and wipe
dry.
• Never use harsh cleaners, wax or polish on
the cabinet front.
• Be sure to wring excess water from the cloth
before wiping around the controls. Excess
water in or around the controls may cause
damage to the air conditioner.
Energy Saving Ideas
• Do not block the air flow inside with blinds,
curtains or furniture; or outside with shrubs,
enclosures, or other buildings.
• The capacity of the room air conditioner must
fit the room size for efficient and satisfactory
operation.
• Install the room air conditioner on the shady
side of your home. A window that faces North
is best because it receives the least amount
of sun exposure.
• Close the fireplace damper, floor and wall
registers so cool air does not escape.
• Keep blinds and drapes closed for cooling
and open for heating.
• Clean the air filter as recommended in the
“care and cleaning” section.
• Proper insulation and weather stripping in
your home will help limit cool air loss.
• External house shading with trees, plants, or
awnings helps reduce the air conditioner’s
work load.
• Operate heat producing appliances during the
coolest part of the day. Such as a dishwasher, oven, or computer.
12
Page 13

TROUBLESHOOTING
PROBLEM
The Air Conditioner will not start
POSSIBLE CAUSES
The air conditioner is unplugged
The fuse is blown/circuit breaker is
tripped.
Power Failure
The current interrupter device is
tripped.
SOLUTIONS
• Make sure the air conditioner is
plug is pushed completely into the
outlet
• Check the house fuse/circuit
breaker box and replace the fuse
or reset the breaker.
• The unit will automatically re-start
when power is restored.
• There is a protective time delay
(approx. 3 minutes) to prevent
tripping of the compressor
overload. For this reason, the unit
may not start normal cooling for 3
minutes after it is turned back on.
• Press the RESET button located
on the power cord plug.
• If the RESET button will not stay
engaged, discontinue use of the
air conditioner and contact a
qualified service technician.
The Air Conditioner does not cool
as it should
The Air Conditioner is freezing up
The Remote Control is not working
Airflow is restricted
The temperature control may not be
set correctly.
The air filter is dirty
The room may be too warm
Cold air is escaping
The Cooling Coils are frozen
Ice blocks the air flow and stops the air
conditioner from cooling the room
The batteries are inserted incorrectly
The batteries may be dead
• Make sure there are no curtains,
blinds, or furniture blocking the
front of the air conditioner
• Lower the set thermostat temperature
• Clean the filter. See the Cleaning
and Care Section of the manual.
• Please allow time for the room to
cool down after turning on the air
conditioner.
• Check for open furnace registers
and cold air returns
• See “Air Conditioner Freezing Up”
below.
• Set the MODE dial to HIGH FAN
or HIGH COOL and set the thermostat to a higher temperature
• Check the position of the batteries.
• Replace the batteries
13
Page 14

TROUBLESHOOTING
TROUBLESHOOTING (CONT.)
PROBLEM
Water is dripping outside
Water is dripping inside the room
Water collects in the base pan
The Air Conditioner Display reads
“AS”
The Air Conditioner Display reads
“HS”
POSSIBLE CAUSES
Hot and Humid weather.
The air conditioner is not correctly
tilted outside.
Moisture removed from the air is
draining into the base pan.
A Sensor has failed in the air
conditioner
A Sensor has failed in the air
conditioner
SOLUTIONS
• This is normal
• For proper water drainage, make
sure the air conditioner is slightly
tilted downward from the front of
the unit to the rear.
• This is normal for a short period in
areas with low humidity and normal for a longer period in areas
with high humidity.
• Contact customer service
• Contact customer service
The Air Conditioner Display reads
“ES”
A Sensor has failed in the air
conditioner
• Contact customer service
14
Page 15

Warranty
Soleus International Inc. warrants the accompanying Soleus Air Air Conditioner to be free of defects in material and workmanship for the applications specified in its operation instruction for the period of parts specified
below.
This warranty shall not apply to broken or marred cabinets, accessories, knobs, filters or routine maintenance.
This warranty does not apply to uncrating, setup, installation, removal of the product for repair or reinstallation
of the product after repair.
This warranty does not apply to repairs or replacements necessitated by any cause beyond the control of Soleus
International including, but not limited to, any malfunction, defect or failure caused by or resulting from unauthorized service or parts, improper maintenance, operation contrary to furnished instructions, shipping or transit accidents, modification or repair by the user, abuse, misuse, neglect, accident, incorrect power line voltage,
fire, flood or other Acts of God, or normal wear and tear.
Warranty service must be performed by a qualified HVAC contractor. Soleus maintains a centralized service
network to provide parts and assist in resolving service problems if difficulties are encountered. Soleus agrees
to provide service information, sell repair parts and reimburse the dealer /serviceman for parts in accordance
with Soleus International’s Policies and Procedures.
SOLEUS INTERNATIONAL MAINTAINS THAT ALL WARRANTIES, INCLUDING IMPLIED WARRANTY OR MERCHANTABILITY ARE LIMITED TO THE TERMS AND CONDITIONS SPECIFIED
ABOVE. SOLEUS INTERNATIONAL DISCLAIMS ANY LIBILITY FOR CONSEQUENTIAL OR INCIDENTAL DAMAGES AND IN NO EVENT SHALL SOLEUS INTERNATIONAL INC.’S LIABILITY EXCEED THE RETAIL VALUE OF THE AIR CONDITIONER.
This warranty covers only new products purchased from our authorized dealers or retailers. It does not cover
internet sales, used, salvaged, or refurbished products.
5 YEARS FOR COMPRESSOR
1 YEAR FOR OTHER COMPONENTS
FOR TECHNICAL SUPPORT AND WARRANTY SERVICE, PLEASE CONTACT:
Soleus International Inc. 20035 E Walnut Dr North, City of Industry, CA 91789. USA
Tel: 1-888-8-SOLEUS Monday through Friday, 9:00 AM to 5:00 PM, PST
Email: Contact@soleusair.com
Website:
www.SoleusAir.com
www.SoleusHVAC.com
www.GreeUSA.com
15
 Loading...