

Page 1
SG-DEH-25-4 | Ultra Compact 25 Pint Dehumidifier
Operating Instructions
3097844
© 2011 Soleus Air International
Page 2

Thank you for choosing a Soleus Air Powered by Gree Portable Dehumidifier. This owner’s manual
will provide you with valuable information necessary for the proper care and maintenance of your
new product. Please take a few moments to thoroughly read the instructions and familiarize yourself
with all the operational aspects of your new Dehumidifier.
For your own records, please attach a copy of your sales receipt to this manual. Also, write the store
name/location, date purchased, and serial number below:
Store Name: ____________________________________________________
Location: ______________________________________________________
Date Purchased: _________________________________________________
Serial Number (located on back of unit): ______________________________
IMPORTANT INSTRUCTIONS
Before installing and using your dehumidifier, please read this owner’s manual carefully. Store this manual in a
safe place for future reference.
1) Always place the unit on a level surface.
2) Never use or store gasoline or other flammable vapor or liquid near this unit unless instructed by this
manual.
3) Maintain at least 12-18 inches clearance space around this unit (at least 40” for the exhaust on the side).
Do not block or cover air inlet or outlet grilles.
4) The unit must be connected to a correctly grounded power supply.
5) Do not start or stop the unit by inserting or pulling out the power plug.
6) Do not use an adapter plug or extension cord.
7) Do not use the unit in the immediate surroundings of a bath, a shower or a swimming pool.
8) Do not insert anything into the air outlet. Do not obstruct air inlet or outlet grills unless instructed by this
manual.
9) Do not let children play near this unit.
10) Always inspect the cord for signs of damage before use. If the power cord is damaged, it must be replaced
by the manufacturer or a qualified service technician.
11) When cleaning the unit, always turn the unit off and unplug the power cord.
2
Page 3
PACKAGE CONTENTS
Portable Dehumidifier
Operating Instructions
Garden Hose Connector
SPECIFICATIONS
• Noise level is measured at a distance of 3.28 ft away from the front of the unit.
• Power consumption is measured when the fan runs at the highest speed setting.
• These specifications are for reference only. For actual data, please refer to the rating label on the back of the unit.
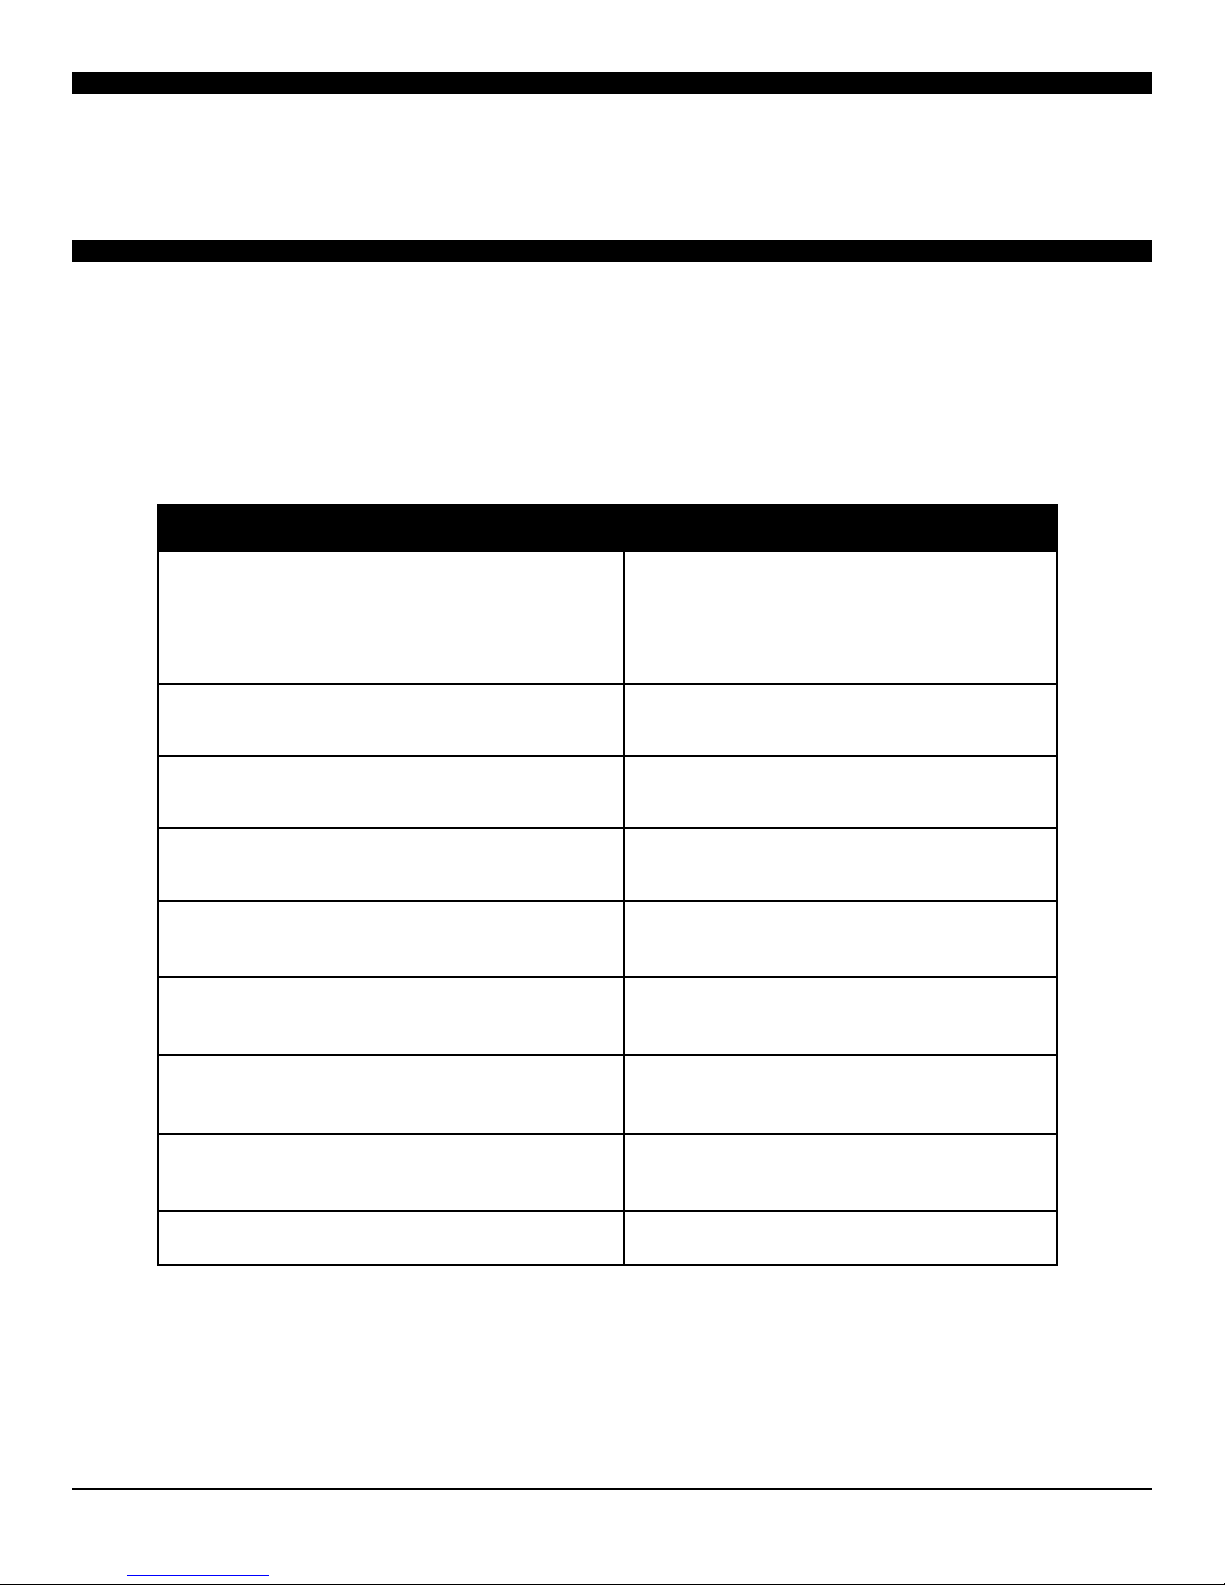
Dehumidifying Capacity
MODEL SG-DEH-25-4
Removes 25 Pints of moisture
per 24 Hours
Power Consumption (Watts) 410 Watts
Air Flow Volume (High/Low) 95 / 76 CFM
Power Source 115 V / 60 HZ
Rated Current (Amps) 3.8A
Sound Pressure Level dB (max) 54 dB (A)
Weight
29 lbs
Dimensions (WxDxH) 13.875” x 8.875” x 19.5”
Energy Star Yes
DISCLAIMER
ALL INFORMATION AND THE TECHNICAL SPECIFICATIONS PRESENTED IN THIS USER’S MANUAL ARE THE
PRESENTATION OF THE MANUFACTURER. SOLEUS INTERNATIONAL HAS NOT CONDUCTED INDEPENDENT
TEST TO THE INFORMATION AND THE SPECIFICATIONS PRESENTED HEREWITHIN.
3
Page 4
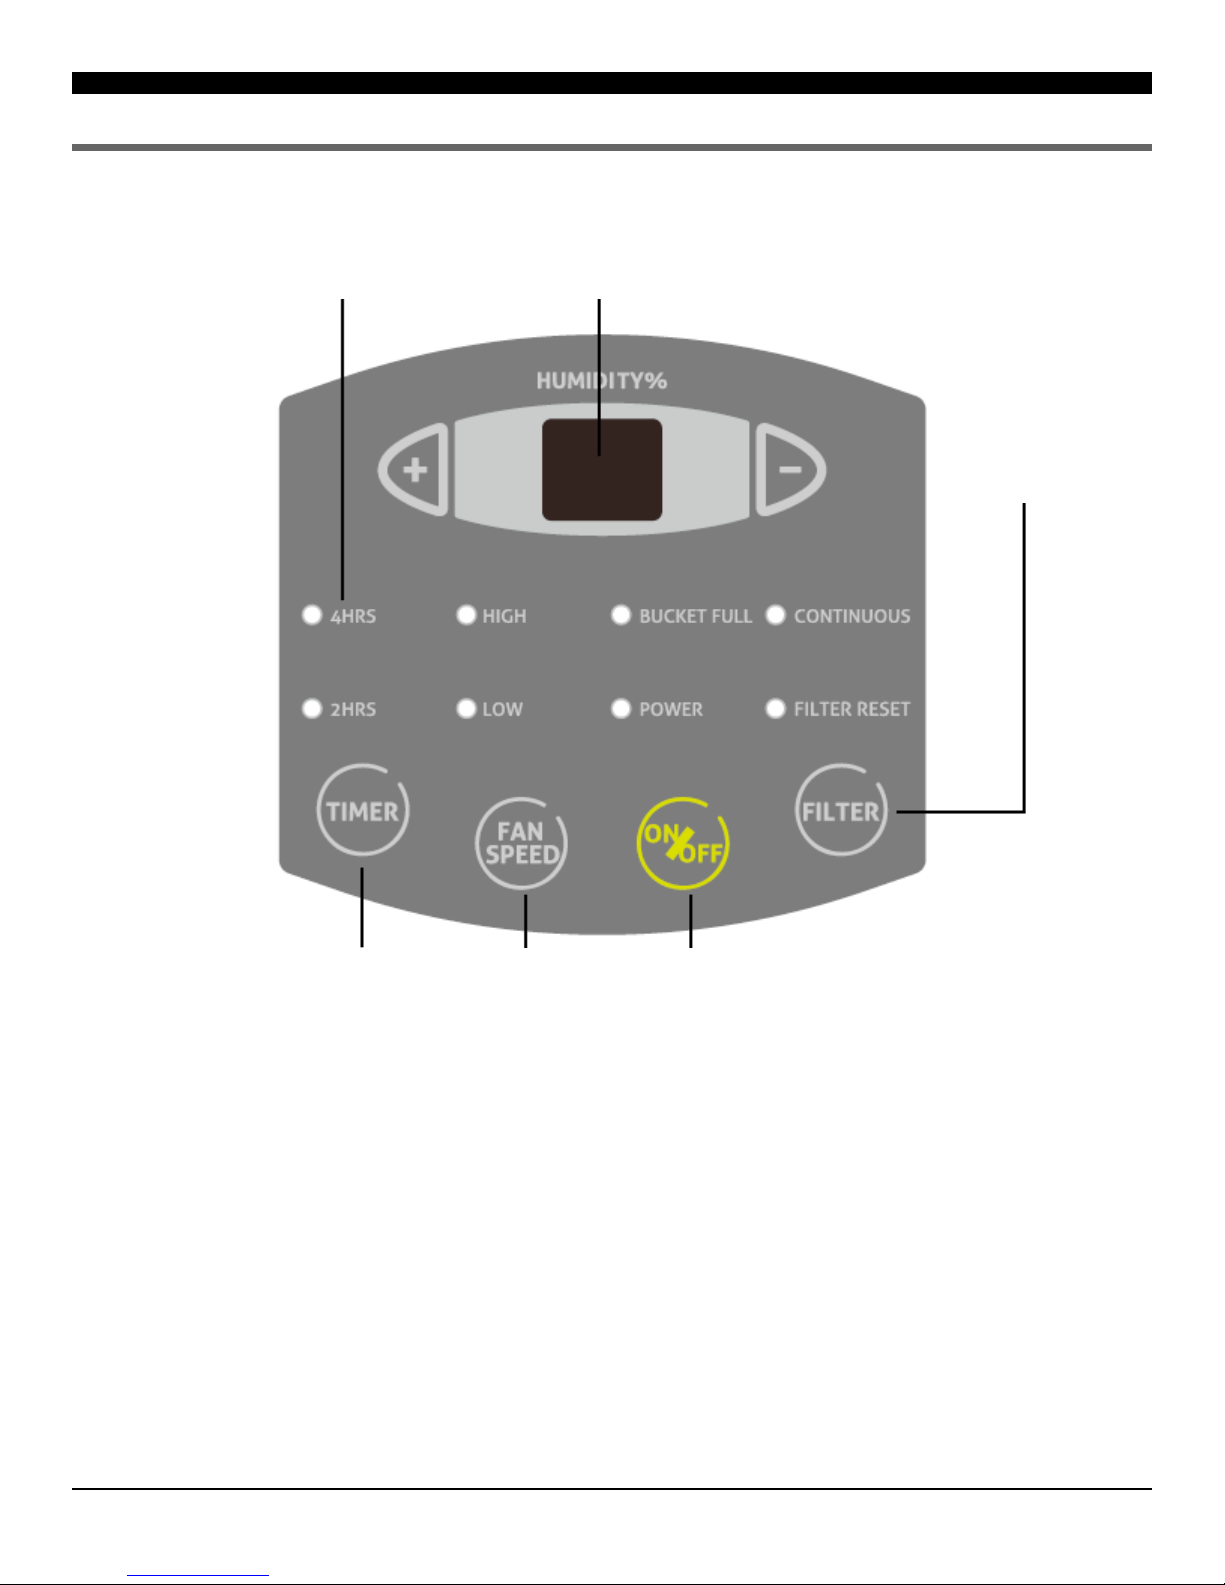
CONTROL PANEL & DIGITAL DISPLAY
Auto-Off Timer
Indicator lights
TIMER BUTTON
INCREASE/DECREASE ROOM
HUMIDITY LEVEL
FAN SPEED
BUTTON
FILTER
BUTTON
POWER
BUTTON
4
Page 5
OPERATING INSTRUCTIONS
OPERATING INSTRUCTIONS
1) When first operating the dehumidifier, run it in Continuous mode for 24 hours.
2) Power On and Off
- Press the POWER button once to manually turn the unit on. Press the POWER
button once more to turn the unit off.
3) Humidity Selection
- Press the “+” or “-” buttons to choose the desired relative humidity in the room.
Each press of the button will change the desired room humidity by 5%. The room humidity is selectable
from 35%-80% or continuous. The unit will cycle on and off to maintain the humidity level chosen on the
digital display. If you want the dehumidifier to operate continuously regardless of the room humidity, press
the (-) buttons until you see “CO” on the digital display. This will enable continuous operation and the
“Continuous” indicator will light up on the control panel. NOTE: The unit will run for 3 minutes before
the compressor turns on and begins the dehumidification process.
4) Fan Speed Control - Press the FAN SPEED Button to cycle through the different fan speeds: High and
low. The fan speed can be visually distinguished by the fan speed indicators on the control panel.
5) Timer - To program the unit to automatically turn off, press the TIMER button when the unit is on. You
can select either 2 or 4 hours with the Timer. Once the desired time (2 or 4 hours) is over, the unit will
automatically shut off.
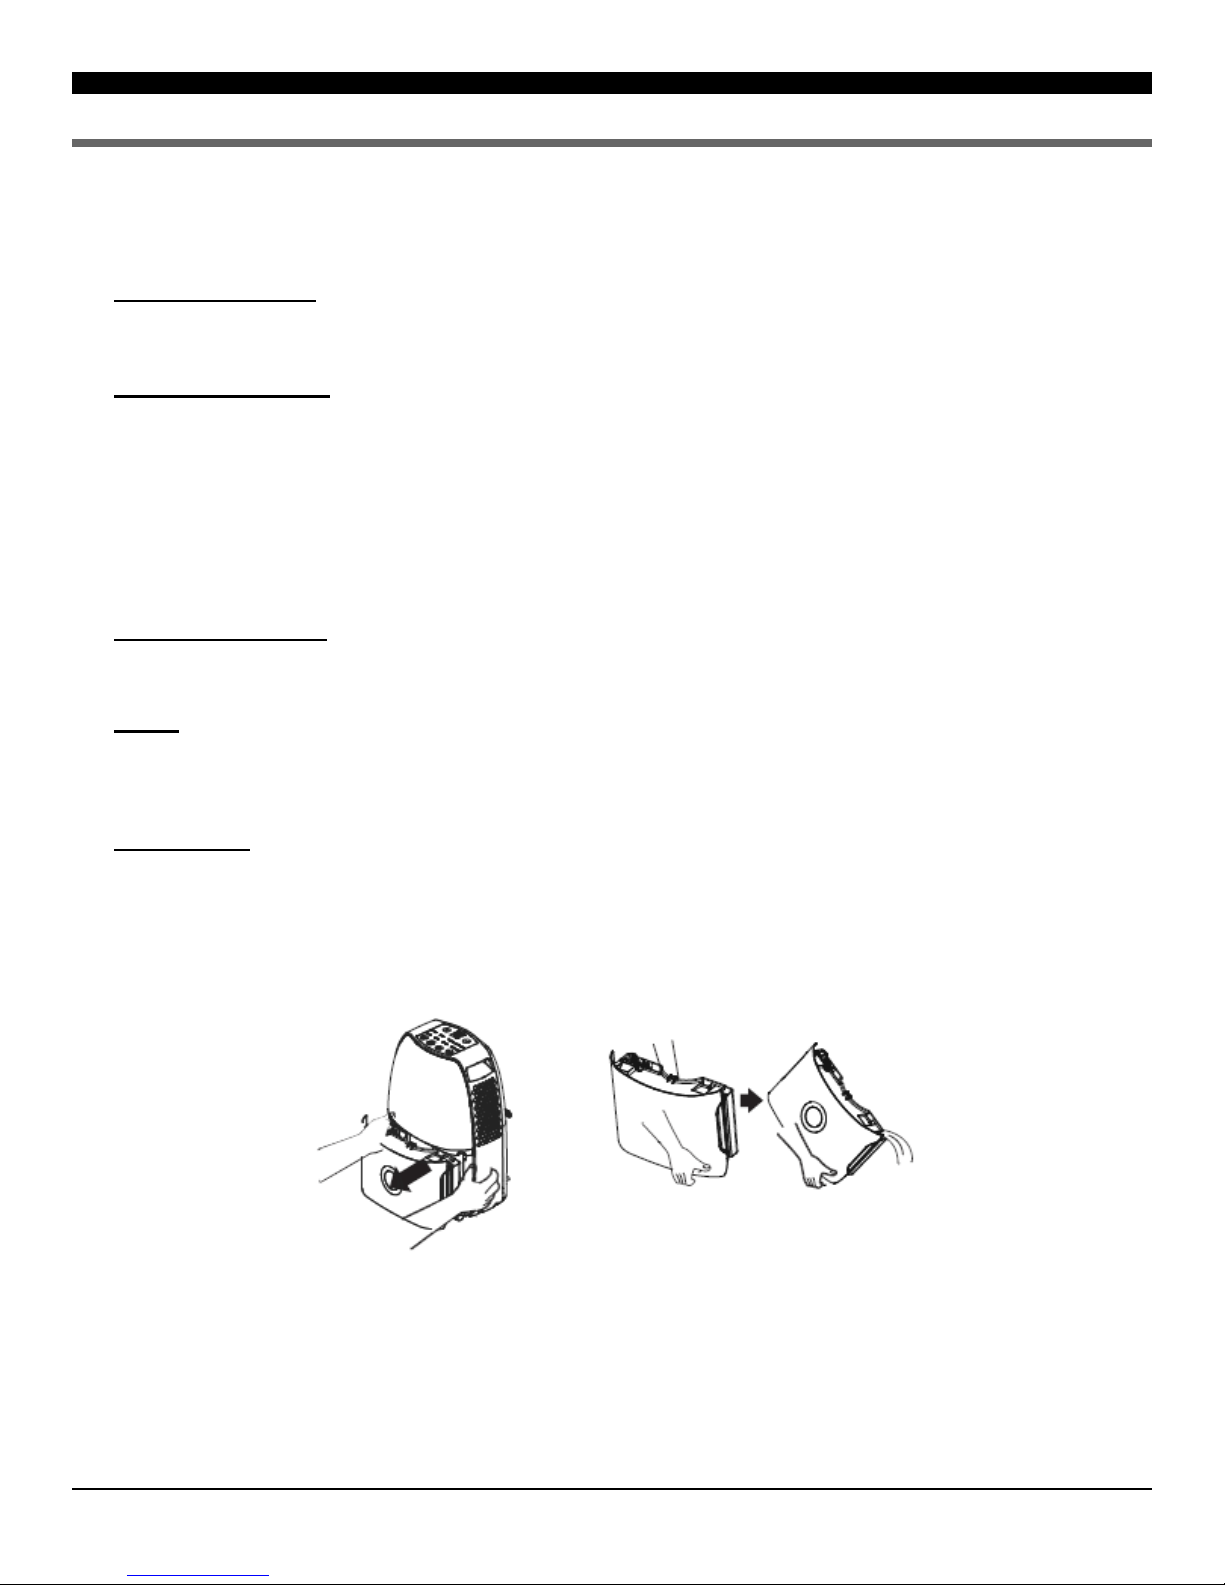
6) Bucket Full - When the water bucket is full of water, the unit will automatically shut off , make a beeping
noise, and the Bucket Full Indicator will light up. The dehumidifier will not function until the water
bucket is emptied and placed back inside the unit. The bucket should be cleaned every few weeks to prevent the growth of mold, mildew and bacteria. Use a mild detergent to clean the bucket. Once clean, completely dry the bucket and place it back inside the dehumidifier.
NOTE: When the bucket is full or removed from the machine, the compressor will turn off, but the fan
will continue to run for a few minutes. This is completely normal. The dehumidifier will not be
removing moisture from the air at this time.
NOTE: Support bucket with both
hands when emptying
5
Page 6
OPERATING INSTRUCTIONS
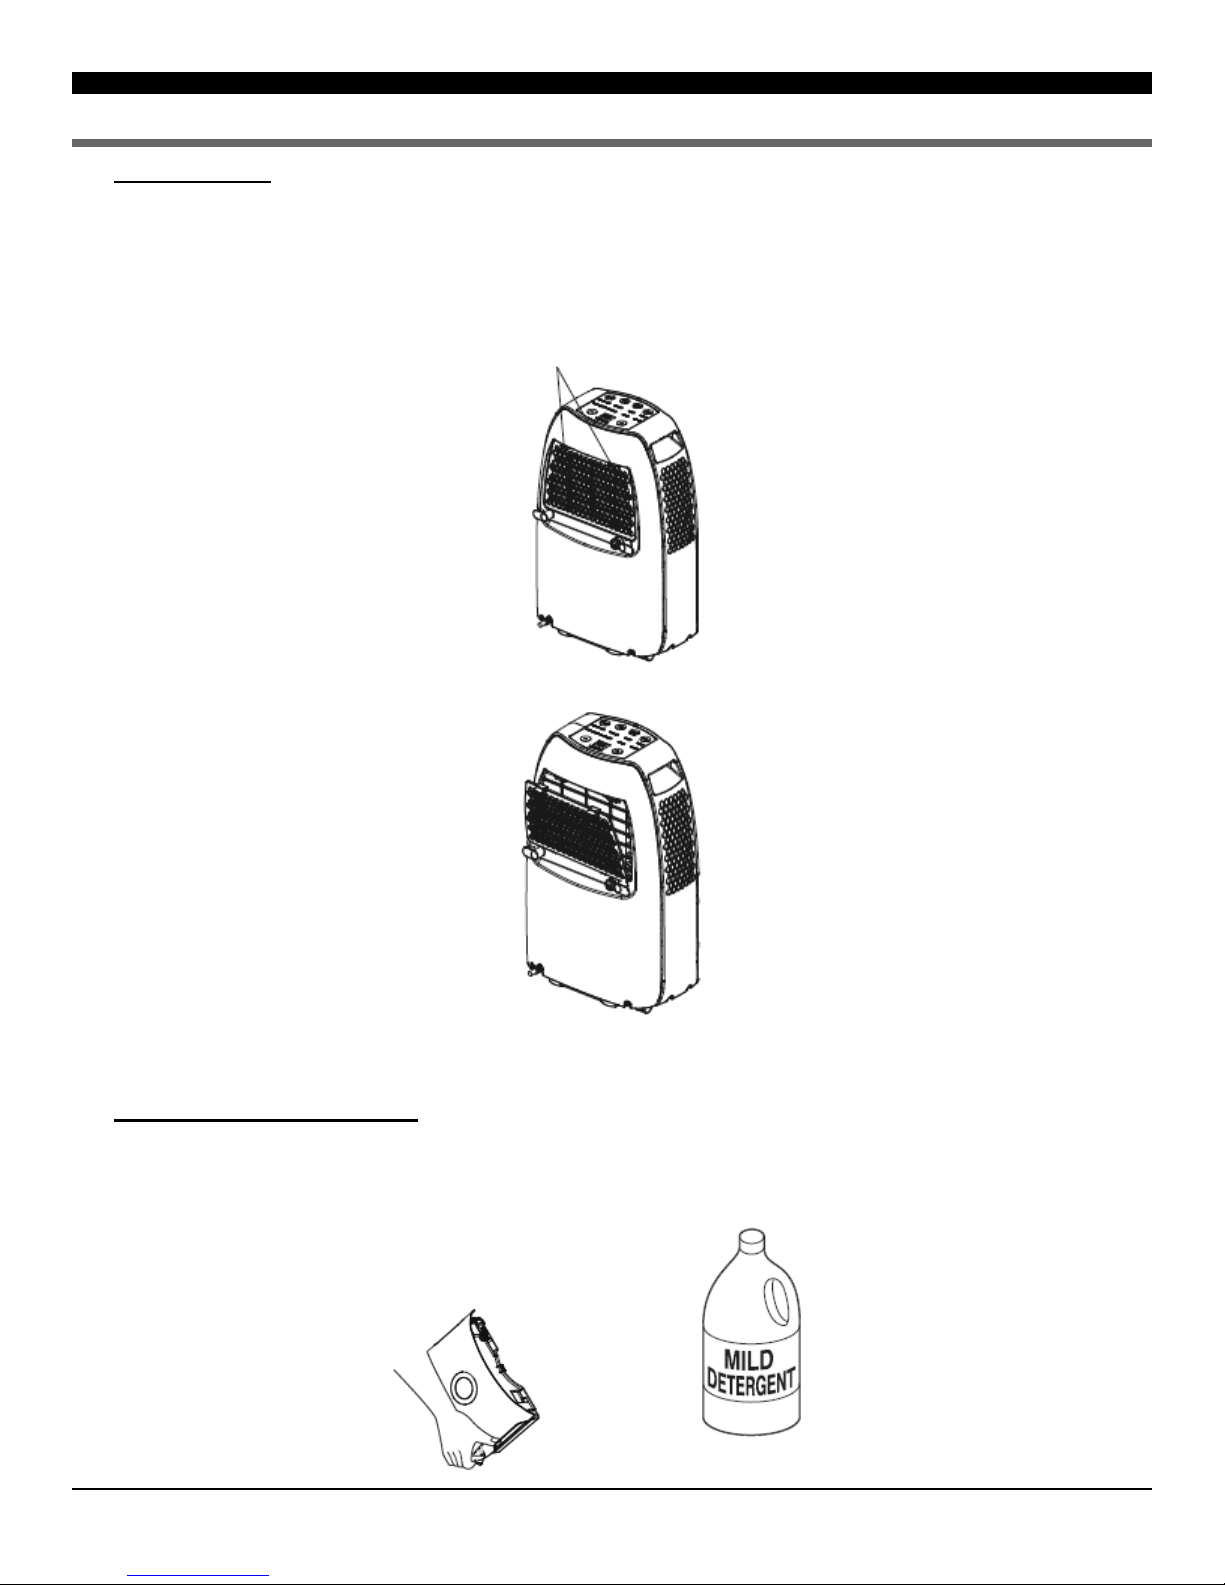
7) Replace Filter - When the filter needs to be replace the filter indicator will light up (after 250 hours of
use). Remove the filter from the back of the unit by pressing the two buttons on top of the filter. Clean the
filter with warm, soapy water. Dry thoroughly before replacing the filter. Once the filter is completely dry,
place the filter back in the unit and press the FILTER button to reset the filter indicator.
CAUTION: DO NOT OPERATE THE DEHUMIDIFIER WITHOUT THE INCLUDED FILTER
NOTE: Do not clean filter in dishwasher
8) Cleaning the Water Bucket
- It is recommended to clean the water bucket to help prevent growth of
mold, mildew, and bacteria. To clean, partially fill the bucket with warm water and some mild detergent.
Swish the water around in the bucket, empty and rinse. Do not place the bucket in the dishwasher.
BUTTONS
6
Page 7

CHOOSING A LOCA TION
A Dehumidifier operating in a basement will have little no effect in drying out an adjacent enclosed storage area, such as a closet, unless there is adequate circulation of air
in and out of the area.
• Do not use outdoors
• This dehumidifier is intended for indoor residential applications only. This unit
should not be used for commercial or industrial applications
• Place the dehumidifier on a smooth , level floor surface that is strong enough to
support the unit with a full bucket of water.
• Allow at least 12”-18” of air flow on all sides and at least 40” for the exhaust side.
• Place the dehumidifier in an area where the temperature will not fall below 41°F.
The coils can become covered with frost at temperatures below 41°F, which may
reduce performance
• Use the dehumidifier in cooking, laundry, bathing and dishwashing areas that have
excessive moisture. NOTE: Place the dehumidifier away from a clothes dryer.
• Use the dehumidifier to prevent moisture damage anywhere books or valuables
are stored.
• Use the dehumidifier in a basement to help prevent moisture damage.
• The dehumidifier must be operated in an enclosed area to be most effective.
• Close all doors, windows and other outside openings to the room.
AUTOMATIC DEFROST
YES NO
When frost builds up on the evaporator coils, the compressor will cycle off and the fan will continue to run until the frost disappears.
When the coils is completely defrosted, the compressor or fan (depending on the model) will automatically restart and
dehumidification will resume.
CONTINUOUS DRAINAGE HOSE
Water can be automatically emptied by attaching a hose to the continuous drainage port on the side of the dehumidifier. This will
allow the unit to run continuously (depending on the selected humidity level) without having to empty the water bucket. To drain,
simply attach a standard garden hose (not included).
• Remove the drain cap (1) by unscrewing the cap (counter-clockwise) from the back of the unit.
• Remove the drain plug (2) after removing the drain cap
• Attach the garden hose connector (included) to the dehumidifier
• Attach the garden hose (not included) to the garden hose connector on the dehumidifier to start the continuous drainage process.
NOTE: The bucket must be in place and securely seated for the dehumidifier to operate correctly.
Back of Unit
7
Page 8

TROUBLESHOOTING
Problem Possible Causes Solutions
Dehumidifier does not start
Dehumidifier does not dry the
air as it should
The dehumidifier is unplugged. Make sure the dehumidifier’s plug is pushed completely into
the outlet.
The fuse is blown / circuit breaker
is tripped.
Dehumidifier has reached its
present level or the bucket is full.
Bucket is not in the proper
position.
Power Failure. There is a protective time delay (up to 3 min.) to prevent trip-
Not enough time allowed for unit
to remove moisture.
Airflow is restricted. Make sure there are no curtains, blinds, or furniture blocking
Dirty filter. See the Replacing Filter section on Page 6.
The Humidity Control may not be
set low enough.
Check the house fuse / circuit breaker box and replace fuse or
reset breaker.
The dehumidifier automatically turns off when either condition
occurs. Change to a lower setting or empty the water bucket
and replace properly.
The bucket must be in place and securely seated for the dehumidifier to operate.
ping of the compressor overload. For this reason, the unit may
not start normal dehumidification for 3 min. after it is powered
back on.
When first installed, allow at least 24 hours to maintain the
desired dryness.
the front or back of the dehumidifier. See the Choosing a Lo-
cation section on Page 7.
For drier air, press the “
ity desired in the room, or set the dehumidifier to CO for maximum dehumidification.
-” button to lower the percent humid-
Dehumidifier runs too much The area to be dehumidified is too
Frost appears on the coils The dehumidifier has recently
Controls cannot be set The compressor will turn off and
Fan Noise Air is moving through the unit. This is normal.
Water on the floor Hose connection may be loose. Check the hose connection. See the Drainage Section on pg. 7.
Doors and windows may not be
closed tightly.
Clothes dryer may be blowing
moist air into the room.
Room temperature is too low. Moisture removal is best at higher room temperatures. Lower
large.
Doors and windows are open. Close all doors and windows to the outside.
been turned on or the room
temperature is below 41°F.
the fan will automatically
continue to run for approximately
3 minutes at a fixed setting.
Hose is attached but not draining
into a drain
Check that all doors, windows, and other openings are securely
closed.
Install the dehumidifier away from the dryer. The dryer should
be vented outside.
room temperatures will reduce the moisture removal rate. This
model is designed to operate at temperatures above 41°F.
The capacity of your dehumidifier may not be adequate for the
room size.
This is normal. Frost will usually disappear within 60 minutes.
This is normal. Wait approximately 3 minutes and set the fan
speed at the desired level.
Disconnect the hose if using the bucket or place the hose near a
drain.
8
Page 9

WARRANTY
One Year Limited Warranty
Gree USA, Inc. warrants the accompanying Soleus Air Powered by Gree Dehumidifier to be free of defects in material
and workmanship for the applications specified in its operation instruction for a period of ONE (1) year from the date of
original retail purchase in the United States.
If the unit exhibits a defect in normal use, Gree USA will, at its option, either repair or replace it, free of charge within a
reasonable time after the unit is returned during the warranty period.
As a condition to any warranty service obligation, the consumer must present this Warranty Certificate along with a
copy of the original purchase invoice.
THIS WARRANTY DOES NOT COVER:
• Damage, accidental or otherwise, to the unit while in the possession of a consumer not caused by a defect in
material or workmanship.
• Damage caused by consumer misuse, tampering, or failure to follow the care and special handling provisions
in the instructions.
• Damage to the finish of the case, or other appearance parts caused by wear.
• Damage caused by repairs or alterations of the unit by anyone other than those authorized by Gree USA, Inc.
• Freight and Insurance cost for the warranty service.
• Filter and Accessories
ALL WARRANTIES, INCLUDING ANY IMPLIED WARRANTY OF MERCHANT ABILITY ARE LIMITED TO
ONE-YEAR DURATION OF THIS EXPRESS LIMITED WARRANTY. GREE USA INC. DISCLAIMS ANY
LIABILITY FOR CONSEQUENTIAL OR INCIDENTAL DAMAGES AND IN NO EVENT SHALL
GREE USA,INC LIABILITY EXCEED THE RETAIL VALUE OF THE UNIT FOR BREACH OF ANY
WRITTEN OR IMPLIED WARRANTY WITH RESPECT TO THIS UNIT.
This warranty covers only new products purchased from our authorized dealers or retailers. It does not cover used, salvaged, or refurbished products.
As some states do not allow the limitation or exclusion of incidental or consequential damages, or do not allow
limitation on implied warranties, the above limitations and exclusions may not apply to you. This warranty gives you
specific legal rights, and you may also have other rights that vary from state to state.
For Technical Support and Warranty Service
Please Call (888) 876-5387
Or Write To:
Gree USA, Inc.
20035 E. Walnut Dr. N.
City of Industry, CA 91789
www.greeusa.com
www.soleusair.com
www.soleusgreen.com
9
Page 10

Page 11

SG-DEH-25-4 | DESHUMIDIFICADOR
Con Potencia
Instrucciones de Uso
3097844
© 2011 Soleus Air International
Page 12

Gracias por elegir el Deshumidificador Portátil de Soleus Air con potencia Gree. Este manual del
propietario le proveerá valiosa información necesaria para el cuidado y mantenimiento apropiado de
su nuevo producto. Por favor tome unos momentos para leer detenidamente las instrucciones y
familiarizarse con todos los aspectos operacionales de su nuevo Deshumidificador.
Mantenga una copia del recibo de venta con este manual para su información. También, escriba a
continuación el nombre de la tienda/dirección, fecha de compra, y número de serie:
Nombre de Tienda: _________________________________________________________________
Dirección de Tienda: ________________________________________________________________
Fecha de Compra: __________________________________________________________________
Número de Serie (ubicado en la parte de atrás de la unidad): ______________________________
INSTRUCCIONES IMPORTANTES
Antes de utilizar su deshumidificador, por favor lea este manual del propietario cuidadamente. Guarde este manual en un lugar seguro para futura referencia.
1) Siempre coloque la unidad en una superficie plana.
2) Nunca use o almacene gasolina o otros líquidos inflamables cerca de esta unidad a no ser que sea instruido
en este manual.
3) Mantenga por lo menos de 12-18 pulgadas de espacio libre alrededor de la unidad (por lo menos 40 pulgadas para el escape en el lado). No bloque o cubra la entrada o la salida de aire.
4) La unidad debe estar conectada correctamente a un suministro de energía con contacto tierra.
5) No encienda o apague la unidad desconectando o conectando el enchufe.
6) No use un enchufe adaptador o un cable de extensión.
7) No use esta unidad a los alrededores inmediatos del baño, la ducha, o la piscina.
8) No inserte nada en la salida de aire. No obstruya la entrada o la salida de aire a no ser que sea instruido en
este manual..
9) No permita que los niños jueguen cerca de esta unidad.
10) Siempre inspeccione el cable de suministro de energía por daños antes de uso. Si el cable de energía esta
dañado, debe ser reemplazado por el manufacturar o un técnico de servicio calificado.
11) Cuando limpie la unidad, siempre apague la unidad y desconecte el cable de suministro de energía.
2
Page 13

CONTENIDOS DE LA CAJA
Deshumidificador Portátil
Instrucciones de Uso
Conector de Manguera
ESPECIFICACIONES
• Los niveles de ruido son medidos a una distancia de 3.28 pies del frente de la unidad.
• El consumo de energía es medido cuando el ventilador esta funcionando en la mas alta velocidad.
• Estas especificaciones son para referencia solamente. Para información actual, por favor lea la etiqueta de información en la
parte de atrás de la unidad.
Capacidad Deshumidificadora
Consumo de Energía (Watts) 410 Vatios
Volumen de Flujo de Aire
Nivel de Presión de Sonido dB
MODELO SG-DEH-25-4
Remueve 25 Pintas de humedad
por 24 horas
95 / 76 CFM
(Alto/ Bajo)
Fuente de Energía 115 V / 60 HZ
Corriente (Amps) 3.8A
54 dB (A)
(max)
Peso 29 libras
Dimensiones (An x P x Al) 13.875” x 8.875” x 19.5”
Con Energy Star Si
DESCARGO DE RESPONSABLIDAD
TODA LA INFORMACION Y LAS ESPECIFICACIONES TECNICAS PRESENTADAS EN ESTE MANUAL DEL USARIO SON PRESENTADAS POR EL FABRICANTE. SOLEUS INTERNATIONAL NO HA EFECTUADO PRUEBAS INDEPENDIENTEMENTE EN
LO REFERENTE A LA INFORMACION O ESPECIFACIONES PRESENTADAS EN ESTE MANUAL
3
Page 14

PANEL DE CONTROL & PANTALLA DIGITAL
Luces Indicadoras
de Auto-Apagado
de
Temporizador
BOTON
TEMPORIZADOR
AUMENTA/DISMINUE EL NIVEL
DE HUMEDAD DEL CUARTO
BOTON DE
VELOCIDAD
DEL
VENTILADOR
BOTON DE
ENCENDIDO/
APAGADO
BOTON DE
FILTRO
4
Page 15

INSTRUCCIONES DE USO
INSTRUCCIONES DE USO
1) Cuando use/opere el deshumidificador la primera vez, déjelo funcionando durante 24 horas en modo
CONTINUOUS (Continuo).
2) Encendido/Apagado - Presione el botón POWER (Encendido) una vez para encender manualmente la
unidad. Presione el botón POWER (Encendido) otra vez para apagar la unidad..
3) Seleccionando la Humedad - Presione los botones “+” o “-” para escoger la humedad relativa desea-
da en el cuarto. Cada vez que presione el botón, la humedad relativa cambiara en 5%. La humedad del
cuarto se puede seleccionar desde 35%-80% o CONTINUOUS (Continuo). La unidad cambiara de ciclo
apagado a encendido para mantener el nivel de humedad seleccionada en la pantalla digital. Si usted desea
que el deshumidificador funcione continuamente, sin importar la humedad del cuarto, presione el botón (-)
hasta que usted observe “CO” en la pantalla digital. Esto permitirá la operación continua y el indicador
CONTINUOUS” se encenderá en el panel de control. NOTA: la unidad funcionara por 3 minutos antes de
que el compresor se encienda y el proceso deshumidificador inicie.
4) Control de Velocidad de Ventilador - Presione el botón FAN SPEED (Velocidad de Ventilador) para
circular entre las diferentes velocidades del ventilador HIGH (Alto) y LOW (Bajo). La velocidad del ventilador puede ser visualmente distinguida por los indicadores de velocidad en el panel de control.
5) Temporizador - Para programar el apagado automático de la unidad, presione el botón TIMER
(Temporizador) cuando la unidad este encendida. Usted puede seleccionar 2 o 4 horas en el temporizador.
Una vez que el tiempo deseado (2 o 4 horas) ha finalizado, la unidad se apagara automáticamente.
6) Contenedor de Agua Lleno - Cuando el contenedor de agua esta lleno, la unidad se apagara automáticamente, emitiendo un sonido agudo, y la luz de BUCKET FULL INDICATOR (Contenedor Lleno) se
encenderá. El deshumidificador no funcionara hasta que el contenedor de agua sea vaciado y regresado al
la unidad. El contenedor debería ser limpiado cada pocas semanas para prevenir la acumulación de moho,
hongos, o bacteria. Use un detergente suave para limpiar el contenedor. Cuando esta limpio y completamente seco regrese el contenedor al deshumidificador.
NOTA: Sostenga el contenedor
con ambos manos cuando la vacié
NOTA: Cuando el contenedor de agua esta lleno o removido de la unidad, el compresor se apagara pero
el ventilador continuara funcionando por unos pocos minutos. Esto es completamente normal. El deshumidificador no removerá humedad del aire en este momento.
5
Page 16

INSTRUCCIONES DE USO
7) Reemplazando el Filtro - Cuando sea necesario cambiar el filtro la luz indicadora se encenderá
(después de 250 horas de uso). Remueva el filtro de la parte trasera de la unidad presionado los dos botones en la parte superior del filtro. Lave el filtro con agua tibia y enjabonada. Secar completamente antes de
colocar el filtro. Una vez que el filtro esta seco completamente, colóquelo en la unidad y presione el botón
FILTER (Filtro) para reiniciar el indicador del filtro.
PRECAUCIÒN: NO OPERE/USE EL DESHUMIDIFICADOR SIN EL FILTRO INCLUIDO
NOTA: No lave el filtro en el lavaplatos
8) Limpiando el Contenedor de Agua
acumulación de moho, hongos, y bacteria. Para limpiarlo, llene el parcialmente el contenedor con agua tibia y detergente suave. Agite el agua alrededor del contenedor, vacíelo, y enjuáguelo. No coloque el contenedor en el lavaplatos.
BOTONES
- Se recomienda limpiar el contenedor de agua para prevenir la
6
Page 17

ESCOGIENDO LA UBICACION
Un Deshumidificador operando/funcionando en un sótano tendrá un efecto nulo o muy
poco para secar una área cerrada adyacente de almacenamiento , como un closet, a no
ser que la circulación de aire hacia afuera y adentro sea la adecuada.
• No usar al aire libre
• Este deshumidificador es para uso residencial únicamente. Esta unidad no es para uso in-
dustrial o comercial.
• Coloque el deshumidificador en una superficie nivelada y plana que sea suficientemente
fuerte para soportar la unidad con el contenedor de agua lleno.
• Permita por lo menos de 12-18 pulgadas de espacio alrededor de la unidad para la circula-
ción de aire y por lo menos 40 pulgadas para el lado de escape.
• Coloque el deshumidificador en una área donde la temperatura no será menos de 41°F. Las
bobinas se podrían cubrir de hielo a temperaturas menores de 41°F, que podría reducir el
rendimientos
• Use el deshumidificador en áreas de humedad excesiva como la cocina, lavandería, baño, y
área de lavaplatos . NOTA: Coloque el deshumidificador lejos de la secadora de ropa.
• Use el deshumidificador para prevenir daños de humedad en cualquier lugar que libros y
objetos valiosos son almacenados.
• Use el deshumidificador en un sótano para prevenir daños por humedad.
• El deshumidificador debe ser operada en una área encerada para que sea mas efectivo.
• Cierre todas las puertas, ventanas, y cualquier abertura hacia afuera de el cuarto.
DESCONGELADOR AUTOMATICO
SI NO
Arriba de Abajo de
Cuando el hielo se acumula en las bobinas del evaporador, el compresor se apagara y el ventilador continuara funcionando hasta que
el hielo desaparezca. Cuando las bobinas estén completamente descongeladas, el compresor o ventilador (dependiendo del modelo)
automáticamente reiniciara y el proceso deshumidificador continuara.
MANGUERA DE DRENAJE CONTINUO
El agua puede ser automáticamente vaciada conectando la manguera a la salida del drenaje continuo en el lado del deshumidificador.
Esto permitirá que la unidad funcione continuamente (dependiendo del nivel de humedad seleccionado) sin tener que vaciar el contenedor de agua. Para drenar, simplemente conecte una manguera de jardín regular (no incluida).
• Remueva la tapa del drenaje (1) girando la tapa (dirección contra las del agujas del reloj) en la parte de atrás de la unidad.
• Remueva el tapón de drenaje(2) después de remover la tapa de drenaje
• Coloque el conector de manguera (incluido) al deshumidificador
• Conecte la manguera de jardín (no incluida) al conector de manguera para iniciar el proceso de drenaje continuo.
NOTA: El contenedor de agua debe estar en su lugar y seguro para que el deshumidificador opere correctamente.
Parte de Atrás
de la Unidad
7
Page 18

SOLUCIONES A PROBLEMAS
Problema Posible Razón Soluciones
Deshumidificador no empieza
El deshumidificador no esta enchufado.
Asegúrese que el enchufe esta insertado completamente en el tomacorriente.
El deshumidificador no
seca el aire como debería
El fusible esta fundido/el interruptor
de circuito se disparo.
El deshumidificador ha alcanzado su
nivel o el contenedor de agua esta
lleno.
El contenedor de agua no esta en la
posición apropiada.
Falla en el suministro eléctrico. Hay un retraso de tiempo protector (3 minutos) para prevenir una
No suficiente tiempo permitido para
que la unidad remueva la humedad.
Flujo de aire restringido. Asegúrese de que no hay cortinas, persianas, o muebles bloqueando el
Filtro sucio. Ver la sección Reemplazando el Filtro en la Pagina 6.
El control de humedad podría no estar
lo suficientemente bajo.
Revise la caja de fusibles y cambie los fusibles dañados y/o reinicie el
interruptor de circuito.
El deshumidificador se apaga automáticamente cuando cualquiera de
estas dos situaciones ocurre. Cambie a una configuración mas baja o
vacié el contenedor de agua y colóquelo en su lugar apropiadamente.
El contenedor debe estar en su lugar y seguro para que el deshumidificador funcione correctamente.
sobrecarga del compresor. Por esta razón, la unidad podría no comenzar normalmente el proceso deshumidificador por 3 minutos después
de que el suministro eléctrico sea restablecido.
Cuando se instale por primera vez, permita el funcionamiento por lo
menos durante 24 horas para mantener la sequedad deseada..
frente o la parte de atrás del deshumidificador. Ver la sección Esco-
giendo la Ubicación en la Pagina
Para aire mas seco, presione el botón “-” para bajar el porcentaje de
humedad deseado en el cuarto, o configure el deshumidificador a
“CO” para máxima deshumidificación.
7.
Deshumidificador funciona/corre demasiado.
Hay hielo en las bobinas. El deshumidificador fue recientemen-
Los controles no se pueden
configurar.
Ruido del ventilador El aire se mueve a través de la unidad Esto es normal.
Agua en el piso La conexión de la manguera puede
Puertas y ventanas podrían no estar
cerradas completamente.
La secadora puede estar emitiendo
aire húmedo en el cuarto.
La temperatura del cuarto es muy
baja.
El área para ser deshumidificada es
muy grande.
Puertas y ventanas están abiertas. Cierre todas las puertas y ventanas.
te encendido o la temperatura del
cuarto es menos de 41°F.
El compresor se apagara y el ventilador continuara automáticamente por 3
minutos en la configuración programada.
estar floja.
Revise que todas las puertas, ventanas, y otras aberturas están cerradas completamente.
Instale el deshumidificador lejos de la secadora. La secadora debe de
tener ventilación hacia afuera.
La eliminación de humedad es mejor en cuartos con temperaturas
altas. Cuartos con temperaturas bajas reducirán la capacidad de eliminación de humedad. Este modelo esta diseñado para operar a temperaturas arriba de 41°F.
La capacidad de su deshumidificador podría no ser adecuado para el
tamaño del cuarto
Esto es normal. El hielo usualmente se desaparece en 60 minutos.
Esto es normal. Espere aproximadamente 3 minutos y configure la
velocidad del ventilador al nivel deseado.
Revise la conexión de la manguera. Vea la sección de Drenaje en la
Pagina
7.
Manguera conectada pero no esta
drenando al drenaje.
Desconecte la manguera si esta usando un contenedor o coloque la
manguera cerca al drenaje.
8
Page 19

GARANTIA
Un Año de Garantía Limitada
Gree USA, Inc. garantiza que el Deshumidificador de Soleus Air con Potencia Gree esta libre de defectos en materiales
y manufactura para las aplicaciones especificas en sus instrucciones de operación por un periodo de UN (1) año de la
fecha de compra original en los Estados Unidos.
Si la unidad muestra un defecto por uso normal,
la unidad libre de cargos, dentro de un tiempo razonable después de que la unidad ha sido regresada durante el periodo
de garantía.
Como condición de cualquier obligación de servicio de garantía, el consumidor debe presentar este Certificado de Garantía así como una copia de la factura original de compra.
ESTA GARANTIA NO CUBRE:
• Daños accidentales o no a la unidad mientras este en posesión del consumidor que no fueron causados por
defecto en materiales o manufactura.
• Daños causados por el mal uso del consumidor, manipulación, o por no seguir las indicaciones de cuidado y
provisiones de manejo especial en las instrucciones.
• Daños al acabado exterior de la unidad, u otras aspectos de apariencia en el acabado causadas por el uso.
• Daños causados por reparaciones o alteraciones a la unidad por cualquier otra persona que no este autorizada
Gree USA,Inc.
por
• Costos de Envió y Seguro para el servicio de garantía..
TODAS LAS GARANTIAS, INCLYUENDO CUALQUIER GARANTIA IMPLICITA EN LA CAPACIDAD DEL
COMERCIANTE ESTA LIMITADA A UN AÑO DE DURACION DE ESTA GARANTIA EXPRESA LIMITADA .
Gree USA,Inc. HACE DESCARGO DE CUALQUIER RESPONSABLILIDAD POR DAÑOS
INCIDENTALES O CONSECUENTES Y DE NINGUNA FORMA GREE USA,INC TENDRA
RESPONSIBLILIDAD QUE EXCEDA EL VALOR DE VENTA AL DETALLE DE LA UNIDAD POR INCUMPLIMIENTO DE CUALQUIER GARANTIA YA SEA ESCRITA O IMPLICITA CON RESPECTO A ESTA UNIDAD.
Esta garantía cubre solamente productos nuevos comprados a distribuidores autorizados o vendedores minorista. No
cubre mercancía usada, salvada, o reconstruida.
Ya que algunos estados no permiten la limitación o exclusión de daños incidentales o consecuentes, o no permiten limitación en garantías implícitas, las limitaciones y exclusiones antes mencionadas podrían no aplicar a usted. Esta garantía
le da derechos legales específicos, y usted podría tener otros derechos que varían de estado a estado.
Para Apoyo Técnico y Servicio de Garantía
Por favor llamar (888) 876-5387
O Escriba:
Gree USA, Inc.
20035 E. Walnut Dr. N.
City of Industry, CA 91789 USA
www.greeusa.com
www.soleusair.com
www.soleusgreen.com
Gree USA,Inc. podría optar por, ya sea reparar o reemplazar
9
Page 20

66129908808
 Loading...