

Soleus Air PMC-12HP-201,PMC-14HP-201 Operating Instructions Manual
Portable Air Condioner with Heat Pump
12,000 BTU • 14,000 BTU
OPERATING INSTRUCTIONS
V170123
PMC-12HP-201
PMC-14HP-201
3058080

Thank you for choosing a Soleus Air Portable Air Conditioner. This Owner’s Manual will provide
you with valuable information necessary for the proper care and maintenance of your new product.
Please take a few moments to thoroughly read the instructions and familiarize yourself with all the
operational aspects of your new Soleus Air Portable Air Conditioner.
For your own records, please attach a copy of your sales receipt to this manual. Also, write the
store name/location, date purchased, and serial number below:
Store Name: ____________________________________________________
Location: _____________________________________________________
Date Purchased: _________________________________________________
Serial Number (located on back of unit): ______________________________
Before installing and using your portable air conditioner, please read this owner’s manual carefully. Store this
manual in a safe place for future reference.
1) Always place the unit on a level surface.
2) Never use or store gasoline or other flammable vapor or liquid near this unit unless instructed by this manual.
3) Maintain at least 10 inches (25 cm) clearance space around this unit. Do not block or cover air inlet or outlet
grilles.
4) The unit must be connected to a correctly grounded power supply.
5) Do not start or stop the unit by inserting or pulling out the power plug.
6) Do not use an adapter plug or extension cord.
7) Do not use the unit in the immediate surroundings of a bath, a shower or a swimming pool.
8) Do not insert anything into the air outlet. Do not obstruct air inlet or outlet grills unless instructed by this
manual.
9) Do not let children play near this unit.
10) Always inspect the cord for signs of damage before use. If the power cord is damaged, it must be replaced by
the manufacturer or a qualified service technician.
11) When cleaning the unit, always turn the unit off and unplug the power cord.
12) Do not mix old and new batteries in the remote control.
IMPORTANT INSTRUCTIONS
PURCHASE INFORMATION
Portable Air Conditioner (1)
Exhaust Hose (1)
Exhaust Hose Connector (1)
Window Kit Panel (3)
Window Kit Adapter (1)
Window Kit Adapter Grille (1)
Optional Window Kit Adapter Extension (1)
Wing Nut (2)
Optional Drain Tube (1)
Drain Tube Stopper (1)
Remote Control (1)
AAA Battery (2)
Owner’s Manual (1)
Optional Window Security Pack (1)
PACKAGE CONTENTS
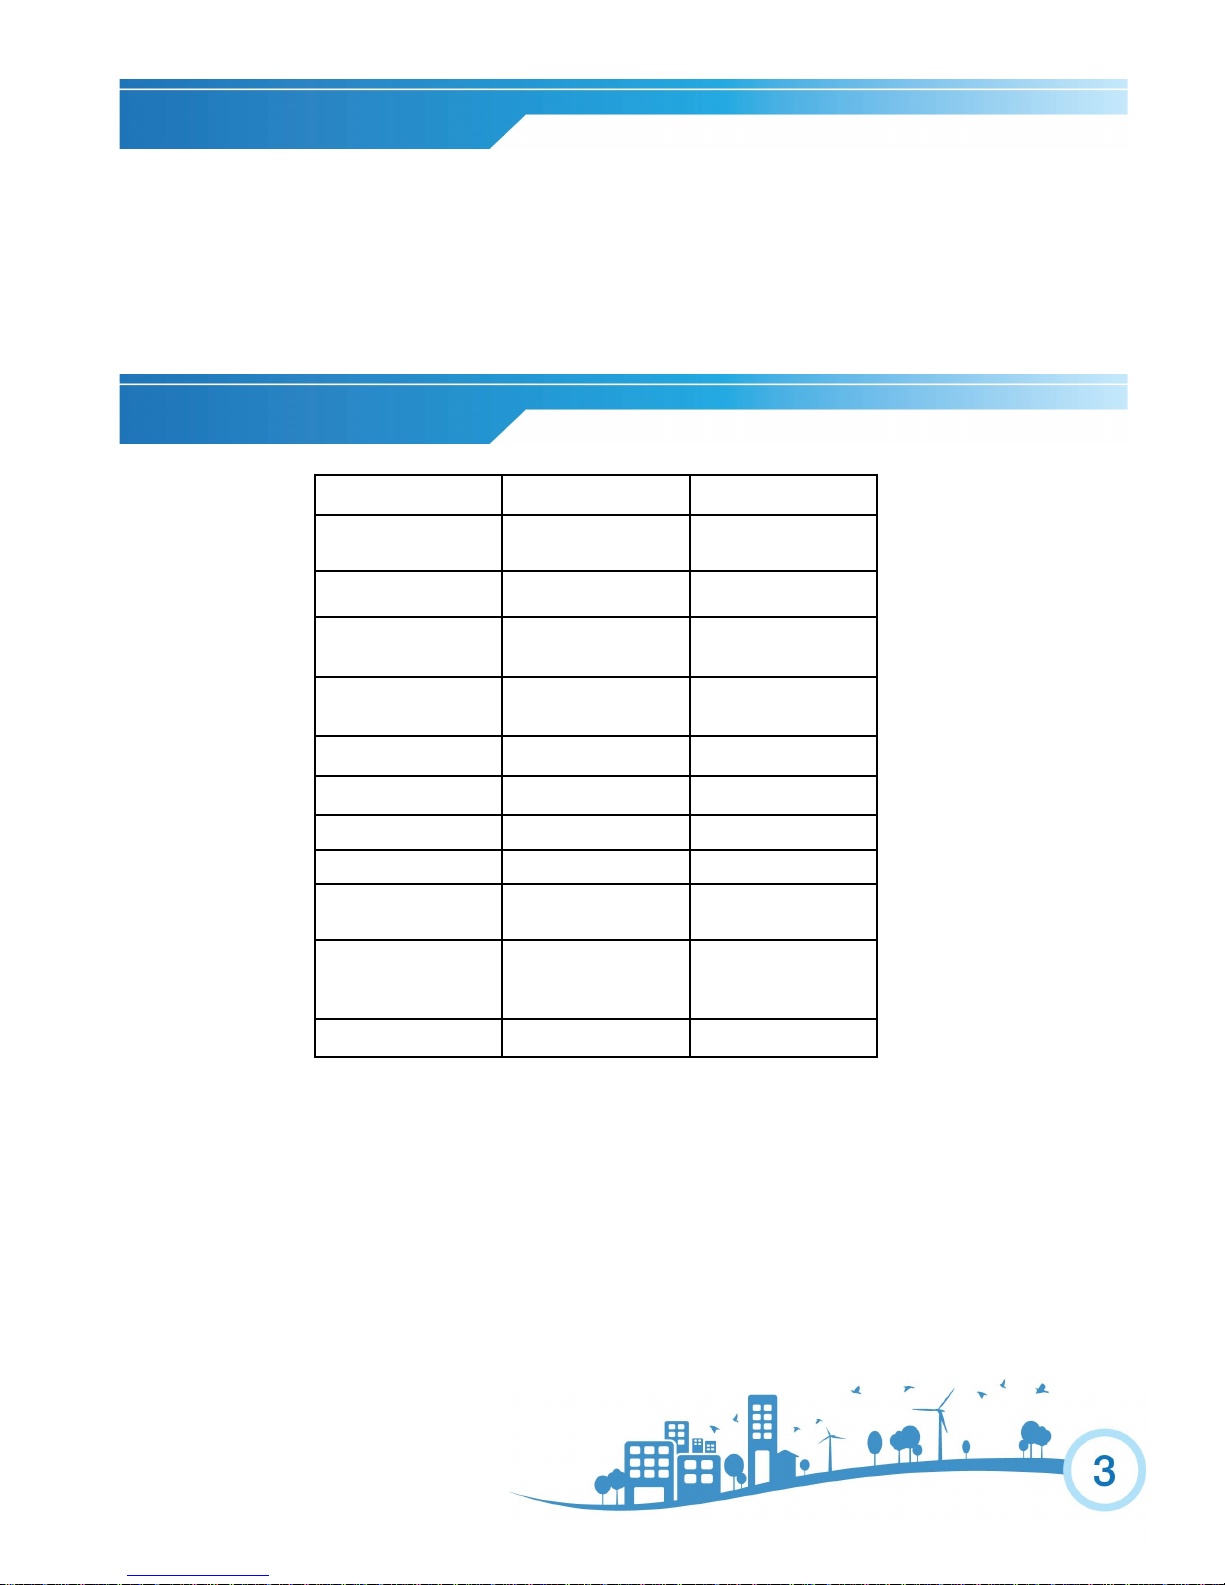
SPECIFICATIONS
The cooling capacity is measured at an ambient temperature of DB 95˚F, WB 83 ˚F.
Noise level is measured at a distance of 3.28 ft away from the front of the unit, when the unit
is in cooling mode.
Power consumption is measured when the fan runs at the highest speed setting.
These specifications are for reference only. For actual data, please refer to the rating label on
the back of the unit.
If the environment temperature is higher than the max operating temperature or lower than the mini-
mum operating temperature, the air conditioner may not work properly.
Model Number PMC-12HP-201 PMC-14HP-201
Capacity
Cool/Heat
12,000/10,000 14,000/11,000
Dehumidification 120 pts/Day 120 pts/Day
Cooling Power
Usage
1385 Watts,
12.2 Amps
1535 Watts
12.5 Amps
Heating Power
Usage
1120 Watts
9.8 Amps
1230 Watts
11 Amps
Air Flow 206 CFM 206 CFM
Power Source 115 V / 60 HZ 115 V / 60 HZ
Noise Level dB(A) 55 55
Product Weight 65 Lbs 66.1 Lbs
Operating
Temperature
61℉-88℉ 61℉-88℉
Product Dimension
(W x H x D)
17.5” W× 28.75”H
×14.5” D
17.5” W× 28.75” H
×14.5” D
Refrigerant R-410A R-410A
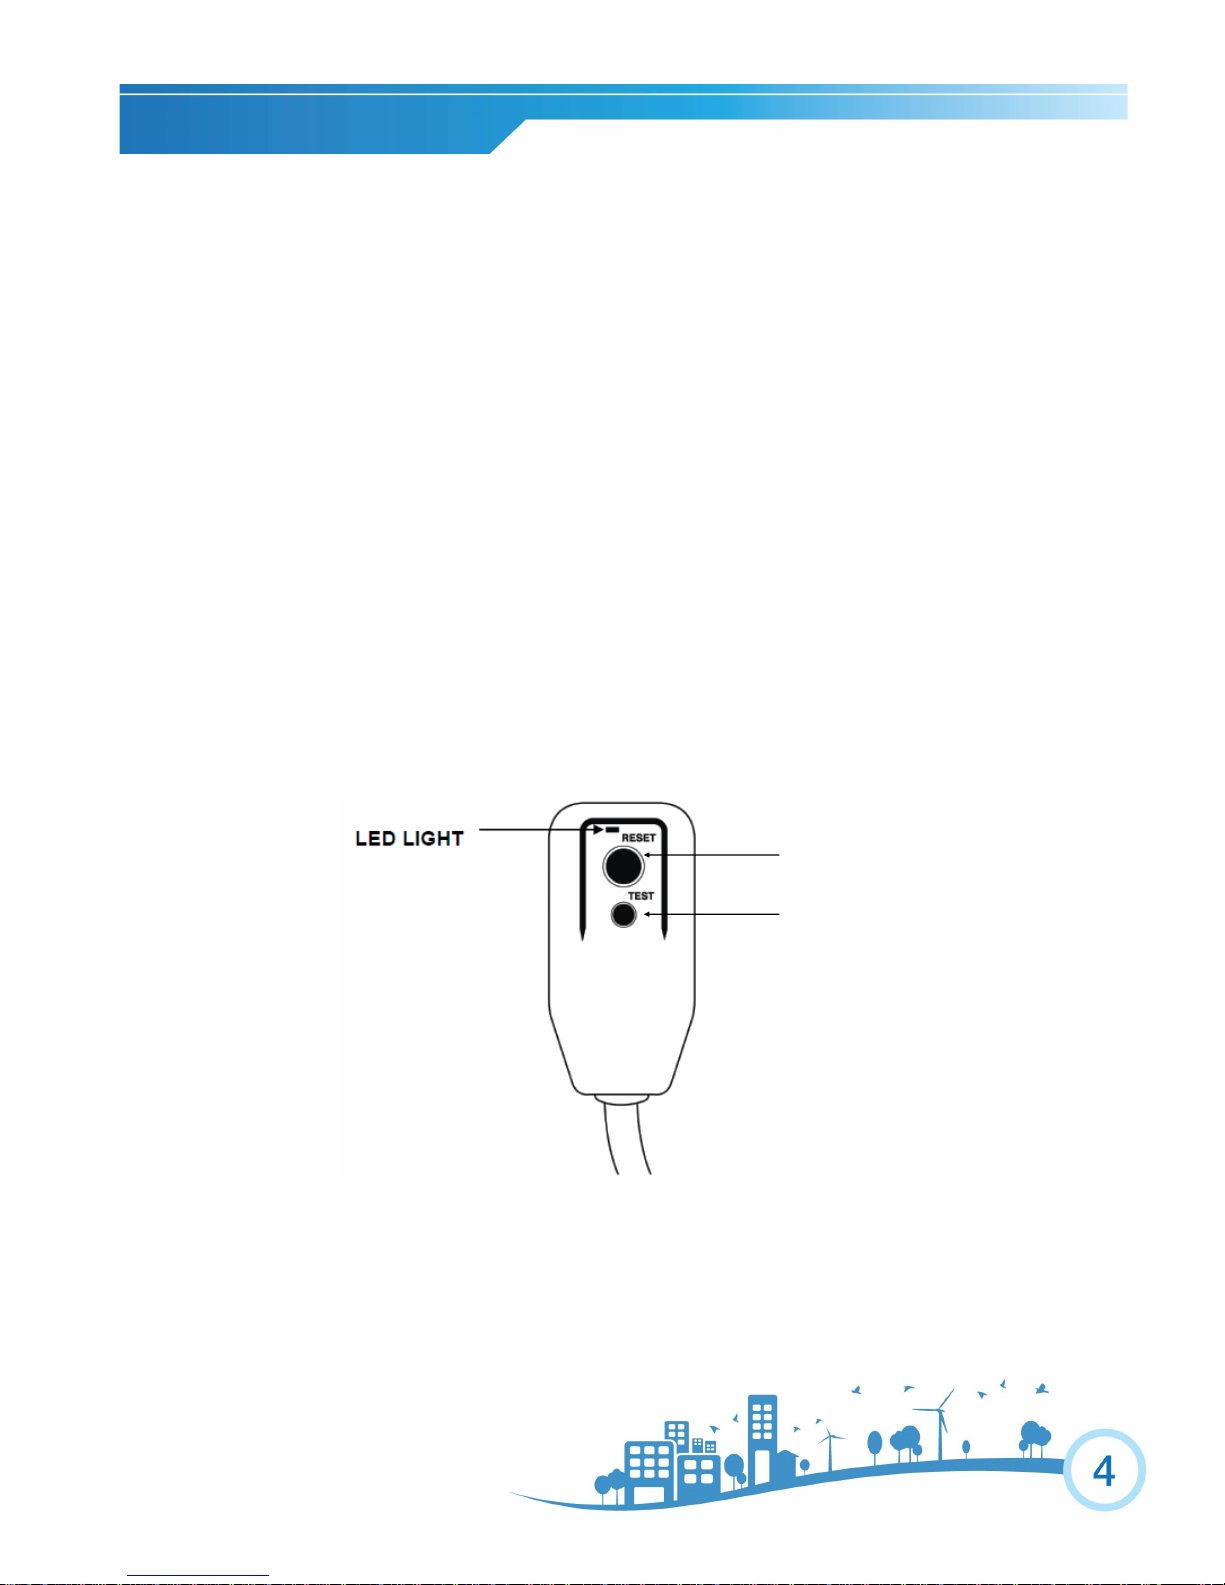
This air conditioner is equipped with an LCDI (Leakage Current Detection and Interruption) power cord
and plug as required by US National Electric Code 440.65. This cord consists of a length of shielded flexible cord with no termination on the load side and a LCDI attachment plug on the line side.
The LCDI power cord and plug will remove the supply source via electrical disconnect (circuit trip) if the
nominal current leakage between the cord shield and either load conductor exceeds a predetermined value.
The cord will remain de-energized until the devise has been manually reset. This is intended to reduce the
risk of a fire in the power cord or combustible materials nearby. The cord shields are not grounded and they
must be considered a shock hazards if exposed. The cord shield must not be connected to ground or to any
exposed metal.
The test and reset buttons on the LCDI Plug are used to check if the plug is functioning properly. To test:
1. Plug power cord into wall outlet, the LED light will turn on.
2. Press TEST Button, circuit should trip, cutting power to the air conditioner. When this occurs,
the LED light will turn off.
3. Press RESET button to restore power to the unit. Once power is restored, the LED light will turn
on again.
If test button is pressed and unit can still be turned on, current leakage has been detected. Do not use the air
conditioner or attempt to reset the LCDI Plug. Contact Customer Service for troubleshooting recommenda-
tions.
Note: Your unit’s power cord may
differ from the one shown.
WARNING:
1. DO NOT press the TEST button while the air conditioner is operating.
2. The TEST and RESET buttons should not be used as “ON” and “OFF” switches.
3. The cord and plug are not intended to offer protection to externally connected loads or supply circuits.
4. The cord and plug are intended for indoor use only.
RESET
TEST
POWER CORD AND PLUG
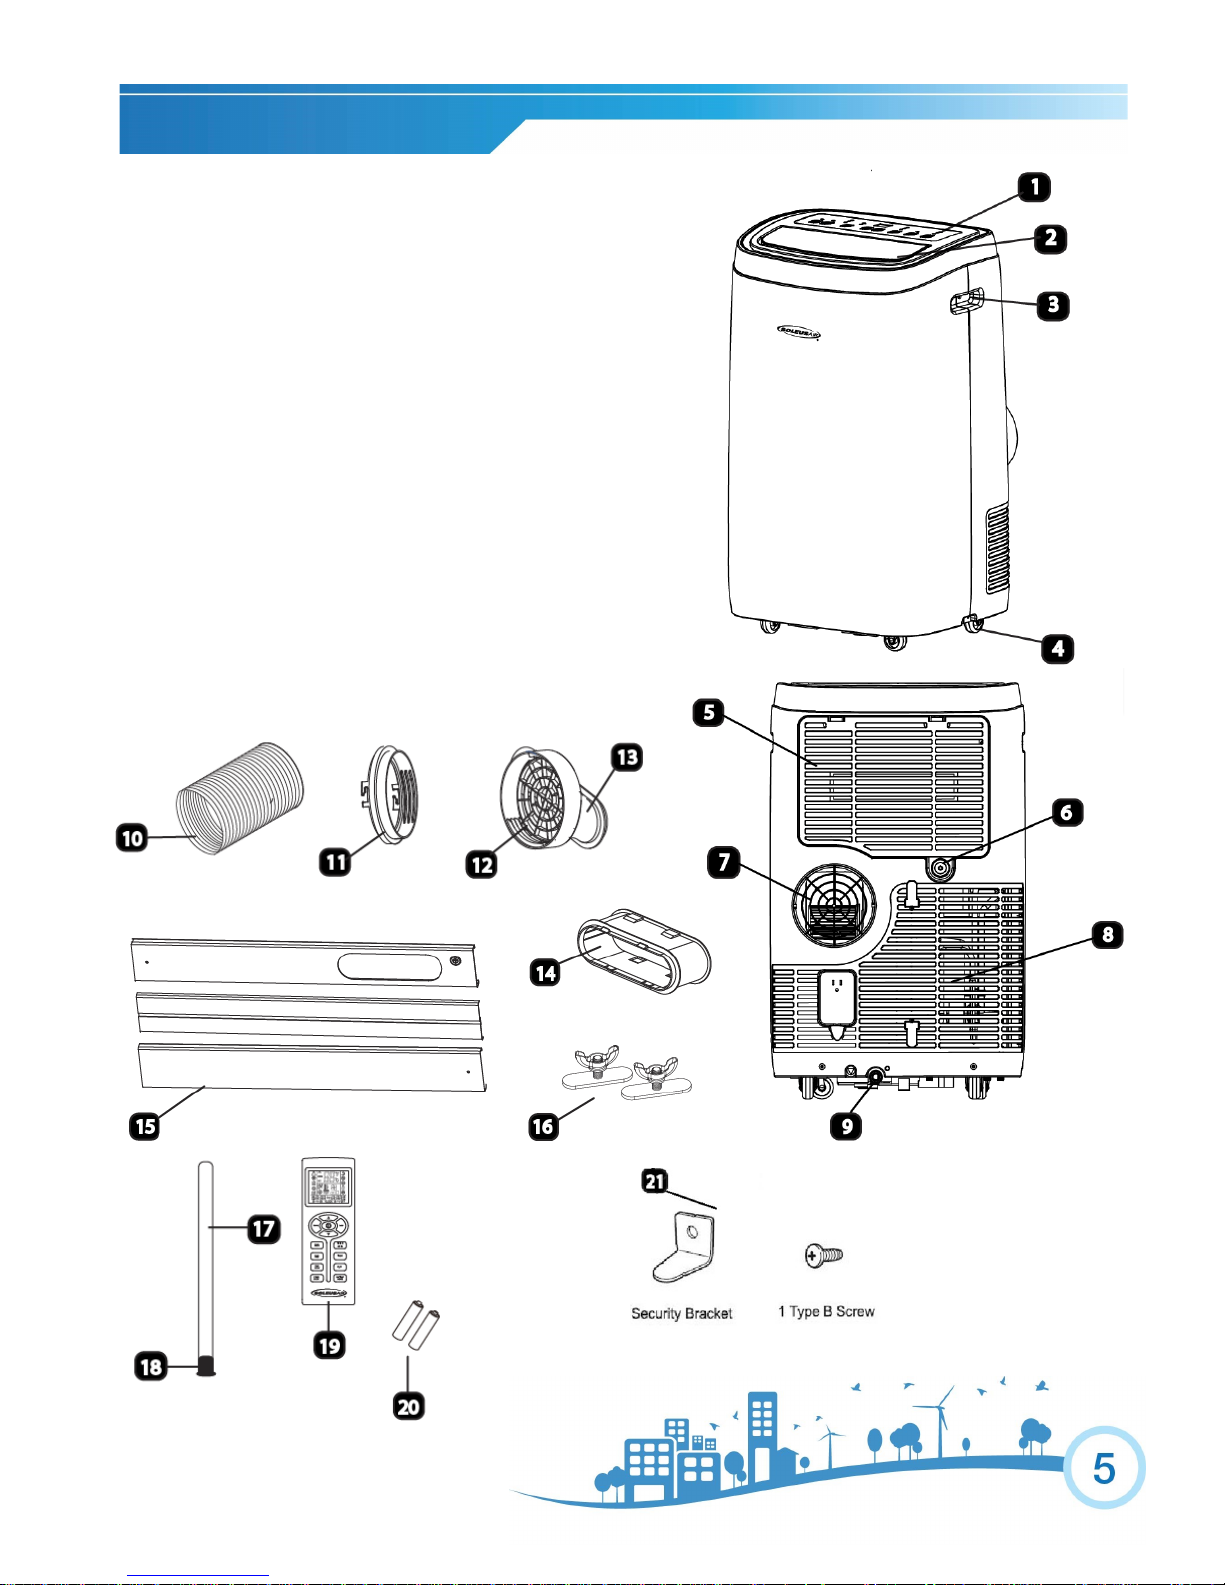
1. Control Panel
2. Manual Control Louver & Air Outlet
3. Carry Handle
4. Caster
5. Air Filter
6. Continuous Drain Port
7. Hot Air Discharge Opening
8. Air Intake Grille
9. Condensation Drain Hole
10. Exhaust Hose
11. Exhaust Hose Connector
12. Window Kit Adapter Grille
13. Window Kit Adapter
14. Optional Window Kit Adapter Extension
15. Window Kit Panel
16. Wing Nuts
17. Optional Drain Tube
18. Drain Tube Stopper
19. Remote Control
20. Battery
21. Optional Window Security Pack
PRODUCT DIAGRAM
MODEL# PMC-12HP-201/PMC-14HP-201
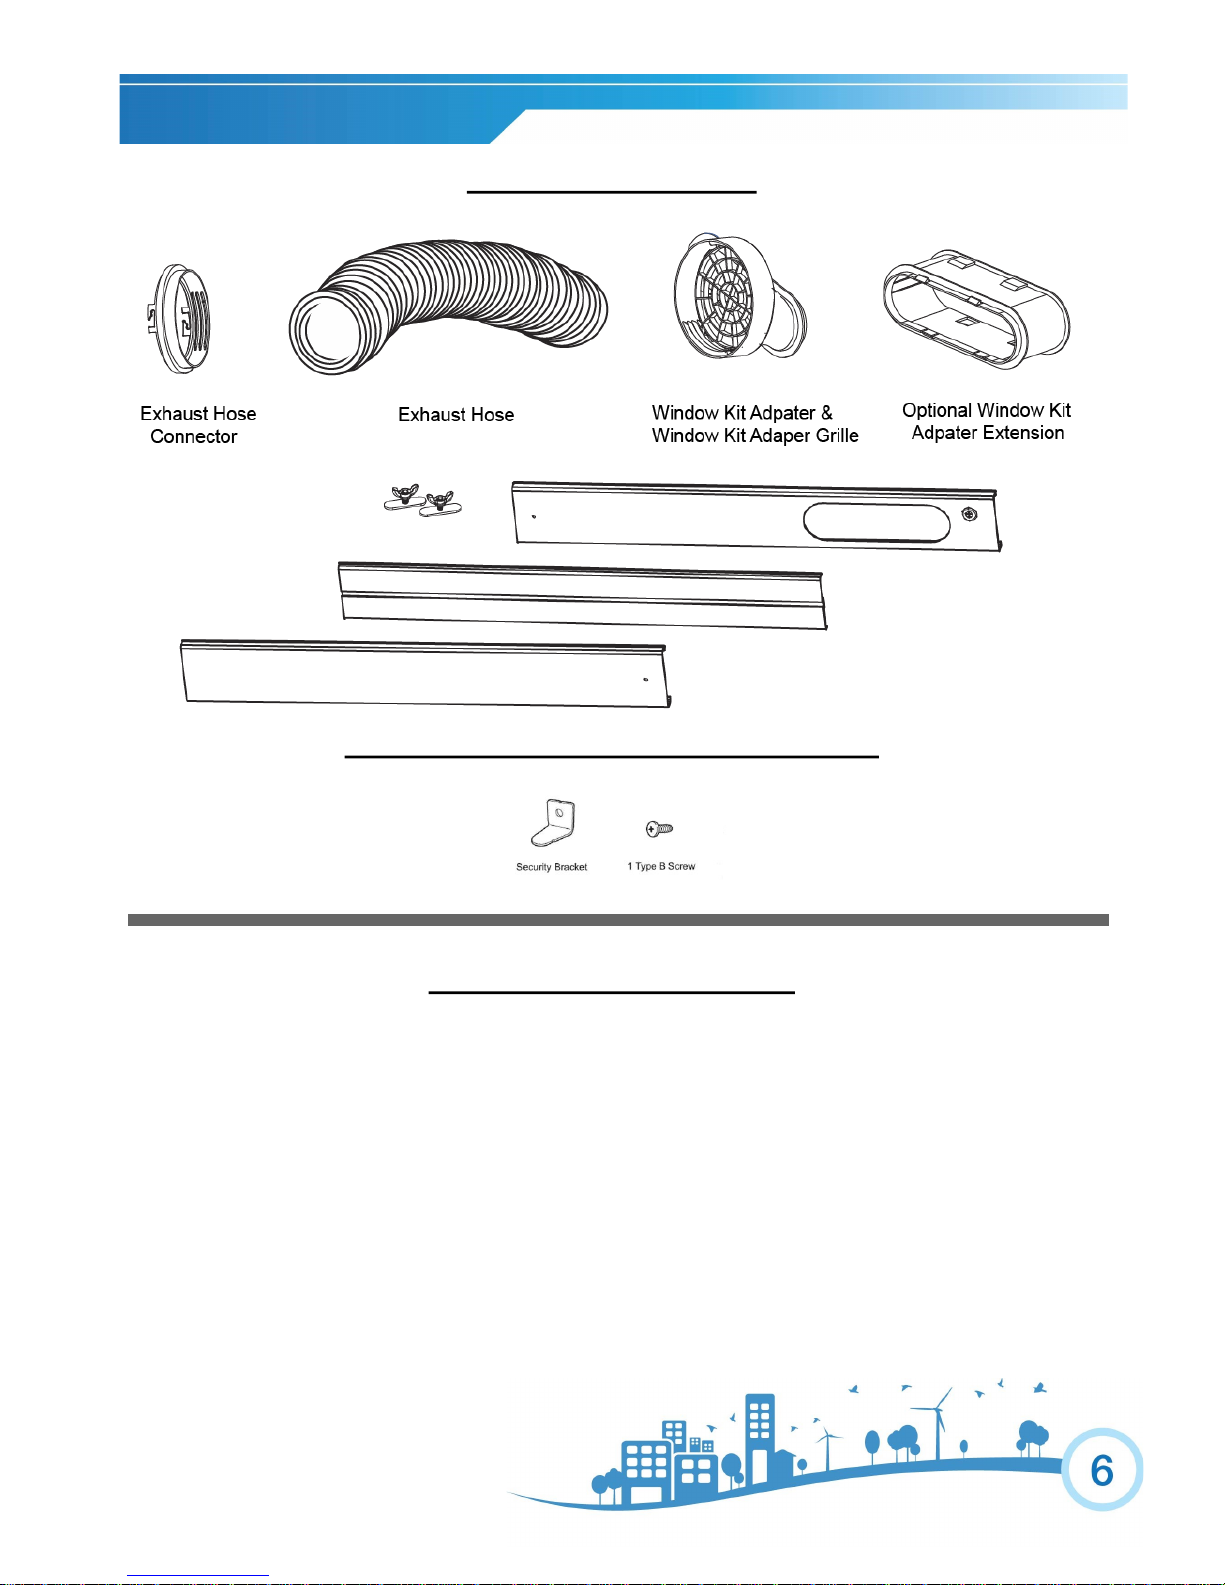
WINDOW VENTING KIT
OPTIONAL WINDOW SECURITY BRACKET
ASSEMBLY & INSTALLATION
When the unit is operating in air conditioning mode, the unit draws in indoor air and exhausts hot air out of the room
to complete the air exchange. The Window Kit must be installed when operating the unit in air conditioning, dehumidification and heating modes. When the unit is operating in Fan Mode, no outdoor air exchange takes place. The
window kit and exhaust hose do not need to be installed when the unit is used as a fan.
The supplied window kit can be installed in sliding windows and sliding glass doors up to 7 ft. long
(approximate length). When installed, be sure to keep the exhaust hose and short and straight as possible for
maximum efficiency.
PARTS & ASSEMBLY
 Loading...