

manual de instrucciones / instructions for use
mode d’emploi / manual de instruçoes
gebrauchsanweisung / manuale d’instruzioni
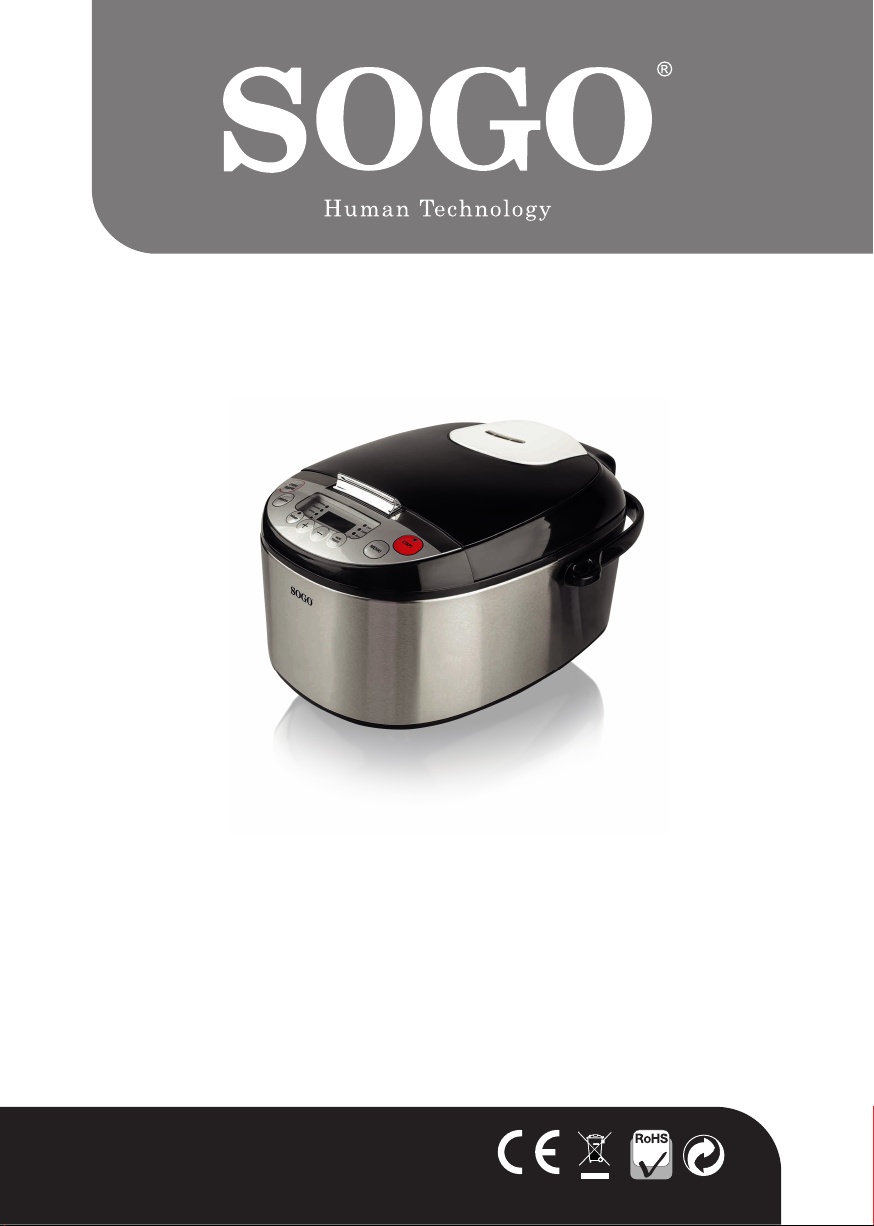
OLLA MULTIUSO
MULTI COOKER
MULTI CUISEUR
MULTI FOGÃO
MULTI KOCHER
MULTI FORNELLO
Precaución: lea y conserve estas importantes instrucciones
Caution: please read and preserve these important instructions
ref. SS-10785
2015 / 863 / EU

Este manual de instrucciones también se
puede descargar desde nuestra página web
www.sogo.es
MEDIDAS DE SEGURIDAD IMPORTANTES:
Al utilizar aparatos eléctricos, siempre se
deben seguir las precauciones básicas de
seguridad para reducir el riesgo de incendio,
descarga eléctrica y / o lesiones a las
personas, incluidas las siguientes:
1. El cable de alimentación debe estar bien
enchufado a una toma de corriente de pared
con conexión a tierra.
2. Mantenga siempre la olla desenchufada
cuando no esté en uso o cuando no tenga olla.
3. No coloque la olla en un lugar húmedo o
inestable, o cerca de un fuego, una estufa,
de lo contrario, la olla se deformará o
funcionará mal.
4. Para evitar deformaciones, no haga
funcionar la olla con objetos duros ni la
caliente en otra estufa. Nunca use otro
recipiente en lugar de la olla para cocinar.
5. No cubra la olla con un paño, esto puede
deformar o decolorar la tapa exterior.
6. La salida de vapor está muy caliente durante
la cocción. Mantenga la cara y las manos
alejadas de la tapa exterior y de la salida de
vapor.
7. Para protegerse contra descargas eléctricas,
no sumerja el aparato y el cable eléctrico
en agua o cualquier líquido, ni evite que el
líquido entre en las partes eléctricas y el
2 español english français portuguese deutsch italiano

conector.
8. El fabricante del electrodoméstico debe
recomendar el uso de un cable de
alimentación cuando esté dañado.
9. Los aparatos pueden ser utilizados
por personas con capacidades físicas,
sensoriales o mentales reducidas o con
falta de experiencia y conocimiento si han
recibido supervisión o instrucción sobre
el uso del aparato de forma segura y
comprenden los peligros involucrados.
10. Los niños deben ser supervisados para
asegurarse de que no jueguen con el
aparato.
11. Este aparato puede ser utilizado por niños
de 8 años en adelante si han recibido
supervisión o instrucciones sobre el uso del
aparato de forma segura y si comprenden
los peligros que implica. Los niños no deben
realizar la limpieza y el mantenimiento del
usuario a menos que sean mayores de 8
años y estén supervisados. Mantenga el
aparato y su cable fuera del alcance de los
niños menores de 8 años.
12. Este aparato está diseñado para ser
utilizado en aplicaciones domésticas y
similares, como
- áreas de cocina para el personal en
tiendas, ocinas y otros entornos de trabajo;
- casas de campo;
- por clientes en hoteles, moteles y otros
entornos de tipo residencial;
- Ambientes tipo alojamiento y desayuno.
13. La supercie del elemento calefactor está
sujeta a calor residual después de su uso.
3español english français portuguese deutsch italiano

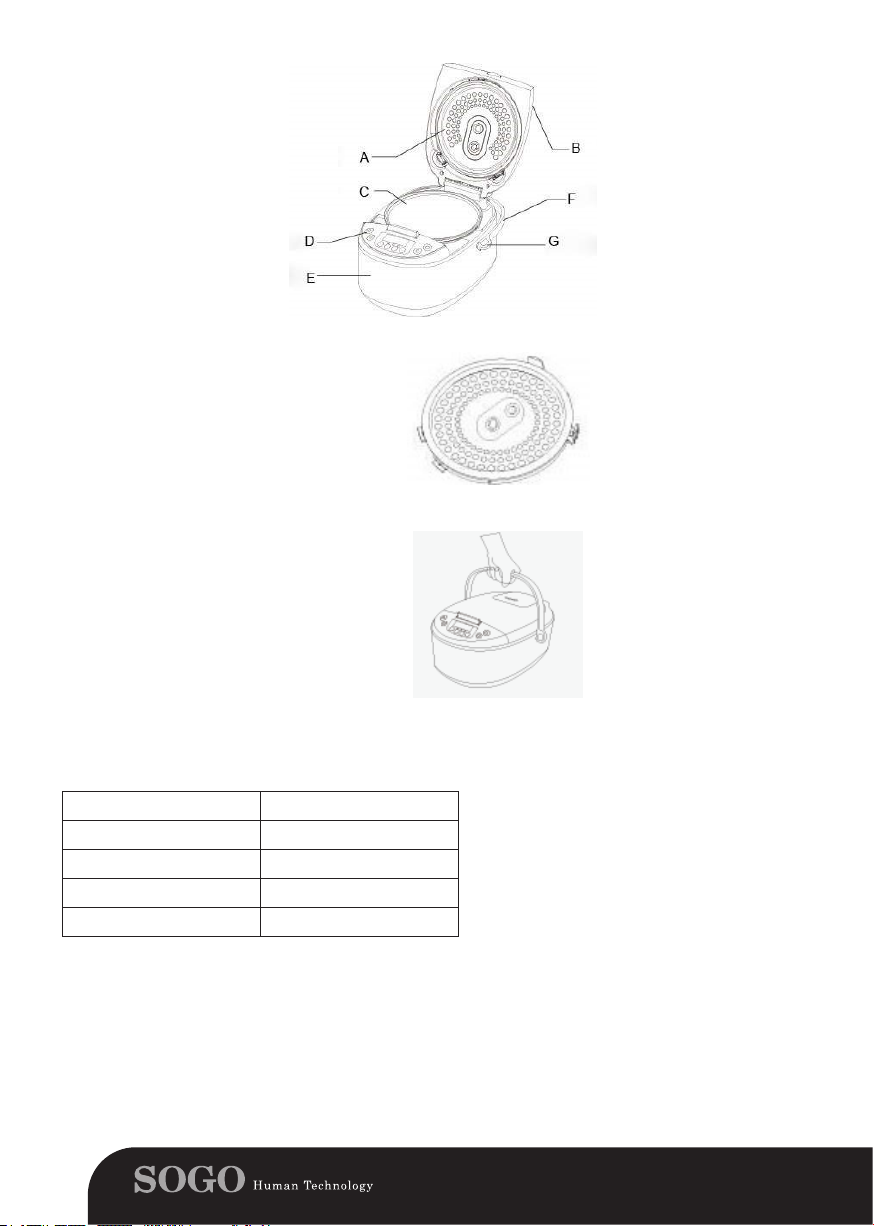
1. COMPONENTES
A. Tapa interior
B. Tapa exterior
C. Olla interior
D. Botón de apertura de la tapa
E. Cuerpo principal
F. Manija
G. Ranura para cuchara
¡Precaución!
1) Asegúrese de haber montado correctamente
la tapa interior antes de cocinar.
2) No levante ni mueva la olla por el asa
mientras esté en funcionamiento.
2. MODELO DE PRODUCTOS Y ESPECIFICACIONES
Modelo SS-10785
Voltaje nominal 220-240V~ 50/60Hz
Potencia nominal 900W
Capacidad nominal 5L
Recomendado para 5-10 personas
4 español english français portuguese deutsch italiano

3. TABLA DE COCCIÓN
Programas
Gachas de leche
1
(Milk porridge)
2
Estofado (Stew)
Mi receta
3
(My recipe)
Tiempo
de cocción
Ajuste de tiempo
Temperatura
predeterminado
0:10 0:10-1:30 salto de 1 min - 60 min Si
1:00 1:00-8:00 salto de 10 min - 60 min Si
0:05 0:05-24:00 salto de 5 min
35 - 180º
salto de 5º
Tiempo de
calentamiento
automático
NO Si
24 horas
preestablecidas
4 Sopa (Soup) 0:50 00:50-4:00 salto de 5 min - 60 min Si
5
Vapor (Steam)
6
Yogur (Yogurt)
7
Hornear (Bake)
0:20 0:20-1:30 salto de 1 min - 60 min Si
6:00
0:45
03:00-12:00 salto de 5 min
0:10-1:30 salto de 5 min
- NO NO
- 60 min Si
5:00-8:00 salto de 10 min - 60 min Si
primera hora -
segunda hora -
tercera hora -
60 min Si
8
(Slow cook)
Cocción
lenta
5.00
cuarta y quinta hora -
9 Pasta (Pasta) 0:08 0:02-0:20 salto de 1 min - 60 min Si
10 Arroz (Rice) 0:40 0:15-1:30 salto de 1 min - 60 min Si
11 Freír (Fry) 0:15 0:05-1:00 salto de 5 min - NO NO
4. USO DEL APARATO
Gachas de leche (Milk porridge)
a) Tome un volumen adecuado de arroz con la taza medidora proporcionada. No exceda las cantidades
indicadas en el interior de la olla interior. 1 taza de arroz es aprox. 180 ml (aproximadamente 160 g). El
volumen máximo de arroz para 4L es 8 tazas y 5L es 10 tazas.
b) Lave bien el arroz.
c) Ponga el arroz prelavado en la olla interior.
d) Agregue agua hasta el nivel indicado en la escala dentro de la olla interior que
corresponde al número de tazas de arroz utilizadas. Luego, alise la supercie del arroz. Se recomienda
que la proporción normal de agua y arroz sea de 8: 1 para las gachas de leche.
e) Coloque la olla interior en la olla arrocera. Asegúrese de que la olla esté colocada correctamente y que
la placa calefactora y el exterior de la olla interior estén limpios y secos.
f) Cierre la tapa y conecte el cable de alimentación.
g) Seleccione la función “Milk Porridge” presionando el botón “Menu”. La luz indicadora correspondiente
está encendida.
h) Congure el tiempo de cocción presionando los botones “Hour” y “Minute”.
i) Presione el botón “Start” para comenzar a cocinar. El tiempo contará hacia atrás después de comenzar
a cocinar.
j) Al nal del proceso de cocción, el aparato vuelve a emitir un pitido y la luz “Keep warm” se enciende
para indicar que el aparato ha cambiado al modo de mantener caliente. Si no necesita mantenerse
caliente, presione el botón “Cancel”.
Estofado (Stew)
a) Asegúrese de que la olla esté colocada correctamente y que la placa calefactora y el exterior de la olla
interior estén limpios y secos.
b) Cierre la tapa y conecte el cable de alimentación.
c) Seleccione la función “Stew” pulsando el botón “Menu”. Ajuste la hora presionando los botones “Hour”
5español english français portuguese deutsch italiano

y “minute”.
d) Presione el botón “Start” para comenzar a cocinar. El tiempo contará hacia atrás una vez que
comience a cocinar.
e) Al nal del proceso de cocción, el aparato emite 5 pitidos y la luz de “Keep-warm” se enciende para
indicar que el aparato ha cambiado al modo de mantenimiento del calor. Si no necesita el modo de
mantener caliente, presione el botón “Cancel”.
Mi receta (My recipe)
Esta función le permite congurar su propio programa de cocción con un tiempo de cocción y una
temperatura diferentes a los utilizados en los programas automáticos.
a) Seleccione la función “My recipe” presionando el botón “Menu”.
b) Utilice los botones “Hour” y “Minute” para programar el tiempo de cocción (de 5 minutos a 24 horas).
c) Utilice el botón “Temperature” para congurar la temperatura deseada (de 35 a 180 ° C)
d) Presione el botón “Start” para comenzar a cocinar.
e) Al nal del proceso de cocción, el aparato emite 5 pitidos y la luz de “Keep-warm” se enciende para
indicar que el aparato ha cambiado al modo de mantenimiento del calor. Si no necesita el modo de
mantener caliente, presione el botón “Cancel”.
Sopa (Soup)
a) Ponga los ingredientes para la sopa en la olla interior y agregar el agua. No exceda el nivel máximo de
agua indicado dentro de la olla interior, en la escala
b) Coloque la olla interior en la olla arrocera. Asegúrese de que la olla esté colocada correctamente y que
la placa calefactora y el exterior de la olla interior estén limpios y secos.
c) Cierre la tapa y conecte el cable de alimentación.
d) Seleccione la función “Soup” presionando el botón “Menu”. La luz indicadora correspondiente está
encendida.
e) Congure el tiempo de cocción presionando los botones “Hour” y “Minute”; el tiempo predeterminado
es 1 hora y 30 minutos.
f) Presione el botón “Start” para comenzar a cocinar. El tiempo contará hacia atrás después de comenzar
a cocinar.
g) Al nal del proceso de cocción, el aparato vuelve a emitir un pitido y la luz de “Keep-warm” se
enciende para indicar que el aparato ha cambiado al modo de mantener caliente. Si no necesita
mantenerse caliente, presione el botón “Cancel”.
Vapor (Steam)
a) Mida 3 tazas de agua con la taza medidora y viértala en la olla interior. La cantidad de agua necesaria
varía según la cantidad de comida que se cuece al vapor.
b) Seleccione la función “Steam” presionando el botón “Menu”. El tiempo predeterminado es de 15
minutos. Ajuste la hora presionando los botones “Hour” y “Minute”.
c) Presione el botón “Start” para comenzar a cocinar. El tiempo contará hacia atrás después de comenzar
a cocinar.
d) Al nal del proceso de cocción, el aparato vuelve a emitir un pitido y la luz de “Keep-warm” se
enciende para indicar que el aparato ha cambiado al modo de mantener caliente. Si no necesita
mantenerse caliente, presione el botón “Cancel”.
Nota: Si el agua de la olla se seca antes de que nalice el programa, los aparatos también cambiarán
a la función de mantener caliente por seguridad.
Yogur (Yogurt)
a) Agregue la mezcla de yogur preparada con la caja en la olla interior.
b) Coloque la olla interior en la olla arrocera. Asegúrese de que la olla esté colocada correctamente y que
la placa calefactora y el exterior de la olla interior estén limpios y secos.
c) Cierre la tapa y conecte el cable de alimentación.
d) Seleccione la función “Yogurt” presionando el botón “Menu”.
e) Presione el botón “Start” para comenzar a cocinar. El tiempo predeterminado es de 6 horas y se puede
ajustar de 4 a 12 horas.
f) Al nal del proceso de cocción, el aparato vuelve a emitir un pitido y la luz de “Keep-warm” se
enciende para indicar que el aparato ha cambiado al modo de mantener caliente. Si no necesita
mantenerse caliente, presione el botón “Cancel”.
6 español english français portuguese deutsch italiano

Hornear (Bake)
a) Mezclar los ingredientes para preparar la mezcla del bizcocho.
b) Engrase la olla interior.
c) Agregue la mezcla de pastel preparada en el recipiente interior (no más de 250 g).
d) Ponga la olla interior en la olla arrocera. Asegúrese de que la olla esté colocada correctamente y que
la placa calefactora y el exterior de la olla interior estén limpios y secos.
e) Cierre la tapa y conecte el cable de alimentación.
f) Seleccione la función “Bake” presionando el botón “Menu”.
g) Presione el botón “Start” para comenzar a cocinar.
h) Al nal del proceso de cocción, el aparato vuelve a emitir un pitido y la luz de “Keep-warm” se
enciende para indicar que el aparato ha cambiado al modo de mantener caliente. Si no necesita
mantenerse caliente, presione el botón “Cancel”.
Nota: Cuando termine la cocción, el pastel debe sacarse a tiempo para evitar quemarse.
Cocción lenta (Slow cook)
a) Asegúrese de que la olla esté colocada correctamente y que la placa calefactora y el exterior de la olla
interior estén limpios y secos.
b) Cierre la tapa y conecte el cable de alimentación.
c) Seleccione la función “Slow cook” presionando el botón “Menu”. Ajuste la hora presionando los
botones “Hour” y “Minute”.
d) Presione el botón “Start” para comenzar a cocinar. El tiempo contará hacia atrás una vez que
comience a cocinar.
e) Al nal del proceso de cocción, el aparato emite 5 pitidos y la luz de mantenimiento del calor se
enciende para indicar que el aparato ha cambiado al modo de “Keep-warm”. Si no necesita el modo de
“Keep-warm”, presione el botón “Cancel”.
Pasta (Pasta)
a) Asegúrese de que la olla esté colocada correctamente y que la placa calefactora y el exterior de la olla
interior estén limpios y secos.
b) Conecte el cable de alimentación.
c) Seleccione la función “Pasta” presionando el botón “Menu”. Ajuste la hora presionando los botones “Hour” y
“Minute”.
d) Presione el botón “Start” para comenzar a cocinar. El tiempo contará hacia atrás una vez que
comience a cocinar.
e) Al nal del proceso de cocción, el aparato emite 5 pitidos y la luz de “Keep-warm” se enciende para
indicar que el aparato ha cambiado al modo de mantenimiento del calor. Si no necesita el modo de
mantener caliente, presione el botón “Cancel”.
Arroz (Rice)
a) Tome un volumen adecuado de arroz con la taza medidora proporcionada. Cada taza de arroz crudo
normalmente da 2 tazones de arroz cocido. No exceda las cantidades indicadas en el interior de la olla
interior. 1 taza de arroz es aprox. 180 ml (aproximadamente 160 g). El volumen máximo de arroz para
4L es 8 tazas y 5L es 10 tazas.
b) Lave bien el arroz en otro recipiente en lugar de en la olla interior.
c) Ponga el arroz prelavado en la olla interior.
d) Agregue agua hasta el nivel indicado en la escala dentro de la olla interior que corresponde al número
de tazas de arroz utilizadas. Luego, alise la supercie del arroz. Se recomienda que la proporción
normal de agua y arroz sea 1: 1.
e) Coloque la olla interior en la olla arrocera. Asegúrese de que la olla esté colocada correctamente y que
la placa calefactora y el exterior de la olla interior estén limpios y secos.
f) Cierre la tapa y conecte el cable de alimentación.
g) Seleccione la función “Rice” presionando el botón “Menu”. La luz indicadora correspondiente está
encendida.
h) Presione el botón “Start” para comenzar a cocinar. El tiempo contará hacia atrás después de
comenzar a cocinar.
i) Al nal del proceso de cocción, el aparato vuelve a emitir un pitido y la luz “Keep-warm” se enciende
para indicar que el aparato ha cambiado al modo de mantener caliente. Si no necesita mantenerse
caliente, presione el botón “Cancel”.
7español english français portuguese deutsch italiano

Fritura (Fry)
a) Asegúrese de que la olla esté colocada correctamente y que la placa calefactora y el exterior de la olla
interior estén limpios y secos.
b) Conecte el cable de alimentación.
c) Seleccione la función “Fry” presionando el botón “Menu”. Ajuste la hora presionando los botones
“Hour” y “Minute”.
d) Presione el botón “Start” para comenzar a cocinar. El tiempo contará hacia atrás una vez que
comience a cocinar.
e) Al nal del proceso de cocción, el aparato emite 5 pitidos y la luz de “Keep warm” se enciende para
indicar que el aparato ha cambiado al modo de mantenimiento del calor. Si no necesita el modo de
mantener caliente, presione el botón “Cancel”.
FUNCIÓN PRESET
La función PRESET se utiliza para programar la hora de inicio de la máquina. La hora de inicio se puede
establecer entre 1 minuto y 24 horas.
Para usar esta función, debe seleccionar el menú, cambiar el tiempo predeterminado si es necesario,
luego presionar el botón PRESET y congurar el tiempo después del cual desea que la máquina se inicie
automáticamente. Por ej. si son las 8 de la mañana y desea que la máquina se encienda a las 11.30 de
la mañana, presione el botón PRESET, congure la hora en 3 y los minutos en 30. La máquina se iniciará
automáticamente después de las 3.30 horas a las 11.30 de la mañana.
Esta función no se puede utilizar con la función de YOGURT y FRY.
5. PRECAUCIÓN
(1) Peligro
- No cubra la salida de vapor y el regulador de presión cuando la olla arrocera esté en funcionamiento.
(2) Advertencia
- Compruebe si el voltaje indicado en el aparato se corresponde con el voltaje de la red local antes de
conectar el aparato.
- Conecte el aparato únicamente a una toma de corriente con toma de tierra. Asegúrese siempre de que
el enchufe esté rmemente insertado en la toma de pared.
- Mantenga el cable de alimentación fuera del alcance de los niños. No deje que el cable de
alimentación cuelgue del borde de la mesa o encimera sobre la que se encuentra el aparato.
- Asegúrese de que el elemento calefactor, el sensor de temperatura y el exterior de la olla interior estén
limpios y secos antes de conectar el enchufe a la toma de corriente.
- No utilice el aparato si el anillo de sellado está dañado.
- No enchufe el aparato ni presione ninguno de los botones del panel de control con las manos mojadas.
- Nunca conecte este aparato a un temporizador externo para evitar una situación peligrosa.
- No se acerque al regulador de presión ni a la salida de vapor con la cara o las manos cuando la olla
arrocera esté en funcionamiento.
- No abra la tapa mientras el arroz esté hirviendo.
- No abra la tapa inmediatamente después de que haya terminado el proceso de cocción; espere hasta
que el vapor dentro de la olla arrocera se haya liberado por completo.
- Compruebe la salida de vapor con regularidad para asegurarse de que no haya obstrucciones.
- Si tiene un marcapasos u otro dispositivo implantado, consulte a su médico antes de utilizar el aparato.
(3) Precaución
- Utilice únicamente la cuchara para arroz proporcionada. Evite el uso de utensilios alados.
- No exponga la olla arrocera a altas temperaturas, ni la coloque sobre una estufa o olla en
funcionamiento o aún caliente.
- Inserte siempre la olla interior antes de enchufar el enchufe en la pared y encender la olla arrocera.
- Desenchufe siempre la olla arrocera si no se utiliza durante un período de tiempo prolongado.
- Deje siempre enfriar la olla arrocera antes de limpiarla o moverla.
- No coloque la olla interior directamente sobre un fuego abierto para cocinar arroz.
- Si el aparato se utiliza de forma inadecuada o con nes profesionales o semiprofesionales o si no se
utiliza de acuerdo con las instrucciones de este manual de usuario, la garantía pierde su validez y
rechazamos la responsabilidad por los daños causados.
8 español english français portuguese deutsch italiano

- Coloque la olla arrocera sobre una supercie estable, horizontal y nivelada.
- Las supercies accesibles pueden calentarse cuando el aparato está en funcionamiento. Solo toque el
panel de control.
- Tenga cuidado con el vapor caliente que sale de la salida de vapor y del regulador de presión durante
la cocción o de la olla arrocera cuando abre la tapa.
- No levante ni mueva la olla arrocera por el asa mientras esté en funcionamiento.
- No exponga la olla arrocera a la luz solar directa.
- No inserte objetos metálicos o sustancias extrañas en la ventilación de vapor y el regulador de presión.
- No cocine alimentos pegajosos o que burbujeen mucho, como curry o té de cebada.
- Asegúrese de que la palanca de bloqueo de la tapa esté en la posición de bloqueo antes de encender
la olla arrocera.
- No coloque una sustancia magnética sobre la tapa. No utilice el aparato cerca de una sustancia
magnética.
- No utilice la olla interior si está deformada.
- No sobrepasar el nivel máximo de agua indicado en la olla interior, para evitar desbordes por el
regulador de presión.
- No coloque la cuchara de arroz dentro de la olla mientras cocina.
- Limpiar siempre el aparato después de su uso.
6 LIMPIEZA Y MANTENIMIENTO
1. Lave la olla de cocción y la vaporera en agua tibia y jabón con una esponja o un
paño y enjuague con agua adecuadamente, luego seque con un paño. No limpie
con cepillos abrasivos para evitar dañar el revestimiento antiadherente.
2. Saque el colector de rocío y vierta el agua. Lávelo con agua y vuelva a colocarlo
en la olla arrocera.
3. Los granos de arroz u otros residuos pueden adherirse a la placa calefactora.
Para asegurar un contacto adecuado con la olla de cocción, frote los granos /
residuos de la placa calefactora con papel de lija no (No. 320), luego límpielo
nuevamente con un paño.
7. DIAGRAMA DE CIRCUITO
9español english français portuguese deutsch italiano

8. SOLUCIÓN DE PROBLEMAS
Problema Descripción Causa Solución
La luz indicadora
no se enciende
La placa
calefactora
no funciona.
1. El cable de alimentación no
está bien conectado.
2. la PCB está defectuosa.
1. Verique la conexión del
cable de alimentación.
2. Lleve el aparato a su
distribuidor o centro de servicio
autorizado.
La luz indicadora
se enciende
La placa
calefactora
funciona
La placa
calefactora
no funciona.
la PCB está defectuosa. Lleve el aparato a su
distribuidor o centro de servicio
autorizado.
1. Funcionamiento incorrecto
de las piezas electrónicas o del
sensor de temperatura.
Lleve el aparato a su
distribuidor o centro de servicio
autorizado.
2. El fusible está roto.
3. La PCB está desconectada.
El arroz se quema o el aparato
no se enciende al proceso de
conservación del calor de forma
automática.
1. La PCB está defectuosa.
2. Funcionamiento incorrecto
de los componentes
electrónicos o del sensor de
temperatura.
Hay desbordamiento durante el
proceso de cocción.
1. La PCB está defectuosa.
2. Funcionamiento incorrecto
de los componentes
electrónicos o del sensor de
temperatura.
El arroz no está cocido. 1. No se ha añadido suciente
agua.
2. La PCB está defectuosa.
3. Funcionamiento incorrecto
de los componentes
electrónicos o del sensor de
temperatura.
Código de error: E1 El sensor de temperatura
en la parte superior está
desconectado.
Código de error: E2 El sensor de temperatura
en la parte superior tiene un
cortocircuito.
Código de error: E3 El sensor de temperatura
en la parte inferior tiene un
cortocircuito.
Código de error: E4 El sensor de temperatura
en la parte inferior está
desconectado.
Lleve el aparato a su
distribuidor o centro de servicio
autorizado.
Lleve el aparato a su
distribuidor o centro de servicio
autorizado.
1. Agregue agua de acuerdo
con la escala en el interior de
la olla interior.
2. Lleve el aparato a su
distribuidor o centro de servicio
autorizado.
Lleve el aparato a su
distribuidor o centro de servicio
autorizado.
Lleve el aparato a su
distribuidor o centro de servicio
autorizado.
Lleve el aparato a su
distribuidor o centro de servicio
autorizado.
Lleve el aparato a su
distribuidor o centro de servicio
autorizado.
10 español english français portuguese deutsch italiano

This instruction manual can also be downloaded
from our web page www.sogo.es
IMPORTANT SAFEGUARDS:
When using electrical appliances, basic safety
precautions should always be followed to
reduce the risk of re, electric shock, and/or
injury to persons, including the following:
1. The power cord must closely plug into the
wall outlet with earthing.
2. Always keep the cooker unplugged when not
in use or without cooking pot.
3. Do not place the cooker on a wet or unstable
place, or near a ring, heating range, if not,
the cooker will deform or malfunction.
4. In order to avoid deforming, do not run
the pot with hard objects, or heat the pot
on other stove. Never use other container
instead of pot to cook.
5. Do not cover the cooker with a cloth, this
may warp or discolor the outer lid.
6. The steam vent is very hot during cooking,
keep face and hands aways from outer lid
and steam vent.
7. To protect against electric shock, do not
immerse the appliance and electric cord in
water or any liquid, or avoid spillage liquid to
come into electrical parts and connector.
8. The use of power cord must be
recommended by the appliance
manufacturer when it is damaged.
9. Appliances can be used by persons with
reduced physical, sensory or mental
11español english français portuguese deutsch italiano

capabilities or lack of experience and
knowledge if they have been given
supervision or instruction concerning use of
the appliance in a safe way and understand
the hazards involved
10. Children should be supervised, ensure they
do not play the appliance.
11. This appliance can be used by children aged
from 8 years and above if they have been
given supervision or instruction concerning
use of the appliance in a safe way and
if they understand the hazards involved.
Cleaning and user maintenance shall not be
made by children unless they are older than
8 and supervised. Keep the appliance and
its cord out of reach of children aged less
than 8 years
12. This appliance is intended to be used in
household and similar applications such as
- sta kitchen areas in shops, oces and
other working environments;
- farm houses;
- by clients in hotels, motels and other
residential type environments;
- bed and breakfast type environments.
13. The heating element surface is subject to
residual heat after use.
12 español english français portuguese deutsch italiano
1. COMPONENTS
A. Inner lid
B. Outer lid
C. Inner pot
D. Lid release button
E. Main body
F. Handle
G. Spoon slot
Caution!
1) Please make sure you have correctly
assembled the inner lid before cooking.
2) Do not lift and move the rice cooker by its
handle while it is operating
2. PRODUCT MODELS AND SPECIFICATIONS
Model SS-10785
Rated voltage 220-240V~ 50/60Hz
Rated power 900W
Rated capacity 5L
Recommended for 5-10 persons
13español english français portuguese deutsch italiano

3. Cooking table
Programs
Default
cooking time
Time adjustment
Temperature
Auto keep
warm time
24 hrs
preset
1 Milk porridge 0:10 0:10-1:30 step 1 min - 60 min Yes
2 Stew 1:00 1:00-8:00 step 10 min - 60 min Ye s
3
My recipe
0:05 0:05-24:00 step 5 min
35 - 180º step
5 degrees
NO Yes
4 Soup 0:50 00:50-4:00 step 5 min - 60 min Yes
5 Steam 0:20 0:20-1:30 step 1 min - 60 min Ye s
6 Yogurt 6:00 03:00-12:00 step 5 min - NO NO
7 Bake 0:45 0:10-1:30 step 5 min - 60 min Yes
5:00-8:00 step 10 min - 60 min Yes
rst hour -
8 Slow cook 5.00
second hour -
third hour -
60 min Yes
fourth and fth hours -
9 Pasta 0:08 0:02-0:20 step 1 min - 60 min Ye s
10 Rice 0:40 0:15-1:30 step 1 min - 60 min Yes
11 Fry 0:15 0:05-1:00 step 5 min - NO NO
4. USING THE APPLIANCE
Milk porridge
a) Take suitable volume of rice with the provided measuring cup. Do not exceed the quantities indicated
on the inside of the inner pot. 1 cup of rice is approx. 180ml (approx. 160g). Maximum volume of rice
for 4L is 8 cups and 5L is 10 cups.
b) Wash the rice thoroughly.
c) Put the pre-washed rice in the inner pot.
d) Add water to the level indicated on the scale inside the inner pot that corresponds to the number
of cups of rice used. Then smooth the surface of the rice. Normal proportion of water and rice is
recommended to be 8:1 for porridge.
e) Put the inner pot in the rice cooker. Make sure the pot is placed properly and the heating plate and the
outside of the inner pot are clean and dry.
f) Close the lid and connect the power cord.
g) Select “Milk porridge” function by pressing “Menu” button. The corresponding indication light is on.
h) Set the cooking time by pressing “Hour” and “Minute” buttons.
i) Press “Start” button to start cooking. Time will count down after starting cooking.
j) At the end of the cooking process the appliance beeps again and the Keep-Warm light goes on to
indicate that the appliance has switched to the keep-warm mode. If you do not need to keep warm,
press “Cancel” button.
Stew
a) Make sure the pot is placed properly and the heating plate and the outside of the inner pot are clean
and dry.
b) Close the lid and connect the power cord.
c) Select “Stew” function by pressing “Menu” button. Adjust time by pressing “Hour” and “Minute” buttons.
d) Press “Start” button to start cooking. Time will count down after starting cooking.
e) At the end of the cooking process the appliance beeps 5 times and the Keep-Warm light goes on to indicate that
the appliance has switched to the keep-warm mode. If you do not need to keep warm, press “Cancel” button.
14 español english français portuguese deutsch italiano

My receipt
This function allows you to set your own cooking program with a cooking time and temperature that are
dierent from those used in the automatic programs.
a) Select the “My recipe” function by pressing “Menu” button.
b) Use “Hour” and “Minute” buttons to set the cooking time (from 5 minute to 24 hours).
c) Use the “Temperature” button to set the desired temperature (from 35 to 180°C)
d) Press the “Start” button to begin cooking.
e) At the end of the cooking process the appliance beeps 5 times and the Keep-
Warm light goes on to indicate that the appliance has switched to the keep-warm
mode. If you do not need to keep warm, press “Cancel” button.
Soup
a) Put the ingredients for the soup in the inner pot and add the water. Do not exceed the maximum water
level indicated inside the inner pot on the scale,
b) Put the inner pot in the rice cooker. Make sure the pot is placed properly and the heating plate and the
outside of the inner pot are clean and dry.
c) Close the lid and connect the power cord.
d) Select “Soup” function by pressing “Menu” button. The corresponding indication light is on.
e) Set the cooking time by pressing “Hour” and “Minute” buttons, but the default time is 1 hour and 30
minutes.
f) Press “Start” button to start cooking. Time will count down after starting cooking.
g) At the end of the cooking process the appliance beeps again and the Keep-Warm light goes on to
indicate that the appliance has switched to the keep-warm mode. If you do not need to keep warm,
press “Cancel” button.
Steam
a) Measure 3 cups of water with the measuring cup and pour it into the inner pot. The amount of water
required varies according to the quantity of food being steamed.
b) Select “Steam” function by pressing “Menu” button. The default time is 15 minutes. Adjust time by
pressing “Hour” and “Minute” buttons.
c) Press “Start” button to start cooking. Time will count down after starting cooking.
d) At the end of the cooking process the appliance beeps again and the Keep-Warm light goes on to
indicate that the appliance has switched to the keep-warm mode. If you do not need to keep warm,
press “Cancel” button.
Note: If the water in the pot dries out before the program ends, the appliances will also switch to keep-
warm function for safety.
Yogurt
a) Add the prepared yogurt mixture with box into the inner pot.
b) Put the inner pot in the rice cooker. Make sure the pot is placed properly and the heating plate and the
outside of the inner pot are clean and dry.
c) Close the lid and connect the power cord.
d) Select “Yogurt” function by pressing “Menu” button.
e) Press “Start” button to start cooking. The default time is 6 hours and can be adjusted from 4 hours to
12 hours.
f) At the end of the cooking process the appliance beeps again and the Keep-Warm light goes on to
indicate that the appliance has switched to the keep-warm mode. If you do not need to keep warm,
press “Cancel” button.
Bake
a) Mix the ingredients to prepare the cake mixture.
b) Grease the inner pot.
c) Add the prepared cake mixture into the inner pot (no more than 250g).
d) Put the inner pot in the rice cooker. Make sure the pot is placed properly and the heating plate and the
outside of the inner pot are clean and dry.
e) Close the lid and connect the power cord.
f) Select “Bake” function by pressing “Menu” button.
g) Press “Start” button to start cooking.
h) At the end of the cooking process the appliance beeps again and the Keep-Warm light goes on to
indicate that the appliance has switched to the keep-warm mode. If you do not need to keep warm,
press “Cancel” button.
15español english français portuguese deutsch italiano

Note: When cooking nishes, the cake should be taken out timely to avoid getting burned.
Slow cook
a) Make sure the pot is placed properly and the heating plate and the outside of the inner pot are clean
and dry.
b) Close the lid and connect the power cord.
c) Select “Slow Cook” function by pressing “Menu” button. Adjust time by pressing “Hour” and “Minute” buttons.
d) Press “Start” button to start cooking. Time will count down after starting cooking.
e) At the end of the cooking process the appliance beeps 5 times and the Keep-Warm light goes on to
indicate that the appliance has switched to the keep-warm mode. If you do not need to keep warm,
press “Cancel” button.
Pasta
a) Make sure the pot is placed properly and the heating plate and the outside of the inner pot are clean
and dry.
b) Connect the power cord.
c) Select “Pasta” function by pressing “Menu” button. Adjust time by pressing “Hour” and “Minute” buttons.
d) Press “Start” button to start cooking. Time will count down after starting cooking.
e) At the end of the cooking process the appliance beeps 5 times and the Keep-Warm light goes on to
indicate that the appliance has switched to the keep-warm mode. If you do not need to keep warm,
press “Cancel” button.
Rice
a) Take suitable volume of rice with the provided measuring cup. Each cup of uncooked rice normally gives
2 bowls of cooked rice. Do not exceed the quantities indicated on the inside of the inner pot. 1 cup of rice
is approx. 180ml (approx. 160g). Maximum volume of rice for 4L is 8 cups and 5L is 10 cups.
b) Wash the rice thoroughly in another container instead of inner pot.
c) Put the pre-washed rice in the inner pot.
d) Add water to the level indicated on the scale inside the inner pot that corresponds to the number
of cups of rice used. Then smooth the surface of the rice. Normal proportion of water and rice is
recommended to be 1:1.
e) Put the inner pot in the rice cooker. Make sure the pot is placed properly and the heating plate and the
outside of the inner pot are clean and dry.
f) Close the lid and connect the power cord.
g) Select “Rice” function by pressing “Menu” button. The corresponding indication light is on.
h) Press “Start” button to start cooking. Time will count down after starting cooking.
i) At the end of the cooking process the appliance beeps again and the Keep- Warm light goes on to
indicate that the appliance has switched to the keep-warm mode. If you do not need to keep warm,
press “Cancel” button.
Fry
a) Make sure the pot is placed properly and the heating plate and the outside of the inner pot are clean and dry.
b) Connect the power cord.
c) Select “Fry” function by pressing “Menu” button. Adjust time by pressing “Hour” and “Minute” buttons.
d) Press “Start” button to start cooking. Time will count down after starting cooking.
e) At the end of the cooking process the appliance beeps 5 times and the Keep-Warm light goes on to
indicate that the appliance has switched to the keep-warm mode. If you do not need to keep warm,
press “Cancel” button.
PRESET FUNCTION
PRESET function is used to program the start time of the machine.
The start time can be set from 1 min to 24 hours.
To use this function, you need to select the menu, change the default time if required, then press the
PRESET button and set the time after which you want the machine to start automatically. For eg. if its 8
am in the morning and you want the machine to start at 11.30 am, press the PRESET button, set the hour
to 3 and minute to 30. The machine will start automatically after 3.30 hours at 11.30 am.
This function cannot be used with YOGURT and FRY function.
16 español english français portuguese deutsch italiano

5. CAUTION
(1) Danger
- Do not cover the steam vent and the pressure regulator when the rice cooker is operating.
(2) Warning
- Check if the voltage indicated on the appliance corresponds to the local mains voltage before you
connect the appliance.
- Only connect the appliance to an earthed wall socket. Always make sure that the plug is inserted rmly
into the wall socket.
- Keep the mains cord out of the reach of children. Do not let the mains cord hang over the edge of the
table or worktop on which the appliance stands.
- Make sure the heating element, the temperature sensor and the outside of the inner pot are clean and
dry before you put the plug in the wall socket.
- Do not use the appliance if the sealing ring is damaged.
- Do not plug in the appliance or press any of the buttons on the control panel with wet hands.
- Never connect this appliance to an external timer switch in order to avoid a hazardous situation.
- Do not come near the pressure regulator or the steam vent with your face or hands when the rice
cooker is operating.
- Do not open the lid while rice is boiling.
- Do not open the lid immediately after the cooking process has ended, but wait until the steam inside
the rice cooker has been released completely.
- Check the steam vent regularly to ensure that there is no blockage.
- If you have a pacemaker or other implanted device, consult your doctor before you use the appliance.
(3) Caution
- Only use the rice scoop provided. Avoid using sharp utensils.
- Do not expose the rice cooker to high temperatures, nor place it on a working or still hot stove or cooker.
- Always insert the inner pot before you put the plug in the wall socket and switch on the rice cooker.
- Always unplug the rice cooker if not used for a longer period of time.
- Always let the rice cooker cool down before you clean or move it.
- Do not place the inner pot directly over an open re to cook rice.
- If the appliance is used improperly or for professional or semi-professional purposes or if it is not used
according to the instructions in this user manual, the guarantee becomes invalid and we refuse liability
for any damage caused.
- Place the rice cooker on a stable, horizontal and level surface.
- The accessible surfaces may become hot when the appliance is operating. Only touch the control panel.
- Beware of hot steam coming out of the steam vent and pressure regulator during cooking or out of the
rice cooker when you open the lid.
- Do not lift and move the rice cooker by its handle while it is operating.
- Do not expose the rice cooker to direct sunlight.
- Do not insert metallic objects or alien substances into the steam vent and pressure regulator.
- Do not cook sticky food or food that bubbles a lot, such as curry or barley tea.
- Make sure the lid lock lever is in lock position before you switch on the rice cooker.
- Do not place a magnetic substance on the lid. Do not use the appliance near a magnetic substance.
- Do not use the inner pot if it is deformed.
- Do not exceed the maximum water level indicated in the inner pot to prevent overows through the
pressure regulator.
- Do not place the rice scoop inside the pot while cooking.
- Always clean the appliance after use.
6. CLEAN AND MAINTENANCE
1. Wash the cooking pot and steamer in warm and soapy water using a sponge
or cloth and rinse with water properly, then wipe dry with cloth. Don’t clean with
abrasive brushes to avoid damaging the non-stick coating.
2. Take out the dew collector and pour the water. Wash it with water and place it
back to the rice cooker.
3. Rice grains or other residues may stick on the heating plate. To ensure a proper
contact with the cooking pot, rub the grains/residues away from the heating plate
with ne sandpaper (NO.320), then wipe it with cloth again.
17español english français portuguese deutsch italiano

7. CIRCUIT DIAGRAM
8. TROUBLESHOOTING
Problem Description Cause Solution
Indication light
does not go on
Indication light
goes on
Heating plate
does not work.
Heating plate
works.
Heating plate
does not work.
1. The power cord is not well
connected.
2. PCB is defective.
1. Check power coed connection.
2. Take the appliance to your dealer
or an authorized service centre.
PCB is defective. Take the appliance to your dealer
or an authorized service centre.
1. Electronic parts or
the temperature sensor
Take the appliance to your dealer
or an authorized service centre.
malfunction.
2. Fuse is broken.
3. PCB is disconnected.
Rice gets burned or the appliance
fails to switch to keep-warm
process automatically.
1. PCB is defective.
2. Electronic parts or
the temperature sensor
Take the appliance to your dealer
or an authorized service centre.
malfunction.
There is overow during cooking
process.
1. PCB is defective.
2. Electronic parts or
Take the appliance to your dealer
or an authorized service centre.
the temperature sensor
malfunction.
The rice is not cooked. 1. Not enough water has
been added.
2. PCB is defective.
3. Electronic parts or
the temperature sensor
malfunction.
Error code: E1 Temperature sensor on top is
disconnected.
Error code: E2 Temperature sensor on top
has a short circuit.
Error code: E3 Temperature sensor on
bottom has a short circuit.
Error code: E4 Temperature sensor on
bottom is disconnected.
1. Add water according to the
scale on the inside of the inner
pot.
2. Take the appliance to your
dealer or an authorized service
centre.
Take the appliance to your dealer
or an authorized service centre.
Take the appliance to your dealer
or an authorized service centre.
Take the appliance to your dealer
or an authorized service centre.
Take the appliance to your dealer
or an authorized service centre.
18 español english français portuguese deutsch italiano
 Loading...