


26496

HANG5 RACK INSTRUCTIONS
Model #26496
Important
This bike rack is designed to carry a maximum of 5 bikes and is intended to be used ONLY with a 2” receiver hitch.
Do not use this rack for anything other than carrying bicycles on a passenger vehicle.
Do not exceed your vehicles load ratings for any reason.
This rack cannot be used on vehicles with a 1.25” hitch.
Reference the instruction manual for proper use of this rack.
DO NOT use any aftermarket extenders or adapters with this rack.
Check the tightness of bolts and nuts periodically as they may loosen slightly during normal use.
DO NOT drive the vehicle with the bike rack loaded in the Parallelogram Lowered position.
This rack CANNOT be mounted and used on the rear of trailers or RVs.
Remove this rack from the vehicle before going through a car wash.
Warning
PARTS INCLUDED
TOOLS REQUIRED
Metric Allen Wrench (5mm)
2 Adjustable Crescent Wrenches
13 mm Socket Wrench w Extension (2-3”)
Metric Socket Set
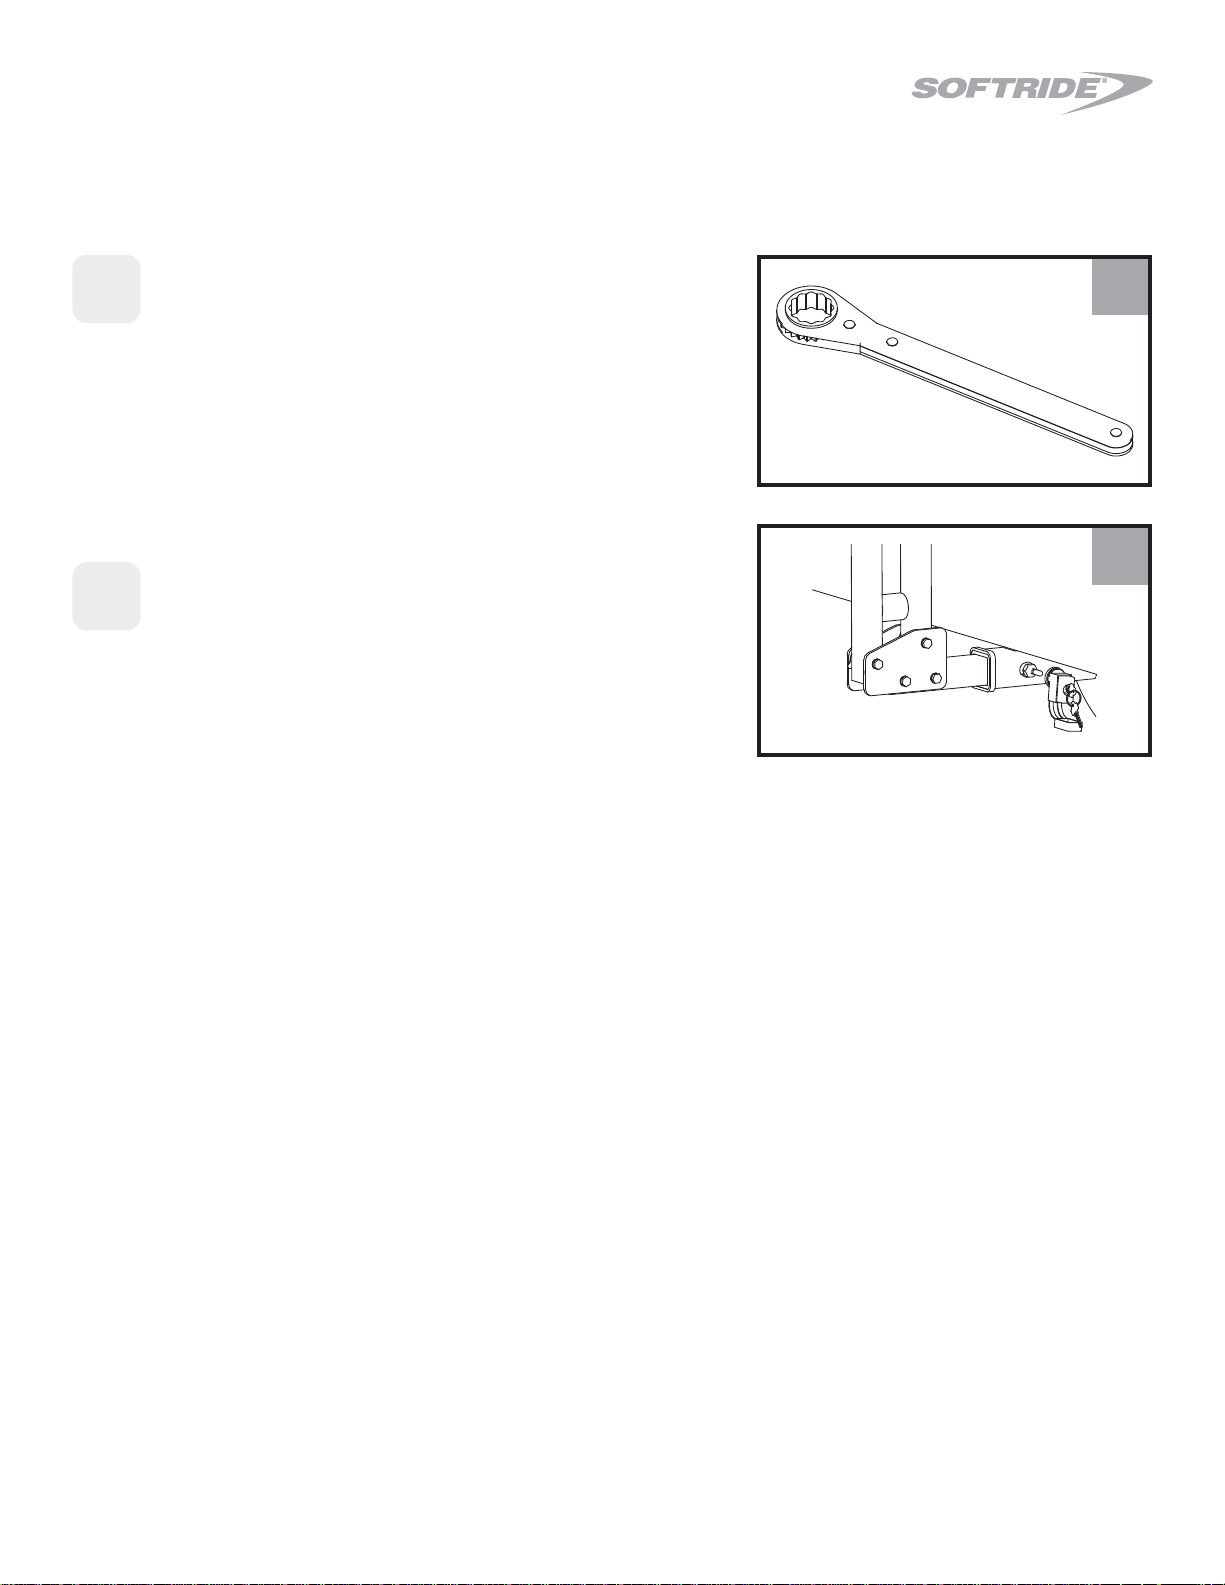
7/8” Ratcheting Box Wrench (See Fig. 10)
13mm Wrench
Torque Wrench up to 60 ft-lbs
RECOMMENDED ASSEMBLY TOOLS
(1A) Main Base Rack Assembly
(1B) Top Plate
(1C) Carriage Bolt, Nut and Washer x4
(1D) 5/8” Hitch Bolt and Lock Washer
(1E) Hitch Lock (p/n 25056)
(1A)
(1B)
(1C) x 4
(1D)
(1E)
BOX 1
Lower Support Bars x2
Rear Wheel Support Bar (longer)
Rear Wheel Support Bar (shorter)
Rubber Straps (14 hole) x 10
8mm x50mm Bolt, Nut, 2 Washers x4
10mm x 65mm Bolt, Nut, 2 Washers x6
8mm x 65mm Bolt, Nut, 2 Washers x16
(ships with 10 of 16 pre-installed)
8mm Button Head Bolt, Nut, Washer x4
(5mm hex wrench required)
(1F)
(1G)
(1H)
(1I)
(1J)
(1K)
(1L)
(1M)
(1F) x 2
(1G)
(1H)
(1I)
(1J) x 4
(1K) x 6
(1L) x 16
(1M) x 4
(Access Rack)
(Hang5 Rack)
1

HANG5 RACK INSTRUCTIONS
PARTS INCLUDED (continued)
BOX 2
(Hang5 Rack)
(2A)
(2B)
(2C)
(2D)
(2E)
(2F)
(2G)
(2H)
(2I)
(2J)
(2K)
(2L)
Inner Pivot Plates w/ 1” Top Plate Bar x2
Outer Pivot Plate w/ Vertical Hanger Support x2
Outer Pivot Plate w/out Vertical Hanger Attached x2
Plastic Anti-Friction Plate Left x2
(ships pre-assembled)
Plastic Anti-Friction Plate Right x2 (ships pre-assembled)
Hang Bar Right Side (ships with 2 hangers pre-assembled)
Hang Bar Left Side (ships with 3 hangers pre-assembled)
Hangers #2 and #4 (short reach) x2
Hangers #1 and #5 (long reach) x2
Hanger #3 (long reach) Center x1
Pivot Pin x2
2 Hole Metal Spacer x2
(2A) x 2
(2D) x 2
(2G)
(2J)
(2C) x 2
(2F)
(2I) x 2
(2L) x 2
(2B) x 2
(2E) x 2
(2H) x 2
(2K) x 2
2

ASSEMBLY OF ACCESS RACK
HANG5 RACK INSTRUCTIONS
View a video on how to install this rack
Scan this code on a mobile device, or visit www.softride.com/H5
Fully Assembled Access Rack
Remove Access Rack parts from Box 1
(1A), (1B), (1C), (1D), (1E) Page 1
Begin assembly of rack by loading the
carriage bolts (1C) into the 4 holes in the
top plate (1B). Place the top plate on the floor,
top side down on a piece of cardboard.
1
2
2
3
Position the base rack assembly (1A) on the
top plate (1B), aligning the mounting holes
of the top plate with the holes in the brackets
on the base rack assembly.
3
4
Place the lock washers and lock nuts on the
carriage bolts and tighten them to
12 foot-pounds with a torque wrench.
Tip: This is where the 13mm socket and the
extension is used.
3

HANG5 RACK INSTRUCTIONS
ASSEMBLY OF ACCESS RACK (continued)
5
5
Check to make sure that the nut inside the rack
hitch bar is aligned with the hole in the hitch bar.
Adjust with a screw driver if necessary.
Tip: If you don’t see the threaded nut, look
down the inside of hitch bar tube from the
end. It may have shifted during shipping.
6
Check inside the receiver hitch for dirt, debris
or burs and remove them from inside the
hitchbox. A clean receiver hitch ensures
maximum anti-rattle capabilities and helps
prevent rust from migrating from receiver hitch
to bike rack.
7
Slide the rack into the receiver hitch of
the vehicle.
8
Line up the hole in the rack hitch bar with the
hole in the receiver hitch.
Tip: When possible, use nearer hole position
for enhanced stability.
9
Place the lock washer on the hitch bolt and
hand thread it into the nut in the hitch bar.
Tighten to 60 foot-pounds with a torque
wrench. Note, the bolt is not intended to go
through the other side of the hitch bar or
receiver hitch.
Tip: This is where the torque wrench is
useful until you have a good feel as to
what 60 foot-pounds is with your ratcheting
box wrench.
7
8
9
4
HANG5 RACK INSTRUCTIONS
ASSEMBLY OF ACCESS RACK (continued)
10
Once the hitch bolt is hand tightened, gently
wiggle the hitch bar in the receiver hitch and
retighten to 60 foot-pounds if necessary.
Tip: A 7/8” ratcheting box wrench will speed
up install and un-install process and is easy
to stow in the car so it is always near the
bike rack. This is easier and more cost
effective than using a deep socket set in
most cases.
11
To lock the bike rack to the vehicle, press
the hitch lock over the bolt stud on the
hitch bolt.
10
11
The Access Rack Assembly (Parallelogram) is now
installed on the vehicle. Turn to Box 2, and retrieve
the pieces set aside earlier from Box 1.
Recommended Tool
5
7/8”
 Loading...