

Softride 26321 User Manual
HYDRAULIC ASSIST
DURA BIKE RACK INSTRUCTIONS
Model #26321
Important This bike rack is designed for use in a 2” or 1.25” receiver and designed to hold a maximum of four bikes. Do not
use this rack for anything other than carrying bicycles. Do not exceed your vehicle’s receiver load ratings for any
reason. This rack cannot be used on Class 1 vehicle receivers. Reference the instruction manual for proper use of
this rack.
Warning Check the tightness of bolts and nuts periodically as they may loosen slightly during normal use.
DO NOT drive the vehicle with the bike rack in the lowered position.
This rack CANNOT be mounted and used on the rear of trailers.
This rack MUST be removed from the vehicle before going through a car wash.
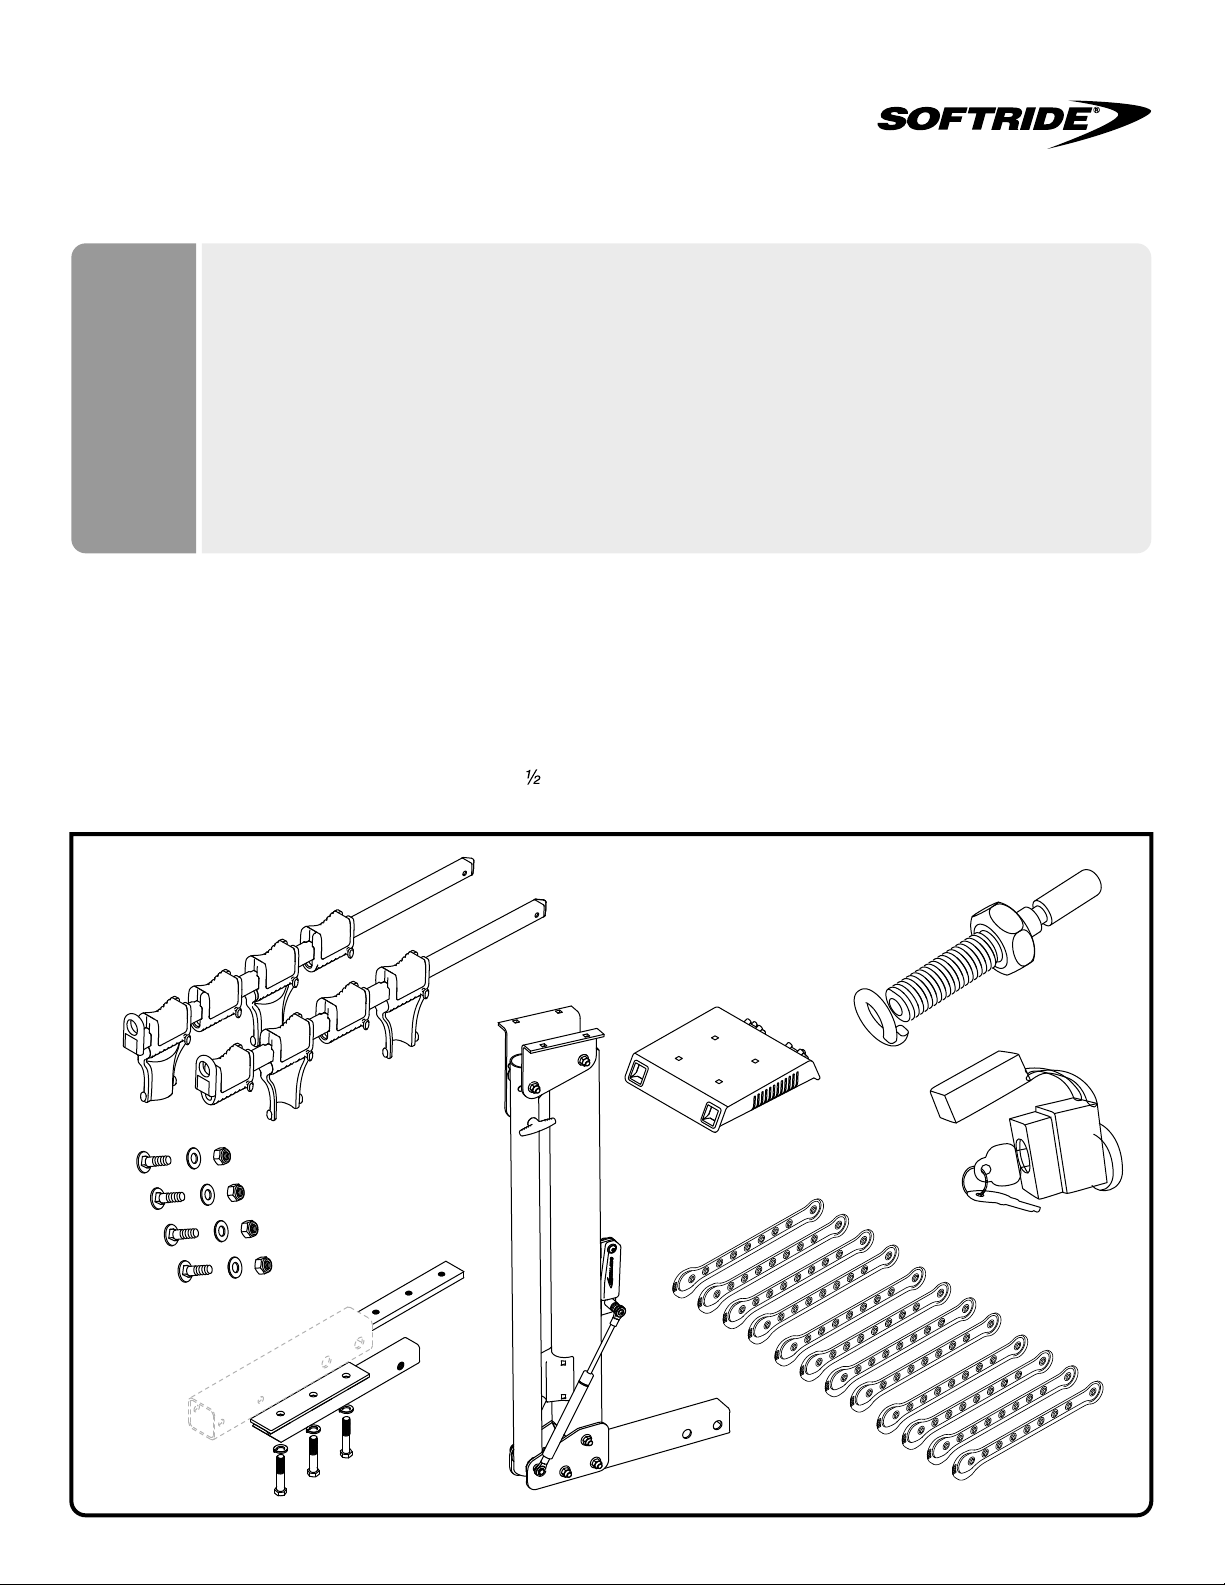
PARTS INCLUDED
(A) Main rack assembly
(B) Top plate
(C) Bike rack arms (2)
(D) Arm straps (12)
(E) Carriage bolts and lock washers (4 each)
(F) Hitch lock with keys
(G) Hitch bolt with lock washer (5/8” for 2” rack, ” for 1.25” rack)
(H) 1.25” Hitch Bar
(C)
(B)
(A)
TOOLS REQUIRED
13mm socket with extension
Adjustable wrench (2)
Screw driver
(G)
(E)
(D)
(F)
(H)

HYDRAULIC ASSIST DURA BIKE RACK INSTRUCTIONS
Assembly Of Rack
Begin assembly of rack by loading the carriage
1
2
3
bolts into the 4 holes in the top plate. Place the
top plate on the floor, top side down.
Position the main rack assembly on the top
plate, aligning the mounting holes of the top
plate with the holes in the brackets on the main
assembly.
Be sure the cable lock can be accessed from the
rear after the top plate has been secured. Place
the lock washers and lock nuts on the carriage
bolts and tighten them to 12 foot pounds.
FOUR CARRIAGE BOLTS
1
2-3
4
5
To convert your 2” rack to a 1.25” rack you will
need to add on the 1.25” assembly to the 2”
hitch bar. Remove the nut holder from the inside
of the 2” hitch bar assembly. Slide the threeholed nut plate inside the 2” hitch bar, aligning
the holes. Pass the three bolts through the lock
washer and 1.25” hitch bar and tighten to the
nut plate. Make sure the three bolts are tightened securely and recheck the tightness of the
bolts from time to time.
Place the straps on the bike arms.
FOUR
NUTS
FOUR WASHERS
4
(H)
5
2
 Loading...